06 Paint Database Guide - X-Rite
06 Paint Database Guide - X-Rite
06 Paint Database Guide - X-Rite

You also want an ePaper? Increase the reach of your titles
YUMPU automatically turns print PDFs into web optimized ePapers that Google loves.
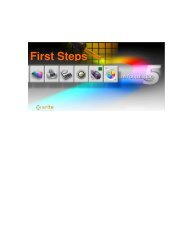
<strong>Paint</strong> <strong>Database</strong> <strong>Guide</strong><strong>Paint</strong> <strong>Database</strong> <strong>Guide</strong>Color iQC and Color iMatch<strong>Paint</strong> <strong>Database</strong> <strong>Guide</strong>Version 8.0 | July 201230 July 2012 Revision 1.0 Page 1
<strong>Paint</strong> <strong>Database</strong> <strong>Guide</strong>Table of ContentsStep 1 – Review General Requirements.....................................................................................................3Homogeneity...........................................................................................................................................3Reproducibility ......................................................................................................................................3Representative ........................................................................................................................................3Accuracy.................................................................................................................................................3Sample preparation process ...................................................................................................................4Substrate .................................................................................................................................................4Filler (f.e. Blancfix)................................................................................................................................4Calibration Components ........................................................................................................................4Calibration Mixtures ..............................................................................................................................5Step 2 – Verification of samples and tools..................................................................................................5Visual verification of sample & process repeatability............................................................................5Visual verification of calibration mixtures.............................................................................................5Measurement verification of sample & process repeatability ................................................................6Measurement verification of homogeneity of calibration samples ........................................................6Measurement sequence for non hiding samples (over OL/OD) ............................................................6Step 3 – Measurement of all Calibration samples......................................................................................6Mixtures of colorant with Resin.............................................................................................................7.........................................................................................................................................................................7Mixtures of colorant with white..............................................................................................................7.........................................................................................................................................................................7Step 4 – Prepare all data for the creation of the Colorant Collection.........................................................8Step 5 –Creation of the <strong>Paint</strong> Data File and storage of Base Data.............................................................9Create a data base.................................................................................................................................................................9.........................................................................................................................................................................9.........................................................................................................................................................................9.........................................................................................................................................................................9Enter substrate data...............................................................................................................................10.......................................................................................................................................................................10.......................................................................................................................................................................10Enter the Name, Price, Colorant Strength, SG,.. for Base, White and Black.......................................11.......................................................................................................................................................................11.......................................................................................................................................................................11.......................................................................................................................................................................11Insert Calibration samples.....................................................................................................................11.......................................................................................................................................................................11.......................................................................................................................................................................11.......................................................................................................................................................................11.......................................................................................................................................................................11.......................................................................................................................................................................11.......................................................................................................................................................................11.......................................................................................................................................................................11.......................................................................................................................................................................1130 July 2012 Revision 1.0 Page 2
<strong>Paint</strong> <strong>Database</strong> <strong>Guide</strong>.......................................................................................................................................................................11.......................................................................................................................................................................11.......................................................................................................................................................................11Recall reflectance data for the calibration mixtures.............................................................................12.......................................................................................................................................................................12.......................................................................................................................................................................12.......................................................................................................................................................................12Analysis of data – with the Calibrate and Diagnostic Views................................................................13.......................................................................................................................................................................13.......................................................................................................................................................................13.......................................................................................................................................................................13General Rules for evaluation of concentration samples, which do not fit............................................13.......................................................................................................................................................................13.......................................................................................................................................................................13.......................................................................................................................................................................13.......................................................................................................................................................................13.......................................................................................................................................................................13.......................................................................................................................................................................13.......................................................................................................................................................................13.......................................................................................................................................................................1330 July 2012 Revision 1.0 Page 3
<strong>Paint</strong> <strong>Database</strong> <strong>Guide</strong><strong>Database</strong> PreparationRefer to the X-<strong>Rite</strong> <strong>Database</strong> preparation and prepare all requested samplesBefore starting the measurement process, it is good to inspect all samples• Make sure, that the samples are complete• Make sure, that all samples are in good surface qualityStep 1 – Review General RequirementsHomogeneityPrimary samples must be homogeny. No matter at which location of the sample themeasurement is taken, the measurements should provide the same result. If samples arenon-homogeneous, multiple measurements could be taken to achieve a statisticalhomogeneity.ReproducibilityPrimary samples must be reproducible. No matter, which person under which condition thesamples produced, the same recipe should produce the same sample.In the process of the sample preparation it is strongly recommended, that the reproducibilitywill be tested. 3 persons should produce at 3 days 3 recipes – these will be compared todefine the reproducibility.Experiences have shown, that ideally all calibration samples should be produced by thesame person.RepresentativePrimary samples must represent the application and the condition under which later ontests will be done.Example: Film thickness If the typical paint applications will tested at 100 my film thicknessit is recommended to produce the primary samples at the same film thickness.Example: Pigment load For each pigment the maximum concentration in a given productshould be defined and should not be exceeded, when producing the calibration samples.Surface changes like gloss changes or orange peel effects are indications, that themaximum pigmentation has been exceeded.AccuracyThe highest available accuracy is required in each step of the calibration sample preparationprocess.Example: Scaling It is not important, that you scale exactly the amount, which isrecommended by X-<strong>Rite</strong> for a defined sample, but it is absolutely important, that the exactscaled amount will be documented. We recommend to use a scale with minimum 3digitaccuracy.Example: Film thickness: Film thickness can be defined using different methods (wet, dry).Whatever method is chosen, it is important that the correct film thickness will be provided.It is recommended, that the film thickness within a colorant calibration file should staywithin +-5%30 July 2012 Revision 1.0 Page 4
<strong>Paint</strong> <strong>Database</strong> <strong>Guide</strong>Sample preparation processThe same sample preparation process should be used for all samplesExample: mixing - The same mixing equipment with the same settings for time and speedmust be used for all calibration samples.Example: application – The same application equipment with the same settings must beused for all calibration samples.SubstrateCalibration samples should ideally be applied over non fluorescing black and white contrastcards. These must provide areas of coat over black and white of at least 25mm * 25mm.This allows taking good measurements over contrast background and provides a good basefor load calculations. Our customers have collected good experience with Form 5DX fromLeneta.Filler (f.e. Blancfix)Filling additives have very often a color contribution. There are methods to define this andtake this into account, when formulating.Calibration ComponentsThe calibration pigments, white and black as well as the calibration Resin are base materialsfor any new calibration. Mixtures of colorant with white and mixtures of colorant with blackare made for any new colorant. That’s why it is important, that enough of these materials isstocked.30 July 2012 Revision 1.0 Page 5
<strong>Paint</strong> <strong>Database</strong> <strong>Guide</strong>Calibration MixturesThe ideal mixtures of colorant with white, black and resin depend on the individual conditionin a given system. An excel table is available to calculate the ratios depending on thecondition.Base Calibration – Black white and ResinRequirements for each colorant30 July 2012 Revision 1.0 Page 6
<strong>Paint</strong> <strong>Database</strong> <strong>Guide</strong>Step 2 – Verification of samples and toolsPart of the sample preparation process is to define the process and scaling conditions.For this purpose we would like you to completely prepare 3 different recipes from beginningto the end (scaling, mixing, application, drying) at 3 days by 3 persons. This will produce 3sets with each 9 samples. This will give you some idea about the reproduce ability withinthe given working condition.Visual verification of sample & process repeatabilityVisually compare the 3 sets of 9 samples. Are these visually acceptable?Visual verification of calibration mixturesVisually check all calibration samples• Are the surfaces ok?o Do you recognize surface effects like bronzing, gloss variations, orange peelo Are the samples homogeneous• Is the build-up logical?o Increasing concentrations should lead to samples with increased colorstrength?30 July 2012 Revision 1.0 Page 7
<strong>Paint</strong> <strong>Database</strong> <strong>Guide</strong>Sample Set for Basecalibration with thefollowing samples• Resin,• the substrate,• 3 mixtures ofwhite with Resin,• 3 mixtures ofcolorant withblack• 3 mixtures ofcolorant withwhite and black.30 July 2012 Revision 1.0 Page 8
<strong>Paint</strong> <strong>Database</strong> <strong>Guide</strong>Sample Set for OxideRed calibration withthe followingsamples• 3 mixtures ofcolorant withresin• 3 mixtures ofcolorant withblack and resin• 5 mixtures ofcolorant withwhite and resinIt is easily to be seenthat the sampleswith transparent arecloudyOn the mixturescolorants with whitea good build fromright to left is seen.30 July 2012 Revision 1.0 Page 9
30 July 2012 Revision 1.0 Page 10<strong>Paint</strong> <strong>Database</strong> <strong>Guide</strong>
<strong>Paint</strong> <strong>Database</strong> <strong>Guide</strong>Measurement verification of sample & process repeatabilityCompare the 3 set`s of each 9 samples.Measurement verification of homogeneity of calibration samplesEspecially, when we build up a paint data file with based on non hiding samples, we oftenexperienced, in homogeneity within the samples. One of the reasons could be thicknessvariations.Whatever the reason for in homogeneity is, it is recommended to define the repeatability onthose samples. This helps to define, whether single measurements are ok for themeasurement of calibration samples or multiple readings have to be taken.From the job button choose the[select calibration] mode option.Select the Calibration mode Over Light/OverDark – if it is not yet available create a newcalibration mode.Within the properties of the calibration modeselect in the extended measurement modethe Over Light/Over Dark optionMeasurement sequence for non hiding samples (over OL/OD)Measurement sequence to measure a standard (or trial) over black and white. In thisexample for an average of two measurementsEnter Name and Group data and continue with next30 July 2012 Revision 1.0 Page 11
<strong>Paint</strong> <strong>Database</strong> <strong>Guide</strong>MeasureMeasureMeasureMeasure30 July 2012 Revision 1.0 Page 12
<strong>Paint</strong> <strong>Database</strong> <strong>Guide</strong>With the above measurement sequence a few measurement comparisons have been made.Results are shown underneathExample: Average of 2 – measurement at random positions created differences of about 0.5DE and variations of about +- 0.5 in CR as well. In the following example an averaging of 3showed differences of about 0.1 DE*Step 3 – Measurement of all Calibration samplesFor this function a job will be created to store all calibration samples in this job.Certainly all measurements could be done directly in the Pigment Calibration routine, butthere are some advantages, if all samples have been measured before in a separateprocess.• All measurements are made at the same time with more focus and less interruptions• If something goes wrong with the calibration – the samples can be recalled any time• Easy to do additional tests, if there are doubts about the measurement for difficultsamplesTypically all mixtures would be measured and sample identifications would be provided,which makes it easy to recall the correct sampleA measure routine for OverLight/OverDark would be defined and all samples will bemeasured.30 July 2012 Revision 1.0 Page 13
<strong>Paint</strong> <strong>Database</strong> <strong>Guide</strong>At the end all samples have been measured and stored in the job file. The display (printer)form contains the information about CR as well.30 July 2012 Revision 1.0 Page 14
<strong>Paint</strong> <strong>Database</strong> <strong>Guide</strong>Mixtures of colorant with ResinEach group of colorants can be analyzed. In this case 3mixtures of yellow color with resin viewed. 1 = highestconcentration 2a is the lowest concentration.In the above data group we can see, that theconcentration line is represented by the Contrast ratio1=51 / 2=34 / 2a = 31.On the right side, we see that the samples have more orless the same hue angle,Reflectance dataover white andblackThe measurementsover white show agood separationThe measurementsover black showstrange behaviourfor the lowestconcentrationMixtures of colorant with white30 July 2012 Revision 1.0 Page 15
<strong>Paint</strong> <strong>Database</strong> <strong>Guide</strong>Here we have 4 mixtures of the yellow with white.The increasing yellow concentration from 7 (lowest) to 3(highest) can be seen on the b-value.The higher contrast ration of sample 7 (higher whitecontent) agrees with the expectation.On the right side, we see that the samples have more orless the same hue angle,Reflectance dataover white andblackThere is a goodseparation betweenthe concentrationEach of the calibration sets should be analyzed and any anomalies should be noted.30 July 2012 Revision 1.0 Page 16
<strong>Paint</strong> <strong>Database</strong> <strong>Guide</strong>Step 4 – Prepare all data for the creation of the Colorant CollectionWithin the process of a Colorant Collection the following information are required:1. Job with all reflectance data2. All concentrations of the calibration samples3. All Specific Gravities, Colorant Prices,30 July 2012 Revision 1.0 Page 17
<strong>Paint</strong> <strong>Database</strong> <strong>Guide</strong>Step 5 –Creation of the <strong>Paint</strong> Data File and storage of Base DataCreate a data baseWith F2 the SET-UP will becalled. On the Tab IFS ColorantCollection – a new collectionname will be provided and theCreate New Collection buttonwill be clicked.30 July 2012 Revision 1.0 Page 18
<strong>Paint</strong> <strong>Database</strong> <strong>Guide</strong>The Set Colorant File windowswill come up and filedefinitions have to be made.For <strong>Paint</strong> Application with nonhiding samples theOverLight/OverDark applicationmode will be selected.Typically the Specularcomponent included mode willbe selectedTypically the Sample Amountmethod – weight will beselected, since scaling ofcalibration samples is typicallydone by weight.Typically the Sample thicknesswill be defined in the samplethickness.If the calibrate Enable isactivated, the film thicknesswill be part of the calibrationNext the substrate has to bemeasured or called from JobThis is done by clicking thesubstrate button.30 July 2012 Revision 1.0 Page 19
<strong>Paint</strong> <strong>Database</strong> <strong>Guide</strong>Enter substrate dataThis is done by clicking thesubstrate button.By pressing the [White] buttonthe measurement of the whitebackground would be initiated.By pressing the [Black] buttonthe measurement of the whitebackground would be initiated.Since all measurements havebeen done in the job we press[Recall from Job].This allows to retrieve themeasurement data from thejob.As soon the measurement datahave been retrieved the lab –values for the over light andover dark will be shown.30 July 2012 Revision 1.0 Page 20
<strong>Paint</strong> <strong>Database</strong> <strong>Guide</strong>Enter the Name, Price, Colorant Strength, SG,.. for Base, White and BlackIn the next step enter theName and data of thetransparent base.As soon this is done press the[Go to White] button.This switch to the windows toenter the White Colorant Data.In the next step enter theName and data of the white.As soon this is done press the[Go to Black] button.This switch to the windows toenter the Black Colorant Data.30 July 2012 Revision 1.0 Page 21
<strong>Paint</strong> <strong>Database</strong> <strong>Guide</strong>In the next step enter theName and data of the Black.As soon this is done press the[OK Save] button.All technical data and pricesfor the Base, the White and theBlack have been entered now.Insert Calibration samplesIn list of calibration data asample with 100 % Transparentis already listed.The – sign in the sampleindicates that no reflectancemeasurements have beenstored yet.If we mark this sample andpress modify, we can view thedetails of this input30 July 2012 Revision 1.0 Page 22
<strong>Paint</strong> <strong>Database</strong> <strong>Guide</strong>We change the Name to agree– to the name we used in thejob for the 100 % TransparentPEL-BWR-00Pressing next will allow toenter the next concentrationFor the next series of samples – the mixtures of White with Resin - the name andconcentration will be entered.For the next series of samples – the mixtures of Black with Resin will be enteredFor the next series of samples – the mixtures of White and Black and Resin will be entered30 July 2012 Revision 1.0 Page 23
<strong>Paint</strong> <strong>Database</strong> <strong>Guide</strong>Recall reflectance data for the calibration mixturesAs soon all concentrations have been entered press the ok buttonWhen all concentrations havebeen entered a list of allsamples will be shown. The –sign will indicate, that noreflectance readings areavailable.Mark the first sample and pressthe [Recall from Job] button.Select from the job the samplewhich contains the reflectancefor this concentrationsRepeat this for all samples in the list.30 July 2012 Revision 1.0 Page 24
<strong>Paint</strong> <strong>Database</strong> <strong>Guide</strong>As soon all for samples areflectance curve has beenadded the listing would likethis.Instead of a – there is a sampleicon with a measurement overwhite and black background forthe non hiding samples and asolid icon with the color of thesample for the hiding samples.For whatever sample isselected detailed informationwill be provided underneath.30 July 2012 Revision 1.0 Page 25
<strong>Paint</strong> <strong>Database</strong> <strong>Guide</strong>Analysis of data – with the Calibrate and Diagnostic ViewsIn this example of thecalibration view there is a quitegood back calculation of allsamples over white except forsample 8 which shows adifference of 6 DE over lightand 6.1 over black.The program allows to disableeasily the questionablesamplesOnce the questionable samplehas been disabled – thecalibrated function will be usedagain.30 July 2012 Revision 1.0 Page 26
<strong>Paint</strong> <strong>Database</strong> <strong>Guide</strong>After disabling the sample 08the average color differencehas dropped down from 1.6down to 0.8.As better the average dE is, asbetter the agreement of thesamples to each other is (asbetter the process control) inthe sample preparation.General Rules for evaluation of concentration samples, which do not fitIf there are samples, which do not fit to the rest of the samples proceed in the followingway:• Check the concentration – is the right concentration entered• Check the film thickness entry• Recall the sample once again (to avoid that a wrong sample has been used)• Remeasure the sample• Remake the sample30 July 2012 Revision 1.0 Page 27
<strong>Paint</strong> <strong>Database</strong> <strong>Guide</strong>With the diagnostic viewsfurther information can bereceived.In the diagnostic views thereflectance curves, Absorption,Scattering and K vs. S curvesand Curve comparisons can bemade.30 July 2012 Revision 1.0 Page 28
<strong>Paint</strong> <strong>Database</strong> <strong>Guide</strong>One of the items you shouldlook for is a goodrepresentation over the totalreflectance area.Once the samples have beenapproved press OK / Save30 July 2012 Revision 1.0 Page 29
<strong>Paint</strong> <strong>Database</strong> <strong>Guide</strong>This will review the calibrationof the samplesRepeat the procedure for allcolorants• Enter data (price, SG, …)• Enter Data (Price, SG,min max, ….)• Recipes• Recall samples• Evaluate samplesFrom to time close the colorantfile30 July 2012 Revision 1.0 Page 30
<strong>Paint</strong> <strong>Database</strong> <strong>Guide</strong>Save to <strong>Database</strong> and save jobafterwardsThe colorant set is nowavailable in the data base andcan be used for formulation,The next step would be tocreate a job template with thecolorant collection.30 July 2012 Revision 1.0 Page 31