
You also want an ePaper? Increase the reach of your titles
YUMPU automatically turns print PDFs into web optimized ePapers that Google loves.
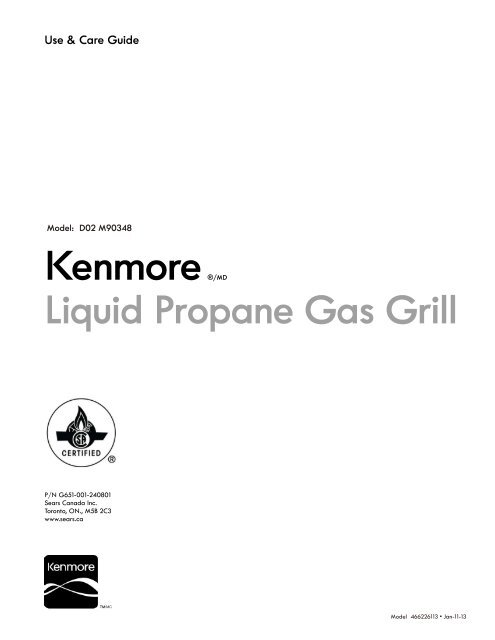
Use & Care GuideModel: D02 M90348Kenmore®/MDLiquid Propane Gas GrillP/N G651-001-240801Sears Canada Inc.Toronto, ON., M5B 2C3www.sears.ca /MCModel <strong>466226113</strong> • Jan-11-13
Product RecordIMPORTANT: Fill out the product record information below.Model NumberSerial NumberDate PurchasedDANGERIf you smell gas:1. Shut off gas to the appliance.2. Extinguish any open flame.3. Open lid.4. If odor continues, keep away from the applianceand immediately call your gas supplier or yourfire department.WARNING1. Do not store or use gasoline or otherflammable liquids or vapors in the vicinity ofthis or any other appliance.2. An LP Tank not connected for use shall notbe stored in the vicinity of this or any otherappliance.Call the Grill Information Center for Help and PartsMissing Parts? Assembly Questions? Operation Problems?Before returning grill to store, call 1-800-241-7548See rating label on grill for serial number.To Installer/Assembler: Leave these instructions withconsumer.To Consumer: Keep this manual for future reference.CAUTIONSome parts may contain sharp edges, especiallyas noted in these instructions.Wear protective gloves if necessary.CAUTIONFor residential use only. Do not use for commercialcooking.WARNINGCALIFORNIA PROPOSITION 651. Combustion by-products produced when using thisproduct contain chemicals known to the State ofCalifornia to cause cancer, birth defects, and otherreproductive harm.2. This product contains chemicals, including leadand lead compounds, known to the State ofCalifornia to cause cancer, birth defects or otherreproductive harm.Wash your hands after handling this product.Installation Safety Precautions• Use grill, as purchased, only with LP (propane) gas and theregulator/valve assembly supplied.• Grill installation must conform with local codes, or in theabsence of local codes, with either the National Fuel GasCode, ANSI Z223.1/ NFPA 54, Natural Gas and PropaneInstallation Code, CSA B149.1, or Propane Storage andHandling Code, B149.2, or the Standard for RecreationalVehicles, ANSI A 119.2/NFPA 1192, and CSA Z240 RVSeries, Recreational Vehicle Code, as applicable.• All electrical accessories (such as a rotisserie) must beelectrically grounded in accordance with local codes, orNational Electrical Code, ANSI / NFPA 70 or CanadianElectrical Code, CSA C22.1. Keep any electrical cordsand/or fuel supply hoses away from any hot surfaces.• Grill is not for use in or on recreational vehicles and/or boats.• This grill is safety certified for use in the United Statesand/or Canada only. Do not modify for use in any otherlocation. Modification will result in a safety hazard.Safety SymbolsThe symbols and boxes shown below explain what eachheading means. Read and follow all of the messages foundthroughout the manual.DANGERDANGER: Indicates an imminently hazardous situationwhich, if not avoided, will result in death or serious injury.WARNINGWARNING: Be alert to the possibility of serious bodily injuryif the instructions are not followed. Be sure to read andcarefully follow all of the messages.CAUTIONCAUTION: Indicates a potentially hazardous situation which,if not avoided, may result in minor or moderate injury.© 2013 Sears Canada Inc.2 • <strong>466226113</strong>Printed in China
Table of ContentsFor Your Safety . . . . . . . . . . . . . . . . . . . . . . . . . . . . . . . . . . . . . . 2Grill Information Center . . . . . . . . . . . . . . . . . . . . . . . . . . . . . . 2Product Record Information . . . . . . . . . . . . . . . . . . . . . . . . . . . 2Safety Symbols . . . . . . . . . . . . . . . . . . . . . . . . . . . . . . . . . . . . . . 2Installation Safety Precautions . . . . . . . . . . . . . . . . . . . . . . . . . 2Kenmore Grill Warranty . . . . . . . . . . . . . . . . . . . . . . . . . . . . . . 3Grilling Guide. . . . . . . . . . . . . . . . . . . . . . . . . . . . . . . . . . . . . 4-7Use and Care. . . . . . . . . . . . . . . . . . . . . . . . . . . . . . . . . . . . . 8-14Parts List . . . . . . . . . . . . . . . . . . . . . . . . . . . . . . . . . . . . . . . . . . . 15Parts Diagram . . . . . . . . . . . . . . . . . . . . . . . . . . . . . . . . . . . . . . 16Assembly . . . . . . . . . . . . . . . . . . . . . . . . . . . . . . . . . . . . . . . 17-29Troubleshooting . . . . . . . . . . . . . . . . . . . . . . . . . . . . . . . . . 30-32WARNING• Read and follow all Safety, Assembly,and Use and Care Instructions in thisGuide before assembling and cookingwith this grill.• Failure to follow all instructions in thisUse and Care Guide may lead to fire orexplosion, which could result in propertydamage, personal injury or death.WARRANTYKENMORE GRILL WARRANTYOne Year Full Warranty on Kenmore GrillIf this grill fails due to a defect in material or workmanshipwithin one year from the date of purchase, call 1-800-241-7548 to arrange for free repair parts (or replacement if repairproves impossible).Ten-Year Limited Warranty on BurnersFor ten year from the date of purchase, any burner thatrusts through will be replaced free of charge.All warranty coverage excludes ignitor batteries and grill partpaint loss, discoloration or surface rusting, which are eitherexpendable parts that can wear out from normal use withinthe warranty period, or are conditions that can be the resultof normal use, accident or improper maintenance.All warranty coverage is void if this grill is ever used forcommercial or rental purposes.All warranty coverage applies only if this grill is used inCanada.Sears Canada Inc.Toronto, ON., M5B 2C3This Grill is for Outdoor Use OnlyTools needed for assembly:Adjustable wrench (not provided)Screwdriver (not provided)7/16" Combination wrench (not provided)<strong>466226113</strong> • 3
GRILLING GUIDE – Getting StartedFirst Time UseRead your Assembly Manual and ensure the grill is puttogether properly. Remove all Point-of-Purchase advertisingmaterial from all grill surfaces before first use. Werecommend operating your grill on its highest setting for 15-20 minutes prior to your first use. This aids in removing theoils used during manufacturing.Lava Rock / BriquettesThis gas grill has been designed, engineered, and tested tobe used with flame tamers or heat distribution plates toprovide more even heating, improve the cleaning process,and reduce flare-ups. The addition of after market lavarocks, charcoal, or briquettes of any type will cause poorcombustion and increase the likelihood of a grease fire, andis not recommended. Using briquettes, lava rock, orcharcoal in this grill will void your warranty. For extrasmoke flavor, we recommend using a smoker box with woodchips.TemperatureThe temperature gauge in the hood of your new grillmeasures air temperature. The air temperature inside yourgrill will never be as hot as the temperature at the cookingsurface.Note: Since 1995, all regulators (the part that attaches tothe gas tank to regulate the flow of gas) have included asafety feature that restricts gas flow in the event of a gasleak. You can inadvertently activate this safety featurewithout having a gas leak. This typically occurs when youturn on the gas using the grill control knob before you turnon the LP tank valve. If the gas regulator safety featureactivates, the grill will only reach temperatures between250°F and 300°F even with all burners on the high setting.RegulatorCoupling NutIf your grill is not getting hotter than 250°F to 300°F thesesteps should be taken first to reset the gas regulator safetydevice:1. Open the grill lid.2. Turn off all knobs on the control panel in front.3. Turn off the tank knob.4. Disconnect the regulator from the LP tank.5. Wait 30 seconds.6. Reconnect the regulator to the LP tank.7. Slowly open the LP tank knob all the way. Do not putexcessive force on the valve at the full open position toavoid damaging the valve.8. Turn on the appropriate control knob and light the grillper the instructions on the control panel.An illustration of this process is included in this ProductGuide. See Troubleshooting section for additionalinformation.Pre-Heating Your GrillJust like your home oven, your grill should be pre-heated toprovide optimum performance. Pre-heat the grill on high for10-15 minutes – longer if weather conditions require. Pleaserefer to the lighting instructions inside the Product Guide ifyou have questions about how to light your grill. A matchlightchain and hole is provided for your convenience.4 • <strong>466226113</strong>
GRILLING GUIDE – Grilling 101Outdoor grilling is really quite simple. You'll succeed withburgers, dogs, or steaks usually on your very first try. Withexperience, you will learn how to work with your grill,creating more imaginative meals all the time. Thisknowledge makes up the art of grilling. Before you startgrilling, organize your food according to cooking techniqueand required cooking time, and optimize the use of yourgrilling area.Rotisserie CookingRotisserie cooking is best for 'round' meat, such as largeroasts, whole poultry, and pork. It generally requires anaccessory motor and spit rod that allows the meat to beturned at a constant speed. Rotisserie cooking is best donein front of a special rotisserie burner, or utilizing an indirectcooking burner arrangement. A pan can be placedunderneath the meat to catch grease and food drippings,and helps minimize clean-up.Direct CookingDirect cooking involves grilling your meat directly over highheat. It is perfect for searing steaks, chops, and othersmaller pieces of meat and vegetables that quickly maketheir way to the table.Indirect CookingIndirect cooking utilizes select burners to circulate heatthroughout the grill, without direct contact between themeat and the flame. The meat is placed over the burnerthat is 'off'. This method is generally used to slow cooklarge cuts of meat and poultry. A pan can be placedunderneath the meat to catch grease and food drippings,and helps minimize clean-up.Food SafetyFood safety is a very important part of enjoying theoutdoor cooking experience. To keep food safe fromharmful bacteria, follow these four basic steps:Clean: Wash hands, utensils, and surfaces with hot soapywater before and after handling raw meat.Separate: Separate raw meats from ready-to-eat foods toavoid cross contamination. Use a clean platter and utensilswhen removing cooked foods.Cook: Cook meat and poultry thoroughly to kill bacteria.Use a thermometer to ensure proper internal foodtemperatures.Chill: Refrigerate prepared foods and leftovers promptly.<strong>466226113</strong> • 5
GRILLING GUIDE – Tips & TricksCooking on your new grill is a hands-on experience, and itis recommended to remain outside with your grill whilecooking. Grilling can be affected by many externalconditions. In cold weather, you will need more heat toreach an ideal cooking temperature, and grilling may takelonger. The meat's internal temperature and thickness canalso affect cooking times. Cold and thicker meats will takelonger to cook.Internal Meat TemperaturesMeat cooked on a grill often browns very fast on theoutside. Therefore, use a meat thermometer to ensure it hasreached safe internal temperatures.Canadian Food Inspection AgencyRecommended Internal cooking tempeauresFoodBeef, veal and lamb (pieces and whole cuts) -medium-rareBeef, veal and lamb (pieces and whole cuts) -mediumBeef, veal and lamb (pieces and whole cuts) -well donePork (pieces and whole cuts)Poultry (e.g. chicken, turkey, duck) - piecesPoultry - wholeGround meat and meat mixtures (e.g.burgers, sausages, meatballs, meatloaf,casseroles) - beef, veal, lamb and porkGround meat and meat mixtures - poultryEgg dishesOthers (hot dogs, stuffing and leftovers)Temperature63°C (145°F)71°C (160°F)77°C (170°F71°C (160°F)74°C (165°F)85°C (185°F)71°C (160°F)74°C (165°F)74°C (165°F)74°C (165°F)For more information call : Canadian Food Inspection AgencyHotline at 1-800-442-2342.SaucesSauces containing sugars and fats can cause flare-ups, andyour food may burn. In general, apply these sauces duringthe final 10 minutes of cooking. Keep in mind, use ofexcessive sauces or glazes will also require extra cleaningafterwards.Marinades and RubsTo enhance the flavor of grilled foods, a liquid marinade ordry rub can be used prior to cooking. Meat can be eithersoaked or injected with liquid marinade up to 24 hoursprior to grilling. Dry rubs can be applied directly to themeat immediately before grilling.Wood ChipsFor extra smoke flavor when grilling, try adding wood chips.Soak the chips in water for approximately 30 minutesbefore adding to a smoke box or pan. Place smoke box orpan on top of the cooking grate above the flame. Turn grillon high until the wood starts to smoke. Reduce heat todesired temperature for cooking, and place food oncooking grate as desired. Close lid to retain more smoke.Hardwood varieties that work particularly well with grilledfoods include Alder, Apple, Cherry, Grapevines, Hickory,Mesquite, Oak, Rosemary and Sassafras.SkewersMetal skewers should be flat, with long handles. Roundskewers allow food to roll when turned, so it may not cookas evenly. Use metal skewers when cooking meat kabobs.Wooden skewers should be soaked in water for an hourbefore use, and are best used for quick cooking foods suchas vegetables and fruits.UtensilsUse tongs or a spatula to handle the food instead of a fork,and don't turn the food toooften. Piercing the foodwith a fork will releasejuices that you want inthe meat, and maycause flare-ups.6 • <strong>466226113</strong>
GRILLING GUIDE – Cleaning Your GrillWhy Clean?We've all heard the saying, “an ounce of prevention is wortha pound of cure.” This is great advice when it comes tokeeping your grill clean.Routine CarePeriodic cleaning of this grill is necessary,as grill fires can occur when grease andfood debris collect in the bottom of the grill.After each use, remove any remainingfood particles from the cooking grate andinside of the grill using a grill brush. Dothis after the grill has cooled down, yet isstill warm. It is much easier to clean foodparticles while warmth is still present, thanafter the food particles have completelycooled and hardened. This grill is notdesigned to be 'burned off' by closing thelid and turning the burners on High for anextended time. The excessive heatgenerated can cause leftover grease tocatch fire, and can cause permanentdamage to your grill.Cooking surfaces: If a bristle brush is used to clean any ofthe grill cooking surfaces, ensure no loose bristles remain oncooking surfaces prior to grilling. It is not recommended toclean cooking surfaces while grill is hot.Storing Your Grill• Clean cooking grates.• Store grill in dry location.• When LP cylinder is connected to grill, store outdoors in awell ventilated space and out of reach of children.• Cover grill if stored outdoors. Choose from a variety ofgrill covers offered by manufacturer.• Store grill indoors ONLY if LP cylinder is turned off,disconnected, and removed from grill. Never store LPcylinder indoors.• When removing grill from storage, follow the 'Cleaning theBurner Assembly' instructions in the Use and Care sectionof the Product Guide.General CleaningPlastic parts: Wash with warm soapy water and wipe dry.Do not use abrasive cleaners, degreasers or a concentratedgrill cleaner on plastic parts. Damage to and failure ofparts can result.Porcelain surfaces: Because of glass-like composition, mostresidue can be wiped away with baking soda/watersolution or glass cleaner. Use non-abrasive scouring powderfor stubborn stains.Painted surfaces: Wash with mild detergent or non-abrasivecleaner and warm water. Wipe dry with a soft non-abrasivecloth.Stainless steel surfaces: Stainless steel can rust under certainconditions. This can be caused by environmental conditionssuch as chlorine or salt water, or impropercleaning tools such as wire or steelwool. It can also discolor due to heat,chemicals, or grease build-up. Tomaintain your grill's high qualityappearance, wash with mild detergentand warm water, or use a stainlesssteel grill cleaner. Baked-on greasedeposits may require the use of anabrasive plastic cleaning pad. Use onlyin direction of brushed finish to avoiddamage. Do not use abrasive pad onareas with graphics.CrittersSpiders like to make their homes in the venturi tubes ofgrills. These must be inspected and cleaned regularly toensure there are no blockages. Refer to the Use and Careportion of this Product Guide for complete information.<strong>466226113</strong> • 7
USE AND CARE• NEVER store a spare LP cylinder under or near theappliance or in an enclosed area.• Never fill a cylinder beyond 80% full.• If the information in the two points above is notfollowed exactly, a fire causing death or seriousinjury may occur.• An overfilled or improperly stored cylinder is ahazard due to possible gas release from the safetyrelief valve. This could cause an intense fire withrisk of property damage, serious injury or death.• If you see, smell or hear gas escaping, immediatelyget away from the LP cylinder and appliance andcall your fire department.LP Tank Removal, Transport And Storage• Turn OFF all control knobs and LP tank valve. Turn couplingnut counterclockwise by hand only - do not use tools todisconnect. Lift LP tank wire upward off of LP tank collar,then lift LP tank up and off of support bracket. Installsafety cap onto LP tank valve. Always use cap and strapsupplied with valve.Failure to use safety cap as directed may result in seriouspersonal injury and/or property damage.LP Tank ValveSafety CapRetainer Strap• A disconnected LP tank in storage or being transported musthave a safety cap installed (as shown). Do not store an LPtank in enclosed spaces such as a carport, garage, porch,covered patio or other building. Never leave an LP tankinside a vehicle which may become overheated by the sun.• Do not store an LP tank in an area where children play.8 • <strong>466226113</strong>DANGERLP Tank• The LP Tank used with your grill must meet the followingrequirements:• Use LP Tanks only with these required measurements: 12"(30.5cm) (diameter) x 18" (45.7 cm) (tall) with 20 lb. (9 kg.)capacity maximum.• LP Tanks must be constructed and marked in accordancewith specifications for LP Tanks of the U.S. Department ofTransportation (DOT) or for Canada, CAN/CSA-B339, tanks,spheres and tubes for transportation of dangerous goods.Transport Canada (TC). See LP Tank collar for marking.• LP Tank valve must have:• Type 1 outlet compatible withregulator or grill.• Safety relief valve.• UL listed Overfill ProtectionOPD Hand WheelDevice (OPD). This OPD safetyfeature is identified by a unique triangular hand wheel.Use only LP Tanks equipped with this type of valve.• LP Tank must be arranged for vapor withdrawal and includecollar to protect LP Tank valve. Always keep LP Tanks inupright position during use, transit or storage.LP Tank in upright position for vapor withdrawalLP (Liquefied Petroleum Gas)• LP gas is nontoxic, odorless and colorless when produced.For Your Safety, LP gas has been given an odor (similar torotten cabbage) so that it can be smelled.• LP gas is highly flammable and may ignite unexpectedlywhen mixed with air.LP Tank Filling• Use only licensed and experienced dealers.• LP dealer must purge new tank before filling.• Dealer should NEVER fill LP Tank more than 80% of LP Tankvolume. Volume of propane in tank will vary by temperature.• A frosty regulator indicates gas overfill. Immediately closeLP Tank valve and call local LP gas dealer for assistance.• Do not release liquid propane (LP) gas into the atmosphere.This is a hazardous practice.• To remove gas from LP Tank, contact an LP dealer or call alocal fire department for assistance. Check the telephonedirectory under “Gas Companies” for nearest certified LPdealers.
LP Tank Exchange• Many retailers that sell grills offer you the option ofreplacing your empty LP tank through an exchange service.Use only those reputable exchange companies that inspect,precision fill, test and certify their tanks. Exchange yourtank only for an OPD safety feature-equipped tank asdescribed in the "LP Tank" section of this manual.• Always keep new and exchanged LP tanks in uprightposition during use, transit or storage.• Leak test new and exchanged LP tanks BEFOREconnecting to grill.• Place dust cap on cylinder valve outlet whenever thecylinder is not in use. Only install the type of dust cap onthe cylinder valve outlet that is provided with the cylindervalve. Other types of caps or plugs may result in leakageof propane.LP Tank Leak TestFor your safety• Leak test must be repeated each time LP tank is exchangedor refilled.• Do not smoke during leak test.• Do not use an open flame to check for gas leaks.• Grill must be leak tested outdoors in a well-ventilated area,away from ignition sources such as gas fired or electricalappliances. During leak test, keep grill away from openflames or sparks.• Use a clean paintbrush and a 50/50 mild soap and watersolution. Brush soapy solution onto areas indicated byarrows in figure below. Leaks are indicated by growingbubbles.If “growing” bubbles appear do not use or move the LP tank.Contact an LP gas supplier or your fire department!▲ Do not use household cleaning agents. Damage to gasvalve/hose/regulator components can result.Connecting Regulator To The LP Tank1. LP tank must be properly secured onto grill. (Refer toassembly section.)2. Turn all control knobs to the OFF position.3. Turn LP tank OFF by turning OPD hand wheel clockwise toa full stop.4. Remove the protective cap from LP tank valve. Always usecap and strap supplied with valve.Safety Relief ValveOffClockwiseStrap and Cap5. Hold regulator and insert nipple into LPtank valve. Hand-tighten the couplingnut, holding regulator in a straight linewith LP tank valve so as not to crossthreadthe connection.OPD Hand WheelType 1 outlet withthread on outsideDo not insert a POL transport plug(plastic part with external threads)into the Type 1 tank valve outlet.It will defeat the Safety ReliefValve feature.Nipple has to be centeredinto the LP tank valve.<strong>466226113</strong> • 9
StraightHold coupling nut and regulatoras shown for proper connectionto LP tank valve.Leak Testing Valves, Hose and Regulator1. Turn all grill control knobs to OFF.2. Be sure regulator is tightly connected to LP tank.3. Completely open LP tank valve by turning OPD hand wheelcounterclockwise. If you hear a rushing sound, turn gas offimmediately. There is a major leak at the connection.Correct before proceeding by calling customer services forreplacement parts at 1-800-241-7548.4. Brush soapy solution onto areas where bubbles are shown inpicture below:6. Turn the coupling nut clockwise and tighten to a full stop. Theregulator will seal on the back-check feature in the LP tankvalve, resulting in some resistance. An additional one-half tothree-quarters turn is required to complete theconnection. Tighten by hand only – do not use tools.NOTE:If you cannot complete the connection, disconnect regulatorand repeat steps 5 and 6. If you are still unable to completethe connection, do not use this regulator!Call 1-800-241-7548 for identical replacement parts.Never remove threadedorifice at end of valve.DANGER• Do not insert any tool or foreign objects into the valveoutlet or safety relief valve. You may damage the valveand cause a leak. Leaking propane may result inexplosion, fire, severe personal injury, or death.• If a leak is detected at any time, STOP and call the firedepartment.• If you cannot stop a gas leak, immediately close LP tankvalve and call LP gas supplier or your fire department!5. If “growing” bubbles appear, there is a leak. Close LP tankvalve immediately and retighten connections. If leakscannot be stopped do not try to repair. Call customerservices for replacement parts at 1-800-241-7548.6. Always close LP tank valve after performing leak test byturning hand wheel clockwise.WARNING• Never attempt to attach this grill to the self-containedLP gas system of a camper trailer or motor home.• Do not use grill until leak-tested.10 • <strong>466226113</strong>
WARNINGFor Safe Use of Your Grill and to Avoid SeriousInjury:• Do not let children operate or play near grill.• Keep grill area clear and free from materials thatburn.• Do not block holes in sides or back of grill.• Check burner flames regularly.• Use grill only in well-ventilated space. NEVER usein enclosed space such as carport, garage, porch,covered patio, or under an overhead structure ofany kind.• Do not use charcoal or ceramic briquets in a gasgrill. (Unless briquets are supplied with your grill.)• Do not cover grates with aluminum foil or anyother material. This will block burner ventilationand create a potentially dangerous conditionresulting in property damage and/or personalinjury.• Use grill at least 3 ft. from any wall or surface.Maintain 10 ft. clearance to objects that can catchfire or sources of ignition such as pilot lights onwater heaters, live electrical appliances, etc.• Apartment Dwellers:Check with management to learn the requirementsand fire codes for using an LP gas grill in yourapartment complex. If allowed, use outside on theground floor with a three (3) foot clearance fromwalls or rails. Do not use on or under balconies.• NEVER attempt to light burner with lid closed. Abuildup of non-ignited gas inside a closed grill ishazardous.• Never operate grill with LP cylinder out ofcorrect position specified in assemblyinstructions.• Always close LP cylinder valve and removecoupling nut before moving LP cylinder fromspecified operation position.Safety Tips▲ Before opening LP cylinder valve, check the coupling nutfor tightness.▲ When grill is not in use, turn off all control knobs and LPcylinder valve.▲ Never move grill while in operation or still hot.▲ Use long-handled barbecue utensils and oven mitts toavoid burns and splatters.▲ Maximum load for side burner and side shelf is 10 lbs.▲ The grease tray or cup must be inserted into grill andemptied after each use. Do not remove grease tray orcup until grill has completely cooled.▲ Clean grill often, preferably after each cookout. If abristle brush is used to clean any of the grill cookingsurfaces, ensure no loose bristles remain on cookingsurfaces prior to grilling. It is not recommended to cleancooking surfaces while grill is hot.▲ If you notice grease or other hot material dripping fromgrill onto valve, hose or regulator, turn off gas supply atonce. Determine the cause, correct it, then clean andinspect valve, hose and regulator before continuing.Perform a leak test.▲ Keep ventilation openings in cylinder enclosure (grill cart)free and clear of debris.▲ Do not store objects or materials inside the grill cartenclosure that would block the flow of combustion air tothe underside of either the control panel or the fireboxbowl.▲ The regulator may make a humming or whistling noiseduring operation. This will not affect safety or use of grill.▲ If you have a grill problem see the "TroubleshootingSection".▲ If the regulator frosts, turn off grill and LP cylinder valveimmediately. This indicates a problem with the cylinderand it should not be used on any product. Return tosupplier!CAUTION• Putting out grease fires by closing the lid is notpossible. <strong>Grills</strong> are well ventilated for safety reasons.• Do not use water on a grease fire. Personal injury mayresult. If a grease fire develops, turn knobs and LPcylinder off.• Do not leave grill unattended while preheating orburning off food residue on HI. If grill has not beenregularly cleaned, a grease fire can occur that maydamage the product.<strong>466226113</strong> • 11
Ignitor Lighting▲ Do not lean over grill while lighting.1. Turn OFF gas burner control valves.2. Turn ON gas at tank or source.3. Open lid during lighting.4. To ignite, push and turn IGNITION BURNER knobto HIGH.5. Push and hold ELECTRONIC IGNITION button untilthe burner lights.6. If ignition does NOT occur in 5 seconds, turn theburner controls OFF, wait 5 minutes and repeat thelighting procedure.7. To ignite remaining burners, turn knob to the HIGHposition starting with the burners closest toIGNITION BURNER first. If ignitor does not work,follow match lighting instructions.8. For grills equipped with ELECTRONIC IGNITIONat each burner:Repeat steps 4 through 6 to light each burner.9. Once each burner has ignited, turn knobs todesired setting.WARNINGTurn controls and gas source when not in use.CAUTIONIf ignition does NOT occur in 5 seconds, turn theburner controls OFF, wait 5 minutes and repeat thelighting procedure. If the burner does not ignite withthe valve open, gas will continue to flow out of theburner and could accidently ignite with risk of injury.Match-Lighting▲ Do not lean over grill while lighting.1. Open lid. Turn ON gas at tank or source.2. Place match into match holder (hanging from leftside panel of grill). Light match; then light burnerby placing match through the match light hole onleft side of grill.3. Push in and turn far left burner knob to the HIGHposition. Be sure burner lights and stays lit.4. Light adjacent burners in sequence by pushingknobs in and turning to the HIGH position.SEAR Burner Ignitor Lighting▲ Do not lean over grill while lighting.1. Turn OFF gas burner control valves.2. Turn ON gas at tank or source.3. Open lid during lighting.4. To ignite, push and turn SEAR burner knob to HIGH.5. Push and hold ELECTRONIC IGNITION button untilthe burner lights.6. If ignition does NOT occur in 5 seconds, turn theburner controls OFF, wait 5 minutes and repeat thelighting procedure.SEAR Burner Match-Lighting▲ Do not lean over grill while lighting.1. Open lid. Turn ON gas at tank or source.2. Place match into match holder (hanging from rightside panel of grill). Light match; then light burnerby placing match through the match light hole onright side of grill.3. Push in and turn SEAR burner knob to the HIGHposition. Be sure burner lights and stays lit.NOTE: Your grill may NOT be equipped with aSideburner!Sideburner Ignitor Lighting▲ Do not lean over grill while lighting.1. Open sideburner lid. Turn ON gas attank or source.2. Turn sideburner knob to the HIGH position, pushand hold ELECTRONIC IGNITOR button.3. If sideburner does NOT light within 5 seconds, turnknob to OFF, wait 5 minutes, then repeat lightingprocedure.Sideburner Match Lighting1. Open sideburner lid. TurnON gas at source.2. Place lit match near burner.3. Turn sideburner knob to theHIGH position. Be sureburner lights and stays lit.12 • <strong>466226113</strong>
Burner Flame Check• Remove cooking grates and heat diffusers. Lightburners, rotate knobs from HIGH to LOW. You shouldsee a smaller flame in LOW position than seen onHIGH. Perform burner flame check on sideburner,also. Always check flame prior to each use. If onlylow flame is seen refer to "Sudden drop or lowflame" in the Troubleshooting Section.HIGHLOWTurning Grill Off• Turn all knobs to the OFF position. Turn LP cylinderOFF by turning hand-wheel clockwise to a full stopor turn of NG source.Ignitor Check• Turn gas off at LP cylinder or source. Press and holdelectronic ignitor button. "Click" should be heardand spark seen each time between each collectorbox or burner and electrode. See "Troubleshooting"if no click or spark.Valve Check• Important: Make sure gas is off at LP cylinder orsource before checking valves. Knobs lock in OFFposition. To check valves, first push in knobs andrelease, knobs should spring back. If knobs do notspring back, replace valve assembly before usinggrill. Turn knobs to LOW position then turn back toOFF position. Valves should turn smoothly.Hose Check• Before each use, check to see if hoses are cut orworn or kinked. Replace damaged hoses beforeusing grill. Use only valve/hose/regulator specifiedby manufacturer.General Grill Cleaning• Do not mistake brown or black accumulation ofgrease and smoke for paint. Interiors of gas grillsare not painted at the factory (and should never bepainted). Apply a strong solution of detergent andwater or use a grill cleaner with scrub brush oninsides of grill lid and bottom. Rinse and allow tocompletely air dry. Do not apply a caustic grill/ovencleaner to painted surfaces.• Plastic parts: Wash with warm soapy water andwipe dry. Do not use citrisol, abrasive cleaners,degreasers or a concentrated grill cleaner on plasticparts. Damage to and failure of parts can result.• Porcelain surfaces: Because of glass-like composition,most residue can be wiped away with bakingsoda/water solution or specially formulated cleaner.Use nonabrasive scouring powder for stubbornstains.• Painted surfaces: Wash with mild detergent ornonabrasive cleaner and warm soapy water. Wipedry with a soft nonabrasive cloth.• Stainless steel surfaces: To maintain your grill’s highquality appearance, wash with mild detergent andwarm soapy water and wipe dry with a soft clothafter each use. Baked-on grease deposits mayrequire the use of an abrasive plastic cleaning pad.Use only in direction of brushed finish to avoiddamage. Do not use abrasive pad on areas withgraphics.• Cooking surfaces: If a bristle brush is used to cleanany of the grill cooking surfaces, ensure no loosebristles remain on cooking surfaces prior to grilling.It is not recommended to clean cooking surfaceswhile grill is hot.<strong>466226113</strong> • 13
CAUTIONSPIDER ALERT!Important: Always ensure that the venturi burner tubes are clean. Aventuri burner tube has a narrow area in which spiders tend to buildnests.CONTROL PANELVALVESPIDER AND WEBSINSIDE BURNER TUBEIf you notice that your grill is getting hard to light or that theflame isn’t as strong as it should be, take the time to check andclean the burner tubes.SPIDER WEBSINSIDE VENTURI TUBEBURNERSpiders or small insects have been known to create “flashback”problems. The spiders spin webs, build nests and lay eggs in thegrill’s venturi tube(s) obstructing the flow of gas to the burner.The backed-up gas can ignite in the burner tube behind thecontrol panel. This is known as a flashback and it can damageyour grill and even cause injury.To prevent flashbacks and ensure good performance the burnerand venturi tube assembly should be removed from the grilland cleaned before use whenever the grill has been idle for anextended period.Storing Your Grill• Clean cooking grates.• Store in dry location.• Cover grill if stored outdoors. Choose from a varietyof grill covers offered by manufacturers.• When removing grill from storage, follow “Cleaningthe Burner Assembly” instructions before startinggrill.Cleaning the Burner AssemblyFollow these instructions to clean and/or replace partsof burner assembly or if you have trouble igniting grill.1. Turn gas OFF at control knobs and LP cylinder.2. Remove cooking grates and heat diffusers.3. Remove carryover tubes and burners.14 • <strong>466226113</strong>4. Detach electrode from burner.NOTE: Removal/Detachment method will dependon the burner configuration. See differentconfigurations in illustrations below.5. Carefully lift each burner up and away from valveopenings. We suggest three ways to clean theburner tubes. Use the one easiest for you.(A) Bend a stiff wire (a light weight coat hangerworks well) into a small hook. Run the hookthrough each burner tube several times.(B) Use a narrow bottle brush with a flexiblehandle (do not use a brass wire brush), run thebrush through each burner tube several times.(C) Wear eye protection: Use an air hose to forceair into the burner tube and out the burnerports. Check each port to make sure air comesout each hole.6. Wire brush entire outer surface of burner to removefood residue and dirt.7. Clean any blocked ports with a stiff wire such as anopen paper clip.8. Check burner for damage, due to normal wear andcorrosion some holes may become enlarged. If anylarge cracks or holes are found replace burner.VERY IMPORTANT: Burner tubes must reengagevalve openings. See illustrations at right.9. Attach electrode to burner.10. Carefully replace burners.11. Attach burners to brackets on firebox.12. Reposition carryovertubes and attach toburners. Replace heatdiffusers and cookinggrates.FireboxFireboxCarryover tubeFireboxburnerbracketCarryover tubeFirebox burnerbracketCorrectburner-to-valveengagementElectrodeElectrodeRemove screwsPry off electrodewith a flat bladescrewdriver
PARTS LISTKey Qty Description Part #1 1 BOTTOM SHELF G651-B900-W12 1 LEFT SIDE CART PANEL G651-2200-W1A3 1 RIGHT SIDE CART PANEL G651-2300-W1A4 2 MATCH HOLDER G401-0079-W15 4 CASTER SOCKET G408-0036-W16 1 LOWER BACK PANEL G651-7701-W17 1 TANK EXCLUSION WIRE G651-7702-W18 1 FRONT DOOR BRACE G651-B800-W19 2 CASTER, LOCKING G350-0023-W110 2 CASTER, FIXED G350-0024-W111 1 WEIGHT BLOCK G651-0012-W112 1 TOP LID G651-4200-W113 1 LOGO PLATE F/ LID G528-0002-W214 1 TEMPERATURE GAUGE G430-0022-W115 1 BEZEL, F/ TEMPERATURE G404-0034-W1GAUGE16 2 LID BUMPER, RECTANGLE G430-00B8-W117 2 LID BUMPER, ROUND G303-0038-W118 1 TOP LID HARDWARE G430-0024-W219 1 HANDLE, F/ LID G651-0008-W120 1 FIREBOX G651-C300-W121 5 MAIN BURNER-TUBE BURNER G431-0300-W222 1 MAIN BURNER-BAR BURNER G651-1100-W123 1 ELECTRODE, F/ MAIN BURNER G501-0010-W124 1 ELECTRODE, F/ SEAR BURNER G651-5103-W225 4 CARRY OVER TUBE G501-0015-W126 1 CONTROL PANEL, MAIN G651-0053-W127 1 ELECTRONIC IGNITION G651-1300-W1MODULE28 1 HEAT SHIELD, F/ IGNITION G308-0025-W1MODULE29 1 HOSE VALVE REGULATOR G651-8800-W1ASSEMBLY30 7 BEZEL F/ CONTROL KNOB G430-0027-W231 7 CONTROL KNOB G432-0010-W132 1 RIGHT SIDE SHELF G530-0500-W233 1 FASCIA, F/ RIGHT SHELF G651-P901-W134 1 LEFT SIDE SHELF F/ SB G530-0600-W235 1 DRIP PAN, F/ SB G516-0021-W236 2 RUBBER BUMPER, F/ G501-0066-W1SIDEBURNER37 1 CONTROL PANEL, F/ SB G651-Q001-W1Key Qty Description Part #38 1 SIDEBURNER G651-Q200-W139 1 ELECTRODE, F/ SB G515-0039-W140 1 ELECTRODE WIRE, F/ G602-0007-W1SIDEBURNER41 1 SIDEBURNER VALVE CLIP G405-0019-W142 1 SIDEBURNER LID G521-0021-W143 1 HINGE, F/ SIDEBURNER G513-1100-W144 1 HANDLE, F/ SB LID G517-0011-W245 1 SIDEBURNER GRATE G606-0015-W146 1 GRIDDLE, F/ SIDEBURNER G516-0070-W147 2 HANDLE, F/ DOOR G651-0006-W248 1 LEFT DOOR G651-5501-W149 1 RIGHT DOOR G651-5601-W150 2 DOOR PIN, FIXED G401-0053-W151 2 DOOR PIN, SPRING G439-0036-W252 2 MAGNET ASSEMBLY G213-0022-W153 5 HEAT DIFFUSER G430-0005-W154 1 HEAT DIFFUSER F/ BAR G651-0011-W1BURNER55 4 COOKING GRATE G432-0002-W156 1 WARMING RACK G651-0017-W157 1 BUTTON, F/ IGNITION G409-0030-W1MODULE58 1 SHEILD, F/ TANK G651-1206-W159 1 GREASE TRAY G651-1200-W160 1 GREASE PAN G416-0015-W161 1 SCREW, F/ TANK RETAINER G430-C001-W262 1 ROTISSERIE BRACKET, G651-0020-W1MOTOR SIDE63 1 ROTISSERIE BRACKET, G651-0021-W1HANDLE SIDE64 1 ROTISSERIE MOTOR W/ FORK G651-0054-W1ASSEMBLYNOT Pictured… 1 CASTER PIN G350-0026-W1… 1 PRODUCT MANUAL, ENGLISH G651-240801-W1… 1 PRODUCT MANUAL, FRENCH G651-240802-W1… 1 HARDWARE PACK G65124-B001-W1To order replacement parts after using grill,call 1-800-241-7548.NOTE: Some grill parts shown in the assembly steps may differ slightly in appearance fromthose on your particular grill model. However, the method of assembly remains the same.<strong>466226113</strong> • 15
PARTS DIAGRAM636264181256433642555555552121 21 21 212253 53 53 53 53 54231924444645382525 2525201716131514353934374140263233282757304316029303130 30 30 30 30 31 31 31 31 315851 52594851348496471124755179910615052501016 • <strong>466226113</strong>
ASSEMBLY1• Attach bottom shelf, oriented as shown, to left and right leg assemblies with 1/4-20x2-3/8” machine screws and 1/4-20flange nuts. The cut out hole for the LP cylinder should be on the left side.For Front DoorBrace AssemblyRight Side PanelLeft Side PanelFront1/4-20x2-3/8"Machine ScrewQty: 6RearBottom Shelf1/4-20Flange NutQty: 62• Place lower back panel between side panels as shown. Attach to left and right side panels with (4) #8x3/8” sheet metalscrews. Then attach to bottom shelf with (2) #8x3/8” sheet metal screws.Left Side PanelRight Side Panel#8x3/8"Sheet Metal ScrewsQty. 6Lower Back PanelBottom ShelfMagnet Assembly<strong>466226113</strong> • 17
3• Hang tank exclusion wire onto lower back panel, attach other end to bottom shelf with #8x3/8” sheet metal screw.Lower Back Panel#8x3/8"Sheet Metal ScrewsQty. 14•Place front door brace as shown. Attach to left and right leg assemblies with 1/4-20x2-3/8" machine screws and1/4-20 flange nuts.1/4-20Flange NutQty: 41/4-20x2-3/8"Machine ScrewQty: 4Front Door Brace18 • <strong>466226113</strong>
5• Turn assembly upside down.• Insert Caster Pin into the caster mounting plate to lock it in place, shown A. Spin the caster clockwise into the threads onthe bottom shelf until secure. Remove the Caster Pin and repeat for remaining casters. Make sure the two locking castersare secured at the rear and the non-locking casters are secured at the front (B). After all 4 casters are secure remove theCaster Pin and save for future maintenance.• Attach weight block to bottom shelf with (2) 1/4-20x2” machine screws and 1/4-20 flange nuts (C).Locking CasterLocking CasterFixed CasterFixed CasterCaster PinBRearCasterPinFrontALeft Leg AssemblyRight Leg Assembly1/4-20 Flange NutWeight BlockC1/4-20x2"Machine ScrewQty: 21/4-20Flange NutQty: 21/4-20x2"Machine Screw<strong>466226113</strong> • 19
6•Stand cart upright.• This step requires two people to lift and position grill head onto cart.• Carefully lower the grill head onto the cart. Make sure the regulator hose is hanging outside the cart. Attach with1/4-20x1/2” screws.Grill Head1/4-20x1/2" ScrewQty: 420 • <strong>466226113</strong>
7• Attach right side fascia to right side shelf with #10-24x3/8" screw assemblies (A).• Hook the right side shelf to firebox by the pre-assembled screws (B).• Inside firebox, insert 7mm fiber washer and 1/4-20x1/2” screw as shown (C).• Attach shelf with 1/4-20x1/2" screw and 1/4-20 flange nuts, and fasten the two pre-assembled screws (D).#10-24x3/8" screwassemblyQty. 31/4-20x1/2"Machine ScrewQty. 21/4-20Flange NutQty. 17mmFiber WasherQty. 1BRight Side ShelfA#10-24x3/8" screwassemblyC7mmFiber WasherD1/4-20x1/2"Screw1/4-20Flange Nut1/4-20x1/2"ScrewTighten the screws8• Attach fascia to firebox with #8x3/8” sheet metal screws.Fascia,Right Side Shelf#8x3/8"Sheet Metal ScrewsQty. 2<strong>466226113</strong> • 21
9• Attach left side fascia to left side shelf with #10-24x3/8" screw assemblies (A).• Hook the side burner shelf to firebox by the pre-assembled screws (B).• Inside firebox, insert 7mm fiber washer and 1/4-20x1/2” screw as shown (C).• Attach shelf with 1/4-20x1/2" screw and 1/4-20 flange nuts, and fasten the two pre-assembled screws (D).#10-24x3/8"screw assemblyQty. 31/4-20x1/2"Machine ScrewQty. 21/4-20Flange NutQty. 17mmFiber WasherQty. 1Side Burner ShelfBA#10-24x3/8" screwassembly7mmFiber WasherCD1/4-20x1/2"Screw1/4-20Flange Nut1/4-20x1/2"ScrewTighten the screws10• Attach fascia to firebox with #8x3/8” sheet metal screws.#8x3/8"sheet metal screwsQty. 222 • <strong>466226113</strong>
11• Attach side burner bezel and valve with #8-32x3/8” Stainless Steel screws. (A).• Place side burner into shelf. Make sure valve is inside side burner tube. Attach side burner with #8 wing nut (B). Hookventuri clip to side burner tube and around manifold. Attach side burner ignitor wire to ignitor as shown (C).• Press side burner control knob onto valve stem (D).Side BurnerBSide Burner TubeAValveSide Burner Bezel#8 wing nutSide Burner ValveSide Burner Control KnobDCBurner TubeValveSideburnerIgnitor WireVenturi Clip#8-32X3/8"Stainless Steel ScrewQty. 2#8 Wing NutQty. 1<strong>466226113</strong> • 23
12• Place side burner lid onto left side shelf and align hinges holes in back of lid with side shelf holes. Attach side burner lidassembly to side shelf with #8-32 x3/8" screws and #8-32 hex nuts.• Place side burner cooking grate and griddle onto side burner shelf.#8-32X3/8” ScrewQty. 4#8-32x3/8"Screw#8-32 Hex NutQty. 4#8-32 Hex NutSide Burner GriddleSide Burner Cooking Grate24 • <strong>466226113</strong>
13• Attach handle to door with #10-24x1/2” machine screws, 5mm flat washers and 5mm lock washers (A).• Insert hinge pin on bottom shelf into hole in door. Press upper hinge pin in front door brace, align hinge hole on top ofdoor, and release hinge pin into door.Hinge Pin holeAHinge Pin hole5mm Lock Washer#10-24x1/2"Machine ScrewQty. 4Left Handle#10-24x1/2"Machine ScrewRight Handle5mm Flat Washer5mm Flat WasherQty. 4Left DoorRight Door5mm Lock WasherQty. 4<strong>466226113</strong> • 25
14• Place heat diffusers over tube burners and the heat diffuser for sear burner over sear burner by inserting tabs into slotsin front of firebox. Opposite ends of heat diffusers rest on pins in back of firebox.Back of FireboxHeat Diffuser,F/Sear Burner(Stainless Steel)PinHeat DiffuserHeat Diffuser(Black)Sear BurnerFront of FireboxHeat Diffuser15• Place cooking grates onto grate rests.• Insert ends of Warming Rack pivot wire into holes in sides of gril lid. Insert ends of Warming Rack leg wire into holes insides of firebox.NOTE: Pivot and leg wires, running side-to-side, should be under wires running front-to-back. If pivot and leg wires areon top, Warming Rack is installed upside-down.• Unscrew ignitor cap and place AA battery into ignitor slot with positive end (+) facing outward. Screw ignitor cap ontoignitor.Warming Rack WiresPivot Wire (front-to-back)(side to side)Leg Wire(side to side)Pivot WireWarming RackLeg WireCooking Grate-++ –AA Battery26 • <strong>466226113</strong>
16• Attach the heat shield to grease tray with #8x3/8” sheet metal screws (A).• Place grease pan into grease tray, then place the tray into the cart (B).CAUTIONFailure to install grease tray andgrease pan will cause hot grease todrip from bottom of grill with risk offire or property damage.AGrease TrayHeat ShieldBGrease TrayGrease Pan#8x3/8"Sheet Metal ScrewsQty. 417• LP tank is sold separately. Use only with an OPD (over-fill protection device) equipped LP tank. Fill and leak-checkbefore attaching to grill and regulator. See Use and Care section to correctly Leak Test and perform the Burner FlameCheck.• Place LP tank into hole in bottom shelf with tank collar opening facing to the front as shown. Finger tighten tankthumbscrew to hold LP tank securely in place.Always keep LP cylinders inupright position during use,transport, and storage.CAUTIONFailure to install tank correctly mayallow gas hose to be damaged inoperation, resulting in the risk offire.Cylinder screw at rear of cartRegulatorLP Cylinder(not included)Tank Retainer ScrewLP Tank<strong>466226113</strong> • 27
18• Remove the warming rack and open the side burner lid before assembling rotisserie.• Remove the pre-assembled screws, fiber washers and flange nuts from rotisserie brackets. Then attached the handle siderotisserie bracket to left and motor side rotisserie bracket to right side of firebox, as shown A.• Push rotisserie motor onto the motor side rotisserie bracket, as shown B.• Insert the rotisserie bushing and rotisserie washer to the threaded end of the spit rod. Attached the rotisserie handle.Insert the spit rod through rotisserie forks, as shown C.• Insert the motor end of the rotisserie into motor side rotisserie bracket. The handle end rest onto handle side rotisseriebracket, as shown D.ARotisserie Bracket,Motor SideRotisserie Bracket,Handle SideBRotisserie MotorRotisserie WasherRotisserie BushingRotisserie ForkCRotisserie HandleSpit RodD28 • <strong>466226113</strong>
Rotisserie Operation InstructionsUse only a Ground Fault Interrupter (GFI) protected circuitwith this rotisserie motor.1. Make sure power switch on the rotisserie motor is in the“OFF” position.2. Connect rotisserie motor plug to an extension cord, thenput the extension cord plug into the outlet on the wall.3. After placing the spit rod as stated in the assemblyinstructions, turn the rotisserie motor to “ON”.WARNING• Keep any electrical supply cord away from any heatedsurface.• Use the shortest length extension cord required. Do notconnect 2 or more extension cords together.WARNINGElectrical Grounding Instructions:This appliance is equipped with a three prong (grounded)plug for your protection against shock hazard and shouldbe plugged directly into a properly grounded three prongreceptacle. Do not cut or remove the grounding prongfrom this plug.WARNINGWhen using and extension cord, for your safety:• Use only outdoor type with three prong grounding plug,approved by UL, marked with a W-A and with a tagstating “Suitable for Use with Outdoor Appliance”.• Keep connections dry and off ground.• Do not let cord hang over edge of table or other itemswhere it can be pulled by children or tripped over.Important SafeguardsPlease use the following basic safety precautions whenusing your rotisserie.1. Read all instructions before attempting assembly,installation and use.2. Do not allow children to operate this product. Provideclose supervision if used near children.3. Do not touch hot surfaces without proper protection.4. Allow all parts to cool before assembling ordisassembling.5. Do not use accessory attachments unless recommendedby <strong>Char</strong>-Briol.6. Do not operate for any use other than intended.7. Removed motor from grill and store indoors when not inuse.8. Do not use grill for non-rotissorie cooking with motorinstalled.9. To protect against electric shock, do not immerse motor,cord or plugs in water or other liquid10. Do not operate any outdoor cooking gas appliance witha damaged cord, plug, or after the appliancemalfunctions or has been damaged in any manner.Contact the manufacturer for replacement parts.11. Do not allow cord to touch hot surfaces.12. Unplug cord from outlet when not in use and beforecleaning.13. Turn motor OFF before removing plug from outlet.<strong>466226113</strong> • 29
EMERGENCIES: If a gas leak cannot be stopped, or a fire occurs due to gas leakage, call the fire department.EmergenciesGas leaking fromcracked/cut/burnedhose.Gas leaking from LPcylinder.Gas leaking from LPcylinder valve.Gas leaking betweenLP cylinder andregulator connection.Fire coming throughcontrol panel.Grease fire orcontinuous excessiveflames above cookingsurface.TroubleshootingProblemBurner(s) will not lightusing ignitor.(See Electronic IgnitionTroubleshooting also)Continued on nextpage.30 • <strong>466226113</strong>Possible Cause• Damaged hose.• Mechanical failure due to rusting ormishandling.• Failure of cylinder valve frommishandling or mechanical failure.• Improper installation, connection nottight, failure of rubber seal.• Fire in burner tube section of burnerdue to blockage.• Too much grease buildup in burnerarea.Possible CauseGAS ISSUES:• Trying to light wrong burner.• Burner not engaged with control valve.• Obstruction in burner.• No gas flow.• Vapor lock at coupling nut to LPcylinder.• Coupling nut and LP cylinder valve notfully connected.ELECTRICAL ISSUES:• Electrode cracked or broken; “sparks atcrack.”• Electrode tip not in proper position.• Wire and/or electrode covered withcooking residue.• Wires are loose or disconnected.• Wires are shorting (sparking) betweenignitor and electrode.• Dead battery.Prevention/Solution• Turn off gas at LP cylinder or at source on natural gas systems.If the hose is cracked or cut but not burned, simply replacevalve/hose/ regulator. If the hose is burned, the cause could beother than a faulty valve/hose/regulator. Discontinue use of grilluntil a plumber or gas technician has investigated andcorrected the problem.• Replace LP cylinder.• Turn off LP cylinder valve. Return LP cylinder to gas supplier.• Turn off LP cylinder valve. Remove regulator from cylinder andvisually inspect rubber seal for damage. See LP Cylinder LeakTest and Connecting Regulator to the LP Cylinder.• Turn off control knobs and LP cylinder valve. Leave lid open toallow flames to die down. After fire is out and grill is cold,remove burner and inspect for spider nests or rust. See SpiderAlert and Cleaning the Burner Assembly sections of this Use &Care Guide.• Turn off control knobs and LP cylinder valve. Leave lid open toallow flames to die down. After cooling, clean food particlesand excess grease from inside firebox area, grease tray, andother surfaces.Prevention/Solution• See instructions on control panel and in Use and Care section.• Make sure valves are positioned inside of burner tubes.• Ensure burner tubes are not obstructed with spider webs or othermatter. See cleaning section of Use and Care.• Make sure LP cylinder is not empty. If LP cylinder is not empty,refer to “Sudden drop in gas flow.”• Turn off knobs and disconnect coupling nut from LP cylinder.Reconnect and retry.• Turn the coupling nut approximately one-half to three-quartersadditional turn until solid stop. Tighten by hand only - do notuse tools.• Replace electrode(s).Main Burners:• Tip of electrode should be pointing toward gas port opening onburner. The distance should be 1/8” to 1/4”. Adjust if necessary.Side burner:• Tip of electrode should be pointing toward gas port opening onburner. the distance should be 1/8” to 3/16”. Adjust if necessary.• Clean wire and/or electrode with rubbing alcohol and cleanswab.• Reconnect wires or replace electrode/wire assembly.• Replace ignitor wire/electrode assembly.• Replace with a new AA-size alkaline battery.
Troubleshooting (continued)ProblemBurner(s) will not lightusing ignitor.(See Electronic IgnitionTroubleshooting also)Burner(s) will notmatch light.Sudden drop in gasflow or low flame.Flames blow out.Flare-up.Persistent grease fire.Flashback...(fire in burner tube(s)).Unable to fill LPcylinder.One burner does notlight from otherburner(s).Possible CauseELECTRONIC IGNITION:• No spark, no ignition noise.• No spark, some ignition noise.• Sparks, but not at electrode or at fullstrength.• See “GAS ISSUES:” on previous page.• Match will not reach.• Improper method of match-lighting.• Out of gas.• Excess flow valve tripped.• Vapor lock at coupling nut/LP cylinderconnection.• High or gusting winds.• Low on LP gas.• Excess flow valve tripped.• Grease buildup.• Excessive fat in meat.• Excessive cooking temperature.• Grease trapped by food builduparound burner system.• Burner and/or burner tubes areblocked.• Some dealers have older fill nozzleswith worn threads.• Grease buildup or food particles inend(s) of carryover tube(s).Prevention/Solution• See Section I of Electronic Ignition System.• See Section II of Electronic Ignition System.• See Section III of Electronic Ignition System.• Use long-stem match (fireplace match).• See “Match-Lighting” section of Use and Care.• Check for gas in LP cylinder.• Turn off knobs, wait 30 seconds and light grill. If flames are stilllow, turn off knobs and LP cylinder valve. Disconnect regulator.Reconnect regulator and leak-test. Turn on LP cylinder valve,wait 30 seconds and then light grill.• Turn off knobs and LP cylinder valve. Disconnect coupling nutfrom cylinder. Reconnect and retry.• Turn front of grill to face wind or increase flame height.• Refill LP cylinder.• Refer to “Sudden drop in gas flow” above.• Clean burners and inside of grill/firebox.• Trim fat from meat before grilling.• Adjust (lower) temperature accordingly.• Turn knobs to OFF. Turn gas off at LP cylinder. Leave lid inposition and let fire burn out. After grill cools, remove and cleanall parts.• Turn knobs to OFF. Clean burner and/or burner tubes. Seeburner cleaning section of Use and Care.• The worn nozzles don’t have enough “bite” to engage the valve.Try a second LP dealer.• Clean carry-over tube(s) with wire brush.<strong>466226113</strong> • 31
Troubleshooting - Electronic IgnitionProblem (Ignition)Possible CauseCheck ProcedurePrevention/SolutionSECTION INo sparks appear atany electrodes whenElectronic IgnitionButton is pressed; nonoise can be heardfrom spark module.• Battery not installedproperly.• Dead battery.• Check battery orientation.• Has battery been usedpreviously?• Install battery (make sure that “+” and “–”connectors are oriented correctly, with “+” end upand “–” end down.)• Replace battery with new AA-size alkaline battery.• Button assembly notinstalled properly.• Check to insure threads areproperly engaged. Buttonshould travel up and downwithout binding.• Unscrew button cap assembly and reinstall,making sure threads are aligned and engagedfully.• Faulty spark module.• If no sparks are generatedwith new battery and goodwire connections, module isfaulty.• Replace spark module assembly.SECTION IINo sparks appear atany electrodes whenElectronic IgnitionButton is pressed; noisecan be heard fromspark module.• Output leadconnections notconnected.• Are output connections onand tight?• Remove and reconnect all output connections atmodule and electrodes.SECTION IIISparks are presentbut not at allelectrodes and/or notat full strength• Output leadconnections notconnected.• Arcing to grill awayfrom burner(s).• Are output connections onand tight?• If possible, observe grill indark location. Operateignition system and look forarcing between output wiresand grill frame.• Remove and reconnect all output connections atmodule and electrodes.• If sparks are observed other than from burner(s),wire insulation may be damaged. Replace wires.• Weak battery.• All sparks present but weakor at slow rate.• Replace battery with a new AA-size alkalinebattery.• Electrodes are wet.• Has moisture accumulatedon electrode and/or inburner ports?• Use paper towel to remove moisture.• Electrodes cracked orbroken “sparks atcrack”.• Inspect electrodes forcracks.• Replace cracked or broken electrodes.32 • <strong>466226113</strong>
Notes<strong>466226113</strong> • 33
Notes34 • <strong>466226113</strong>
Notes<strong>466226113</strong> • 35
Get it fixed, at your home or ours!Your HomeFor troubleshooting, product manuals, repair and expert advice:Please call Grill Service Center for Help and PartsFor <strong>English</strong> and French service: please call 1-800-241-7548For repair – in your home – of all major brand appliances,lawn and garden equipment, or heating and cooling systems,no matter who made it, no matter who sold it!For the replacement parts, accessories andowner’s manuals that you need to do-it-yourself.For Sears professional installation of home appliancesand items like garage door openers and water heaters.1-800-4-MY-HOME ® (1-800-469-4663)Call anytime, day or night (U.S.A. and Canada)www.sears.com www.sears.caOur HomeFor repair of carry-in items like vacuums, lawn equipment,and electronics, call anytime for the location of your nearestSears Parts & Repair Service Center1-800-488-1222 (U.S.A.) 1-800-469-4663 (Canada)www.sears.comwww.sears.caTo purchase a protection agreement on a product serviced by Sears:1-800-827-6655 (U.S.A.) 1-800-361-6665 (Canada)Para pedir servicio de reparacióna domicilio, y para ordenar piezas:1-888-SU-HOGAR®(1-888-784-6427)www.sears.comAu Canada pour service en français:1-800-LE-FOYER MC(1-800-533-6937)www.sears.caTM® Registered Trademark / Trademark of KCD IP, LLC in the United Stat es, or Sears Brands, LLC in other countriesTM® Marca Registrada / Marca de Fábrica de KCD IP, LLC en Estados Unidos, o Sears Brands, LLC in otros paísesMC MDMarque de commerce / Marque déposée de Sears Brands, LLC