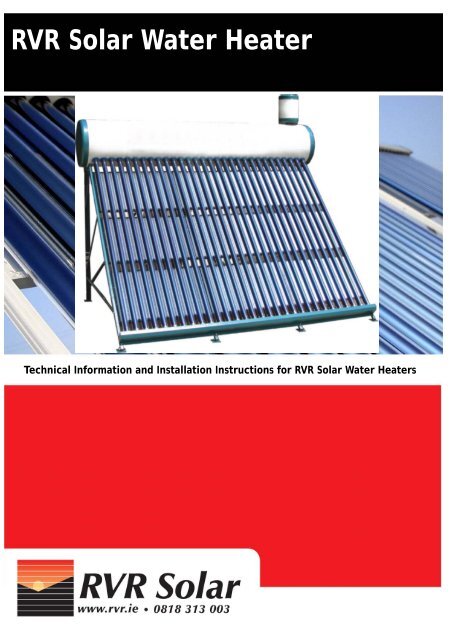
RVR Solar Water Heater - RVR.ie
RVR Solar Water Heater - RVR.ie
RVR Solar Water Heater - RVR.ie

You also want an ePaper? Increase the reach of your titles
YUMPU automatically turns print PDFs into web optimized ePapers that Google loves.
<strong>RVR</strong> <strong>Solar</strong> <strong>Water</strong> <strong>Heater</strong>Technical Information and Installation Instructions for <strong>RVR</strong> <strong>Solar</strong> <strong>Water</strong> <strong>Heater</strong>s
<strong>RVR</strong> <strong>Solar</strong> <strong>Water</strong> <strong>Heater</strong> InstructionsTable of ContentsPage Title3 Description of <strong>Solar</strong> <strong>Water</strong> <strong>Heater</strong>3 How the vacuum tube works4 Principle of operation of the small tank.5 <strong>Water</strong> heater installation5 Choosing a site for the solar water heater5 Assembly6 Installation of the tank6 Installation of the vacuum tubes.7 <strong>Water</strong> Supply7 Plumbing the unit8 Electrical installation8 Frost protection.8 Lightning protection.9 Operation of the solar water heater.WARNINGThe solar water heater can reach very high temperatures. High temperature water cancause severe injury (serious burns and scalds) or death. A mixing valve can be connected asshown to ensure that the user cannot be exposed to temperatures higher than 60°.If it is not possible to limit the water temperature to safe levels (this may be the case in adairy application), the installer and user should take all necessary precautions to ensure thatpersons un-familiar with the equipment cannot come into contact with very hot water. Accessto the equipment should be restricted and warnings should be posted. Great care should betaken to ensure that children or older persons cannot come into contact with the hot water.WARNINGFailure to observe the correct electrical connections may lead to serious injury or death.The unit must be installed by a qualif<strong>ie</strong>d person in strict accordance with IEE regulations.In particular, the solar water heater must be earthed and protected by an earth leakage circuitbreaker. The cable supplying the solar water heater should be fused at 10A.2
<strong>RVR</strong> <strong>Solar</strong> <strong>Water</strong> <strong>Heater</strong> InstructionsDescription of solar water heater.The solar water heater has 24 specially designedglass vacuum tubes which collect the solar energy.These allow sunlight in but do not allow heat out.The tubes contain water, which is heated by thesolar energy. This water rises as it is heated andgradually fills the tank with hot water. The tanktemperature can rise as high as 85°C on sunnydays.The tank contains a heat exchanger coil. Oneend of the coil is connected to the cold water supplyand the hot water outlet at the other end.The water is heated as it passes through the heatexchanger coil. This water is used for washing andsterilising the milking equipment.Fig. 1 - <strong>Solar</strong> <strong>Water</strong> <strong>Heater</strong>The water contained in the solar tubes and tankis never mixed with the hot water produced by thesystem. This means that hot water used for cleaningis never stored and there is no risk of legionellagrowth or other contamination which maybe a problem with other types of water heater.This is a further advantage which ensures thehighest level of hyg<strong>ie</strong>ne.The solar water heater is also fitted with anelectric immersion heater. This has an inbuiltthermostat which comes on automatically whenthe tank temperature is below 60°C and turns offwhen it reaches 85°C.Fig. 2—SchematicHow the Vacuum Tube worksThe vacuum tube collector is composed of an inner glass tube, the outer surface of which iscoated with a special absorption layer. There is an outer glass tube and between the glass tubesthere is a vacuum. The inner tube contains water.Sunshine enters through the outer glass tube, passes through the vacuum and is absorbed in theabsorption layer which transforms solar energy into heat energy. The vacuum space acts as a veryeffic<strong>ie</strong>nt insulator, which prevents heat being lost from the inner tube.The water inside the tubes is heated. As the temperature of the water rises the density reducesand the warm water in the tubes moves upwards into the tank. The cold water in the tank sinksdown into the tubes. A natural circulation is set up, and the water in the tank is heated.1. Inner tube.2. Selective absorption layer3. Vacuum space.4. Outer tube.5. Spring clip6. Air absorption coating.7. Inner tube holderFig. 3—Vacuum Tube3
<strong>RVR</strong> <strong>Solar</strong> <strong>Water</strong> <strong>Heater</strong> InstructionsPrinciple of operation of the small tank.When the solar water heater is installed, the incoming cold water fills the small tank first. Thewater flows from the small tank into the large tank and finally into the vacuum tubes. When thelarge tank is full of water, the ball-cock in the small tank closes and prevents further water fromentering.The water in the tank and vacuum tubes expands when it is heated and the small tank acts as anexpansion vessel to absorb the increased volume of the heated water.If there is any loss of water from the tank or vacuum tube through evaporation or leakage, thewater will be replenished by the small tank automatically. The small tank is used to maintain thelevel of water in the water heater automatically.Fig. 4 - Diagram of vacuum tubes and tank on bracketFig. 5— Structure of the tank4
<strong>RVR</strong> <strong>Solar</strong> <strong>Water</strong> <strong>Heater</strong> Instructions<strong>Water</strong> heater installationChoosing a site for the solar water heaterThe solar water heater should be installed so that the collector faces due south, if possible. Itwill work at any or<strong>ie</strong>ntation between south east and south west, although its output will be reduced.The solar water heater should be rigidly mounted so that it can withstand any strong winds towhich it may be exposed. If it is mounted on a supporting structure such as a roof or frame, thestrength of the supporting structure should be carefully checked to ensure that it can support theweight of the solar water heater, and the water which it contains. Remember that 1 litre of waterweighs 1 kg. The total weight of the solar water heater, when it is full of water is approximately400 kg.AssemblyAssemble the unit according to the following instructions:• Unpack all the components and sort the parts into groups. i.e. the frame has a number ofdifferent length p<strong>ie</strong>ces,• put all the p<strong>ie</strong>ces which are the same together in a group. Assemble the triangles first andbuild up the structure as shown in Fig .6 below.• Note: There is a right and left tank support bracket.Fig. 6 - Structure of bracket5
<strong>RVR</strong> <strong>Solar</strong> <strong>Water</strong> <strong>Heater</strong> InstructionsInstallation of the tankPlace the water tank on top of the framebut don't fully tighten the M8 nuts until thevacuum tubes are fitted. The tank mayneed to be rotated so the tubes will lineup correctly Fig.7Fig. 7 - M8 nuts on tankInstallation of the vacuum tubes.Slide the plastic grommets over the vacuumtubes. Keep them about 100 mm fromthe open end.Use water with a small amount of washingup liquid to lubricate the end of the tube.This makes it eas<strong>ie</strong>r to install the vacuumtube into the tank. Fig. 8Insert the vacuum tubes into the holes inthe tank. Make sure that the tubes areseated properly. When all of the tubes havebeen installed, assemble the lower retainingbracket to the frame. Seat the tubes properlyin the retaining bracket. Fig. 9Tighten all the bolts properly including thenuts on the cylinder.Fig. 8 - Inserting the tubes into the tank on top of the collectorFig. 9 - Inserting the tubes into the lower bracket6
<strong>RVR</strong> <strong>Solar</strong> <strong>Water</strong> <strong>Heater</strong> Instructions<strong>Water</strong> SupplyFlow rate Vs Pressure16A supply of clean water at a reasonablepressure must be available. A minimum pressureof at least 1 bar (10 m head) is recommendedfor satisfactory performance. It isunlikely that suffic<strong>ie</strong>nt pressure will be availablefrom a storage tank. The water shouldbe suppl<strong>ie</strong>d from the mains or a pumped supply.Flow (Litres/m)141210864200.25 0.5 0.75 1 1.25 1.6 1.8 2 2.1Pressure Loss (bar)Plumbing the unit.Fig. 10 - Flowrate Vs <strong>Water</strong> pressureWARNINGThe solar water heater can reach very high temperatures. High temperature water can causesevere injury (serious burns and scalds) or death. A mixing valve can be connected as shown toensure that the user cannot be exposed to temperatures higher than 60°.If it is not possible to limit the water temperature to safe levels (this may be the case in a dairyapplication), the installer and user should take all necessary precautions to ensure that personsun-familiar with the equipment cannot come into contact with very hot water. Access to theequipment should be restricted and warnings should be posted. Great care should be taken to ensurethat children or older persons cannot come into contact with the hot water.The connections to the water heater are detailed in the schematic below, Fig. 11.Connect the water heater as shown to the incoming cold water supply, and to the hot water outlet.7Fig. 11 - Hydraulic diagram
<strong>RVR</strong> <strong>Solar</strong> <strong>Water</strong> <strong>Heater</strong> InstructionsElectrical InstallationWARNINGFailure to observe the correct electrical connections may lead to serious injury or death. Theunit must be installed by a qualif<strong>ie</strong>d person in strict accordance with IEE regulations.In particular, the solar water heater must be earthed and protected by an earth leakage circuitbreaker. The cable supplying the solar water heater should be fused at 10A.The solar water heater contains anelectric immersion heater. This is ratedat 1.5 kW. It is fitted with a thermostat,which switches on when the watertemperature is below 60° and off whenthe water temperature is approximately85°.A 220 V, 50 Hz supply is required. Thisshould be fused at 10 amps and protectedby an earth leakage circuitbreaker. The solar water heater mustbe earthed.The solar water heaters should be installedstrictly in accordance with IEEregulations.Fig. 12 - Wiring of immersion heaterFrost protection.The solar water heater and the connectingpipework may be exposed tovery cold temperatures in winter time.Provision should be made to ensure thatfreezing cannot occur. All pipeworkconnected to the solar water heatershould be properly insulated and a traceheating cable used to ensure that freezingof the pipework does not occur.The electric immersion heater can beenergised in cold weather to ensure thatthe water heater is protected from excessivelycold temperatures. A goodmethod of frost protection is shown inFig. 13.Fig. 13 - Frost protection schematicLightning protection.If a lightning protection system is used in the building in which the solar water heater is installed,and then it should be extended to include protection of the solar water heater.The solar water heater should not be used during lightning storms and should be disconnectedfrom the electrical supply to reduce the possibility of damage or injury.8
<strong>RVR</strong> <strong>Solar</strong> <strong>Water</strong> <strong>Heater</strong> InstructionsOperation of the solar water heater.Open the supply valve V1. <strong>Water</strong> will fill the small tank, and this in turn will fill the large tankand vacuum tubes. When the tank is full of water, the ball-cock in the small tank will stop furtherwater entering the system.Adjust the mixing valve to the required water outlet temperature.In cold or cloudy weather, the electric immersion heater may be used as an auxiliary energysource to heat the water in the tank. It is good practice to switch off the power supply before usingwater from the tank.Fig. 14 - Hydraulic diagram9
<strong>RVR</strong> <strong>Solar</strong> <strong>Water</strong> <strong>Heater</strong> Instructions10