View Operators Manual - Invivo
View Operators Manual - Invivo
View Operators Manual - Invivo
- No tags were found...

You also want an ePaper? Increase the reach of your titles
YUMPU automatically turns print PDFs into web optimized ePapers that Google loves.
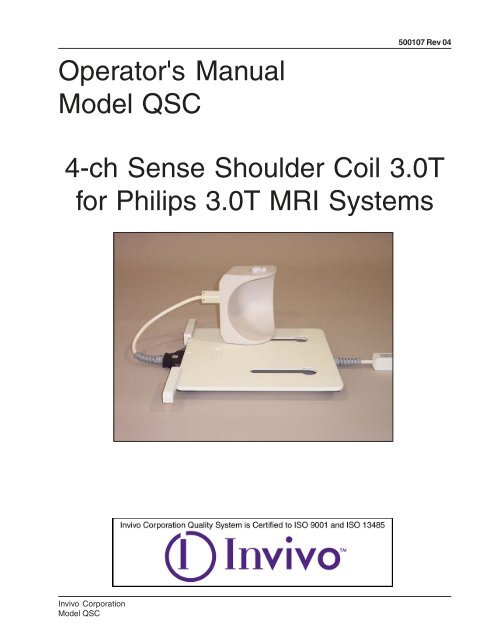
Operator's <strong>Manual</strong>Model QSC500107 Rev 044-ch Sense Shoulder Coil 3.0Tfor Philips 3.0T MRI Systems<strong>Invivo</strong> CorporationModel QSC1
500107 Rev 04July 2004©2004 <strong>Invivo</strong> CorporationAll rights reserved. No part of this publication may be reproduced, transmitted, transcribed, stored in aretrieval system, or translated into any language in any form by any means without the written permission of<strong>Invivo</strong> Corporation.Licenses and TrademarksThe <strong>Invivo</strong> Corporation Logo is a registered trademark of <strong>Invivo</strong> Corporation.This manual describes the use and operation of the 4-ch Sense Shoulder Coil 3.0Tfor Philips 3.0T MRI Systems.Medical Device DirectiveThese products conform with the requirements of council directive 93/42/EEC concerning medical devices,when they bear the following CE Mark of Conformity:NOTICE:Attention, ConsultAccompanying DocumentsType BF EquipmentTRANSPORT AND STORE THIS PRODUCT UNDERTHE FOLLOWING ENVIRONMENTAL CONDITIONSONLY, FOR A PERIOD NOT EXCEEDING 4 WEEKS:AMBIENT TEMPERATURE OF -40°C to +70°CRELATIVE HUMIDITY OF 10% TO 100% (Non-Condensing)ATMOSPHERIC PRESSURE ON 500 hPa TO 1060hPaClass II EquipmentWARNING: This product contains chemicals, includinglead, known to the state of California to cause birthdefects or other reproductive harm. Wash hands afterhandling.Caution:Federal law restricts this device to sale,distribution, and use by or on the order ofa physician.2<strong>Invivo</strong> CorporationModel QSC
500107 Rev 04IntroductionThis manual describes the safety precautions, features, use, and care of the<strong>Invivo</strong> Corporation 4-ch Sense Shoulder Coil 3.0T. Please review this manualthoroughly before using the device.The <strong>Invivo</strong> Corporation 4-ch Sense Shoulder Coil 3.0T, 800370, is compatiblewith Philips 3.0T MRI systems. The required system software levels are:Philips Intera R 10.4 or higherPhilips Achieva R1.1 or higherManufacturer:<strong>Invivo</strong> Corporation3545 SW 47th AvenueGainesville, FL 32608U.S.A.Phone: (352) 336-0010Fax: (352) 336-1410Web: www.invivocorp.comE-mail: info@invivocorp.comFor Sales and Servicein Europe:<strong>Invivo</strong> Germany GmbHSchweinfurter Strasse 2897076, WürzburgGermanyPhone: +49 (0)931 359 76-0Fax: +49 (0)931 359 76-10Authorized Representative in Europe:GBM Authorised Representative Ltd.The White House, 2 MeadrowGodalming, Surrey GU7 3HNUnited KingdomPhone: 44 (0) 7710 039721Fax: 44 1483 424 310Web: www.mba-gbm.comE-mail: martin.biggs@mba-gbm.com<strong>Invivo</strong> CorporationModel QSC3
500107 Rev 044-ch Sense Shoulder Coil 3.0T1The 4-ch Sense Shoulder Coil 3.0T consists of thefollowing parts. Please inspect upon receipt tomake sure all parts are in good order. Use thisguide to refer to part names throughout thismanual.1. Operator's <strong>Manual</strong>2. Base Plate3. Baseplate Pad4. Patient Support Pad5. Large Shoulder Coil6. Small Shoulder Coil7. Phantom Positioner Base8. Phantom Positoner Bracket9. Phantom Bottle6235247 984<strong>Invivo</strong> CorporationModel QSC
Table of Contents500107 Rev 04Introduction............................................................................................................... 34-ch Sense Shoulder Coil 3.0T ................................................................................ 4Chapter 1 - Patient Safety ........................................................................................ 6Training .................................................................................................................. 6Quality Assurance ................................................................................................. 6Indications ............................................................................................................. 6Contra-indications .................................................................................................. 6Precautions ............................................................................................................ 6Cautions ................................................................................................................. 6Emergency Procedures ......................................................................................... 7Chapter 2 - Using the Shoulder Coils ..................................................................... 8Selecting the Best Coil .......................................................................................... 8Positioning the Baseplate ...................................................................................... 8Locking the Coil to the Baseplate .......................................................................... 8Routing the Cable .................................................................................................. 9Patient Positioning ................................................................................................. 9Connecting the Cable ............................................................................................ 9Chapter 3 - Quality Assurance .............................................................................. 10Setup - Large Shoulder Coil................................................................................ 10Complete Standard Survey Scan Large .............................................................. 11SNR CHECK ........................................................................................................ 12SNR Calculations- Channel 2 Large .................................................................... 14SNR Calculations- Channel 3 Large .................................................................... 15SNR Calculations- Channel 4 Large .................................................................... 16Setup - Small Shoulder Coil ................................................................................. 17Complete Standard Survey Scan Small .............................................................. 18SNR CHECK ........................................................................................................ 18SNR Calculations- Channel 2 Small .................................................................... 20SNR Calculations- Channel 3 Small ................................................................... 21SNR Calculations- Channel 4 Small ................................................................... 22Chapter 4 - Scanning .............................................................................................. 23Channel Selection ................................................................................................ 23Coil Selection ....................................................................................................... 23Field of <strong>View</strong> and Coverage ................................................................................. 23Survey Image ...................................................................................................... 23IMPORTANT! Using Autoshim ............................................................................. 23Suggested Scan Protocols .................................................................................. 23Chapter 5 - Cleaning and Storage ......................................................................... 24Cleaning ............................................................................................................... 24Storage ................................................................................................................ 24<strong>Invivo</strong> CorporationModel QSC5
500107 Rev 04Chapter 1 - Patient SafetyTrainingThis manual contains detailed information on the setup, positioning, and use of the<strong>Invivo</strong> Corporation coil. The instructions should be read carefully and thoroughlybefore attempting to scan patients with the coil.QualityAssuranceThe procedure described in the Quality Assurance Section of this manual shouldbe performed upon receipt of the coil to establish a baseline of coil performance.The procedure should be repeated at regular intervals.IndicationsContraindicationsThe coil is indicated for use, on the order of a physician, in conjunction with anMR scanner as an accessory to produce images of the shoulder.The operator should be aware of the following contraindications related to thestrong magnetic field of the MR system:Scanning patients who have electrically, magnetically, or mechanically activatedimplants (for example, cardiac pacemakers) is contraindicated. The magneticand electromagnetic fields produced by the MR system and coil may interferewith the operations of these devices.Scanning patients who have intracranial aneurysm clips is contraindicated.PrecautionsPrecautions should be taken when scanning patients with the followingconditions:Greater than normal potential for cardiac arrestIncreased likelihood for developing seizures or claustrophobiaUnconscious, heavily sedated, or confused mental or physical stateInability to maintain reliable communicationsCautionsThe following general warning statements apply to scanning with a magneticresonance system. For further details, review the warnings in your MR systemOperator's <strong>Manual</strong>.Do not cross or loop cables. Arcing and patient burns could result. Routecables out of the magnet so that they do not touch the patient.6<strong>Invivo</strong> CorporationModel QSC
500107 Rev 04Assure that the patient is not touching the bore. If necessary, place padsbetween the patient and the surface of the bore.If the patient complains of warming, tingling, stinging, or similar sensations,promptly stop the scan procedure, examine the patient, and contact theresponsible physician before continuing the procedure. Pay specialattention to very young, sedated, or other compromised patients who maynot be able to communicate effectively.Patients with ferromagnetic metal should not be scanned because themagnetic field may interact with implanted surgical clips or other ferromagneticmaterials.Persons with cardiac pacemakers or other implanted electronic devicesshould not enter the magnetic field zone delineated by the MR systemmanufacturer.There is a risk to scanning feverish or decompensated cardiac patients.Facial makeup should be removed before scanning because it may containmetal flakes which can cause skin and eye irritation. Permanent eyelinertattoos may cause eye irritation due to ferromagnetic particles.Patients who work in environments in which there is a risk of havingembedded metallic fragments in or near the eye should be carefullyscreened before undergoing an MR exam.Visually inspect the cable insulator jackets, strain reliefs and connectorboxes before each use. If the insulation is broken or if the cable is frayed,immediately discontinue use of the device.EmergencyProceduresIn the unlikely event that a coil creates smoke, sparks, or makes an unusuallyloud noise, or if the patient requires emergency assistance:• Stop the scan if one is in progress.• Remove the patient from the scan room if medical treatment is needed.<strong>Invivo</strong> CorporationModel QSC7
500107 Rev 04Chapter 2 - Using theShoulder CoilsSelecting theBest CoilTip!The 4-ch Sense Shoulder Coil 3.0Tincludes a 20 cm diameter coil and a16.5 cm diameter coil. As with allcoils, a smaller coil provides higherSNR. Each coil size is optimized forits respective shoulder volume.The small 16.5 cm coil is designed tofit small to medium size shoulders.This coil will fit the majority of patients,and will accommodate patients up toapproximately 180 lbs.The large 20 cm coil is designed forlarger patients. This coil may be usedwith patients from 180 lbs and above.Assure the correct size shoulder coil isselected before attaching to the coilbase.PositioningtheBaseplateThe 4-ch Sense Shoulder Coil 3.0Tincludes a baseplate to support thecoil. Locking the coil down greatlyreduces motion artifact. The baseplateis designed to rest directly on thepatient support. Position the baseplatenear the magnet end of the patienttable.Locking theCoil to theBaseplatePut the lock down so it fits into thehole on the baseplate and slide thecoil laterally into position.The cablemust point into the magnet for properoperation. Use either angled slot,depending on whether the study is ofthe right or left shoulder. A positioncloser to the center allows the shoulderto be positioned closer to themagnet center, resulting in betterimages.8<strong>Invivo</strong> CorporationModel QSC
500107 Rev 04Routing theCableThe cable must point into the magnet. Assure that the cable is routed correctlyfor right or left shoulder scans. Do not cross or loop cables. Arcing and patientburns could result. Route cables out of the magnet so that they do not touch thepatient.PatientPositioningThe Shoulder Coils are designed for head first exams only!Have the patient slide his or her shoulder into the coil and relax the shoulderagainst the coil housing. The Shoulder Coil may now be adjusted medially orlaterally, and rotated to fit comfortably on the patient's shoulder.Connectingthe CableThe cable is connected to the systemusing the standard phased array plug.Plug the cable into the Synergy arrayport of the system.ATTENTION: Do not attempt to use theShoulder Coil when it is unplugged.<strong>Invivo</strong> CorporationModel QSC9
500107 Rev 04Chapter 3 - Quality AssuranceSetup -LargeShoulderCoilPlace the Large Shoulder coil on thebaseplate and slide it into thepatient's left lateral slot. Connect thecoil cable to the baseplate connectoras shown.The phantom positioner base isdesigned with two curvatures, one tofit the LARGE Shoulder coil and oneto fit the SMALL Shoulder coil.Orient the phantom positioner basesuch that it cups the curvature of thecoil in use.Place the phantom positioner baseinto the lateral slots and move ittoward the Shoulder Coil until thetwo curvatures mate.Place the phantom positionerbracket onto the phantom positionerbase. The hooks in the phantompositioner bracket seat directly intothe notches in the phantompositioner base.10<strong>Invivo</strong> CorporationModel QSC
500107 Rev 04Place the phantom bottle onto thephantom positioner bracket as shown.Move the table into position. Landmarkon the upper locking knob cross.Perform TRAVEL-TO-SCANPLANE.CompleteStandardSurvey ScanLargeFrom your stored Sub Anatomy folder, select an appropriate Standard Surveysequence, for example: Upper Extremity - Shoulder - Survey Left. Run this StandardSurvey sequence.When the Survey is complete and reconstructed, position slices for the SNR CHECKprocedure as demonstrated below. Proceed with the SNR sequence as providedon the following page.IMPORTANT: Be certain to SAVE RAW DATA on the SNR CHECK on the followingpage.<strong>Invivo</strong> CorporationModel QSC11
500107 Rev 04SNR CHECKRun an SNR CHECK scan using the parameters listedbelow.TIP: Save this SNR CHECK scan for future QA scans.*** IMPORTANT: Be certain to SAVE RAW DATA under Post Processing ***Geometry Shim noCoil Selection SENSE-Shoulder SPIR no- channel Combination 1234 TFE prepulse invert- connection d - slice selection noMulti Coil no - delay shortestHomogeneity correction none MTC noFOV (mm) 200.00 SAR mode defaultRFOV (%) 100.00 Gradient mode regularFoldover suppression noMatrix scan 256 Motion- reconstruction 256 Cardiac synchronisation noScan percentage (%) 50.00 Respiratory compensation noStacks 3 Flow compensation no- current A NSA 1- type parallel- slices 3 Dyn/ang- slice thickness (mm) 10.00 Angio no- slice gap user defined Quantitative flow no- - gap (mm) 10.00 <strong>Manual</strong> start no- slice orientation trans Dynamic study no- foldover direction APSlice scan order default PostprocStack display order no Preparation phases autoPlanAlign no MIP/MPR noREST slabs 0 Images: O:M no no noPatient position head first Autoview image M- orientation supine Reference tissue White matterPreset window contrast softContrast Reconstruction mode immediateScan mode M2D Save raw data yes- technique FFE Push to workstation noContrast enhancement T1 Hardcopy protocol noFast Imaging mode TFE Ringing filter no- shot mode multi-shot Silent mode noTFE factor 42- shot interval shortest Offc/ang no- profile order linear Stacks 3Echoes 1 - current A- partial echo no Stack Offc.AP (P=+mm) -20.00TE shortest RL (L=+mm) 140.00Flip angle (deg) 20.00 FH (H=+mm) 0.00TR user defined Ang. AP (deg) 0.00- (ms) 15.00 RL (deg) -0.00Half Scan no FH (deg) -0.00Water fat shiftmaximum12<strong>Invivo</strong> CorporationModel QSC
500107 Rev 04Reconstruct SNR CHECK image for individual channels using theinstructions provided below.1. Before running the SNR CHECK scan, be sure to have the "Save Raw Data" option set to "Yes" under[Postproc].2. Do not delete the current scan from the [Scanlist].3. Under the [Scanlist] icon, select the [Add Rec] icon, then the [Del. Recon] icon.4. Left-mouse select on the scan to perform the reconstructions, then [Proceed].5. Change the "Synergy selection" option from "0" to "2" for reconstruction of the 2nd channel, then [Proceed].6. Select [Options], and change the name of the reconstruction to "2".7. Repeat steps 3-6 for each channel (channels 3 and 4), and change the "Synergy selection" option to the nextchannel, then rename the scans appropriately for each channel selected. (i.e. 3, 4)8. From the [Scan List] icon, delete all scans except those renamed for each element.9. Select [Start Scan] to start the reconstruction of the images.Note: Example of reconstructed images are shown below.<strong>Invivo</strong> CorporationModel QSC13
500107 Rev 04SNRCalculations-Channel 2Large1. Select the reconstructed image from Channel 2, and display an elliptical ROIwith a total pixel area similar to that in the example below. Refer to PhilipsGyroscan Instruction <strong>Manual</strong> for ROI help.2. Position ROI in the center of the phantom bottle, as shown below.3. Bring up Statistics for ROI, right-mouse select over the ROI number (arbitrarynumber next to the ROI), left-mouse select on Statistics from the drop-downbox, and select Statistics again from the drop box.4. Record the Signal Mean value.5. Move ROI to background noise, as shown below.6. Record noise standard deviation.7. Divide the signal mean by the noise standard deviation for the phantom bottle.8. Record this SNR value for future reference.9. Repeat above procedure for channels 3 and 4 as shown on the following pages.14<strong>Invivo</strong> CorporationModel QSC
500107 Rev 04SNRCalculations-Channel 3Large1. Select reconstructed image from Channel 3, and display an elliptical ROI witha total pixel area similar to that in the example below. Refer to PhilipsGyroscan Instruction <strong>Manual</strong> for ROI help.2. Position ROI in the center of the phantom bottle as shown below.3. Bring up Statistics for ROI: right-mouse select over the ROI number (arbitrarynumber next to the ROI), left-mouse select on Statistics from the drop-down box,and select Statistics from drop box again.4. Record the Signal Mean value.5. Move ROI to background noise, as shown below.6. Record noise standard deviation.7. Divide the signal mean by the noise standard deviation for the phantom bottle.8. Record this SNR value for future reference.9. Repeat the above procedure for channel 4 as shown on following pages.<strong>Invivo</strong> CorporationModel QSC15
500107 Rev 04SNRCalculations-Channel 4Large1. Select the reconstructed image from Channel 4, and display an elliptical ROIwith a total pixel area similar to that in the example below. Refer to PhilipsGyroscan Instruction <strong>Manual</strong> for ROI help.2. Position ROI in the center of the phantom bottle as shown below.3. Bring up Statistics for ROI: right-mouse select over the ROI number (arbitrarynumber next to the ROI), left-mouse select on Statistics from the drop-downbox, and select Statistics from drop box again.4. Record the Signal Mean value.5. Move ROI to background noise as shown below.6. Record noise standard deviation.7. Divide the signal mean by the noise standard deviation for the phantom bottle.8. Record this SNR value for future reference.16<strong>Invivo</strong> CorporationModel QSC
500107 Rev 04Setup -SmallShoulderCoilPlace the Small Shoulder coil on thebaseplate and slide it into thepatient's left lateral slot. Connect thecoil cable to the baseplate connectoras shown.The phantom positioner base isdesigned with two curvatures, one tofit the LARGE Shoulder coil and oneto fit the SMALL Shoulder coil.Orient the phantom positioner basesuch that it cups the curvature of thecoil in use.Place the phantom positioner baseinto the lateral slots and move ittoward the Shoulder Coil until thetwo curvatures mate.Place the phantom positionerbracket onto the phantom positionerbase. The hooks in the phantompositioner bracket seat directly intothe notches in the phantompositioner base.<strong>Invivo</strong> CorporationModel QSC17
500107 Rev 04Place the phantom bottle onto thephantom positioner bracket as shown.Move the table into position. Landmarkon the upper locking knob cross.Perform TRAVEL-TO-SCANPLANE.CompleteStandardSurvey ScanSmallFrom your stored Sub Anatomy folder, select an appropriate Standard Surveysequence, for example: Upper Extremity - Shoulder - Survey Left. Run this StandardSurvey sequence.When the Survey is complete and reconstructed, position slices for the SNR CHECKprocedure as demonstrated below. Proceed with the SNR sequence as providedon the following page.IMPORTANT: Be certain to SAVE RAW DATA on the SNR CHECK on the followingpage.SNRCHECKRun an SNR CHECK scan using the parameters listed onpage 15.TIP: Save this SNR CHECK scan for future QA scans.18<strong>Invivo</strong> CorporationModel QSC
500107 Rev 04Reconstruct SNR CHECK image for individual channels using theinstructions provided below.1. Before running the SNR CHECK scan, be sure to have the "Save Raw Data" option set to "Yes" under[Postproc].2. Do not delete the current scan from the [Scanlist].3. Under the [Scanlist] icon, select the [Add Rec] icon, then the [Del. Recon] icon.4. Left-mouse select on the scan to perform the reconstructions, then [Proceed].5. Change the "Synergy selection" option from "0" to "2" for reconstruction of the 2nd channel, then [Proceed].6. Select [Options], and change the name of the reconstruction to "2".7. Repeat steps 3-6 for each channel (channels 3 and 4), and change the "Synergy selection" option to the nextchannel, then rename the scans appropriately for each channel selected. (i.e. 3, 4)8. From the [Scan List] icon, delete all scans except those renamed for each element.9. Select [Start Scan] to start the reconstruction of the images.Note: Example of reconstructed images are shown below.<strong>Invivo</strong> CorporationModel QSC19
500107 Rev 04SNRCalculations-Channel 2Small1. Select the reconstructed image from Channel 2, and display an elliptical ROIwith a total pixel area similar to that in the example below. Refer to PhilipsGyroscan Instruction <strong>Manual</strong> for ROI help.2. Position ROI in the center of the phantom bottle, as shown below.3. Bring up Statistics for ROI, right-mouse select over the ROI number (arbitrarynumber next to the ROI), left-mouse select on Statistics from the drop-downbox, and select Statistics again from the drop box.4. Record the Signal Mean value.5. Move ROI to background noise, as shown below.6. Record noise standard deviation.7. Divide the signal mean by the noise standard deviation for the phantom bottle.8. Record this SNR value for future reference.9. Repeat above procedure for channels 3 and 4 as shown on the following pages.20<strong>Invivo</strong> CorporationModel QSC
500107 Rev 04SNRCalculations-Channel 3Small1. Select reconstructed image from Channel 3, and display an elliptical ROI witha total pixel area similar to that in the example below. Refer to PhilipsGyroscan Instruction <strong>Manual</strong> for ROI help.2. Position ROI in the center of the phantom bottle as shown below.3. Bring up Statistics for ROI: right-mouse select over the ROI number (arbitrarynumber next to the ROI), left-mouse select on Statistics from the drop-down box,and select Statistics from drop box again.4. Record the Signal Mean value.5. Move ROI to background noise, as shown below.6. Record noise standard deviation.7. Divide the signal mean by the noise standard deviation for the phantom bottle.8. Record this SNR value for future reference.9. Repeat the above procedure for channel 4 as shown on following pages.<strong>Invivo</strong> CorporationModel QSC21
500107 Rev 04SNRCalculations-Channel 4Small1. Select the reconstructed image from Channel 4, and display an elliptical ROIwith a total pixel area similar to that in the example below. Refer to PhilipsGyroscan Instruction <strong>Manual</strong> for ROI help.2. Position ROI in the center of the phantom bottle as shown below.3. Bring up Statistics for ROI: right-mouse select over the ROI number (arbitrarynumber next to the ROI), left-mouse select on Statistics from the drop-downbox, and select Statistics from drop box again.4. Record the Signal Mean value.5. Move ROI to background noise as shown below.6. Record noise standard deviation.7. Divide the signal mean by the noise standard deviation for the phantom bottle.8. Record this SNR value for future reference.22<strong>Invivo</strong> CorporationModel QSC
Chapter 4 - Scanning500107 Rev 04ChannelSelectionThe 4-ch Sense Shoulder Coil 3.0T uses channels 1, 2, 3, and 4. Select theproper channel(s) from the channel combination (ch. combination) menu on thesystem operator's console. The following Allowed Channel Combinationinformation is coded into the coil resource file:Coil: SENSE-ShoulderNormal Operation 1, 2, 3, 4Each channel individuallyCoilSelectionAfter connecting the Shoulder Coil to the system, the following coil selection mustbe made at the console:SENSE-ShoulderField of <strong>View</strong>andCoverageThe large shoulder coil is 20 cm in diameter, and therefore has an inherent field ofview (FOV) of 20 centimeters.The small shoulder coil is 16 cm in diameter, and therefore has an inherent fieldof view (FOV) of 16 centimeters.You may use a smaller or larger FOV if desired.SurveyImageThe body coil may be used at any time while the Shoulder Coil is in the scanner. Thisallows a large FOV (400 mm) body coil SURVEY to be performed, which is helpfulin determining the foot-head offset required for imaging the shoulder.IMPORTANT!UsingAutoshimAUTOSHIM is a system software feature that improves image quality. This isdone by improving the magnetic field homogeneity within the FOV selected. Theimprovement in image quality is often dramatic when the selected FOV is far offcenter, and when acquiring SPIR images.SuggestedScanProtocols<strong>Invivo</strong> Corporation recommends that you select imaging protocols that have beenestablished by your radiologists. Additional protocols can be found within yourPhilips Application Guides.<strong>Invivo</strong> CorporationModel QSC23
500107 Rev 04Chapter 5 - Cleaning andStorageCleaningThe 4-ch Sense Shoulder Coil 3.0T, and accessory pads, must be cleaned andstored using the following procedures:• Wipe with a cloth that has been dampened in a solution of 10% bleach and 90%tap water, or 30% isopropyl alcohol and 70% tap water.• Do not pour any cleaning solution directly on the coil or baseplate!• Let the coil housing, base plate, and pads dry before use.• Under no circumstances should the coil be placed into any type of sterilizer.StorageStore the coil and base plate in an air-conditioned scan room or equipment room.To store the coils and baseplate, a storage space of 50.5 cm/19.9 in (width) x 60.5cm/23.8 in (depth) x 28.0 cm/11.0 in (height) is required.24<strong>Invivo</strong> CorporationModel QSC
500107 Rev 04<strong>Invivo</strong> CorporationModel QSC25
500107 Rev 0426<strong>Invivo</strong> CorporationModel QSC
500107 Rev 04<strong>Invivo</strong> Corporation Phone: (352) 336-00103545 SW 47th Avenue Fax: (352) 336-1410Gainesville, FL 32608 info@invivocorp.comU.S.A.www.invivocorp.com<strong>Invivo</strong> CorporationModel QSC27