production
Improved plantain production - Anancy
Improved plantain production - Anancy

Create successful ePaper yourself
Turn your PDF publications into a flip-book with our unique Google optimized e-Paper software.
COLLECTION<br />
PRO-AGRO<br />
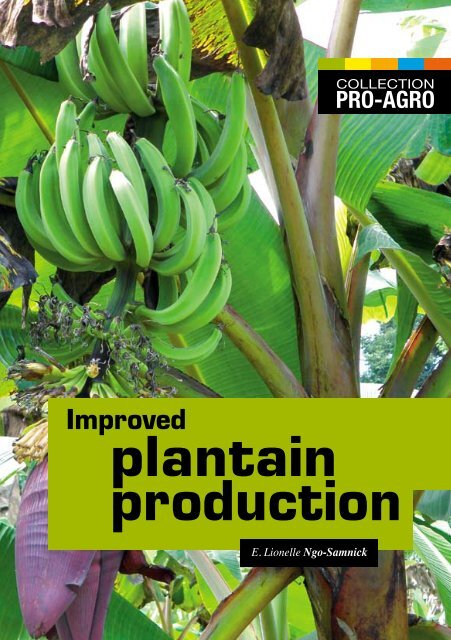
Improved<br />
plantain<br />
<strong>production</strong><br />
E. Lionelle Ngo-Samnick
Contributors<br />
TEXT<br />
E. Lionelle Ngo-Samnick<br />
REVIEW<br />
Samuel Nanga Nanga and Pascal Nondjock<br />
TRANSLATION<br />
David Dunn<br />
Illustrations<br />
Eric Mengaptche<br />
LAYOUT<br />
Stéphanie Leroy<br />
The Pro-Agro Collection is a joint publication by Engineers Without Borders,<br />
Cameroon (ISF Cameroun) and The Technical Centre for Agricultural and Rural<br />
Co-operation (CTA).<br />
CTA - P.O. Box 380 – 6700 AJ Wageningen - The Netherlands - www.cta.int<br />
ISF Cameroun - P.O. Box 7105 - Douala-Bassa - Cameroon - www.isf-cameroun.org<br />
© CTA and ISF 2011<br />
ISBN (CTA): 978-92-9081-476-4
Contents<br />
1<br />
Main stages in PIF <strong>production</strong><br />
1.1 Making a propagator .................................................................... 5<br />
1.2 Greenhouse ............................................................................................. 6<br />
1.3 Shade house ........................................................................................... 6<br />
1.4 Selecting suckers .............................................................................. 7<br />
1.5 Cleaning and trimming .............................................................. 7<br />
1.6 Peeling ........................................................................................................ 8<br />
1.7 Phytosanitary treatment before<br />
propagation ............................................................................................ 9<br />
1.8 Propagation ............................................................................................ 11<br />
1.9 Reactivation ........................................................................................... 11<br />
1.10 Taking cuttings .................................................................................. 12<br />
1.11 Replanting in bags and acclimatisation<br />
in shade houses .................................................................................. 12<br />
1.12 Plant care ................................................................................................. 13<br />
2<br />
Plantain <strong>production</strong> and sales<br />
2.1 Production costs and sales price ........................................ 14<br />
2.2 Agronomic requirements .......................................................... 15<br />
2.3 Cultivation ............................................................................................... 15<br />
2.4 Plant care ................................................................................................. 18<br />
2.5 Control of pests and diseases ................................................. 20<br />
2.6 Preventive methods ......................................................................... 21<br />
2.7 Income generated from sales ................................................. 21<br />
3<br />
Other information<br />
3.1 Uses and nutritional value ....................................................... 22<br />
3.2 Suggested recipes ............................................................................. 22<br />
3.3 Useful addresses ................................................................................ 23
General<br />
information<br />
Plantains are able to adapt to a variety of ecosystems and offer great<br />
potential in food <strong>production</strong>; however, despite this, plantain cultivation<br />
remains a marginal activity.<br />
The cultivation of plantain is underexploited due to inadequate<br />
provision of good quality propagation material. The negative influence<br />
of parasites also leads to the use of poor quality suckers,<br />
resulting in a growth cycle of over two years. The return on the<br />
effort put in by farmers is therefore unsatisfactory, leading to<br />
further discouragement among plantain growers.<br />
Fortunately, a number of intensive <strong>production</strong> techniques have<br />
been developed, including in vitro cultivation, typically used<br />
in research centres, and macropropagation using the plantlet<br />
from stem fragments (usually named the PIF technique) whereby<br />
the primary buds of entire suckers or fragments of corms<br />
are destroyed and axillary buds are exposed to high humidity<br />
to induce sprouts which are then harvested, hardened, and<br />
distributed. PIF has met with great success among small-scale<br />
farmers because it is relatively easy to produce large numbers<br />
of plantlets in a short time. One sucker can produce between<br />
10 and 50 plantlets, depending on the variety of plantain and<br />
the experience of the farmer.<br />
The procedure described in this manual may vary according to<br />
the needs and means of individual farmers, but it is important<br />
to follow the basic principles.
1<br />
Main stages<br />
in PIF <strong>production</strong><br />
1.1 Making a propagator<br />
Propagators, or seedbeds, can be made from wood, plastic or cement,<br />
constructed at ground level or above ground. Their size can vary and<br />
depends on the <strong>production</strong> objectives.<br />
The most important thing is that there is easy access to the explants. They<br />
can be built with planks of wood, cement blocks, etc.<br />
Recommended dimensions: One metre wide, with variable length. A propagator<br />
of 1 m x 10 m is a good size, allowing for easy handling of the<br />
explants.<br />
25 to 50 cm<br />
10 m<br />
1 m<br />
Propagator dimensions<br />
Depth is 25 to 50 cm. The base is sealed in order to prevent direct<br />
contact between the substrate and the ground below. A 10 cm layer of<br />
fine sand or gravel can be added to the bottom, or a sheet of polythene,<br />
perforated in order to allow drainage from watering.
The seedbed is filled with a layer of light-coloured sawdust approximately<br />
20 cm deep. Avoid using sawdust from coloured wood (dark, red or<br />
yellow) as this may contain substances that are potentially harmful to the<br />
development of plantlets.<br />
Light-coloured<br />
sawdust<br />
Propagator or seedbed<br />
1.2 Greenhouse<br />
The greenhouse is built around the propagator. Build a framework<br />
80 cm to 120 cm above the seed flat. It is best to make two slopes in<br />
order to facilitate runoff in case of rain. The propagator should be hermetically<br />
sealed with strong, transparent polythene.<br />
80 - 120 cm<br />
Strong,<br />
transparent<br />
polythene<br />
Greenhouse<br />
1.3 Ombrière Shade house<br />
The material used will depend on availability and resources (palm<br />
fronds, straw, netting, etc.). It should be 1.5 – 2 metres high, and should<br />
reduce sunlight on the seedlings by about 50 percent.
Shade<br />
house<br />
Straw<br />
1.4 Selecting suckers<br />
Selection is the key to the whole operation: remove a healthy sucker<br />
from the base of a fully grown cultivar. The sucker should have narrow,<br />
sword-shaped leaves, with a pseudostem of 5 to 40 cm in height (sword<br />
sucker), and the bulb should be free from traces of disease (no fringing<br />
or traces of nematodes).<br />
1.5 Cleaning and trimming<br />
This involves cleaning the bulb with a sharp knife or machete. The top<br />
of the bulb should be removed, as well as all the roots, up to 3 to 5 mm.<br />
Once trimming is completed, the bulb should be totally white.<br />
Before and after cleaning and trimming<br />
Pseudostem<br />
Bulb trimmed<br />
to white<br />
Bulb<br />
Sword sucker<br />
Bulb
1.6 Peeling<br />
The success of the procedure depends on this stage. Note that the<br />
base of the plantain plant has a conical pseudostem formed by the leaf<br />
sheaths of its spirally arranged, long, thin leaves. Peeling involves removing<br />
these leaf sheaths one by one. At the level of the bulb, there is a<br />
light-coloured band (the colour depends on the variety) that attaches each<br />
leaf sheath to the bulb; this is called the knot.<br />
Each leaf sheath has a knot. Peel up to 2 mm above the knot. Remove<br />
the sheaths one by one, generally 3 to 5 layers. The pseudostem should<br />
be cut back to 1 to 2 cm above the stem’s last visible knot. Make a rightangled<br />
crosscut on the bud at the starting point of each leaf sheath.<br />
Leaf sheath<br />
Boundary<br />
between bulb and<br />
pseudostem<br />
Peeled<br />
pseudostem<br />
Peeling<br />
Crosscut<br />
on a bud
1.7 Phytosanitary treatments before<br />
propagation<br />
In order to eliminate fungus, insects and nematodes, the peeled stem<br />
is then soaked in a mix of fungicide and insecticide, then dried in the<br />
open air, in a dry, shady place for between 48 and 72 hours. There are a<br />
number of different products, with different instructions for use. The local<br />
agricultural service provider should be contacted for specific information.<br />
For example, the peeled bulbs can be soaked in a mix made up of 100 g of<br />
Callidium 50EC and Ridomil Plus in 40 litres of water. The precise amounts<br />
of pesticides should be added to the water while stirring.<br />
By way of example, the following table shows some commercial<br />
pesticides:<br />
Trade name<br />
Active ingredient<br />
Remarks<br />
Callidium-<br />
Ridomil plus<br />
Dimethoate-copper<br />
oxide<br />
Refer to<br />
instructions for use<br />
Sarpagrum<br />
Cypermethrine 1,5%<br />
+ Iadocarbamate 3,0%<br />
Refer to<br />
instructions for use<br />
Caiman Rouge<br />
Endosulfan 250g/kg<br />
+ Thiram 2250g/kg<br />
Refer to<br />
instructions for use<br />
Besides commercial products, it is recommended to use organic fungicides-insecticides.<br />
There are several easily accessible means of organic<br />
treatment. Natural substances, for example, can be used as insecticides<br />
and fungicides.
Some natural substances used as insecticide and fungicide<br />
Natural<br />
substance<br />
Part<br />
used<br />
Active<br />
ingredient<br />
Utilization<br />
Neem<br />
(Melia<br />
azadirachta L.)<br />
Seed,<br />
leaf,<br />
bark<br />
Azadirachtin<br />
Dilute 2 cl of neem oil<br />
as droplets in one litre<br />
of water. One litre of oil<br />
produces 50 litres of<br />
product for spraying. Put<br />
the mixture in a vaporiser<br />
and spray.<br />
Garlic<br />
(Allium Sativum)<br />
Bulbs<br />
Allicin<br />
Pour 10 litres of boiling<br />
water over 80 to 100 g<br />
of crushed bulbs.<br />
Cover the container and<br />
leave for 1 hour. Filter,<br />
without diluting, and spray<br />
once it is cold.<br />
Hot peppers<br />
(Capsicum annuum)<br />
Fruit<br />
Capsaicin<br />
Mix 300 g of finely ground<br />
peppers with two litres<br />
of water. Then shake the<br />
mixture in a sealed<br />
container in order to get<br />
a good mix. Filter the<br />
mixture and add soapy<br />
water. Spray the mixture.<br />
Insecticidal plants<br />
such as the<br />
Mahogany (Khaya<br />
senegalensis),<br />
mango tree,<br />
acacia, etc.<br />
Ashes<br />
Spray a suspension of the<br />
ashes in soapy water, urine<br />
or milk.<br />
Another possibility is Bordeaux mixture, which is a fungicide made up of<br />
20 percent copper sulfate and 80 percent hydrated lime.<br />
10
1.8 Propagation<br />
Right-angled crosscut<br />
in the centre of the<br />
explant<br />
Explants placed<br />
in the<br />
propagator<br />
This stage involves placing the explants in the propagator. Once the<br />
drying period is completed, use a sharp knife to trim the surface of the<br />
explant until only 2-3 mm of the pseudostem remains. Make a rightangled<br />
crosscut in the centre of the explant. Leave it to stand for 30 to<br />
60 minutes.<br />
Place the explants side by side in the propagator with the crosscut facing<br />
up. The number of explants per square metre will depend on the size of<br />
the explants used. Cover with a 2 to 3 cm layer of light-coloured sawdust.<br />
It is recommended not to water the explants on the day they are placed in<br />
the propagator, but to water thoroughly 24 to 30 hours later.<br />
1.9 Reactivation<br />
Two weeks later, the explants will have multiple shoots. In some cases,<br />
plantlets stemming from side buds develop more quickly and have greater<br />
strength. When the shoots reach thumb size, reactivation can begin.<br />
Remove the plantlets from the explant 2 mm above the node, and make a<br />
new right-angled crosscut in the pseudostem of the plantlet. Reactivation<br />
is not necessary and will depend on <strong>production</strong> objectives. It is not recommended<br />
for beginners as it requires a lot of experience, but is a means of<br />
increasing the number of plantlets per explant.<br />
11
1.10 Taking cuttings<br />
Taking cuttings occurs 30 to 40 days after propagation. Young<br />
plants with 3 to 5 leaves are carefully removed with a scalpel, razor blade<br />
or very sharp knife. Depending on the variety (Horn or French), in three<br />
months 20 to 100 plants can be produced per explant.<br />
Separated<br />
plantlet<br />
Explant<br />
with shoots<br />
1.11 Replanting in bags and acclimatisation<br />
in shade houses<br />
The plantlet is replanted, with all its roots, in a black, perforated polyethylene<br />
bag, whose size will vary according to the <strong>production</strong> schedule.<br />
In contrast, separated plantlets without roots should be replanted in the<br />
propagator sawdust for ten days before being transferred to bags. Bags<br />
of 17 cm x 24 cm are highly recommended.<br />
Make sure that the bags are filled with rich compost and that water<br />
can easily drain through. In certain conditions, the compost can be mixed<br />
with sand or coffee husks. The quantities used will depend on the local<br />
Young plants with 3 to 5 leaves are carefully removed with a scalpel,<br />
razor blade or very sharp knife.<br />
12
Bagging<br />
plantlets<br />
soil types and the material available. In coastal regions in Cameroon, for<br />
example, equal measures of soil and coffee husks are often used. Once<br />
filled, the bags are placed on a plank and watered the evening before<br />
replanting. It is recommended that the bags be thoroughly soaked when<br />
beginning the replanting. To replant, make a hole in the centre of the bag,<br />
deep enough so that the roots will not be bent.<br />
Place the plantlet in the hole and gently fill it with soil, without pressing<br />
down. Only the bulb should be in the soil; if the plantlet is pushed too far<br />
in, it may take longer to begin growing.<br />
Once replanting is completed, water the plantlets thoroughly. Place them<br />
in the shade, in a temperature of 25-27°C, in order to facilitate acclimatization.<br />
The plantlets should be watered four times a week.<br />
1.12 Plant care<br />
Weed the nursery regularly. The plantlets will suffer from competition<br />
with weeds. In addition to treating the plantlets, insecticide can also be<br />
applied directly in the bags or in the propagator in order to control parasites.<br />
In case of need, apply foliar fertilization. Between six to ten weeks<br />
after taking cuttings, the young plants are ready to be planted and can be<br />
transferred to the field.<br />
13
2<br />
Plantain <strong>production</strong><br />
and sales<br />
2.1 Production costs and sales price<br />
On average, 100 suckers are needed to produce 1000 plantain plants.<br />
The <strong>production</strong> cost per plant is determined by the initial investments to<br />
construct the propagator and shade house.<br />
In general, it costs around 100,000 FCFA, or 150 euros, to produce<br />
1000 plantain plants: 10% to purchase the first plants; 30% for the<br />
materials, the bags and the plant care products; and 60% for labour<br />
costs. Each plant produced can be sold for between 150 and 230 FCFA<br />
(0.23 - 0.35 euros).<br />
Production costs: 1000 plantain plants<br />
Description<br />
Purchasing 100 suckers<br />
Purchasing 100 bags<br />
Labour<br />
Total<br />
Unit price (FCFA)<br />
100<br />
300<br />
Total<br />
10 000<br />
30 000<br />
60 000<br />
100 000<br />
Income: 1000 plantain plants<br />
Description<br />
Unit price (FCFA)<br />
Total<br />
Sale of 1000 plants<br />
Gross margin<br />
150<br />
150 000<br />
50 000<br />
14
2.2 Agronomic requirements<br />
>>> Temperature: The optimal temperature for growing plantain is 28°C.<br />
From 28 to 20°C, growth will gradually slow down, and will become negligible<br />
around 16-18°C.<br />
>>> Light: Shade accelerates height growth, and it is advisable to determine<br />
the density depending on the cultivar selected, in order to provide<br />
the best light conditions for the plantation.<br />
>>> Water: Plantain needs a lot of water. It should get around 200 mm<br />
per month throughout its life cycle.<br />
>>> Wind: Plantain is very sensitive to strong wind, which can cause physical<br />
damage to the plant (torn leaves, toppling).<br />
>>> Soil: Plantain grows best in deep soil that is well drained and rich in<br />
organic matter. Fallow land can also be used, but the yield will depend on<br />
what was previously grown and the duration of the fallow.<br />
2.3 Cultivation<br />
>>> Choosing a site<br />
The site should be easily accessible, have good exposure to sunlight and<br />
offer shelter from the wind. Flat or slightly sloping land with good drainage<br />
should be chosen rather than land with steep slopes that could lead to<br />
problems of erosion and loss of fertile soil, and that have greater risk of<br />
wind damage. It is best to use virgin land due to its high levels of organic<br />
matter, but previously cultivated, fallow land can also be used, depending<br />
on the amount of plant matter. At all costs, avoid former banana or plantain<br />
plantations due to the likelihood of poor soil fertility and phytosanitary<br />
conditions.<br />
Systematic<br />
clearing of<br />
undergrowth<br />
>>> Land preparation<br />
Preparation will depend on the type of land and the type of farm, and<br />
should be adapted according to available resources. Some months before<br />
planting, the land should be systematically cleared, followed by selective<br />
felling. In forest zones, after clearing, the dry undergrowth is burned. In<br />
savanna zones that have only sparse plant biomass, burning is not recommended;<br />
systematic clearing is enough to prepare the land.<br />
15
Choosing a system of cultivation<br />
Plantain can be grown together with other types of compatible crops<br />
(cocoa, cocoyam) or as a single crop. In the latter case, each plot should<br />
comprise only one cultivar. Plots should be as homogenous as possible,<br />
by selecting the same type of plant material (plantlet or sucker) within<br />
one plot.<br />
>>> Plant density<br />
Density will depend on the climate, the soil quality, the planned lifespan of<br />
the plantation and the cultivars selected. The higher the density, the longer<br />
the lifecycle and the lighter the bunches produced. In a monoculture,<br />
distances of 3 m x 2 m or 2 m x 2 m will give 1 666 to 2 500 plants/<br />
Ha. In mixed cultivation, distances of 4 m x 4 m or 4 m x 2 m will allow<br />
the farmer to use the spaces between the plantain plants for other food<br />
crops. There will be a low yield as of the third year because of an increase<br />
in parasite pressure and reduced soil fertility. After harvesting, only one<br />
plant should be left to replace the mother plant.<br />
>>> Marking out<br />
The field should be laid out according to the planting distances described<br />
above and marked with stakes/poles of about two metres high.<br />
>>> Digging planting pits<br />
In non-mechanized farming, plantains do not require any particular soil<br />
preparation. Planting pits of 40 cm x 40 cm x 40 cm produce the best<br />
results. During this step, make sure to separate the surface soil (10 – 15<br />
cm) that is rich in humus from the deep soil. The pits will also be filled with<br />
about 2 kg of well composted manure per pit.<br />
Surface<br />
soil<br />
40 cm<br />
Deep<br />
soil<br />
Planting pit<br />
16
Surface soil should be put<br />
back deepest<br />
Planting<br />
>>> Calibrating the plants<br />
Calibrating involves grouping plants together according to size and weight.<br />
Only plants with similar characteristics should be planted together.<br />
>>> Planting<br />
While planting, make sure the bottom of the pit does not fill with water. If<br />
necessary, mix black earth with 10 to 15 kg of compost. Before planting,<br />
add 15 to 20 cm black earth to the bottom of the pit. The plants should<br />
be placed in the pit with their scars facing the same direction in order<br />
to facilitate their care and propping. Planting PIF plants is very delicate.<br />
Make sure each one is planted so that the collar is visible. Pile up a little<br />
soil around each plant and avoid planting them too deep.<br />
Good growth in the first 3 to 4 months guarantees good productivity<br />
17
Choosing planting dates<br />
In intensive farming, using the most homogenous material possible, it is<br />
possible to forecast the exact time of flowering and harvesting in the first<br />
cycle, depending on climatic conditions. In the second cycle, there will<br />
be greater heterogeneity within the plantation and it will be much harder<br />
to determine the flowering period, which could be spread over several<br />
months.<br />
2.4 Plant care<br />
>>> Physical and sanitary care<br />
Good growth in the first 3 to 4 months guarantees good productivity, as long<br />
as other measures are not neglected. Tilling or hoeing is not necessary.<br />
Annual crops or crops with shallow roots or that require hoeing or earthing<br />
up should be avoided.<br />
Trade<br />
name<br />
Active<br />
ingredient<br />
Quantity per<br />
application<br />
Remarks<br />
Round Up<br />
Glyphosate<br />
6 litres per ha for<br />
perennial weeds;<br />
4.5 litres per ha for<br />
annual weeds<br />
• Long-lasting effect<br />
• Useful in dry season<br />
and in between (4<br />
hours without rain after<br />
application)<br />
Gramoxone<br />
Paraquat<br />
2 to 3 litres per ha<br />
• Useful in the wet<br />
season (1 hour without<br />
rain after application)<br />
Basta<br />
Ammonium<br />
glufosinate<br />
3 to 5 litres per ha<br />
• Long-lasting effect<br />
(4 hours without rain<br />
after application)<br />
Gramuron<br />
Paraquat<br />
3 to 4 litres per ha<br />
• Not useful in the dry<br />
season<br />
Herbicides currently used for chemical weeding in banana<br />
and plantain plantations<br />
18
Weeding<br />
Weed the plantation regularly during the first six months, using a machete<br />
or herbicide. Herbicide can be used on weeds up to 10 to 15 cm in height;<br />
if they are higher, then they should be cut with a machete. Herbicide<br />
should then be applied when they begin to grow back, but should never<br />
touch the plantain plants.<br />
>>> Propping<br />
This involves supporting the plantain plant by using some form of support<br />
or a cord, called a prop, and use mainly for tall varieties (French) or in areas<br />
that are subject to strong winds. Props should be used when bunches<br />
begin to appear.<br />
>>> Trimming<br />
Remove any old, dry leaves that hang down on the pseudostem (they can<br />
hide insects and larvae). Do not cut the green leaves as they are essential<br />
for ripening the bunches. Approximately 2 to 3 months after harvesting<br />
the bunches, remove all remaining shoots apart from two bayonet-shaped<br />
shoots, one large and one small. Avoid weeds, dead leaves, pieces of<br />
pseudostem and other plant debris piling up at the base of the plantain<br />
plants, where they could provide shelter for the banana root weevil or<br />
other insects and larvae.<br />
>>> Pruning of suckers<br />
This involves removing all the shoots that appear around the base of<br />
the parent plant in order to reduce competition during the initial growth<br />
phase. After flowering, keep the strongest sucker that is best placed in<br />
line with the plantation rows. Remove the others by cutting or pulling them<br />
out; this should be done at regular intervals. The removed suckers can be<br />
used as replanting material.<br />
Propping<br />
Removing male buds<br />
19
Caring for the bunch<br />
Break the male bud 7 to 10 days after the appearance of the last hand<br />
around 20 cm long.<br />
>>> Fertilization<br />
It is strongly recommended to provide the plants with waste plant material<br />
from weeding or other crop sources. Animal manure should only be applied<br />
during the wet season. Be careful not to spread the manure too close to<br />
the plant because the heat produced during decomposition could cause the<br />
plantain to wilt. Additional mineral fertilizer can be used depending on the<br />
soil type and the use of organic waste. It is necessary to put back in the soil<br />
the elements that the plant has withdrawn in order to maintain high yields.<br />
• Apply around 10 to 15 tonnes (100 to 150 sacks of 100 kg) of compost<br />
or chicken droppings per hectare per year. This means that before<br />
planting, each planting pit should get 10 to 15 kg of chicken droppings or<br />
compost mixed with black earth.<br />
• At the beginning and end of each wet season, apply 1 to 2 kg of a<br />
complete fertilizer high in nitrogen and potash to each plantain plant each<br />
year. Divide the fertilizer into two or three measures. Apply the fertilizer<br />
in a drip line placement around the plantain plant.<br />
2.5 Control of pests and diseases<br />
The plantain is prone to several parasites and diseases. Here is a list<br />
of the most common ones:<br />
>>> Banana weevil (Cosmopolites sordidus)<br />
The larva of this weevil bores into the root of the plantain in order to provide<br />
food for itself, thereby destroying the root system. As a result, the<br />
plant cannot draw up nutrients effectively and its anchorage to the soil is<br />
undermined, which means it can be toppled even by a light breeze. Both<br />
chemical and organic measures can be used. Neem powder, mixed with<br />
soil, can be effective against banana weevils. Chemical products should be<br />
applied to the soil at the edge of the plant in a drip line placement of 10 -15<br />
cm wide (make sure to first remove any organic waste material).<br />
There are not many authorized and effective products, and those that exist<br />
tend to be relatively expensive (500 FCFA per litre).<br />
- Dursban (active ingredient: Chlorpyrifos): liquid pesticide sprayed around<br />
the plantain plant.<br />
- Furadan (active ingredient: Carbofuran): a systemic pesticide in granular<br />
form, spread around the plantain plant.<br />
Apply Dursban or Furadan 2 to 4 times per year, depending on the degree<br />
of infestation. Use these pesticides only during the wet season.<br />
20
Black sigatoka<br />
Black sigatoka is a leaf spot disease caused by a fungus that grows on the<br />
plantain leaves, causing them to wilt. The fruits are badly filled and maturation<br />
is abnormal resulting in poor taste quality and lower fruit yields. When<br />
black sigatoka is found,<br />
• Remove the damaged leaves (burning them, if possible);<br />
• Make sure plantations are not too damp: reduce the density of plants in<br />
order to facilitate good air circulation; avoid using plots that are too damp;<br />
and weed regularly.<br />
>>> Nematodes<br />
Nematodes are microscopic “worms” that penetrate and reproduce in the<br />
roots of the plantain, thereby destroying them. Infested roots die off, and<br />
the plantain can no longer extract nutrients from the soil and can topple<br />
easily. To combat nematodes, apply a mix of water, clay and nematicide<br />
to the base of the infested plant. However, the most effective solution is<br />
to use healthy source material and to rotate crops to include nematicidal<br />
plants such as marigolds or neem.<br />
Effects<br />
of BBTV<br />
>>> Viral diseases<br />
A serious viral disease that affects plantain – the so-called “bunchy top”,<br />
caused by BBTV, banana bunchy top virus – is becoming increasingly widespread<br />
in certain regions of <strong>production</strong>. Initial symptoms consist of yellow<br />
leaf margins and dark green streaks in the veins of lower portions of<br />
the leaf midrib and the leaf stem. In badly affected plants, the leaves are<br />
narrower than normal and appear to be “bunched” at the top of the<br />
plant. On the appearance of these symptoms, uproot and bury the infested<br />
plants and their offshoots.<br />
2.6 Preventive methods<br />
Whatever the system of cultivation being practised, the most effective<br />
way to prevent and combat parasites is to use healthy source material<br />
such as in vitro micropropagation and PIF macropropagation. Use of chemicals<br />
is only cost effective in very large-scale, intensive farming.<br />
2.7 Income generated from sales<br />
The cost of producing a bunch of plantain is about 597 FCFA (0.91 e) in<br />
the first year, and will rarely go above 197 FCFA (0.30 e) as of year two.<br />
The sales price for a bunch will vary according to the variety, but can be estimated<br />
to be around 795 FCFA (1.21 e). Even taking into account losses in<br />
<strong>production</strong>, the plantain grower can end up making a considerable profit.<br />
21
3<br />
Other<br />
information<br />
3.1 Uses and nutritional value<br />
Plantain is never eaten raw because of its high levels of starch. The<br />
green or ripe fruits can be eaten boiled, as chips or as flour. Plantain is rich<br />
in starch, tannin, potassium and vitamins. In 100 g, plantain contains 116<br />
kcal calories, 31 g carbohydrates, 0.2 g fat and 0.8 g proteins.<br />
3.2 Suggested recipes<br />
Boiled plantain<br />
• Cut off the ends and make a<br />
lengthwise slit along the plantain<br />
(avoid cutting the insides).<br />
• Boil the plantain in salted water<br />
for several minutes, then remove<br />
the skin.<br />
• Continue boiling without the<br />
skin. Check the plantain is cooked<br />
through. It is ready when a<br />
knifepoint goes in easily.<br />
• Remove and drain. The plantain<br />
can now be mashed or fried in<br />
butter or oil.<br />
Baked<br />
plantain<br />
• Preheat the oven to<br />
180°C.<br />
• Wash the plantain<br />
with the skin on.<br />
• Place in the oven for<br />
45 to 60 minutes.<br />
• Remove from the oven,<br />
remove the skin and<br />
serve with a knob of<br />
butter and a sprinkling<br />
of brown sugar.<br />
22
3.3 Useful addresses<br />
n International Institute of Tropical Agriculture (IITA)<br />
PMB 5320, Ibadan, Oyo State, Nigeria<br />
Tel.: +234 2751 7472<br />
Fax: INMARSAT: 8737 6179 8636<br />
Email: iita@cgiar.org<br />
Website: www.iita.org<br />
n African Centre for Banana and Plantain Research (CARBAP)<br />
P.O. Box 832, Douala, Cameroon<br />
Tel.: +237 342 6052<br />
Fax: +237 342 5786<br />
Email: contact@carbap-africa.org<br />
Website: www.carbapafrica.org<br />
In the same collection…<br />
How to make a hand pump<br />
Thomas Simb Simb<br />
Cultivation and processing of rattan<br />
E. Lionelle Ngo-Samnick<br />
Breeding cane rats<br />
E. Lionelle Ngo-Samnick<br />
Cultivation and processing of maize<br />
Maybelline Escalante-Ten Hoopen<br />
23
Improved<br />
plantain<br />
<strong>production</strong><br />
Pro-Agro is a collection of practical, illustrated guides that are jointly published by CTA and<br />
ISF Cameroon. They are an ideal source of information for farmers, rural communities and<br />
extension workers in tropical and subtropical regions.<br />
The present text describes the technique of producing plantain from stem fragments (PIF),<br />
and the recommended steps for growing plantain. The reader will also find useful information<br />
regarding some economic and practical aspects of this agricultural <strong>production</strong>.<br />
• The Technical Centre for Agricultural and Rural Cooperation (CTA) is a joint international<br />
institution of the African, Caribbean and Pacific (ACP) Group of States and the<br />
European Union (EU). Its mission is to advance food and nutritional security, increase<br />
prosperity and encourage sound natural resource management in ACP countries. It provides<br />
access to information and knowledge, facilitates policy dialogue and strengthens the<br />
capacity of agricultural and rural development institutions and communities. CTA operates<br />
under the framework of the Cotonou Agreement and is funded by the EU.<br />
• Engineers without Borders (ISF) is a network of professionals in more than 52<br />
countries to promote human development through improved access to scientific and<br />
technical knowledge. In Cameroon, ISF works together with local people to improve their<br />
livelihoods and strengthen their technical capacity by sharing and diffusing information<br />
adapted to their needs.<br />
CTA