

Microcomputer Graphics
myers-1982-microcomputer-graphics
myers-1982-microcomputer-graphics

You also want an ePaper? Increase the reach of your titles
YUMPU automatically turns print PDFs into web optimized ePapers that Google loves.
<strong>Microcomputer</strong> <strong>Graphics</strong>
Roy E. Myers<br />
Mathematics Department<br />
The Pennsylvania State University<br />
<strong>Microcomputer</strong><br />
<strong>Graphics</strong><br />
A<br />
<br />
Addison-Wesley Publishing Company<br />
Reading, Massachusetts • Menlo Park, California<br />
London • Amsterdam • Don Mills, Ontario • Sydney
This book is in the<br />
Addison-Wesley Microbooks<br />
Technical Series<br />
Thomas A. Dwyer, Consulting Editor<br />
Thomas A. Bell, Sponsoring Editor<br />
Library of Congress Cataloging in Publication Data<br />
Myers, Roy E.<br />
<strong>Microcomputer</strong> graphics.<br />
(Addison-Wesley microbooks technical series)<br />
Includes index.<br />
1. Computer graphics. 2. <strong>Microcomputer</strong>s-Programming.<br />
I. Title. II. Series.<br />
T385.M93 00 1.55'3 82 -166 1<br />
ISBN 0-201-0 5092-7<br />
AACR2<br />
Copyright © 1982 by Addison-Wesley Publishing Company, Inc.<br />
All rights reserved. No part of this publication may be reproduced, stored in a retrieval system, or<br />
transmitted, in any form or by any means, electronic, mechanical, photocopying, recording, or<br />
otherwise, without the prior written permission of the publisher. Printed in the United States of<br />
America. Published simultaneously in Canada. Library of Congress Catalog Card No. 82 -166 1.<br />
ISBN 0-201-0 5092-7<br />
BCDEFGHIJ-D0-8 5432<br />
Second Printing, October 1982<br />
ISBN 0-201-05092-7<br />
CDEFGHIJKL-HA-898765432
Preface<br />
Aristotle dre\V figures in the sand. Leonardo Da Vinci illustrated his<br />
studies of anatomy and engineering with ink drawings. Young children<br />
can express their emotions and ideas with pencil or crayon drawings<br />
before they can do so verbally. Whatever the medium, the value of<br />
visual images has long been recognized. "A picture is worth a thousand<br />
words.''<br />
Now, at a time when computers are controlling the functions of<br />
automobiles, stereo sound systems, and space satellites, it would be surprising<br />
if computers were not used in the development and display of<br />
graphic images. Applications of computer graphics range from video<br />
games, to computer assisted design, to the display of images received<br />
from Voyager 2 as it passed by Saturn.<br />
Work in computer graphics began in the 1950s. While major advances<br />
have been made since then, few people have been able to use<br />
computer graphics. For years the cost of equipment has kept graphics<br />
out of reach of most computer users. But now a new day has arrived. A<br />
microcomputer graphics system can be purchased for a few thousand<br />
dollars. Businesses, educational institutions, and individuals are finding<br />
that computer graphics is accessible, and that it can be useful, interesting,<br />
challenging, and fun.<br />
While the graphics systems associated with low-cost microcomputers<br />
are far from the state of the art, they provide reasonable images<br />
in a reasonable time for a programmer of modest talents. More sophisticated<br />
graphics systems have capabilities which microcomputers do not<br />
provide. In order to achieve quality images, the microcomputer programmer<br />
must compensate for the limitations of the graphics hardware<br />
and the graphics language.<br />
v
vi<br />
<strong>Microcomputer</strong> <strong>Graphics</strong><br />
It is the intention of this book to provide the mathematical and programming<br />
techniques that are central to microcomputer graphics. The<br />
mathematical processes described are applicable to any computer system.<br />
The programs provided are written in BASIC for use on the Apple<br />
II; many may be adapted for use with other languages and microcomputers.<br />
No attempt has been made to teach programming in BASIC. It is assumed<br />
that the reader is familiar with the language, and has access to the<br />
Applesofttm BASIC Programming Reference Manual and the Apple II<br />
Reference Manual. While example programs assume a 48K system with<br />
a disk drive, most can be modified to run on smaller systems. Apple II<br />
users without disk drives should find no difficulty in adapting the programs<br />
to cassette tape storage. On Apple II computers where memory<br />
capacity is limited to the point of providing only one high resolution<br />
graphics page, the replacement of HGR2 with HGR: POKE -16302,0<br />
will make most programs function properly.<br />
The program examples are written to illustrate graphics techniques,<br />
not programming techniques; they are not intended to be model programs.<br />
The astute programmer will find ways to improve the execution<br />
time and to make the programs more "elegant." All programs have<br />
been tested and checked for errors. If one does not perform as described,<br />
it's more than likely a typing error.<br />
ACKNOWLEDGEMENTS<br />
A person working alone learns very little. It is through our contact with<br />
others that we gain the most. In realizing this I recognize that I have<br />
benefitted greatly from my association with Herb McKinstry, a good<br />
friend who is very generous with his time and talents. His comments,<br />
and those of Tom Dwyer, were very useful to me. Recognition is also<br />
due Neal, Alice, Karen, Glenn, and Linda for providing motivation and<br />
inspiration. Karen assisted in the preparation of materials. Karen and<br />
Alice helped with the proofreading.
Preface<br />
vii<br />
DISKETTE OF PROGRAMS<br />
A diskette is available which contains the programs in this book. In<br />
addition, machine level programs are included (documentation provided)<br />
which handle some of the time-consuming calculations associated<br />
with three-dimensional calculations and hidden line elimination. The<br />
diskette is available for $15 (price subject to change) from:<br />
Roy Myers<br />
<strong>Graphics</strong> Programs Disk<br />
R. D. 1, Box 3150<br />
Leechburg, PA 15656<br />
Copies will be on 16-sector diskettes unless a 13-sector copy is requested.
Contents<br />
Part I. Introduction<br />
CHAPTER 1. The World of <strong>Microcomputer</strong> <strong>Graphics</strong><br />
Rasters and Pixels<br />
Space<br />
Bouncing Ball<br />
Space Ship<br />
Moire<br />
Colored Lines<br />
Curve<br />
Circle<br />
Ring<br />
Artist's Aid<br />
Summary<br />
Notes and Suggestions<br />
3<br />
3<br />
4<br />
4<br />
5<br />
5<br />
7<br />
8<br />
8<br />
8<br />
9<br />
12<br />
12<br />
Part II. The Computer<br />
CHAPTER 2. <strong>Graphics</strong> Characteristics of the Apple II<br />
Memory Allocation and Usage<br />
Memory Addressing for Display Purposes<br />
TEXT<br />
GR<br />
HGR<br />
Notes and Suggestions<br />
Colors<br />
Resolution<br />
What Is a Line?<br />
HCOLOR Settings<br />
15<br />
17<br />
17<br />
20<br />
24<br />
24<br />
25<br />
27<br />
27<br />
29<br />
30<br />
31<br />
ix
x<br />
<strong>Microcomputer</strong> <strong>Graphics</strong><br />
Soft Switches<br />
Memory Move<br />
Additional <strong>Graphics</strong> Pages<br />
Page 2 of TEXT<br />
Negative Images<br />
Programming Aids<br />
Reading the Keyboard<br />
Long Programs<br />
Notes and Suggestions<br />
33<br />
37<br />
40<br />
42<br />
44<br />
45<br />
45<br />
45<br />
46<br />
CHAPTER 3. Text on the <strong>Graphics</strong> Screen<br />
Bit Pattern Text<br />
Characters<br />
Implementation<br />
Notes and Suggestions<br />
Shape Table Text<br />
Notes and Suggestions<br />
49<br />
49<br />
50<br />
55<br />
59<br />
61<br />
66<br />
Part Ill. Two-Dimensional <strong>Graphics</strong><br />
CHAPTER 4. Software Tools for Computer <strong>Graphics</strong><br />
Scaling the Screen<br />
Clipping and Viewports<br />
Clipping<br />
Viewports<br />
Transformations<br />
Introduction<br />
Matrix Representation of Transformations<br />
Identity<br />
Scaling<br />
Reflection<br />
Shear<br />
Rotation<br />
Homogeneous Coordinates<br />
Translation<br />
Co.mbinations of Transformations<br />
Notes and Suggestions<br />
69<br />
71<br />
71<br />
72<br />
73<br />
77<br />
77<br />
77<br />
79<br />
80<br />
82<br />
83<br />
84<br />
85<br />
90<br />
91<br />
91<br />
98<br />
CHAPTER 5. Analytic Geometry and Computer <strong>Graphics</strong><br />
Coordinate Axes<br />
Lines<br />
Circles<br />
Rectangular Coordinate Method<br />
Point Generation by Angular Increments<br />
99<br />
100<br />
102<br />
104<br />
104<br />
105
Contents<br />
xi<br />
Recursive Generation of Points<br />
Clipping<br />
Ellipses<br />
Ellipse with Center at (0,0)<br />
Translation and Rotation<br />
More Transformations<br />
Parametric Equations<br />
Parabolas<br />
Hyperbolas<br />
Polar Coordinate Curves<br />
Curves of the Form Y = F(X)<br />
107<br />
108<br />
109<br />
112<br />
112<br />
114<br />
115<br />
116<br />
118<br />
119<br />
120<br />
Part IV. Three-Dimensional <strong>Graphics</strong><br />
123<br />
CHAPTER 6. Basics of Three-Dimensional <strong>Graphics</strong><br />
Coordinate Systems<br />
Transformations<br />
Scaling<br />
Rotation<br />
Translation<br />
Reflection<br />
Sequential Transformations<br />
Inverses of Matrices<br />
Transforming a Coordinate System<br />
Projection<br />
Two-Dimensional Images of Three-Dimensional Objects<br />
Programming<br />
Viewpoint and Perspective<br />
Transformation of Images<br />
Notes and Suggestions<br />
Surfaces of the Form Z = F(X, Y)<br />
125<br />
125<br />
131<br />
131<br />
131<br />
132<br />
133<br />
i33<br />
134<br />
135<br />
136<br />
138<br />
145<br />
146<br />
149<br />
152<br />
152<br />
CHAPTER 7. Hidden Line and Hidden Surface Routines<br />
Introduction<br />
Surface Orientation<br />
Theory of Operation<br />
Orientation Vector<br />
Visibility<br />
Program 7.1<br />
The Vertex Array<br />
The Surface Array<br />
The Normal Array<br />
The Visibility Test<br />
155<br />
156<br />
156<br />
157<br />
158<br />
160<br />
160<br />
161<br />
163<br />
164<br />
165
xii<br />
<strong>Microcomputer</strong> <strong>Graphics</strong><br />
The Edge Array<br />
Plotting<br />
Notes and Suggestions<br />
Two Objects: Blackout<br />
Two Objects: Binary Search<br />
Two Objects: Arbitrary Viewpoint<br />
Theory of Operation<br />
Program 7.4<br />
The Vertex Arrays<br />
The Surface Array<br />
The Normal Array<br />
The Edge Array<br />
Object Priority<br />
Priority One Edges<br />
Priority Two Edges<br />
Visibility Status of Edge Endpoints<br />
Clipping Edges That Are Partly Hidden<br />
Notes and Suggestions<br />
Hidden Line Elimination for Surfaces of the Form<br />
Z =<br />
F(X,Y)<br />
Notes and Suggestions<br />
167<br />
168<br />
171<br />
171<br />
173<br />
176<br />
176<br />
178<br />
179<br />
181<br />
182<br />
183<br />
185<br />
186<br />
187<br />
188<br />
190<br />
195<br />
196<br />
201<br />
Part V. Animation<br />
203<br />
CHAPTER 8. Animated Images<br />
Animation Using HPLOT<br />
Rotating Square<br />
Three-dimensional Animation<br />
Shape Table Animation<br />
Notes and Suggestions<br />
205<br />
205<br />
206<br />
208<br />
212<br />
215<br />
Part VI. Peripheral Equipment and Software<br />
CHAPTER 9. System Components<br />
Input Hardware and Software<br />
Game Paddles and Pushbuttons<br />
Light Pens<br />
<strong>Graphics</strong> Tablets<br />
Output Hardware and Software<br />
Plotters<br />
<strong>Graphics</strong> Printers<br />
217<br />
219<br />
219<br />
219<br />
221<br />
221<br />
223<br />
223<br />
225
Contents<br />
xiii<br />
Appendices<br />
APPENDIX 1. Binary, Decimal, and Hexadecimal Number Systems<br />
Binary<br />
Hexadecimal<br />
Relationship of Hex to Binary<br />
APPENDIX 2. Shape Tables<br />
Shapes and Shape Tables<br />
Notes on Program A2.2<br />
Using Shapes<br />
Program A2.2 (Shape Construction)<br />
APPENDIX 3. Vectors<br />
Scalar Multiples of Vectors<br />
Vector Representation of Lines<br />
Vectors in Three-dimensional Space<br />
Dot Products of Vectors<br />
Cross Products of Vectors<br />
Half-planes<br />
APPENDIX 4. Matrices<br />
Products of Matrices<br />
APPENDIX 5. Radian Measure of Angles<br />
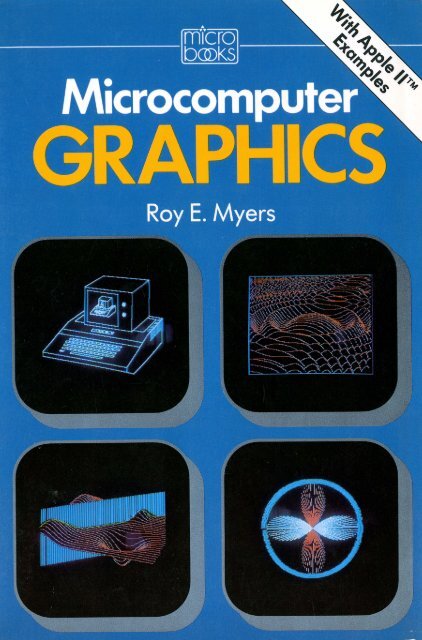
APPENDIX 6. Program Listings for Cover Images<br />
INDEX<br />
227<br />
227<br />
228<br />
229<br />
232<br />
233<br />
234<br />
237<br />
239<br />
241<br />
247<br />
248<br />
249<br />
250<br />
251<br />
253<br />
253<br />
257<br />
257<br />
261<br />
263<br />
281
Programs<br />
I. I SPACE 4<br />
1.2 BOUNCING BALL 4<br />
1.3<br />
SPACE SHIP 5<br />
1.4 MOIRE 5<br />
1.5 COLORED LINES 7<br />
1.6 CURVE 8<br />
1.7 CIRCLE 8<br />
1.8 RING 8<br />
1.9 ARTIST'S AID 10<br />
2.1 BIT PATTERN 25<br />
2.2 BIT PATTERN CHARACTERS 26<br />
2.3 COLOR PROBLEM 28<br />
2.4 PROBLEM WITH MIXED COLORS 28<br />
2.5 HIGHER RESOLUTION 30<br />
2.6 HCOLOR SETTINGS 32<br />
2.7 IMPROVED HCOLOR CONTROL 32<br />
2.8 FLASHING X AND SQVARE 35<br />
2.9<br />
AN IMA TED SQUARES 36<br />
2.10 MEMORY MOVE SUBROUTINE<br />
2.11 NAME COPIER<br />
2.12 ADDITIONAL GRAPHICS PAGES 40<br />
2.13 TWO PAGES OF TEXT 43<br />
39<br />
39<br />
3.1 BIT PATTERN ALPHABET FILE 56<br />
3.2 BIT PATTERN TEXT FOR THE GRAPHICS PAGE 58<br />
3.3 SHAPE TABLE ALPHABET FILE 62<br />
3.4 SHAPE TABLE TEXT FOR THE GRAPHICS PAGE 65<br />
4.1 CLIPPING<br />
4.2 RECTANGLE I 77<br />
76<br />
xv
xvi<br />
<strong>Microcomputer</strong> <strong>Graphics</strong><br />
4.3 RECTANGLE2 77<br />
4.4 RECTANGLES 78<br />
4.5 MATRIX 81<br />
4.6 HOMOGENEOUS COORDINATES 92<br />
4.7 HEXAGON 96<br />
4.8 HEXAGON DESIQN 97<br />
5.1 LINES 102<br />
5.2 CLIPPED LINE 102<br />
5.3 LINE 104<br />
5.4 CIRCLE 1 104<br />
5.5 CIRCLE2 106<br />
5.6 CIRCLE 3 108<br />
5.7 CLIPPED CIRCLE 109<br />
5.8 ELLIPSE I 112<br />
5.9 ELLIPSE2 113<br />
5.10 ELLIPSE 3 114<br />
5.11 PARAMETRIC 116<br />
5.12 PARABOLA 117<br />
5.13 ROTA TED PARABOLA 118<br />
5.14 HYPERBOLA 119<br />
5.15 POLAR 120<br />
5.16 CURVE 120<br />
6.1 CUBE 145<br />
6.2 VIEWPOINT 147<br />
6.3 TRANSFORMED CUBE 151<br />
6.4 SURFACE 152<br />
7.1 HIDDEN LINE ELIMINATION (SURFACE ORIENTATION METHOD) 169<br />
7. 2 HIDDEN LINE ELIMINATION (TWO OBJECTS; BLACKOUT) 172<br />
7. 3 HIDDEN LINE ELIMINATION (TWO OBJECTS; BINARY SEARCH) 174<br />
7.4 HIDDEN LINES (TWO OBJECTS; ARBITRARY VIEWPOINT) 192<br />
7.5 SURFACE 196<br />
7. 6 HIDDEN LINES (FOR SURFACE Z = F(X, Y) 198<br />
8.1 ROTATING SQUARE 206<br />
8.2 ROTATING PYRAMID 210<br />
8.3 INCHWORM 213<br />
9.1 PADDLE READER 220<br />
9.2 ELECTRONIC PEN 220<br />
9.3 IMPROVED ELECTRONIC PEN 220<br />
Al.I BASE CONVERTER (HEX TO DECIMAL) 231<br />
Al.2 BASE CONVERTER (DECIMAL TO HEX) 231
Contents<br />
xvii<br />
A2.l RADAR 241<br />
A2.2 SHAPE CONSTRUCTION 242<br />
A6.l FRONT COVER, UPPER LEFT; APPLE II 264<br />
A6.2 FRONT COVER, UPPER RIGHT; COSINE SURFACE 268<br />
A6.3 FRONT COVER, LOWER LEFT; SURFACE/PLANE 270<br />
A6.4 FRONT COVER, LOWER RIGHT; POLAR HEX SIGN 272<br />
A6.5 BACK COVER, LEFT; PIE CHART 274<br />
A6.6 BACK COVER, RIGHT; HOUSE 275<br />
A6.7 FIGURE 5.1; CARDIOID 278
Part I<br />
Introduction
Chapter l<br />
The World<br />
Of <strong>Microcomputer</strong><br />
<strong>Graphics</strong><br />
The phrase "cpmputer graphics" does not have the same meaning to all<br />
persons. To some, it brings to mind a video arcade game; to others, a<br />
flight simulator for training aircraft pilots. To an architect, computer<br />
graphics provides a means of planning and displaying drawings for the<br />
design of a building. An engineer might use computer graphics to design<br />
and analyze an electrical circuit or a bridge.<br />
The uses of computers for graphics purposes are many and varied. It<br />
is the intent of this book to consider the mathematical components and<br />
programming techniques necessary to generate graphics images on a<br />
low-cost microcomputer. The Apple II is used as the basis of discussion<br />
and all examples are written in Applesoft BASIC. In this chapter, we<br />
will consider example programs that illustrate both the capability of the<br />
computer and the programming processes that are described in later<br />
chapters.<br />
RASTERS AND PIXELS<br />
The Apple uses a raster display. This means simply that the display<br />
screen consists of a collection of horizontal lines (the rasters), and each<br />
raster line is made up of dots called pixels. In the Apple's high resolution<br />
graphics mode, there are 192 raster lines, each containing 280 pixels.<br />
The raster lines are numbered from 0 to 191; the pixels within each<br />
line are numbered from 0 to 279. Each pixel is thus identified by two<br />
numbers: the number of the raster line, and the number of the pixel<br />
within the line. Images are generated on the graphics screen by turning<br />
pixels on and off.<br />
3
4 <strong>Microcomputer</strong> <strong>Graphics</strong><br />
At the heart of a raster scan computer graphics language must be the<br />
ability to turn on individual pixels (i.e., to plot points). In Applesoft the<br />
HP LOT command performs this duty. HP LOT X, Y will turn on the<br />
pixel in the X position of raster line Y. For example, HPLOT 0,0 will<br />
turn on the dot in the top left corner of the screen; HP LOT 279, 191 will<br />
turn on the dot in the bottom right corner. Dots in any position on any<br />
line are easily controlled in this way.<br />
While most of the images we will be generating consist of more than<br />
a few individual dots, our first example program develops an image<br />
using only the HPLOT command.<br />
Program 1.1: SPACE<br />
1 REM PROGRAM 1.1 (SPACE)<br />
2 REM PLOTS RANDOMLY SELECTED POINTS<br />
10 HOME : HGR : HCOLOR= 3<br />
20 FOR I = 1 TO 100<br />
30 X = RND (1) * 27 9: Y = RND (1) * 191<br />
40 HPLOT X,Y<br />
50 NEXT I<br />
In this program, "stars" are plotted in positions randomly selected<br />
by line 30, providing a new "star scene" each time the program is run.<br />
Program 1.2: BOUNCING BALL<br />
As a second example of a program based primarily on the HPLOT<br />
command, consider the following simulation of a bouncing ball:<br />
1 REM PROGRAM 1 . 2 (BOUNCIN G BA LU<br />
2 REM SIMULATES A BALL BOUNCIN G OF F FLOOR AND<br />
WALLS<br />
10 DX = 4: X = B: Y = O: A = 2: V = 0<br />
20 HOME : HGR<br />
30 HCOLOR= 2: HP LOT 2,0 TO 2 I 133 TO 266,133<br />
TO 266,0<br />
40 HCOLOR= 3: HP LOT x I y: HP LOT x + 1 I y<br />
50 IF y =<br />
-<br />
132 THEN v = v: IF v = 0 THEN v =<br />
-<br />
20<br />
-<br />
60 IF x > 263 THEN DX = DX<br />
-<br />
70 IF x < 6 THEN DX = DX<br />
80 v = v + A<br />
90 HCOLOR= 0: HP LOT x I y ! HP LOT x +<br />
100 y = y + V: X = x +<br />
110 GOTO 40<br />
DX<br />
1 I y
The World of <strong>Microcomputer</strong> <strong>Graphics</strong> 5<br />
The "ball" is provided by line 40. In order to increase the visibility<br />
of the ball, two dots are plotted side-by-side. Line 30 provides ''walls''<br />
and a "floor" for the ball to bounce against. As the ball moves, the<br />
horizontal movement is controlled by a constant velocity DX; the vertical<br />
movement is controlled by a variable velocity V, together with a constant<br />
acceleration A. The "movement" of the ball is simulated by plotting<br />
a dot in white (line 40), then erasing it by plotting the same dot in<br />
black (line 90). The position X, Y of the dot is changed (line 100) and the<br />
ball is plotted in the new position. "Bounces" off the walls and floor are<br />
controlled by lines 50 through 70. To maintain the action, line 50 accelerates<br />
the ball when its bounce is low (Y = 132 and V = 0). The ball<br />
will continue to bounce until interrupted by CTRL-C or RESET.<br />
NOTE: In this chapter, the example programs use techniques which<br />
will be descriped in later parts of the book. Don't be concerned about<br />
programming details yet. Enjoy the graphics.<br />
Program 1.3: SPACE SHIP<br />
The program below draws a child's version of a space ship.<br />
1 REM PROGRAM 1.3 (SPACE SHIP)<br />
2 REM USES HPLOT TO DRAW ELEMENTARY SHAPES<br />
10 HOME : HGR2 : HCOLOR= 3<br />
20 HPLOT 120,170 TO 120,50 TO 140,20 TO 160,50<br />
TO 160,170<br />
30 HPLOT 160,120 TO 180,170 TO 100,170 TO<br />
120,120<br />
Programs of this sort are valuable for establishing a working understanding<br />
of the graphics screen. A rough line drawing on a page of<br />
graph paper will provide a model from which to write the program (see<br />
Figure 1.1).<br />
We turn now to some "designer" programs.<br />
Program 1 . .4: MOIRE<br />
1 REM PROGRAM 1.4 (MOIRE)<br />
2 REM DRAWS OVERLAPPING RANDOM PATTERNS<br />
10 HGR2 :A = 5<br />
20 X1 = RND (1) * 279:Y1 = RND (1) * 191<br />
30 C = C + 1: IF C = 8 THEN C = 0<br />
40 HCOLOR= C:Y = 191<br />
(continued)
6<br />
<strong>Microcomputer</strong> <strong>Graphics</strong><br />
_l<br />
j_<br />
I\<br />
(120, SO)v \ (160, 50)<br />
(120, 120) (160, 120)<br />
I<br />
<br />
t<br />
7<br />
(10 17<br />
(! 20, 170)<br />
i _l<br />
"'<br />
<br />
l<br />
\<br />
(160 1<br />
, 170? (i80, i 70)<br />
T T I I T T T T<br />
Figure 1.1
The World of <strong>Microcomputer</strong> <strong>Graphics</strong><br />
7<br />
SO FOR X = 0 TO 279 STEP A<br />
60 HPLOT X,191 TO X1,Y1 TO 279 - X,0<br />
70 NE XT X<br />
80 FOR Y = 0 TO 191 STEP A<br />
90 HPLOT 279,191 - Y TO X1,Y1 TO 0,Y<br />
100 NE XT Y<br />
110 FOR I = 1 TO SOO: NE XT I<br />
120 IF PEEK ( - 16384) = 1SS THEN POKE<br />
- 16368,0: TE XT : HOME : END<br />
130 GOTO 20<br />
Press £SC<br />
co e/'ld<br />
t:hci pro3,r-am<br />
Color anomalies built into the Apple often result in pleasing effects,<br />
as illustrated in the MOIRE program. The effects seen here will be considered<br />
more carefully in the next chapter. For the present, enjoy the designs.<br />
Line 20 determines a random "center" for the design. This program<br />
draws consecutive designs over one another, changing colors between<br />
designs (line 30,40). Line 110 provides a brief pause to allow time to<br />
view a pattern before drawing over it. Line 120 provides something new,<br />
an exit; pressing ESC will end the program. There will be more on this<br />
technique in Chapter 2.<br />
Program 1.5: COLORED LINES<br />
This program is briefer, and simpler in design.<br />
1 REM PROGRAM 1.S (COLORED LINES)<br />
2 REM RANDOMLY DROPS COLORED LINES ON THE<br />
SCREEN<br />
10 HGR2<br />
20 X1 = RND (1) * 279:Y1 = RND (1) * 191<br />
30 X2 = RND (1) * 279:Y2 = RND (1) * 191<br />
40 C = C + 1: IF C = 8 THEN C = 0<br />
SO HCOLOR= C<br />
60 HPLOT X1,Y1 TO X2,Y2<br />
70 GOTO 20<br />
Lines 20 and 30 select random end points for line segments drawn by<br />
line 60. Different colors are used in drawing consecutive line segments.
8 <strong>Microcomputer</strong> <strong>Graphics</strong><br />
Program 1.6: CURVE<br />
So far, our examples have used points and straight line segments.<br />
These are the components of all graphics images. We are able to draw<br />
curves and surfaces only by approximating them with straight line segments.<br />
The following example illustrates the technique: '<br />
1 REM PROGRAM 1.6 (CURVE)<br />
2 REM STRAIGHT LINES - - > CUR VE<br />
10 HGR2 : HCOLOR= 3<br />
20 FOR Y = 0 TO 191 STEP 4<br />
30 HPLOT 0,Y TO 27 9 * Y I 191,191<br />
40 NEXT Y<br />
Clearly, only straight line segments are plotted (line 30). The image<br />
generated yields an approximation of a curve in the same manner as<br />
"string sculpture."<br />
Program 1.7: CIRCLE<br />
Circles can be generated through several techniques; some are considered<br />
in Chapter 5. The one used here is the fastest of those we will discuss.<br />
The significance of SC, CX, CY will be explained in Chapter 4.<br />
1 REM PROGRAM 1.7 (CIRCLE)<br />
2 REM CIRCLE GENERATOR<br />
10 OT = .1 : C = COS (OT) : S = SIN (OT)<br />
20 SC = 1.16: CX = 140: CY = 96<br />
30 HGR2 : HCOLOR= 3<br />
40 X = O: Y = 80<br />
50 HPLOT SC * X + CX,Y + CY<br />
60 FOR I = 1 TO 63<br />
70 T = X * C - Y * S: Y = Y * C + X * S: X = T<br />
80 HPLOT TO SC * X + CX,Y + CY<br />
90 NEXT I<br />
Program 1.8: RING<br />
An elaboration of the CIRCLE program yields a colorful spiral circular<br />
band. Again, tricks are used which will be explained later.<br />
1 REM PROGRAM 1.8 (RIN G)<br />
2 REM DRAWS A COLORF UL CIRCULAR BAND<br />
10 OT = .1 : C = COS (OT) : S = SIN (OT)<br />
20 SC = 1.16: CX = 140: CY = 96<br />
30 HGR2 : HCOLOR= 3<br />
40 x = 6: y = 80
The World of <strong>Microcomputer</strong> <strong>Graphics</strong><br />
9<br />
50 HPLOT SC * X + CX,Y + CY<br />
60 FOR J = 1 TO 20<br />
70 FOR I = 1 TO 63<br />
80 T = X * C - Y * S:Y = Y * C + X * S:X = T<br />
90 READ CL: POKE 28,CL: IF CL = 255 THEN<br />
RESTORE<br />
100 HPLOT TO SC * X + CX,Y + CY<br />
110 NEXT I<br />
120 Y = Y - 2: NEXT J<br />
130 DATA 42,85,127,128,170,213,255<br />
Program 1. 9: ARTIST'S AID<br />
The last of our initial examples is also the most complex. This program<br />
will allow you to interact with the computer via the keyboard to<br />
generate designs.<br />
A rotating cursor (a line segment) is used to color portions of the<br />
screen. The cursor is placed in one of three modes by pressing C, D, or<br />
E. In the C (cursor) mode, the cursor rotates and is barely visible. If you<br />
press D (draw), line segments are drawn in each position occupied by the<br />
cursor. In the E (erase) mode, black line segments are drawn in cursor<br />
positions, effectively erasing portions of the screen (since the background<br />
color is black).<br />
The color used for the D (draw) mode is controlled by pressing keys<br />
1, 2, 3, 4, 5, or 6. The colors obtained are those identified in the Applesoft<br />
Reference Manual, page 89.<br />
The size of the cursor may be increased by pressing L (lengthen) and<br />
decreased by pressing S (shorten). To change the length quickly, press L<br />
or S and hold down REPT simultaneously.<br />
Finally, the point around which the cursor rotates may be changed<br />
by pressing the keys I, J, K, or M. The effects are:<br />
I<br />
J<br />
Move UP<br />
Move LEFT<br />
K Move RIGHT<br />
M Move DOWN<br />
Holding down I, J, K, or M, together with the REPT key, allows rapid<br />
change of position.<br />
The program makes use of a convenient tool called a shape table. In<br />
this example, a simple shape table is identified in lines lO through 40.<br />
The shape is the rotating cursor. The size, rotation, color, and location
IO<br />
<strong>Microcomputer</strong> <strong>Graphics</strong><br />
of the shape then are changed by the program. Shape tables are discussed<br />
in the Applesoft Reference Manual (Chapter 9). We consider<br />
them in Appendix 2.<br />
1 REM PROGRAM 1.9 (ARTIST'S AID)<br />
2 REM PROVIDES PAINTBRUSH UNDER KEYBOARD<br />
CONTROL<br />
10 POKE 768,1: POKE 770,4<br />
20 POKE 771,0: POKE 772,4<br />
30 POKE 773,0<br />
40 POKE 232,0: POKE 233,3<br />
50 HGR : POKE - 16302,0: C = 3: S = 25:<br />
x = 140: y = 96<br />
60 FOR I = 1 TO 64<br />
70 A = PEEK ( - 16384): POKE - 16368,0<br />
80 IF A = 155 THEN TEXT : HOME : END<br />
90 . IF A = 17 7 THEN C = 1<br />
100 IF A = 17 8 THEN C = 2<br />
110 IF A = 17 9 THEN C = 3<br />
120 IF A = 180 THEN C = 4<br />
130 IF A = 181 THEN C = 5<br />
140 IF A = 182 THEN C = 6<br />
150 IF A = 202 THEN X = X - 1: IF X < 0<br />
THEN X = 27 9<br />
160 IF A = 203 THEN X = X + 1: IF X > 27 9<br />
THEN X = 0<br />
17 0 IF A = 201 THEN Y = Y - 1: IF Y < 0<br />
THEN Y = 191<br />
180 IF A = 20 5 THEN Y = Y + 1: IF Y > 191<br />
THEN Y = 0<br />
190 IF A = 211 THEN S = S - 1: IF S < 1<br />
THEN S = 1<br />
200 IF A = 204 THEN S = S + 1<br />
210 IF A = 19 5 THEN F = 0<br />
220 IF A = 196 THEN F = 1<br />
230 IF A = 197 THEN F = 2<br />
240 IF A = 200 THEN HGR2<br />
250 HCOLOR= C: ROT= I: SCALE= S<br />
260 IF F = 0 THEN HCOLOR= 3: XDRAW 1 AT X,Y:<br />
XDRAW 1 AT X,Y: GOTO 300<br />
270 DRAW 1 AT X,Y<br />
280 IF F = 1 THEN 300<br />
290 HCOLOR= 4: DRAW 1 AT X,Y<br />
300 NEXT I<br />
310 GOTO 60
The World of <strong>Microcomputer</strong> <strong>Graphics</strong><br />
11<br />
Be careful when typing this program. Some typing errors will result<br />
in ?SYNTAX ERROR, but others simply will cause the program to behave<br />
strangely.<br />
When you have finished typing the program, type RUN and press<br />
RETURN. The screen will turn black and a flickering, rotating wand<br />
will appear near the center of the screen.<br />
To control your cybernetic paintbrush:<br />
•<br />
Press D to indicate that you want to draw.<br />
•<br />
Press K and the REPT key simultaneously for about two seconds<br />
(this will paint a broad stroke to the right).<br />
•<br />
Press key 5 to change color.<br />
•<br />
Paint a sweeping stroke downward by pressing M and REPT<br />
together.<br />
•<br />
Press C to cease drawing. The cursor will be visible, but will not<br />
paint its trail as it rotates.<br />
•<br />
Press I and REPT together to move to the left.<br />
•<br />
Press S and REPT simultaneously to shorten the cursor.<br />
•<br />
Now press D to resume drawing.<br />
Let your imagination and creative abilities take over. When you want to<br />
quit this program, press ESC. The program will return to the text page<br />
and will END.<br />
If you want to return to the graphics page to admire your creation,<br />
don't type HGR. This will return to the high resolution graphics page,<br />
but will erase it immediately. Instead, type:<br />
POKE -16297,0: POKE -16302,0: POKE -16304,0:<br />
POKE -16300,0<br />
If the image is one you want to save for display at a later time, it<br />
may be saved on a disk. First, decide on a NAME for the picture, then<br />
type:<br />
BSAVE NAME, A$2000, L$2000<br />
Then, any time you want to show this picture, type:<br />
HGR: POKE -16302,0: PRINT CHR$ (4) ; "BLOAD NAME,<br />
A$2000"
12 <strong>Microcomputer</strong> <strong>Graphics</strong><br />
SUMMARY<br />
The intention of this chapter has been to provide short examples of programs<br />
that generate graphics images. While the programs are not very<br />
sophisticated, several make use of methods which may not be immediately<br />
clear. These techniques are explained in the chapters that follow.<br />
As you progress through the book, these programs should become<br />
transparent. You soon should be able to improve on them.<br />
NOTES AND SUGGESTIONS<br />
1. Several programs given in this chapter use the RND command.<br />
You might reasonably expect this command to yield random numbers<br />
when used. Actually, the numbers provided start through the same sequence<br />
every time the computer is turned on. As a result, the "random"<br />
designs generated by several of the programs really are predictable. To<br />
randomize the starting point in the sequence of random numbers, insert<br />
the following routine in Programs 1.1, 1.4, and 1.5.<br />
3 TEXT: HOME<br />
4 PRINT "WHEN READY, PRESS ANY KEY TO START"<br />
5 IF PEEK (-16384)>127 THEN POKE -16368,0:<br />
GOTO 10<br />
6 X=RND (1)<br />
7 GO TO 5<br />
Program lines 5 through 7 will continue to take numbers from the<br />
sequence of random numbers used by the computer until a key is<br />
pressed. Since the timing of the keypress is unpredictable, the numbers<br />
obtained by later use of RND will not predictable. The use of PEEK<br />
( -16384) and POKE -16368,0 are discussed in Chapter 2.<br />
2. <strong>Graphics</strong> displays may be enlivened by sounds. Since the Apple<br />
has a speaker, why not use it? The bouncing ball of Program 1.2 will<br />
have an audible bounce if line 5Q is modified in this way:<br />
50 IF Y=132 THEN S=PEEK (-16336)+ PEEK (-16336):<br />
V=-· V: IF V=O THEN V= - 20<br />
3. To gain familiarity with the graphics screen, draw some simple<br />
shapes like the space ship in Program 1.3, such as your initials or name,<br />
scenery (mountains, trees), houses, city skyline, and so forth. First,<br />
draw the image on graph paper, then translate the points and lines to a<br />
program to draw the image on the graphics screen.
The World of <strong>Microcomputer</strong> <strong>Graphics</strong><br />
13<br />
4. Try some variations on Program 1.4. Line 10 defines A to be 5.<br />
This controls the density of the lines that generate the random images.<br />
Rewrite line 10 to define A= 3, 4, 6, or 7.<br />
5. If you are tiring of typing the programs, note that a disk is available<br />
which contains all the programs given in this book. See page vii for<br />
information.
Part II<br />
The Computer
Chapter 2<br />
<strong>Graphics</strong> Characteristics of<br />
the Apple II<br />
MEMORY ALLOCATION AND USAGE<br />
<strong>Graphics</strong> output of the Apple II is really a display of the contents of a<br />
section of the computer's memory. Because of this characteristic, we begin<br />
our consideration of Apple II graphics with a study of the allocation<br />
and usage of memory. While the user may make some changes in the<br />
way memory is used by the computer, standard usage is shown by the<br />
memory map in Figure 2.1. Memory addresses are given in both hexadecimal<br />
(with "$" prefix) and decimal.<br />
NOTE: Throughout this chapter, brief examples are given that illustrate<br />
the principles under discussion. It is best to have an Apple II<br />
at hand to try the examples as you read.<br />
An Apple II with 48K RAM has an additional 16K ROM, giving<br />
a total of 64K units of memory. While K is sometimes read as 1000,<br />
in computer work it represents 1024. Thus 48K means 48(1024) =<br />
49152, and 64K represents 64(1024) = 65536. This may seem like a<br />
strange number of memory units to have available, but that is because<br />
we are more accustomed to decimal than to binary numbers. Remember,<br />
the computer is a binary machine, and 65536 in binary is<br />
10000000000000000, which is not such an inconvenient number (except<br />
for its size).<br />
Each unit of memory (a byte) holds eight bits of information. The<br />
information in a bit may be either a 0 or a 1. The location of a byte in<br />
memory is called its address. An address and its contents may be identified<br />
in decimal, binary, or hexadecimal (hex) notation. For example, if<br />
17
18 <strong>Microcomputer</strong> <strong>Graphics</strong><br />
HEX<br />
$FFFF<br />
$COOO<br />
$9600<br />
$6000<br />
$4000<br />
$2000<br />
$0800<br />
$0400<br />
$0000<br />
ADDRESS<br />
DECIMAL<br />
65535<br />
} System<br />
49152<br />
MEMORY ALLOCATION and USAGE<br />
Usage<br />
} Disk Operating System<br />
38400<br />
} Strings<br />
General Usage<br />
} Page 2 of Hi Res <strong>Graphics</strong><br />
}<br />
}<br />
Page I of Hi Res <strong>Graphics</strong><br />
Sin<br />
General Usage<br />
Variable Array<br />
$0BFF<br />
Variables<br />
Text Page 2<br />
Program<br />
and<br />
J<br />
Low Res <strong>Graphics</strong> Page<br />
$0800<br />
2<br />
2048<br />
} Text Page I and Low Res <strong>Graphics</strong> Page I<br />
24576<br />
16384<br />
1024<br />
} System Usage<br />
0<br />
Figure 2.1<br />
memory location 5005 contains the number 65, there are three ways to<br />
picture this unit of memory:<br />
0001001110001101 IOlOOOOOli 5005 [@ 138D [ill<br />
in binary notation in decimal notation in hex notation
<strong>Graphics</strong> Characteristics of the Apple II 19<br />
In general, we will ref er to addresses in either decimal or hexadecimal<br />
notation. While binary is used internally by the computer, it is too bulky<br />
for us to use consistently.<br />
The 65536 memory locations are numbered consecutively from 0<br />
through 65535 in decimal. In hex, the numbering is $0 through $FFFF.<br />
When discussing a memory location such as $1B82 (7042), frequently we<br />
will refer to $1B (27) as being the "high order byte" and $82 (130) as being<br />
the "low order byte" (7042 = 27 x 256 + 130).<br />
NOTE 1: While there is little likelihood that the number 1B might<br />
be misread as a decimal number, a number like 82 might be intended<br />
as a decimal or as a hex number. It is necessary to have a means of<br />
distinguishing hex and decimal numbers. Since decimal notation is<br />
: solidly entrenched in our language, we will not tamper with it, but<br />
will specially designate the hex notation. There are three common<br />
ways of doing this: 1B16, lBH, or $1B. We're using the third form,<br />
since it is the one used in the Apple manuals.<br />
NOTE 2: A more complete discussion of decimal and hexadecimal<br />
notation is included in Appendix 1.<br />
Memory locations $400 (1024) through $7FF (2047) are used for two<br />
purposes: text display, and low resolution graphics. When it is in the<br />
TEXT mode, the computer interprets the contents of these memory locations<br />
as text and displays 24 lines, each having 40 character positions.<br />
When it is in the GR mode, the computer interprets the contents of<br />
memory locations $400 through $7FF as graphics-plus-text and displays<br />
four lines of text at the bottom of the screen and a 40 x 40 graphics matrix<br />
at the top.<br />
Memory locations $800 (2048) through $BFF (3071) also may be<br />
used for text or graphics display, but Applesoft programs usually reside<br />
in this area. Techniques for using memory locations $800 through $BFF<br />
as a second text or graphics page will be given later, under Page 2 of<br />
Text.<br />
Memory locations $2000 (8192) through $3FFF (16383) usually are<br />
used for high resolution graphics, page 1. When it is in the HOR mode,<br />
the computer will display a 280 x 160 graphics matrix and four lines of<br />
text at the bottom of the screen. The four lines of text are the last four<br />
lines of Text Page 1 ($400-$7FF).<br />
A second page of high resolution graphics is available in memory locations<br />
$4000 (16384) through $5FFF (24575). When it is in the HGR2
20 <strong>Microcomputer</strong> <strong>Graphics</strong><br />
mode, the computer interprets this area of memory as a 280 x 192<br />
graphics matrix, with no text display.<br />
It is possible to display high resolution graphics page 2 with text at<br />
the bottom of the screen. The text will be drawn from the last four lines<br />
of text page 2 ($800-$BFF). It also is possible to display high resolution<br />
graphics page 1 with no text at the bottom of the screen. In this case, the<br />
graphics display provides a 280 x 192 matrix. Similarly, low resolution<br />
graphics pages 1 and 2 each may be displayed with or without text.<br />
Techniques for effecting these modes are described below under Soft<br />
Switches.<br />
MEMORY ADDRESSING FOR<br />
DISPLAY PURPOSES<br />
Memory locations $400 through $7FF are used for text display and for<br />
low resolution graphics page 1, but the addressing structure is not as<br />
might be expected. Figure 2.2 illustrates the pattern of addressing this<br />
area of memory for use as a text page.<br />
The label shown in Figure 2.2 may be printed by the commands<br />
10 TEXT: HOME: VTAB 6: PRINT TAB (18>; "TEXT"<br />
20 PRINT TAB (1 5): "ADDRESSIN G"<br />
or by the commands<br />
10 TEXT: HOME<br />
20 FOR ADDR=1681 TO 1684<br />
30 READ X: POKE ADDR,X<br />
40 NEXT ADDR<br />
50 FOR ADDR=1806 TO 181 5<br />
60 REA.D X: POKE ADDR,X<br />
70 NEXT ADDR<br />
80 DATA 212, 197 , 216, 212<br />
90 DATA 193, 196, 196, 210, 197 , 211, 211, 201,<br />
206, 199<br />
Figure 2.3 shows the addressing pattern when memory locations<br />
1024 through 2047 are used as a low resolution graphics page. Figure 2.4<br />
shows the addressing of high resolution graphics page 1. High resolution<br />
graphics page 2 has a similar structure.
<strong>Graphics</strong> Characteristics of the Apple II<br />
21<br />
To obtain the memory address corresponding to a particular text screen<br />
location, add the row and column address codes. (Note that the column address<br />
is 1 less than the column number.) For example, to locate the address of the block<br />
containing the letter "X"; add the row address, 1664, and the column address,<br />
19, to obtain 1683. The "R", with row address 1792 and column address 17, has<br />
memory address 1792 + 17 = 1809.<br />
0 I 2 3 4 S 6 7 8 9 AB C DE FI01112 13!415161718191AIB1CIDIEIFW2 122 232 4252 62 7<br />
0 I ? 3 4 5 6 7 8 91011 P13 141516171819?Q?l22 '3 24?52627'8?930313'33 343536373839<br />
- - - - - - - - -<br />
$400 1024<br />
$480 1152<br />
$500 1280<br />
$580 i408<br />
$600 1536<br />
$680 1664<br />
$700 1792<br />
TE XT<br />
AD DR ES S I NG<br />
$780 1920<br />
$428 1064<br />
$4A8 1192<br />
$528 1320<br />
$5A8 1448<br />
$628 1576<br />
$6A8 1704<br />
$728 1832<br />
$7A8 1960<br />
!<br />
$450 1104<br />
$4DO 1232<br />
$550 1360<br />
$5DO 1488<br />
$650 1616<br />
$6DO 1744<br />
$750 1872<br />
$7DO 2000<br />
Figure 2.2. Addressing the TEXT Screen
22 <strong>Microcomputer</strong> <strong>Graphics</strong><br />
To obtain the address of a particular screen location, add the corresponding<br />
row and column address codes. For example, to locate the address of.the shaded<br />
block; add the row address code, 1664, and the column address code, 25, to obtain<br />
1689. Address 1689 controls two blocks. The color of the upper block is determined<br />
by the contents of the lower nybble of address 1689; the lower block is<br />
controlled by the contents of the upper nybble. (A nybble is four bits, or half a<br />
byte. )<br />
HEX<br />
DEC<br />
$400 1024<br />
0 1 2 3 4 5 6 7 8 9 AB C D E F101112 131415161718191AlB1CID1ElF2021222324252627<br />
0 1 2 3 4 5 6 7 8 9101112 131415161718192021 22 232425262728293031 32 33343536373839<br />
$480 1152<br />
$500 1280<br />
$580 1408<br />
$600 1536<br />
$680 1664<br />
$700 1792<br />
<br />
$780 1920<br />
$428 1064<br />
$4A8 1192<br />
$528 1320<br />
$5A8 1448<br />
$628 1576<br />
$6A8 1704<br />
$728 1832<br />
$7A8 1960<br />
$450 1104<br />
$400 1232<br />
$550 1360<br />
$500 1488<br />
$650 1616<br />
. $600 1744<br />
I<br />
$750 1872<br />
$700 2000 i<br />
Figure 2.3. Addressing the Low Resolution <strong>Graphics</strong> Screen
<strong>Graphics</strong> Characteristics of the Apple II<br />
23<br />
Each block shown contains 8 bytes. The sum of the row address code and the<br />
column address code gives the address of the uppermost byte in a block. The addresses<br />
of the subsequent 7 bytes can be obtained by successive addition of 1024.<br />
The addresses of the eight bytes in the shaded block are<br />
8967'-----<<br />
9991 1----1<br />
11015 '-----<<br />
12039 1----1<br />
13063 '-----<<br />
14087---<br />
15111 .__ ____ _<br />
161351-----'<br />
HEX 0 I 2 3 4 S 6 7 8 9 A BC D E Fl011 12l314151 61 718191AIBICIDIEIF202l 22 23 24 252627<br />
HEX DEC 0 I 2 3 4 5 6 7 8 9101112 !31415!6171 81 92021 22 23 24 252627282930313233 34 3536373839<br />
$2000 8192<br />
>--l---l-1-+--1--1-1--1---+---l-+-+-11-+--l--l-l--l---+---1-+-l--l-l--l---+----l--l-1-+--1--1-l--l--I<br />
$2080 8320<br />
$2100 8448<br />
$2180 8576<br />
$2200 8704<br />
$2280 8832<br />
$2300 8960<br />
<br />
$2380 9088<br />
$2028 8232<br />
$20A8 8360<br />
$2128 8488<br />
$21A8 8616<br />
$2228 8744<br />
$22A8 8872<br />
$2328 9000<br />
$23A8 9128<br />
$2050 8272<br />
$2000 8400<br />
$2150 8528<br />
$21DO 8656<br />
$2250 8784<br />
$2200 8912<br />
$2350 9040<br />
$2300 9168<br />
Figure 2.4. Addressing the High Resolution <strong>Graphics</strong> Screen
24 <strong>Microcomputer</strong> <strong>Graphics</strong><br />
TEXT<br />
Using the BASIC language command POKE, we may illustrate the<br />
screen addressing structures. A POKE stores a number in a specified<br />
memory location. For example, POKE 1390,25 stores the number 25 in<br />
memory location 1390. If the computer is using the TEXT mode for display<br />
purposes, the visible effect of this POKE would be to place an inverse<br />
(black on white) letter Y in position 31 of line 19. The inverse Y appears<br />
because the code for inverse Y is a decimal 25 (See ASCII Screen<br />
Character Set in the Apple II Reference Manual, page 15). The location<br />
of the inverse Y on the screen is determined by the addressing structure<br />
of the text screen (see Figure 2.2). To place a flashing Y (ASCII character<br />
code 89) directly above the inverse Y, we would POKE 1262,89. To<br />
place a normal (white on black) Y below the inverse Y, :POKE 1518,217.<br />
NOTE: If the above commands are executed consecutively, the<br />
scrolling of the screen may change the effective locations. To observe<br />
the effect described above, type:<br />
TEXT : HOME : POKE 1390 ,25 :POKE 1262 ,89:<br />
POKE 1 5 18,217 (RETURN)<br />
GR<br />
If the computer is in the GR mode, the interpretation of memory contents<br />
is handled quite differently. The display consists of a 40 x 40<br />
graphics matrix with four lines of text at the bottom of the screen. The<br />
contents of one memory location controls the color of two graphics<br />
blocks, one stacked above the other. The color of the upper block is<br />
determined by the number in the lower nybble of the memory location;<br />
the color of the lower block is determined by the number in the upper<br />
nybble. Here are some examples to show how it works:<br />
Since decimal 25 is equivalent to $19, POKE 1390,25 will place a<br />
magenta (color code 1) block under an orange (color code 9) block.<br />
Location 1390 controls screen blocks (30,36) and (30,37), so block<br />
(30,36) will be orange and block (30,37) will be magenta.<br />
For a second example, note that decimal 89 is equivalent to $59 and<br />
memory location 1262 controls the contents of low resolution blocks<br />
(30,34) and (30,35). Thus, POKE 1262,89 will color block (30,34)
<strong>Graphics</strong> Characteristics of the Apple II 25<br />
orange and block (30,35) gray. Similarly, POKE 1518,217 will color<br />
block (30,38) orange and block (30,39) yellow.<br />
HGR<br />
If the computer is in the HGR or HGR2 mode, the image shown on the<br />
screen is almost a bit-by-bit display of the contents of part of the computer's<br />
memory. We may use the addressing pattern shown in Figure 2.4<br />
and the POKE command to illustrate this graphics display.<br />
When in the HGR mode, the top left screen position is controlled by<br />
memory location $2000 (8192). In fact, the first seven bits of memory location<br />
8192 are displayed as the first seven dots on the topmost line of<br />
the HGR display screen. Bit 1 controls the leftmost dot, bit 2 controls<br />
the second dot, and so forth. Bit 8 is not displayed, but is used to control<br />
color (for details, see Apple Reference Manual, page 19).<br />
As an example, assume location 8192 contains the number 18 (to assure<br />
this, POKE 8192, 18). The binary representation of 18 is 00010010.<br />
Since the graphics display shows the bits in reverse order, dots 2 and 5<br />
should be ON and the others should be OFF.<br />
f<br />
Figure 2.5<br />
The following program will illustrate a means of controlling the bit<br />
pattern display.<br />
Program 2.1: BIT PATTERN<br />
1<br />
2<br />
1 0<br />
20<br />
30<br />
40<br />
so<br />
60<br />
70<br />
80<br />
REM PROGRAM 2.1 (B IT PATTERN )<br />
REM PLACES THE LETTER A ON THE HI RES SCR EEN<br />
DATA 8,2 0,3 4,3 4,62,3 4,3 4<br />
HOME : HGR : VTAB 21<br />
FOR I = 81 92 TO 14366 STEP 1024<br />
READ X<br />
PO KE I,X<br />
INPUT K$<br />
NEXT I<br />
EN D<br />
each c1me 3ou ,P/tf:.55<br />
R£TLJ/fN<br />
ar; add;- -.e:/oha./ ,6_yce<br />
of C/Je A>-t-cer t!Vi// he<br />
adef'ea!.
26 <strong>Microcomputer</strong> <strong>Graphics</strong><br />
The FOR loop beginning in line 30 references memory locations<br />
8192, 9216, 10240, 11264, 12288, 13312, and 14366. The contents of<br />
these memory locations are displayed below one another at the top left<br />
corner of the screen . As a result of the loop in lines 30 through 70, the<br />
contents of these memory locations will be as follows:<br />
Memory Location Bit Pattern (reversed) Display<br />
Decimal<br />
Binary<br />
8192 8 0001000<br />
9216 20 0010100<br />
10240<br />
11264<br />
34<br />
34<br />
0100010<br />
0100010<br />
12288 62 0111110<br />
13312 34 0100010<br />
14366 34 0100010<br />
Figure 2.6<br />
As the contents of these memory locations are displayed on the screen,<br />
they create the image of the letter "A."<br />
The discussion above suggests a means by which text may be displayed<br />
on the graphics screen easily. More detail will be given in Chapter<br />
3. For the present, we will identify procedures that define additional<br />
characters.<br />
Map the character or symbol on a grid; 7 x 7 works well. For example,<br />
to obtain the letter "Z," convert each of the bit patterns to a<br />
number code, as has been done in Figure 2. 7. Then POKE the bit pattern<br />
into memory. Memory locations may be identified from Figure<br />
2.4.<br />
To continue the example, we may display the symbols "A" and<br />
"Z" side-by-side in the top left corner of the screen using Program<br />
2.2.<br />
Program 2.2: BIT PATTERN CHARACTERS<br />
1 REM PROGRAM 2.2 (BIT PA TTERN CHARAC TERS)<br />
2 REM PLAC ES LETTERS A AN D Z ON THE HI RES<br />
SC REEN
<strong>Graphics</strong> Characteristics of the Apple II<br />
27<br />
Display<br />
Bit Pattern (reversed)<br />
Binary<br />
0111110<br />
0100000<br />
0010000<br />
0001000<br />
0000100<br />
0000010<br />
0111110<br />
Decimal<br />
62<br />
32<br />
16<br />
8<br />
4<br />
2<br />
62<br />
Figure 2.7<br />
1 0<br />
20<br />
30<br />
40<br />
so<br />
60<br />
70<br />
80<br />
90<br />
100<br />
11 0<br />
120<br />
HOME : HGR : VTAB 21<br />
DATA 8,2 0,3 4,3 4,6 2,3 4,3 4<br />
FOR I = 81 92 TO 14366 STEP 1024<br />
READ X<br />
PO KE I,X<br />
NEXT I<br />
DATA 62,3 2,1 6,8,4,2,62<br />
FOR I = 81 93 TO 14367 STEP 1024<br />
READ X<br />
PO KE I,X<br />
NEXT I<br />
EN D<br />
Letter A<br />
Letter Z<br />
NOTES AND SUGGESTIONS<br />
Write a program that displays a short word, or your initials, on the<br />
graphics screen. First map the characters on graph paper.<br />
COLORS<br />
It is not our intention to dwell on the characteristics of color graphics<br />
display on the high resolution screen, but it is necessary to be aware of<br />
one significant restriction. Not every block can be plotted in every color.<br />
To illustrate, run Program 2.3.
28 <strong>Microcomputer</strong> <strong>Graphics</strong><br />
Program 2.3: COLOR PROBLEM 1<br />
1 REM PROGRAM 2.3 (COLOR PRO BLEM)<br />
2 REM PLOTTED LINES AR E NOT VISI BLE<br />
1 0 HOME : HGR VTAB 21<br />
20 HCOLOR= 2<br />
30 FOR I = 2 TO S<br />
40 HPLOT 7 * I , 10 TO 7 * I , 30<br />
SO NEXT I<br />
60 END<br />
Note that while four vertical lines are requested by the program, only<br />
two are visible on the display screen. This is because color 2 (blue) may be<br />
drawn only in even numbered columns. Similar restrictions are placed on<br />
the other colors (except black and white). Colors 1 and 5 may be drawn in<br />
odd numbered columns; colors 2 and 6 may be drawn in even numbered<br />
columns. Only black and white are available in all columns.<br />
To guard against drawing vertical colored lines in positions where<br />
they are not visible, double-drawing may be used: If a program generates<br />
coordinates (X,Yl), (X,Y2) to be used in a command<br />
HPLOT X,Y1 TO X,Y2<br />
add the command<br />
HP LOT X + 1 , Y1 TO X + 1 , Y2<br />
Program 2.4: PROBLEM WITH MIXED COLORS<br />
Another color problem is illustrated in Program 2.4. Try it.<br />
1 REM PROGRAM 2.4 (PROBLEM WITH MIXED<br />
2 REM PLOTTING OVER BACKGROUND COLOR<br />
10 HOME : VTAB 21 : HGR : HCOLOR= 2<br />
20 HPLOT 0,0<br />
30 CAL L 624S4<br />
40 HCOLOR= S<br />
SO HPLOT 1 , 1 TO 100,100<br />
60 END<br />
The colors available on the Apple are coded as follows:<br />
COLORS)<br />
Sec semen<br />
('0/0"<br />
to o/oe<br />
(;!COLO =-2)<br />
0-BLACK 1<br />
1-GREEN(variable)<br />
2-BLUE(variable)<br />
3-WHITE 1<br />
4-BLACK 2<br />
5-variable<br />
6-variable<br />
7-WHITE 2
<strong>Graphics</strong> Characteristics of the Apple II<br />
29<br />
Colors 1, 2, 5, and 6 are variable, depending on the adjustment of the<br />
color controls on the display monitor.<br />
When mixing colors on a screen image, it is safest to select from 1<br />
colors 0, 1, 2, and 3, or from colors 4, 5, 6, and 7. ln Program 2.4, we<br />
selected the color blue (line 10), which we then used as the background<br />
color (lines 20, 30). When color 5 is used to draw a diagonal line (line<br />
50), the mix of colors results in an image which is either distracting or<br />
pleasing, depending on the effect you are seeking.<br />
RESOLUTION<br />
The term "resolution," when applied to the graphics screen, refers to<br />
the number of blocks in the grid used for graphing. The HP LOT X, Y<br />
command acepts integer values of X between 0 and 279, and integer<br />
values of Y between 0 and 191. For this reason, the high resolution<br />
graphics screens are said to have a resolution of 280 x 192, providing<br />
53760 blocks, or pixels, in the graphics grid.<br />
There is reason to contest this statement of resolution. Most Apple<br />
graphics programmers discover at an early stage that not every block<br />
can be plotted in every color. This is noticed in the execution of commands<br />
such as<br />
HGR: HCOLOR= 1: HPLOT 20,1 0 to 20,1 00<br />
The intended vertical line does not appear on the screen. In fact, the resolution<br />
available for color plotting is not 280 x 192, but rather<br />
140 x 192.<br />
Many black and white lines also have an effective 140 x 192 resolution.<br />
To illustrate, try the commands<br />
HGR: HCOLOR=3: HPLOT 10,1 0 to 100 ,1 00<br />
While we might hope that the resulting line would be "thin" (one dot<br />
thick), this is not the case. Without clearing the screen, try<br />
HCOLOR= O: HPLOT 9,1 0 TO 99,1 00<br />
Clearly, the earlier line was "wider" than necessary.<br />
On the other hand, much better resolution may be attained for black<br />
and white images.
30 <strong>Microcomputer</strong> <strong>Graphics</strong><br />
Program 2.5: HIGHER RESOLUTION<br />
To show that greater resolution may be achieved, try Program 2.5.<br />
1<br />
2<br />
1 0<br />
20<br />
30<br />
40<br />
so<br />
60<br />
70<br />
80<br />
REM PR OGRAM 2.5 (HIGH ER RES OLUTION)<br />
REM DISPLAYS 14 DOTS PER BYTE<br />
HOME : HGR<br />
FOR I = 1 TO 14<br />
READ<br />
X<br />
POK E 14800 ,X<br />
VTAB 22 : PR INT I<br />
FOR J = 1 TO 500 : NEXT J<br />
NEXT<br />
I<br />
DATA 1 , 129,2,130,4,132 ,8,136 ,16,144,3 2,160,<br />
64 ,192<br />
Watch carefully when the program is run. You should be able to distinguish<br />
a sequence of 14 dots displayed as a result of changing the contents<br />
of a single byte. Since the graphics screen is 40 bytes wide, we have<br />
an implied resolution of 560 x 192.<br />
The point of the foregoing discussion is that the Apple II high resolution<br />
mode is not always as good as 280 x 192, nor need it be as poor<br />
as 280 x 192 (for black and white plotting). The attainment of higher<br />
resolution clearly requires additional programming effort. That effort is<br />
not a focus of this book. The interested reader should consult the references<br />
given at the end of this chapter.<br />
WHAT IS A LINE?<br />
Dictionary definitions are not always applicable to the situations we face<br />
in daily life. Such is the case when we consider the interpretation of<br />
"line" as an image on a graphics screen. Theoretically, a line has a<br />
width, or thickness, of measure zero. In the graphical representation of<br />
a line, pixels are either ON or OFF. Since the dimensions of a pixel are<br />
not zero, the representation of a line has nonzero thickness. Further,<br />
pixels are neatly arranged in rows and columns. When diagonal lines are<br />
drawn, the results may be distinctly nonlinear.<br />
As an illustration, consider the line of Figure 2.8. If we turn ON<br />
each pixel the line passes through, the image of the line will have a distinct<br />
stair-step appearance.<br />
The Applesoft command HPLOT Xl, Yl TO X2, Y2 will result in a<br />
stair-step "line," similar to the one shown in Figure 2.8.
<strong>Graphics</strong> Characteristics of the Apple II 31<br />
Figure 2.8<br />
The way in which a line is defined also will affect its image. Whel)<br />
drawing a line, Applesoft must determine which pixels should be turned<br />
ON. As a result of the calculations used, the direction in which a line is<br />
defined becomes important. Try the following:<br />
HGR : HCOLOR =3:HPLOT 10,1 0 TO 100,90<br />
A diagonal line is drawn. Now, without clearing the screen, try:<br />
HPLOT 100 ,9 0 TO 10,1 0<br />
Watch carefully. Although the same line is requested the image is slightly<br />
different. This is due to the reversed orientation. To see this in a different<br />
way, try the following:<br />
HGR: HCOLOR=3: HPLOT 10,1 0 TO 100 ,9 0<br />
HCOLOR =O: HPLOT 100 ,9 0 TO 10,1 0<br />
While the second drawing of the line, in black, should have erased the<br />
white line, some traces remain.<br />
The differences caused by line orientation usually are not important.<br />
However, on occasion, attention to such detail may be important in obtaining<br />
satisfactory images.<br />
HCOLOR SETTINGS<br />
Before using any plotting commands it is necessary to specify the area of<br />
memory to be used for plotting (HGR or HGR2), and the color to be<br />
used for plotting (HCOLOR = C, where C = 0, 1, 2, 3, 4, 5, 6, or 7).<br />
Once HCOLOR is specified, it remains set, through HPLOTs and
32 <strong>Microcomputer</strong> <strong>Graphics</strong><br />
HPLOT TOs, until the next HCOLOR = statement. However, whenever<br />
HCOLOR is specified it must be followed by the HPLOT command,<br />
not HPLOT TO . The reason is this: When the statement HPLOT<br />
TO X, Y is executed, the color most recently used for plotting is retained.<br />
On the other hand, HPLOT X, Y always uses the color specified<br />
by the most recent HCOLOR = statement.<br />
It would be convenient to be able to change colors in the midst of<br />
several HPLOT TO X, Y statements without inserting an HPLOT X, Y<br />
to reset HCOLOR. By circumventing the standard Applesoft procedures,<br />
we can accomplish this.<br />
Memory location 228 ($E4) contains the color code of the most recently<br />
specified HCOLOR, while memory location 28 ($1C) contains the<br />
color code of the most recently plotted HCOLOR. If we change the contents<br />
of memory location 28 (with a POKE statement), we can fool Applesoft<br />
into changing colors.<br />
Program 2.6: HCOLOR SETTINGS<br />
To illustrate, try the following:<br />
1 REM PROGRAM 2.6 (HCOLOR SET TINGS )<br />
2 REM CONVENTI ONAL COLOR CONTROL<br />
10 HOME : VTAB 21 : HGR : HCOLOR= 2<br />
20 HPLOT 20,20 TO 50,75<br />
30 HCOLOR= 3<br />
40 HPLOT TO 100,10<br />
50 HPLOT 10,100 TO 200,150<br />
60 END<br />
Note that specifying a new color in line 30 has no effect until line 50,<br />
when an HPLOT statement recognizes the new color. For comparison,<br />
try the following program.<br />
Program 2.7: IMPROVED HCOLOR CONTROL<br />
1 REM PROGRAM 2.7 (IM PROVED HCOLOR CONTROL)<br />
2 REM SETTING HCOLOR WITH POKES<br />
10 HOME : VTAB 21 : HGR : HCOLOR= 2<br />
20 HPLOT 20,20 TO 50,75<br />
30 POKE 28,127: REM COLOR CODE OF HCOLOR=3<br />
40 HPLOT TO 100,10<br />
50 HPLOT 10,100 TO 200,150
<strong>Graphics</strong> Characteristics of the ApJl].e II 33<br />
Note that the change of color in line 30 had effect in line 40 (when Applesoft<br />
thought the most recently plotted HCOLOR was 3), but that<br />
line 50 changes the color back to the color specified in the most recent<br />
HCOLOR = statement.<br />
To use this procedure it is necessary to have the color codes of the<br />
HCOLORs available for plotting:<br />
HCOLOR Color Code Color<br />
0 0 Black<br />
1 42 Green<br />
2 85 Blue<br />
3 127 Whitel<br />
4 128 Black2<br />
5 170 variable<br />
6 213 variable<br />
7 255 White2<br />
The technique described here was used in the Program 1.8 in Chapter<br />
1 to change the plotting color through a sequence of values.<br />
SOFT SWITCHES<br />
When the command HGR is used in a program. it has several effects.<br />
Among them are:<br />
1. Display high resolution graphics page 1;<br />
2. Clear high resolution graphics page 1 to black;<br />
3. Identify high resolution graphics page 1 as the area to be used for<br />
subsequent plotting.<br />
There are times when one would want to display the contents of a<br />
graphics page without erasing it, or flip between two graphics pages.<br />
Special effects, especially animation, may be provided by displaying<br />
page 1 while drawing on page 2, then flipping to display page 2 while<br />
drawing on page 1, and so forth. These types of demands cannot be met<br />
with the HGR, HGR2 commands.<br />
Control over display modes is available through the use of "soft<br />
switches," eight memory locations accessed through software. It is useful<br />
to think of these as four switches:
34 <strong>Microcomputer</strong> <strong>Graphics</strong><br />
1. A text-graphics switch;<br />
2. A full screen-mixed screen switch;<br />
3. A page 1-page 2 switch;<br />
4. A high resolution-low resolution switch.<br />
Each switch controls only the specified mode of display. BASIC<br />
commands control several switches at a time. For example, HGR will<br />
set switch 1 to graphics, switch 2 to mixed screen, switch 3 to page 1, and<br />
switch 4 to high resolution. The command GR is different in that it sets<br />
switch 4 to low resolution. (Note: Each of these commands performs<br />
duties in addition to setting the switches.)<br />
Independent control of each of the four switches is available<br />
through the use of the POKE command, as suggested in Table 2.1.<br />
Table 2.1<br />
Switch Effect BASIC Command<br />
2<br />
3<br />
4<br />
<br />
<br />
<br />
<br />
GRAPHICS mode POKE -16304,0<br />
TEXT mode POKE -16303,0<br />
FULL SCREEN text or graphics POKE -16302,0<br />
MIXED graphics and text POKE -16301,0<br />
PAGE! POKE -16300,0<br />
PAGE 2 POKE -16299,0<br />
LOW RESOLUTION POKE -16298,0<br />
HIGH RESOLUTION POKE -16297,0<br />
Each switch may be pushed (POKEd) to either of its two possible<br />
positions. It remains there until pushed (POKEd) to the other position.<br />
Since the four switches may be controlled independently, it would<br />
seem that 16 possible display modes are available. This is not the case,<br />
however. When switch 1 is in the text position (POKE -16303,0),<br />
changes in switches 2 or 4 have no visible effect.<br />
There are, in fact, ten observably different display modes, as Table<br />
2.2 shows.
<strong>Graphics</strong> Characteristics of the Apple II<br />
35<br />
Table 2.2<br />
Mode<br />
TEXT, page 1<br />
TEXT, page 2<br />
Low resolution graphics,<br />
page 1, full screen<br />
Low resolution graphics,<br />
page 1, mixed screen<br />
Low resolution graphics,<br />
page 2, full screen<br />
Low resolution graphics<br />
page 2, mixed screen<br />
High resolution graphics,<br />
page 1, full screen<br />
High resolution graphics,<br />
page 1, mixed screen<br />
High resolution graphics,<br />
page 2, full screen<br />
High resolution graphics,<br />
page 2, mixed screen<br />
Basic Commands<br />
POKE -16303,0: POKE -16300,0<br />
POKE -16303,0: POKE -16299,0<br />
POKE -16298,0: POKE -16304,0<br />
POKE -16300,0: POKE -16302,0<br />
POKE -16298,0: POKE -16304,0<br />
POKE -16300,0: POKE -16301,0<br />
POKE -16298,0: POKE -16304,0<br />
POKE -16299,0: POKE -16302,0<br />
POKE -16298,0: POKE -16304,0<br />
POKE -16299,0: POKE -16301,0<br />
POKE -16297,0: POKE -16304,0<br />
POKE -16300,0: POKE -16302,0<br />
POKE -16297,0: POKE -16304,0<br />
POKE -16300,0: POKE -16301,0<br />
POKE -16297,0: POKE -16304,0<br />
POKE -16299,0: POKE -16302,0<br />
POKE -16297,0: POKE -16304,0<br />
POKE -16299,0: POKE -16301',0<br />
Changing from one display mode to another requires changing only<br />
the switches that must be affected. For example, to change from full<br />
screen high resolution graphics page 1 to full screen high resolution<br />
graphics page 2, only switch 3 need be changed (POKE -16299,0). To<br />
change from full screen high resolution graphics page 1 to mixed screen<br />
high resolution graphics page 1, only switch 2 need be changed (POKE<br />
-16301,0).<br />
Program 2.8: FLASHING X AND SQUARE<br />
Program 2.8 illustrates one type of effect available through the use<br />
of the soft switches.<br />
1 REM PROGR AM 2.8 (FLASHING X AND SQUARE)<br />
2 REM ILL USTRATES USE OF SOFT SWITCHES<br />
10 HGR : HCOLOR= 3<br />
20 HPLOT 90,4 0 TO 19 0,40 TO 190,1 60 TO 90,1 60 TO<br />
90,4 0<br />
30 HGR 2<br />
(continued)
36 <strong>Microcomputer</strong> <strong>Graphics</strong><br />
40 HP LOT 90 ,40 TO 190,160: HP LOT 190,40<br />
TO 90 ,160<br />
dtspiay<br />
50 FOR I = 1 TO 1 0 0<br />
Sec<br />
60 FOR J = 1 TO 50: NEXT<br />
70 A = 1 - A<br />
switch<br />
80 POKE - 16299 - A, 0<br />
90 NEXT I<br />
The process described above allows for the display of images on either<br />
of the two graphics pages, but does not permit easy modification of<br />
the images. A more pleasing effect may be provided by modifying the<br />
images on the graphics pages while the display is showing text, or another<br />
graphics page. The soft switches allow control over the display<br />
mode, but have no effect on the graphics page used for drawing.<br />
Memory location $E6 (230) is used to identify the graphics page to<br />
be used for drawing. If page 1 is to be used, the location will contain $20<br />
(32); if page 2 is to be used, the location will contain $40 (64) . Since the<br />
contents of $E6 (230) may be controlled independently of the display<br />
mode, it is possible to prepare one page for display while displaying the<br />
other page.<br />
Program 2.9: ANIMATED SQUARES<br />
Program 2.9 illustrates the process of preparing a graphics page for<br />
display while displaying another.<br />
1 REM PROGRAM 2.9 (AN IMA TED SQUAR ES)<br />
2 REM ILLUST RAT ES AN IMA TION TECHNIQUES<br />
10 HGR : HGR2<br />
20 A = 1 : B = - 1 : C = 2:0 = 1<br />
30 FOR I = 1 TO 20<br />
40 FOR J = 1 TO 2<br />
50 POKE 230 ,32 * J<br />
60 A = A + B<br />
70 HCOLOR= 0<br />
80 HPLOT 140 - A,96 - A TO 140 + A, 96 - A<br />
TO 140 + A, 96 + A TO 140 - A, 96 + A<br />
TO 140 - A,96 - A<br />
90 A = A + C<br />
100 HCOLOR= 3<br />
110 HPLOT 140 - A, 96 - A TO 140 + A, 96 - A<br />
TO 140 + A, 96 + A TO 140 - A, 96 + A<br />
TO 1 4 0 - A, 96 - A
<strong>Graphics</strong> Characteristics of the Apple II<br />
37<br />
- -<br />
120 PO KE 16299 DI 0<br />
130 D = -<br />
1 D Set:: m70!<br />
140 NEXT J I I<br />
160 B = -B:C<br />
= -<br />
c .s(.U>t-h<br />
170 GOTO 30<br />
Program 2.9 should result in the display of a growing, then shrinking,<br />
square. The alternation of growing and shrinking phases will continue<br />
until interrupted by CTRL-C or RESET.<br />
Within the program, line 50 identifies the graphics page on which<br />
drawing is to take place. Note that drawing always takes place on the<br />
page not being displayed. Lines 60 through 80 erase the square previously<br />
drawn on the graphics page (by drawing it in black, the background<br />
color). Lines 90 through 110 draw a new square in a larger or smaller<br />
size. Line 120 then flips the display switch to show the newly drawn<br />
square. The program then continues, erasing and drawing on the undisplayed<br />
graphics page.<br />
MEMORY MOVE<br />
There are a number of reasons for moving data from one area of memory<br />
to another. Our main interest is with graphics. Since Apple II graphics<br />
display is really a display of memory contents, moving memory (in<br />
the sense of moving the contents of memory) has the effect of moving<br />
the data that represents a graphic image.<br />
NOTE: The phrase "moving memory" is a conventional, but not<br />
an accurate, description of the effect we are pursuing. We will actually<br />
be COPYing data from one area of memory to another.<br />
One method of moving data from one area of memory to another is<br />
to use the BASIC commands PEEK and POKE. PEEK reads the contents<br />
of a specified memory location, while POKE stores a value in a<br />
memory location. Thus the command<br />
PO KE 9, PEE K (8)<br />
reads the contents of location 8 (PEEK (8)) and stores it in location 9.<br />
The contents of location 8 are not affected.<br />
Using PEEKs and POKEs, the contents of any section of memory<br />
may be copied to any other area. For example, the following will copy
38 <strong>Microcomputer</strong> <strong>Graphics</strong><br />
the contents of high resolution graphics page 2 to high resolution graphics<br />
page 1.<br />
110 FOR I = 81 92 TO 16383<br />
120 POKE I , PE E KC81 92 + I)<br />
130 NEXT I<br />
The only criticism of the above procedure is that it is much too slow.<br />
Fortunately, a machine level program to do the same thing is available<br />
to the user. A BASIC program may access the machine level MOVE<br />
program by first providing the following initialization:<br />
POKE 768,160: POKE 769,0<br />
POKE 770 ,76: POKE 771 ,44<br />
POKE 772 ,254<br />
Then, each time the contents of an area of memory are to be copied to a<br />
new area, it is necessary to identify:<br />
1. The beginning address of the SOURCE (section to be copied);<br />
2. The ending address of the SOURCE ;<br />
3. The beginning address of the DESTINATION (section to receive the<br />
data).<br />
Then CALL 768 will implement the MOVE program.<br />
Each of the three addresses to be identified must be given in two<br />
stages. The high and low bytes of the addresses must be stored for access<br />
by the MOVE program as follows:<br />
Location<br />
Contents<br />
60 Low byte of beginning SOURCE address<br />
61 High byte of beginning SOURCE address<br />
62 Low byte of end of SOURCE address<br />
63 High byte of end of SOURCE address<br />
66 Low byte of beginning DESTINATION address<br />
67 High byte of beginning DESTINATION address<br />
For example, the following program will initialize the MOVE program,<br />
copy the contents of high resolution graphics page 2 onto high<br />
resolution graphics page 1, then copy the contents of memory locations<br />
$6000 through $7FFF onto high resolution graphics page 2.
<strong>Graphics</strong> Characteristics of the Apple II<br />
39<br />
Program 2.10: MEMORY MOVE SUBROUTINE<br />
1 REM PR OGRAM 2.1 0 (MEMORY MO VE SUBROUTINE )<br />
2 REM NOT A DISPLAY PROGRAM<br />
10 REM INITIALIZE<br />
20 PO KE 768,1 60: PO KE 769,0<br />
30 PO KE 770,76: PO KE 771,44<br />
40 PO KE 772 I<br />
254<br />
50 REM PAGE 2 TO PAGE 1<br />
60 PO KE 60,0: PO KE 61,64<br />
70 PO KE 62,255: PO KE 63,95<br />
80 PO KE 66,0: PO KE 67,3 2<br />
90 CALL 768<br />
100 REM PAGE 3 TO PAGE 2<br />
110 PO KE 60,0: PO KE 61,96<br />
120 PO KE 62,255: PO KE 63,1 27<br />
130 PO KE 66,0: PO KE 67,64<br />
140 CALL 768<br />
The PEEK and POKE method of copying data may be a simpler<br />
routine to put into a BASIC program, but the initialization and calling<br />
of the machine level MOVE program is much faster in execution.<br />
The use of the MOVE program requires one caution: if the beginning<br />
of the destination lies within the source, part of the source will be<br />
written over before it has been copied. This effect usually would be one<br />
to avoid. However if it is intended to duplicate a pattern repeatedly, we<br />
might over-write the source intentionally. Program 2.11 asks for a<br />
name, prints it at the top of a clear screen, then copies it over the rest of<br />
the page.<br />
Program 2. 11: NAME COPIER<br />
1 REM PROGRAM 2.1 1 (NAME COPIER )<br />
2 REM USES MEMORY MO VE TO DUPLICATE<br />
10 PO KE 768,1 60: PO KE 769,0<br />
20 PO KE 770,76: PO KE 771,44<br />
30 PO KE 772,254<br />
40 TEXT : HOME<br />
50 INP UT "YOUR NAME, PLEASE" ;A$<br />
60 HOME : PRINT A$<br />
70 L = LEN (A$ ) + 1<br />
80 PO KE 60,0: PO KE 61,4<br />
A STRING<br />
90 PO KE 62, 255 - L: PO KE<br />
100 PO KE 66,L: PO KE 67,4<br />
110 CALL 768: WAIT -1 6384, 1 28<br />
1 2 0 H 0 ME --=::::__ ______
40 <strong>Microcomputer</strong> <strong>Graphics</strong><br />
ADDITIONAL GRAPHICS PAGES<br />
In Program 2.10 above, the contents of locations $6000 through $7FFF<br />
are copied onto high resolution graphics page 2. There is little reason for<br />
doing this unless a high resolution picture has been stored in locations<br />
$6000 through $7FFF. There are three ways of getting a picture in $6000<br />
through $7FFF:<br />
1. Load it from disk (BLOAD PICTURE, A$6000);<br />
2. Draw it on high resolution page 1 or 2, then copy it to $6000-$7FFF;<br />
3. Draw directly on "high resolution page 3" ($6000-$7FFF).<br />
Option 3 is easily implemented from BASIC and is illustrated in<br />
Program 2.12. You must identify ''page 3 '' as the area to be used for<br />
drawing (POKE 230,96) , clear the screen to black (CALL 62450), and<br />
then proceed with normal plot commands. As long as we are expanding<br />
the number of graphics pages, why not add a "page 4"? Memory locations<br />
$8000 through $9FFF could be used for drawing purposes, except<br />
for the fact that DOS overlaps this area. Clearing this "Screen," or<br />
drawing on it, will erase or disable part of DOS. In preparation for this,<br />
line 100 disconnects DOS. As a result, at the end of the program, it will<br />
be necessary to reboot the system.<br />
"Page 5" of high resolution graphics ($AOOO-$BFFF) can be used in<br />
the same manner as ''page 4.''<br />
When using "page 4" or "page 5," it is necessary to avoid having<br />
strings stored there. Since strings are usually stored just under HIMEM,<br />
Gust below DOS), one solution is to set HIMEM to 8191 early in the<br />
program.<br />
1 HIMEM : 8191<br />
This will cause strings to be stored just below high resolution graphics<br />
page 1.<br />
Program 2. 12: ADDITIONAL GRAPHICS PAGES<br />
1 REM PROGRAM 2.1 2 (ADDITIONAL GRAPH ICS PAGES)<br />
2 REM DRAWS , DISPLAYS 4 PAG ES OF GRAPH ICS<br />
10 TEXT : HOME : HCOLOR= 3<br />
20 POKE 768,160: POKE 769,0<br />
30 POKE 770 ,76: POKE 771 ,44<br />
40 POKE 772 I 254<br />
50 POKE 230,64: CAL L 62450<br />
60 HPLOT 140,10 TO 140,180<br />
Clea.r :sc.1.een<br />
//?ct/eQ.Cec(_ .oy<br />
/acct-tion c:?!O<br />
-dlea d1cu.v tJJe1e
<strong>Graphics</strong> Characteristics of the Apple II 41<br />
70<br />
80<br />
90<br />
100<br />
11 0<br />
120<br />
130<br />
140<br />
150<br />
160<br />
170<br />
180<br />
190<br />
200<br />
PO KE 230,96: CALL 6245 0<br />
HPLOT 120,1 0 TO 120,1 80<br />
HPLOT 160,1 0 TO 160,1 80<br />
IN# 0: PR # 0<br />
PO KE 230,1 28: CALL 6245 0<br />
HPLOT 110,1 0 TO 110,1 80<br />
HPLOT 140,1 0 TO 140,1 80<br />
HPLOT 170 ,1 0 TO 170,1 80<br />
C/&ar se/Pe11<br />
/ht:t1cated. t:?y<br />
/octibon 30<br />
cAe/7 dmw z!Jere<br />
PO KE 230,1 60: CALL 6245 0<br />
HPLOT 110,1 0 TO 110,1 80<br />
HPLOT 170 ,1 00 TO 10,1 00 TO 110,1 0<br />
PR INT "THIS PR OGR AM WILL DISPLAY ON E OF<br />
FOUR ": PR INT<br />
PR INT "HIGH RESOLUT ION IMAGES ": PR INT<br />
PR INT "PRESS KEYS 1, 2, 3 OR 4 TO SEE<br />
THEM": PR INT<br />
21 0 PR INT "PR ESS 'ESC ' TO EN D THE PROGRAM":<br />
PRIN T<br />
220 PR INT "PR ES S 'RET URN ' TO RETURN TO THIS<br />
MEN U"<br />
230 PO KE -1 6297,0: PO KE -1 63 02,0<br />
240 VTAB 18: GET A$: PR INT :X= FRE (0 )<br />
250 IF AS C (A $ ) = 27 THEN TEXT : HOME<br />
260<br />
270<br />
280<br />
290<br />
300<br />
31 0<br />
320<br />
33 0<br />
340<br />
350<br />
360<br />
370<br />
380<br />
390<br />
400<br />
41 0<br />
42 0<br />
43 0<br />
44 0<br />
45 0<br />
460<br />
47 0<br />
480<br />
PR INT "DOS IS DEAD! ": EN D<br />
IF AS C (A $ ) = 13 THEN PO KE -1 6303,0:<br />
GOTO 240<br />
A= VAL (A $ ): ON A GOTO 290,340,3 9 0,44 0<br />
GOTO 240<br />
PO KE -1 63 04,0<br />
PO KE 60,0: PO KE 61,64<br />
PO KE 62,255: PO KE 63,95<br />
PO KE 66,0: PO KE 67,3 2<br />
CALL 768: GOTO 240<br />
PO KE -1 63 04,0<br />
PO KE 60,0: PO KE 61,96<br />
PO KE 62,255: PO KE 63,1 27<br />
PO KE 66,0: PO KE 67,3 2<br />
CALL 768: GOTO 240<br />
PO KE -1 63 04,0<br />
PO KE 60,0: PO KE 61,1 28<br />
PO KE 62,255: PO KE 63,1 59<br />
PO KE 66,0: PO KE 67,3 2<br />
CALL 768: GOTO 240<br />
PO KE -1 63 04, 0<br />
PO KE 60,0: PO KE 61,1 60<br />
PO KE 62,255: PO KE 63,1 91<br />
PO KE 66,0: PO KE 67,3 2<br />
CALL 768: GOTO 240<br />
/'fove pCi_Jes<br />
0?1 .31 .L/1 S C-o<br />
pe /
42 <strong>Microcomputer</strong> <strong>Graphics</strong><br />
.<br />
Program 2.12 illustrates the use of the soft switches in combination<br />
with the ability to draw on portions of memory other than high resolution<br />
pages 1 and 2. Of course, images drawn on "page 3," "page 4," or<br />
"page 5" will not be visible unless moved to pages 1 or 2.<br />
The exit (line 250) is a cold exit, with DOS inoperative. Replacing<br />
line 250 with<br />
250 IF AS C (A$ ) = 27 THEN TEXT : CAL L 50688<br />
will result in rebooting the disk upon exit, assuming that the disk controller<br />
is in slot 6.<br />
PAGE 2 OF TEXT<br />
The Apple II provides a means of displaying a second text page (POKE<br />
-16303,0: POKE -16299,0), but does not make it easy to write on this<br />
text page. While our primary interest is in high resolution graphics, the<br />
ability to display text on page 2 is valuable, especially since mixed-textand-graphics<br />
on high resolution page 2 will draw its text portion from<br />
text page 2.<br />
The first problem associated with the use of text page 2 is that it resides<br />
in a portion of memory ($800-$BFF) usually used for Applesoft<br />
BASIC programs. In order to use text page 2 in a BASIC program, it is<br />
necessary to locate the program in some other area of memory. This is<br />
easily done. Memory locations $67 (103) and $68 (104) contain the low<br />
and high bytes, respectively, of the address of the beginning of the Applesoft<br />
program in effect. Thus location 103 usually contains $0 1 (1) and<br />
location 104 usually contains $08 (8). (While the area of memory reserved<br />
for the program begins at $800, location $800 will contain a zero;<br />
the program actually begins at $801.)<br />
If a BASIC program is to use text pages 1 and 2 and high resolution<br />
graphics pages 1 and 2, the first large block of memory available for locating<br />
the program begins at $6000 (24576) . If we wish to enter or load a<br />
program at that address we must set the contents of 103 and 104 to $0 1<br />
(1) and $60 (96) respectively (24576 = 96 x 256). We must also enter the<br />
beginning-of-program code (0) at location $6000 (24576) . To enter a<br />
program at this location, we could type:<br />
POKE 103, 1<br />
POKE 104,96<br />
POKE 24576,0<br />
NEW<br />
then begin typing the new program.
<strong>Graphics</strong> Characteristics of the Apple II<br />
43<br />
To load and run a program at this location, we could type:<br />
PO KE 103,1<br />
PO KE 104,96<br />
PO KE 24576,0<br />
RUN PR OGR AM<br />
The above four lines may be typed from the keyboard, be part of an<br />
Applesoft program, or be EXECed from a text file.<br />
Having identified a means of placing the BASIC program out of the<br />
way of text page 2, we turn to the problem of writing on this text page.<br />
There are two ways of doing so:<br />
1. Printing on text page 1, as usual, then using the machine level<br />
MOVE program to copy the contents of text page 1 onto text page 2;<br />
or<br />
2. Printing dfrectly on text page 2.<br />
In order to use the second method, it is necessary to identify page 2<br />
as the area to be used for printing. Memory location $29 (41) normally<br />
contains numbers between 4 and 7, identifying 1024 memory locations<br />
between $400 and $7FF as the part of memory used for<br />
storing text or low resolution graphics. Loading $29 with 8, 9, 10, or<br />
11 will cause this location to point to $800 through $BFF. Printing<br />
then will be directed to page 2. Unfortunately, location $29 is reset to<br />
a value between 4 and 7 each time a RETURN is encountered (at the<br />
end of each line of a BASIC program). Thus location $29 must be set<br />
immediately before each PRINT to page 2. Program 2.13 illustrates<br />
the method.<br />
Program 2.13: TWO PAGES OF TEXT<br />
1 REM PR OGRAM 2.13 (T WO PAGES OF TEXT )<br />
2 REM ILLUSTRATES PR INT I NG, DISPLAY ING PAGE TWO<br />
OF TEXT<br />
3 REM BE SURE TO SET PROGRAM PO INTERS<br />
4 REM AT LOCAT IONS 103,1 04<br />
5 REM BEFORE LOAD ING OR TYPING THIS PROGR AM<br />
10 HOME : VTAB 10<br />
20 FOR I = 2048 TO 3071: PO KE 1, 1 60: NEXT I<br />
30 PO KE -1 6 299,0<br />
40 SPEED= 55<br />
(continued)
44<br />
<strong>Microcomputer</strong> <strong>Graphics</strong><br />
50<br />
60<br />
70<br />
80<br />
90<br />
1 0 0<br />
1 1 0<br />
1 2 0<br />
130<br />
140<br />
150<br />
160<br />
170<br />
180<br />
190<br />
200<br />
21 0<br />
POKE 41 , PE EK (41 ) + 4: PR INT "WE AR E NOW<br />
PR INTING ON PAG E 2."<br />
POKE 41 , PE EK (41 ) + 4: PR INT "GET READ Y FOR<br />
A CHANGE TO PAG E 1 . "<br />
FOR I = 1 TO 1000 : NEXT I<br />
POKE -1 630 0 ,0: VTAB 10<br />
PR INT "WE AR E NOW PR INTING ON PAG E 1 . "<br />
PR INT "WE WI LL DISPLAY EAC H OF THE TWO"<br />
PR INT "TEXT PAG ES<br />
REPEATEDLY"<br />
PR INT "WH ILE COUNTING FROM 1 TO 40"<br />
sP E ED= 255 Pr1/l<br />
F o R J = 1 To 2 o<br />
't<br />
11n117ed/al:e ly<br />
POKE - 16299,0<br />
VTAB 18: POKE 41 , PE EK (41 ) after<br />
p R I NT 2 * J - 1 set;-t:i1!J<br />
FOR I = 1 TO 1000 : NEXT I<br />
po1ncer<br />
VTAB 18: PR INT 2 * J<br />
(///')<br />
POKE -1 63 00,0 -r./<br />
FOR I = 1 TO 1000 : NEXT<br />
NEXT J<br />
NEGATIVE IMAGES<br />
An Apple high resolution graphics image is a display of the bit patterns<br />
of the numbers contained in a block of the computer's memory. When<br />
an image is being displayed, a pixel which is turned ON corresponds to a<br />
bit which contains a 1. If a pixel is turned OFF, the corresponding bit<br />
contains a 0.<br />
If the contents of the high resolution graphics memory locations are<br />
systematically changed, the displayed image will be changed. The negative,<br />
or complement, of an image will result if all of the ON pixels are<br />
turned OFF and all of the OFF pixels are turned ON. To cause this<br />
change, bit contents must be changed: Os must replace ls and ls must<br />
replace Os. This may be accomplished, for the first page of high resolution<br />
graphics, by<br />
FOR I = 81 92 TO 16383 : POKE I , 255 - PE EK (!) :<br />
NEXT I<br />
or, for the second page of high resolution graphics,<br />
FOR I = 1638 4 TO 24575 : POKE I , 255 - PE EK (!) :<br />
NEXT<br />
I
<strong>Graphics</strong> Characteristics of the Apple II 45<br />
PROGRAMMING AIDS<br />
READING THE KEYBOARD<br />
Interactive programs accept user input by using either the INPUT or the<br />
GET statement. When either of these is used the computer will wait for<br />
user input before continuing with calculation or display of results. There<br />
are occasions when we might pref er to have program execution continue<br />
until a specific key, say ESC, is pressed. This was the case in Program<br />
1.4. Rather than forcing a halt in the graphics display while awaiting<br />
user input, the program looks regularly at the contents of memory location<br />
-16384 (PEEK( -16384)). This memory location receives the result<br />
of any keypress. If ESC is pressed [PEEK( -16384) = 155], the program<br />
is ended (line 120). Otherwise, program execution continues. (For a list<br />
of ASCII keycodes, see the Apple II Reference Manual, page 7 .)<br />
Program line 120 takes care of one other detail. When a key is<br />
pressed, the appropriate code is stored in memory location -16384 and<br />
is retained there. When the results of the keystroke are read, the command<br />
POKE -16368,0 "clears the keyboard strobe," preparing to receive<br />
a new keystroke.<br />
Program 1.9 provides another example of keyboard input without<br />
the use of INPUT or GET statements. Line 70 reads the keyboard; the<br />
result of a keypress, analyzed in lines 80 through 240, is used to control<br />
the behavior of the program.<br />
LONG PROGRAMS<br />
If strings of dots start creeping across the graphics screen during program<br />
execution, or if the end of a program disappears suddenly, it may<br />
be that your program is too long. The strings of dots may be the visible<br />
effect of variables being stored in the part of memory which is used for<br />
high resolution graphics display. If program storage requires more<br />
memory than is available between $800 and $1FFF, then an HGR<br />
command within the program will erase the end of the program.<br />
Prevention of these problems is fairly easy. At any stage of entering<br />
a program, or after it is loaded from disk,<br />
PR INT PEE K (1 75) + 256 * PEEK (1 76)<br />
will give the address of the memory location which contains the end of<br />
the Applesoft program. This address must be sufficiently below 8192
46 <strong>Microcomputer</strong> <strong>Graphics</strong><br />
(the beginning of high resolution graphics page 1) to allow room for<br />
storage of the variables defined in the program. If it appears that insufficient<br />
room is available, take one of the following precautions:<br />
1. Store variables above the graphics page. To do this, define LOMEM<br />
equal to 24576 (to put variables above high resolution graphics page<br />
2) or 16384 (to put variables above high resolution graphics page 1,<br />
but in page 2). The value of LOMEM must be established early in<br />
the program; for example,<br />
1 LOMEM :24576<br />
2. Store the program and variables above the graphics pages. This part<br />
of the computer memory frequently goes unused. The area normally<br />
used for program storage lies between 2048 ($800) and 8191<br />
($1 FFF). There are about 6000 bytes of memory there. However, between<br />
the second page of graphics and DOS, there are nearly 14000<br />
bytes of memory in a 48K RAM system. Locate long programs<br />
there. The process to be followed is the same as described earlier,<br />
under Text Page 2.<br />
NOTES AND SUGGESTIONS<br />
1. The Apple Reference Manual is one of the best references for information<br />
on memory usage. Related articles frequently appear in<br />
magazines such as the Apple Orchard, MICRO, and Nibble. Articles<br />
specific to higher resolution graphics have appeared in Apple Orchard,<br />
Vol. 1, No. 2, and Vol. 2, No. 1. An excellent reference to memory organization<br />
is What's Where in the Apple by W. F. Luebbert.<br />
2. Modify Program 1.9 to respond to<br />
S (save current image on page 2 of high resolution graphics). Use the<br />
memory move subroutine.<br />
T (display the image which is on high resolution graphics page Two).<br />
Use the POKEs for Soft Switches.<br />
0 (display the image which is on high resolution graphics page One).<br />
Use the POKEs for Soft Switches.<br />
R (recopy image from page 2 to page 1). Use the memory move subroutine.<br />
Each of S, T, 0, and R should cause automatic transfer to the C<br />
(cursor) mode.
<strong>Graphics</strong> Characteristics of the Apple II 47<br />
With these keys recognized by the program, it will be possible to:<br />
1. Save partially completed images on page 2, while drawing will continue<br />
on page 1;<br />
2. Compare further work (on page 1) with an earlier effort (on page 2);<br />
3. Return to an earlier version if later work is not satisfactory.<br />
3. Write a FLASHER program, which draws an image on page 1 of<br />
high resolution graphics, places its negative (complement) on page 2,<br />
then flips the display switch between page 1 and page 2 so that the original<br />
and its negative are alternately displayed. It will be necessary to<br />
place a counting loop (FOR I = 1 to 50:NEXT I) between successive<br />
POKEs of the display switch in order to waste a little time. Otherwise<br />
the display screen will not be able to keep up with the computer output.<br />
4. For the FLASHER program, arrange that all drawing and complementing<br />
occur while displaying the text page. Display the graphics<br />
pages only during the flashing part of the program. Allow exit from the<br />
flashing with the pressing of ESC.<br />
5. Write a program that will draw<br />
•<br />
On page 2 of high resolution graphics, the outline of a house (stick<br />
figure style, no windows or doors);<br />
•<br />
On page 3 of high resolution graphics, the above image, with windows,<br />
doors;<br />
•<br />
On page 4 of high resolution graphics, the image on page 3, with an<br />
attached garage at the side;<br />
•<br />
On page 5 of high resolution graphics, the image of page 4, with a<br />
tree (a triangle, Christmas tree style) beside the house.<br />
When the drawings are complete, allow each of the images to be displayed<br />
on receiving a corresponding keypress (use the MOVE routine).<br />
If you are more ambitious, use color graphics to add blue sky, sun,<br />
green grass, driveway, and so forth, to the various images; or provide a<br />
single view for each of the four seasons.
Chapter 3<br />
TEXT on the <strong>Graphics</strong><br />
Screen<br />
Applesoft makes no provision for easy display of text on the graphics<br />
pages. It is possible to display graphics with four lines of text, but this is<br />
not entirely satisfactory. To be effective, labels should be capable of being<br />
positioned among graphic images. Two methods of providing text<br />
are presented below. Example programs are given which may be made<br />
more versatile to suit the needs of the user.<br />
BIT PATTERN TEXT<br />
The character set used on the TEXT page is given on page 14 of the Apple<br />
II Reference Manual. Each character consists of a pattern of white<br />
dots on a matrix of 8 x 7. An enlargement of the letter A is shown in<br />
Figure 3.1.<br />
Figure 3.1<br />
49
50 <strong>Microcomputer</strong> <strong>Graphics</strong><br />
The high resolution graphics page, with a matrix of 280 x 192,<br />
may be divided into 8 x 7 blocks, resulting in 24 rows of 40 blocks<br />
each. A comparison with the dimensions of the TEXT page suggests<br />
a means for providing text on the graphics screen. A process for<br />
duplicating the text character bit patterns onto the graphics screen<br />
would provide labels as desired. Program 3.2 includes a subroutine<br />
that performs this duty. The development of the subroutine rests on a<br />
means of locating the specific byte of memory which corresponds to<br />
a desired screen location, and a means for placing the text character<br />
bit patterns on the screen.<br />
CHARACTERS<br />
It was pointed out in Chapter 2 that the high resolution graphics display<br />
is a map of the contents of a block of computer memory.<br />
To illustrate, consider memory location 8192. This byte of RAM is<br />
displayed at the top left corner of the HGR screen. Assume that the byte<br />
contains the number 67 (POKE 8192,67). In binary notation, the number<br />
67 is represented as 01000011. On the HGR screen the pattern will be<br />
reproduced, in reversed order, as:<br />
Figure 3.2<br />
Note that HGR displays only the lower seven bits of the byte, with the<br />
low order bit first.<br />
Similarly, if 8192 contains the number 87 (binary 01010111), the following<br />
bit pattern will appear at the top left corner of the HGR screen:<br />
Figure 3.3<br />
The block of eight bytes at the top left corner of the graphics screen<br />
are numbered as shown in Figure 3 .4.
TEXT on the <strong>Graphics</strong> Screen<br />
51<br />
8192<br />
t--+-+--+---+--+--1<br />
9216<br />
t--+-+--+---+--+--1<br />
10240<br />
l--+----+---1-----l<br />
11264<br />
l--+----+---1-----l<br />
12288<br />
l--+----+---1-----l<br />
13312<br />
l--+----+---1-----l<br />
14336<br />
15360<br />
t---+--+---+--+---1<br />
Figure 3.4<br />
In order to print the symbol 4 at the top left corner of the screen, we<br />
will arrange for these memory locations to contain the bit patterns<br />
shown in Figure 3. 5.<br />
BIT PATTERN<br />
(reversed)<br />
Binary<br />
Decimal<br />
8192 0000000 0<br />
9216 0010000 16<br />
10240 0011000 24<br />
11264 0010100 20<br />
12288 0010010 18<br />
13312 0111110 62<br />
14336 0010000 16<br />
15360 0010000 16<br />
Figure 3.5
52 <strong>Microcomputer</strong> <strong>Graphics</strong><br />
We can display the number 4 by the following sequence of commands:<br />
HGR: POKE 81 9 2,0: POKE 9216,16: POKE 10240 , 24:<br />
POKE 11264 , 20: POKE 12288,18: POKE 1331 2,62:<br />
POKE 14336 ,16: POKE 15360,16<br />
In a similar fashion we could display other symbols, first drawing<br />
the bit pattern, converting the bit pattern from a binary code to a decimal<br />
number, then POKEing the bit pattern into the appropriate memory<br />
locations . An 8 x 7 pattern is the most easily addressed, but more<br />
elaborate symbols and patterns may be displayed as combinations of<br />
8 x 7 blocks.<br />
While any desired symbol may be displayed, the process is as yet<br />
rather inefficient. We lack a convenient means of accessing the bit patterns<br />
and displaying them on the screen. Several methods are available.<br />
Programs 3 .1 and 3 .2 approach the solution by means of an array<br />
ALOJo(l,J).<br />
Since the standard Apple character set has 64 characters, each having<br />
an eight byte display pattern, the array is dimensioned ALOJo(64,8).<br />
If we number the characters in array so that the symbol 4 is the 20th<br />
character, we should expect to find:<br />
AL%(20,0) = 0<br />
AL%(20,l) = 16<br />
AL%(20,2) = 24<br />
AL%(20,3) = 20<br />
AL%(20,4) = 18<br />
AL%(20,5) = 62<br />
AL%(20,6) = 16<br />
AL%(20,7) = 16<br />
The symbol 4 may be placed at the top left corner of the screen by:<br />
HGR<br />
FOR I = 0 TO 7<br />
ADDR=81 92 + 1* 1 024<br />
POKE ADDR, AL%(20 , I )<br />
NEXT<br />
I<br />
Since the first 32 ASCII values do not correspond to the characters<br />
we normally would want to display, it is convenient to reference the array<br />
entries for a character K$ as:
TEXT on the <strong>Graphics</strong> Screen<br />
53<br />
AL% (CH,0 )<br />
through<br />
where<br />
AL% (CH,7 )<br />
CH = AS C (K$) - 32<br />
One task remains: Identifying the screen locations at which the<br />
character should appear. At this point it would be well to review the<br />
screen addressing pattern used for high resolution graphics.<br />
Figure 3 .4 shows the addresses of the block of eight bytes whose<br />
contents are displayed at the top left corner of HGR. The addresses<br />
range from 8192 through 15360, in increments of 1024. Immediately below<br />
15360, a second block of eight bytes begins, with an initial address<br />
of 8320. The addresses of the bytes in this block range from 8320<br />
through 15488, in increments of 1024. Eight such blocks appear at the<br />
left of the upper third of the screen. The base address of block<br />
1(0 :SI :S 7) is given by the formula:<br />
BA = 81 92 + 128*!.<br />
Within each block, the eight bytes J =<br />
as:<br />
0, 1, 2, . .. , 7 may be addressed<br />
BA + 1024*J<br />
The middle third of the screen is addressed in a similar manner, but<br />
uses a reference of 8232 instead of 8192 (note that 8232 = 8192 + 40).<br />
The lower third has the same structure, using an initial reference of 8272<br />
(note that 8272 = 8192 + 2 x 40).<br />
To identify the address of a memory location whose contents are<br />
displayed along the left side of the HGR screen, it is necessary to determine:<br />
1. Whether the screen location is in the upper, middle, or lower segment;<br />
2. The block desired within each segment;<br />
3. The byte desired within each block.<br />
In order to address the graphics screen for text purposes, we will be concerned<br />
most with steps 1 and 2, since each symbol will make use of all<br />
eight bytes within a block.
54 <strong>Microcomputer</strong> <strong>Graphics</strong><br />
For convenience, the upper, middle, and lower third of the screen<br />
will be referred to as segments 0, 1, and 2 respectively. Similarly, the<br />
eight blocks within each third will be ref erred to as blocks 0 through 7<br />
(top to bottom).<br />
Program 3 .2 uses HT and VT (as in HT AB and VT AB) to identify<br />
the screen location at which text is to be located. Considering VT first,<br />
note that:<br />
VT = 1-8 identifies blocks in segment 0<br />
VT = 9-16 identifies blocks in segment 1<br />
VT = 17-24 identifies blocks in segment 2<br />
As a result, the segment number, SE, may be identified by:<br />
SE = INT((VT - 1 > / 8) .<br />
Within each segment it is necessary to identify the block (BL = 0<br />
through 7) indicated by VT. To this end, note the following association<br />
between VT, SE, and BL:<br />
VT SE BL VT SE BL VT SE BL<br />
l 0 0 9 0 17 2 0<br />
2 0 IO l 18 2<br />
3 0 2 11 2 19 2 2<br />
4 0 3 12 3 20 2 3<br />
5 0 4 13 4 21 2 4<br />
6 0 5 14 5 22 2 5<br />
7 0 6 15 6 23 2 6<br />
8 0 7 16 7 24 2 7<br />
If Applesoft provided a MOD command, the block number could be<br />
calculated as BL = (VT - l)MOD(8). With MOD missing, we have:<br />
BL = VT - 1 - 8* INT((VT - 1 ) / 8)<br />
The base address of each block may be calculated as:<br />
BA = 81 92 + 40*SE + 128*BL<br />
Thus, we can identify:<br />
BA = 81 92 + 40*INT((VT-1 ) / 8) +<br />
128* (VT-1 - INT((VT-1 > / 8) )<br />
Having resolved the addressing of character positions along the left<br />
of the graphics screen, we now turn to the effect of HT. Happily, this is
TEXT on the <strong>Graphics</strong> Screen 55<br />
an easy task since the addresses of adjacent bytes along a horizontal line<br />
differ by 1. The byte identified by a specific VT and HT has base address:<br />
BA = 81 92 + 40*INT ((VT -1 )/8) +<br />
128* (VT-1 - INT (VT-1 )/8) )+ HT - 1<br />
This formula permits the identification of a block position by VT and<br />
HT (as in VT AB, HT AB) as a means to access the base address of the<br />
block. You should confirm its equivalence to the simpler formula:<br />
BA = 8063 + 128*VT - 984*INT ((VT -1 )/8) + HT<br />
IMPLEMENTATION<br />
Having determined a method of placing characters at specific screen<br />
locations, we now turn to the provision of the bit patterns. The use<br />
of an array to store the bit patterns for symbols requires that the array<br />
be made available. Defining the elements of the array within the<br />
program requires a bulky addition to the user program. Accessing the<br />
array by means of a text file is time consuming and is wasteful of<br />
disk space. The approach used below, while unconventional, wastes<br />
little time or space.<br />
Program 3.1 fills a two dimensional integer array AL%(I,J). An<br />
I ( = 0 through 63) identifies each symbol K$ by ASC(K$) - 32. Each<br />
AL%(I,J) (J = 0 through 7) identifies one byte of the bit pattern of the<br />
character I. The DAT A read into the array was identified by first drawing<br />
a character on an 8 x 7 matrix to establish the bit pattern, then converting<br />
the bit pattern from a binary to decimal code. When the array is<br />
filled, it is saved on disk as a binary file (line 90).<br />
A few words about the saving of the array to disk: Memory locations<br />
107 and 108 contain the address of the beginning of the array space<br />
(low order byte first). Memory locations 109 and 110 contain the address<br />
of the end of the array space. The array space is moved upward in<br />
memory as new variables (such as ADDR and LN) are defined, since<br />
simple variables are stored between LOMEM and the array space. It is<br />
thus important that the calculation of the beginning address (ADDR)<br />
and the length (LN) of the block of memory to be BSA VEd not result in<br />
moving the array, and that the array then be stored before any additional<br />
variables are defined. For this reason ADDR and LN are defined in<br />
line 10; the calculation in lines 70 and 80 will not disturb the array space.
56 <strong>Microcomputer</strong> <strong>Graphics</strong><br />
Program 3 .2 demonstrates the use of the array. It must be loaded<br />
from disk and stored in appropriate memory locations, and the array<br />
pointers must be properly set. To this end, ADDR, the destination of<br />
the array (which should follow the simple variables), is read in line 20 of<br />
Program 3 .2. After the array has been loaded (line 30), the length of the<br />
BLOADed file is read from locations 43616 ($AA60) and 43617<br />
($AA61). Finally, the pointers to the end of the array space are set (lines<br />
50, 60). The array is then ready for use.<br />
Program 3 .2 illustrates the use of the symbol-printing subroutine<br />
(lines 210-290). The subroutine receives a string ST$ and horizontal and<br />
vertical tab settings HT and VT. The string is then read, character by<br />
character, and the symbol bit patterns are POKEd into the calculated<br />
memory locations.<br />
The subroutine may be used in graphics programs to place labels at<br />
specified locations on the high resolution screens. Before jumping to the<br />
subroutine, it is necessary to define the label (ST$) and the tab settings<br />
(HT, VT), In setting HT, be careful that the label not run off the right<br />
side of the screen. Otherwise, since the program will not provide a line<br />
feed, the end ofthe label may appear in surprising places. Similarly,<br />
check to assure that the values of HT and VT are in the proper ranges<br />
(1::::; HT::::; 40; 1 ::::; VT::::; 24).<br />
Program 3. 1: BIT PATTERN ALPHABET FILE<br />
1 REM PROGRAM 3.1 (BIT PATTERN ALPHABET FILE)<br />
2 REM SAVES AN ALPHABET FILE ON DISK<br />
10 ADDR = O : L N = 0<br />
20 DIM AL%(64 ,8)<br />
30 FOR I = 0 TO 63<br />
40 FOR J = 0 TO 7<br />
50 READ AL%( I , J)<br />
60 NEXT J, I<br />
70 ADDR = PEEK (107) + 256 * PEEK (108)<br />
80 LN = PEEK (109) + 256 * PEEK (110) - ADDR<br />
90 PRINT CHR$ (4) ; "BSAVE ALPHABET, A";<br />
ADDR; " IL" ; LN<br />
100 END<br />
110 DATA 0,0,0,0,0,0,0,0: REM SPACE<br />
120 DATA 0,8,8,8,8,8,0,8: REM !<br />
130 DATA 0,20,20,20,0,0,0,0: REM<br />
140 DATA 0,20 ,20,62,20,62,20,20: REM #<br />
1 5 0 DATA 0,8,60,10,28,40,30,8: REM $<br />
II
TEXT on the <strong>Graphics</strong> Screen 57<br />
160 DATA 0,6,3 8,1 6,8,4,5 0,48: REM %<br />
170 DATA 0,4,1 0,1 0,4,42,1 8,44: REM &<br />
180 DATA 0,8,8,0,0,0,0,0: REM<br />
I<br />
190 DATA 0,8,4,2,2,2,4,8: REM (<br />
200 DATA 0,8,1 6,3 2,3 2,3 2,1 6,8: REM<br />
21 0 DATA 0 I 8 I 42 I 28 I 8 I 28 I 42 I 8: REM *<br />
220 DATA 0 I 0 I 8 I 8 I 62 I 0 I 0 I 0: REM +<br />
230 DATA o,o,o,o,o, 8,8,4: REM I<br />
240 DATA 0,0,0,0,62,0,0,0: REM -<br />
250 DATA o,o,o,o,o,o,o, 8: REM .<br />
260 DATA 0,0,3 2,1 6,8,4,2,0: REM I<br />
270 DATA 0,28,3 4,5 0,42,3 8,3 4,2 8: REM 0<br />
280 DATA 0 I8I 12 I 8 I 8 I 8 I 8 I 28: REM 1<br />
290 DATA 0,28,3 4,3 2,2 4,4,2,6 2: REM 2<br />
300 DATA 0,62,3 2,1 6,24,3 2,3 4,2 8: REM 3<br />
31 0 DATA 0,1 6,2 4,2 0,1 8,6 2,1 6,1 6: REM 4<br />
320 DATA 0,6 2,2,3 0,3 2,3 2,3 4,2 8: REM 5<br />
330 DATA 0,5 6,4,2,3 0,3 4,3 4,2 8: REM 6<br />
340 DATA 0,62,3 2,1 6,8,4,4,4: REM 7<br />
350 DATA 0,2 8,3 4,3 4,2 8,3 4,3 4,28: REM 8<br />
360 DATA 0,28,3 4,3 4,6 0,3 2,1 6,1 4: REM 9<br />
370 DATA 0,0,0,8,0,8,0,0: REM :<br />
380 DATA 0,0,0,8,0,8,8,4: REM ;<br />
390 DATA 0,1 6,8,4,2,4,8,1 6: REM <<br />
400 DATA 0 I 0 I 0 I 62 I 0 I 62 I 0 I 0: REM<br />
=<br />
41 0 DATA 0,4,8,1 6,3 2,1 6,8,4: REM ><br />
420 DATA 0,28,3 4,1 6,8,8,0,8: REM ?<br />
430 DATA 0,2 8,3 4,4 2,42,26,2,60: REM @<br />
440 DATA 0,8,2 0,3 4,3 4,6 2,3 4,3 4: REM A<br />
450 DATA 0,3 0,3 4,3 4,3 0,3 4,3 4,3 0: REM B<br />
460 DATA 0,2 8,3 4,2,2,2,3 4,2 8: REM c<br />
470 DATA 0,3 0,3 4,3 4,3 4,3 4,3 4,3 0: REM D<br />
480 DATA 0,6 2,2,2,3 0,2,2,62: REM E<br />
490 DATA 0,62 ,2,2,3 0,2,2,2: REM F<br />
500 DATA 0,6 0,2,2,2,5 0,3 4,6 0: REM G<br />
510 DATA 0,3 4,3 4,3 4,6 2,3 4,3 4,3 4: REM H<br />
520 DATA 0 I 28 I 8 I 8 I 8 I 8 I 8 I 28: REM I<br />
530 DATA 0,3 2,3 2,3 2,3 2,3 2,3 4,2 8: REM J<br />
540 DATA 0,3 4,1 8,1 0,6,10,1 8,3 4: REM K<br />
550 DATA 0,2,2,2,2,2,2,62: REM L<br />
560 DATA 0,3 4,5 4,4 2,3 4,3 4,3 4,3 4: REM M<br />
570 DATA 0,3 4,3 4,3 8,4 2,5 0,3 4,3 4: REM N<br />
580 DATA 0,2 8,3 4,3 4,3 4,3 4,3 4,2 8: REM 0<br />
590 DATA 0,3 0,3 4,3 4,3 0,2,2,2: REM p<br />
600 DATA 0,2 8,3 4,3 4,3 4,42,1 8,28: REM Q<br />
(continued)
58 <strong>Microcomputer</strong> <strong>Graphics</strong><br />
61 0 DATA 0,30 ,34,34,30,10,18,34: REM R<br />
620 DATA 0,28,34,2,28,32 ,34,28: REM S<br />
63 0 DATA 0,62,8,8,8,8,8,8: REM T<br />
640 DATA 0,34,34,34,34,34,34,28: REM U<br />
650 DATA 0,34,34,34,34,34,20,8: REM V<br />
660 DATA 0,34,34,34,42,42,54, 5 4: REM W<br />
670 DATA 0,34,34,20,8,20,34,34: REM X<br />
680 DATA 0,34,34,20,8,8,8,8: REM Y<br />
690 DATA 0,62,32,16,8,4,2,62: REM Z<br />
700 DATA 0,62,6,6,6,6,6,62: REM LEFT BRACKET<br />
71 0 DA TA 0,0,2,4,8,16,32,0: REM BACKS LASH<br />
720 DATA 0,62,48,48,48,48,48,62: REM RIGHT<br />
BRACKET<br />
730 DATA 0,0,8,20,34, 0,0,0: REM A<br />
740 DATA o,o,o,o,o,o,o, 6 2: REM UNDERLINE<br />
Program 3.2: BIT PATTERN TEXT FOR THE GRAPHICS PAGE<br />
1 REM PROGRAM 3.2 (BIT PATTERN TEXT FOR THE<br />
GRAPHICS<br />
PAGE)<br />
2 REM DEMONSTRATES PRINTING FOR THE GRAPHICS<br />
PAGE<br />
10 ADDR = O; L N = 0<br />
20 ADDR = PEEK (107> + 256 * PEEK (1 08)<br />
30<br />
40<br />
so<br />
60<br />
PRINT CHR$ (4) ; "BLOAD ALPHABET,A";ADDR<br />
LN=256 * PEEK (4361 7) + PEEK (4361 6)<br />
POKE 110, INT ( ( ADDR + LN) I 256)<br />
POKE 1 0 9,ADDR + LN - 256 * INT ( ( ADDR +<br />
I 256 ><br />
70 HGR : HOME : VTAB 21<br />
80 VT = S: HT = S: ST$ = "BIT PATTERN TEXT FOR<br />
HG R II<br />
90 GOSUB 21 0<br />
100 VT = ?: HT = S: ST$ = "PROVIDING TEXT ,<br />
NUMBERS , AND SYMBOLS"<br />
110 GOSUB 21 0<br />
120 VT = 10:HT = 10:ST$ = "TRY IT ! "<br />
130 GOSUB 21 0<br />
140 VT = 20 : HT = 1 :ST$ = "ENTER :"<br />
150 GOSUB 21 0<br />
160 INPUT "STRING ";ST$<br />
170 INPUT "VTA B ";VT<br />
180 INPUT "HTA B ";HT<br />
190 GOSUB 21 0<br />
200 END<br />
LN )
TEXT on the <strong>Graphics</strong> Screen 59<br />
21 0 BA<br />
=<br />
8063 + 128 * VT - 984 *<br />
INT {(VT - 1 ) I 8) + HT<br />
220 FOR I = 1 TO LEN (S T $)<br />
230 CH<br />
= AS C ( MID$ (S T $, I,1 )) - 32<br />
240 FOR J<br />
=<br />
0 TO 7<br />
250 PO KE BA + 1024 * J,AL% (CH,J )<br />
260 NEXT J<br />
270 BA = BA + 1<br />
280 NEXT I<br />
290 RET URN<br />
NOTES AND SUGGESTIONS<br />
1. There are commercially available programs that make use of the<br />
bit-pattern approach to providing symbols for the graphics page. These<br />
typically come .with several character sets and provide the capability of<br />
adding symbols considered useful by the user. The programs are written<br />
in machine language, and thus are much faster than the ones described<br />
above.<br />
2. The subroutine of Program 3 .2 may be modified to print labels<br />
vertically instead of horizontally. Make the following changes:<br />
21 0 FOR I<br />
=<br />
1 TO LEN (S T $)<br />
220 BA<br />
=<br />
8063 + 128 * VT - 984 *<br />
INT ((VT - 1) I 8) + HT<br />
230 CH<br />
=<br />
AS C ( MID$ (S T $,I,1 ))- 32<br />
240 FOR J<br />
=<br />
0 TO 7<br />
250 PO KE BA + 1024 * J,AL% (CH,J )<br />
260 NEXT J<br />
270 VT = VT + 1<br />
280 NEXT I<br />
290 RET URN<br />
You might find it useful to include two subroutines in a program, one<br />
for horizontal labels, and one for vertical labels.<br />
3. Inverse printing may be achieved: replace line 250 of Program<br />
3.2 with:<br />
250 PO KE BA + 1024*J, 255 - AL% (CH,J )<br />
4. If you want to have symbols printed upside down (why not?) try<br />
the following replacement for line 250:<br />
250 PO KE BA + 1024*J, AL% (CH, 7 - J)
60 <strong>Microcomputer</strong> <strong>Graphics</strong><br />
5. A line feed capability may be added to the subroutine of Program<br />
3.2 by changing lines 210 through 290 to read as follows:<br />
21 0 FOR I = 1 TO LEN (ST$)<br />
220 BA = 8063 + 128 * VT - 984 *<br />
INT ( ( VT - 1 ) I 8) + HT<br />
230 CH = ASC ( MID$ (ST$ , I , 1 ) )<br />
240 FOR J = 0 TO 7<br />
250 POKE BA + 1024 * J, AL%(CH,J)<br />
260 NEXT J<br />
270 HT + HT + 1 : IF HT = 41 THEN HT = 1 :<br />
VT = VT + 1<br />
280 NEXT I<br />
290 RETURN<br />
To protect against an inconvenient break in the middle of a word, you<br />
may add a loop which reads each word (characters between spaces), and<br />
measures its length. If a word length exceeds 40 - HT, it will not fit on<br />
the current line and a line feed is appropriate:<br />
HT = 1 : VT = VT + 1 : GOTO ***<br />
6. You may extend the array AL%(1,J) to include the lower case alphabet<br />
and any special symbols you want to have. If the array is dimensioned<br />
AL%(90,8), with entries Al%(64,J) through AL%(89,J) containing<br />
the bit patterns of the lower case alphabet, the existing subroutine<br />
will print the label "Lower" when provided with the string:<br />
ST$ = "L" + CHR$ (78) + CHR$ (86) +<br />
CHR$ (68) + CHR$ (81 )<br />
7. Numbers defined as part of a string, as in<br />
-<br />
32<br />
ST$ = "X = 45"<br />
are processed properly by the subroutine. To display a number X that is<br />
calculated within the program, use<br />
ST$ = STR$ (X)<br />
8. Printing in HGR2 may be done just as efficiently. The address of<br />
the RAM location which corresponds to the top left corner of the screen<br />
changes from 8192 to 16384. The effect of this change is seen in line 210,<br />
which should (for HGR2) read:<br />
21 0 BA = 16255 + 128 * VT - 984 *<br />
INT ( ( VT - 1 ) / 8) + HT
TEXT on the <strong>Graphics</strong> Screen<br />
61<br />
9. The program will not permit the input of certain symbols (such<br />
as '','' from the keyboard. However, when the symbols are included in<br />
the definition of a string, such as:<br />
ST$ = "A,B"<br />
the subroutine will properly process the symbols.<br />
SHAPE TABLE TEXT<br />
Shape table graphics provides a second way of placing text on the graphics<br />
pages. With the expenditure of additional effort at the preparation<br />
stage, the user can have a symbol-manipulation tool that is in some ways<br />
more powerful and flexible than what is provided by bit patterns.<br />
A shape table is a collection of predefined shapes, or graphic images,<br />
which may quickly be placed at specified locations on a high resolution<br />
graphics page. Accessing shapes for drawing is an easy process.<br />
Each shape is stored in coded form and identified by number. A shape<br />
may be displayed by specifying the shape number N and the desired<br />
screen location (X,Y), through either of the commands:<br />
or<br />
DRAW N AT X,Y<br />
XDRAW N AT X,Y<br />
While either DRAW or XDRA W will display a specified shape at a<br />
desired location, DRAW uses the most recently specified HCOLOR,<br />
while XDRA W displays a shape in the complement of the colors that<br />
currently are in the screen locations the shape is to occupy. As a result,<br />
consecutive XDRAWs cause the display, then erasure, of a shape. Further,<br />
since:<br />
XDRAW N AT X,Y<br />
XDRAW N AT X,Y<br />
(complement colors )<br />
62 <strong>Microcomputer</strong> <strong>Graphics</strong><br />
the type of task that may effectively be handled by the computer. Shape<br />
table programs have been published in computer magazines, and several<br />
are commercially available. A listing of one is given in Appendix 2,<br />
along with a general discussion of shapes.<br />
In this chapter, our interest in shape tables is for the display of text.<br />
We need a shape table in which the shapes are the standard text symbols.<br />
The user may wish to create a shape table for this purpose; however,<br />
Program 3.3 will enter a shape table containing the standard text page<br />
characters. The shapes are numbered by the ASCII character codes as<br />
follows:<br />
Shape number of character K$ = ASC(K$) - 32.<br />
Program 3.3: SHAPE TABLE ALPHABET FILE<br />
1 REM PROGRAM 3 . 3 (SHAPE TABLE ALPHABET FILE)<br />
2 REM SAVES A SHAPE TABLE ALPHABET ON DISK<br />
1 0 FOR I = 24576 TO 25364<br />
20 READ X<br />
30 POKE I , X<br />
40 NEXT I<br />
50 PRINT CHR$ (4) ; "BSAVE SHAPE ALPHABET,<br />
A24576 , L793"<br />
60 END<br />
70 DATA 63 ,0,128, 0,134,0,142,0,157,0:<br />
REM -----------<br />
80 DATA 172,0,185,0,200,0,20 6,0,214,0<br />
90 DATA 222,0,236,0,245 ,0,249 ,0,255 ,0<br />
100 DATA 2,1 ,9,1 ,24,1 ,32,1 ,44 ,1 :<br />
REM<br />
SHAPE TABLE<br />
110 DATA 56,1 ,67,1 , 79 , 1 , 9 3,1 ,102,1<br />
120 DATA 116,1 ,127 ,1 ,133 ,1 ,139 ,1 ,148,1<br />
130 DATA 156 ,1 ,165,1 ,175,1 ,190,1 ,202 ,1 :<br />
REM<br />
ADDRESSING<br />
140 DATA 21 6 ,1 ,228 ,1 ,240 , 1 , 2 54, 1 , 8,2<br />
1 5 0 DATA 19,2,31 ,2,40,2,48,2,61 ,2<br />
160 DATA 70 ,2,82,2,94,2,106 ,2,116,2:<br />
REM<br />
STRUCTURE<br />
170 DATA 130,2,143,2,155,2,163,2,174,2<br />
180 DATA 185,2,198,2,210,2,219,2,231 ,2<br />
190 DATA 245,2,25 3,2,9,3,17,3:<br />
REM -----------<br />
200 DATA 73 ,4,32,36,36,0: REM !<br />
21 0 DATA 9,64,24,32,108,54,4,0: REM<br />
220 DATA 9,36,103,60,5,32, 13,246 ,45 ,23,30 ,45,<br />
23 ,38,0: REM #<br />
II
TEXT on the <strong>Graphics</strong> Screen<br />
63<br />
230 DATA 1,40,53,1 2,1 2,2 8,5 5,28,28,1 2,3 7,2 2,12,<br />
37,0: REM $<br />
240 DATA 73,4 1 ,60,2 23,1 2,12,1 2,5,2 48,3 5,5 5,4,0:<br />
REM %<br />
250 DATA 73,9,2 8,2 8,2 8,2 8,1 00, 21,1 90,2 6,1 74,<br />
101 ,8,4,0: REM &<br />
260 DATA 73,64,2 4,3 2,3 6,0: REM '<br />
270 DATA 73,28,28,3 6,1 2,1 2,4,0: REM (<br />
' _<br />
280 DATA 73,1 2,1 2,3 6,28,28,4,0: REM )<br />
290 DATA 73,3 6,3 6,3 6,141,23,31,28,1 50,98,1 3,21,<br />
4,0: REM *<br />
300 DATA 73,3 2,60,1 11, 41,31,32,4,0: REM +<br />
31 0 DATA 9,1 2,3 6,0: REM I<br />
320 DATA 64,24,4 1,4 5,3 7,0: REM -<br />
330 DATA 73,4,0: REM .<br />
340 DATA 1,96,1 2,1 2,1 2,4,0: REM I<br />
350 DATA 9,4 5,1 2,3 6,3 6,28,63,23,5 4,5 4,1 2,1 2,1 2,<br />
4,0: -REM 0<br />
360 DATA , 45, 28,3 6,3 6,1 8 8,,0: REM 1<br />
370 DATA 719 1 6 ,6,1 p0,1 2,1 0 1,228,3,23,4,0:<br />
REM 2<br />
380 DATA 8,2 1,45,1 ?,2 28,1 0 3,5,3 2,63,3,4,0:<br />
REM 3<br />
390 DATA 73,3,44,31,63,1 00,1 2,1 2 ,5 4,8,0:<br />
REM 4<br />
400 DATA 8,2 1,45,1 2,3 6,2 8,63,3 9,44,4 5,7,G:<br />
REM 5<br />
41 0 DATA 9,4 5,1 2,2 2 8,63,5 5,8,6 4,3,1 2,12,4 5,<br />
4,0: REM 6<br />
420 DATA 9,3 6,1 2,1 2,1 2,60,63,3 9,0: REM 7<br />
430 DATA 9,4 5,1 2,2 2 8,63,23,3 8,6 4,3,1 00,45,21,<br />
38,0: REM 8<br />
440 DATA 41,1 01,1 2,3 6,2 2 8,63,23,1 74,4 5,4,0:<br />
REM 9<br />
450 DATA 73,64,3,4,3 2,0: REM :<br />
460 DATA 9,5,3 2,4,3 2,0: REM ;<br />
470 DATA 73,2 2 5,28,2 8,1 2,1 2,1 2,4,0: REM <<br />
480 DATA 64,45,45,4,5 6,63,3 9,0: REM =<br />
490 DATA 9,1 2,1 2,1 2,28,2 8,2 8,4,0: REM ><br />
500 DATA 73,4,3 2,1 2,1 2,2 8,63,23,4,0: REM ?<br />
51 0 DATA 9,4 5,3 7,64,3,3 6,2 8,63,23,5 4,5 4,7 6,229,<br />
36,0: REM @<br />
520 DATA 33,3 6,1 00,1 2,1 4,1 4,5 4,63,1 11,1 7,3 8,0:<br />
REM A<br />
530 DATA 33,3 6,3 6,44,4 5,2 1,1 90,3 1,1 09,5 0,23,63,<br />
4,0: REM B<br />
(continued)
64 <strong>Microcomputer</strong> <strong>Graphics</strong><br />
540 DATA 73 ,9,184,63,28,36,36,12,45,21 ,4,0:<br />
REM C<br />
550 DATA 33 ,36,36,44,45,21 ,54,54 ,23,63 ; 4,0:<br />
REM D<br />
560 DATA 41 ,45,37 ,192,63,55,38 ,64,3,36,45,<br />
45 ,4,0: REM E<br />
570 DATA 33 ,36,36,44,45,181 , 2 6,63,4,0: REM F<br />
580 DATA 9,45,37,60,223 ,34,36,100,45,37 ,0:<br />
REM G<br />
590 DATA 33 ,36,36,180,10,45,37 ,36,150,50,38,0:<br />
REM H<br />
600 DATA 9,45,28,36,36,60,13,4,0: REM I<br />
61 0 DATA 1 , 168,45,12,36,36,36,0: REM J<br />
620 DATA 33 ,36,36,108,9,23,23,23,21 ,21 ,21 ,4,0:<br />
REM K<br />
63 0 DATA 73 ,9,63,63,36,36,36,4,0: REM L<br />
640 DATA 33 ,36,36,172,21 ,102,96,54,54,54,4,0:<br />
REM M<br />
650 DATA 33 ,36,36,172,170,21 ,149,36,36,36,4,0:<br />
REM N<br />
660 DATA 9,45,12,36,36,28,63,23 ,54,54,4,0:<br />
REM 0<br />
670 DATA 33 ,36,36, 4 4,45,21 ,190,63,4,0: REM P<br />
680 DATA 9,37,168,21 ,4,32 ,36,28,63 ,23,54,<br />
54,4,0: REM Q<br />
690 DATA 33 ,36,36,44,45,21 ,190,63 ,21 ,21 ,21 ,4,0:<br />
REM R<br />
700 DATA 8,21 ,45,12,60,56,231 ,100,45,21 ,4,0: REM<br />
s<br />
71 0 DATA 73 ,36,36,36,63,77,37,0: REM T<br />
720 DATA 9,45,12,36,36,252, 27 ,54,54,38,0:<br />
REM U<br />
730 DATA 73 ,12,12,36,36,22 3,51 ,54,174,4,0:<br />
REM V<br />
DATA 33 ,36,36,108,9,54,54,54,28,28,<br />
180,35 ,0: REM W<br />
DATA 33 ,12,12,28,28,108,9,190,22,21 ,38,0:<br />
REM X<br />
DATA 73 ,36,228,28,108,9,246 ,4,0: REM Y<br />
DATA 73 ,9,63,63,100,12,12,12,60,63,39 ,0: REM<br />
z<br />
DATA 73 ,9,63,63,44,60,44,60 ,44,28,45,<br />
45 ,4,0: REM LEFT BRACKET<br />
DATA 72 ,73,28,28,28,28,4,0: REM BACKS LASH<br />
DATA 41 ,45,3 7,39,37 ,39,37 ,39,25 3,63,4,0: REM<br />
RIGHT BRACKET<br />
DATA 64 ,24,97,12,21 ,21 ,4,0: REM "<br />
DATA 41 ,45,37,0: REM UNDERLINE
TEXT on the <strong>Graphics</strong> Screen<br />
65<br />
The use of a shape table as a means of displaying text requires<br />
t. The availability of the shape table;<br />
2. The identification of the specific shape to be displayed; and<br />
3. The identification of a location at which the shape is to be displayed.<br />
Program 3 .4 illustrates each of these.<br />
Program 3.4: SHAPE TABLE TEXT FOR THE GRAPHICS PAGE<br />
REM PROGRAM 3.4 (SHAPE TABLE TEXT FOR THE<br />
GR APH ICS PAGE )<br />
2 REM DEMON STRATES HIGH RES PR INT ING WITH<br />
SHAPES<br />
1 0 PR INT CHR $ (4 ) ;"BLOAD SHAPE ALPHA BET,<br />
A24576"<br />
20 PO KE 232, PEE K (43634): PO KE 233,<br />
PEE K (4363 5)<br />
30 HOME : HGR : HCOLOR= VTAB 21 : SCALE= 1 :<br />
ROT= 0<br />
HG R II<br />
40 VT = 5:HT = 5:ST$ = "SHAPE TABLE TEXT FOR<br />
60 GOS UB 180<br />
70 VT = ?: HT = 5:ST$ = "PROVIDING TEXT , NUMBERS,<br />
AN D SYMBOLS "<br />
80 GOS UB 180<br />
90 VT = 10:HT = 10:ST$ = "TRY IT!"<br />
100 GOS UB 180<br />
110 VT = 20:HT = 1:ST$ = "ENTER: "<br />
120 GOS UB 180<br />
130 I.NPUT "STR ING ";ST$<br />
140 INPUT "VTAB ";VT<br />
150 INPUT "HTAB ";HT<br />
160 GOS UB 180<br />
170 EN D<br />
180 HT = 7 * (HT - 1 ) :VT = 8 * VT -<br />
190 FOR I = 1 TO LEN (S T $)<br />
200 CH = AS C ( MID$ (S T$,I,1 )) - 32<br />
21 0 IF CH = 0 THEN 230<br />
220 XDR AW CH AT HT,VT<br />
230 HT = HT + 7<br />
240 NEXT I<br />
250 RET URN<br />
The shape table is loaded from disk ig line 10. The destination of the<br />
shape table is somewhat arbitrary (don't load it on top of the program,<br />
in either graphics page, etc.). Line 20 identifies the location of the shape<br />
3:
66 <strong>Microcomputer</strong> <strong>Graphics</strong><br />
table, so that it may be accessed by the XDRA W command. The location<br />
is identified by reading it from 43634 and 43635, which (in a 48K<br />
system) contain the destination address of the file most recently<br />
BLOADed.<br />
In general, location 232 and 233 contain the low and high bytes of<br />
the address of the shape table. A shape table located at address A can be<br />
made accessible by:<br />
= =<br />
POKE 232, A - 256*INT(A/256) : POKE 233 , INT (A/256)<br />
Program line 30 sets SCALE 1 and ROT 0. These two parameters<br />
control the size and position of the :::hapes to be drawn. Each of<br />
these is discussed in the Applesoft Programming Reference Manual.<br />
Program 3 .4 uses values of HT (HT AB) and VT (VT AB) to draw<br />
shapes. This allows the graphics screens to be addressed in the manner<br />
of the text page.<br />
NOTES AND SUGGESTIONS<br />
1. Program 3.4 positions each shape by using HT and VT, which<br />
have the effect provided on the TEXT page by HTAB and VTAB. This<br />
allows 24 lines of text, each having 40 characters. While this typically is<br />
adequate, it does constrain the location of labels unnecessarily.<br />
If line 180 is deleted from the program, values of VT and HT may be<br />
given in the ranges 0 ::; VT::; 191 and 0::; HT::; 279. This allows much<br />
greater flexibility in positioning labels.<br />
For the shape table constructed by Program 3.3, the location<br />
(HT, VT) of a character is actually the location of the bottom left dot of<br />
an 8 x 7 matrix which the character will occupy.<br />
One caution: Shapes will "wrap around" the screen. The command<br />
XDRAW 33 AT 276,10<br />
specifies (276, 10) as the bottom left corner of a 8 x 7 dot matrix. The<br />
right columns of this matrix will be beyond the right boundary of the<br />
screen. They will "wrap around" the screen, appearing on the left.<br />
Similarly,<br />
=<br />
shapes drawn near<br />
=<br />
the top of the<br />
=<br />
screen may wrap around to<br />
the bottom.<br />
2. Sh
TEXT on the <strong>Graphics</strong> Screen 67<br />
3. Shapes may be rotated. Line 40 of Program 3.4 identifies<br />
ROT= 0. If this is changed to ROT= 16, ROT= 32, or ROT= 48, the<br />
shapes drawn will be rotated in a clockwise direction by 90°, 180°, or<br />
270° respectively.<br />
4. Adjusting the subroutine to provide vertical labels is easy: replace<br />
line 230 with:<br />
230 VT = VT + 8<br />
Can you arrange for diagonal labels? For labels printed upside down<br />
and backwards?<br />
5. Shape table text has advantages and disadvantages when compared<br />
with the bit pattern text process described above. One of the advantages<br />
is the ease with which labels may be erased without disturbing<br />
other parts of the graphic display. This allows labels to be changed interactively,<br />
and permits animation of labels or other symbols. See Chapter<br />
8 for an example of shape animation.<br />
6. Several of the remarks associated with the display of bit pattern<br />
text (display of calculated numbers, lower case characters, etc.) are also<br />
applicable to shape table text.
Part Ill<br />
Two-Dimensional<br />
<strong>Graphics</strong>
Chapter 4<br />
Software Tools For<br />
Computer <strong>Graphics</strong><br />
The large station wagon my wife drives has an automatic transmission,<br />
power brakes, power steering, and air conditioning. The car I drive has<br />
none of these. I must change gears as I drive, crank the windows down<br />
in warm weather, and use more muscle to steer and to brake.<br />
We face similar, and perhaps more dramatic, differences if we compare<br />
full-scale graphics computers with the graphics capabilities of a<br />
microcomputer. Some of the built-in gadgetry of the large system is not<br />
available in a microcomputer; other features are available only when<br />
provided by the programmer.<br />
It is the intent of this chapter to provide a description of some of the<br />
''tools of the trade'' of a microcomputer graphics programmer. Each<br />
tool is presented in a form which explains how and why, for those who<br />
are interested. Example programs illustrate the use of the techniques discussed.<br />
SCALING THE SCREEN<br />
It is fairly common to find differences between the horizontal and vertical<br />
scales on a microcomputer display screen. The Apple HPLOT command<br />
is based on a grid of 280 x 192, which suggests that a horizontal<br />
unit is equivalent to 192/280 of a vertical unit. The discrepancy in scaling<br />
is further affected by the adjustment of the display screen.<br />
There are occasions when it is important that the horizontal and vertical<br />
scales be equivalent-that a square appear to have sides of equal<br />
lengths, and that all points of a circle appear to be equidistant from the<br />
center. We can meet this need by scaling points before plotting them.<br />
71
72 <strong>Microcomputer</strong> <strong>Graphics</strong><br />
Since the adjustment of the display device will affect the perceived<br />
scales, it is necessary to determine the scaling factor for each computerdisplay<br />
screen combination. One way to identify the scaling factor is the<br />
following:<br />
1. Plot a square on the screen.<br />
2. Measure the displayed height (H) and width (W) of the "square. "<br />
3. Define SC = H/W.<br />
4. For future plots, multiply the horizontal coordinate by SC before<br />
plotting.<br />
As an example,<br />
1. 10 HGR2 : HCOLOR = 3<br />
20 HPLOT 20,20 TO 180,20 TO 180,180 TO 20 ,180<br />
TO 20 ,20<br />
2. On one computer-screen combination the measured width of the<br />
"square" was 14.1 cm; the measured height was 16.3 cm.<br />
3. SC = H/W = 16.3/14. 1=1.16.<br />
4. To get a better square:<br />
1 0 HGR2: HCOLOR = 3 : SC = 1 . 16<br />
20 HPLOT 20*SC,20 TO 180*SC,20 TO 180*SC ,180<br />
30 END<br />
TO 20*SC ,180 TO 20*SC,20<br />
Note that the value of SC is dependent on the computer-screen combination<br />
being used.<br />
In many applications we need not be careful to have the horizontal<br />
and vertical scales equivalent. In general, the programs used in this book<br />
will not provide for equivalent scales. The equivalence is easily provided<br />
when desired.<br />
CLIPPING AND VIEWPORTS<br />
When specifying points or lines to be plotted, it is necessary to be careful<br />
to plot only those points, or parts of lines, that are visible on the display<br />
screen. The Apple BASIC command<br />
HPLOT 90 ,25 TO 360,175<br />
results in the message<br />
?I LLEGAL QUANTITY ERROR
Software Tools for Computer <strong>Graphics</strong> 73<br />
since the point 360, 175 lies to the right of the screen boundary. In order<br />
to display the visible portion of this line segment, it is necessary to calculate,<br />
or have the computer calculate, the intersection of the line segment<br />
with the screen boundary.<br />
In this case the equation of the line is<br />
Y = 25 + (X - 90)(175 - 25)/(360 - 90), or Y = - 25 + 5(X/9). The<br />
intersection with the right boundary occurs at X = 279. Since<br />
Y - 25 + 5(279/9), we find that the intersection of the line segment<br />
with the screen boundary is at (279,130). We may thus use the<br />
=<br />
command:<br />
HPLOT 90,2 5 TO 279,1 30<br />
CLIPPING<br />
Clipping refers to the process of displaying visible points and parts of<br />
line segments while clipping and discarding points and parts of line segments<br />
that are beyond the screen boundaries. Clipping individual points<br />
is a relatively easy process. The coordinates ofthe point to be plotted are<br />
compared with the screen boundaries; if the point lies outside the screen<br />
boundaries, it is not plotted. In Applesoft BASIC,<br />
100 IF X < 0 OR X > 279 OR Y < 0 OR Y > 191<br />
THEN 120<br />
110 HPLOT X,Y<br />
120<br />
The clipping of line segments is a much more complex task. If one or<br />
both of the endpoints of a line segment lie off screen, it is necessary to<br />
determine the points of intersection of the line segment and the boundaries;<br />
then the points of intersection may be used to plot the visible portion<br />
of the line segment.<br />
The plane of the display screen is divided into nine regions by the<br />
four lines that determine the screen boundaries (see Figure 4.1). Each of<br />
the two endpoints of a line segment must lie in one of the 9 regions. If<br />
both endpoints lie in the center (screen) region, the entire line segment is<br />
visible, and may be plotted. Otherwise the segment must be tested to<br />
determine whether any portion of it is visible.<br />
A line clipping subroutine must systematically determine any points<br />
of intersection of the line segment and the screen boundaries. The seg-
74 <strong>Microcomputer</strong> <strong>Graphics</strong><br />
Point 1<br />
L<br />
R<br />
T<br />
T<br />
DISPLAY SCREEN<br />
Plotted<br />
B<br />
B<br />
Not Plotted<br />
L<br />
Point 2<br />
R<br />
Figure 4.1<br />
ment thus is divided into smaller portions. Any portion of the line segment<br />
which lies on the screen may be plotted; other portions are discarded.<br />
Program 4.1 provides an example of a clipping subroutine applied<br />
to the line segments making up a rectangle. The endpoints identified in<br />
the DATA statements (300-330) are first classified. For endpoint<br />
X(l) , Y(l), four variables are identified. The array values L(l) , R(l),<br />
T(l), B(l) are individually set to 0 if the point X(l), Y(l) lies on the<br />
screen side of lines L, R, T, and B, respectively. If the point lies on the<br />
outside of the lines, the corresponding array values are set to 1. In the<br />
same fashion values for L(2), R(2), T(2), and B(2) are identified. This<br />
initial classification of endpoints takes place in the subroutine of lines<br />
100 through 150.<br />
For example, for the points shown in Figure 4.1,<br />
T(l) = 1<br />
T(2) = 0<br />
L(l) = 1<br />
L(2) = 0<br />
B(l) = 0<br />
B(2) = 1<br />
R(l) = 0<br />
R(2) = 0<br />
The clipping subroutine (lines 200-250) begins by determining<br />
whether the line segment may be discarded. If the endpoints both lie on<br />
the outside of any boundary line, then the corresponding product<br />
L(l) x L(2), R(l) x R(2), T(l) x T(2), or B(l) x B(2) will be 1.
Software Tools for Computer <strong>Graphics</strong> 75<br />
Otherwise, each of the products will be 0. Thus a line segment may be<br />
discarded if the sum L(l) x L(2) + R(l) x R(2) + T(l) x T(2) +<br />
B(l) x B(2) is nonzero (line 200).<br />
Line 210 plots the line segment if both endpoints lie on the screen<br />
side of all of the boundaries. Otherwise, one of the two points (point<br />
I) is identified as lying on the outside of at least one of the boundary<br />
lines.<br />
Lines 220 through 250 will replace point X(l),Y(I) with the point of<br />
intersection of the line segment and one of the screen boundaries. The<br />
newly identified X(l),Y(I) then is routed through the CLASSIFY subroutine<br />
(lines 100-150) and back to the beginning of the CLIP subroutine.<br />
Clipping of a line segment continues until a segment is obtained<br />
which either has both endpoints on the screen (the segment is plotted by<br />
line 210), or has both endpoints on the outside of one of the screen<br />
boundaries (the segment is discarded by line 200).<br />
The line segment PQ shown in Figure 4.2 first would be clipped to<br />
CQ, then to DQ, and finally to DE, which then would be plotted.<br />
p<br />
Q<br />
Figure 4.2
76 <strong>Microcomputer</strong> <strong>Graphics</strong><br />
Program 4. 1: CLIPPING<br />
1 REM PROGRAM 4.1 (CLIPPING)<br />
2 REM EXAMPLE OF USE OF CLIPPING SUBROUTINE<br />
1 0 XR = 279:XL = O:YT = O:YB = 191<br />
20 HGR2 : HCOLOR= 3:SC = 1 . 16<br />
25 REM ****MA IN LOOP<br />
30 FOR J = 1 TO 4: FOR I = 1 TO 2<br />
40 READ X(I) ,Y(I) : GOSUB 100<br />
50 NEXT I<br />
60 GOSUB 200<br />
70 NEXT J<br />
80 END<br />
95 REM **** CLASSIFY SUBROUTINE<br />
100 L(I) = O:R(I) = O:T(I) = O:B(I) = 0<br />
110 IF X(I) < XL THEN L(I) = 1<br />
1 2 0 IF X(I) > XR THEN R(I) = 1<br />
130 IF Y(I) < YT THEN T(I) = 1<br />
140 IF Y(I) > YB THEN B(I) = 1<br />
1 5 0 RETURN<br />
190 GOSUB 100<br />
195 REM **** CLIPPING SUBROUTINE<br />
200 IF L(1 ) * L(2) + R(1 ) * R(2) + T(1 ) * T(2)<br />
+ B(1 ) * B(2) < > 0 THEN RETURN<br />
21 0 I = 1 : IF L(I) + R(I) + T(I) + B(I) = 0<br />
THEN I = 2: IF L(I) + R(I) + T(I) + B(I) = 0<br />
THEN HPLOT X(1 ) ,Y(1 ) TO X(2) ,Y(2) : RETURN<br />
220 IF L(I) = 1 THEN Y(I) = Y(1 ) + (Y(2) -<br />
Y(1 ) ) * (XL - X(1 ) ) I (X (2) - X(1 ) ) :<br />
X(I) = XL: GOTO 190<br />
230 IF R(I) = 1 THEN Y(I) = Y(1 ) + (Y (2) -<br />
Y(1 ) ) * (XR - X(1 ) ) I (X(2) - X(1 ) ) :<br />
X(I) = XR: GOTO 190<br />
240 IF T(I) = 1 THEN X(I) = X(1 ) + (X (2) -<br />
X(1 ) ) * (YT - Y(1 ) ) I (Y(2) - Y(1 ) ) :<br />
Y(I) = YT : GOTO 190<br />
250 IF B(I) = 1 THEN X(I) = X(1 ) + (X (2) -<br />
X(1 ) ) * (YB - Y(1 ) ) I (Y(2) - Y(1 ) ) :<br />
Y(I) = YB : GOTO 190<br />
300 DATA 20 , - 20,300,40<br />
31 0 DATA 20 , - 20 , - 10,120<br />
320 DATA - 10,120,270,180<br />
330 DATA 300,40,270 ,180<br />
The clipping algorithm of Program 4. 1 will noticeably slow the plotting<br />
of large numbers of line segments. Because of this time consideration<br />
we will not use the algorithm if it is practical to assume that all line
Software Tools for Computer <strong>Graphics</strong><br />
77<br />
segments lie on the display screen. In other cases we will use faster, less<br />
accurate clipping processes in order to speed and simplify a program.<br />
(For an example, see Program 5.7.)<br />
VIEWPORTS<br />
The display screen is a viewport through which images can be seen. The<br />
clipping process described above allows you to discard those portions of<br />
an image that are not visible through the viewport. While we usually are<br />
interested in using all of the display screen as a viewport, there may be<br />
times when we want to use only a portion.<br />
By resetting the variables XR, XL, YT, and YB, we may use the clipping<br />
subroutine as a viewport subroutine. For example, with XR = 120,<br />
XL= 25, YT= 130, and YB= 180, the subroutine will display only<br />
those parts of an image that are visible through a viewport in the lower<br />
left part of the display screen.<br />
TRANSFORMATIONS<br />
INTRODUCTION<br />
A 20 x 10 rectangle may be drawn in the upper left portion of the Apple<br />
screen by program 4.2, RECTANGLE 1:<br />
1 REM PR OGRAM 4.2 (R ECTAN GLE 1)<br />
2 REM PLOTS ON E RECTAN GLE<br />
10 HOME : HGR : HCOLOR= 3<br />
20 HPLOT 0,0 TO 20,0 TO 20,1 0 TO 0,1 0 TO 0,0<br />
or by Program 4.3, RECTANGLE 2:<br />
1 REM PROGRAM 4.3 (RECTAN GLE 2)<br />
2 REM PLOTS ON E RECTAN GLE<br />
10 HOME : HGR : HCOLOR= 3<br />
20 READ X,Y: HPLOT X,Y<br />
30 FOR I = 1 TO 4<br />
40 READ X,Y: HPLOT TO X,Y<br />
50 NEXT I<br />
60 DATA 0,0,2 0,0,2 0,1 0,0,1 0,0,0<br />
While Program 4.3 is the longer it is also the more adaptable of the<br />
two. Changes in the DAT A statement will result in other images of sequences<br />
of connected line segments. Of course, Program 4.2 has similar<br />
capabilities. We must look further to see the advantages of the process<br />
used in Program 4.3.
78 <strong>Microcomputer</strong> <strong>Graphics</strong><br />
Program 4.4 generates images of eight rectangles, each derived from<br />
a common DATA statement. In contrast to Program 4.3, which reads<br />
values of X and Y, then plots a point or line segment (HP LOT TO<br />
X,Y), Program 4.4 transforms the coordinates (X,Y) to obtain the<br />
screen coordinates (SX,SY) to be plotted. The size, shape, and location<br />
of the rectangles are controlled through changes in the values of A, B,<br />
C, and D.<br />
Two types of transformations are at work in Program 4.4, REC<br />
TANGLES:<br />
1. The magnitudes of coordinates are controlled by multiplication by<br />
A and C. This is referred to as scaling the image.<br />
2. The location of the image is controlled by the values of B and D.<br />
This is referred to as translating the image.<br />
Program 4.4: RECTANGLES<br />
1 REM PROGRAM 4.4 (RECTANGLES)<br />
2 REM PLOTS 8 RECTANGLES FROM SET OF DATA<br />
1 0 A = 20 :B = O:C = 10:D = 0<br />
20 HOME : HGR : HCOLOR= 3<br />
30 FOR J = 1 TO 8<br />
40 READ X,Y:SX = A * X + B:SY = C * Y + D<br />
50 HPLOT SX ,SY<br />
60 FOR I = 1 TO 4<br />
70 READ X,Y:SX = A * X + B:SY = C * Y + D<br />
80 HPLOT TO SX, SY<br />
90 NEXT I<br />
100 A = A + 15:B = B + 1 5 : C = C + 10:D = D + 10<br />
110 RESTORE<br />
120 NEXT J<br />
130 DATA o,o, 1 , o ,1 ,1 ,0,1 ,o,o<br />
To become more familiar with the scaling and translation transformations,<br />
try the following:<br />
1. Write a program that will draw eight rectangles of varying size, each<br />
with a corner in the top left corner of the screen. (Use scaling, not<br />
translation.)<br />
2. Write a program that will draw eight rectangles, all the same size, in<br />
different regions of the screen. (Use translation, not scaling.)<br />
Transformations are valuable in generating graphics images. While<br />
some introductory work with transformations may be pursued in the
Software Tools for Computer <strong>Graphics</strong> 79<br />
manner of Program 4.4, greater power and versatility will result from<br />
first introducing some related topics: matrices, and homogeneous coordinate<br />
representation of points.<br />
WHAT IS A MATRIX?<br />
A matrix is a rectangular array of numbers, such as:<br />
A= U ) or B = ( -)<br />
We can add matrices:<br />
A=( 3<br />
1 2<br />
4 )+(0 5<br />
-3<br />
2) ( 1+0 2+2 ) ( 1 4 )<br />
- 3 + 5 4 - 3<br />
- 8 1<br />
and multiply matrices:<br />
( )( 2 ) -(<br />
-3<br />
(1)(0) + (2)(5)<br />
-<br />
(3)(0) + (4)(5)<br />
= ( 10 - 4)<br />
20 -6<br />
(1 )(2) + (2)( -3))<br />
(3)(2) + (4)( -3)<br />
A summary of matrix notation and matrix calculation is given in<br />
Appendix 4.<br />
MATRIX REPRESENTATION OF TRANSFORMATIONS<br />
Transformations of points in a two dimensional plane (the display<br />
screen) may be represented as products of points (1 x 2 matrices) with<br />
2 x 2 matrices. For example, we may transform (move) a point (X,Y) to<br />
a new point (X' , Y') as follows:<br />
(X,Y) ( )= (AX+ CY, BX+ DY)= (X', Y')<br />
Thus, for each point (X, Y), we identify a transformed point<br />
(X,Y)' = (X' ,Y') = (AX+ CY, BX+ DY).<br />
Clearly, the effect of a transformation is determined by the choice<br />
of values for A, B, C, and D. Program 4.5 accepts values for A, B,<br />
C, and D, then shows the effect of the transformation on the points<br />
of a square. We will ușe the program to illustrate several transformations.
80 <strong>Microcomputer</strong> <strong>Graphics</strong><br />
Identity<br />
The matrix<br />
represents the identity transformation. Since<br />
(X,Y) ( ) = (X,Y)<br />
the identity transformation leaves points unchanged.<br />
Running Program 4.5 and identifying A = 1, B = 0, C = 0, and<br />
D = 1, will result in a display of a square, modified by the identity transformation<br />
(i.e. , unmodified). See Figure 4.3.<br />
Figure 4.3
Software Tools for Computer <strong>Graphics</strong><br />
81<br />
Program 4.5: MATRIX<br />
1<br />
2<br />
REM PR OGRAM 4.5 (MATR IX)<br />
REM SHOWS EFFECT OF A 2x2 TRANS FORMAT ION<br />
MAT R IX<br />
10 ex = 140 :CY = 96 :SC = 1 . 16<br />
20 XR = 279 :XL = O:YT = O:YB = 191<br />
30<br />
40<br />
50<br />
60<br />
70<br />
80<br />
90<br />
100<br />
11 0<br />
120<br />
130<br />
140<br />
150<br />
160<br />
170<br />
180<br />
190<br />
200<br />
21 0<br />
220<br />
2- 3 0<br />
TEXT : HOME<br />
INPUT<br />
II<br />
A =<br />
INPUT<br />
II<br />
B =<br />
INPUT<br />
II<br />
c =<br />
INPUT<br />
II<br />
D =<br />
II ; A<br />
II ; B<br />
II<br />
; c<br />
";D<br />
HGR : HCOLOR= 6<br />
HPLOT 0,96 TO 279, 96 : HPLOT 140,0 TO 140,<br />
191<br />
HCOLOR = 3<br />
FOR S = 1 TO 4<br />
F 0 R . I = 1 TO 2<br />
READ X,Y<br />
TX = A * X + C * Y:TY = B * X + D * Y<br />
X(I ) = SC * TX + CX :Y(I ) = CY - TY<br />
GOS UB 300<br />
NEXT I<br />
GOS UB 380<br />
NEXT S: RESTORE<br />
VTAB 21 : PR INT "A B"; TAB ( 1 1 ) ; A;<br />
TAB (20 ) ; B<br />
VTAB 22 : PR INT TAB ( 8) ; 11= 11<br />
VTAB 23 : PR INT "C D" ; TAB ( 1n;c;<br />
TAB (20 ) ; D<br />
VTAB 24: PR INT "PRES S I N I FOR NEW MATR IX;<br />
'ESC ' TO END" ;<br />
240 VTAB 10: GET A$ : IF A$ = "N " THEN 30<br />
250 IF AS C (A $) = 27 THEN TEXT : HOME : EN D<br />
260 GOTO 240<br />
270 DATA 0,0,40,0,40,0,40,40,40,4 0 ,0,4 0,0,4 0,<br />
280<br />
290<br />
300<br />
310<br />
320<br />
330<br />
340<br />
350<br />
0,0<br />
EN D<br />
REM **** CLASS IFY SUBROUT INE<br />
L( I) = O:R(I) = O:T XR THEN R (I ) = 1<br />
IF y (I ) < YT THEN T (I ) = 1<br />
IF y (I ) > YB THEN B (I ) = 1<br />
RET URN<br />
= 0<br />
(continued)
82 <strong>Microcomputer</strong> <strong>Graphics</strong><br />
360 GOSUB 300<br />
370 REM **** CLIPPING SUBROUTINE<br />
380 IF L ( 1 ) * L( 2) + R ( 1 ) * R(2) + T ( 1 ) * T(2)<br />
+ B ( 1 ) * B(2) < > 0 THEN RETURN<br />
390 I =<br />
1 : IF L(I) + R (I) + T( I) + B (I) =<br />
0<br />
THEN I<br />
=<br />
2: IF L( I) + R (I) + T (I) + B (I) =<br />
0<br />
THEN HP LOT XC1 > ,Y(1 ) TO X(2) ,Y(2) : RETURN<br />
400 IF L(I) =<br />
1 THEN y (I)<br />
= y ( 1 ) + (Y (2)<br />
y ( 1 ) ) * (XL<br />
-<br />
x ( 1 ) ) I ( x ( 2 )<br />
-<br />
X(1 ) ) :<br />
x (I) =<br />
XL: GOTO 360<br />
41 0 IF R (I) = 1 THEN y (I)<br />
= y ( 1 ) + (Y (2)<br />
y ( 1 ) ) * (XR<br />
-<br />
x ( 1 ) ) I (X(2)<br />
-<br />
XC1 > ) :<br />
x (I) =<br />
XR: GOTO 360<br />
420 IF T( I) = 1 THEN x (I) = x ( 1 ) + (X(2)<br />
-<br />
x ( 1 ) ) * (YT y ( 1 ) ) I (Y(2)<br />
y (I) =<br />
YT : GOTO 360<br />
-<br />
Y(1 ) ) :<br />
43 0 IF B (I) = 1 THEN x (I) = x ( 1 ) + (X(2)<br />
x ( 1 ) ) * (YB<br />
y (I) =<br />
YB: GOTO 360<br />
-<br />
y ( 1 ) ) I (Y(2)<br />
-<br />
Y(1 ) ) :<br />
-<br />
-<br />
-<br />
-<br />
Scaling<br />
Scaling may be controlled by a diagonal matrix. Note that:<br />
(X,Y) ( g) = (AX,DY).<br />
The diagonal entries of the matrix thus may be used to provide independent<br />
scaling in the direction of each of the coordinate axes. For example,<br />
we may scale (stretch) points in the X direction by a factor of 2<br />
through multiplication by<br />
( )<br />
(See Figure 4.4).<br />
Run Program 4.5, identifying A = 2, B = 0, C = 0, and D = 1.<br />
To scale (shrink) points in the direction of the Y axis by a factor of<br />
115, multiply by<br />
( .)
Software Tools for Computer <strong>Graphics</strong><br />
83<br />
(figure 4.5). Overall scaling is provided by the matrix<br />
( )<br />
In Program 4.5, try a variety of values for A and D. Keep B = 0 and<br />
c = 0.<br />
Reflection<br />
Reflection of an object through the Y axis or X axis refers to the<br />
process of generating a mirror image of the object on the opposite side<br />
of the respective axis. A little thought will show that the matrices<br />
( -1 0 ) (1 0 )<br />
0 1 and 0 -1 _<br />
Figure 4.4
84 <strong>Microcomputer</strong> <strong>Graphics</strong><br />
Figure 4.5<br />
represent reflections through the X axis and Y axis respectively. Transformation<br />
through the origin (0,0) is represented by the matrix<br />
(-1 0)<br />
0 -1<br />
Note that these reflections are essentially scalings for which the scale<br />
factor is negative.<br />
Reflection of images through other lines is possible, but the matrices,<br />
in general, are not so easy to identify. The process of reflection<br />
through an arbitrary line will be discussed below, in the section Combinations<br />
Of Transformations.<br />
Shear<br />
The effect of the matrix
Software Tools for Computer <strong>Graphics</strong> 85<br />
on the points of the square of Program 4.5 is shown in Figure 4.6. Algebraically,<br />
(X ' ,Y ') = (X,Y) ( \ ) 5 = (X,l.5X + Y).<br />
The transformation is referred to as a Y shear (or shear in the direction<br />
of Y). An X shear is represented by matrices of the form:<br />
Run Program 4.5, identifying A, B, C, and D so as to define several<br />
shears.<br />
Rotation<br />
The points of an image may be rotated counterclockwise by multiplying<br />
the points by the matrix:<br />
( )<br />
coso SINO -SINO coso<br />
NOTE: The symbol 0 is the Greek letter theta. Many math books<br />
use such letters for angles, although they could just as well use English<br />
letters (e.g. , SINA). In BASIC, we'll use TH or THETA instead<br />
of 0. We'll also use parentheses, so SIN 0 will be written in BASIC<br />
programs as SIN(TH).<br />
The effect of the components of the matrices for scaling, reflection,<br />
and shear were fairly easy to identify. The components of the rotation<br />
matrix are less obvious. First note that<br />
(A, B) = (1, 0) ( )<br />
and<br />
(C, D) = (0, 1) ( )<br />
Thus, the first row of the matrix of a transformation shows the effect<br />
the transformation has on the point (1,0), and the second row of the matrix<br />
shows the effect the transformation has on the point (0, 1).
86<br />
<strong>Microcomputer</strong> <strong>Graphics</strong><br />
Figure 4.6<br />
(-sin IJ, cos IJ) (0, I)<br />
cos e<br />
Figure 4.7<br />
From trigonometry we observe that the rotation of (1,0) through a<br />
counterclockwise angle () yields the point (COSO,SINO), while rotation<br />
of (0, 1) through the same angle yields ( -SINO,COSO).
Software Tools for Computer <strong>Graphics</strong><br />
87<br />
NOTE: The trigonometry functions SIN and COS may be used to<br />
represent ratios of sides of a right triangle. These right triangle relationships<br />
provide the justification for the above results.<br />
b<br />
SIN(A) = <br />
c<br />
COS(A) = <br />
c<br />
The matrix which represents the rotation is thus<br />
( coso SINO )<br />
- SINO coso<br />
Figure 4.8 shbws the result of using Program 4.5 with A = COS(.5)<br />
= .878, B = SIN(.5) = .479, C = - SIN(.5) = - .479, and D =<br />
COS(.5) = .878.<br />
Figure 4.8
88 <strong>Microcomputer</strong> <strong>Graphics</strong><br />
NOTE: In BASIC, angles must be measured in radians. A radian is<br />
about 57 .3 degrees. The exact relation is that 2 7r radians = 360°, so 1<br />
radian = 360/6.2832° = 57 .2956°. A more complete description of<br />
radian measure is given in Appendix 5.<br />
We now may use matrices to represent the following transformations:<br />
identity, scale, reflection, shear, and rotation. Still others may be<br />
derived, either through the process used to justify the rotation matrix,<br />
or by combining the existing transformation matrices.<br />
Example: Define transformation T to consist of rotating through a<br />
counterclockwise angle of () = .4 radians followed by scaling the X component<br />
by a factor of 2.<br />
The rotation may be accomplished by<br />
(X ' Y') = (X Y) ( COS(.4) SIN(.4)<br />
)<br />
' ' -SIN(.4) COS(.4)<br />
and the scaling by<br />
(X 11 ,<br />
y 11) = (X 1 , y 1 ) ( )<br />
or, replacing (X ' ,Y'),<br />
(X11 Y11) = [(X Y)(<br />
COS(.4)<br />
SIN(.4) )] (<br />
2 0)<br />
' ' -SIN(.4) COS(.4) 0 1<br />
,<br />
= (X Y)[( COS(.4) SIN(.4)<br />
' -SIN(.4) COS(.4) 0 1<br />
= (X Y) ( )<br />
2COS(.4) SIN(.4)<br />
'<br />
-2SIN(.4) COS(.4)<br />
) ( 2 O)]<br />
The matrix of transformation T is<br />
( 2COS(.4) SIN(.4) ) ""' ( 1.842 .389 )<br />
-2SIN(.4) COS(.4) -.779 .921<br />
NOTE:<br />
In BASIC, 2COS(.4) would have to be written as<br />
Z*COS C.4)
Software Tools for Computer <strong>Graphics</strong> 89<br />
The matrix of a series of sequentially applied transformations is the<br />
product of the matrices of the transformations. When calculating the<br />
product, one must be careful to have the matrices in the proper order. In<br />
general, matrix products are not commutative (i.e., the principle<br />
AB= BA does not always hold). Note that we get a transformation T *<br />
that is very different from T if we first scale the X component by a factor<br />
of 2, then rotate through a counterclockwise angle of () = .4.<br />
Suggestion: Show that the matrix of the transformation T * described<br />
above is<br />
( 1.842<br />
-.389<br />
.779)<br />
.921 .<br />
One serious deficiency exists in our present ability to represent transformations<br />
by matrices: each of the transformations we have considered<br />
Figure 4.9a) Effect of T on the square of Program 4.5<br />
Figure 4.9b) Effect of T* on the >quare of Program 4.5
90 <strong>Microcomputer</strong> <strong>Graphics</strong><br />
is centered at (0,0) . Stated differently, if each of the transformations is<br />
applied to (0,0), the result is (0,0) ; the point (0,0) is invariant under the<br />
transformations. In the long term, this is not a healthy position. Rotation<br />
through a counterclockwise angle () is rotation about the point (0,0) .<br />
Rotation about other points is not available. Similarly, reflections may<br />
be through the X axis, the Y axis, or the origin, but not through other<br />
points or lines.<br />
As a step in developing the ability to remove the zero-centered nature<br />
of transformations, we now will introduce homogeneous coordinates.<br />
HOMOGENEOUS COORDINATES<br />
The two-coordinate representation of points is a convenient and efficient<br />
reference system for points in a plane. A reference point (the origin)<br />
is established, and a pair of directed perpendicular lines intersecting<br />
at the origin is chosen as the coordinate axes. Each point in the plane is<br />
then associated with the ordered pair of its directed distances from these<br />
coordinate axes.<br />
The homogeneous coordinate representation of points in a plane<br />
associates, with each point (A,B), an ordered triple (P,Q,R), with P, Q,<br />
and R chosen so that A = P /R and B = Q/R.<br />
The homogeneous coordinate representation of a point is not<br />
unique. The point (2,5), for example, may be identified as (4,10,2),<br />
(-20, -50, - 10), (2. 1,5.25,1.05), or (2,5,1), among others. We will<br />
use the representation (2,5,1) and, in general, will refer to (A,B,1) as<br />
the normalized homogeneous coordinate representation of the point<br />
(A,B). As a result, the point with homogeneous coordinates (P,Q,R)<br />
has normalized form (P/R,Q/R,1) and Cartesian coordinates<br />
(P/R,Q/R).<br />
When using the normalized homogeneous coordinates (A,B,1) of<br />
the point (A,B), we may consider the third coordinate to be an appendage.<br />
While unnecessary at times, homogeneous coordinates add to our<br />
·<br />
ability to represent transformations as matrix products.<br />
The most obvious effect of the introduction of homogeneous coordinates<br />
is that our previous matrix representations of transformations<br />
must be upgraded. This is easily done, since each of the earlier matrices:<br />
( ) becomes ( )
Software Tools for Computer <strong>Graphics</strong> 91<br />
Translation<br />
The problem which led to the introduction of homogeneous coordinates<br />
is easily addressed by adding translation to the list of transformations.<br />
By "translate through (H,K)" we intend that the points of an<br />
object be moved horizontally through H units and vertically through K<br />
units. While translations previously could not be represented by matrices,<br />
homogeneous coordinate representation of points adds the transformation<br />
matrix:<br />
( )<br />
H K 1<br />
Multiplying the point (X,Y,1) by this matrix yields (X + H,Y + K,1).<br />
COMBINATIONS OF TRANSFORMATIONS<br />
Many transformations cannot be represented by one of the matrices described<br />
above, but are combinations of several. For example, the rotation<br />
transformation matrix represents a rotation about the origin<br />
through a counterclockwise angle e. We will now obtain the matrix of a<br />
rotation about the point (20,20) through a counterclockwise angle of<br />
30°.<br />
The rotation transformation matrix represents a rotation which is<br />
centered at (0,0). A rotation centered at (20,30) may be effected by<br />
1. Translating (20,30) to the origin (translating the origin to<br />
( -20, -30). The matrix of this transformation is<br />
T =<br />
( <br />
-20<br />
0 0)<br />
1 0 .<br />
-30 1<br />
2. Rotation through 30°. The transformation matrix is<br />
(<br />
cos 30°<br />
R = -SI 30°<br />
SIN 30° 0) ( .866<br />
cos 30° 0 = -.5<br />
0 1 0<br />
3. Translate (0,0) to (20,30) in order to restore the system to its original<br />
position:<br />
T * =<br />
( )·<br />
20 30 1
92 <strong>Microcomputer</strong> <strong>Graphics</strong><br />
Thus a point (X, Y) may be rotated through 30° about the point (20,30)<br />
to a position (X ' ,Y') by the sequence (X ' ,Y' ,1) = (X,Y,l)TRT * .<br />
Rather than multiplying (X,Y,l) by the three matrices, we might<br />
first multiply the matrices together to obtain M = TRT * . Then,<br />
(X ' ,Y' ,1) = (X,Y,l)M. In this case,<br />
( 0)<br />
.866 .5<br />
M =<br />
.866 0<br />
l . 8 -5.98 1<br />
and (X ' ,Y ' ,1) = (. 866X - .5Y + 17.68, .5X + .866Y - 5.98, 1).<br />
Products of the transformation matrices for homogeneous coordinates<br />
will always be of the form<br />
( 0)<br />
A B<br />
C D 0<br />
H K 1<br />
and the effect of the transformations on a point (X, Y) may be described<br />
by<br />
(X ' ,Y ' ,1) = (X,Y,l) ( i<br />
H K 1<br />
or X' =AX+ CY + H and Y' =BX+ DY + K.<br />
To illustrate the effects of such transformations, we may use Program<br />
4.6, which is a modification of Program 4.5. Then, by providing<br />
values for A, B, C, D, H, and K, we will see the effect of a transformation<br />
on a square. Figure 4. 10 shows the effect of the transformation of<br />
the example above.<br />
Program 4.6: HOMOGENEOUS COORDINATES<br />
1 REM PROGRAM 4.6 (HOMOGENEOUS COORDINATES)<br />
2 REM ILL USTRATES EFFECT OF 3x3 TRANSFORMATION<br />
MATRIX<br />
1 0 ex = 140:CY = 96 :SC<br />
=<br />
1 . 1 6<br />
20 XR =<br />
279:XL = O:YT<br />
= O:YB<br />
= 1 91<br />
30 TEXT : HOME<br />
40 INPUT<br />
so INPUT<br />
60 INPUT<br />
70 INPUT<br />
80 INPUT<br />
II<br />
II<br />
II<br />
II<br />
II<br />
A<br />
= II ; A<br />
B = II ; B<br />
c = II ; c<br />
D = II ; D<br />
H = II ; H
Software Tools for Computer <strong>Graphics</strong><br />
93<br />
90 INPUT II K = ";K<br />
100 HGR : HCOLOR = 6<br />
110 HPLOT 0,96 TO 279,96: HPLOT 140,0<br />
TO 140,1 91<br />
120 HCOLOR= 3<br />
130 FOR S = 1 TO 4<br />
140 FOR I = 1 TO 2<br />
150 READ X,Y<br />
160 TX = A * X + C * Y + H:<br />
TY = B * X + D * Y + K<br />
170 X(l ) = SC * TX + CX: Y(l ) = CY - TY<br />
180 GOS UB 320<br />
190 NEXT I<br />
200 GOS UB 400<br />
21 0 NEXT S: RESTORE<br />
220 VTAB 21: PR INT "A B"; TAB ( 1 1 > ; A; TAB<br />
( 20) ; B<br />
230 VTAB 22: PR INT "C D" ; TAB ( 8 ) ; 11 =11 ; TAB<br />
( 1 1 ) ; C; TAB ( 20) ;0<br />
240 VT AB 23: PR INT "H K" ; TAB ( 1 1 > ; H; TAB<br />
( 20) ;K<br />
(continued)
94 <strong>Microcomputer</strong> <strong>Graphics</strong><br />
250 VTAB 24: PRINT "PRESS 'N' FOR NEW MATRIX;<br />
' E SC'<br />
TO END";<br />
260 VTAB 10: GET A$ : IF A$ = "N" THEN 30<br />
270 IF ASC (A$) = 27 THEN TEXT : HOME : END<br />
280 GOTO 260<br />
290 DATA 0,0,40,0,40,0,40,40,40,40,0,40,0,40, 0,0<br />
300 END<br />
31 0 REM **** CLASSIFY SUBROUTINE<br />
320 l(I) = O:R(I) = O:T(I) = O:B(I) = 0<br />
330 IF X(I) < XL THEN l(I) = 1<br />
340 IF X(I) > XR THEN R(I) = 1<br />
350 IF Y(I) < YT THEN T(I) = 1<br />
360 IF Y(I) > YB THEN B(I) = 1<br />
370 RETURN<br />
380 GOSUB 320<br />
390 REM **** CLIPPING SUBROUTINE<br />
400 IF l(1 ) * L(2) + R(1 ) * R(2) + T(1 ) *<br />
T(2) + B(1 ) * B(2) < > 0 THEN RETURN<br />
41 0 I = 1 : IF L(I) + R(I) + T(I) + B(I) = 0<br />
THEN I = 2: IF l(I) + R(I) + T(I) + B(I) = 0<br />
THEN HPLOT XC1 ) ,Y(1 ) TO X(2) ,Y(2) : RETURN<br />
420 IF L(I) = 1 THEN Y(I) = Y(1 ) + (Y (2) -<br />
Y(1 ) ) * (XL - XC1 ) ) I CX (2) - X(1 ) ) :X(I) =<br />
XL: GOTO 380<br />
43 0 IF R(I) = 1 THEN Y(I) = YC1 ) + (Y(2) -<br />
Y(1 ) ) * (XR - X(1 ) ) I (X (2) - X(1 ) ) :X(I) =<br />
XR: GOTO 380<br />
440 IF T(I) = 1 THEN X(I) = X(1 ) + (X(2) -<br />
X(1 ) ) * (YT - YC1 > ) I CYC2) - Y(1 > ) :<br />
Y(I) = YT : GOTO 380<br />
450 IF B(I) = 1 THEN X(I) = X(1 ) + (X (2) -<br />
X(1 ) ) * CYB - Y(1 ) ) I (Y(2) - Y(1 ) ) :Y(I) =<br />
YB: GOTO 380<br />
As a second example of the use of transformation matrices, we will<br />
work through the development of a program which draws a sequence of<br />
nested hexagons to generate the image in Figure 4. 11.<br />
We will center the hexagon at the origin (0,0) and provide one of the<br />
six vertices. Since consecutive vertices of the hexagon are separated by a<br />
central angle of 60°, the second vertex will be derived by rotating the first<br />
through 60°. The third then will be calculated by rotating the second vertex<br />
through 60°. In this manner, we will obtain vertices 4, 5, and 6.<br />
The matrix of the rotation transformation is<br />
( cose SINO o)<br />
R = -SNO cse .
Software Tools for Computer <strong>Graphics</strong> 95<br />
Figure 4.1 1<br />
At each stage of calculation, we obtain the coordinates (XN, YN) of the<br />
next vertex from the coordinates of the current vertex by (XN, YN, 1)<br />
= (X,Y,l)R, so that<br />
XN = X*COS CTH) - Y*S IN (TH)<br />
YN = X*S IN (TH) + Y*COS CTH)<br />
Since the calculations of sine and cosine are time consuming, we will do<br />
this only once, identifying C = COS(60°) and S = SIN(60°). The calculation<br />
of (XN,YN) then becomes:<br />
XN = X*C-Y*S<br />
YN = X*S +Y*C<br />
Locating the hexagon's center at (0,0) is convenient for use of the rotation<br />
transformation, but inconvenient for use with the Apple II display
96 <strong>Microcomputer</strong> <strong>Graphics</strong><br />
x<br />
DISPLAY<br />
SCREEN<br />
y<br />
Figure 4.12<br />
screen: most of the vertices will be off-screen, as indicated in Figure<br />
4.12.<br />
Before the points of the hexagon may be.plotted, they must be translated<br />
to an onscreen location. Each point may be translated through<br />
(CX, CY) by multiplication by the matrix<br />
( 1 0 0)<br />
0 1 0 .<br />
ex CY 1<br />
At this point we may draw a single hexagon using the following program:<br />
Program 4.7: HEXAGON<br />
1 REM PROGRAM 4.7 (HEXAGON)<br />
2 REM DRAWS A SINGLE HEXAGON<br />
10 PI = 3.14159<br />
20 C = COS (Pl I 3) :S = SIN CPI/3)<br />
40 X = 95 :Y = O : C X = 140:CY = 96 :SC = 1 . 16<br />
50 HGR2 : HCOLOR= 3<br />
70 FOR I = 0 TO 6<br />
80 SX = X * SC + CX : SY = CY + Y<br />
90 IF I = 0 THEN HPLOT SX ,SY<br />
100 HPLOT TO SX ,SY<br />
110 XN = X * C - Y * S:Y = X * S + Y *<br />
C:X = XN<br />
120 NEXT I
Software Tools for Computer <strong>Graphics</strong> 97<br />
We will add program lines to provide a sequence of hexagons nested<br />
within this first one, each slightly smaller than the previous one, and<br />
each slightly rotated.<br />
The size of the hexagons may be controlled by multiplication by the<br />
matrix<br />
(SF 0 0)<br />
0 SF 0<br />
0 0 1<br />
where SF is a scale factor of our choice. To rotate each hexagon slightly,<br />
we again will use the rotation transformation matrix with a new value<br />
for e.<br />
The transition from one hexagon to the next (scaling, rotation) is effected<br />
by<br />
or<br />
(XN,YN,1) =<br />
(SF<br />
(X,Y,1) <br />
o o) ( cose s1Ne o)<br />
0<br />
si -sNe cse<br />
XN = X*S F*COS (TH) - Y*S F*S IN CTH)<br />
YN = X*S F*S IN CTH) + Y*S F*COS (TH)<br />
Having identified one point on the next hexagon, we then use Program<br />
4.7 to draw the hexagon.<br />
1<br />
Program 4.8: HEXAGON DESIGN<br />
The sequence of hexagons is drawn by Program 4.8.<br />
1 REM PROGRAM 4.8 (HEXAGON DES IGN)<br />
2 REM DRAWS A SEQUENCE OF SPIRALLING HEXAGON S<br />
10 PI = 3.14159<br />
20 C = COS CPI I 3):S = SIN (P l I 3)<br />
30 C1 = COS (P l I 36) :S1 = SIN (P l I 36) :S F =<br />
.95<br />
40 X = 95:Y = O: CX = 140 :CY = 96:SC = 1 . 16<br />
50 HGR 2 : HCOLOR= 3<br />
60 FOR J = 1 TO 40<br />
70 FOR I = 0 TO 6<br />
80 SX = X * SC + CX: SY = CY + Y<br />
90 IF I = 0 THEN HPLOT SX,S Y<br />
(continued)
98 <strong>Microcomputer</strong> <strong>Graphics</strong><br />
100 HPLOT TO SX,SY<br />
110 XN = X * C - Y * S:Y = X * S + Y * C:X = XN<br />
1 2 0 NEXT I<br />
130 XN = SF * (X * C1 - Y * S1 ) :Y = SF *<br />
(X * S1 + y * en :X = XN<br />
140 NEXT J<br />
NOTES AND SUGGESTIONS<br />
1. Adapt Program 4. 7 so that it will draw a pentagon or an octagon.<br />
Modify it again to ask for N, the number of sides, then draw an N<br />
sided polygon.<br />
2. Write a program to draw your initials on the graphics screen.<br />
Then, by using appropriate transformations, have the initials drawn:<br />
a. at 3 locations on the screen (use translation);<br />
b. rotated through 45° (use rotation);<br />
c. upside down (use reflection);<br />
d. in three sizes (use scaling).<br />
3. Start with a program that draws a design on the screen (such as<br />
Program 4.8). Modify it to provide a viewport feature. Arrange it so<br />
that the design is drawn twice (without erasing in between):<br />
a. with the viewport in the upper right portion of the screen, say<br />
(XR = 250, XL = 140, YT = 5, YB = 80);<br />
b. with the viewport in the lower left portion of the screen, say<br />
(XR = 130, XL = 90, YT = 90, YB = 150) .
Chapter 5<br />
Analytic Geometry And<br />
Computer <strong>Graphics</strong><br />
Figure 5.1<br />
99
100 <strong>Microcomputer</strong> <strong>Graphics</strong><br />
One of the topics in high school mathemadcs is the sketching of graphs.<br />
It is a part of analytic geometry, the study of processes for stating<br />
mathematical relationships both algebraically (or analytically) and<br />
graphically.<br />
The pages ahead will mimic portions of a course in analytic geometry,<br />
but will leave the calculation and plotting to the computer while we<br />
focus on the design.<br />
COORDINATE AXES<br />
Analytic geometry is often called "coordinate geometry" because of its<br />
reliance on a coordinate axis system. Students in analytic geometry begin<br />
by drawing a pair of directed perpendicular lines intersecting in the<br />
middle of the page, as suggested in Figure 5.2.<br />
A coordinate axis system is provided in the Apple high resolution<br />
display screen, but its location and orientation differs somewhat from<br />
that which is shown below. The Apple coordinate system is shown in<br />
Figure 5.3.<br />
We can reorient and relocate points so that they may be identified<br />
relative to a centrally located, Y-upward, X-rightward coordinate system.<br />
First, provide the lines for the coordinate axes:<br />
HPLOT 140,0 TO 140,191 : HPLOT 0,96 TO 279 ,96<br />
Next, identify the center of the coordinate system:<br />
CX=1 40 :<br />
CY=96<br />
Figure 5.2
Analytic Geometry and Computer <strong>Graphics</strong><br />
101<br />
Apple II<br />
<strong>Graphics</strong><br />
Display<br />
Figure 5.3<br />
Then replace HPLOT X,Y with HPLOT X + CX,CY - Y for all future<br />
plots. The HPLOT command now will accept points (X,Y) with<br />
-140:s;X:s;139 and -96 :s;Y:s;95.<br />
Note that by replacing HPLOT X,Y with HPLOT X + CX,<br />
CY - Y, we have effected a transformation: reflection through the X<br />
axis, followed by translation through CX,CY. The matrix of the reflection<br />
is<br />
rn 0 ) -1<br />
0<br />
and the matrix of the translation is<br />
The product of the matrices is<br />
and<br />
(c 0<br />
1<br />
( )<br />
0<br />
(X,Y,l) -1<br />
<br />
ex<br />
CY<br />
n<br />
(c 0 ) -1<br />
CY<br />
CY<br />
(X + CX,CY - Y,l).
102 <strong>Microcomputer</strong> <strong>Graphics</strong><br />
For specified values of X and Y, we may identify the screen coordinates<br />
(SX,SY) relative to the centered coordinate system by calculating<br />
SX = X + CX and SY = CY - Y or, if we wish to use a scaling factor<br />
SC, SX = SC* X + CX and SY= CY - Y. We will use this latter form<br />
for most of the example programs in this chapter.<br />
LINES<br />
Aside from the point, the simplest geometric object is the line, algebraically<br />
represented by Y MX + B. Mis the slope of the line, providing a<br />
=<br />
measure of its steepness; Bis the value of Y at the point of intersection<br />
of the line and the Y axis. The following brief program will sketch the<br />
graph of Y = .4X + 20 on the coordinate axis system described above.<br />
Program 5. 1: LINES<br />
1 REM PROGRAM 5.1 (LINES)<br />
2 REM LINE Y = MX+B<br />
10 HGR2 : HCOLOR= 2<br />
20 HPLOT 140 , 0 TO 140 , 191 : HPLOT 0 , 96 TO 279 , 96<br />
30 HCOLOR= 3:CX = 140:CY = 96<br />
40 X = -1 4 0:Y = .4 * X + 20<br />
50 SX = X + CX :SY = CY - Y<br />
60 HPLOT SX, SY<br />
70 X = 139:Y = . 4 * X + 20<br />
80 SX = X + CX :SY = CY - Y<br />
90 HPLOT TO SX , SY<br />
Program 5 .1 functions adequately for the line in question. However,<br />
because we have not used a scaling factor SC, the line may not appear to<br />
have the proper slope. Furthermore, a line such as Y = 2X + 20 would<br />
identify off-screen points for X = - 140 and X = 139. Some form of<br />
clipping is in order. The clipping process of Chapter 4 works well in this<br />
case. With the essential portions of Program 4.1 added, the line generating<br />
program is as follows:<br />
Program 5.2: CLIPPED LINE<br />
1 REM PROGRAM 5.2 (CLIPPED LINE)<br />
2 REM I L L USTRATES USE OF LINE CLIPPING<br />
SUBROUTINE<br />
10 XR = 279:XL = O:YT = O:YB = 191
Analytic Geometry and Computer <strong>Graphics</strong> 103<br />
20 HGR2 : HCOLOR = 2: SC = 1.16<br />
30 HPLOT 140,0 TO 140,191: HPLOT 0,96 TO 279,96<br />
40 HCOLOR= 3: CX = 140: CY = 96<br />
50 I = 1: X = - 140: Y = .4 * X + 20: X(I) = SC * X<br />
+ CX: Y(I) = CY - Y: GOSUB 100<br />
60 I = 2: X = 139: Y = .4 * X + 20: X(I) = SC * X +<br />
CX: Y(I) = CY - Y: GOSUB 100<br />
70 GOSUB 200<br />
80 END<br />
95 REM **** CLASSIFY SUBROUTINE<br />
100 L (I) = O: R(I) = O: T(I) = O: B(I) = 0<br />
110<br />
IF x (I) < XL THEN L (I) = 1<br />
120 IF x (I) > XR THEN R (I) = 1<br />
130 IF y (I) < YT THEN T( I) = 1<br />
140 IF y (I) > YB TH EN B (I) = 1<br />
150 RETURN<br />
190 GOSUB 100<br />
195 REM **** CLIPPING SUBROUTINE<br />
200 IF L(1) * L(2) + R(1) * R(2) + T(1) * T(2)<br />
+ B(1) * B(2) < > 0 THEN RETURN<br />
210 I = 1: IF L(I) + R(I) + T(I) + B(I) = 0 THEN<br />
I = 2: IF L(I) + R(I) + T(I) + B(I) = 0 THEN<br />
HPLOT X(1),Y(1) TO X(2),Y(2): RETURN<br />
220 IF L(I) = 1 THEN Y(I) = Y(1) + (Y(2) -<br />
Y(1)) * (XL - X(1)) I (X(2) - X(1)): X(I) =<br />
XL: GOTO 190<br />
230 IF R(I) = 1 THEN Y(I) = Y(1) + (Y(2) -<br />
Y(1)) *
104 <strong>Microcomputer</strong> Graphic<br />
Program 5.3: LINE<br />
1 REM PROGRAM 5.3 (LINE)<br />
2 REM DRAWS LINE SLOWLY<br />
10 HGR2 : HCOLOR= 3<br />
20 X1 = 10:Y1 = 150:X2 = 250 :Y2 = 50<br />
30 DX = X2 - X1 :DY = Y2 - Y1<br />
40 HPLOT X1 , Y1<br />
50 FOR T = 0 TO 1 STEP .0 01<br />
60 HPLOT TO X1 + T * DX , Y1 + T * DY<br />
70 NEXT T<br />
In drawing from (Xl, Yl) to (X2, Y2) it is necessary for X to change<br />
by an amount DX = X2 - Xl, and for Y to change by an amount<br />
DY = Y2 - Yl. Rather than have the changes occur all at once (as in<br />
HP LOT X 1, Y 1 TO X2, Y2), the loop in lines 50 through 70 takes the<br />
changes in 1000 small increments. Control of the step size in this loop<br />
provides control of the rate of movement along the line.<br />
CIRCLES<br />
A circle is described as the set of all points (X, Y) at a fixed distance (R)<br />
from the center (H,K). Algebraically, we have (X - H)2 + (Y - K)2 =<br />
R2• For a circle with its center at (0,0), the equation becomes<br />
x2 + y2 = R z (Equation 5 .1)<br />
There are several methods of using this relationship between X and<br />
Y to generate the image of a circle on the graphics screen. Three are presented<br />
below.<br />
RECTANGULAR COORDINATE METHOD<br />
The relation X2 + Y2 = R2 may be decomposed into the two functions<br />
YP --./R2 - X2 and YN = = ---./R2 - X2• The following program will<br />
. generate a sketch of the circle X2 + Y2 8100, using the above two<br />
=<br />
functions:<br />
Program 5 • .4: CIRCLE 1<br />
1 REM PROGRAM 5.4 (CIRCLE 1 )<br />
2 REM RECTANGULAR COORDINATE CIRCLE<br />
1 0 ex = 140:cY = 96<br />
20 DEF FN YP(X) = SQR (81 00 - X * X)
Analytic Geometry and Computer <strong>Graphics</strong> 105<br />
30 DEF FN YN(X) = -SQR (8100 - x * X)<br />
40 HGR2 : HCOLOR= 3<br />
so x = 90: Y = O: SX = x + CX: SY = CY - y<br />
60 HP LOT SX,SY<br />
70 FOR x = 80 TO -90 STEP -10<br />
80 y = FN YP(X)<br />
90 sx = x + CX: SY = CY - y<br />
100 HP LOT TO SX,SY<br />
11 0 NEXT x<br />
120 FOR x = - 80 TO 90 STEP 1 0<br />
130 y = FN YN(X)<br />
140 sx = x + CX: SY = CY - y<br />
150 HP LOT TO SX,SY<br />
160 NEXT x<br />
170 END<br />
Two features of the image should attract immediate attention:<br />
1. Scaling. The circle does not appear ''circular.'' The fault lies with<br />
the Apple high resolution screen. (See Chapter 4 for a discussion.)<br />
The cure is to multiply the X coordinate of point (X, Y) by a scaling<br />
factor before plotting.<br />
2. Angularity. The program draws an upper semicircle (lines 50-110)<br />
and a lower semicircle (lines 120-160). The ends of each of these<br />
semicircles have an angular appearance. One cure for the problem is<br />
to choose a smaller step size for the point generating loop, thus having<br />
a larger number of points calculated. This will result in a<br />
smoother circle. Unfortunately, some time will be wasted in calculating<br />
additional points for the middle sections of the semicircles,<br />
which already have a smooth appearance.<br />
The fault for the angularity lies with the point generating loops,<br />
which space points at equal distances as measured by increments in<br />
the X-coordinates, rather than at equal distances around the arc of<br />
the circle. To see more clearly the lack of uniform spacing, replace<br />
lines 100 and 150 with<br />
100 HPLOT SX,SY<br />
150 HPLOT SX,SY<br />
POINT GENERATION BY ANGULAR INCREMENTS<br />
The angularity in the image generated by the above program resulted<br />
from calculating points which were not evenly spaced around the arc of<br />
the circle. We consider here a technique which provides for equally<br />
spaced points.
106 <strong>Microcomputer</strong> <strong>Graphics</strong><br />
From trigonometry, we have, for a point (X, Y) on the circle<br />
x2 + y2 =<br />
R z ,<br />
X = RCOS(O)<br />
Y RSIN(O)<br />
=<br />
(Equations 5 .2)<br />
with 8 measured as indicated in Figure 5.4.<br />
Program 5. 5 makes use of these formulas to sketch a circle using<br />
equally spaced points.<br />
Program 5.5: CIRCLE 2<br />
1 REM PROGRAM 5.5 (CIRCLE 2)<br />
2 REM DRAWS CIRCLE USING ANGULAR INCREMENTS<br />
1 0 ex = 140:CY = 96 :SC = 1 . 16:FL = O:R = 90<br />
20 HGR2 : HCOLOR= 3<br />
30 FOR T = 0 TO 6.4 STEP .3<br />
40 X = R * COS (T) :Y = R * SIN (T)<br />
50 SX = SC * X + CX :SY = CY - Y<br />
60 IF FL = 1 THEN 80<br />
70 HPLOT SX, SY : F L = 1<br />
80 HPLOT TO SX, SY<br />
90 NEXT T<br />
y<br />
x<br />
Figure 5.4
Analytic Geometry and Computer <strong>Graphics</strong> 107<br />
The choice of SC (line 10) is dependent on the equipment in use (see<br />
Chapter 4).<br />
Before the command HPLOT TO may be used to draw a line segment,<br />
it is necessary that HPLOT or a previous HPLOT TO provide<br />
a point for the beginning of the line segment. In Program 5.3, an<br />
initial HPLOT was provided in line 60. Program 5.4 used a flag (variable<br />
FL) to identify whether an initial point had been provided<br />
(FL = 1) or not (FL = 0). This allows the point generating loop to<br />
handle all plotting.<br />
RECURSIVE GENERATION OF POINTS<br />
Program 1. 7 in Chapter 1 sketched a circle. The process used is derived<br />
from the one just described, but is organized to calculate points more<br />
rapidly.<br />
The repeated calculation of values for COS(O) and SIN(O) consumes<br />
a large amount of time. The process presented here requires the calculation<br />
of the sine and cosine of only one angle.<br />
We could number the points generated for use in sketching an image.<br />
In Program 5.5, 22 points are calculated. They would be numbered<br />
as (Xi.Y1), (X2,Y2), (X3,Y3), • • • (X22,Y22). Two consecutive points<br />
(Xn,Yn) and (Xn + 1.Yn + 1) are related by<br />
Xn = RCOS(O)<br />
Yn = RSIN(O)<br />
Xn + 1 = RCOS(O + DO)<br />
Yn + 1 = RSIN(O +DO),<br />
where DO is the value of the step size for the point generating loop.<br />
From trigonometry, we get<br />
Xn + 1 = RCOS(O + DO) = RCOS(O)COS(DO) - RSIN(O)SIN(DO)<br />
= XnCOS(DO) - YnSIN(DO), and<br />
Yn + 1 = RSIN(O +DO)= RSIN(O)COS(DO) + RCOS(O)SIN(DO)<br />
= YnCOS(DO) + XnSIN(DO).<br />
By calculating COS(DO) and SIN(DO) only once and providing initial<br />
values for Xn and Y n• we can use the above formulas to provide successive<br />
values for Xn + 1 and Y n + 1• To incorporate the formulas into a program<br />
we write [using DT for DO, C for COS(DO), and S for SIN(DO)],<br />
T = X* C - Y*S: Y = Y* C + X*S: X=T
108 <strong>Microcomputer</strong> <strong>Graphics</strong><br />
Note that it is necessary to use the variable T as a temporary stand-in for<br />
X until a new value for Y is calculated. Program 5.6 illustrates the process.<br />
Program 5.6: CIRCLE 3<br />
1 REM PROGRAM 5.6 (CIRCLE 3)<br />
2 REM RECURSIVELY CALCULATES POI NTS ON A CIRCLE<br />
10 ex = 140:CY = 96 :SC = 1 . 16:X = 90 :Y = O:FL = 0<br />
20 OT = .1 : C = COS (OT ) :S = SIN (OT ) :N = 6.4 I OT<br />
30 HGR2 : HCOLOR= 3<br />
40 FOR I = 1 TO N<br />
50 T = X * C - Y * S:Y = Y * C + X * S:X = T<br />
60 SX = SC * X + CX :SY = CY - Y<br />
70 IF FL = 1 THEN 90<br />
80 HPLOT SX , SY : F L = 1<br />
90 HPLOT TO SX, SY<br />
100 NEXT I<br />
Each of the circle generating programs has centered the circle at the<br />
origin (0,0). We may generate a circle having center at point (H,K) by<br />
translation of each of the points to be plotted. Each point (X, Y) may be<br />
translated to (X + H, Y<br />
(<br />
+ K) by<br />
0)<br />
the matrix product<br />
1 0<br />
(X,Y,1) 0 1 0 = (X + H,Y + K,1).<br />
H K 1<br />
We may include the translation in Program 5.6 by changing line 60 to<br />
read<br />
60 sx = SC* (X+H) + ex: SY = CY - (Y+K)<br />
CLIPPING<br />
Translating the circle, or choosing larger values for the circle radius,<br />
may lead to calculation of points that are at off screen locations. The<br />
clipping routine described at the beginning of Chapter 4 may be used in<br />
any of the circle generating programs. However, testing each line segment<br />
for intersection with each of the screen boundaries is a time consuming<br />
task when the number of points is large. We obtain effective line
Analytic Geometry and Computer <strong>Graphics</strong> 109<br />
clipping at a smaller cost in time by discarding line segments that have at<br />
least one off screen endpoint, as in the following modification of Program<br />
5.6.<br />
Program 5.7: CLIPPED CIRCLE<br />
1 REM PROGRAM 5.7 (CLIPPED CIRCLE)<br />
2 REM DRAWS A TRANSLATED CIRCLE<br />
10 H = -40: K = 20<br />
20 ex = 140: CY = 96: SC = 1.16: X = 90: Y = O: FL = 0<br />
30 OT = .1 : C = COS (OT) : S = SIN (OT) : N = 6.4 I DT<br />
40 HGR2 : HCOLOR= 3<br />
50 FOR I = 1 TO N<br />
60 T = X * C - Y * S: Y = Y * C + X * S: X = T<br />
70 SX = SC * (X + H) + CX: SY = CY - (Y + K)<br />
80 IF SX < 0 OR SX > 279 OR SY < 0 OR SY > 191<br />
THEN FL = 0: GOTO 120<br />
90 IF FL = 1 THEN 110<br />
100 HPLOT SX,SY: FL = 1<br />
110 HPLOT TO SX,SY<br />
120 NEXT I<br />
Line 80 causes plotting of a segment to cease if off screen points are encountered.<br />
Note that FL is reset to zero so that the first onscreen point<br />
will result in an HP LOT rather than an HP LOT TO.<br />
ELLIPSES<br />
Elementary school students are sometimes taught (in art or math class)<br />
that they can draw an ellipse by using a pencil, two thumbtacks, and a<br />
length of string. The procedure is as follows:<br />
1. Using the thumbtacks, fasten the ends of the string to a piece of<br />
paper or cardboard (but not to the dining room table). The thumbtacks<br />
must be positioned so that some slack remains in the<br />
string.<br />
Figure 5.5
110 <strong>Microcomputer</strong> <strong>Graphics</strong><br />
2. Place a pencil point against the string, pulling it taut.<br />
Figure 5.6<br />
3. Keeping the pencil erect and the string taut, draw a curve on the<br />
paper through all points that the pencil can reach. The resulting<br />
curve is an ellipse.<br />
Figure 5.7<br />
The shape of the ellipse obtained is dependent on the location of the<br />
thumbtacks and the length of the string. (The ratio of the length of the<br />
string to the distance between the thumbtacks is an item of value to students<br />
of analytic geometry.)<br />
We describe the relationship between the thumbtacks, the length of<br />
string, and the associated ellipse by saying that
Analytic Geometry and Computer <strong>Graphics</strong><br />
Ill<br />
An ellipse is the set of points for which the sum of the distances<br />
from two fixed points (the thumbtacks) is a constant (the length of<br />
the string). Each of the fixed points (thumbtacks) is called a focus<br />
(plural: foci) of the ellipse.<br />
Our interest in ellipses is related to a desire to obtain images of pleasing<br />
or useful curves. We will want to be able to identify ellipses by specifying<br />
a size, shape, and location.<br />
In the ellipse shown in Figure 5.8, it is conventional to identify the<br />
coordinates of point C (the center) as (H,K); the distance AC ( = BC) is<br />
usually designated by A; and the distance EC ( = CD) is usually identified<br />
as B. (In case you are interested, the foci (thumbtacks) are located<br />
on the line segment AB at a distance ,,)A2 - B2 from the center. The<br />
length of the string is 2A.) With this notation, the ellipse is represented<br />
algebraically by<br />
(X - H)2 + (Y - K)2 - 1<br />
-<br />
A2 B2<br />
(Equation 5.3)<br />
While this equation for an ellipse is the form most commonly seen<br />
and accurately represents the points of an ellipse, other equations are<br />
available that are more effective for our purposes.<br />
y<br />
D<br />
A<br />
C(H,K)<br />
B<br />
x<br />
E<br />
Figure 5.8
112 <strong>Microcomputer</strong> <strong>Graphics</strong><br />
ELLIPSE WITH CENTER AT (0,0)<br />
We may simplify the algebra, and our programming, by working with<br />
ellipses centered at the point (0,0) (The translation transformation will<br />
allow easy relocation). Equation 5.3 then becomes<br />
x2 y2<br />
A2 + = 1 (Equation 5.4)<br />
B2<br />
The use of this equation for plotting purposes results in the problem<br />
associated with the use of X2 + Y2 = R2 for the representation of a circle-the<br />
image will have angular components unless the number of<br />
points plotted is quite large.<br />
The following are algebraically equivalent to equation 5.4:<br />
X = ACOS(O)<br />
Y = BSIN(O), for 0:50< 2?r (Equations 5.5)<br />
These equations are easily programmed, as Program 5.8 suggests.<br />
Program 5.8: ELLIPSE 1<br />
1 REM PROGRAM 5.8 (ELLIPSE 1 )<br />
2 REM DRAWS AN ELLIPSE CENTERED ON SCREEN<br />
1 0 ex = 140:CY = 96 :SC = 1 . 16:FL = 0: A = 90 :<br />
B = 50<br />
20 HGR2 : HCOLOR= 3<br />
30 FOR TH = 0 TO 6.4 STEP . 3<br />
40 x = A * co s (TH) :Y = B * SIN CT H)<br />
50 sx = SC * x + CX :SY = CY<br />
60 IF sx < 0 OR sx > 279 OR SY < 0 OR SY > 1 91<br />
THEN FL = 0: GOTO 100<br />
70 IF FL = 1 THEN 90<br />
80 HP LOT SX , SY : F L = 1<br />
90 HP LOT TO SX , SY<br />
100 NEXT TH<br />
-<br />
y<br />
TRANSLATION AND ROTATION<br />
Changing the values of A and Bin the above program will result in a variety<br />
of ellipses. The orientation and location of the image is limited,<br />
however. The center always will be at (0,0) and the axis of the ellipse<br />
(line AB of Figure 5 .8) always will be parallel to either the horizontal or
Analytic Geometry and Computer <strong>Graphics</strong><br />
113<br />
the vertical coordinate axis. We can add variety by rotating and translating<br />
the image.<br />
The rotation of points through an angle of measure 8 is represented<br />
by the transformation matrix<br />
( )<br />
COS(O) SIN(O) o<br />
-SIN(O) COS(O) 0<br />
0 0 1<br />
The matrix of translation through<br />
(<br />
(H,K)<br />
0)<br />
is<br />
1 0<br />
0 1 0<br />
H K 1<br />
The rotation of an image through an angle of measure 8, followed<br />
by the<br />
(<br />
translatipn of the result<br />
0) (<br />
through<br />
0)<br />
(H,K),<br />
(<br />
is represented by<br />
O)<br />
COS(O) SIN(ll) 1 0 COS(O) SIN(ll)<br />
-SIN(O) COS(O) 0 0 1 0 = -SIN(O) COS(O)<br />
0 0 1 H K l H K<br />
The transformation<br />
(<br />
of a point (X,<br />
0)<br />
Y) results in<br />
COS(ll) SIN(ll)<br />
(X,Y,1) -SIN(ll) COS(O) 0 =<br />
H K 1<br />
(XCOS(O) - YSIN(ll) + H,XSIN(O) + YCOS(O) + K,1).<br />
Adding this transformation to Program 5. 8 yields<br />
Program 5.9: ELLIPSE 2<br />
1 REM PROGRAM 5.9 (ELLIPSE 2)<br />
2 REM ROTATION; TRANSLATION<br />
10 ex = 140: CY = 96: SC = 1.16: FL = O: A = 90:<br />
B = 50<br />
20 H = 10: K = 30: T = . 3: c 1 = cos ( T):<br />
S1 = SIN (T)<br />
30 HGR2 : HCOLOR= 3<br />
40 FOR TH = 0 TO 6.4 STEP . 3<br />
50 x = A * cos (TH): Y = B * SIN (TH)<br />
(continued)
114 <strong>Microcomputer</strong> <strong>Graphics</strong><br />
60 X1 = X * C1 - Y * S1 + H:<br />
Y1 = X * S1 + Y * C1 + K<br />
70 SX = SC * X1 + CX :SY = CY - Y1<br />
80 IF SX < 0 OR SX > 279 OR SY < 0 OR SY > 191<br />
THEN FL = 0: GOTO 120<br />
90 IF FL = 1 THEN 110<br />
100 HPLOT SX, SY : F L = 1<br />
110 HPLOT TO SX, SY<br />
120 NEXT TH<br />
MORE TRANSFORMATIONS<br />
We may consider an ellipse to be a deformed circle. By scaling (stretching)<br />
a circle in the direction of the X or Y axis we may change the circle<br />
to an ellipse. For example, a circle of radius 1 (X2 + Y2 = 1) may be<br />
stretched into the ellipse<br />
x2 y2<br />
A2 + B2 = 1<br />
A, by scaling the X components by and the Y components by B (compare<br />
equations 5.2 with equation<br />
(A<br />
5.5) The<br />
0)<br />
matrix of such a scaling is<br />
0<br />
0 B 0<br />
0 0 1<br />
By scaling, rotating, and translating the image of Program 5. 7, we obtain<br />
the following ellipse sketching program:<br />
Program 5.10: ELLIPSE 3<br />
1 REM PROGRAM 5.10 (ELLIPSE 3)<br />
2 REM ELLIPSE AS A TRANSFORMED CIRCLE<br />
1 0 ex = 140:CY = 96 :SC = 1 . 16:X = 1 : Y = O:FL = 0<br />
20 A = 90 :B = 50<br />
30 OT = . 1 : C = COS (OT ) :S = SIN (OT ) :N = 6.4 I<br />
OT<br />
40 H = 10:K = 30 :T = .3:S1 = SIN (T) :C1 = COS<br />
(T)<br />
50 HGR2 : HCOLOR= 3<br />
60 FOR I = 1 TO N<br />
70 T = X * C - Y * S:Y = Y * C + X * S:X = T<br />
80 X1 = X* A * C1 - Y * B * S1 + H:Y1 = X * A *<br />
S1 + Y * B * C1 + K
Analytic Geometry and Computer <strong>Graphics</strong> 115<br />
90 SX = SC * X1 + CX: SY = CY - Y1<br />
100 IF SX < 0 OR SX > 279 OR SY < 0 OR SY > 191<br />
THEN FL = 0: GOTO 140<br />
110 IF FL = 1 THEN 130<br />
120 HPLOT SX,SY: FL = 1<br />
130 HPLOT TO SX,SY<br />
140 NEXT I<br />
150 END<br />
PARAMETRIC EQUATIONS<br />
Equations such as<br />
X = T2 + 10<br />
Y = T2 - lOT<br />
are called parametric equations. They make use of a parameter, T, to<br />
calculate values of X and Y. Although we have not used the word parameter<br />
before, you might recognize the technique. Program 5.5 used<br />
the parametric equations<br />
X =<br />
Y =<br />
R COS(T)<br />
R SIN(T)<br />
with R = 90 to draw a circle. Some of the ellipse programs also used<br />
parametric equations.<br />
Applications of mathematics to science, engineering, and business<br />
frequently use parametric equations because the parameter and the values<br />
of X and Y are important to the application. We have used parametrically<br />
defined relations between X and Y primarily because they enabled<br />
us to obtain smooth curves while reducing calculation time. They<br />
also will permit us to sketch some pleasing and exotic curves.<br />
Program 5 .11 sketches the graph defined by the equations<br />
X = 50 SIN(2(T - l<br />
))<br />
Y = --70 COS(T)<br />
This pair of equations is a special case of the more general pair<br />
X = ASIN(B(T ))<br />
-<br />
Y = DCOS(T)<br />
for which we have chosen A= 50, B = 2, C = 13, D = -70. Try a few<br />
other selections for A, B, C, and D.
116 <strong>Microcomputer</strong> <strong>Graphics</strong><br />
Program 5. 11: PARAMETRIC<br />
1 REM PROGRAM 5.11 (PARAMETRIC )<br />
2 REM DRAWS LISSAJOUS FIGURES<br />
1 0 ex = 140:CY = 96 :SC = 1 . 16:FL = 0<br />
20 PI = 3.141 5 9<br />
30 A = SO:B = 2:C = 13:0 = -70<br />
40 HGR2 : HCOLOR= 3<br />
50 FOR T = 0 TO 6.3 STEP .1<br />
60 X = A * SIN (B * (T PI I C) ) : Y = D * COS<br />
( T )<br />
70 SX = SC * X + CX :SY = CY - Y<br />
80 IF SX < 0 OR SX > 279 OR SY < 0 OR SY > 191<br />
THEN FL = 0: GOTO 110<br />
90 IF FL = 0 THEN HPLOT SX , SY : F L =<br />
100 HPLOT TO SX , SY<br />
110 NEXT T<br />
Some other parametric equations which may interest you:<br />
X 30 T 2<br />
=<br />
Y = 30 T3, - 2 :::; T :::; 2<br />
X =<br />
Y =<br />
80 COS T<br />
80 SIN T, 0 :::; T :::; 271"<br />
X 30T - 50 SIN T<br />
=<br />
Y = 30 - COS T, - 4 :::; T :::; 4<br />
X = 5(COS T + T SIN T)<br />
Y = 5(SIN T - T COS T), 0 :::; T :::; 20<br />
The sections ahead will provide further examples of curves defined<br />
parametrically.<br />
PARABOLAS<br />
The parabola is a curve which has many physical applications. For<br />
example, if a stone or baseball is tossed upward, the path it follows (if<br />
· wind resistance is ignored) is a parabola. Parabolic reflectors are useful<br />
because they concentrate reflected light at a single point, the focus.<br />
Comets follow parabolic orbits as they pass the sun, which is the focus<br />
of the parabola.<br />
The equation Y = X2 I 4P identifies points of the parabola shown in<br />
Figure 5.9. The origin (0,0) is the vertex of the parabola; the focus is at<br />
the point (O,P). The line containing the focus and the vertex is referred
Analytic Geometry and Computer <strong>Graphics</strong> 117<br />
y<br />
x<br />
Figure 5.9<br />
to as the axis of the parabola. The value of P determines the relative<br />
position of the focus and the vertex, and also the shape of the parabola.<br />
The line segment AB, which contains the focus and is perpendicular to<br />
the axis of the parabola, has length 4IPI. In a sense, the value 4IPI provides<br />
a measure of the "width" of the parabola.<br />
While the equation Y = X2/4P will identify the points of a . parabola,<br />
a more useful formulation is the set of parametric equations<br />
X =<br />
Y =<br />
2PT<br />
PT2•<br />
When these equations are provided in a program, we may quickly identify<br />
parabolas of varied shapes by changing the value of P. Try several<br />
choices of P in Program 5.12.<br />
Program 5.12: PARABOLA<br />
1 REM PROGRAM 5.12 (PARABOLA)<br />
2 REM DRAWS A PARABOLA; PARAMETRIC EQUATIONS<br />
10 ex = 140: CY = 96: SC = 1.16: FL = 0<br />
20 p = 10<br />
40 HGR2 : HCOLOR= 3<br />
50 FOR T = -5 TO 5 STEP .5<br />
60 X = 2 * P * T: Y = P * T * T<br />
(continued)
118 <strong>Microcomputer</strong> <strong>Graphics</strong><br />
80 SX = SC * X + CX :SY = CY - Y<br />
90 IF SX < 0 OR SX > 279 OR SY < 0 OR SY > 191<br />
THEN FL = 0: GOTO 120<br />
1 0 0 IF FL = 0 THEN HPLOT SX, SY : F L = 1<br />
110 HPLOT TO SX , SY<br />
120 NEXT T<br />
The process of passing to parabolas of arbitrary location and orientation<br />
by now should be obvious-we must transform the points of the<br />
parabola by rotation and translation. This is done in Program 5 .13.<br />
Program 5.13: ROTATED PARABOLA<br />
1 REM PROGRAM 5 .13 (ROTATED PARABOLA)<br />
2 REM DRAWS A TRANSLATED, ROTATED PARABOLA<br />
1 0 ex = 140:CY = 96 :SC = 1 . 16:FL = 0<br />
20 p = 1 0<br />
30 H = 10:K = -80 :TH = .3:S1 = SIN CTH) :C1 = COS<br />
CTH)<br />
HGR2 : HCOLOR= 3<br />
FOR T = - 5 TO 5 STEP .5<br />
X = 2 * P * T:Y = P * T * T<br />
X1 = X * C1 - Y * S1 + H:Y1 = X * S1 + Y * C1<br />
+ K<br />
SX = SC * X1 + CX :SY = CY - Y1<br />
IF SX < 0 OR SX > 279 OR SY < 0 OR SY > 191<br />
THEN FL = 0: GOTO 120<br />
IF FL = 0 THEN HPLOT SX, SY : F L = 1<br />
HPLOT TO SX , SY<br />
NEXT T<br />
HYPERBOLAS<br />
The circle, the ellipse, and the parabola are called conic sections because<br />
they are curves formed by the intersection of a cone and a plane. The<br />
hyperbola is another of the conic sections. We will consider the hyperbola<br />
briefly, as we leave the conic curves.<br />
The hyperbola (Figure 5 .10) is represented by the equation<br />
x2 y2<br />
A2 - B2 = 1<br />
The shape of the hyperbola obviously is controlled by the choice of values<br />
for A and B. The parametric equations<br />
X = A SEC T<br />
Y= BTAN T
Analytic Geometry and Computer <strong>Graphics</strong> 119<br />
y<br />
x<br />
Figure 5.10<br />
also represent the hyperbola, and are more useful in writing a program<br />
to sketch the graph.<br />
Program 5. 14: HYPERBOLA<br />
1 REM PROGRAM 5.14 (HYPERBOLA)<br />
2 REM PARAMETRIC EQUATIONS FOR A HYPERBOLA<br />
10 ex = 140: CY = 96: SC = 1.16: FL = 0<br />
20 A = 30: B = 35<br />
30 HGR2 : HCOLOR= 3<br />
40 FOR T = -1.6 TO 4.5 STEP .05<br />
50 X = A I COS (T): Y = B * TAN (T)<br />
60 SX = SC * X + CX: SY = CY - Y<br />
70 IF SX < 0 OR SX > 279 OR SY < 0 OR SY > 191<br />
THEN FL = 0: GOTO 100<br />
80 IF FL = 0 THEN HPLOT SX,SY: FL =<br />
90 HPLOT TO SX,SY<br />
100 NEXT T<br />
POLAR COORDINATE CURVES<br />
Program 5. 5 identified the graph of a circle by use of the parametric<br />
equations<br />
X =<br />
Y =<br />
R COS(T)<br />
R SIN(T)<br />
R ( = 90) provided the radius of the circle.
120 <strong>Microcomputer</strong> <strong>Graphics</strong><br />
If we cause R to vary, instead of remaining constant, we obtain<br />
some very interesting and pleasing curves. We will define Ras a function<br />
of T, and thus associate the variation in R with changes in T.<br />
Program 5.15: POLAR<br />
1 REM PROGRAM 5 . 1 5 (POLAR)<br />
2 REM DRAWS A ROSE<br />
1 0 ex = 140:CY = 96 :SC = 1 . 16:FL = 0<br />
20 HGR2 : HCOLOR= 3<br />
30 FOR T = 0 TO 6.3 STEP . 1<br />
40 R = 80 * cos (2 * T)<br />
50 x = R * cos ( T ) : y = R * SIN ( T )<br />
60 sx = SC * x + CX :SY = CY - y<br />
70 IF sx < 0 OR sx > 279 OR SY < 0 OR SY > 191<br />
THEN FL = 0: GOTO 100<br />
80 IF FL = 0 THEN HP LOT SX , SY : F L = 1<br />
90 HP LOT TO SX, SY<br />
100 NEXT T<br />
The association between the shape of a curve and the relationship<br />
between R and T is, at first, somewhat obscure. Some experimentation<br />
is recommended. Try the following<br />
R = 80*COS (3*T> CT ry 0 $ T $ 3.2 STEP . 1 )<br />
R = 80* COS (4* T> (Try 0 $ T $ 6.3 STEP . 1 ><br />
R = 30* (COS (T) - 1 )<br />
R = 30*
Analytic Geometry and Computer <strong>Graphics</strong><br />
121<br />
20 FL = O:CX = 140 :CY = 96 :SC = 1 . 16<br />
30 DEF FN Y(X) = SIN (X)<br />
40 HGR2 : HCOLOR= 3<br />
50 FOR X = MINX TO MAXX STEP ST<br />
60 Y = FN Y(X)<br />
70 sx = ex + SC * XS * X:SY = CY - YS * y<br />
80 IF SX < 0 OR SX > 279 OR SY < 0 OR SY > 191<br />
THEN FL = 0: GOTO 110<br />
90<br />
100<br />
110<br />
IF FL = 0 THEN HPLOT SX,SY :FL = 1<br />
HPLOT TO SX,SY<br />
NEXT X
Part IV<br />
Three-Dimensional<br />
<strong>Graphics</strong>
Chapter 6<br />
Basics of Three-Dimen·<br />
sional <strong>Graphics</strong><br />
The computer screen is a two-dimensional display device. However, just<br />
as an artist can create the impression of a three-dimensional scene on a<br />
canvas, so we can display three-dimensional images on our graphics<br />
computer.<br />
WARNING-READ SLOWLY MATHEMATICS AHEAD<br />
The process of displaying three-dimensional images requires additional<br />
mathematics. As is usual when travelling in rough terrain, we<br />
will progress more rapidly if we move slowly and carefully.<br />
In order to be able to generate images of three-dimensional objects,<br />
it is necessary to establish a convention through which points in threedimensional<br />
space may be identified. Two coordinate systems are described<br />
below.<br />
COORDINATE SYSTEMS<br />
The rectangular (or Cartesian) coordinate system requires three mutually<br />
perpendicular axes. The X and Y axes used in the two-dimensional<br />
system are augmented by a Z axis through the origin, perpendicular to<br />
the XY plane. Two possible orientations are possible for the Z axis. The<br />
orientation shown in Figure 6.1 identifies a right-hand system, so called<br />
because a right hand with first and second fingers pointing in the direction<br />
of the X and Y axes, as shown, will have the thumb pointing in the<br />
direction of the Z axis.<br />
125
126 <strong>Microcomputer</strong> <strong>Graphics</strong><br />
z<br />
z<br />
y<br />
y<br />
Figure 6. 1<br />
A left-hand system differs only in that the direction of the Z axis is<br />
reversed.<br />
When viewing the two-dimensional XY plane the right-hand system<br />
will have the Z axis perpendicular to the plane, pointing toward the<br />
viewer's eye, as in Figure 6.2a. The left-hand system will have the Z axis<br />
pointing away from the viewer, as shown in Figure 6.2b.<br />
The selection of right-hand or left-hand system is somewhat arbitrary,<br />
since the calculations of interest to us could be completed using<br />
either coordinate system. As a matter of convenience, we will establish<br />
the right-hand system as standard.<br />
Any pair of coordinate axes identifies a plane, referred to as a coordinate<br />
plane. The three coordinate planes are identified as the XY plane,<br />
the YZ plane, and the XZ plane. Points are identified by ordered triples<br />
(A,B,C) of numbers; with A, B, and C providing the directed distance<br />
from the point to the YZ, the XZ, and the XY planes, respectively.<br />
Figure 6.3 shows the plotting of points (1,8,5), (5,3,3), (0,5, -7),<br />
and ( - 2,5, -7).<br />
The second coordinate system we will use is the spherical coordinate<br />
system (see Figure 6.4). In this system, each point P is represented<br />
by an ordered triple {p,8,¢) of numbers. The distance from the point<br />
---+<br />
to the origin is p. The angle between OP and the positive direction of<br />
the Z axis is ¢. The angle between the positive direction of the X axis<br />
<br />
and the projection of OP onto the XY plane is (), and is measured in<br />
a counterclockwise direction as viewed from a point on the positive Z<br />
axis.
Basics of Three-Dimensional <strong>Graphics</strong><br />
127<br />
z<br />
(a)<br />
Figure 6.2<br />
z<br />
x<br />
Figure 6.3<br />
More Greek: In the tradition of mathematics books, we're using the<br />
Greek letters p (rho), 8 (theta), and (phi) for spherical coordinates.<br />
In BASIC we'll call these RHO, THETA, and PHI. Since Applesoft<br />
BASIC only recognizes the first two letters of a variable name, we<br />
could use RH, TH, and PH. Program 6.1 illustrates this usage.
128<br />
<strong>Microcomputer</strong> <strong>Graphics</strong><br />
z<br />
z<br />
-?J<br />
/I<br />
I<br />
I<br />
I<br />
y<br />
y<br />
x<br />
x<br />
Figure 6.4<br />
Since a point may be identified in terms of rectangular (X, Y ,Z) or<br />
spherical (p,(},) coordinates, it is necessary to have a means of conversion<br />
between the two systems. The following formulas are based on<br />
right triangle trigonometry:<br />
x = pSINCOS()<br />
y = pSINSIN()<br />
z = pCOS<br />
P 2 = x 2 + y 2 + 22<br />
In order to obtain an image of a three-dimensional object on a twodimensional<br />
graphics display screen, it is necessary to associate a pair of<br />
screen coordinates (SX,SY) with each triple of rectangular coordinates<br />
(X,Y,Z) or spherical coordinates (p,(),). The process used to obtain the<br />
screen coordinates is illustrated in Figure 6.5.<br />
The position of the viewer is represented by point P. The display<br />
screen is a plane onto which an object is to be projected. This projection<br />
plane is assumed to be perpendicular to the line OP, and at a fixed distance<br />
D from point P. As the points of the object are projected onto the<br />
projection plane, we obtain screen coordinates (SX,SY) for each point<br />
(X,Y,Z). See Figure 6.7.<br />
We will adopt the practice of identifying the viewpoint (location of<br />
the viewer's eye) in terms of its spherical coordinates. This will permit<br />
easy control over the location of the viewpoint:<br />
p (rho) will represent the distance from the viewpoint to the point<br />
(0,0,0). Increasing p will move the viewer away from the object being<br />
viewed. This will cause the object to appear as a smaller image.<br />
() (theta) and (phi) identify the direction from which the viewer will<br />
see an object.
Basics of Three-Dimensional <strong>Graphics</strong> 129<br />
z<br />
/<br />
/<br />
f-<br />
I<br />
I<br />
I<br />
I<br />
I<br />
Io<br />
x<br />
y<br />
Figure 6.5<br />
Figure 6.5 suggests that the projection plane (display screen) is located<br />
between the viewer and the object. It is not necessary that this be<br />
the case. Figure 6.6 positions the display screen on the opposite side of<br />
the object from the viewer. This results in a larger screen image. It is<br />
worth noting that<br />
moving the display screen closer to the viewer will result in a smaller<br />
projected image.<br />
moving the display screen farther from the viewer will result in a<br />
larger projected image.<br />
Control over the viewing parameters p, (),
130 <strong>Microcomputer</strong> <strong>Graphics</strong><br />
Figure 6.6<br />
z<br />
x<br />
Figure 6.7
Basics of Three-Dimensional <strong>Graphics</strong> 131<br />
TRANSFORMATIONS<br />
Again we will use homogeneous coordinates to represent points. A point<br />
whose rectangular coordinates are given by (X, Y ,Z) will have homogeneous<br />
coordinates (X,Y,Z,l). Linear transformations then may be<br />
represented by 4 x 4 matrices. We will not consider all of the transformations<br />
available to us but will focus on those which are most valuable.<br />
SCALING<br />
Diagonal matrices represent scaling transformations. Since<br />
(X,Y,Z,1)<br />
A 0 0 0<br />
0 B 0 0<br />
O O C O<br />
=<br />
0 0 0 1<br />
(AX,BY,CZ,1)<br />
we may scale each of the coordinates individually to control scale in the<br />
direction of any of the coordinate axes. Overall scaling then may be provided<br />
as follows:<br />
K<br />
0<br />
(X,Y,Z,l)<br />
O<br />
0<br />
0<br />
K<br />
0<br />
0<br />
0 0<br />
0 0<br />
K 0<br />
0 1<br />
= (KX,KY,KZ,1)<br />
Since {X,Y,Z,D), when normalized, becomes (X/D,Y /D,Z/D,l), overall<br />
scaling also may be accomplished through multiplication by the matr<br />
ix<br />
ROTATION<br />
1 0 0 0<br />
0 1 0 0<br />
0 0 1 0<br />
0 0 0 1/K<br />
It will be sufficient for us to be able to rotate an object about each of the<br />
coordinate axes. This ability is within easy reach. In Chapter 2, when considering<br />
a rotation about the origin, we used the transformation matrix<br />
( cose SINO o)<br />
R = -sNe cse
132 <strong>Microcomputer</strong> <strong>Graphics</strong><br />
Multiplication of vector (X, Y, 1) by R had the effect of rotating the vector<br />
about the origin through a counterclockwise angle e. If we picture<br />
the Z axis pointing toward us from the XY plane, the action is described<br />
as a rotation about the Z axis. In applying the rotation to a three-dimensional<br />
vector we use the matrix<br />
coso SINO o o \<br />
R = -SINO coso 0 OJ<br />
z 0 0 1 0<br />
0 0 0 1<br />
The transformation matrices which effect rotations about the x axis<br />
and y axis are<br />
1 0 0 0<br />
0 coso SINO 0<br />
R<br />
x<br />
= 0 -SINO coso 0<br />
0 0 0 1<br />
co so 0 -SINO 0<br />
0 1 0 0<br />
R<br />
y<br />
= SINO 0 co so 0<br />
0 0 0 1<br />
In each case the rotation is through a counterclockwise angle 0, as<br />
viewed from a point along the positive axis, facing the origin.<br />
TRANSLATION<br />
If it were not for our need for translation capability, we might not have<br />
elected to use homogeneous coordinates. It will prove convenient to represent<br />
a translation by means of a matrix transformation.<br />
(X,Y,Z,1)<br />
1 0<br />
0 1<br />
0 0<br />
H K L<br />
0 0<br />
0 0<br />
0<br />
1<br />
= (X + H,Y + K,Z + L,l)<br />
To move a point, or collection of points, by displacing the coordinates a<br />
distance specified by the vector (H,K,L), we multiply by the above matrix.<br />
Alternately, we may consider that the effect of the translation is to<br />
move the origin to the point ( -H, -K, -L).
Basics of Three-Dimensional <strong>Graphics</strong> 133<br />
REFLECTION<br />
The reflection of an object through a plane refers to generating a<br />
mirror image of all points of the object on the opposite side of the plane.<br />
Thus the reflection of points through the XY plane has the effect of<br />
changing the sign of the Z coordinates of each of the points. The transformation<br />
matrix for this reflection is<br />
1 0 0 0<br />
0 1 0 0<br />
0 0 -1 0<br />
0 0 0<br />
Transformation matrices which represent reflections through the XZ<br />
plane and the YZ plane are<br />
Mxz =<br />
Myz =<br />
1 0 0 0<br />
0 -1 0 0<br />
0 0 1 0<br />
0 0 0 1<br />
-1 0 0 0<br />
0 1 0 0<br />
0 0 1 0<br />
0 0 0 1<br />
SEQUENTIAL TRANSFORMATIONS<br />
The effect of a sequence of transformations may be represented by a single<br />
matrix, the product of the matrices of the individual transformations.<br />
For example, we may create the effect of rotation through 30°<br />
<br />
about the ray PQ (P = (0,2,3),Q = (1,2,3)) by<br />
1. Translation 1 0 0 0<br />
0 1 0 0<br />
T=<br />
0 0 1 0<br />
0 -2 1<br />
-3<br />
followed by<br />
2. Rotation 1 0 0 0<br />
0 cos30° SIN30° 0<br />
R=<br />
0 -SIN30° cos30° 0<br />
0 0 0 1<br />
followed by
134 <strong>Microcomputer</strong> <strong>Graphics</strong><br />
3. Translation<br />
T * =<br />
1 0 0 0<br />
0 1 0 0<br />
0 0 1 0<br />
0 2 3 1<br />
The same effect is available from the matrix<br />
M = TRT * =<br />
1<br />
0<br />
0<br />
0<br />
cos30°<br />
-SIN30°<br />
0 0<br />
SIN30° 0<br />
cos30°<br />
o<br />
0 -2COS30° + 3SIN30° + 2 -2SIN30° - 3COS30° + 3 1<br />
1 0<br />
0 .866<br />
0 -.5<br />
0 1.768<br />
0 0<br />
.5 0<br />
.866 0<br />
-.598 1<br />
The ordering of a sequence of transformations is quite important. In<br />
general, changes in the order of transformations will change the effect<br />
of the sequence. For example, a rotation followed by a translation has a<br />
different effect than the same translation followed by the rotation.<br />
INVERSES OF MATRICES<br />
In the last example, the matrices T and T * had opposite effects. Multiplication<br />
by matrix T causes a translation through (0, -2, -3), while T *<br />
represents a translation through (0,2,3). Successive multiplication by T<br />
and T * would place a point in its original location, since<br />
TT * =<br />
1 0<br />
0 1<br />
0 0<br />
0 -2<br />
0 0<br />
0 0<br />
1 0<br />
-3 1<br />
1 0 0 0<br />
0 1 0 0<br />
0 0 1 0<br />
0 2 3 1<br />
1 0 0 0<br />
0 1 0 0<br />
0 0 1 0<br />
0 0 0 1<br />
= I<br />
Pairs of matrices whose product is I are referred to as inverses. The<br />
inverse of a matrix M is frequently denoted as M-1• While some matrices<br />
do not have inverses, many of the ones that are useful in computer<br />
graphics do have inverses. For example, the matrix<br />
R =<br />
1<br />
0<br />
0<br />
0<br />
0<br />
cos30°<br />
-SIN30°<br />
0<br />
0 0<br />
SIN30° 0<br />
cos30° o<br />
0 1<br />
0 0<br />
0 .866<br />
0 -.5<br />
0 0<br />
0 0<br />
.5 0<br />
.866 0<br />
0 1
Basics of Three-Dimensional <strong>Graphics</strong> 135<br />
which represents a rotation of 30° about the x axis, has an inverse R - 1<br />
which represents a rotation of -30° about the x axis:<br />
R-1 =<br />
1<br />
0<br />
0<br />
0<br />
0<br />
.866<br />
.5<br />
0<br />
0 0<br />
-.5 0<br />
.866 0<br />
0 1<br />
TRANSFORMING A COORDINATE SYSTEM<br />
We have referred to transforming a point, or a set of points, within a coordinate<br />
system. It is also frequently useful to establish a new coordinate<br />
system through transformation of the axes. For example, we might<br />
move the origin to a new location, or rotate the axis system about one of<br />
the axes.<br />
In such cases it is necessary to identify points in terms of the original,<br />
or standard, coordinates, and also in terms of coordinates relative<br />
to the new axis system. We will identify coordinates relative to a second<br />
axis system by affixing a prime (' ). Thus the coordinates (2, 1,3) are assumed<br />
to identify a point relative to the standard axis system, while<br />
(2, 1,3)' identifies a point relative to a second axis system.<br />
As an example, a rotation about the z axis through a counterclockwise<br />
angle of 30° may be represented by the transformation<br />
matrix:<br />
M=<br />
cos30° SIN30° 0 0 .866 .5 0 0<br />
-SIN30° cos30° 0 0 -.5 .866 0 0<br />
0 0 1 0 0 0 1 0<br />
0 0 0 1 0 0 0 1<br />
When applying this transformation matrix to points or sets of points,<br />
multiplication of the coordinate vector of a point by the matrix will yield<br />
the coordinate vector of tqe rotated point.<br />
For example, the point (2,4, 1) rotates to the position<br />
(-.268,4.464,1), since<br />
(2,4,1,1)<br />
.866<br />
-.5<br />
0<br />
0<br />
.5 0 0<br />
.866 0 0<br />
0 1 0<br />
0 0 1<br />
= ( -.268,4.464, 1, 1)<br />
The point P' results from rotation of point P through a counterclockwise<br />
angle of 30° about the Z axis. Consider the effect of rotating the
136 <strong>Microcomputer</strong> <strong>Graphics</strong><br />
coordinate system through a clockwise angle of 30° about the Z axis.<br />
The resulting coordinate system, X', Y' ,Z', will provide another means<br />
of referencing point P. The position of the rotated point P relative to the<br />
X, Y ,Z coordinate system is the same as the position of point P relative<br />
to the rotated coordinate system X' , Y' ,Z' .<br />
Thus matrix M above may be used to:<br />
1. Determine the coordinates of points following rotation of the points<br />
through a counterclockwise angle of 30°; or<br />
2. Determine the coordinates of points following a rotation of the coordinate<br />
axes through a clockwise angle of 30°.<br />
The example above is not an isolated case, but represents a general<br />
principle which we will find valuable: The matrix required to represent<br />
the transformation of an axis system is the inverse of that needed to<br />
transform points within an axis system.<br />
PROJECTION<br />
We now know how to manipulate three-dimensional figures, but we're<br />
not yet ready to show them on a computer graphics screen. The reason,<br />
of course, is that a graphics screen is a two-dimensional surface. To obtain<br />
a two-dimensional (screen) representation of a three-dimensional<br />
object we'll next develop a method for projecting each point of the object<br />
onto a plane. This process was represented in Figure 6.7. Before<br />
confronting this problem, we will consider a related one: the projection<br />
of points onto a plane parallel to the XY plane.<br />
The projection plane is at a distance D from the XY plane, as indicated<br />
in Figure 6.8. The projection plane will be the display screen, so<br />
we will identify points on the plane by screen coordinates (SX,SY), with<br />
the SX axis and the SY axis parallel to the X and Y axes, respectively.<br />
The scale of distance measured on the projection plane will be the same<br />
as that of the coordinate axes. Thus, a point (SX,SY) on the plane is referred<br />
to as (X,Y,D), with X = SX and Y = SY.<br />
Several types of projection are available. We will be working with<br />
perspective projections, with the center of the projection at the origin<br />
0(0,0,0). That is, a point P(X,Y,Z) will be projected to the intersection<br />
of the projection plane with the line OP.
Basics of Three-Dimensional <strong>Graphics</strong> 137<br />
z<br />
B<br />
x<br />
y<br />
Figure 6.8<br />
In identifying the screen coordinates (SX,SY) associated with the<br />
point P(X,Y,Z), note the right triangles OBA and ODC (Figure 6.8 and<br />
Figure 6.9). These are similar triangles with<br />
DC<br />
OD<br />
BA<br />
OB
138 <strong>Microcomputer</strong> <strong>Graphics</strong><br />
B ,.....-__ Y __ ___, A<br />
z<br />
z<br />
D<br />
0<br />
0<br />
Figure 6.9<br />
Thus<br />
so that SY= D(Y /Z).<br />
In the same fashion, from similar triangles OBF and ODE, we have<br />
DE BF SX X<br />
OD = OB and D = Z<br />
Thus, SX = D(X/Z).<br />
We now have all of the elements necessary to generate screen images<br />
of three-dimensional objects and will turn to that task.<br />
TWO-DIMENSIONAL IMAGES OF THREE<br />
DIMENSIONAL OBJECTS<br />
Ref er to Figure 6.5. The location of the eye (point P) is identified as having<br />
rectangular coordinates (H,K,L) and spherical coordinates (p,0,¢).<br />
We position the projection plane (display screen) at a distance D from<br />
the viewer's eye, placed so that it is perpendicular to the line connecting<br />
the viewer's eye with the origin. A second rectangular axis system is located<br />
at point P. Points then may be identified by giving eye coordinates<br />
(Xe,Ye,Ze) or standard coordinates (X,Y,Z).
Basics of Three-Dimensional <strong>Graphics</strong> 139<br />
z<br />
A<br />
e<br />
z<br />
x<br />
y<br />
Figure 6.10<br />
The eye coordinate system is shown in Figure 6.10. It orients the<br />
axes so that, when the viewer's line of sight is directed toward the origin<br />
of the X, Y ,Z axis system, the Ze axis points in the direction of the line<br />
of sight, the Xe axis points to the right, and the Ye axis points upward.<br />
(Note that the eye coordinate system is a left-hand system.)<br />
The task we face has two stages:<br />
1. The identification of eye coordinates (Xe,Ye,Ze) associated with a<br />
point having standard coordinates (X,Y,Z);<br />
2. The identification of screen coordinates (SX,SY) associated with a<br />
specific set of eye coordinates (Xe, Ye,Ze).<br />
The second of these calculations is the easier. From the equations given<br />
in the previous section, we have SX = D(Xe/Ze) and SY= D(Ye/Ze).
140 <strong>Microcomputer</strong> <strong>Graphics</strong><br />
We now may turn to the first task, establishing the association between<br />
the standard coordinates and the eye coordinates. This is done<br />
through a sequence of four transformations, each of which will partially<br />
transform the X,Y,Z axis system to the Xe,Ye,Ze axis system. The four<br />
transformations, along with pictorial representations of their effects,<br />
are given on pages 142, 143. There, and in our notation, the intermediate<br />
axis systems are each ref erred to as X' , Y' ,Z', with the final<br />
X', Y' ,Z' axis system being the eye coordinate system, Xe, Ye,Ze.<br />
(Compare Figure 6.14 with Figure 6.5).<br />
The effect of the transformations will be viewed as the establishment<br />
of a sequence of new coordinate systems, with the eye coordinate system<br />
as the final result.<br />
For the purpose of these transformations, the point P, at the viewer's<br />
eye, is identified by rectangular coordinates (H,K,L) or by spherical<br />
coordinates (p,O,), measured relative to the standard coordinate axes.<br />
Recall that H = psincos(), K = psinsin(), and L = pcos.<br />
In brief,<br />
1. Step I establishes a coordinate system at the viewer's eye, retaining<br />
the orientation and directions of the original axis system. This<br />
process is represented by the transformation matrix A, as shown<br />
below.<br />
2. Steps II and III rotate the axis system in order that the Z' axis points<br />
toward the origin of the standard axis system, with the Y' axis directed<br />
so as to intersect the positive Z axis. From the viewer's position,<br />
the Y' axis points upward and the X' axis points to the left.<br />
3. Step IV converts to a left-hand system, inverting the X axis so that it<br />
points to the right. This provides a more conventional orientation<br />
for the viewer.<br />
Since the transformations are best represented as matrices, we will<br />
consider each step separately, establishing the matrix of the transformation.<br />
Step I. Establish the origin at (H,K,L) (pSINCOSO,pSINSINO,<br />
=<br />
pCOS). The transformation matrix that has this effect is:<br />
A=<br />
1<br />
0<br />
0<br />
-H<br />
0<br />
1<br />
0<br />
-K<br />
0 0<br />
0 0<br />
1 0<br />
-L
Basics of Three-Dimensional <strong>Graphics</strong> 141<br />
or<br />
A=<br />
1 0 0 0<br />
0 1 0 0<br />
0 0 1 0<br />
-pSIN
142 <strong>Microcomputer</strong> <strong>Graphics</strong><br />
(Xe,Ye,Ze,1) = (X,Y,Z,1)<br />
-SINO<br />
cose<br />
0<br />
0<br />
-COSOCOS -COSOSIN 0<br />
-SINOCOS SINOSIN 0<br />
SIN¢ -COS¢ 0<br />
0<br />
p 1<br />
The multiplication of ABCD is outlined on page 144.<br />
I. TRANSLATE ORIGIN TO (H,K,L):<br />
A=<br />
1 0 0<br />
0 1 0<br />
0 0 1<br />
-pCOSOSINcf.> -pSINOSIN -pCOS<br />
0<br />
0<br />
0<br />
1<br />
z<br />
Z'<br />
Figure 6.11<br />
x<br />
II.<br />
ROTATE THROUGH (90° - 0) CLOCKWISE ABOUT Z'<br />
AXIS:<br />
B=<br />
SINO<br />
-cose<br />
0<br />
0<br />
cose o o<br />
SINO 0 0<br />
0 1 0<br />
0 0 1<br />
z<br />
Z'<br />
x<br />
Figure 6.12
Basics of Three-Dimensional <strong>Graphics</strong><br />
143<br />
III.<br />
ROTATE THROUGH (180° - ¢) COUNTERCLOCKWISE<br />
ABOUT X' AXIS:<br />
c =<br />
1<br />
0<br />
0<br />
0<br />
0<br />
-COS¢<br />
SIN<br />
0<br />
0 0<br />
-SIN¢ 0<br />
-COS 0<br />
0 1<br />
z<br />
Y'<br />
x<br />
y<br />
Figure 6.13<br />
IV.<br />
CONVERT TO LEFT-HAND SYSTEM:<br />
D=<br />
-1 0 0 0<br />
0 1 0 0<br />
0 0 1 0<br />
0 0 0 1<br />
z<br />
y'<br />
x<br />
y<br />
Figure 6.14
T= ABCD<br />
1 0 0 0 sin8<br />
0 1 0 0 -cos8<br />
0 0 1 0 0<br />
-pcos8 sin -psin8 sin -pcos
Basics of Three-Dimensional <strong>Graphics</strong> 145<br />
PROGRAMMING<br />
While matrices provide a convenient form for establishing relationships<br />
between standard and eye coordinates of a point, languages available<br />
for microcomputers frequently do not provide for matrix arithmetic. To<br />
include the above matrix product in a BASIC program, write<br />
1 0 S1<br />
=<br />
SIN(THETA): C1<br />
=<br />
COS(THETA):<br />
S2<br />
=<br />
SIN(PHI): C2<br />
=<br />
COS(PHI)<br />
20 XE<br />
=<br />
-X* S1 + Y*C1<br />
30 YE<br />
=<br />
-X* C1* C2 - Y* S1* C2<br />
40 ZE<br />
=<br />
-X*C1*S2 - Y* S1* S2<br />
Screen coordinates then are provided by<br />
SO SX<br />
=<br />
D*XE/ZE<br />
60 SY<br />
=<br />
D*YE/ZE<br />
+ Z*S2<br />
- Z*C2 + RHO<br />
Screen addressing techniques used by different microcomputers require<br />
changes in lines 50 and 60. In order to center the image on the<br />
Apple II screen and reorient the screen Y axis, write<br />
SO SX<br />
=<br />
D*XE/ZE + 140<br />
60 SY<br />
=<br />
96 - D*YE/ZE<br />
Program 6. 1 shows one way of using the formulas above to generate<br />
an image of a three-dimensional object. Viewing parameters are defined<br />
in line 10. Note that we have chosen D larger than RHO, placing the object<br />
between the viewer and the projection plane. Line 20 calculates values<br />
that are used in the projection calculations. Line 30 identifies the<br />
center of the high resolution graphics screen. The coordinates of the visible<br />
vertices of a cube are given in lines 40 through 60. Lines 80 through<br />
130 read the coordinates from the DATA statements and pass them to<br />
the subroutine in 150 and 160, which calculates the projected screen coordinates<br />
SX and SY. On return from the subroutine, the projected<br />
points are plotted.<br />
Program 6.1: CUBE<br />
1 REM PROGRAM 6.1 (CUBE)<br />
2 REM DRAWS THE VISIBLE PARTS OF A CUBE<br />
10 RHO<br />
=<br />
10: THETA<br />
=<br />
.?: PHI<br />
=<br />
1_3: 0<br />
=<br />
SOO<br />
20 S1 = SIN (TH): C1<br />
=<br />
COS (TH): S2<br />
=<br />
SIN (PH):<br />
C2<br />
=<br />
COS (PH)<br />
30 ex<br />
=<br />
140: CY<br />
=<br />
96<br />
(continued)
146 <strong>Microcomputer</strong> <strong>Graphics</strong><br />
40 DATA 1 , 1 , 0 , 1 , 1 , 1 , 0 , 1 , 1 , 0 I 1 I 0<br />
so DATA 1 , 1 , 0 , 1 , 0 , 0 , 1 , 0 , 1 , 0 I 0 I 1<br />
60 DATA 0 , 1 , 1 , 1 , 0 , 1 , 1 I 1 I 1<br />
70 HGRZ : HCOLOR= 3<br />
80 READ x I y I z : GOSUB 150: HPOT SX, SY<br />
90 FO R I = 1 TO 8: READ x I y I z<br />
1 00 GOSUB 150: HP LOT TO SX , SY<br />
110 NEXT I<br />
1ZO READ x I y I z : GOSUB 150: HP LOT SX , SY<br />
130 READ x I y I z : GOSUB 150: HP LOT TO SX , SY<br />
140 END<br />
150 XE =<br />
-<br />
x * S1 + y * C 1 : YE =<br />
-<br />
x * C1 *<br />
C2<br />
C1<br />
-<br />
-<br />
-<br />
y * S1 * CZ + z * SZ :ZE = x * sz *<br />
y * SZ * S1<br />
-<br />
z * CZ + RHO<br />
160 sx = D * XE I ZE + CX :SY = CY<br />
RETURN<br />
-<br />
D * YE I Z E :<br />
VIEWPOINT AND PERSPECTIVE<br />
It is worthwhile noting how each of RHO, THETA, PHI, and D affect<br />
the image generated on the display screen.<br />
Changing the values of THETA and PHI will permit us to view an<br />
object from different angles. Changing the value of RHO (the distance<br />
from the viewer to the origin) permits us to move the viewer closer to, or<br />
farther from, the object. We thus may control the size of the image.<br />
We have a second means of controlling the size of the screen image:<br />
changing the value of D. When a viewpoint {p,0,¢) is specified, changes<br />
in D affect the size of the image on the projection plane-increasing D<br />
will increase the size of the image. Figure 6.15 illustrates the consequences<br />
of variations in the relative values of RHO and D.<br />
Since RHO and D both affect the size of the image, it is important to<br />
understand the relationship between them. If the effect of each is to control<br />
size, why provide control over both? The answer to this lies in perspective:<br />
an object close to the viewer appears larger than when it is farther<br />
away because it occupies a larger proportion of field of view. Thus,<br />
· for example, a perspective view of a cube will cause the edges close to<br />
the viewer to appear larger than edges farther away. To decrease the apparnt<br />
effect of perspective, increase the value of RHO. This will decrease<br />
the perceived size of the image. To compensate, increase D.<br />
(What happens if the ratio RHO/D is maintained?)<br />
Program 6.2 provides an opportunity to observe the effects of<br />
RHO, THETA, PHI, and D. The program accepts values of RHO,
Basics of Three-Dimensional <strong>Graphics</strong><br />
147<br />
Image<br />
Image<br />
Figure 6.15<br />
--r--7'---<br />
I<br />
I<br />
I<br />
I<br />
0 b1ect .<br />
I<br />
I<br />
J<br />
I <br />
L<br />
Rho<br />
THETA, PHI, and D, then uses the values to display a view of a cube.<br />
To help maintain orientation, a diagonal line has been placed on the side<br />
of the cube that faces in the direction of the positive X axis. Try the following<br />
combinations of values, then experiment with several choices of<br />
your own. (Note that the angles THETA and PHI are again measured in<br />
radians.)<br />
RHO 7 3 15 15 15 15<br />
THETA .3 .3 .3 .7 1.5 2.2<br />
PHI 1.3 1.3 1.0 1.3 1.3 1.3<br />
D 150 60 300 300 300 300<br />
Program 6.2 illustrates the role of RHO, THETA, PHI, and D. It<br />
also points out another concern: it is possible to "see through" the<br />
closer faces of the cube to the farther edges. While this may be acceptable<br />
in some cases and desirable in some others, it is a problem when it<br />
leads to optical illusions. In the next chapter we will discuss two methods<br />
of eliminating "hidden" lines and surfaces from the display.<br />
Program 6.2: VIEWPOINT<br />
1 REM PROGRAM 6.2 (VIEWPOINT ><br />
2 REM ILLUSTRATES EFFECT OF CHANGING THE<br />
VIEWPOINT PARAMETERS<br />
10 TEXT : HOME : GOTO 180<br />
(continued)
148 <strong>Microcomputer</strong> <strong>Graphics</strong><br />
zo XE = - X * S1 + Y * C1 :YE = - X * C1 *<br />
CZ - Y * S1 * CZ + Z * SZ :ZE = - X * SZ *<br />
C1 - Y * SZ * S1 - Z * CZ + RHO<br />
30 SX = D * XE I ZE + CX :SY = CY - D * YE I ZE:<br />
40 RETURN<br />
HGR ONERR GOTO 43 0<br />
so S1 = SIN 0 THEN RHO = VAL (R$)<br />
3ZO VTAB 5: HTAB 1 5 : PRINT II "; RHO; "<br />
II<br />
330 VTAB 8: HTAB 17: INPUT T$<br />
340 IF LEN (T$) < > 0 THEN THETA = VA L (T$)<br />
350 VTAB 8: HTAB 17: PRINT II ";THETA;" II<br />
360 VTAB 1 1 : HTAB 15: INPUT P$<br />
370 IF LEN (P$) < > 0 THEN PHI = VA L (P$)
Basics of Three-Dimensional <strong>Graphics</strong><br />
149<br />
380 VTAB 11: HTAB 15: PRINT II "; PHI; " II<br />
390 VTAB 14: HTAB 20: INPUT 0$<br />
400 IF LEN (0$) < > 0 THEN 0 = VAL (0$)<br />
410 VTAB 14: HTAB 20: PRINT II "; D; " II<br />
420 GOTO 240<br />
430 TEXT : HOME : POKE 216,0<br />
440 VTAB 10: PRINT "THE CUBE IS PARTLY<br />
OFFSCREEN ."<br />
450 VTAB 15: PRINT "TRY A LARGER VALUE OF<br />
RH 0 II<br />
460 VTAB 20: PRINT "OR A SMALLER VALUE FOR<br />
DISTANCE"<br />
470 FOR I = 1 TO 3000: NEXT I<br />
480 HOME : GOTO 250<br />
TRANSFORMATION OF IMAGES<br />
Matrix transformations were introduced earlier and were used to establish<br />
a relationship between standard and eye coordinate systems of<br />
points. We will use them now to transform the points that define an object.<br />
Program 6.3 generates images of three solids. Line 120 establishes<br />
the viewpoint. Lines 190 through 300 READ the DATA, transform it to<br />
screen coordinates, and plot the three solids. Solid number 1 is the cube<br />
of Program 6.1. Solids 2 and 3 result from transformations applied to<br />
the points before screen coordinates are calculated.<br />
SOLID 2:<br />
a) Scale the solid by multiplying the Z coordinates by 3. The transformation<br />
matrix is<br />
A=<br />
1 0 0 0<br />
0 1 0 0<br />
0 0 3 0<br />
0 0 0 1<br />
b) Rotate the solid through 30° about the Z axis. The transformation<br />
matrix is<br />
B=<br />
cos30° SIN30° 0 0 .866 .5 0 0<br />
-SIN30° cos30° 0 0 -.5 .866 0 0<br />
0 0 1 0 0 0 1 0<br />
0 0 0 1 0 0 0
150 <strong>Microcomputer</strong> <strong>Graphics</strong><br />
c) Translate the solid, placing its center at ( -1,4,2). The transformation<br />
matrix is<br />
C=<br />
1 0 0 0<br />
0 1 0 0<br />
0 0 1 0<br />
-1 4 2 1<br />
I<br />
Applying the successive transformations to a point P(X, Y ,Z) results<br />
in point P'(Xl,Yl,Zl) with (Xl,Yl,Zl,1) = (X,Y,Z,l)ABC<br />
= (X,Y,Z,1)<br />
.866<br />
-.5<br />
0<br />
-1<br />
.5<br />
.866<br />
0<br />
4<br />
0 0<br />
0 0<br />
3 0<br />
2 1<br />
so that<br />
Xl = .866X - .SY - 1<br />
Yl = .SX + .866Y + 4<br />
Zl = 3Z + 2<br />
In Program 6.3, lines 60 through 90 calculate the transformed coordinates,<br />
which are then passed to lines 100 through 110 to obtain screen<br />
coordinates.<br />
SOLID 3:<br />
a) Scale X and Y coordinates by a factor of 2<br />
b) Rotate the solid through 60° about the X axis.<br />
c) Rotate the solid through 15° about the Z axis.<br />
d) Translate the solid, placing its center at (4,2, -2).<br />
For practice, write the transformation matrices of steps a, b, c, and<br />
d; multiply them to obtain the matrix<br />
M=<br />
1.93 .518 0 0<br />
-.259 .966 1.732 0<br />
.224 -.836 .5 0<br />
4 2 -2 1<br />
As a result, the coordinates of the points of Solid 3 are described as<br />
(Xl,Yl,Zl,1) = (X,Y,Z,1) M<br />
Xl = 1.93X - .259Y + .224Z + 4
Basics of Three-Dimensional <strong>Graphics</strong><br />
151<br />
Yl = .518X + .966Y - .836Z + 2<br />
Zl = l.732Y + .5Z - 2<br />
Lines 20 through 50 transform the coordinates before obtaining the<br />
screen coordinates of solid 3.<br />
Program 6.3: TRANSFORMED CUBE<br />
1 REM PROGRAM 6.3
152 <strong>Microcomputer</strong> <strong>Graphics</strong><br />
NOTES AND SUGGESTIONS:<br />
1. Modify Program 6.1 to generate images of other three-dimensional<br />
objects. Try pyramids, houses, furniture, and so forth. For each<br />
image you should make a rough sketch keeping the three-dimensional<br />
X,Y,Z coordinate system in mind. From the drawing you may make a<br />
listing of the coordinates of points to be displayed. For the present, if<br />
you wish to eliminate hidden lines and surfaces, leave the corresponding<br />
points out of your listing. With each selection of an object, it is usually<br />
necessary to experiment with choices of values for the viewing parameters<br />
RHO, THETA, PHI, and D.<br />
2. Add a clipping routine to the programs you write. The routine<br />
described in Chapter 4 may be used. This will allow a zoom capability,<br />
without being concerned that offscreen points will result.<br />
3. For the imaginative: You may already have tried using values of<br />
D that position the viewer between the object and the display screen (try<br />
negative values of D). If you haven't, can you predict the result before<br />
trying it on the computer? While you are at it, what will happen if the<br />
viewer is placed within the object? (Any images which are drawn with<br />
such a viewpoint must be processed by a line clipping subroutine.)<br />
SURFACES OF THE FORM Z =<br />
F(X,Y)<br />
Having developed the processes of generating three-dimensional images,<br />
we may apply them to a variety of surfaces. The program structure will<br />
be similar to that of Program 6.3. We must<br />
1. Provide rectangular coordinates (X, Y ,Z) of points of the surfaces;<br />
2. Transform these to screen coordinates (SX,SY); and<br />
3. Plot the points.<br />
Unlike the previous programs in this chapter, we will not provide the coordinates<br />
of points as DAT A in the program, but will have the points<br />
. generated by a program segment. The following program will illustrate<br />
this.<br />
Program 6.4: SURFACE<br />
1 REM PROGRAM 6.4 (SURFA CE)<br />
2 REM DRAWS A SURF ACE Z = F(X, Y)<br />
1 0 GOTO 40
Basics of Three-Dimensional <strong>Graphics</strong> 153<br />
ZO XE = - X * S1 + Y * C1 : YE = X * C1 * CZ Y<br />
* S1 * CZ + Z * SZ :ZE = - X * SZ * C1 - Y *<br />
SZ * S1 - Z * CZ + RHO<br />
30 SX = D * XE I ZE + CX : SY = CY - D * YE I ZE:<br />
RETURN<br />
40 RHO = 30 :0 = 350 : THETA = .3 : PHI = 1:CX =<br />
140 :CY = 96 : S1 = SIN (THETA) : SZ = SIN<br />
(PHI) : C1 = COS (THETA) : CZ = COS (PHI)<br />
50 DEF FN Z(X) = COS (.1 * (X * X + Y * Y))<br />
60 HGRZ : HCOLOR= 3<br />
70 FOR X = 10 TO - 10 STEP - 1<br />
80 FL = 0<br />
90 FOR Y = - 10 TO 10<br />
100 Z = FN Z(X) : GOSUB ZO<br />
110 IF SX < 0 OR SX > Z79 OR SY < 0 OR SY > 191<br />
TH EN FL = 0: GOTO 140<br />
1ZO IF FL = 0 THEN FL = 1: HPLOT SX,SY<br />
130 HPLOT TO SX,SY<br />
·1 4 0 N E x T y I x<br />
The program generates an image which represents the surface as a<br />
sequence of wire-frame curves. The curves are the intersections of the<br />
surface with vertical planes parallel to the YZ plane. We thus use twodimensional<br />
curves to create a three-dimensional image. This is an<br />
example of a standard maxim of mathematics and computer science:<br />
When attacking a new problem, reduce it to a simpler form-one which<br />
you know how to handle.<br />
The image obtained by the program obviously is dependent on the<br />
function selected (line 50). A pleasing image which shows the significant<br />
characteristics of the surface typically is the result of a time-consuming<br />
trial-and-error process. Minor changes in the definition of the function<br />
may affect the image significantly. You might experiment with minor<br />
variations in the above function. Try<br />
or<br />
Z = 3* COS(.4*(X* X+Y* Y))<br />
Z = COS(.1 *(X* X+ Y* Y)).<br />
A smoother surface will result from calculating more points on each<br />
curve (decreasing the step size of the loop beginning in line 90). Of<br />
course, this will result in an increase in execution time.<br />
While the image is dependent on the function, it is also severely affected<br />
by the choice of the viewing parameters RHO, THETA, PHI,
154 <strong>Microcomputer</strong> <strong>Graphics</strong><br />
and D. Try RHO= 60 or PHI = 2, or experiment with other choices of<br />
your own.<br />
As different viewing positions are selected, the image may become<br />
badly confused by overlapping curves. The program creates a "transparent"<br />
surface. We can "see through" the near parts of the surface to<br />
the farther parts that lie behind. This is sometimes desirable, but frequently<br />
is a problem, leading to confused images and optical illusions.<br />
We might obtain images that are more pleasing if the closer portions of<br />
the surface were able to "hide" the more distant portions. In general,<br />
the development of effective hidden line algorithms is one of the most<br />
challenging problems in computer graphics. The next chapter provides<br />
some approaches to the problem.<br />
Experiment with the graphs of the following functions. It usually<br />
will be necessary to adjust the viewing parameters and the domain<br />
(limits of the FOR-NEXT loops). Selection of larger values for the<br />
STEP size will result in faster program execution, but "curves" that are<br />
more angular.<br />
1. Z = 3 * COS(.05 *(X *X Y * Y ) ) Try different viewpoints.<br />
2. Z = 3 * EXP ( - • 1 * ( X * X + Y * Y ) )<br />
3. z = A* s IN
Chapter 7<br />
Hidden Line and Hidden<br />
Surface Routines<br />
ffi ffi EB<br />
Figure 7.1<br />
155
156 <strong>Microcomputer</strong> <strong>Graphics</strong><br />
INTRODUCTION<br />
Faster than a speeding bullet!<br />
More powerful than a locomotive!!<br />
Able to leap tall buildings in a single bound!!!<br />
Superman also had x-ray vision; he could see through objects. As ordinary<br />
people we might envy such an ability when we must make special<br />
efforts to identify a weak component in a mechanical device, or to study<br />
the inner workings of the human body, or when we are looking for lost<br />
car keys. On the other hand, uncontrolled x-ray vision would be inconvenient.<br />
An "x-ray world," in which all things are transparent or translucent,<br />
would be a very confusing place. We might then wish fot the<br />
ability to look at an object, to turn it over as we study it, without being<br />
able to see through the closer surfaces of the object to the farther surfaces<br />
and vertices.<br />
Our previous attempts to provide images of three-dimensional objects<br />
resulted in an x-ray world. Our microcomputer has Superman's vision,<br />
which we would like to have behave in a more "normal" fashion.<br />
It will require some very special efforts on our part to bring it under control.<br />
We must develop methods for identifying those surfaces and line<br />
segments which are visible, or partly visible, and those which are not.<br />
We may then display the visible portions of an object and eliminate<br />
those portions which are hidden from view.<br />
The elimination of hidden lines and surfaces is one of the most challenging<br />
problems of computer graphics. Hidden line algorithms require<br />
large amounts of computer time and memory. These are precious commodities<br />
in a microcomputer. For this reason we will limit our discussion,<br />
presenting the theory of operation of several techniques and providing<br />
sample programs that draw images of simple three-dimensional<br />
objects. A general-purpose hidden line subroutine would be very inefficient.<br />
It is much more effective for the programmer to adapt the tech-<br />
. niques to each specific application.<br />
SURFACE ORIENTATION<br />
The processes described in Chapter 6 permit the drawing of images of<br />
three-dimensional objects. If we want to avoid drawing the hidden lines<br />
and surfaces of objects it is necessary to have a method of distinguishing<br />
the visible lines from the hidden lines.
Hidden Line and Hidden Surface Routines 157<br />
One obvious way to display only the visible portions of an object is<br />
to be careful that only the visible portions be identified to the computer.<br />
This was done in Program 6.1, which drew only the visible portions of a<br />
cube. Only the vertices of surfaces which were visible from the specified<br />
viewpoint were identified in the program. This technique requires the<br />
programmer to plan the view desired and to identify the points of the<br />
object which are visible from that view. The program is short and draws<br />
the image quickly. It is limited, however. If the image is to be drawn<br />
from a different viewpoint, it may be necessary to change the DA TA<br />
statements and the program portion that draws the visible line segments.<br />
The following method is more general. The program determines<br />
which surfaces are facing the viewpoi:µt and identifies these as the visible<br />
surfaces.<br />
NOTE: Tqe following discussion assumes familiarity with vectors<br />
and the cross products and dot products of vectors. See Appendix 3<br />
for a brief summary of these concepts.<br />
THEORY OF OPERATION<br />
As we look at a die, two or three of the faces are visible to us. The other<br />
faces are not visible since they are facing away from us (see Figure 7 .2).<br />
It is the orientation, or "facing direction" of a surface, that we will use<br />
in our first hidden line technique.<br />
With each face of a cube we can associate two normal (perpendicular)<br />
directions. One normal direction will point inward; the other will<br />
point outward, away from the cube. We represent these directions by<br />
normal vectors and take the outward-pointing vector as the orientation<br />
vector of the surface. The outward-pointing normals are shown in Figure<br />
7.3).<br />
With each surface of an object we also associate a second vector, a<br />
line-of-sight vector. This is the vector directed from one of the vertices<br />
Figure 7.2<br />
®<br />
'<br />
•
158 <strong>Microcomputer</strong> <strong>Graphics</strong><br />
Figure 7.3<br />
of the surface (any vertex) to the viewpoint (the location of the eye of<br />
the viewer).<br />
For each surface we may measure the angle between the line-ofsight<br />
vector and the orientation vector. If this angle is between 0° and<br />
90°, the surface is facing the viewer. It is visible and should be displayed.<br />
If the angle is between 90° and 180°, then the surface is facing<br />
away from the viewer. It is not visible and should not be displayed.<br />
(See Figure 7.4)<br />
ORIENTATION VECTOR<br />
In Figure 7 .5, we have numbered the vertices of one surface of a cube.<br />
The identification of vertex number I is arbitrary, but it is important<br />
that the numbering of the remaining vertices of the surface continue in<br />
a counterclockwise direction, as viewed from outside the cube, facing<br />
the surface. We then identify vector u, directed from vertex number I<br />
to vertex number 2, and vector v, directed from vertex number I to<br />
vertex number 3. The cross product, rt= u x v, will be normal (perpendicular)<br />
to the face of the cube and will be directed outward. (The<br />
magnitude, or length, of the orientation vector rt will not be of importance<br />
to us.)
Hidden Line and Hidden Surface Routines<br />
159<br />
e<br />
(a)<br />
Figure 7.4<br />
Figure 7.5<br />
CD<br />
NOTE: It is important that the vertices numbered 1, 2, 3, 4 on the<br />
surface be given in counterclockwise direction as seen from outside<br />
the cube, facing the surface. If the points are assigned in a clockwise<br />
direction, the vector rt = it x v, as described above, will be pointing<br />
inward.
160 <strong>Microcomputer</strong> <strong>Graphics</strong><br />
VISIBILITY<br />
The dot product of vectors w and ii has the property<br />
w ·<br />
ii = [w[<br />
[ii[ cose<br />
where (J is the angle between w and ii. If .8 is between 0° and 90°, the<br />
value of w · ii will be positive. If (J is between 90° and 180°, w · ii will be<br />
negative.<br />
Using w to represent the line-of-sight vector of a surface, and ii to<br />
represent the orientation vector, we have a visibility test. For a visible<br />
surface, such as the surface of Figure 7.4b, the angle between w and ii is<br />
between 0° and 90 °, and w · ii is positive. For a hidden surface, as in<br />
Figure 7.4a, the angle between w and ii is between 90° and 180°, and<br />
.. .. . .<br />
w · n is negative.<br />
Program 7.1<br />
To illustrate the use of surface orientation in eliminating hidden lines,<br />
we will discuss a program which draws a house. (The program which<br />
draws this object is a long one, so we will present it in five parts. The<br />
complete listing of the program is given on pages 169-171.)<br />
The house is defined by seven surfaces: two roof components, the<br />
front, the back, two ends, and the bottom. Each surface is defined by<br />
Figure 7.6
Hidden Line and Hidden Surface Routines 161<br />
four or five edges. The two ends have five edges each; the other surfaces<br />
have four edges each. The edges, in turn, are defined by endpoints, or<br />
vertices. For the house shown (Fig. 7 .6), there are 10 vertices.<br />
The Vertex Array<br />
We begin by identifying the ten vertices of the house. For reference purposes<br />
they are numbered as shown in Figure 7. 7.<br />
Vertex<br />
Coordinates<br />
l 5 7 -5<br />
2 5 7 5<br />
3 5 -7 5<br />
4 5 -7 -5<br />
5 -5 7 -5<br />
6 -5 -7 -5<br />
7 -5 -7 5<br />
8 -5 7 5<br />
9 0 7 8<br />
IO 0 -7 8<br />
Figure 7.7
162 <strong>Microcomputer</strong> <strong>Graphics</strong><br />
Program 7. 1 , Part 1<br />
10 REM VIEWPOINT AND SCREEN PARAMETERS<br />
20 RHO = 40 : THETA = .?:PHI = 1 : D = 250<br />
30 ex = 140:CY = 96 :S1 = SIN (TH) :C1 = cos<br />
CTH) :S2 = SIN CPH) : C 2 = COS (PH)<br />
40 REM VERTICES<br />
50 DATA 5 , 7 , -5<br />
60 DATA 5 , 7 , 5<br />
70 DATA 5 , -7 , 5<br />
80 DATA 5 , -7 , -5<br />
90 DATA - 5 , 7 , - 5<br />
100 DATA - 5 , -7 , - 5<br />
110 DATA - 5 , -7 , 5<br />
120 DATA -5 , 7 , 5<br />
130 DATA 0 , 7 , 8<br />
140 DATA 0 , -7 , 8<br />
150 REM FILL VERTEX ARRAYS<br />
160 DIM VC10, 3) , SVC1 0 , 2)<br />
170 FOR I = 1 TO 10<br />
180 READ X , Y , Z<br />
190 VCI, 1 ) = X:VCI, 2) = Y:VCI, 3) = Z<br />
200 X1 = - X * S1 + Y * C1 :Y1 = - X * C1 * C2<br />
Y * S1 * C2 + Z * S2 :Z1 = - X * S2 * C1 - Y<br />
* S2 * S1 - Z * C2 + RHO<br />
21 0 SVCI, 1 ) = D * CX1 I Z1 ) + CX :SVCI, 2) = D *<br />
CY1 I Z1 ) + CY<br />
220 NEXT I<br />
Program lines 40 through 220 load the vertex coordinates into a twodimensional<br />
vertex array. For each array entry, V(l,J), I is the identification<br />
number of the vertex (between 1 and 10), while J is the number of<br />
the coordinate identified. For example, V(8,1) will be the first (x) coordinate<br />
of the 8th vertex, V(8,2) will be the second (y) coordinate of the<br />
8th vertex, and V(8,3) will be the third (z) coordinate of the 8th vertex.<br />
Since vertex number 8 is ( -5, 7 ,5), we have<br />
V(8,l) = -5<br />
V(8,2) = 7<br />
V(8,3) = 5<br />
As the coordinates of the vertices are saved in the vertex array, the<br />
screen coordinates of each point are calculated for the screen vertex array<br />
SV(l,J), For each I, SV(l,1) and SV(l,2) are the screen coordinates<br />
SX,SY, respectively, of point number I.
Hidden Line and Hidden Surface Routines 163<br />
The Surface Array<br />
There are seven surfaces in the object (house) to be drawn. The surfaces<br />
are identified by number as shown in Figure 7.8.<br />
Each surface may be drawn by connecting the appropriate vertices:<br />
for surface I, connect vertex I to 2 to 3 to 4 to I; for surface 2, connect<br />
vertex I to 5 to 8 to 9 to 2 to 1. The other surfaces are defined in a similar<br />
manner (see Figure 7 .9).<br />
The array S(I,J) identifies, for each surface I, the vertices that define<br />
the surface. Since the boundary of surface I connects vertices 1,2,3 ,4,<br />
and 1, these numbers are saved as S(l, 1), S(l ,2), S(l ,3), S(l ,4), and<br />
S(l,5), respectively. Similarly, S(2,l) = 1, S(2,2) = 5, S(2,3) = 8,<br />
S(2,4) = 9, S(2,5) = 2, and S(2,6) = I.<br />
m@<br />
0 ® ®<br />
.<br />
0 0<br />
CD<br />
Figure 7.8<br />
0<br />
l<br />
G:J@ i<br />
© CD<br />
Figure 7.9
164 <strong>Microcomputer</strong> <strong>Graphics</strong><br />
The complete array looks like this:<br />
J<br />
(p oints to be connected)<br />
S(l,J) 1 2 3 4 5 6<br />
2 3 4 0<br />
2 I 5 8 9 2 I<br />
3 5 6 7 8 5 0<br />
(surface) 4 4 3 10 7 6 4<br />
5 3 2 9 10 3 0<br />
6 7 10 9 8 7 0<br />
7 4 6 5 0<br />
It is important, for each surface, that the vertices be identified in<br />
counterclockwise order as they appear from outside the object. You<br />
should verify that the points as listed in the surface array are in proper<br />
order. Refer to Figure 7.8 for outside views of each of the surfaces.<br />
Program 7 .1; Part 2<br />
230 REM NUMBER OF POINTS IN EACH SURFACE<br />
240 DATA 5 , 6 , 5 , 6 , 5 , 5 , 5<br />
250 DIM NPS (7)<br />
260 FOR I =<br />
1 TO 7<br />
270 READ NPS(I)<br />
280 NEXT I<br />
290 REM SURFACE ARRAY<br />
300 DATA 1 , 2 , 3 , 4 , 1<br />
31 0 DATA 1 , 5 , 8 , 9 , 2 , 1<br />
320 DATA 5 , 6 , 7 , 8 , 5<br />
330 DATA 4 , 3 , 10, 7 , 6 , 4<br />
340 DATA 3 , 2 , 9 , 10, 3<br />
350 DATA 7 , 1 0 , 9 , 8 , 7<br />
360 DATA 1 , 4 , 6 , 5 , 1<br />
370 REM FILL SURFACE ARRAY<br />
380 DIM S(7 , 6)<br />
390 FOR I =<br />
1 TO 7<br />
400 FOR J =<br />
1 TO NPS(I)<br />
41 0 READ S(I, J)<br />
420 NEXT J , I<br />
-<br />
POINTERS TO VERTICES<br />
The Normal Array<br />
The Surface Orientation approach to hidden line elimination requires a<br />
vector normal (perpendicular) to each of the surfaces. These normals<br />
are calculated in program lines 430 through 550.
Hidden Line and Hidden Surface Routines 165<br />
Program 7.1; Part 3<br />
430 REM CALCULATE VECTOR NORMAL TO EACH SURFACE<br />
440 DIM N(7,3)<br />
450 FOR I<br />
=<br />
1 TO 7<br />
460 U1<br />
=<br />
V(S(l,2),1) V(S(I,1),1)<br />
470 U2<br />
=<br />
V(S(l,2),2)<br />
-<br />
V(S(I,1),2)<br />
480 U3<br />
=<br />
V(S(l,2),3) V(S(l ,1) ,3)<br />
490 V1<br />
=<br />
V(S(l,3),1)<br />
500 V2<br />
=<br />
V(S(l,3),2)<br />
510 V3<br />
=<br />
V(S(l,3),3)<br />
520 N(I,1)<br />
=<br />
U2 * V3<br />
530 N(l,2)<br />
=<br />
U3 * V1<br />
-<br />
-<br />
-<br />
-<br />
-<br />
V(S(l,1),1)<br />
V(S(l,1),2)<br />
V(S(I,1),3)<br />
V2 * U3<br />
V3 * U1<br />
540 N(l,3)<br />
=<br />
U1 * V2 V1 * U2<br />
550 NEXT<br />
The order in which points are listed in the surface array is important<br />
when the normal array is developed. This array contains the coordinates<br />
of outward pointing normal vectors to the surfaces. N(l,1), N(l,2), and<br />
N(l ,3) are the x, y, z components of an outward pointing normal vector<br />
to surface 1. N(2, 1), N(2,2), and N(2,3) are the components of an outward<br />
pointing normal vector to surface 2. For each surface I (1 ::::; I ::5<br />
7), the array values N(I,1), N(l,2), and N(l,3) are the components of an<br />
outward pointing vector that is normal to the surface.<br />
The calculation of the normal vectors makes use of the fact that the<br />
cross product of two vectors is normal to the plane containing the two<br />
vectors. To identify a vector normal to a surface, we first choose vectors<br />
u and vwhich are parallel to the surface. Then u x vwill yield a normal<br />
vector.<br />
Each surface has either five or six vertices. Program lines 460<br />
through 510 identify u as extending from the first to the second of these<br />
vertices. Vector v extends from the first to the third vertex. Lines 520<br />
through 540 calculate the components of the cross product of u and v.<br />
Notice how the order of vertices affects the calculation of the normal<br />
vector. If the vertices of a surface are listed in a clockwise direction,<br />
then the relative orientation of u and v will be reversed, and u x v will<br />
be an inward pointing normal vector, rather than an outward pointing<br />
normal vector (see Figure 7 .10).<br />
The Visibility Test<br />
We are now ready to apply the visibility test to ech surface of the object.<br />
For each surface, we choose a line-of-sight vector w extending from<br />
a point (any point) on the surface to the viewpoint (XE, YE,ZE). The
166 <strong>Microcomputer</strong> <strong>Graphics</strong><br />
Figure 7.10<br />
angle between w and the outward pointing normal, n, provides a visibility<br />
criterion. If the angle is between 0° and 90°, the surface faces the<br />
viewer. In this case the dot product n · w will be positive. If the angle is<br />
between 90° and 180° the surface faces away from the viewer; n. '<br />
w will<br />
be negative.<br />
Program line 650 is the visibility filter. Those surfaces which face<br />
the viewer (n · w > 0) will pass through the filter, eventually to be plotted.<br />
Those surfaces which do not face the viewer (n · w :5 0) will be rejected.<br />
Program 7 .1; Part 4<br />
560 REM DETERM INE VISIBILITY OF EACH SURFACE<br />
570 REM AND COLLECT VISIBLE EDGES IN EDGE ARRAY<br />
580 XE =<br />
RH * S2 * C 1 : YE<br />
=<br />
RH * S2 * s 1 :<br />
ZE =<br />
RH * C2<br />
590 DIM E(12, 3) :N =<br />
1<br />
600 FOR I<br />
=<br />
1 TO 7<br />
6 10 E2 =<br />
S(I, 1 )<br />
620 wx<br />
=<br />
XE<br />
-<br />
630 WY =<br />
YE<br />
-<br />
640 w z<br />
= ZE<br />
-<br />
V(E2 , 1 )<br />
V(E2 , 2)<br />
V(E2 , 3)<br />
650 IF N(I, 1 ) * wx + N(I, 2) * WY + N(I, 3) *<br />
w z < =<br />
0 THEN 760<br />
660 E1 =<br />
S(I, 1 )<br />
670 FOR J =<br />
2 TO NPS (l)<br />
680 E2 =<br />
S(I, J)<br />
690 FOR K<br />
=<br />
1 TO N
Hidden Line and Hidden Surface Routines<br />
167<br />
700 IF E(K,1) = E2 AND E(K,2) = E1<br />
THEN E(K,3) = 2: GOTO 740<br />
710 NEXT K<br />
720 E(N,1) = E1: E(N,2) = E2: E(N,3) =<br />
730 N = N + 1<br />
740 E1 = E2<br />
750 NEXT J<br />
760 NEXT I<br />
The Edge Array<br />
Visible surfaces are decomposed into edges that are collected in the edge<br />
array, which has been dimensioned to accept as many as 12 edges [DIM<br />
E(l2,3)].<br />
Each of the edges that are put in the array is identified by a number I<br />
(between 1 and 12). For each edge I, three numbers are saved. E(I, 1) and<br />
E(l,2) are the identification numbers of the two endpoints of the edge.<br />
E(l,3) is a tag, and identifies the number of visible surfaces for which<br />
the edge is a boundary. If the edge is a boundary of one visible edge,<br />
then the value of E(l,3) is 1. If the edge is a boundary of two visible<br />
edges, then the value of E(l,3) is 2.<br />
Figure 7 .11 illustrates the labelling of edges in the edge array.<br />
Edge<br />
1<br />
2<br />
3<br />
4<br />
5<br />
6<br />
7<br />
8<br />
9<br />
10<br />
11<br />
12<br />
Endpoints<br />
1 2<br />
2 3<br />
3 4<br />
4<br />
5<br />
5 8<br />
8 9<br />
9 2<br />
9 10<br />
10 3<br />
0 0<br />
0 0<br />
Tag<br />
2<br />
2<br />
1<br />
I<br />
2<br />
1<br />
0<br />
0<br />
Edges 11 and 12 are not needed for this view. The array provides<br />
more space than is necessary; no view of the object will show more than<br />
12 edges.<br />
Notice that the edges that are "outer" edges of the drawing (edges<br />
3,4,5,6,7,9,10) all have a tag with a value of 1. These edges are those<br />
which are a boundary of only one visible surface. The "inner" edges of
the drawing (1,2,8) are those which bound two visible surfaces. Their<br />
tags are all equal to 2. The distinction between "inner" and "outer"<br />
edges becomes important when we consider the drawing of more than<br />
one object.<br />
Program lines 660 through 760 fill the edge array. The endpoints of<br />
each edge are read from the surface array (lines 660, 680, and 740) and<br />
stored in the edge array (line 720), and the tag is set to 1. If an edge is encountered<br />
for a second time, the tag is reset to 2 (line 700).<br />
Plotting<br />
It is now the time to draw the visible edges. Lines 790 through 830 identify<br />
the visible edges (those with nonzero tags), read the identification<br />
numbers of the corresponding endpoints, and plot the edges.<br />
Program 7 .1; Part 5<br />
770 REM DRAW VISIBLE EDGES<br />
780 HGR2 : HCOLOR= 3<br />
790 FOR I = 1 TO 12
Hidden Line and Hidden Surface Routines<br />
169<br />
800 IF E(l,3) = 0 THEN 830<br />
810 J = E(l,1): K = E(l,2)<br />
820 HPLOT SV(J,1),SV{J,2) TO SV(K,1),SV(K,2)<br />
830 .NEXT I<br />
840 END<br />
Program 7.1: HIDDEN LINE ELIMINATION, SURFACE ORIENTATION<br />
METHOD<br />
1 REM PROGRAM 7.1 (HIDDEN LINE ELIMINATION)<br />
2 REM SURFACE ORIENTATION METHOD<br />
10 REM VIEWPOINT AND SCREEN PARAMETERS<br />
20 RHO = 40: THETA = .?: PHI = 1: D = 250<br />
30 ex = 140: CY = 96: S1 = SIN
170 <strong>Microcomputer</strong> <strong>Graphics</strong><br />
31 0 DATA 1 , 5 , 8 , 9 , 2 , 1<br />
320 DATA 5 , 6 , 7 , 8 , 5<br />
330 DATA 4 , 3 , 10, 7 , 6 , 4<br />
340 DATA 3 , 2 , 9 , 10, 3<br />
350 DATA 7 , 10, 9 , 8 , 7<br />
360 DATA 1 , 4 , 6 , 5 , 1<br />
370 REM FILL SURFACE ARRAY<br />
380 DIM S(7 , 6)<br />
390 FOR I = 1 TO 7<br />
400 FOR J = 1 TO NPS(I)<br />
41 0 READ S(l, J)<br />
420 NEXT J , I<br />
43 0 REM CALCULATE VECTOR NORMAL TO EACH SURFACE<br />
440 DIM NC7 , 3)<br />
450 FOR I = 1 TO 7<br />
460 U1 = V(S(l, 2) , 1 ) - V(S(l, 1 ) , 1 )<br />
470 U2 = V(S(I, 2) , 2) - V(S(l, 1 ) , 2)<br />
480 U3 = V(S(l, 2) , 3) - V(S(I, 1 ) , 3)<br />
490 V1 = V(S(l, 3) , 1 ) - V(S(I, 1 ) , 1 )<br />
500 V2 = V(S(l, 3) , 2) - V(S(I, 1 ) , 2)<br />
51 0 V3 = V(S(I, 3) , 3) - V(S(l, 1 ) , 3)<br />
520 N(l, 1 ) = U2 * V3 - V2 * U3<br />
530 N(l, 2) = U3 * V1 - V3 * U1<br />
540 N(l, 3) = U1 * V2 - V1 * U2<br />
550 NEXT I<br />
560 REM DETERMINE VISIBILITY OF EACH SURFACE<br />
570 REM AND COLLECT VISIBLE EDGES IN EDGE ARRAY<br />
580 XE = RH * S2 * C1 :YE = RH * S2 * S1 :<br />
ZE = RH * C2<br />
590 DIM E(1 2 , 3) :N = 1<br />
600 FOR I = 1 TO 7<br />
61 0 E2 = S(I, 1 )<br />
620 WX = XE - VCE2 , 1 )<br />
630 WY = YE - V(E2 , 2)<br />
640 WZ = ZE - V(E2 , 3)<br />
650 IF N(I, 1 ) * WX + N ( l , 2) * W Y + N(l, 3) * WZ<br />
< = 0 THEN 760<br />
660 E1 = S(I, 1 )<br />
670 FOR J = 2 TO NPS(I)<br />
680 E2 = S(l, J)<br />
690 FOR K = 1 TO N<br />
700 IF E(K , 1 ) = E2 AND E(K, 2) = E1<br />
THEN E(K, 3) = 2: GOTO 740<br />
71 0 NEXT K<br />
720 E(N , 1 ) = E1 : E (N, 2) = E2 :E(N , 3) = 1<br />
73 0 N = N + 1
Hidden Line and Hidden Surface Routines<br />
171<br />
740 E1 = E2<br />
750 NEXT J<br />
760 NEXT I<br />
770 REM DRAW VISIB LE EDGES<br />
780 HGR2 : HCO LOR= 3<br />
790 FOR I = 1 TO 12<br />
800 IF E(l,3) = 0 THEN 830<br />
81 0 J = E(l,1 ): K = E(l,2)<br />
820 HP LOT SV(J,1 > ,SV(J,2) TO SV( K,1 > ,SV( K,2)<br />
830 NEXT I<br />
840 END<br />
NOTES AND SUGGESTIONS<br />
1. If you became impatient with the above program and recognize<br />
ways that could make it more efficient, good ! The program was designed<br />
to illustrate the surface orientation approach to eliminating hidden<br />
lines in a way that was easy to describe, and to introduce some techniques<br />
(such as the edge array, with tags) that will be valuable later.<br />
These goals did not lead to the most efficient program. For example,<br />
one-dimensional arrays are accessed more rapidly than are two-dimensional<br />
arrays.<br />
2. The viewpoint parameters are specified in line 20. Try a variety<br />
of views. In general, you will want to change only THETA or PHI.<br />
3. Choosing small values for RHO or large values for D may result<br />
in an image that will not fit on the screen. You may want to insert a clipping<br />
routine (see Chapter 4).<br />
4. Programming other convex polygonal solids will require obvious<br />
changes in the data for the vertex array and the surface array, and related<br />
changes in the limits of the various FOR-NEXT loops. Try objects<br />
such as cubes, pyramids, and prisms.<br />
5. Once a surface is identified as being visible (facing the viewer),<br />
components within that surface may be assumed to be visible. To each<br />
of the four walls of the house, add windows and doors, drawing these<br />
components whenever the corresponding surface is visible.<br />
TWO OBJECTS; BLACKOUT<br />
The methods described above permit the drawing of the visible portions<br />
of a single convex object. In the pages ahead, methods will be presented<br />
that allow the drawing of the visible portions of several objects. In addi-
172 <strong>Microcomputer</strong> <strong>Graphics</strong><br />
tion to being concerned about the identification of those portions of an<br />
object which face toward, or away from, the viewer, it will be necessary<br />
to identify those portions which are hidden by a closer object.<br />
When we look around us, portions of objects are hidden by closer<br />
objects because of the inability of light to pass through an opaque substance.<br />
We could consider that the hidden portions of an object have<br />
been "drawn," but were "erased" by the "drawing" of a closer object<br />
(see Figure 7.12). This approach is used in Program 7.2.<br />
Program 7.2: HIDDEN LINE ELIMINATION , TWO OBJECTS; BLACKOUT<br />
1 REM PROGRAM 7.2 (HIDDEN LINE ELIMINAT ION)<br />
2 REM TWO OBJ ECTS; BLACKOUT<br />
10 TEXT : HOME : GOTO 130<br />
20 XE = -X * S1 + Y * C1 :YE = -X * C1 * C2 - Y *<br />
S1 * C2 + Z * S2 :ZE = -X * S2 * C1 - Y * S2 *<br />
S1 - Z * C2 + RHO<br />
30 SX = D * XE I ZE + CX :SY = CY D * YE I ZE :<br />
RETURN<br />
40 DATA 1 , 1 , 0 , 0 , 0 , 1 , 0 , 1 , 0 , 1 , 1 , 0 , 1 , 0 , 0 ,<br />
0 I 0 I 1<br />
50 DATA 1 , 1 . 5 , 1 , 0 , 1 . 5 , 1<br />
60 DATA 0 , 2.5, 1 , 1 , 2 .5, 1 , 1 , 2.5, 0 ,<br />
0 , 2.5, 0 , 0 , 2.5, 1 , 0 , 1 . 5 , 1 , 1 , 1 . 5 , 1 , 1 , 1 . 5 , 0 ,<br />
1 , 2.5, 0 , 1 , 2.5, 1 , 1 , 1 . 5 , 1<br />
70 FOR I = 1 TO N: READ X , Y , Z<br />
80 GOSUB 20<br />
90 IF I = 1 THEN HPLOT SX , SY<br />
100 HPLOT TO SX , SY<br />
110 NEXT I<br />
Figure 7.12
Hidden Line and Hidden Surface Routines<br />
173<br />
120 RETU RN<br />
130 RHO = 10:D = 600 : THET A = 1 : PHI = 1 . 2:<br />
ex = 140: CY = 96<br />
140 S1 = SIN (THETA) :C1 = COS (THETA)<br />
150 S2 = SIN (PHI) :C2 = COS (PHI)<br />
160 HG R2 : HCOLO R= 7<br />
170 N = 6: GOSUB 70<br />
180 READ X,Y,Z : GOSUB 20 :X1 = SX :Y1 = SY<br />
190 READ X,Y,Z : GOSUB 20 :X2 = SX : Y2 = SY<br />
200 SL = (Y 1 - Y2) I (X 1 - X2)<br />
21 0 HCOLOR= 4<br />
220 FO R XP = X1 TO X2 : YP = SL * (XP - X1 ) + Y1<br />
230 HPLOT XP,YP TO XP,1 91<br />
240 NEXT XP<br />
250 HCOLOR= 7<br />
260 N = 9: GOSUB 70:N = 2: GOSUB 70<br />
The data in lines 40 through 60 identify the vertices of a cube and a<br />
pyramid as shown in Figure 7 .12. The only vertices given are those<br />
which are part of a surface that faces the viewer. The more distant of the<br />
two objects (the pyramid) is drawn first (line 170). Before the closer object<br />
(the cube) is drawn, the hidden portions of the pyramid are removed<br />
from the screen. This is accomplished by using HCOLOR = 4 (BLACK,<br />
the background color) to draw over a portion of the screen occupied by<br />
the cube. The erasure of the hidden parts of the pyramid is handled in<br />
lines 180 through 240. Vertical black lines are drawn from the screen<br />
image of one of the cube edges to the bottom of the screen. When the<br />
erasure is complete, the cube is drawn (line 260).<br />
This technique of hidden line elimination is fairly easy to use, and<br />
gives nice results in short execution time. It is limited, however; the<br />
viewpoint must be planned well in advance. This planning is necessary in<br />
order that only the vertices of visible surfaces are provided, and so that<br />
the region to be "blacked out" may be identified. A change in viewpoint<br />
typically will require changes in DAT A statements and changes in the<br />
blackout routine.<br />
TWO OBJECTS; BINARY SEARCH<br />
In Figure 7 .13, the cube should block vertex H of the pyramid from<br />
view. Edge VH of the pyramid should be partly hidden, with only VT<br />
visible. While the screen coordinates of vertex V are available, the coordinates<br />
of T must be calculated. Since Tis the point of intersection of
174 <strong>Microcomputer</strong> <strong>Graphics</strong><br />
v<br />
p<br />
Figure 7.13<br />
cube edge PQ and pyramid edge VH, the coordinates of T could be calculated<br />
from the equations of lines VH and PQ. The algebra involved is<br />
straightforward, but not efficient. Instead, we will recommend a "binary<br />
search" to identify the coordinates of T.<br />
Program 7 .3: HIDDEN LINE ELIMINATION , TWO OBJECTS; BINARY<br />
SEARCH<br />
1 REM PROGRAM 7.3 (HIDDEN LINE ELIMINATION)<br />
Z REM TWO OBJ ECTS; BINARY SEARCH<br />
10 TEXT : HOME : GOTO 140<br />
ZO XE = -X * S1 + Y * C1 :YE = -X * C1 * CZ - Y *<br />
S1 * CZ + Z * SZ :ZE = -X * SZ * C1 - Y * SZ *<br />
S1 - Z * CZ + RHO<br />
30 SX = D * XE I ZE + CX : SY = CY - D * YE I ZE :<br />
RETURN<br />
40 DATA O , Z.5, 1 , 1 , Z.5, 1 , 1 , Z.5, 0 ,<br />
O , Z.5, 0 , 0 , Z.5; 1 , 0 , 1 . 5 , 1 , 1 , 1 . 5 , 1 , 1 , 1 . 5 , 0 ,<br />
1 , Z.5, 0 , 1 , Z.5, 1 , 1 , 1 . 5 , 1<br />
50 DATA 1 , 1 , 0 , 0 , 0 , 1 , 1 , 0 , 0 , 1 , 1 , 0<br />
60 DATA 1 , 1 , 0 , 0 , 1 , 0 , 1 , 1 . 5 , 0 , 1 , 1 . 5 , 1<br />
70 DATA 0 , 0 , 1 , 0 , 1 , 0 , 1 , 1 . 5 , 1 , 0 , 1 . 5 , 1<br />
80 FOR I = 1 TO N: READ X , Y , Z<br />
90 GOSUB ZO<br />
100 IF I = 1 THEN HPLOT SX , SY<br />
1 1 0 HPLOT TO SX, SY<br />
1ZO NEXT I<br />
130 RETURN<br />
140 RHO = 10:D = 600 :THETA = 1 :PHI = 1 . Z:<br />
ex = 140:cY = 96
Hidden Line and Hidden Surface Routines<br />
175<br />
150 S1 = SIN (THETA) : C1 = COS
176 <strong>Microcomputer</strong> <strong>Graphics</strong><br />
To determine the visibility of T, we identify vector l1 extending<br />
from point Q to point P, the vector (XV - XQ, YV - YQ) extending<br />
from point Q to point V, and the vector (XT - XQ,YT - YQ) extending<br />
from point Q to point T. If T is visible, then T must lie on the same<br />
side of line PQ as point V. If that is the case, the cross product of<br />
(XT - XQ, YT - YQ) and l1 will have the same sign as the cross product<br />
of (XV - XQ, YV - YQ) and vector ll. If T is not visible, the cross<br />
products will have opposite signs. (May we safely assume that neither<br />
cross product is zero?) Line 290 takes care of the comparison of the<br />
cross products.<br />
The value of (XT, YT) is accepted after the seventh value has been<br />
calculated. The length of (Vl, V2) is then 11128th of the distance from<br />
(XV,YV) to (XH,YH). This provides acceptable accuracy for most images<br />
on the Apple display screen. Greater accuracy may be obtained by<br />
increasing the number of cycles through the loop.<br />
On leaving the loop, the line segment from point V to point T is<br />
plotted. The procedure is then repeated for the second partially hidden<br />
line.<br />
TWO OBJECTS; ARBITRARY VIEWPOINT<br />
The previous two methods for eliminating hidden lines from images<br />
containing several convex objects place limits on the viewpoint. If it is<br />
pref erred to have a more general method, we may extend the surface<br />
orientation method.<br />
THEORY OF OPERATION<br />
We will use the objects shown in Figure 7 .14 to illustrate the calculations<br />
that are necessary.<br />
From the angle of view provided in 7 .14a, the cube lies closer to the<br />
viewer, hiding a part of the pyramid. In Figure 7 .14b, the pyramid hides<br />
part of the cube. One of our concerns will be the assignment of a priority<br />
to each of the objects. When two objects are a part of a scene, the<br />
one that is not hidden by the other will be given first priority status. The<br />
object which is partly hidden will be assigned second priority status. Assignment<br />
of priority may be made on the basis of distance from the<br />
viewpoint to the center of each object, with the closer object being assigned<br />
first priority status.<br />
A second method of assigning priority is based on a "separating<br />
plane" (a plane that separates the two objects). First priority is assigned
Hidden Line and Hidden Surface Routines 177<br />
Figure 7.14<br />
(a)<br />
(b)<br />
to the object that lies on the same side of the separating plane as the<br />
viewpoint. Any plane which separates the objects may be chosen as the<br />
"separating plane." (The separating plane may contain a point, an<br />
edge, or a surface of one or both of the objects.) If a change in separating<br />
planes causes a change in the priority of the objects, we need not<br />
worry. In that case, neither object will hide the other.<br />
Once the objects have been assigned priority, the first priority object<br />
may be plotted. We will use the surface orientation process to draw only<br />
those surfaces which face the viewer.<br />
The surface orientation process also will be applied to the second<br />
priority object in order to identify those surfaces which face the viewer.<br />
Each edge of a "visible" surface then must be considered separately to<br />
determine whether either of its endpoints are hidden by the first priority<br />
object. If neither endpoint is hidden, the edge may be plotted. If both<br />
endpoints are hidden, the edge is discarded. If exactly one endpoint is<br />
hidden, we must calculate the point of intersection of the screen image<br />
of the edge with the screen image of the boundary of the priority one object.<br />
The visible portion of the edge is then plotted.<br />
This problem presents challenges we have not faced before. We will<br />
illustrate them with a cube and an edge of a pyramid.<br />
In Figure 7. l 5a, the hidden portions of two edges of the pyramid are<br />
shown as dashed lines. Since the visible portion of each of these edges<br />
extends from the visible endpoint to the intersection with an outside<br />
boundary of the cube image, we may simplify the diagram by discarding<br />
the inner cube boundaries (Figure 7. l 5b).<br />
The orientation of the outside cube edges, inherited from the definition<br />
of the surface array entries, is shown in Figure 7. l 5c. In that drawing,<br />
note that point H of the pyramid edge, lying inside the cube boundaries<br />
and thus hidden by the cube, is in the left half-plane of each of the
178 <strong>Microcomputer</strong> <strong>Graphics</strong><br />
v<br />
• v<br />
• H<br />
(a) (b) (c)<br />
Figure 7 .15<br />
cube boundaries. Point V, which is not hidden by the cube, is in the left<br />
half-plane of several cube boundaries, and in the right half-plane of<br />
others. (See Appendix 3 for a discussion of half-planes.)<br />
To identify the visible portions of the pyramid edge, we move along<br />
the line from H to V, testing each point for visibility. Identify T as the<br />
first point which is found to lie in the right half-plane of at least one<br />
cube boundary. Then the visible line segment from V to T may be plotted.<br />
PROGRAM 7.4<br />
The methods described above are illustrated in the following program.<br />
To the ''house'' of Program 7 .1, we will add a second object: a ''chimney.''<br />
(Again, the program is a long one; it will be given in several<br />
parts.)<br />
The chimney is defined by six surfaces: the top, the bottom, and<br />
four sides. Every surface is defined by four edges, each of which is identified<br />
by its endpoints (vertices of the chimney).<br />
In defining the two objects, the vertices of the house are retained as<br />
they were defined in Program 7.1. (Figure 7.16).<br />
Vertex<br />
Coordinates<br />
1 5 7 -5<br />
2 5 7 5<br />
3 5 -7 5<br />
4 5 -7 -5<br />
5 -5 7 -5<br />
6 -5 -7 -5<br />
7 -5 -7 5<br />
8 -5 7 5<br />
9 0 7 8<br />
10 0 -7 8
Hidden Line and Hidden Surface Routines 179<br />
CD<br />
Figure 7.16<br />
The vertices of the chimney are identified by number as shown in Figure<br />
7.17.<br />
Vertex<br />
Coordinates<br />
11 -2 -7 -5<br />
12 -2<br />
13<br />
-9 -5<br />
-5 -9 -5<br />
14 -5 -7<br />
-5<br />
15 -2 -7 9<br />
16 -2<br />
17<br />
18<br />
-9<br />
-5 -9<br />
-5<br />
9<br />
9<br />
-7 9<br />
The Vertex Arrays<br />
Program lines 10 through 310 identify the viewpoint and screen parameters,<br />
and read the coordinates of the vertices into the vertex arrays. Arrays<br />
V(l,J) and SV(l,J) are dimensioned so that each accommodates the<br />
coordinates of 18 points. The vertex array V(l,J) serves the same function<br />
as before, with V(l,1), V(l,2), and V(l,3) identifying the x, y, and z<br />
coordinates of vertex I.<br />
Program 7.4; Part 1<br />
10 REM VIEWPOINT AND SCREEN PARAMETERS<br />
20 RHO = 40: THETA = .?: PHI = 1: 0 = 250<br />
30 ex = 140: CY = 96: S1 = SIN (TH) :<br />
C1 = COS (TH ) : S2 = SIN (PH ) : C2 = COS (PH )<br />
40 REM VERTICES OF OBJECT 1 (HOUSE )<br />
(continued)
180 <strong>Microcomputer</strong> <strong>Graphics</strong><br />
16<br />
17<br />
Figure 7 .17<br />
11<br />
14<br />
50 DATA 5 , 7 , -5<br />
60 DATA 5 I 7 I 5<br />
70<br />
DATA 5 , -7 , 5<br />
80 DATA 5 , -7 , -5<br />
90<br />
DATA -5 , 7 , -5<br />
100 DATA -5 , -7 , -5<br />
1 1 0 DATA -5 , -7 , 5<br />
1 2 0 DATA -5 , 7 , 5<br />
130 DATA 0 , 7 , 8<br />
140 DATA 0 , -7 , 8<br />
150 REM VERTICES OF OBJ ECT 2 (CHIMNEY><br />
160 DATA -2 , -7 , -5<br />
170 DATA -2 , -9 , -5<br />
180 DATA -5 , -9 , -5<br />
190 DATA -5 , -7 , -5<br />
200 DATA -2 , -7 , 9<br />
21 0 DATA -2 , -9 , 9<br />
220 DATA -5 , -9 , 9<br />
230 DATA -5 , -7 , 9<br />
240 REM FILL VERTEX ARRAYS<br />
250 DIM V(18, 3) , SV C18 , 3)<br />
260 FOR I = 1 TO 18<br />
270 READ x I y I z<br />
280 V(I, 1 ) = X:V(l, 2)<br />
= Y:V(l, 3)<br />
=<br />
z
Hidden Line and Hidden Surface Routines 181<br />
290 X1 = - x * S1 + y * c 1 : y 1 = -x * C1 * C2<br />
- y *<br />
S1 * C2 + z * S2: Z1 = -x * S2 * C1<br />
- y * S2 *<br />
S1<br />
-<br />
z * C2 + RH O<br />
300 SV CI,1 > = D * CX1 I Z1 > + ex :<br />
SV(I,2) = -D * ( y 1 I Z1 > + CY<br />
310 NEXT I<br />
The entries SV(l,1) and SV(l,2) are calculated as the values of V(l,1),<br />
V(l,2), and V(l,3) are identified. For each I, SV(l,l) and SV(l,2) identify<br />
the screen coordinates of the point (X,Y,Z). A third entry, SV(l,3) is<br />
available for each vertex I. Initially, each SV(l,3) is left equal to 0.<br />
Later, this entry will be changed in order to identify the status (visible or<br />
hidden) of some of the vertices.<br />
The Surface Array<br />
The surface array is the next to be filled. The array simply is an enlargement<br />
of the one used in Progam 7 .1, identifying surfaces 1 through 7 as<br />
the surfaces of the house, and surfaces 8 through 13 as the surfaces of<br />
the chimney. Surfaces 8 and 9 are the top and bottom of the chimney;<br />
surfaces 10, 11, 12, and 13 are the four sides of the chimney. As before,<br />
the array entries V(I, 1) through V(l,NPS(I)) identify the vertices of surface<br />
I, listed in counterclockwise order around the surface (as seen from<br />
outside the object).<br />
Program 7.4: Part 2<br />
320 REM NUMBER OF POI NTS IN EACH SURFAC E<br />
330 DATA 5,6,5,6,5,5,5,5,5,5,5,5,5<br />
340 DIM NPS(13)<br />
350 FOR I = 1 TO 13<br />
360 READ NPS(I)<br />
370 NEXT I<br />
380 REM SURFAC E ARRAY - POINTERS TO VERTIC ES<br />
390 DATA 1,2,3,4,1<br />
400 DATA 1,5,8,9,2,1<br />
410 DATA 5,6,7,8,5<br />
420 DATA 4,3,10,7,6,4<br />
430 DATA 3,2,9,10,3<br />
440 DATA 7,10,9,8,7<br />
450 DATA 1,4,6,5,1<br />
460 DATA 11,12,13,14,11<br />
(continued)
182 <strong>Microcomputer</strong> <strong>Graphics</strong><br />
470 DATA 15,18,17,16,15<br />
480 DATA 11,14,18,15,11<br />
490 DAT A 12,16,17,13,12<br />
500 DATA 11,15,16,12,11<br />
510 DATA 14,13,17,18,14<br />
520 REM FILL SURFACE ARRAY<br />
530 DIM S(13,6)<br />
540 FOR I = 1 TO 13<br />
550 FOR J = 1 TO NPS(I)<br />
560 READ S(I,J)<br />
570 NEXT J , I<br />
When complete, the surface array looks like this:<br />
J<br />
(points to be connected)<br />
S(I,J) 1 2 3 4 5 6<br />
1 2 3 4 1 0<br />
2 5 8 9 2 1<br />
3 5 6 7 8 5 0<br />
4 4 3 10 7 6 4<br />
5 3 2 9 10 3 0<br />
6 7 10 9 8 7 0<br />
7 1 4 6 5 1 0<br />
(surface) 8 11 12 13 14 11 0<br />
9 15 18 17 16 15 0<br />
10 11 14 18 15 11 0<br />
11 12 16 17 13 12 0<br />
12 11 15 16 12 11 0<br />
13 14 13 17 18 14 0<br />
The Normal Array<br />
The normal array is calculated as before, with N(l,1), N(l,2), and N(l,3)<br />
identifying the three components of the outward pointing normal vector<br />
to surface I.<br />
Program 7.4; Part 3<br />
580 REM CALCULATE VECTOR NORMAL TO EACH SURFACE<br />
590 DIM N(13,3)<br />
600 FOR I = 1 TO 13<br />
610 U1 = V(S(l,2),1) V(S(l,1),1)<br />
620 U2 = V(S(I,2),2) - V(S(I,1),2)
Hidden Line and Hidden Surface Routines 183<br />
630 U3<br />
=<br />
V(S(I,2),3) V(S(I,1),3)<br />
640 V1<br />
=<br />
V(S(!,3),1) V(S(!,1),1)<br />
650 V2<br />
=<br />
V(S(!,3),2) V(S(I,1),2)<br />
660 V3<br />
=<br />
V(S(!,3),3) V(S(I,1),3)<br />
670 N(I,1)<br />
=<br />
U2 * V3 V2 * U3<br />
680 N(!,2)<br />
=<br />
U3 * V1 V3 * U1<br />
690 N(I,3)<br />
=<br />
U1 * V2<br />
700 NEX T<br />
-<br />
V1 * U2<br />
Edge Array<br />
In Program 7 .1, the edge array provided space for the identification of<br />
the endpoints of as many as 12 visible edges of the house. The chimney<br />
adds 12 edges, no more than nine of which are visible from any given<br />
viewpoint.<br />
Since some of the edges of the farther object may be partly hidden<br />
by the closer object, it is useful to classify each edge so that it may be<br />
referenced by object number. The edge array is dimensioned E(2,1 2,3).<br />
When referencing an entry in the edge array, E(l,J ,K), I will have a<br />
value of 0 or 1, referring to an edge of object 1 or object 2 (house or<br />
chimney). For each I, J will have a value between 1 and 12, allowing as<br />
many as 12 visible edges for each object (at most, 12 are needed for the<br />
house; at most, 9 for the chimney). For edge J of object I, E(l,J,1) and<br />
E(l,J ,2) are pointers to the vertices that are the endpoints of the edge.<br />
E(l,J ,3) is a tag which identifies the number of visible surfaces for which<br />
·<br />
the edge is a boundary.<br />
Figure 7 .18 shows the pattern of labelling the edges in the edge array.<br />
I =<br />
1; object I (house)<br />
Edge . Endpoints Tag<br />
I =<br />
2; object 2 (chimney)<br />
Edge Endpoints Tag<br />
l<br />
2 2<br />
3 3<br />
4 4<br />
5 l<br />
6 5<br />
7 8<br />
8 9<br />
9 9<br />
10 10<br />
11 0<br />
12 0<br />
2<br />
3<br />
4<br />
5<br />
8<br />
9<br />
2<br />
10<br />
3<br />
0<br />
0<br />
2<br />
2<br />
2<br />
l<br />
l<br />
0<br />
0<br />
11 12<br />
2 14 11<br />
3 15 18 2<br />
4 18 17 l<br />
5 17 16 l<br />
6 16 15 2<br />
7 14 18 l<br />
8 15 11 2<br />
9 16 12 l<br />
10 0 0 0<br />
11 0 0 0<br />
12 0 0 0
184 <strong>Microcomputer</strong> <strong>Graphics</strong><br />
[@]<br />
rn<br />
[}]<br />
®<br />
QJ<br />
©<br />
[}]<br />
OJ<br />
0<br />
0<br />
CD<br />
m<br />
rn<br />
[}]<br />
Figure 7 .18<br />
The contents of the edge array are dependent on the viewpoint selected.<br />
As the viewpoint changes, the number of edges will change, and the sequence<br />
of edges in the array and the tags will change.<br />
Program 7.4; Part 4<br />
710 REM DETERMINE VISIBILITY OF EACH SURFACE<br />
720 REM AND COLLECT VISIBLE ED GES IN ED GE ARRAY<br />
730 XE = RH * S 2 * C 1 : YE = RH * S 2 * S 1 :<br />
ZE = RH * C2
Hidden Line and Hidden Surface Routines 185<br />
740 DIM EC 2 ,12,3)<br />
750 0 = 1 : N = 1<br />
760 FOR I = 1 TO 13<br />
770 E2 = SCl , 1)<br />
780 vx = XE<br />
790 VY = YE<br />
800 vz = ZE<br />
-<br />
-<br />
-<br />
VCE2 ,1)<br />
VCE 2 ,2)<br />
VCE2 ,3)<br />
81 0 IF NC I ,1) * vx + NC I ,2) * VY + NC I , 3) * vz<br />
< = 0 THEN 920<br />
820 E1 = S(I,1)<br />
830 FOR J = 2 TO NPS (I)<br />
840 E2 = SCl ,J)<br />
850 FOR K = 1 TO N<br />
860 IF EC O,K,1) = E2 AND E(O,K,2) = E1<br />
THEN EC O , K ,3) = 2: GOTO 900<br />
870 NEX T K<br />
880 E(O,N,1) = E1 :ECO ,N,2) = E2 :E(O,N,3) =<br />
890 N = : N +<br />
900 E1 = E2<br />
910 NEX T J<br />
920 IF I = 7 THEN 0 = 2: N = 1<br />
930 NEX T I<br />
The identification of visible edges by the program is performed in essentially<br />
the same fashion as in Program 7 .1. The surfaces of object 1<br />
(the house) are considered first (line 750). Each surface of the object is<br />
tested for visibility in line 810 and the surfaces that face away from the<br />
viewpoint are discarded. Lines 820 through 910 then consider each of<br />
the edges of a visible surface. The endpoints of each edge are identified<br />
in lines 820 and 840, and collected in the edge array by line 880. The tag<br />
E(O,N,3) is set to 1 in line 880. If an edge is encountered for a second<br />
time (suggesting that it is a boundary of two visible surfaces) the tag<br />
E(O,N,3) is set to 2 (line 860). When all surfaces of object 1 (the house)<br />
have been tested for visibility, the testing continues with the surfaces of<br />
object 2 (the chimney).<br />
Object Priority<br />
Since edges of the farther object may be partly hidden by the closer object,<br />
it is necessary to classify the objects by their relative positions. A<br />
separating plane has been used to establish the priority of the two objects.<br />
The plane Y = - 7 is used as the separating plane, since the points<br />
of object 1 are either in the plane or on the side opposite the points of<br />
object 2.<br />
If the viewpoint (XE, YE,ZE) lies on the same side of the separating<br />
plane as the house, then the visible edges of the house cannot be hidden
186 <strong>Microcomputer</strong> <strong>Graphics</strong><br />
by portions of the chimney. The house is given priority 1, while the<br />
chimney, the edges of which may be partly or fully hidden by the house,<br />
is given priority 2. If the viewpoint is on the same side of the separating<br />
plane as the chimney, then the chimney is given priority 1 and the house<br />
is given priority 2.<br />
Program 7 .4; Part 5<br />
940 REM ESTABLISH PRIORITY OF OBJECTS<br />
950 IF YE > = -7 THEN P(1) = 1 :P(2) = 2<br />
960 IF YE < -7 THEN P(1) = 2:P(2) = 1<br />
P(l) = 2<br />
P(2) = 1<br />
Figure 7 .19<br />
Priority One Edges<br />
The visible edges of the object having first priority may now be drawn.<br />
Each of the edges is a boundary of a surface which has passed the surface<br />
orientation test for visibility. Since the edges are associated with the<br />
object having first priority, they could not be hidden (partly or completely)<br />
by the other object.<br />
Program 7.4; Part 6<br />
970 REM DRAW VISIBLE ED GES OF FIRST PRIORITY<br />
OBJECT<br />
980 HGR2 : HCOLOR= 3<br />
990 FOR I = 1 TO 12<br />
1000 IF E(P(1),I,3) = 0 THEN 1030<br />
1010 J = E(P(1),I,1):K = E(P(1),I,2)<br />
1020 HPLOT SV{J,1),SV{J,2) TO SV(K,1),SV(K,2)<br />
1030 NEXT I
Hidden Line and Hidden Surface Routines 187<br />
Priority Two Edges<br />
The edges associated with the second object must be scrutinized more<br />
carefully. An edge which is in the edge array may be partly or completely<br />
hidden by the priority one object.<br />
To illustrate, consider the view of the house and chimney shown in<br />
Figure 7 .20.<br />
6<br />
9 8<br />
7<br />
2<br />
Figure 7.20<br />
Edges 1 and 2 of the chimney are boundaries of sides of the chimney<br />
which have passed the surface orientation test for visibility. However,<br />
these edges are completely hidden by the house. They should not be<br />
plotted. Edges 3, 4, 5, and 6 are completely visible and should be plotted.<br />
On the other hand, edges 7, 8, and 9 are only partly visible. For<br />
each of these edges it will be necessary to determine at what point the<br />
edge becomes visible, then plot only the visible portion.<br />
There are, then, three types of edges associated with the visible surfaces<br />
of the object which have second priority. Some edges are completely<br />
hidden by a closer object, some are only partly hidden, others are<br />
completely visible.<br />
Program 7.4; Part 7<br />
1040 REM TEST EACH EDGE OF SECOND PRIORITY<br />
OBJE CT FOR VISIBILITY STATUS<br />
1050 REM DRAW VISIBLE EDGES AND VISIBLE PARTS<br />
OF<br />
EDGES<br />
(continued)
188<br />
<strong>Microcomputer</strong> <strong>Graphics</strong><br />
1060<br />
1070<br />
1080<br />
1090<br />
1100<br />
111 0<br />
1120<br />
1130<br />
1140<br />
1150<br />
FOR E = 1 TO 12<br />
IF E(P(2),E,3) = 0 THEN 1150<br />
I = E(P(2) ,E,1) :J = E(P(2) ,E,2)<br />
IF SV(l,3) = 0 THEN XT = SV(l,1):<br />
YT = SV(l,2): GOSUB 1170:SV(l,3) = VI<br />
IF SV(J,3) = 0 THEN XT = SV(J,1):<br />
YT = SV(J,2): GOSUB 1170:SV(J,3) = VI<br />
IF SV(l,3) + SV(J,3) = -2 THEN 1140<br />
IF SV(I,3) + SV(J,3) = 0 THEN 1260<br />
HPLOT SV(l,1 > ,SV(l,2) TO SV(J,1 > ,SV(J,2)<br />
NEXT<br />
END<br />
E<br />
Program lines 1040 through 1140 oversee the disposition of the priority<br />
two edges. As each edge is considered, the screen array entries SV(I,3),<br />
which have been ignored until now, will be used to indicate the visibility<br />
status of the endpoints (identified in line 1080). Line 1090 and 1100 use<br />
the subroutine beginning at line 1160 (discussed below) to determine the<br />
visibility status of each endpoint. If an endpoint I is visible, then SV(I,3)<br />
is set equal to 1. If an endpoint I is hidden, then SV(I,3) is set equal to<br />
-1.<br />
An edge with vertices I and J as endpoints is identified as hidden if<br />
SV(I,3) + SV(J,3) = -2; such an edge may be discarded (line 1110).<br />
If SV(I,3) + SV(J ,3) = 0 (line 1120), then one endpoint is visible<br />
and one is hidden. The endpoints are turned over to the subroutine beginning<br />
at line 1260, which identifies and plots the visible portion of the<br />
edge.<br />
If SV(I,3) + SV(J ,3) = 2, then both endpoints are visible; the edge<br />
may be plotted (line 1130).<br />
Visibility Status of Edge Endpoints<br />
Program lines 1080 through 1100 identify the endpoints of each edge<br />
and refer each endpoint to lines 1160 through 1250 for classification as<br />
visible or hidden. Figure 7 .21 will be used to illustrate the process used<br />
. for endpoint classification.<br />
In Figure 7 .2la, the visible surfaces of the house have been plotted,<br />
and endpoints of one edge of the chimney are shown. Note that endpoint<br />
H, which should be hidden by the house, is inside the outer boundary<br />
of the house (Figure 7 .21 b ), while point Vis outside. Since the outside<br />
house boundaries have a counterclockwise orientation (specified in<br />
the surface array and preserved in the edge array), an "inside" point H
Hidden Line and Hic!den Surface Routines 189<br />
eH<br />
Figure 7.21<br />
(a)<br />
(b)<br />
is identified as such because it lies in the left half-plane of each component<br />
of the boundary. The point V is identified as an ''outside'' point by<br />
noting that it is in the right half-plane of at least one boundary component.<br />
Program 7.4: Part 8<br />
1i60 REM CLASSIFY ENDPO INTS OF EDGES AS VISIBLE<br />
OR<br />
1170 VI = - 1<br />
HIDDEN<br />
1180 FOR L = 1 TO 12<br />
1190 I F E(P (1), L ,3) < > 1 THN 1 240<br />
1 200 P = EC PC 1>, L,1):Q = EC PC 1 >, L,2)<br />
1210 R1 = SVC Q, 1) - SVCP ,1>:<br />
R2 = SVC Q, 2 ) - SVCP ,2)<br />
1220 U1 = XT - SVCP ,1> : U2 = YT - SVCP ,2)<br />
1230 I F U2 * R1 - U1 * R2 > 0<br />
1 240 NEXT L<br />
1 2 50 RETURN<br />
THEN VI = 1 : RETURN<br />
The intent of the classification subroutine is to establish the value of the<br />
visibility variable VI as + 1 for a visible endpoint (a point outside the<br />
house boundary) or -1 for a hidden endpoint (a point inside the house<br />
boundary). To this end, we assume that each point is hidden (line 1170:<br />
VI = -1) until it is proven visible.<br />
Since a point is visible if it is in the right half-plane of at least one<br />
boundary component, the loop 1180 through 1240 compares the endpoint<br />
(XT, YT) with each visible edge of the house. In order to obtain an
190 <strong>Microcomputer</strong> <strong>Graphics</strong><br />
"inside" or "outside" classification, only those edges which are outside<br />
boundaries need be considered. Line 1190 skips over all others.<br />
For each outside edge PQ of the house, two vectors are calculated.<br />
Q ..<br />
Figure 7.22<br />
As shown in Figure 7 .22, vector 2extends from P to Q. Vector u extends<br />
from P to (XT,YT), the point to be classified. If (XT,YT) is in the right<br />
half-plane of line PQ (thus visible), then u x 2is a positive multiple of<br />
(0,0,1) (See Appendix 3). In this case, program line 1230 will change the<br />
value of VI to 1, then return from the subroutine.<br />
If the endpoint (XT, YT), is in the left half-plane of each of the outside<br />
edges of the house, then we will return from the subroutine with<br />
VI= -1.<br />
Clipping Edges That Are Partly Hidden<br />
If an edge has one vertex hidden and one visible, it is necessary to clip<br />
the line segment so as to display only the visible portion. Program line<br />
1120 refers such edges to a routine beginning at line 1270. There, the<br />
point that is visible is identified as (XV, YV) and the hidden point is<br />
labelled as (XH,YH).<br />
Program lines 1290 through 1360 use a "binary search" to locate<br />
the point (XT,YT) that divides the line segment into two parts: a visible<br />
segment from (XV,YV) to (XT,YT), and a hidden portion from<br />
. (XT,YT) to (XH,YH). The binary search at first may appear to be a<br />
slow and random approach to use. In fact it is very efficient. It<br />
works like this:<br />
1. Identify the vector (V 1, V2) extending from (XV, YV) halfway to<br />
(XH,YH). (Line 1290.)<br />
2. Add (Vl,V2) to (XV,YV) to obtain the midpoint (XT,YT) of the<br />
line segment from (XV,YV) to (XH,YH). (Line 1300.)
Hidden Line and Hidden Surface Routines<br />
191<br />
3. Test (XT,YT) for visibility. (Line 1320.)<br />
4. Redefine (V l,V2) = (V l,V2)/2. (Line 1330.)<br />
5. If (XT, YT) is visible, then move towards (XH, YH) by redefining<br />
(XT,YT) = (XT,YT) + (V l,V2). (Lines 1340, 1350.) If (XT,YT) is<br />
hidden, then move towards (XV, YV) by redefining (XT, YT) =<br />
(XT,YT) - (V l,V2). (Lines 1340, 1350.)<br />
6. Return to step 3. (Line 1360.)<br />
The test for visibility of (XT, YT) (line 1320) uses the classification<br />
subroutine beginning at line 1170. As before, the routine returns with<br />
VI = + 1 if (XT, YT) is visible or with VI = -1 if (XT, YT) is hidden.<br />
The value of VI then determines whether the next (XT, YT) is obtained<br />
by moving toward (XH, YH) if VI = + 1, or by moving toward<br />
(XH,YH) if VI = -1.<br />
The exit f om the loop of steps 3 through 5 occurs when the seventh<br />
value of (XT, YT) has been calculated. The length of (V l, V2) then is<br />
1/128th of the distance between (XV,YV) and (XH,YH). This resolution<br />
is more than adequate for most images on the Apple display screen.<br />
Of course, greater resolution may be obtained by increasing the number<br />
of cycles through the loop.<br />
On leaving the loop, the line segment from (XV, YV) to (XT, YT) is<br />
plotted. Program control is then returned to line 1070 in order to begin<br />
consideration of another edge.<br />
Program 7.4; Part 9<br />
1260 REM PLOT VISIBLE PORTION OF EDGES WH ICH<br />
ARE PARTLY HIDD EN<br />
1270 IF SV (I,3) = 1 THEN XV = SV (I,1) :YV =<br />
SV(I,2) :XH = SV( J ,1) : YH = SV(J, 2)<br />
1280 IF SV( J,3) = 1 THEN XV = SV (J,1) :YV =<br />
SV( J ,2) :XH = SV(I, 1 ) : YH = SV( I,2 )<br />
1290 V1 = (XH - XV) I 2:V2 = (YH - YV) I 2<br />
1300 XT = XV + V1 :YT = YV + V2<br />
1310 FOR I = 2 TO 7<br />
1320 GOSUB 1170<br />
1330 V1 = V1 I 2:V2 = V2 I 2<br />
1340 XT = XT + VI * V1<br />
1350 YT = YT + VI * V2<br />
1360 NEX T I<br />
1370 HPLOT XV,YV TO XJ ,YT<br />
1380 NEX T E
192 <strong>Microcomputer</strong> <strong>Graphics</strong><br />
Program 7.4: HIDDEN LINE ELIMINATION, TWO OBJECTS: ARBITRARY<br />
VIEWPOINT<br />
1 REM PROGRAM 7.4 (HIDDEN LINES)<br />
2 REM TW O OB JECTS; ARB ITRARY VIEWPOINT<br />
10 REM VIEWPOINT AND SCREEN PARAMETERS<br />
20 RHO = 40:THETA = .?:PHI = 1:D = 250<br />
30 ex = 140:CY = 96:S1 = SIN (TH):C1 = cos (TH):<br />
S2 = SIN (PH): C2 = COS (PH)<br />
40 REM VERTICES OF OB JECT 1 (HOUSE)<br />
50 DATA 5,7,-5<br />
60 DATA 5,7,5<br />
70 DATA 5, - 7,5<br />
80 DATA 5,-7,-5<br />
90 DATA -5,7, -5<br />
100 DATA -5,-7,-5<br />
110 DATA -5,-7,5<br />
120 DATA -5,7,5<br />
130 DATA 0,7,8<br />
140 DATA 0, - 7,8<br />
150 REM VERTICES OF OBJECT 2 (CHIMNEY)<br />
160 DATA -2,-7, -5<br />
170 DATA -2,-9,-5<br />
180 DATA -5,-9,-5<br />
190 DATA -5,-7,-5<br />
200 DATA -2,-7,9<br />
210 DATA -2,-9,9<br />
220 DATA -5,-9,9<br />
230 DATA -5, - 7,9<br />
240 REM FILL VERTEX ARRAYS<br />
250 DIM V(18,3,SV(18,3)<br />
260 FOR I = 1 TO 18<br />
270 READ X,Y,Z<br />
280 V(I,1) = X:V(I,2) = Y:V(l,3) = Z<br />
290 X1 = -X * S1 + Y * C1 :Y1 = -X * C1 * C2 - Y *<br />
S1 * C2 + Z * S2:Z1 = -X * S2 * C1 - Y * S2 *<br />
S1 - Z * C2 + RHO<br />
300 SV(I,1) = D * (X1 I zn + CX:<br />
SV(I,2) = -D * (Y1 I zn + CY<br />
310 NEXT I<br />
320 REM NUMBER OF POINTS IN EACH SURFACE<br />
330 DATA 5,6,5,6,5,5,5,5,5,5,5,5,5<br />
340 DIM NPS(13)<br />
350 FOR I = 1 TO 13<br />
360 READ NPS(I)<br />
370 NEXT I<br />
380 REM SURFACE ARRAY - POINTERS TO VERTICES
Hidden Line and Hidden Surface Routines<br />
193<br />
39 0 DATA 1 , 2,3,4, 1<br />
40 0 DATA 1 , 5,8,9,2, 1<br />
41 0 DATA 5,6,7,8, 5<br />
42 0 DATA 4,3, 10,7,6,4<br />
43 0 DATA 3,2,9, 10,3<br />
44 0 DATA 7, 10,9,8,7<br />
45 0 DATA 1 , 4,6, 5,1<br />
46 0 DATA 11 ,12, 13, 14,11<br />
47 0 DATA 15,18, 17, 16, 15<br />
48 0 DATA 11 ,14, 18,15,11<br />
49 0 DATA 12, 16, 17, 13, 12<br />
500 DATA 11,15,16, 12,11<br />
51 0 DATA 14, 13, 17, 18, 14<br />
520 REM FILL SU R FACE ARRAY<br />
530 DIM S(13,6)<br />
540 FOR I = 1 TO 13<br />
550 FOR J = 1 TO NPS ( I)<br />
560 REA D S(l,J)<br />
570 NEX T J, I<br />
580 REM CALCULATE VEC TOR NO RMAL TO EA CH SU R FACE<br />
590 DIM N(13,3)<br />
60 0 FOR I = 1 TO 13<br />
61 0 U1 = V(S(l,2), 1) V(S(l, 1), 1)<br />
62 0 U2 = V(S(l,2),2) - V(S(l, 1),2)<br />
63 0 U3 = V(S(l,2),3) V(S(l, 1),3)<br />
640 V1 = V(S(l,3), 1) V(S(l, 1), 1)<br />
65 0 V2 = V(S(l,3),2) V(S (I,1) ,2)<br />
66 0 V3 = V(S(l,3),3) V(S (I,1) ,3)<br />
67 0 N(l, 1) = U2 * V3 - V2 * U3<br />
68 0 N(l,2) = U3 * V1 - V3 * U1<br />
690 N(l,3) = U1 * V2 - V1 * U2<br />
70 0 NEX T I<br />
71 0 REM DETER MINE VISIBI LITY OF EA CH SU R FACE<br />
72 0 REM AND COLLECT VISIBLE ED GES IN ED GE ARRAY<br />
73 0 XE = RH * S 2 * C 1 : YE = RH * S 2 * S 1 :<br />
ZE = RH * C2<br />
74 0 DIM E(2,12,3)<br />
75 0 0 = 1 : N = 1<br />
76 0 FOR I = 1 TO 13<br />
77 0 E2 = S(l, 1)<br />
78 0 VX = XE - V(E2 , 1)<br />
79 0 VY = YE - V(E2 ,2)<br />
80 0 VZ = ZE - V(E2 ,3)<br />
81 0 IF N(l, 1) * VX + N(l,2) * VY + N(l,3) * VZ<br />
< = 0 THEN 92 0<br />
82 0 E1 = S(l, 1)<br />
(continued)
194<br />
<strong>Microcomputer</strong> <strong>Graphics</strong><br />
830<br />
840<br />
850<br />
860<br />
870<br />
880<br />
890<br />
900<br />
910<br />
920<br />
930<br />
940<br />
950<br />
960<br />
970<br />
980<br />
990<br />
1000<br />
1010<br />
1020<br />
1030<br />
1040<br />
1050<br />
1060<br />
1070<br />
1080<br />
1090<br />
1100<br />
1110<br />
1120<br />
1130<br />
1140<br />
1150<br />
1160<br />
1170<br />
1180<br />
1190<br />
1200<br />
1210<br />
FOR J = 2 TO NPS(I)<br />
E2 = S(I,J)<br />
FOR K = 1 TO N<br />
IF E(O,K,1) = E2 AND E(O,K,2) = E1<br />
THEN E(O,K,3) = 2: GOTO 900<br />
NEXT K<br />
E(O,N,1) = E1:E(O,N,2) = E2:E(O,N,3) = 1<br />
N = N + 1<br />
E1 = E2<br />
NEXT J<br />
IF I = 7 THEN 0 = 2:N = 1<br />
NEXT I<br />
REM ESTABLISH PRIORITY OF OBJECTS<br />
IF YE > = -7 THEN P(1) = 1 :P(2) = 2<br />
IF YE < -7 THEN P(1) = 2:P(2) = 1<br />
REM DRAW VISIBLE ED GES OF FIRST PRIORITY<br />
OBJECT<br />
HGR2 : HCOLOR= 3<br />
FOR I = 1 TO 12<br />
IF E(P(1),I,3) = 0 THEN 1030<br />
J = E(P(1),I,1):K = E(P(1),I,2)<br />
HPLOT SV(J,1),SV(J,2) TO SV(K,1),SV(K,2)<br />
NEXT I<br />
REM TEST EACH ED GE OF SECOND PRIORITY<br />
OBJECT FOR VISIBILITY STATUS<br />
REM DRAW VISIBLE ED GES AND VISIBLE PARTS<br />
OF ED GES<br />
FOR E = 1 TO 12<br />
IF E(P(2),E,3) = 0 THEN 1150<br />
I = E(P(2) ,E,1):J = E(P(2) ,E,2)<br />
IF SV(I,3) = 0 THEN XT = SV(I,1):<br />
YT = SV(I,2): GOSUB 1170:SV(I,3) = VI<br />
IF SV(J,3) = 0 THEN XT = SV(J,1):<br />
YT = SV(J,2): GOSUB 1170:SV(J,3) = VI<br />
IF SV(I,3) + SV(J,3) = -2 THEN 1140<br />
IF SV(I,3) + SV(J,3) = 0 THEN 1260<br />
HPLOT SV(I,1),SV(I,2) TO SV(J,1),SV(J,2)<br />
NEXT E<br />
END<br />
REM CLASSIFY ENDPOINTS OF ED GES AS VISIBLE<br />
OR HIDDEN<br />
VI = -1<br />
FOR L = 1 TO 12<br />
IF E(P(1),L,3) < > 1 THEN 1240<br />
P = E(P(1),L,1):Q = E(P(1),L,2)<br />
R1 = SV(Q,1) SV(P,1):<br />
R2 = SV(Q,2) - SV(P,2)
Hidden Line and Hidden Surface Routines<br />
195<br />
1220 U1 = XT - SV(P,1>:U2 = Y T - SV(P,2)<br />
1230 IF U2 * R1 - U1 * R2 > 0<br />
THEN VI = 1 : RETURN<br />
1240 NEXT L<br />
1250 RETURN<br />
1260 REM PLOT VISIBLE PORTION OF EDGES WH ICH<br />
ARE PARTLY<br />
HIDDEN<br />
1270 I F SV(I,3) = 1 THEN XV = SV( l ,1) :<br />
YV = SV( l ,2) :XH = SV( J , 1 ) : YH = SV(J, 2)<br />
1280 IF SV (J, 3) = 1 THEN XV = SV ( J ,1) :<br />
YV = SV( J ,2) :XH = SVC I , 1 ) : YH = SV( l, 2)<br />
1290 V1 = CX H - XV) I 2:V2 = CY H - YV) I 2<br />
1300 XT = XV + V1 :YT = YV + V2<br />
1310 FOR I = 2 TO 7<br />
1320 GOSUB 1170<br />
1330 V1 = V1 I 2:V2 = V2 I 2<br />
1340 XT = XT + VI * V1<br />
1350 YT · = YT + VI * V2<br />
1360 NEXT I<br />
1370 HPLOT XV,YV TO XT ,YT<br />
1380 NEXT E<br />
NOTES AND SUGGESTIONS<br />
1. The techniques described are not without flaws. For example, if<br />
the endpoints of an edge of a priority two object are both outside the image<br />
of the priority one object, the edge is drawn. This may result in the<br />
drawing of edges that should be partly hidden. To illustrate, edge AB of<br />
the prism below would be drawn, even though a portion of it is hidden<br />
by the cube. From certain viewpoints, Program 7.4 can draw ''hidden''<br />
parts of lines.<br />
Figure 7.23
196 <strong>Microcomputer</strong> <strong>Graphics</strong><br />
2. Modify the data and the limits in the loops of the program in<br />
order to draw other images. For example, try the pryamid and cube of<br />
Figure 7.14.<br />
3. The techniques described here may be extended to images containing<br />
three or more objects. Of course, the program complexity will<br />
increase, and program execution will take longer.<br />
4. Program 7.4 does not provide for line clipping should the image<br />
be too large to fit on the display screen. Modify the program so that all<br />
lines are sent to a clipping subroutine (such as the one described in<br />
Chapter 4) before being drawn.<br />
HIDDEN LINE ELIMINATION FOR SURFACES<br />
OF THE FORM Z = F(X,Y)<br />
Toward the end of Chapter 6, a program listing was given as an example<br />
of a means of generating images of the form Z = F(X, Y). The program<br />
was brief, and drew the surface quickly. Unfortunately, no provision was<br />
made for hidden line elimination. The result was an image that sometimes<br />
was confusing. We intend to correct the situation, so that we might<br />
obtain images like the one shown on the upper right of the front cover.<br />
Before turning to the hidden line calculations, we will review the ear"<br />
lier program:<br />
Program 7 .5: SURFACE<br />
1 REM PRO GRAM 7.5 (SURFACE)<br />
2 REM REPEAT OF PROGRAM 6.4<br />
10 REM INITIALIZATION<br />
20 HGR2 : HCOLOR= 3:RHO = 30:THETA = .4:PHI =<br />
1.25: D = 420:CX = 140:CY = 96<br />
30 S1 = SIN
Hidden Line and Hidden Surface Routines 197<br />
150 XE<br />
=<br />
-x * S1 + y * C1<br />
160 YE<br />
=<br />
-x * C1 * C2 y * S1 * C2 + z * S2<br />
170 ZE<br />
=<br />
-x * S2 * C1<br />
S1<br />
-<br />
z * C2 + RHO<br />
180 sx<br />
=<br />
D * (XE I ZE) + ex<br />
190 SY<br />
=<br />
-D * (YE I Z E) + CY<br />
-<br />
y * S2 *<br />
200 I F sx < 0 OR sx > 279 OR SY < 0 OR SY > 191<br />
THEN FL<br />
=<br />
0: RETURN<br />
21 0 IF FL<br />
=<br />
0 THEN HP LOT SX ,SY:FL<br />
=<br />
1<br />
220 HP LOT TO SX ,SY<br />
230 RETURN<br />
Program lines 20 through 50 identify the viewing parameters, the<br />
screen parameters, and the function to be plotted. The nested loops<br />
in lines 70 through 120 generate the coordinates of points on the surface<br />
and send the points to the plotting subroutine, which begins at<br />
line 150. There, the screen coordinates (SX, SY) are calculated (lines<br />
150-190). If the calculated coordinates identify a point that is offscreen,<br />
it is discarded (line 200). The first point of a wire-frame curve<br />
(FL = 0), or the first onscreen point that follows an offscreen point<br />
(again, FL = 0), results in plotting via HPLOT SX,SY (line 210).<br />
Otherwise, a line segment is plotted which connects the point with the<br />
one most recently plotted (line 220). Then, control is returned to the<br />
point generating loop.<br />
Program 7 .6 is an extension of the above program to include hidden<br />
line capabilities. The initialization (lines 10-70) is similar to the beginning<br />
of Program 7 .5, establishing the viewing and screen parameters<br />
and the function to be plotted. Then, in lines 60 and 70, two arrays are<br />
defined. These are for use by the hidden line routine. The intent of the<br />
arrays is as follows:<br />
YX(XP) [Y - maX] identifies, for each horizontal screen coordinate<br />
XP, the maximum (lowest on screen) vertical screen coordinate<br />
encountered. YN(XP) [Y - miN] identifies, for each horizontal<br />
screen coordinate XP, the minimum (highest on screen) vertical<br />
screen coordinate encountered.<br />
Initially, the value of each YX(I) is zero and the value of each YN(I) is<br />
191. As points (XP, YP) are plotted, the values of YX(XP) and YN(XP)<br />
are reset. As each (XP, YP) is considered for plotting, YP is compared<br />
with YX(XP) and YN(XP). If YP lies between YX(XP) and YN(XP),<br />
the point (XP, YP) is classified as hidden. Otherwise it is assumed to be<br />
visible. The function of the arrays is shown in Figure 7 .24.
198 <strong>Microcomputer</strong> <strong>Graphics</strong><br />
\Hidden<br />
\<br />
\<br />
\<br />
Figure 7.24<br />
Program 7.6: HIDDEN LINES (FOR SURFACES Z = F(X,Y))<br />
1 REM PROGRAM 7.6 (HIDDEN LINES)<br />
2 REM HIDDEN LINE ELIMINATION FOR SURFACES: Z =<br />
F
Hidden Line and Hidden Surface Routines 199<br />
170 EN D<br />
180 REM PLOTT ING SUB R OUT INE<br />
190 XE<br />
= - x * S1 + y * c 1<br />
200 YE<br />
= - x * C1 * C2 - y * S1 * C2 + z * S2<br />
21 0 ZE<br />
= - x * S2 * C1<br />
RHO<br />
220 sx<br />
=<br />
D * (XE I Z E) + ex<br />
230 SY<br />
=<br />
-D * ( y E I Z E) + CY<br />
-<br />
y * S2 * S1 - z * C2 +<br />
240 IF FL<br />
=<br />
0 THEN FL<br />
=<br />
1 : F<br />
=<br />
0: GOTO 36 0<br />
250 DX<br />
=<br />
ox<br />
-<br />
sx : IF DX<br />
=<br />
0 THEN DX<br />
=<br />
1<br />
260 SL<br />
=<br />
COY - SY ) I DX :YP<br />
=<br />
OY<br />
270 FOR XP<br />
=<br />
INT (OX) + 1 TO sx<br />
280 FG<br />
=<br />
1<br />
290 yp<br />
=<br />
yp + SL<br />
30 0 IF XP < 0 OR XP > 279 THEN FG - 0: F<br />
=<br />
0:<br />
GOTO 35 0<br />
31 0 IF yp > 191 OR yp < 0 THEN FG<br />
=<br />
0: F<br />
=<br />
0<br />
32 0 IF yp < =<br />
YN (XP) THEN 37 0<br />
33 0 IF yp > =<br />
YXCXP) THEN 42 0<br />
34 0 F<br />
=<br />
0<br />
35 0 NEX T XP<br />
36 0 ox<br />
=<br />
SX :OY<br />
=<br />
s y : RETURN<br />
37 0 YN (XP)<br />
=<br />
yp<br />
38 0 IF FG<br />
=<br />
0 THEN 41 0<br />
390 IF F<br />
=<br />
0 THEN HP LOT XP ,YP: F<br />
=<br />
40 0 HP LOT TO XP,YP<br />
41 0 IF yp < YX(XP) THEN 35 0<br />
42 0 YXCXP)<br />
=<br />
yp<br />
43 0 IF FG<br />
=<br />
0 THEN 46 0<br />
44 0 IF F<br />
=<br />
0 THEN HP LOT XP ,YP: F<br />
=<br />
45 0 HP LOT TO XP ,YP<br />
46 0 GOTO 35 0<br />
This use of arrays requires that the wire-frame curves representing<br />
the surface be generated sequentially, beginning with the one closest to<br />
the viewer. The point generating loop (lines 80-140) provides that this is<br />
the case.<br />
As each point (X,Y,Z) is generated, it is passed to the hidden line<br />
subroutine, where the corresponding screen coordinates (SX, SY) are<br />
calculated.<br />
The point (SX, SY) could be tested for visibility (is SY< = YN(SX),<br />
or is SY> = YX(XP)? ). However, that would not be adequate. It is<br />
necessary to determine the status of each point (XP, YP) along the line<br />
segment connecting (SX,SY) with the point previously calculated<br />
(OX, OY) (old point). If (XP,YP) is hidden, it is not plotted. If (XP,YP)
200 <strong>Microcomputer</strong> <strong>Graphics</strong><br />
is visible, it is plotted and the corresponding array entry (YX(XP) or<br />
YN(XP)) is updated.<br />
The hidden line subroutine uses three variables as flags to signal actions<br />
within the program.<br />
1. FL: If the point (SX,SY) is the first of a wire-frame curve, then<br />
FL= O; otherwise, FL= 1.<br />
2. F: If F = 0, the command HPLOT XP, YP should be used to plot<br />
the next visible point (XP, YP). If F = 1, then the command<br />
HPLOT TO XP, YP should be used.<br />
3. FG: If the current point (XP, YP) is off screen, then FG = O; otherwise,<br />
FG = 1.<br />
The first point on a wire-frame curve is marked by setting FL = 0<br />
(line 100). Within the subroutine, this is taken (line 240) as a signal to<br />
define (OX,OY) (old point) as the newly calculated (SX,SY), and the<br />
program returns to the point generating loop.<br />
If FL = 1, the points on the line segment from (OX,OY) to (SX,SY)<br />
will be tested for visibility. Lines 250 and 260 identify the slope of the<br />
line segment. Line 270 begins a loop that steps through the integers XP<br />
(screen coordinates) between OX and SX. After YP is calculated (line<br />
290), the point (XP, YP) is tested to see whether it lies on the screen. If it<br />
does, YP is compared with the array values YN(XP) and YX(XP) (lines<br />
320, 330, and 410) to determine visibility of the point (XP,YP).<br />
If YN(XP) < YP < YX(XP), then the point (XP, YP) is not visible; F<br />
is set to 0 (line 340), and the next point is considered (line 350).<br />
If YP < = YN(XP), then YP is no larger than any previous vertical<br />
screen coordinate associated with XP. The point (XP, YP) is visible, appearing<br />
above the previously plotted portion of the surface. Array value<br />
YN(XP) is reset to YP (line 370), and the point (XP, YP) is plotted (lines<br />
390 and 400).<br />
If YP > = YX(XP) (line 330 and 410), then YP is as large as any previous<br />
vertical screen coordinate associated with XP. The point (XP, YP)<br />
· is visible, appearing below the previously plotted portion of the surface.<br />
The array value YX(XP) is reset to YP (line 420), and the point (XP, YP)<br />
is plotted (lines 440 and 450).<br />
When all integral values of XP along the line segment from<br />
(OX,OY) to (SX,SY) have been considered, (OX,OY) is redefined as<br />
(SX,SY), and the program returns to the point generating loop (line<br />
360).
Hidden Line and Hidden Surface Routines 201<br />
NOTES AND SUGGESTIONS<br />
1. Program 7 .6 assumes that each wire-frame curve is generated in<br />
a left-to-right direction on the screen. A more versatile subroutine results<br />
from adding a line such as<br />
265 ST = SGN(SX - OX)<br />
changing line 270 to read<br />
270 FOR XP = INT (OX) + ST to SX STEP ST<br />
and changing line 290 to read<br />
290 YP = YP + ST * SL<br />
2. Some points (XP, YP) will identify new screen maximum values<br />
· (YP > = YX(XP)) and new screen minimum values (YP < = YN(XP)).<br />
This properly ill result in resetting both YX(XP) and YN(XP). However,<br />
it also will result in plotting the point or line segment twice (lines<br />
390, 400, 440, and 450). No harm is done by replotting, although some<br />
small amount of time is wasted. Can you correct this?<br />
3. Several hidden line techniques have been discussed in this chapter.<br />
Adapt them to generate other images, such as Saturn, with rings; a<br />
cube with a hole through it; the cube and prism of Figure 7 .23.<br />
4. To reiterate the statement made at the beginning of this chapter:<br />
The elimination of hidden lines and surfaces is one of the most challenging<br />
problems of computer graphics.<br />
It is a problem which has received a lot of attention; many hidden line<br />
techniques have beeri developed. Those given here constitute a brief<br />
introduction. The reader interested in pursuing the subject should consult<br />
texts such as Principles of Interactive Computer <strong>Graphics</strong> by Newman<br />
and Sproull or Fundamentals of Interactive Computer <strong>Graphics</strong> by<br />
Foley and Van Dam.<br />
5. Machine level subroutines which perform some of the hidden<br />
line calculations are included on the disk described on page vii. The use<br />
of such subroutines greatly increases the execution speed of programs.
Part V<br />
Animation
Chapter 8<br />
Animated Images<br />
ANIMATION USING HPLOT<br />
So far we have focused our efforts on obtaining images of two- or threedimensional<br />
objects in fixed positions. We now will point out methods<br />
of animating simple images. Of course, as in film animation, we really<br />
will be displaying a sequence of still images that only simulate motion.<br />
Several of our earlier programs provided animation. In this chapter we<br />
will elaborate on each of the methods used.<br />
Program 1.2 provided a simulation of a bouncing ball. The ball was<br />
represented by a pair of dots which were drawn at one screen location,<br />
then erased and drawn at a new location. Since the image was a simple<br />
one (two dots) and little calculation was needed between successive<br />
HPLOTs, the ball appeared to move smoothly.<br />
A similar ploy was used in Program 2.9. This time, since the image<br />
was slightly more complex (a square, four line segments) a noticeable<br />
flicker would have been present as the image was drawn, then erased,<br />
then redrawn. To avoid the flicker, we arranged to use both of the high<br />
resolution graphics pages. One of the pages was displayed while the<br />
other was erased and drawn on. When the new image was ready it was<br />
displayed; the other page was then erased, and drawing resumed.<br />
The necessary ingredients of this animation program are<br />
1. Control of the page used for drawing (POKE 230, 32 for page 1,<br />
POKE 230,64 for page 2);<br />
2. Control of the page being displayed (use of the soft switches); and<br />
3. Fast, simple calculations between successive images.<br />
205
206 <strong>Microcomputer</strong> <strong>Graphics</strong><br />
It is the third requirement that is most demanding. For many animated<br />
images, a considerable amount of calculation time is necessary between<br />
successive displays.<br />
NOTE: One way to speed up calculations is to write the program in<br />
machine language. This requires much greater effort on the part of<br />
the prograll}.mer, and is not a part of this book. Recently, however,<br />
Applesoft BASIC compilers have become available which provide the<br />
BASIC programmer with an easy way to obtain a machine language<br />
version of a program. If you are interested in animation, you may<br />
find a compiler to be valuable.<br />
ROTATING SQUARE<br />
If extensive calculations are needed to provide successive images, perhaps<br />
these calculations may be done in advance, with the results saved<br />
for access for later drawing. Program 8.1 illustrates this technique.<br />
The vertices of a square are stored in the two arrays XO(I) and<br />
YO(I). This square is centered at (0,0) and is not intended to be drawn .<br />
Rather, it is a reference square from which others are derived by transformations.<br />
Lines 80 through 150 calculate the coordinates of ten<br />
squares. Each of the ten is obtained by rotating the reference square<br />
through an angle AN (lines 90 and 110-130) and translating it to the center<br />
of the screen. For square 1, the value of AN is O; for square 2, the<br />
value of AN is 7r/20; for square 3, the value of AN is 27r/20; and so on<br />
(lines 20 and 90). The calculated coordinates are stored in a pair of arrays,<br />
X(I) and Y(I). When the coordinates of the ten squares have been<br />
calculated, lines 160 through 180 copy the coordinates for the first two<br />
squares, so that squares 11 and 12 are identical to squares 1 and 2. This<br />
is done to ease the bookkeeping involved in erasing images.<br />
Program 8.1: ROTATING SQUARE<br />
1 REM PRO GRAM 8.1 (ROTATIN G SQUARE)<br />
2 REM ANIMATION, VIA PRIOR CALCULATION<br />
10 DIM X(60),Y(60)<br />
20 PI = 3.14159:DT = PI I 20<br />
30 C = COS (OT):S = SIN (OT)<br />
40 DATA 80,0,0,80, -80,0,0,-80,80,0<br />
50 FOR I = 1 TO 5<br />
60 READ XO(I),YO(I)<br />
70 NEXT I<br />
80 FOR I = 0 TO 9
Animated Images<br />
207<br />
90 AN = I * OT<br />
100 FOR J = 1 TO 5<br />
110 T = COS CAN) * XO (J) - SIN CAN) *<br />
YO(J) + 140<br />
120 YC5 * I + J) = SIN CAN) * XO (J) + COS CAN) *<br />
YO(J) + 96<br />
130 XC 5 * I + J) = T<br />
140 NEXT J<br />
150 NEXT I<br />
160 FOR I = 51 TO 60<br />
170 X(I) = X(I - 50) : Y (I) = YC I - 50)<br />
180 NEXT I<br />
190 HGR : HGR2 : I = 1<br />
20 0 HCOLOR= 0: POKE 23 0 ,32<br />
21 0 HPLOT XC I),Y(I) TO XC I + 1),YCI + 1)<br />
TO XC I + 2) ,Y (I + 2) TO XC I + 3) , Y(I + 3)<br />
TO XC I + 4) ,Y (I + 4)<br />
22 0 I = I + 10: HCOLOR= 3<br />
23 0 HPLOT X(I),Y (I) TO XC I + 1),YCI + 1)<br />
TO XC I + 2) ,Y (I + 2) TO XC I + 3) , Y ( I + 3)<br />
TO XC I + 4) ,Y (I + 4)<br />
24 0 POKE - 163 00 ,0: POKE 23 0 ,64: I = I - 5:<br />
HCOLOR= 0<br />
25 0 HPLOT X(I),Y (I) TO XC I + 1>,YCI + 1)<br />
TO XC I + 2) ,Y (I + 2) TO X(I + 3) ,Y (I + 3)<br />
TO XC I + 4) ,Y (I + 4)<br />
26 0 I = I + 10: HCOLOR= 3<br />
27 0 HPLOT X(I),Y (I) TO XC I + 1),YCI + 1)<br />
TO XC I + 2) ,Y (I + 2) TO XC I + 3) , Y(I + 3)<br />
TO XC I + 4) ,Y (I + 4)<br />
28 0 POKE - 16299 , 0 : I = I - 5 : I F I = 51 THEN I = 1<br />
290 GOTO 20 0<br />
NOTE: It may seem that after ten rotations of the original square<br />
through an angle of 7r/20, the resulting square would have been rotated<br />
90° from the original and have the appearance of the original.<br />
Theoretically, it will. However, our calculations and our value of 7r<br />
are only approximate. To see the accumulated error of approximation,<br />
make the following adjustments:<br />
1 Replace line 80 with<br />
80 FOR I = 0 to 11<br />
2 Delete lines 160, 170 and 180<br />
3 Run the program
208 <strong>Microcomputer</strong> <strong>Graphics</strong><br />
The display of consecutive rotated squares is handled by lines 200<br />
through 290. Lines 200 through 230 first erase a square on graphics page<br />
1, then draw a new square there. With the drawing complete, line 240<br />
displays page 1, then identifies page 2 for use in drawing. Lines 250<br />
through 270 erase a square on graphics page 2, then draw a new square.<br />
Line 280 displays the newly drawn square. The process is then repeated<br />
(line 290). When the last square (number 12) is drawn, we return to the<br />
first, and continue drawing (line 280).<br />
NOTE: In animating these objects, we have erased images by drawing<br />
them in black, the background color. We also could have cleared<br />
the screen (CALL 62450). Usually, this is unsatisfactory. It typically<br />
takes longer, unless the image is complex. It also has the disadvantage<br />
of clearing the entire screen, including any images that are not to be<br />
animated.<br />
THREE-DIMENSIONAL ANIMATION<br />
The next program is quite longer than the last, but makes use of essentially<br />
the same animation processes. Program 8.2 displays a rotating<br />
pyramid. We start with a pyramid which has a base on the xy plane and<br />
a vertex on the positve z axis. This object then is rotated about the three<br />
coordinate axes.<br />
Since the rotating pyramid will present different sides to the viewer,<br />
it is necessary to use some form of hidden line elimination to obtain satisfactory<br />
images. We saw in Chapter 7 that this was a time-consuming<br />
process, clearly not appropriate for real-time animation. For this reason,<br />
we will perform the calculation in advance so that the display of images<br />
is done with reasonable speed.<br />
Since only one object is to be displayed, we may use the surface<br />
orientation method for identifying the visible surfaces. In using the surface<br />
orientation method, Program 8.2 includes most of Program 7 .1.<br />
We will point out the differences.<br />
Line 10 dimensions an integer array SP%(I). This array receives all<br />
screen coordinates of endpoints of visible edges of the pyramid views as<br />
they are calculated. A view of the pyramid may display as many as six<br />
edges. Each edge will be identified by two endpoints, each having two<br />
coordinates. If you have been counting, you can see that we may need as<br />
many as twenty-four numbers to identify the coordinates of the visible
Animated Images 209<br />
edges of one view of the pyramid. We will be calculating and storing<br />
thirty-six views of the rotating pyramid. This accounts for 864 array entries.<br />
We will want the first two and last two pyramid views to be identical<br />
(to allow easy erasure when the array values are recycled). For this<br />
reason, a thirty-seventh and thirty-eighth view are provided, which are<br />
duplicates of the first and second. This brings the required size of the array<br />
to 912.<br />
In lines 40 and 50 we identify the angles through which the pyramid<br />
will be rotated, and save the SIN and COS of these angles for use in the<br />
rotation transformation.<br />
As mentioned earlier, we will generate thirty-six pyramid views. The<br />
consecutive views are calculated and tested for visible parts in lines 260<br />
through 740. As visible edges are found, the coordinates of their endpoints<br />
are stored in the array SPOJo(I) (line 610). When all visible parts of<br />
one pyramid have been calculated, the coordinates that define the pyramid<br />
are transformed by the rotation transformation (lines 640 through<br />
720).<br />
Line 730 prints the current value of RO (the pyramid for which calculations<br />
have been completed) on the screen, so you will know how the<br />
calculation is progressing.<br />
When all thirty-six views are completed, line 750 copies the first two<br />
views as the thirty-seventh and thirty-eighth. This is necessary in order<br />
that the era,sure of images may be easily handled.<br />
The display of the pyramid views is handled in a manner that is very<br />
similar to that used by Program 8.1. For each of the six edges of the pyramid,<br />
four numbers (the coordinates of the endpoints) are taken from<br />
the array SPOJo(I) (lines 830 and 900). The edges are drawn by lines 870<br />
through 920 and erased by lines 800 through 850. The value of ADDR,<br />
which serves as an index to the array, is adjusted after each edge is<br />
drawn (lines 840 and 910) and after each pyramid view is complete (lines<br />
860 and 930).<br />
NOTE: How did we know that the pyramid would return to its original<br />
position after thirty-six successive transformations? Perhaps it<br />
doesn't. In the initial stages of planning this program, all coordinates<br />
of views of the pyramid were printed and compared. It was noticed<br />
that after thirty-six rotations, the pyramid was approximately in its<br />
original position.
210 <strong>Microcomputer</strong> <strong>Graphics</strong><br />
Program 8.2: ROTATING PYRAMID<br />
1 REM PROGRAM 8.2 (ROTATIN G PYRAMID)<br />
2 REM THREE DIMENSIONAL ANIMATION WITH HIDDEN<br />
LINES ELIMINATED<br />
10 DIM SP%(912):ADDR = 1: DIM E(6,3)<br />
20 RHO = 1S:THETA = .S:PHI = .9:D = 400<br />
30 ex = 140:CY = 96:S1 = SIN (TH):<br />
C1 = COS (TH):S2 = SIN (PH):C2 = COS (PH)<br />
40 TN = -.1:TT = .1:CT = COS (TT):<br />
ST = SIN (TT):SO = SIN (TN):CO = COS (TN)<br />
50 TP = -.1:SP = SIN (TP):CP = COS (TP)<br />
60 DATA 0,0,3<br />
70 DATA 1,0,0-<br />
80 DATA -.2,1,0<br />
90 DATA -.2, -1,0<br />
100 DIM V(4,3),SV(4,2)<br />
110<br />
FOR I = 1 TO 4: READ X,Y,Z<br />
120 V(I,1) = X:V(l,2) = Y:V(l,3) = Z<br />
130 XE = -X * S1 + Y * C1 :YE = -X * C1 *<br />
C2 - Y * S1 * C2 + Z * S2:ZE = -X * S2 *<br />
C1 - Y * S2 * S1 - Z * C2 + RHO<br />
140 SV(I,1) = D * (XE I ZE) + ex :<br />
SV(l,2) = -D * (YE I ZE) + CY<br />
150 NEXT I<br />
160 DATA 1,4,2,1<br />
170 DATA 1,2,3,1<br />
180 DATA 1,3,4,1<br />
190 DATA 2,4,3,2<br />
200 DIM S(4,4)<br />
210 FOR I = 1 TO 4<br />
220 FOR J = 1 TO 4<br />
230 READ S(l,J)<br />
240 NEXT J,I<br />
250 DIM N(4,3)<br />
260 FOR RO = 1 TO 36<br />
270 FOR I = 1 TO 6:E(l,3) = 0: NEXT I<br />
280 FOR I = 1 TO 4<br />
290 U1 = V(S(I,2),1) - V(S(I,1),1)<br />
300 U2 = V(S(l,2),2) - V(S(I,1),2)<br />
310 U3 = v ( s (I I 2) I 3) V(S(I,1),3)<br />
320 V1 = V(S(l,3),1) - V(S(I,1),1)<br />
330 V2 = V(S(l,3),2) - V(S(l,1),2)<br />
340 V3 = V(S(l,3),3) V(S(I,1),3)<br />
350 N(l,1) = U2 * V3 - V2 * U3<br />
360 N(l,2) = U3 * V1 - V3 * U1<br />
370 N(l,3) = U1 * V2 - V1 * U2<br />
380 NEXT I
Animated Images<br />
211<br />
390 XE = RH * S2 * C1 :YE = RH * S2 * S1 :<br />
ZE = RH * C2<br />
400 N = 1<br />
41 0 FOR I = 1 TO 4<br />
420 E2 = S (l, 1 )<br />
43 0 WX = XE V(E2 , 1 )<br />
440 WY = YE - VC E2, 2)<br />
450 WZ = ZE - V(E2,3 )<br />
460 IF NC I , 1 ) * WX + N(l, 2) * WY + N(l,3 ) * WZ<br />
< = 0 THEN 570<br />
470 E1 = SC I , 1 )<br />
480 FOR J = 2 TO 4<br />
490 E2 = S(l,J)<br />
500 FOR K = 1 TO N<br />
510 IF E(K, 1 ) = E2 AND E(K, 2) = E1<br />
THEN E(K,3 ) = 2: GOTO 550<br />
520 NEXT K<br />
530 E(N ;1 ) = E1 :E(N , 2) = E2 :E(N ,3 ) =<br />
540 N = N + 1<br />
550 E1 = E2<br />
560 NEXT J<br />
570 NEXT I<br />
580 FOR I = 1 TO 6<br />
590 IF EC I ,3 ) = 0 THEN 620<br />
600 J = E(l, 1>: K = EC I , 2)<br />
61 0 SP%(AD) = SV( J, 1>: S P%CA D + 1 ) =<br />
SV( J , 2) :SP %C A DDR + 2) = SV(K, 1 ) :<br />
SP%(ADDR + 3) = SV(K, 2)<br />
620 ADDR = ADDR + 4<br />
63 0 NEXT I<br />
640 FOR I = 1 TO 4<br />
650 T1 = CP * CT * VC I , 1 ) - (ST * CP + SO * SP) *<br />
V(l, 2) + (SO * ST * CP - SP * CO) * V(l,3 )<br />
660 T2 = ST * V(I, 1 ) + CO * CT * V(l, 2) - SO *<br />
CT * V(l,3 )<br />
670 T3 = SP * CT * V(l, 1 ) + (SO * CP - CO * ST *<br />
SP) * V(l, 2) + (ST * SO * SP + CO * CP) *<br />
V(l,3 )<br />
680 VC I , 1 ) = T1 :V(l, 2) = T2 :V(l,3 ) = T3<br />
690 X = T1 :Y = T2 :Z = T3<br />
700 XE = -X * S1 + Y * C1 :YE = -X * C1 *<br />
C2 - Y * S1 * C2 + Z * S2 :ZE = -X * S2 *<br />
C1 - Y * S2 * S1 - Z * C2 + RHO<br />
71 0 SV ( l, 1 ) = D * (XE I ZE ) + CX :<br />
SVCI, 2) = -D * (YE I ZE ) + CY<br />
(continued)
212 <strong>Microcomputer</strong> <strong>Graphics</strong><br />
720 NEXT I<br />
730 PRINT RO<br />
740 NEXT RO<br />
750 FOR I = 1 TO 48:SP%(1 + 864) =<br />
SP%(1): NEXT I<br />
760 HOME : INPUT "READY";A$<br />
770 HGR : HGR2 :DP = 0<br />
780 ADDR = 1<br />
790 POKE 230,32 * (DP + 1)<br />
800 HCOLOR= 4<br />
810 FOR I = 1 TO 6<br />
820 IF SP%(ADDR) = 0 THEN 840<br />
830 HPLOT SP%(ADDR),SP%(ADDR + 1)<br />
TO SP%(ADDR + 2),SP%(ADDR +3)<br />
840 ADDR = ADDR+4<br />
850 NEXT I<br />
860 ADDR = ADDR+24<br />
870 HCOLOR = 7<br />
880 FOR I = 1 TO 6<br />
890 IF SP%(ADDR) = 0 THEN 910<br />
900 HPLOT SP%(ADDR),SP%(ADDR + 1)<br />
TO SP%(ADDR + 2), SP%(ADDR + 3)<br />
910 ADDR = ADDR + 4<br />
920 NEXT I<br />
930 ADDR = ADDR - 48<br />
940 IF ADDR = 865 THEN ADDR =<br />
950 POKE - 16300 + DP,0<br />
960 DP = 1 - DP<br />
970 GOTO 790<br />
SHAPE TABLE ANIMATION<br />
Animating images by using HPLOT statements typically requires preparation,<br />
so that only minimal calculation is necessary between the display<br />
of consecutive images. Preparation is also needed when simulating<br />
motion by using shape tables, since we must prepare the table of shapes<br />
to be drawn.<br />
Program 1.9 (ARTIST'S AID) used a shape as the rotating cursor of<br />
variable length. The XDRA Wand DRAW commands, together with<br />
the use of colors, permitted the cursor to "paint" a screen image.<br />
Another example of shape animation is given in Appendix 2, as Program<br />
A2.1. Here, the shapes provide a rotating cursor and airplane<br />
images, simulating a radar screen.
Animated Images 213<br />
In each of the examples mentioned above, movement was simulated<br />
by drawing and redrawing a shape at a sequence of locations. Program<br />
8.3 extends this procedure, simulating motion by drawing a sequence of<br />
shapes.<br />
Program 8.3: INCHWORM<br />
1 REM PROGRAM 8.3 (INCHWORM)<br />
2 REM SHAPE TABLE AN IMATION<br />
10<br />
DATA 5 ,0, 1 ·2,\1, 2 . 1 ,Q,3 \ 0 ,.Q·,3 •9, 0 , 4,16, 0 ·'<br />
2 0 DAT A 4,,Sc-; 4 0 , 3 Z , 5 , 1 6 8 , 1 7 4, 2 1 , 3 7 , 0<br />
30<br />
DATA 45, 40,3 2, 5 , 40, 45, 21,3 7, 0<br />
40 DATA 45, 5 , 40, 5 , 40, 45, 21,3 7, 0<br />
50 DATA 45,4 5, 45, 45, 45,3 7, 0<br />
60 DATA 9 , 5 ,3 2, 5 ,4 0, 168, 21, 21, 173 ,3 7 , 0<br />
70 FOR I = 768 TO 824<br />
80 READ X: POKE I , X<br />
90 NEXT I<br />
100 POKE 232 , 0: POKE 233,3<br />
1 1 0 HOME : HGR : HCOLOR= 3: SCALE= 1 : ROT= 0<br />
120 FOR X = 10 TO 100 STEP 4<br />
130 FOR I = 1 TO 5<br />
140 XDRAW I AT X , 100<br />
150 FOR T = 1 TO 60 : NEXT T<br />
160 XDRAW I AT X , 100<br />
170 NEXT I , X<br />
The shapes drawn are those shown in Figure 8 .1. They are intended<br />
to represent the positions of a crawling inchworm. The shapes were initially<br />
designed using Program A2.2 (SHAPE TABLE CONSTRUC<br />
TION). When the table was completed the contents were read and used<br />
as the DATA lines of Program 8. 3. As a result; the program identifies<br />
the shape tabie and its location (lines 10-100). Program lines 110<br />
through 170 use the XDRA W command to consecutively draw, then<br />
erase, the five shapes at points along a horizontal screen line.<br />
XDRA W is used for the display of shapes, since XDRA W draws a<br />
shape using the complement of the colors found at the screen locations<br />
that the shape is to occupy. Erasure then is especially easy. Since<br />
XDRA W N AT X, Y displays shape N using the complements of colors<br />
currently at screen locations, a second XDRA W N AT X, Y command<br />
will cause a re-complementing of these colors. As a result, the screen is<br />
returned to its original status. This permits a shape to move across a<br />
background of other images without disrupting those images.
Figure 8.1
Animated Images<br />
215<br />
In Program 8.3, each shape is displayed by line 140 and erased by<br />
line 160. A delay loop (line 150) holds the image on the screen briefly<br />
before it is erased.<br />
NOTES AND SUGGESTIONS<br />
1. Simple shapes are drawn and erased quickly, but the drawing of<br />
complex shapes may be distracting to watch. In such cases, the use of<br />
both graphics pages, along with the soft switches, causes the drawing to<br />
take place on the undisplayed page.<br />
2. Use HPLOT animation to display a rotating arrow (like the hand<br />
of a clock). Try the same with shape animation.<br />
3. The inchworm of Program 8.3 shows the animation of a simple<br />
figure. Write a program that uses shapes to show a person walking. Use<br />
a stick figure person; design several shapes that present the person with<br />
various leg and arm positions. It may be more efficient to have the shape<br />
table (constructed by Program A2.2) BLOADed from disk rather than<br />
defined within the program.<br />
4. In the same manner, write a program that shows a person<br />
ascending stairs.<br />
5. To each of the programs suggested in 3 and 4, add background<br />
scenery before beginning the animation.<br />
6. As mentioned earlier, animated images may be made to move<br />
more quickly and smoothly with machine language programs. If you<br />
have access to a BASIC compiler, you might try some of the above programs<br />
in compiled form.<br />
7. Software is commercially available which assists in the animation<br />
of simple images. These are machine language driver programs, to<br />
which you may add data for specific images. Some simulate motion<br />
through the use of both graphics pages and the soft switches, as in<br />
HPLOT animation mentioned above. Others generate images in the<br />
manner described under Bit Pattern Text, in Chapter 3.
Part VI<br />
Peripheral<br />
Equipment and<br />
Software
Chapter 9<br />
System Components<br />
There are thre.e components of a computer graphics system:<br />
1. Input device: a means of identifying data and passing instructions<br />
to the computer.<br />
2. Processor: the computer.<br />
3. Output device: the means provided for displaying the graphic<br />
image.<br />
Up to this point we have acted as though the keyboard were the only<br />
input device available, and the display screen the only output device.<br />
Other types of input and output devices are available. Several will be<br />
discussed briefly in the pages ahead.<br />
INPUT HARDWARE AND SOFTWARE<br />
GAME PADDLES AND PUSHBUTTONS<br />
The variable control dials (potentiometers) sometimes provided with<br />
microcomputers are frequently referred to as "game paddles" because<br />
of their use in video games. From a programming point of view, each<br />
paddle identifies an integer between 0 and 255. A dial that is turned to<br />
its full counterclockwise position provides a O; a dial turned to its full<br />
clockwise position yields a reading of 255.<br />
As many as four game paddles may be connected to the Apple II,<br />
with the values provided by the paddles available at memory locations<br />
through the PDL(I) command (I = 0, 1, 2, or 3).<br />
Program 9 .1 displays the values provided by game paddles 0 and 1.<br />
219
220 <strong>Microcomputer</strong> <strong>Graphics</strong><br />
Program 9.1: PADDLE READER<br />
1 REM PRO GRAM 9.1 (PADDLE READER)<br />
2 REM DISPLAYS VALUES PROVIDED BY GAME PADDLES<br />
10 TEXT : HOME<br />
20 VTAB 1: PRINT POL (Q), POL (1)<br />
30 GOTO 20<br />
Try the program. Turn both of the two game paddles and note the effect.<br />
The numbers provided by the game paddles may be used for a<br />
variety of graphics applications. Program 9.2 uses the paddles to draw a<br />
picture. The user controls the drawing via the paddles in much the same<br />
fashion as the user of an "ETCH-A-SKETCH" toy.<br />
Program 9.2: ELECTRONIC PEN<br />
1 REM PRO GRAM 9.2 (ELECTRONIC PEN)<br />
2 REM USES PADDLES TO CONTROL DRAWIN G<br />
10 HGR2 : HCOLOR= 3<br />
20 X = 279 * POL (Q) I 255<br />
30 Y = 191 * POL (1) I 255<br />
40 IF F = 0 THEN F = 1: HPLOT X,Y<br />
50 HPLOT TO X,Y<br />
60 GOTO 20<br />
Game paddles supplied for Apple computers have pushbuttons. As<br />
many as three pushbuttons may be accomodated by the Apple, although<br />
only two are provided by the standard paddles. Each pushbutton may be<br />
used to send an ON or OFF signal. The signals are received at memory<br />
locations -16287, -16286, and -16285. Normally, the memory location<br />
corresponding to a pushbutton contains a number less than 128<br />
(OFF). When a pushbutton is held in, the corresponding memory location<br />
is given a value 128 or larger (ON).<br />
Program 9.3 is an enhancement of the ELECTRONIC PEN program.<br />
The additions to the program allow greater control of the drawing<br />
via the pushbuttons. Pressing pushbutton 0 causes drawing to cease.<br />
The "pen" may be moved and its location is indicated, but nothing is<br />
drawn. Pressing pushbutton 1 causes drawing to resume.<br />
Program 9.3: IMPROVED ELECTRONIC PEN<br />
1 REM PRO GRAM 9.3 (IMPROVED ELECTRONIC PEN)<br />
2 REM INCLUDES PUSHBUTTON CONTROL<br />
10 HGR2 : HCOLOR= 3
System Components 221<br />
20 x = 279 * POL ( 0 ) I 255<br />
30 y = 1 91 * PO L ( 1 ) I 255<br />
40 IF F = 0 THEN F = 1 : HP LOT X , Y<br />
50 HP LOT TO X , Y<br />
60 IF PEEK (<br />
70 GOTO 20<br />
-<br />
16287) > 127 THEN 80<br />
80 x = 279 * PO L (0) I 255<br />
90 y = 191 * PO L (1 ) I 255<br />
1 0 0 HCOLOR= 3: HP LOT X , Y<br />
1 1 0 FOR I = 1 TO 1 0: NEXT I<br />
120 IF PEEK (<br />
-<br />
16286) > 127<br />
THEN F = 0: GOTO 20<br />
130 HCOLOR= 0: HP LOT X , Y<br />
140 GOTO 80<br />
LIGHT PENS<br />
A light pen is a pencil-like device with which the user may reference the<br />
display screen. A cable attaches the light pen to the computer. When the<br />
tip of the pen is pressed against the display screen, the location of the<br />
light pen is transmitted to the computer. The information is used to<br />
draw lines on the graphics screen as was done with the game paddles.<br />
The light pen also may be used to point to an image on the screen. In this<br />
wy it can identify a component of a graphic image that is to be modified<br />
or studied in greater detail, or make a selection from a menu displayed<br />
on the screen.<br />
GRAPHICS TABLETS<br />
A graphics tablet functions somewhat like a light pen. Indeed, it uses a<br />
pen-like device that is connected by wire to the computer. However,<br />
instead of referencing the display screen, the pen is pressed against a<br />
"tablet." The tap let is a thin rectangular board, also connected by wires<br />
to the computer. When the pen is pressed against the tablet, its position<br />
on the tablet is communicated to the computer.<br />
While the graphics tablet performs some of the functions of the light<br />
pen, it can be less convenient. It is a separate device. While it identifies<br />
locations of elected graphic elements on the screen, the pen cannot read<br />
screen locations directly; it must reference the tablet.<br />
The advantage of the tablet is in its separate nature. It lies flat, and<br />
is much easier to use for drawing purposes. If a map is laid on the tablet,<br />
the pen can trace rivers, highways, or topographic features. As the trac-
222 <strong>Microcomputer</strong> <strong>Graphics</strong><br />
ing progresses, a copy may be produced on the screen and the information<br />
stored in the computer memory for later use.<br />
The tablet typically has much finer resolution than the light pen.<br />
While a light pen may provide the 280 x 192 resolution available to the<br />
Apple display screen, the graphics tablet may far exceed this. The increased<br />
precision is valuable when an image is to be subject to enlargement,<br />
or when components are to be used for calculation. Further, while<br />
the display screen may not be able to make use of greater resolution,<br />
other output devices are available.<br />
Figure 9 .1 shows a graphics tablet that is available for microcomputer<br />
use. An example of an image created by use of a graphics tablet is<br />
given in Figure 9.4.<br />
Some very powerful software is available for use with light pens and<br />
graphics tablets. With the proper support software, the pen may be used<br />
to draw and erase easily. Portions of the display may be enlarged, reduced,<br />
or rotated. A graphic element may be colored in easily; an estimate<br />
of perimeter or area may be calculated as the pen traces around an<br />
object.<br />
Figure 9.1<br />
<strong>Graphics</strong> Tablet<br />
Photo courtesy of Houston Instruments
System Components<br />
223<br />
OUTPUT HARDWARE AND SOFTWARE<br />
PLOTTERS<br />
Each of the graphics devices described above is for input. A plotter is an<br />
output device, rendering a graphic image on paper using pen and ink.<br />
The location of the pen is controlled by the computer in somewhat the<br />
same fashion as BASIC commands HPLOT and HPLOT TO control<br />
the plotting of points on the display screen. Of course, when the plOtter<br />
is used as a supplement or replacement for the display screen, the information<br />
sent to the plotter must be formatted in a manner acceptable to<br />
the plotter.<br />
In its most elementary form, the information sent to the plotter<br />
identifies the pen status (UP or DOWN) and position (coordinates of<br />
the desired pen location). A sequence of instructions such as<br />
UP<br />
100,120<br />
DOWN<br />
UP<br />
Figure 9.2 Digital Plotter<br />
Photo courtesy of Houston Instruments
224 <strong>Microcomputer</strong> <strong>Graphics</strong><br />
will result in raising the pen, moving to location (100,120), pressing the<br />
pen to the paper, then raising it again. Thus a single dot would be<br />
plotted.<br />
To draw a line from location (100,120) to (200,10), a sequence such<br />
as the following would be used:<br />
UP<br />
100,120<br />
DOWN<br />
200,10<br />
UP<br />
(raise pen)<br />
(move pen to (100,120))<br />
(lower pen)<br />
(move pen to (200,10))<br />
(raise pen)<br />
Capabilities of plotters vary. Many have built-in character sets, allowing<br />
easy inclusion of labels in an image. Various line modes (solid,<br />
dash, dot, dot-dash, etc.) also may be available. Programmable pauses<br />
permit pen changes for color plots, but more sophisticated plotters may<br />
be instructed to make pen changes automatically.<br />
Examples of plotter output appear in this book as Figures 4.11, 5 .1,<br />
and 7.1.<br />
Figure 9.3<br />
Dot Matrix Printer<br />
Photo courtesy of Integral Data Systems
System Components 225<br />
GRAPHICS PRINTERS<br />
Several printers are available which may be used to obtain graphic output.<br />
The print head of the dot matrix printer has an array of pins.<br />
Software that uses the printer for graphics output sends to the printer<br />
a byte-by-byte map of the bit patterns on one of the graphics pages. If<br />
a bit of a byte is turned on, the corresponding pin of the print head is<br />
extended. Typically, the bit patterns of a vertical block of bytes are<br />
read and transmitted to the printer at one time. Thermal printers function<br />
in a similar manner, but transmit the bit pattern to paper by heat<br />
rather than ink.<br />
An example of dot matrix printer graphics is shown in Figure 9.4.<br />
The image is one which was developed through the use of a graphics tablet.<br />
Figure 9.4
Appendix l<br />
Binary, Decimal, and<br />
Hexadecimal Number<br />
Systems<br />
It is said to be an accident of nature that we use a base 10 number system.<br />
If our ancestors had 6 fingers on each hand we might be using base<br />
12. If they had 1 finger on each hand perhaps we would calculate in base<br />
2. We might then have less trouble communicating with a computer.<br />
The conversion between base 2 and base 10 is one of the inconveniences<br />
we must live with in order to get the most out of a computer.<br />
The structure of number systems is the same, regardless of the base<br />
used. The number 243. 72 (base 10) represents<br />
2(10)2 + 4(10)1 + 3(10)0 + 7(10)-1 + 2(10)-2<br />
If we write a number a 1 a 2<br />
a3 .a4a5 (base b), it is assumed that the number<br />
represents<br />
a 1 (b)2 + a1(b) 1 +<br />
a 3 (b)0 + aib)-1 +<br />
a5(b)-2<br />
Thus, 423 .51 (base 7) represents<br />
and 13 .423 (base 5) represents<br />
4(7)2 + 2(7) 1 +<br />
3(7)0 + 5(7)-1 +<br />
1(7)-2<br />
1(5)1 + 3(5)0 + 4(5)-1 + 2(5)-2 + 3(5)-3 (8.904 (base 10))<br />
It is necessary to be familiar with three number systems in order to<br />
communicate properly with the Apple II. We assume you are familiar<br />
with base 10 (decimal). The other two systems we will use are base 2<br />
(binary) and base 16 (hexadecimal). Base 2 is the native language of digital<br />
computers; base 16 happens to be convenient for conversation<br />
between people and computers. Base 16 is convenient because it is, in a<br />
way, a shorthand base 2 notation. This will be apparent later.<br />
227
228 <strong>Microcomputer</strong> <strong>Graphics</strong><br />
BINARY<br />
When working in base 10 we have the ten symbols 0, 1, 2, 3, 4, 5, 6, 7, 8,<br />
and 9 with which to represent numbers. In base 2 we have only two symbols:<br />
0, and 1. Any number may be represented in base 2 as a pattern of<br />
Os and ls. For example, the binary 1011011 represents (starting from the<br />
left):<br />
1(2)6 + 0(2)5 + 1(2)4 + 1(2)3 + 0(2) 2 + 1(2) 1 + 1(2)0 =<br />
64 + 0(32) + 16 + 8 + 0(4) + 2 + 1 = 91<br />
Thus the binary number 1011011 represents the number that we would<br />
write as decimal 91.<br />
Similarly, the binary 110111 represents the decimal 55, since<br />
1(2)5 + 1(2)4 + 0(2)3 + 1(2) 2 + 1(2) 1 + 1(2)0 = 55<br />
Conversion of a number from decimal to binary representation is accomplished<br />
through subtraction of powers of 2, starting with the largest<br />
possible power. To write the number 237 in binary form, we note that<br />
128 = 27 is the largest power of 2 which can be subtracted from 237<br />
(237 = 128 + 109). We then turn to 109. The largest power of 2 which<br />
can be subtracted from 109 is 26 = 64 (109 = 64 + 45). Thus<br />
237 = 128 + 64 + 45. Since 45 = 32 + 13, and 13 = 8 + 4 + 1, we may<br />
write:<br />
237 = 128 + 64 + 32 + 8 + 4 + 1<br />
= 1(2)7 + 1(2)6 + 1(2)5 + 0(2)4 + 1(2)3 + 1(2) 2 + 0(2)1 + 1(2)0<br />
= 11101101 (base 2)<br />
EXERCISES<br />
1. Convert each of the following from decimal to binary form<br />
a) 145 b) 252<br />
c) 201 d) 75<br />
2. Convert each of the following from binary to decimal form<br />
a) 11011100 b) 10110111<br />
c) 10010001 d) 11001101<br />
The Apple II is a digital computer, performing its arithmetic in base<br />
2. Further, it is an eight bit computer, which means that the largest number<br />
of Os and ls it can handle at one time is eight. Because of this, the<br />
memory available for the computer to use is configured in blocks of<br />
eight. Each eight-bit unit is referred to as a byte. A half-byte is called a<br />
nybble. The number 10111110 (decimal 190) is one byte. The lower, or
Binary, Decimal, and Hexadecimal Number Systems<br />
229<br />
least significant, nybble is I I IO, and tpe higher, or most significant,<br />
nybble is 1011.<br />
You may have figured out that the largest number that can be represented<br />
as an eight-bit binary is decimal 255 (I IHI I I I). That doesn't<br />
prevent the computer from considering larger numbers (or fractions). It<br />
simply breaks the number up into components and stores the parts in<br />
several bytes.<br />
HEXADECIMAL<br />
The hexadecimal (or hex) notation for a number is the base I6 representation<br />
of the number. In this numeration system, the number 235 refers<br />
to 2(16)2 + 3(I6) 1 + 5(I6)0 = 565. In order to avoid confusing the hex<br />
number 235 with the decimal number 235, it is common practice to add<br />
a "$" prefix to the hex notation. Thus $235 = 565.<br />
In base 10, ten symbols are available to represent numbers. Base 2<br />
provides only the symbols 0 and I. For work with hexadecimal notation,<br />
we need I6 symbols. It is conventional to use the symbols 0 through 9<br />
for their normal duty, and the symbols A, B, C, D, E, and F to represent<br />
the decimal numbers 10, 11, I2, 13, I4, and I5 .<br />
If we were counting in hex, our count would go like this: $I, $2,<br />
$3, $4, $5, $6, $7, $8, $9, $A, $B, $C, $D, $E, $F, $10, $11, $I2, $13,<br />
$I4, $I5, $I6, $I7, $I8, $I9, $IA, $IB, $IC, $ID, $IE, $IF, $20,<br />
$21. . . .<br />
NOTE: It is considered poor form to refer to $24 as "hex twentyfour,''<br />
since ''twenty-four'' implies decimal. Proper reading of $24 is<br />
''hex-two-four. ''<br />
To convert $2A3E to decimal, we write<br />
Similarly,<br />
$2A3E = 2(I6) 3 + 10(16)2 + 3(I6) 1 + I4(16)0<br />
= 2(4096) + 10(256) + 3(I6) + I4(I)<br />
= 8 I 92 + 2560 + 48 + I 4<br />
= 108I4<br />
$E38F = I4(I6) 3 + 3(16)2 + 8(16) 1 + I5(I6)0<br />
= 57344 + 768 + I28 + I5<br />
= 58255
230 <strong>Microcomputer</strong> <strong>Graphics</strong><br />
Table Al .1 may be used to save calculation time. Using the table, we<br />
read<br />
$1111 as 4096 + 256 + 16 + 1 = 4369<br />
$2202 as 8192 + 512 + 0 + 2 = 8706<br />
$253B as 8192 + 1280 + 48 + 11 = 9531<br />
$EB29 as 57344 + 2816 + 32 + 9 = 60201<br />
Table Al.1<br />
16 3 16 2 16 1 16 °<br />
$1 4096 256 16 1 $1<br />
$2 8192 512 32 2 $2<br />
12288 768 48 3<br />
$4 16384 1024 64 4 $4<br />
$5 20480 1280 80 5 $5<br />
$6 24576 1536 96 6 $6<br />
$7 28672 1792 112 7 $7<br />
$8 32768 2048 128 8 $8<br />
$9 36864 2304 144 9 $9<br />
$A 40960 2560 160 10 $A<br />
$B 45056 2816 176 11 $B<br />
$C 49152 3072 192 12 $C<br />
$D 53248 3328 208 13 $D<br />
$E 57344 3584 224 14 $E<br />
$F 61440 3840 240 15 $F<br />
$3<br />
$3<br />
To convert the decimal 29143 to hex notation, we first identify the<br />
largest multiple of the largest power of 16 that may be subtracted from<br />
29143. That number is 7(16)3 = 28672. Subtracting yields 29143 -<br />
28672 = 471. Next, identify the largest multiple of the largest power of<br />
16 that may be subtracted from 471. That number is 1(16) 2 = 256. Subtracting<br />
yields 471 - 256 = 215. Continuing, the largest multiple of<br />
(16)1 that may be subtracted from 215 is 13(16) = 208, and<br />
215 - 208 = 7. Thus,<br />
29143 = 28672 + 471<br />
= 7(16)3 + 256 + 215<br />
= 7(16)3 + 1(16)2 + 208 + 7<br />
= 7(16)3 + 1(16) 2 + 13(16)1 + 7<br />
= $71D7
Binary, Decimal, and Hexadecimal Number Systems<br />
231<br />
Similarly,<br />
43618 = 40960 + 2658<br />
= 10( 4096) + 2560 + 98<br />
= 10(16)3 + 10(256)2 + 96 + 2<br />
= 10(16)3 + 10(16)2 + 6(16) 1 + 2(16)<br />
= $AA62<br />
If you find the conversion between decimal and hex to be tedious,<br />
unpleasant, and frustrating, you may appreciate the following programs.<br />
The first provides for conversion from decimal to hexadecimal,<br />
while the second provides for conversion from hex to decimal. You may<br />
easily merge them into a single program if you like. Similar programs<br />
may be designed for conversions involving binary numbers.<br />
Program A 1.1: BASE CONVERTER (HEX TO DECIMAL)<br />
1 REM PROGRAM A1 .1 (BASE CONVERTER)<br />
2 REM HEX TO DECIMAL<br />
10 INPUT "NUMBER (HEX) ";A $<br />
20 L = LEN (A$) :N = 0<br />
30 FOR I = 0 TO L - 1 :<br />
T = ASC ( MID$ (A$, L - I , 1 ) )<br />
40 IF T = 36 THEN GOTO 80<br />
SO T = T - 48 : IF T > 9 THEN T = T - 7<br />
,.<br />
60 N = N + T * 16 I<br />
70 NEXT I<br />
80 PRINT N<br />
Program A 1.2: BASE CONVERTER (DECIMAL TO HEX)<br />
1 REM PROGRAM A1 .2 (BASE CONVERTER)<br />
2 REM DECIMAL TO HEX<br />
10 H$ = "01 234S6 789ABCDEF"<br />
20 BASE = 16:I = 1<br />
30 INPUT "NUMBER
232 <strong>Microcomputer</strong> <strong>Graphics</strong><br />
RELATIONSHIP OF HEX TO BINARY<br />
Each of the decimal numbers from 0 to 15 may be represented by a fourbit<br />
binary (0000 through 1111), or by a one-digit hex ($0 through $F).<br />
The decimal numbers from 0 through 255 have one-byte (eight-bit) binary<br />
representation (00000000 through 11111111) and two-digit hex representation<br />
($00 through $FF).<br />
The decimal 181 is represented by binary 10110101, and by hex $B5.<br />
Note here that the lower nybble 0101 has hex value $5, while the upper<br />
nybble has hex value $B. This association is not an accidental occurrance,<br />
and is consistent. To convert between binary and hex representations<br />
of a number, we may associate hex digits with binary nybbles.<br />
EXAMPLE: Write $6C in binary form.<br />
Since $6 = 0110 (binary) and $C = 1100 (binary),<br />
then $6C = 01101100 (binary)<br />
EXAMPLE: Write 10111101 in hex notation.<br />
The upper nybble, 1011, has hex equivalent $B;<br />
the lower nybble, 1101, has hex equivalent $D.<br />
Thus 10111101 (binary) = $BD.<br />
EXERCISES<br />
Convert the following binary representations to hex.<br />
A) 10111001 C) 10001111<br />
B) 10111100 D) 11011011<br />
Convert the following to binary form.<br />
A) $3F C) $2D<br />
B) $CA D) $E6
Appendix 2<br />
Shape Tables<br />
The Applesoft commands HPLOT and HPLOT TO provide one<br />
means of generating graphic images. A second method is available,<br />
one which is especially useful for displaying frequently used graphic<br />
components. When these components, or shapes, are assembled into<br />
a shape table, the commands DRAW and XDRA W may be used to<br />
add the shapes to a graphic image. There are several reasons for<br />
using shape tables.<br />
1) Once the shape table is made available to a program, a single<br />
command will display a shape, no matter how complex the<br />
shape.<br />
2) A shape easily may be displayed, then erased, without disturbing<br />
the background image. This capability is valuable in animating an<br />
image.<br />
3) Scaling and rotation of shapes is possible.<br />
There are, of course, some inconveniences associated with the use of<br />
shapes. For example, shapes that are scaled or rotated are somewhat distorted.<br />
However, the most pronounced difficulty is in the design and<br />
construction of the shape table. When this is undertaken by hand, it is<br />
an onerous task, and is susceptible to many errors and frustrations. Fortunately,<br />
it can be handled by the computer, when an appropriate program<br />
is available. Such programs have appeared in computer magazines<br />
and several are commercially available. One is given in this Appendix as<br />
Program A2.2.<br />
233
234 <strong>Microcomputer</strong> <strong>Graphics</strong><br />
The next several pages discuss the process of assembling a shape<br />
table, and the basis of Program A2.2. The program may be used without<br />
an understanding of this discussion. If this is your intent, you only<br />
need note the instructions given under Using Shapes.<br />
SHAPES AND SHAPE TABLES<br />
A shape is a coded sequence of numbers representing line segments that<br />
define the form of a graphic element. It could be considered to be a set<br />
of instructions about where to draw the dots and line segments that define<br />
the object.<br />
In order to be accessed for drawing purposes, a shape must be part<br />
of a shape table. The first part of a shape table consists of an addressing<br />
structure. The first byte of the table identifies N, the number of shapes<br />
contained in the table, which may be as large as 255. The second byte of<br />
the table is unused. The 2N bytes that follow are used to identify the displacement<br />
from the first byte of the table to the first byte of each of the<br />
shapes in the table. The displacements are stored as two bytes, low order<br />
byte first.<br />
Each shape consists of a sequence of codes representing vectors that<br />
trace the shape. Each vector is an instruction to move a distance of one<br />
unit up, right, down, or left. Further, the vectors are of two types: plotthen-move<br />
vectors, and don't-plot-just-move vectors. The eight vectors<br />
available for use in defining shapes are shown, together with their codes,<br />
in Table A2.1:<br />
Table A2.1<br />
Don't-plot-just-move vectors Plot-then-move vectors<br />
Vector Code Vector Code<br />
Up ! 0 Up 1 4<br />
Right 1 Right 5<br />
Down<br />
2 Down<br />
6<br />
1<br />
Left 3 Left 7<br />
l<br />
To illustrate the effects of these codes, select an initial point and<br />
draw the following vectors: 6, 6, 2, 6, 6, 1, 1, 6, 3, 6, 3, 7, 0, 4, 3, and 5.<br />
The resulting shape is shown as Figure A2. l.<br />
While we may draw a shape when given a sequence of coded vectors,<br />
the form in which the vectors are presented by the shape table is very
Shape Tables 235<br />
important to the shape drawing commands. It might seem reasonable to<br />
store the vector codes sequentially in memory, using one byte of memory<br />
per vector. However, there are hazards in that practice. Further,<br />
memory is not efficiently used-the vector code numbers each use at<br />
most three of the eight bits available in each byte.<br />
The shape drawing commands can read as many as three vectors<br />
from a single byte of the shape table. However, it is not always possible<br />
to be this efficient. There are two factors which may prevent the inclusion<br />
of three vectors in a byte:<br />
1. The vector codes are three bits long. If the leading bit of the third<br />
vector code is not zero, nine bits are necessary, not the eight available<br />
in a byte;<br />
2. The shape drawing commands ignore leading zeros that appear in<br />
any byte of the table, and interpret a zero byte as an end-of-shape<br />
code. For this reason, zero vectors (don't-plot-just-move-up) must<br />
be stored carefully.<br />
The vectors that define the shape of Figure A2.1 will be used to illustrate<br />
the preparation of the vector table for the shape.<br />
The sequence 6, 6, 2, which begins the shape of Figure A2.1, has<br />
binary form 110, 110, 10. Listing the three in order from right to left, we<br />
have 10, 110, 110. With the commas removed, we have an eight bit number<br />
10110110. Similarly, the next sequence of three (6, 6, 1) may be<br />
written as 01, 110, 110; or 01110110. The sequence 1, 6, 3 becomes<br />
11110001. In this way, the first nine vectors of the shape are coded as the<br />
three bytes 10110110, 01110110, and 11110001.<br />
The next three vectors (6, 3, 7), in binary form, are 110, 011, 111.<br />
Listed in order from right to left, the code becomes 111011110. This<br />
code will not fit in an eight-bit byte. The first two vectors may be<br />
entered in the byte as 00011110 (leading zeros are ignored), while the<br />
third is deferred to the next byte.<br />
The next three vectors to be considered are 7, 0, 4. Again, the three<br />
will not fit in a single byte. Further, since the shape-drawing commands<br />
will ignore leading zeros, the first two vectors cannot be entered as one<br />
byte. Instead, the 7 will be entered into one byte while the other two vectors<br />
are def erred to the next byte.<br />
The three vectors 0, 4, 3 may be put into one byte as 11100000. The<br />
final vector, 5, is left for a byte by itself. A zero byte marks the end of<br />
the shape.
236 <strong>Microcomputer</strong> <strong>Graphics</strong><br />
The shape of Figure A2.1, as described by the vector codes 6, 6,<br />
2, 6, 6, 1, 1, 6, 3, 6, 3, 7, 0, 4, 3, and 5, may be stored in 8 bytes as<br />
follows:<br />
Binary Decimal<br />
10110110 = 182<br />
2 6 6<br />
01110110 = 118<br />
1 6 6<br />
11110001 = 241<br />
3 6 1<br />
00011110 = 30<br />
3 6<br />
00000111 = 7<br />
7<br />
11100000 = 224<br />
3 4 0<br />
00000101 = 5<br />
5<br />
00000000 = 0<br />
end-of-shape code<br />
A short shape table, containing only this shape, may be constructed<br />
as follows:<br />
BYTE number<br />
BYTE number 2<br />
BYTE number 3<br />
BYTE number 4<br />
0<br />
4<br />
0<br />
BYTE number 5 : 182<br />
· BYTE number 6 : 118<br />
BYTE number 7 : 241<br />
BYTE number 8 : 30<br />
BYTE number 9 7<br />
BYTE number 10 : 224<br />
BYTE number 11 5<br />
BYTE number 12 0<br />
(number of shapes)<br />
(unused)<br />
(displacement to first<br />
byte of shape number 1)<br />
(codes for shape number 1)<br />
(end of shape code)
Shape Tables<br />
237<br />
Figure A2.l<br />
NOTES ON THE PROGRAM A2.2<br />
Much of this program is taken up with the user interface. That part of<br />
the program will not be discussed here.<br />
The program allows the creation of a new shape table or the loading<br />
of an existing table from disk (lines 40-90). In either case, the shape<br />
table is located just above the second high resolution graphics page. If a<br />
new table is indicated, the space for the addressing structure is allocated<br />
(line 230), and the displacement from the beginning of the table to the<br />
beginning of the first shape is stored (lines 200-220). After communication<br />
with the user permits the shape creating grid to be drawn, the program<br />
turns to the task of assembling shapes.
238 <strong>Microcomputer</strong> <strong>Graphics</strong><br />
The design of a shape consists of two stages: (1) identifying the vectors<br />
that define the shape, and (2) assembling the vector codes to obtain<br />
the bytes of the shape table. These stages were evident in the design of<br />
the shape of Figure A2.1, and form the basis of Program A2.2. The<br />
heart of the program, less some of the user interface commands, is listed<br />
below.<br />
410<br />
420<br />
440<br />
450<br />
460<br />
470<br />
480<br />
500<br />
510<br />
GET V$: PRINT<br />
IF, V$ = "Q" THEN POKE ADDR,P:<br />
POKE ADDR + 1, 255: GOT O 520<br />
IF V$ = "P" THEN P = 4: GOT O 410<br />
IF V$ = "U" THEN V = P<br />
IF V$ = "R" THEN V = P + 1<br />
IF V$ = "D" THEN V = P + 2<br />
IF V$ = "L" THEN V = P + 3<br />
POKE ADDR,V: ADDR = ADDR + 1<br />
P = 0: GOTO 410<br />
520 ADDR = PEEK CT A + SN * 2 + 2) + 256 *<br />
PEEK CT A + SN * 2 + 3r + TA:BYT E = ADDR<br />
530 C1 = PEEK (BYTE): IF C1 = 255<br />
THEN POKE ADDR,0: ADDR = ADDR + 1: GOT O 660<br />
540 C2 = PEEK (BYT E + 1): IF C2 = 255<br />
THEN POKE ADDR,C1: POKE ADDR + 1,0:<br />
ADDR = ADDR + 2: GOT O 660<br />
550 C3 = PEEK (BYT E + 2): IF C3 = 255<br />
THEN POKE ADDR,C1 + 8 * C2: POKE ADDR + 1,0:<br />
ADDR = ADDR + 2: GOT O 660<br />
560 CODE = C1 + 8 * C2 + 64 * C3<br />
570 IF CODE = 0 THEN POKE ADDR,64:<br />
580<br />
590<br />
600<br />
POKE ADDR + 1,24: ADDR = ADDR + 1:<br />
BYT E = BYT E + 2: GOT O 650<br />
IF CODE < 8 THEN POKE ADDR,CODE: GOT O 650<br />
IF CODE < 64 THEN POKE ADDR,CODE:<br />
BYT E = BYT E + 1: GOT O 650<br />
IF CODE < 256 THEN POKE ADDR,CODE:BYT E =<br />
BYTE + 2: GOTO 650<br />
610 CODE = CODE - 64 * C3<br />
620 IF CODE = 0 THEN POKE ADDR,64:<br />
POKE ADDR + 1,3:ADDR = ADDR + 1:<br />
BYTE = BYT E + 1: GOT O 650<br />
630 IF CODE < 8 THEN POKE ADDR,CODE: GOT O 650<br />
640 POKE ADDR,CODE:BYT E = BYT E + 1<br />
650 ADDR = ADDR + 1:BYTE = BYT E + 1: GOT O 530<br />
As vectors are received from the keyboard, the vector codes are<br />
stored in a temporary table by line 500. A "Q," indicating the end of a<br />
shape, results in the final vector being stored, along with a temporary<br />
end-of-shape code (255).
Shape Tables 239<br />
Line 520 resets ADDR to the beginning of the temporary table and<br />
BYTE to the address of the beginning of the shape (both are the same<br />
here).<br />
Lines 530 through 550 read three consecutive vectors from the temporary<br />
table. If any of the three is 255 (end-of-shape code), the shape is<br />
closed out. Otherwise, line 560 calculates the CODE that represents the<br />
three vectors.<br />
If the value of CODE is 0 (line 570), then each of the three vectors is<br />
a DON'T-PLOT-JUST-MOVE-UP vector. Since a zero byte would be<br />
interpreted as an end-of-shape code by the shape drawing commands,<br />
the sequence of vectors 0,0,0 is revised as 0, 0, 1,0, 3. The addition of<br />
move-right (1) and move-left (3) vectors serves to break up the upward<br />
movement. The five vectors 0,0, 1,0, 3 translate into two bytes: 64<br />
(0,0, 1), and 24 (0,3).<br />
If the value of CODE is between 1 and 7 (line 580), it must represent<br />
a nonzero vector code followed by two zero vector codes. Since leading<br />
zeros are ignored by the shape drawing commands, the leading zeros are<br />
def erred for use in the next byte.<br />
If the value of CODE is between 8 and 63 (line 590), it must repre<br />
sent a sequence of vectors in which the second is nonzero, but the third<br />
is zero. Again, the third must be deferred to the next byte.<br />
If CODE is between 64 and 255, the three vectors read from the temporary<br />
table may be put into a single byte (line 600).<br />
If CODE is 256 or larger, then the binary representation of CODE<br />
requires 9 bits. The third vector must be deferred to the following byte<br />
(line 610), and the first two vectors must be analyzed for zero vectors<br />
(lines 620 and 630).<br />
When the shape assembly is completed, the program displays the result<br />
(line 670), then asks the user if he or she wishes to include the shape<br />
in the table. If the shape is to be included in the table, the shape number,<br />
SN, is incremented, and the displacement to the next shape is stored<br />
(line 680).<br />
USING SHAPES<br />
Before the shapes in a table may be drawn, the shape table must be designed,<br />
or loaded from disk, and placed in a safe area of memory that<br />
will not be used for other purposes. A limited amount of memory is<br />
)<br />
available beginning at location 768 ($300), and may be used for storing a<br />
short shape table. Large tables may be stored at the upper end of memory<br />
(just below DOS) and protected by setting HIMEM to a value below
240 <strong>Microcomputer</strong> <strong>Graphics</strong><br />
the beginning of the table. Another area that usually is safe lies just<br />
above the second page of high resolution graphics. Program A2.2 stores<br />
a shape table there.<br />
While the location of a shape table in memory is somewhat arbitrary,<br />
the address of the beginning of the table must be made known to<br />
the shape drawing commands. When either DRAW or XDRA Wis used,<br />
the address of the shape table is found in locations 232 (low part of the<br />
address) and 233 (high part of the address). It is the programmer's<br />
responsibility to see that these locations contain the proper addresses.<br />
In general, for a shape table stored at location A, location 232<br />
should contain the value A - 2 5 6 * < INT > , while location 233<br />
should contain I NT • These values may be set when the table is<br />
loaded from disk. Several tables may be used within a program if the<br />
contents of locations 232 and 233 are redefined at appropriate times.<br />
Values of ROT, SCALE, and HCOLOR should be defined before<br />
using either DRAW or XDRA W. (See the Applesoft Basic Programming<br />
Reference Manual for a description of these commands.) You will<br />
find that some distortion occurs when shapes are rotated or scaled.<br />
Also, since most shapes contain vertical line segments, you will find that<br />
colors are not easily used. White is the preferred color for shapes.<br />
The following short program illustrates a use of shape tables to simulate<br />
a radar screen. The shape table is identified in lines 20 and 30. It<br />
consists of two shapes: a single plot-then-move-up vector, and a collection<br />
of vectors that define an airplane. The shapes are illustrated in Fig-<br />
•<br />
•<br />
• • • • • •<br />
(a)<br />
•<br />
•<br />
(b)<br />
Figure A2.2
Binary, Decimal, and Hexidecimal Number Systems 241<br />
ure A2.2. When shape number 1 is scaled (SCALE = 75), it appears as a<br />
line and is used as the scanning line for the radar screen. As the scanning<br />
line sweeps around the screen, the positions of the two airplanes change<br />
slightly. This display may be incorporated into a larger game program to<br />
simulate an aircraft battle or an airport.<br />
Program A2. 1: RADAR<br />
1 REM PROGRAM A2.1 (RADAR)<br />
2 REM ILL USTRATES THE USE OF SHAPES<br />
10 FOR I = 768 TO 782 : READ X: POKE I ,X : NEXT I<br />
20 POKE 233,3 : POKE 232 , 0<br />
30 HGR2 : ROT= 0: SCALE= 2<br />
40 OT = .1 : C = COS (OT ) :S = SIN (OT ) :N = 6.4 I DT<br />
50 ex = 140:CY = 96 :SC = 1.16:X = 50 :Y = O:FL = 0<br />
60 GOSUB 190<br />
7 0 X = '3 0 : Y = 0 : F L = 0 : G 0 S U B 1 9 0<br />
80 A = 175:8 = 61 : C = 191 :0 = 113<br />
90 XDRAW 2 AT A , B: XDRAW 2 AT C , D<br />
100 SCALE = 75 : FOR I = 0 TO 63<br />
110 ROT= I : XDRAW 1 AT 140 ,96<br />
120 FOR J = 1 TO 15: NEXT J<br />
130 IF I = 8 THEN SCALE = 2: ROT= 1 :<br />
XDRAW 2 AT A , B:A = A - 3:B = B + 3:<br />
XDRAW 2 AT A , B: SCALE= 75<br />
140 IF I = 19 THEN SCALE= 2: ROT= 1 :<br />
XDRAW 2 AT C , D:C = C - 3:0 = D - 1 :<br />
XDRAW 2 AT C , D: SCALE = 75<br />
150 I F A < 140 THEN TEXT : HOME : END<br />
160 ROT= I : XDRAW 1 AT 140 ,96<br />
170 NEXT I : GOTO 100<br />
180 DATA 2 , 0 ,6 , 0 ,8 , 0 , 4, 0 , 109, 229, 240, 54, 14, 4, 0<br />
190 FOR J = 1 TO N<br />
200 T = X * C - Y * S:Y = Y * C + X * S:X = T<br />
21 0 SX = SC * X + CX :SY = CY - Y<br />
220 IF FL = 1 THEN 240<br />
230 HPLOT SX, SY: F L = 1<br />
240 HPLOT TO SX, SY<br />
250 NEXT J: RETURN<br />
PROGRAM A2.2 (SHAPE CONSTRUCTION)<br />
This program will assemble shapes into a shape table and store the table<br />
on disk (if desired) as a binary file. The program provides a chance to<br />
store and recall tables from disk. Thus, a shape table may be developed<br />
over several sessions.
242 <strong>Microcomputer</strong> <strong>Graphics</strong><br />
The program allows the user to define a shape as a pattern of dots<br />
on a grid, which is displayed on the screen. The size of the grid (up to<br />
15 x 15) may be specified by the user. Control over the size of the grid is<br />
useful when designing shapes that are to be of a uniform size (such as<br />
alphabet characters).<br />
The square of the grid that is used as the starting point for the shape<br />
also is under user control. This point of the shape is placed at the screen<br />
location that is referenced by the shape drawing commands. When designing<br />
a collection of shapes, it usually is useful to have a uniform position<br />
to use as the starting point.<br />
The keys U, D, L, and R are used to move the cursor a distance of<br />
one unit up, down, left, or right (attempts to move off the grid are<br />
thwarted). The P key will plot a dot at the current cursor location. Press<br />
Q when the shape is completed, or when you would like to try again.<br />
When Q is pressed, the computer takes a short time to assemble the<br />
shape you have drawn, then displays the result at the right of the grid.<br />
NOTE: If you prefer to use I, J, K, and M for moving the cursor (as<br />
in text screen editing), make those substitutions in lines 450 through<br />
480.<br />
As each shape is completed, you have the option of including it in<br />
the shape table or rejecting it. You then have the option of developing<br />
another shape, changing the grid size, changing the starting point, saving<br />
the current shape table to disk, or leaving the program.<br />
Program A2.2: SHAPE CONSTRUCTION<br />
1 REM PROGRAM A2.2 (SHAPE CONSTRUCTION)<br />
2 REM ASSISTS IN CONSTRUCTIN G SHAPE TABLES<br />
10 HCOLOR= 3: SCALE= 1: ROT= O:TA = 24576<br />
20 POKE 768,1: POKE 769,0: POKE 770,4: POKE<br />
771, 0<br />
30 POKE 772,58: POKE 773,36: POKE 774,45: POKE<br />
775,54: POKE 776,7: POKE 778,0<br />
40 TEXT : HOME : PRINT "CHOOSE:": PRINT<br />
50 PRINT "L --> LOAD A SHAPE TABLE FROM DISK":<br />
PRINT<br />
60 PRINT "N --> START A NEW SHAPE TABLE":<br />
PRINT<br />
70 PRINT "YOUR CHOICE "; CHR$ (95);: HTAB 12:<br />
INPUT A$
Binary, Decimal, and Hexidecimal Number Systems<br />
243<br />
80 IF A$ = "N" THEN 180<br />
90 IF A$ < > "L" THEN 40<br />
100 PRINT : INPUT "NAME OF THE TABLE ":N$<br />
1 1 0 PRINT CHR$ (4);"BLOAD ";N $;", A$6000"<br />
120 N = ( PEEK CTA + 2) + 256 *<br />
PEEK (TA + 3) - 2) I 2<br />
130 SN = PEEK (TA) : PRINT : IF SN = N THEN PRINT<br />
"TABLE FULL" : END<br />
140 PRINT "TH IS TABLE CAN HOLD ";N;" SHAPES":<br />
PRINT<br />
150 PRINT "IT PRESENTLY HAS ";S N;" SHAPE (S) IN<br />
IT": PRINT<br />
160 FOR I = 1 TO 2500 : NEXT I<br />
170 GOTO 240<br />
180 TEXT : HOME : INPUT "NUMBER OF SHAPES IN<br />
THIS TAB LE : ";N<br />
190 POKE TA, 0: POKE TA + 1 , 0<br />
2 0 0 DA= : 2 * N + 2<br />
21 0 POKE TA + 2 , DA - 256 * INT (DA I 256)<br />
220 POKE TA + 3 , INT (DA I 256)<br />
230 FOR I = TA + 4 TO TA + 2 * N + 3: POKE 1 , 0:<br />
NEXT I<br />
240 PRINT PRINT "CHOOSE SIZE OF SHAPE DESIGN<br />
GRID"<br />
250 INPUT "NUMBER OF COLUMNS (1 - 15) ";C : C =<br />
1 0 * c<br />
260 INPUT "NUMBER OF ROWS (1 - 15) ";R :R = 150<br />
- 10 * R<br />
270 HGR<br />
280 FOR I = R TO 150 STEP 10: HPLOT 0 , 1 TO C , I :<br />
NEXT I<br />
290 FOR I = 0 TO C STEP 10: HPLOT I , R TO 1 , 150:<br />
NEXT I<br />
300 IF A = 1 THEN 330<br />
31 0 HOME : VTAB 21 : PRINT "STARTING POS ITION?<br />
LOWER LEFT IS (1, 1>"<br />
320 INPUT "COLUMN ";X1 : INPUT "ROW ";Y 1<br />
330 X = 10 * X1 - 5:Y = 155 - 10 * Y1<br />
340 ADDR = PEEK (TA + SN * 2 + 2) + 256 * PEEK<br />
(TA + SN * 2 + 3) + TA<br />
350 POKE 232, 0: POKE 233,3<br />
360 XDRAW 1 AT X , Y:P = O:V = - 1<br />
370 HOME : VTAB 21 : PRINT "TABLE CAPACITY: ";N;"<br />
SHAPES-TH IS IS # ";S N + 1<br />
380 VTAB 22 : PRINT TAB ( 10);"DIRECTION<br />
(U/D/L/R)<br />
II<br />
(continued)
244 <strong>Microcomputer</strong> <strong>Graphics</strong><br />
390 VTAB 23: PRINT "CHOOSE: PLOT (P)"<br />
400 VTAB 24: PRINT TAB( 10);"QUIT THIS SHAPE<br />
(Q)";<br />
410 VTAB 23: HTAB 35: GET V$: PRINT<br />
420 IF V$ = "Q" THEN POKE ADDR,P: POKE ADDR +<br />
1,255: GOTO 520<br />
430 XDRAW 1 AT X,Y<br />
440 IF V$ = "P" THEN P = 4:<br />
FOR I = X - 3 TO X + 3: HPLOT I,Y - 3 TO<br />
I,Y + 3: NEXT I: XDRAW 1 AT X,Y: GOTO 410<br />
450 IF V$ = "U" THEN V = P:Y = Y - 10: IF Y < R<br />
THEN Y = Y + 10: PRINT CHR$ (7);:V = - 1<br />
460 IF V$ = "R" THEN V = P + 1 :X = X + 10: IF X<br />
> C THEN X = X - 10: PRINT CHR$ (7);:V = -<br />
1<br />
470 IF V$ = "D" THEN V P + 2:Y = Y + 10: IF Y<br />
> 150 THEN Y = Y - 10: PRINT CHR$ (7);:V =<br />
- 1<br />
480 IF V$ = "L" THEN V = P + 3:X = X - 10: IF X<br />
< 0 THEN X = X + 10: PRINT CHR $ (7);:V = -<br />
1<br />
490 IF V = - 1 THEN XDRAW 1 AT X,Y: GOTO 410<br />
500 POKE ADDR,V:ADDR = ADDR + 1<br />
510 XDRAW 1 AT X,Y:P = O:V = - 1: GOTO 410<br />
520 ADDR = PEEK (TA + SN * 2 + 2) + 256 * PEEK<br />
(TA + SN * 2 + 3) + TA:BYTE = ADDR<br />
530 C1 = PEEK (BYTE): IF C1 = 255 THEN POKE<br />
ADDR,O:ADDR = ADDR + 1: GOTO 660<br />
540 C2 = PEEK (BYTE + 1): IF C2 = 255 THEN POKE<br />
ADDR,C1: POKE ADDR + 1,0 :ADDR = ADDR + 2:<br />
GOTO 660<br />
550 C3 = PEEK (BYTE + 2): IF C3 = 255 THEN POKE<br />
ADDR,C1 + 8 * C2: POKE ADDR + 1,0:ADDR =<br />
ADDR + 2: GOTO 660<br />
560 CODE = C1 + 8 * C2 + 64 * C3<br />
570 IF CODE = 0 THEN POKE ADDR,64: POKE ADDR +<br />
1,24:ADDR = ADDR + 1:BYTE = BYTE + 2: GOTO<br />
650<br />
580 IF CODE < 8 THEN POKE ADDR,CODE: GOTO 650<br />
590 IF CODE < 64 THEN POKE ADDR,CODE:BYTE =<br />
BYTE + 1: GOTO 650<br />
600 IF CODE < 256 THEN POKE ADDR,CODE:BYTE =<br />
BYTE + 2: GOTO 650<br />
610 CODE = CODE - 64 * C3<br />
620 IF CODE = 0 THEN POKE ADDR,64: POKE ADDR +<br />
1,3:ADDR = ADDR + 1 :BYTE = BYTE + 1: GOTO<br />
650
Binary, Decimal, and Hexidecimal Number Systems 245<br />
630 IF CODE < 8 THEN POKE ADDR, C ODE : GOTO 650<br />
640 POKE ADDR, C ODE : BYTE = BYTE + 1<br />
650 ADDR = ADDR + 1 : B YTE = BYTE + 1 : GOTO 530<br />
660 POKE TA ,SN + 1 : POKE 233 ,96: DRAW SN + 1 AT<br />
200,100<br />
670 HOME : VTAB 22 : PRINT "SAVE THIS AS SHAPE<br />
NUMBER ";SN + 1 ; "(Y/N)"; : INPUT A$<br />
680 IF A$ = "Y" THEN SN = SN + 1 : IF SN < N<br />
THEN DA = ADDR - TA : POKE TA + 2 * SN +<br />
2,DA - 256 * INT (DA I 256) : POKE TA + 2 *<br />
SN + 3, INT (DA I 256)<br />
690 I F A$ < > "N" AND A$ < > " '( " THEN 670<br />
700 POKE TA ,SN<br />
71 0 TEXT : HOME : VTAB 17: PRINT "CHOOSE:"<br />
720 PRINT TAB ( 5) ;"(1 ) DRAW ANOTHER SHAPE"<br />
730 PRINT TAB ( 5) ; "(2) CHANGE DOT MATRIX"<br />
740 PRINT TAB ( 5) ;"(3) CHANGE STARTING POI NT"<br />
750 PRINT TAB ( 5) ;"(4) SAVE SHAPE TABLE TO<br />
DISK"<br />
760 PRINT TAB ( 5) ;"(5) LEAVE THE PROGRAM"<br />
770 INPUT A$ :A = VAL (A$)<br />
780 IF A < 1 OR A > 5 THEN 71 0<br />
790 IF SN = N AND A < 4 THEN PRINT "TABLE<br />
FULL" : FOR I = 1 TO 1000 : NEXT I : GOTO 71 0<br />
800 ON A GOTO 270 ,240 , 270 ,820<br />
81 0 TEXT : HOME : END<br />
820 INPUT "NAME ";N$<br />
830 PRINT CHR$ (4) ; "BSAVE ";<br />
N$;",A24576, L ";ADDR - 24576<br />
840 GOTO 71 0
Vectors<br />
Appendix 3<br />
For our purposes, a vector may be considered to be a directed line segment.<br />
For points P and Q, the vector extending from P to Q may be represented<br />
by PQ or by a single character v. If coordinates are provided<br />
for P and Q, say P(a, b) and Q(c, d), then the vector vmay be identified<br />
by its components. The x-component of the vector is vx = c - a, and<br />
Vy = d - bis the y-component.<br />
For P(-3,1) and Q(4,6), as shown in Figure A3. 1, vector V = PQ<br />
has components vx = 7 and vy = 5. It is customary to write V = (7,5).<br />
Q<br />
p<br />
Figure A3.1<br />
247
248 <strong>Microcomputer</strong> <strong>Graphics</strong><br />
Although the notation (3, 7) is used to specify the point P(3, 7), and<br />
also to identify the vector extending from Q(O,O) to P, the ambiguity<br />
should not be a problem for us.<br />
Vector addition (see Figure A3 .2) is easily defined in terms of components.<br />
For u = (a,b) and v = (c,d), we define u + v =(a+ c,b + d).<br />
Figure A3.2<br />
Vector subtraction (see Figure A3.3) follows from the definition of<br />
addition: for u = (a,b) and v = (c,d), u - v = (a - c,b - d).<br />
Figure A3.3<br />
SCALAR MULTIPLES OF VECTORS<br />
The multiplication of a vector by a number (scalar) is ref erred to as<br />
scalar multiplication. For u = (a,b) the product tu is defined as tu=<br />
t(a,b) = (ta,tb). Multiplication of a vector by a positive scalar has the<br />
effect of multiplying the length of the vector by the scalar, without<br />
affecting the direction of the vector. Multiplication of a vector by a<br />
negative scalar multiplies the length of the vector by the absolute<br />
value of the scalar, while reversing the direction of the vector. See<br />
Figure A3 .4.
Vectors<br />
249<br />
Figure A3.4<br />
VECTOR REPRESENTATION OF LINES<br />
If v and w are vectors extending from 0(0,0) to points p and Q, then<br />
i1 = w - vis a vector extending from P to Q. If xis another vector<br />
which extends from 0(0,0) to a point on the line containing P and Q,<br />
t h en x - v w1 e as a mu tip e o u: x - v = tu, or x = v + tu see 1gure<br />
A3.5 and figure A3.6).<br />
To illustrate, let v = (10, 3) and w = (1, 7) (see Figure A3 .6). Then,<br />
i1 = w - v = (1, 7) - (10, 3) = ( - 9, 4) . For any choice of x = (x,y) lying<br />
on the line PQ, then x = v + ti1, or (x,y) = (10,3) + t( - 9 ,4) . Each<br />
-+ -+<br />
·11 b I . I<br />
f -+ -+ -+ -+ -+ -+ -+ ( f "<br />
p<br />
Figure A3.5
250 <strong>Microcomputer</strong> <strong>Graphics</strong><br />
Figure A3.6<br />
choice of a value for t will result in a specific pair of values (x,y) that<br />
identifies a point on the line PQ (see Figure A3.7). For example,<br />
x<br />
y<br />
1 1 7<br />
2 -8 11<br />
3 -17 15<br />
0 IO 3<br />
-1 19 -1<br />
-2 28 -5<br />
Notice that the line has positive and negative directions, inherited from<br />
the positive and negative directions of the vector u.<br />
VECTORS IN THREE-DIMENSIONAL SPACE<br />
The previous discussion of vectors, based in two-dimensional space, is<br />
easily extended to higher dimensions. Most of our need for vectors will<br />
be for three-dimensional calculations. For vectors v = (2, 1, 7) and<br />
w = (3 ,2, -5) we calculate<br />
v + w = (2,1,7) + (3,2, -5) = (5,3,2)<br />
v-w = (2,1,7) - (3,2,-5) = (-1,-1,12)<br />
4v = 4(2, 1, 7) = (8,4,28).
Vectors 251<br />
t=2<br />
Figure A3.7<br />
The line passing through the points (2, 1, 7) and (3 ,2, - 5) may be represented<br />
as x = v + tii', where ii' = w - v = (3 ,2, - 5) - (2, 1, 7) =<br />
(1,1, -12). Thus, the vector form of the equation of the line is (x,y,z) =<br />
(2, 1, 7) + t(l,1, -12).<br />
DOT PRODUCTS OF VECTORS<br />
We define the dot product of vectors ii' = (a, b,c) and v = (d, e, f) to be<br />
ii'· v = (a,b,c) · (d, e,f) =ad+ be + cf. For example, if ii' = (9, 1,2) and<br />
v = (3, -5, 7), then ii' · v = (9, 1,2) · (3, -5, 7) = 27 - 5 + 14 = 36.<br />
For two-dimensional vectors, the definition of the dot product is<br />
similar: (a, b) · (c, d) = ac + bd. For example, (3, 5) · (7, -3) = 21 -<br />
15 = 6.<br />
While these definitions provide an easy means of calculating the dot<br />
product of two vectors, no hint is given of the significance of the dot<br />
product. It may be shown that ii' · v = l ii'I !VI cosO . Here, l ii'I refers to<br />
the magnitude, or length, of ii'. The length of vis !VI, and 0 is the angle<br />
between ii' and v. Many useful applications may be derived from this<br />
interpretation of the dot product, but we shall require only one: If the<br />
angle between ii' an.ct vis between 0° and 90° , the dot product of ii' and<br />
vis positive. If the angle is between 90° and 180° '<br />
the dot product is<br />
negative.
252 <strong>Microcomputer</strong> <strong>Graphics</strong><br />
The value of e may be calculated from the dot product:<br />
. Smee u __, · v __, I __, I I __,I<br />
= u v cose,<br />
then cose =<br />
--t<br />
--t<br />
u·v<br />
TUIWI<br />
u·v<br />
and e<br />
( --t --t)<br />
= arc cos TUIWI<br />
Since lul and fVI are always positive, the sign of i1 · v =<br />
lul fVI cos e<br />
is the sign of cos e. The truth of the above statement thus rests on the<br />
characteristics of the cosine. If e is between 0° and 90°, then cose is positive.<br />
If e is between 90° and 180° '<br />
cose is negative.<br />
To illustrate, if i1 = (1,3), v = (3,-5), and w = (-1,-6) (see Figure<br />
A3.8), then i1 · v = (1,3)·(3,-5) = 3 - 15 = -12 is negative, since<br />
the angle between i1 and vis between 90° and 180°; and i1 · w =<br />
(1,3)·(-1,-6) = -1 - 18 = -19. Again, the angle is between 90° and<br />
180°. But v · w = (3,-5)·(-1,-6) = - 3 + 30 = 27 is positive; the<br />
angle is between 0° and 90°.<br />
y<br />
x<br />
Figure A3.8
Vectors 253<br />
CROSS PRODUCTS OF VECTORS<br />
The definition of the cross product is more cumbersome than that of<br />
the dot product. For i1 = (a,b,c) and v = (d,e, f), we have ux v =<br />
(bf - ce,cd - af, ae - bd). Note that while i1 · vis a number, ux vis a<br />
vector. Further, while i1 · v may be calculated for two- or three-dimensional<br />
vectors, ux vis defined only for three-dimensional vectors.<br />
For i1 = (1,9,8) and v = (3, 0, 7)<br />
ux v = (1, 9,8) x (3, 0, 7)<br />
= (63 - 0, 24 - 7,0 - 27)<br />
= (63, 17, -27)<br />
What is the significance of the cross product? Only one application<br />
is of interest to us: In a right hand coordinate system, the cross product<br />
of vectors i1 and v will yield a vector w which is normal (perpendicular)<br />
to the plane of i1 and v. The orientation of w = ux vis such that, if the<br />
index and second finger of the right hind are pointing in the direction of<br />
i1 and v, respectively, then w has the direction of the thumb.<br />
Note that vx i1 and ux vhave opposite directions. For vectors<br />
i1 = (1,3,0) and v = ( -3, 7,0), lying in the xy plane, ux vis a positive<br />
multiple of (0,0, 1), while vx i1 is a negative multiple of (0,0, 1). In a left<br />
hand coordinate system (such as the Apple display screen), when the index<br />
finger and second fingers of the left hand point in the direction of i1<br />
and v, respectively, i1 x v will be normal to the plane of i1 and v, having<br />
the direction of the thumb.<br />
HALF-PLANES<br />
The line (x,y) = (a,b) + t(c,d) divides the xy plane into two half-planes.<br />
When facing in the direction of the vector v = (c, d), the half-plane on<br />
the left is referred to as the left half-plane, while the half-plane on the<br />
right is called the right half-plane. Note that the designation of left and<br />
right half-planes rests on the orientation of the vector v = (c,d).<br />
For example, the line (x,y) = (2,5) + t( -1,3) divides the plane as<br />
shown in Figure A3.9b. The line (x,y) = (2,5) + t(l, -3) (same line, opposite<br />
orientation) divides the plane as shown in Figure A3.9a.<br />
Our concern with half-planes occurs in Chapter 7, when we must<br />
determine which half-plane contains a given point. For the half-planes<br />
determined by the line = i1 + tv, the left and right half-planes are as
254 <strong>Microcomputer</strong> <strong>Graphics</strong><br />
Left<br />
half plane<br />
Left<br />
half plane<br />
Right<br />
half plane<br />
Figure A3.9<br />
indicated in Figure A3 .10. To determine which half-plane contains point<br />
P(a,b), we will define vector r = (a,b) and vector w = r - u. If P is in<br />
the left half-plane, then vx w will be a positive multiple of (0,0, 1). If P<br />
is in the right half-plane, then vx w will be a negative multiple of<br />
(0,0,1).<br />
To illustrate, consider line (x,y) = (2,5) + t(l, -3) and point P(4,8).<br />
Then<br />
and<br />
u = (2,5,o), :v = o,-3,o), r= (4,8,o)<br />
w = r - u = (4,8,o) - (2,5,o) (2,3,o)<br />
vx w = (1, -3,0) x (2,3,0)<br />
= (0,0,3 + 6)<br />
= (0,0,9) = 9(0,0,1)<br />
which is a positive multiple of (0,0,1). We can see from Figure A3.10<br />
that P is indeed in the left half-plane.<br />
NOTE:<br />
The test above for location of a point in either the left or<br />
right half-plane is valid for points located in a right-hand coordinate<br />
system, which is a conventional context for calculation. However, the<br />
Apple display screen has a left-hand coordinate system. When working<br />
with points and half-planes on the Apple display screen, the rule<br />
above must be modified: With u, v, G w, and P as defined above, we<br />
will find that Pis in the left half-plane if vx w is a negative multiple<br />
of (0,0, l); but Pis in the right half-plane if vx w is a positive multiple<br />
of (0,0,1).
Vectors<br />
255<br />
• p<br />
Left half plane<br />
Right<br />
half plane<br />
Figure A3. IO
Matrices<br />
Appendix 4<br />
A matrix is a rectangular array of numbers, such as<br />
Matrices have a wide range of applications, and a large number of<br />
matrix formulas and techniques have been developed. Our interest in the<br />
use of matrices for representing transformations will require only a very<br />
basic knowledge of matrices and matrix products .<br />
The labelling and referencing of the elements of a matrix is illus- (<br />
trated by<br />
a12 a13 a14)<br />
a12 a13 a14<br />
a31 a33 a34<br />
The subscripts of an element identify the row and column position of<br />
that element. Thus a24 is in the 2nd row, 4th column, and a3 1 is in the 3rd<br />
row, 1st column. A matrix such as A, which has 3 rows and 4 columns,<br />
is ref erred to as a 3 x 4 matrix.<br />
PRODUCTS OF MATRICES<br />
The following example illustrates matrix multiplication:<br />
A<br />
x<br />
B<br />
c<br />
a11 b 12 + a12b22)<br />
a11 b 12 + a21b22<br />
257
258 <strong>Microcomputer</strong> <strong>Graphics</strong><br />
Note that in obtaining the matrix product AB = C, each entry cu of the<br />
product is the sum of the products of the entries of the ith row of A with<br />
the corresponding entries of the }th column of B. Thus, c 2 1 is the sum of<br />
the products of the 2nd row entries of A(a 2 1, a 22 ) with the corresponding<br />
entries of the first column of B (b11, b 2 1).<br />
Because of this definition of matrix product, AB is defined only<br />
if each row of A has as many entries as a column of B. Thus, if A is<br />
an m x n matrix and B is a p x q matrix, the product AB is possible<br />
only if n = p. We then may expect the product to have as many rows<br />
as A and as many columns as B: AB will be an m x q matrix. For example:<br />
(l 4<br />
0 5 -i)(-5<br />
<br />
2<br />
( <br />
(2, I, 3)<br />
9<br />
-4<br />
0<br />
2<br />
9<br />
-4<br />
-!)+<br />
-5 ) = (19, 1, 14)<br />
;<br />
-7 -8)<br />
27 18<br />
-11 -15<br />
We note without proof that matrix multiplication in general is not<br />
commutative (AB f:. BA) but is associative (A(BC) = (AB)C).<br />
The coordinates of a point may be considered to form a 1 x 2<br />
matrix. The product<br />
shows that the matrix<br />
provides a means of associating each point (x,y) with a second point<br />
(4x + 8y,2x + 9y). For example:<br />
(1, -1) (: )=(-4, -7) and (-2, 1) (: )=(0,5)<br />
In a similar manner, any matrix<br />
( )
Matrices 259<br />
may be considered to provide a means of associating the point (x ,y) with<br />
the point (ax + cy,bx + dy) . We speak of transforming the point (x ,y)<br />
to the point (ax + cy,bx + dy) , and refer to<br />
( )<br />
as being the matrix of the transformation.
Appendix 5<br />
Radian Measure of Angles<br />
There are several units avai l able for measuring angles. While degree<br />
measurement is commonly used, it is not the preferred system for work<br />
in science or engineering; nor is it- used by computers. Measurement of<br />
angles in radians is more conventional.<br />
Figure A5. l shows a unit circle (radius 1), and an angle LAPB with<br />
its vertex at the center of the circle. The radian measure of angle LAPB<br />
is the length of the arc AB.<br />
A<br />
,__c__ ____B<br />
p<br />
Figure A5.l<br />
261
262 <strong>Microcomputer</strong> <strong>Graphics</strong><br />
Thus, radian measure is defined in terms of arc length measured on a<br />
circle of radius 1.<br />
The association between degrees and radians is established by noting<br />
that the circumference of a unit circle is given by C = 27rr = 27r(l) =<br />
271". Thus, an angle of 360° has a radian equivalent of 271". As a result, an<br />
angle of 1° has a radian measure of 27r/360.<br />
The following rule converts degrees to radians:<br />
RADIANS= DEGREES x 7r/180.<br />
To convert from radians to degrees:<br />
DEGREES= RADIANS x 180/71"<br />
Table A5 .1 shows the degree-radian equivalence of some commonly-used<br />
angles.<br />
Table AS.I<br />
Degrees<br />
Radians<br />
oo 0<br />
30° 1fl6"" .5236<br />
45° 1fl4"" .7854<br />
60° 7r/3 "" 1.0472<br />
90° 1fl2 "" 1.5708<br />
180° 7f"" 3.1416<br />
270° h/2"" 4.7124<br />
360° 27f"" 6.2832<br />
To use radian measure within a program it usually is convenient to<br />
provide the value of 71". This may be done by defining the variable, as<br />
Pl = 3.141592654<br />
or, since tan(45°) = tan(7r/4) = 1,<br />
PI = 4 * ATN (1)
Appendix 6<br />
Cover Program Listings<br />
In the following pages we provide listings of the programs which draw<br />
the images used on the cover of this book. In addition we list the program<br />
which draws the image of Figure 5 .1. Each of the programs is accompanied<br />
by a brief description which references pertinent chapters.<br />
The documentation for the programs is brief, and assumes familiarity<br />
with the concepts and programs discussed in the related chapters.<br />
FRONT COVER: UPPER LEFT<br />
Although this program is long, it is quite simple in structure. The length<br />
is due to the large number of points which must be individually identified.<br />
In planning the program, approximate measurements (in inches)<br />
were taken from an Apple II, using the lower left rear corner as the reference<br />
point. Some of the numbers were later ''fudged'' slightly to improve<br />
the appearance of the image. Some of the measurements are provided<br />
in DAT A statements, identifying the x,y ,z coordinates of points<br />
to be plotted. The coordinates of others are identified as needed.<br />
The program uses the projection subroutine of lines 20-60 to obtain<br />
screen coordinates of points to be plotted. The subroutine was introduced<br />
in Chapter 6, and used in the programs of Chapters 6 and 7.<br />
The hidden line elimination is handled in lines 1490-1600, using the<br />
''blackout'' method described in Chapter 7.<br />
The variable Tis used for two purposes. First, it identifies the topof-screen<br />
Y coordinate which is used by the blackout routine (T = 0 for<br />
the first image; T = 40 for the second image). Secondly, Tis used to<br />
branch<br />
263
264 <strong>Microcomputer</strong> <strong>Graphics</strong><br />
around parts of the program when the second image is being drawn. As<br />
a result, the second, smaller image looses some of the detail provided in<br />
the first. The third image looses a lot of detail, since it provides only a<br />
pair of rectangles (lines 1940, 1950).<br />
Program A6. 1<br />
1 REM PRO GRAM A6 .1 (APPLE I I)<br />
2 REM DRAW S UPPER LEFT IMA GE ON FRONT COVER<br />
10 GOTO 130<br />
-<br />
20 XE = x * S1 + y * c 1<br />
30 YE =<br />
-<br />
x * c 1 * C2<br />
40 ZE =<br />
-<br />
x * S2 * C1<br />
+ RHO<br />
50 sx = D * XE I ZE + ex<br />
60 SY = CY<br />
-<br />
-<br />
-<br />
y * S1 * C2 + z * S2<br />
y * S2 * S1<br />
D * YE I ZE: RETURN<br />
-<br />
z * C2<br />
70 GO SUB 20<br />
80 HP LOT SX, SY<br />
90 RETURN<br />
100 GO SUB 20<br />
110 HP LOT TO SX, SY<br />
120 RETURN<br />
130 RHO = 100: D = 1100: CX = 116: CY = 105<br />
140 THETA = . 45: s 1 = SIN (TH) : C1 = co s (TH)<br />
150 PH I = 1.25: S2 = SIN (PH) :C2 = co s (PH)<br />
160 HGR2 : HCOLOR= 3<br />
170 DATA 17.75, 15 • 25 I 2<br />
180 DATA 17 • 75 I 15•25 I 1. 25<br />
190 DATA 15 I 15 • 25 I 0<br />
200 DATA 0 I 15•25 I 0<br />
210 DATA 0 I 15•25 I 4<br />
220 DATA 8 • 75 I 15 • 25 I 4<br />
230 DATA 17 • 75 I 15 • 25 I 2<br />
240 DATA 17 • 75 I 0 I 2<br />
250 DATA 17 • 75 I 0 I 1 . 25<br />
260 DATA 17 • 75 I 15 • 25 I 1 . 25<br />
270 DATA 17 • 75 I 0 I 2<br />
280 DATA 8 • 75 I 0 I 4<br />
290 DATA 0 I 0 I 4<br />
300 DATA 0 I 15 • 25 I 4<br />
310 REA D X,Y,Z: GO SUB 70<br />
320 FOR I = 1 TO 9<br />
330 REA D X,Y,Z: GO SUB 100<br />
340 NEXT I<br />
350 REA D X,Y,Z: GO SUB 70<br />
360 FOR I = 1 TO 3
Cover Program Listings<br />
265<br />
370 REA D X,Y,Z: GO SUB 100<br />
380 NEXT I<br />
390 IF T < > 0 THEN 470<br />
400 x = .875<br />
410 FOR I = 1 TO 18 STEP 2<br />
420 Y = 14 .625: Z = 4: GO SUB 70<br />
430 Y = 15 .25: GO SUB 100<br />
440 Z = 2.5: GO SUB 100<br />
450 x = x + .75<br />
460 NEXT I<br />
470 REM LID<br />
480 DATA 1,1, 1,14 .3, 7.75,14 .3, 7.75,1, 1,1<br />
490 Z = 4: REA D X,Y: GO SUB 70<br />
500 FOR I = 1 TO 4<br />
510 RE D X,Y: GO SUB 100<br />
520 NEXT I 1<br />
530 Y = O: X = 11: Z = 3.5: GO SUB 70<br />
540 y = 15 .25: GO SUB 1oo l\<br />
550 X = 12 .25: Z = 3.22: GO SUB 70<br />
560 Y = 0: GO SUB 100<br />
570 REM KEYBOAR D<br />
580 X = 13 .25: Z = 3.125: Y = 3: GO SUB 70<br />
590 Y = 12 .5: GO SUB 100<br />
600 IF T < > 0 THEN 670<br />
610 X = 13 .75: GO SUB 100<br />
620 Y = 3: GO SUB 100<br />
630 FOR Y = 3 TO 11 .77 STEP .73<br />
640 X = 13 .25: GO SUB 70<br />
650 X = 13 .75: GO SUB 100<br />
660 NEXT Y<br />
670 X = 14: Z = 2.88: Y = 2.625: GO SUB 70<br />
680 Y = 12 .5: GO SUB 100<br />
690 IF T < > 0 THEN 760<br />
700 X = 14 .5: GO SUB 100<br />
710 Y = 2.625: GO SUB 100<br />
720 FOR Y = 2.625 TO 11 .425 STEP .73<br />
730 X = 14: GO SUB 70<br />
740 X = 14 .5: GO SUB 100<br />
750 NEXT Y<br />
760 X = 14 .75: Z = 2.635: Y = 2.7<br />
770 GO SUB 70<br />
780 Y = 12 .2: GO SUB 100<br />
790 IF T < > 0 THEN 860<br />
800 X = 15 .25: GO SUB 100<br />
810 Y = 2.7: GO SUB 100<br />
820 FOR Y = 2.7 TO 12 .2 STEP .73<br />
(continued)
266 <strong>Microcomputer</strong> <strong>Graphics</strong><br />
830 x<br />
=<br />
14. 75: GO SUB 70<br />
840 x<br />
=<br />
15. 25: GO SUB 100<br />
850 NEXT y<br />
860 x<br />
=<br />
15. 5: z = 2.39: Y<br />
=<br />
2. 7: GO SUB 70<br />
870 y<br />
=<br />
12. 2: GO SUB 100<br />
880 IF T < > 0 THEN 970<br />
890 x =<br />
16: GO SUB 100<br />
900 y =<br />
2. 7: GO SUB 100<br />
910 y<br />
=<br />
2. 7: x =<br />
15. 5: GO SUB 70<br />
920 x = 16: GO SUB 100<br />
930 FOR y<br />
=<br />
3.7 TO 11 . 2 STEP .73<br />
940 x<br />
=<br />
15 . 5 : GO SUB 70<br />
950 x<br />
=<br />
16: GO SUB 100<br />
960 NEXT y<br />
970 x<br />
=<br />
16.25: Z =<br />
2.145: Y<br />
= 4. 7: GO SUB 70<br />
980 y =<br />
10.45: GO SUB 100<br />
990 IF T < > 0 THEN 1070<br />
1000 x<br />
=<br />
16. 75: GO SUB 100<br />
1010 y<br />
=<br />
4. 7: GO SUB 100<br />
1020 x<br />
=<br />
16. 25: GO SUB 100<br />
1030 FOR y =<br />
2.7 TO 3.45 STEP . 1<br />
1040 x<br />
=<br />
16. 25: GO SUB 70<br />
1050 x =<br />
16. 75: GO SUB 100<br />
1060 NEXT y<br />
1070 DEF FN Z(X)<br />
= 5.94<br />
- . 2 * x<br />
1080 IF T < > 0 THEN 1480<br />
1090 REM A<br />
1100 y<br />
=<br />
7: X =<br />
9.95: Z<br />
=<br />
FN z ( x) : GO SUB 70<br />
1110 x<br />
=<br />
9.75: Z =<br />
FN z ( x) : GO SUB 100<br />
1120 y<br />
=<br />
6. 7: GO SUB 100<br />
1130 x<br />
=<br />
9.95: Z =<br />
FN z ( x) : GO SUB 100<br />
1140 REM pp<br />
1150 FOR LY =<br />
7.2 TO 7.7 STEP . 5<br />
1160 x<br />
=<br />
10.05: Y =<br />
LY: Z = FN z ( x) : GO SUB 70<br />
1170 x<br />
=<br />
9.75: Z =<br />
FN z ( x) : GO SUB 100<br />
1180 y =<br />
LY + . 3: GO SUB 100<br />
1190 x<br />
=<br />
9.95: Z<br />
=<br />
FN z ( x) : GO SUB 100<br />
1200 y<br />
=<br />
Ly: GO SUB 100<br />
1210 NEXT LY<br />
1220 REM '-<br />
1230 y =<br />
8. 2: GO SUB 70<br />
1240 x<br />
=<br />
9.65: Z =<br />
FN z ( x) : GO SUB 100<br />
1250 REM E<br />
1260 y =<br />
8.8: X =<br />
9.95: Z<br />
=<br />
FN z ( x) : GO SUB 70<br />
1270 y<br />
=<br />
8. 45: GO SUB 100<br />
1280 x<br />
=<br />
9.75: Z =<br />
FN z ( x) : GO SUB 100<br />
1290 y =<br />
8. 8: GO SUB 100
Cover Program Listings<br />
267<br />
1300 X = 9.95: Y = 8.45: Z = FN Z(X) : GO SUB 100<br />
1310 REM J<br />
1320 Y = 9: GO SUB 70<br />
1330 X = 9.65: Z = FN ZCX) : GO SUB 100<br />
1340 Y = 9.25: GO SUB 70<br />
1350 X = 9.95: Z = FN ZCX) : GO SUB 100<br />
1360 REM ' BOX<br />
1370 Y = 5.5: X = 10.4: Z = FN ZCX) : GO SUB 70<br />
1380 Y = 9.5: GO SUB 100<br />
1390 X = 9.4: Z = FN Z(X) : GO SUB 100<br />
1400 Y = 5.5: GO SUB 100<br />
1410 X = 10.4: Z = FN ZCX) : GO SUB 100<br />
1420 REM APP LE<br />
1430 HCO LOR= 5<br />
1440 FOR X = 9.8 TO 10.1 STEP .1 : Z = FN Z(X)<br />
1450 Y = 6: GO SUB 70<br />
1460 Y = 6.3: GO SUB 100<br />
1470 NEXT X<br />
1480 REM BLACKOUT<br />
1490 X = 8.75: Y = 3.4: Z = 4: GO SUB 20: P1 = SX: P2<br />
= SY<br />
1500 Y = 12.4: GO SUB 20: Q1 = SX: Q2 = SY<br />
1510 X = 0: GO SUB 20: R1= SX: R2 = SY<br />
1520 SL = CQ2 - P2) I CQ1 - P1><br />
1530 HCO LOR= 4<br />
1540 FOR X = P1 TO Q1<br />
1550 y = SL * ex - P1) + P2<br />
1560 HP LOT X,T TO X,Y<br />
1570 NEXT X<br />
1580 SL = CR2 - Q2) I CR1 - Q1><br />
1590 FOR X = Q1 TO R1: Y = SL * CX - Q1> + Q2<br />
1600 HP LOT X,T TO X,Y: NEXT X<br />
1610 REM MON ITOR<br />
1620 HCO LOR= 3<br />
1630 X = 8.75: Y = 3.4: Z = 4: GO SUB 70<br />
1640 Y = 12.4: GO SUB 100<br />
1650 Z = 10: GO SUB 100<br />
1660 Y = 3.4: GO SUB 100<br />
1670 Z = 4: GO SUB 100<br />
1680 IF T < > 0 THEN 1780<br />
1690 REM DIALS<br />
1700 X = 8.75: Y = 11: Z = 6.5: GO SUB 20<br />
1710 FOR TH = 0 TO 6.3 STEP .4<br />
1720 HP LOT SX, SY TO SX + 4 * CO S CTH) ,SY + 4<br />
* SIN CTH)<br />
1730 NEXT TH<br />
(continued)
268 <strong>Microcomputer</strong> <strong>Graphics</strong><br />
1740 Z = 8: GOSUB 20<br />
1750 FOR TH = 0 TO 6.3 STEP .4<br />
1760 HPLOT SX,SY TO SX + 4 * COS (TH),SY + 4<br />
* SIN (TH)<br />
1770 NEXT TH<br />
1780 y = 3.9:Z = 4. 5: GOSUB 20:P1 = SX:P2 = SY<br />
1790 y = 9. 9: GOSUB 20:Q1 = SX:Q2 = SY<br />
1800 z = 9. 5: GO SUB 20:R1 = SX:R2 = SY<br />
1810 y = 3. 9: GOSUB 20:T1 = SX:T2 = SY<br />
1820 HP LOT P1 I P2 TO Q1 I Q2 TO R 1 IR 2 TO T1 I T2 TO<br />
P1 I P2<br />
183 0 z = 4:Y = 12. 4: GOSUB 70<br />
1840 x = 0: GOSUB 100<br />
1850 z = 1 0: GOSUB 100<br />
1860 y = 3. 4: GOSUB 100<br />
1870 x = 8. 75: GOSUB 100<br />
1880 y = 12.4: GOSUB 70<br />
1890 x = 0: GOSUB 100<br />
1900 IF T < > 0 THEN 1940<br />
1910 REM RETURN FOR SECOND IMAGE<br />
1920 T = 40: RESTORE :RHO = 435:CX = 140:CY =<br />
64: GOTO 310<br />
1930 REM FAKE THIRD IMAGE<br />
1940 HPLOT 143,55 TO 149,57 TO 149,59 TO 143,58<br />
TO 143,55<br />
1950 HPLOT 144,56 TO 144,52 TO 148,53<br />
TO 148,57<br />
FRONT COVER: UPPER RIGHT<br />
Program A6. 2 is almost the same as Program 7 .6. The differences lie in<br />
the function being used (line 50) and the limits used in the FOR . ..<br />
NEXT loops (lines 90, 110) which generate points of the surface. As a<br />
result of plotting the surface over such a wide range of values of x and y,<br />
and the associated projection and hidden line calculations, the program<br />
requires approximately forty minutes to complete the image.<br />
Program A6.2<br />
1 REM PROGRAM A6.2 (COSINE SURFACE)<br />
2 REM DRAWS UPPER RIGHT IMAGE ON FRONT COVER<br />
10 HGR2 : HCOLOR = 5:CX = 140:CY = 96<br />
20 RHO = 80:D = 750<br />
30 THETA = .4:S1 = SIN (TH):C1 = COS (TH)
Cover Program Listings<br />
269<br />
40 PHI = 1.25:S2 = SIN (PH):C2 = COS (PH)<br />
50 DEF FN Z(X) = COS (.06 * (X * X + Y * Y))<br />
60 DIM YN (280),Y X(280)<br />
70 FOR I = 0 TO 279:Y N(I) = 191: NEXT I<br />
80 REM POINT GENERATING LOOP<br />
90 FOR X = 22 TO -55 STEP -1<br />
100 FL = 0<br />
110 FOR Y = - 40 TO 19<br />
120 Z = FN Z(X)<br />
130 GOSUB 190<br />
140 NEXT Y,X<br />
150 HCOLOR= 2<br />
160 HPLOT 0,0 TO 278,0 TO 278,191 TO 0,191 TO<br />
0,0<br />
170 END<br />
180 REM PLOTTING SUB ROUTINE<br />
190 XE = - X * S1 + Y * C1<br />
200 YE = - X * C1 * C2 - Y * S1 * C2 + Z * S2<br />
210 ZE = - X * S2 * C1 - Y * S2 * S1 - Z * C2 +<br />
RHO<br />
220 s x = D * ( x E I z E) I<br />
+ c x<br />
230 SY = - D * (Y E I ZE) + CY<br />
240 IF FL = 0 THEN FL = 1:F = 0: GOTO 360<br />
250 DX = OX - SX: IF DX = 0 THEN DX = 1<br />
260 SL = (OY - SY ) I DX:Y P = OY<br />
270 FOR XP = INT (OX) + 1 TO SX<br />
280 FG = 1<br />
290 YP = YP + SL<br />
300 IF XP < 0 OR XP > 279 THEN FG = O:F = 0:<br />
GOTO 350<br />
310 IF YP > 191 OR YP < 0 THEN FG = O:F = 0<br />
320 IF YP < = YN (XP) THEN 370<br />
330 IF YP > = YX (XP) THEN 420<br />
340 F = 0<br />
350 NEXT XP<br />
360 OX = SX:OY = SY : RETURN<br />
370 YN (XP) = YP<br />
380 IF FG = 0 THEN 410<br />
390 IF F = 0 THEN HPLOT XP,YP:F =<br />
400 HPLOT TO XP,Y P<br />
410 IF YP < YX (XP) THEN 350<br />
420 YX (XP) = YP<br />
430 IF FG = 0 THEN 460<br />
440 IF F = 0 THEN HPLOT XP,YP:F =<br />
450 HPLOT TO XP, YP<br />
460 GOTO 350<br />
]
270 <strong>Microcomputer</strong> <strong>Graphics</strong><br />
FRONT COVER; LOWER LEFT<br />
This image was developed to assist in describing some concepts of multivariable<br />
calculus (partial derivative, directional derivative) and is used<br />
as part of an educational software package distributed by CONDUIT,<br />
Iowa City, Iowa. However, in addition to being instructive, the image is<br />
an interesting one.<br />
Much of the program is similar to Program A6. 2. The function<br />
which defines the surface is much more complex (see lines 70-110), but<br />
the point calculation and hidden line calculation is essentially the same.<br />
The program first draws the closer part of the surface, then the vertical<br />
plane, and finally the farther part of the surface. A separate projection<br />
subroutine is used for the plane, and the hidden line array update is<br />
handled differently than for the surface (line 340). The reason for the<br />
difference is that the array YX(I) does not need to be updated when the<br />
plane is being drawn.<br />
Be patient; the program requires a substantial amount of time (approximately<br />
twenty-five minutes) to draw the image.<br />
Program A6.3<br />
1 REM PROGRAM A6.3 (SURFACE/PLANE)<br />
2 REM DRAWS LOWER LEFT IMAGE ON FRONT COVER<br />
10 HGR2 : HCOLOR = 5:CX = 140:CY = 96<br />
20 RHO = 80:D = 750<br />
30 THETA = .4:S1 = SIN (TH):C1 = COS
Cover Program Listings<br />
271<br />
170 YL = YS + (X - XS) * SP<br />
180 FOR Y = YL TO 17 STEP .5<br />
190 Z = FN Z(X): GOSUB 490<br />
200 NEXT Y,X<br />
210 REM CURVE OF INTERSECTION<br />
220 FL = 0<br />
230 FOR X = 14 TO - 18 STEP - .4<br />
240 Y = YS + (X - XS) * SP:Z = FN Z(X): GOSUB<br />
490<br />
250 NEXT X<br />
260 REM PLANE<br />
270 HCOLOR = 3<br />
280 FOR X = 14 TO - 18 STEP - .4<br />
290 Y = YS + (X - XS) * SP:Z = 5<br />
300 FL = 0: GOSUB 780<br />
310 IF SX < 0 OR SX > 279 THEN 390<br />
320 IF SY < 0 THEN SY = 0<br />
330 HPLOT SX,SY TO SX,Y N (SX) - 2<br />
340 FOR I = PX TO SX:Y N(I) = SY : NEXT I<br />
350 Z = - ?:FL = 1: GOSUB 780<br />
360 IF SY > 191 THEN SY = 191<br />
370 IF SY > YX (SX) + 2 THEN HPLOT SX,SY TO<br />
SX,Y X (SX) + 2<br />
380 PX = SX<br />
390 NEXT X<br />
400 REM FARTHER PART OF SURFACE<br />
410 HCOLOR = 5<br />
420 FOR X = - 5 TO - 18 STEP - 1<br />
430 FL = 0<br />
440 FOR Y = - 13 TO 0 STEP .5<br />
450 Z = FN Z(X): GOSUB 490<br />
460 NEXT Y,X<br />
470 END<br />
480 REM PROJECTION AND HIDDEN LINES<br />
490 XE = - X * S1 + Y * C1<br />
500 YE = - X * C1 * C2 - Y * S1 * C2 + Z * S2<br />
510 ZE = - X * S2 * C1 - Y * S2 * S1 - Z * C2<br />
+ RHO<br />
520 sx = D * (XE I ZE) + ex<br />
530 SY = - D * (Y E I ZE) + CY<br />
540 IF FL = 0 THEN FL = 1:F = 0: GOTO 660<br />
550 DX = OX - SX: IF DX = 0 THEN DX = 1<br />
560 SL = COY - SY ) I DX:Y P = OY<br />
570 FOR XP = INT (OX) + 1 TO SX<br />
580 FG = 1<br />
590 YP = YP + SL<br />
(continued)
272 <strong>Microcomputer</strong> <strong>Graphics</strong><br />
600 IF XP < 0 OR XP > Z79 THEN FG = 0: F = 0:<br />
GOTO 650<br />
610 IF yp > 191 OR yp < 0 THEN FG = 0: F = 0<br />
6Z O IF yp < = YN (XP) THEN 670<br />
630 IF yp > = YX (XP) THEN 7Z O<br />
640 F = 0<br />
650 NEXT XP<br />
660 OX = SX:OY = s y: RETURN<br />
670 YN (XP) = yp<br />
680 IF FG = 0 THEN 710<br />
690 IF F = 0 THEN HP LOT XP,YP:F =<br />
700 HP LOT TO XP,Y P<br />
710 IF yp < YX (XP) THEN 6:)0<br />
7Z O YX (XP) = yp<br />
730 IF FG = 0 THEN 760<br />
740 IF F = 0 THEN HP LOT XP,YP:F =<br />
750 HP LOT TO XP,Y P<br />
760 GOTO 650<br />
770 REM PROJECTION<br />
-<br />
FOR PLANE<br />
-<br />
780 XE = x * S1 + y * C1<br />
790 YE =<br />
-<br />
x * C1 * CZ<br />
800 ZE =<br />
-<br />
x * SZ * C1<br />
+ RHO<br />
-<br />
810 SY = 0 * (Y E I ZE) + CY<br />
8Z O IF FL = 1 THEN RETURN<br />
830 sx<br />
= 0 * (XE I Z E) + ex<br />
840 RETURN<br />
-<br />
-<br />
y * S1 * SZ + z * SZ<br />
y * SZ * S1<br />
-<br />
z * CZ<br />
FRONT COVER; LOWER RIGHT<br />
This image, which resembles a Pennsylvania Dutch hex sign, combines<br />
boundary circles with a region defined by the polar coordinate equation<br />
R = COS(20). Polar coordinate equations are discussed briefly in Chapter<br />
5. The points of the boundary circles are calculated by the recursive<br />
method, also discussed in Chapter 5.<br />
Program A6.4<br />
1 REM PROGRAM A6.4 (POLAR HEX SIGN)<br />
Z R EM 0 R A.W S L 0 W E R R I G H T I MA G E 0 N F R 0 N T C 0 V E R<br />
10 HGRZ :SC = 1.16
Cover Program Listings<br />
273<br />
20 ex = 140:CY = 96<br />
30 c = cos (.1>:S = SIN (. 1)<br />
40 REM POLAR "ROSE"<br />
so FOR TH = 0 TO 6.3 STEP . OS<br />
60 R = 88 * cos (2 * TH)<br />
70 HCOLOR= 7: IF R < 0 THEN HCOLOR =<br />
80 x = ex + SC * R * cos
274 <strong>Microcomputer</strong> <strong>Graphics</strong><br />
Program A6.5<br />
1 REM PROGRAM A6.5 (PIE CHART)<br />
2 REM DRAWS LEFT IMAGE ON BACK COVER<br />
10 PRINT CHR$ (4): "BLOAD SHAPE ALPHABET,<br />
A$6000"<br />
20 POKE 232,0: POKE 233,96<br />
30 SCALE = 1: ROT = O:SC = 1. 16<br />
40 X = O:Y = - 75:PI = 3. 14 159266<br />
50 C = COS (.0 1) :S = SIN (.0 1)<br />
60 DATA 20,50,30, 10,25<br />
70 DATA 3,6,5,2, 1<br />
80 FOR I = 1 TO 5<br />
90 READ A(I)<br />
100 TL = TL + A(I)<br />
110 NEXT I<br />
120 HGR2 :N = 3<br />
130 FOR I = TO 5<br />
140 FI = (TL * FI + A(I)) I TL<br />
150 READ K: HCOLOR = K<br />
160 ex = 140:CY = 96<br />
170 IF I < > N THEN 200<br />
180 ex = ex + 11 * SIN ((ST + Fl) * Pl)<br />
190 CY = CY + 11 * COS ((ST + Fl) * Pl)<br />
200 FOR TH = ST * 628 TO Fl * 628<br />
210 T = X * C - Y * S:Y = X * S + Y * C:X = T<br />
220 HPLOT CX,CY TO ex + SC * X,CY - y<br />
230 NEXT TH<br />
240 ST = Fl<br />
250 NEXT I<br />
260 HT = 25:VT = 22<br />
270 ST$ = "MISCELLANEOUS": GOSUB 370<br />
280 HT = 34:VT = 9<br />
290 ST$ = "HOUSING": GOSUB 370<br />
300 HT = 1:VT = 2<br />
310 ST$ = "TRANSPORTATION": GOSUB 370<br />
320 HT = 4:VT = 14<br />
330 ST$ = "FOOD": GOSUB 370<br />
340 VT = 21:HT = 5<br />
350 ST$ = "CLOTHING": GOSUB 370<br />
360 END<br />
370 HT = 7 * (HT - 1):VT = 8 * VT - 1<br />
380 FOR I = 1 TO LEN (ST$)<br />
390 CH = ASC ( MID$ (ST$,l, 1)) - 32<br />
400 IF CH = 0 THEN 420<br />
410 XDRAW CH AT HT,VT
Cover Program Listings<br />
275<br />
420 HT = HT + 7<br />
430 NEXT I<br />
440 RETURN<br />
BACK COVER; RIGHT<br />
This program is the basis for Figure 7 .1 which was drawn by a digital<br />
plotter. The program which was used to draw Figure 7 .1 differs from<br />
this one only in that the graphics commands (HGR, HPLOT) used here<br />
were replaced with corresponding plotter commands.<br />
This program is long but simple. The coordinate of line endpoints<br />
are provided through DAT A statements, beginning at line 360. As these<br />
are read, they are passed to one of several subroutines. Each uses the<br />
perspective projection subroutine (lines 80-120). The subroutine which<br />
begins at line 290 plots a sequence of N visible line segments. The subroutine<br />
beginning at line 140 handles hidden line elimination, using the<br />
binary search method discussed in Chapter 7. The plotting of the sequence<br />
of lines which define a window is handled by the subroutine beginning<br />
at line 810 This subroutine assumes that the variables X, Y, Z<br />
define the lower left corner of the window. Similarly, subroutine<br />
920-1010 draws a garage door, assuming that X, Y, Z defines the lower<br />
right corner of the door.<br />
The data elements provided, and the hidden line technique used<br />
(binary search) limit the selection of viewpoint. You might want to try<br />
some other values for RHO, THETA, and PHI (lines 20, 30, 40), but be<br />
careful; the range of choices is limited.<br />
Program A6.6<br />
1 REM PROGRAM A6.6 (HOUSE)<br />
2 REM DRAWS RIGHT IMAGE ON BACK COVER<br />
3 REM THIS IS ALSO FIGURE 7 .1<br />
1 0 HGR2 : HCOLOR = 3<br />
20 RHO = 100:D = 390:CX = 100:CY = 150<br />
30 THETA = . 7: s 1 = SIN (TH): C1 = co s (TH)<br />
40 PHI = 1 . 3: S2 = SIN (PH):C2 = cos (PH)<br />
50 GOTO 350<br />
60 REM PERSPECTIVE PROJECTION<br />
70 READ x, y, z<br />
80 XE =<br />
-<br />
x * S1 + y * C1<br />
(continued)
276 <strong>Microcomputer</strong> <strong>Graphics</strong><br />
90 YE = - X * C1 * C2 - Y * S1 * C2 + Z * S2<br />
100 ZE = - X * S2 * C1 - Y * S2 * S1 - Z * C2<br />
+ RHO<br />
110 sx = D * XE I ZE + ex<br />
120 SY = CY - D * YE I ZE: RETURN<br />
130 REM HIDDEN LINE ROUTINE<br />
140 GOSUB 70:XP = SX:Y P = SY<br />
150 GOSUB 70:XQ = SX:Y Q = SY<br />
160 GOSUB 70:XV = SX:Y V = SY<br />
170 GOSUB 70:XH = SX:Y H = SY<br />
180 V1 = (XH - XV) I 2:V2 = (Y H - YV) I 2<br />
190 U1 = XP - XQ:U2 = YP - YQ<br />
200 XT = XV + V1:Y T = YV + V2<br />
210 FOR I = 2 TO 7<br />
220 VI = SGN ((U2 * (XV - XQ) - U1 * (Y V - YQ))<br />
* (U2 * (XT - XQ) - U1 * (Y T - YQ)))<br />
230 V1 = V1 I 2:V2 = V2 I 2<br />
240 XT = XT + VI * V1:Y T = YT + VI * V2<br />
250 NEXT I<br />
260 HPLOT XV,Y V TO XT,Y T<br />
270 RETURN<br />
280 REM VISIBLE LINE ROUTINE<br />
290 FOR I = 1 TO N<br />
300 GOSUB 70<br />
310 IF I = 1 THEN HPLOT SX,SY<br />
320 HPLOT TO SX,SY<br />
330 NEXT I: RETURN<br />
340 REM DATA FOR HOUSE<br />
350 N = 11: GOSUB 290<br />
360 DATA -11, -20,23, 6, -20,9, 6,-20,0<br />
370 DATA 6,32,0, 0,32,0, 0,32,20<br />
380 DATA 0,0,20, 0,0,13, 0,32, 13<br />
390 DATA 6,32,9, 6, -20,9<br />
400 N = 2: GOSUB 290<br />
410 DATA 6,32,0, 6,32,9<br />
420 N = 2: GOSUB 290<br />
430 DATA 6,0,0, 6,0,9<br />
440 N = 3: GOSUB 290<br />
450 DATA 0,32,0, 0,0,0, 6,0,0<br />
460 N = 5: GOSUB 290<br />
470 DATA 0,32,0, -11.5,32,0, -11.5,33.5,0<br />
480 DATA -11.5,33.5,33, -11.5,32,33<br />
490 GOSUB 140: HPLOT XP,Y P TO XQ,Y Q<br />
500 DATA -11.5,32,33, -1 1.5,32,0<br />
510 DATA 0,32,20, -14,32,3 1.5<br />
520 GOSUB 160
Cover Program Listings 277<br />
530 DATA -14,0,31.5, -14,32,31.5<br />
540 GOSUB 140: HP LOT XP,Y P TO XQ,Y Q<br />
550 DATA 0,0,20, -14,0,31.5<br />
560 DATA -11, -20,23, -11,0,23<br />
570 N<br />
=<br />
2: GOSUB 290<br />
580 DATA -11.5,33.5,0, -16.5,3.5,0<br />
590 N<br />
=<br />
2: GOSUB 290<br />
600 DATA -11.5,33.5,33, -16.5,33.5,33<br />
610 GOSUB 140: HP LOT XP,Y P TO XQ,Y Q<br />
620 DATA -16.5,33.5,0, -16.5,33.5,33<br />
630 DATA -28,32,0, -16.5,32,0<br />
640 GOSUB 160<br />
650 DATA -28,32,20, -14,32,33<br />
660 N<br />
=<br />
2: GOSUB 290<br />
670 DATA -28,32,20, -28,32,0<br />
680 GOSUB 140<br />
690 DA.TA 6, -20,9, 6,32,9<br />
700 DATA 0 I 0 I 0 I 0,0,10<br />
710 FOR I<br />
=<br />
1 TO 5: READ x I y I z : GOSUB 810:<br />
NEXT I<br />
720 DATA 0,5,13.5, 0,14,13.5, 0,23,13.5<br />
730 DATA 0,14,2, 0,23,2<br />
740 FOR I<br />
=<br />
1 TO 2: READ x I y I z : GOSUB 920:<br />
NEXT I<br />
750 DATA 6,-11,0, 6,-1.5,0<br />
760 N<br />
=<br />
4: GOSUB 290<br />
770 DATA 0,6,0, 0,6,6.5<br />
780 DATA 0,9,6.5, 0,9,0<br />
790 END<br />
800 REM WINDOWS SUB ROUTINE<br />
810 GOSUB 80: HP LOT SX,SY<br />
820 y<br />
=<br />
y + 4: GOSUB 80: HP LOT TO SX,SY<br />
830 z<br />
=<br />
z + 5. 5: GOSUB 80: HP LOT TO SX,SY<br />
840 y =<br />
y - 4: GOSUB 80: HP LOT TO SX,SY<br />
850 z<br />
=<br />
z - 5 . 5: GOSUB 80: HP LOT TO SX,SY<br />
860 y<br />
=<br />
y + 2: GOSUB 80: HP LOT SX,SY<br />
870 z<br />
=<br />
z + 5. 5: GOSUB 80: HP LOT TO SX,SY<br />
880 y<br />
=<br />
y - 2:Z<br />
=<br />
z - 2. 75: GOSUB 80: HP LOT<br />
SX,SY<br />
890 y<br />
=<br />
y + 4: GOSUB 80: HP LOT TO SX,SY<br />
900 RETURN<br />
910 REM GARAGE DOOR SUBROUTINE<br />
920 GOSUB 80: HP LOT SX,SY<br />
930 z<br />
=<br />
z + 7: GOSUB 80: HP LOT TO SX,SY<br />
940 y<br />
=<br />
y - 7. 5: GOSUB 80: HP LOT TO SX,SY<br />
(continued)
278 <strong>Microcomputer</strong> <strong>Graphics</strong><br />
950 z = z<br />
-<br />
7: GOSUB 80: HP LOT TO SX,SY<br />
960 z = z + 5: y = y + 1 : GOSUB 80: HP LOT SX,SY<br />
970 z = z + 1 : GOSUB 80: HP LOT TO SX,SY<br />
980 y = y + 5. 5: GOSUB 80: HP LOT TO SX,SY<br />
-<br />
990 z = z 1 : GOSUB 80: HP LOT TO SX,SY<br />
1000 y = y<br />
-<br />
101 0 RETURN<br />
5. 5: GOSUB 80: HP LOT TO SX,SY<br />
FIGURE 5.1<br />
The microcomputer cannot directly draw a curve. We have achieved<br />
curves as a result of drawing sequences of short straight line segments.<br />
This program shows how a sequence of curves (circles) can approximate<br />
another curve (cardioid).<br />
The program draws nineteen individual circles. The center of each is<br />
located on a reference, or base, circle. Further, each of the nineteen circles<br />
passes through a common point P on the base circle. The twenty<br />
points (P and the nineteen centers) are spaced at equal intervals around<br />
the base circle. The base circle is not drawn .<br />
• · dn the program the identification of the nineteen centers (CX, CY) is<br />
handled by lines 60-120, using the recursive method of calculating<br />
points on a circle. For each center, lines 140-210 draw the associated circle<br />
through point P, again using the recursive method of calculating<br />
points on a circle.<br />
Figure 5 .1 was drawn by a slightly different program than this one.<br />
The figure was drawn by a digital plotter, requiring the graphics commands<br />
to be replaced with corresponding plotter commands. Otherwise<br />
the program is essentially the same as this one.<br />
Program A6.7<br />
1 REM PROGRAM A6.7 (FIGURE s. n<br />
2 REM DRAWS A CARDIOID AS THE<br />
3 REM ENVELOPE OF CIRCLES<br />
10 PI = 3.14159266<br />
20 XO = 25:Y O = O:XN = XO:Y N = YO<br />
30 c = cos (.1):S = SIN (. 1 ): N = 64<br />
40 C1 = co s ( p I I 10) :S1 = SIN CPI I 10)<br />
so HGR2 : HCOLOR = 3<br />
60 FOR I = 1 TO 19<br />
70 T = XN * C1 YN * S1<br />
-
Cover Program Listings<br />
279<br />
80 YN = XN * S1 + YN * C1 :XN = T<br />
90 ex = 140 + XN:CY 96 - YN<br />
100 X = XO - XN:Y = YO - YN<br />
110 GOSUB 140<br />
120 NEXT I<br />
130 END<br />
140 FOR J = 1 TO N<br />
150 T = X * C - Y * S<br />
160 Y = Y * C + X * S:X = T<br />
170 SX = X + CX:SY = CY - Y<br />
180 IF FL = 0 THEN HPLOT SX,SY<br />
190 HPLOT TO SX,SY:FL = 1<br />
200 NEXT J<br />
210 RETURN<br />
..<br />
l·
Index<br />
Address, 17, 18<br />
Addressing<br />
TEXT, 21, 24<br />
1 o res graphics, 22, 24<br />
hi res graphics, 23, 25, 53-55<br />
shape tables, 66, 240<br />
Animation, 4, 5, 36, 205-215<br />
Binary, 17,227-229,232<br />
Binary file, 55<br />
Binary search, 175, 190, 191, 275<br />
Bit, 17, 228<br />
Bit pattern graphics, 25-27, 49-60<br />
Blackout, 171-173, 263<br />
Byte, 17, 228<br />
Cardioid, 278<br />
Circles, 8, 104-109<br />
rectangular coordinates, 104,<br />
105<br />
polar coordinates, 106<br />
recursive calculation, 107, 108<br />
clipping, 108, 109<br />
Clipping, 72-77<br />
lines 73-76, 102<br />
circles, 108, 109<br />
points, 73<br />
Coordinate plane, 126<br />
Coordinate systems<br />
Apple, 100, 101, 254<br />
eye, 138-141<br />
homogeneous,90,92<br />
left-hand, 126, 139, 141, 254<br />
rectangular, 90, 100, 125-128<br />
right-hand, 125, 126, 254<br />
screen, 129, 130<br />
spherical, 126-128<br />
transforming, 135, 136, 140-144<br />
COS, Cosine, 87<br />
Cross product, 253, 254<br />
Curve, 8, 120, 121<br />
Dot product, 166, 251, 252<br />
DRAW, 61, 240<br />
Edge array, 167, 183<br />
Ellipse, 109-115<br />
Focus, 111<br />
GR, 19, 22, 24<br />
<strong>Graphics</strong> pages, 40<br />
<strong>Graphics</strong> tablet, 221<br />
Half-plane, 177, 178, 253-255<br />
HCOLOR, 28, 31-33<br />
Hexadecimal, 17, 19, 227, 229-232<br />
Hidden lines, 156-201, 263, 275<br />
High resolution graphics, 19, 25<br />
Homogeneous coordinates, 90, 92, 131<br />
Hyperbola, 118, 119<br />
Identity, 80<br />
Inverse, 134, 135, 141<br />
K, 17<br />
Keyboard, reading, 45<br />
Left-hand system, 126, 139, 141, 143, 254<br />
Light pen, 221<br />
Lines,30, 73, 102-104,249<br />
Lissajous figure, 116<br />
Long programs, 45<br />
Matrix, 79, 257-259<br />
inverse, 134, 135, 141<br />
product, 79,257-259<br />
sum, 79<br />
281
282<br />
Index<br />
Memory map<br />
general, 18<br />
hi res graphics, 23<br />
lo res graphics, 22<br />
TEXT,21<br />
Memory move, 37<br />
Negatives of images, 44<br />
Normal, 164<br />
Normal array, 164, 165, 182<br />
Nybble, 22, 228<br />
Orientation<br />
edge, 177<br />
surface, 156, 157<br />
vector, 158, 159<br />
Paddles, 219, 220<br />
Page control, 34, 36, 40, 205<br />
Parabola, 116-118<br />
Parametric equations, 115, 116<br />
PEEK, 37<br />
Perspective, 136, 146, 147<br />
Phi, 127<br />
Pixel, 3, 30, 44<br />
Plotter, 223<br />
POKE, 24, 34, 37<br />
Printer, graphics, 225<br />
Priority, 185-187<br />
Projection, 136-138<br />
Projection plane, 129, 130, 136-138<br />
Pushbuttons, 220<br />
Radian, 88, 261, 262<br />
Raster, 3<br />
Reflection, 83, 84, IOI, 133<br />
Resolution, 29, 30, 46<br />
Rho, 127<br />
Right-hand system, 125, 126, 254<br />
RND, 12<br />
ROT, 67, 240<br />
Rotation, 85-87, 94, 131, 132, 141-143<br />
SCALE, 66, 240<br />
Scaling<br />
screen, 71, 72<br />
three dimensions, 131<br />
two dimensions, 78, 82, 83, 97<br />
Separating plane, 176, 177, 185, 186<br />
Sequential transformations, 91, 92, 133, 134<br />
Shape,9,234<br />
Shape table,9,6!,62,212-215,232-245<br />
addressing, 66, 240<br />
Shear, 84, 85<br />
Simulation, bouncing ball, 4, 5<br />
SIN, Sine, 87<br />
Soft switches, 33-35<br />
Sounds, use of speaker, 12<br />
Spherical coordinates, 126-128<br />
Surface array, 163-164, 181<br />
TEXT, 19, 21, 24<br />
bit pattern, 25, 49-60<br />
graphics screen, 49-67<br />
page 2 of TEXT, 42, 43<br />
shape table,61-66,273<br />
Theta, 85, 127<br />
Transformations, 77, 149<br />
identity, 80<br />
inverse, 134, 141<br />
matrix, 79<br />
reflection, 83, 84, IOI, 133, 143<br />
rotation, 85-87, 94, 131, 132, 141-143<br />
scaling, 78, 82, 83, 97, 131<br />
sequential, 91, 133, 134<br />
translation, 78, 91, 96, IOI, 132, 140,<br />
142<br />
Vectors, 247-255<br />
Vertex array, 161, 162, 179<br />
Viewpoint, 128-130, 146, 147, 157, 176,<br />
275<br />
Viewport, 77, 98<br />
XDRAW 61, 213, 240
. J
T
Books in the Microbooks Series, available from your local<br />
computer store or bookstore. For more information write:<br />
General Books Division<br />
Addison-Wesley Publishing Company, Inc.<br />
Reading, Massachusetts 01 867<br />
(61 7) 944-3700<br />
(06272) Legal Care For Yo ur Software<br />
A Step-By-Step Guide For Computer<br />
Software Writers<br />
Daniel Remer<br />
(06577) Pascal For BASIC Programmers ,..<br />
Charles Seiter and Robert Weiss<br />
(07768) Picture This! An Introduction To Computer<br />
<strong>Graphics</strong> For Kids Of All Ages<br />
David D. Thornburg<br />
(101 13)<br />
(10341)<br />
(10279)<br />
(10939)<br />
(031 15)<br />
(01 589)<br />
(05247)<br />
Computer Choices<br />
H. Dominic Covvey and Neil Harding McAlister<br />
· Pascal: A Problem Solving Approach<br />
Elliot B. Koffman<br />
The Addison-Wesley Book of Apple Software '82<br />
Jeffrey Stanton and John Dickey<br />
Computer Consciousness<br />
H. Dominic Covvey and Neil Harding McAlister<br />
A Bit Of BASIC<br />
Thomas A. Dwyer and Margot Critchfield<br />
BASIC And The Personal Computer<br />
Thomas A. Dwyer and Margot Critchfield<br />
The Little Book Of BASIC Style<br />
John M. Nevison<br />
(05248) Executive Computing<br />
John M. Nevison<br />
(03399) The S6800 Family: Hardware Fundamentals<br />
Mitchell Gooze<br />
(01 937) Real Time Programming: Neglected To pics<br />
Caxton C. Foster<br />
(01 995) Programming A <strong>Microcomputer</strong>: 6502<br />
Caxton C. Foster<br />
(7773)<br />
Interfacing <strong>Microcomputer</strong>s To The Real World<br />
Murray Sargent Ill or.id Richard L. Shoemaker<br />
(05092) <strong>Microcomputer</strong> <strong>Graphics</strong><br />
Roy E. Myers
n=ri·cro<br />
---1 C 0 M P U T E R i--b
Books ir<br />
computE<br />
Gen<br />
Addis1<br />
Readir<br />
(61 7)<br />
•<br />
"<br />
c<br />
-<br />
(06272)<br />
(06577)<br />
(07768)<br />
(101 13)<br />
(10341)<br />
-<br />
·-<br />
i<br />
(10279)<br />
(10939)<br />
(031 15)<br />
(01 589).<br />
(05247)<br />
(05248)<br />
(03399)<br />
(01 937)<br />
>-a.<br />
.I<br />
"'<br />
"'<br />
CD<br />
c<br />
·-<br />
"'<br />
::::»<br />
al<br />
c<br />
0<br />
(/)<br />
<br />
u<br />
Q)<br />
z<br />
Q_<br />
E<br />
a<br />
Q)<br />
CJ)<br />
.Q<br />
(/)<br />
<br />
0<br />
z<br />
<br />
f--!<br />
c<br />
0<br />
:.i=<br />
c<br />
:&<br />
ISBN 0-201-05092-7