

KNITmuch | Issue 01
Here it is! The much anticipated FREE Premiere issue of KNITmuch Magazine! We’re extremely excited to launch this first issue featuring a full 52 pages of knitting projects, tips, techniques, and products. In this issue, you’ll find a review of the NEW Downton Abbey Yarn Collection and the irresistible Top This! yarn kit. See the Crawley Vest and Budding Romance Shawl patterns for great project ideas using the new Downton Abbey yarns. We also review a variety of project ideas to make with Red Heart’s Cutie Pie and Sashay yarns. We go back to knitting basics to inspire new knitters to expand their knowledge of knitting and get to the bottom of key technical knitting terms and skills. Enjoy exploring our very first issue. Save it in your favorites, share it with your knitting friends!
Here it is! The much anticipated FREE Premiere issue of KNITmuch Magazine! We’re extremely excited to launch this first issue featuring a full 52 pages of knitting projects, tips, techniques, and products.
In this issue, you’ll find a review of the NEW Downton Abbey Yarn Collection and the irresistible Top This! yarn kit. See the Crawley Vest and Budding Romance Shawl patterns for great project ideas using the new Downton Abbey yarns. We also review a variety of project ideas to make with Red Heart’s Cutie Pie and Sashay yarns. We go back to knitting basics to inspire new knitters to expand their knowledge of knitting and get to the bottom of key technical knitting terms and skills.
Enjoy exploring our very first issue. Save it in your favorites, share it with your knitting friends!

You also want an ePaper? Increase the reach of your titles
YUMPU automatically turns print PDFs into web optimized ePapers that Google loves.
<strong>Issue</strong> 1<br />
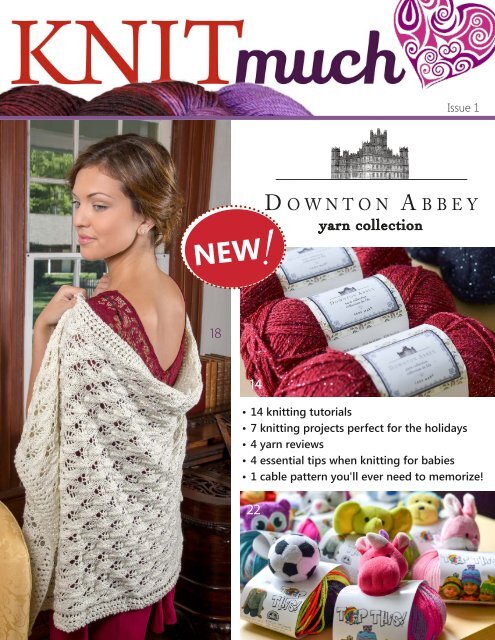
NEW!<br />
18<br />
14<br />
• 14 knitting tutorials<br />
• 7 knitting projects perfect for the holidays<br />
• 4 yarn reviews<br />
• 4 essential tips when knitting for babies<br />
• 1 cable pattern you'll ever need to memorize!<br />
22<br />
<strong>KNITmuch</strong> | issue 1<br />
1
36<br />
40<br />
48<br />
42<br />
12<br />
20<br />
2 <strong>KNITmuch</strong> | issue 1
KNIT<br />
...to<br />
much<br />
K, is to<br />
8<br />
10<br />
12<br />
14<br />
16<br />
17<br />
18<br />
20<br />
22<br />
30<br />
32<br />
34<br />
36<br />
38<br />
40<br />
42<br />
44<br />
46<br />
48<br />
50<br />
much<br />
Introducing the NEW Downton Abbey Yarn Collection!<br />
Knit a vest for Matthew with Downton Abbey Yarn<br />
KNIT...to knit, is to love<br />
The Crawley Vest<br />
Knit a shawl for Lady Mary with Downton Abbey Yarn<br />
Hooked on Books<br />
Adding some sparkle to your holiday<br />
much<br />
knitting<br />
The Budding Romance Shawl<br />
KNIT...to Honeycomb Poncho<br />
K, is to<br />
Knitting a Top This! hat<br />
How to fix a dropped knit stitch<br />
Knitting with cables – C4L<br />
Knitting with cables – C4R<br />
A better one-row buttonhole<br />
Pom-poms – the cutest knitted accessories, right?<br />
Stitch holders are safety nets for your knitting<br />
What you should know about Red Heart Cutie Pie yarn<br />
4 essential tips when knitting for babies<br />
Hand knit snuggle sack<br />
Creative cabled cowl<br />
The benefits of knitting with Red Heart Sashay Fringe yarn<br />
contents<br />
<strong>KNITmuch</strong> | issue 1<br />
3
4 <strong>KNITmuch</strong> | issue 1
Welcome to our premiere issue of <strong>KNITmuch</strong>!<br />
editor's letter<br />
Share the love of knitting. Own the obsession.<br />
If you're like me you'll understand my obsession with<br />
knitting, I am most happy to know that I'm not alone.<br />
Knitting is not only about making striking knitwear in the<br />
yarn I love, and the colors I adore and look great it. Knitting<br />
is what makes some scenarios of life, bareable. It's what<br />
makes long car rides short, it's what helps me exercise my<br />
skill in patience and grace when waiting for someone, and<br />
it's what helps me gather my wits at the end of the day,<br />
with a cup of tea, naturally.<br />
It's comforting to know there are so many knitters like you<br />
and I who share a deep love for yarn, and understand it's<br />
not a twisted concept, and that so many of you have the<br />
same unquenchable thirst for anything related to knitting.<br />
It's a great thrill to see friends picking up knitting needles<br />
for the first time and getting hooked on it, which always<br />
leads to happy knit-a-longs! Life is so sweet.<br />
I hope you'll love this first issue and that you'll look forward<br />
to more. It's meant to be shared with those you know share<br />
the same passion for knitting, and for those you think<br />
would love to learn to knit.<br />
Just when I thought life couldn't get any sweeter... check<br />
out the NEW Downton Abbey Yarn Collection with yarn<br />
review and patterns included. We also review Red Heart's<br />
Cutie Pie, Sashay Fringe and Top This! hat kit - perfect for<br />
holiday gift making. Get yours today!<br />
follow me on<br />
5
KNIT<br />
...to<br />
much<br />
K, is to<br />
much KNIT...to knit, is to love<br />
much KNIT...to K, is to<br />
EDITOR-IN-CHIEF, ART DIRECTOR<br />
Carla A. Canonico<br />
carla@<strong>KNITmuch</strong>.com<br />
ADVERTISING SALES<br />
John De Fusco<br />
john@<strong>KNITmuch</strong>.com<br />
PUBLISHER<br />
A Needle Pulling Thread<br />
PHOTOGRAPHERS<br />
John De Fusco, Carla A. Canonico<br />
BLOGGERS/CONTRIBUTORS<br />
Glenna Harris<br />
crazyknittinglady.wordpress.com<br />
Michelle Nguyen<br />
www.stitchesbeslippin.com<br />
GRAPHIC & WEB DESIGN<br />
Carla A. Canonico<br />
Carla@<strong>KNITmuch</strong>.com<br />
Sondra Armas<br />
Sondra@<strong>KNITmuch</strong>.com<br />
WEBSITE / BLOG : www.<strong>KNITmuch</strong>.com<br />
Like us on Facebook : <strong>KNITmuch</strong><br />
Follow us on Twitter : @<strong>KNITmuch</strong>mag<br />
WHERE TO GET YOUR COPY<br />
<strong>KNITmuch</strong> is a quarterly eMagazine published<br />
by A Needle Pulling Thread. It is available free for<br />
personal use online at www.<strong>KNITmuch</strong>.com.<br />
A limited number of printed copies of <strong>KNITmuch</strong><br />
are available for purchase at select yarn shops<br />
and specialty stores. Ask for it at your local shop.<br />
<strong>KNITmuch</strong> is not available by subscription.<br />
YARN SHOPS<br />
If you are interested in carrying <strong>KNITmuch</strong> in your<br />
store, please email john@<strong>KNITmuch</strong>.com.<br />
EDITORIAL<br />
Bloggers, designers and other contributors who<br />
would like to be considered for future issues<br />
please email Carla@<strong>KNITmuch</strong>.com with a brief<br />
description of your work and your proposed<br />
project.<br />
© 2<strong>01</strong>5 Coats & Clark 15-024<br />
◦{<br />
daily blog<br />
◦{<br />
weekly giveaways<br />
◦{<br />
monthly newsletter<br />
◦{<br />
quarterly magazine<br />
◦{<br />
Facebook page<br />
◦{<br />
Pinterest page<br />
◦{<br />
ALL of the above!<br />
<br />
6 <strong>KNITmuch</strong> | issue 1<br />
ALL<br />
FREE!<br />
SIGN UP today at<br />
www.<strong>KNITmuch</strong>.com<br />
and receive a free ebook:<br />
Cynthia MacDougall's<br />
Knitting Essentials!<br />
the<br />
©2<strong>01</strong>5 A Needle Pulling Thread. All rights reserved.<br />
<strong>Issue</strong> #1.<br />
No part of this publication may be reproduced<br />
without written permission from the publisher.<br />
All designs, patterns, and information in this magazine<br />
are for private, non-commercial use only, and are<br />
copyrighted material owned by their respective<br />
creators or owners.<br />
www.TheNeedleworkPages.com<br />
find a<br />
local shop!<br />
9 listings<br />
9 reviews<br />
9 events<br />
9 new products<br />
9 free patterns<br />
9 blogs<br />
& more!<br />
pages
Sparkly<br />
& Stylish<br />
Sparkle in this stylish top<br />
knit with Red Heart ®<br />
Boutique Swanky .<br />
Diamond Girl Top<br />
LW4397<br />
This and other free patterns<br />
available at redheart.com<br />
<strong>KNITmuch</strong> | issue 1<br />
7
I<br />
ntroducing<br />
Glenna Harris<br />
the NEW Downton Abbey Yarn Collection!<br />
In this issue, it is with great<br />
excitement that we introduce a<br />
new set of yarns! The Downton<br />
Abbey Yarns are new for this fall<br />
and winter season, and feature<br />
four different yarns, each named<br />
after a different character on<br />
the Downton Abbey show. We're<br />
thrilled to cover two of the new yarns<br />
in this issue, Matthew and Lady<br />
Mary yarns, and go over patterns<br />
and ideas for how to work with them.<br />
he other two, Branson and Lady Sybil,<br />
will be covered in our next issue.<br />
New yarns can lead to great new<br />
knitting projects!<br />
If you haven’t had the chance to<br />
branch out to different kinds of<br />
fiber combinations in your knitting<br />
projects so far, the Downton Abbey<br />
Yarns will give you the chance to try<br />
out a few interesting blends. If you’re<br />
(like me) a fan of the show Downton<br />
Abbey, you might be able to guess<br />
what kinds of yarn have been made<br />
for each character! The Matthew<br />
yarn (pictured above) includes some<br />
tweedy wool for a very rustic look.<br />
Can’t you imagine him walking<br />
around the Crawleys’ estate in a vest<br />
made from this flecked yarn?<br />
The Matthew yarn is a worsted weight<br />
blend of wool/acrylic/viscose and<br />
would be so versatile for accessories,<br />
garments, or even blankets and<br />
pillows. There are a lot of possibilities<br />
and the color selection is very much<br />
in line with the outdoors palette, lots<br />
of naturals and rustic tones. The dark<br />
purple (far below) is another great<br />
color in this line, and many would<br />
be great choices for either men’s or<br />
women’s projects.<br />
On the other hand, Lady Mary makes<br />
us think a bit more about the elegant<br />
indoor social life side of things! So<br />
it’s no surprise that the Lady Mary<br />
yarn line includes a bit of shiny silvery<br />
thread woven through the yarn. I<br />
think this would be a perfect yarn for<br />
holiday accessory projects. Shawls,<br />
scarves, and fingerless mitts would be<br />
lovely with that extra touch of shine.<br />
This is just the first hint of what we’ll<br />
be showing off this week. We’ll look at<br />
some of the patterns designed just for<br />
these yarns – available in this issue!<br />
There are a lot of knitting and crochet<br />
projects to choose from out there so<br />
finding three or four that you like for<br />
even just one yarn, can seem like a<br />
very short list some days. But, I think<br />
that’s half the fun. New yarns can lead<br />
to great new knitting projects!<br />
Read on and find two exciting and<br />
elegant patterns: Crawley Vest and<br />
The Budding Romance Shawl.<br />
Knitting in Downton Abbey style<br />
8 <strong>KNITmuch</strong> | issue 1
The new<br />
Downton Abbey Yarns<br />
are fun to knit with<br />
and so versatile.<br />
The Lady Mary yarn<br />
line includes sparkly<br />
threads woven<br />
through the yarn, for<br />
extra elegance!<br />
The Matthew yarn<br />
line is a tweedy blend<br />
including 25% wool, for<br />
a rustic tweedy effect.<br />
<strong>KNITmuch</strong> | issue 1<br />
9
Knit<br />
Glenna Harris<br />
a vest for Matthew with Downton Abbey Yarn<br />
The Matthew yarn, which is a worsted<br />
weight blend including 20% wool, has<br />
a nice tweedy look. Just right for a<br />
character like Matthew who spends a lot<br />
of time outside on the Crawley estate, or<br />
cycling to his work office.<br />
The Matthew yarn has several great free<br />
patterns designed by Premier Yarns to go<br />
with it, including the Crawley Vest. The vest<br />
is one of the few garment patterns included<br />
in the Downton Abbey Yarn Collection, and<br />
it would be a nice selection if you're new to<br />
making garments. Making the jump from<br />
smaller accessories to larger garments can<br />
often involve a different selection of skills<br />
and techniques. However, since vests cover<br />
the body but don’t include sleeves, as<br />
pullovers and cardigans do, a vest can be a<br />
good “starter” garment. And, in a worsted<br />
weight yarn like this one, it will knit up a bit<br />
faster than a lighter DK or sport weight yarn.<br />
This is a classic V-neck vest with a simple<br />
textured stitch pattern. We introduced some<br />
slipped stitch patterns in our September<br />
<strong>KNITmuch</strong> blog posts, so you might enjoy<br />
looking at those posts if this is new to you!<br />
When knitting up this vest, these are the<br />
skills you can expect to use:<br />
• Casting on and binding off<br />
• Working knit, purl, and slip stitches<br />
• Working ribbing (for hem, and armhole<br />
and neckband edgings)<br />
• Following a written stitch pattern (the<br />
pattern does not include charts)<br />
• Sewing seams<br />
• Picking up stitches (for armhole and<br />
neckband edgings)<br />
This vest is worked in pieces (as opposed<br />
to “in the round” in one piece) and from the<br />
“bottom up” starting at the hem (as opposed<br />
to “top down” starting from the neck). The<br />
back and the front are worked the same,<br />
with the exception of the front V-neck<br />
shaping. So, this means that once you've<br />
made the back piece you'll have done<br />
most of the same steps required for the<br />
front piece. Finally, these two pieces will be<br />
seamed together at the sides and shoulders,<br />
before picking up stitches for the ribbed<br />
neckband and armhole edgings.<br />
In the photos here, you can see the<br />
swatches I’ve done up in the slip-stitch<br />
“furrows” pattern used in the Crawley Vest.<br />
Sometimes it can make all the difference to<br />
see different color selections! The sample<br />
shown in the free pattern uses a dusty green<br />
color, and here we have two other options.<br />
The creamy off-white shown in the photo<br />
on the next page is a very classic look. The<br />
darker purple is another almost-neutral<br />
color that’s a little more modern. There are<br />
eight different colors to choose from in<br />
the Matthew yarn so just keep in mind the<br />
kind of colors you like to wear most in your<br />
wardrobe and let that be your guide when<br />
selecting yarn colors as well!<br />
I’m excited to be dreaming<br />
up fall and winter knitting<br />
projects with these new<br />
Downton Abbey Yarns<br />
arriving fresh on the<br />
crafting scene!<br />
10 <strong>KNITmuch</strong> | issue 1<br />
Photos by Glenna Harris
<strong>KNITmuch</strong><br />
Standard abbreviations & terms<br />
The Crawley vest uses this<br />
simple textured pattern and is a<br />
versatile and cozy knit. Imagine<br />
it in this creamy off-white color<br />
and this lovely autumnal purple.<br />
alt = alternate<br />
approx = approximately<br />
beg = begin(ning)<br />
BO= bind off<br />
CC = contrast colour<br />
ch = chain<br />
cm = centimetre(s)<br />
cn = cable needle<br />
CO = cast on<br />
cont = continue, continuing<br />
dc = double crochet<br />
dec = decrease(s), decreasing<br />
dpn = double-pointed needle(s)<br />
foll = following<br />
g = gram(s)<br />
inc = increase(s), increasing<br />
in(s) = inch(es)<br />
k = knit<br />
kf&b or kfb = knit into front and back of st (increase)<br />
k2tog = knit 2 sts tog (right-leaning decrease)<br />
K3tog = knit 3 sts together (double right-leaning<br />
decrease)<br />
M = marker<br />
m = metre(s)<br />
M1 = Make 1 stitch: pick up the horizontal strand<br />
between 2 stitches from front to back and knit<br />
it tbl (lifted increase)<br />
MC = main colour<br />
mm = millimetre(s)<br />
oz = ounce(s)<br />
p = purl<br />
p2tog = purl 2 sts tog (decrease)<br />
patt = pattern<br />
pfb = purl into front and back of stitch (increase)<br />
pm = place marker<br />
psso = pass slipped stitch over<br />
RS = right side<br />
rem = remain(ing)<br />
rep = repeat<br />
rev = reverse<br />
rnd = round<br />
sc = single crochet<br />
sl = slip<br />
skp = slip one st, knit next st, pass slipped st over<br />
knit st (dec)<br />
ssk = slip, slip, knit: slip 2 sts knitwise, 1 at a time,<br />
insert left-hand needle into front of both sts<br />
and knit them tog (left-leaning decrease)<br />
Sssk = Slip next three stitches individually, knitwise.<br />
Insert tip of left needle from front to back<br />
into the fronts of these three stitches and knit<br />
them together (double left-leaning decrease)<br />
st(s) = stitch(es)<br />
St st = stocking stitch<br />
tbl = through back loop<br />
tog = together<br />
tr = treble crochet<br />
WS = wrong side<br />
yo = yarn over<br />
<strong>KNITmuch</strong> | issue 1<br />
11
CRAWLEY VEST<br />
DA00003<br />
SIZES<br />
Small (Medium, Large, X-Large, XX-Large)<br />
Shown in Small Size<br />
FINISHED MEASUREMENTS<br />
Chest: 37 (43, 46, 49, 55)”<br />
MATERIALS<br />
Downton Abbey Matthew by Premier Yarns (75%<br />
Acrylic, 21% Wool, 4% Viscose; 100g/230 yds)<br />
• # DA40<strong>01</strong>-05 Herb Green – 4 (4, 5, 5, 5) balls<br />
Needle: US Size 8 (5 mm) and US Size 9 (5.5 mm) straight<br />
needles or size needed to obtain gauge<br />
Notions: Tapestry needle, stitch markers, stitch holder<br />
or locking ring marker<br />
GAUGE<br />
16 Left sts Armhole x 30 rows Edging = 4” in Furrows pattern on larger needle<br />
Save Sew left time, shoulder check your and gauge. Neckband seam. Work as for Right<br />
Armhole edging.<br />
Sew side seams. Weave in ends.<br />
CRAWLEY V<br />
Photo courtesy of Premier Yarns<br />
The Crawley Vest knitted up in the<br />
Matthew yarn of the new Downton Abbey<br />
Yarn Collection – Herb Green color<br />
Abbreviations<br />
beg begin(ning)<br />
k knit<br />
k2tog knit 2 sts together (1 st dec’d)<br />
meas measures<br />
p purl<br />
patt pattern<br />
RS right side<br />
rep repeat(ing)<br />
sl slip<br />
ssk slip slip knit (1 st dec’d)<br />
st(s) stitch(es)<br />
s2kp slip two sts knitwise, knit 1, pass the 2 slipped sts over<br />
(2 sts dec’d)<br />
WS wrong side<br />
Downton and Downton Abbey® ©2<strong>01</strong>5 Carnival Film & Television Limited. All Rights Reserved.<br />
12 <strong>KNITmuch</strong> | issue 1
CRAWLEY VEST<br />
STITCH GUIDE<br />
Furrows (multiple of 6 sts + 3)<br />
Row 1 and 3(RS): P3, *k1, sl 1, k1, p3; rep from * to end.<br />
Row 2: *K3, p3; rep from * to last 3 sts, k3.<br />
Rows 5 and 7: K4, *sl 1, k5; rep from * to last 5 sts, sl 1, k4.<br />
Row 6 and 8: Purl.<br />
Rep Rows 1-8 for patt.<br />
P2, K1 Ribbing (multiple of 3 sts)<br />
Row 1 (RS): *P1, *k1, p2; rep from * to last 2 sts, k1, p1.<br />
Row 2: K1, *p1, k2; rep from * to last 2 sts, p1, k1.<br />
Rep Rows 1 & 2 for patt.<br />
VEST<br />
Back<br />
With smaller needle, cast on 75 (87, 93, 99, 111) sts. Work in<br />
P2, K1 Ribbing for 2”, ending with a WS row. Switch to larger<br />
needles and work in Furrows until piece meas 16 (17 ½, 17 ½, 17<br />
¾, 17 ¾)”, ending with a WS row.<br />
Armhole Shaping<br />
Bind off 4 (4, 6, 6, 6) sts at beg of next 2 rows – 67 (79, 81, 87,<br />
99) sts.<br />
Dec Row: K1, ssk, work in patt to last 3 sts, k2tog, k1 – 2 sts<br />
dec’d.<br />
Rep Dec Row 1 (5, 4, 6, 11) more times – 63 (67, 71, 73, 75) sts.<br />
Work even in patt until armhole meas 7 ½ (8, 8 ½, 9 ¼, 9 ¼)”,<br />
ending with a WS row.<br />
Next Row: K15 (16, 18, 19, 19), join new yarn and bind off 33 (35,<br />
35, 35, 37) sts, knit to end.<br />
Working each side separately, work even in patt until armhole<br />
meas 8 ½ (9, 9 ½, 10 ¼, 10 ¼)”, ending with a WS row. Bind off.<br />
Front<br />
Work as for back until armholes meas 2 (2, 2 ½, 2 ½, 2 ½)”,<br />
ending with a WS row. Continue armhole shaping as for back,<br />
AT THE SAME TIME work neck and shoulder shaping as<br />
follows:<br />
Left Shoulder<br />
Knit to center st and place on a st holder or locking ring<br />
marker, turn and work on these sts only.<br />
Next Row: Work in patt to end.<br />
Dec Row: Work in patt to last 3 sts, k2tog, k1.<br />
Rep last two rows 15 (16, 16, 16, 17) more times.<br />
Work even in patt on 15 (16, 18, 19, 19) rem sts until armhole<br />
meas 8 ½ (9, 9 ½, 10 ¼, 10 ¼)”.<br />
Bind off.<br />
Right Shoulder<br />
With RS facing, join yarn at center front and work Dec Row as<br />
follows:<br />
Dec Row: K1, ssk, work in patt to end.<br />
Next Row: Work in patt to end.<br />
Rep last two rows 15 (16, 16, 16, 17) more times.<br />
Work even in patt on 15 (16, 18, 19, 19) rem sts until armhole<br />
meas 8 ½ (9, 9 ½, 10 ¼, 10 ¼)”.<br />
Bind off.<br />
FINISHING<br />
Right Armhole Edging<br />
Sew right shoulder seam. Using smaller needle, with RS facing,<br />
pick up and knit evenly across armhole, adjusting st count as<br />
needed to work a multiple of 3 sts. Work P2, K1 Ribbing for 1”.<br />
Bind off.<br />
Neckband<br />
With RS facing and smaller needle, starting at left shoulder,<br />
pick up and knit evenly along neck edge to held center st.<br />
Place stitch on right needle leaving locking ring marker on<br />
center st. Pick up sts along right neck edge to shoulder seam,<br />
pick up sts along back neck to left shoulder making sure to<br />
adjust st count as needed to work a multiple of 3 sts.<br />
Next Row (WS): Work Row 2 of P2, K1 Ribbing to marked<br />
center st, p1, work in patt to end.<br />
Next Row (RS): Work Row 1 of P2, K1 Ribbing to one st before<br />
marked st, s2kp, work in patt to end.<br />
Rep last two rows, moving marker up each row until Neckband<br />
meas 1”.<br />
Bind off loosely.<br />
Left Armhole Edging<br />
Sew left shoulder and Neckband seam. Work as for Right<br />
Armhole edging.<br />
CRAWLEY V<br />
Sew side seams. Weave in ends.<br />
For more free patterns from the Downton Abbey Yarn Collection, Abbreviations visit www.premieryarns.com/DowntonAbbey<br />
beg begin(ning)<br />
k knit<br />
© 2<strong>01</strong>5 Premier® Yarns All rights reserved.<br />
This pattern may not be reproduced k2tog for business, knit trade 2 sts or together sale. (1 st dec’d)<br />
meas measures<br />
p purl<br />
<strong>KNITmuch</strong> | issue 1<br />
patt pattern<br />
13
Knit<br />
Glenna Harris<br />
a shawl for Lady Mary with Downton Abbey Yarn<br />
Knitters, do you have holiday knitting on<br />
your mind, yet? I’m not just talking about<br />
gift knitting, but knitting for yourself! Let's<br />
take a closer look at the Lady Mary yarn<br />
from the Downton Abbey Yarn Collection,<br />
and this is something you might want to<br />
keep for yourself if you're interested in a<br />
bit of a sparkly treat just for you. Indulgent<br />
knitting can lift your spirits!<br />
The Budding Romance Shawl is a free<br />
pattern designed with the Lady Mary yarn in<br />
mind, and is a very pretty rectangular shawl<br />
that would be just right for the holidays.<br />
It would make a generous gift or a great<br />
personal knit for yourself – I can just picture<br />
wearing this with a little black dress to a party.<br />
The shawl pattern uses a repeating lace<br />
pattern which is shown below in a couple of<br />
swatches in different colors. The Lady Mary<br />
yarn comes in a number of different colors,<br />
both brights and neutrals. It's amazing how<br />
different the pattern can look when we<br />
change only the color but everything else<br />
stays the same!<br />
If you've never tried a lace stitch before, this<br />
will be a fun challenge for you. The main<br />
trick with working a lace pattern is that you'll<br />
be doing a combination of decreases as well<br />
as yarnovers. To make a “yarnover” means<br />
to bring your yarn forward to the front of<br />
the needle, then work the next knitted stitch<br />
or knitted decrease as indicated. It creates<br />
the little eyelets that form the lace patterns,<br />
along with those decreases. You can see<br />
in the swatches just above and just below,<br />
the decreases and yarnovers do sit in a<br />
purposeful order, making a repeating pattern.<br />
When knitting up this shawl, these are the<br />
skills you can expect to use:<br />
• Cast on and bind off<br />
• Work knit, purl, decreases, and yarnovers<br />
• Follow a lace stitch pattern (written<br />
instructions, not a chart)<br />
• Work flat, back and forth (as opposed to<br />
'in the round')<br />
The nice thing about this kind of pattern is<br />
that, once you have established the stitch<br />
pattern after the first couple of repeats,<br />
you get to continue working along in a<br />
straight rectangular piece. Unlike a garment<br />
or some other accessories, you can simply<br />
knit to the indicated length of the pattern<br />
without having to worry about stopping to<br />
work decreases or increases for shaping the<br />
item. This makes it easier to concentrate on<br />
getting the stitch pattern right, rather than<br />
the shape of the garment itself.<br />
Can you see the sparkle coming from these<br />
little swatches? The Lady Mary yarn has that<br />
silvery touch from some metallic thread<br />
that’s woven into the yarn, which is the<br />
unique feature of this yarn line. As a result I<br />
think it will be a great selection for holiday<br />
projects or a number of simple accessories<br />
that would make it easy to show off the<br />
sparkle. You probably don’t want to try<br />
cables or color-work with this kind of<br />
yarn as the shiny quality would get a<br />
little lost in the pattern.<br />
There are so many project<br />
possibilities, especially for<br />
beautiful gift projects or gifts<br />
to yourself! Indulgent knitting<br />
can lift your spirits!<br />
14 <strong>KNITmuch</strong> | issue 1
The Budding Romance Shawl<br />
uses this beautiful lace stitch. Try<br />
your hand at some lace knitting<br />
with this pattern! How lovely<br />
would this silvery grey look as a<br />
festive winter stole? ...so many<br />
gorgeous colors to choose from.<br />
Photo courtesy of Premier Yarns<br />
Budding Romance Shawl<br />
knit with Lady Mary yarn<br />
from the Downton Abbey Yarn<br />
Collection. The Lady Mary line<br />
has an elegant sparkle.<br />
Photos by Glenna Harris<br />
<strong>KNITmuch</strong> | issue 1<br />
15
hooked on books<br />
Knit the Sky<br />
By Lea Redmond<br />
In Knit the Sky, designer/artist Lea Redmond invites<br />
knitters of all levels to join her adventurous knitting<br />
journey with projects that will make you think outside<br />
the craft box. More than a knitting book, Knit<br />
the Sky is a unique collection of 30 creativity starters<br />
that has you knitting using practical things found in<br />
the weather, your neighbourhood, your travels and<br />
more! It’s filled with illustrations to fall in love with,<br />
and you’ll cherish the book from page 1 to 168 as<br />
you create knitted memories!<br />
168 pages, Hardcover, ISBN 978-1-61212-333-2<br />
The Taunton Press<br />
www.thomasallen.ca<br />
Knit Christmas Stockings<br />
Edited by Gwen W. Steege<br />
Make this holiday one your family will remember forever!<br />
With these 19 fun, simple patterns, even first-time<br />
knitters can create beautiful knitted Christmas stockings,<br />
as well as delightful knit and felt ornaments for the<br />
Christmas tree.<br />
136 pages, ISBN 978-1-61212-252-6<br />
www.storey.com<br />
One-Skein Wonders for Babies<br />
1<strong>01</strong> Knitting Projects for Infants & Toddlers<br />
by Judith Durant<br />
This irresistible collection offers 1<strong>01</strong> original knitting<br />
projects for babies and toddlers – each using<br />
just a single skein of yarn! From mittens and hats<br />
to tees, sweaters, hoodies, pants, dresses, socks,<br />
and bootees, you’ll find the perfect wearable for<br />
every child and every occasion. You’ll also discover<br />
beautiful bibs, blankets, and sleep sacks, plus<br />
adorable stuffed toys, blanket buddies, and more.<br />
These beautiful projects were contributed by<br />
designers and crafters around the world, and each<br />
comes with complete step-by-step instructions<br />
and a photograph of the finished piece.<br />
288 pages, ISBN 978-1-61212-480-3<br />
Storey Publishing<br />
www.thomasallen.ca<br />
Knitting Fabric Rugs<br />
Karen Tiede<br />
This is a book with invaluable information on not only<br />
how to make rugs, but also includes a lesson in color<br />
combinations, the A to Z on how to recycle materials<br />
to make the rugs, and the process of making rugs. Add<br />
color to your floors and living space with these 28 colorful<br />
designs for crafters of every level. Take your knitting<br />
to an exciting new adventure and enjoy the softness of<br />
these rugs underfoot or displayed on the wall for extra<br />
color boost!<br />
178 pages, ISBN 978-1-61212-448-3<br />
www.storey.com<br />
Beanies & Bobble Hats<br />
by Fiona Goble<br />
What more to say about this very hip and cool book<br />
including 36 colour designs for beanies, berets, bobble<br />
hats and more for the young and young at heart? This<br />
is an indispensable collection of knitted accessories if<br />
you’re contemplating making knitted gifts for Christmas.<br />
Look around your neighbourhood, many wear beanies<br />
and hats all year round as a fashion accessory! Hats are<br />
quick to make even for novice knitters. Cables, special<br />
stitches, as well as simple and mindless knitting stitches<br />
are explored in the variety of styles. My favourite…? The<br />
knitted golden crown!<br />
130 pages, ISBN 978-78249-196-5<br />
Cico Books<br />
www.thomasallen.ca<br />
Arm and Finger Knitting<br />
by Laura Strutt<br />
If you like large-scale knits or you appreciate the<br />
bigger stitches and open texture you can achieve<br />
by knitting with your arms or fingers, then you will<br />
find plenty of inspiration in Arm and Finger Knitting.<br />
Breaking free from the constraints of normal needle<br />
sizes, Laura Strutt demonstrates how to do all the<br />
usual stitches and techniques using just your arms<br />
and hands, from plain garter stitch to moss stitch,<br />
increasing and decreasing, and knitting with two<br />
or more strands of yarn at a time. To make the best<br />
use of the unique texture and scale of no-needle<br />
knitting, she has designed 35 stylish projects for you<br />
to make, for the home and to wear.<br />
112 pages, ISBN 978-1-78249-208-5<br />
Cico Books<br />
www.thomasallen.ca<br />
16 <strong>KNITmuch</strong> | issue 1
If you’re thinking about gift knitting<br />
already – or perhaps need a little nudge<br />
towards thinking about gift knitting – we<br />
have a few things in mind. We’ve already<br />
shown you a couple of patterns made<br />
just for the NEW Downton Abbey Yarn<br />
Collection, here some selections from<br />
the vast knitting internet to give you<br />
more ideas! Let’s take a look again at the<br />
Lady Mary yarn this awesome collection,<br />
which can be both elegant and fun<br />
because of that extra bit of metallic<br />
thread. It’s never too early to start gift<br />
knitting and adding some sparkle to your<br />
holiday knitting!<br />
The Lady Mary yarn is listed as a light<br />
yarn weight in category 3, in other<br />
words as a DK weight or “light worsted.”<br />
This makes it versatile for projects<br />
needing 5-6 stitches per inch in gauge.<br />
Knitted more firmly it would make an<br />
extremely stiff fabric, for knitting threedimensional<br />
ornaments and baubles,<br />
and knitted more loosely it would be<br />
enjoyable for lacy projects, as in the<br />
Budding Romance shawl pattern.<br />
One lovely and quick gift idea is this<br />
Mini Mitten pattern. It uses doublepointed<br />
needles and can be done easily<br />
within an evening – make a pair for a<br />
unique present-topper or ornament! Or<br />
perhaps a bookmark? Or, how about this<br />
little stocking pattern, for a similar festive<br />
ornament project?<br />
Another great gift idea that I like are<br />
these knitted coffee cozies. If you know<br />
people who enjoy their daily dose of<br />
caffeine, save them the trouble of always<br />
throwing out those cardboard cup cozies<br />
they provide at cafes, and give them<br />
a re-usable one instead! Knitted in a<br />
sparkly color like this yarn, they will be<br />
less likely to forget it!<br />
Or, try a simple hat pattern – hats<br />
make very quick gift projects. With the<br />
metallic component we don’t need to<br />
look at cables or color-work patterns<br />
since the pattern and sparkle would<br />
compete too much.<br />
Adding some<br />
sparkle<br />
to your holiday knitting<br />
Glenna Harris<br />
The Lady Mary yarn from the new<br />
Downton Abbey yarns includes<br />
metallic thread for extra sparkle.<br />
These are just a few fun ideas – there are<br />
so many to choose from! When trying a<br />
new yarn it’s always a good idea to buy<br />
one or two skeins to play with before committing<br />
to a big project, if you’re thinking<br />
about something larger. So, these are all<br />
one-skein-or-less projects to get you started.<br />
And remember, it’s never too early to<br />
think about gift knitting while adding some<br />
sparkle to your holiday knitting!<br />
<strong>KNITmuch</strong> | issue 1<br />
17
BUDDING ROMANCE SHAWL<br />
FINISHED MEASUREMENTS<br />
Length: 60”<br />
Width: 20”<br />
MATERIALS<br />
Downton Abbey Lady Mary by Premier Yarns (95%<br />
Acrylic, 5% Metallic; 85g/290yds)<br />
• #DA4004-06 Lily Ice – 4 balls<br />
Needle: US Size 8 (5 mm) straight needles or size<br />
needed to obtain gauge<br />
Notions: Tapestry needle<br />
GAUGE<br />
20 sts x 19 rows = 4” in Little Buds patt<br />
Save time, check your gauge.<br />
DA000<strong>01</strong><br />
Downton and Downton Abbey® ©2<strong>01</strong>5 Carnival Film & Television Limited. All Rights Reserved.<br />
18 <strong>KNITmuch</strong> | issue 1
BUDDING ROMANCE SHAWL<br />
STITCH GUIDE<br />
Little Buds (multiple of 8 sts + 3)<br />
Row 1 (RS): K1, *yo, sl 1, k1, psso, k6; rep from * to last 10 sts, yo,<br />
sl 1, k1, psso, k8.<br />
Row 2 and all even-numbered rows: Purl.<br />
Row 3, 5, and 7: K2, *yo, k2, cdd, k2, yo, k1; rep from * to last<br />
9 sts, yo, k2, cdd, k2, yo, k2.<br />
Row 9: K5, yo, sl 1, k1, psso, k6; rep from * last 6 sts, sl 1, k1,<br />
psso, k4.<br />
Row 11, 13, and 15: K1, k2tog, *k2, yo, k1, yo, k2, cdd; rep from *<br />
to last 8 sts, k2, yo, k1, yo, k2, sl 1, k1, psso.<br />
Row 16: Purl.<br />
Rep Rows 1-16 for patt.<br />
Garter and Eyelet (multiple of 2 sts)<br />
Row 1 (RS): Knit.<br />
Row 2: Knit.<br />
Row 3: Knit.<br />
Row 4: P1, yo, p2tog; rep from * to last st, p1.<br />
Row 5: Knit.<br />
Row 6: Knit.<br />
Row 7: Knit.<br />
Row 8: P1, *p2tog, yo; rep from * to last st, p1.<br />
Rep Rows 1-8 for patt.<br />
Abbreviations<br />
cdd central double decrease - slip 2 sts tog knitwise, knit<br />
the next st, pass the 2 slipped stitches over knit st just<br />
worked (2 sts dec’d)<br />
k knit<br />
k2tog knit 2 sts together (1 st dec’d)<br />
meas measures<br />
p purl<br />
p2tog purl 2 sts together (1 st dec’d)<br />
patt pattern<br />
psso pass slipped stitch over<br />
rep repeat(ing)<br />
RS right side<br />
s2kp<br />
sl slip<br />
WS wrong side<br />
yo yarn over<br />
GARMENT<br />
Cast on 102 sts. Work Rows 1-8 of Garter and Eyelet.<br />
Set-up Row: Work Garter and Eyelet over 8 sts, pm, work<br />
Little Buds over 83 sts, pm, work Garter and Eyelet to end.<br />
Work in patt as established, slipping markers as you come to<br />
them until piece meas 59”, ending with a WS row.<br />
Work Rows 1-8 of Garter and Eyelet removing markers on<br />
Row 1.<br />
Bind off.<br />
FINISHING<br />
Weave in ends. Block lightly.<br />
For more free patterns from the Downton Abbey Yarn Collection,<br />
visit www.premieryarns.com/DowntonAbbey<br />
© 2<strong>01</strong>5 Premier® Yarns All rights reserved.<br />
This pattern may not be reproduced for business, trade or sale.<br />
<strong>KNITmuch</strong> | issue 1<br />
19
20 <strong>KNITmuch</strong> | issue 1<br />
Cathy Payson<br />
www.redheart.com
skill level easy<br />
finished measurements<br />
Neck: 34" [86cm]<br />
Hem: 45" [114cm]<br />
Length: 15" [38cm]<br />
Poncho fits most women.<br />
materials<br />
yarn<br />
RED HEART® Boutique Twilight: 5 balls 9959 Mercury<br />
(7 Jumbo) RED HEART® Boutique Twilight Art E829<br />
available in 3.5oz [100g], 59yd [54m] balls<br />
needles<br />
US 15 [10mm]<br />
yarn needle, stitch marker<br />
gauge<br />
8½ sts = 4" [10cm]; 16 rows = 4" [10cm] in Simple Garter<br />
Lace Pattern. CHECK YOUR GAUGE. Use any size<br />
needles to obtain the gauge.<br />
SPECIAL STITCHES<br />
P2tog = Purl 2 Stitches Together. Purl 2 sts together<br />
(decrease).<br />
Yfrn = Yarn Forward Round Needle. Bring yarn forward<br />
and wrap around needle. It's worked as a yarn over<br />
when worked between a knit stitch and a purl stitch<br />
(increase).<br />
PATTERN STITCH<br />
Simple Garter Lace Pattern (multiple of 4 sts + 2)<br />
All Rows: K2, *yfrn, p2tog, k2; repeat from * to end of<br />
row. Repeat every row.<br />
Notes:<br />
Poncho is worked in rows. The 2 pieces (Front and Back) are<br />
sew together. When casting on, leave a 25"<br />
(64 cm) tail for seaming. When joining Front and Back pieces<br />
together, use the “edge st” for seaming.<br />
Honeycomb<br />
poncho<br />
The Honeycomb<br />
Poncho is one of<br />
those fairly quick<br />
projects to make<br />
for a cherished<br />
someone on your<br />
Christmas gift list.<br />
PONCHO<br />
Front and Back (make 2 pieces)<br />
Cast on 48 sts.<br />
Knit 1 row on Wrong Side.<br />
Next Row (Right Side): K1 (edge st), work across row in<br />
Simple Garter Lace Pattern to last st, k1 (edge st).<br />
Place stitch marker to mark Right Side of work.<br />
Keeping first and last sts in Stockinette St for edge<br />
stitches, and center 46 sts in Simple Garter Lace<br />
Pattern, continue until piece measures 14½" [37cm]<br />
from cast on edge, ending with a Wrong Side row.<br />
Next Row (Right Side): Knit across row decreasing 12 sts<br />
evenly spaced—36 sts.<br />
Next Row (Wrong Side): Knit all sts.<br />
Next Row (Right Side): Bind off all sts leaving a 25" [64cm]<br />
tail to sew side seam.<br />
finishing<br />
Join Front and Back pieces together using yarn needle<br />
and Mattress St. Sew the “edge sts” together creating a<br />
flat, invisible seam. Weave in ends.<br />
abbreviations<br />
yfrn = yarn forward around needle;<br />
* or ** = repeat whatever follows the * or ** as indicated. <br />
17"<br />
[43 cm]<br />
FRONT<br />
&<br />
BACK<br />
22½"<br />
[57 cm]<br />
15"<br />
[38 cm]<br />
Photos courtesy of Red Heart<br />
<strong>KNITmuch</strong> | issue 1<br />
21
Knitting<br />
a Top This! hat<br />
Glenna Harris<br />
Christmas is almost at our door. Although it's<br />
a great plan to knit holiday gifts all year long,<br />
there's always a person that pops on my Christmas<br />
list at the last minute! I'm actually not<br />
usually one of those people who plans to knit<br />
Christmas gifts starting January, but I always try<br />
to do better each year! Socks and hats come<br />
to mind for small gifts for loved ones, and the<br />
Top This! hat is the perfect knitted gift if you<br />
have children on your holiday list.<br />
If you're a relatively new knitterm hats are an<br />
ideal project to help build up some knitting<br />
skills beyond the basic knit and purl. Knitting<br />
a hat will help you practice not just casting on<br />
and knitting, but knitting in the round and knitting<br />
some basic decreases. These are all great<br />
building blocks for bigger projects. These kits<br />
are made with self-striping yarn, which<br />
changes color as you knit it – so, even<br />
though there are stripes in these hats,<br />
you never have to stop and change yarn<br />
part way through.<br />
Children’s hats like these are also often smaller<br />
than adult projects, so you can finish them<br />
faster and feel satisfied. One of these hats took<br />
me only 2-3 episodes of Miss Fisher’s Murder<br />
Mysteries on Netflix – it’s hard to beat that!<br />
These kits have completely charmed me, I confess,<br />
and I’m already making a list of the little<br />
folks in my life who will be receiving them as<br />
gifts. They come with enough yarn for a hat<br />
as well as a little topper shaped like a little<br />
animal or fun toy.<br />
We’ll walk through the steps to make one, using<br />
the grey and pink kitty, and the handsome green<br />
and yellow elephant.<br />
The first step of embarking on any knitting project<br />
is to check that you’ve got the right knitting<br />
needles to work with. If you’re working with a<br />
brand new yarn, the best thing to do is check the<br />
label first. All commercially available yarn labels<br />
(or “ball bands”) will have a wealth of information<br />
on them, including recommended needle size,<br />
the fiber content (materials that the yarn is made<br />
of), and washing instructions. In this case, the<br />
yarn label also contains the hat pattern, on the<br />
inside.<br />
We can see from the fine print here that this<br />
project requires 5.5mm/US #9 needles. Reading<br />
ahead in the pattern instructions inside, we can<br />
find out that these are recommended to be a<br />
16''/40cm circular needle as well as double-pointed<br />
needles. Other things we’ll need for this project<br />
are things you'll often need on hand almost<br />
all the time as a knitter, are stitch markers, yarn<br />
needles for sewing in ends when it’s all finished,<br />
and a row counter is optional if you like some help<br />
tracking how many rounds or rows you’ve knitted.<br />
22 <strong>KNITmuch</strong> | issue 1
So many animal<br />
figures to<br />
choose from the<br />
Top This! hat kit<br />
collection!<br />
Ahhh, the trusted ball<br />
band. Check it for all<br />
pertinent information<br />
for knitting up the<br />
the zany Top This! hat.<br />
Photos by Glenna Harris<br />
<strong>KNITmuch</strong> | issue 1<br />
23
Knitting<br />
with<br />
the<br />
cable<br />
cast on<br />
Hats, in particular, are the perfect projects<br />
for beginner knitters. They encompass so<br />
many techniques in one little project that<br />
offers relatively immediate satisfaction to<br />
boot! They also make great last minute<br />
knitted gifts. Let's get started on the<br />
holiday gift list by knitting some children’s<br />
hats using the sweet Top This! hat kits.<br />
One of the first cast on techniques many<br />
of us learn is the knitted cast on, which is<br />
a great first step because its steps mimic<br />
the knit stitch itself, so you can make the<br />
most of all the new skills you're learning<br />
as a new knitter. If you’re new to knitting,<br />
learning a variety of cast on and bind off<br />
techniques is one of the most valuable<br />
steps you can take to expand your “tool<br />
box” of skills. Many of us have a favorite<br />
cast on or bind off that we use frequently,<br />
so you never know if one of those new<br />
techniques will become your new favorite!<br />
The cable cast on makes a neat edge<br />
that's a good choice for ribbing because<br />
it looks equally neat and tidy no matter<br />
if you’re looking at a “purl side” or “knit<br />
side” of the fabric. It’s also similar to the<br />
knitted cast on which makes it an easy<br />
2nd cast on to learn. You don’t need it just<br />
for cabled knitting, though, so don’t be<br />
fooled by the name!<br />
As we can see in the photos, the cable<br />
cast on is just a little bit different from<br />
the knitted cast on, with the main<br />
difference that we start by inserting<br />
the right needle between the first two<br />
stitches on the left needle, rather than<br />
through the actual first stitch.<br />
These are the steps for the cable cast on:<br />
1. Start by making a slip knot and placing<br />
it onto the left needle. Make a 2nd stitch<br />
knitwise by knitting into the slip knot and<br />
placing that stitch back onto the left hand<br />
needle. You now have 2 sts.<br />
2. Next, insert the needle in between the<br />
first 2 sts on the left hand needle.<br />
3. Wrap the working yarn around the right<br />
hand needle as you normally would when<br />
making a knit stitch.<br />
4. Pull the yarn through the two stitches to<br />
the front of the work.<br />
5. Place this new stitch back onto the left<br />
hand needle, inserting the left hand<br />
needle into the front of the stitch (this<br />
twists the stitch around slightly).<br />
6. Repeat steps 2-5 until you have the<br />
number of stitches you need.<br />
Above all, try to keep your cast on a little bit<br />
loose – if the stitches are too tight then you<br />
may end up with a very tight edge that's<br />
hard to slip over your head.<br />
The photos<br />
demonstrate<br />
the steps for the<br />
cable cast on<br />
24 <strong>KNITmuch</strong> | issue 1
Start with a slip knot, then knit a 2nd stitch using the<br />
knitted cast on.<br />
The Top This! hat kits recommend starting<br />
with a 16''/40cm circular needle and then<br />
switching to double-pointed needles once<br />
you start decreasing at the top. However, if<br />
you’re knitting a smaller size, you might find<br />
it hard to fit the stitches around the circular<br />
needle, in which case you can start with the<br />
double-pointed needles (above) by dividing<br />
the stitches equally around 3 working needles.<br />
Use a 4th needle for knitting.<br />
Now we’re ready to knit onwards!<br />
Insert your needle between the stitches, not into a stitch.<br />
Larger hat sizes can easily use a 16"/40cm circular needle to<br />
hold all stitches in the round.<br />
Wrap the yarn as if to knit a stitch.<br />
Keep repeating these steps until you have the number of stitches<br />
you need.<br />
Pull the loop through as you would for making a stitch.<br />
Place the stitch onto the left needle, inserting the left needle<br />
through the ‘front’ of the stitch. This turns the stitch a little.<br />
For smaller hat sizes you may need to use double-pointed needles.<br />
Arrange your stitches equally among 3 working needles.<br />
<strong>KNITmuch</strong> | issue 1<br />
25
2<br />
ways to knit a hat in the round, which is better?<br />
Knitting in the<br />
round requires<br />
either circular<br />
needles or<br />
double-pointed<br />
needles.<br />
Have you ever knitted a project “in the<br />
round” before? If you haven’t, a whole<br />
world of new projects and tools await<br />
you. Many knitters start off working<br />
“flat” projects because it’s an easy way<br />
to make a plain scarf or small blanket,<br />
which make nice first projects. However,<br />
knitting a hat in the round is also a great<br />
project for new knitters. They are small<br />
and quick to finish, and also make easy<br />
gifts. There are more than 2 ways to knit<br />
a hat in the round, but here are the two<br />
more common ones using the sweetest<br />
Top This! hats (one in pink, and one in<br />
green) to demonstrate.<br />
Tips to keep in mind when knitting in<br />
the round.<br />
1. When starting your first round, make<br />
sure your right hand needle is the one<br />
that has the working yarn hanging<br />
from it. Then, when you knit the first<br />
stitch on the left hand needle, you will<br />
close that gap. This is called “joining<br />
to work in the round.”<br />
2. A common reminder is to “join to<br />
work in the round, being careful not<br />
to twist“. This means to make sure<br />
that the cast on row is fully lined up<br />
below the needle (as shown below),<br />
rather than twisted around the needle<br />
(almost like a mobius strip). When<br />
you're knitting flat, you don’t need to<br />
worry about this step, but it is very<br />
important when knitting in the round.<br />
3. Remember to use a stitch marker to<br />
mark the beginning of your round.<br />
Knitting pattern instructions will often<br />
indicate this directly as “place marker”<br />
or “pm” as an abbreviation. Keep<br />
different colors of stitch markers on<br />
hand for different uses in the pattern.<br />
4. If you’re knitting with double-pointed<br />
needles, like I’m using for the green<br />
hat in the photo, you can’t place a<br />
marker at the beginning of the round<br />
since the beginning of the round<br />
starts in between two of the needles.<br />
Instead, place it after the first stitch<br />
in the round, or clip it to the knitted<br />
fabric itself and adjust its place every<br />
so often as you knit more of the<br />
project.<br />
5. Double-pointed needles can feel<br />
awkward at the beginning, as though<br />
you’re holding too many things at<br />
once! But, remember that you’re only<br />
ever working with 2 of the needles at<br />
once, and there will be 2 (or 3) other<br />
needles at rest that are simply holding<br />
the rest of the stitches in the round.<br />
6. Try to keep things steady by resting<br />
your 2 working needles on top of the<br />
2 resting needles on either side. After<br />
a while you’ll find yourself making this<br />
adjustment automatically whenever<br />
you move from one needle to the<br />
next.<br />
7. Most patterns will tell you to work the<br />
first few rounds (or rows, if working<br />
flat) in ribbing or another stitch that<br />
will let the edge lie evenly (instead<br />
of curling up on itself, like stockinette<br />
stitch tends to do), and then change<br />
to the pattern stitch for the rest of the<br />
project. In this case our pattern stitch<br />
is stockinette stitch (knitting every<br />
round), so we need to count the<br />
rounds of stockinette stitch to track<br />
our progress.<br />
26 <strong>KNITmuch</strong> | issue 1
Use a stitch marker to mark the beginning of the round.<br />
“join to work in the round, being careful not to twist“<br />
With double-pointed needles, place the marker after the first stitch on the<br />
first needle, to mark the beginning of the round.<br />
Double-pointed needles can take a bit of practice to get used to.<br />
You can use a row counter gadget to help count<br />
your rounds (or rows), by turning the dial each time<br />
you finish a round. If you’ve lost count and need<br />
to just count them visually, just remember that one<br />
of those little “V” shapes in the fabric is one stitch.<br />
By counting how many of those “Vs” are stacked<br />
on top of each other, you’ll get your count. Just<br />
remember to always include the round that is on<br />
your needle also. For example, in the picture below,<br />
we can count 6 rounds of the pink yarn have been<br />
knitted, plus the one on the needles so that actually<br />
means we have knitted 7 rounds of pink.<br />
Knitting in the round can be great television<br />
knitting or “transit knitting” while on the go,<br />
especially if you’re using a circular needle and<br />
don’t ever have to worry about dropping a<br />
needle by accident.<br />
For these hats, we’ll knit several rounds of ribbing<br />
to start, then continue in stockinette until it’s time to<br />
work the decreases.<br />
Counting how many rounds you have knitted is easy to do on stockinette stitch.<br />
<strong>KNITmuch</strong> | issue 1<br />
27
Making decreases<br />
for your knitted hat<br />
What the top of your hat will look like with all the<br />
finished decreases.<br />
Transfer your stitches to double-pointed needles for the<br />
crown decreases.<br />
Place stitch markers evenly around the needles as<br />
indicated by the pattern.<br />
The k2tog: knitting 2 stitches together.<br />
Eventually the markers will be separated by only 1 stitch.<br />
The next step to finishing our Top This! hat is to do the simple<br />
stitch decreases needed to shape the crown of the hat, or the<br />
very top of the hat.<br />
For this kit, the decreases are worked as a simple spiral, where<br />
the decreases are spaced evenly around each round. You can<br />
see what this looks like in the first photo when it’s all finished.<br />
The first thing you’ll need to do is transfer your stitches from<br />
your circular needle (if you were using one) onto your double-pointed<br />
needles (DPNs). As you decrease stitches, it will<br />
be harder to fit them onto the fixed circumference of the circular<br />
needle, so even if you start a hat with a circular needle<br />
you’ll also need the DPNs in order to finish it.<br />
The other step you’ll need to do is place stitch markers<br />
around the needles, evenly spaced according to the pattern<br />
instructions. Since we’re using the DPNs at this point, the<br />
gap between 2 DPNs counts as a “marker”. So, we’ve got the<br />
same number of stitches on each needle, and the same number<br />
of stitches in between markers. Now we’re ready to start<br />
the decreases!<br />
There are many different ways to work stitch decreases in<br />
knitting – as with many other techniques! In this case we're<br />
working the “K2tog” decrease as indicated by the pattern in<br />
the kit. This is the most simple decrease, which is simply to<br />
“knit 2 stitches together.”<br />
Our decrease rounds are simply to work to 2 stitches before<br />
the marker, then work the k2tog. This involves inserting the<br />
right hand (RH) needle through the first 2 stitches on the left<br />
hand (LH) needle (as seen below), and then continue as you<br />
usually would for a knit stitch by pulling the stitch through<br />
and onto the RH needle.<br />
As new knitters, many of us end up working the K2tog by<br />
accident, not noticing that we are knitting 2 stitches together<br />
instead of just one. Then we end up wondering why the stitch<br />
count has changed, and figure out what went wrong. But in<br />
this case we're doing the decreases on purpose!<br />
For these hats this continues for every marker on every round,<br />
until we're left with only 1 stitch between each pair of markers<br />
(as seen below). At this point, your decreases are finished!<br />
And probably the DPNs are starting to feel a little awkward<br />
and wobbly with most of their stitches decreased away.<br />
All that’s left now are the final finishing steps! These simple<br />
stitch decreases are easy to work and get you almost to the<br />
finish line!<br />
28 <strong>KNITmuch</strong> | issue 1
Finishing your knitted hat the right way<br />
The crown of your hat after all the decreases are finished.<br />
Use a yarn needle to thread the working yarn through the<br />
remaining stitches.<br />
Sewing up the top.<br />
Don’t forget to attach the fun topper!<br />
We’re finally ready to finish up our Top This! hats. Finishing<br />
your knitted hat is the last step, and involves sewing up the<br />
top of the crown, weaving in any other loose ends of yarn,<br />
and in this case, attaching the cute little animal topper that<br />
comes with the kit.<br />
When you’ve completed all the decreases, remove any stitch<br />
markers you were using (they’ve finished their job now!) Cut<br />
your working yarn, but leave a long tail of at least 8" if not<br />
more.<br />
Thread the end of the yarn onto a yarn needle, and thread<br />
the needle through the remaining stitches while they're still<br />
on the knitting needle as in the photo. Remove the knitting<br />
needles as the stitches are threaded. When you’ve got all<br />
remaining stitches threaded onto the yarn, pull it snug and if<br />
you wish, thread the yarn through the stitches again for extra<br />
security (next photo below). When you’re satisfied they are<br />
secure, pull the needle through to the inside of the hat and<br />
weave the yarn through a few stitches on the wrong side of<br />
the work. Tie a knot and cut the yarn, leaving a short end.<br />
Now these little cuties are all finished up and ready to be<br />
worn or saved as gifts! If you’re like me and want to keep<br />
up your knitting all year round, but don’t like big projects<br />
taking up space in your lap during the summer, then knitting<br />
hats are a nice way to keep some small projects in the mix. If<br />
you can add to your gift knitting pile then that is almost like<br />
having money in the bank! Finishing your knitted hat is the<br />
last step in this quick and satisfying process.<br />
<strong>KNITmuch</strong> | issue 1<br />
29
How to fix a dropped knit stitch<br />
Glenna Harris<br />
The dropped stitch can happen when you least expect it! But it can be easily fixed.<br />
Step 1: Secure the live stitch with a stitch marker so it doesn’t drop any further.<br />
When was the last time you discovered<br />
a dropped stitch in your<br />
knitting? If you’re a new knitter<br />
this might be a very stressful<br />
situation! But I can tell you that<br />
as knitter of more than 10 years,<br />
I still drop stitches from time to<br />
time. And, as long as you discover<br />
the dropped stitch within<br />
a few rows, you should be able<br />
to fix it pretty easily.<br />
The first thing to do, once you<br />
discover the dropped stitch, is<br />
to make sure it doesn’t drop<br />
down any farther. Grab a stitch<br />
marker (or safety pin) and close it<br />
through the live stitch.<br />
Next, you’ll need a crochet hook,<br />
preferably one that's close to the<br />
size of the needles you used to<br />
knit your project. I used a 5.5mm<br />
needle for this Top This! hat, and<br />
didn’t have that exact crochet<br />
hook size nearby so the 4.5mm<br />
hook was the closest size I had<br />
available. This is fine, since you’re<br />
not actually going to be using<br />
it for crochet, just to do a quick<br />
pick-up.<br />
To pick up the dropped stitch,<br />
you’ll need to pick it up several<br />
times, one on top of each other,<br />
since there are several loose<br />
strands there that need to be<br />
corrected. This is actually fairly<br />
simple. Follow these steps:<br />
Step 2: Insert a crochet hook through the front of the stitch.<br />
30 <strong>KNITmuch</strong> | issue 1
After securing the stitch and locating<br />
your crochet hook, remove the stitch<br />
marker and then insert the crochet<br />
hook through the stitch as in the<br />
photo.<br />
Next, use the crochet hook to grab<br />
the first loose strand above the<br />
live stitch, and then pull that loop<br />
through the stitch that is still on your<br />
hook. Leave this newly pulled stitch<br />
on the crochet hook, and repeat<br />
those steps over and over again<br />
until you have caught all of the loose<br />
strands, one at a time. You’re done!<br />
The line of stitches you’ve just picked<br />
up will probably be a little bit looser<br />
than the original knitted fabric was,<br />
but once you’ve finished the project<br />
and given it a wash, you’ll never<br />
know the difference.<br />
If you’ve managed to drop two or<br />
three stitches, all right next to each<br />
other, then you can still use this same<br />
process but will need to work one<br />
stitch at a time. It’ll be a little more<br />
painstaking, but can be done.<br />
The alternative, of course, is to simply<br />
pull out your knitting as far as<br />
the stitch has dropped, and re-knit<br />
from that point. The choice is yours<br />
about which would be more time<br />
consuming or frustrating! Usually the<br />
crochet hook solution is the faster<br />
choice. Next time you find yourself in<br />
this situation, you’ll know how to fix a<br />
dropped knit stitch!<br />
Step 3: Use the crochet hook to grab the loose bar just above the dropped stitch.<br />
Pull that bar through the dropped stitch. Leave the pulled loop on the crochet<br />
hook and repeat the process.<br />
Photos by Glenna Harris<br />
Place the last pulled-up stitch back on the needle, and you’re done! You’ll never<br />
know the difference<br />
<strong>KNITmuch</strong> | issue 1<br />
31
Knitting with cables – C4L<br />
Glenna Harris<br />
Cable needles are essential tools for knitting cabled stitches!<br />
A cable needle<br />
is a tool that<br />
every knitter<br />
should have in<br />
their tool kit!<br />
Knitting with<br />
cables – easier<br />
than it seems!<br />
Cable stitches are among the most<br />
popular kinds of stitch patterns out<br />
there. You don’t need to look very long<br />
before coming across patterns that use<br />
cables – socks, hats, scarves, sweaters<br />
and mittens are all just as likely to<br />
show off different kinds of cabled stitch<br />
patterns. This makes cables an all-yearround<br />
kind of technique, and one that is<br />
very versatile to know.<br />
Cables are made by manipulating the<br />
stitches on your row of knitting so that<br />
a few stitches switch places with other<br />
stitches next to them on the needle.<br />
Essentially, a cable stitch isn’t a new<br />
kind of stitch, just a rearrangement<br />
of other knit or purl stitches. So, the<br />
cable needle is used to help with this<br />
'rearrangement'!<br />
easier than it seems!<br />
All cables have a “direction.” They<br />
travel either to the left or to the right,<br />
depending on which direction the front<br />
stitches move. In the picture above,<br />
you can see three sets of 'right leaning'<br />
cables on the right, and three sets of “left<br />
leaning” cables on the left. All of these<br />
stitches are worked as knit stitches, and<br />
all are worked over 4 stitches in total.<br />
In a knitting pattern, these would be<br />
indicated as C4R for the right leaning<br />
ones (cable four right), and C4L for the<br />
left leaning ones (cable four left).<br />
In the photos below we’ll demonstrate<br />
the steps for working a C4L.<br />
C4L means we are working over 4<br />
stitches for the full cable. Typical<br />
cables split this full number into two<br />
halves, where one half of the stitches<br />
travels in the front of the work. So,<br />
here we’re working with 2 + 2 stitches.<br />
32 <strong>KNITmuch</strong> | issue 1<br />
Photos by Glenna Harris
Cable needles are essential tools for knitting cabled stitches!<br />
C4L (left cable over 4 sts) Step 1: Slip 2 sts onto cable needle.<br />
C4L (left cable over 4 sts) Step 2: Knit 2 sts from the left needle<br />
First, take your cable needle and slip<br />
the first 2 stitches onto it from the left<br />
hand needle. This one has a notch in<br />
the middle of the needle to allow these<br />
stitches to settle into the middle and sit<br />
more easily. Right now these stitches<br />
are just hanging out, waiting to be used<br />
again when they are next needed!<br />
The next step is to knit the next 2<br />
stitches as normal (as shown above).<br />
This can feel a bit fidgety with the cable<br />
needle attached to the work, but you’ll<br />
get the hang of it with practice.<br />
These two steps above will be described<br />
in a knitting pattern something along<br />
the lines of “slip 2 sts to cn and hold<br />
in front, k2.” Cable needle is typically<br />
abbreviated as “cn.”<br />
The next and final step is to slip the<br />
stitches on the cable needle back<br />
onto the left hand needle, and then<br />
knit these 2 stitches as normal. You<br />
could even try knitting the stitches<br />
directly from the cable needle, if you’re<br />
comfortable with it!<br />
And then, you’re done! On the left of<br />
the photo above you can see a closeup<br />
of the C4L cable, and how it leans to<br />
the left. There are a few steps involved<br />
in creating a simple cable like this, but<br />
with practice you will get more quick<br />
at it. Some knitters develop habits like<br />
leaving the cable needle tucked behind<br />
their ear like a pencil, or piercing it<br />
through their sweater like a pin, to hold<br />
onto it, ready to grab for the next cable.<br />
In tomorrow’s post will look at the<br />
opposite direction, C4R! Give the C4L a<br />
try if it’s new to you, and see how you<br />
like it. You may find knitting cables with<br />
a cable needle is easier than you think!<br />
C4L (left cable over 4 sts) Step 3: Slip the first 2 stitches back onto the<br />
left hand needle, from the cable needle, then knit them as normal.<br />
<strong>KNITmuch</strong> | issue 1<br />
33
Knitting with cables – C4R<br />
The C4R is worked very similarly to<br />
the basic C4L cable – a cable over<br />
4 stitches that leans to the left.<br />
Cable needles are easy knitting<br />
tools to use!<br />
Cable needles come in different<br />
varieties, but all are essentially a<br />
shorter needle that holds a small<br />
number of stitches for a very short<br />
time. Cable stitches are worked by<br />
manipulating traditional knit and<br />
purl stitches, so they don’t create<br />
any new stitches, they just rearrange<br />
them. Below, we’ll demonstrate<br />
the C4R cable.<br />
Just like the C4L, because we’re<br />
working over 4 stitches, the first<br />
step is to slip 2 stitches onto the<br />
cable needle. Typical cables work<br />
with half the stitches at a time (although<br />
that’s not always the case).<br />
When slipping your stitches, slip<br />
them “as if to purl”, in other words,<br />
slip them so that you don’t twist<br />
the stitches in the process.<br />
The next step is to hold the cable<br />
needle behind the work, as opposed<br />
to holding it in front of the<br />
work for the C4L. You can see in<br />
the two photos above how this<br />
looks. Again, the first time you do<br />
this might feel a little awkward, but<br />
that’ll get easier with practice!<br />
The next steps proceed just as we<br />
did with our C4L before – hold the<br />
stitches on the cable needle, then<br />
knit the next 2 stitches from the<br />
left hand needle like normal. The<br />
stitches on the cable needle are<br />
waiting patiently, just held in back<br />
instead of in front.<br />
Finally, transfer the stitches from<br />
the cable needle back to the left<br />
hand needle, and then knit those<br />
stitches like normal. That’s it!<br />
You’ve done a C4R. Hold it up and<br />
admire your handiwork.<br />
Depending on the pattern you’re<br />
using, cable stitches might be<br />
written down as ‘back’ or ‘front’<br />
cables instead of ‘right’ or ‘left’.<br />
This refers to the placement of the<br />
cable needle rather than the visual<br />
direction of the cable.<br />
So, a “C4R” and “C4B” are the<br />
same thing, just as “C4L” and “C4F”<br />
are the same. It’s more typical for<br />
contemporary patterns to use the<br />
left and right terminology, but<br />
there are decades of knitting patterns<br />
out there to knit from, so it’s<br />
good to know just in case.<br />
Either way, cable needles are easy<br />
tools to learn to use and I hope<br />
you’ll enjoy knitting with cables<br />
this coming fall and winter! Stay<br />
tuned tomorrow for knitting fun!<br />
C4L – C4R combination<br />
34 <strong>KNITmuch</strong> | issue 1
C4R (right cable over 4 sts) Step 1: Slip first 2 stitches onto a cable needle.<br />
C4R (right cable over 4 sts) Step 3: Knit the next 2 stitches as normal.<br />
C4R (right cable over 4 sts) Step 2: Hold the cable needle in back of the<br />
work (behind the needles).<br />
C4R (left cable over 4 sts) Step 4: Slip the 2 stitches from the cable needle<br />
back onto the left hand needle, to knit as normal.<br />
Holding the cable needle behind the work for C4R.<br />
Beautiful knitwear is<br />
made of the simple art<br />
of knitting cables.<br />
<strong>KNITmuch</strong> | issue 1<br />
35
A better one-row buttonhole Glenna Harris<br />
Whenever I go shopping for buttons I always<br />
end up coming home with several<br />
different kinds, even if I only need them<br />
for one project at the time! Building up<br />
a button collection of your own is a fun<br />
task, so you’ll eventually be prepared and<br />
ready for different button situations.<br />
There are many different ways to knit a<br />
button-hole. One of the first methods<br />
many of us encounter is a two-row button-hole<br />
method (shown second on that<br />
page), where the knitter first binds off<br />
stitches for the button-hole on the first<br />
row, then on the second row coming back,<br />
casts on new stitches over top of the gap<br />
created by that first bind-off. This is an<br />
easy way to get the hang of button-holes<br />
at first, because all knitters know how to<br />
do at least one basic bind-off and cast-on.<br />
If you’re a knitter who has advanced to<br />
sweaters – whether for adults or children<br />
– you’ve probably encountered the need<br />
for button-holes in your knitting! Button-holes<br />
can be tricky to get the hang<br />
of, and there are many different ways to<br />
make them. Trying a new button-hole<br />
technique could make all the difference<br />
for your next cardigan project.<br />
There’s also a huge variety of buttons out<br />
there to choose from. I love the versatile<br />
style of these round ones (pictured left),<br />
each about an inch wide. But these adorable<br />
owls and lobsters (pictured below)<br />
would be amazing on a little children’s<br />
sweater. They are longer than they are<br />
wide – so choose your button-hole width<br />
based on the narrower length.<br />
36 <strong>KNITmuch</strong> | issue 1<br />
Photos and video by Glenna Harris
An alternative to this is the one-row horizontal button-hole<br />
method, where both of these steps are done on<br />
the same row. The advantage with this technique is that<br />
it creates less of a gape in the button-hole itself, since<br />
both the bind-off and cast-on happen on the same row.<br />
It requires just a little bit more attention, but the skills you<br />
need are very similar.<br />
In the video clip below, I’ll show you how to work the<br />
one-row horizontal buttonhole. It just takes a few minutes<br />
to learn!<br />
I hope you enjoyed the little clip, and if you’re new to the<br />
one-row button-hole technique, be sure to give it a try!<br />
If it’s still not your favorite technique, be sure and keep<br />
looking around for other methods and see what you like<br />
best. Fall is coming soon, and so is sweater weather, so<br />
we’ll be making a lot of button-holes very soon. Trying a<br />
new technique could make all the difference!<br />
How to work the one-row horizontal buttonhole<br />
<strong>KNITmuch</strong> | issue 1<br />
37
Pom-poms<br />
– the cutest knitted accessories, right?<br />
Glenna Harris<br />
Pom poms make<br />
darling decorations<br />
on their own, and<br />
the perfect finish<br />
for winter hats and<br />
mittens. You just need<br />
these tools and your<br />
favorite scrap yarn!<br />
Pom-poms are one of the final flourishes<br />
that can take your finished knitting<br />
to the “next level.” They’re often used as<br />
an accessory on top of a knitted hat, or<br />
at the edge of a mitten cuff. You might<br />
even have seen them attached to the<br />
corners of baby blankets, or the ends<br />
of scarves. These little darlings are very<br />
versatile!<br />
There are a lot of 'low tech' ways to<br />
make them, but if you want that almost<br />
magazine-looking quality, try using<br />
a pom-pom maker. They'll give your<br />
pom-poms a symmetrical, polished<br />
quality that’s hard to beat, and also<br />
come in different sizes for different<br />
pom-pom needs. In the photos, I’m<br />
going to show you how it works! The<br />
results are hard to beat.<br />
First, gather your materials. You’ll need<br />
a bit of scrap yarn (any weight will<br />
do – I’m using worsted-weight wool to<br />
demonstrate these), your pom-pom<br />
maker in the size you prefer, and a<br />
dull tapestry needle/wool needle for<br />
the smaller sized pom-poms if that’s<br />
the size you’re making. The pom-pom<br />
makers I’m using in this demonstration<br />
come in 3 sizes that all snap together.<br />
This means you can use one size at a<br />
time, or combine 2 or 3 sizes together<br />
to adjust the size if you wish.<br />
38 <strong>KNITmuch</strong> | issue 1<br />
If you’re using the smaller<br />
pom-pom makers, it’s easier<br />
to use a tapestry needle to<br />
thread the yarn through the<br />
smaller hole in the center.
All ready? Let’s start our pom-poms!<br />
1<br />
Step 1 Begin with the 2 pom-pom rings facing together with<br />
their ‘flat’ side out. start wrapping your yarn around both of the<br />
rings together, and keep wrapping all the way around.<br />
Step 2 Keep wrapping the yarn until it’s as thick as you want it<br />
to be. The more you wrap, the more solid your pom-pom will<br />
be. I recommend wrapping it at least twice around all the way,<br />
but keep wrapping more if you want a really sturdy pom-pom!<br />
Step 3 Once you’ve wrapped the yarn as much as you want to,<br />
hold the rings – which now resemble a “yarn doughnut!” – firmly<br />
in the center, and start cutting all around the outside edge of<br />
the rings.<br />
2<br />
The first time I tried<br />
this, I worried the<br />
yarn would simply fall<br />
out of the center of<br />
the ring and that it<br />
wouldn’t work at all.<br />
I was wrong! As long<br />
as you’ve created<br />
enough yarn wraps,<br />
the yarn will simply<br />
rest nestled up all the<br />
strands together in<br />
3 4<br />
the center.<br />
Step 4 Slowly pull the two rings apart, to expose the center of<br />
the little yarn bundle – but be careful not to completely remove<br />
them. This will look a bit like two jellyfish stuck together.<br />
Step 5 With the center of the yarn bundle exposed, tie 1 or 2<br />
longer strands of yarn around the whole works, and tie a knot<br />
firmly. Now it’s safe to remove the rings!<br />
Step 6 Once you’ve removed the rings, all that’s left to do is<br />
snip away any uneven ends and then give it a “floof” with your<br />
fingers, and you’re done! It’s a perfect little pom-pom, ready to<br />
adorn the top of your next winter hat.<br />
If you keep your pom-pom maker handy in your knitting toolkit,<br />
you’ll be ready to finish your hat and mittens if they call for<br />
pom-poms right away. Or, you can make a few at a time when<br />
you come to the end of a project, as a way to use up small<br />
amounts of extra yarn. Pom-poms make great little decorations<br />
on their own, or strung together to make a garland! Pompoms<br />
are gorgeous final flourishes to take your knitting to the<br />
next level.<br />
Photos by Glenna Harris<br />
5<br />
6<br />
<strong>KNITmuch</strong> | issue 1 39
Stitch holders are safety nets for your knitting<br />
Glenna Harris<br />
Stitch holders come in many sizes and are<br />
designed to securely hold your stitches aside.<br />
We talked about stitch markers earlier, now we’re<br />
going to take a moment to extol the virtues of<br />
stitch holders. These little life-savers aren’t hard to<br />
use, but we tend to use them while making slightly<br />
more advanced projects, so as you progress in<br />
your knitting skills you’ll find yourself reaching for<br />
them more and more. Stitch holders are safety<br />
nets for your knitting.<br />
Stitch holders come in different sizes, ranging from<br />
just a few inches long to nearly a foot. They’re<br />
a staple of the yarn shop tools display, and so<br />
helpful to use once you start knitting garments<br />
like sweaters. They're designed to do exactly what<br />
you might think – hold stitches aside, securely, for<br />
a portion of your project. (If you needed to put<br />
the whole piece aside for a short while, you would<br />
simply leave it on the needles).<br />
You’ll commonly see pattern directions telling<br />
you to use a stitch holder when you’re starting<br />
the neckline of a sweater while working from the<br />
bottom up. On the sweater pictured above, (which<br />
is the Ravine pullover pattern), you can see the<br />
center of the scoop neckline starts across the<br />
middle cable panel, and on each side just above<br />
that are the rows of decreases that shape the rest<br />
of the scoop. This bottom center of the scoop<br />
is first established by holding the stitches aside,<br />
and then working each side of the sweater front<br />
one side at a time. Once you’ve held the middle<br />
stitches aside, you’re essentially working two<br />
pieces, not just one.<br />
When the sweater is all finished, the collar is<br />
worked by picking up stitches all along the edge<br />
of the neck, and transferring those stitches held<br />
aside back onto your needles so that they can be<br />
worked into the ribbing as pictures. So, once the<br />
sweater is done you can’t really tell that anything<br />
was temporarily held aside! It’s all just one step in<br />
the process of completing your sweater.<br />
40 <strong>KNITmuch</strong> | issue 1
These two photos show what this<br />
looks like on a cabled swatch – I’ve<br />
taken the middle stitches and put<br />
them aside on the stitch holder. At<br />
this point, if it were a “real” sweater,<br />
I would continue working one side<br />
at a time and do some decreases<br />
on each side of the held stitches<br />
to finish shaping the rest of the<br />
neckline.<br />
Another popular place to use a<br />
stitch holder is on the under-arm of<br />
a sweater knitted in the round, or<br />
when needing to hold aside thumb<br />
stitches on a mitten. This is where it<br />
helps to have a few different stitch<br />
holder sizes handy, depending on<br />
how many stitches you’re working<br />
with at once.<br />
If you’re absolutely stuck and don’t<br />
have a stitch holder handy, you can<br />
accomplish the same task by using<br />
some “waste yarn” (a bit of extra<br />
yarn you’re not using) or even dental<br />
floss to hold onto the stitches. The<br />
advantage of stitch holders, though,<br />
is the security of being able to snap<br />
them closed! At those times when<br />
you’re working on a large project, it<br />
definitely feels like stitch holders are<br />
safety nets for your knitting.<br />
We’re using this cabled swatch as though it is the front of<br />
a neckline, to separate out the middle section of stitches.<br />
Simply slip the stitches from the needle onto the stitch<br />
holder, and then lock it closed.<br />
Photos by Glenna Harris<br />
<strong>KNITmuch</strong> | issue 1<br />
41
What you should know about<br />
Michelle Nguyen<br />
Red Heart<br />
[ Cutie Pie Yarn<br />
The very first thing<br />
that ran through my<br />
mind when I opened<br />
Red Heart’s Cutie Pie<br />
yarn was ‘omg soft.’<br />
It wasn’t in a clear<br />
enunciated way either;<br />
it was in that muffled<br />
way that only truly soft<br />
yarn would be able to<br />
invoke.<br />
The texture of this yarn takes a couple minutes<br />
to adjust to. When you’re feeling it all wound<br />
up in the ball it's very soft. When you go to<br />
cast on it’s still soft, but the texture likes to hang<br />
onto the needles a little bit. The very first time<br />
I cast on was with bamboo needles, but the<br />
stitches weren’t sliding particularly well. When<br />
I switched to wood needles my knitting was<br />
flowing nicely again. I checked how Cutie Pie<br />
did with metal needles and it went well. The<br />
smoother the needle surface, the easier my<br />
stitching went.<br />
Red Heart Cutie Pie Yarn is ‘omgosh so soft.<br />
42 <strong>KNITmuch</strong> | issue 1
Snowflake<br />
color work<br />
swatch<br />
Playing with<br />
cables using<br />
Cutie Pie<br />
yarns<br />
The chenille fuzziness of Cutie Pie yarn also<br />
means that all your stitches look even. All the<br />
stitches look smooth together rather than<br />
individual stitches being accentuated. If you’re<br />
looking for something to do color work in,<br />
this yarn would be great. If you’re looking for<br />
something to clearly define some cable work<br />
or a textured stitch, I would try something like<br />
Red Heart’s With Love yarn.<br />
The swatch above is made with the colors<br />
Indigo and Cotton. While you can see the<br />
color work perfectly, it is more difficult to<br />
make out individual stitches. I think it makes<br />
any stranded knitting really pop and look<br />
much more realistic. When you’re knitting an<br />
intricate design, it sometimes looks pixelated.<br />
The velvet texture of Cutie Pie yarn makes the<br />
design slightly softer and adds depth to the<br />
picture you’re trying to create.<br />
Cutie Pie is made with 100% polyester and<br />
washing instructions are machine wash warm,<br />
gentle cycle; tumble dry low. It’s the perfect<br />
yarn for baby knits with the ease of washing<br />
and the extreme softness. I tied a couple<br />
knots into my knitting to see if I could make it<br />
uncomfortable but the yarn is just so soft you<br />
can’t even feel where the knots are.<br />
Red Heart’s Cutie Pie yarn is a fantastic yarn<br />
for all things baby, but don’t stop there.<br />
Any garment that is worn close to the skin<br />
would lend itself well to this yarn. Soft,<br />
warm cowls and luxurious slippers would be<br />
particularly coveted.<br />
Photos by Michelle Nguyen<br />
<strong>KNITmuch</strong> | issue 1<br />
43
4<br />
Michelle Nguyen<br />
essential tips<br />
when knitting<br />
for babies<br />
Knitting for children, especially babies,<br />
is one of the most addictive kinds of<br />
knitting you can find. Knitting tiny<br />
sweaters and blankets have all the fun<br />
of a regular garment with the added<br />
benefit of taking less time. Plus, they’re<br />
just too cute. However, here are 4 tips<br />
when knitting for babies we knitters<br />
should keep in mind, especially when<br />
knitting for someone else’s little ones<br />
Cutie Pie yarn<br />
in colors<br />
Jelly,<br />
Indigo and<br />
Cotton<br />
44 <strong>KNITmuch</strong> | issue 1
Red Heart Cutie Pie Yarn is so soft therefore perfect for knitting for babies.<br />
Cutie Pie yarn in colors Cotton, Koala and Splash<br />
Have a sense of style<br />
I know this should go<br />
without saying, but<br />
it’s one thing a lot of<br />
gift givers (or makers)<br />
forget. Just because<br />
you like the style of<br />
something, doesn’t<br />
mean everyone else<br />
will. I know we’re<br />
all thinking that this<br />
adorable little sweater<br />
is for a baby and the<br />
babies don’t have<br />
a sense of style, but<br />
mommy and daddy<br />
do. If the parents have<br />
a really plain sense of<br />
style, chances are, they<br />
aren’t going to dress<br />
their little girl in tons of<br />
frills and bows.<br />
Photos by Michelle Nguyen<br />
1 2 3 4<br />
Go functional<br />
You know what every<br />
new parent needs?<br />
Blankets. I was<br />
recently the hostess<br />
of a baby shower and<br />
didn’t realize, until<br />
that moment, how<br />
many sheets, blankets,<br />
cloths, towels, etc.<br />
are required for one<br />
small baby. If you’re<br />
not totally sure if<br />
the garment you’re<br />
looking at knitting<br />
is going to be well<br />
received, blankets are<br />
always used!<br />
Wash-ability would<br />
also be under the<br />
functional headline. If<br />
you’re looking to make<br />
an heirloom, handwash<br />
only would be<br />
acceptable. If you’re<br />
looking to make<br />
something a parent<br />
would actually use, I<br />
would highly suggest<br />
a fiber that is machine<br />
washable.<br />
Think color palette<br />
If it isn’t obvious, I’m<br />
a huge color person.<br />
I love all shades and<br />
will admit to reigning<br />
myself in when it<br />
comes to matters<br />
of choosing colors<br />
for babies. While<br />
I might think rich<br />
colors are awesome,<br />
some mothers might<br />
object. If there’s a color<br />
palette for the nursery<br />
a matching blanket will<br />
be safe. Odds are the<br />
parents have picked<br />
colors they like for their<br />
child’s room.<br />
Another good thing<br />
to think about is<br />
gender stereotypes.<br />
It’s more and more<br />
common for parents<br />
to break the ‘blue is<br />
for boys’, ‘pink is for<br />
girls’ color schemes. I<br />
know there are strong<br />
feelings on both sides<br />
of the color-stereotype<br />
line; it would be best<br />
to find out if there are<br />
any strong feelings<br />
either way.<br />
Safety<br />
This is something<br />
that can be easily<br />
overlooked, but of<br />
paramount importance.<br />
If knitting a textured<br />
blanket, have a care,<br />
the lacework could<br />
get tangled around<br />
little fingers and toes.<br />
Make sure buttons<br />
are sewn on securely<br />
and all pom poms<br />
and bobbles are kept<br />
within reason to avoid<br />
choking hazards.<br />
Taking these 4<br />
tips when knitting<br />
for babies into<br />
consideration will<br />
ensure your lovely<br />
knitted gift is received<br />
and used with joy.<br />
A few well placed<br />
questions could save<br />
you hurt feelings and<br />
frustration. If you’re<br />
going to spend hours<br />
making something<br />
why not make sure it<br />
meets the stylistic and<br />
safety standards of the<br />
recipient.<br />
<strong>KNITmuch</strong> | issue 1<br />
45
Michelle Nguyen<br />
Hand Knit Snuggle Sack<br />
A snuggle sack isn’t your ordinary<br />
blanket; it’s like swaddling without<br />
the careful wrapping. These snuggle<br />
sacks are becoming more and more<br />
popular over the past couple years<br />
and are an excellent shower gift.<br />
It’s like giving a baby blanket with<br />
significantly less knitting! Here’s how<br />
to make a hand knit snuggle sack…<br />
A trendy baby shower gift<br />
skill level easy<br />
finished measurements 17" x 13"<br />
materials<br />
1 ball Cutie Pie in color Destiny (Color A)<br />
1 ball Cutie Pie in color Splash (Color B)<br />
1 ball Cutie Pie in color Koala (Color C)<br />
1 circular needle US 7 [4.5mm] 16''<br />
1 set double pointed needles US 7<br />
[4.5mm]1 tapestry needle<br />
This pattern is knit in the round with<br />
the yarn held double. I wound the<br />
skeins into two separate balls and<br />
worked from there, but you can also<br />
work from a strand pulled from the<br />
inside and a strand pulled from the<br />
outside. There’s a much greater<br />
chance of tangles, but it can be done.<br />
This pattern is for a large snuggle<br />
sack for 8 to 12 month old, if you’re<br />
attempting to make a newborn size,<br />
subtract 20 stitches and 2" in length<br />
for each color block. In the pattern I’ll<br />
be writing color A, B and C; if you wish<br />
to change the colors simply switch<br />
them out and follow the pattern.<br />
Red Heart<br />
[ Cutie Pie Yarn<br />
46 <strong>KNITmuch</strong> | issue 1
Cast on 80 sts in color A, join into<br />
the round, place marker, and knit<br />
in stockinette for 4''. Make the<br />
folded hem. With RS facing, fold<br />
the cast on edge away from you<br />
and hold behind the working needle.<br />
Pick up one stitch from cast<br />
on edge and knit it together with<br />
the next stitch on working needle.<br />
Continue to do this until all the<br />
cast on stitches have been knit.<br />
Knit one round plain. The next<br />
round, add 10 stitches evenly<br />
through the stitches on the needle.<br />
If you’re working with 80<br />
stitches, you’ll knit 7 then knit<br />
in front and back of loop. After<br />
increase row is finished, knit in<br />
stockinette until the snuggle sack<br />
is 6'' in total. Switch to color B and<br />
knit in stockinette until this section<br />
is 6'' as well. Finally switch to color<br />
C and continue in stockinette until<br />
this color block is 5''.<br />
Begin the decreases as follows:<br />
Row 1: *K8, k2tog* repeat<br />
Row 2: K all stitches<br />
Row 3: *K7, k2tog* repeat<br />
Row 4: K all stitches<br />
Row 5: *K6, k2tog* repeat<br />
Row 6: K all stitches<br />
Continue in this manner, switching<br />
into double pointed needles when<br />
needed, until you reach K1, k2tog.<br />
After completing K1, k2tog, there’s<br />
no plain stockinette row, work<br />
K2tog.<br />
Cut your working yarn, leaving a<br />
12'' tail. Thread the tail onto your<br />
tapestry needle and thread the<br />
yarn through the live stitches. Pull<br />
tight and weave in the end.<br />
Finished folded hem.<br />
Finish the snuggle sack by threading yarn onto your<br />
tapestry needle then threading the yarn through<br />
your live stitches. Pull tight and weave in the end.<br />
The bottom of the snuggle sack<br />
complete with decreases. Ends just<br />
need to be woven in.<br />
You can’t beat the softness of<br />
Red Heart Cutie Pie yarn<br />
to make this snuggle sack.<br />
This hand knit snuggle sack is<br />
one of the most appreciated<br />
baby knits I’ve ever made.<br />
It keeps baby ensconced in<br />
soft warmth with no danger<br />
of little toes peeking out<br />
and getting cold. There’s no<br />
tucking corners or fussing<br />
with multiple blankets, just<br />
one cozy little cocoon.<br />
Photos by Michelle Nguyen<br />
<strong>KNITmuch</strong> | issue 1<br />
47
Michelle Nguyen<br />
Creative Cabled Cowl<br />
One of the most soughtafter<br />
Christmas gifts is a<br />
smashing cabled cowl! A<br />
cowl is a very versatile<br />
accessory that adds<br />
warmth and style to any<br />
wardrobe, so much so that<br />
it's often worn in place<br />
of a necklace. Imagine<br />
knitting one up in an<br />
intricate cabled pattern<br />
using yummy yarn. Here's<br />
a pattern that looks<br />
complicated but is really<br />
very simple. The classic<br />
18'', three-button cowl<br />
is the easiest cable cowl<br />
you'll ever memorize.<br />
the easiest cabled cowl you’ll ever memorize<br />
skill level easy<br />
finished measurements 18" x 8"<br />
materials<br />
1 ball of Red Heart's With Love in color<br />
Iris<br />
1 needle US 9 [5.5mm]<br />
1 tapestry needle<br />
The texture of<br />
Red Heart’s ‘With Love’ yarn<br />
lends itself perfectly to the<br />
{Creative Cabled Cowl<br />
48 <strong>KNITmuch</strong> | issue 1
Cast on 36 stitches and work in a k1 p1<br />
seed stitch for an inch ending on a wrong<br />
side row. Continue in seed stitch for 4 sts,<br />
place marker, knit row one of the chart<br />
below, place marker and finish last four sts<br />
in seed stitch.<br />
Continue starting with 4 sts in seed stitch<br />
then work the next pattern row.<br />
I would suggest knitting until the cowl is<br />
18'' in length to give you a nice snug fit<br />
to keep you warm on a cold winter day.<br />
If you prefer a looser fitting cowl, do as<br />
many repeats as you feel comfortable with.<br />
When you’re ready to do the buttonholes,<br />
stop the chart after row 8 and re-establish<br />
your seed stitch. Knit half an inch in<br />
seed stitch then place your buttonholes<br />
accordingly.<br />
Row 1: Knit 4 sts in seed stitch pattern,<br />
then bind off three stitches, knit 10 more<br />
sts in seed stitch and bind off three, knit<br />
9 sts in seed stitch pattern, bind off three<br />
and finish last four sts in seed stitch.<br />
Row 2: Continue in seed stitch pattern<br />
until you reach the bound off areas and<br />
cast on two sts using the backwards loop<br />
method.<br />
Work in seed stitch for another half inch<br />
and bind off. Make sure you re-establish<br />
the seed stitch after the buttonholes<br />
properly or your seed stitch will turn into a<br />
rib stitch.<br />
Now all you have left to do is sew on<br />
your buttons!<br />
This cowl perfectly covers the space your jacket<br />
leaves open to the unforgiving winter winds. We<br />
all have a friend who is always cold, keep them<br />
warm with this beautiful creative cabled cowl.<br />
Photos by Michelle Nguyen<br />
<strong>KNITmuch</strong> | issue 1<br />
49
The benefits of knitting with<br />
Red Heart Sashay Fringe yarn<br />
Michelle Nguyen<br />
Red Heart’s Sashay Fringe yarn<br />
is a very interesting and unique<br />
product, so I wanted to talk<br />
about my specific experiences<br />
making the Positive Pink Ruffles<br />
scarf pattern. The ruffle yarn,<br />
without the fur, was very popular<br />
in the not-too-distant past and<br />
as a result there are thousands<br />
of patterns you can make. The<br />
difference is you get a bit of<br />
extra flair when knitting them<br />
with Sashay Fringe. Not only this,<br />
see the benefits of knitting with<br />
Sashay Fringe yarn.<br />
I absolutely love this yarn for<br />
scarves because it’s so easy, but<br />
it looks much more difficult than<br />
it actually is. This is perfect for<br />
someone who is just starting out<br />
and looking for a fun project, but<br />
also for tempting your friends<br />
into knitting! The yarn counts as<br />
a bulky, but you’re just knitting in<br />
the mesh, as seen on the how-to<br />
video.<br />
First thing is to cast on; this can<br />
be really tricky if you’re not sure<br />
what you’re doing with this yarn.<br />
The mesh already has holes in it<br />
so you aren’t doing a long-tail<br />
cast on or anything. You’re using<br />
the holes in that mesh webbing<br />
to cast on. Sashay Fringe doesn’t<br />
have the little rail road track<br />
in the top, so I would suggest<br />
starting at the holes nearer to the<br />
center. This way you won’t see<br />
much of the mesh itself as you’re<br />
knitting and the stitches you have on<br />
your needle are a little more defined.<br />
50<br />
<strong>KNITmuch</strong> | issue 1
Sashay your way onto the Fringe of Fashion<br />
There aren’t that many stitches<br />
either, the pattern from the Red<br />
Heart website calls for 6 stitches.<br />
Trust me, this is the most difficult<br />
part of the whole thing! Once<br />
your cast on is done, it's time to<br />
get knitting.<br />
The scarf knits up really fast, but<br />
in the first few rows you may find<br />
yourself thinking it’s incredibly<br />
ugly. This is normal, it’s like<br />
knitting lace; it doesn’t look good<br />
until you are closer to the end.<br />
With lace that means blocking,<br />
with Sashay Fringe, it means a bit<br />
closer to the end.<br />
One difference between ruffle<br />
yarns and Sashay Fringe that<br />
I really enjoyed, is the lack<br />
of maintenance while you’re<br />
knitting it. With the regular<br />
ruffle yarn you have to smooth<br />
it out as you’re knitting it to get<br />
a real ‘ruffled’ effect. The fur<br />
edge is what you’re looking to<br />
accentuate with this yarn and<br />
there’s no need to smooth it out.<br />
The weight of the fur itself makes<br />
sure the yarn isn’t bunched up<br />
within the knitted folds of the<br />
scarf. Closer to the end of the<br />
ball the mesh is folded into the<br />
fur, but that is a simple matter<br />
of unfolding as you go along.<br />
If you place your thumb in the<br />
folded groove, as you move<br />
along the strand it will open up<br />
automatically.<br />
The Rows of Ruffles pillow is<br />
something that I would dearly<br />
love to try; I relish in the thought<br />
it will turn out so soft. This<br />
pattern is linked to a crochet<br />
pattern and my crochet skills<br />
leave something to be desired,<br />
so I would knit the whole thing.<br />
Photos by Michelle Nguyen<br />
To convert this pillow pattern to a<br />
knitting pattern find your knitting<br />
gauge using Sashay Fringe, lift<br />
up the ruffles to the stitches<br />
underneath. My gauge was 4<br />
stitches in 1", so if my pillow was<br />
22" around, I would have to cast<br />
on 88 stitches to cover that pillow.<br />
This isn’t a proper pattern, just<br />
some quick and dirty math to get<br />
the knitted pillow you want.<br />
You’ll might have to keep an eye<br />
on a pillow like that to make sure<br />
it doesn’t migrate to a friend’s<br />
home. It would be a great idea<br />
for covering old pillows that are<br />
faded or stained. Furthermore,<br />
it works up so quickly, you can<br />
make several to give to your<br />
girlfriends for the upcoming<br />
holiday season. Knit it up in their<br />
favorite color or in the color to<br />
match up with their decor.<br />
Knitting a scarf with Sashay Fringe<br />
isn’t the only thing. With the many<br />
patterns out there for ruffle yarn,<br />
there’s no end to the accessories<br />
you can make, as there are<br />
several benefits of knitting with<br />
Sashay Fringe yarn. All those<br />
patterns will be brand new again<br />
when knit with Sashay Fringe. The<br />
little edge of fur brings a totally<br />
different look to your favorite<br />
patterns.<br />
Give it a whirl!<br />
Using the holes in the mesh webbing to cast on the<br />
Sashay Fringe<br />
Red Heart Sashay Scarf cast on<br />
Running your thumb along the inside as you knit<br />
makes it open right up<br />
The stitches can be seen between my finger and the<br />
ruler, that is one row of four stitches.<br />
<strong>KNITmuch</strong> | issue 1<br />
51
Get more knitting fun in<br />
A NEEDLE PULLING THREAD<br />
GAMES<br />
AT<br />
THE<br />
COLOSSEUM<br />
A Needle Pulling Thread<br />
10 th Anniversary <strong>Issue</strong>!<br />
A NEEDLE PULLING THREAD<br />
Sweetheart<br />
Entrelac Cowl<br />
Crystal<br />
Lattice<br />
visit<br />
www.ANPTmag.com<br />
to order!<br />
ADay at the<br />
charity<br />
knitting<br />
Fall 2<strong>01</strong>5 Volume 10 <strong>Issue</strong> 3<br />
12<br />
Halloween &<br />
Christmas<br />
ornaments<br />
3QUILTS<br />
4 sweaters<br />
2 shawls<br />
+ socks,<br />
hats,<br />
scarves<br />
and more!<br />
or call 1-866-969-2678<br />
L ife<br />
better<br />
with<br />
12<br />
goes<br />
needlework!<br />
Chalet<br />
Wrap<br />
58<br />
50<br />
Beach<br />
Date-Night<br />
KNIT sweater<br />
52 <strong>KNITmuch</strong> | issue 1


