Create successful ePaper yourself
Turn your PDF publications into a flip-book with our unique Google optimized e-Paper software.
2014<br />
Vol. 02<br />
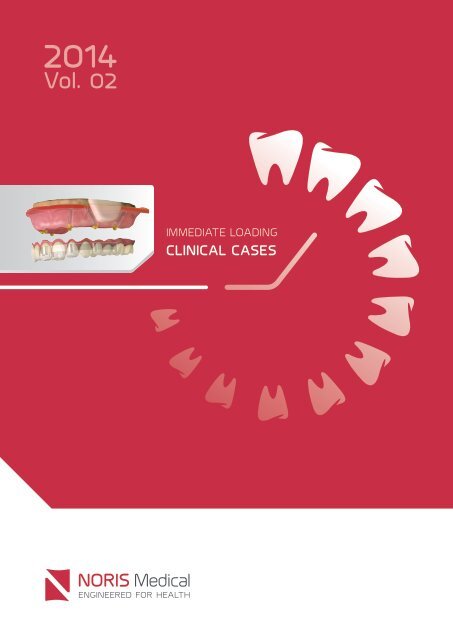
IMMEDIATE LOADING<br />
CLINICAL CASES
Protocol of an Immediate Loading Procedure in Severe<br />
Mandibular Atrophy.<br />
With the courtesy of Dr. Balan Igal D.M.D.<br />
A 79 year old patient – Non-smoker<br />
Anamnesis:<br />
• Controlled Hypertension;<br />
• Hypothyroidism;<br />
• Mastectomy (15 years prior to the date of examination);<br />
Principal Patient’s Complaints:<br />
• Impaired aesthetic;<br />
• Difficulty in chewing due to loss of posterior teeth;<br />
• Bad breath odor;<br />
• Teeth mobility;<br />
Intraoral examination:<br />
• Severe bilateral alveolar bone loss – posterior mandible.<br />
(Fig.1);<br />
• Reduced posterior occlusal support;<br />
• Chronic generalized severe periodontitis;<br />
Treatment Plan:<br />
• Mandibular clearance (Fig.2);<br />
• Placement of four implants:<br />
Two Cortical implants at the extraction sites;<br />
Two tilted implants at the posterior area;<br />
Cortical implants are aggressively threaded<br />
implants that provide primary stability and bi-cortical<br />
anchoring (Fig3). These implants allow immediate<br />
loading due to their primary high stability.<br />
Cortical implants are provided with a smooth<br />
“Neck” surface (i.e. with no aggressive roughness).<br />
The smooth neck surface reduces the adherence of<br />
perio-pathogens thus reducing the development of<br />
inflammatory process around the neck area<br />
(i.e. mucositis and peri-implantitis).<br />
The tilted implants are to be installed as distally as<br />
possible in order to shorten any possible extension<br />
and its resulting cantilever effect.<br />
These implants are also of the smooth neck surface<br />
type, for the same reasons as detailed above (Fig4);<br />
• The implants would be immediately loaded and<br />
rehabilitated by a screws retained acrylic bridge,<br />
reinforced by a 3 mm induction welded titanium<br />
(grade 5) bar;<br />
• The bridge to be is a screw retained type restoration,<br />
based on angle correcting multi unit abutments;<br />
Fig.1 Panoramic X-Ray demonstrating extensive bone loss in the<br />
posterior mandible.<br />
Fig.2 Post extraction site<br />
Fig.3 Cortical implant (4X18 mm) with an aggressive thread for<br />
a better primary stability and with a smooth neck surface for reduction<br />
of bacterial adherence and inflammatory process development.
Fig. 4 TUFF Implant (37.5X11.5 mm) with a smooth neck surface for<br />
reducing bacteria accumulation and infection.<br />
Fig.5 Cortical implant located in the extraction site of tooth 43. The<br />
Coronal area is left exposed due to bone loss.<br />
Fig.6 Straight Multi-Unit abutment mounted on the Cortical implant.<br />
Fig.7 Cortical implant (4X20 mm) located in the extraction site of<br />
tooth 33.<br />
Fig.8 Four implants with Multi-Units showing the Decortication of the<br />
bone prior to bone grafting.<br />
Fig.9 Bone augmentation using HA & Calcium sulfate bone graft.<br />
Fig.10 Snap-on Transfer for an easy impression taking using closed<br />
tray technique.<br />
Fig.11 Post op. panoramic X-ray, taken at the day of the operation.
Immediate loading protocol of a cortical implant placed in<br />
a post extraction socket with an extensive bone loss.<br />
With the courtesy of Dr. Balan Igal D.M.D.<br />
Primary stability (mechanical stability) of the dental implants<br />
is a key factor with high correlation to implant survival rate.<br />
Micro movements that exceed 200µm may result in implant<br />
failure. Insertion and loading of an implant placed in a<br />
fresh socket requires adequate primary stability. Due to its<br />
aggressive threaded design, the Cortical implant enables<br />
bi-cortical anchorage thus increasing the primary stability<br />
which is required for immediate loading.<br />
The following <strong>case</strong> presents an implant placement in a<br />
post extraction site after enucleation of a specimen which<br />
was later diagnosed as a radicular cyst. The chronic<br />
inflammatory process caused severe bone loss.<br />
61 years old female patient – nonsmoker.<br />
Declares to be of good health.<br />
Chief complains:<br />
• Unstable denture in the lower jaw;<br />
• Impaired aesthetic;<br />
• Teeth mobility;<br />
• Bad breath odor;<br />
Clinical examination:<br />
• Lower jaw: Moderate alveolar bone loss and root<br />
remnants;<br />
• Upper jaw: Chronic generalized severe periodontitis,<br />
severe bilateral alveolar bone loss of posterior maxilla<br />
and secondary caries. Additionally, extensive periapical<br />
lesions were detected (fig 1);<br />
Treatment plan:<br />
• Extraction of roots remnants;<br />
• Cyst enucleation in the location of teeth 13 and 14 (the<br />
cyst was histologically diagnosed as “Radicular Cyst”).<br />
The cyst caused an extensive bone resorption with a wide<br />
destruction of the buccal plate (fig 2 and 3). It was<br />
decided to place a Cortical implant at the location of the<br />
enucleated cyst (fig 4 and 5);<br />
• The implant is to be placed at a 30° angle, parallel to the<br />
mesial wall of the maxillary sinus. The angulation will be<br />
later corrected by a 30° Multi-Unit abutment (fig 6);<br />
• The implants would be immediately loaded and<br />
rehabilitated by a screws retained acrylic bridge,<br />
reinforced by a 3 mm induction welded titanium (grade 5)<br />
bar;<br />
Fig 1: The panoramic X-ray illustrates chronic generalized severe<br />
periodontitis and severe bilateral alveolar bone loss.<br />
Fig 2: Radicular Cyst that was enucleated from the location of the<br />
teeth 13, 14.<br />
Fig 3: Enucleation site
Fig 4: A Cortical implant (4x16) placed at the location of the major<br />
bone loss.<br />
Fig 5: Despite the extensive bone loss, the recommended initial<br />
stability (over 45Ncm) for immediate loading was obtained.<br />
Fig 6: A Multi-<br />
Unit abutment is<br />
mounted on the<br />
implant in order to<br />
compensate for<br />
the angulation.<br />
Fig 7: Decortication of the bone prior to bone grafting.<br />
Fig 8: Bone augmentation using HA & Calcium sulfate bone graft.<br />
Fig 9: Post op. panoramic X-ray, taken at the day of the operation.
Extramaxillary Technique - Zygomatic implant in Severe Maxillary<br />
Resorption: Full Mouth Rehabilitation.<br />
With the courtesy of Dr. Balan Igal D.M.D<br />
Patient: 56 years old female.<br />
Smoker: 10 packs years.<br />
Declares to be in good health.<br />
Chief complains:<br />
• Impaired aesthetic (shy smile);<br />
• Teeth mobility;<br />
• Bad breath odor;<br />
• Spontaneous bleeding;<br />
Clinical examination:<br />
• Upper jaw:<br />
• Chronic generalized severe periodontitis;<br />
• Teeth mobility;<br />
• Extensive loss of supporting bone;<br />
• Panoramic X-ray demonstrating Sinus pneumatization;<br />
• Grade III furcation defect in tooth 16;<br />
• Lower jaw:<br />
• Chronic generalized severe periodontitis;<br />
• Teeth 44-45 show extensive crown destruction anddeep<br />
caries;<br />
• Periapical lesion in tooth 43;<br />
• Implants – Perimplantitis with threads exposure (fig 1);<br />
Surgical procedure:<br />
Lower jaw: Teeth extraction, installation of parallel (axial)<br />
implants.<br />
Upper jaw: Extractions, installation of axial implants at the<br />
anterior zone and tilted implants at the posterior zone to<br />
avoid sinus elevation.<br />
Fig 1: The panoramic X-ray illustrates chronic generalized severe<br />
periodontitis, sinus pneumatization, caries and perimplantitis.<br />
Fig 2: A tunnel preparation drill for the Zygomatic implant.<br />
It was decided to install a Zygomatic implant at the right side because of the pneumatization of the sinus and inability<br />
to place a TPP (Tubero-Pterygo-Platine) implant.<br />
The Zygomatic implant placement is a highly predictable procedure with a high success rate in restoration of<br />
atrophic jaws, without the need for complex bone augmentation procedures. The implant was placed following the<br />
extramaxillary protocol; this is a modification of the traditional Branemark technique.<br />
In the Extramaxillary technique a bypass of the maxillary sinus is being made in a manner that prevents damage to<br />
the Schneiderian membrane.<br />
The Zygomatic implant is anchored in the zygomatic bone and not in the alveolar bone; the resulting torque is very<br />
high. The prosthetic platform is being shifted buccally to a more appropriate position of the restoration.<br />
Having an unthreaded body ending with an aggressive thread at the apical part of the implant the Zygomatic implant<br />
is highly suitable for the Extramaxillary approach.This design facilitates the fixation of the implant in the zygomatic<br />
bone.<br />
A special drill design allows the clinician to create a clean tunnel preparation with minimal risk of membrane damage<br />
(Fig 2 and 3).<br />
Following the osteotomy, a sinus lift procedure is done as well to prevent any damage to membrane integrity during<br />
implant placement.<br />
A 45° angle Multi-Unit abutment will provide the angle correction needed.<br />
Rehabilitation follows immediate loading protocol by a screw retained acrylic bridge, reinforced by a 3 mm induction<br />
welded titanium (grade 5) bar.
Fig 3: Osteotomy preparation.<br />
Fig 4: Tunnel preparation.<br />
Fig 5: Intact Schneiderian membrane after osteotomy preparation.<br />
Fig 6: length measurement of the osteotomy – 45mm<br />
Fig 7: Zygomatic implant (4.2x45)<br />
Fig 8: The Zygomatic implant is mostly unthreaded to reduce<br />
periopathogens accumulation and development of perimplantitis;<br />
Aggressive fixation threads to the Zygomatic bone exist only at the<br />
apical part<br />
Fig 9: The mounted Multi-Unit Abutments demonstrate the parallelism<br />
level that was achieved after angle correction.<br />
Fig 10: Post op. panoramic X-ray, taken at the day of the operation
Dental Implantation Treatment plan – Planning ahead.<br />
With the courtesy of Dr. Balan Igal D.M.D.<br />
Dental Implantation has been in use for about 50 years. During this period of time, many technological and biological<br />
developments that contributed significantly to the high success rate of implantations, have taken place.<br />
Measureable quantitative and qualitative criteria for determining the success rate of dental implants have been set by<br />
various researchers such as Alberktson and others.<br />
The use of dental implants as part of routine dental care is growing. However, with the number of implants installed,<br />
we observe a marked increase in failure rates as well as in the incidence of pathological processes such as mucositis<br />
and perioimplantitis.<br />
Long-term follow-ups and vast accumulated knowledge reveal a less optimistic picture of dental implantation, and the<br />
illusion that dental implants can serve as long term substitutes for natural teeth is beginning to dissipate.<br />
Nowadays we see more and more implants losing their bony support, and aside of functional failures there is also<br />
deterioration in the uncompromised aesthetic aspect.<br />
Therefore, more and more often clinicians are faced with the need for an upfront treatment planning of complicated<br />
<strong>case</strong>s which involve the removal of previously installed failed implants.<br />
Having to deal with failures raises questions about the key rules in planning of implantation procedures, for example:<br />
As it is well known, 16 mm or even 13 mm Long implants, show stability even after losing half of their support. However,<br />
once their support has been compromised, a non-reversible damage is being caused which makes their replacement,<br />
in <strong>case</strong> of failure, much more difficult. Based on this premise, the question that comes forth is whether to choose long<br />
implants or short implants to start with.<br />
When we offer a treatment plan to a patient who had previously installed implants that failed, we should take into<br />
consideration the etiological factors that led to this failure. It is also important to understand that the use of implants is<br />
not a lifetime solution, and therefore the planning has to take into consideration future needs of the patient.<br />
The following <strong>case</strong> presents a 64 years<br />
old female patient.<br />
The <strong>clinica</strong>l examination showed:<br />
• Chronic generalized severe periodontitis;<br />
• Peri-Implantitis and Mucositis around<br />
implant's in the lower jaw;<br />
• Calculus and plaque accumulation;<br />
• Implant’s threads exposure;<br />
• Bleeding on probing;<br />
• Periodontal pockets and mobility;<br />
• Secondary caries in some of the restorations;<br />
• Periapical lesions around teeth 34-35;<br />
Treatment plan:<br />
• Clearance - Extractions of all teeth and implants<br />
(mandible and maxilla);<br />
• Installation of 7 implants in maxilla, out of which:<br />
• 2 Tubero Pterygoid Palatine implants (TPP);<br />
• 1 Zygoma implant by extra maxillary approach;<br />
• 2 tilted implants (the right one being parallel<br />
to the sinus mesial wall);<br />
• 2 parallel implants at the anterior region;<br />
• Lower jaw- 5 implants, out of which 4 in the<br />
intremental region. 4 of which are Cortical type<br />
implants;
Upper jaw:<br />
Panoramic X-Ray demonstrating<br />
an Extensive Periodontal disease,<br />
Secondary Caries, Peri-Implantitis<br />
and Periapical Lesions.<br />
Coarse diamond grit coated Primary bur, used for the<br />
preparation of a groove for the Zygomatic implant.<br />
Following burs are coated with a finer grit.<br />
The Sinus membrane can be seen intact after the<br />
groove preparation.<br />
Sinus Membrane Lateralization to<br />
minimize any eventual damage while<br />
drilling deeper to the Zygomatic bone.<br />
Zygomatic implant with a 45° Multi Unit<br />
abutment correcting the angulation.<br />
Reinforced provisional bridge, fabricated on the day of<br />
the operation.<br />
In Extra-Maxillary technique the screws are<br />
inserted bucally unlike the screw insertion in the<br />
Branemark conventional technique.
Lower jaw:<br />
Clinical image of the lower jaw prior to the extraction.<br />
Calculus and Plaque accumulation, Implant Threads<br />
exposure, Peri-Implantitis and Mucositis are observed.<br />
Old Implants post extraction.<br />
Lower jaw after the extractions. Extensive bony defects at the extraction<br />
sites are observed.<br />
A Cortical implant with aggressive threads, designed to provide excellent<br />
primary stability.<br />
Cortical implant inserted at the extraction site.<br />
The neck of the implant remains exposed. The smooth neck minimizes<br />
the adherence of periopathogens.
A Multi-Unit<br />
abutment is<br />
mounted on the<br />
implant.<br />
Bone augmentation using HA & Calcium sulfate bone graft<br />
Snap-On Transfer bases are mounted on the Multi-Unit.<br />
Suturing around the transfer bases<br />
The female components of the transfers are being mounted on the male components.<br />
Reinforced provisional lower acrylic bridge.<br />
Occlusal view of the lower acrylic bridge.<br />
Panoramic X-Ray (with the provisional bridge) at the end of the operation.
CC 2014 Rev 2 | © 2014 NORIS MEDICAL<br />
www.norismedical.com<br />
Noris Medical Ltd. Headquarters and R&D center<br />
8 Hataasia Street, Nesher 3688808, Israel<br />
T. +972-73-796-4477 | F. +972-4-695-0991<br />
Info@norismedical.com


