

Aroma Espresso MakerAEM-646A (AEM-646A) - AEM-646A Instruction Manual - Espresso Maker
Aroma Espresso MakerAEM-646A (AEM-646A) - AEM-646A Instruction Manual - Espresso Maker
Aroma Espresso MakerAEM-646A (AEM-646A) - AEM-646A Instruction Manual - Espresso Maker

You also want an ePaper? Increase the reach of your titles
YUMPU automatically turns print PDFs into web optimized ePapers that Google loves.
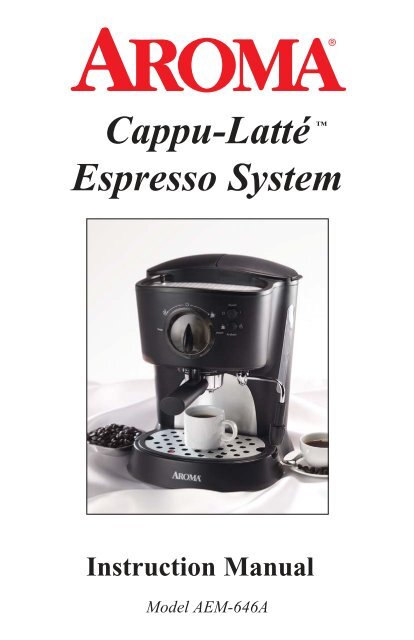
Cappu-Latté<br />
<br />
<strong>Espresso</strong> System<br />
<strong>Instruction</strong> <strong>Manual</strong><br />
Model <strong>AEM</strong>-<strong>646A</strong>
Congratulations!<br />
Your Cappu-Latte <strong>Espresso</strong> System will make a fine addition to<br />
your home. Now you can enjoy the great taste of gourmet espresso in the<br />
comfort of your own kitchen. This elegant, high-quality unit will provide great<br />
tasting espresso coffee in just minutes time after time.<br />
Please read the following instructions carefully before your first use.<br />
Published By:<br />
<strong>Aroma</strong> Housewares Co.<br />
6469 Flanders Drive<br />
San Diego, CA 92121<br />
U.S.A.<br />
1-800-276-6286<br />
www.aromaco.com<br />
© 2005 <strong>Aroma</strong> Housewares Company All rights reserved.
IMPORTANT SAFEGUARDS<br />
Basic safety precautions should always be followed when using electrical appliances,<br />
including the following:<br />
1. Read all instructions before use.<br />
2. Do not touch hot surfaces. Use handles or knobs.<br />
3. To protect against electrical shock, do not immerse cord, plug or espresso maker<br />
in water or any other liquid.<br />
4. Close supervision is necessary when this appliance is used by or near children.<br />
This appliance is not intented to be used by children.<br />
5. Unplug from outlet when not in use and before cleaning. Allow to completely cool<br />
before putting on or taking off any parts and before cleaning.<br />
6. Do not operate this appliance with a damaged cord, plug or after the appliance<br />
malfunctions or has been damaged in any manner. Return appliance to the<br />
nearest authorized service facility for examination, repair or adjustment.<br />
7. The use of accessory attachments not recommended by the appliance<br />
manufacturer may cause injuries.<br />
8. Do not use outdoors.<br />
9. Do not let cord hang over edge of table or counter, or touch hot surfaces.<br />
10. Do not place on or near a hot gas or electrical burner or in a heated oven.<br />
11. To disconnect, press the Power button, then remove plug from wall outlet.<br />
12. Do not use appliance for anything other than its intended use.<br />
13. Scalding may occur if the lid is removed during the brewing process.<br />
SAVE THESE INSTRUCTIONS<br />
Product for Household Use Only.<br />
1
SHORT CORD INSTRUCTIONS<br />
1. A short power-supply cord is provided to reduce risk resulting from becoming<br />
entangled in or tripping over a longer cord.<br />
2. Longer extension cords are available and may be used if care is exercised.<br />
3. If a longer extension cord is used:<br />
a. The marked electrical rating of the extension cord should be at least as great as the<br />
electrical rating of the appliance.<br />
b. The longer cord should be arranged so that it will not drape over counter or tabletop<br />
where it can be pulled by children or tripped over unintentionally.<br />
c. If the appliance is of the grounded type, the extension cord should be a grounding-type-<br />
3-wire cord<br />
POLARIZED PLUG<br />
This appliance has a polarized plug (one blade is wider than the other); follow the<br />
instructions below:<br />
To reduce the risk of electric shock, this plug is intended to fit into a polarized outlet<br />
only one way. If plug does not fully fit into the outlet, reverse the plug. If it still does<br />
not fit, contact a qualified electrician. Do not attempt to modify the plug in any way.<br />
This appliance is for household use only.<br />
2
14<br />
PARTS IDENTIFICATION<br />
1<br />
Power<br />
2<br />
3<br />
13<br />
Power<br />
Ready<br />
Preheat<br />
12<br />
4<br />
11<br />
5<br />
10<br />
8<br />
7<br />
6<br />
9<br />
1. Removable water reservoir<br />
2. Power switch<br />
3. Preheat switch<br />
4. Steam nozzle<br />
5. Froth attachment<br />
6. 2-cup filter<br />
7. 1-cup filter<br />
8. Filter handle<br />
9. Slip resistant rubber feet<br />
10. Drip tray with overflow protection<br />
11. Filter lock<br />
12. <strong>Espresso</strong> brewing head<br />
13. Operation dial<br />
14. Preheating plate 3<br />
Measuring scoop & tamper<br />
<strong>Espresso</strong><br />
Setting<br />
Steam<br />
Setting
PREPARING FOR USE<br />
Before First Use:<br />
1. Read all the instructions and important safeguards.<br />
2. Remove all packaging materials; make sure all your items are received in good condition.<br />
3. Lift water reservoir lid and remove the measuring spoon from the water reservoir.<br />
4. Wash all the accessories with warm soapy water using a sponge or dishcloth.<br />
5. Rinse thoroughly to remove soapy residue.<br />
6. Wipe body clean with a damp cloth.<br />
Pre-Rinsing the Cappu-Latte <strong>Espresso</strong> System:<br />
1. Remove the water reservoir, wash thoroughly with warm soap and water, and fill it up<br />
with cold water. Return the reservoir and plug the unit into an outlet.<br />
2. Place a filter in the filter handle and position the filter handle on the espresso brewing<br />
head. Lock the filter handle in place, but do not over tighten. Lining up the arrows on<br />
the filter handle that correspond with the arrows on the brewing head, will make<br />
locking the filter handle easier.<br />
3. Place a large container beneath the brewing head.<br />
4. Once the ready light illuminates the water has been heated to the correct<br />
temperature. Turn the operation dial clockwise to the espresso function and allow all<br />
the water to run through the unit.<br />
** It may be necessary to turn the operation dial back to the “O” off position<br />
mid-cycle to empty the large container.<br />
‣ Do not use abrasive cleaners or scouring pads.<br />
‣ Do not immerse the espresso maker, cord or plug in water at any time.<br />
Filling The Water Reservoir and Pre-Rinsing your <strong>Espresso</strong> <strong>Maker</strong>:<br />
Or<br />
Lift up to open the lid of<br />
the water reservoir<br />
While it is in place, fill<br />
the water reservoir with<br />
cold water<br />
4<br />
Remove water reservoir
PREPARING FOR USE<br />
Fill with fresh cold water<br />
Replace the full<br />
water reservoir<br />
Begin preheating by<br />
shifting the Preheat switch<br />
to the espresso setting.<br />
The “Ready” light will<br />
illuminate when the water<br />
is the correct termperature<br />
Select either the 1-cup<br />
or the 2-cup filter<br />
Position the filter handle<br />
on the espresso<br />
brewing head<br />
Lock the filter handle<br />
into place by turning it<br />
to the right--use the<br />
arrows on the<br />
corresponding parts to<br />
help them easily fit<br />
Place your large<br />
container beneath the<br />
espresso brewing head<br />
Once the ready light turns on, turn the<br />
operation dial clockwise to activate the<br />
espresso function. Make sure all the<br />
water runs through the machine.<br />
5
HOW TO USE<br />
Preparing Gourmet <strong>Espresso</strong>:<br />
Make sure the operation dial is turned to the “O” off position and the Power switch is in<br />
the off position. Then, insert the plug into the proper outlet.<br />
Preheat your espresso cups by placing them<br />
upside down on the preheating plate. Shift<br />
the preheat switch to the espresso setting. To<br />
begin the preheating process, shift the Power<br />
switch to the On position. The red “Power”<br />
light will illumintate<br />
Place your choice of coffee in<br />
the coffee filter. A fine to<br />
medium grind is recommended<br />
Use the included tamper to<br />
pack the coffee into the<br />
filter. Do not apply too<br />
much pressure<br />
Remove excess coffee<br />
grounds by wiping the<br />
edge of the filter<br />
Insert the filter handle<br />
into the espresso<br />
machine and lock it in<br />
place by turning the<br />
filter handle to the right<br />
Once the “Ready” light turns on,<br />
turn the operation dial clockwise<br />
to the espresso setting to begin<br />
brewing espresso 6
HOW TO USE<br />
Important notes for preparing gourmet espresso:<br />
1. Do not overfill the filter with coffee, and always wipe around the edges of the filter to<br />
remove excess coffee grounds. Do not tamp the coffee with excessive force. Lightly<br />
flatten the grinds with a small amount of pressure.<br />
2. When the water has reached the ideal temperature for brewing espresso, the<br />
“Ready” light will illuminate. For best results, do not start the brewing process before<br />
this has occured.<br />
3. Once the brewing process has begun, the machine will begin to make a pumping<br />
noise. This is the espresso brewing process and is completely normal. Once the<br />
cup(s) are filled to the desired level, return the operation dial to the “O” off position.<br />
4. When removing the used coffee grounds, allow the unit to completely cool before<br />
removing the filter handle. Remove the filter handle by turning it to the left until the<br />
arrows on the brewing head line up with the arrows on the filter handle. Push the<br />
filter lock towards the edge of the filter, flip upside down over a trash bin and gently<br />
tap out the used coffee.<br />
Warning:<br />
After each use of your Cappu-Latte <strong>Espresso</strong> System, it is recommended that you<br />
flush the machine to remove and wash out any old or used coffee grinds stuck in the<br />
espresso machine, and also to help ensure the correct water temperature for the<br />
next espresso shot. With the filter handle already removed from the espresso<br />
machine, turn the operation dial clockwise to the espresso function and allow the<br />
water to run through the machine until there is a consistent flow of water.<br />
‣ Do not leave the filter handle locked in position for extended periods of time or<br />
when the machine is not in use. This may damage the brewing head rubber<br />
seals.<br />
7
HOW TO USE<br />
Frothing the Milk: (Detailed directions & tips on page 12)<br />
Slide the froth attachment<br />
onto the steam nozzle froth<br />
without the attachment if<br />
you like<br />
Hot Water Dispensing:<br />
Turn the operation dial<br />
counter-clockwise to the<br />
steam function to froth the<br />
milk<br />
Fill the machine with<br />
water and shift the<br />
Preheat switch to the<br />
espresso setting. Remove<br />
the froth attachment<br />
Turn the operation dial<br />
counter-clockwise to the<br />
steam function to<br />
dispense hot water<br />
Removing & Cleaning the Drip Tray (detailed cleaning on page 11):<br />
Carefully remove the<br />
top cover of the drip<br />
tray<br />
Remove drip tray and<br />
wash with soap and<br />
water<br />
8
ESPRESSO TIPS<br />
Now you are ready to enjoy the wonderful process of making gourmet espresso at<br />
home. Your new Cappu-Latte <strong>Espresso</strong> System coupled with a little practice and<br />
experience will have you making coffeehouse espresso in no time at all. Here are a few<br />
suggestions to help you along the way:<br />
• One single shot of espresso should be no more than 1.5oz of coffee.<br />
• Before running your brewing cycle, be sure that your espresso is tamped (packed down) evenly.<br />
• Do not use coffee grinds that are too coarse. A fine to medium grind of coffee is<br />
recommended.<br />
• For optimum results, use cold milk and a stainless steel container when steaming. Do not<br />
overheat the milk when frothing. The perfect temperature is right when the container<br />
becomes too hot to continue to hold.<br />
• If too much water is run through the coffee grounds, the espresso will likely come out thin<br />
and have a bitter taste.<br />
• In the event your espresso pours too slowly from the machine, use less pressure when<br />
tamping the coffee grinds or try using a coarser blend.<br />
• Fresher coffee beans or grounds will yield better taste. Always buy the freshest coffee<br />
available and store in an air-tight container in a cool, dry, dark place.<br />
• Whole coffee beans will stay fresher longer than ground coffee. When grinding your own<br />
coffee, never grind more than you will use for immediate brewing. The coffee will lose its<br />
flavor quickly once it’s ground.<br />
• Proper maintenance of your espresso maker will result in better tasting espresso. Keep it<br />
cleaned and thoroughly rinsed. Run water through the brewing head and flush the steam<br />
nozzle with fresh water after each use.<br />
Warning:<br />
In rare instances using cofffee grounds that are too small may cause the coffee flow to<br />
reduce to a slow drip, or the machine to stop working altogether. If this occurs, run fresh<br />
water through the brewing head and use a coarser coffee grind.<br />
9
MILK FROTHING STEPS<br />
The perfect cappuccino begins with milk frothed to the perfect texture. The following<br />
are some steps to help you master creating the perfect froth:<br />
1. Begin by sliding the froth attachment onto the steam nozzle. The steam nozzle may be<br />
used without the froth attachment if preferred.<br />
2. Fill a stainless steel container with fresh, cold milk no more than half way.<br />
Hint: Steam an amount of milk that is appropriate for the amount of espresso you are<br />
preparing. The volume of milk will increase during the frothing process.<br />
3. Activate the steam function before frothing the milk to remove any condensed water. To do<br />
this, swing the steam nozzle to the side of the machine, and place an empty glass or cloth<br />
under the steam nozzle and turn the operation dial counter-clockwise to activate the steam<br />
function. Operate for 3-5 seconds.<br />
4. Insert the steam nozzle into your stainless steel container so that the head of the nozzle is<br />
just below the surface fo the milk. Place your hand on the side of the conatiner during the<br />
frothing process to feel for temperature.<br />
5. Position your stainless steel container so that the head of the steam nozzle is near one<br />
side. This will cause the milk to circulate and give you better results as you froth. The milk<br />
in the container will rise as it is heated. Follow the level of the milk by lowering your<br />
container so that the steam nozzle head is always just below the surface.<br />
6. After the milk has doubled its original volume the steam nozzle can be lowered further<br />
below the surface. This action will give the milk the perfect texture.<br />
7. Once your stainless steel container becomes too hot to comfortably hold, the milk has<br />
reached the ideal temperature and the frothing process can stop. Simply turn the operation<br />
dial to the “O” off position and remove your container.<br />
8. For best results, pour the frothed milk into your gourmet espresso as soon as possible.<br />
10
CARE AND CLEANING<br />
WARNING: NEVER WASH YOUR ESPRESSO MACHINE ACCESSORIES IN THE<br />
DISHWASHER<br />
Regular and proper maintenance of your Cappu-Latte <strong>Espresso</strong> System will ensure a<br />
long-lasting life, and the best tasting espresso. Coffee oils and deposits build up over<br />
time and need to be flushed out and cleaned for optimum espresso taste.<br />
Cleaning the steam nozzle and froth attachment:<br />
Clean these parts immediately after each use to avoid damage. Wipe the stainless steel<br />
steam nozzle with a clean, damp cloth and simply place the froth attachment under<br />
warm running water until all excess milk has been removed. After this step, turn the<br />
operation dial counter-clockwise to the steam setting and clear any leftover milk out of<br />
the steam nozzle.<br />
On a monthly basis we recommend a thorough cleaning of the steam nozzle to ensure<br />
longevity. For a thorough cleaning, insert the head of the steam nozzle into a container<br />
of water. Make sure that the water level is over the head of the steam nozzle. Run<br />
steam through the nozzle for 30 seconds and let it soak overnight. After the nozzle has<br />
soaked, remove the steam nozzle head and stick a pin up the steam nozzle. (To remove<br />
the nozzle head, use the measuring scoop as a tool. There are fittings on the scoop that<br />
fit on the steam nozzle head and act as a wrench to make removing the head simple).<br />
Remove pin, then turn the unit on and run steam through the nozzle again for 30<br />
seconds.<br />
Warning: Use caution when operating the steam nozzle. Steam is very hot and can scald.<br />
Cleaning the drip tray:<br />
Remove the drip tray and its cover after each use to empty. If the red overflow indicator<br />
appears through the cover, empty the drip tray immediately. Using non-abrasive<br />
cleaners, wash the drip tray and cover in warm, soapy water, rinse and dry. It is normal<br />
for the inside of the drip tray to be stained by coffee oils.<br />
11
CARE AND CLEANING<br />
Cleaning the espresso brewing head and filters:<br />
Rinse the filters and filter head using warm water after each use. Every 10-15 uses,<br />
wash in warm soapy water using a mild detergent. To clean the espresso brewing head,<br />
flush water through and wipe the head and the inside rim with a damp cloth. To help<br />
ensure the longevity of the filters and filter handle, run the machine with the filters in<br />
place using only water, no coffee, at the end of each espresso making session. If the<br />
filter holes become clogged with coffee grinds, remove them by using a fine bristled<br />
brush.<br />
Caring for the rubber seals:<br />
The rubber seal is located on the bottom of the brewing head. It creates a seal against<br />
the filter handle when making espresso. As time passes this seal loses its elasticity and<br />
needs to be replaced. We recommend replacing this seal every 8-12 months.<br />
Indications that the seal needs replacing include the following: the filter handle feels<br />
loose when rotated to the right or steam escapes from around the espresso brewing<br />
head during use.<br />
For information on obtaining replacement rubber seals, please call the <strong>Aroma</strong> Customer<br />
Service Center at 1-800-276-6286.<br />
Cleaning the espresso preheating plate and exterior:<br />
Wipe the preheating plate and espresso maker exterior with a damp cloth and wipe dry.<br />
Do not use abrasive cleaners or metal scouring pads as they can scratch the surfaces.<br />
12
CARE AND CLEANING<br />
Descaling your Cappu-Latte <strong>Espresso</strong> System:<br />
We recommend that you descale your Cappu-Latte <strong>Espresso</strong> System every 2-3 months<br />
depending on the hardness of your water and frequency of use. You may purchase a<br />
variety of espresso maker descaling solutions in the market or you can use distilled<br />
white vinegar. Keep in mind that vinegar might produce a lingering taste for the first few<br />
batches of espresso after the descaling process.<br />
1. Remove the water reservoir and drip tray from the unit and set aside. Remove the<br />
filter handle and rinse it thoroughly under running water and set it aside.<br />
2. Remove the froth attachment and fill the water reservoir with your descaling solution.<br />
3. Use two large containers and place one beneath the brewing head, and the other<br />
beneath the steam nozzle.<br />
4. Plug the unit in, shift the Preheat switch to the espresso setting and turn the power<br />
on. Run roughly 1/3 of the liquid through the machine.<br />
5. Once the liquid has been run through, shift the Preheat switch to the steam setting<br />
and run the solution through the steam nozzle for approximately 2 minutes.<br />
6. Afterwards, turn the machine off by shifting the Power switch to the off position. Shift<br />
the Preheat button back to the espresso position.<br />
13
CARE AND CLEANING<br />
Descaling your Cappu-Latte <strong>Espresso</strong> System continued:<br />
7. Leave the machine turned off for 15 minutes to allow the descaling solution to take affect.<br />
8. After the 15 mintues, turn the unit back on and run half of the remaining descaling<br />
solution through the machine. After the solution has passed through, activate the<br />
steam function and allow the unit to steam for 3-5 minutes.<br />
9. Activate the espresso function again and allow the rest of the solution in the<br />
reservoir to run through the machine. Remove the containers placed under the<br />
brewing head and steam nozzle, empty and replace.<br />
10. Thoroughly wash and rinse the water reservoir to remove all traces of the descaling<br />
solution. Once this is done, run 2 full cycles with the water reservoir completely full. Refill<br />
the water reservoir and run the steam nozzle for 5 minutes. Water run through the<br />
machine should be clean and clear after this process.<br />
11. Return the drip tray and froth attachment to their positions.<br />
12. You are now ready to brew gourmet espresso again.<br />
14
Gourmet <strong>Espresso</strong> Recipes:<br />
RECIPES<br />
Hot <strong>Espresso</strong> Recipes:<br />
Classic <strong>Espresso</strong> - The original espresso recipe. A single shot of espresso served in a<br />
preheated espresso cup. Double your pleasure with a double shot or <strong>Espresso</strong> Doppio<br />
served in a preheated cappuccino cup.<br />
<strong>Espresso</strong> Con Panna - A single or double shot of espresso topped with whipped cream.<br />
<strong>Espresso</strong> Macchiato - A single shot of espresso topped with 1-2 tbsp of frothed milk.<br />
<strong>Espresso</strong> Romano - A single shot of espresso garnished with a fresh lemon peel.<br />
Caffee Americano - <strong>Espresso</strong> diluted with fresh hot water to drip coffee strength.<br />
Spicy Viennese <strong>Espresso</strong> - Mix together a double shot of espresso, 1/2 tsp of<br />
cinnamon, 4 ground cloves and 1/2 tsp of allspice. Top the mixture off with whip cream.<br />
Classic Cappuccino - Commonly consists of 1/3 part espresso to 2/3 part frothed milk<br />
in a 5-ounce cappuccino cup, and topped off with foam from the frothed milk. If<br />
preferred, the cappuccino can be garnished with a light sprinkle of ground chocolate,<br />
cocoa powder, cinnamon, nutmeg or vanilla powder.<br />
Caffe Latte - Referred to by the French as Cafe au Lait (Cafay-oh-lay) and the Spanish<br />
as Cafe con Leche. A double-shot of espresso (about 3 ounces) mixed with 5oz of<br />
steamed milk. Typically little or no foam is added to the top. Serve in a large, bowlshaped<br />
heavy cup.<br />
Mocha Cappucinno - Mix together 1/3 part espresso to 2/3 part steamed milk after<br />
dissolving chocolate syrup or cocoa with the milk to taste.<br />
15
Gourmet <strong>Espresso</strong> Recipes Continued...<br />
Cold <strong>Espresso</strong> Recipes:<br />
RECIPES<br />
Iced Cappuccino - Fill a 12oz glass with ice and add 5oz of milk. Mix in 2oz of<br />
espresso and enjoy. Mix the 2oz of espresso with one ounce of chocolate syrup prior to<br />
adding to the steamed milk for a delicious Iced Mochaccino.<br />
Iced <strong>Espresso</strong> Latte - Serves 4. Recipe includes the following ingredients: 2 cups<br />
espresso coffee, 2 tbsp brown sugar, 1.5 cups fat free milk, 2 tbsp almond syrup (or<br />
hazlenut), ice cubes, 1 cup whipped cream and 1 tsp ground espresso beans. Combine<br />
espresso, brown sugar, milk and syrup in a pitcher, stir until ingredients are well mixed<br />
and refrigerate until cold. Fill 4 glasses with ice cubes and pour the mixture over the ice.<br />
Add whip cream to each glass and sprinkle with ground espresso beans.<br />
Amaretto Iced Smoothie - A delicious espresso smoothie with an added kick. Take 1/2oz<br />
<br />
Amaretto, a 1/2oz Kahlua, 6oz chilled espresso, and 1 scoop of chocolate ice cream and mix<br />
in a blender on low until smooth. Top with whipped cream and serve immediately.<br />
Yogurtccino - A refreshing blend for the health-conscious espresso lover. This recipe<br />
calls for 3oz chilled espresso, 3/4 cup of non-fat frozen yogurt, 1/2 cup of ice and 1.5tbs<br />
of sugar. To prepare, blend all ingredients in a blender on the low setting until smooth.<br />
Serve immediately in a tall glass.<br />
Orange Truffle Mocha - Fill a tall glass halfway with ice. Whisk together a single shot<br />
of espresso, 1oz orange juice, 1oz caramel syrup, 1tbs cocoa powder and pour directly<br />
over the ice. Fill the rest of the glass with cold milk, stir lightly and serve.<br />
16
LIMITED WARRANTY<br />
<strong>Aroma</strong> Housewares Company warrants this product free from defects in material<br />
and workmanship for one year from provable date of purchase in the continental<br />
United States.<br />
Within this warranty period, <strong>Aroma</strong> Housewares Company will repair or replace, at<br />
its option, defective parts at no charge, provided the product is returned, freight<br />
prepaid with proof of purchase and U.S. $8.00 for shipping and handling charges<br />
payable to <strong>Aroma</strong> Housewares Company. Before returning an item, please call the<br />
toll free number below for return authorization number. Allow 2-4 weeks for return<br />
shipping.<br />
This warranty does not cover improper installation, misuse, abuse or neglect on the<br />
part of the owner. Warranty is also invalid in any case that the product is taken<br />
apart or serviced by an unauthorized service station.<br />
This warranty gives you specific legal rights which may vary from state to state and<br />
does not cover areas outside the United States.<br />
AROMA HOUSEWARES COMPANY<br />
6469 Flanders Drive<br />
San Diego, California 92121<br />
1-800-276-6286<br />
M-F, 8:30 AM - 5:00 PM, Pacific Time<br />
Website: www.aromaco.com<br />
17


