

Samsung SCX-4216F - SCX-4216F/XAA - User Manual ver. 1.00 (ENGLISH,7.36 MB)
Samsung SCX-4216F - SCX-4216F/XAA - User Manual ver. 1.00 (ENGLISH,7.36 MB)
Samsung SCX-4216F - SCX-4216F/XAA - User Manual ver. 1.00 (ENGLISH,7.36 MB)

You also want an ePaper? Increase the reach of your titles
YUMPU automatically turns print PDFs into web optimized ePapers that Google loves.
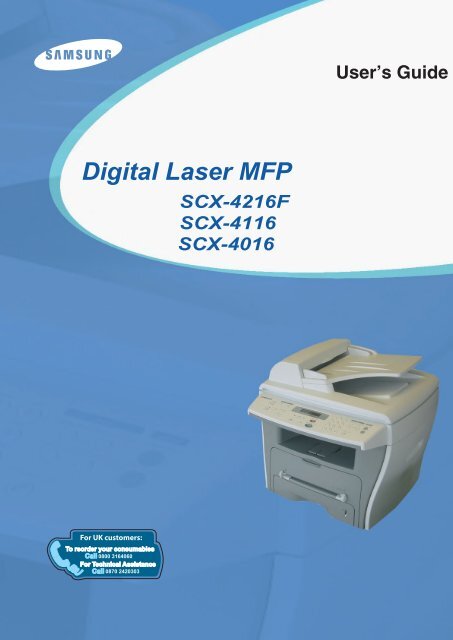
<strong>User</strong>’s Guide<br />
Digital Laser MFP<br />
<strong>SCX</strong>-<strong>4216F</strong><br />
<strong>SCX</strong>-4116<br />
<strong>SCX</strong>-4016
About the <strong>User</strong>’s Guides<br />
Your machine comes with the three user’s guides:<br />
This Laser MFP <strong>User</strong>’s Guide provides information you need for setting up your machine<br />
and installing the supplied software. It also provides all of the detailed instructions for using<br />
your machine as a printer, a scanner and a copier and information for maintaining and<br />
troubleshooting the machine.<br />
The Laser Facsimile <strong>User</strong>’s Guide (only for <strong>SCX</strong>-<strong>4216F</strong>) provides information for using<br />
your machine as a fax machine. You can find how to send and receive a fax, and how to set<br />
fax-related options.<br />
The SmarThru 3 <strong>User</strong>’s Guide provides the basic description about using the<br />
multi-function application. <strong>Samsung</strong> SmarThru allows you to scan and edit images, and to scan<br />
for copying, faxing and sending an e-mail on your computer. You can also find a brief<br />
description on the automatic text recognition program, AnyPage.<br />
This manual is provided for information purposes only. All information included herein is<br />
subject to change without notice. <strong>Samsung</strong> Electronics is not responsible for any changes,<br />
direct or indirect, arising from or related to use of this manual.<br />
© 2003 <strong>Samsung</strong> Electronics Co., Ltd. All rights reserved.<br />
• <strong>SCX</strong>-4016, <strong>SCX</strong>-4116, <strong>SCX</strong>-<strong>4216F</strong> and <strong>Samsung</strong> logo are trademarks of <strong>Samsung</strong><br />
Electronics Co., Ltd.<br />
• Centronics is a trademark of Centronics Data Computer Corporation.<br />
• IBM and IBM PC are trademarks of International Business Machines Corporation.<br />
• Microsoft, Windows, Windows 9x, Window Me, Windows 2000, Windows NT 4.0<br />
and Windows XP are registered trademarks of Microsoft Corporation.<br />
• All other brand or product names are trademarks of their respective companies or<br />
organisations.
CONTENTS<br />
Chapter 1: GETTING STARTED<br />
Unpacking .......................................................... 1.2<br />
Selecting a Location ........................................ 1.4<br />
Understanding the Component Location .................. 1.5<br />
Front View ..................................................... 1.5<br />
Rear View ...................................................... 1.6<br />
Control Panel Functions ................................... 1.7<br />
Installing the Toner Cartridge ............................... 1.10<br />
Loading Paper .................................................... 1.12<br />
Making Connections ............................................ 1.15<br />
Turning the Machine On ....................................... 1.17<br />
Changing the Display Language ............................ 1.17<br />
Setting the Paper Type and Size ........................... 1.18<br />
Using the Save Modes ......................................... 1.19<br />
Toner Save Mode ........................................... 1.19<br />
Power Save Mode .......................................... 1.19<br />
CCD Power Save Mode ................................... 1.20<br />
Chapter 2: INSTALLING SOFTWARE<br />
About <strong>Samsung</strong> Software ..................................... 2.2<br />
Printer Dri<strong>ver</strong> Features .................................... 2.3<br />
System Requirements .......................................... 2.4<br />
Installing <strong>Samsung</strong> Software in Windows ................ 2.5<br />
Installing the USB Dri<strong>ver</strong> in Windows 98/Me ....... 2.9<br />
Uninstalling <strong>Samsung</strong> Software ............................ 2.10<br />
Uninstalling the MFP Dri<strong>ver</strong> ............................. 2.10<br />
Uninstalling <strong>Samsung</strong> SmarThru ...................... 2.11<br />
Using the CD-ROM ......................................... 2.13<br />
ii
Chapter 3: PAPER HANDLING<br />
Selecting Print Materials ....................................... 3.2<br />
Size, Input Sources and Capacities .................... 3.2<br />
Guidelines for Paper and Special Materials .......... 3.3<br />
Selecting an Output Location ................................. 3.4<br />
Printing to the Front Output Tray (Face down) .... 3.5<br />
Printing to the Rear Output Slot (Face up) .......... 3.5<br />
Loading Paper in the Paper Tray ............................ 3.6<br />
Using the Bypass Tray .......................................... 3.8<br />
Setting the Paper Type and Size for the Bypass Tray .<br />
3.10<br />
Chapter 4: COPYING<br />
Loading Paper for Copying .................................... 4.2<br />
Making Copies on the Document Glass .................... 4.2<br />
Making Copies from the Automatic Document Feeder (For<br />
<strong>SCX</strong>-4116/<strong>4216F</strong>) ................................................ 4.4<br />
Setting Copy Options ........................................... 4.6<br />
Contrast ........................................................ 4.6<br />
Image ........................................................... 4.6<br />
Reduced/Enlarged Copy ................................... 4.7<br />
Number of Copies ........................................... 4.8<br />
Using Special Copy Features ................................. 4.8<br />
Auto Fit Copying ............................................. 4.9<br />
Clone Copying ................................................ 4.9<br />
Collation Copying ........................................... 4.10<br />
2-side Copying .............................................. 4.11<br />
2-up or 4-up Copying ..................................... 4.12<br />
Poster Copying .............................................. 4.12<br />
Changing the Default Settings .............................. 4.13<br />
Setting the Time Out Option ................................. 4.14<br />
iii
Chapter 5: PRINTING<br />
Printing a Document ............................................ 5.2<br />
Cancelling a Print Job ...................................... 5.5<br />
Using a Favorite Setting .................................. 5.6<br />
Using Help ..................................................... 5.6<br />
Setting Paper Properties ....................................... 5.7<br />
Printing Multiple Pages on One Sheet of Paper (N-Up Printing)<br />
................................................................... 5.8<br />
Printing a Reduced or Enlarged Document .............. 5.10<br />
Fitting Your Document to a Selected Paper Size ...... 5.11<br />
Printing Posters .................................................. 5.12<br />
Using Watermarks .............................................. 5.13<br />
Using an Existing Watermark ........................... 5.13<br />
Creating a Watermark .................................... 5.14<br />
Editing a Watermark ...................................... 5.15<br />
Deleting a Watermark .................................... 5.15<br />
Using O<strong>ver</strong>lays ................................................... 5.16<br />
What is an O<strong>ver</strong>lay? ....................................... 5.16<br />
Creating a New Page O<strong>ver</strong>lay .......................... 5.16<br />
Using a Page O<strong>ver</strong>lay ..................................... 5.18<br />
Deleting a Page O<strong>ver</strong>lay ................................. 5.19<br />
Setting Graphic Properties ................................... 5.20<br />
Setting Up the Locally Shared Printer .................... 5.22<br />
In Windows 9x/Me ......................................... 5.22<br />
In Windows NT 4.0/2000/XP ........................... 5.23<br />
Chapter 6: SCANNING<br />
Scanning Basics .................................................. 6.2<br />
Scanning Using <strong>Samsung</strong> SmarThru ....................... 6.2<br />
Scanning Process with TWAIN-enabled Software ...... 6.5<br />
iv
Chapter 7: MAINTENANCE<br />
Clearing the Memory ............................................ 7.2<br />
Cleaning Your Machine ......................................... 7.3<br />
Cleaning the Outside ....................................... 7.3<br />
Cleaning the Inside ......................................... 7.3<br />
Cleaning the Scan Unit .................................... 7.5<br />
Maintaining the Toner Cartridge ............................. 7.6<br />
Redistributing Toner ........................................ 7.7<br />
Replacing the Toner Cartridge .......................... 7.8<br />
Setting the Notify Toner Option<br />
(For <strong>SCX</strong>-<strong>4216F</strong>) ........................................... 7.10<br />
Cleaning the Drum ......................................... 7.10<br />
Consumables and Replacement Parts .................... 7.11<br />
Chapter 8: TROUBLESHOOTING<br />
Clearing Document Jams (For <strong>SCX</strong>-4116/<strong>4216F</strong>) ...... 8.2<br />
Input Misfeed ................................................. 8.2<br />
Exit Misfeed ................................................... 8.3<br />
Roller Misfeed ................................................ 8.3<br />
Clearing Paper Jams ............................................. 8.4<br />
In the Paper Feed Area .................................... 8.4<br />
In the Paper Exit Area ..................................... 8.5<br />
In the Fuser Area or Around the Toner Cartridge . 8.7<br />
In the Bypass Tray .......................................... 8.8<br />
Tips for Avoiding Paper Jams When Printing on the A5-<br />
sized Paper .................................................... 8.9<br />
Tips for Avoiding Paper Jams ........................... 8.10<br />
Clearing LCD Error Messages ................................ 8.11<br />
Solving Problems ................................................ 8.14<br />
Paper Feeding Problems ................................. 8.14<br />
Printing Problems .......................................... 8.15<br />
Printing Quality Problems ................................ 8.18<br />
Fax Problems (For <strong>SCX</strong>-<strong>4216F</strong>) ........................ 8.22<br />
Copying Problems .......................................... 8.24<br />
Scanning Problems ........................................ 8.25<br />
v
Chapter A: SPECIFICATIONS<br />
General Specifications .......................................... A.2<br />
Scanner and Copier Specifications .......................... A.3<br />
Printer Specifications ............................................ A.4<br />
Facsimile Specifications (For <strong>SCX</strong>-<strong>4216F</strong>) ................ A.5<br />
Paper Specifications ............................................. A.6<br />
O<strong>ver</strong>view ....................................................... A.6<br />
Supported Sizes of Paper ................................. A.6<br />
Guidelines for Using Paper ............................... A.7<br />
Paper Specifications ........................................ A.8<br />
Paper Output Capacity ..................................... A.8<br />
Printer and Paper Storage Environment ............. A.9<br />
vi
Important Precautions and Safety Information<br />
When using this machine, these basic safety precautions should always be followed<br />
to reduce risk of fire, electric shock, and injury to people:<br />
1. Read and understand all instructions.<br />
2. Use common sense whene<strong>ver</strong> operating electrical appliances.<br />
3. Follow all warnings and instructions marked on the machine and in the literature<br />
accompanying the machine.<br />
4. If an operating instruction appears to conflict with safety information, heed the<br />
safety information. You may have misunderstood the operating instruction. If you<br />
cannot resolve the conflict, contact your sales or service representative for<br />
assistance.<br />
5. Unplug the machine from the AC wall socket and/or telephone jack before<br />
cleaning. Do not use liquid or aerosol cleaners. Use only a damp cloth for cleaning.<br />
6. Do not place the machine on an unstable cart, stand or table. It may fall, causing<br />
serious damage.<br />
7. Your machine should ne<strong>ver</strong> be placed on, near or o<strong>ver</strong> a radiator, heater, air<br />
conditioner or ventilation duct.<br />
8. Do not allow anything to rest on the power. Do not locate your machine where<br />
the cords will be abused by persons walking on them.<br />
9. Do not o<strong>ver</strong>load wall outlets and extension cords. This can diminish performance,<br />
and may result in the risk of fire or electric shock.<br />
10. Do not allow pets to chew on the AC power, telephone or PC interface cords.<br />
11. Ne<strong>ver</strong> push objects of any kind into the machine through case or cabinet<br />
openings. They may touch dangerous voltage points, creating a risk of fire or<br />
shock. Ne<strong>ver</strong> spill liquid of any kind onto or into the machine.<br />
12. You machine may have a heavy co<strong>ver</strong> for optimal pressure on the document for<br />
the best scanning and/or faxing (usually the flatbed-type machine). In this case,<br />
replace the co<strong>ver</strong> after placing document on the scan glass, by holding and<br />
moving it down slowly until it seats on its location.<br />
13. To reduce the risk of electric shock, do not disassemble the machine. Take it to a<br />
qualified service technician when repair work is required. Opening or removing<br />
co<strong>ver</strong>s may expose you to dangerous voltages or other risks. Incorrect<br />
reassembly could cause electric shock when the unit is subsequently used.<br />
14. Unplug the machine from the telephone jack, PC and AC wall outlet, and refer<br />
servicing to qualified service personnel under the following conditions:<br />
• When any part of the power cord, plug, or connecting cable is damaged or<br />
frayed.<br />
• If liquid has been spilled into the machine.<br />
• If the machine has been exposed to rain or water.<br />
• If the machine does not operate properly after instructions have been followed.<br />
• If the machine has been dropped, or the cabinet appears damaged.<br />
• If the machine exhibits a sudden and distinct change in performance.<br />
vii
15. Adjust only those controls co<strong>ver</strong>ed by the operating instructions. Improper<br />
adjustment of other controls may result in damage, and may require extensive<br />
work by a qualified service technician to restore the machine to normal operation.<br />
16. Avoid using this machine during a lightning storm. There may be a remote risk of<br />
electric shock from lightning. If possible, unplug the AC power and telephone cord<br />
for the duration of the lightning storm.<br />
17. SAVE THESE INSTRUCTIONS.<br />
Laser Safety Statement<br />
The printer is certified in the U.S. to conform to the requirements of DHHS 21 CFR,<br />
chapter 1 Subchapter J for Class I(1) laser products, and elsewhere is certified as a<br />
Class I laser product conforming to the requirements of IEC 825.<br />
Class I laser products are not considered to be hazardous. The laser system and<br />
printer are designed so there is ne<strong>ver</strong> any human access to laser radiation above a<br />
Class I level during normal operation, user maintenance, or prescribed service<br />
condition.<br />
WARNING<br />
Ne<strong>ver</strong> operate or service the printer with the protective co<strong>ver</strong> removed from Laser/<br />
Scanner assembly. The reflected beam, although invisible, can damage your eyes.<br />
CAUTION - INVISIBLE LASER RADIATION <br />
WHEN THIS COVER OPEN. <br />
DO NOT OPEN THIS COVER.<br />
VORSICHT - UNSICHTBARE LASERSTRAHLUNG, <br />
WENN ABDECKUNG GEFFNET. <br />
NICHT DEM STRAHL AUSSETZEN.<br />
ATTENTION - RAYONNEMENT LASER INVISIBLE EN CAS <br />
DOUVERTURE. EXPOSITION DANGEREUSE <br />
AU FAISCEAU.<br />
ATTENZIONE - RADIAZIONE LASER INVISIBILE IN CASO DI <br />
APERTURA. EVITARE LESPOSIZIONE AL FASCIO.<br />
PRECAUCIN - RADIACIN LASER INVISIBLE CUANDO SE ABRE. <br />
EVITAR EXPONERSE AL RAYO.<br />
PERIGO - RADIAO LASER INVISŒVEL AO ABRIR. EVITE <br />
EXPOSIO DIRECTA AO FEIXE.<br />
GEVAAR - ONZICHTBARE LASERSTRALEN BIJ GEOPENDE <br />
KLEP. DEZE KLEP NIET OPENEN.<br />
ADVARSEL. - USYNLIG LASERSTRLNING VED BNING, NR <br />
SIKKERHEDSBRYDERE ER UDE AF FUNKTION. <br />
UNDG UDSAETTELSE FOR STRLNING.<br />
ADVARSEL. - USYNLIG LASERSTRLNING NR DEKSEL <br />
PNES. STIRR IKKE INN I STRLEN. UNNG <br />
EKSPONERING FOR STRLEN.<br />
VARNING - OSYNLIG LASERSTRLNING NR DENNA DEL <br />
R PPEN OCH SPRREN R URKOPPLAD. <br />
BETRAKTA EJ STRLEN. STRLEN R FARLIG.<br />
VARO! - AVATTAESSA JA SUOJALUKITUS OHITETTAESSA <br />
OLET ALTTIINA NKYMTTMLLE LASER-<br />
STEILYLLE L KATSO STEESEEN.<br />
viii
Ozone Safety<br />
During normal operation, this machine produces ozone. The<br />
ozone produced does not present a hazard to the operator.<br />
Howe<strong>ver</strong>, it is advisable that the machine be operated in a well<br />
ventilated area.<br />
If you need additional information about ozone, please request<br />
your nearest <strong>Samsung</strong> dealer.<br />
Power Sa<strong>ver</strong><br />
This machine contains advanced energy conservation<br />
technology that reduces power consumption when it is not<br />
in active use.<br />
When the machine does not receive data for an extended<br />
period of time, power consumption is automatically<br />
lowered.<br />
The energy star emblem does not represent EPA<br />
endorsement of any machine or service.<br />
Recycling<br />
Please recycle or dispose of the packaging material for this<br />
product in an environmentally responsible manner.<br />
ix
Radio Frequency Emissions<br />
FCC Information to the <strong>User</strong><br />
This equipment has been tested and found to comply with the limits for a Class B<br />
digital device, pursuant to Part 15 of the FCC Rules. These limits are designed to<br />
provide reasonable protection against harmful interference in a residential<br />
installation. This equipment generates, uses and can radiate radio frequency energy<br />
and, if not installed and used in accordance with the instructions, may cause harmful<br />
interference to radio communications. Howe<strong>ver</strong>, there is no guarantee that<br />
interference will not occur in a particular installation. If this equipment does cause<br />
harmful interference to radio or television reception, which can be determined by<br />
turning the equipment off and on, the user is encouraged to try to correct the<br />
interference by one or more of the following measures:<br />
• Reorient or relocate the receiving antenna.<br />
• Increase the separation between the equipment and recei<strong>ver</strong>.<br />
• Connect the equipment into an outlet on a circuit different from that to which the<br />
recei<strong>ver</strong> is connected.<br />
• Consult the dealer or experienced radio TV technician for help.<br />
CAUTION: Change or modifications not expressly approved by the manufacturer<br />
responsible for compliance could void the user's authority to operate the equipment.<br />
Canadian Radio Interference Regulations<br />
This digital apparatus does not exceed the Class B limits for radio noise emissions<br />
from digital apparatus as set out in the interference-causing equipment standard<br />
entitled “Digital Apparatus”, ICES-003 of the Industry and Science Canada.<br />
Cet appareil numérique respecte les limites de bruits radioélectriques applicables aux<br />
appareils numériques de Classe B prescrites dans la norme sur le matériel brouilleur:<br />
“Appareils Numériques”, ICES-003 édictée par l’Industrie et Sciences Canada.<br />
Fax Branding<br />
The Telephone Consumer Protection Act of 1991 makes it unlawful for any person to<br />
use a computer or other electronic device to send any message via a telephone<br />
facsimile machine unless such message clearly contains in a margin at the top or<br />
bottom of each transmitted page or on the first page of the transmission the following<br />
information:<br />
(1) the date and time of transmission<br />
(2) identification of either business, business entity or individual sending the<br />
message; and<br />
(3) telephone number of either the sending machine, business, business entity or<br />
individual.<br />
x
Refer to the Facsimile <strong>User</strong>’s Guide for instructions on how to enter this information<br />
into your machine’s memory.<br />
The Telephone Company may make changes in its communications facilities,<br />
equipment operations, or procedures where such action is reasonably required in the<br />
operation of its business and is not inconsistent with the rules and regulations in FCC<br />
Part 68. If such changes can be reasonably expected to render any customer terminal<br />
equipment incompatible with telephone company communications facilities, or<br />
require modification or alteration of such terminal equipment, or otherwise materially<br />
affect its use or performance, the customer shall be given adequate notice in writing,<br />
to allow the customer an opportunity to maintain uninterrupted service.<br />
Ringer Equivalence Number<br />
The Ringer Equivalence Number and FCC Registration Number for this machine may<br />
be found on the label located on the bottom or rear of the machine. In some instances<br />
you may need to provide these numbers to the telephone company.<br />
The Ringer Equivalence Number (REN) is a measure of the electrical load placed on<br />
the telephone line, and is useful for determining whether you have “o<strong>ver</strong>loaded” the<br />
line. Installing se<strong>ver</strong>al types of equipment on the same telephone line may result in<br />
problems making and receiving telephone calls, especially ringing when your line is<br />
called. The sum of all Ringer Equivalence Numbers of the equipment on your<br />
telephone line should be less than five in order to assure proper service from the<br />
telephone company. In some cases, a sum of five may not be usable on your line. If<br />
any of your telephone equipment is not operating properly, you should immediately<br />
remove it from your telephone line, as it may cause harm to the telephone network.<br />
WARNING:<br />
FCC Regulations state that changes or modifications to this equipment not expressly<br />
approved by the manufacturer could void the user’s authority to operate this<br />
equipment. In the event that terminal equipment causes harm to the telephone<br />
network, the telephone company should notify the customer that service may be<br />
stopped. Howe<strong>ver</strong>, where prior notice is impractical, the company may temporarily<br />
cease service, providing that they:<br />
a) promptly notify the customer.<br />
b) give the customer an opportunity to correct the equipment problem.<br />
c) inform the customer of the right to bring a complaint to the Federal Communication<br />
Commission pursuant to procedures set out in FCC Rules and Regulations Subpart<br />
E of Part 68.<br />
xi
You should also know that:<br />
•Your machine is not designed to be connected to a digital PBX system.<br />
• If you intend to use a computer modem or fax modem on the same phone line as<br />
your machine, you may experience transmission and reception problems with all<br />
the equipment. It is recommended that no other equipment, except for a regular<br />
telephone, share the line with your machine.<br />
• If your area experiences a high incidence of lightning or power surges, we<br />
recommend that you install surge protectors for both the power and the telephone<br />
lines. Surge protectors can be purchased from your dealer or telephone and<br />
electronic specialty stores.<br />
• When programming emergency numbers and/or making test calls to emergency<br />
numbers, use a non-emergency number to advise the emergency service<br />
dispatcher of your intentions. The dispatcher will give you further instructions on<br />
how to actually test the emergency number.<br />
• This machine may not be used on coin service or party lines.<br />
• This machine provides magnetic coupling to hearing aids.<br />
•You may safely connect this equipment to the telephone network by means of a<br />
standard modular jack, USOC RJ-11C.<br />
xii
Declaration of Conformity (European Countries)<br />
Approvals and Certifications<br />
The CE marking applied to this product symbolises <strong>Samsung</strong><br />
Electronics Co., Ltd. Declaration of Conformity with the following<br />
applicable 93/68/EEC Directives of the European Union as of the<br />
dates indicated:<br />
January 1, 1995: Council Directive 73/23/EEC Approximation of the laws of the<br />
member states related to low voltage equipment.<br />
January 1, 1996: Council Directive 89/336/EEC (92/31/EEC), approximation of the<br />
laws of the Member States related to electromagnetic compatibility.<br />
March 9, 1999: Council Directive 1999/5/EC on radio equipment and<br />
telecommunications terminal equipment and the mutual recognition of their<br />
conformity.<br />
A full declaration, defining the relevant Directives and referenced standards can be<br />
obtained from your <strong>Samsung</strong> Electronics Co., Ltd. representative.<br />
EC Certification<br />
Certification to 1999/5/EC Radio Equipment & Telecommunications<br />
Terminal Equipment Directive (FAX)<br />
This <strong>Samsung</strong> product has been self-certified by <strong>Samsung</strong> for pan-European single<br />
terminal connection to the analogue public switched telephone network (PSTN) in<br />
accordance with Directive 1999/5/EC. The product has been designed to work with<br />
the national PSTNs and compatible PBXs of the European countries:<br />
In the event of problems, you should contact the Euro QA Lab of <strong>Samsung</strong> Electronics<br />
Co., Ltd. in the first instance.<br />
The product has been tested against TBR21. To assist in the use and application of<br />
terminal equipment which complies with this standard, the European<br />
Telecommunication Standards Institute (ETSI) has issued an advisory document (EG<br />
201 121) which contains notes and additional requirements to ensure network<br />
compatibility of TBR21 terminals. The product has been designed against, and is fully<br />
compliant with, all of the relevant advisory notes contained in this document.<br />
xiii
Replacing the Fitted Plug (for UK Only)<br />
IMPORTANT<br />
The mains lead for this machine is fitted with a standard (BS 1363) 13 amp plug and<br />
has a 13 amp fuse. When you change or examine the fuse, you must re-fit the correct<br />
13 amp fuse. You then need to replace the fuse co<strong>ver</strong>. If you have lost the fuse co<strong>ver</strong>,<br />
do not use the plug until you have another fuse co<strong>ver</strong>.<br />
Please contact the people from you purchased the machine.<br />
The 13 amp plug is the most widely used type in the UK and should be suitable.<br />
Howe<strong>ver</strong>, some buildings (mainly old ones) do not have normal 13 amp plug sockets.<br />
You need to buy a suitable plug adaptor. Do not remove the moulded plug.<br />
WARNING<br />
If you cut off the moulded plug, get rid of it straight away.<br />
You cannot rewire the plug and you may receive an electric shock if you plug<br />
it into a socket.<br />
IMPORTANT WARNING: You must earth this machine.<br />
The wires in the mains lead have the following colour code:<br />
• Green and Yellow: Earth<br />
• Blue:<br />
Neutral<br />
• Brown:<br />
Live<br />
If the wires in the mains lead do not match the colours marked in your plug, do the<br />
following:<br />
You must connect the green and yellow wire to the pin marked by the letter “E” or by<br />
the safety `Earth symbol' or coloured green and yellow or green.<br />
You must connect the blue wire to the pin which is marked with the letter “N” or<br />
coloured black.<br />
You must connect the brown wire to the pin which is marked with the letter “L” or<br />
coloured red.<br />
You must have a 13 amp fuse in the plug, adaptor, or at the distribution board.<br />
xiv
xv
Differences Between British and American English<br />
British English<br />
(Re)dialling<br />
Colour<br />
Emphasise<br />
Recognise<br />
Organise<br />
Authorise<br />
Cancelling<br />
Customise<br />
American English<br />
(Re)dialing<br />
Color<br />
Emphasize<br />
Recognize<br />
Organize<br />
Authorize<br />
Canceling<br />
Customize<br />
xvi
1<br />
GETTING<br />
STARTED<br />
Thank you for purchasing this <strong>Samsung</strong> multifunctional<br />
product. Your machine provides printing, copying,<br />
scanning, and faxing (<strong>SCX</strong>-<strong>4216F</strong> only) functions!<br />
This chapter gives you step-by-step instructions for<br />
setting up your machine.<br />
This chapter includes:<br />
• Unpacking<br />
• Understanding the Component Location<br />
• Installing the Toner Cartridge<br />
• Loading Paper<br />
• Making Connections<br />
• Turning the Machine On<br />
• Changing the Display Language<br />
• Setting the Paper Type and Size<br />
• Using the Save Modes
Unpacking<br />
Remove the machine and all accessories from the packing carton.<br />
Make sure that the machine has been packed with the following<br />
items:<br />
Starter Toner Cartridge AC Power Cord *<br />
CD-ROM **<br />
Quick Install Guide<br />
Telephone Line Cord *<br />
(only for <strong>SCX</strong>-<strong>4216F</strong>)<br />
*. The appearance of the power cord and the telephone line cord may differ<br />
according to your country’s specifications.<br />
**. The CD-ROM contains the MFP dri<strong>ver</strong>, SmarThru software, the user’s guides<br />
and the Adobe Acrobat Reader program.<br />
NOTES:<br />
•You should use the telephone line cord which is supplied with<br />
your machine. If you are replacing it with another vendor’s, it<br />
should be AWG #26 or lower gage.<br />
•Power cord must be plugged into a grounded power socket.<br />
•You can purchase and install the optional Network Print Ser<strong>ver</strong>.<br />
For details, refer to the user’s guide supplied with your Network<br />
Print Ser<strong>ver</strong>.<br />
1.2<br />
GETTING STARTED
Remove the packing tape from the front, back and sides of the<br />
machine.<br />
Tape<br />
1<br />
GETTING STARTED 1.3
Selecting a Location<br />
Select a level, stable place with adequate space for air<br />
circulation. Allow extra space for opening co<strong>ver</strong>s and trays.<br />
The area should be well-ventilated and away from direct sunlight<br />
or sources of heat, cold and humidity. Do not set the printer<br />
close to the edge of your desk or table.<br />
Clearance Space<br />
Front: 482.6 mm (enough space so that the paper tray can be<br />
removed)<br />
Back: 100 mm (enough space for ventilation)<br />
Right: 100 mm<br />
Left: 100 mm (enough space for ventilation)<br />
482.6 mm (18.8 in.)<br />
1018.6 mm (40.1 in)<br />
674 mm (26.5 in)<br />
1.4<br />
GETTING STARTED
Understanding the Component<br />
Location<br />
These are the main components of your machine:<br />
1<br />
Front View<br />
Automatic<br />
Document Feeder<br />
(for <strong>SCX</strong>-4116/<strong>4216F</strong>)<br />
Document<br />
Guides<br />
Document<br />
Input Tray<br />
Document<br />
Co<strong>ver</strong><br />
Document Glass<br />
Document<br />
Output Tray<br />
Control Panel<br />
(<strong>SCX</strong>-<strong>4216F</strong>: see page 1.7<br />
<strong>SCX</strong>-4016/4116: see page 1.9)<br />
Front Output Tray<br />
(face down)<br />
Paper Output<br />
Extension<br />
Paper Tray<br />
Bypass Tray<br />
Paper Level<br />
Indicator<br />
Front Co<strong>ver</strong><br />
* The figure above shows a <strong>SCX</strong>-<strong>4216F</strong>.<br />
GETTING STARTED 1.5
Rear View<br />
Rear Co<strong>ver</strong><br />
Rear Output Slot<br />
(Face up)<br />
Power Switch<br />
AC Power Cord<br />
Connector<br />
Parallel<br />
Connector<br />
USB<br />
Connector<br />
Telephone Connector<br />
(for <strong>SCX</strong>-<strong>4216F</strong>)<br />
* The figure above shows a <strong>SCX</strong>-<strong>4216F</strong>.<br />
1.6<br />
GETTING STARTED
Control Panel Functions<br />
<strong>SCX</strong>-<strong>4216F</strong><br />
1 2 3<br />
4 5<br />
6<br />
1<br />
Adjusts the brightness of the documents for<br />
the current copy job.<br />
1<br />
C<br />
O<br />
P<br />
Y<br />
Selects the document type for the current<br />
copy job.<br />
Allows you to use special copy features, such<br />
as Clone, Collation, Auto fit, 2-side, N-up<br />
(multiple pages on a sheet) and Poster<br />
copying.<br />
Makes a copy smaller or larger than the<br />
original.<br />
Selects the number of copies.<br />
2<br />
Displays the current status and prompts<br />
during an operation.<br />
Turns on when the toner cartridge is empty.<br />
Scrolls through the options available for the<br />
selected menu item.<br />
3<br />
Confirms the selection on the display.<br />
Enters Menu Mode and scrolls through the<br />
menus available.<br />
GETTING STARTED 1.7
Sends you back to the upper menu level.<br />
3<br />
Stops an operation at any time.<br />
In Standby Mode, clears/cancels the copy<br />
options, such as the contrast, the image<br />
setting, the copy size and the number of<br />
copies.<br />
Starts a job.<br />
4<br />
Dials a number or enters alphanumeric<br />
characters.<br />
Adjusts the resolution of the documents for<br />
the current fax job.<br />
Allows you to send a fax to multiple<br />
destinations.<br />
5<br />
F<br />
A<br />
X<br />
• Allows you to store frequently-dialed fax<br />
numbers using a one or two-digit speed dial<br />
or group number for automatic dialling and<br />
edit the stored numbers.<br />
• Allows you to print a Phonebook list.<br />
Redials the last number in Standby Mode or<br />
inserts a pause into a fax number in edit<br />
mode.<br />
Engages the telephone line.<br />
6<br />
S<br />
A<br />
V<br />
E<br />
Allows you to save on toner by using less<br />
toner to print a document.<br />
Allows you to save on call costs by sending a<br />
fax at a preset toll-saving time. Using this<br />
feature, you can take advantage of lower long<br />
distance rates at night, for example.<br />
1.8<br />
GETTING STARTED
<strong>SCX</strong>-4016/4116<br />
1 2 3<br />
4 5<br />
1<br />
1<br />
2<br />
Adjusts the brightness of the documents for<br />
the current copy job.<br />
Selects the document type for the current<br />
copy job.<br />
Displays the current status and prompts<br />
during an operation.<br />
Turns on when the toner cartridge is empty.<br />
Scrolls through the options available for the<br />
selected menu item.<br />
Confirms the selection on the display.<br />
Enters Menu Mode and scrolls through the<br />
menus available.<br />
3<br />
Sends you back to the upper menu level.<br />
Stops an operation at any time.<br />
In Standby Mode, clears/cancels the copy<br />
options, such as the contrast, the image<br />
setting, copy size and the number of copies.<br />
Starts a job.<br />
GETTING STARTED 1.9
4<br />
Allows you to use special copy features, such<br />
as Clone, Collation, Auto fit, 2-side, N-up<br />
(multiple pages on a sheet) and Poster<br />
copying.<br />
Makes a copy smaller or larger than the<br />
original.<br />
Selects the number of copies.<br />
5<br />
Allows you to save on toner by using less<br />
toner to print a document.<br />
Installing the Toner Cartridge<br />
1 Open the front co<strong>ver</strong>.<br />
2 Remove the starter toner cartridge from its bag. Gently roll<br />
the cartridge to distribute the toner.<br />
Thoroughly rolling the cartridge will assure the maximum<br />
copies per cartridge.<br />
1.10<br />
GETTING STARTED
3 Slide the toner cartridge into the machine until it locks into<br />
place completely.<br />
1<br />
4 Close the front co<strong>ver</strong>.<br />
NOTE: When the toner cartridge needs to be replaced, the<br />
indicator turns on and the “Toner Empty” message appears on the<br />
display. To replace the toner cartridge, see page 7.8.<br />
GETTING STARTED 1.11
Loading Paper<br />
The paper tray can hold a maximum of 250 sheets of 20 lb plain<br />
paper. For copying or faxing, you can use A4-, Letter-, or<br />
Legal-sized paper only. For printing a PC file, you can use many<br />
different sizes of paper. The paper tray is preset for using Lettersized<br />
paper.<br />
To load a stack of Letter-sized paper:<br />
1 Pull open the paper tray.<br />
2 Push down on the pressure plate until it locks into place.<br />
3 Fan the edges of the paper stack to separate the pages.<br />
Then tap the stack on a flat surface to even it up.<br />
1.12<br />
GETTING STARTED
4 Insert the paper stack into the paper tray.<br />
1<br />
If you want to load a different sized paper, you need to<br />
adjust the paper guides. For details, see page 1.14.<br />
5 Pay attention to the paper limit mark on the left inside wall<br />
of the tray. Paper o<strong>ver</strong>loading may cause paper jams.<br />
6 Slide the paper tray back in.<br />
After you load paper, you need to set up your machine for the<br />
paper type and size you loaded. See page 1.18 for copying and<br />
faxing, or page 5.7 for PC-printing.<br />
GETTING STARTED 1.13
Changing the Paper Size in the Paper Tray<br />
To load longer sizes of paper, such as Legal-sized paper, you<br />
need to adjust the paper guides to extend the paper tray.<br />
1 Pressing and unlatching the guide lock, slide the paper<br />
length guide out completely to extend the paper tray to its<br />
full length.<br />
2 After inserting paper into the tray, slide in the guide until it<br />
lightly touches the end of the paper stack.<br />
3 Pinching the paper width guide as shown, move it toward<br />
the stack of paper until it lightly touches the side of the<br />
stack.<br />
1.14<br />
GETTING STARTED
NOTES:<br />
• Do not push the paper width guide far enough to cause the<br />
materials to warp.<br />
• If you do not adjust the paper width guide, it may cause paper<br />
jams.<br />
1<br />
Making Connections<br />
1 If you have <strong>SCX</strong>-4016/4116:<br />
Skip this step and proceed to Step 2.<br />
If you have <strong>SCX</strong>-<strong>4216F</strong>:<br />
Plug the supplied telephone line cord into the LINE jack<br />
and the other end into the wall jack.<br />
GETTING STARTED 1.15
2 If you want to use a parallel printer cable, purchase only<br />
IEEE-1284 compliant parallel cable and connect it to the<br />
parallel connector on your machine.<br />
Push the metal clips down to fit inside the notches on the<br />
cable plug.<br />
➜ To the parallel port on<br />
your computer<br />
Connecting the printer to the USB port of the computer<br />
requires a certified USB cable. You need to buy a USB 1.1<br />
compliant cable that is within 3 m in length. Connect it to<br />
the USB connector on your machine.<br />
➜ To the USB port on<br />
your computer<br />
1.16<br />
GETTING STARTED<br />
NOTES:<br />
•You only need to connect one of the cables mentioned above. Do<br />
not use the parallel and the USB cables at the same time.<br />
• If you are using a USB cable, you must be running Windows 98/<br />
Me/2000/XP.<br />
• When using the USB connection, your machine provides two USB<br />
modes; Fast and Slow. Fast is the default mode. Some PC users<br />
may experience poor USB function in the default mode. If this<br />
occurs, select the Slow mode to achieve successful results. For<br />
details about changing the USB mode, see page 8.17.
Turning the Machine On<br />
1 Plug one end of the supplied three-pronged electrical type<br />
cord into the AC socket on the machine and the other end<br />
into a properly grounded AC outlet.<br />
1<br />
2 Press the power switch to turn the machine on. “Warming<br />
Up Please Wait” appears on the display indicating that the<br />
machine is now on.<br />
To view your display text in another language, see below.<br />
CAUTIONS:<br />
• The fusing areas at the rear part of the inside of your machine is<br />
hot when powered. Be careful not to be burned when you access<br />
this area.<br />
• Do not disassemble the machine when it is powered. If you do, it<br />
may give you an electric shock.<br />
Changing the Display Language<br />
To change the language that displays on the display of the<br />
control panel, follow these steps:<br />
1 Press Menu until “Machine Setup” appears on the top line<br />
of the display.<br />
2 Press the scroll button ( or ) until “Language” appears<br />
on the bottom line of the display.<br />
GETTING STARTED 1.17
3 Press Enter. The current setting appears on the bottom<br />
line of the display.<br />
4 Press the scroll button ( or ) until the language you<br />
want appears on the display.<br />
5 Press Enter to save the selection.<br />
6 To return to Standby Mode, press Stop/Clear.<br />
Setting the Paper Type and Size<br />
After loading paper in the paper tray, you need to set the paper<br />
type and size using the control panel buttons. These settings will<br />
apply to copy mode. For PC-printing, you need to select the<br />
paper type and size in the application program you use.<br />
1 Press Menu.<br />
The display shows “Paper Setting” on the top line and the<br />
first menu item, “Paper Type,” on the bottom line.<br />
2 Press Enter to access the menu item.<br />
3 Use the scroll button ( or ) to find the paper type you<br />
are using and press Enter to save it.<br />
4 Press the button to scroll to “Paper Size” and press<br />
Enter to access the menu item.<br />
5 Press Enter when “Tray Paper” displays on the bottom line.<br />
6 Use the scroll button ( or ) to find the paper size you<br />
are using and press Enter to save it.<br />
7 To return to Standby Mode, press Stop/Clear.<br />
1.18<br />
GETTING STARTED
Using the Save Modes<br />
Toner Save Mode<br />
1<br />
The toner save mode allows your machine to use less toner on<br />
each page. Activating this mode extends the life of the toner<br />
cartridge longer than the normal mode, but it reduces the print<br />
quality.<br />
To turn the toner save mode on or off, press Toner Save.<br />
• If the button backlight is on, the mode is active and the<br />
machine uses less toner when printing a document.<br />
• If the button backlight is off, the mode is deactivated and<br />
the machine prints with the normal quality.<br />
NOTE: For PC-printing, you can also turn on or off the toner save<br />
mode in the printer properties. See page 5.20.<br />
Power Save Mode<br />
The power save mode allows your machine to reduce power<br />
consumption when it is not in actual use. You can turn this mode<br />
on by selecting the length of time for which the machine waits<br />
after a job is printed before it switches to a reduced power state.<br />
1 Press Menu until “Machine Setup” appears on top line of<br />
the display.<br />
2 Press the scroll button ( or ) until “Power Save” appears<br />
on the bottom line. Press Enter.<br />
3 Press the scroll button ( or ) to display “On” on the<br />
bottom line and press Enter.<br />
Selecting “Off” means that the power save mode turns off.<br />
4 Press the scroll button ( or ) until the time settings you<br />
want appears.<br />
The available options are 5, 10, 15, 30 and 45 (minutes).<br />
5 Press Enter to save the selection.<br />
6 To return to Standby Mode, press Stop/Clear.<br />
GETTING STARTED 1.19
CCD Power Save Mode<br />
The scan lamp under the document glass automatically turns off<br />
when it is not in actual use to reduce power consumption and<br />
extend the lamp life. The lamp automatically wakes up after<br />
some warm-up time when you start scanning.<br />
You can set the length of time for which the scan lamp waits<br />
after a scan job is completed before it switches to the power<br />
save mode.<br />
1 Press Menu until “Machine Setup” appears on top line of<br />
the display.<br />
2 Press the scroll button ( or ) until “CCD Power Save”<br />
appears on the bottom line. Press Enter.<br />
3 Press the scroll button ( or ) until the time setting you<br />
want appears on the bottom line.<br />
The available time options are 1, 4, 8 and 12 (hours).<br />
4 Press Enter to save the selection.<br />
5 To return to Standby Mode, press Stop/Clear.<br />
1.20<br />
GETTING STARTED
2<br />
INSTALLING SOFTWARE<br />
This chapter gives you information for installing the<br />
supplied <strong>Samsung</strong> software. You must install the <strong>Samsung</strong><br />
software to use your machine as a printer and a scanner.<br />
This chapter includes:<br />
• About <strong>Samsung</strong> Software<br />
• System Requirements<br />
• Installing <strong>Samsung</strong> Software in Windows<br />
• Uninstalling <strong>Samsung</strong> Software
About <strong>Samsung</strong> Software<br />
You must install software using the supplied CD-ROM after you<br />
have set up your machine and connected it to your computer.<br />
The CD-ROM includes:<br />
• <strong>Samsung</strong> software<br />
• <strong>User</strong>’s Guides<br />
• Adobe Acrobat Reader<br />
The CD-ROM provides you with the following software:<br />
Windows MFP Dri<strong>ver</strong><br />
To use your machine as a printer and scanner in Windows, you<br />
must install the MFP dri<strong>ver</strong>. For information about installing the<br />
MFP dri<strong>ver</strong> in Windows, see page 2.5.<br />
Remote Control Panel<br />
This Windows-based program is only available for <strong>SCX</strong>-<strong>4216F</strong>. It<br />
is automatically installed when you install the MFP dri<strong>ver</strong>. For<br />
information about using the program, refer to the Facsimile<br />
<strong>User</strong>’s Guide.<br />
USB Dri<strong>ver</strong><br />
You must first install the USB dri<strong>ver</strong> for the USB connection in<br />
Windows 98/Me. For information about installing the USB dri<strong>ver</strong>,<br />
see page 2.9. In Windows 2000/XP, the USB port is provided so<br />
that you don’t need to install the USB dri<strong>ver</strong>.<br />
SmarThru Software<br />
SmarThru is the accompanying software for your multifunctional<br />
machine. SmarThru contains a powerful image editor that allows<br />
you to edit images in many ways and also includes powerful<br />
Internet mail client software.<br />
With SmarThru, you can save the scanned images in a dedicated<br />
storage area for subsequent editing, sending via e-mail or fax,<br />
printing and processing by other programs of your choice.<br />
OCR Software (AnyPage Lite)<br />
OCR (Optical Character Recognition) is software that has the<br />
ability to recognise most character formats so that a scanned<br />
document can be read and edited with word processing<br />
software.<br />
2.2<br />
INSTALLING SOFTWARE
Printer Dri<strong>ver</strong> Features<br />
Your printer dri<strong>ver</strong>s will support the following standard features:<br />
• Paper source selection<br />
• Paper size, orientation and media type<br />
• number of copies<br />
Table below lists a general o<strong>ver</strong>view of features supported by<br />
your printer dri<strong>ver</strong>s.<br />
2<br />
Feature<br />
Printer Dri<strong>ver</strong><br />
Win9x/Me Win2000/XP NT4 .0<br />
Toner Save Y Y Y<br />
Print quality option Y Y Y<br />
Poster printing Y Y Y<br />
Multiple pages per sheet<br />
(N-up)<br />
Y Y Y<br />
Fit to page printing Y Y Y<br />
Scale printing Y Y Y<br />
Watermark Y Y Y<br />
O<strong>ver</strong>lay Y Y Y<br />
INSTALLING SOFTWARE 2.3
System Requirements<br />
Before you begin, ensure that your system meets the minimum<br />
requirements.<br />
Supported Operating System<br />
• Windows 95 OSR2<br />
• Windows 98/Windows 98 SE<br />
• Windows Me<br />
• Windows NT 4 Workstation or Ser<strong>ver</strong> with Service Pack 3<br />
• Windows 2000 Professional or Advanced Ser<strong>ver</strong><br />
• Windows XP Home edition or Professional.<br />
Minimal Requirements<br />
• Disk space: 300 <strong>MB</strong> for installation<br />
• Memory: 64 <strong>MB</strong><br />
• CPU: Pentium II 233 or higher<br />
• Required software: Internet Explorer 4.01<br />
NOTES:<br />
• For Windows NT 4.0/2000/XP, the system administrator should<br />
install the software.<br />
• Windows 95 <strong>ver</strong>sions prior to OSR2 are not recommended due to<br />
incompatibility with OLE/COM libraries.<br />
2.4<br />
INSTALLING SOFTWARE
Installing <strong>Samsung</strong> Software in<br />
Windows<br />
NOTES:<br />
• Cancel the “New Hardware Found” window when your computer<br />
boots up.<br />
• Make sure that your machine is plugged in and connected to<br />
your computer’s parallel port or USB port before installing<br />
software. Windows 95 and Windows NT 4.0 do not support the<br />
USB connection.<br />
2<br />
1 Insert the supplied CD-ROM into your CD-ROM drive.<br />
The CD-ROM should automatically run and an installation<br />
window appears.<br />
If the installation window does not appear, click Start and<br />
then Run. Type X:Autorun.exe, replacing “X” with the<br />
letter of your drive and click OK.<br />
2 When you are asked to select a language, choose the<br />
language you want.<br />
3 Click Install the <strong>Samsung</strong> Software on your PC.<br />
Installs the <strong>Samsung</strong><br />
Software on your PC.<br />
Installs the Adobe<br />
Acrobat Reader program<br />
on your PC.<br />
Opens the user’s guides<br />
in PDF file format.<br />
Accesses the <strong>Samsung</strong><br />
web site to allow you to<br />
register as a user.<br />
Uninstalls the <strong>Samsung</strong><br />
Software. See page 2.13.<br />
INSTALLING SOFTWARE 2.5
4 Click Next.<br />
5 Follow the on-screen instructions and click Next.<br />
6 Click Next.<br />
7 Select the installation type and click Next.<br />
The software installation supports three types of setup:<br />
• Typical: Program will be installed with the most common<br />
options and is recommended for most users.<br />
• Compact: Only the MFP dri<strong>ver</strong> will be installed.<br />
• Custom: You may choose the options you want to install.<br />
If you select the Custom installation, you may<br />
choose the components you want to install.<br />
• SmarThru Software: to scan and edit images<br />
and to work with electronic documents.<br />
• OCR Software: AnyPage Lite software to enable<br />
OCR.<br />
• MFP Dri<strong>ver</strong>: to print and scan.<br />
2.6<br />
INSTALLING SOFTWARE
8 Choosing the SmarThru networking option allows you to<br />
share the modems on other computer in your network, and<br />
the scan device or to access similar devices on other<br />
computers.<br />
Stand-alone configuration does not allow you to use any<br />
networking features, such as Remote Fax or Remote Scan<br />
service.<br />
2<br />
When you select SmarThru networking, you can elect to<br />
install it as a Ser<strong>ver</strong>, a Client or both.<br />
The Ser<strong>ver</strong> option allows you to share a local fax modem<br />
and/or a scanner o<strong>ver</strong> a LAN. You can control sharing by<br />
managing a remote service user. The Client option allows<br />
you to use Remote Fax or Remote Scan services provided<br />
by a SmarThru Ser<strong>ver</strong> o<strong>ver</strong> a LAN. You need to have a<br />
client account provided by the ser<strong>ver</strong>. For details about<br />
Remote Fax/Scan Services, refer to the SmarThru <strong>User</strong>’s<br />
Guide.<br />
INSTALLING SOFTWARE 2.7
9 Click Next.<br />
10 If you want to register yourself as a user of the <strong>Samsung</strong><br />
printer, click Next. You can access the <strong>Samsung</strong> web site.<br />
If not, remove the check mark and click Next.<br />
11 When the installation is complete, click Finish.<br />
When your computer does not shut down and restart<br />
automatically, you must shut it down manually and restart<br />
it before the changes are saved.<br />
NOTE: When you install the software, the Digital Signature Not<br />
Found window appears in Windows 2000 and Windows XP. Click<br />
OK in Windows 2000 and click Continue Anyway in Windows XP.<br />
2.8<br />
INSTALLING SOFTWARE
Installing the USB Dri<strong>ver</strong> in Windows 98/<br />
Me<br />
1 Connect the printer to your computer using the USB cable<br />
and turn them on. For further details, see page 1.16.<br />
2 The Add New Hardware Wizard window appears. Click<br />
Next.<br />
3 Place the CD-ROM in the CD-ROM drive and check Search<br />
for the best dri<strong>ver</strong> for your device and click Next.<br />
2<br />
4 Check CD-ROM drive and click Browse. Choose x:\USB<br />
(where x is the drive letter for the CD-ROM drive) and click<br />
Next.<br />
5 Click Next. The USB dri<strong>ver</strong> is installed.<br />
6 When the installation is complete, click Finish.<br />
7 When the language selection window appears, select the<br />
appropriate language.<br />
NOTE: If you have already installed the printer software, this<br />
window doesn’t appear.<br />
8 Follow the instructions on the window to complete the<br />
printer software installation. For further details, see<br />
page 2.5.<br />
INSTALLING SOFTWARE 2.9
NOTES:<br />
• When you want to use your machine with a parallel cable,<br />
remove the USB cable and connect the parallel cable. Then<br />
reinstall the MFP dri<strong>ver</strong>.<br />
• When your machine doesn’t work properly, reinstall the MFP<br />
dri<strong>ver</strong>.<br />
Uninstalling <strong>Samsung</strong> Software<br />
Uninstall is required if you are upgrading the software or if your<br />
installation fails. You can uninstall all software including<br />
SmarThru and MFP dri<strong>ver</strong>, using the CD-ROM or uninstall the<br />
desired item using the Windows unInstallShield.<br />
Uninstalling the MFP Dri<strong>ver</strong><br />
1 From the Start menu, select Programs, and then select<br />
<strong>Samsung</strong> <strong>SCX</strong>-4x16 Series.<br />
2 You can select a component in the MFP dri<strong>ver</strong> to uninstall<br />
individually.<br />
If you want to uninstall the printer dri<strong>ver</strong>, select Printer<br />
Dri<strong>ver</strong> Uninstall.<br />
If you want to uninstall the twain dri<strong>ver</strong>, select Twain<br />
Dri<strong>ver</strong> Uninstall.<br />
For <strong>SCX</strong>-<strong>4216F</strong>, if you want to uninstall the Remote Control<br />
Panel, select Remote Control Panel Uninstall.<br />
2.10<br />
INSTALLING SOFTWARE
3 When your computer asks you to confirm your selection,<br />
click Yes or OK.<br />
The selected dri<strong>ver</strong> and all of its components are removed<br />
from your computer.<br />
4 When the uninstallation is done, click Finish or OK.<br />
Uninstalling <strong>Samsung</strong> SmarThru<br />
2<br />
NOTE: Before beginning uninstallation, ensure that all<br />
applications are closed on your computer. A system reboot is<br />
required after the software is uninstalled.<br />
1 From the Start menu, select Programs.<br />
2 Select <strong>Samsung</strong> SmarThru, and then select SmarThru 3<br />
Uninstall.<br />
INSTALLING SOFTWARE 2.11
3 When your computer asks you to confirm your selection,<br />
click Yes. The Uninstall Options window appears.<br />
Uninstall options are:<br />
• Backup and delete: Backs up all your data and options<br />
to a safe place. It then removes the SmarThru system<br />
including the data.<br />
• Delete: Deletes all the SmarThru data and options. No<br />
backup or copying takes place. Be careful while using this<br />
option as you can easily lose your data.<br />
• Leave intact: Uninstalls SmarThru software leaving data<br />
and options intact. This can be useful, if, for example,<br />
you decide to install the Stand Alone configuration o<strong>ver</strong><br />
the SmarThru Networking. In this case, uninstall<br />
<strong>Samsung</strong> SmarThru having the Leave intact option set<br />
and install the SmarThru Stand Alone configuration.<br />
4 After selecting the uninstall option, click Next.<br />
5 When the uninstallation is done, the message window<br />
recommends restarting your computer. Click OK.<br />
2.12<br />
INSTALLING SOFTWARE
6 Click Finish.<br />
2<br />
When your computer doesn’t shut down and restart<br />
automatically, you must shut it down manually and restart<br />
it before the changes are saved.<br />
Using the CD-ROM<br />
You can uninstall all of the MFP dri<strong>ver</strong>, the Remote Control Panel<br />
and the SmarThru software with the CD-ROM you have used to<br />
install them.<br />
1 Insert the supplied CD-ROM into your CD-ROM drive.<br />
The CD-ROM should automatically run and an installation<br />
window appears.<br />
If the installation window doesn’t appear, select Run from<br />
the Start menu and then type X:Autorun.exe, replacing<br />
“X” with the letter of your drive and click OK.<br />
2 When you are asked to select a language, choose the<br />
language you want.<br />
INSTALLING SOFTWARE 2.13
3 Click Uninstall the <strong>Samsung</strong> Software on your PC.<br />
4 Follow the on-screen instructions to complete the<br />
uninstallation.<br />
5 When the uninstallation is done, click Finish.<br />
When your computer doesn’t shut down and restart<br />
automatically, you must shut it down manually and restart<br />
it before the changes are saved.<br />
2.14<br />
INSTALLING SOFTWARE
3<br />
PAPER<br />
HANDLING<br />
This chapter introduces you to the basics of selecting print<br />
materials and loading them into your machine.<br />
This chapter includes:<br />
• Selecting Print Materials<br />
• Selecting an Output Location<br />
• Loading Paper in the Paper Tray<br />
• Using the Bypass Tray
Selecting Print Materials<br />
Always use print materials that meet the guidelines for use with<br />
this machine. Using print materials that are not recommended<br />
may cause paper jams or print quality problems.<br />
Size, Input Sources and Capacities<br />
Size (mm/in.)<br />
Input Source/Capacity *<br />
Paper Tray<br />
Bypass Tray<br />
Plain paper<br />
Letter (215.9 x 279/8.5 x 11)<br />
A4 (210 x 297/8.27 x 11.69)<br />
Folio (215.9 x 330.2/8.5 x 13)<br />
Legal (215.9 x 355.6/8.5 x 14)<br />
Executive (184.2 x 266.7/7.25 x 10.5)<br />
A5 (148 x 210/5.83 x 8.27)<br />
A6 (105 x 148/4.13 x 5.88)<br />
Envelopes<br />
No.9 (98.4 x 225.4/3.88 x 8.88)<br />
No.10 (104.8 x 241.3/4.13 x 9.5)<br />
DL (110 x 220/4.33 x 8.66)<br />
C5 (162 x 229/6.38 x 9.02)<br />
C6 (114 x 162/4.49 x 6.38)<br />
B5 (176 x 250/6.93 x 9.84)<br />
No.7 3/4 (98.4 x 190.5/3.88 x 7.5)<br />
YES/250<br />
YES/250<br />
YES/250<br />
YES/250<br />
YES/250<br />
YES/250<br />
YES/250<br />
NO/0<br />
NO/0<br />
NO/0<br />
NO/0<br />
NO/0<br />
NO/0<br />
YES/1<br />
YES/1<br />
YES/1<br />
YES/1<br />
YES/1<br />
YES/1<br />
YES/1<br />
YES/1<br />
YES/1<br />
YES/1<br />
YES/1<br />
YES/1<br />
Labels **<br />
Letter (215.9 x 279/8.5 x 11)<br />
A4 (210 x 297/8.27 x 11.69)<br />
NO/0<br />
NO/0<br />
YES/1<br />
YES/1<br />
Transparency films **<br />
Letter (215.9 x 279/8.5 x 11)<br />
A4 (210 x 297/8.27 x 11.69)<br />
NO/0<br />
NO/0<br />
YES/1<br />
YES/1<br />
Card stocks **<br />
A6 card (105 x 148/4.13 x 5.88)<br />
Post Card (101.6 x 152.4/4 x 6)<br />
Hagaki (100 x 148/3.94 x 5.83)<br />
NO/0<br />
NO/0<br />
NO/0<br />
YES/1<br />
YES/1<br />
YES/1<br />
*. Maximum capacity may be reduced depending on paper thickness.<br />
**. If you experience excessive jamming, load one sheet at a time through the<br />
Bypass tray.<br />
3.2<br />
PAPER HANDLING
Guidelines for Paper and Special Materials<br />
When selecting or loading paper, envelopes, or other special<br />
materials, keep these guidelines in mind:<br />
•Attempting to print on damp, curled, wrinkled, or torn paper<br />
can cause paper jams and the poor print quality.<br />
• Use only high quality copier grade paper. Avoid paper with<br />
embossed lettering, perforations, or texture that is too<br />
smooth or too rough. Paper jams may occur.<br />
• Store paper in its ream wrapper until ready to use. Place<br />
cartons on pallets or shelves, not on the floor. Do not place<br />
heavy objects on top of the paper, whether it is packaged or<br />
unpackaged. Keep it away from moisture, or other conditions<br />
that can cause it to wrinkle or curl.<br />
• During storage, you should use moisture-proof wrap, such as<br />
any plastic container or bag, to prevent dust and moisture<br />
from contaminating your paper.<br />
• Always use paper and other materials that conform with the<br />
specifications listed under “Paper Specifications” on page A.6.<br />
• Use only well-constructed envelopes with sharp, well creased<br />
folds.<br />
- DO NOT use envelopes with clasps and snaps.<br />
- DO NOT use envelopes with windows, coated lining,<br />
self-adhesive seals, or other synthetic materials.<br />
- DO NOT use damaged or poorly made envelopes.<br />
• Load special paper types one sheet at a time.<br />
• Only use materials specifically recommended for use in laser<br />
printers.<br />
•To prevent special materials, such as transparencies and label<br />
sheets from sticking together, remove them as they prints<br />
out.<br />
• Place transparencies on a flat surface after removing them<br />
from the machine.<br />
• Do not leave transparencies in the paper tray for long periods<br />
of time. Dust and dirt may accumulate on them resulting in<br />
spotty printing.<br />
•To avoid smudging caused by fingerprints, handle<br />
transparencies and coated paper carefully.<br />
•To avoid fading, do not expose the printed transparencies to<br />
prolonged sunlight.<br />
• Store unused materials at temperatures between 15 o C and<br />
30 o C (59 o F to 86 o F). The relative humidity should be<br />
between 10 % and 70 %.<br />
•Verify that your labels’ adhesive material can tolerate fusing<br />
temperature of 200 o C (392 o F) for 0.1 second.<br />
3<br />
PAPER HANDLING 3.3
• Make sure that there is no exposed adhesive material<br />
between labels. Exposed areas can cause labels to peel off<br />
during printing, which can cause paper jams. Exposed<br />
adhesive can also cause damage to machine components.<br />
• Do not load a sheet of labels through the machine more than<br />
once. The adhesive backing is designed for one pass through<br />
the machine.<br />
• Do not use labels that are separating from the backing sheet<br />
or are wrinkled, bubbled, or otherwise damaged.<br />
NOTE: Do not use Carbonless paper and Tracing paper. They<br />
could make smell of chemicals and damage your printer.<br />
Selecting an Output Location<br />
The machine has two output locations; the rear output slot (face<br />
up) and the front output tray (face down).<br />
Front output<br />
tray<br />
Rear output slot<br />
To use the front output tray, make sure that the rear co<strong>ver</strong> is<br />
closed. To use the rear output slot, open the co<strong>ver</strong>.<br />
NOTES:<br />
• If paper coming out of the front output tray has problems, such<br />
as excessive curl, try printing to the rear output slot.<br />
•To avoid paper jams, do not open or close the rear co<strong>ver</strong> while<br />
the machine is printing.<br />
3.4<br />
PAPER HANDLING
Printing to the Front Output Tray (Face down)<br />
The front output tray collects printed paper face-down, in<br />
correct order. The tray should be used for most print jobs.<br />
3<br />
Printing to the Rear Output Slot (Face up)<br />
Using the rear output slot, paper comes out of the machine<br />
face up.<br />
Printing from the Bypass tray to the rear output slot provides the<br />
straight paper path. Using the rear output slot might improve<br />
the output quality with the following:<br />
•envelopes<br />
• labels<br />
• small custom-sized paper<br />
• postcards<br />
•transparencies<br />
PAPER HANDLING 3.5
To use the rear output slot:<br />
1 Open the rear co<strong>ver</strong> by pulling it upward.<br />
CAUTION: The fusing area at the rear part of the inside of your<br />
machine is hot when powered. Be careful not to be burned when<br />
you access this area.<br />
2 If you do not want to stack the printed pages on the rear<br />
output slot, close the rear co<strong>ver</strong>. The pages stack on the<br />
front output tray.<br />
Loading Paper in the Paper Tray<br />
The paper tray can hold a maximum of 250 sheets of 20 lb plain<br />
paper. For copying or faxing, you can use A4-, Letter- or<br />
Legal-sized paper only. For PC-printing, you can use many<br />
different sizes of paper; see page 3.2.<br />
3.6<br />
PAPER HANDLING
The paper level indicator on the front of the paper tray shows<br />
the amount of paper currently left in the tray. When the tray is<br />
empty, the indicator of the bar is lowered.<br />
Paper full <br />
3<br />
Paper empty<br />
To load paper, pull open the paper tray and load paper with the<br />
print side face down.<br />
You can load letterhead paper with the design side face down.<br />
The top edge of the sheet with the logo should be placed at the<br />
front side of the tray.<br />
For details about loading paper in the paper tray, see “Loading<br />
Paper” on page 1.12.<br />
PAPER HANDLING 3.7
NOTES:<br />
• If you experience problems with paper feed, place the paper in<br />
the Bypass tray.<br />
•You can load up to 150 sheets of<br />
previously printed paper. The printed<br />
side should be facing up with an<br />
uncurled edge at the top side. If you<br />
experience problems with paper<br />
feed, turn the paper around. Note<br />
that the print quality is not<br />
guaranteed.<br />
Using the Bypass Tray<br />
Use the Bypass tray to print transparencies, labels, envelopes or<br />
postcards in addition to making quick runs of paper types or<br />
sizes that are not currently loaded in the paper tray.<br />
Postcards, 3.5 by 5.83 in.(index) cards and other custom-sized<br />
materials can be printed with this printer. The minimum size is<br />
76 by 127mm(3.0 by 5.0 in.) and the maximum size is 216 by<br />
356mm(8.5 by 14 in.)<br />
Acceptable print materials are plain paper with sizes ranging<br />
from 100 x 148 mm (3.9 x 5.8 in.) to Legal, 216 x 356 mm<br />
(8.5 x 14 in.), the largest size acceptable, and weighing between<br />
16 lb and 32 lb.<br />
NOTES:<br />
• Always load only the print materials specified in the<br />
Specifications on page A.6 to avoid paper jams and print quality<br />
problems.<br />
• Flatten any curl on postcards, envelopes and labels before<br />
loading them into the Bypass tray.<br />
• When you print on 76mm X 127mm (3 X 5 in.) sized media with<br />
loading into the tray, open the rear output tray.<br />
1 Load a sheet of the print material with the print side face<br />
up and into the center of the tray.<br />
3.8<br />
PAPER HANDLING
For transparencies, hold the transparencies by the edges<br />
and avoid touching the print side. Oils from your fingers<br />
that are deposited on them can cause print quality<br />
problems.<br />
CAUTION: Make sure to open the rear output slot when you print<br />
on transparencies. If not, they may tear while exiting the machine.<br />
For envelopes, load a sheet with the flap side face down<br />
and with the stamp area on the top left side.<br />
3<br />
2 Adjust the paper guide to the width of the print material.<br />
The machine picks up the material from the tray and<br />
begins printing.<br />
NOTE: When printing on previously<br />
printed paper from the Bypass tray,<br />
the printed side should be facing<br />
down with an uncurled edge to the<br />
machine. If you experience<br />
problems with paper feed, turn the<br />
paper around.<br />
PAPER HANDLING 3.9
3 Open the rear co<strong>ver</strong> to use the rear output slot.<br />
4 After printing, close the rear co<strong>ver</strong>.<br />
Setting the Paper Type and Size for the<br />
Bypass Tray<br />
After loading paper in the Bypass tray, you need to set the<br />
correct paper type and size using the control panel buttons.<br />
These settings will apply to copy mode. For PC-printing, you<br />
need to select the paper size in the application program you use.<br />
To set the paper size for the Bypass tray:<br />
1 Press Menu.<br />
The display shows “Paper Setting” on the top line and the<br />
first item, “Paper Type,” on the bottom line.<br />
2 Press Enter to access the menu item.<br />
3 Use the scroll button ( or ) to find the paper type you<br />
are using and press Enter to save it.<br />
4 Press the button to scroll to “Paper Size” and press<br />
Enter to access the menu item.<br />
5 Use the scroll button ( or ) to display “Bypass Paper” on<br />
the bottom line. Press Enter to access the menu item.<br />
6 Use the scroll button ( or ) to find the paper size you<br />
are using and press Enter to save it.<br />
7 To return to Standby Mode, press Stop/Clear.<br />
3.10<br />
PAPER HANDLING
4 COPYING<br />
This chapter gives you step-by-step instructions for copying<br />
documents.<br />
This chapter includes:<br />
• Loading Paper for Copying<br />
• Making Copies on the Document Glass<br />
• Making Copies from the Automatic Document<br />
Feeder (For <strong>SCX</strong>-4116/<strong>4216F</strong>)<br />
• Setting Copy Options<br />
• Using Special Copy Features<br />
• Changing the Default Settings<br />
• Setting the Time Out Option
Loading Paper for Copying<br />
You can copy a document to A4-, Letter- or Legal-sized paper.<br />
The instructions for loading print materials are the same<br />
whether you are printing, faxing or copying. For further details,<br />
see page 1.12 for loading in the paper tray and page 3.8 for<br />
loading in the Bypass tray.<br />
Making Copies on the Document<br />
Glass<br />
1 Lift and open the document co<strong>ver</strong>.<br />
2 Place the document face down on the document glass and<br />
align it with the registration guide on the top left corner of<br />
the glass.<br />
4.2<br />
COPYING
NOTE: For <strong>SCX</strong>-4116/<strong>4216F</strong>, make sure that no other documents<br />
are in the ADF (Automatic Document Feeder). If a document is<br />
detected in the ADF, it has priority o<strong>ver</strong> the document on the<br />
document glass.<br />
3 Close the document co<strong>ver</strong>.<br />
NOTES:<br />
• Leaving the co<strong>ver</strong> open while copying may affect the copy quality<br />
and toner consumption.<br />
• If you are copying a page from a book or magazine, lift the co<strong>ver</strong><br />
until its hinges are caught by the stopper and then close the<br />
co<strong>ver</strong>. If the book or magazine is thicker than 30 mm, start<br />
copying with the co<strong>ver</strong> open.<br />
4 Customise the copy settings including number of copies,<br />
copy size, the contrast and the image type by using the<br />
control panel buttons. See “Setting Copy Options” on<br />
page 4.6.<br />
To clear the settings, use the Stop/Clear button.<br />
4<br />
5 If necessary, you can use special copy features, such as<br />
Auto Fit, Clone and 2-side copying.<br />
6 Press Start Copy or Start Copy/Fax to begin copying.<br />
The display shows the copy processing.<br />
NOTES:<br />
•You can cancel the copy job during an operation. Press Stop/<br />
Clear, and the copying will stop.<br />
• Dust on the document glass may cause black spots on the<br />
printout. Keep it always clean.<br />
•To get the best scan quality, especially for coloured or gray<br />
scaled images, use the document glass.<br />
COPYING 4.3
Making Copies from the Automatic<br />
Document Feeder (For <strong>SCX</strong>-4116/<strong>4216F</strong>)<br />
Using the ADF (Automatic Document Feeder), you can load up<br />
to 30 documents (75 g/m 2 , 20lb) in one job.<br />
When you use the ADF:<br />
• Do not load documents smaller than 142 x 148 mm or<br />
larger than 216 x 356 mm.<br />
• Do not attempt to feed the following types of documents:<br />
- carbon-paper or carbon-backed paper<br />
- coated paper<br />
- onion skin or thin paper<br />
- wrinkled or creased paper<br />
- curled or rolled paper<br />
- torn paper<br />
•Remove all staples and paper clips before loading<br />
documents.<br />
• Make sure any glue, ink or correction fluid on the paper is<br />
completely dry before loading documents.<br />
• Do not load documents containing different sizes or<br />
weights of paper.<br />
If you want to make copies from booklet, pamphlet,<br />
transparencies or documents having other unusual<br />
characteristics, use the document glass to load the document;<br />
see page 4.2.<br />
1 Load the documents up to 30 pages face up into the ADF<br />
and adjust the document guides to the document size.<br />
4.4<br />
COPYING
2 Make sure that the bottom of the document stack matches<br />
the paper size marked on the document tray.<br />
3 Customise the copy settings including number of copies,<br />
copy size, contrast and image type by using the control<br />
panel buttons. See “Setting Copy Options” on page 4.6.<br />
To clear the settings, use the Stop/Clear button.<br />
4 If necessary, you can use special copy features, such as<br />
Collation and 2 or 4 up-copying.<br />
4<br />
5 Press Start Copy or Start Copy/Fax to begin copying.<br />
The display shows the copy processing.<br />
NOTE: Dust on the ADF glass may cause black lines on the<br />
printout. Keep it always clean.<br />
COPYING 4.5
Setting Copy Options<br />
The buttons on the control panel let you make all the basic copy<br />
options; contrast, image type, copy size and number of copies.<br />
Set the following options for the current copy job before<br />
pressing Start Copy or Start Copy/Fax to make copies.<br />
NOTE: If you press Stop/Clear while you set the copy options,<br />
all of the options you have set for the current copy job will be<br />
canceled and return to their default status. Or, they automatically<br />
returns to their default status after copying.<br />
Contrast<br />
If you have an original document containing faint markings and<br />
dark images, you can adjust the brightness to make a copy that<br />
is easier to read.<br />
To adjust the contrast, press Contrast.<br />
Each time you press the button, the LED labeled with the<br />
selected mode turns on.<br />
You can choose from the following contrast modes:<br />
• Lighten: works well with dark print.<br />
• Normal: works well with standard typed or printed<br />
documents.<br />
• Darken: works well with light print or faint pencil<br />
markings.<br />
Image<br />
The Image setting is used to improve the copy quality by<br />
selecting the document for the current copy job.<br />
To select the image type, press Image.<br />
Each time you press the button, the LED labeled with the<br />
selected mode turns on.<br />
You can choose from the following image modes:<br />
• Text: Use for documents containing mostly text.<br />
• Mixed: Use for documents with mixed text and graphics.<br />
• Photo: Use when the originals are photographs.<br />
NOTE: When you copy a document containing colour on the<br />
background, such as a newspaper or a catalog, you can get the<br />
background on your copy.<br />
If you want to reduce the background, change the Contrast<br />
setting to Lighten and/or the Image setting to Text.<br />
4.6<br />
COPYING
Reduced/Enlarged Copy<br />
Using the Reduce/Enlarge button, you can reduce or enlarge<br />
the size of a copied image, from 25% to 400% when you copy<br />
original documents from the document glass or from 25% to<br />
100% from the ADF. Note that the zoom rate available is<br />
different depending on the document loading method.<br />
To select from the predefined copy sizes:<br />
1 Press Reduce/Enlarge.<br />
The default setting appears on the bottom line of the<br />
display.<br />
2 Use Reduce/Enlarge or the scroll button ( or ) to find<br />
the size setting you want.<br />
3 Press Enter to save the selection.<br />
To fine-tune the size of copies:<br />
4<br />
1 Press Reduce/Enlarge.<br />
2 Press Reduce/Enlarge or the scroll button ( or )<br />
until “Custom:25-100%,” or “Custom:25-400%” (for <strong>SCX</strong>-<br />
4116/<strong>4216F</strong>) displays on the bottom line. Press Enter.<br />
3 Press the scroll button ( or ) until the copy size you<br />
want appears on the display.<br />
Pressing and holding the button allows you to quickly scroll<br />
to the number you want.<br />
For <strong>SCX</strong>-<strong>4216F</strong>, you can enter the value using the number<br />
keypad.<br />
4 Press Enter to save the selection.<br />
NOTE: When you make a reduced copy, black lines may appear at<br />
the bottom of your copy.<br />
COPYING 4.7
Number of Copies<br />
Using the No. of Copies button, you can select the number of<br />
copies from 1 to 99.<br />
1 Press No. of Copies.<br />
2 Press the scroll button ( or ) until the number you want<br />
appears on the display.<br />
Pressing and holding the button allows you to quickly scroll<br />
to the number you want.<br />
For <strong>SCX</strong>-<strong>4216F</strong>, you can enter the value using the number<br />
keypad.<br />
3 Press Enter to save the selection.<br />
Using Special Copy Features<br />
You can use the following copy features using the Special<br />
button on the control panel:<br />
• Auto Fit: Automatically reduces or enlarges the original<br />
image to fit on the paper currently loaded in the machine.<br />
See below.<br />
• Clone: Prints multiple image copies from the original<br />
document on a single page. The number of images is<br />
automatically determined by the original image and paper<br />
size. See page 4.9.<br />
• Collation: Sorts the copy job. For example, if you make 2<br />
copies of 3 page documents, one complete 3 page document<br />
will print followed by the second complete document. See<br />
page 4.10.<br />
• 2-Side: Prints 2-sided original document on one sheet of<br />
paper. See page 4.11.<br />
• 2/4-Up: Prints 2/4 original images reduced to fit onto one<br />
sheet of paper. See page 4.12.<br />
• Poster: Prints an image onto 9 sheets of paper (3x3). You<br />
can paste the printed pages together to make one postersize<br />
document. See page 4.12.<br />
4.8<br />
COPYING<br />
NOTE: Some features may not be available depending on where<br />
you loaded the document, on the document glass or in the<br />
Automatic Document Feeder (for <strong>SCX</strong>-4116/<strong>4216F</strong>).
Auto Fit Copying<br />
A<br />
This special copy mode can be applied when you load document<br />
only using the document glass. For <strong>SCX</strong>-4116/<strong>4216F</strong>, if a<br />
document is detected in the ADF, the Auto Fit does not work.<br />
1 Load the document to be copied on the document glass,<br />
and close the co<strong>ver</strong>.<br />
2 Press Special.<br />
3 Press Special or the scroll button ( or ) until “Autofit”<br />
appears on the bottom line.<br />
4 Press Enter to save the selection.<br />
5 If necessary, customise the copy settings including number<br />
of copies, contrast and image type by using the control<br />
panel buttons. See “Setting Copy Options” on page 4.6.<br />
NOTE: You cannot adjust the copy size using the Reduce/<br />
Enlarge button while the Auto Fit copying is enabled.<br />
4<br />
6 Press Start Copy or Start Copy/Fax to begin copying.<br />
Clone Copying<br />
This special copy mode can be applied when you load document<br />
only using the document glass. For <strong>SCX</strong>-4116/<strong>4216F</strong>, if a<br />
document is detected on the ADF, the Clone copying feature<br />
does not work.<br />
1 Load the document to be copied on the document glass,<br />
and close the co<strong>ver</strong>.<br />
2 Press Special.<br />
3 Press Special or the scroll button ( or ) until “Clone”<br />
displays on the bottom line.<br />
4 Press Enter to save the selection.<br />
COPYING 4.9
5 If necessary, customise the copy settings including number<br />
of copies, contrast and image type by using the control<br />
panel buttons. See “Setting Copy Options” on page 4.6.<br />
NOTE: You cannot adjust the copy size using the Reduce/<br />
Enlarge button while making a clone copy.<br />
6 Press Start Copy or Start Copy/Fax to begin copying.<br />
1<br />
2<br />
3<br />
1<br />
2<br />
3<br />
Collation Copying<br />
The Collation copying feature is available only when you load<br />
documents in the ADF.<br />
1 Load the documents to be copied in the ADF.<br />
2 Press Special.<br />
3 Press Special or the scroll button ( or ) until “Collation”<br />
displays on the bottom line.<br />
4 Press Enter to save the selection.<br />
5 If necessary, customise the copy settings including number<br />
of copies, copy size, contrast and image type by using the<br />
control panel buttons. See “Setting Copy Options” on<br />
page 4.6.<br />
6 Press Start Copy or Start Copy/Fax to begin copying.<br />
4.10<br />
COPYING
2-side Copying<br />
You can copy a 2-sided document on one page of A4, Letter or<br />
Legal-sized paper.<br />
When you copy using this feature, the machine prints one side<br />
on the upper half of the paper and the other side on the lower<br />
half without reducing the original. This feature is helpful for<br />
copying a small-sized document, such as a name card.<br />
If the original document is larger than the printable area, some<br />
portions may not be printed.<br />
This special copy mode can be applied when you load document<br />
only using the document glass. For <strong>SCX</strong>-4116/<strong>4216F</strong>, if a<br />
document is detected in the ADF, the 2-side copying feature<br />
does not work.<br />
1 Load the document to be copied on the document glass,<br />
and close the co<strong>ver</strong>.<br />
2 Press Special.<br />
3 Press Special or the scroll button ( or ) until “2-Side”<br />
displays on the bottom line.<br />
4<br />
4 Press Enter to save the selection.<br />
5 If necessary, customise the copy settings including number<br />
of copies, copy size, contrast and image type by using the<br />
control panel buttons. See “Setting Copy Options” on<br />
page 4.6.<br />
6 Press Start Copy or Start Copy/Fax to begin copying.<br />
Your machine begins scanning the front side.<br />
7 When “Set Backside” displays on the bottom line, open the<br />
document co<strong>ver</strong> and flip the document o<strong>ver</strong>. Close the<br />
co<strong>ver</strong>.<br />
NOTE: If you press the Stop button or if no buttons are pressed<br />
for about 30 seconds, the machine cancels the copy job and<br />
returns to Standby Mode.<br />
8 Press Start Copy or Start Copy/Fax again.<br />
NOTE: You cannot adjust the copy size using the Reduce/<br />
Enlarge button for making a 2-side Copying.<br />
COPYING 4.11
2-up or 4-up Copying<br />
The 2 or 4-up copying feature is available only when you load<br />
documents in the ADF.<br />
1 2<br />
2-up copying<br />
1 2<br />
3 4<br />
4-up copying<br />
1 Load the documents to be copied in the ADF.<br />
2 Press Special.<br />
3 Press Special or the scroll button ( or ) until “2-Up” or<br />
“4-Up” displays on the bottom line.<br />
4 Press Enter to save the selection.<br />
5 If necessary, customise the copy settings including number<br />
of copies, contrast and image type by using the control<br />
panel buttons. See “Setting Copy Options” on page 4.6.<br />
NOTE: You cannot adjust the copy size using the Reduce/<br />
Enlarge button for making a 2 or 4-up copy.<br />
6 Press Start Copy or Start Copy/Fax to begin copying.<br />
NOTE: 2-up copy reduces your original document by 50 %. 4-up<br />
copy reduces the document by the following rates depending on<br />
the paper loaded: 76 % for Letter, 81 % for A4 and 95 % for<br />
Legal.<br />
Poster Copying<br />
This special copy mode can be applied when you load document<br />
only using the document glass. For <strong>SCX</strong>-4116/<strong>4216F</strong>, if a<br />
document is detected in the ADF, the Poster copying feature<br />
does not work.<br />
1 Load the documents to be copied on the document glass<br />
and close the co<strong>ver</strong>.<br />
2 Press Special.<br />
3 Press Special or the scroll button ( or ) until “Poster”<br />
displays on the bottom line.<br />
4 Press Enter to save the selection.<br />
4.12<br />
COPYING
5 If necessary, customise the copy settings including number<br />
of copies, contrast and image type by using the control<br />
panel buttons. See “Setting Copy Options” on page 4.6.<br />
NOTE: You cannot adjust the copy size using the Reduce/<br />
Enlarge button for making a poster.<br />
6 Press Start Copy or Start Copy/Fax to begin copying.<br />
Your original document is divided into 9<br />
portions. Each portion is scanned and<br />
printed one by one in the following order:<br />
Changing the Default Settings<br />
4<br />
The copy options, including contrast, image quality, copy size<br />
and number of copies, can be set to the most frequently used<br />
modes. When you copy a document, the default settings are<br />
used unless they are changed by using the corresponding<br />
buttons on the control panel.<br />
To create your own default settings:<br />
1 Press Menu on the control panel until “Copy Setup”<br />
appears on the top line of the display.<br />
The first menu item, “Change Default”, appears on the<br />
bottom line.<br />
2 Press Enter to access the menu item. The first setup<br />
option, “Contrast,” appears on the bottom line.<br />
3 Press the scroll button ( or ) to scroll through the setup<br />
options.<br />
4 When the option you want to set appears, press Enter to<br />
access the option.<br />
5 Change the setting using the scroll button ( or ) or<br />
enter the value using the number keypad.<br />
COPYING 4.13
6 Press Enter to save the selection.<br />
7 Repeat steps 3 through 6, as needed.<br />
8 To return to Standby Mode, press Stop/Clear.<br />
NOTES: While you set copy options, pressing Stop/Clear cancels<br />
the changed settings and restores their default status.<br />
Setting the Time Out Option<br />
You can set the time the machine waits before it restores the<br />
default copy settings, if you do not start copying after changing<br />
them on the control panel.<br />
1 Press Menu on the control panel until “Copy Setup”<br />
appears on the top line of the display.<br />
2 Press the scroll button ( or ) to display “Timeout” on<br />
the bottom line.<br />
3 Press Enter to access the menu item.<br />
4 Press the scroll button ( or ) until the status you want<br />
appears on the display.<br />
You can select from 15, 30, 60 and 180 (seconds).<br />
Selecting “Off” means that the machine does not restore<br />
the default settings until you press Start Copy or Start<br />
Copy/Fax to begin copying, or Stop/Clear to cancel.<br />
5 Press Enter to save the selection.<br />
6 To return to Standby Mode, press Stop/Clear.<br />
4.14<br />
COPYING
5 PRINTING<br />
This chapter explains how to print your documents in<br />
Windows and how to use the print settings.<br />
This chapter includes:<br />
• Printing a Document<br />
• Setting Paper Properties<br />
• Printing Multiple Pages on One Sheet of Paper<br />
(N-Up Printing)<br />
• Printing a Reduced or Enlarged Document<br />
• Fitting Your Document to a Selected Paper Size<br />
• Printing Posters<br />
• Using Watermarks<br />
• Using O<strong>ver</strong>lays<br />
• Setting Graphic Properties<br />
• Setting Up the Locally Shared Printer
Printing a Document<br />
The following procedure describes the general steps required for<br />
printing from various Windows applications. The exact steps for<br />
printing a document may vary depending on the application<br />
program you are using. Refer to your software application’s<br />
user’s guide for the exact printing procedure.<br />
1 Open the document you want to print.<br />
2 Select Print from the File menu.<br />
The Print window displays. It may look slightly different<br />
depending on your application.<br />
The basic print settings are selected within the Print<br />
window. These settings include the number of copies and<br />
print range.<br />
Make sure that your<br />
machine is selected.<br />
Windows 98<br />
3 To take advantage of the printer features provided by your<br />
machine, click Properties in the application’s print window<br />
and go to Step 4.<br />
If you see Setup, Printer or Options, click that button<br />
instead. Then click Properties on the next screen.<br />
4 Now you see the <strong>Samsung</strong> <strong>SCX</strong>-4x16 Series Properties<br />
window, which allows you to access all of information you<br />
need when using your machine.<br />
5.2<br />
PRINTING
The Layout tab first displays.<br />
The preview image<br />
shows the sample page<br />
with the settings you<br />
currently specified.<br />
If necessary, select the Orientation option.<br />
The Orientation option allows you to select the direction in<br />
which information is printed on a page.<br />
• Portrait prints across the width of the page, letter style.<br />
• Landscape prints across the length of the page,<br />
spreadsheet style.<br />
5<br />
• If you want to rotate the page in 180 degrees, select<br />
Rotate 180 Degrees.<br />
Landscape<br />
Portrait<br />
5 From the Paper tab, select the paper source, size and<br />
type. For further details, see page 5.7.<br />
PRINTING 5.3
6 If necessary, you can set in what sequence the pages will<br />
be printed from the Extra tab. Select the required print<br />
order from the Print Order drop-down list.<br />
• Normal: Your machine prints in normal order.<br />
• Re<strong>ver</strong>se All Pages: Your machine prints all of the pages<br />
in re<strong>ver</strong>se. This setting is helpful when you are using the<br />
rear output slot.<br />
• Print Odd Pages: Your machine prints only the odd<br />
pages of the document.<br />
• Print Even Pages: Your machine prints only the even<br />
pages of the document.<br />
7 Click other tabs on the top of the <strong>Samsung</strong> <strong>SCX</strong>-4x16<br />
Series Properties window to access other features, if<br />
needed.<br />
8 When you finish setting the properties, click OK until the<br />
Print window displays.<br />
9 Click OK to start printing.<br />
Notes:<br />
• Most Windows applications o<strong>ver</strong>rides settings you specified in<br />
the printer dri<strong>ver</strong>. Change all of the print settings available in the<br />
software application first, and change any remaining settings<br />
using the printer dri<strong>ver</strong>.<br />
• The settings you change remain in effect only while you are<br />
using the current program. To make your changes permanent,<br />
make them in the Printers folder. Follow these steps:<br />
1. Click the Windows Start menu.<br />
2. For Windows 95/98/Me/NT 4.0/2000, select Settings and then<br />
Printers.<br />
For Windows XP, select Printers and Faxes.<br />
3. Select the <strong>Samsung</strong> <strong>SCX</strong>-4x16 Series printer.<br />
4. Click the right mouse button on the printer icon and:<br />
• For Window 95/98/Me, select Properties.<br />
• For Windows 2000/XP, select Print Setup or select Properties and<br />
click Printing Preferences.<br />
• For Windows NT 4.0, select Document Default.<br />
5. Change the settings on each tab and click OK.<br />
5.4<br />
PRINTING
Cancelling a Print Job<br />
There are two ways to cancel a print job:<br />
To stop a print job from the control panel:<br />
Press the Stop/Clear button.<br />
Your machine finishes printing the<br />
page that is moving through the<br />
machine and delete the rest of the<br />
print job. Pressing the button cancels<br />
only the current job. If more than one<br />
print job is in the machine’s memory,<br />
you need to press the button once for<br />
each job.<br />
To stop a print job from the Printers folder:<br />
1 From the Windows Start menu, select Settings.<br />
2 Select Printers to open the Printers window and<br />
double-click the <strong>Samsung</strong> <strong>SCX</strong>-4x16 Series icon.<br />
3 From the Document menu, select Cancel Printing<br />
(Windows 9x/Me) or Cancel (Windows NT 4.0/2000/XP).<br />
5<br />
Windows 98<br />
NOTE: You can access this window simply by double-clicking the<br />
printer icon at the bottom right corner of the Windows desktop.<br />
PRINTING 5.5
Using a Favorite Setting<br />
The Favorites option, which is visible on each properties tab,<br />
allows you to save the current properties settings for future use.<br />
To save a Favorites item:<br />
1 Change the settings on each tab, as needed.<br />
2 Enter a name for the item in the Favorites input box.<br />
3 Click Save.<br />
To use a saved setting, select it from the Favorites drop-down<br />
list.<br />
To delete a favorite setting item, select it from the list and click<br />
Delete.<br />
You can also restore the printer dri<strong>ver</strong>’s default settings by<br />
selecting from the list.<br />
Using Help<br />
Your machine has a help screen that can be activated by the<br />
Help button in the printer’s properties window. These help<br />
screens give detailed information about the printer features<br />
provided by the printer dri<strong>ver</strong>.<br />
You can also click from the upper right hand corner, and then<br />
click on any setting.<br />
5.6<br />
PRINTING
Setting Paper Properties<br />
Use the following options to set the paper handling needs when<br />
you access the printer properties. See page 5.2 for more<br />
information about accessing printer properties.<br />
Click the Paper tab to access many paper properties.<br />
1<br />
2<br />
3<br />
4<br />
1<br />
Property<br />
Copies<br />
Description<br />
Copies allows you to choose the number of<br />
copies to be printed. You can enter up to 999.<br />
5<br />
2<br />
Size<br />
The Size option allows you to choose the size<br />
of paper loaded in the tray.<br />
If the required size is not listed in the Size<br />
box, click Add Custom. When the Custom<br />
Page Size window appears, set the paper size<br />
and click Ok. The size setting appears on the<br />
Size list so that you can select it.<br />
Enter the custom<br />
name you want to<br />
use.<br />
Enter the paper<br />
size.<br />
PRINTING 5.7
3<br />
4<br />
Property<br />
Source<br />
Type<br />
Description<br />
Make sure that Source is set to the<br />
corresponding paper tray.<br />
The <strong>Manual</strong> Feed source is used when<br />
printing to special materials. You need to load<br />
one sheet at a time into the Bypass Tray. See<br />
page 3.8.<br />
If the paper source is set to Auto Select,<br />
the machine automatically picks up print<br />
materials according to the following order:<br />
the Bypass tray and the paper tray.<br />
Make sure that Type is set to Printer<br />
Default. If you load a different type of print<br />
material, select the corresponding paper<br />
type. For more information about print<br />
materials, refer to Chapter 3, "Paper<br />
Handling."<br />
If you use cotton paper, set the paper type to<br />
Thick for the best printing.<br />
To use recycled paper, which weights from<br />
75g/m 2 to 90g/m 2 (20lb to 24lb), or other<br />
coloured paper, select Colored(Coloured).<br />
Printing Multiple Pages on One<br />
Sheet of Paper (N-Up Printing)<br />
1 2<br />
3 4<br />
You can select the number of pages to print on a single sheet of<br />
paper. To print more than one page per sheet, the pages will<br />
appear decreased in size and arranged on the sheet. You can<br />
print up to 16 pages on one sheet.<br />
1 To change the print settings from your software<br />
application, access the printer properties. See page 5.2.<br />
2 From the Layout tab, choose Multiple Pages per Side on<br />
the Type drop-down list.<br />
5.8<br />
PRINTING
3 Select the number of pages you want to print per sheet<br />
(1, 2, 4, 9 or 16) on the Pages per Side drop-down list.<br />
4 Select the page order on the Page Order drop-down list, if<br />
necessary.<br />
1<br />
2<br />
1<br />
3<br />
2<br />
1<br />
3<br />
1<br />
3<br />
4<br />
Right, Then<br />
Down<br />
2<br />
4<br />
Down, Then<br />
Right<br />
4<br />
3<br />
Left, Then<br />
Down<br />
4<br />
2<br />
Down, Then<br />
Left<br />
5<br />
Check Print Page Border to print a border around each<br />
page on the sheet. Print Page Border is enabled only, if<br />
the pages per sheet is 2, 4, 9 or 16.<br />
5 Click the Paper tab and select the paper source, size and<br />
type.<br />
6 Click OK and print the document.<br />
PRINTING 5.9
Printing a Reduced or Enlarged<br />
Document<br />
You can scale your print job on a page.<br />
1 When you change the print settings from your software<br />
application, access the printer properties. See page 5.2.<br />
2 From the Layout tab, select Reduce/Enlarge on the<br />
Type drop-down list.<br />
3 Enter the scaling rate in the Persentage input box.<br />
You can also click the or button.<br />
4 Click the Paper tab and select the paper source, size and<br />
type.<br />
5 Click OK and print the document.<br />
5.10<br />
PRINTING
Fitting Your Document to a Selected<br />
Paper Size<br />
A<br />
You can scale your print job to any selected paper size<br />
regardless of the digital document size. This can be useful when<br />
you want to check fine details on a small document.<br />
1 When you change the print settings from your software<br />
application, access the printer properties. See page 5.2.<br />
2 From the Layout tab, select Fit to Page on the Type<br />
drop-down list.<br />
3 Select the correct size from the Target Paper drop-down<br />
list.<br />
5<br />
4 Click the Paper tab and select the paper source, size and<br />
type.<br />
5 Click OK and print the document.<br />
PRINTING 5.11
Printing Posters<br />
You can print a single-page document onto 4, 9 or 16 sheets of<br />
paper, for the purpose of pasting the sheets together to form<br />
one poster-size document.<br />
1 When you change the print settings from your software<br />
application, access the printer properties. See page 5.2.<br />
2 From the Layout tab, select Poster on the Type<br />
drop-down list.<br />
3 Configure the poster option:<br />
You can select the page layout from 2x2, 3x3 or 4x4. If you<br />
select 2x2, the output will be automatically stretched to<br />
co<strong>ver</strong> 4 physical pages.<br />
2 x 2 3 x 3<br />
5.12<br />
PRINTING
Specify an o<strong>ver</strong>lap in millimeters or inches to make it<br />
easier to reconstruct the resulting poster.<br />
0.1 inches<br />
0.1 inches<br />
4 Click the Paper tab and select the paper source, size and<br />
type.<br />
5 Click OK and print the document. You can complete the<br />
poster by reconstructing the results.<br />
Using Watermarks<br />
The Watermark option allows you to print text o<strong>ver</strong> an existing<br />
document. For example, you may want to have large gray letters<br />
reading “DRAFT” or “CONFIDENTIAL” printed diagonally across<br />
the first page or all pages of a document.<br />
There are se<strong>ver</strong>al predefined watermarks that come with your<br />
machine, and they can be modified or you can add new ones to<br />
the list.<br />
5<br />
Using an Existing Watermark<br />
1 When you change the print settings from your software<br />
application, access the printer properties. See page 5.2.<br />
2 Click the Extras tab and select a watermark on the<br />
Watermark drop-down list. It appears in the preview<br />
image window.<br />
Preview<br />
image<br />
3 Click Ok and start printing.<br />
PRINTING 5.13
Creating a Watermark<br />
1 When you change the print settings from your software<br />
application, access the printer properties. See page 5.2.<br />
2 Click the Extras tab and click the Edit button in the<br />
Watermark section. The Edit Watermarks window<br />
appears.<br />
3 Enter the text message you want to print in the<br />
Watermark Message box.<br />
The message displays in the preview image window. The<br />
preview image is provided so that you can see how the<br />
watermark will appear on the printed page.<br />
When the First Page Only box is checked, the watermark<br />
is printed on the first page only.<br />
4 Select the watermark options.<br />
You can select the font name, style and size and gray scale<br />
level from the Font Attributes section and set the angle of<br />
the watermark from the Message Angle section.<br />
5 Click Add to add a new watermark to the list.<br />
6 When you finish creating, click Ok and start printing.<br />
To stop printing the watermark, select on<br />
the Watermark drop-down list.<br />
5.14<br />
PRINTING
Editing a Watermark<br />
1 When you change the print settings from your software<br />
application, access the printer properties. See page 5.2.<br />
2 Click the Extras tab and click the Edit button in the<br />
Watermark section. The Edit Watermarks window<br />
appears.<br />
3 Select the watermark you want to edit on the Current<br />
Watermarks list, and change the watermark message and<br />
the options. Refer to “Creating a Watermark” on page 5.14.<br />
4 Click Update to save the changes.<br />
5 Click Ok.<br />
Deleting a Watermark<br />
1 When you change the print settings from your software<br />
application, access the printer properties. See page 5.2.<br />
2 From the Extras tab, click the Edit button in the<br />
Watermark section. The Edit Watermarks window<br />
appears.<br />
5<br />
3 Select the watermark you want to delete on the Current<br />
Watermarks list and click Delete.<br />
4 Click Ok.<br />
PRINTING 5.15
Using O<strong>ver</strong>lays<br />
What is an O<strong>ver</strong>lay?<br />
Dear ABC<br />
Regards<br />
WORLD BEST<br />
An o<strong>ver</strong>lay is text and/or images stored in the computer hard<br />
disk drive (HDD) as a special file format that can be printed on<br />
any document. O<strong>ver</strong>lays are often used to take the place of<br />
preprinted forms and letterhead paper. Rather than using<br />
preprinted letterhead, you can create an o<strong>ver</strong>lay containing the<br />
exact same information that is currently on your letterhead. To<br />
print a letter with your company’s letterhead, you do not need<br />
to load preprinted letterhead paper in the machine. You need<br />
only tell the machine to print the letterhead o<strong>ver</strong>lay on your<br />
document.<br />
Creating a New Page O<strong>ver</strong>lay<br />
To use a page o<strong>ver</strong>lay, you must create a new page o<strong>ver</strong>lay<br />
containing your logo or image.<br />
WORLD BEST<br />
1 Create or open a document containing text or an image for<br />
use in a new page o<strong>ver</strong>lay. Position the items exactly as<br />
you wish them to appear when printed as an o<strong>ver</strong>lay. If<br />
needed, save the file for later use.<br />
2 When you change the print settings from your software<br />
application, access the printer properties. See page 5.2.<br />
3 Click the Extras tab and click Edit button in the O<strong>ver</strong>lay<br />
section.<br />
5.16<br />
PRINTING
4 In the Edit O<strong>ver</strong>lays window, click Create O<strong>ver</strong>lay.<br />
5 In the Create O<strong>ver</strong>lay window, type a name of up to eight<br />
characters in the File name box. Select the destination<br />
path, if necessary. (The default is C:\Formo<strong>ver</strong>).<br />
5<br />
6 Click Save. You can see the name on the O<strong>ver</strong>lay List.<br />
7 Click OK or Yes until you complete creating.<br />
The file is not printed out. Instead it is stored in your<br />
computer HDD disk.<br />
NOTE: The o<strong>ver</strong>lay document size must be the same as<br />
documents you will print with the o<strong>ver</strong>lay. Do not create an o<strong>ver</strong>lay<br />
with a watermark.<br />
PRINTING 5.17
Using a Page O<strong>ver</strong>lay<br />
After an o<strong>ver</strong>lay has been created, it is ready to be printed with<br />
your document. To print an o<strong>ver</strong>lay with a document:<br />
1 Create or open the document you want to print.<br />
2 When you change the print settings from your software<br />
application, access the printer properties. See page 5.2.<br />
3 Click the Extras tab.<br />
4 Select the o<strong>ver</strong>lay you want to print from the O<strong>ver</strong>lay<br />
drop-down list box.<br />
5 When the o<strong>ver</strong>lay file doesn’t appear on the O<strong>ver</strong>lay List,<br />
click the Edit button and Load O<strong>ver</strong>lay, and select the<br />
o<strong>ver</strong>lay file.<br />
If you have stored the o<strong>ver</strong>lay file you want to use into an<br />
external source, you can also load the file when you access<br />
this Load O<strong>ver</strong>lay window.<br />
After you select the file, click Open. The file is now shown<br />
in the O<strong>ver</strong>lay List box and is available for printing. Select<br />
the o<strong>ver</strong>lay from the O<strong>ver</strong>lay List box.<br />
5.18<br />
PRINTING
6 If necessary, click Confirm Page O<strong>ver</strong>lay When<br />
Printing. When this box is checked, a message window<br />
appears each time you submit a document for printing,<br />
asking you to confirm your wish to print an o<strong>ver</strong>lay on your<br />
document.<br />
Answering Yes to the window means that the selected<br />
o<strong>ver</strong>lay will be printed with your document. Answering No<br />
to the window cancels o<strong>ver</strong>lay printing.<br />
If this box is empty and an o<strong>ver</strong>lay has been selected, the<br />
o<strong>ver</strong>lay will be automatically printed with your document.<br />
7 Click OK or Yes until the printing starts.<br />
The o<strong>ver</strong>lay is downloaded with your print job and printed<br />
on your document.<br />
Note: The resolution of the o<strong>ver</strong>lay document must be the same<br />
as that of the document you will print with the o<strong>ver</strong>lay.<br />
Deleting a Page O<strong>ver</strong>lay<br />
You can delete page o<strong>ver</strong>lays that are no longer used.<br />
1 In the printer properties window, click the Extras tab.<br />
2 Click Edit in the O<strong>ver</strong>lay section.<br />
5<br />
3 Select the o<strong>ver</strong>lay you want to delete from the O<strong>ver</strong>lay<br />
List box.<br />
4 Click Delete O<strong>ver</strong>lay.<br />
5 Click OK until you exit the Print window.<br />
PRINTING 5.19
Setting Graphic Properties<br />
Use the following graphic options to adjust the print quality for<br />
your specific printing needs. See page 5.2 for more information<br />
about accessing printer properties.<br />
Click the Graphics tab to display the properties shown below.<br />
1<br />
2<br />
3<br />
1<br />
2<br />
Property<br />
Resolution<br />
Toner Save<br />
Description<br />
You can select the printing resolution by<br />
choosing from 600 dpi (Normal) or<br />
300 dpi (Draft). The higher the setting,<br />
the sharper the clarity of printed<br />
characters and graphics. Higher settings<br />
may increase time it takes to print a<br />
document.<br />
Selecting this option extends the life of your<br />
toner cartridge and reduces your cost per<br />
page without a significant reduction in the<br />
print quality.<br />
• Printer Setting: When you select this<br />
option, the Toner Save feature is<br />
determined by the setting you’ve made on<br />
the control panel of the printer.<br />
• On: Select this option to allow the printer<br />
to use less toner on each page.<br />
• Off: When you do not need to save toner<br />
to print a document, select this option.<br />
5.20<br />
PRINTING
3<br />
Property<br />
Advanced<br />
Options<br />
Description<br />
You can set advanced settings by clicking<br />
the Advanced Options button.<br />
Darkness<br />
Use this option to lighten or darken the<br />
image appearance in your print.<br />
• Normal: This setting is for normal<br />
documents.<br />
• Light: This setting is for bolder line<br />
widths or darker gray scale images.<br />
• Dark: This setting is for finer line width,<br />
higher definition in graphics and lighter<br />
gray scale images.<br />
When the Darken Text option is checked,<br />
all text in your document is allowed to print<br />
darker than a normal document.<br />
5<br />
Print All Text Black<br />
When the Print All Text Black option is<br />
checked, all text in your document is<br />
allowed to print solid black, regardless of<br />
the colour it appears on the screen. When<br />
it is not checked, coloured text is allowed<br />
to print in shades of gray.<br />
PRINTING 5.21
Property<br />
Description<br />
3<br />
Advanced<br />
Options<br />
(continued)<br />
True Type Options<br />
This option determines what the dri<strong>ver</strong><br />
tells the machine about how to image the<br />
text in your document. Select the<br />
appropriate setting according to the status<br />
of your document.<br />
• Download as Bit Image: When this<br />
option is selected, the dri<strong>ver</strong> downloads<br />
the font data as bitmap images.<br />
Documents with complicated fonts, such<br />
as Korean or Chinese, or various types of<br />
fonts print faster in this setting.<br />
• Print as Graphics: When this option is<br />
selected, the dri<strong>ver</strong> downloads any fonts<br />
as graphics. When printing documents<br />
with high graphic content and relatively<br />
few TrueType fonts, printing performance<br />
(speed) may be enhanced in this setting.<br />
Setting Up the Locally Shared Printer<br />
You can connect the machine directly to a selected computer,<br />
which is called “host computer,” on the network. Your machine<br />
can be shared by other users on the network through a Windows<br />
9x, Me, 2000, XP or NT 4.0 network printer connection.<br />
In Windows 9x/Me<br />
Setting Up the Host Computer<br />
1 Start Windows.<br />
2 From the Start menu, select Control Panel and<br />
double-click on the Network icon.<br />
3 Check the File and Print Sharing box and click OK.<br />
5.22<br />
PRINTING
4 Click Start and select Printers from Settings. Doubleclick<br />
your printer name.<br />
5 Select Properties in the Printer menu.<br />
6 Click the Sharing tab and check the Shared As box. Fill in<br />
the Shared Name field and then click OK.<br />
Setting Up the Client Computer<br />
1 Right-click Start and select Explorer.<br />
2 Open your network folder in the left column.<br />
3 Right-click the shared name and select Capture Printer<br />
Port.<br />
4 Select the port you want, check the Reconnect at log on<br />
box and then click OK.<br />
5 From the Start menu, select Settings and then Printers.<br />
6 Double-click your printer icon.<br />
7 From the Printer menu, select Properties.<br />
5<br />
8 From the Details tab, select the printer port and click OK.<br />
In Windows NT 4.0/2000/XP<br />
Setting Up the Host Computer<br />
1 Start Windows.<br />
2 For Windows NT 4.0/2000, from the Start menu, select<br />
Settings and then Printers.<br />
For Windows XP, from the Start menu, select Printers and<br />
Faxes.<br />
3 Double-click your printer icon.<br />
4 From the Printer menu, select Sharing.<br />
PRINTING 5.23
5 For Windows NT 4.0, check the Shared box.<br />
For Windows 2000, check the Shared As box.<br />
For Windows XP, check the Share this printer box.<br />
6 For Windows NT 4.0, fill in the Share Name field and click<br />
OK.<br />
For Windows 2000/XP, fill in the Shared Name field and<br />
click OK.<br />
Setting Up the Client Computer<br />
1 Right-click Start and select Explorer.<br />
2 Open your network folder in the left column.<br />
3 Click the shared name.<br />
4 For Windows NT 4.0/2000, from the Start menu, select<br />
Settings and Printers.<br />
For Windows XP, from the Start menu, select Printers and<br />
Faxes.<br />
5 Double-click your printer icon.<br />
6 From the Printer menu, select Properties.<br />
7 Press the Ports tab and click Add Port.<br />
8 Select Local Port and click New Port.<br />
9 Fill in the Enter a port name field and enter the shared<br />
name.<br />
10 Click OK and click Close.<br />
11 For Windows NT 4.0, click OK.<br />
For Windows 2000/XP, click Apply and click OK.<br />
5.24<br />
PRINTING
6 SCANNING<br />
Scanning with your machine lets you turn pictures and text<br />
into digital files on your computer. Then you can fax or<br />
e-mail the files, display them on your web site or use them<br />
to create projects that you can print using <strong>Samsung</strong><br />
SmarThru software.<br />
This chapter includes:<br />
• Scanning Basics<br />
• Scanning Using <strong>Samsung</strong> SmarThru<br />
• Scanning Process with TWAIN-enabled Software
Scanning Basics<br />
Your machine offers two ways to begin scanning:<br />
• From the <strong>Samsung</strong> SmarThru software: Launch <strong>Samsung</strong><br />
SmarThru and open the Scan Wizard to begin scanning. See<br />
below.<br />
• From TWAIN-compliant software: You can use other software<br />
including Adobe PhotoDeluxe and Adobe Photoshop. See<br />
page 6.5.<br />
NOTES:<br />
•To scan with your machine, you must install the MFP dri<strong>ver</strong>.<br />
• Scanning is done through the same LPT or USB port currently<br />
assigned for your printer port.<br />
Scanning Using <strong>Samsung</strong> SmarThru<br />
<strong>Samsung</strong> SmarThru is the accompanying software for your<br />
machine. With the SmarThru, scanning becomes a pleasure.<br />
Follow these steps to start scanning using the SmarThru:<br />
1 Make sure that your machine and computer are turned on<br />
and properly connected to each other.<br />
2 Place a single document face down on the document glass<br />
then close the co<strong>ver</strong>. For further details, see page 4.2.<br />
OR<br />
Load the document(s) to be scanned face up into the ADF<br />
(Automatic Document Feeder). For further details, see<br />
page 4.4.<br />
6.2<br />
SCANNING
3 Once you have installed <strong>Samsung</strong> software, you see the<br />
SmarThru icon on the desktop window. Double-click the<br />
SmarThru 3 icon.<br />
Double-click this icon.<br />
The SmarThru 3 window opens.<br />
4 To open the Scan Wizard, click the Scan Wizard icon in<br />
the plugin bar on the left of the SmarThru 3 window.<br />
6<br />
Scan Wizard<br />
icon.<br />
SCANNING 6.3
The Scan Wizard lets you use the following services:<br />
• Scan<br />
Lets you scan the original documents and save them in<br />
the Image Manager of the <strong>Samsung</strong> SmarThru system.<br />
The Image Manager is an image database manager and<br />
image editor program.<br />
• Copy<br />
Lets you use your machine to produce professional<br />
quality copies. You can adjust the image size and select<br />
advanced settings.<br />
• Scan to Email<br />
Lets you scan the original documents and then launches<br />
a default mail program of your system, such as Microsoft<br />
Outlook Express, so that you can send the scanned image<br />
attached to a new mail. To send e-mail using the<br />
<strong>Samsung</strong> SmarThru system, you need to enable the<br />
Internet Gate and configure an e-mail account in<br />
SmarThru Configuration. Refer to the SmarThru <strong>User</strong>’s<br />
Guide.<br />
• Scan to FAX<br />
Lets you scan the original documents and then launches<br />
a New Fax form which helps you to send them as a fax<br />
image. This service is available only when you enable and<br />
configure the Fax Gate in SmarThru Configuration. Refer<br />
to the SmarThru <strong>User</strong>’s Guide.<br />
• Scan to WEB<br />
Lets you scan the original documents for further<br />
publishing to the Web.<br />
• Scan to OCR<br />
Lets you scan the original documents and pass them to<br />
the OCR program. OCR (Optical Character Recognition) is<br />
the process of con<strong>ver</strong>ting a scanned image into text that<br />
you can edit in a word processing program. After you<br />
scan your document, the software processes or<br />
“recognises” it. Then you can change it and either save<br />
the file or open it in any word processing program on<br />
your computer.<br />
5 Click the service icon according to your job.<br />
6.4<br />
SCANNING
6 The <strong>Samsung</strong> Scan Manager opens for the selected service.<br />
Adjust the scan settings. You can use the Help button to<br />
receive on-line help.<br />
7 To start scanning, click Scan.<br />
For more information, please refer to the SmarThru <strong>User</strong>’s<br />
Guide which came with your machine.<br />
NOTE: If you want to cancel the scan job, press the Stop/Clear<br />
button on the control panel.<br />
Scanning Process with TWAINenabled<br />
Software<br />
6<br />
If you want to scan documents using other software, you will<br />
need to use TWAIN-compliant software, such as Adobe<br />
PhotoDeluxe or Adobe Photoshop. The first time you scan with<br />
your machine, select it as your TWAIN source in the application<br />
you use.<br />
The basic scanning process involves a number of steps:<br />
• Place your photograph or page on the document glass or in<br />
the ADF.<br />
• Open an application, such as PhotoDeluxe or Photoshop.<br />
• Open the TWAIN window and set the scan options.<br />
• Scan and save your scanned image.<br />
You need to follow the program’s instructions for acquiring an<br />
image. Please refer to the user’s guide of the application.<br />
SCANNING 6.5
MEMO<br />
6.6<br />
SCANNING
7 MAINTENANCE<br />
This chapter provides information for maintaining your<br />
machine and the toner cartridge.<br />
This chapter includes:<br />
• Clearing the Memory<br />
• Cleaning Your Machine<br />
• Maintaining the Toner Cartridge<br />
• Consumables and Replacement Parts
Clearing the Memory<br />
You can selectively clear information stored in your machine’s<br />
memory.<br />
1 Press Menu on the control panel until “Maintenance”<br />
appears on the top line of the display.<br />
2 Press the scroll button ( or ) until you see “Clear<br />
Memory” on the bottom line and press Enter.<br />
The first available menu item, “Paper Setting,” displays on<br />
the bottom line.<br />
3 Press the scroll button ( or ) until you see the item you<br />
want to clear.<br />
•Paper Setting: Restores all of the Paper Setting options to<br />
the factory default.<br />
• Copy Setup: Restores all of the Copy Setup options to the<br />
factory default.<br />
•Fax Setup: (only for <strong>SCX</strong>-<strong>4216F</strong>) Restores all of the Fax<br />
Setup options to the factory default.<br />
•Fax Feature: (only for <strong>SCX</strong>-<strong>4216F</strong>) Cancels all of the<br />
scheduled fax jobs in the machine’s memory.<br />
• Advanced Fax: (only for <strong>SCX</strong>-<strong>4216F</strong>) Restores all of the<br />
Advanced Fax setting options to the factory default.<br />
• Sound/Volume: (only for <strong>SCX</strong>-<strong>4216F</strong>) Resets the sound<br />
and volume settings to the factory default.<br />
• Machine Setup: Resets all of the system settings, such as<br />
the machine ID, date and time, display language and<br />
save modes, to the factory default.<br />
• Sent Report: (only for <strong>SCX</strong>-<strong>4216F</strong>) Clears all of records of<br />
your faxes sent.<br />
• RCV Report: (only for <strong>SCX</strong>-<strong>4216F</strong>) Clears all of records of<br />
your faxes received.<br />
• Phone Book: (only for <strong>SCX</strong>-<strong>4216F</strong>) Clears the speed dial<br />
or group dial numbers stored in the memory.<br />
4 Press Enter. The selected memory is cleared and the<br />
display asks you to continue clearing the next item.<br />
7.2<br />
MAINTENANCE
5 Repeat steps 2 and 3 to clear another item.<br />
OR<br />
To return to Standby Mode, press Stop/Clear.<br />
Cleaning Your Machine<br />
To maintain the print quality, follow the cleaning procedures<br />
below each time the toner cartridge is replaced or if print quality<br />
problems occur.<br />
NOTE: While cleaning the inside of the printer, be careful not to<br />
touch the transfer roller (located underneath the toner cartridge).<br />
Oil from your fingers can cause print quality problems.<br />
CAUTIONS: Cleaning the cabinet of the printer with surfactants<br />
containing large amounts of alcohol, solvent or other strong<br />
substances can discolour or crack the cabinet.<br />
Cleaning the Outside<br />
Clean the cabinet of the printer with a soft, lint-free cloth. You<br />
can dampen the cloth slightly with water, but be careful not to<br />
be let any water drip onto the printer or inside of it.<br />
Cleaning the Inside<br />
During the printing process, paper, toner and dust particles can<br />
accumulate inside the machine. This buildup can cause print<br />
quality problems, such as toner specks or smearing. Cleaning<br />
the inside of the machine clears or reduces these problems.<br />
7<br />
1 Turn the machine off and unplug the power cord. Wait for<br />
the machine to cool down.<br />
MAINTENANCE 7.3
2 Open the front co<strong>ver</strong> and pull the toner cartridge out,<br />
lightly pushing it down.<br />
3 With a dry and lint-free cloth, wipe away any dust and<br />
spilled toner from the toner cartridge area and the toner<br />
cartridge cavity.<br />
CAUTION: To prevent damage to the toner cartridge, do not<br />
expose it to light for more than a few minute. Co<strong>ver</strong> it with a piece<br />
of paper, if necessary. Do not touch the black transfer roller inside<br />
the machine.<br />
4 Reinsert the toner cartridge and close the co<strong>ver</strong>.<br />
5 Plug in the power cord and turn the machine on.<br />
7.4<br />
MAINTENANCE
Cleaning the Scan Unit<br />
Keeping the scan unit clean helps ensure the best possible<br />
copies. We suggest that you clean the scan unit at the start of<br />
each day and during the day, as needed.<br />
1 Slightly dampen a soft lint-free cloth or paper towel with<br />
water.<br />
2 Open the document co<strong>ver</strong>.<br />
3 Wipe the surface of the document glass and ADF glass<br />
(for <strong>SCX</strong>-4116/<strong>4216F</strong>) until it is clean and dry.<br />
White sheet<br />
Document<br />
co<strong>ver</strong><br />
ADF glass<br />
Document glass<br />
4 Wipe the underside of the white document co<strong>ver</strong> and white<br />
sheet (for <strong>SCX</strong>-4116/<strong>4216F</strong>) until it is clean and dry.<br />
5 Close the document co<strong>ver</strong>.<br />
7<br />
MAINTENANCE 7.5
Maintaining the Toner Cartridge<br />
Toner cartridge storage<br />
To get the most from the toner cartridge, keep the following<br />
guidelines in mind:<br />
• Do not remove the toner cartridge from its package until<br />
ready for use.<br />
• Do not refill the toner cartridge. The machine warranty<br />
does not co<strong>ver</strong> damage caused by using a refilled<br />
cartridge.<br />
• Store toner cartridges in the same environment as your<br />
machine.<br />
•To prevent damage to the toner cartridge, do not expose it to<br />
light for more than a few minute.<br />
Saving toner<br />
To save toner, press the Toner Save button on the printer<br />
control panel; see page 1.19. The button backlight will be lit.<br />
Using this feature extends the life of the toner cartridge and<br />
reduces your cost per page, but it also reduces the print quality.<br />
Expected Cartridge Life<br />
The life of the toner cartridge depends on the amount of toner<br />
that print jobs require. When printing text at IDC 5% co<strong>ver</strong>age,<br />
a new toner cartridge lasts an a<strong>ver</strong>age of 3,000 pages. (The<br />
original toner cartridge supplied with the printer lasts an<br />
a<strong>ver</strong>age of 1,000 pages.) The actual number may be different<br />
depending on the print density of the page you print. If you print<br />
a lot of graphics, you may need to change the cartridge more<br />
often.<br />
7.6<br />
MAINTENANCE
Redistributing Toner<br />
When the toner cartridge is near the end of its life, white streaks<br />
or light print occurs. The LCD displays the warning message,<br />
“Toner Low.” You can temporarily reestablish the print quality by<br />
redistributing the remaining toner in the cartridge.<br />
1 Open the front co<strong>ver</strong>.<br />
2 Pull the toner cartridge out and gently roll the cartridge to<br />
distribute the toner evenly inside the cartridge.<br />
NOTE: If the toner gets on your clothing, wipe it off with a dry<br />
cloth and wash clothing in cold water. Hot water sets the toner into<br />
fabric.<br />
3 Reinstall the cartridge and close the front co<strong>ver</strong>.<br />
7<br />
MAINTENANCE 7.7
Replacing the Toner Cartridge<br />
When the toner eventually runs out, only blank pages print<br />
when a print job is sent or when a fax is received. At this stage,<br />
the toner cartridge needs to be replaced. The display shows the<br />
warning message, “Toner Empty,” and the indicator on the<br />
control panel turns on.<br />
1 Open the front co<strong>ver</strong>.<br />
2 Lightly pushing the used cartridge down, pull it out.<br />
NOTE: Help the environment by recycling your used toner<br />
cartridge. Refer to the recycling brochure packed with the toner<br />
cartridge for details.<br />
7.8<br />
MAINTENANCE
3 Unpack the new toner cartridge and gently shake it<br />
horizontally four or five times to distribute the toner evenly<br />
inside the cartridge.<br />
Save the box and the co<strong>ver</strong> for shipping.<br />
4 Slide the new toner cartridge in until it locks into place.<br />
5 Close the front co<strong>ver</strong>.<br />
7<br />
MAINTENANCE 7.9
Setting the Notify Toner Option<br />
(For <strong>SCX</strong>-<strong>4216F</strong>)<br />
If you have set the Notify Toner menu option to “On”, your<br />
machine automatically sends a fax to your service company or<br />
the dealer to notify them that your machine requires a new<br />
toner cartridge when the toner cartridge needs to be replaced.<br />
The fax number is preset by your dealer when you bought your<br />
machine.<br />
1 Press Menu on the control panel until “Maintenance”<br />
appears on the top line of the display.<br />
The first available menu item, “Clean Drum,” displays on<br />
the bottom line.<br />
2 Press the scroll button ( or ) to display “Notify Toner”<br />
on the bottom line and press Enter.<br />
3 Press the scroll button ( or ) to change the setting.<br />
Select “On” to enable this feature. Selecting “Off” disables<br />
this feature.<br />
4 Press Enter to save the selection.<br />
Cleaning the Drum<br />
If there are streaks or spots on your print, the OPC drum of the<br />
cartridge may require cleaning.<br />
1 Before setting the cleaning procedure, make sure that<br />
paper is loaded in the machine.<br />
2 Press Menu on the control panel until “Maintenance”<br />
appears on the top line of the display. The first available<br />
menu item, “Clean Drum,” displays on the bottom line.<br />
3 Press Enter.<br />
The display confirms your selection.<br />
The machine prints out a cleaning page. Toner particles on<br />
the drum surface are affixed to the paper.<br />
4 If the problem remains, repeat steps 1 through 3.<br />
7.10<br />
MAINTENANCE
Consumables and Replacement<br />
Parts<br />
From time to time, you needs to replace the toner cartridge,<br />
roller, and fuser unit to maintain top performance and to avoid<br />
print quality problems and paper feed problems resulting from<br />
worn parts.<br />
The following items should be replaced after you have printed a<br />
specified number of pages:<br />
Items<br />
Yield (A<strong>ver</strong>age)<br />
ADF rubber pad 20,000<br />
ADF roller 60,000<br />
Paper feeding roller 60,000<br />
Transfer roller 60,000<br />
Fuser unit 60,000<br />
To purchase the consumables and replacement parts, contact<br />
your <strong>Samsung</strong> dealer or the retailer where you bought your<br />
machine. We strongly recommend that items be installed by a<br />
trained service professional, except for the toner cartridge.<br />
7<br />
MAINTENANCE 7.11
MEMO<br />
7.12<br />
MAINTENANCE
8 TROUBLESHOOTING<br />
This chapter gives helpful information for what to do<br />
if you encounter an error.<br />
This chapter includes:<br />
• See Clearing Document Jams (For <strong>SCX</strong>-<br />
4116/<strong>4216F</strong>)<br />
• See Clearing Paper Jams<br />
• See Clearing LCD Error Messages<br />
• See Solving Problems
Clearing Document Jams (For <strong>SCX</strong>-4116/<strong>4216F</strong>)<br />
When a document jams while it passes through the ADF<br />
(Automatic Document Feeder), “Document Jam” appears on the<br />
display.<br />
Input Misfeed<br />
1 Remove the remaining documents from the ADF.<br />
2 Open the ADF co<strong>ver</strong>.<br />
3 Rotate the bushing on one end of the ADF roller toward the<br />
ADF ( a ) and remove the roller from the slot( b ). Pull the<br />
document gently to the right and out of the ADF.<br />
4 Close the ADF co<strong>ver</strong>. Then load the documents back into<br />
the ADF.<br />
NOTE: To prevent document jams, use the document glass for<br />
thick, thin or mixed documents.<br />
8.2<br />
TROUBLESHOOTING
Exit Misfeed<br />
1 Remove the remaining documents from the ADF.<br />
2 Open the document co<strong>ver</strong> and turn the release knob to<br />
remove the misfed documents from the document output<br />
tray.<br />
3 Close the document co<strong>ver</strong>. Then load the documents back<br />
into the ADF.<br />
Roller Misfeed<br />
1 Remove the remaining documents from the ADF.<br />
2 Open the document co<strong>ver</strong>.<br />
3 Turn the release knob so that you can easily seize the<br />
misfed document, and remove the document from the<br />
roller or the feed area by carefully pulling it to the right<br />
using both hands.<br />
8<br />
4 Close the document co<strong>ver</strong>. Then load the documents back<br />
into the ADF.<br />
TROUBLESHOOTING 8.3
Clearing Paper Jams<br />
When a paper jam occurs, “Paper Jam” appears on the display.<br />
Refer to the table below to locate and clear the paper jam.<br />
Message Location of Jam Go to<br />
Paper Jam 0<br />
Paper Jam 1<br />
In the paper feed area.<br />
In the Bypass tray<br />
In the fuser area or around<br />
the toner cartridge.<br />
In the Bypass tray<br />
below<br />
page 8.8<br />
page 8.7<br />
page 8.8<br />
Paper Jam 2 In the paper exit area page 8.5<br />
To avoid tearing the paper, pull the jammed paper out gently<br />
and slowly. Follow the steps below to clear a jam.<br />
In the Paper Feed Area<br />
1 Open and close the front co<strong>ver</strong>. The jammed paper<br />
automatically exits the machine.<br />
If the paper does not exit, continue to Step 2.<br />
2 Pull the paper tray open.<br />
8.4<br />
TROUBLESHOOTING
3 Remove the jammed paper by gently pulling it straight out.<br />
If there is any resistance and the paper does not move<br />
when you pull or if you cannot see the paper in this area,<br />
skip to the fuser area around the toner cartridge. See<br />
page 8.7.<br />
4 Insert the paper tray into the machine until it snaps into<br />
place.<br />
5 Open and close the front co<strong>ver</strong> to resume printing.<br />
In the Paper Exit Area<br />
1 Open and close the front co<strong>ver</strong>. The jammed paper<br />
automatically exits the machine.<br />
8<br />
If the paper does not exit, continue to Step 2.<br />
TROUBLESHOOTING 8.5
2 Gently pull the paper out of the front output tray. Skip to<br />
Step 6.<br />
3 If there is any resistance and the paper does not move<br />
when you pull or if you cannot see the paper in the front<br />
output tray, open the rear co<strong>ver</strong>.<br />
4 Remove the jammed paper by gently pulling it straight out.<br />
8.6<br />
TROUBLESHOOTING
5 Close the rear co<strong>ver</strong>.<br />
6 Open and close the front co<strong>ver</strong> to resume printing.<br />
In the Fuser Area or Around the Toner<br />
Cartridge<br />
NOTE: The fuser area is hot. Take care when removing paper<br />
from the machine.<br />
1 Open the front co<strong>ver</strong> and pull the toner cartridge out,<br />
lightly pushing it down.<br />
2 Remove the jammed paper by gently pulling it straight out.<br />
8<br />
TROUBLESHOOTING 8.7
3 Replace the toner cartridge and close the front co<strong>ver</strong>.<br />
Printing automatically resumes.<br />
In the Bypass Tray<br />
“Paper Jam 0” , “Paper Jam 1” appears on the display when you<br />
try to print using the Bypass tray and the machine does not<br />
detect paper, due to no paper or improper paper loading.<br />
“Paper Jam 0” , “Paper Jam 1” also may occur when the paper<br />
is not properly fed into the machine through the Bypass tray. In<br />
that case, pull the paper out of the machine.<br />
8.8<br />
TROUBLESHOOTING
Tips for Avoiding Paper Jams When Printing<br />
on the A5-sized Paper<br />
If paper jams frequently occur when you print on the A5-sized<br />
paper:<br />
1 Open the input tray and load paper into the tray as shown<br />
below.<br />
2 Open the <strong>Samsung</strong> <strong>SCX</strong>-4x16 Series Properties window, set<br />
the paper size to A5(5.8x8.3 in.) from the Paper tab.<br />
3 From the Orientation option of the Layout tab, set the<br />
Rotate option to 90º.<br />
Select 90 degrees.<br />
Click.<br />
8<br />
4 Click OK to start printing.<br />
TROUBLESHOOTING 8.9
Tips for Avoiding Paper Jams<br />
By selecting the correct paper types, most paper jams can be<br />
avoided. When a paper jam occurs, follow the steps outlined in<br />
“Clearing Paper Jams” on page 8.4.<br />
• Follow the procedures in “Loading Paper” on page 1.12. Ensure<br />
that the adjustable guides are positioned correctly.<br />
• Do not o<strong>ver</strong>load the paper tray. Ensure that the paper is below<br />
the paper capacity mark on the inside wall of the paper tray.<br />
• Do not remove the paper from the tray while your machine is<br />
printing.<br />
• Flex, fan and straighten the paper before loading.<br />
• Do not use creased, damp or highly curled paper.<br />
• Do not mix paper types in the paper tray.<br />
• Use only recommended print materials. See “Paper<br />
Specifications” on page A.6.<br />
• Ensure that the recommended print side of print materials is<br />
facing down in the paper tray and facing up in the Bypass tray.<br />
8.10<br />
TROUBLESHOOTING
Clearing LCD Error Messages<br />
Display Meaning Suggested solutions<br />
Cancel ?<br />
1:Yes 2:No<br />
(only for <strong>SCX</strong>-<strong>4216F</strong>)<br />
Comm. Error<br />
(only for <strong>SCX</strong>-<strong>4216F</strong>)<br />
Document Jam<br />
(only for <strong>SCX</strong>-4116/<br />
<strong>4216F</strong>)<br />
Door Open<br />
CRU Fuser Error<br />
Heating Error<br />
Open Heat Error<br />
O<strong>ver</strong> Heat<br />
Group Not<br />
Available<br />
(only for <strong>SCX</strong>-<strong>4216F</strong>)<br />
Incompatible<br />
(only for <strong>SCX</strong>-<strong>4216F</strong>)<br />
Invalid<br />
Cartridge<br />
Your machine’s memory is<br />
full during the machine<br />
stores the document into<br />
the memory.<br />
The machine has a<br />
communication problem.<br />
The loaded document has<br />
jammed in the ADF<br />
(Automatic Document<br />
Feeder).<br />
The front or rear co<strong>ver</strong> is<br />
not securely latched.<br />
There is a problem in the<br />
fuser unit.<br />
You have tried to select a<br />
group location number<br />
where only a single<br />
location number can be<br />
used, such as when<br />
adding locations for a<br />
broadcasting operation.<br />
The remote machine did<br />
not have the requested<br />
feature, such as a delayed<br />
transmission.<br />
It also occurs if the<br />
remote machine does not<br />
have enough memory<br />
space to complete the<br />
operation you are<br />
attempting.<br />
You have used<br />
unauthorised cartridge.<br />
To cancel the fax job, press the 1<br />
button to accept “Yes.”<br />
If you want to send the pages were<br />
stored, press the 2 button to accept<br />
“No.” You should send the<br />
remaining pages later when the<br />
memory is available.<br />
Ask the sender to try again.<br />
Clear the document jam. See<br />
page 8.2.<br />
Close the co<strong>ver</strong> until it locks into<br />
place.<br />
Unplug the power cord and plug it<br />
back in. If the problem persists,<br />
please call for service.<br />
Just use a speed dial number or dial<br />
a number manually using the<br />
number keypad.<br />
Reconfirm the remote machine’s<br />
features.<br />
You must use a <strong>Samsung</strong> approved<br />
cartridge.<br />
8<br />
TROUBLESHOOTING 8.11
Display Meaning Suggested solutions<br />
Line Busy<br />
(only for <strong>SCX</strong>-<strong>4216F</strong>)<br />
Line Error<br />
(only for <strong>SCX</strong>-<strong>4216F</strong>)<br />
Load Document<br />
LSU Error<br />
Memory Full<br />
(only for <strong>SCX</strong>-<strong>4216F</strong>)<br />
No Answer<br />
(only for <strong>SCX</strong>-<strong>4216F</strong>)<br />
No Cartridge<br />
No. Not<br />
Assigned<br />
(only for <strong>SCX</strong>-<strong>4216F</strong>)<br />
No Paper<br />
Operation Not<br />
Assigned<br />
(only for <strong>SCX</strong>-<strong>4216F</strong>)<br />
The remote party did not<br />
answer or the line is<br />
already engaged.<br />
Your machine cannot<br />
connect with the remote<br />
machine or has lost<br />
contact because of a<br />
problem with the phone<br />
line.<br />
You have attempted to set<br />
up a copy or fax operation<br />
with no document loaded.<br />
A problem has occurred in<br />
the LSU (Laser Scanning<br />
Unit).<br />
The memory is full.<br />
The remote fax machine<br />
has not answered after<br />
se<strong>ver</strong>al redial attempts.<br />
The toner cartridge is not<br />
installed.<br />
The speed dial location<br />
you tried to use has no<br />
number assigned to it.<br />
The paper in the paper<br />
tray has run out.<br />
You are doing in the Add/<br />
Cancel operation, but<br />
there is no jobs waiting.<br />
Try again after a few minutes.<br />
Try again. If the problem persists,<br />
wait an hour or so for the line to<br />
clear and try again.<br />
Or, turn the ECM mode on. See the<br />
Facsimile <strong>User</strong>’s Guide.<br />
Load a document and try again.<br />
Unplug the power cord and plug it<br />
back in. If the problem persists,<br />
please call for service.<br />
Delete unnecessary documents,<br />
retransmit after more memory<br />
becomes available or split the<br />
transmission into more than one<br />
operation.<br />
Try again. Make sure that the<br />
remote machine is operational.<br />
Install the toner cartridge. See<br />
page 1.10.<br />
Dial the number manually using the<br />
number keypad or assign the<br />
number. See the Facsimile <strong>User</strong>’s<br />
Guide.<br />
Load paper in the paper tray. See<br />
page 1.12.<br />
Check the display to see if there is<br />
any scheduled job. The display<br />
should indicate them in Standby<br />
Mode, for example, Delay Fax.<br />
8.12<br />
TROUBLESHOOTING
Display Meaning Suggested solutions<br />
Paper Jam 0<br />
Paper Jam 1<br />
Paper Jam 2<br />
Power Failure<br />
Retry Redial?<br />
(only for <strong>SCX</strong>-<strong>4216F</strong>)<br />
Stop Pressed<br />
Toner Empty<br />
Toner Low<br />
Paper has jammed in the<br />
feeding area of the paper<br />
tray.<br />
Your machine detects non<br />
feeding from the Bypass<br />
tray.<br />
Paper has jammed in the<br />
paper exit area.<br />
Your machine detects non<br />
feeding from the Bypass<br />
tray.<br />
Paper has jammed in the<br />
fuser area.<br />
Power has turned off then<br />
on and the machine’s<br />
memory has not been<br />
saved.<br />
The machine is waiting for<br />
a specified time interval to<br />
redial a previously busy<br />
station.<br />
The Stop/Clear button is<br />
pressed during a copy or<br />
fax operation.<br />
The toner cartridge has<br />
run out. The machine<br />
stops.<br />
The toner is almost empty.<br />
Clear the jam. See page 8.4.<br />
Load paper in the Bypass tray. Or<br />
remove the jammed paper from the<br />
Bypass tray.<br />
Clear the jam. See page 8.7.<br />
Load paper in the Bypass tray. Or<br />
remove the jammed paper from the<br />
Bypass tray.<br />
Clear the jam. See page 8.5.<br />
You need to start again the job<br />
which you were trying to do before<br />
the power failure.<br />
You can press Enter to immediately<br />
redial, or Stop/Clear to cancel the<br />
redial operation.<br />
Try again.<br />
Replace with a new toner cartridge.<br />
See page 7.8.<br />
Take out the toner cartridge and<br />
gently shake it. By doing this, you<br />
can temporarily reestablish printing<br />
operations.<br />
8<br />
TROUBLESHOOTING 8.13
Solving Problems<br />
The following chart lists some conditions that may occur and the<br />
recommended solutions. Follow the suggested solutions until<br />
the problem is corrected. If the problem persists, please call for<br />
service.<br />
Paper Feeding Problems<br />
Condition<br />
Paper is jammed during<br />
printing.<br />
Paper sticks together.<br />
Multiple sheets of paper<br />
do not feed.<br />
Paper does not feed into<br />
the machine.<br />
The paper keeps<br />
jamming.<br />
Transparencies stick<br />
together in the paper<br />
exit.<br />
Envelopes skew or fail to<br />
feed correctly.<br />
Suggested solutions<br />
Clear the paper jam. See page 8.4.<br />
• Ensure that there is not too much paper in the paper tray.<br />
The paper tray can hold up to 250 sheets of paper,<br />
depending on the thickness of your paper.<br />
• Make sure that you are using the correct type of paper. See<br />
“Paper Specifications” on page A.6.<br />
•Remove paper from the paper tray and flex or fan the paper.<br />
• Humid conditions may cause some paper to stick together.<br />
• Different types of paper may be stacked in the paper tray.<br />
Load the paper of only one type, size and weight.<br />
• If multiple sheets have caused a paper jam, clear the paper<br />
jam. See page 8.4.<br />
•Remove any obstructions inside the machine.<br />
•Paper has not been loaded correctly. Remove paper from the<br />
tray and reload it correctly.<br />
• There is too much paper in the paper tray. Remove excess<br />
paper from the tray.<br />
• The paper is too thick. Use only paper that meets the<br />
specifications required by the machine. See “Paper<br />
Specifications” on page A.6.<br />
• There is too much paper in the paper tray. Remove excess<br />
paper from the tray. If you are printing on special materials,<br />
use the Bypass tray.<br />
• An incorrect type of paper is being used. Use only paper that<br />
meets the specifications required by the machine. See<br />
“Paper Specifications” on page A.6.<br />
• There may be debris inside the machine. Open the front<br />
co<strong>ver</strong> and remove the debris.<br />
Use only the transparencies specifically designed for a laser<br />
printer. Remove each transparency as it exits from the<br />
machine.<br />
Ensure that the paper guides are against both sides of the<br />
envelopes.<br />
8.14<br />
TROUBLESHOOTING
Printing Problems<br />
Condition Possible cause Suggested solutions<br />
The machine<br />
does not print.<br />
The machine is not<br />
receiving power.<br />
Check the power cord connections. Check<br />
the power switch and the power source.<br />
The machine is not<br />
selected as the default<br />
printer.<br />
Select <strong>Samsung</strong> <strong>SCX</strong>-4x16 Series as your<br />
default printer in your Windows.<br />
Check the machine for<br />
the following:<br />
• The front or rear co<strong>ver</strong> is not closed.<br />
•Paper is jammed.<br />
• No paper is loaded.<br />
• The toner cartridge is not installed.<br />
If a printer system error occurs, contact<br />
your service representative.<br />
The connection cable<br />
between the computer<br />
and the machine is not<br />
connected properly.<br />
Disconnect the printer cable and reconnect<br />
it.<br />
The connection cable<br />
between the computer<br />
and the machine is<br />
defective.<br />
If possible, attach the cable to another<br />
computer that is working properly and print<br />
a job. You can also try using a different<br />
printer cable.<br />
The port setting is<br />
incorrect.<br />
Check the Windows printer setting to make<br />
sure that the print job is sent to the correct<br />
port, for example, LPT1. If the computer<br />
has more than one port, make sure that the<br />
machine is attached to the correct one.<br />
The machine may be<br />
configured incorrectly.<br />
Check the printer properties to ensure that<br />
all of the print settings are correct.<br />
The printer dri<strong>ver</strong> may<br />
be incorrectly installed.<br />
Remove the printer dri<strong>ver</strong> and then reinstall<br />
it; see page 2.10 and page 2.5 respectively.<br />
The machine is<br />
malfunctioning.<br />
Check the display message on the control<br />
panel to see if the machine is indicating a<br />
system error.<br />
The machine<br />
selects print<br />
materials from<br />
the wrong<br />
paper source.<br />
The paper source<br />
selection in the printer<br />
properties may be<br />
incorrect.<br />
For many software applications, the paper<br />
source selection is found under the Paper<br />
tab within the printer properties. Select the<br />
correct paper source. See page 5.8.<br />
8<br />
TROUBLESHOOTING 8.15
Condition Possible cause Suggested solutions<br />
A print job is<br />
extremely slow.<br />
Half the page is<br />
blank.<br />
The machine<br />
prints, but the<br />
text is wrong,<br />
garbled, or<br />
incomplete.<br />
The job may be <strong>ver</strong>y<br />
complex.<br />
If you are using<br />
Windows 9x/Me, the<br />
Spooling Setting may<br />
be set incorrectly.<br />
The page orientation<br />
setting may be<br />
incorrect.<br />
The paper size and the<br />
paper size settings do<br />
not match.<br />
The printer cable is<br />
loose or defective.<br />
The wrong printer<br />
dri<strong>ver</strong> was selected.<br />
The software<br />
application is<br />
malfunctioning.<br />
The operating system is<br />
malfunctioning.<br />
Reduce the complexity of the page or try<br />
adjusting the print quality settings.<br />
The maximum print speed of your machine<br />
is 17 PPM for Letter-sized paper.<br />
From the Start menu, choose Settings and<br />
Printers. Right-click the <strong>Samsung</strong><br />
<strong>SCX</strong>-4x16 Series printer icon, choose<br />
Properties, click the Details tab, and then<br />
choose the Spool Settings button. Select<br />
the desired spool setting.<br />
Change the page orientation in your<br />
application. See page 5.3.<br />
Ensure that the paper size in the printer<br />
dri<strong>ver</strong> settings matches the paper in the<br />
tray.<br />
Disconnect the printer cable and reconnect.<br />
Try a print job that you have already printed<br />
successfully. If possible, attach the cable<br />
and the machine to another computer and<br />
try a print job that you know works. Finally,<br />
try a new printer cable.<br />
Check the application’s printer selection<br />
menu to ensure that your machine is<br />
selected.<br />
Try printing a job from another application.<br />
Exit Windows and reboot the computer.<br />
Turn the machine off and then back on<br />
again.<br />
8.16<br />
TROUBLESHOOTING
Condition Possible cause Suggested solutions<br />
Pages print, but<br />
are blank.<br />
The illustrations<br />
print incorrectly<br />
in Adobe<br />
Illustrator.<br />
An error occurs<br />
repeatedly<br />
when you are<br />
printing with<br />
the USB<br />
connection.<br />
The toner cartridge is<br />
defective or out of<br />
toner.<br />
The file may have blank<br />
pages.<br />
Some parts, such as<br />
the controller or the<br />
board, may be<br />
defective.<br />
The setting in the<br />
software application is<br />
wrong.<br />
When the USB mode is<br />
set to “Fast,” some PC<br />
users may experience<br />
poor USB<br />
communication.<br />
Redistribute the toner. if necessary. See<br />
page 7.7.<br />
If necessary, replace the toner cartridge.<br />
Check the file to ensure that it does not<br />
contain blank pages.<br />
Contact a service representative.<br />
Print the document with selecting<br />
Download as Bit Image in the Advanced<br />
Options window of the Graphic properties.<br />
Change the USB mode to “Slow.” To do so,<br />
follow these steps:<br />
1. Press Menu on the control panel until<br />
“Machine Setup” appears on the top line<br />
of the display.<br />
2. Press the scroll button ( or ) until<br />
“USB Mode” appears on the bottom line,<br />
and press Enter.<br />
3. Press the scroll button ( or ) to select<br />
“Slow.”<br />
4. Press Enter to save the selection.<br />
5. Press Stop/Clear to return to Standby<br />
Mode.<br />
8<br />
TROUBLESHOOTING 8.17
Printing Quality Problems<br />
The dirty inside of the machine or improper paper loading may reduce the print<br />
quality. See the table below to clear the problem.<br />
Condition<br />
Light or faded<br />
print<br />
AaBbCc<br />
AaBbCc<br />
AaBbCc<br />
AaBbCc<br />
AaBbCc<br />
Toner specs<br />
AaBbCc<br />
AaBbCc<br />
AaBbCc<br />
AaBbCc<br />
AaBbCc<br />
Suggested solutions<br />
If a <strong>ver</strong>tical white streak or faded area appears on the page:<br />
• The toner supply is low. You may be able to temporarily<br />
extend the toner cartridge life. See “Redistributing Toner” on<br />
page 7.7. If this does not improve the print quality, install a<br />
new toner cartridge.<br />
• The paper may not meet paper specifications; for example,<br />
the paper is too moist or too rough. See “Paper<br />
Specifications” on page A.6.<br />
• If the entire page is light, the print resolution setting is too<br />
low or the toner save mode is on. Adjust the print resolution<br />
and turn the toner save mode off. See page 5.20 and<br />
page 1.19 respectively.<br />
•A combination of faded or smeared defects may indicate that<br />
the toner cartridge needs cleaning. See “Cleaning the Drum”<br />
on page 7.10.<br />
• The paper may not meet specifications; for example, the<br />
paper is too moist or too rough. See “Paper Specifications” on<br />
page A.6.<br />
• The transfer roller may be dirty. Clean the inside of your<br />
machine. See page 7.3.<br />
• The paper path may need cleaning. See “Cleaning the Drum”<br />
on page 7.10.<br />
Dropouts<br />
AaBbCc<br />
AaBbCc<br />
AaBbCc<br />
AaBbCc<br />
AaBbCc<br />
If faded areas, generally rounded, occur randomly on the page:<br />
•A single sheet of paper may be defective. Try reprinting the<br />
job.<br />
• The moisture content of the paper is uneven or the paper has<br />
moist spots on its surface. Try a different brand of paper. See<br />
“Paper Specifications” on page A.6.<br />
• The paper lot is bad. The manufacturing processes can cause<br />
some areas to reject toner. Try a different kind or brand of<br />
paper.<br />
• The toner cartridge may be defective. See Vertical repetitive<br />
defects on the next page.<br />
• If these steps do not correct the problems, contact a service<br />
representative.<br />
8.18<br />
TROUBLESHOOTING
Condition<br />
Vertical lines<br />
AaBbCc<br />
AaBbCc<br />
AaBbCc<br />
AaBbCc<br />
AaBbCc<br />
Gray background<br />
AaBbCc<br />
AaBbCc<br />
AaBbCc<br />
AaBbCc<br />
AaBbCc<br />
Suggested solutions<br />
If black <strong>ver</strong>tical streaks appear on the page:<br />
• The drum inside the toner cartridge has probably been<br />
scratched. Install a new toner cartridge. See “Installing the<br />
Toner Cartridge” on page 1.10.<br />
If the amount of background shading becomes unacceptable:<br />
• Change to a lighter weight pages. See “Paper Specifications”<br />
on page A.6.<br />
• Check the machine’s environment; <strong>ver</strong>y dry (low humidity) or<br />
high humidity (higher than 80% RH) conditions can increase<br />
the amount of background shading.<br />
•Remove the old toner cartridge and install a new one. See<br />
“Installing the Toner Cartridge” on page 1.10.<br />
Toner smear • Clean the inside of the machine. See page 7.3.<br />
• Check the paper type and quality. See “Paper Specifications”<br />
on page A.6.<br />
•Remove the toner cartridge and install a new one. See<br />
“Installing the Toner Cartridge” on page 1.10.<br />
Vertical repetitive<br />
defects<br />
AaBbCc<br />
AaBbCc<br />
AaBbCc<br />
AaBbCc<br />
AaBbCc<br />
If marks repeatedly appear on the printed side of the page at<br />
even intervals:<br />
• The toner cartridge may be damaged. If a repetitive mark<br />
occurs on the page, print a cleaning sheet se<strong>ver</strong>al times to<br />
clean the cartridge; see “Cleaning the Drum” on page 7.10.<br />
After the printout, if you still have the same problems, install<br />
a new toner cartridge. See “Installing the Toner Cartridge” on<br />
page 1.10.<br />
• Parts of the machine may have toner on them. If the defects<br />
occur on the back of the page, the problem will likely correct<br />
itself after a few more pages.<br />
• The fusing assembly may be damaged. Contact a service<br />
representative.<br />
8<br />
TROUBLESHOOTING 8.19
Condition<br />
Background<br />
scatter<br />
A<br />
Misformed<br />
characters<br />
Suggested solutions<br />
Background scatter results from bits of toner distributed on the<br />
printed page.<br />
• The paper may be too damp. Try printing with a different<br />
batch of paper. Do not open packages of paper until<br />
necessary so that the paper does not absorb too much<br />
moisture.<br />
• If background scatter occurs on an envelope, change the<br />
printing layout to avoid printing o<strong>ver</strong> areas that have<br />
o<strong>ver</strong>lapping seams on the re<strong>ver</strong>se side. Printing on seams can<br />
cause problems.<br />
• If background scatter co<strong>ver</strong>s the entire surface area of a<br />
printed page, adjust the print resolution through your<br />
software application or the printer properties.<br />
• If characters are improperly formed and producing hollow<br />
images, the paper stock may be too slick. Try a different<br />
paper. See “Paper Specifications” on page A.6.<br />
• If characters are improperly formed and producing a wavy<br />
effect, the scanner unit may need service. For service,<br />
contact a service representative.<br />
Page skew<br />
AaBbCc<br />
AaBbCc<br />
AaBbCc<br />
AaBbCc<br />
AaBbCc<br />
• Ensure that the paper is loaded properly.<br />
• Check the paper type and quality. See “Paper Specifications”<br />
on page A.6.<br />
• Ensure that the paper or other material is loaded correctly<br />
and the guides are not too tight or too loose against the<br />
paper stack.<br />
Curl or wave<br />
• Ensure that the paper is loaded properly.<br />
• Check the paper type and quality. Both high temperature and<br />
humidity can cause paper curl. See “Paper Specifications” on<br />
page A.6.<br />
•Turn o<strong>ver</strong> the stack of paper in the paper tray. Also try<br />
rotating the paper 180° in the tray.<br />
8.20<br />
TROUBLESHOOTING
Condition<br />
Wrinkles or<br />
creases<br />
Suggested solutions<br />
• Ensure that the paper is loaded properly.<br />
• Check the paper type and quality. See “Paper Specifications”<br />
on page A.6.<br />
•Turn o<strong>ver</strong> the stack of paper in the paper tray. Also try<br />
rotating the paper 180° in the tray.<br />
Back of printouts<br />
are dirty<br />
Check for leaking toner. Clean the inside of the machine. See<br />
page 7.3.<br />
Black pages<br />
A<br />
• The toner cartridge may not be installed properly. Remove<br />
the cartridge and reinsert.<br />
• The toner cartridge may be defective and need replacing.<br />
Install a new toner cartridge. See “Installing the Toner<br />
Cartridge” on page 1.10.<br />
• The machine may require repair. Contact a service<br />
representative.<br />
Loose toner • Clean the inside of the machine. See page 7.3.<br />
• Check the paper type and quality. See “Paper Specifications”<br />
on page A.6.<br />
• Install a new toner cartridge. See “Installing the Toner<br />
Cartridge” on page 1.10.<br />
• If the problem persists, the machine may require repair.<br />
Contact a service representative.<br />
Character Voids<br />
A<br />
Character voids are white areas within the parts of characters<br />
that should be solid black:<br />
• If you are using transparencies, try another type of<br />
transparency. Because of the composition of the<br />
transparency, some character voids are normal.<br />
•You may be printing on the wrong surface on the paper.<br />
Remove the paper and turn it around.<br />
• The paper may not meet paper specifications. See “Paper<br />
Specifications” on page A.6.<br />
8<br />
TROUBLESHOOTING 8.21
Condition<br />
Horizontal stripes<br />
AaBbCc<br />
AaBbCc<br />
AaBbCc<br />
AaBbCc<br />
AaBbCc<br />
Suggested solutions<br />
If horizontally aligned black streaks or smears appear:<br />
• The toner cartridge may be installed improperly. Remove the<br />
cartridge and reinsert.<br />
• The toner cartridge may be defective. Install a new toner<br />
cartridge. See “Installing the Toner Cartridge” on page 1.10.<br />
• If the problem persists, the machine may require repair.<br />
Contact a service representative.<br />
Curl<br />
If the printed paper is curl or paper does not feed into the<br />
printer:<br />
• Turn o<strong>ver</strong> the stack of paper in the input tray. Also try<br />
rotating the paper 180° in the input tray.<br />
Fax Problems (For <strong>SCX</strong>-<strong>4216F</strong>)<br />
Condition<br />
The machine is not<br />
working, there is no<br />
display and the buttons<br />
are not working.<br />
No dial tone sounds.<br />
The numbers stored in the<br />
memory do not dial<br />
correctly.<br />
The document does not<br />
feed into the machine.<br />
Suggested solutions<br />
• Unplug the power cord and plug it in again.<br />
• Ensure that there is power to the electrical receptacle.<br />
• Check that the phone line is connected properly.<br />
• Check that the phone socket in the wall is working by<br />
plugging in another phone.<br />
Make sure that the numbers are stored in the memory<br />
correctly. Print a Phonebook list, referring to the Facsimile<br />
<strong>User</strong>’s Guide.<br />
• Make sure that the document is not wrinkled and you are<br />
putting it in correctly. Check that the document is the<br />
right size, not too thick or thin.<br />
• Make sure that the ADF (Automatic Document Feeder)<br />
co<strong>ver</strong> is firmly closed.<br />
8.22<br />
TROUBLESHOOTING
Condition<br />
Faxes are not received<br />
automatically.<br />
The machine does not<br />
send.<br />
The incoming fax has<br />
blank spaces or is received<br />
with a poor-quality.<br />
Some of the words on a<br />
incoming fax are<br />
stretched.<br />
There are lines on the<br />
documents you send.<br />
The machine dials a<br />
number, but a connection<br />
with another fax machine<br />
fails.<br />
Documents are not stored<br />
in the memory.<br />
Blank areas appear at the<br />
bottom of each page or on<br />
other pages, with a small<br />
strip of text at the top.<br />
Suggested solutions<br />
• The FAX mode should be selected.<br />
• Make sure that there is paper in the tray.<br />
• Check to see if the display shows “Memory Full.”<br />
• Make sure that the document is loaded in the ADF or on<br />
the document glass.<br />
• “TX” should show up on the display.<br />
• Check the other fax machine you are sending to, to see if<br />
it can receive your fax.<br />
• The fax machine sending you the fax may be faulty.<br />
•A noisy phone line can cause line errors.<br />
• Check your machine by making a copy.<br />
• The toner cartridge may be empty. Replace the toner<br />
cartridge, referring to page 7.8.<br />
The fax machine sending you the fax had a temporary<br />
document jam.<br />
Check your scan glass for marks and clean it. See<br />
page 7.5.<br />
The other fax machine may be turned off, out of paper, or<br />
cannot answer incoming calls. Speak with the other<br />
machine operator and ask her/him to sort out the problem.<br />
There may not be enough memory to store the document.<br />
If the display shows a “Memory Full” message, delete any<br />
documents you no longer need from the memory and then<br />
restore the document.<br />
You may have chosen the wrong paper settings in the user<br />
option setting. See page 1.18 for the paper tray and<br />
page 3.10 for the Bypass tray.<br />
8<br />
TROUBLESHOOTING 8.23
Copying Problems<br />
Condition<br />
Copies are too light or too<br />
dark.<br />
Smears, lines, marks or spots<br />
appears on copies.<br />
Copy image is skewed.<br />
Blank copies print out.<br />
Image rubs off the copy<br />
easily.<br />
Frequent copy paper jams<br />
occurs.<br />
Fewer copies from the toner<br />
cartridge than expected prints<br />
out.<br />
Suggested solutions<br />
Use the Contrast button to darken or lighten the<br />
background of the copies.<br />
• If defects are on the original, press the Contrast<br />
button to lighten the background of your copies.<br />
• If no defects are on the original, clean the document<br />
glass and underside of the document co<strong>ver</strong>. See<br />
page 7.5.<br />
• Ensure that the original is positioned correctly on<br />
document glass.<br />
• Check that the copy paper is loaded correctly.<br />
Ensure that the original is face down on the document<br />
glass or face up in the Automatic Document Feeder (for<br />
<strong>SCX</strong>-4116/<strong>4216F</strong> only).<br />
•Replace the paper in the paper tray with paper from a<br />
new package.<br />
• In high humidity areas, do not leave paper in the<br />
machine for the extended periods of time.<br />
•Fan the stack of paper, then turn it o<strong>ver</strong> in the paper<br />
tray. Replace the paper in the tray with a fresh supply.<br />
Check/adjust the paper guides, if necessary.<br />
• Ensure that the paper is the proper paper weight.<br />
75 g/m 2 (20 lb) bond paper is recommended.<br />
• Check for copy paper or pieces of copy paper<br />
remaining in the machine after a paper jam has been<br />
cleared.<br />
•Your originals may contain pictures, solids or heavy<br />
lines. For example, your originals may be forms,<br />
newsletters, books or other documents that use more<br />
toner.<br />
• The machine may be turned frequently on and off.<br />
• The document co<strong>ver</strong> may be left open while copies are<br />
being made.<br />
8.24<br />
TROUBLESHOOTING
Scanning Problems<br />
Condition<br />
The scanner does not work.<br />
The unit scans <strong>ver</strong>y slowly.<br />
Suggested solutions<br />
• Make sure that you place the document to be<br />
scanned face down on the document glass, or<br />
face up in the Automatic Document Feeder (for<br />
<strong>SCX</strong>-4116/<strong>4216F</strong>).<br />
• There may not be enough available memory to<br />
hold the document you want to scan. Try the<br />
Prescan function to see if that works. Try<br />
lowering the scan resolution rate.<br />
• Check that the USB or parallel cable is<br />
connected properly.<br />
• Make sure that the USB or parallel cable is not<br />
defective. Switch the cable with a known good<br />
cable. If necessary, replace the cable.<br />
• If you are using a parallel cable, ensure that it<br />
is compliant with the IEEE 1284 standard.<br />
• Check that the scanner is configured correctly.<br />
Check scan setting in the SmarThru<br />
Configuration or the application you want to<br />
use to make certain that the scanner job is<br />
being sent to the correct port, for example,<br />
LPT1.<br />
• Check if the machine is printing received data.<br />
Scan the document after the current job is<br />
completed.<br />
•Graphics are scanned more slowly than text.<br />
• Communication speed becomes slow in scan<br />
mode because of the large amount of memory<br />
required to analyse and reproduce the scanned<br />
image. Set your computer to the ECP printer<br />
mode through BIOS setting. It will help to<br />
increase the speed. For details about how to<br />
set BIOS, refer to your computer user’s guide.<br />
8<br />
TROUBLESHOOTING 8.25
Condition<br />
Message appears on your computer<br />
screen:<br />
• “Device can't be set to the H/W<br />
mode you want.”<br />
•“Port is being used by another<br />
program.”<br />
•“Port is Disabled.<br />
• “Scanner is busy receiving or<br />
printing data. When the current<br />
job is completed, try again.”<br />
• “Invalid handle.”<br />
• “Scanning has failed.”<br />
Suggested solutions<br />
• There may be a copying or printing job in<br />
progress. When the current job is complete,<br />
try the job again.<br />
• The Selected port is currently being used.<br />
Restart your computer and try again.<br />
• The printer cable may be improperly<br />
connected or the power may be off. You<br />
must use a parallel cable that supports<br />
IEEE-1284 bi-directional communications.<br />
• The scanner dri<strong>ver</strong> is not installed or an<br />
operating environment is not set up<br />
properly.<br />
• Ensure that port is properly connected<br />
and power is on, Then restart your<br />
computer.<br />
• Check, The USB cable may be improperly<br />
connected or the power may be off.<br />
• Do not use the parallel and the USB<br />
cables at the same time.<br />
8.26<br />
TROUBLESHOOTING
A SPECIFICATIONS<br />
This chapter includes:<br />
• General Specifications<br />
• Scanner and Copier Specifications<br />
• Printer Specifications<br />
• Facsimile Specifications (For <strong>SCX</strong>-<strong>4216F</strong>)<br />
• Paper Specifications
General Specifications<br />
Item<br />
Automatic document<br />
feeder (for <strong>SCX</strong>-4116/<strong>4216F</strong>)<br />
ADF Document size<br />
(for <strong>SCX</strong>-4116/<strong>4216F</strong>)<br />
Paper input capacity<br />
Paper output capacity<br />
Paper type<br />
Consumables<br />
Power requirements<br />
Power consumption<br />
Noise *<br />
Warm-up Time<br />
Operating conditions<br />
LCD<br />
Toner cartridge life **<br />
SET dimension<br />
(W x D x H)<br />
Description<br />
Up to 30 sheets (20 lb, 75 g/m 2 )<br />
Width: 142 to 216 mm (5.6 to 8.5 inches)<br />
Length: 148 to 356 mm (5.8 to 14 inches)<br />
Paper tray: 250 sheets (weight: 75 g/m 2 , 20 lb)<br />
Bypass tray: 1 sheets (weight: 75 g/m 2 , 20 lb)<br />
Front output tray: 150 sheets (face down)<br />
Rear output slot: 1 sheet (face up)<br />
Paper tray: Plain paper (60 ~ 90 g/m 2 , 16 ~ 24 lb)<br />
Bypass tray: Plain paper, Transparencies, Labels, Card,<br />
Post card, Envelopes (60 ~ 120 g/m 2 , 16 ~ 32 lb)<br />
1-piece toner cartridge system<br />
100 ~ 127 VAC, 50/60 Hz, 4.5A<br />
220 ~ 240 VAC, 50/60 Hz, 2.5A<br />
Sleep mode: Less than 19 W<br />
Standby mode: Less than 85 W(100 ~ 127 VAC) /<br />
Less than 95 W(220 ~ 240 VAC)<br />
A<strong>ver</strong>age: Less than 350 W<br />
Warm-up: Less than 50 dBA<br />
Standby mode: Less than 35 dBA<br />
Printing: Less than 55 dBA<br />
Less than 42 seconds<br />
Temperature: 50 o F to 89 o F (10 o C to 32 o C)<br />
Humidity: 20 % to 80 % RH<br />
16 characters x 2 lines<br />
3,000 A4/Letter pages (for starter, 1,000 pages)<br />
@ IDC 5 % co<strong>ver</strong>age<br />
<strong>SCX</strong>-4116/<strong>4216F</strong>: 474 x 436 x 417 mm<br />
<strong>SCX</strong>-4016: 474 x 436 x 353 mm<br />
A.2<br />
SPECIFICATIONS
Item<br />
Description<br />
Weight<br />
Package Weight<br />
Net: 13 (<strong>SCX</strong>-4116/<strong>4216F</strong>)/11.7 (<strong>SCX</strong>-4016) Kg<br />
(including consumables)<br />
Gross: 17 (<strong>SCX</strong>-4116/<strong>4216F</strong>)/15.7 (<strong>SCX</strong>-4016) Kg<br />
(including consumables, accessories and package)<br />
Paper: 2.7 Kg<br />
Plastic: 0.7 Kg<br />
*. Sound Pressure Level, ISO7779<br />
**.May be affected by operating environment, printing interval, media type, media size.<br />
Scanner and Copier Specifications<br />
Item<br />
Description<br />
Compatibility<br />
Scanning method<br />
Resolution<br />
Effective scanning length<br />
Effective scanning width<br />
colour bit depth<br />
Mono bit depth<br />
Scan speed (Text mode) *<br />
Copy speed **<br />
Paper size<br />
TWAIN standard<br />
ADF and Flat-bed CCD (Charge Coupled Device)<br />
module<br />
Optical: Up to 600 dpi (Mono and colour)<br />
Enhanced: Up to 4,800 dpi (USB)<br />
Platen: 293 mm (11.5 in.)<br />
ADF (for <strong>SCX</strong>-4116/<strong>4216F</strong>): 356 (14 in.)<br />
8.2 inches (208 mm)<br />
Internal: 24 bit<br />
External: 24 bit<br />
1 bit for Text mode<br />
8 bit for Gray mode<br />
Platen: Up to 23 seconds<br />
ADF (<strong>SCX</strong>- 4116/<strong>4216F</strong>): Up to 25 seconds<br />
Letter: Up to 17 copies per minute<br />
A4: Up to 16 copies per minute<br />
Letter, A4, Legal<br />
A<br />
SPECIFICATIONS A.3
Item<br />
Copy resolution<br />
Zoom rate<br />
Multiple copies<br />
Gray scale<br />
Platen: Up to 600 x 300 (Text, Mixed) /<br />
Up to 600 x 600 (Photo)<br />
ADF (for <strong>SCX</strong>-4116/<strong>4216F</strong>): Up to 600 x 300 (Text,<br />
Mixed, Photo)<br />
Platen: 25 ~ 400 %<br />
ADF (for <strong>SCX</strong>-4116/<strong>4216F</strong>): 25 ~ 100 %<br />
99 pages<br />
256 levels<br />
Description<br />
*. Condition: Standard resolution. ITU-T No.1 Chart<br />
**. Copy speed is based on single document multiple copy.<br />
Printer Specifications<br />
Item<br />
Description<br />
Printing method<br />
Printing speed *<br />
Paper size<br />
Print resolution<br />
Emulation<br />
Laser Beam Printing<br />
Letter: Up to 17 copies per minute<br />
A4: Up to 16 copies per minute<br />
Paper tray: Letter, A4, Legal, Folio, A5, A6<br />
Bypass tray: Letter, Legal, A4, Folio, Executive, A5, A6,<br />
A6 card, Post Card 4x6, HagaKi, Envelope 7-3/4,<br />
Envelope 9, Envelope 10, Envelope DL, Envelope C5,<br />
Envelope C6, Envelope B5<br />
* Min.: 76 x 127 mm (3 x 5 in.)<br />
Max.: 216 x 356 (8.5 x 14 in.)<br />
Up to 600 x 600 dpi<br />
SPL (GDI)<br />
PC Interface IEEE 1284 Parallel (ECP Only), USB 1.1<br />
Compatibility<br />
First printing time<br />
Windows 95/98/2000/NT 4.0/Me/XP<br />
Standby mode: 12 seconds<br />
Power save mode: 54 seconds<br />
*. Speed will be affected by Operating system used, computing performance, application software,<br />
connecting method, media type, media size and job complexity.<br />
A.4<br />
SPECIFICATIONS
Facsimile Specifications (For <strong>SCX</strong>-<strong>4216F</strong>)<br />
Item<br />
Description<br />
Compatibility<br />
Applicable line<br />
Data coding<br />
Modem speed<br />
Transmission speed<br />
Scanning speed<br />
Maximum document length<br />
Paper size<br />
Resolution<br />
<strong>User</strong> Memory<br />
Halftone<br />
Auto dialer<br />
ITU-T Group 3, ECM<br />
Public Switched Telephone Network (PSTN) or behind<br />
PABX<br />
MH/MR/MMR (ECM Mode) and JPEG for colour fax<br />
transmission<br />
33600/31200/28800/26400/24000/21600/19200/<br />
16800/14400/12000/9600/7200/4800/2400 bps with<br />
fall back<br />
Approx. 3 seconds/page<br />
* Transmission time applies to memory transmission of<br />
text data with ECM compression using only ITU-T<br />
No.1 Chart.<br />
Platen: approx. 6 seconds/A4 (at standard fax<br />
resolution mode)<br />
ADF: approx. 8 seconds/A4 (at standard fax resolution<br />
mode)<br />
Platen: 297 mm<br />
ADF: 1.5 m<br />
Letter, A4, Legal<br />
Standard: Up to 203 x 98 dpi<br />
Fine: Up to 203 x 196 dpi<br />
Super Fine: Up to 300 x 300 dpi / Up to 203 x 392 dpi<br />
Photo: Up to 203 x 196 dpi<br />
Colour: Up to 200 x 200 dpi<br />
4 <strong>MB</strong> (320 pages)<br />
256 levels<br />
Speed dialling (registration for 100 numbers)<br />
A<br />
SPECIFICATIONS A.5
Paper Specifications<br />
O<strong>ver</strong>view<br />
Your machine accepts a variety of print materials, such as cut-sheet paper (including<br />
up to 100% recycled fiber content paper), envelopes, labels, transparencies and<br />
custom-size paper. Properties, such as weight, composition, grain and moisture<br />
content, are important factors affecting the machine’s performance and the output<br />
quality. Paper that does not meet the guidelines outlined in this user’s guide can<br />
cause the following problems:<br />
•Poor print quality<br />
• Increased paper jams<br />
• Premature wear on the machine.<br />
NOTES:<br />
• Some paper may meet all of the guidelines in this guide and still not produce<br />
satisfactory results. This may be the result of improper handling, unacceptable<br />
temperature and humidity levels, or other variables o<strong>ver</strong> which <strong>Samsung</strong> has no<br />
control.<br />
• Before purchasing large quantities of paper, insure the paper meets the requirements<br />
specified in this user’s guide.<br />
CAUTION: Using paper that does not meet these specifications may cause problems,<br />
requiring repairs. These repairs are not co<strong>ver</strong>ed by the <strong>Samsung</strong> warranty or service<br />
agreements.<br />
Supported Sizes of Paper<br />
Paper Dimensions * Weight Capacity **<br />
Letter<br />
8.5 X 11 in. (216 X 279<br />
mm)<br />
A4<br />
Executive<br />
Legal<br />
Folio<br />
210 X 297 mm (8.3 X<br />
11.7 in.)<br />
7.25 X 10.5 in. (191 X<br />
267 mm)<br />
8.5 X 14 in. (216 X 356<br />
mm)<br />
216 X 330 mm (8.5 X<br />
13 in.)<br />
• 60 to 105 g/m 2<br />
bond (16 to<br />
28 lb) for the<br />
paper tray<br />
• 60 to 120 g/m 2<br />
bond (16 to<br />
32 lb) for the<br />
Bypass tray<br />
• 250 sheets of 75 g/<br />
m 2 bond (20 lb)<br />
paper for the paper<br />
tray<br />
• 1 sheet of paper<br />
for the Bypass tray<br />
A.6<br />
SPECIFICATIONS
Paper Dimensions * Weight Capacity **<br />
Minimum size (custom)<br />
Maximum size (Legal)<br />
76 x 127 mm (3 x 5 in)<br />
216 x 356 mm<br />
(8.5 x 14 in)<br />
60 to 120 g/m 2<br />
bond (16 to 32 lb)<br />
Transparency<br />
138 to 146 g/m 2<br />
Labels Same minimum and 120 to 150 g/m 2<br />
Cards<br />
maximum paper sizes as<br />
listed above.<br />
90 to 163 g/m 2<br />
• 1 sheet of paper for<br />
the Bypass tray<br />
Envelopes 75 to 90 g/m 2<br />
*. The machine supports a wide range of media sizes. See “Size, Input Sources and Capacities” on<br />
page 3.2.<br />
**.Capacity may vary depending on print materials’ weight and thickness, and environmental conditions.<br />
NOTE: You may experience jams when using print materials with a length of less than<br />
127 mm (5 in.). For optimum performance, ensure that you are storing and handling the<br />
paper correctly. Please refer to “Printer and Paper Storage Environment” on page A.9.<br />
Guidelines for Using Paper<br />
For the best result, use conventional 75 g/m 2 (20 lb) paper. Ensure that the paper is<br />
of good quality, and free of cuts, nicks, tears, spots, loose particles, dust, wrinkles,<br />
voids, and curled or bent edges.<br />
If you are unsure of what type of paper you are loading, such as bond or recycled<br />
paper, check the label on the package.<br />
The following problems may cause print quality deviations, jamming or even damage<br />
to the printer:<br />
Symptom Problem with Paper Solution<br />
Poor print quality or toner<br />
adhesion, problems with<br />
feeding<br />
Dropout, jamming, curl<br />
Increased gray background<br />
shading/printer wear<br />
Excessive curl problems with<br />
feeding<br />
Too moist, too rough, too<br />
smooth or embossed; faulty<br />
paper lot<br />
Stored improperly<br />
Too heavy<br />
Too moist, wrong grain<br />
direction or short-grain<br />
construction<br />
Try another kind of paper,<br />
between 100 ~ 400 Sheffied,<br />
4 ~ 5 % moisture content.<br />
Store paper flat in its<br />
moisture-proof wrapping.<br />
Use lighter paper, use the rear<br />
output slot.<br />
• Use the rear output slot.<br />
• Use long-grain paper.<br />
Jamming, damage to printer<br />
Cutouts or perforations<br />
Do not use paper with cutouts<br />
or perforations.<br />
Problems with feeding Ragged edges Use good quality paper.<br />
A<br />
SPECIFICATIONS A.7
NOTES:<br />
• Do not use letterhead paper printed with low-temperature inks, such as those used in<br />
some types of thermography.<br />
• Do not use raised or embossed letterhead.<br />
• The printer uses heat and pressure to fuse toner to the paper. Insure that any coloured<br />
paper or preprinted forms use inks that are compatible with this fusing temperature<br />
(200 °C or 392 °F for 0.1 second).<br />
Paper Specifications<br />
Category<br />
Specifications<br />
Acid Content<br />
Caliper<br />
Curl in Ream<br />
Cut Edge Conditions<br />
Fusing Compatibility<br />
Grain<br />
Moisture Content<br />
Smoothness<br />
5.5 pH or lower<br />
0.094 ~ 0.18 mm (3.0 ~ 7.0 mils)<br />
Flat within 5 mm (0.02 in.)<br />
Cut with sharp blades with no visible fray.<br />
Must not scorch, melt, offset or release hazardous emissions<br />
when heated to 200 °C (392 °F) for 0.1 second.<br />
Long Grain<br />
4 % ~ 6 % by weight<br />
100 ~ 400 Sheffied<br />
Paper Output Capacity<br />
Output Location<br />
Face-down output tray<br />
Face-up output slot<br />
Capacity<br />
150 sheets of 75 g/m 2 bond (20 lb) paper<br />
1 sheet of 75 g/m 2 bond (20 lb) paper<br />
A.8<br />
SPECIFICATIONS
Printer and Paper Storage Environment<br />
Paper storage environmental conditions directly affect the feed operation.<br />
Ideally, the machine and paper storage environment should be at or near room<br />
temperature, and not too dry or humid. Remember that paper is hygroscopic; it<br />
absorbs and loses moisture rapidly.<br />
Heat works with humidity to damage paper. Heat causes the moisture in paper to<br />
evaporate, while cold causes it to condense on the sheets. Heating systems and air<br />
conditioners remove most of the humidity from a room. As paper is opened and used,<br />
it loses moisture, causing streaks and smudging. Humid weather or water coolers can<br />
cause the humidity to increase in a room. As paper is opened and used it absorbs any<br />
excess moisture, causing light print and dropouts. Also, as paper loses and gains<br />
moisture it can become distorted. This can cause paper jams.<br />
Care should be taken not to purchase more paper than can be used in a short time<br />
(about 3 months). Paper stored for long periods may experience heat and moisture<br />
extremes, which can cause damage. Planning is important to prevent damage to<br />
large supplies of paper.<br />
Unopened paper in sealed reams can remain stable for se<strong>ver</strong>al months before use.<br />
Opened packages of paper have more potential for environment damage, especially<br />
if they are not wrapped with a moisture-proof barrier.<br />
The paper storage environment should be properly maintained to ensure optimum<br />
performance. The required condition is 20 to 24 °C (68 to 75 °F), with a relative<br />
humidity of 45 % to 55 %. The following guidelines should be considered when<br />
evaluating the paper’s storage environment:<br />
•Paper should be stored at or near room temperature.<br />
• The air should not be too dry or too humid.<br />
• The best way to store an opened ream of paper is to rewrap it tightly in its<br />
moisture-proof wrapping. If the machine environment is subject to extremes,<br />
unwrap only the amount of paper to be used during the day’s operation to prevent<br />
unwanted moisture changes.<br />
A<br />
SPECIFICATIONS A.9
MEMO<br />
A.10<br />
SPECIFICATIONS
INDEX<br />
Numerics<br />
2/4-up, special copy 4.12<br />
2-side, special copy 4.11<br />
A<br />
ADF, load 4.4<br />
auto fit, special copy 4.9<br />
B<br />
bypass tray, use 3.8<br />
C<br />
cancel<br />
copy 4.3<br />
print 5.5<br />
scan 6.5<br />
CCD power save mode, use 1.20<br />
clone, special copy 4.9<br />
collation, special copy 4.10<br />
connection<br />
AC power 1.17<br />
parallel 1.16<br />
telephone line cord 1.15<br />
USB 1.16<br />
consumables 7.11<br />
contrast, copy 4.6<br />
control panel 1.7<br />
copy<br />
contrast 4.6<br />
default setting, change 4.13<br />
from ADF 4.4<br />
from document glass 4.2<br />
image 4.6<br />
number of pages 4.8<br />
special features 4.8<br />
time out, set 4.14<br />
D<br />
display language, change<br />
control panel 1.17<br />
document<br />
jam, clear 8.2<br />
load in ADF 4.4<br />
load on document glass 4.2<br />
document glass<br />
clean 7.5<br />
load 4.2<br />
drum, clean 7.10<br />
E<br />
error messages 8.11<br />
F<br />
Favorite setting, use 5.6<br />
fit to page<br />
copy 4.9<br />
print 5.11<br />
front output tray, use 3.5<br />
G<br />
graphic properties, set 5.20<br />
H<br />
help, use 5.6<br />
I<br />
install<br />
toner cartridge 1.10<br />
Windows software 2.5<br />
J<br />
jam, clear<br />
document 8.2<br />
paper 8.4
M<br />
memory, clear 7.2<br />
MFP dri<strong>ver</strong><br />
install 2.5<br />
uninstall 2.10<br />
N<br />
network printer, set 5.22<br />
n-up (multiple pages per sheet)<br />
copy 4.12<br />
print 5.8<br />
O<br />
orientation, print 5.3<br />
output location, select 3.4<br />
o<strong>ver</strong>lay, use 5.16<br />
P<br />
paper guidelines 3.3<br />
paper jam, clear 8.4<br />
paper level indicator 3.7<br />
paper load<br />
in bypass tray 3.8<br />
in paper tray 1.12<br />
paper load capacity 3.2<br />
paper properties, set 5.7<br />
paper size, set<br />
bypass tray 3.10<br />
paper tray 1.18<br />
print 5.7<br />
paper source, set 5.8<br />
paper type 3.2<br />
paper type, set<br />
bypass tray 3.10<br />
paper tray 1.18<br />
print 5.8<br />
parallel, connect 1.16<br />
poster<br />
copy 4.12<br />
print 5.12<br />
power save mode, use 1.19<br />
print order, set 5.4<br />
print resolution 5.20<br />
printer dri<strong>ver</strong><br />
install in Windows 2.5<br />
uninstall 2.10<br />
printing<br />
fitting to a selected paper size 5.11<br />
from Windows 5.2<br />
multiple pages on one sheet 5.8<br />
posters 5.12<br />
reduced or enlarged document<br />
5.10<br />
using o<strong>ver</strong>lays 5.16<br />
watermarks 5.13<br />
problem, solve<br />
copying 8.24<br />
error messages 8.11<br />
fax 8.22<br />
paper feeding 8.14<br />
printing 8.15<br />
printing quality 8.18<br />
scanning 8.25<br />
R<br />
rear output slot, use 3.5<br />
reduced/enlarged<br />
copy 4.7<br />
print 5.10<br />
S<br />
scan dri<strong>ver</strong><br />
install 2.5<br />
uninstall 2.10<br />
SmarThru<br />
install 2.5<br />
uninstall 2.11<br />
specifications<br />
facsimile A.5<br />
general A.2<br />
paper A.6<br />
printer A.4<br />
scanner and copier A.3<br />
system requirements<br />
Windows 2.4<br />
T<br />
tel line, connect 1.15<br />
toner cartridge<br />
install 1.10<br />
life 7.6<br />
redistribute 7.7<br />
replace 7.8<br />
toner save mode, use 1.19<br />
TWAIN, scan 6.5
U<br />
unistall<br />
MFP dri<strong>ver</strong> 2.10<br />
SmarThru 2.11<br />
using CD-ROM 2.13<br />
USB<br />
connect 1.16<br />
mode, change 8.17<br />
USB dri<strong>ver</strong>, install<br />
in Windows 98/Me 2.9<br />
W<br />
watermarks, use 5.13<br />
Z<br />
zoom rate, copy 4.7
Home<br />
Visit us at:<br />
www.samsungprinter.com<br />
Rev. 0.04
<strong>SCX</strong>-<strong>4216F</strong>
CONTENTS<br />
Chapter 1: GETTING STARTED<br />
Control Panel Functions ....................................... 1.2<br />
Setting the Machine ID ......................................... 1.4<br />
Entering Characters Using the Number Keypad ... 1.5<br />
Setting the Date and Time .................................... 1.7<br />
Changing the Clock Mode ................................. 1.8<br />
Setting Sounds .................................................... 1.8<br />
Speaker, Ringer, Key Sound and<br />
Alarm Sound .................................................. 1.9<br />
Speaker Volume ............................................. 1.9<br />
Setting the Dial Mode .......................................... 1.10<br />
Using the Toll Save Mode ..................................... 1.10<br />
Setting up the Fax System ................................... 1.12<br />
Changing the Fax Setup options ...................... 1.12<br />
Available Fax Setup Options ............................ 1.13<br />
Chapter 2: GENERAL FAX FUNCTIONS<br />
Sending a Fax ..................................................... 2.2<br />
Preparing Documents for Faxing ....................... 2.2<br />
Loading an Original Document .......................... 2.2<br />
Adjusting the Document Resolution ................... 2.4<br />
Sending a Fax Automatically ............................ 2.5<br />
Sending a Fax <strong>Manual</strong>ly ................................... 2.6<br />
Confirming Transmission ................................. 2.6<br />
Automatic Redialling ....................................... 2.7<br />
Receiving a Fax ................................................... 2.7<br />
About Receiving Modes .................................... 2.7<br />
Loading Paper for Receiving Faxes .................... 2.7<br />
Receiving Automatically in the Fax Mode ............ 2.8<br />
Receiving <strong>Manual</strong>ly in the Tel Mode ................... 2.8<br />
Receiving Faxes in the Memory ......................... 2.8<br />
CONTENTS<br />
i
Chapter 3: AUTOMATIC DIALLING<br />
Speed Dialling ..................................................... 3.2<br />
Storing a Number for Speed Dialling .................. 3.2<br />
Sending a Fax using a Speed Number ................ 3.3<br />
Group Dialling ..................................................... 3.4<br />
Setting Group Dial .......................................... 3.4<br />
Editing Group Dial Numbers ............................. 3.5<br />
Sending a Fax Using Group Dialling<br />
(Multi-address Transmission) ........................... 3.6<br />
Searching for a Number in the Memory ................... 3.7<br />
Searching Sequentially through the Memory ....... 3.7<br />
Searching with a Particular First Letter .............. 3.7<br />
Printing a Phonebook List ...................................... 3.8<br />
Chapter 4: OTHER WAYS TO FAX<br />
Redialling ........................................................... 4.2<br />
Sending Broadcasting Faxes .................................. 4.2<br />
Sending a Delayed Fax ......................................... 4.3<br />
Sending a Priority Fax .......................................... 4.5<br />
Adding Documents To a Scheduled Fax ................... 4.7<br />
Cancelling a Scheduled Fax ................................... 4.8<br />
Chapter 5: ADDITIONAL FEATURES<br />
Using the Secure Receiving Mode ........................... 5.2<br />
Printing Reports .................................................. 5.3<br />
Using Advanced Fax Settings ................................. 5.5<br />
Changing Setting Options ................................ 5.5<br />
Advanced Fax Setting Options .......................... 5.6<br />
Using the Remote Control Panel ............................. 5.7<br />
ii<br />
CONTENTS
1<br />
GETTING<br />
STARTED<br />
The following topics are included:<br />
• Control Panel Functions<br />
• Setting the Machine ID<br />
• Setting the Date and Time<br />
• Setting Sounds<br />
• Setting the Dial Mode<br />
• Using the Toll Save Mode<br />
• Setting up the Fax System
Control Panel Functions<br />
1 2 3<br />
4 5<br />
6<br />
Adjusts the brightness of the documents for<br />
the current copy job.<br />
1<br />
C<br />
O<br />
P<br />
Y<br />
*<br />
Selects the document type for the current<br />
copy job.<br />
Allows you to use special copy features, such<br />
as Clone, Collation, Auto fit, 2-side, N-up<br />
(multiple pages on a sheet) and Poster<br />
copying.<br />
Makes a copy smaller or larger than the<br />
original.<br />
Selects the number of copies.<br />
2<br />
Displays the current status and prompts<br />
during an operation.<br />
Turns on when the toner cartridge is empty.<br />
Scrolls through the options available for the<br />
selected menu item.<br />
3<br />
Confirms the selection on the display.<br />
Enters Menu Mode and scrolls through the<br />
menus available.<br />
1.2<br />
GETTING STARTED
Sends you back to the upper menu level.<br />
3<br />
Stops an operation at any time.<br />
In Standby Mode, clears/cancels the copy<br />
options, such as the contrast, the image<br />
setting, the copy size and the number of<br />
copies.<br />
1<br />
Starts a job.<br />
4<br />
Dials a number or enters alphanumeric<br />
characters.<br />
5<br />
F<br />
A<br />
X<br />
Adjusts the resolution of the documents for<br />
the current fax job.<br />
Allows you to send a fax to multiple<br />
destinations.<br />
• Allows you to store frequently-dialed fax<br />
numbers using a one or two-digit speed dial<br />
or group number for automatic dialling and<br />
edit the stored numbers.<br />
• Allows you to print a Phonebook list.<br />
Redials the last number in Standby Mode or<br />
insert a pause into a fax number in the edit<br />
mode.<br />
Engages the telephone line.<br />
6<br />
S<br />
A<br />
V<br />
E<br />
Allows you to save on toner by using less<br />
toner to print a document.<br />
Allows you to save on call costs by sending a<br />
fax at a preset toll-saving time. Using this<br />
feature, you can take advantage of lower long<br />
distance rates at night, for example.<br />
*. For details about copy features, refer to the MFP <strong>User</strong>’s Guide.<br />
GETTING STARTED 1.3
Setting the Machine ID<br />
In some countries, you are required by law to indicate your fax<br />
number on any fax you send. The Machine ID, containing your<br />
telephone number and name (or company name), will be printed<br />
at the top of each page sent from your machine.<br />
1 Press Menu until “Machine Setup” appears on the top line<br />
of the display. The first available menu item, “Machine Id”<br />
displays on the bottom line.<br />
2 Press Enter. The display asks you to enter the fax number.<br />
If there is a number already set, the number appears.<br />
3 Enter your fax number using the number keypad.<br />
NOTE: If you make a mistake while entering numbers, press the<br />
button to delete the last digit.<br />
4 Press Enter when the number on the display is correct. The<br />
display asks you to enter the ID.<br />
5 Enter your name or company name using the number<br />
keypad.<br />
You can enter alphanumeric characters using the number<br />
keypad, and include special symbols by pressing the 0<br />
button.<br />
For details on how to use the number keypad to enter<br />
alphanumeric characters, see “Entering Characters Using<br />
the Number Keypad” on page 1.5.<br />
If you want to enter the same letter or number in<br />
succession (e.g. SS, AA, 777), enter one digit, move the<br />
cursor by pressing the button and enter the next digit.<br />
If you want to insert a space in the name, you can also use<br />
the button to move the cursor to skip the position.<br />
1.4<br />
GETTING STARTED
6 Press Enter when the name on the display is correct.<br />
7 Press Stop/Clear to return to Standby Mode.<br />
Entering Characters Using the Number<br />
Keypad<br />
1<br />
As you perform various tasks, you need to enter names and<br />
numbers. For example, when you set up your machine, you<br />
enter your name (or your company’s name) and telephone<br />
number. When you store one or two digit speed dial or group dial<br />
numbers, you may also enter the corresponding names.<br />
To enter alphanumeric characters:<br />
1 When you are prompted to enter a letter,<br />
locate the button labeled with the<br />
character you want. Press the button<br />
until the correct letter appears on the<br />
display.<br />
For example, to enter the letter O,<br />
press 6, labeled with “MNO.”<br />
Each time you press 6, the display<br />
shows a different letter, M,<br />
N, O and finally 6.<br />
You can enter special characters (space, plus sign, etc.). For<br />
details, see “Keypad Letters and Numbers” on page 1.6.<br />
2 To enter additional letters, repeat Step 1.<br />
If the next letter is printed on the same button, move the<br />
cursor by pressing the button and then press the button<br />
labeled with the letter you want. The cursor will move to the<br />
right and the next letter will appear on the display.<br />
You can enter a space by pressing the<br />
button.<br />
3 When you finish entering letters, press Enter.<br />
GETTING STARTED 1.5
Keypad Letters and Numbers<br />
Key<br />
Assigned numbers, letters or characters<br />
1 1 Space<br />
2 A B C 2<br />
3 D E F 3<br />
4 G H I 4<br />
5 J K L 5<br />
6 M N O 6<br />
7 P Q R S 7<br />
8 T U V 8<br />
9 W X Y Z 9<br />
0 + - , . ‘ / * # & 0<br />
Changing Numbers or Names<br />
If you make a mistake while entering a number or name, press<br />
the button to delete the last digit or character. Then enter the<br />
correct numbers or characters.<br />
Inserting a Pause<br />
With some telephone systems, you must dial an access code (9,<br />
for example) and listen for a second dial tone. In such cases,<br />
you must insert a pause in the telephone number. You can insert<br />
a pause while you are setting up speed dial numbers.<br />
To insert a pause, press Redial/Pause at the appropriate place<br />
while entering the telephone number. A “–” appears on the<br />
display at the corresponding location.<br />
1.6<br />
GETTING STARTED
Setting the Date and Time<br />
All of your faxes will have the date and time printed on them.<br />
NOTE: If power to the machine is cut off, you need to reset the<br />
correct time and date once the power is restored.<br />
1<br />
1 Press Menu until “Machine Setup” appears on the top line<br />
of the display.<br />
2 Press the scroll button ( or ) to display “Date & Time” on<br />
the bottom line and press Enter.<br />
3 Enter the correct time and date using the number keypad.<br />
Month = 01 ~ 12<br />
Day = 01 ~ 31<br />
Year = requires the four digits<br />
Hour = 01 ~ 12 (12-hour mode)<br />
00 ~ 23 (24-hour mode)<br />
Minute = 00 ~ 59<br />
NOTE: The date format may differ from each country.<br />
You can also use the scroll button ( or ) to move the<br />
cursor under the digit you want to correct and enter a new<br />
number.<br />
4 To select “Am” or “Pm” for 12-hour format, press the or<br />
button.<br />
When the cursor is not under the AM or PM indicator,<br />
pressing the or button immediately moves the cursor<br />
to the indicator.<br />
You can change the clock mode to 24-hour format (e.g.<br />
01:00 PM as 13:00). For details, see “Changing the Clock<br />
Mode” on page 1.8.<br />
GETTING STARTED 1.7
5 Press Enter when the time and date on the display is<br />
correct.<br />
When you enter a wrong number, the machine beeps and<br />
does not proceed to the next step. If this happens, just<br />
reenter the correct number.<br />
Changing the Clock Mode<br />
You can set your machine to display the current time using<br />
either a 12-hour or 24-hour format.<br />
1 Press Menu until “Machine Setup” appears on the top line<br />
of the display.<br />
2 Press the scroll button ( or ) until you see “Clock Mode”<br />
on the bottom line and press Enter.<br />
The clock mode currently set for the machine displays.<br />
3 Press the scroll button ( or ) to select the other mode<br />
and then press Enter to save the selection.<br />
4 To return to Standby Mode, press Stop/Clear.<br />
Setting Sounds<br />
You can control the following sounds:<br />
• Ringer: You can adjust the ringer volume.<br />
•Key Sound: With this option set to “On,” a key tone sounds<br />
each time any key is pressed.<br />
• Alarm Sound: You can turn the alarm sound on or off. With<br />
this option set to “On,” an alarm tone sounds when an<br />
error occurs or fax communication ends.<br />
• Speaker: You can turn on or off the sounds from the<br />
telephone line through the speaker, such as a dial tone or a<br />
fax tone. With this option set to “Comm.,” the speaker is<br />
on until the remote machine answers.<br />
•You can adjust the volume level using the On Hook Dial<br />
button.<br />
1.8<br />
GETTING STARTED
Speaker, Ringer, Key Sound and<br />
Alarm Sound<br />
1 Press Menu until “Sound/Volume” appears on the top line<br />
of the display.<br />
1<br />
2 Press the scroll button ( or ) to scroll through the<br />
options. Press Enter when you see the desired sound<br />
option.<br />
3 Press the scroll button ( or ) to display the desired<br />
status or loudness for the option you have selected.<br />
You will see the selection on the bottom line of the display.<br />
For the ringer volume, you can select from “Off”, “Low”,<br />
“Med” and “High”. Setting “Off” means that the ringer turns<br />
off. The machine works normally even if the ringer is turned<br />
off.<br />
4 Press Enter to save the selection. The next sound option<br />
appears.<br />
5 If necessary, repeat steps 2 through 4.<br />
6 To return to Standby Mode, press Stop/Clear.<br />
Speaker Volume<br />
1 Press On Hook Dial. A dial tone sounds from the speaker.<br />
2 Press the scroll button ( or ) until you hear the loudness<br />
you want. The display shows the current volume level.<br />
3 Press On Hook Dial to save the change and return to<br />
Standby Mode.<br />
NOTE: You can adjust the speaker volume only when the<br />
telephone line is connected.<br />
GETTING STARTED 1.9
Setting the Dial Mode<br />
You can select the type of the telephone dial system where your<br />
machine is connected.<br />
NOTE: The Dial Mode setting may be unavailable depending on<br />
your country.<br />
1 Press Menu until “Machine Setup” appears on the top line<br />
of the display.<br />
2 Press the scroll button ( or ) until you see “Dial Mode”<br />
on the bottom line and press Enter.<br />
3 Press the scroll button ( or ) to select the desired dial<br />
mode.<br />
Select “Tone” if your machine is connected to a tone dial<br />
line.<br />
Select “Pulse” if the machine is connected to a pulse dial<br />
line.<br />
4 Press Enter to save the selection.<br />
To return to Standby Mode, press Stop/Clear.<br />
Using the Toll Save Mode<br />
Using the Toll Save button on the control panel, you can quickly<br />
set your machine to send the document(s) stored in the memory<br />
during the preset time slot, when the call charge is lowered. This<br />
Toll Save mode helps you to take advantage of lower long<br />
distance rates at night, for example.<br />
NOTE: The toll-saving time slot may vary depending on your<br />
contract with a long distance phone company.<br />
1.10<br />
GETTING STARTED
To turn the toll save mode on:<br />
1 Press Toll Save. The button backlight turns on.<br />
2 Press Enter when “Start Time” displays on the bottom line.<br />
3 Enter the time when your machine starts sending toll save<br />
faxes, using the number keypad.<br />
1<br />
To select “Am” or “Pm” for 12-hour format, press the<br />
button.<br />
or<br />
4 Press Enter when the start time on the display is correct.<br />
5 Press the scroll button ( or ) to display “End Time” and<br />
press Enter.<br />
6 Enter the time when the toll save transmission ends, using<br />
the number keypad.<br />
7 Press Enter to save the setting.<br />
8 To return to Standby Mode, press Stop/Clear.<br />
Once the toll save mode is activated, your machine stores all of<br />
the documents to be faxed into the memory and sends them at<br />
the programed time.<br />
To turn the toll save mode off, press Toll Save again. The button<br />
backlight turns off and the mode is deactivated.<br />
NOTE: Once the toll-saving time is set, the Toll Save button<br />
allows you to only enable or disable the toll save mode. To change<br />
the time setting, use the Toll Save item in the Advaced Fax<br />
menu. See page 5.5.<br />
GETTING STARTED 1.11
Setting up the Fax System<br />
From the Fax Setup menu, you can configure many settings for<br />
the fax system.<br />
Changing the Fax Setup options<br />
1 Press Menu until “Fax Setup” appears on the top line of the<br />
display.<br />
The first available menu item, “Receive Mode,” displays on<br />
the bottom line.<br />
2 Press the scroll button ( or ) until you see the desired<br />
menu item on the bottom line and press Enter.<br />
3 Use the scroll button ( or ) to find the status or use the<br />
number keypad to enter the value for the option you have<br />
selected.<br />
4 Press Enter to save the selection. The next Fax Setup<br />
option appears.<br />
5 If necessary, repeat steps 2 through 4.<br />
6 To return to Standby Mode, press Stop/Clear.<br />
1.12<br />
GETTING STARTED
Available Fax Setup Options<br />
Option<br />
Receive<br />
Mode<br />
Description<br />
You can select the default fax receiving mode.<br />
• In the Fax mode, the machine answers an<br />
incoming call and immediately goes into<br />
the fax reception mode.<br />
• In Tel mode, you can receive a fax by<br />
pressing On Hook Dial (you can hear<br />
voice or fax tone from the remote<br />
machine) and then Start Copy/Fax on<br />
the control panel of your machine.<br />
1<br />
Ring To<br />
Answer<br />
You can specify the number of times the<br />
machine rings, 1 to 7, before answering an<br />
incoming call.<br />
Contrast<br />
You can select the default contrast mode to<br />
fax your documents lighter or darker.<br />
• Lighten works well with dark print.<br />
• Normal works well with standard typed or<br />
printed documents.<br />
• Darken works well with light print or faint<br />
pencil markings.<br />
Redial Term<br />
Your machine can automatically redial a<br />
remote fax machine if it was busy. Intervals<br />
from 1 to 15 minutes can be entered.<br />
Redials<br />
You can specify the number of redial<br />
attempts, 0 to 13. If you enter 0, the machine<br />
will not redial.<br />
MSG<br />
Confirm<br />
You can set your machine to print a report<br />
showing whether the transmission was<br />
successful, how many pages were sent, and<br />
more. The available options are On, Off and<br />
On-Error, which prints only when a<br />
transmission is not successful.<br />
Auto Report<br />
A report with detailed information about the<br />
previous 50 communications operations,<br />
including time and dates. The available<br />
options are On or Off.<br />
GETTING STARTED 1.13
Option<br />
Auto<br />
Reduction<br />
Description<br />
When receiving a document as long as or<br />
longer than the paper loaded in the paper<br />
tray, the machine can reduce the size of the<br />
document to fit the size of paper loaded in the<br />
machine. Select On if you want to<br />
automatically reduce an incoming page.<br />
With this feature set to Off, the machine<br />
cannot reduce the document to fit onto one<br />
page, the document is divided and printed in<br />
actual size on two or more pages.<br />
When receiving a document as long as longer<br />
than the paper installed in your machine, you<br />
can set the machine to discard any excess at<br />
the bottom of the page. If the received page<br />
is outside the margin you set, it will print on<br />
two sheets of paper at the actual size.<br />
Discard Size<br />
When the document is within the margin and<br />
the Auto Reduction feature is turned on, the<br />
machine reduces the document to fit it onto<br />
the appropriate sized paper and discard does<br />
not occur. If the Auto Reduction feature is<br />
turned off or fails, the data within the margin<br />
will be discarded. Settings range from 0 to 30<br />
mm.<br />
1.14<br />
GETTING STARTED
2<br />
GENERAL<br />
FAX FUNCTIONS<br />
The following topics are included:<br />
• Sending a Fax<br />
• Receiving a Fax
Sending a Fax<br />
Preparing Documents for Faxing<br />
Use the following guidelines to prepare your documents for<br />
faxing:<br />
• Do not load documents smaller than 142 x 148 mm or larger<br />
than 216 x 356 mm in the Automatic Document Feeder<br />
(ADF).<br />
• Do not attempt to load the following types of documents into<br />
the ADF:<br />
- carbon-paper or carbon-backed paper<br />
- coated paper<br />
- onion skin or thin paper<br />
- wrinkled or creased paper<br />
- curled or rolled paper<br />
- torn paper<br />
•Remove all staples and paper clips before loading documents<br />
in the ADF.<br />
• Make sure any glue, ink or correction fluid on the paper is<br />
completely dry before loading documents in the ADF.<br />
• Do not load documents containing different sizes or weights<br />
of paper in the ADF.<br />
• If you want to make copies from booklets, pamphlets,<br />
transparencies or documents having other unusual<br />
characteristics, use the document glass to load the<br />
document.<br />
Loading an Original Document<br />
To fax a document using the Automatic<br />
Document Feeder (ADF):<br />
1 Slide the document face up into the ADF. You can insert up<br />
to 30 sheets at a time.<br />
2.2<br />
GENERAL FAX FUNCTIONS
2 Adjust the document guide on the ADF to match the width<br />
of the document.<br />
To fax a document from the document glass:<br />
1 Open the document co<strong>ver</strong>.<br />
2<br />
2 Place the document face down on the document glass and<br />
align it with the registration guide on the top left corner of<br />
the glass.<br />
3 Close the document co<strong>ver</strong>.<br />
GENERAL FAX FUNCTIONS 2.3
NOTES:<br />
• If you are copying a page from a book or magazine, lift the co<strong>ver</strong><br />
until its hinges are caught by the stopper and then close the<br />
co<strong>ver</strong>. If the book or magazine is thicker than 30 mm, start<br />
copying with the co<strong>ver</strong> open.<br />
• Make sure that no document is in the ADF. If any document is<br />
detected in the ADF, it has priority o<strong>ver</strong> the document on the<br />
document glass.<br />
•To get the best scan quality, especially for coloured or gray<br />
scaled images, use the document glass.<br />
Adjusting the Document Resolution<br />
The default document settings produce good results when<br />
setting typical text based documents.<br />
Howe<strong>ver</strong>, if you send documents that are of a poor quality, or<br />
contain photographs, you can adjust the resolution to produce a<br />
higher quality fax.<br />
1 Press Resolution.<br />
2 By pressing Resolution or the scroll button ( or ), you<br />
can choose from Standard, Fine, Super Fine, Photo and<br />
Color(Colour).<br />
3 When the mode you want to use displays, press Enter to<br />
save the selection.<br />
The document types recommended for the resolution settings<br />
are described in the table below.<br />
Mode<br />
Standard<br />
Fine<br />
Super Fine<br />
Photo<br />
Recommended for:<br />
Documents with normal sized characters.<br />
Documents containing small characters or thin<br />
lines or documents printed using a dot-matrix<br />
printer.<br />
Documents containing extremely fine detail.<br />
The super fine mode is enabled only if the<br />
remote machine also supports the Super Fine<br />
resolution. See the notes below.<br />
Documents containing shades of gray or<br />
photographs.<br />
2.4<br />
GENERAL FAX FUNCTIONS
Mode<br />
Color(Colour)<br />
Recommended for:<br />
Documents with colours. Sending a colour fax<br />
is enabled only if the remote machine<br />
supports colour fax reception and you send<br />
the fax manually. In this mode, the memory<br />
transmission is not available.<br />
NOTES:<br />
•For the memory transmission, the super fine mode is not<br />
available. The resolution setting is automatically changed to<br />
Fine.<br />
• When your machine is set to Super Fine resolution and the<br />
remote fax machine does not support the Super Fine resolution,<br />
the machine transmits using the highest resolution mode<br />
supported by the remote fax machine.<br />
2<br />
Sending a Fax Automatically<br />
1 Load the document(s) face up into the ADF.<br />
OR<br />
Place a single document face down on the document glass.<br />
For details about loading a document, see page 2.2.<br />
2 Adjust the document resolution to suit your fax needs (see<br />
page 2.4).<br />
If you need to change the contrast, see page 1.13.<br />
3 Enter the remote fax phone number using the number<br />
keypad.<br />
You can use one or two-digit speed or group dial numbers.<br />
For details, see Chapter 3, "Automatic Dialling."<br />
4 Press Start Copy/Fax.<br />
5 When the document is loaded on the document glass, the<br />
display shows “Another Page?” on the top line after the<br />
document is scanned into the memory. If you have the next<br />
page, remove the scanned page and load the next page on<br />
the glass and select “1.Yes.” Repeat as necessary.<br />
After all of the pages are scanned, select “2.No” when the<br />
display shows “Another Page?.”<br />
GENERAL FAX FUNCTIONS 2.5
6 The number is dialed and then the machine begins sending<br />
the fax when the remote fax machine is ready.<br />
NOTE: When you want to cancel the fax job, press Stop/Clear at<br />
any time while sending the fax.<br />
Sending a Fax <strong>Manual</strong>ly<br />
1 Load the document(s) face up into the ADF.<br />
OR<br />
Place a single document face down on the document glass.<br />
For details about loading a document, see page 2.2.<br />
2 Adjust the document resolution to suit your fax needs (see<br />
page 2.4).<br />
If you need to change the contrast, see page 1.13.<br />
3 Press On Hook Dial. You hear a dial tone.<br />
4 Enter the remote fax machine’s fax number using the<br />
number keypad.<br />
5 When you hear a high-pitched fax signal from the remote fax<br />
machine, press Start Copy/Fax.<br />
NOTE: When you want to cancel the fax job, press Stop/Clear at<br />
any time while sending the fax.<br />
Confirming Transmission<br />
When the last page of your document has been sent successfully,<br />
the machine beeps and returns to Standby Mode.<br />
If something goes wrong while sending your fax, an error<br />
message appears on the display. For a listing of error messages<br />
and their meanings, see the MFP <strong>User</strong>’s Guide.<br />
If you receive an error message, press Stop/Clear to clear the<br />
message and try to send the document again.<br />
You can set your machine to print a confirmation report<br />
automatically each time sending a fax is completed. For further<br />
details, see the MSG Confirm item in “Available Fax Setup<br />
Options” on page 1.13.<br />
2.6<br />
GENERAL FAX FUNCTIONS
Automatic Redialling<br />
If the number you have dialed is busy or there is no answer<br />
when you send a fax, the machine will automatically redial the<br />
number e<strong>ver</strong>y three minutes up to seven times by the factory<br />
default settings.<br />
When the display shows “Retry Redial ?,” press Enter to redial<br />
the number without waiting. To cancel the automatic redialling,<br />
press Stop/Clear.<br />
To change the time interval between redials and the number of<br />
redial attempts. See page 1.12.<br />
Receiving a Fax<br />
2<br />
About Receiving Modes<br />
• In the fax mode, the machine answers an incoming fax call<br />
and immediately goes into the fax reception mode.<br />
• In Tel mode, you can receive a fax pressing On Hook Dial<br />
(you can hear voice or fax tone from the remote machine)<br />
and then Start Copy/Fax on the control panel of your<br />
machine.<br />
When the memory is full, the receiving mode automatically<br />
switches to Tel.<br />
For details about changing the receiving mode, see page 1.12.<br />
NOTES: If you do not want other people to view your received<br />
documents, you can use the secure receiving mode. In this mode,<br />
all received faxes are stored in the memory. For further details,<br />
see page 5.2.<br />
Loading Paper for Receiving Faxes<br />
The instructions for loading paper in the paper tray are the same<br />
whether you are printing, faxing, or copying, except that faxes<br />
can only be printed on Letter-, A4- or Legal-sized paper. For<br />
details about loading paper and setting the paper size in the<br />
tray, refer to the MFP <strong>User</strong>’s Guide.<br />
GENERAL FAX FUNCTIONS 2.7
Receiving Automatically in the Fax Mode<br />
Your machine is preset to the fax mode at the factory.<br />
When you receive a fax, the machine answers the call on a<br />
specified number of rings and automatically receives the fax.<br />
To change the number of rings, see “Available Fax Setup<br />
Options” on page 1.13.<br />
If you want to adjust the ringer volume, see “Setting Sounds”<br />
on page 1.8.<br />
Receiving <strong>Manual</strong>ly in the Tel Mode<br />
When a fax comes in, your machine sounds the ringer and then<br />
you can hear a fax tone. Press On Hook Dial and then Start<br />
Copy/Fax.<br />
The machine begins receiving a fax and returns to Standby<br />
Mode when the reception is completed.<br />
Receiving Faxes in the Memory<br />
Since your machine is a multi-tasking device, it can receive<br />
faxes while you are making copies or printing. If you receive a<br />
fax while you are copying or printing, your machine stores<br />
incoming faxes in the memory. Then, as soon as you finish<br />
copying or printing, the machine automatically prints the faxes.<br />
2.8<br />
GENERAL FAX FUNCTIONS
3<br />
AUTOMATIC<br />
DIALLING<br />
The following topics are included:<br />
• Speed Dialling<br />
• Group Dialling<br />
• Searching for a Number in the Memory<br />
• Printing a Phonebook List
Speed Dialling<br />
You can store up to 100 frequently dialed numbers in one or<br />
two-digit speed dial locations (0-99).<br />
Storing a Number for Speed Dialling<br />
1 Press Phonebook on the control panel.<br />
2 Press Phonebook or the scroll button ( or ) to display<br />
“Store/Edit” on the bottom line of the display. Press Enter.<br />
3 Press Enter when “Speed Dials” appears on the display.<br />
4 Enter a one or two-digit speed dial number between 0 and<br />
99, using the number keypad and press Enter.<br />
If a number is already stored in the location you chose, the<br />
display shows the number to allow you to change it. To start<br />
o<strong>ver</strong> with another speed-dial number, press Upper Level.<br />
5 Enter the number you want to store using the number<br />
keypad and press Enter.<br />
To insert a pause between numbers, press Redial/Pause<br />
and a “-” appears on the display.<br />
6 To assign a name to the number, enter the name. For<br />
details about how to enter names, see “Entering Characters<br />
Using the Number Keypad” on page 1.5.<br />
OR<br />
If you do not want to assign a name, skip this step.<br />
7 Press Enter when the name appears correctly or without<br />
entering a name.<br />
8 To store more fax numbers, repeat steps 4 through 7.<br />
OR<br />
To return to Standby Mode, press Upper Level or Stop/<br />
Clear.<br />
3.2<br />
AUTOMATIC DIALLING
Sending a Fax using a Speed Number<br />
1 Feed the document(s) face up into the ADF.<br />
Or<br />
Place a single document face down on the document glass.<br />
For details about loading a document, see page 2.2.<br />
2 Adjust the document resolution to suit your fax needs (see<br />
page 2.4).<br />
If you need to change the contrast, see page 1.13.<br />
3 Enter the speed dial number.<br />
• For a one-digit speed dial number, press and hold the<br />
appropriate digit button.<br />
• For a two-digit speed dial number, press the first digit<br />
button and hold the last digit button.<br />
The corresponding entry’s name briefly displays.<br />
4 The document scans into the memory.<br />
When the document is loaded on the document glass, the<br />
LCD display asks if you want to send another page. Select<br />
“1.Yes” to add more documents or “2.No” to begin sending<br />
the fax immediately.<br />
3<br />
5 The fax number stored in the speed dial location is<br />
automatically dialed. The document is sent when the<br />
remote fax machine answers.<br />
AUTOMATIC DIALLING 3.3
Group Dialling<br />
If you frequently send the same document to se<strong>ver</strong>al<br />
destinations, you can create a group of these destinations and<br />
set them under a one or two-digit group dial location. This<br />
enables you to use a group dial number setting to send the same<br />
document to all the destinations in the group.<br />
Setting Group Dial<br />
1 Press Phonebook on the control panel.<br />
2 Press Phonebook or the scroll button ( or ) to display<br />
“Store/Edit” on the bottom line of the display. Press Enter.<br />
3 Press the scroll button ( or ) to display “Group Dials” on<br />
the bottom line and press Enter.<br />
4 Press Enter when “New” displays on the bottom line.<br />
5 Enter a group number between 0 and 99 and press Enter.<br />
6 Enter a one or two-digit speed number you want to include<br />
in the group and press Enter.<br />
• For a one-digit speed dial number, press and hold the<br />
appropriate digit button.<br />
• For a two-digit speed dial number, press the first digit<br />
button and hold the last digit button.<br />
7 Repeat Step 6 to enter other speed dial numbers into the<br />
group.<br />
8 Press Upper Level button when you have entered all of<br />
the desired numbers. The display prompts you to enter a<br />
group ID.<br />
9 To assign a name to the group, enter the name.<br />
OR<br />
If you do not want to assign a name, skip this step.<br />
3.4<br />
AUTOMATIC DIALLING
10 Press Enter when the name appears correctly or without<br />
entering a name.<br />
11 If you want to assign another group, repeat from Step 4.<br />
OR<br />
To return to Standby Mode, press Stop/Clear.<br />
NOTE: You cannot include one group dial number in another<br />
group dial number.<br />
Editing Group Dial Numbers<br />
You can delete a specific speed dial number from a selected<br />
group or add a new number to the selected group.<br />
1 Press Phonebook on the control panel.<br />
2 Press Phonebook or the scroll button ( or ) to display<br />
“Store/Edit” on the bottom line of the display. Press Enter.<br />
3 Press the scroll button ( or ) to display “Group Dials” on<br />
the bottom line and press Enter.<br />
3<br />
4 Press the scroll button ( or ) to display “Edit” on the<br />
bottom line and press Enter.<br />
5 Enter the group number you want to edit and press Enter.<br />
The display prompts you to enter a speed dial number.<br />
6 Enter a speed dial number to be added or deleted.<br />
7 When you enter the specific number from the group, the<br />
display shows “Delete?.”<br />
When you enter a new number, the display shows “Add?.”<br />
8 Press Enter.<br />
9 If you want to edit another group, repeat from Step 4.<br />
Or<br />
To return to Standby Mode, press Upper Level.<br />
AUTOMATIC DIALLING 3.5
Sending a Fax Using Group Dialling<br />
(Multi-address Transmission)<br />
You can use group dialling for Broadcasting or Delayed<br />
transmissions.<br />
Follow the procedure of the desired operation (Broadcasting<br />
transmission; see page 4.2, Delayed transmission; see<br />
page 4.3). When you come to a step in which the display asks<br />
you to enter the remote fax number:<br />
•For a one-digit group number, press and hold the appropriate<br />
digit button.<br />
•For a two-digit group number, press the first digit button and<br />
hold the last digit button.<br />
You can use only one group number for one operation. Then<br />
continue the procedure to complete the desired operation.<br />
Your machine automatically scans the document loaded in the<br />
Automatic Document Feeder or on the document glass into the<br />
memory. The machine dials each of the numbers included in the<br />
group.<br />
3.6<br />
AUTOMATIC DIALLING
Searching for a Number in the<br />
Memory<br />
There are two ways to search for a number in the memory. You<br />
can either scan from A to Z sequentially, or you can search using<br />
the first letter of the name associated with the number.<br />
Searching Sequentially through the Memory<br />
1 Press Phonebook.<br />
2 Press Enter when “Search/Dial” appears on the display.<br />
3 Press the scroll button ( or ) to scroll through the<br />
memory until the name and number you want to dial<br />
display. You can search upwards or downwards through the<br />
entire memory in alphabetical order, from A to Z.<br />
While searching through the machine’s memory, you can<br />
see that each entry is preceded by one of two letters; “S”<br />
for speed dial or “G” for group dial number. These letters<br />
tell you how the number is stored.<br />
3<br />
4 When the name and/or the number you want displays,<br />
press Start Copy/Fax or Enter to dial.<br />
Searching with a Particular First Letter<br />
1 Press Phonebook.<br />
2 Press Enter when “Search/Dial” appears on the display.<br />
3 Press the button labeled with the letter you want to search<br />
for. A name beginning with the letter displays.<br />
For example, if you want to find the name “MOBILE,” press<br />
the 6 button, which is labeled with “MNO.”<br />
4 Press the scroll button ( or ) to display the next name.<br />
5 When the name and/or the number you want displays,<br />
press Start Copy/Fax or Enter to dial.<br />
AUTOMATIC DIALLING 3.7
Printing a Phonebook List<br />
You can check your automatic dial setting by printing a<br />
Phonebook list.<br />
1 Press Phonebook.<br />
2 Press Phonebook or the scroll button ( or ) until “Print”<br />
appears on the bottom line and press Enter.<br />
A list showing your speed dial and group dial entries prints<br />
out.<br />
3.8<br />
AUTOMATIC DIALLING
4<br />
OTHER<br />
WAYS TO FAX<br />
The following topics are included:<br />
• Redialling<br />
• Sending Broadcasting Faxes<br />
• Sending a Delayed Fax<br />
• Sending a Priority Fax<br />
• Adding Documents To a Scheduled Fax<br />
• Cancelling a Scheduled Fax
Redialling<br />
To redial the number you last called:<br />
Press Redial/Pause.<br />
When a document is loaded in the ADF (Automatic Document<br />
Feeder; see page 2.2), the machine automatically begins to<br />
send.<br />
For the document loaded on the document glass, the display<br />
asks if you want to load another page. Select “1.Yes” to add.<br />
Otherwise, select “2.No.”<br />
Sending Broadcasting Faxes<br />
Using the Broadcasting button on the control panel, you can<br />
use the broadcasting fax feature, which allows you to send a<br />
document to multiple locations. Documents are automatically<br />
stored in the memory and sent to a remote station. After<br />
transmission, the documents are automatically erased from the<br />
memory.<br />
1 Load the document(s) face up into the ADF.<br />
OR<br />
Place a single document face down on the document glass.<br />
For details about loading a document, see page 2.2.<br />
2 Adjust the document resolution to suit your fax needs (see<br />
page 2.4).<br />
If you need to change the contrast, see page 1.13.<br />
3 Press Broadcasting on the control panel.<br />
4 Enter the number of the remote machine using the number<br />
keypad.<br />
You can use one or two-digit speed dial or group dial<br />
numbers. For details, see Chapter 3, "Automatic Dialling."<br />
4.2<br />
OTHER WAYS TO FAX
5 Press Enter to confirm the number. The display asks you to<br />
enter another fax number to send the document.<br />
NOTE: Your machine can send one broadcasting fax to multiple<br />
destinations. The “Enter Number” prompt does not appear if a<br />
broadcast is set up and not completed. You must wait until the<br />
current broadcast is completed.<br />
6 If you want to enter more fax numbers, repeat steps 4 and<br />
5. You can add up to 10 destinations.<br />
Note that you cannot use group dial numbers for another<br />
fax number.<br />
7 When you finish entering fax numbers, press Start Copy/<br />
Fax.<br />
The document is scanned into the memory before<br />
transmission. The display shows the memory capacity and<br />
the number of pages being stored in the memory.<br />
For the document loaded on the document glass, the<br />
display asks if you want to load another page. Select<br />
“1.Yes” to add. Otherwise, select “2.No.”<br />
8 The machine begins sending the document in order of the<br />
numbers you entered.<br />
Sending a Delayed Fax<br />
You can set your machine to send a fax at a later time when you<br />
will not be present.<br />
4<br />
1 Load the document(s) face up into the ADF.<br />
OR<br />
Place a single document face down on the document glass.<br />
For details about loading a document, see page 2.2.<br />
2 Adjust the document resolution to suit your fax needs (see<br />
page 2.4).<br />
If you need to change the contrast, see page 1.13.<br />
OTHER WAYS TO FAX 4.3
3 Press Menu until “Fax Feature” appears on the top line of<br />
the display. The first available menu item, “Delay Fax,”<br />
displays on the bottom line.<br />
4 Press Enter.<br />
5 Enter the number of the remote machine using the number<br />
keypad.<br />
To enter the number, you can use one or two-digit speed<br />
dial or group dial numbers. For details, see Chapter 3,<br />
"Automatic Dialling."<br />
6 Press Enter to confirm the number on the display. The<br />
display asks you to enter a name.<br />
7 If you want to assign a name to the transmission, enter the<br />
name. If not, skip this step.<br />
For details on how to enter the name using the number<br />
keypad, see “Entering Characters Using the Number<br />
Keypad” on page 1.5.<br />
8 Press Enter. The display shows the current time and asks<br />
you to enter the start time when the fax is to be sent.<br />
9 Enter the time using the number keypad.<br />
To select “Am” or “Pm” for 12-hour format, press the<br />
button.<br />
or<br />
If you set a time earlier than the current time, the<br />
document will be sent at that time on the following day.<br />
10 Press Enter when the start time displays correctly.<br />
11 The document is scanned into the memory before<br />
transmission. The display shows the memory capacity and<br />
the number of pages being stored in the memory.<br />
For the document loaded on the document glass, the<br />
display asks if you want to load another page. Select<br />
“1.Yes” to add. Otherwise, select “2.No.”<br />
4.4<br />
OTHER WAYS TO FAX
12 The machine returns to Standby Mode. The display reminds<br />
you that you are in Standby Mode and that a delayed fax is<br />
set.<br />
NOTE: If you want to cancel the delayed transmission, see<br />
“Cancelling a Scheduled Fax” on page 4.8.<br />
Sending a Priority Fax<br />
Using the Priority Fax feature, a high priority document can be<br />
sent ahead of reserved operations. The document is scanned<br />
into the memory and transmitted when the current operation is<br />
finished. In addition, the priority transmission interrupts a<br />
broadcast operation between stations (i.e., when the<br />
transmission to station A ends, before transmission to station B<br />
begins) or between redial attempts.<br />
1 Load the document(s) face up into the ADF.<br />
OR<br />
Place a single document face down on the document glass.<br />
For details about loading a document, see page 2.2.<br />
2 Adjust the document resolution to suit your fax needs (see<br />
page 2.4).<br />
If you need to change the contrast, see page 1.13.<br />
3 Press Menu until “Fax Feature” appears on the top line of<br />
the display.<br />
4<br />
4 Press the scroll button ( or ) to display “Priority Fax” on<br />
the bottom line and press Enter.<br />
5 Enter the number of the remote machine using the number<br />
keypad.<br />
To enter the number, you can use one or two-digit speed<br />
dial or group dial numbers. For details, see Chapter 3,<br />
"Automatic Dialling."<br />
OTHER WAYS TO FAX 4.5
6 Press Enter to confirm the number. The display asks you to<br />
enter a name.<br />
7 If you want to assign a name to the transmission, enter the<br />
name. If not, skip this step.<br />
For details on how to enter a name using the number<br />
keypad, see “Entering Characters Using the Number<br />
Keypad” on page 1.5.<br />
8 Press Enter.<br />
The document is scanned into the memory before<br />
transmission. The display shows the memory capacity and<br />
the number of pages being stored in the memory.<br />
For the document loaded on the document glass, the<br />
display asks if you want to load another page. Select<br />
“1.Yes” to add. Otherwise, select “2.No.”<br />
9 The machine shows the number being dialed and begins<br />
sending the document.<br />
4.6<br />
OTHER WAYS TO FAX
Adding Documents To a Scheduled<br />
Fax<br />
You can add documents to the delayed transmission previously<br />
reserved in your machine’s memory.<br />
1 Load the document(s) face up into the ADF.<br />
OR<br />
Place a single document face down on the document glass.<br />
For details about loading a document, see page 2.2.<br />
2 Adjust the document resolution to suit your fax needs (see<br />
page 2.4).<br />
If you need to change the contrast, see page 1.13.<br />
3 Press Menu until “Fax Feature” appears on the top line of<br />
the display.<br />
4 Press the scroll button ( or ) to display “Add/Cancel” on<br />
the bottom line and press Enter.<br />
5 Press Enter when “Add Page” displays on the bottom line.<br />
The display shows the last job reserved in the memory.<br />
6 Press the scroll button ( or ) until you see the fax job to<br />
which you want to add documents and press Enter.<br />
The machine automatically stores the documents in the<br />
memory, and the display shows the memory capacity and<br />
the number of pages.<br />
4<br />
For the document loaded on the document glass, the<br />
display asks if you want to load another page. Select<br />
“1.Yes” to add. Otherwise, select “2.No.”<br />
7 After storing, the machine displays the numbers of total<br />
pages and added pages and then returns to Standby Mode.<br />
OTHER WAYS TO FAX 4.7
Cancelling a Scheduled Fax<br />
1 Press Menu until “Fax Feature” appears on the top line of<br />
the display.<br />
2 Press the scroll button ( or ) to display “Add/Cancel” on<br />
the bottom line and press Enter.<br />
3 Press the scroll button ( or ) to display “Cancel Job” and<br />
press Enter. The display shows the last job reserved in the<br />
memory.<br />
4 Press the scroll button ( or ) until you see the fax job<br />
you want to cancel, and press Enter.<br />
The selected job is canceled and the machine returns to<br />
Standby Mode.<br />
4.8<br />
OTHER WAYS TO FAX
5<br />
ADDITIONAL<br />
FEATURES<br />
The following topics are included:<br />
• Using the Secure Receiving Mode<br />
• Printing Reports<br />
• Using Advanced Fax Settings<br />
• Using the Remote Control Panel
Using the Secure Receiving Mode<br />
You may need to prevent your received faxes from being<br />
accessed by unauthorised people. You can turn on the secure fax<br />
mode using the Secure Receive option to restrict printing out all<br />
of the received faxes when the machine is unattended. In the<br />
secure fax mode, all incoming faxes will go in the memory. When<br />
the mode turns off, any faxes stored will be printed.<br />
To turn the secure receiving mode on:<br />
1 Press Menu until “Advanced Fax” appears on the top line of<br />
the display.<br />
2 Press the scroll button ( or ) until “Secure Receive”<br />
appears on the bottom line and press Enter.<br />
3 Press the scroll button ( or ) to display “On” on the<br />
bottom line and press Enter.<br />
4 Enter a four-digit passcode you want to use, using the<br />
number keypad and press Enter.<br />
NOTE: You can use the secure receiving mode without setting a<br />
passcode, but cannot protect your faxes.<br />
5 To return to Standby Mode, press Stop/Clear.<br />
When a fax is received in the secure receiving mode, your<br />
machine stores it into the memory and displays “Secure<br />
Receive” to let you know that there is a fax stored.<br />
To print received documents:<br />
1 Access the Secure Receive menu by following steps 1 and<br />
2 above.<br />
2 Press the scroll button ( or ) to display “Print” on the<br />
bottom line and press Enter.<br />
3 Enter the four-digit passcode and pressEnter.<br />
The faxes stored in the memory are printed all together.<br />
5.2<br />
ADDITIONAL FEATURES
To turn the secure receiving mode off:<br />
1 Access the Secure Receive menu by following steps 1 and<br />
2 in “To turn the secure receiving mode on:” on page 5.2.<br />
2 Press the scroll button ( or ) to display “Off” on the<br />
bottom line and press Enter.<br />
3 Enter the four-digit passcode and press Enter.<br />
The mode is deactivated and the faxes stored in the<br />
memory are printed all together.<br />
4 To return to Standby Mode, press Stop/Clear.<br />
Printing Reports<br />
Your machine can print reports containing useful information.<br />
The following reports are available:<br />
Phonebook List<br />
This list shows all of the numbers currently stored in the<br />
machine’s memory as speed dial and group dial numbers.<br />
You can print this Phonebook list using the Phonebook button;<br />
see page 3.8.<br />
Sent Fax Report<br />
This report shows information of the faxes you recently sent.<br />
Received Fax Report<br />
This report shows information of the faxes you recently<br />
received.<br />
System Data List<br />
This list shows the status of the user-selectable options. You<br />
may print this list to confirm your changes after changing any<br />
settings.<br />
5<br />
ADDITIONAL FEATURES 5.3
Scheduled Job Information<br />
This list shows the document currently stored for Delayed faxes<br />
or Toll Save faxes. The list shows the starting time and type of<br />
operation.<br />
Message Confirmation<br />
This report shows the fax number, the number of pages, the<br />
elapsed time of the job, the communication mode, and the<br />
communication results.<br />
You can set up your machine to automatically print the message<br />
confirmation report after each fax job. See page 1.13.<br />
Junk Fax Number List<br />
This list shows up to 10 fax numbers specified as the junk fax<br />
numbers by using the Junk Fax Setup menu; see page 5.6.<br />
When the Junk Fax Barrier feature is turned on, incoming faxes<br />
from those numbers will be blocked.<br />
This feature recognise the last 6 digits of the fax number set as<br />
a remote fax machine’s ID.<br />
Multi-Communication Report<br />
This report is printed automatically after sending documents<br />
from more than one location.<br />
Power Failure Report<br />
This report is printed out automatically when power is restored<br />
after a power failure, if there occurs any data loss due to the<br />
power failure.<br />
NOTE: The lists you have set to print out automatically don’t print<br />
out when there is no paper loaded or a paper jam has occurred.<br />
Printing a Report<br />
1 Press Menu until “Reports” appears on the top line of the<br />
display. The first available menu item, “Phone Book”<br />
displays on the bottom line.<br />
5.4<br />
ADDITIONAL FEATURES
2 Press the scroll button ( or ) to display the report or list<br />
you want to print on the bottom line.<br />
• Phone Book: Phonebook list<br />
• Sent Report: Sent fax report<br />
• RCV Report: Received fax report<br />
•System Data: System data list<br />
• Scheduled Jobs: Scheduled job information<br />
• MSG Confirm: Message confirmation<br />
• Junk Fax List: Junk fax number list<br />
3 Press Enter.<br />
The selected information prints out.<br />
Using Advanced Fax Settings<br />
Your machine has various user-selectable setting options for<br />
sending or receiving faxes. These options are preset at the<br />
factory, but you may need to change them. To find out how the<br />
options are currently set, print the System Data list. For details<br />
about printing the list, see “Printing Reports” on page 5.3.<br />
Changing Setting Options<br />
1 Press Menu until “Advanced Fax” appears on the top line of<br />
the display. The first available menu item, “Send Forward,”<br />
displays on the bottom line.<br />
2 Press the scroll button ( or ) until you see the desired<br />
menu item on the bottom line and press Enter.<br />
3 When the option you want appears on the display, choose<br />
the desired status by pressing the scroll button ( or ) or<br />
enter the desired value using the number keypad.<br />
4 Press Enter to save the selection.<br />
5 You can exit from the setup mode at any time by pressing<br />
Stop/Clear.<br />
5<br />
ADDITIONAL FEATURES 5.5
Advanced Fax Setting Options<br />
Option<br />
Send Forward<br />
RCV Forward<br />
Toll Save<br />
Junk Fax Setup<br />
Secure Receive<br />
Description<br />
You can set the machine to always forward all of the<br />
outgoing faxes to the specified destination besides the fax<br />
numbers you entered.<br />
Select Off to turn this feature off.<br />
Select On to turn this feature on. You can set the number<br />
of the remote fax machine to which faxes are forwarded.<br />
You can set your machine to forward incoming faxes to<br />
another fax number during a specified time period. When<br />
a fax arrives at your machine, it is stored in the memory.<br />
Then, the machine dials the fax number that you have<br />
specified and sends the fax.<br />
Select Off to turn this feature off.<br />
Select On to turn this feature on. You can set the fax<br />
number to which faxes are forwarded. Then, you can enter<br />
the start time and/or the end time. The Print Local Copy<br />
option allows you to set the machine to print the fax, if fax<br />
forwarding is completed with no error.<br />
You can set your machine to store your faxes into the<br />
memory and send them at the spedified toll-saving time.<br />
For details about sending toll save faxes, see page 1.10.<br />
Select Off to turn this feature off.<br />
Select On to turn this feature on. You can set the start<br />
time and/or the end time for toll save mode.<br />
Using the Junk Fax Barrier feature, the system will not<br />
accept faxes sent from remote stations of which their<br />
numbers are stored in the memory as junk fax numbers.<br />
This feature is useful for blocking any unwanted fax.<br />
Select Off to turn the feature off. Anybody can send you a<br />
fax.<br />
Select On to turn the feature on. You can set up to 10 fax<br />
numbers as junk fax numbers. After storing numbers, you<br />
do not receive any faxes from the registered stations.<br />
You can keep your received faxes from being accessed by<br />
unauthorised people.<br />
For further details about setting this mode, see page 5.2.<br />
5.6<br />
ADDITIONAL FEATURES
Option<br />
Prefix Dial<br />
Stamp RCV Name<br />
ECM Mode<br />
Description<br />
You can set a prefix dial number of up to five digits. This<br />
number dials before any auto dial number is started. It is<br />
useful for accessing the PABX exchange.<br />
This option allows the machine to automatically print the<br />
page number, and the date and time of the reception at<br />
the bottom of each page of a received document.<br />
Select Off to turn this feature off.<br />
Select On to turn this feature on.<br />
The Error Correction Mode helps with poor line quality and<br />
makes sure any fax you send are sent smoothly to any<br />
other ECM-equipped fax machine. If the line quality is<br />
poor, it takes more time to send a fax when you are using<br />
the ECM mode.<br />
Select Off to turn this feature off.<br />
Select On to turn this feature on.<br />
Using the Remote Control Panel<br />
Using the Remote Control Panel, you can set up fax system data<br />
options, create and edit Phonebook entries or view information<br />
of your machine on the desktop window of your computer.<br />
When you install the <strong>Samsung</strong> software, the Remote Control<br />
Panel program is automatically installed.<br />
For information about installing the <strong>Samsung</strong> software, please<br />
refer to the MFP <strong>User</strong>’s Guide.<br />
To open the Remote Control Panel:<br />
1 Start your Windows.<br />
2 Click the Start button on your desktop computer.<br />
5<br />
ADDITIONAL FEATURES 5.7
3 From Programs, select <strong>Samsung</strong> <strong>SCX</strong>-4x16 Series and<br />
then Remote Control Panel.<br />
Then the Remote Control Panel program opens.<br />
4 The <strong>SCX</strong>-4x16 Series Remote Control Panel window<br />
provides five tabs; Settings, Advanced, Phonebook,<br />
Information, and Firmware Update.<br />
To exit, click the Exit button at the bottom of each tab.<br />
For further details, click the Help button at the bottom of<br />
each tab.<br />
The Settings Tab<br />
Click the Settings tab to configure fax system settings.<br />
Reads the current<br />
settings in your<br />
machine and refreshes<br />
the Remote Control<br />
Panel with them.<br />
Downloads the<br />
settings made in<br />
Remote Control<br />
Panel to your<br />
machine.<br />
5.8<br />
ADDITIONAL FEATURES
The Advanced Tab<br />
Click the Advanced tab to configure advanced fax system<br />
settings.<br />
Reads the current<br />
settings in your<br />
machine and<br />
refreshes the Remote<br />
Control Panel with<br />
them.<br />
Downloads the<br />
settings made in<br />
Remote Control<br />
Panel to your<br />
machine.<br />
The Phonebook Tab<br />
Click the Phonebook tab to create and edit Phonebook entries.<br />
Reads the<br />
Phonebook entries<br />
from the machine to<br />
the Remote Control<br />
Panel.<br />
Downloads the<br />
Phonebook entries<br />
from the Remote<br />
Control Panel to<br />
the machine.<br />
Phonebook entries<br />
Allows you to<br />
edit a selected<br />
Phonebook entry<br />
in a separate Edit<br />
window.<br />
Deletes a selected<br />
Phonebook entry.<br />
Deletes all<br />
Phonebook entries.<br />
5<br />
ADDITIONAL FEATURES 5.9
The Information Tab<br />
Click the Information tab to view the software <strong>ver</strong>sion<br />
information and many counters which allow you to check how<br />
many scanning, printing, and jamming are made in your<br />
machine.<br />
Reads the current<br />
information in your<br />
machine and<br />
refreshes the<br />
Remote Control<br />
Panel.<br />
The Firmware Update Tab<br />
Click the Firmware Update tab to update the firmware of your<br />
machine. This feature should be used by an authorised<br />
technician. Please consult with the purchase point.<br />
5.10<br />
ADDITIONAL FEATURES
INDEX<br />
A<br />
add documents 4.7<br />
ADF, load 2.2<br />
automatic dialling<br />
group 3.4<br />
speed 3.2<br />
automatic redialling 2.7<br />
B<br />
broadcasting faxes 4.2<br />
C<br />
cancelling<br />
fax 2.6<br />
scheduled faxes 4.8<br />
characters, enter 1.5<br />
contrast, set 1.13<br />
control panel 1.2<br />
D<br />
date and time, set 1.7<br />
delayed fax 4.3<br />
document<br />
load<br />
ADF 2.2<br />
document glass 2.3<br />
prepare 2.2<br />
document glass, load 2.3<br />
F<br />
fax system, set<br />
advanced settings 5.5<br />
options 1.13<br />
G<br />
group dial<br />
dialling 3.6<br />
editing 3.5<br />
setting 3.4<br />
M<br />
machine ID, set 1.4<br />
P<br />
paper, load 2.7<br />
print<br />
Phonebook list 3.8<br />
reports 5.3<br />
priority fax 4.5<br />
R<br />
receive a fax<br />
in fax mode 2.8<br />
in secure receiving mode 5.2<br />
in tel mode 2.8<br />
in the memory 2.8<br />
receive mode, set 1.13<br />
redial, last number 4.2<br />
Remote Control Panel 5.7<br />
reports, print 5.3<br />
resolution, set 2.4<br />
S<br />
search, a number 3.7<br />
secure receiving mode, use 5.2<br />
send a fax<br />
automatically 2.5<br />
manually 2.6<br />
sounds, set 1.8<br />
speed dial<br />
dialling 3.3<br />
storing 3.2<br />
T<br />
toll save mode 1.10<br />
V<br />
volume, adjust<br />
ringer 1.9
Home<br />
Visit us at:<br />
www.samsungprinter.com<br />
Rev. 3.00


