

Samsung YP-T9JQBY - YP-T9JQBY/XAA - User Manual ver. 1.0 (ENGLISH,2.08 MB)
Samsung YP-T9JQBY - YP-T9JQBY/XAA - User Manual ver. 1.0 (ENGLISH,2.08 MB)
Samsung YP-T9JQBY - YP-T9JQBY/XAA - User Manual ver. 1.0 (ENGLISH,2.08 MB)

Create successful ePaper yourself
Turn your PDF publications into a flip-book with our unique Google optimized e-Paper software.
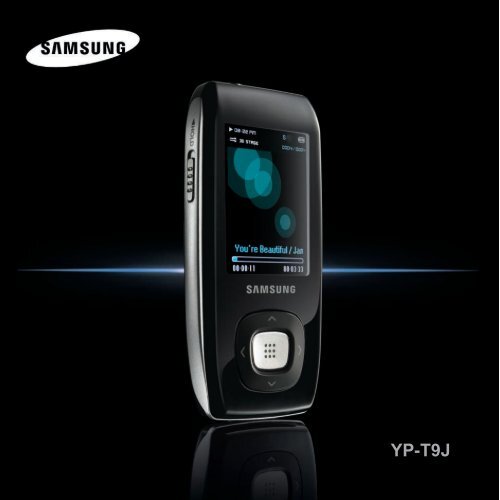
<strong>YP</strong>-T9J
Read this manual carefully to ensure proper use of the product and<br />
For Your Safety to avoid any danger or physical damage.<br />
WARNING<br />
Failing to heed the product instructions may cause serious injury.<br />
Product Use<br />
Improper use can result in explosion,<br />
fire or electric shock.<br />
To avoid hearing damage<br />
2<br />
Do not disassemble, repair<br />
or modify this product on<br />
your own.<br />
Do not get the product wet<br />
or drop it in water.<br />
If the product gets wet,<br />
do not switch it on.<br />
Contact a Service Center.<br />
Do not place the product in<br />
damp, dusty or sooty areas,<br />
as it could result in fire or<br />
electric shock.<br />
Do not leave the player in<br />
areas above 35°C(95°F)<br />
(such as a sauna or inside<br />
a parked car).<br />
During hot weather, the<br />
temperature inside a car may<br />
rise up to 80°C(176°F).<br />
Avoid using your player at<br />
high volume levels, as it may<br />
result in permanent<br />
hearing damage.<br />
If you experience ringing in<br />
your ears while using the<br />
earphones, remove the<br />
earphones immediately<br />
and/or lower the volume.<br />
To avoid a risk of traffic accident<br />
Do not use the earphones while you are<br />
driving a bicycle, automobile or motorcycle.<br />
It can cause a serious accident and furthermore,<br />
is prohibited by law in some areas.<br />
Using the earphones while walking, in particular,<br />
on a crosswalk, can lead to a serious accident.<br />
Take care not to tangle the earphone cable<br />
around your arms or neighboring objects<br />
while driving, working out or walking, as it<br />
could result in a car accident or other<br />
injuries.
CAUTION<br />
Failure to follow all instructions lead to physical injuries or damage to the product.<br />
Product Use<br />
Take care to avoid product<br />
malfunction and physical damage.<br />
To avoid malfunction<br />
Backup Important Data<br />
When wearing the product<br />
around your neck, take<br />
care not to exert excessive<br />
force on the neck string.<br />
Be sure to backup<br />
important data.<br />
Please be aware that we<br />
claim no responsibility for<br />
damage from data loss due<br />
to breakdown, repair or other<br />
causes.<br />
Do not cause excessive<br />
impact on the product by<br />
dropping it. Do not place<br />
heavy objects on top of the<br />
product.<br />
Prevent any foreign<br />
particles or dust from<br />
entering into the product.<br />
Always use the accessories<br />
provided by or approved by<br />
<strong>Samsung</strong>.<br />
Do not spray water on the<br />
product. Ne<strong>ver</strong> clean the<br />
product with chemical<br />
substances such as<br />
benzene or thinner, as it may<br />
cause fire, electric shock or<br />
deteriorate the surface.<br />
Do not place the product<br />
near magnetic objects, as it<br />
may cause a malfunction.<br />
3Chapter 1. Preparation
Contents<br />
4<br />
For Your Safety ..........................................2<br />
Contents .......................................................4<br />
Chapter 1. Preparation<br />
Basic Information .......................................6<br />
Components...............................................6<br />
Screen Display Information........................9<br />
Button Functions ......................................10<br />
Charging the battery ................................11<br />
Basic Use ...................................................12<br />
Chapter 2. Loading Your Desired File<br />
Loading Your Desired File ......................16<br />
Installing <strong>Samsung</strong> Media Studio ............16<br />
Connecting to your PC.............................17<br />
Adding Folders/Files in <strong>Samsung</strong><br />
Media Studio ............................................18<br />
Transferring Files to the Player<br />
with <strong>Samsung</strong> Media Studio ....................20<br />
Chapter 3. Multimedia function<br />
Listening to Music....................................22<br />
Listening to Music ....................................22<br />
Section Repetition....................................25<br />
Creating Playlists Using<br />
<strong>Samsung</strong> Media Studio............................26<br />
To Play a Playlist......................................28<br />
Using Music menu ...................................31<br />
Video............................................................34<br />
Video ........................................................34<br />
Using Video menu....................................37<br />
Photo Viewing ...........................................38<br />
Photo Viewing ..........................................38<br />
Using Photo menu ...................................40<br />
Text Viewing...............................................42<br />
Text Viewing.............................................42<br />
Using Text menu ......................................43<br />
Listening to FM Radio .............................47<br />
Listening to FM Radio..............................47<br />
Setting a Frequency.................................49<br />
To Delete Presets.....................................51<br />
Using FM Radio menu .............................52<br />
Recording...................................................53<br />
Recording.................................................53<br />
Voice/FM Radio Recording ......................54<br />
Recorded File Names ..............................55<br />
Game ...........................................................56<br />
Game .......................................................56
Chapter 4. Setting<br />
Setting ....................................................58<br />
Setting Music.......................................58<br />
Setting Record.....................................60<br />
Setting Time .......................................61<br />
Setting Display ...................................63<br />
Setting Language ................................64<br />
Setting System ...................................65<br />
Chapter 6. Appendix<br />
Menu Tree...................................................69<br />
Product Specifications ............................70<br />
Chapter 5. Troubleshooting<br />
Troubleshooting........................................67<br />
5
Basic Information<br />
Components<br />
Checking the Accessories<br />
Player Earphones USB Cable Installation CD<br />
AH30-00087D AH39-00899A AH80-00138A<br />
■<br />
Design of accessories is subject to change for the purpose of improvement, without notice.<br />
6
Front, Right Side and Top<br />
Earphone Connection Jack<br />
Neck String Hole<br />
Microphone<br />
Screen Display<br />
Section Repeat(A<br />
Recording Button<br />
Back Button<br />
MENU Button<br />
B)/<br />
Power & Play/Pause Button<br />
Move/File Browser Button<br />
Move/Volume Control Button<br />
Select Button<br />
7Chapter 1. Preparation Components
Basic Information<br />
Components (Continued)<br />
Bottom and Left Side<br />
USB Connection Port<br />
Hold Switch<br />
Earphone Connection<br />
√ Top<br />
Earphones<br />
8
Basic Information<br />
Screen Display Information<br />
Music<br />
1<br />
2<br />
3<br />
4<br />
8<br />
9<br />
1 Current Time Display<br />
2 Playback Display<br />
3 Play Mode Display<br />
4 Sound Mode Display<br />
8 Battery Status Display<br />
9 Current Track Playing/<br />
Total Number of Tracks Display<br />
10 Total Play Time Display<br />
5 Music Title Display<br />
5<br />
6<br />
Audio Track 1<br />
00:01:42 00:05:06<br />
10<br />
6 Play Status Bar<br />
7 Play Time Display<br />
7<br />
FM Radio<br />
1<br />
2<br />
3<br />
4<br />
5<br />
1 Mono/Stereo Display<br />
2 Frequency Display<br />
3 Frequency Location Display<br />
4 Battery Display<br />
5 Preset/<strong>Manual</strong>/Add Preset<br />
/Remove Preset Display<br />
NOTE<br />
■<br />
The screen pictures are for illustration purposes only. The actual screen may differ.<br />
9Chapter 1. Preparation Components/Screen Display Information
Basic Information<br />
Button Functions<br />
Buttons<br />
Functions and Use<br />
■ Press and hold for power on/off.<br />
■ Press for play/pause.<br />
■ Press to display the menu screen.<br />
■ Press and hold to move to the main menu.<br />
■ Press to return to the previous stage.<br />
■ Press and hold to start recording.<br />
■ Press to set section repetition, stop recording and add to/delete from the playlist.<br />
■ Press to move to the selected menu/confirm and save your selection.<br />
■ Press and hold to quickly scan tracks.<br />
■ Press to move to the previous track or play the current track from the<br />
beginning.<br />
■ Press and hold to quickly scan tracks.<br />
■ Press to move to next track.<br />
■ Press to increase the volume or move to an upper item/menu.<br />
■ Press to reduce the volume or move to a lower item/menu.<br />
■ Push in the direction of the arrow to lock the button functions.<br />
10
Charging the battery<br />
Fully charge the rechargeable battery before using the<br />
player for the first time or when it has not been used for a<br />
while.<br />
NOTE<br />
Screen Display<br />
■ Charging...<br />
■ Fully Charged<br />
1<br />
2<br />
1<br />
2<br />
Connect the USB cable to the USB port<br />
( ) on your PC.<br />
Connect the other end of the USB<br />
cable to the USB Connection Port on<br />
the bottom of the player.<br />
■ When connected with the USB cable, it takes<br />
about 4 hours for the player to fully charge<br />
although this may vary depending on your PC<br />
environment.<br />
Battery Use<br />
■ Recharge and store within the temperature range<br />
of 5°C~35°C(40°F~95°F).<br />
■ Do not o<strong>ver</strong>charge (longer than 12 hours).<br />
Excessive charging or discharging may shorten<br />
the battery’s life.<br />
■ Battery life naturally shortens slowly o<strong>ver</strong> time.<br />
■ If you are charging the player while it is connected to your Notebook, make sure the Notebook's<br />
battery is also fully charged.<br />
Chapter 1. Preparation Button Functions/Charging the battery<br />
11
Basic Use<br />
Turning the Power On & Off<br />
Turning the Power On<br />
Press and hold the [<br />
■<br />
Power is turned on.<br />
Turning the Power Off<br />
Press and hold the [<br />
■<br />
Power is turned off.<br />
]button<br />
]button<br />
NOTE<br />
■ Power is automatically turned off when none of the buttons have been pressed for a preset<br />
period of time (Default: 1 minute) in the pause mode. √ Page 61<br />
Playing Music<br />
1<br />
Press the [ ] button to select and then<br />
press the [ ] button.<br />
2 Press the [ ] button to select the desired music file.<br />
Audio Track 1<br />
00:01:42 00:05:06<br />
3 Press the [ ] button.<br />
■ The music file will begin playing.<br />
12<br />
NOTE<br />
■ Press the [<br />
] button to move to the sub menu.<br />
■ Press the [BACK] button to move to the previous screen.
Volume Control<br />
Audio Track 1<br />
00:01:42 00:05:06<br />
Press the [ ] button.<br />
■ You will see a volume control icon.<br />
■ Press the button to increase the volume or the button to decrease it.<br />
Chapter 1. Preparation Basic Use<br />
Lock Function<br />
Hold!<br />
In Hold mode, all buttons are disabled. This function is useful<br />
when you are walking or jogging.<br />
1<br />
2<br />
Push the [HOLD] switch in the direction of the arrow.<br />
Push the [HOLD] switch in the opposite direction of the<br />
arrow to release the Lock function.<br />
13
Basic Use (Continued)<br />
Searching for Files with <br />
Search easily for files using the function.<br />
1<br />
2<br />
3<br />
Press the [ ] button to select a folder of your choice.<br />
4 Press the [ ] button to bring up the file list in the<br />
selected folder.<br />
■ Use the [ ] button to return to the previous step.<br />
5<br />
6<br />
Press the [ ] button to select .<br />
Press the [<br />
] button.<br />
■ The folder list containing Music, Text, Pictures and<br />
Video appears.<br />
Press the [<br />
Press the [ ] button.<br />
■ The selected file will start playing.<br />
] button to select a file of your choice.<br />
14
Reset Function<br />
If a product malfunction occurs, you can<br />
re-initialize the system.<br />
Press and hold the [MENU] and [A B/ ]<br />
buttons at the same time.<br />
■ The system will be initialized.<br />
■ Your settings and files will not be affected.<br />
Chapter 1. Preparation Basic Use<br />
15
Loading Your Desired File<br />
Installing <strong>Samsung</strong> Media Studio<br />
Use Media Studio to transfer music<br />
files from your PC to the player.<br />
Before you start!<br />
Insert the installation CD provided with the player into the CD-ROM drive of<br />
your PC.<br />
1<br />
Click .<br />
2<br />
Click .<br />
■ Media Studio installation starts.<br />
■ An icon is created on the desktop after<br />
installation is complete and Media Studio<br />
starts.<br />
The T9 gives you freedom!<br />
- Fill up your T9 now, free!<br />
- Get Unlimited Downloads<br />
- Choose from o<strong>ver</strong> 2 Million Songs<br />
- Manage your existing MP3 Library with any of<br />
these great music services<br />
Choose a service and get your first 30<br />
days on us.<br />
16
Loading Your Desired File<br />
Connecting to your PC<br />
Before you start!<br />
Use the USB Cable provided when connecting the player to your PC.<br />
1<br />
2<br />
CAUTION<br />
1<br />
Connect the larger end of the USB cable to the USB Connection Port on the bottom<br />
of the player.<br />
Connect the USB cable to the USB port ( ) on your PC.<br />
■ appears on the screen display of the player.<br />
■ If you connect the player through a USB hub, the connection may be unstable. Please connect the<br />
player to the computer directly.<br />
PC Requirements<br />
For use in conjunction with your PC, the following is required:<br />
2<br />
Chapter 2. Loading Your Desired File Installing <strong>Samsung</strong> Media Studio/<br />
Connecting to your PC<br />
■ Pentium 300MHz or higher<br />
■ USB Port 2.0<br />
■ Windows XP Service Pack 2 or higher<br />
■ DirectX 9.0 or higher<br />
■ 100<strong>MB</strong> of free hard disc space<br />
■ CD Rom Drive (2X or higher)<br />
■ Windows Media Player 10.0 or higher<br />
■ Resolution 1024 X 768 or higher<br />
17
Loading Your Desired File<br />
Adding Folders/Files in <strong>Samsung</strong> Media Studio<br />
Media Studio enables you to select and organize files and folders in preparation<br />
for transfer to your player.<br />
[<strong>YP</strong>-T9[MTP]]<br />
2<br />
[<strong>YP</strong>-T9<br />
3<br />
3<br />
Please refer to Help for more information on how to use Media Studio.<br />
■<br />
Click ➝ ➝ from the menu on the top of the Media Studio program.<br />
18
■<br />
Before you start! Connect the player to your PC.<br />
■ Media Studio must be installed on your PC.<br />
1<br />
2<br />
3<br />
4<br />
Media Studio will automatically start when the player is connected to your PC.<br />
■ If the program does not start automatically, double Click the Media Studio icon on the desktop.<br />
Click the desired file icon.<br />
Choose the file type you want to transfer by clicking on one of these icons.<br />
■<br />
■ Click icon to display music list. ■ Click icon to display video list.<br />
■ Click icon to display photo list.<br />
■ Click icon to display etc list. The ETC list includes file types (ex: TXT, XOV, etc) other than<br />
music, photo, and video files.<br />
To add folders to Media Studio<br />
Click on the bottom of Media Studio.<br />
■<br />
The Open Folder window will appear.<br />
Select the folder from your PC to add and click .<br />
■ The selected folder is added to the list on the left side of the<br />
Media Studio Screen.<br />
4<br />
Chapter 2. Loading Your Desired File Adding Folders/Files in<br />
<strong>Samsung</strong> Media Studio<br />
3<br />
4<br />
To add files to Media Studio<br />
Click on the bottom of Media Studio.<br />
■<br />
The Open window will appear.<br />
Select the files from your PC to add and click<br />
.<br />
■ The selected files are added to the list.<br />
4<br />
19
Loading Your Desired File<br />
Transferring Files to the Player with <strong>Samsung</strong> Media Studio<br />
Perform the following steps to transfer files from your PC to the player.<br />
2<br />
[<strong>YP</strong>-T9[MTP]]<br />
3<br />
[<strong>YP</strong>-T9]<br />
4<br />
Portable<br />
window<br />
20<br />
NOTE<br />
■ Music recognition technology and related data are provided by Gracenote and<br />
Gracenote CDDB ® Music Recognition Service SM .<br />
■ CDDB is a registered trademark of Gracenote. The Gracenote logo and logotype, the Gracenote<br />
CDDB logo and logotype, and the "Powered by Gracenote CDDB" logo are<br />
trademarks of Gracenote. Music Recognition Service and MRS are service marks of Gracenote.
■<br />
Before you start! Connect the player to your PC.<br />
■ Media Studio must be installed on your PC.<br />
1<br />
2<br />
3<br />
CAUTION<br />
NOTE<br />
Media Studio will automatically start when the player is connected to your PC.<br />
■ If the program does not start automatically, double click the Media Studio icon on the desktop.<br />
Click the desired file icon.<br />
Choose the file type you want to transfer by clicking on one of these icons.<br />
■<br />
■ Click icon to display music list. ■ Click icon to display video list.<br />
■ Click icon to display photo list.<br />
■ Click icon to display etc list. The ETC list includes file types (ex: TXT, XOV, etc) other than<br />
music, photo, and video files.<br />
Select the file to transfer in the left file list.<br />
4 Click icon.<br />
■ The selected file is transferred to the player.<br />
■ Do not disconnect the USB cable during file transfer. This may cause damage to the<br />
player or your PC.<br />
■ When transferring a photo or video file to the player using , it is automatically con<strong>ver</strong>ted<br />
into JPG(photo) or SVI(video) format before transfer. The file size is automatically adjusted, too.<br />
■ You can’t transfer a file on the player to your PC by using Media Studio.<br />
■ If you want to view a text file in the ➝ folder in your player, select the <br />
folder from ETC of and transfer the file into it.<br />
Chapter 2. Loading Your Desired File Transferring Files to the Player with<br />
<strong>Samsung</strong> Media Studio<br />
21
Listening to Music<br />
Listening to Music<br />
Before you start!<br />
Music<br />
1,2,3<br />
Now Playing<br />
Artists<br />
Albums<br />
Tracks<br />
Genres<br />
Playlists<br />
Connect the earphones, then turn on the player, and check the battery.<br />
1<br />
2<br />
Press the [ ] button to select and<br />
then press the [ ] button.<br />
Press the [ ] button to select the desired<br />
list and then press the [ ] button.<br />
3 Press the [ ] button to select the file<br />
to play and then press the [ ] button.<br />
■<br />
The music file starts to play.<br />
File information including the artist name, album name, music<br />
title and genre will be displayed according to the ID3 tag<br />
information on the appropriate music file. A file without an<br />
ID3 Tag is displayed as [Unknown].<br />
■ : The file currently playing<br />
■ : To play by artist<br />
■ : To play by album<br />
■ : To play in numeric or alphabetical order<br />
■ : To play by genre<br />
■ : To play by Playlist<br />
22<br />
NOTE<br />
■ MP3 and WMA music files are compatible with this player.<br />
■ MP1 or MP2 files which have a changed extension to MP3 may not play on the player.<br />
■ If you press the [ ] button in Music mode, the “S” mark appears on the screen and the Street mode is<br />
set to On. Press [ ] again to make the “S” mark disappear and set the Street mode to off. √ Page 59<br />
■ Press and hold the [BACK] button to move to the main menu.<br />
■ What is an ID3-Tag?<br />
This is what is attached to an MP3 to carry information relevant to the file, such as the title, artist, album,<br />
year, genre and a comment field.
To Pause<br />
1<br />
2<br />
Press the [ ] button while the music is playing.<br />
■ The music playback will be paused.<br />
Press the [ ] button again.<br />
■ The music will play from the point where it stopped.<br />
To search within a track<br />
1 Press and hold the [ ] button while the selected track is playing.<br />
2<br />
■ It searches to the beginning or the end of the track.<br />
Release the button at the point you wish to start.<br />
■ It starts playing from the point you release the button.<br />
Chapter 3. Multimedia Function Listening to Music<br />
23
Listening to Music<br />
Listening to Music (Continued)<br />
To Play from the beginning of the current track<br />
Press the [ ] button after 5 seconds of play.<br />
■ The current track starts playing from the beginning.<br />
To play the previous/next track<br />
Press the [ ] button within 5 seconds of play.<br />
■ The previous track will start playing.<br />
Press the [<br />
] button.<br />
■ The next track will start playing.<br />
CAUTION<br />
■ When playing VBR files, the previous track may not play even if you press the [<br />
5 seconds of the play.<br />
] button within<br />
24
Listening to Music<br />
Section Repeat<br />
This function enables you to listen to specific parts of a track repeatedly.<br />
Recommended for language learning.<br />
To set a section to repeat<br />
Audio Track 1<br />
00:01:42 00:05:06<br />
2,3<br />
1<br />
2<br />
3<br />
Play a file of your choice.<br />
Press the [A B/ ] button at the<br />
beginning of the section you want to repeat.<br />
■ The starting point is set and will appear in<br />
the screen display window.<br />
Press the [A B/ ] button again to set the<br />
ending of the section you want to repeat.<br />
■ will appear on the screen and the specified<br />
section starts to play repeatedly.<br />
To cancel the section repeat<br />
Press the [A B/ ] button again during Section<br />
Repeat.<br />
■ Section Repeat will be canceled.<br />
Chapter 3. Multimedia Function Listening to Music/<br />
Section Repeat<br />
NOTE<br />
■ You can set the start and end points of the section repeat only within a single file.<br />
25
Listening to Music<br />
Creating a Playlist Using <strong>Samsung</strong> Media Studio<br />
A playlist is a list of your favorite songs.<br />
1<br />
[<strong>YP</strong>-T9[MTP]]<br />
3<br />
3<br />
2<br />
26<br />
1<br />
2<br />
3<br />
Click on the top of Media Studio.<br />
■ The window appears.<br />
Click on the bottom.<br />
■ The Creation window appears.<br />
Type in the album title and click .<br />
■ A new album (playlist) will be created and stored in the My Album section of Media Studio on your<br />
computer.
3<br />
3<br />
Adding Music files to a Playlist<br />
NOTE<br />
1<br />
Exporting a Playlist to your Player Using Media Studio<br />
1<br />
2<br />
5<br />
■ A maximum of 999 playlists<br />
transferred to the player can be<br />
played.<br />
2<br />
4<br />
1<br />
2<br />
3<br />
4<br />
5<br />
1<br />
2<br />
3<br />
4<br />
Click on the top of Media Studio.<br />
■ The My PC window appears. Click on <br />
to the right.<br />
Click in the right corner of the<br />
window.<br />
■ The My Album window appears.<br />
Double click on a desired album in the right<br />
window.<br />
Select files that you want to transfer in the<br />
window.<br />
Click icon.<br />
■ The selected files will be added to the album (playlist).<br />
Click on the top of Media Studio.<br />
■ The My Album window appears.<br />
Click in the right corner of the<br />
window.<br />
■ The Portable window appears.<br />
Select a desired album in the list.<br />
Click icon.<br />
■ The selected album will be transferred to the player<br />
and stored in ➝ .<br />
Chapter 3. Multimedia Function Creating a Playlist Using<br />
<strong>Samsung</strong> Media Studio<br />
27
Listening to Music<br />
To Play a Playlist<br />
You can easily listen to your favorite music by adding it to a Playlist.<br />
To make your own Playlist<br />
Music<br />
Song 1<br />
Song 2<br />
Song 3<br />
Song 4<br />
Song 5<br />
1<br />
2<br />
Method 1<br />
Press the [ ] button on your player to select and then press the [ ] button.<br />
Press the [ ] button to select and then press<br />
the [ ] button.<br />
■ The file list appears.<br />
3 Press the [ ] button to select a file to add to the<br />
playlist and then press the [A B/ ] button.<br />
■ The mark appears next to the selected file, and the file is<br />
included in → → .<br />
28<br />
NOTE<br />
■ You can add up to 100 music files to .<br />
■ If you want to remove a file from the , select a file marked with and then press the<br />
[A B/ ] button. Alternately, you can press the [MENU] button to select and<br />
press the [ ] button.<br />
■ For more information, see pages 26~27 to see how to create and transfer playlists to your player.
To make your own Playlist (Continued)<br />
Add to Favorites<br />
Delete<br />
1<br />
2<br />
Method 2<br />
Press the [ ] button to select and<br />
then press the [ ] button.<br />
Press the [ ] button to select and then press<br />
the [ ] button.<br />
■ The file list appears.<br />
3 Press the [ ] buttons to select a file to add to<br />
the playlist and then press the [MENU] button.<br />
4<br />
Press the [ ] button to select and<br />
then press the [ ] button.<br />
■ The mark appears next to the selected file, and the file is<br />
included in → → .<br />
Chapter 3. Multimedia Function To Play a Playlist<br />
NOTE<br />
■ If you want to remove a file from the , select a file marked with and then press the<br />
[A B/ ] button. Alternately, you can press the [MENU] button to select and<br />
press the [ ] button.<br />
29
Listening to Music<br />
To Play a Playlist (Continued)<br />
To Play a Playlist<br />
Playlists<br />
Favorites<br />
Ballad<br />
Jazz<br />
1<br />
2<br />
Press the [ ] button to select and then<br />
press the [ ] button.<br />
Press the [ ] button to select and then<br />
press the [ ] button.<br />
■ The Playlist(s) will appear.<br />
3<br />
4<br />
Press the [ ] button to select the playlist of your<br />
choice, then press the [ ] button.<br />
■ The music files saved in the selected Playlist will appear.<br />
Press the [ ] button to select the file to play and<br />
then press the [ ] button.<br />
■ The music file will start playing.<br />
30
Listening to Music<br />
Using Music menu<br />
To select Street mode<br />
This allows you to hear music more clearly outdoors.<br />
Street Mode<br />
DNSe<br />
Play Mode<br />
Music Backgrou..<br />
Play Speed<br />
Skip Interval<br />
00:01:42 00:05:06<br />
1<br />
2<br />
3<br />
To select 3D surround sound (DNSe)<br />
Press the [MENU] button when you are in the music<br />
playback mode.<br />
Press the [ ] button to select and<br />
then press the [ ] button.<br />
Press the [ ] button to select or and<br />
then press the [ ] button.<br />
■ Select .<br />
You can listen to the music with 3D surround sound.<br />
Street Mode<br />
DNSe<br />
Play Mode<br />
Music Backgrou..<br />
Play Speed<br />
Skip Interval<br />
00:01:42 00:05:06<br />
To exit the menu,<br />
press the [MENU] button.<br />
1<br />
2<br />
3<br />
Press the [MENU] button when you are in the music<br />
playback mode.<br />
Press the [ ] button to select and then<br />
press the [ ] button.<br />
Press the [ ] button to select the desired mode and<br />
then press the [<br />
] button.<br />
■ Select either <br />
<br />
or .<br />
■ The <strong>User</strong> EQ cannot be set in this menu. It must be set in the Settings menu. √ Page 59<br />
NOTE<br />
Chapter 3. Multimedia Function To Play a Playlist/Using Music menu<br />
31
Listening to Music<br />
Using Music menu (Continued)<br />
To select Play mode (Repeat)<br />
Street Mode<br />
DNSe<br />
Play Mode<br />
Music Backgrou..<br />
Play Speed<br />
Skip Interval<br />
00:01:42 00:05:06<br />
1<br />
2<br />
3<br />
To select a background image for Music mode<br />
You can set a background image for Music mode.<br />
Street Mode<br />
DNSe<br />
Play Mode<br />
Music Backgrou..<br />
Play Speed<br />
Skip Interval<br />
00:01:42 00:05:06<br />
1<br />
2<br />
3<br />
Press the [MENU] button when you are in the music<br />
playback mode.<br />
Press the [ ] button to select and then<br />
press the [ ] button.<br />
Press the [ ] button to select the desired mode and<br />
then press the [<br />
] button.<br />
■ Select either or .<br />
■ : To play all the tracks in order one time.<br />
■ : To repeat the current folder.<br />
■ : To repeat one file.<br />
■ : To play files at random.<br />
Press the [MENU] button when you are in the music<br />
playback mode.<br />
Press the [ ] button to select and<br />
then press the [ ] button.<br />
Press the [ ] button to select the desired background<br />
image and then press the [ ] button.<br />
■ Select either <br />
or .<br />
■ Selecting will play a to background<br />
image each time a different file is played.<br />
32<br />
NOTE<br />
■ If there is an image contained in the tag information of a music file, it will be displayed as a background image when you<br />
select . only supports images less than 200 pixel (horizontal) x 200 pixel(<strong>ver</strong>tical) in size.
To select the play speed<br />
You can set the play speed either faster or slower than normal.<br />
Street Mode<br />
DNSe<br />
Play Mode<br />
Music Backgrou..<br />
Play Speed<br />
1<br />
2<br />
3<br />
Press the [MENU] button when you are in the music<br />
playback mode.<br />
Press the [ ] button to select and then<br />
press the [ ] button.<br />
Skip Interval<br />
Press the [ ] button to select the play speed and<br />
then press the [ ] button.<br />
00:01:42 00:05:06<br />
■ Select either (Normal) or .<br />
■ The larger the number (+), the faster the speed of play.<br />
Negative numbers (-) equal slower play.<br />
To set the skip interval<br />
You can set a playback interval within a track when you press the [<br />
playback.<br />
Street Mode<br />
DNSe<br />
Play Mode<br />
Music Backgrou..<br />
Play Speed<br />
Skip Interval<br />
00:01:42 00:05:06<br />
1<br />
2<br />
3<br />
] button during<br />
Press the [MENU] button when you are in the music<br />
playback mode.<br />
Press the [ ] button to select and<br />
then press the [ ] button.<br />
Press the [ ] button to select the desired skip<br />
interval and then press the [ ] button.<br />
■ Select either <br />
or .<br />
Chapter 3. Multimedia Function Using Music menu<br />
33
Video<br />
Video<br />
Before you start!<br />
Connect the earphones, then turn on the player, and check the battery.<br />
1<br />
2<br />
Press the [ ] button to select and<br />
then press the [ ] button.<br />
Press the [ ] button to select the desired<br />
video clip and then press the [ ] button.<br />
■<br />
The selected video file starts to play.<br />
To stop playing the video file<br />
Press the [ ] button in Video mode.<br />
■ Each time you press the [ ] button, the player stops<br />
playing the video file or resumes playback.<br />
1,2<br />
NOTE<br />
■ When transferring a video file to the player using , it is automatically con<strong>ver</strong>ted into<br />
SVI format before transfer. The file size is automatically adjusted, too.<br />
■ Press and hold the [BACK] button to move to the main menu.<br />
34
Video Information Display<br />
Press the [<br />
any story 1<br />
] button in Video mode.<br />
■ Information on the current video appears. Press the [<br />
disappear.<br />
1<br />
2<br />
3<br />
4<br />
5<br />
6<br />
] button again to make the information<br />
1 Play/Pause Indicator<br />
2 File Name<br />
3 Play Position Indicator<br />
4 Current Play Time Indicator<br />
5 Volume Level Indicator<br />
6 Full play time for the current video<br />
Chapter 3. Multimedia Function Video<br />
To move to a certain position of the current video file<br />
any story 1<br />
1<br />
2<br />
In a horizontal view, press and hold the [ ] button.<br />
■ This enables you to scroll through the current video file.<br />
Release the button when you have moved to the desired<br />
position.<br />
■ The video starts playing from the position.<br />
35
Video<br />
Video (Continued)<br />
To play the previous/next video file<br />
Press the [ ] button within 5 seconds after the current<br />
video started playing.<br />
■ This will return to the previous video.<br />
any story 2<br />
Press the [<br />
] button.<br />
■ This will move to the next video.<br />
To set a bookmark<br />
Once you bookmark a specific scene that you want to see again, you can enjoy it at<br />
any time you want.<br />
Press the [A<br />
■<br />
B/ ] button at the desired scene.<br />
A bookmark is created at the currently played/stopped point.<br />
NOTE<br />
■ You can set a maximum of 20 bookmarks.<br />
36
Video<br />
Using Video menu<br />
To Move to the bookmark<br />
Go to<br />
Delete<br />
1<br />
Press the [MENU] button in Video mode.<br />
■ The Bookmark menu appears.<br />
2 Press the [ ] button.<br />
3<br />
4<br />
To Remove a bookmark<br />
Go to<br />
Delete<br />
1<br />
Press the [ ] button to select and press the<br />
[ ] button.<br />
Press [ ] to select the desired bookmark and press<br />
the [ ] button.<br />
■ Playback will start from the selected bookmark.<br />
Press the [MENU] button in Video mode.<br />
■ The Bookmark menu appears.<br />
2 Press the [ ] button.<br />
3<br />
4<br />
Press the [ ] button to select and press the<br />
[ ] button.<br />
Press [ ] to select a bookmark to remove and press<br />
the [ ] button.<br />
■ It will remove the selected bookmark.<br />
Chapter 3. Multimedia Function Video/Using Video menu<br />
37
Photo Viewing<br />
Photo Viewing<br />
Before you start!<br />
Connect the earphones, then turn on the player, and check the battery.<br />
1<br />
2<br />
Press the [ ] button to select and<br />
then press the [ ] button.<br />
■ The photo preview window appears.<br />
Press the [ ] button to select the desired<br />
photo and then press the [ ] button.<br />
■<br />
The selected photo is displayed.<br />
To move to the previous/next photo<br />
Press the [ ] button while viewing a photo or<br />
press the [ ] button in preview mode to display<br />
the previous or next photo.<br />
Photo<br />
1,2<br />
test0 1/20<br />
Photo Viewing mode<br />
Preview mode<br />
38<br />
NOTE<br />
■ When transferring a photo file to the player using , it is automatically con<strong>ver</strong>ted into<br />
JPG format before transfer. The file size is automatically adjusted, too.<br />
■ You can also use the to search for a photo file. √ Page 14<br />
■ You can keep listening to music even if you select to view a photo.<br />
■ Press and hold the [BACK] button to move to the main menu.
Photo Display Window<br />
1<br />
Photo<br />
3<br />
1 Preview Pane<br />
2 File Name<br />
3 Thumbnails<br />
4 The current file number/total number of photos<br />
2 test0 1/20 4<br />
Slideshow Viewing<br />
Start Slideshow<br />
Zoom<br />
As Music Backgr..<br />
1<br />
2<br />
To stop the slideshow<br />
Press the [MENU] while viewing a photo<br />
Press the [ ] button to select and<br />
then press the [ ] button.<br />
■ The slideshow will start.<br />
Chapter 3. Multimedia Function Photo Viewing<br />
Press the [<br />
■ This will stop the slideshow.<br />
] button in Slideshow mode.<br />
39
Photo Viewing<br />
Using Photo menu<br />
Photo Enlarging<br />
100%<br />
200%<br />
400%<br />
1<br />
2<br />
3<br />
Press the [MENU] while viewing a photo<br />
Press the [ ] button to select and then press<br />
the [ ] button.<br />
■ The Zoom Setting menu appears.<br />
Press the [ ] button to select the desired scale factor<br />
and then press the [ ] button.<br />
■ You can select either or .<br />
4 Press the [ ] to move to the portion of the photo<br />
to magnify.<br />
5<br />
To cancel the magnification, select from the Zoom<br />
options and then press the [ ] button.<br />
■ This returns to the original size.<br />
NOTE<br />
■ Press the [<br />
] button in the Photo Viewing mode to display the Zoom Setting menu.<br />
40
To set a photo as a music background image<br />
1 Select a photo file to set as a background image.<br />
Audio Track 1<br />
00:01:42 00:05:06<br />
2<br />
Press the [MENU] while viewing the photo.<br />
3 Press the [ ] button to select < As Music Background><br />
and then press the [ ] button.<br />
■ The Music Background Image Setting menu appears.<br />
4 Press the [ ] button to select and then press the<br />
[ ] button.<br />
■ The selected photo file is set to a background image for music.<br />
Chapter 3. Multimedia Function Using Photo menu<br />
NOTE<br />
■ Press the [A<br />
B/ ] button while viewing a photo to display the Music Background Setting menu.<br />
41
Text View<br />
Text Viewing<br />
You can read a novel or see the manuscript text of a news story or soap<br />
opera while listening to music.<br />
Before you start!<br />
For instructions on transferring a text file to the player, refer to pages 18-19.<br />
Turn on the player, and check the battery.<br />
1<br />
2<br />
Press the [ ] button to select and<br />
then press the [ ] button.<br />
Press the [ ] button to select Text and then<br />
press the [ ] button.<br />
■<br />
You will see the text on the screen.<br />
To scroll the text by the line<br />
1,2<br />
Press the [<br />
■<br />
■<br />
] button.<br />
Once you set → in Text menu, you can<br />
move to the previous / next page of the text file. √ Page 45<br />
Once you set → in Text menu, you can<br />
move to the previous / next line of the text file. √ Page 45<br />
Press and hold the [ ] button to move up or down faster<br />
through the file.<br />
42<br />
NOTE<br />
■ You can also use the to search for a text file. √ Page 14<br />
■ This product supports the TXT file format in Text mode.<br />
■ You can keep listening to music even if you select .<br />
■ Press the [ ] button if you want to play a music while viewing text. Press the [ ] button<br />
again to stop playing the music.<br />
■ Press and hold the [BACK] button to move to the main menu.
Text View<br />
Using Text menu<br />
To set a bookmark<br />
Once you bookmark a specific part of text that you want to read again, you can enjoy it<br />
at any time you want.<br />
Press the [A B/ ] button while viewing text.<br />
■ A bookmark is set on the current text screen with the † symbol displayed<br />
on the top left corner.<br />
■ The bookmark can be deleted by pressing the [A B/ ] button in the<br />
bookmarked page.<br />
■ You can set a maximum of 20 bookmarks.<br />
NOTE<br />
Chapter 3. Multimedia Function Text Viewing/Using Text menu<br />
43
Text View<br />
Using Text menu (Continued)<br />
To move to the bookmark<br />
Go to<br />
Delete<br />
1<br />
2<br />
3<br />
4<br />
Press the [MENU] button while viewing text.<br />
Press the [ ] button to select and<br />
then press the [ ] button.<br />
■ The Bookmark menu appears.<br />
Press the [ ] button to select and then<br />
press the [ ] button.<br />
Press the [ ] to select the desired bookmark and<br />
press the [ ] button.<br />
■ It will move to the selected bookmark<br />
44<br />
To remove a bookmark<br />
Go to<br />
Delete<br />
1<br />
2<br />
3<br />
4<br />
Press the [MENU] button while viewing text.<br />
Press the [ ] button to select and<br />
then press the [ ] button.<br />
■ The Bookmark menu appears.<br />
Press the [ ] button to select and then<br />
press the [ ] button.<br />
Press the [ ] to select the removed bookmark and<br />
press the [ ] button.<br />
■ It will remove the selected bookmark.
To move to the first page<br />
You can see the text file from the beginning.<br />
Go to 1st Page<br />
Bookmark<br />
Scroll By<br />
Text Viewer Type<br />
Text Viewer Color<br />
1<br />
2<br />
To set the scroll option<br />
Go to 1st Page<br />
Bookmark<br />
Scroll By<br />
Text Viewer Type<br />
Text Viewer Color<br />
Press the [MENU] button while viewing a text.<br />
Press the [ ] button to select and<br />
then press the [ ] button.<br />
■ The Confirmation window will appear.<br />
3 Press the [ ] button to select and press the<br />
[ ] button.<br />
■ This will move to the first page of the text file.<br />
1<br />
2<br />
3<br />
Press the [MENU] button while viewing text.<br />
Press the [ ] button to select and then<br />
press the [ ] button.<br />
■ The Scroll option menu appears.<br />
Press the [ ] button to select the desired option and<br />
then press the [ ] button.<br />
■ You can select either or .<br />
■ : Use the [ ] button to scroll through the file by the page.<br />
■ : Use the [<br />
] button to scroll through the file by the line.<br />
Chapter 3. Multimedia Function Using Text menu<br />
NOTE<br />
■ You can press the [<br />
] button to change the scroll option in Text View mode.<br />
45
Text View<br />
Using Text menu (Continued)<br />
To set the text viewer type<br />
Go to 1st Page<br />
Bookmark<br />
Scroll By<br />
Text Viewer Type<br />
Text Viewer Color<br />
1<br />
2<br />
3<br />
To set the text viewer color<br />
Go to 1st Page<br />
Bookmark<br />
Scroll By<br />
Text Viewer Type<br />
Text Viewer Color<br />
1<br />
2<br />
3<br />
Press the [MENU] button while viewing text.<br />
Press the [ ] button to select and<br />
then press the [ ] button.<br />
■ The Text Viewer Type menu appears.<br />
Press the [ ] button to select the desired text viewer type.<br />
■ You can select either or .<br />
Press the [MENU] button while viewing text.<br />
Press the [ ] button to select and<br />
then press the [ ] button.<br />
■ The Text Viewer Color menu appears.<br />
Press the [ ] button to select the desired text viewer<br />
color.<br />
■ Select either or .<br />
■ Selecting will set the viewer color to the same as the main menu.<br />
46
Listening to FM Radio<br />
Listening to FM Radio<br />
Before you start!<br />
Connect the earphones, then turn on the player, and check the battery.<br />
Press the [ ] button to select and then press<br />
the [ ] button.<br />
■ FM radio reception will start.<br />
To use Mute function<br />
Press [ ] button during listening to FM radio.<br />
■ Sound is muted.<br />
■ Press [ ] button once again to sound back.<br />
Chapter 3. Multimedia Function Using Text menu/<br />
Listening to FM Radio<br />
NOTE<br />
■ Press and hold the [BACK] button to move to the main menu.<br />
47
Listening to FM Radio<br />
Listening to FM Radio (Continued)<br />
To automatically search for frequencies<br />
1<br />
Press the [ ] button to select , then press<br />
the [ ] button to select .<br />
■ You will see in the top right corner.<br />
Auto Searching...<br />
2 Press and hold the [ ] button and then release.<br />
■ The frequency nearest from the point the button is released will be searched.<br />
NOTE<br />
■ To scan for an incoming frequency, select . To listen to a<br />
memorized frequency, select .<br />
■ To switch from to <strong>Manual</strong> mode, press [MENU] and use the<br />
[ ] button to select and press the [ ] button.<br />
You will switch to mode.<br />
■ To switch from mode to Preset mode, press [MENU] and use the<br />
[ ] button to select and press the [ ] button.<br />
You will switch to mode.<br />
To manually search for frequencies<br />
1<br />
Press the [ ] button to select , then press<br />
the [ ] button to select .<br />
■ You will see in the top right corner.<br />
2 Press the [ ] button.<br />
■ Moves to frequencies whene<strong>ver</strong> the button is pressed.<br />
48<br />
CAUTION<br />
■ Always connect your earphones to the player when searching or setting frequencies.<br />
The earphones are used as antennas to receive FM radio reception.<br />
■ In poor reception areas, the player may not be able to scan any frequencies.
Listening to FM Radio<br />
Setting a Frequency<br />
Go to Preset Mo..<br />
Add to Preset<br />
Auto Preset<br />
FM Region<br />
FM Sensitivity<br />
To automatically preset frequencies<br />
1<br />
2<br />
Press the [MENU] button in FM Radio mode.<br />
Press the [ ] button to select and then<br />
press the [ ] button.<br />
■ The Auto Preset Confirm window will appear.<br />
3 Press the [ ] button to select and then press the<br />
[ ] button.<br />
■ The window will appear and up to 30 frequencies<br />
will be set automatically.<br />
To cancel during setting<br />
To cancel the setting, press the [ ] button.<br />
■ The auto preset setting is canceled and frequencies set up to then are<br />
stored.<br />
Chapter 3. Multimedia Function Listening to FM Radio/<br />
Setting a Frequency<br />
■ If is selected after presets have already been made, the existing presets will be deleted.<br />
NOTE<br />
49
Listening to FM Radio<br />
Setting a Frequency (Continued)<br />
To manually preset frequencies<br />
1<br />
Press the [ ] button to select , then press<br />
the [ ] button to select .<br />
2 Press the [ ] button to select the desired frequency to<br />
preset.<br />
3<br />
■ You will see in the top right corner.<br />
Press the [A B/ ] button.<br />
■ blinks before the preset number appears.<br />
4 Press the [ ] button to select the desired preset number<br />
at the bottom of the screen and press the [ ] button.<br />
■ The selected frequency is set as a preset number.<br />
■ You can also set the preset frequency by pressing [MENU] to select in mode.<br />
■ If you set an identical frequency, you will see . Press the [ ]<br />
NOTE<br />
button<br />
to select or and press the [ ] button.<br />
To search for frequencies in PRESET mode<br />
Once presets are set, the unit will automatically be in Preset mode when FM Radio<br />
mode is selected.<br />
1<br />
Press the [ ] button to select , then press<br />
the [ ] button to select .<br />
■ You will see in the top right corner.<br />
2 Press the [ ] button.<br />
■ The preset number is selected and you can listen to the stored radio<br />
frequency.<br />
50<br />
■ If no frequencies were preset, will appear and you cannot switch to mode.<br />
■ NOTE To switch between <strong>Manual</strong> and Preset modes when listening to the FM Radio, simply press the [ ] button.
Listening to FM Radio<br />
To Delete Presets<br />
Before you start! ■ Follow the steps below to delete frequencies while listening to FM radio.<br />
1<br />
2<br />
Press the [ ] button to select , then press<br />
the [ ] button to select .<br />
■ You will see in the top right corner.<br />
Press the [A B/ ] button.<br />
■ blinks.<br />
3 Press the [ ] button to select the frequency that you<br />
want to remove from the PRESET list and press the [ ]<br />
button.<br />
■ The Delete Preset window will appear.<br />
4 Press the [ ] button to select and press<br />
the [ ] button.<br />
■ The selected preset number will be deleted.<br />
■ If you don’t want to delete the preset number, select .<br />
Chapter 3. Multimedia Function Setting a Frequency/<br />
To Delete Presets<br />
■ You can also remove the preset frequency by pressing [MENU] to select in mode.<br />
NOTE<br />
51
Listening to FM Radio<br />
Using FM Radio menu<br />
To set FM region<br />
Go to Preset Mo..<br />
Add to Preset<br />
Auto Preset<br />
FM Region<br />
FM Sensitivity<br />
1<br />
2<br />
3<br />
Press the [MENU] button in FM Radio mode.<br />
Press the [ ] button to select and then<br />
press the [ ] button.<br />
■ The FM Region menu appears.<br />
Press the [ ] button to select the FM Region and then<br />
press the [ ] button.<br />
■ You can select from .<br />
NOTE<br />
■ Frequency range by region<br />
- Korea/US: Search for FM frequencies in 100 kHz increments between 87.5 MHz~108.0 MHz.<br />
- Japan: Search for FM frequencies in 100 kHz increments between 76.0 MHz~108.0 MHz.<br />
- Other Countries: Search for FM frequencies in 50 kHz increments between 87.50 MHz~108.00 MHz.<br />
■ If you change the FM region, the previously stored radio frequencies are removed.<br />
52<br />
To set FM sensitivity<br />
Go to Preset Mo..<br />
Add to Preset<br />
Auto Preset<br />
FM Region<br />
FM Sensitivity<br />
1<br />
2<br />
3<br />
Press the [MENU] button in FM Radio mode.<br />
Press the [ ] button to select and<br />
then press the [ ] button.<br />
■<br />
The FM Sensitivity menu appears.<br />
Press the [ ] button to select the search level and then<br />
press the [ ] button.<br />
■ You can select from and .<br />
■ The higher FM Sensitivity is, the more frequencies can be received.
Recording<br />
Recording<br />
Recordings can be made of your voice or FM broadcasts.<br />
To stop recording<br />
1<br />
2<br />
3<br />
3<br />
1,2<br />
1<br />
Press the [ ] button to select <br />
and then press the [ ] button.<br />
■ Then, press the [MENU] button and use the [ ]<br />
and [ ] buttons to set your recording options.<br />
2 Press the [ ] button to select the desired<br />
recording mode and press the [ ] button.<br />
■ The appropriate window appears.<br />
3<br />
Press the [A B/ ] button while in recording.<br />
Press the [A B/ ] button.<br />
■ You will see a message that prompts you to confirm your choice.<br />
■ Recording starts and the file name is displayed.<br />
■ : you can make a voice recording.<br />
■ : you can record the FM radio<br />
broadcast you're currently listening to, or you can use<br />
the [ ] button to select a desired frequency.<br />
■ : you can listen to voice recording<br />
and FM radio recording.<br />
Press the [ ] button to select or and press the [ ] button.<br />
■ will play the just recorded file.<br />
■ will not play the just recorded file.<br />
■ After the recorded file plays back, the 'Save the recording file?' message appears.<br />
Press the [ ] button to select and press the [ ] button.<br />
■ The recorded file is stored in the → .<br />
Chapter 3. Multimedia Function Using FM Radio menu/<br />
Recording<br />
■ Press and hold the [BACK] button to move to the main menu.<br />
NOTE<br />
53
Recording<br />
Voice/FM Radio Recording<br />
Below are other ways to make Voice or FM broadcast recordings.<br />
To make a voice recording<br />
You can make a voice recording at any time.<br />
Press and hold the [A B/ ] button.<br />
■ Recording is started with displaying the file name to save.<br />
To record FM radio broadcasting<br />
You can record FM radio broadcasts.<br />
In FM Radio mode, press and hold the [A<br />
B/ ] button.<br />
■ An automatically created file name appears and the recording<br />
starts.<br />
■ Do not place the microphone too close or too far away during recording, as this can affect the recording quality.<br />
NOTE ■ Voice recording does not perform properly when the battery is low.<br />
■ You can make a voice recording for up to 69 hours (based on 32Kbps, 1GB)<br />
54
Recording<br />
Recorded File Names<br />
File names during recording<br />
1<br />
2<br />
3<br />
During recording, a recording file name is automatically generated.<br />
The file name contains the type (V or F), month (mm), date (dd), hour (hh),<br />
minutes (mm) and seconds (ss).<br />
The recording type is as follows;<br />
■ Voice - V<br />
■ Radio – F (FM)<br />
For example, the file name “V0801103020” indicates a voice recording was<br />
made 10 o’clock 30 minutes 20 seconds on August 1st.<br />
Chapter 3. Multimedia Function Voice/FM Radio Recording/<br />
Recorded File Names<br />
NOTE<br />
■ To listen to saved recording files, use the function. √ Page 14<br />
■ For more information on recording, see the recording setting section on page 60.<br />
■ You can set or store a maximum of 999 files for each of voice and FM radio recording.<br />
55
Game<br />
Game<br />
You can enjoy BaseBall and Pizza Deli<strong>ver</strong>y games.<br />
Before you start!<br />
■ Connect the earphones, then turn on the player, and check the battery.<br />
1<br />
2<br />
Press the [ ] button to select and<br />
then press the [ ] button.<br />
■ The Game menu appears.<br />
Press the [ ] button to select the desired<br />
game and then press the [ ] button.<br />
1,2<br />
■ The games bundled with the player may be added or changed without notice.<br />
NOTE ■ Press and hold the [BACK] button to move to the main menu.<br />
56
BaseBall<br />
Pizza Deli<strong>ver</strong><br />
This game provides you with animated players, and simulates<br />
the feel of a baseball stadium.<br />
■ Press the [ ] button to select a menu or function.<br />
■ Press the [ ] button to pitch or hit the ball.<br />
The goal of this game is to deli<strong>ver</strong> pizza on a motor bike<br />
while dodging obstacles on the road.<br />
■ Press the [<br />
] button to make the motorbike jump to avoid obstacles.<br />
Chapter 3. Multimedia Function Game<br />
57
Settings<br />
Setting Music<br />
You can set detailed settings for music playback.<br />
Settings<br />
Music<br />
Record<br />
Time<br />
Display<br />
Language<br />
System<br />
1<br />
2<br />
Press the [ ] button to select and then<br />
press the [ ] button.<br />
■<br />
Press the [ ] button to select and then<br />
press the [ ] button.<br />
■<br />
The Settings menu appears.<br />
The Music menu appears.<br />
3 Use the [ ] and [ ] buttons to set the<br />
desired functions<br />
NOTE<br />
■ Button functions to use during setting.<br />
- Press the [ ] button to move to the previous item.<br />
- Press the [ ] button to move to the next item.<br />
- Press the [ ] button to move up or down through the current menu.<br />
- Press the [ ] button to select or save the menu.<br />
■ Press and hold the [BACK] button to move to the main menu.<br />
■ If you do not press any buttons for approximately 1 minute in the Settings screen, settings will be<br />
canceled and the player will return to the last function you were using.<br />
58
■ : Allows you to enjoy the music outdoors more clearly.<br />
You can select either or .<br />
■ : You can select a suitable sound for each music genre. Select either <br />
<br />
or .<br />
■ : Sets 3D sound effect and bass enhancement.<br />
3D can be set between 0~5 levels, and Bass Enhance between 0~3 levels.<br />
After you set , you can select in .<br />
■ : You can directly select a sound frequency to adjust (EQ). After you set<br />
, you can select in .<br />
■ : Select playback mode such as repeat settings.<br />
Select from and .<br />
■ : Adjust the playback speed of music/voice recordings.<br />
Select either (Normal) . (The higher the number is, the<br />
faster the playback speed is.)<br />
■ : Set the playback interval within a track when you press the [ ] button during<br />
playback. Select either or .<br />
NOTE<br />
■ For a VBR file, the Skip Interval may not be exact.<br />
■ What is DNSe?<br />
DNSe is a sound effect function for MP3 players developed by <strong>Samsung</strong> and consists of 3D and Street<br />
modes. The 3D adds a stereophonic sound effect to the music and the Street mode provides an automatic<br />
volume control function that amplifies quiet sounds in noisy street environments.<br />
Chapter 4. Settings Setting Music<br />
59
Settings<br />
Setting Record<br />
You can refine your recording options for FM radio and voice recording.<br />
Settings<br />
Music<br />
Record<br />
Time<br />
Display<br />
Language<br />
System<br />
1<br />
2<br />
Press the [ ] button to select and then<br />
press the [ ] button.<br />
■<br />
Press the [ ] button to select and then<br />
press the [ ] button.<br />
■<br />
The Settings menu appears.<br />
The Record menu appears.<br />
3 Use the [ ] and [ ] buttons to set the<br />
desired functions<br />
■ : You can choose the recording quality for FM radio.<br />
Select one from .<br />
(The greater the number is, the better the quality is, but the file size is bigger)<br />
■ : You can select the voice recording quality. Select one from<br />
. (The greater the number is, the better the quality is,<br />
but the file size is bigger)<br />
60
Settings<br />
Setting Time<br />
You can set functions related to the Sleep Timer and Auto Power Off.<br />
Settings<br />
Music<br />
Record<br />
Time<br />
Display<br />
Language<br />
System<br />
1<br />
2<br />
Press the [ ] button to select and then<br />
press the [ ] button.<br />
■ The Settings menu appears.<br />
Press the [ ] button to select and then press<br />
the [ ] button.<br />
■ The Time menu appears.<br />
3 Use the [ ] and [ ] buttons to set the<br />
desired functions<br />
■ : You can set the current time and date. √ Page 62<br />
■ : Turns off power automatically after the preset time. Select either <br />
or .<br />
■ : If no button is pressed within the time set shown below, the display screen will<br />
automatically turn off. Select either or .<br />
Press any button to turn it back on.<br />
■ : Automatically turns power off when no buttons are pressed after the<br />
preset time in the pause mode. Select either or .<br />
■ : If no button is pressed within the time set shown below in music mode,<br />
the player will display the screen sa<strong>ver</strong> image. Select either < 1 min ><br />
or .<br />
Chapter 4. Settings Setting Record/<br />
Setting Time<br />
61
Settings<br />
Setting Time (Continued)<br />
Date/Time Setting<br />
Time<br />
Date/Time Set<br />
Sleep<br />
LCD Off<br />
Auto Power Off<br />
Screen Sa<strong>ver</strong><br />
1<br />
2<br />
Press the [ ] button to select and<br />
then press the [ ] button.<br />
Press the [ ] button to move to and press the [ ] to set it.<br />
Date/Time Set<br />
AM/PM Hour Min<br />
AM 3 8<br />
Year Month Date<br />
2006 5 19<br />
3 Press the [ ] button.<br />
■ The Confirmation window will appear.<br />
4<br />
Press the [ ] button to select and press the<br />
[ ] button.<br />
■<br />
■<br />
The set time/date will be saved.<br />
will cancel the time setting.<br />
62
Settings<br />
Setting Display<br />
You can set the display options including color theme and the music<br />
background image.<br />
■<br />
■<br />
■<br />
Settings<br />
Music<br />
Record<br />
Time<br />
Display<br />
Language<br />
System<br />
1<br />
2<br />
Press the [ ] button to select and then<br />
press the [ ] button.<br />
■ The Settings menu appears.<br />
Press the [ ] button to select and then<br />
press the [ ] button.<br />
■ The Display menu appears.<br />
3 Use the [ ] and [ ] buttons to set the<br />
desired functions<br />
: You can set the background color for the display screen. Choose one from the<br />
6 color theme options. When is selected, each time you turn off and turn on the<br />
power, the background color will be changed.<br />
: You can select a background image to add to your listening experience.<br />
Select either or .<br />
Selecting will automatically change the background image between to<br />
each time a different file is played.<br />
: You can set the background color for text. Choose one of 6 colors.<br />
■ : You can choose to view the text either <strong>ver</strong>tically or horizontally.<br />
You can select either or .<br />
■ : You can adjust the brightness of the display light. Select from .<br />
Chapter 4. Settings Setting Time/<br />
Setting Display<br />
63
Settings<br />
Setting Language<br />
Set the language for the menu and track information (ID3 Tag).<br />
Settings<br />
Music<br />
Record<br />
Time<br />
Display<br />
Language<br />
System<br />
1<br />
2<br />
Press the [ ] button to select and then<br />
press the [ ] button.<br />
■<br />
Press the [ ] button to select and then<br />
press the [ ] button.<br />
■<br />
The Settings menu appears.<br />
The Language menu appears.<br />
3 Use the [ ] and [ ] buttons to set the<br />
desired functions<br />
■ : Set the menu language. Select from < > <br />
< > < > < > < > <br />
< >.<br />
■ : Set the track information language.Select from <br />
<br />
<br />
<br />
and .<br />
64<br />
NOTE<br />
■ The supported languages can be changed or added.<br />
■ What is ID3-Tag?<br />
This is what is attached to an MP3 to carry information relevant to the file, such as the title, artist, album, year,<br />
genre and a comment field.
Settings<br />
Setting System<br />
You can set the booting mode, resume and button sound.<br />
■<br />
■<br />
■<br />
■<br />
■<br />
■<br />
■<br />
Settings<br />
Music<br />
Record<br />
Time<br />
Display<br />
Language<br />
System<br />
1<br />
2<br />
Press the [ ] button to select and then<br />
press the [ ] button.<br />
■ The Settings menu appears.<br />
Press the [ ] button to select and then<br />
press the [ ] button.<br />
■ The System menu appears.<br />
3 Use the [ ] and [ ] buttons to set the<br />
desired functions<br />
: You can set the start window after the system reboots. Select either<br />
or . If you set , the function last used will come up when you<br />
turn the player back on.<br />
: Specifies the starting point to restart playback after playback is stopped.<br />
If set to , the last file will play from the beginning. If set to , the last file will play from the point<br />
it was previously stopped.<br />
: Sets the beep sound for button operations to on or off. Select either or .<br />
: You can avoid hearing damage by setting the volume limit when using earphones.<br />
will limit the maximum volume level up to 20. The maximum volume level when Volume Limit is<br />
set to is 40.<br />
: Returns all settings to the default value. Select from and .<br />
√ Page 66<br />
: Indicates the remaining memory capacity. indicates the usage, <br />
indicates the remaining capacity and indicates the total memory capacity.<br />
: Displays the current firmware <strong>ver</strong>sion.<br />
Chapter 4. Settings Setting Language/<br />
Setting System<br />
65
Settings<br />
Setting System (Continued)<br />
Default Set<br />
System<br />
Booting Mode<br />
Resume<br />
Button Sound<br />
Default Set<br />
Memory<br />
Firmware Version<br />
Press the [ ] button to select either or and<br />
then press the [ ] button.<br />
■<br />
■<br />
: Initializes all settings to default (original factory settings).<br />
: Cancels default settings.<br />
■ Regarding the Built-In Memory<br />
NOTE The actual built-in memory available is slightly less than indicated as the internal firmware uses a portion<br />
of the memory.<br />
66
Troubleshooting<br />
If a malfunction is experienced, check the following If the problem persists,<br />
contact 1-800-SAMSUNG for a <strong>Samsung</strong> Service Center near you.<br />
Problem<br />
Power will not turn on.<br />
Buttons do not work.<br />
Check points & Troubleshooting<br />
■ Power will not turn on if the battery is fully discharged.<br />
Recharge the battery and turn the power on again.<br />
■ Press and hold the [MENU] and [A B/ ] buttons at the same<br />
time to reset the system.<br />
■ Check if the [HOLD] switch is in the direction of the arrow position.<br />
■ Check if you pressed the right button, then press again.<br />
■ Press and hold the [MENU] and [A B/ ] buttons at the same<br />
time to reset the system.<br />
The screen will not turn<br />
on.<br />
Power is turning off.<br />
Battery life differs from<br />
what is stated in the<br />
<strong>Manual</strong>.<br />
Program Malfunction<br />
Connection to your PC is<br />
disabled.<br />
The file transfer rate is<br />
too low.<br />
■ The screen may not be visible under direct sunlight.<br />
■ When is selected from → , the<br />
LCD will be turned off. Press any button and see if it turns on.<br />
The power is automatically turned off when the battery is fully<br />
discharged. Recharge the battery.<br />
■ The battery time may vary, depending on the sound mode and<br />
display setting.<br />
■ Product life may be shortened when left for extended periods in<br />
low or high temperatures.<br />
Please check if your PC requirements are met.<br />
Press on the toolbar of your PC to run Windows Update.<br />
Select Key Updates and Service Packs, then update all.<br />
Reboot your PC and reconnect.<br />
If you are running multiple programs including Media Studio on<br />
your PC, the file transfer rate will be low. Make sure to exit<br />
unnecessary programs before proceeding.<br />
Chapter 5. Troubleshooting Setting System/<br />
Troubleshooting<br />
67
Troubleshooting (Continued)<br />
Problem<br />
Check points & Troubleshooting<br />
Playing is disabled.<br />
File upload is disabled.<br />
Files or Data are Missing.<br />
■ Check if the available file has been saved in the memory.<br />
■ Check if the music file is damaged.<br />
■ Check if there is enough battery power.<br />
■ Check if the USB cable is securely connected.<br />
Reconnect if necessary.<br />
■ Check if the memory is full.<br />
■ Press and hold the [MENU] and [A B/ ] buttons at the same<br />
time to reset the system.<br />
Check if the USB cable has been disconnected during file or data<br />
transmission. If this is the case, it may cause serious damage not<br />
only to files/data but also to the product. You have to be extra<br />
cautious as <strong>Samsung</strong> cannot be held responsible for data loss.<br />
Abnormal Play Time<br />
Display during Play.<br />
Check if the file is in VBR (Variable Bit Rate) format.<br />
Abnormal Display<br />
of File Name.<br />
Move to → → in the Menu<br />
screen and set an appropriate language.<br />
68<br />
The product is hot.<br />
A downloaded video<br />
does not play and a<br />
message pops up.<br />
Heat may be generated during recharging. This has no effect on<br />
the product life or functions.<br />
Try to download the movie clip through Media Studio again.
Menu Tree<br />
You can quickly view the menu structure.<br />
Menu Select Screen<br />
Music File Browser FM Radio Text Photo Video Game Record Settings<br />
Music<br />
Street Mode<br />
DNSe<br />
3D <strong>User</strong> Set<br />
<strong>User</strong> EQ Set<br />
Play Mode<br />
Play Speed<br />
Skip Interval<br />
Record<br />
FM Recording Bit Rate<br />
Voice Recording Bit Rate<br />
Time<br />
Date/Time Set<br />
Sleep Timer<br />
LCD Off<br />
Auto Power Off<br />
Screen Sa<strong>ver</strong><br />
Display<br />
Color Theme<br />
Music Background<br />
Text Viewer Color<br />
Text Viewer Type<br />
LCD Brightness<br />
Language<br />
Menu<br />
ID3 Tag<br />
System<br />
Booting Mode<br />
Resume<br />
Button Sound<br />
Volume Limit<br />
Default Set<br />
Memory<br />
Firmware Version<br />
Chapter 6. Appendix Troubleshooting/<br />
Menu Tree<br />
69
Product Specifications<br />
Model Name<br />
Power<br />
Built-in Battery Power<br />
<strong>YP</strong>-T9<br />
3.7V (Li-Polymer Rechargeable)<br />
740 mAh<br />
AUDIO: MPEG1/2/2.5 Layer3(8kbps~320kbps, 8kHz~48kHz),<br />
WMA(5kbps~320kbps,8kHz~48kHz)<br />
File Compatibility Video: SVI (Video: MPEG4, Audio: MP3 (44.1kHZ, 128kbps),<br />
Resolution: 208X176, Frame Rate: 15fps)<br />
Image: JPG (Progressive, Sequential Scanning, File Size: less than 3<strong>MB</strong>)<br />
Supported Number of folders and Files Folder: Max. 500, File: Max. 5000(Include folder)<br />
Earphone Output<br />
20mW (16Ω)<br />
Output Frequency Range 20Hz~20KHz<br />
Noise Ratio<br />
85 dB with 20kHz LPF(based on 1KHz 0 dB)<br />
Play Time<br />
Maximum of 30 hours for music playback (based on: MP3 128kbps,<br />
Volume: 20, Normal Mode), Maximum of 6 hours for video playback<br />
Temperature Range for Operation -5~35 °C (23~95°F)<br />
Case<br />
Plastic<br />
Weight<br />
1.73 oz<br />
Dimension (WxHxD) 1.67 X 3.27 X 0.43 inches<br />
FM FM Frequency 87.5~108.0MHz FM T.H.D 1%<br />
Radio FM Signal to Noise Ratio 55dB FM Useable Sensitiivity 10dBµ<br />
● The contents of this <strong>Manual</strong> are subject to change without prior notice for further<br />
improvement.<br />
70
License<br />
The product unit accompanying this user manual is licensed under certain intellectual<br />
property rights of certain third parties. In particular, this product is licensed under the<br />
following US patents : 5,991,715, 5,740,317, 4,972,484, 5,214,678, 5,323,396,<br />
5,539,829, 5,606,618, 5,530,655, 5,777,992, 6,289,308, 5,610,985, 5,481,643,<br />
5,544,247, 5,960,037, 6,023,490, 5,878,080, and under US Published Patent Application<br />
No. 2001-44713-A1.<br />
This license is limited to private non-commercial use by end-user consumers for licensed<br />
contents. No rights are granted for commercial use. The license does not co<strong>ver</strong> any<br />
product unit other than this product unit and the license does not extend to any unli-censed<br />
product unit or process conforming to ISO/IEC 11172-3 or ISO/IEC 13818-3 used<br />
or sold in combination with this product unit. The license only co<strong>ver</strong>s the use of this<br />
product unit to encode and/or decode audio files conforming to the ISO/IEC 11172-3 or<br />
ISO/IEC 13818-3. No rights are granted under this license for product features or func-tions<br />
that do not conform to the ISO/IEC 11172-3 or ISO/IEC 13818-3.<br />
71
Safety Information<br />
FCC<br />
This device complies with part 15 of the FCC<br />
Rules. Operation is subject to the following two<br />
conditions:<br />
(1) This device may not cause harmful<br />
interference, and (2) this device must accept any<br />
interference received, including interference that<br />
may cause undesired operation.<br />
Caution: Any changes or modifications in<br />
construction of this device which are not<br />
expressly approved by the party responsible for<br />
compliance could void the user’s authority to<br />
operate the equipment<br />
Note: This equipment has been tested and<br />
found to comply with the limits for a Class B<br />
digital device, pursuant to part 15 of the FCC<br />
Rules. These limits are designed to provide<br />
reasonable protection against harmful<br />
interference in a residential installation.<br />
This equipment generates, uses and can radiate<br />
radio frequency ener-gy and, if not installed and<br />
used in accordance with the instructions, may<br />
cause harmful interference to radio<br />
communications, Howe<strong>ver</strong>, there is no guarantee<br />
that interference will not occur in a particular<br />
installation.<br />
If this equipment does cause harmful interference<br />
to radio or television reception, which can be<br />
determined by turning the equipment off and on,<br />
the user is encouraged to try to correct the interference<br />
by one or more of the following measures:<br />
◆ Reorient or relocate the receiving antenna.<br />
◆ Increase the separation between the equipment<br />
and recei<strong>ver</strong>.<br />
◆ Connect the equipment to an outlet on a circuit<br />
different from that to which the recei<strong>ver</strong> is<br />
connected.<br />
◆ Consult the dealer or an experienced radio/TV<br />
technician for help.<br />
72
FCC<br />
Any changes or modifications not expressly<br />
approved by the grantee of this device could<br />
void the user’s authority to operate the device.<br />
Compliance<br />
This product conforms to the following<br />
Council Directive:<br />
◆ Directive 89/336/EEC, 92/31/EEC(EMC)<br />
Declaration of Conformity<br />
Name: <strong>Samsung</strong> Electronics Co., Ltd<br />
Address: 416, Maetan-3Dong, Yeongtong-Gu,<br />
Suwon City, Kyungki-Do, Korea 442-742<br />
declares under its sole responsibility that the<br />
product<br />
Trade Name: <strong>Samsung</strong> Electronics Co., Ltd<br />
Model Number: <strong>YP</strong>-T9<br />
has been tested according to the<br />
FCC/CISPR22/95 requirements for Class B<br />
devices and found compliant with the following<br />
standards<br />
EMI/EMC: FCC Part 15 Subpart B<br />
This device complies with part 15 of the FCC<br />
Rules.<br />
Operation is subject to the following two<br />
conditions:<br />
1.This device may not cause harmful<br />
interference, and<br />
2.This device must accept any interference<br />
received, including interference that may<br />
cause undesirable operation.<br />
Party Responsible for Product Compliance<br />
<strong>Samsung</strong> Electronics America<br />
QA Lab.<br />
3351 Michelson Dr. Suite #290<br />
Irvine, CA92612<br />
73
Warranty<br />
<strong>Samsung</strong> warrants this product as free of<br />
defects in material, design and workmanship<br />
for a period of twelve(12) months from the<br />
original date of purchase.<br />
If during the period of warranty this product<br />
proves defective under normal use and service,<br />
you should return the product to the retailer<br />
from whom it was originally purchased.<br />
The liability of <strong>Samsung</strong> and its appointed<br />
maintenance company is limited to the cost of<br />
repair and/or replacement of the unit under<br />
warranty.<br />
Return of the product for defective reasons<br />
should be to the original purchaser; howe<strong>ver</strong>,<br />
<strong>Samsung</strong> Authorized Dealers and Authorized<br />
Service Centers will comply with the warranty<br />
on the terms issued to purchasers in the<br />
country concerned. For further information<br />
relating to the Authorized Service Centers<br />
contact;<br />
1-800-SAMSUNG (1-800-726-7864)<br />
www.samsung.com<br />
WARRANTY CONDITIONS:<br />
1.The warranty is only valid when the warranty card<br />
is properly completed, and upon presentation of the<br />
proof of purchase consisting of original invoice or<br />
sales slip confirmation, indicating the date of<br />
purchase, dealer’s name, model, serial No. and<br />
product number.<br />
<strong>Samsung</strong> reserves the right to refuse warranty<br />
service if this information has been removed or<br />
changed after the original purchase of the product<br />
from the dealer.<br />
2.<strong>Samsung</strong>'s obligations are to the repair of the<br />
defective part, and at its discretion, replacement of<br />
the product (service exchange unit).<br />
3.Warranty repairs must be carried out by an<br />
Authorized <strong>Samsung</strong> Dealer/Service Center. No<br />
reimbursement will be made for repairs carried out<br />
by non <strong>Samsung</strong> Centers, and warranty co<strong>ver</strong>age<br />
will not be valid for any repairs or damage caused by<br />
such repairs.<br />
4.Repair or replacement under the terms of this<br />
warranty does not give right to extension to or a new<br />
starting of the period of warranty. Repair or direct<br />
replacement under the terms of this warranty may be<br />
fulfilled with functionally equivalent service exchange<br />
units.
5. The warranty is not applicable in cases other<br />
than defects in material, design and workmanship.<br />
The warranty does not co<strong>ver</strong> the following:<br />
◆ Periodic checks, maintenance, repair and<br />
replacement of parts due to normal wear and tear.<br />
◆ Abuse or misuse, including but not solely limited<br />
to the failure to use this product for its normal<br />
purposed or in accordance with <strong>Samsung</strong>'s<br />
instructions usage and maintenance.<br />
◆ Use of the product in conjunction with<br />
accessories not approved by <strong>Samsung</strong> for use with<br />
this product.<br />
◆ Failure of the product arising from incorrect<br />
installationor use not consistent with technical or<br />
safety standardsin current force, or failure to<br />
comply with productmanual instructions.<br />
◆ Unauthorized modifications carried out for the<br />
product to comply with local or national technical<br />
standards in countries for which the <strong>Samsung</strong><br />
product was not originally designed.<br />
◆ Repairs performed by non-authorized service<br />
centers such as opening of the product by a<br />
non-authorized person.<br />
◆ The model, serial No. and product number on<br />
the product has been altered, deleted, removed<br />
or made illegible.<br />
6. This warranty does not affect the consumer’s<br />
statutory rights nor the consumers rights against<br />
the dealer from their purchase/sales agreement.<br />
◆ Accidents, Acts of God or any cause beyond the<br />
control of <strong>Samsung</strong> caused by lightning, water,<br />
fire, public disturbances and improper ventilation.
Warranty<br />
THERE ARE NO EXPRESS WARRANTIES<br />
OTHER THAN THOSE LISTED AND<br />
DESCRIBED ABOVE, AND NO WARRANTIES<br />
WHETHER EXPRESS OR IMPLIED, INCLUDING,<br />
BUT NOT LIMITED TO, ANY IMPLIED WAR-<br />
RANTIES OF MERCHANTABILITY OR FITNESS<br />
FOR A PARTICULAR PURPOSE,<br />
SHALL APPLY AFTER THE EXPRESS WARRANTY<br />
PERIODS STATED ABOVE, AND NO OTHER<br />
EXPRESS WARRANTY OR GUARANTY GIVEN<br />
BY ANY PERSON, FIRM OR<br />
CORPORATION WITH RESPECT TO THIS<br />
PRODUCT SHALL BE BINDING ON SAMSUNG,<br />
SAMSUNG SHALL NOT BE LIABLE FOR LOSS<br />
OF REVENUE OR PROFITS,FAILURE TO<br />
REALIZE SAVINGS OR OTHER BENEFITS, OR<br />
ANY OTHER SPECIAL, INCIDENTAL OR<br />
CONSEQUENTIAL DAMAGES CAUSED BY THE<br />
USE, MISUSE OR INABILITY TO USE THIS<br />
PRODUCT, REGARDLESS OF THE LEGAL<br />
THEORY ON WHICH THE CLAIM IS BASED,<br />
AND EVEN IF SAMSUNG HAS BEEN ADVISED<br />
OF THE POSSIBILITY OF SUCH DAMAGES.<br />
NOR SHALL RECOVERY OF ANY KIND<br />
AGAINST SAMSUNG BE GREATER IN AMOUNT<br />
THAN THE PURCHASE PRICE OF THE<br />
PRODUCT SOLD BY SAMSUNG AND<br />
CAUSING THE ALLEGED DAMAGE.<br />
WITHOUT LIMITING THE FOREGOING,<br />
PURCHASER<br />
ASSUMES ALL RISK AND LIABILITY FOR LOSS,<br />
DAMAGE OR INJURY TO PURCHASER AND<br />
PURCHASER’S PROPERTY AND TO OTHERS<br />
AND THEIR PROPERTY ARISING OUT OF THE<br />
USE, MISUSE OR INABILITY TO USE THIS<br />
PRODUCT SOLD BY SAMSUNG NOT CAUSED<br />
DIRECTLY BY THE NEGLIGENCE OF SAMSUNG.<br />
THIS LIMITED WARRANTY SHALL NOT EXTEND<br />
TO ANYONE OTHER THAN THE ORIGINAL<br />
PURCHASER OF THIS PRODUCT, IS<br />
NONTRANSFERABLE AND STATES YOUR<br />
EXCLUSIVE REMEDY.<br />
Some states do not allow limitations on how long an<br />
implied warranty lasts, or the exclusion or limitation<br />
of incidental or consequential damages, so the<br />
above limitations or exclusions may not apply to you.<br />
This warranty gives you specific legal rights, and you<br />
may also have other rights which vary from state to<br />
state. This product is for personal use only, and is<br />
only for use in compliance with the limitations of<br />
copyright and other laws.<br />
To obtain warranty service, please contact SAM-<br />
SUNG at: <strong>Samsung</strong> Electronics America, Inc. 400<br />
Valley Road, Suite 201 Mount Arlington, NJ 07856<br />
1-800-SAMSUNG (1-800-726-7864)<br />
www.samsung.com 081299
If you have any questions or comments relating to <strong>Samsung</strong> products,<br />
please contact the SAMSUNG customer care center.<br />
<strong>Samsung</strong> Electronics America, Inc.<br />
1-800-SAMSUNG (7267864)<br />
www.samsung.com<br />
REV 0.0


