

QUILTsocial | Issue 07
I'm so excited to share this issue with you, within it there are treasures of quilting know-how that will help you improve your quilting skills. One of my challenges is sewing Y seams, and who doesn't struggle with these at first? Follow the instructions and you'll be well on your way to achieving perfect results. Other essential skills you'll want to hone are achieving perfect points every time using easy foundation piecing, 2 ways to machine quilt a binding, improving your 5 quilt label essentials and the 7 critical questions to ask yourself before quilting your quilt. Plus...expand your creativity using Northcott ColorWorks Concepts fabric, using bright and colorful patterns that engage your quilting senses! Enjoy the patterns in this issue, and Happy Quilting!
I'm so excited to share this issue with you, within it there are treasures of quilting know-how that will help you improve your quilting skills. One of my challenges is sewing Y seams, and who doesn't struggle with these at first? Follow the instructions and you'll be well on your way to achieving perfect results. Other essential skills you'll want to hone are achieving perfect points every time using easy foundation piecing, 2 ways to machine quilt a binding, improving your 5 quilt label essentials and the 7 critical questions to ask yourself before quilting your quilt. Plus...expand your creativity using Northcott ColorWorks Concepts fabric, using bright and colorful patterns that engage your quilting senses! Enjoy the patterns in this issue, and Happy Quilting!

You also want an ePaper? Increase the reach of your titles
YUMPU automatically turns print PDFs into web optimized ePapers that Google loves.
Q .c<br />
UILTsocial<br />
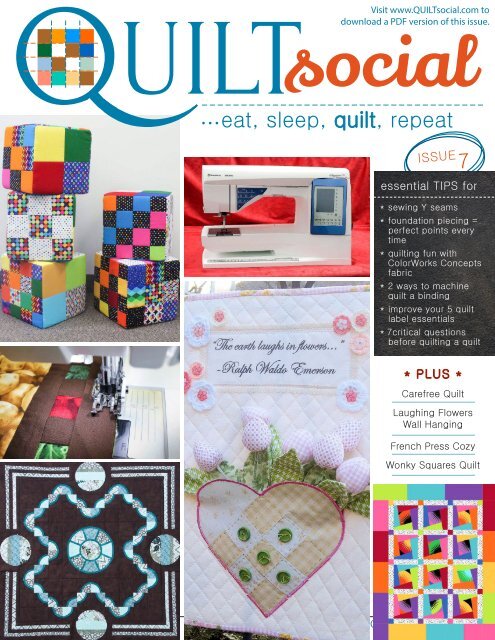
…eat, sleep, quilt, repeat<br />
Diagram 2<br />
Visit www.<strong>QUILTsocial</strong>.com to<br />
download a PDF version of this issue.<br />
ISSUE 7<br />
essential TIPS for<br />
* sewing Y seams<br />
* foundation piecing =<br />
perfect points every<br />
time<br />
* quilting fun with<br />
ColorWorks Concepts<br />
fabric<br />
* 2 ways to machine<br />
quilt a binding<br />
* improve your 5 quilt<br />
label essentials<br />
* 7critical questions<br />
before quilting a quilt<br />
* PLUS *<br />
Carefree Quilt<br />
Laughing Flowers<br />
Wall Hanging<br />
French Press Cozy<br />
Wonky Squares Quilt<br />
Q<br />
.com<br />
UILTsocial<br />
| issue 7 1
Artful<br />
evolution<br />
The creative sensation pro II sewing<br />
and embroidery machine is the evolution<br />
of the PFAFF ® brand’s advanced<br />
technology. The result is performance with<br />
superior precision and control.<br />
PFAFF, PERFECTION STARTS HERE, IDT (image), STITCH CREATOR, SHAPE CREATOR and CREATIVE SENSATION are trademarks of Singer Sourcing<br />
Limited LLC or its Affiliates. © 2016 Singer Sourcing Limited LLC or its Affiliates. All rights reserved. All statements valid at time of printing.<br />
NEW!<br />
Exclusive Double<br />
Ribbon Stitches<br />
PFAFF ® Precision Portfolio<br />
Perfect control in each and every stitch.<br />
• ActivStitch Technology<br />
This revolutionary technology delivers gorgeous embroidery<br />
even when using challenging threads like metallic.<br />
• The Original IDT System<br />
Absolutely even fabric feed from both the top and the bottom.<br />
Only from the PFAFF ® brand!<br />
• Precise Positioning feature<br />
Place every embroidery design exactly where you want it.<br />
• Exclusive Stitch Creator feature<br />
Create new 9mm stitches or edit built-in ones with<br />
professional finish.<br />
• Shape Creator feature<br />
Combine decorative stitches or design elements instantly to<br />
create unique borders and designs.<br />
Ask your local dealer for a personal<br />
demonstration!<br />
www.pfaff.com/en-CA<br />
NEW<br />
At participating Canadian dealers<br />
Like us on<br />
58 Summer 2016 NPT Ad_FNL.indd 1 2016-05-06 3:37 PM
editor's letter<br />
If you've been following me on Sunday<br />
QUILTing, a segment on <strong>QUILTsocial</strong><br />
blog, you'll remember I started making<br />
quilts with mom earlier this year. We<br />
decided to get together every Sunday<br />
(hence the name..) in the afternoon,<br />
tea included. We have joined forces for<br />
many reasons, one was to spend more<br />
quality time together, and since we<br />
would soon be done with light chit chat<br />
we thought it might be fun to make<br />
things together. Mom has been sewing<br />
clothes for over 50 years and has<br />
dabbled in quilting for the last seven<br />
years. This was my opportunity to get<br />
on with the projects in my stash. As I<br />
mentioned in my first post, 4 ways to<br />
work quilting in your busy lifestyle, it's<br />
a lot easier when you team up with a<br />
quilting friend, you share the work and<br />
it keeps you on a meeting schedule,<br />
like church.<br />
Here's our first quilt, completed in the<br />
spring called I Love to Knit. The fabric<br />
print, with sheep that knit and knitting<br />
jargon all over it, was absolutely<br />
impossible to resist as I happen to<br />
own a knitting obsession as well. The<br />
top and backing are both pieced as<br />
I wanted to make it reversible and<br />
use up all the fabric. I love everything<br />
about it, the way it was pieced and<br />
the way it was quilted - what a team!<br />
Since I bought this fabric, it has taken<br />
me a long time to cut it up, so we<br />
kept the pieces wide and long enough<br />
not to lose the funny knitting sheep<br />
and long script. We added fabric<br />
with text and flowers, and I just had<br />
to embroider the quilt label by hand.<br />
You can see and read more about<br />
this quilt, and the other two baby<br />
quilts we made in the summer, in the<br />
subsequent Sunday QUILTing posts.<br />
I hope you will find the technical<br />
articles and purposeful projects in this<br />
issue of <strong>QUILTsocial</strong> very helpful in<br />
accomplishing your quilting dreams.<br />
Cheerfully,<br />
follow me on<br />
3
Q<br />
UILTsocial<br />
.com<br />
… for those who gather with thread and fabric to<br />
‘eat, sleep, quilt, repeat’.<br />
PUBLISHER, EDITOR-IN-CHIEF, ART DIRECTOR<br />
Carla A. Canonico<br />
carla@<strong>QUILTsocial</strong>.com<br />
PUBLISHER, ADVERTISING SALES<br />
John De Fusco<br />
john@<strong>QUILTsocial</strong>.com<br />
PHOTOGRAPHERS<br />
John De Fusco, Carla A. Canonico, Alessia De Fusco<br />
BLOGGERS/CONTRIBUTORS<br />
Elaine Theriault<br />
crazyquilteronabike.blogspot.com<br />
Jean Boyd<br />
patternsbyjeanboyd.com<br />
Jennifer Houlden<br />
quiltsbyjen.ca<br />
Nancy Devine<br />
nancywhiskeynancyo.blogspot.com<br />
GRAPHIC & WEB DESIGN<br />
Carla A. Canonico<br />
carla@<strong>QUILTsocial</strong>.com<br />
Sandra Armas<br />
WEBSITE / BLOG : http://<strong>QUILTsocial</strong>.com<br />
Like us on Facebook : <strong>QUILTsocial</strong><br />
Follow us on Twitter : @<strong>QUILTsocial</strong><br />
WHERE TO GET YOUR COPY<br />
<strong>QUILTsocial</strong> is a quarterly eMagazine published by A Needle<br />
Pulling Thread. It is available free for personal use online at<br />
http://<strong>QUILTsocial</strong>.com.<br />
A limited number of printed copies of <strong>QUILTsocial</strong> are available for<br />
purchase at select quilt shops and specialty stores. Ask for it at your<br />
local shop. <strong>QUILTsocial</strong> is not available by subscription.<br />
QUILT SHOPS<br />
If you are interested in carrying <strong>QUILTsocial</strong> in your store, please<br />
email john@<strong>QUILTsocial</strong>.com.<br />
EDITORIAL<br />
Designers and other contributors who would like to be considered<br />
for future issues please email carla@<strong>QUILTsocial</strong>.com with a<br />
brief description of your work and your proposed project for the<br />
magazine.<br />
©2016 <strong>QUILTsocial</strong>. All rights reserved. <strong>Issue</strong> #7. ISSN 2368-5913.<br />
No part of this publication may be reproduced without written<br />
permission from the publisher.<br />
All designs, patterns, and information in this magazine are for private,<br />
non-commercial use only, and are copyrighted material owned by<br />
their respective creators or owners.<br />
◦{<br />
daily blog<br />
◦{<br />
weekly giveaways<br />
◦{<br />
monthly newsletter<br />
◦{<br />
quarterly magazine<br />
◦{<br />
Facebook page<br />
◦{<br />
Pinterest page<br />
◦{<br />
ALL of the above!<br />
<br />
ALL<br />
FREE!<br />
SIGN UP today at<br />
www.<strong>QUILTsocial</strong>.com<br />
and receive a free ebook<br />
Elaine’s Quilting Tech Tips!<br />
Advertiser Index<br />
55 A Needle Pulling Thread Magazine<br />
63 Brother<br />
62 Business Directory<br />
51 Coats<br />
64 Gütermann Creativ<br />
<strong>07</strong> Northcott<br />
2 PFAFF<br />
60 <strong>QUILTsocial</strong><br />
Q<br />
4 .com | issue 7<br />
UILTsocial
<strong>QUILTsocial</strong> issue 7<br />
c o n t e n t s<br />
6<br />
8<br />
14<br />
18<br />
28<br />
34<br />
42<br />
44<br />
48<br />
52<br />
56<br />
Hooked on Books<br />
Summer Berries Table Runner<br />
Summer Apron with a 10° Twist<br />
Laughing Flowers Wall Quilt<br />
The Wonky Squares Quilt<br />
Carefree Quilt<br />
French Press Cozy<br />
2 reasons to use the Dual Feed Foot<br />
2 ways to machine stitch a binding<br />
Tips for sewing Y seams<br />
Tips for using the Free Motion Foot<br />
Q<br />
.com<br />
UILTsocial<br />
| issue 7 5
hooked on books<br />
Scraps, Inc. (vol.2)<br />
15 Scrap–pieced Designs for the Modern Quilter<br />
Compiled by Susanne Woods Scraps, Inc. (vol.2)<br />
Most quilters present their finished quilts as gifts to friends and loved–ones, but<br />
often these projects leave extra fabric scraps that quiltmakers can't bear to just<br />
throw away. Scrap–based quilting titles are consistently best–sellers as quilters<br />
are always looking for new and innovative patterns to feature these treasured<br />
fabrics. Most often, these are the quilts that get kept by their maker as a reminder<br />
of all of the other quilts they have gifted over the years. Scrap quilts can be<br />
tricky to design due to the variety of color challenges that random scraps can<br />
introduce, but these patterns solve those issues through clearly illustrated color<br />
schematics.<br />
128 Pages, ISBN 978–1–940655–19–2<br />
Lucky Spool<br />
www.thomasallen.ca<br />
Quilting Basics<br />
Michael Caputo<br />
Have you ever thought about creating a patchwork quilt, but decided<br />
it would take too long or be too difficult? If so, Quilting Basics is your<br />
perfect introduction to this popular craft. Beginning with the "Getting<br />
Started" section, quilting teacher Michael Caputo will show the tools and<br />
equipment, and demonstrate the sewing skills you will need, plus the basics<br />
of constructing your quilt. Section two is a series of 12 workshops, each<br />
introducing you to new skills, with a project at the end which enables you<br />
to practice what you have just learned—a great way to get to grips with<br />
the theory. As you progress through the workshops, you'll learn how to join<br />
pre–cut squares, sashing, piecing and paper piecing, using templates, and the<br />
different types of applique.<br />
160 Pages, ISBN 978–1–78249–309–9<br />
www.thomasallen.ca<br />
Sewing Pretty Bags<br />
Debra Valencia & Cheyanne Valencia<br />
Sewing sisters Debra and Cheyanne present 12 quick and easy projects for<br />
sewing boutique handbags, shopping totes, pouches, and more. With step–by–<br />
step instructions and fresh, modern designs, they show how to make beautiful<br />
bags for both fashion and functional uses.<br />
Get inspired to express your unique personality with the stunning prints and<br />
colours of today’s contemporary fabrics. You’ll look stylish carrying your one–<br />
of–a–kind accessory, personalized with fancy trims, pockets, beads, flowers or<br />
embroidery.<br />
128 Pages, ISBN 978–1–57421–951–7<br />
Fox Chapel Publishing<br />
www.thomasallen.ca<br />
Sewing Essentials<br />
Serger Techniques<br />
Pamela Leggett<br />
Learn to operate your serger like a pro. Popular instructor and sewing expert<br />
Pamela Leggett demystifies the serger and makes using it fun with her<br />
invaluable guidance. Through this detailed guidebook and DVD workshop<br />
you will get to know your serger inside and out. Master once–daunting<br />
techniques and learn spool–threading secrets, how to adjust tension and<br />
control the fabric feed, and how to sew basic stitches lickety–split. Clear and<br />
concise instructions throughout the book make it easy to learn how to use<br />
flatlock stitching to secure heavy fabric, embellish with decorative stitching,<br />
or create heirloom–quality pintucks and ruffles. Whether you're a beginner<br />
or have sewing experience, this must–have reference will give you the<br />
confidence to do more with the serger than you ever thought possible.<br />
160 Pages, ISBN 978–1–62710–917–8<br />
Taunton Press<br />
www.thomasallen.ca<br />
Q<br />
6 .com | issue 7<br />
UILTsocial
Join the fun! www.NorthcottFabricCircle.com<br />
Join the fun! www.NorthcottFabricCircle.com<br />
TOSCANA<br />
100% cotton - looks like suede - feels like silk<br />
100% cotton - looks like suede - feels like silk<br />
Toscana captures the subtle tones and elegant textures of an Italian fresco and it<br />
Toscana<br />
looks just<br />
captures<br />
like suede!<br />
the subtle<br />
The kaleidoscope<br />
tones and elegant<br />
of 135 colors<br />
textures<br />
provides<br />
of an Italian<br />
a comprehensive<br />
fresco and it<br />
looks<br />
range<br />
just<br />
in values<br />
like suede!<br />
from<br />
The<br />
rich<br />
kaleidoscope<br />
shades to delicate<br />
of 135<br />
pales,<br />
colors<br />
ideal<br />
provides<br />
for contrast comprehensive<br />
in quilting.<br />
range in values from rich shades to delicate pales, ideal for contrast in quilting.<br />
Toscana is an ongoing blender program that is supported with a<br />
Toscana is an<br />
wide<br />
ongoing<br />
assortment<br />
blender<br />
of<br />
program<br />
patterns and<br />
that<br />
precuts.<br />
is supported with wide assortment of patterns and precuts.<br />
7
Using the right tools and fabrics can make a difference in<br />
the execution of these creative endeavors, but this series of<br />
projects can be accomplished just the same using what you<br />
have at home.<br />
In this installment, we explore a table runner for summer using<br />
fabric with a summer theme; however you can imagine this<br />
runner in another assortment of fabrics with fall, winter and<br />
spring themes. For fall you can tie in more harvest tones, or<br />
cooler winter tones. The idea is to envision this being used in a<br />
multitude of settings. This runner can be used on a picnic table,<br />
kitchen décor, dining room or family room setting. Or even a<br />
fireplace in the season chosen. It can be made to any size, and<br />
with all of the technique blocks shown here, you’ll have no<br />
shortage of creativity for adding more blocks to the runner.<br />
Besides exploring your creativity, you’re using a several<br />
techniques like circular decorative stitches that can be done<br />
in machine embroidery or using a circular attachment in<br />
sewing mode. These make the embellishing part of sewing and<br />
quilting easy and fun.<br />
You’ll also look at embroidery needle felting, vintage decorative<br />
stitching, and surface embellishment using free motion sewing.<br />
Each block of this runner that explores these techniques can<br />
be constructed as separate components to be used for hot<br />
pads, placemats, a focal element displayed in a picture frame or<br />
serving tray. Keep an open mind and adapt this table runner to<br />
your home decorating needs.<br />
Another idea would be to keep each element block separate<br />
and use the circular attachment tool to stitch a circle around<br />
each individual technique ‘block’ with right sides together of<br />
lining and fabric right side. Leave an opening in the seam and<br />
turn the blocks right side out. So there would be a needle<br />
felted embroidery piece, circular stitch piece, decorative<br />
vintage stitched piece in a circular shape and so on. Then using<br />
a bar tack the circles could be placed in an artistic array on your<br />
table. Sew many ideas!<br />
It’s important to remember that a mix of assorted fabrics gives<br />
the surface interest, and in this case linens, cottons, silk Dupioni<br />
and felt have been used to create texture and dimension. I<br />
think having a runner with 2 façades is so cool. I can adapt it to<br />
my mood, include more decorating options in one, and can be<br />
flipped depending on the occasion.<br />
I encourage you to adjust the patterns to your desired sizes,<br />
adjust the shapes if you like, and most of all have fun with it.<br />
Summer Berries<br />
table runner<br />
skill level intermediate<br />
finished measurements 45'' x 10'' [114.5 x 25.5cm]<br />
materials<br />
fabric<br />
• an assortment of cottons, linens, silk Dupioni<br />
• 20” [0.50cm] silk<br />
• 20” [0.50cm] linen<br />
• 2 Printed Cotton fat quarters for texturing<br />
• 2 INSPIRA® Fabric Magic pieces cut to the same size as<br />
each fat quarter<br />
• 6 Jelly Roll Strips 2½” x 45” wide for Vintage pieced blocks<br />
(other fabrics like silk can be substituted)<br />
• Linen for circular stitches and embroideries cut to the<br />
embroidery hoop size<br />
• Dupioni silk for embroidered lettering cut to desired size<br />
Q<br />
8 .com | issue 7<br />
UILTsocial
sewing feet used<br />
• embroidery foot<br />
• general sewing foot<br />
• topstitching foot with guide<br />
• ¼'' seam foot<br />
cutting tools<br />
• rotary cutter<br />
• cutting mat<br />
• INSPIRA® scissors<br />
embroidery requirements<br />
• embroidery software or built in machine<br />
embroidery designs<br />
• HUSQVARNA VIKING® suggested needle felting<br />
designs<br />
• PFAFF® suggested needle felted designs<br />
needles<br />
• INSPIRA® microtex needle size 80 or 90<br />
• INSPIRA® embroidery needles size 90<br />
threads<br />
• assorted colours of Robison- Anton® 40wt Rayon<br />
thread for machine embroidery<br />
• assorted colours of Sulky® 30wt Blendable threads<br />
for construction<br />
• all-purpose thread for construction<br />
stabilizers<br />
• INSPIRA® Tear N Wash with graph for making<br />
pattern<br />
• INSPIRA® Stabilizer Cut Away for machine<br />
embroidery lettering<br />
• INSPIRA® Stabilizer Fast & Easy Tear Away for<br />
decorative stitches – 1 piece<br />
• INSPIRA® Stabilizer Aqua Magic for ornamental<br />
embroidery on tea cozy<br />
other<br />
• circular attachment tool<br />
• needle felting kit for machine embroidery<br />
• craft or wool felt pieces for embroidery felting<br />
• standard hoop 260 x 200<br />
• metal hoop 180 x 130<br />
• extension table for your machine<br />
• quilting gloves<br />
• rick rack trim or assorted trims<br />
• stiletto for point turning<br />
• marking tools<br />
• Singer Steam Press<br />
• assorted buttons<br />
HUSQVARNA VIKING® DESIGNER EPIC sewing and embroidery machine<br />
Husqvarna Viking® provided the following sewing machine<br />
and products to make the sample:<br />
HUSQVARNA VIKING® DESIGNER EPIC sewing and<br />
embroidery machine<br />
HUSQVARNA VIKING® PREMIER+ ULTRA software<br />
The table runner design is one of the built-in signature<br />
designs and fonts on the HUSQVARNA VIKING®<br />
INSPIRA ® Stabilizers<br />
INSPIRA® Machine Needles<br />
INSPIRA® Scissors<br />
Robison-Anton® Embroidery Threads<br />
Sulky Threads<br />
Signature 40wt Cotton Machine Quilting Thread<br />
Hoops<br />
Q<br />
.com<br />
UILTsocial<br />
| issue 7 9
Software possibilities<br />
Back of needle felted embroidery<br />
Front of needle felted embroidery<br />
Needle felting components (1)<br />
instructions<br />
Preparation steps<br />
1. Prewash cotton and the other fabrics if<br />
desired.<br />
Note: It’s also important to measure the<br />
intended table, or create a size that can be<br />
used for a multitude of sizes.<br />
2. Create your patterns using INSPIRA<br />
Tear N Wash stabilizer with graph for<br />
making drawing easy. Adjust your<br />
pattern according to the size of your<br />
center table.<br />
3. All of the finished measurements<br />
of the blocks lettered from A-J<br />
are the measurements after the<br />
techniques were completed and cut<br />
to size as a finished block. So the<br />
starting measurements would vary<br />
depending on the size of the selected<br />
embroideries and the size of your table<br />
runner.<br />
Schematic of finished sizes of technique<br />
blocks letters A to J<br />
A B C D E F G H I J<br />
Cutting blocks<br />
A Single felted flower 6” x 11”<br />
B Textured block 6” x 11”<br />
C Triple Felted flower 12” x 11”<br />
D Decorative Vintage Stitch block 13” x 11”<br />
E Textured block 7” x 11”<br />
F Summer Berries Font embroidered<br />
block 13” x 11”<br />
G Textured Block 7” x 11”<br />
H Decorative Vintage Stitch block 13” x 11”<br />
I Circular Decorative Stitches 11” x 11”<br />
J Textured Block 7” x 7”<br />
If you have a sewing advisor on your<br />
sewing machine, set it to woven<br />
medium for this project.<br />
Thread your sewing machine with<br />
cotton thread for construction. Or Rayon<br />
thread for machine embroidery.<br />
Machine embroidery fonts<br />
1. Hoop the INSPIRA® Cut Away stabilizer<br />
and Dupioni silk, and load the built-in<br />
embroidery fonts of choice. In this<br />
case it was a size 40 Swirl. You may<br />
choose to pick a font from your<br />
Premier Software like Marlow 15-40<br />
mm. Always look at your fonts and<br />
decide if it suits the project.<br />
2. Thread the machine with 40 wt<br />
embroidery thread and bobbin<br />
thread.<br />
3. Explore the placement of the fonts,<br />
and preferred embroideries that can<br />
be incorporated at the same time. A<br />
simple theme was kept for Summer<br />
Berries. When the embroidery is<br />
complete cut way excess stabilizer.<br />
4. This embroidered block was cut<br />
larger to have enough room to add a<br />
2½” strip horizontally just below the<br />
letters, and a textured piece which<br />
was left over after all blocks were cut.<br />
These additional embellishments<br />
were each stitched on after the<br />
embroidery was complete using a<br />
straight stitch.<br />
5. Embellish with a piece of trim.<br />
6. Cut this block to desired size and press.<br />
7. Add buttons.<br />
Machine embroidery felting<br />
1. This particular design is a candle<br />
wicking embroidery. This is a great<br />
example of a built-in embroidery<br />
design being crossed over and used<br />
to do embroidery felting.<br />
2. Load your embroidery design, and<br />
install the Embroidery felting kit onto<br />
your machine.<br />
3. Following manufacturer’s instructions<br />
install all of the important items, work<br />
with a felting needle.<br />
4. Always experiment with<br />
embroideries. Candle wicking designs<br />
work beautifully. Try other designs.<br />
Have fun with it.<br />
Q<br />
10 .com | issue 7<br />
UILTsocial<br />
Instruction photos by Cheryl Stranges
5. Hoop the linen fabric and place the<br />
felt piece on top. The felt is visible<br />
as the embroidery design is felting.<br />
Essentially the felting needle will<br />
push the felt through the linen and<br />
the felted design is occurring on the<br />
underside facing your sewing table.<br />
See the design by removing the<br />
hoop from the machine and turning<br />
the hoop over.<br />
6. There are other ideas that can be<br />
incorporated into these felted pieces.<br />
Wool Roving can be used with or<br />
without the craft felt. It’s always a<br />
great idea to use a water soluble<br />
stabilizer on top of the roving to keep<br />
it in place.<br />
7. Also remember that when working<br />
with felting a great way to remove<br />
the excess felt after the embroidery<br />
is complete is with appliqué scissors.<br />
These allow to get in close to<br />
the roving or felt without cutting<br />
through the main piece, which in<br />
this case is the linen. You can go<br />
through the embroidery felting<br />
process more than once, if you<br />
prefer thicker looking designs.<br />
8. Quilting embroidery designs look<br />
beautiful. And can be repeatedly<br />
felted for a more pronounced<br />
finish. If you felt a hat for example<br />
and two pieces of polar fleece are<br />
felted together, use an invisible<br />
stitch outline around the design if<br />
you use invisible thread. Each style<br />
of project will dictate whether it’s<br />
necessary to do this. Most single<br />
layer of felted embroideries don’t<br />
require this extra stitching.<br />
9. Cut each of the felted embroidery<br />
pieces to desired size and press.<br />
Circular motion stitching using machine<br />
embroidery<br />
1. Select embroidery mode. Select<br />
a decorative stitch in the stitch<br />
menu. This could include quilting,<br />
fun, vintage or a multitude of<br />
other stitches.<br />
2. Choose a hoop size to work with.<br />
Include stabilizer in your hoop and<br />
linen fabric. Select a stitch, and select<br />
the shaping feature, shaping will allow<br />
you to place the stitches in many<br />
shapes. Circular shape was selected<br />
for this technique. Duplicate the<br />
stitch to accommodate the desired<br />
shape size and this will fill in the circle.<br />
Repeat these steps selecting another<br />
decorative stitch. Adjust the next circle<br />
size to correspond to the previous<br />
circle but a bit smaller. Repeat for<br />
each circle that will be larger than the<br />
previous circle.<br />
3. Bring decorative stitches into<br />
embroidery mode. Proceed to<br />
embroider the circles. When this is<br />
complete remove excess stabilizer. Cut<br />
this block to desired size.<br />
Free motion before Fabric Magic<br />
Free motion after Fabric Magic<br />
Q<br />
.com<br />
UILTsocial<br />
| issue 7 11
Textured pieces next to strip colours<br />
Pieced strips<br />
Circular motion stitching using the Circular Attachment tool<br />
1. This technique is done in sewing mode. Use manufacturer’s<br />
instructions to install the circular attachment tool to the<br />
machine. Prepare the fabric to be stitched with a piece of<br />
stabilizer on the underside.<br />
2. Select a decorative stitch, there are a variety of thread<br />
weights that work very well with this technique. Choose a<br />
bobbin thread, and use a topstitching needle.<br />
3. The measurements for the circle diameters are the<br />
measurement guides on the tool. So if you choose a 6” circle,<br />
you can stitch this wonderful stitch in a circular motion.<br />
4. Place the fabric with the pin inserted through the fabric and<br />
stabilizer and place into the tool.<br />
5. Exploring a variety of stitches, and diameter measurements,<br />
will yield a multitude of results. Once the stitches are<br />
on one circle, select another beautiful stitch; adjust the<br />
diameter measurement by sliding the measurement<br />
guide to the desired size. Place fabric with the pin inserted<br />
through the fabric and stabilizer again and place into the<br />
tool. Stitch another circle.<br />
6. Create as many as desired in different areas of the fabric.<br />
There are many shapes and templates to work with so enjoy<br />
this wonderful tool.<br />
7. Cut your technique block to desired size. Press.<br />
Creating surface embellishment<br />
1. Use each fat quarter to create an inspiring surface<br />
embellishment. Your INSPIRA® Fabric Magic can be cut the<br />
same size as the fat quarter.<br />
2. Thread the machine with 40wt Rayon thread or use Sulky<br />
Blendable. A topstitching needle is also recommended. But<br />
experiment with needles.<br />
3. Select a free motion setting and install a free motion sewing<br />
foot on the machine. Select a straight stitch. Proceed to<br />
free motion for small circles in a loopy fashion on the fabric.<br />
Having the Fabric Magic on the underside allows the fabric<br />
to slide very well.<br />
4. Use zigzag or other decorative stitches to free motion with.<br />
Fill in the entire area of the fat quarter. If you would prefer<br />
to sew without free motion, leave the sewing machine in a<br />
regular stitching mode.<br />
5. Use a channel quilting foot as a guide, or a multi-line<br />
decorative foot to select a straight or decorative stitch. And<br />
stitch rows first vertically and then horizontally across the<br />
fabric. Diagonal stitches work very well.<br />
6. When all of the stitching is complete, use a very good<br />
steam iron or press to hover above the stitches with a burst<br />
of steam. The fabric will immediately begin to kink up and<br />
create a wonderful texture. When this process is complete,<br />
cut your technique block to desired size.<br />
Jelly Roll blocks<br />
1. Cut the strips to desired length and an assortment of fabric<br />
types can be used. A 2½” x 12” length was used.<br />
2. Use the ¼” piecing foot and place each strip right sides<br />
together and stitch them one after another to create the<br />
block. When this step is complete, press each strip to one<br />
side.<br />
3. Place a piece of Tear Away stabilizer behind this piece and<br />
select Vintage stitches. 40wt Robison Anton thread and a<br />
topstitching needle were used for this project.<br />
4. Install a topstitching foot with guide onto the machine and<br />
stitch each of the vintage stitches down each seam.<br />
5. Remove any excess stabilizer when complete.<br />
6. Press.<br />
7. Cut this technique block to desired size. Press.<br />
Table runner construction<br />
1. Set sewing machine for sewing mode.<br />
2. Audition the table runner blocks in various orders. This is<br />
where a creative design wall is very helpful. You can place<br />
each piece on the design wall and move the order around<br />
until you get what you like.<br />
Q<br />
12 .com | issue 7<br />
UILTsocial
Vintage stitching<br />
Textured pieces next to strip colours<br />
3. Once you have decided what works well, prepare to pin each<br />
of the technique blocks right sides together, and join them<br />
to each other until you have a very long strip. The letters A to<br />
J in the schematic of blocks is simply a guide. You can create<br />
whatever you love. Some of your techniques may vary from<br />
ours, just remember to have fun. It’s all about the learning.<br />
4. Press your seams to one side on each panel.<br />
5. When complete fold the strip of creative blocks in half, right<br />
sides together. Stitch the last block on each of this runner<br />
strip short seams together. Leave an opening of about 4” in<br />
the seam. This is going to be used later to turn the runner<br />
right side out.<br />
6. Determine the order of the blocks now, as you have one<br />
big circular tube of blocks. The table runner is going to<br />
be different on the front and back. In this project the<br />
embroidered summer berries became the center focal point<br />
on the front. But any order will be fine.<br />
7. Place fabric right sides together and sew the long edges as it<br />
already has finished side seams. Place it on the sewing table.<br />
8. Cut the rick rack, and place in between the seams and pin<br />
into position between the long edges.<br />
9. Stitch the two long edges. When these are complete turn the<br />
table runner to the right side through the 4” seam opening.<br />
10. Press and close the seam.<br />
Cheryl Stranges<br />
Product & Event Specialist, Husqvarna Viking<br />
husqvarnaviking.com<br />
seecherylsew.blogspot.com<br />
Q<br />
.com<br />
UILTsocial<br />
| issue 7 13
S<br />
ummer<br />
apron<br />
with a<br />
10 degree<br />
twist<br />
The pattern is<br />
designed for<br />
a serger and<br />
topstitched<br />
with a sewing<br />
machine. It<br />
can be made<br />
completely<br />
with a sewing<br />
machine. The<br />
advantage of<br />
using a serger is<br />
that the exposed<br />
seams in the<br />
skirt are sewn<br />
and finished in<br />
one step.<br />
14<br />
Q<br />
.com<br />
UILTsocial<br />
| issue 7
skill level easy<br />
finished measurements<br />
top edge to bottom edge 26½” [67cm]<br />
skirt width 50” [127cm]<br />
materials<br />
fabric<br />
• 32” [80cm] Fabric 1 (floral)<br />
• 39” [100cm] Fabric 2 (solid)<br />
• 1yd package or 1yd x 20” Sulky Soft n Sheer extra<br />
required notions<br />
• Sew Easy 10⁰ Wedge Ruler<br />
• quilting ruler 6” x 24”<br />
• 45mm rotary cutter<br />
other<br />
• Kai Scissors 4½”<br />
• Heirloom Glass Head Pins<br />
• 4 spools Gütermann Serger thread<br />
• 30 wt Sulky Cotton Blendables thread<br />
• Topstitch needle size 90/14<br />
• Clever Clips<br />
• Clover Double sided basting tape<br />
• Heirloom Air-erasable marker<br />
• Heirloom Stop Fray<br />
Cutting<br />
Fabric 1<br />
Bib: 2 – 12” x 11” (1 lining and 1 bib front)<br />
Wedges: 2 – 17” x 14”<br />
Binding: 2 – 2½” x 22”<br />
Fabric 2<br />
Ruffle: 2 – 3½”x 40”<br />
Waistband/Ties: 2 – 4½” x 40”<br />
Neck Ties: 2 – 3½” x 40”<br />
Wedges: 2 – 17” x 12”<br />
Soft n Sheer Extra<br />
Bib: 12” x 11”<br />
Waistband: 2¼” x 20”<br />
Serger set up<br />
4–Thread Overlock Stitch<br />
Neck Ties<br />
1. Cut one neck tie strip 20” long. For each tie,<br />
place right sides together, serge the length and<br />
across one end.<br />
2. Put a dab of Fray Stop on the threads at the corners.<br />
3. Turn right-side out. Press and set aside<br />
Bib<br />
1. Fuse Soft n Sheer Extra to the back of the bib front.<br />
2. Place the lining and front right sides together on a cutting<br />
mat with 11” as the width.<br />
3. Line up the Sew Easy 10 degree wedge ruler with the #23<br />
along the bottom edge of the fabric with the edge of the<br />
ruler in the bottom right hand corner. Only trim off the<br />
excess fabric on the right hand side of the ruler and discard.<br />
4. Repeat for the left hand side of the bib.<br />
Inserting the neck ties<br />
1. On the right side of the bib front; place the raw edge end of<br />
each neck tie about ½” in from each side, along the top edge<br />
of the bib.<br />
2. Hold in place with double sided basting tape. Place the<br />
lining and the bib front right sides together.<br />
3. Serge across the top of the bib catching the neck ties in the<br />
seam. Check to make sure the tie ends have been caught.<br />
4. Serge the side seams. Put a dab of Fray Stop on the threads<br />
in the top corners.<br />
Waistband/Ties<br />
Serge the waistband/tie strips together to create one long strip.<br />
To create a firm waist band, place 2¼” x 20” piece of Soft n Sheer<br />
Extra to wrong side of the waistband centering it over the joint<br />
and matching one of the raw edges. Fuse in place.<br />
Skirt<br />
1. Using the Sew Easy 10 degree wedge ruler, place the #6<br />
along the 14” top raw edge of the fabric and the #23 along<br />
the bottom raw edge.<br />
2. Cut along both edges of the ruler. Discard the small wedge<br />
from the side.<br />
3. For second wedge flip the ruler 180 degrees lining up edge<br />
of ruler with cut edge of fabric, #6 along the bottom raw<br />
edge and #23 along the top raw edge.<br />
4. Cut 2nd wedge. Repeat for remaining wedges.<br />
Cut: 7 wedges from the 17” x 14” pieces of Fabric 1<br />
6 wedges from the 17” x 12” pieces of Fabric 2<br />
Q<br />
.com<br />
UILTsocial<br />
| issue 7<br />
15
Cutting the wedges on fabric.<br />
1. Serge the wedges together to create the skirt.<br />
Ruffle<br />
1. Serge the ruffle strips together to create one long strip.<br />
2. Change the serger settings to a Flat 3 thread or Rolled Hem.<br />
Serge the lower edge of ruffle. For a more decorative edge,<br />
thread the upper looper with Sulky 30wt blendable thread.<br />
3. Change the Serger back to a 4 thread overlock with a long<br />
stitch length and the Differential Feed increased to 2. Gather<br />
the top edge of the ruffle.<br />
4. Change the Serger Differential Feed to N. With right sides<br />
together; center and pin the ruffle to the bottom of the skirt.<br />
Serge in place. The ruffle will be slightly longer than the<br />
bottom skirt edge. Using a quilting ruler and rotary cutter,<br />
trim off excess ruffle.<br />
Binding for skirt sides<br />
1. On the short edge of each binding strip, press up ½”. When<br />
applied this will create a nice finish on the lower edge of the<br />
apron.<br />
2. Fold the binding in half lengthwise with wrong sides<br />
together and press.<br />
3. Starting at the bottom edge of the skirt, match the lower<br />
edge of the skirt with the folded edge of the binding, pin<br />
the binding to the wrong side of the skirt side, raw edges<br />
together. Serge in place. Repeat for the second side. Put<br />
a dab of Fray Stop on the threads at the bottom edge of<br />
binding. Press the binding to the right side of the skirt.<br />
Use double-sided basting tape or Clever Clips to hold the<br />
binding in place, hiding the serged seam. Note: The binding<br />
will be topstitched with the sewing machine.<br />
Assembling the apron<br />
1. Mark the center of the following pieces with an air erasable<br />
marker:<br />
• Lower edge of the bib<br />
• Upper edge of skirt<br />
• Waistband<br />
2. Matching the center marks, pin the bib to the upper edge of<br />
the skirt with the bib lining to wrong side of the skirt.<br />
3. Pin the waistband with the Soft n Sheer Extra to the upper<br />
edge of the skirt; right side of the skirt to right side of the<br />
waistband.<br />
Note: You should have a sandwich with the skirt between the<br />
waistband and the bib.<br />
4. Starting on the tie about 3” from the skirt edge, serge<br />
together.<br />
5. Fold the ties in half right sides together along the length.<br />
Serge across the ends of the ties. Serge the length of the<br />
ties starting at each end working towards the middle of the<br />
apron. Stop when you get to the serging from step 14. Put<br />
a dab of Fray Stop on the threads at the corners of the ties.<br />
Turn the ties inside out and press.<br />
Topstitching with a Sewing Machine<br />
Sewing Machine Set up<br />
Sewing Foot: Regular sewing foot<br />
Top and Bobbin thread: Sulky 30wt Blendable<br />
Needle: Topstitch needle size 90/14<br />
Stitch: Straight stitch<br />
Stitch length: 3 mm<br />
1. Reposition the binding if necessary and topstitch.<br />
2. Topstitch the neck ties.<br />
3. Topstitch the bib.<br />
4. Fold in the seam allowance on the waistband and press.<br />
Hold in place with double sided basting tape. Press the bib<br />
up from the back of the apron. Pin in place. Topstitch the<br />
waistband and ties.<br />
Note: This will hold the bib up.<br />
Q<br />
16 .com | issue 7<br />
UILTsocial
Photo courtesy of H.A.Kidd and Company Ltd.<br />
To add texture and movement, use variagated thread to sew seams.<br />
Sew Easy 10° Wedge Ruler<br />
Serge the wedges together to create the skirt.<br />
Donna Housley<br />
www.hakidd.com<br />
& Cathy McClean<br />
Q<br />
.com<br />
UILTsocial<br />
| issue 7 17
Using 3D elements<br />
for your wall quilt<br />
Nancy Devine<br />
Cheerful flowers after a long winter<br />
makes everyone smile.<br />
Tulips are one of my favorite<br />
flowers. They are simply elegant.<br />
Although they are a symbol of<br />
spring, they are often used in<br />
flower arrangements throughout<br />
the year.<br />
I dreamed up the Laughing Flowers<br />
wall quilt, which was inspired by<br />
a line in a Ralph Waldo Emerson<br />
poem.<br />
"The earth laughs in flowers..."<br />
– Ralph Waldo Emerson<br />
It's got some 3D elements, and<br />
high definition fun – what's life<br />
without whimsy?<br />
18
materials<br />
• fat quarter neutral fabric<br />
• fat quarter quilters' muslin<br />
• template plastic<br />
• Firm and Flexible interfacing (the kind<br />
used to create 3D items like vases and<br />
bowls)<br />
• fabric for quilt binding<br />
• quilt batting<br />
• fiber fill<br />
• various fabric scraps<br />
• laces and/or small doilies<br />
• small buttons<br />
• very firm woven fusible interfacing<br />
• Feather Lite HeatnBond<br />
• 505 spray<br />
• small Clever Clips<br />
• spring action thread snips<br />
• air erasable marker<br />
• Flatter pressing spray<br />
• green pipe cleaners<br />
• glue stick<br />
• embroidery floss<br />
• numbered quilting pins<br />
• Heirloom Stop Fray<br />
• ½” diameter wooden dowel<br />
• machine embroidery thread<br />
• Sew Smooth<br />
• Handmaid<br />
The woven heart flower basket is a<br />
traditional Scandinavian decoration.<br />
They're fun to make and quite useful for<br />
all sorts of things, but they are a bit of an<br />
acquired skill.<br />
In this tutorial, the hearts are made with<br />
heavy weight paper (which is traditional).<br />
I wanted to see if I could 'fabricate'<br />
them, employing the technology of<br />
heavy-duty interfacing and Fray Check.<br />
I was not disappointed.<br />
Weaving these hearts takes practice. I<br />
found that using a numbering system<br />
helped to follow the tutorial until I had<br />
the muscle memory to weave a heart<br />
without thinking about it. Those cute<br />
numbered pins helped a lot! Just be<br />
careful that you don't get scratched<br />
while you're weaving.<br />
Print the heart basket template.<br />
Cut two pieces of contrasting fabric, 7"<br />
wide x 18" long, as well as 7" wide x 18"<br />
long heavy duty woven interfacing. Fuse<br />
fabric to interfacing.<br />
Trace with an air erasable marker. Lift the<br />
middle portion of the heart template in<br />
order to trace the pattern.<br />
Weave the heart pieces together, then<br />
pull slightly on the sides to even the<br />
heart shape.<br />
Apply Fray Check to all the cut edges<br />
and allow to dry.<br />
A cardboard template and an air<br />
erasable marker help create the<br />
woven heart flower basket.<br />
These sweet numbered quilting pins help a lot with the<br />
weaving process.<br />
Once you've woven your heart, give it a good (and<br />
fragrant) press with Flatter.<br />
Q<br />
.com<br />
UILTsocial<br />
Photos by Nancy Dervine<br />
| issue 7 19
How making fabric tulips is a meditative process<br />
Nancy Devine<br />
Fill the basket with flowers you've made.<br />
Sew along the traced line of the leaves.<br />
Clip curves along the leaves before turning them.<br />
This will make the seam smoother and reduce<br />
overall bulk.<br />
Wrap pipe cleaner stems in thin strips of fabric.<br />
Let's make some flowers to fill the basket.<br />
I had planned to make about 6 flowers,<br />
but in the end, I made 9 blooms to fill the<br />
heart. Let's see how making fabric tulips is a<br />
meditative process.<br />
For the leaves, fold green fabric scraps<br />
double, right sides facing together. Lay the<br />
doubled fabric on top of a scrap of quilt<br />
batting.<br />
Trace the template onto the fabric side.<br />
Pin the layers together, leaving an opening<br />
for turning at the bottom of the leaf. Sew<br />
along the traced line of the leaves.<br />
Sew around the shape on the drawn line.<br />
Cut out the shape, adding ¼'' as you cut it<br />
out.<br />
Clip curves. Turn leaf right side out and push<br />
out the top of the leaf. Wiggle the seams to<br />
make sure they're smooth. Press well.<br />
Use green embroidery floss to hand quilt<br />
stitches long the outside of the leaf. Tear ¼''<br />
wide strips from the green fabric. Run a glue<br />
stick along the top of the strips. Wind fabric<br />
strips along the length of the pipe cleaner<br />
from top to bottom.<br />
Set aside to dry.<br />
For the tulip buds, sew the three sections,<br />
right sides together, starting at the dot<br />
marked at the top of the bud. Clip curves<br />
and turn right side out.<br />
Turn under ¼'' hem and hand sew it with a<br />
running stitch. Stuff the bud firmly with fiber<br />
fill. Pull up the gathering threads to keep the<br />
filling inside, but don't knot them.<br />
Dip the end of the fabric-wrapped pipe<br />
cleaner into PVC glue and then into the end<br />
of the tulip bud. Pull the gathering threads<br />
tight around the stem, and secure to the<br />
stem with a few stitches and then tie a knot.<br />
Knot tightly.<br />
Run a bead of PVC glue along the bottom<br />
third of the tulip leaf, and wrap the leaf<br />
around the stem, at its mid point. Secure<br />
with a small Clever Clip. When the glue is dry,<br />
join the leaf edges at the bottom with a bit<br />
of hand stitching.<br />
I found making fabric tulips a meditative<br />
process, and I hope you enjoy it too.<br />
Gather the ends of the stuffed flower head, and<br />
secure to the stem.<br />
A bit of hand quilting using embroidery floss on<br />
the leaves creates texture and interest.<br />
Leaves clipped to the stems<br />
Q<br />
20 .com | issue 7<br />
UILTsocial
Laughing flowers<br />
wall quilt templates<br />
*<br />
Tulip Bud<br />
Cut 3<br />
¼” Seam<br />
cut 2 of fabric<br />
cut 2 of interfacing<br />
RS<br />
cut along this line<br />
place on<br />
fold<br />
Tulip Bud<br />
Cut 3<br />
*<br />
Tulip Leaf<br />
¼” Seam<br />
RS<br />
cut along this line<br />
Nancy Devine for <strong>QUILTsocial</strong>.com<br />
Cut 2 of fabric<br />
Cut 1 of batting<br />
Add ¼” seam<br />
Q<br />
.com<br />
UILTsocial<br />
| issue 7<br />
21
Fray Check makes the woven<br />
heart strongerNancy Devine<br />
A lovely basket that elevates our quilt into another dimension.<br />
These next steps for making a cheerful Scandinavian–<br />
inspired quilted wall hanging, will have a lot of help<br />
from Fray Check, a stabilizer, the running and zigzag<br />
stitches.<br />
Now that the cut edges of the basket have been<br />
stabilized by the skillful application of Fray Check, let's<br />
get it ready for placement on center stage of the<br />
Laughing Flowers wall quilt.<br />
Clip any stray threads that have not been contained by<br />
the Fray Check.<br />
Outline each square of the woven heart with<br />
embroidery thread, using a running stitch. This is quite<br />
tricky, but it's necessary to stabilize the weaving.<br />
A stunning pair to create a lovely edge to our woven basket.<br />
Outline each square of the heart weaving with embroidery thread, using a<br />
running stitch.<br />
Q<br />
22 .com | issue 7<br />
UILTsocial
Quote for printing on inkjet fabric. in two font styles<br />
Apply Fray Check to the cut edges of the woven basket fingers.<br />
Zigzag the edges of the heart, taking care not to accidentally<br />
sew it closed, I found that marking the start and stop points<br />
of the bottom of the heart with pins was helpful. I used<br />
embroidery thread and a machine embroidery needle to do<br />
the stitching.<br />
You'll find the embroidery needle is both very sharp and has a<br />
larger, stronger eye to accommodate the thicker, more robust<br />
embroidery thread. Using the proper needle will ensure that<br />
the stitches are pretty and the thread won't break.<br />
Iron on another piece of heavyweight woven interfacing<br />
trimmed, about ¼'' smaller than the heart, to the back of the<br />
shape. This will help stabilize it before it's attached to the wall<br />
quilt.<br />
Download the wording for the quilt and print it out on inkjet<br />
printer fabric. If you prefer, you can download this version and<br />
embroider the words onto the wall quilt. If you're doing this,<br />
you'll need to use some stabilizer, and do the embroidery prior<br />
to the quilting.<br />
I like to cut out the wording patch using a wave-edge rotatory<br />
cutter, but pinking shears are also an option.<br />
Now that stabilizer and Fray Check have made the woven heart<br />
stronger, we'll be quilting the substrate for our wall quilt, which<br />
is an artsy fancy way of saying getting the backdrop ready for<br />
the our laughing flowers basket.<br />
Zigzag the edges of the heart basket, making at least two passes to fill in the edge.<br />
Sew the buttons to the heart, and then tie them for a decorative finish.<br />
Q<br />
.com<br />
UILTsocial<br />
| issue 7 23
Sulky's PolyLite thread adds<br />
shimmer to wall quilt<br />
Nancy Devine<br />
Spray baste all the layers of the quilt sandwich.<br />
We wove together and decorated a sweet woven heart basket<br />
for our Laughing Flowers wall quilt. Let's get the background<br />
quilted and ready for the flower–filled basket. The background<br />
will be a little thicker than the usual quilt so it can support<br />
the 3D woven heart basket, let's see how to create a more<br />
solid background for the wall hanging. Then, we'll add some<br />
shimmer to it with Sulky's PolyLite thread.<br />
There's been a lot of hands-on work involved in this little<br />
quilt so far, and there's more to come. When you change your<br />
machine's needle to work on the quilted substrate of this quilt,<br />
take a moment to take care of your hands with a good quality<br />
lotion. I like Handmaid in a scent called Celebration. It smells<br />
like birthday cake, and that's the best smell in the world –<br />
well, next to new fabric...<br />
The quilt sandwich is a bit different:<br />
•18 • x 22 neutral fabric<br />
••<br />
batting<br />
••<br />
ultra firm interfacing<br />
••<br />
batting<br />
••<br />
muslin<br />
A match made in heaven! Hands that sew can use some tender care.<br />
A walking foot and quilting guide makes short work of creating<br />
the diamond quilt pattern.<br />
Q<br />
24 .com | issue 7<br />
UILTsocial
Press all the layers together so they're smooth. Spray baste the layers<br />
together, and use safety pins to secure the corners.<br />
I elected to quilt the wall quilt in a diamond pattern, using Sulky's PolyLite<br />
thread in a pale pink because I love the little shimmer it creates.<br />
Install your walking foot according to the manufacturer's instructions. At<br />
this time, I also changed my machine needle because this is a robust quilt<br />
sandwich. A new, sharp quilting needle will go through the layers more<br />
easily and create beautifully formed stitches.<br />
Use a quilting ruler to draw a line on the diagonal, from the top to the<br />
bottom of the quilt sandwich, this will be your quilting guide. Stitch<br />
quilting lines, first in one direction and then the other to create the<br />
diamond pattern.<br />
Once the quilting is finished, embellish your quilt with the wording label<br />
using your stash of lace, buttons, and small doilies.<br />
Spray baste the back of the woven heart and place on the quilted<br />
background.<br />
Stitch to the background, very close the edge of the heart, taking care not<br />
to sew it closed. (see photo)<br />
Sometimes we'll look at a quilt and know it's something wonderful, and<br />
small details like Sulky's PolyLite thread that adds shimmer is a detail that<br />
makes all the difference. We're going to finish up our laughing flowers<br />
wall hanging. It's already making you pretty happy, right?<br />
Embellish the wording label with a lacy edge.<br />
...but don't stitch the heart closed.<br />
Stitch the heart to the quilted substrate...<br />
Q<br />
.com<br />
UILTsocial<br />
| issue 7 25
2 Sewing tools<br />
to make binding a quilt easier<br />
Nancy Devine<br />
The finished details in our Laughing Flowers Wall quilt are revealed today.<br />
We're going to create a hanging system and bind the<br />
quilt using 2 sewing tools to make binding a quilt<br />
easier: Flatter starch free spray and small Clever Clips.<br />
From coordinating fabric, cut two 5" squares. Fold in<br />
half on the diagonal and press with a dry iron. Don't<br />
use steam as it will distort and stretch.<br />
Pin the folded triangles to the top edge of the wall quilt,<br />
matching the raw edges.<br />
Stitch the hanging pocket very close to the edge of<br />
the quilt, and then again, slightly more inward from<br />
the first stitching.<br />
Cut 20 – 4" squares of coordinating fabrics and<br />
join them together, alternating patterns. Cut the<br />
resulting strip of fabric in half, and sew the two<br />
halves together along one short edge. This is the<br />
binding for the quilt. Bind the quilt. For tips on how,<br />
follow Elaine Theriault's excellent <strong>QUILTsocial</strong> tutorial<br />
on binding a quilt.<br />
Press the binding to the back of the quilt and clip<br />
with Clever Clips. If you do this while the pressed<br />
edge is still warm, the fabric will really hold a crisp<br />
crease. It's a great solution for those corners that<br />
persist in looking a little more loose than desired.<br />
Press pieces Flatter for a charming pieced border.<br />
Sew the hanging corners close to the edges of the top of the quilt.<br />
Q<br />
26 .com | issue 7<br />
UILTsocial
Slip stitch the binding to the back.<br />
Raid your stash of mini doilies and pretty<br />
buttons to make this wall quilt shout<br />
hello to spring!<br />
Create a label for your wall quilt, and<br />
iron it on to the back using HeatnBond<br />
Featherlite.<br />
Dip the ends of the blooms in PVC glue,<br />
and place in the basket. Allow the flower<br />
arrangement to dry.<br />
Once the glue has dried, assess which<br />
ones might still be a bit floppy. These can<br />
be tacked to the quilt using tiny hand<br />
stitches. If the edges of the basket are not<br />
secure enough, they can be secured with<br />
hand or machine stitching.<br />
If you like, tack a couple of ribbon or raffia<br />
bows to the edges. Insert wooden dowel<br />
and hang for everyone to enjoy!<br />
That's all from me for now, I hope you've<br />
found these 2 sewing tools to make<br />
binding a quilt easier, useful. This basket<br />
full of fabric tulips is a pretty, hopeful and<br />
happy welcome to the coming spring.<br />
Until we meet again, remember to make<br />
a mess and have some quilting fun!<br />
Mini doilies and pretty buttons make this wall<br />
quilt shout hello!<br />
Add a quilt label to your quilt.<br />
Use small Clever Clips to secure the binding to<br />
the back of the quilt, bonus: zero scratches from<br />
the pins!<br />
Slip stitch the binding to the back of the quilt.<br />
Q<br />
.com<br />
UILTsocial<br />
| issue 7 27
quilting fun with<br />
ColorWorks<br />
Concepts<br />
fabric<br />
Jean Boyd<br />
This was left over from the original "Soho" panel I used<br />
in a project from QUILTsocia <strong>Issue</strong> 6.<br />
Let’s have some more quilting fun with the new ColorWorks Concepts<br />
fabric from Northcott! In <strong>Issue</strong> 6 of <strong>QUILTsocial</strong>, I showed you how to make<br />
placemats, a table topper and a table runner using the Soho Panel and<br />
coordinating fabric from this new, modern collection from Northcott. You<br />
can have a look at all the fabrics here. You can also find out which quilt shops<br />
in the USA and Canada have these fabrics by using the Product Finder link at<br />
the top of the page on the Northcott web site.<br />
Table topper, table runner and placemats using the Northcott "Soho" panel<br />
I started with one Soho panel and some<br />
coordinating solids. After finishing my<br />
table set, I still had fabric left over. The<br />
panel had sections cut out of it, but I<br />
knew I could figure out a way to use the<br />
leftovers to make a small quilt.<br />
I designed this little quilt using the<br />
Electric Quilt program. I’ll show you how<br />
to make your own version of the quilt.<br />
Here’s how I started. I cut the remaining<br />
panel pieces into squares and<br />
rectangles. You need 12 of these pieces<br />
for the quilt. The squares will be about<br />
4½" and the rectangles will be about<br />
3½" x 4½". The measurements don’t<br />
have to be exact as long as they are<br />
approximately this size.<br />
To complete the blocks, I decided to<br />
use these 7 solids from the ColorWorks<br />
collection by Northcott, but you may<br />
choose other colors if you wish. You<br />
need 20" of each of the 7 colors. From<br />
each fabric, cut 3 – 3" strips on the<br />
lengthwise grain. Cut the strips into 7½"<br />
lengths. You'll have 6 strips 3" x 7½" of<br />
each color.<br />
Q<br />
28 .com | issue 7<br />
UILTsocial
let's make the<br />
Wonky Squares<br />
quilt<br />
Leftover Panels from the New York Beauty Panel<br />
20" of each of 7 different solids<br />
Cut 6 – 3" x 7½" strips from each solid color fabric<br />
Photos by Jean Boyd<br />
Q<br />
.com<br />
UILTsocial<br />
| issue 7 29
Making<br />
tilted<br />
quilt blocks<br />
with Soho<br />
fabric panels<br />
Jean Boyd<br />
Now that you have everything cut out, let’s start making the<br />
tilted quilt blocks for the Wonky Squares quilt using the colorful<br />
Soho fabric panels. Choose 4 different solid color strips to go<br />
around a center square or rectangle. Sew the first strip to the<br />
center square using a partial seam. Press seam toward strip.<br />
Sew the next strip on the left side of<br />
the block. Press seam toward strip. Trim<br />
excess fabric.<br />
Sew the next strip across the top of the<br />
block. Press seam toward strip. Trim<br />
excess fabric.<br />
Sew the last strip across the bottom.<br />
Q<br />
30 .com | issue 7<br />
UILTsocial
Finish sewing the partial seam on the<br />
first strip. Press the block carefully. Trim<br />
excess fabric.<br />
Place a 7½" plastic ruler square or a 7½" square of<br />
template plastic on the block on an angle.<br />
Trimming the Block<br />
Place a 7½" plastic ruler square or a 7½"<br />
square of template plastic on the right side<br />
of the block, lining up the center with the<br />
center of the fabric square. Place the ruler on<br />
an angle, tilting to the right.<br />
If you're using a plastic ruler square as shown<br />
in the picture above, you can rotary-cut<br />
around all 4 sides to make a 7½" block. Using<br />
a revolving cutting mat is helpful.<br />
If you're using a square of template plastic,<br />
use a fabric marking pencil to trace around<br />
the plastic. Then rotary-cut on the drawn<br />
lines to make a 7½" block. Handle carefully<br />
because all the outside edges are on the bias.<br />
Make 11 more 7½" blocks like this. The ruler<br />
can be placed at a different angle on each<br />
square to give more variety to the blocks.<br />
You can also tilt the ruler to the left on 6 of<br />
the squares for even more visual appeal. You<br />
may have to cut a few more 3" x 7½" strips to<br />
complete all the blocks.<br />
Next, we need to put these titled quilt blocks<br />
together to make the Wonky Squares quilt top.<br />
Rotary-cut the block.<br />
Handle carefully to avoid stretching the outside bias<br />
edges.<br />
Q<br />
.com<br />
UILTsocial<br />
| issue 7 31
SEWING the<br />
tilted<br />
quilt<br />
blocks<br />
& sashing<br />
Jean Boyd<br />
ColorWorks Concepts fabric for the sashing<br />
Now it’s time to start sewing the tilted<br />
quilt blocks and sashing. At this stage<br />
of construction, it’s a good idea to place<br />
the blocks on a design wall or on the<br />
floor, so you can arrange them to create<br />
good color balance.<br />
For the sashing, I used another of the<br />
ColorWorks Concepts coordinates. This<br />
print is a little more neutral so it tones<br />
down the bright colors in the blocks. You<br />
will need 20" of fabric.<br />
Cut 31 strips 2" x 7½" on the lengthwise<br />
grain of the fabric. The edges of the<br />
blocks are all on the bias, so cutting the<br />
sashing on the lengthwise (less stretchy)<br />
grain will help to stabilize the blocks.<br />
Place the sashing strips between the<br />
blocks on your design wall.<br />
Cut 20 – 2" squares from scraps of the<br />
solids for the sashing squares. Place<br />
them on your design wall along with<br />
the rest of the quilt pieces, arranging the<br />
colors as desired.<br />
Sew the 3 blocks and 4 sashing strips<br />
from Row 1 together like this. Press<br />
seams toward sashing.<br />
Sew the remaining 3 rows of blocks and<br />
sashing in the same way.<br />
Sew blocks and sashing strips together.<br />
Sew 4 – 2" squares and three sashing<br />
strips together like this.<br />
Press seams toward sashing strips.<br />
Make a total of 5 sashing rows.<br />
Sew the sashing strips with squares to<br />
the completed rows.<br />
Sew the sashing strips with squares to the<br />
completed rows.<br />
Now that you've finished sewing the<br />
tilted quilt blocks and the sashing, it’s<br />
time to add the border. I’ll be using<br />
the leftover solids from the ColorWorks<br />
Premium solids collection by Northcott.<br />
ColorWorks Premium Solids<br />
Arrange the blocks as in diagram<br />
Q<br />
32 .com | issue 7<br />
UILTsocial<br />
Place sashing strips and 2" squares on the<br />
design wall.
a clever<br />
way<br />
to make a<br />
more<br />
interesting<br />
quilt<br />
border<br />
Sew the first side<br />
border with a<br />
partial seam.<br />
From each solid color, cut 1 or 2 – 5½" strips on the<br />
lengthwise grain. My strips measure between 10" and 14"<br />
in length. It makes a more interesting border if the strips<br />
are different lengths.<br />
Put the completed blocks on a design wall or the floor.<br />
Start placing the strips around the outside of the blocks<br />
until you have an arrangement you like. You may have to<br />
cut a few extra 5½" strips.<br />
You need to have 2 side borders that measure about 43"<br />
and top and bottom borders that measure about 34".<br />
Sew the border strips together, end to end, to make the<br />
length you need for each side. Press seams open.<br />
Sew on the first side border with a partial seam. The<br />
bottom of the border should be even with the bottom of<br />
the quilt. Press seam toward border.<br />
Sew on the bottom border next. Press seam toward border.<br />
Trim excess fabric.<br />
Sew on the next 2 borders, trimming excess fabric as<br />
needed. Then complete the seam in the first border.<br />
After making the borders, you'll probably have enough<br />
solid color fabrics left to make a pieced backing. Another<br />
opportunity to get creative!<br />
Press the quilt top carefully and you're all ready for quilting!<br />
I hope you enjoyed making the borders this way, it cuts<br />
from the monotony.<br />
Borders are sewn on<br />
Q<br />
.com<br />
UILTsocial<br />
| issue 7 33
Carefree Quilt<br />
4 tips for keeping your quilt pieces in order<br />
Jennifer Houlden<br />
The new layout<br />
You might recall that in <strong>Issue</strong> 6 of <strong>QUILTsocial</strong><br />
I started a piece that had lots of 4½'' squares<br />
with ¼ circles added to them, I was having<br />
fun playing with the Carefree Curves circle<br />
templates. Now it’s time to put these squares<br />
together but keeping track of them could<br />
be a challenge. So here are 4 tips for keeping<br />
your quilt pieces in order as you sew them<br />
together – no reverse sewing today!<br />
When I pulled out the project to continue<br />
working on it I realized I still had a lot of work<br />
to do. My original layout has gone and I have<br />
come up with a new layout that I like better<br />
and it uses up more of the shapes I made last<br />
month. I tend to like symmetry in my designs<br />
and this one will be no exception.<br />
First things first I need to finish putting bias<br />
strips around all of the ¼ circles before I can<br />
sew the squares together.<br />
Here the bias strips are all sewn in place.<br />
Doesn’t that Sulky rayon thread just shine on<br />
the dark teal fabric? I'm very happy with how<br />
the light thread contrasts with the dark fabric.<br />
TIP 1 – Design Wall<br />
Lay out all the pieces on a design wall.<br />
Working off a design wall means that you<br />
can work on sections at a time but still see<br />
the whole project and keep track of where<br />
everything goes.<br />
At one time I used a bed to lay everything out<br />
on but it's hard to see the whole picture on a<br />
bed. The design wall that you stand back from<br />
and look at from a distance works a whole lot<br />
better to see the whole picture at once.<br />
TIP 2 – Camera<br />
Take a picture. A picture is worth a thousand<br />
words and it tells you where each piece is<br />
suppose to be when you can’t remember.<br />
More times than not I have mixed up the pieces<br />
and since I took a picture it was easy to see<br />
what I had done wrong so the fix was quick.<br />
Without a picture it takes a lot longer to see<br />
where the piece was turned the wrong way.<br />
Project pieces laid out on the design wall<br />
Q<br />
34 .com | issue 7<br />
UILTsocial<br />
Photos by Jennifer Houlden
Labels HeatnBond bias tape maker and bias strip Laid out 9 patch block<br />
TIP 3 – Labels<br />
Label your pieces. Use numbers, letters or a combination of<br />
each.<br />
Use small sticky labels to write the row number and position<br />
letter on. Masking tape works but I found that if ironed too<br />
much it's hard to peel off the fabric and leaves a sticky residue<br />
whereas the sticky labels don't.<br />
Or use flower head pins with numbers and letters written on in<br />
marker. You can also purchase already numbered pins from your<br />
LQS – I unfortunately, do not have any so I made my own.<br />
TIP 4 – Arrange by machine<br />
Lay out the block you're working on in order by your sewing<br />
machine when sewing it together, this will ensure that each<br />
piece is placed in the appropriate spot when sewn together -<br />
well unless the little gremlins who hide in the closet come and<br />
mess them up when you aren’t looking.<br />
Note I have sticky notes on mine as well. I tend to use all 4<br />
methods to keep track of my pieces that way I shouldn’t have to<br />
do any reverse sewing because nothing gets mixed up.<br />
All those 4½'' squares are sewn into either 9 patch or 12 patch<br />
blocks waiting for the center to be decided upon. I’m going to<br />
put one of the wagon wheel designs in the center. But oh no, I<br />
ran out of the pre-made fusible tape that goes with the Clover<br />
fusible bias tape maker. What to do?<br />
No worries, I’ll use the bias tape maker to press the strip of fabric<br />
into the right shape and size. Then cut a piece of HeatNBond<br />
Lite and iron it to the back side of the bias tape.<br />
It worked like a charm and I'm back in business.<br />
The center of this quilt is done and isn’t the symmetry of the<br />
design wonderful. As you can see I added the circles which are<br />
going to flow into the border but that’s for tomorrow along<br />
with some tips on quilting.<br />
I had an easy time sewing all the 4½'' squares together with<br />
no reverse sewing and no mix ups thanks to using those 4 tips<br />
for keeping your quilt pieces in order.<br />
Quilt center complete<br />
HeatnBond strip fused to back of bias tape<br />
Q<br />
.com<br />
UILTsocial<br />
| issue 7 35
7<br />
Jennifer Houlden<br />
critical questions before quilting a quilt<br />
I kept track of everything and was able<br />
to put all those squares together without<br />
any reverse sewing thanks to those great<br />
organization tips I used. They sure made<br />
life much easier. I've put the borders on<br />
and now it's time to think about quilting<br />
this masterpiece. There are 7 questions<br />
to ask yourself before quilting a quilt.<br />
Borders on the quilt – just need to outline the<br />
circles in dark teal<br />
When I first decided to outline the pieces<br />
with the dark teal bias tape I wasn't so<br />
sure about it and really wasn't sure I<br />
would like it but I love it. It adds to the<br />
quilt and makes the fabrics and shapes<br />
pop. Now just to add it to the circles in<br />
the border.<br />
As you can see I have an uneven border.<br />
I've always wanted to make an uneven<br />
quilt but this one is still symmetrical. It<br />
could result in issues with binding but I'll<br />
leave that conundrum for another day.<br />
Now it's time to get on with the quilting<br />
and answer those 7 questions.<br />
Question 1 – Will the quilt be washed?<br />
If the quilt is an art quilt then more<br />
than likely it will never see the inside<br />
of a washing machine but if it's a kid's<br />
quilt then it may see the inside of the<br />
washing machine many, many times. If<br />
the fabrics were not pre-washed then it's<br />
a really good idea to add a dye catcher<br />
to the first couple of washes to catch any<br />
excess dyes and prevent dye running<br />
into lighter colored fabrics.<br />
Q<br />
36 .com | issue 7<br />
UILTsocial<br />
Pink tinged dye capture sheet that captured red dye<br />
I have had great success with the Dylon<br />
Dye Capture sheets which I picked up<br />
at my LQS. Here's one that has turned<br />
pink as it caught the red dye circulating<br />
through the wash water.<br />
Also if you're going to be washing the<br />
quilt this will determine the amount of<br />
quilting being done on the piece. For<br />
overall even shrinkage you don't want<br />
the quilting lines to be any further apart<br />
than 6" – 10". This is also dependent on<br />
the type of batting being used. I tend<br />
to stick with closer quilting lines when I<br />
know it's going to be washed.<br />
Question 2 – What type of thread?<br />
Cotton, rayon, polyester? Thread that<br />
matches or contrasts? I tend to use a<br />
variety of threads. For this piece I picked<br />
out a few spools in teals and browns,<br />
cotton and rayon.<br />
Array of Sulky thread in cotton and rayon<br />
I decided to use one of the lighter brown<br />
Gütermann rayon threads in 30 wt as<br />
I want the background to lighten up<br />
slightly as I find it very dark. By using<br />
a lighter colored thread I'll get a high<br />
contrast which will take away from<br />
the dark background and show off the<br />
quilting lines. The rayon thread will add a<br />
shine to the background as well.<br />
A great way to test the color on the fabric<br />
other than just lying a piece on the quilt is<br />
to put a little sandwich together and sew<br />
a few lines. This will give you an idea of<br />
whether you like it or not and whether it<br />
provides the contrast you're looking for.<br />
My favorites are the two darkest. And<br />
here I thought I was going to go with a<br />
lighter thread for contrast. Now I'll have<br />
to rethink what look I want.<br />
Auditioning threads on the brown fabric<br />
The bobbin thread I tend to match to the<br />
top thread – it may or may not match<br />
the backing fabric. I also tend to use a 50<br />
wt cotton thread such as Gütermann in<br />
the bobbin no matter what is on top.<br />
I like to use backing that goes with the<br />
front of the quilt and the thread may<br />
or may not blend in with the backing.<br />
If a busy background is used then the<br />
stitches on the back of the quilt will<br />
blend in with the fabric more. If a plain<br />
backing is used the stitches will stand<br />
out more. It all depends on the look you<br />
want and whether you want to hide<br />
your stitching.
Question 3 – What type of batting?<br />
There are many different battings on<br />
the market. There are cotton, blends of<br />
cotton with either bamboo, polyester<br />
or wool, pure wool (one of my favorite),<br />
bamboo, silk and polyester to name a<br />
few. Batting is very much a personal<br />
preference and can be project specific.<br />
For this project I'm using a 100% cotton<br />
because I don't want it to have much<br />
loft. If I wanted loft I could use one that<br />
is a blend 80% cotton and 20% polyester.<br />
Loft is puffiness. Children's quilts look<br />
great with some loft as do bed quilts.<br />
Wall hangings and art quilts tend to look<br />
best with a very low loft or thin batting<br />
such as cotton, silk or bamboo.<br />
Question 4 – How should it be basted?<br />
Basting is a very personal thing. There are<br />
3 different ways to baste a quilt – safety<br />
pins, 505 adhesive spray or stitched with<br />
a basting stitch. My favorite is safety pins.<br />
The key with all three is to make sure<br />
the quilt layers are not going to move<br />
when quilted. There is nothing worse<br />
than finding puckers and folds in the<br />
backing after going to all that hard work<br />
of quilting a quilt.<br />
Follow the directions on the spray<br />
adhesive – some need to be ironed to<br />
set the layers while others don't. And<br />
some don't work very well with polyester<br />
fabrics such as Minkee fabric.<br />
With pins, my rule of thumb is to have<br />
them a fist width apart. This ensures<br />
nothing moves as it gets sewn and<br />
manipulated through the sewing machine.<br />
Quilt sandwich basted with pins<br />
Question 5 – Walking foot or free<br />
motion quilting?<br />
This depends on what you're most<br />
comfortable with, what the quilt is for<br />
and what most suits the quilt design.<br />
For this piece I'm going to do echo<br />
quilting with the walking foot to fill in<br />
the large open spaces. I could do the<br />
echo quilting with the free motion foot<br />
but I have much more control with the<br />
walking foot and the stitches remain<br />
perfect and even. With echo quilting it's<br />
important to have control in maintaining<br />
even spacing for the result to look good.<br />
Quilting feet<br />
Question 6 – What marking tool to use?<br />
Oh there are so many different marking<br />
tools on the market. My favorite are 3<br />
from Clover.<br />
The Clover Chaco Liner which comes<br />
in several different colors and has a<br />
wheel that dispenses a chalk line as it<br />
moves along the fabric. The chalk usually<br />
disappears when sewn over but if not it<br />
can be wiped away with your hand.<br />
The Clover White Marking Pen which is<br />
awesome on dark fabrics. Just remember<br />
that it takes time for it to show up after<br />
you draw the line. To get rid of the line<br />
just iron over it. This will work perfect on<br />
the dark brown background fabric.<br />
The Clover Blue Water Erasable works on<br />
medium and light fabrics and can be<br />
erased with the eraser pen or with water.<br />
It's important that all marking tools<br />
be tested on a scrap piece of fabric to<br />
ensure that they'll come off once the<br />
lines are no longer needed especially on<br />
the lighter colored fabrics.<br />
Assortment of marking pens<br />
Question 7 – Is there going to be<br />
embellishing?<br />
Embellishing should be added after<br />
the quilting is done if it's in the form of<br />
buttons or beads as they are hard to quilt<br />
around. If the embellishing is in the form<br />
of couching then it may be part of the<br />
quilting and can be added along with<br />
the other quilting. I've got some cording<br />
and yarn that may do the trick.<br />
I haven't decided if I will embellish<br />
this piece or not. I see that I took out<br />
part of the design from my new layout<br />
yesterday which I wish I had kept in the<br />
open areas between the corners and the<br />
wagon wheel center so I may put some<br />
couching or applique in there once the<br />
piece is quilted.<br />
Assortment of items to use as<br />
embellishments<br />
Q<br />
.com<br />
UILTsocial<br />
| issue 7 37
How to face a QUILT in<br />
12 easy stepsJennifer Houlden<br />
Once the quilting is done the next step<br />
is to finish the edges. I could use the<br />
traditional method of binding a quilt to<br />
finish this piece but I have run out of<br />
the brown fabric. I could use one of the<br />
printed fabrics but I don’t really want to<br />
frame the piece, I just want it to run off<br />
the page so to say and it needs either<br />
brown binding to do that or another<br />
method of finishing. Instead of binding<br />
I'm going to face my quilt which will give<br />
me that run off the page look I want.<br />
And the other reason I'm facing this quilt<br />
is because I have 'jut outs' on the border.<br />
I couldn’t just do the quilt with simple<br />
straight borders, oh no they had to be<br />
fancy and artistic. Makes life interesting.<br />
If I did want to bind this quilt I would<br />
definitely have to use bias binding to get<br />
around all the corners.<br />
For the purpose of this post I'm facing<br />
a small piece so you can see the steps<br />
and finished project easily. This piece<br />
was originally on a frame which I took it<br />
off of and now need to finish the edges.<br />
Aren't the colors wonderful – spring has<br />
sprung in my studio!<br />
Facing complete on pink dahlia quilt – a dash of<br />
spring color<br />
Facing a quilt<br />
I do suggest using a fabric close to the<br />
same color as the edge of the quilt so<br />
that the facing blends in with the front<br />
of the quilt. I usually try and have a<br />
backing that matches the front as well<br />
but not this time.<br />
Step 1 Square off all edges of excess<br />
batting and backing.<br />
Step 2 Measure all the vertical sides<br />
of the quilt. Cut each piece 4" by the<br />
vertical measurement.<br />
Measuring the vertical edge before cutting<br />
Step 3 Measure all the horizontal sides<br />
of the quilt. Cut each piece 4" by the<br />
horizontal measurement plus 3". The<br />
reason this piece is cut longer is because<br />
the ends are tucked under for the final<br />
finishing and stitching on the back.<br />
Press in half – wrong sides together<br />
Facing pieces pinned to front of quilt<br />
Step 4 Fold all pieces in half with the<br />
wrong sides together and press. I use<br />
steam when pressing these pieces to get<br />
a nice crisp fold line. By the way, this mini<br />
travel GO IRON is deceivingly powerful!<br />
Facing pieces attached with a ¼'' seam in<br />
matching thread<br />
Step 5 Place the vertical pieces along<br />
the vertical edges of the front side of the<br />
quilt with the raw edges meeting. I pin<br />
these in place with flower head pins.<br />
Step 6 Sew the strips in place with a<br />
¼'' seam allowance. Make sure to use<br />
matching thread to the fabric in the top<br />
and bobbin. You'll see why in Step 8.<br />
Q<br />
38 .com | issue 7<br />
UILTsocial
Press facing pieces over edge of quilt<br />
Sewing the stay stitch<br />
Press facing to back of quilt<br />
Step 7 Press the facing strips towards the<br />
edge of the quilt so that they hang over.<br />
Step 8 Turn the quilt over and from the<br />
back sew an ¹∕₈'' seam between the edge<br />
of the quilt and the ¼'' seam just sewn.<br />
This is the stay stitching and will help<br />
create an edge to the quilt as the facing<br />
is pressed to the back of the quilt. The<br />
stitching will be seen on the back of the<br />
quilt so this is why you want the thread to<br />
match the fabric.<br />
Step 9 Press the facing to the back of<br />
the quilt. Use a hot steam iron for a nice<br />
smooth edge.<br />
Step 10 Hand sew the facing to the back<br />
of the quilt. The vertical facing needs to<br />
be sewn down prior to the horizontal<br />
facing being attached.<br />
Step 11 Repeat steps 5 – 9 for the<br />
horizontal facing strips. Make sure to<br />
center the facing strip on the horizontal<br />
edges so there is equal amounts hanging<br />
over each end.<br />
Step 12 Hand sew the facing in place<br />
and fold the extra fabric under to create a<br />
finished edge with no raw edges showing.<br />
If the piece is small I don’t sew this folded<br />
edge to the quilt rather I leave it open so<br />
I can put a hanging rod in through the<br />
opening. But if it's a larger quilt I'll put a<br />
proper hanging sleeve on with a pleat.<br />
My piece is going to take a little bit<br />
longer to do the facing than this one did<br />
because I have a few more edges with<br />
all the jut outs but at least those jut out<br />
pieces are small so won't take long to sew<br />
in place. All in all, my piece will have 10<br />
vertical facings and 10 horizontal facings.<br />
This piece will definitely need a hanging<br />
sleeve if it's to go on a wall. I think it<br />
would make a nice table cloth.<br />
There you have it, facing a quilt in 12 easy<br />
steps which is just as easy as binding<br />
but the facing gives the piece a totally<br />
different finish and look.<br />
Horizontal pieces pinned to quilt<br />
Hand sew facing to back of quilt<br />
Facing sewn in place on back<br />
Q<br />
.com<br />
UILTsocial<br />
| issue 7 39
FABRIC FUN MARKERS<br />
improve your 5 quilt label essentials<br />
Jennifer Houlden<br />
Leftover circle block<br />
Your quilt has been pieced, quilted and<br />
bound and now it's time to add the<br />
finishing touch - a label. Some labels are<br />
hand written, some are embroidered,<br />
some are computer generated but they<br />
all have something in common and<br />
that's the 5 essential details to include<br />
on every label.<br />
It's important for all quilts to be labeled<br />
so that future generations can see<br />
where these pieces of art came from,<br />
who they were made by and when. As<br />
well as what they were made for.<br />
I’ve decided to use one of my left over<br />
circle blocks for my label for the quilt<br />
I've been working on earlier this week.<br />
Although there might be specifics<br />
about the size of a quilt label when a<br />
quilt is entered in a juried show, there's<br />
no rule as to what size the label has to<br />
be or should be for personal quilts.<br />
My label is going to be 12" x 12" and<br />
I'm going to hand write the details<br />
pertaining to this quilt in marker. I<br />
have a whole array of Fabric Fun fabric<br />
markers that I picked up at my LQS and<br />
have just been itching to use them. I<br />
suspect they'll be perfect for writing my<br />
5 essential details.<br />
First I had best read the instructions on<br />
what I need to do to use the markers – if<br />
there's any special prep for the fabric<br />
or not. These markers are non-toxic,<br />
odorless and permanent.<br />
There's no special prep for the fabric<br />
but I ironed a piece of freezer paper to<br />
the back of my block just to add some<br />
stability to the fabric for writing on it.<br />
The markers have 2 tips – a thick tip and<br />
a fine tip. I'm using the fine tip for this<br />
project.<br />
Everything is ready and I’ve picked the<br />
ink color to use on the label. I tested<br />
each color on a piece of scrap before<br />
making my choice.<br />
Freezer paper on back of block for stability<br />
Q<br />
40 .com | issue 7<br />
UILTsocial
Every label should include the following 5 essential details.<br />
1. the title of the work or name of the quilt – mine is Wagon Wheel<br />
2. pieced, designed and quilted by – my piece is quilted and pieced by me as well<br />
as an original design<br />
3. date made – I put the date finished as sometimes the piece can take several<br />
months to make<br />
4. where was the quilt made – name of studio, town and province or state – can<br />
even put in country if you wish<br />
5. who was the quilt made for or what was the quilt made for – mine was made for <strong>QUILTsocial</strong><br />
Fabric markers<br />
Test piece – blue marker wins<br />
If the quilt is going to be in a<br />
show then I strongly suggest<br />
putting your address, telephone<br />
number and e-mail on the label<br />
as well. There are many quilts that<br />
go missing every year and if these<br />
details are on the label then just<br />
maybe it will find it’s way home.<br />
So the ink has dried on my label<br />
and now it's time to set it. To set the<br />
ink turn the piece over and iron on<br />
the wrong side of the fabric at the<br />
hottest temperature that the fabric<br />
will tolerate.<br />
Once the ink has been set it's<br />
washable at temperatures up to 60<br />
degrees Celsius.<br />
After pressing edges of a label to the<br />
back hand sew it to the back of the<br />
quilt – do not fuse it with a fusible<br />
web as it will eventually come off<br />
especially if washed. Hand sewing<br />
is the best way to affix the label to<br />
ensure it stays on for years and years<br />
and years.<br />
Your quilt is now complete and<br />
ready to be loved as all quilts should<br />
be. The lucky owner and their family<br />
will always know the story of their<br />
quilt thanks to the 5 essential details<br />
to be included on every label.<br />
Completed label<br />
Label ready for hand sewing onto back of quilt<br />
Double tipped marker<br />
Q<br />
.com<br />
UILTsocial<br />
| issue 7 41
French Press Cozy<br />
Foundation piecing = perfect points every time<br />
Template drawn on foundation paper<br />
First 2 pieces ready to sew<br />
It has been a beautiful summer at the<br />
cottage despite that occasionally we<br />
had no power. Since there's no power it<br />
means coffee is made in a French press<br />
which tends to get chilled very quickly<br />
when the air around is cool. I thought it<br />
would be a great idea to make a cozy for<br />
my French press. I want to have triangles<br />
in my design and of course they need to<br />
be perfect so using foundation piecing<br />
method will make perfect points.<br />
I've gathered my tools for this project<br />
– lots of embellishments which may<br />
or may not get used along with basic<br />
quilting tools, thread, fabric in nice bright<br />
cheerful colors and Stitch n Sew EZ-print<br />
quilt block sheets for foundation piecing<br />
from HeatnBond.<br />
These sheets can be used in a printer<br />
which is wonderful if you have your<br />
template on your computer. As well they<br />
are transparent enough that it's easy<br />
to trace the design directly onto the<br />
sheet. They are made from a non-woven<br />
specially constructed 100% polyester<br />
making removal simple by just tearing<br />
away in any direction and no distortion<br />
of project.<br />
Also a perfect product as a machine<br />
embroidery stabilizer plus they are<br />
machine washable and dry-able.<br />
I've not used this product before so I'm<br />
keen to give it a go to do my foundation<br />
piecing for my coffee cozy.<br />
First of all I drew out a pattern on a<br />
piece of letter sized paper to fit my<br />
french press. Then I traced it onto the<br />
foundation paper with a fine marker.<br />
I used red but any color will work. The<br />
sheets are definitely easy to see through<br />
for tracing and I didn't need a light box<br />
or window.<br />
Foundation piecing<br />
With my fabric pieces cut I placed the<br />
first two pieces on the foundation paper<br />
with right sides together. Pinning the<br />
two pieces to the foundation paper<br />
ensures that they won't move and that<br />
the ¼'' seam allowance remains.<br />
Sewing on the line<br />
Finger press seams<br />
Trim off excess fabric<br />
Jennifer Houlden<br />
¼'' of fabric over the line<br />
Piece 2 trimmed with a ¼'' seam allowance<br />
Q<br />
42 .com | issue 7<br />
UILTsocial
Piece 3 in position<br />
Foundation piecing complete with perfect points<br />
Piece squared up<br />
Removing the paper<br />
Point turner on back of sandwiched piece<br />
Photos by Jennifer Houlden<br />
There should be a ¼" of fabric beyond<br />
the sewing line. In order to make sure<br />
placement is correct I held the fabric<br />
and paper up to a light like Stella or a<br />
window to ensure the fabric was in the<br />
right place.<br />
Sewing from the backside I used a bit<br />
shorter stitch and followed the red line.<br />
Even though the red line was drawn<br />
on the front it was very easy to see and<br />
follow from the backside with the paper<br />
being so transparent. The shorter stitch<br />
makes removal of the paper easier.<br />
Finger pressing works very well for<br />
foundation piecing and it means you<br />
can stay sitting at the sewing machine<br />
and not have to get up after each seam<br />
is sewn. Definitely allows for more<br />
efficient work flow.<br />
After pressing the fabric, the excess fabric<br />
needs to be trimmed off. Fold over the<br />
foundation paper on the line next to be<br />
sewn on the backside, place a ruler on<br />
the fold at the ¼'' mark and use a rotary<br />
cutter to trim off the excess fabric.<br />
The piece is then ready for the next piece<br />
to be sewn in place with a ¼'' seam<br />
allowance already in place.<br />
Place the next piece on the trimmed<br />
piece with raw edges meeting.<br />
Continue the process until the<br />
foundation piecing is finished.<br />
Square up the piece leaving a ¼" seam<br />
allowance all the way around.<br />
The final step is to remove the paper<br />
from the back. I placed a straight edge<br />
along the stitch line which made<br />
removal of the paper a cinch.<br />
I'm thrilled with this product, loved how<br />
it sewed with no distortion, was easy<br />
to remove and I'll definitely be using it<br />
again for more foundation piecing in the<br />
future. I do own 4 French presses so of<br />
course each one will need it's own cozy.<br />
The top of the coffee cozy is pieced<br />
together with 2 bands of black – one<br />
on either side of the perfectly pieced<br />
triangles. For layering the top, batting<br />
and backing I'm going to use the<br />
envelope method. With this method<br />
I don't have to put a binding on to<br />
finish it. I'm also going to use 2 layers of<br />
batting for extra insulation on those cool<br />
spring and autumn mornings.<br />
Once the layers are sewn together and<br />
the layers are turned right side out the<br />
corners will need to be poked out. I<br />
used this handy dandy point turner and<br />
the pointed end turned those points<br />
perfectly.<br />
Here's the piece quilted using Sulky<br />
Blendables 30 wt cotton thread. I<br />
switched to 90/14 Topstitch needle to<br />
do the quilting as I was using a thicker<br />
thread and going through 4 layers since<br />
I used 2 layers of batting. I had a few<br />
threads to pull through to the back with<br />
my self-threading needles. I do love selfthreading<br />
needles.<br />
After trying to sew a buttonhole on my<br />
machine which I have to say I have never<br />
done because I never sew anything<br />
that requires a buttonhole, I was rather<br />
unsuccessful. So rather than try and figure<br />
it out, I used velcro to secure the tab to the<br />
body of the cozy and called it done.<br />
Quilted coffee cozy<br />
French Press Cozy<br />
Q<br />
.com<br />
UILTsocial<br />
| issue 7 43
2 reasons to use the<br />
Dual Feed Foot<br />
(Walking Foot)<br />
Welcome to another<br />
awesome <strong>QUILTsocial</strong> issue!<br />
I've had the opportunity to<br />
test drive the Husqvarna<br />
Viking Sapphire 960Q and I<br />
can't get enough of it.<br />
This time, I'm going to<br />
explore some techniques that<br />
use different presser feet and<br />
how each, along with the<br />
features of Sapphire 960Q,<br />
make some sewing tasks that<br />
much easier to do.<br />
Organizing your presser feet<br />
Like everything else in our sewing<br />
rooms, we need to keep our presser<br />
feet organized. We start off small with<br />
only the presser feet that come with our<br />
sewing machines and they fit nicely into<br />
the sewing machine accessory box.<br />
At some point when you start buying<br />
more presser feet (and trust me – you<br />
will), you'll no longer have enough room<br />
to keep them in that accessory box and<br />
you'll end up with a mess like this.<br />
I found this little plastic container which<br />
has worked wonders for keeping all<br />
my presser feet contained in one spot.<br />
Notice that I even have a screwdriver<br />
that fits in the box so when I need it, I<br />
don't have to hunt for one.<br />
This box has served me well. While<br />
there's no room in the box to keep the<br />
labels that come with the various feet,<br />
I keep them in that messy drawer. I've<br />
used these feet so often, that I know<br />
what each one is called and what each<br />
one supposed to be used for. Well for the<br />
most part!<br />
You must take very good care of a little<br />
box like this because it's worth a lot of<br />
money. I can't imagine what it would<br />
cost to replace the contents! Like all<br />
of my tools, I make sure that I return<br />
the presser feet to the box so when<br />
I'm looking for a particular foot, I know<br />
where to find it.<br />
And then, very importantly, this box<br />
ALWAYS goes in a special place so I know<br />
where the box is at all times. I can't say<br />
that enough – there's nothing like trying<br />
to find a particular presser foot to do the<br />
job and you can't find the box, so you<br />
substitute (or buy a new foot) and then<br />
realize how much easier the job is if you<br />
have the correct presser foot.<br />
Storage box for sewing machine presser feet<br />
Q<br />
44 .com | issue 7<br />
UILTsocial<br />
Photos by Elaine Therault
If you want to keep the little labels that<br />
come with the presser feet, I found<br />
this different type of storage container<br />
which I purchased from my Husqvarna<br />
Viking dealer. It's called the Deluxe<br />
Presser Foot Case. There's a pouch for<br />
each type of presser foot and room to<br />
store the little label that comes with<br />
it. That packaging label also shows<br />
the instructions for using the foot. For<br />
some feet, you probably don't need the<br />
instructions, especially if it's one that you<br />
use often, but there are others that get<br />
used less frequently and it's nice to have<br />
a reminder how to use them.<br />
There's also a spot if you're handy with<br />
making labels or you can print labels<br />
on the computer, where you can insert<br />
the name of the foot. What I like about<br />
this storage system, is that it's easy to<br />
store the duplicate feet in the same spot.<br />
Yes – I have duplicate feet – some of the<br />
purchases were intentional and some<br />
were not! It's also easy to flip through<br />
the pages to see what you have. Now to<br />
get rid of the mess in that drawer and<br />
put those feet in my new Deluxe Presser<br />
Foot Case.<br />
The Interchangeable Dual Feed Foot<br />
The Interchangeable Dual Feed Foot is<br />
often called the walking foot. And most<br />
people associate it with stitch in the<br />
ditch quilting. Wait – there's a sample in<br />
a minute!<br />
Our sewing machines have a set of feed<br />
teeth in the bed of the sewing machine<br />
that helps to feed the fabric evenly<br />
under the presser foot. This works well<br />
for the bottom layer, but there's nothing<br />
to help the top layer move along. The<br />
Dual Feed Foot has a set of feed teeth<br />
on the underside of the foot that helps<br />
move the top layer along as the same<br />
rate as the bottom layer of fabric.<br />
Now, you may be asking, "Why don't I<br />
use a foot that helps move that top<br />
layer along for all seams?". Unless you're<br />
working with multiple layers such as<br />
quilting a quilt or stitching long stretches<br />
of fabric that you're not pinning, like<br />
stitching two parts of a quilt backing<br />
together, there isn't really a need to use<br />
the Dual Feed Foot. When it comes to<br />
the long seams for a border, I always pin<br />
that seam so I'm controlling both layers<br />
with the pins. The shorter seams that we<br />
stitch are short enough that they don't<br />
get out of whack like the longer ones do<br />
and so it isn't necessary to use the Dual<br />
Feed Foot.<br />
Using the Dual Feed Foot to piece a<br />
quilt backing<br />
Before we sew that quilt backing<br />
together, let's look at how to prep those<br />
backing pieces.<br />
The first thing to do when prepping a<br />
quilt backing is to remove the selvages<br />
from the edges we're going to sew.<br />
The easiest way to remove the selvages<br />
is to open up the backing fabric and<br />
then refold it so that one selvage is<br />
now parallel to itself. Depending on the<br />
length, you may have to fold the fabric<br />
twice so you now have four layers of<br />
fabric with one selvage parallel to itself<br />
on all layers. I don't like to cut through<br />
more than four layers at a time, so if the<br />
quilt backing is big, you may have to<br />
slide that ruler along the edge to cut all<br />
the selvage off.<br />
Then very carefully and with my large<br />
rotary cutter and a ruler, I cut through all<br />
layers and remove that selvage. (Yes – I<br />
need to get a new cutting mat!)<br />
Removing the selvage using a large rotary cutter<br />
and a ruler<br />
Storage binder for presser feet<br />
Q<br />
.com<br />
UILTsocial<br />
| issue 7 45
Depending on how I'm piecing the<br />
backing, I'll only remove ONE selvage<br />
from this first piece as the second<br />
selvage will be along the outside of the<br />
quilt backing.<br />
Then I must remove one selvage from<br />
the second piece of backing and I<br />
usually remove the opposite selvage<br />
from the first one I removed. So if I<br />
removed the selvage with the writing on<br />
the first piece, then I remove the selvage<br />
without the writing on the second piece.<br />
If there's any kind of nap or direction to the<br />
print, you will now have them going in the<br />
same direction when they're sewn together.<br />
Many people don't realize that the<br />
selvages are there for manufacturing<br />
purposes only. The weave on those<br />
selvages is quite a bit tighter and it<br />
doesn't sew or wash the same as the rest<br />
of the fabric. It's best to remove it.<br />
Next up is to put the Interchangeable<br />
Dual Feed Foot on the Sapphire 960Q.<br />
It's easy to put the Dual Feed Foot on,<br />
but I do need my screwdriver as I have<br />
to remove the presser foot ankle. Since<br />
I'm organized and I know where the<br />
screwdriver and the Dual Feed Foot is,<br />
this is an easy task.<br />
TIP Make sure that the U-Shaped arm on<br />
the Dual Feed Foot is around the needle<br />
clamp (the screw that holds the needle<br />
in place). If the U-Shaped arm isn't<br />
properly fitted, you'll have a mess.<br />
Line up the two quilt backing pieces so<br />
the two edges you're sewing together<br />
are the ones that you removed the<br />
selvedges from. I like to sew the quilt<br />
backing with a very generous seam and<br />
I can use the guide on the stitch plate to<br />
keep the seam even.<br />
Is there a reason for making an extra<br />
wide seam? I'm not sure – it's just habit.<br />
And by the way, I press that seam to one<br />
side rather than open. I usually press all<br />
my seams to one side on the top, so why<br />
not on the back as well.<br />
I'm a creature of habit, I like consistency<br />
in what I do. Then I don't have to think as<br />
I'm working. My hands automatically do<br />
the same thing and that makes me happy!<br />
Removing the second selvedge<br />
The Interchangeable Dual Feed Foot<br />
I love the fact that this Dual Feed Foot<br />
has interchangeable presser feet. I can<br />
pick the one that's most appropriate for<br />
the job at hand. I'm going to show you<br />
the difference in a few minutes.<br />
For stitching my quilt backing together,<br />
I'm working with the Changeable<br />
Straight Stitch Foot and for the purpose of<br />
sewing my backing, that works just fine.<br />
Changeable Straight Stitch Foot<br />
Sewing the quilt backing together using the seam<br />
guide on the stitch plate<br />
Why do I use the Dual Feed Foot to sew<br />
the backing together?<br />
This is a very long seam and since I don't<br />
pin those two backing pieces together<br />
(although they have been cut to the<br />
same length), there's the possibility that<br />
the top piece will shift since there are<br />
no feed teeth to control what happens<br />
to it. Using the Dual Feed Foot allows<br />
both layers to be fed evenly and the two<br />
backing pieces will remain the same<br />
length as you can see in the photo above.<br />
Q<br />
46 .com | issue 7<br />
UILTsocial
Did you notice that my backing has a<br />
diagonal stripe on it? Now you're asking<br />
yourself, "Did she match up that stripe?"<br />
The answer is NO. Life is too short to<br />
be worried about joining up a stripe,<br />
especially on the backing of an everyday<br />
quilt. Now if that quilt were going to<br />
be entered into a competition, I would<br />
definitely take the time to match it up.<br />
But for an everyday quilt – I don't see the<br />
reason to frustrate myself on a detail that<br />
no one is going to notice. I don't have<br />
the patience, and I don't want to waste<br />
the time. I want to get onto the next<br />
project.<br />
However, if it's going to bother you that<br />
the stripe doesn't match – then I'd pick a<br />
different fabric for the backing. Like I said,<br />
life is too short to worry about this kind<br />
of detail! Before you start to fuss, think<br />
about two things – who is the recipient<br />
and what will the quilt be used for. And<br />
then you can make a decision if you<br />
need to fuss.<br />
I know my friends would be shocked. At<br />
least, those that I started to quilt with<br />
many years ago. I used to fuss over every<br />
little detail and every point had to match.<br />
While I aim for accuracy, I don't fuss<br />
nearly as much and quilting is a whole lot<br />
more enjoyable because of that!<br />
Stitch in the Ditch quilting<br />
The most common use for the Dual Feed<br />
Foot is "stitch in the ditch" quilting. Yes –<br />
there's a picture coming up!<br />
I started out by using the Changeable<br />
Straight Stitch Foot on the Dual Feed<br />
Foot. I know – too lazy to change the<br />
foot and I wanted to see how it worked<br />
for this task. Yikes – that was a little hard<br />
to see exactly where I was supposed<br />
to be stitching. Let's try something<br />
different.<br />
Very difficult to see where the ditch is for quilting<br />
By putting the Changeable Zigzag Foot<br />
on the Dual Feed Foot, I now get a clear<br />
view of where the ditch is for quilting. It's<br />
fabulous to have these two options.<br />
If you're not familiar with what stitch<br />
in the ditch quilting is – you can see<br />
an example in the picture below, I've<br />
stitched in the vertical seam between<br />
the black and yellow fabric. When the<br />
stitching is done well, you can't see it.<br />
If you look at the left-hand side of the<br />
horizontal seam, you can see where my<br />
stitching didn't quite make the ditch. I<br />
was using invisible thread so it doesn't<br />
really show except when I'm pointing it<br />
out to you in an enlarged photo!<br />
Much easier to see where the ditch is for quilting<br />
Stitch in the ditch quilting<br />
Stripe on the backing doesn't match and that's OK<br />
There you have it – a very valuable tip on<br />
protecting your presser feet investment<br />
and how you can save money by not<br />
purchasing duplicates.<br />
Also, two different ways to use your<br />
Interchangeable Dual Feed Foot. Of<br />
course, using the features on the<br />
Husqvarna Viking Sapphire 960Q made<br />
these jobs very easy.<br />
Q<br />
.com<br />
UILTsocial<br />
| issue 7 47
2 ways to machine stitch<br />
a binding on a quilt<br />
Did you organize your presser<br />
feet? At the very minimum, I<br />
hope you put all your presser<br />
feet in one safe place!<br />
In this installment, I'm going<br />
to use the Husqvarna Viking<br />
Sapphire 960Q to stitch the<br />
binding on a quilt. There are<br />
several different ways to do<br />
this. I'll tell you what I like and<br />
what I don't like!<br />
Which method to choose?<br />
There are two different ways to stitch<br />
the binding on a quilt. The first is the<br />
traditional way of machine stitching the<br />
binding to the front of the quilt and then<br />
hand stitching the binding on the back.<br />
I love this method. The front of the<br />
quilt looks amazing and the back looks<br />
equally amazing as all the stitches are<br />
well hidden. I did mention yesterday<br />
that I don't fuss with some details, but<br />
binding is one area where I like the<br />
workmanship to be top notch.<br />
The binding is one part of the quilt that<br />
people almost always handle and I<br />
want that binding to look and feel nice.<br />
I also want it to be durable so I use tiny<br />
stitches to stitch the binding in place.<br />
When I first started to quilt many years<br />
ago, the owner of the store that I worked<br />
at, told me that a quilt wasn't finished<br />
until that binding was hand stitched<br />
down. And I've lived by that philosophy<br />
Q<br />
48 .com | issue 7<br />
UILTsocial<br />
for years. I enjoy the hand stitching part<br />
although it used to take me forever. I'm<br />
much faster now and I love the process.<br />
I've even been known to hand stitch<br />
bindings in meetings at work, but I work<br />
for a fabric company, so that's OK.<br />
However, I've noticed over the past<br />
decade that many people are sewing<br />
their bindings to the back of the quilt<br />
and then pulling the binding to the front<br />
and stitching it in place with the sewing<br />
machine. Even the store owner that told<br />
me that the quilt wasn't finished until<br />
the binding was hand stitched down, is<br />
sewing her bindings on by machine.<br />
It appears that people don't have time to<br />
do the hand stitching anymore. I make<br />
the time since I love the process and the<br />
finished look! OK – that's not always true<br />
and I'll tell you about that in a minute.<br />
I'm going to give you a brief overview of<br />
both methods so you can judge which<br />
one you prefer.<br />
Method 1: Machine stitching the<br />
binding to the front of the quilt<br />
I start out by prepping my binding. I like<br />
to use 2½" binding strips which have<br />
been joined on the diagonal and folded<br />
in half with wrong sides together. You<br />
can check out this post to get all the<br />
details of making double fold binding.<br />
I like to sew the binding to my quilt<br />
using the Interchangeable Dual Feed<br />
Foot. The feed teeth on the foot and on<br />
the sewing machine help to feed those<br />
thick layers through more evenly than if I<br />
don't use the Dual Feed Foot.<br />
You can decide if you prefer the<br />
Interchangeable Straight Stitch Foot or<br />
the Interchangeable Zigzag Foot for the<br />
job. It doesn't really matter and I tend<br />
to use whichever one happens to be on<br />
the Dual Feed Foot.<br />
Photos by Elaine Therault
The biggest beef I have about binding<br />
is that most people stitch their binding<br />
to the quilt top with a quarter inch seam.<br />
If you use 2½" binding strips, this means<br />
you're going to have "empty" binding<br />
that feels limp and thin or your binding<br />
will not be even on the front and the<br />
back.<br />
You can see in the picture below, I use<br />
the edge of that opening in the Straight<br />
Stitch Foot as my guide for the seam<br />
allowance. This ends up giving me about<br />
a ³∕₈" seam allowance and when I pull<br />
that binding to the back of the quilt and<br />
hand stitch it in place, that binding is<br />
completely full of quilt and feels nice<br />
and firm.<br />
Don't tell anyone I told you this, but I<br />
always check out the binding to see how<br />
it was sewn on! Again – there's nothing<br />
wrong if you use a ¼" seam, but find a<br />
quilt that is done in both styles and then<br />
ask yourself – which one do you like the<br />
best? Then you decide if you want to do<br />
this for your quilts.<br />
Sewing the binding to the front of the quilt using<br />
the Dual Feed Foot<br />
There are also guides on the Changeable<br />
Straight Stitch Foot that help me know<br />
where to stop at the corner. Very handy if<br />
you need it!<br />
I used the Interchangeable Dual<br />
Feed Foot but this time, I used the<br />
Changeable Zigzag Foot. I didn't<br />
find a difference in using either of the<br />
interchangeable feet for this first part.<br />
You can see in the picture, that I'm<br />
using the edge of that opening in the<br />
Changeable Zigzag Foot as the guide for<br />
the seam.<br />
Sewing the binding to the BACK of the quilt<br />
Let's talk about thread color!<br />
Reluctantly, I had to learn how to sew<br />
bindings this way because at work we<br />
often have very tight deadlines to get<br />
quilts ready and there's no time for hand<br />
stitching. Since that first quilt, I've done<br />
several more (including one of mine-<br />
ACK!). I'm still perfecting this technique<br />
but I'll share with you what I have<br />
discovered so far.<br />
Thread color is extremely important.<br />
When initially sewing the binding the<br />
first time, I find it helpful to use a bobbin<br />
thread that matches the color of the<br />
quilt top. It doesn't matter what color<br />
you use on top.<br />
When I sew the binding on the front of<br />
the quilt, I use invisible thread on the top<br />
and use thread that matches the binding<br />
in the bobbin.<br />
In this case, I use my size 80/12 needle<br />
that I use for piecing. That needle has to<br />
go through a lot of layers and the smaller<br />
needle may end up breaking or bending.<br />
While I've seen people use a lot of<br />
different decorative stitches for this step,<br />
I like to use a blanket stitch (D:3) which<br />
is found in the D Menu – Quilt Stitches<br />
on the Sapphire 960Q.<br />
You'll notice in the first picture below<br />
that the default setting of this stitch<br />
has the zags to the left. I want the zags<br />
to go to the right. That's an easy fix on<br />
the Sapphire 960Q when I hit the Mirror<br />
Side-to-Side function. Then I change<br />
the stitch width to 1.5 and the length<br />
to 3.5. You can see in the second photo<br />
the changes I made from the default<br />
settings.<br />
I love being able to see the way the<br />
stitch will stitch out on the screen.<br />
Default settings for Stitch D:3<br />
Using the red guidelines on the Straight Stitch<br />
Foot at the corner<br />
Method 2: Machine stitching the<br />
binding to the back of the quilt<br />
The first step is to prep the binding<br />
the same way you would to stitch the<br />
binding down by hand.<br />
This time, when you machine stitch the<br />
binding to the quilt, you're going to<br />
stitch the binding to the BACK of the<br />
quilt. Turn the corners, do the final join –<br />
everything is the same.<br />
Invisible thread for the top and thread that<br />
matches the binding in the bobbin<br />
Setting up the sewing machine<br />
Normally when I use invisible thread,<br />
I change the needle to a small size<br />
because the invisible thread is very fine.<br />
The modified settings for Stitch D:3<br />
Q<br />
.com<br />
UILTsocial<br />
| issue 7 49
And now it's crucial that I use the<br />
Changeable Zigzag Foot on the Dual<br />
Feed Foot. If I don't, I won't be able to<br />
see where to stitch. It's important to<br />
use the Dual Feed Foot for this process<br />
as we do not want that binding to<br />
stretch. The Dual Feed Foot helps to<br />
keep the top layer feeding at the same<br />
rate as the quilt.<br />
Let's start stitching<br />
I'm going to turn the quilt so the quilt<br />
top is face up and I'll pull that binding<br />
to the front and very carefully stitch it<br />
in place. I want to make sure that the<br />
binding covers the row of stitching that<br />
I used to secure the binding to the back<br />
of the quilt. Because I used a bobbin<br />
thread that matches the quilt top to<br />
initially sew the binding on, if I mess up<br />
a bit, it won't be that obvious.<br />
Once I'm even closer to the corner, I<br />
position the next side of the binding to<br />
create the mitered corner and hold it in<br />
place using the quilter's awl.<br />
Making the mitered corner and holding the layers<br />
in place with the quilter's awl<br />
Now here's the reason why I don't like<br />
this method. Yes – it's faster than hand<br />
stitching but I find it very stressful to do.<br />
Probably because I'm not happy with<br />
the results. Yes – I know – should I be so<br />
fussy? But have a look at the quilt back. I<br />
do not find this neat.<br />
Sometimes you're right on the line and<br />
sometimes you're not. I like things to be<br />
neat and this isn't neat according to me!<br />
Old habits die hard and I always stitched<br />
that mitered corner when I hand stitch<br />
the binding. You can't do that by sewing<br />
machine. However I have to say that this<br />
mitered corner does look very neat and<br />
I could always go back and hand stitch<br />
that corner down.<br />
Machine stitched binding on the front of the quilt<br />
I'm the kind of person who, when<br />
presented with a problem, likes to find<br />
a solution. The fact that the stitches<br />
don't always line up on the back is a<br />
problem to me.<br />
Stitching the final binding seam on the front of<br />
the quilt by machine<br />
When I get to a corner, I use my quilter's<br />
awl or stiletto to hold the binding in<br />
place. You can see the long pointy<br />
thing in the picture below. If you don't<br />
have one of these metal tools, I highly<br />
recommend you get one. I've heard<br />
of all kinds of tools that people use<br />
instead of the metal quilter's awl, but<br />
you need something that will withstand<br />
a lot of pressure and this quilter's awl is<br />
a must have!<br />
Using the quilter's awl to hold the binding fabric<br />
in place near the corner<br />
The quilt back – sometimes you hit the line and<br />
sometimes you don't<br />
From the front of the quilt, the binding<br />
looks pretty good. I don't feel it has that<br />
smooth edge that you get by stitching it to<br />
the front and hand stitching on the back.<br />
However, this is a perfectly acceptable<br />
way to put the binding on a quilt. I<br />
either need to make sure that I allow<br />
enough time to get all my quilts bound<br />
in the way that I prefer, or I have to<br />
perfect this technique or I just learn to<br />
live with it!<br />
The mitered corner with machine stitched<br />
binding<br />
Here's what I propose to help solve<br />
the issue. The binding and the backing<br />
need to be the same fabric. Then if that<br />
stitching goes off, it won't show. Or<br />
you could use a very busy backing and<br />
a matching thread.<br />
There are ways to make this work and<br />
I'm going to try and perfect it since it's<br />
a technique I know I'll have to use for<br />
future quilts with very tight deadlines.<br />
As luck would have it, I had a personal<br />
quilt that had a very tight deadline that<br />
could not be missed. I had no choice<br />
but to stitch the binding down with<br />
the sewing machine. While I'm not a<br />
fan of a white binding on a quilt, the<br />
quilt binding and the light colored back<br />
concealed any errant stitches!<br />
Q<br />
50 .com | issue 7<br />
UILTsocial
Designed<br />
for the details.<br />
Featuring Dual Duty Plus ®<br />
Hand Quilting Thread.<br />
For more information visit:<br />
makeitcoats.com<br />
Pattern “Modern Traditional” courtesy of Cheryl A. Adam<br />
15-023 © 2015 Coats. Coats is a registered trademark. All rights reserved.<br />
51 51
Tips for sewing<br />
Y seams<br />
Let's take a look at a different presser<br />
foot and features of the Husqvarna<br />
Viking Sapphire 960Q that will make<br />
sewing those Y seams a snap.<br />
People shy away from Y seams and yet,<br />
there's nothing to them when you know<br />
what you're doing.<br />
Husqvarna Viking Sapphire 960Q<br />
I recently made some cube cushions and<br />
I thought I would share them with you<br />
as I show you how to sew a Y seam.<br />
I recently made some cube cushions and<br />
I thought I would share them with you<br />
as I show you how to sew a Y seam.<br />
••<br />
Some of my blocks were made with<br />
3¾" cut squares (16 squares per side),<br />
some were made with 4¾" cut squares<br />
(9 squares per side), some were made<br />
with 6¾" squares (4 per side). The<br />
fabrics I used are from Northcott's<br />
ColorWorks Premium Solids and<br />
ColorWorks Concepts (prints)<br />
collections.<br />
•13" • squares of batting (six in total –<br />
one for each side)<br />
•13" • squares of muslin (six in total – one<br />
of each side)<br />
•12" • x 12" x 6" foam pieces (two in total)<br />
Variety of fabric squares to make quilt blocks<br />
Make SIX different quilt blocks that<br />
measure roughly 12½" square. If you<br />
used the measurements above, the<br />
squares should all be slightly larger than<br />
12½". That's OK as you need to quilt them<br />
and there might be some shrinkage.<br />
I used the Interchangeable Dual Feed<br />
Foot on the Sapphire 960Q to stitch in<br />
the ditch on all of the 6 blocks. You can<br />
see a picture of the stitch in the ditch<br />
quilting if you check out this post from<br />
earlier this week.I used a cream colored<br />
thread in the bobbin and invisible thread<br />
on the top. Make sure that you use the<br />
Changeable Zigzag Foot on the Dual<br />
Feed Foot so you can see where you<br />
need to stitch. Or quilt them however<br />
you wish.<br />
Then you want to trim the blocks to 12½".<br />
I didn't get too fussy with this process<br />
and certainly didn't worry if the squares<br />
were evenly spaced in the trimmed<br />
block. It's a cube cushion that's going to<br />
be thrown around. No need to get too<br />
fussy with the details!<br />
Once the blocks are trimmed to 12½", I<br />
sewed a basting seam around the edge<br />
of each block using a ¹∕₈" seam allowance.<br />
This will hold the loose edges together<br />
which will make it easier to sew the<br />
Y seams. I must have been in a hurry<br />
the day I basted those edges together<br />
because I didn't use a longer stitch<br />
length – just in case you're wondering<br />
when you see the picture!<br />
And now we're ready to sew those Y seams.<br />
Colorful scraps from trimming the blocks<br />
Cube cushions – couldn't just make one!<br />
materials<br />
I made my cube cushions 12" square so<br />
you need a variety of fabric to make SIX<br />
12½" blocks.<br />
I made my blocks slightly larger than<br />
12½" and once I was done quilting them,<br />
I trimmed them down to 12½".<br />
Q<br />
52 .com | issue 7<br />
UILTsocial<br />
One of the 6 quilt blocks needed to make a cube<br />
cushion<br />
Quilt the blocks<br />
I layered each of the blocks with batting<br />
and the muslin backing. I didn't bother<br />
with basting – these blocks are small<br />
enough that they don't need basting.<br />
But you could always put in a couple of<br />
pins if you feel the need to make them<br />
more secure.<br />
Baste all three layers together after the blocks are<br />
trimmed.
Sewing the Y seam<br />
Before we get started, let me show<br />
you a picture of a Y seam so you can<br />
understand what I'm talking about.<br />
You can see in the picture below that<br />
there are three different seams that<br />
come together and they look like the<br />
letter Y, hence the name – Y seams.<br />
A Y seam<br />
Setting up the sewing machine<br />
This time, I'm going to use the Quilter's<br />
¼" Piecing Foot. This foot has red lines<br />
on it that mark the pivot points and in<br />
the case of the Y seams, the start and<br />
end of each seam. I love this foot. No<br />
guesswork is needed. I can easily snap<br />
that foot onto the presser foot ankle of<br />
the Sapphire 960Q.<br />
I'm going to choose a straight stitch and<br />
make sure that my stitch length is set to 2.0.<br />
I don't want those seams coming apart.<br />
The FIX function makes it easy to stitch<br />
these Y seams. A normal seam runs right<br />
off the edge of our quilt blocks and in<br />
most cases, another row of stitching will<br />
close off the end securing that line of<br />
stitching. When sewing a Y seam, you<br />
start ¼" in from the edge of the fabric<br />
and no other seam will touch it to lock<br />
the end of the seam in place. Using<br />
the FIX function will essentially tie off<br />
the ends of the stitching, both at the<br />
beginning and the end of the seam. A<br />
very useful function!<br />
The FIX function will tie off the beginning and the<br />
end of each seam to secure the ends<br />
In the photo below, I'm about to start<br />
the first seam. I've taken two of the<br />
blocks and placed them right sides<br />
together. Keep in mind that the line of<br />
stitching you see in the photo is the<br />
basting to secure the three layers of<br />
the block.<br />
I'll use the red lines on the presser foot as<br />
a guide so I can start my seam ¼" in from<br />
the top of the fabric and using the edge<br />
of the foot as my ¼" guide, I'll be sewing a<br />
¼" seam. I hit FIX and the Sapphire 960Q<br />
will tie off the beginning of the seam.<br />
I'll then sew the remainder of the ¼"<br />
seam until I get to within ¼" at the end<br />
of the seam. Again, I can use the red<br />
lines on the presser foot to guide me. I'll<br />
use the FIX function once more to tie off<br />
the end of that seam.<br />
I now have the first seam for the cube<br />
cushion that starts and stops ¼" away<br />
from the top and bottom of the blocks.<br />
Use the FIX function and the red lines as a guide<br />
to start the seam ¼" from the top of the block.<br />
Use the FIX function and the red lines as a guide<br />
to end the seam ¼" from the bottom of the block.<br />
Sew four blocks together in a row using<br />
the same technique as outlined above.<br />
Then join the first and last block together<br />
using the same technique to get a<br />
square with your blocks. Now we have to<br />
add the top and the bottom.<br />
Adding the top and bottom of the<br />
cube cushion<br />
For this next part, I found it easier if I<br />
removed the extension table from the<br />
Sapphire 960Q. It just gave me more<br />
room to maneuver the project. I'm<br />
going to place the right side of one of<br />
the remaining two blocks right sides<br />
together with any one of the blocks in<br />
my loop of four blocks.<br />
Match up the corners. I'm going to sew<br />
the exact same seam (beginning and<br />
ending ¼" from the edge of the block)<br />
as I did to join the first set of four blocks.<br />
Because the seams don't extend all the<br />
way to the edge of the blocks, this is an<br />
easy task.<br />
Adding the top of the cube<br />
You can see below that the ends of each<br />
seam are just touching, but they're not<br />
overlapping each other. Remember that<br />
that line of stitching right at the edge is<br />
the basting stitch which holds the three<br />
layers of each block together. Without<br />
that basting stitch, it would be very<br />
difficult to stitch these cube cushions.<br />
Ends of the seams are touching, but not overlapping<br />
Q<br />
.com<br />
UILTsocial<br />
| issue 7 53
Start and stop on each of the four sides<br />
of the bottom of the cube cushion and<br />
then repeat with the last block for the<br />
top of the cushion. This time, you're<br />
going to sew one complete side and<br />
then two half seams leaving half of the<br />
top open so you can insert the foam.<br />
If you buy the 2" slab of foam, you can<br />
use an electric knife to cut it. Works like<br />
a charm!<br />
I used the same process with the thicker<br />
pieces of foam. I placed the first piece in<br />
the cushion. Then I placed the rulers on<br />
top of that foam piece so I could slide<br />
the second piece of 6" foam into the<br />
cushion. I pulled the rulers out and the<br />
foam was in the cushion.<br />
Last step was to hand stitch the<br />
opening closed.<br />
Leave half of the top open so you can insert the foam.<br />
You can now turn the cushion inside<br />
out and admire those Y seams from the<br />
outside. There's no need to push them<br />
out too far. There's a lot of bulk at the<br />
corner and these are fun cushions. They<br />
don't need to be perfect.<br />
Y seam from the outside of the cube cushion<br />
Cube cushion is almost finished<br />
It's time to insert the foam. I happened<br />
to have 2" thick foam that I was going<br />
to use for another project that never<br />
happened. It just so happened that I<br />
had already cut it into 12" squares so<br />
I decided to use the foam to fill the<br />
cube cushions. I had enough foam for 2<br />
cushions. Then I found foam at a mattress<br />
store that was 6" thick. They cut the foam<br />
for me and I only needed two pieces that<br />
measured 12" x 12" x 6". I used the 6" foam<br />
on the remaining three cushions.<br />
Foam cut and ready for inserting into the cushion<br />
form<br />
It was easy to get the first 5 pieces<br />
of the 2" thick foam into the cushion<br />
form. Notice that I started by filling the<br />
"bottom" or the sewn part of the cushion.<br />
I knew that last piece was going to be<br />
tricky as the foam wasn't going to slide<br />
very well on itself.<br />
Inserting the 2" pieces of foam<br />
I decided to try my rotary cutting rulers<br />
to help slide that last piece of foam<br />
into the cushion and they worked like<br />
a charm. I ended up using two rulers so<br />
the piece of foam that I was inserting<br />
wouldn't touch the foam already inside<br />
the cushion and I had no problem to get<br />
that last piece in the cushion.<br />
Use your rotary cutting rulers to allow the foam to<br />
slip into the cushion<br />
Hand stitch the opening to complete the<br />
cushion<br />
You could use any fabric to make the<br />
cubes. Why not use a children's fabric<br />
book, photos that have been transferred<br />
to fabric, embroidery images or anything<br />
that works for you. You just have to<br />
adjust the sizes accordingly.<br />
Despite the fact that all the seams were<br />
Y seams, these cube cushions were a<br />
snap to sew together. And let me say<br />
that we've been having a blast playing<br />
with them in the office.<br />
The features of the Husqvarna Viking<br />
Sapphire 960Q and the Quilter's ¼"<br />
Piecing Foot made it so easy to sew<br />
them together. I couldn't stop with<br />
just one!<br />
Q<br />
54 .com | issue 7<br />
UILTsocial
Get more quilting fun in<br />
A NEEDLE PULLING THREAD<br />
Fall 2016<br />
Visit www.ANPTmag.com to order!<br />
55
Tips for using the<br />
free motion foot<br />
We start a new project. It's a rag quilt<br />
and a perfect opportunity to practice<br />
free motion quilting. Here are tips for<br />
using the free motion foot you don't<br />
want to miss.<br />
The Husqvarna Viking Sapphire 960Q<br />
is a fabulous sewing machine for free<br />
motion quilting. If you want to learn<br />
more about this sewing machine, you<br />
can check out this <strong>QUILTsocial</strong> post<br />
when I first introduced the Sapphire<br />
960Q.<br />
This is a great project to use up scraps. I<br />
used up a lot of batting scraps by joining<br />
them together. If you'd like to learn<br />
how to do that, you can check out this<br />
<strong>QUILTsocial</strong> post.<br />
I didn't have enough of the backing<br />
fabric to make complete squares, so<br />
I pieced some of them. Same thing<br />
for some of the squares for the top<br />
– I simply pieced a couple of pieces<br />
together and then trimmed to the<br />
correct size. No one will care and no one<br />
will likely notice either!<br />
Choose the Free Motion Technique icon (bottom left)<br />
Husqvarna Viking Sapphire 960Q<br />
Supplies for the rag quilt<br />
You can make the rag quilt as big or as<br />
small as you'd like. I made mine 7 x 9<br />
blocks for a total of 63 blocks.<br />
For each block, you need a 7" square of<br />
backing, a 7" square of fabric for the front<br />
and a 6" square of batting.<br />
I used flannel for my backing and my<br />
top. Flannel is very forgiving when it<br />
comes to free motion. The nap and the<br />
slightly extra thickness help to conceal a<br />
multitude of sins.<br />
Supplies for one block of the rag quilt - backing,<br />
front of block and batting<br />
Q<br />
56 .com | issue 7<br />
UILTsocial<br />
Backing squares and batting squares were joined<br />
when necessary<br />
Setting up the Sapphire 960Q for free<br />
motion<br />
There are a number of features on the<br />
Sapphires 960Q that will make free<br />
motion quilting very easy and it only<br />
takes a minute or two to set it up.<br />
To set the sewing machine for free<br />
motion quilting, I simply touch the Free<br />
Motion Technique icon (the bottom left<br />
button with the squiggly line).<br />
A pop-up screen appears allowing you<br />
to choose between Free Motion Floating<br />
and Free Motion Spring Action. I've<br />
explained the difference between these<br />
two in this <strong>QUILTsocial</strong> post.<br />
I chose the Free Motion Spring Action<br />
mode because the thread that I'm using<br />
is heavier and the spring action works<br />
best for that kind of thread. The feed<br />
dogs are lowered automatically. I love that!<br />
Choose the Free Motion Spring Action for heavier<br />
thread<br />
This is how the screen looks once you<br />
have chosen the Free Motion Technique.<br />
The presser foot diagram changes and<br />
the Free Motion Technique icon is<br />
highlighted in green. The tension is also<br />
automatically adjusted and the stitch<br />
length remains at the default setting<br />
of 2.5 because once the feed teeth<br />
are dropped, the stitch length has no<br />
bearing on the actual stitch length.<br />
Photos by Elaine Therault
Stitch length is determined by how fast<br />
you move your piece of fabric and how<br />
fast the sewing machine is sewing.<br />
Settings for the Free Motion Spring Action technique<br />
The Free Motion Technique remains<br />
selected even when you turn the sewing<br />
machine off and back on again. The<br />
Sapphire 960Q will remain in this mode<br />
until you turn the Free Motion Technique<br />
feature off which is easy to do, just hit<br />
the Free Motion Technique icon and<br />
deselect the free motion techniques.<br />
only go as fast as you have set it for. It's<br />
a good idea to mess around with the<br />
speed to find one that you're the most<br />
comfortable with.<br />
It's amazing how many people are<br />
afraid to mess around with their<br />
sewing machines. Even worse is they<br />
think they should know all this stuff.<br />
The more I play with different techniques,<br />
the more I learn and I can use that<br />
knowledge base to take things to the<br />
next step. I just recently read somewhere<br />
that if you don't make mistakes and try<br />
new things, you're not learning. So get<br />
some scrap fabric and batting and check<br />
out the various speeds. Which one do<br />
you like best?<br />
Needle Stop Up/Down function IS selected (on<br />
the right)<br />
You also want to make sure that you<br />
attach the Free Motion Spring Foot to<br />
the sewing machine. I prefer the one<br />
with the wide open toe so I see my<br />
work clearly.<br />
Choosing Thread<br />
One of the things I love about the<br />
Sapphire 960Q is that no matter what<br />
thread I put on it, I got excellent tension<br />
and very nicely formed stitches. I can't<br />
stress how important this is. While you<br />
can mess with the tension control on all<br />
sewing machines, I would much prefer<br />
to not have to.<br />
I usually choose thread based on the<br />
color, not on the weight or the brand.<br />
In this case, all my backing fabric was<br />
the same, so I used the same 50 weight<br />
thread in the bobbin for the entire<br />
project. That's the thread on the left.<br />
Then I chose heavier weight threads for<br />
the top – but only because that was<br />
what thread I had in the colors I wanted.<br />
Pop up message to remind you the Sapphire<br />
960Q is set for free motion<br />
Taking as many variables out of the<br />
picture as possible is one way to<br />
achieve great success with free motion<br />
quilting. The next variable we're going<br />
to remove is speed. Adjust the speed<br />
of the Sapphire 960Q so when you<br />
start quilting, the sewing machine will<br />
Adjust the speed<br />
Another good tip is to always use your<br />
Needle Stop Up/Down feature. If you<br />
need to stop for whatever reason, the<br />
needle will stop in your quilt sandwich<br />
which prevents it from moving when<br />
you take your hands off and you won't<br />
end up with a big giant stitch.<br />
Needle Stop Up/Down function is NOT selected<br />
(on the right)<br />
Two different weight threads were used for the<br />
bobbin and the top<br />
I decided to be very adventuresome<br />
and use the same bobbin thread for all<br />
the blocks, but I changed the top thread<br />
depending on the color of my top fabric.<br />
I used three different brands of thread<br />
on the top with three different thread<br />
weights: a 30 weight, a 35 weight and<br />
a 40 weight. Only one of the threads<br />
required that I make a slight adjustment to<br />
the tension which I'll show you in a minute.<br />
Q<br />
.com<br />
UILTsocial<br />
| issue 7 57
Being able to use this variety of thread<br />
brand and thread weight is very exciting<br />
and so stress-free. The less I have to mess<br />
around with tension, the more quilting I<br />
do and the happier I am!<br />
Let's have a quick peek at that slight<br />
tension issue that I had. It occurred when<br />
I was using the yellow thread on the top.<br />
Keep in mind that in this sample below,<br />
I used PINK thread in the bobbin. I don't<br />
see any pink thread – do you? This is the<br />
sign of an excellent sewing machine that<br />
is able to handle different weight threads<br />
(35 weight in the top and 50 weight in<br />
the bobbin for this example) and gave<br />
me absolutely no thread pops on top.<br />
Starting and stopping<br />
When you start free motion quilting, you<br />
must bring up that bobbin thread to the<br />
top of your work. If not, you're going to<br />
get a mess on the underside that is nasty<br />
to get rid of. If you have no idea how to<br />
bring up that bobbin thread to the top<br />
of the work, check out this <strong>QUILTsocial</strong><br />
post where I've explained it.<br />
50 weight thread was used consistently for the<br />
bobbin, top threads varied from 30 to 40 weight<br />
Top threads were all used in the horizontal<br />
position<br />
I also love the fact that the stitches are<br />
very nicely formed and well defined. That<br />
makes the project look awesome even<br />
if the stitches aren't super consistent.<br />
We really need to get over that fear that<br />
everything has to be perfect!<br />
No sign of the pink bobbin thread<br />
In the example below, you can see<br />
that some of the yellow thread came<br />
through to the back of the blocks. Mostly<br />
when I went around the corners. I could<br />
probably have left it like that as it only<br />
occurred in one or two spots, but I knew<br />
that I could make a slight adjustment<br />
and get the tension correct. In this case, I<br />
tightened the top tension slightly and it<br />
worked like a charm.<br />
Always bring the bobbin thread to the top of the<br />
work<br />
I'm using the Open Toe Free Motion<br />
Spring Action Foot so I can easily tuck<br />
those two threads to the back of my work.<br />
Use Needle Stop Up/Down and tuck the threads<br />
to the back of your work<br />
Nicely formed stitches on the front<br />
A little bit of a tension issue<br />
Ugly thread nest<br />
Nicely formed stitches on the back<br />
Corrected by slightly tightening the top tension<br />
An even uglier thread nest<br />
Q<br />
58 .com | issue 7<br />
UILTsocial
Start by anchoring the beginning of<br />
the line of stitching with a few very tiny<br />
stitches. This is very easy to do since<br />
you're completely in control over the<br />
length of the stitch. Slowly start the<br />
sewing machine and move your fabric<br />
slightly while you take a couple of stitches.<br />
Once you have your anchoring stitches,<br />
you can bring the machine up to the<br />
speed you're comfortable with and stitch<br />
to the end.<br />
Just before you get to the end of your<br />
line of stitching, slow the sewing<br />
machine down and take a couple of<br />
small stitches to anchor the end of<br />
the line of stitching. Then use manual<br />
scissors to clip the top and bottom<br />
threads. Scissors can be used on the<br />
sewing machine, but I really like to<br />
control the length of those threads<br />
and I'll always have a long tail on the<br />
bobbin to bring to the top if I cut<br />
those threads manually.<br />
After filling the bobbin and placing it<br />
back in the bobbin case, I again bring<br />
that bobbin thread up to the top<br />
(sometimes this is hard if you've cut the<br />
bobbin thread short when inserting it<br />
into the bobbin case). I often leave that<br />
bobbin thread long so I'm in control of<br />
the length at all times.<br />
I start about ½'' over the previous<br />
stitches. I take one or two tiny stitches<br />
to anchor the end, then go into<br />
my previous stitches to secure the<br />
beginning of the new line. This is best<br />
done manually to get the new stitches<br />
to follow the same stitch length as<br />
the old stitches. Then finish the line of<br />
stitching.<br />
Using the Needle Stop Up/Down, the<br />
needle would stop in the fabric block at<br />
each corner, making it very easy to pivot.<br />
Once I had that first row of stitching, I<br />
just moved the block around without<br />
pivoting to get the quilting design.<br />
That's a lot of information to digest,<br />
but the bottom line is that using the<br />
Husqvarna Viking Sapphire 960Q to quilt<br />
these rag quilt blocks was so easy that I<br />
was kind of disappointed when I ran out<br />
of squares.<br />
Not to worry as I have a couple of other<br />
projects in the wings that I can pull out.<br />
But quilting these small squares is a great<br />
way to try a new design or perfect your<br />
stitch length and it's a rag quilt. These<br />
quilts are meant to be loved, used as a<br />
car quilt, used for the dog. It's a super<br />
quilt to practice on and uses up a lot of<br />
scraps. Have a great day! Ciao!<br />
Elaine Therault<br />
The end of the line of stitching is anchored with a<br />
couple of small stitches<br />
What to do when the bobbin runs out<br />
You know it's going to happen. The<br />
bobbin will run out at some point and it<br />
won't be at the end of a line of stitching.<br />
The question is 'What to do?'.<br />
The first step to clip all the loose thread<br />
ends on the top and bobbin of your<br />
work as you don't want to have loose<br />
threads that cause unsightly messes.<br />
Restarting after the bobbin ran out<br />
One last piece of advice<br />
To quilt the rag quilt squares, I started<br />
at the outside of blocks and worked<br />
my way to the center in a squarish/<br />
roundish spiral depending on how I<br />
felt. No two blocks look alike – the more<br />
consistently inconsistent you are with<br />
your quilting, no one can tell which one<br />
is the right one! You'll see the quilting<br />
motif tomorrow. Since there wasn't a lot<br />
to hold onto, I did pivot my block for the<br />
first row. Normally this is a NO-NO when<br />
free motion quilting, but these blocks<br />
are small enough that it's OK to pivot<br />
and easier to maneuver. I also used the<br />
guidelines on the stitch plate to keep the<br />
lines of stitching the same distance from<br />
the edge of the block.<br />
Trim any loose stitches on the top and bobbin side<br />
Use the Needle Stop Up/Down to pivot on the<br />
outside stitching line for these small blocks<br />
Q<br />
.com<br />
UILTsocial<br />
| issue 7 59
don't miss these<br />
projects & tutorials online!<br />
Q<br />
UILTsocial<br />
.com<br />
READ NOW<br />
essential steps for<br />
sewing borders with<br />
setting triangles<br />
READ NOW<br />
READ NOW<br />
making a THANKSGIVING<br />
table runner<br />
how to make needle turn<br />
applique easier<br />
and there's so much more!<br />
Q<br />
60 .com | issue 7<br />
UILTsocial
<strong>QUILTsocial</strong> bloggers<br />
Jennifer Houlden<br />
quiltsbyjen.ca<br />
Jennifer runs Quilts by Jen, a<br />
fantastic educational resource<br />
for quilters with many great free<br />
tutorials ranging from how to<br />
choose fabrics, understanding<br />
the value of fabrics, pressing,<br />
building Bargello runs,<br />
pinning, binding, sandwiching,<br />
couching, quilting, and<br />
much more. Check them out!<br />
Nancy Devine<br />
nancywhiskeynancyo.blogspot.com<br />
Nancy Devine is a devoted user<br />
and collector of remnants, scraps,<br />
and vintage buttons. She lives in<br />
Aurora, Ontario, and can often<br />
be found working on her latest<br />
project, and playing around with<br />
her vintage (and much loved)<br />
Bernina machine. Find more of<br />
her work and musings on her blog.<br />
Elaine Theriault<br />
crazyquilteronabike.blogspot.ca<br />
Elaine made her first quilt at<br />
the tender age of 13. The urge<br />
to quilt resurfaced when her<br />
daughter moved from a crib. The<br />
rest is history – she now teaches<br />
several days a week, makes<br />
quilts on commission and quilts<br />
for others on the long-arm.<br />
Jean Boyd<br />
patternsbyjeanboyd.com<br />
Jean has been designing and<br />
publishing patterns since 1997.<br />
Her work has been published<br />
in several magazines across<br />
North America. Jean holds a<br />
Fiber Arts Certificate in quilting<br />
and has taught extensively<br />
throughout Canada, including<br />
six national Quilt Canada<br />
conferences. She was named<br />
"Canadian Teacher of the Year" in<br />
2003 by the Canadian Quilters<br />
Association and has won<br />
numerous awards for her quilts.<br />
Q<br />
.com<br />
UILTsocial<br />
| issue 7 61
BUSINESS DIRECTORY To list your business in this space please call 1.866.969.2678.<br />
Art of Fabric<br />
955 Brock Rd Unit 1B, Pickering, ON L1W 2X9<br />
905.420.1101<br />
artoffabric.ca shop@artoffabric.ca<br />
A creative shop offering quality fabrics, specializing<br />
in Canadian designed batiks. Large selection of<br />
art supplies for textile arts & the latest notions.<br />
Authorized Bernina dealer providing quality<br />
service&support. Classroom rental space available.<br />
Brenda Franklin Designs<br />
7570 Mapleton SR 18 RR 1, Alma, ON N0B 1A0<br />
519.638.9958 bfdesigns.on.ca<br />
help@bfdesigns.on.ca<br />
More than 500 charts available for counted<br />
needlework, latch hook rugs, beadwork, beaded<br />
knits and knitting patterns. Mail/fax order or ask<br />
for our products at your local shop. Contact us for<br />
custom designs or needle felted sculpture.<br />
Brampton Sew & Serge<br />
289 Rutherford Rd S, Unit 7, Brampton, ON L6W 3R9<br />
905.874.1564 bramptonsewnserge.com<br />
monique@bramptonsewnserge.com<br />
Welcome to Your One Stop Sewing Centre! We are<br />
authorized dealers of Baby Lock, Husqvarna Viking,<br />
and Singer sewing machines and sergers. We also<br />
offer a full schedule of sewing classes for everyone.<br />
Bytowne Threads - Ottawa, ON<br />
1.888.831.4095 bytownethreads.com<br />
mlj@bytownethreads.com<br />
Featuring AURIfil® thread from Italy. Extra-long<br />
staple Egyptian cotton threads: 12wt, 28wt, 40wt &<br />
50wt - 252 colours. Bobbin threads, black & white:<br />
60 and 80wt. Polyester threads 240 high-sheen<br />
colours. Wool threads 180 colours.<br />
Country Concessions<br />
1 Dufferin St, Cookstown, ON L0L 1L0<br />
705.458.4546 or toll-free 1.888.834.44<strong>07</strong><br />
countryconcessions.com<br />
quilting@countryconcessions.com<br />
Visit our lovely and unique quilt shop in the quaint<br />
village of Cookstown. We have over 7000 bolts of<br />
cotton fabrics plus a wide selection of patterns, books<br />
& notions. You will be so glad you came for a visit.<br />
Evelyn's Sewing Centre / The Quilt Store<br />
17817 Leslie St, Unit 40, Newmarket, ON L3Y 8C6<br />
905.853.7001 or toll-free 1.888.853.7001<br />
thequiltstore.ca<br />
Evelyn's Sewing Centre in Newmarket is your Quilt<br />
Store Destination! The staff here at Evelyn's is always<br />
on hand to provide Quilt Wisdom, Quilt Inspiration<br />
and most of all we pride ourselves as the place to<br />
make... All Your Quilt Dreams Come True!<br />
Gitta's<br />
271 Lakeshore Rd E, Mississauga, ON L5G 1G8<br />
905.274.7198 gittas.com<br />
questions@gittas.com<br />
Gitta's, named after owner Gitta Al-Basi, nestled in<br />
the east village of Port Credit, is the place where<br />
stitchers meet with their stitching friends, shop for<br />
stitching supplies and see the new stitching designs<br />
from Europe and the United States.<br />
Hardanger House<br />
4708 52 St, PO Box 1223, Stettler, AB T0C 2L0<br />
403.742.2749 or toll-free 1.866.742.2749<br />
tnplisting.com/hardanger-house.html<br />
Patterns from Canadian, American and European<br />
designers, linen and evenweave fabrics from Zweigart,<br />
DMC pearl Cottons, Caron Collection threads, and<br />
all the related stitching accessories are kept in stock.<br />
Many additional items can be special ordered.<br />
Haus of Stitches<br />
626 Main Street, Humboldt, SK S0K 2A0<br />
306.682.<strong>07</strong>72 or toll-free 1.800.344.6024<br />
hausofstitches.ca<br />
Our one of a kind store offers everything you need<br />
for sewing, quilting, knitting, rug hooking and<br />
needlework.<br />
Impressions Embroidery & Engraving<br />
#8-449 Mayor Magrath Dr S, Lethbridge, AB T1J 3L8<br />
403.942.3934 impressionslethbridge.ca<br />
impressions22@shaw.ca<br />
Our shop does embroidery and laser engraving.<br />
Laser engraving is a beautiful process for fabric,<br />
as nothing cuts cleaner and more precisely than a<br />
laser. We now carry a nice array of fabric as well to<br />
compliment the abilities of the laser.<br />
Joyce's Sewing Shop<br />
325 Wortley Rd, London, ON N6C 3R8<br />
519.433.5344 joycessewingshop.com<br />
joycesewingshop@bellnet.ca<br />
Our mission is to make sewing fun by providing<br />
professional training to teach the benefits of sewing,<br />
to provide excellent service and quality products<br />
to make your sewing easier and to provide friendly<br />
customer service to make you a happy sewer.<br />
My Sewing Room<br />
148-8228 MacLeod Trl SE, Calgary, AB T2H 2B8<br />
403.252.3711 mysewingroom.ca<br />
Queenofeverything@mysewingroom.ca<br />
Canada's Largest Independently Owned Quilting<br />
Store with fabric, patterns, kits, notions, sewing<br />
machines and more! My Sewing Room boasts over<br />
10,000 bolts of 100% cotton fabric from designers<br />
and manufacturers from around the world.<br />
Needles & Knits<br />
15040 Yonge St, Aurora, ON L4G 1M4<br />
905.713.2066 needlesandknits.com<br />
Fabulous selection of yarns. Extremely<br />
knowledgable and expert help. Cozy and friendly<br />
atmosphere. Classes. Guild night every first<br />
Tuesday of the month. Tea with Tove, the owner,<br />
every Thursday from 6-8pm.<br />
Pine Ridge Knit & Sew<br />
17477 Hwy 2 PO Box 68, Trenton, ON K8V 5R1<br />
613.392.1422 pineridgeknitsew.com<br />
yvette@pineridgeknitsew.com<br />
We have knitting machines by Artisan and Silver<br />
Reed, embroidery machines by Husqvarna/Viking<br />
& White. Sewing notions and supplies, books and<br />
software. Hands-on lessons and classes. Wide<br />
variety of yarns, threads, dress and pant zippers.<br />
Ruby Pearl Quilts<br />
500 King St W, Suite 8, Oshawa, ON L1J 2K9<br />
905.436.3535 rubypearlquilts.com<br />
joy@rubypearlquilts.com<br />
We are your full service source of professional quilting<br />
equipment, products, & courses. Led by 44 years of<br />
sewing experience & more than 20 years of quilting<br />
experience, we have the experience necessary to<br />
help you push your hobby to the next level!<br />
Ruti's Needlebed<br />
10 Thomas St, Mississauga, ON L5M 1Y5<br />
905.821.9370 ruti.ca<br />
Mississauga's Finest Quilting and Knitting<br />
Store!! Come see our huge selection of yarn,<br />
fabric, supplies, sewing machines and knitting<br />
machines…a local store for all your quilting, sewing,<br />
knitting needs! We offer a wide variety of classes.<br />
The Yarn Guy<br />
15 Gower St, Toronto, ON M4B 1E3<br />
416.752.1828 or toll-free 1.800.836.6536<br />
theyarnguy.com info@sewknit.ca<br />
See us on Facebook, follow us on Twitter!<br />
Knitting machines, sewing machines, repairs, parts<br />
for Passap, Studio, Singer, Silver Reed, Superba,<br />
White. Sewing notions and supplies, books, ball<br />
yarns, coned yarns, TAMM yarns, Paton's yarns,<br />
Bernat yarns, Phentex yarns, Bernat kits & crafts.<br />
Sew Fancy Inc.<br />
Guelph, ON<br />
519.824.4127 sewfancy.com<br />
sales@sewfancy.com<br />
Your Premier Canadian Source for Specialty Sewing<br />
Supplies including Smocking, Heirloom Sewing,<br />
Goldwork, Silk Ribbon Embroidery, Needle Tatting,<br />
Swarovski Crystals, Sashiko, Quilting and more. Visit<br />
the website for the latest in sewing supplies.<br />
Stitch-It Central<br />
189 Thames Street S, Ingersoll, ON N5C 2T6<br />
519.303.1563<br />
stitchitcentral.ca sales@stitchitcentral.ca<br />
Stitch-It Central is a store to satisfy all your cross<br />
stitching needs. We have everything such as<br />
notions, books & magazines, project kits, charts,<br />
gift collections & certificates, papers & accessories,<br />
fabrics and linens, and so much more.<br />
That Sewing Place<br />
16610 Bayview Ave #10, Newmarket, ON L3X 1X3<br />
905.715.7725 thatsewingplace.ca<br />
jaret&liana@thatsewingplace.ca<br />
Introducing That Sewing Place as your sewing<br />
source and Authorized Dealers for Bernina and<br />
Brother machines. Jaret & Liana focus on placing<br />
your sewing needs first, providing outstanding<br />
support, service, and training.<br />
The Stitching Corner<br />
#2, 185 First St E, Cochrane, AB T4C 2E9<br />
403.932.3390 stitchingcorner.ca<br />
nygabe@telus.net<br />
Your Needlework Shop in Cochrane.<br />
The Stitcher's Muse<br />
4 - 70 Church St, Nanaimo, BC V9R 5H4<br />
250.591.6873 thestitchersmuse.com<br />
info@thestitchersmuse.com<br />
A divine little shop with supplies for all your hand<br />
stitching needs! Friendly, knowledgeable, helpful<br />
staff. Cross stitch, canvaswork, needlepoint,<br />
embroidery, counted thread, lace making and<br />
more. Books, patterns, fabric, threads, tools.<br />
Ultimate Sewing Centre<br />
191 Bloor St East, Oshawa, ON L1H 3M3<br />
905.436.9193 ultimatesewing.com<br />
ultimatesewing@bellnet.ca<br />
For all your sewing needs be sure to call Durham’s<br />
largest one stop shop: Janome and Elna Sewing<br />
Machines, Sergers, & Embroidery machines,<br />
over 3000 bolts of first quality cottons, Floriani<br />
Embroidery supplies, the latest notions, books, &<br />
patterns, year round classes, and so much more!<br />
Upper Canada Quiltworks<br />
PO Box 64, Brockville, ON K6V 5T7<br />
613.345.3956 Fax: 613.342.3327<br />
uppercanadaquiltworks.com<br />
Visit us online for a wide selection quilt patterns<br />
and books. Techniques include felted wool, fusible<br />
appliqué, punchneedle, rag quilting and printing<br />
photos on fabric.<br />
Q<br />
62 .com | issue 7<br />
UILTsocial
Get your game on!<br />
Bring your quilting to a whole new level.<br />
Create your own unique quilts, wall hangings, games, cards, placemats and so much more with Brother’s<br />
Q-Series sewing and quilting machines, and ScanNCut.<br />
Brother’s ScanNCut comes fully loaded with an exciting collection of quilt block patterns so you can design<br />
your own one-of-a-kind creations with the push of a button! Now, cut your favourite material into any shape<br />
— no matter how intricate — without ever touching bulky design cartridges or even a pair of scissors.<br />
Brother’s Q-series sewing and quilting machines and ScanNCut — the only thing limiting your creativity<br />
is your imagination.<br />
Create your own magnetic, quilted tic-tac-toe<br />
board like the one featured here. See how at<br />
brother.ca/tic-tac-toe<br />
NQ900<br />
Stylist - Q-Series sewing & quilting<br />
machine. Fall in love with the large<br />
workspace and wide table<br />
Visit brother.ca/findadealer to find your closest<br />
authorized Brother dealer.<br />
CM650W<br />
ScanNCut - scans and cuts appliqué,<br />
fabric pieces and quit blocks with ease<br />
brother.ca/inspiration<br />
INSPIRING CREATIVITY FOR GENERATIONS<br />
Brother and its logo are trademarks of Brother Industries Ltd., Japan. All specifications are subject to change without notice. © 2016 Brother International Corporation (Canada) Ltd.<br />
63
cr eativ<br />
100% cotton thread<br />
A fine, strong, high quality sewing thread<br />
for hand or machine sewing, no matter<br />
the stitch type or fabric.<br />
Gütermann 50 wt. Cotton Quilting thread<br />
is made of long staple 100% Egyptian<br />
mercerized cotton; it’s versatile and gives<br />
seams a natural character.<br />
•<br />
Suitable<br />
Suitable<br />
for<br />
for<br />
hand<br />
hand<br />
or<br />
or<br />
machine<br />
machine<br />
sewing;<br />
sewing;<br />
the<br />
the<br />
perfect<br />
perfect<br />
thread<br />
thread<br />
for<br />
for<br />
your<br />
your<br />
quilting<br />
quilting<br />
projects<br />
projects<br />
•<br />
Larger<br />
Larger<br />
cone<br />
cone<br />
sizes<br />
sizes<br />
are<br />
are<br />
excellent<br />
excellent<br />
for<br />
for<br />
long<br />
long<br />
arm<br />
arm<br />
quilting<br />
quilting<br />
machines<br />
machines<br />
•<br />
Available<br />
Available<br />
in<br />
in<br />
100m,<br />
100m,<br />
250m,<br />
250m,<br />
400m,<br />
400m,<br />
800m,<br />
800m,<br />
3000m<br />
3000m<br />
and<br />
and<br />
5000m<br />
5000m<br />
spool<br />
spool<br />
lengths<br />
lengths<br />
•<br />
186<br />
186<br />
stunning<br />
stunning<br />
solid<br />
solid<br />
and<br />
and<br />
variegated<br />
variegated<br />
shades<br />
shades<br />
•<br />
Ideal<br />
Ideal<br />
for<br />
for<br />
ornamental<br />
ornamental<br />
stitches,<br />
stitches,<br />
decorative<br />
decorative<br />
seams<br />
seams<br />
and<br />
and<br />
embroidery<br />
embroidery<br />
•<br />
Soft<br />
Soft<br />
and<br />
and<br />
supple<br />
supple<br />
with<br />
with<br />
tear<br />
tear<br />
and<br />
and<br />
abrasion<br />
abrasion<br />
resistance<br />
resistance<br />
•<br />
Colorfast:<br />
Colorfast:<br />
fade<br />
fade<br />
resistant<br />
resistant<br />
to<br />
to<br />
UV<br />
UV<br />
rays<br />
rays<br />
and<br />
and<br />
multiple<br />
multiple<br />
washings<br />
washings<br />
Look for Gütermann threads at your favourite<br />
fabric, sewing and quilting store!


