BIS 450 DeVry Week 6 I Lab 7
Create successful ePaper yourself
Turn your PDF publications into a flip-book with our unique Google optimized e-Paper software.
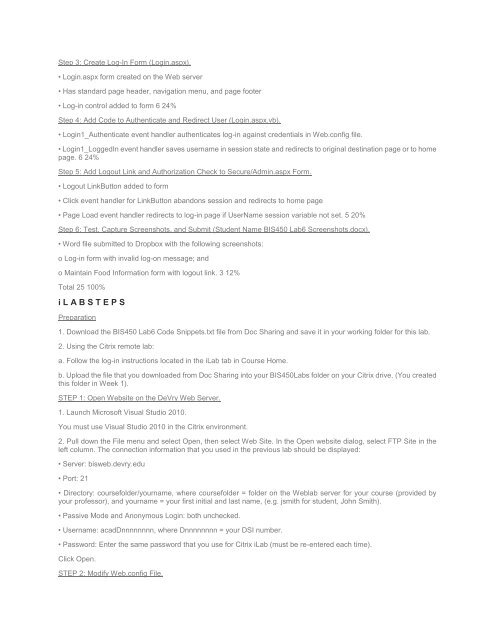
Step 3: Create Log-In Form (Login.aspx).<br />
• Login.aspx form created on the Web server<br />
• Has standard page header, navigation menu, and page footer<br />
• Log-in control added to form 6 24%<br />
Step 4: Add Code to Authenticate and Redirect User (Login.aspx.vb).<br />
• Login1_Authenticate event handler authenticates log-in against credentials in Web.config file.<br />
• Login1_LoggedIn event handler saves username in session state and redirects to original destination page or to home<br />
page. 6 24%<br />
Step 5: Add Logout Link and Authorization Check to Secure/Admin.aspx Form.<br />
• Logout LinkButton added to form<br />
• Click event handler for LinkButton abandons session and redirects to home page<br />
• Page Load event handler redirects to log-in page if UserName session variable not set. 5 20%<br />
Step 6: Test, Capture Screenshots, and Submit (Student Name <strong>BIS</strong><strong>450</strong> <strong>Lab</strong>6 Screenshots.docx).<br />
• Word file submitted to Dropbox with the following screenshots:<br />
o Log-in form with invalid log-on message; and<br />
o Maintain Food Information form with logout link. 3 12%<br />
Total 25 100%<br />
i L A B S T E P S<br />
Preparation<br />
1. Download the <strong>BIS</strong><strong>450</strong> <strong>Lab</strong>6 Code Snippets.txt file from Doc Sharing and save it in your working folder for this lab.<br />
2. Using the Citrix remote lab:<br />
a. Follow the log-in instructions located in the i<strong>Lab</strong> tab in Course Home.<br />
b. Upload the file that you downloaded from Doc Sharing into your <strong>BIS</strong><strong>450</strong><strong>Lab</strong>s folder on your Citrix drive. (You created<br />
this folder in <strong>Week</strong> 1).<br />
STEP 1: Open Website on the <strong>DeVry</strong> Web Server.<br />
1. Launch Microsoft Visual Studio 2010.<br />
You must use Visual Studio 2010 in the Citrix environment.<br />
2. Pull down the File menu and select Open, then select Web Site. In the Open website dialog, select FTP Site in the<br />
left column. The connection information that you used in the previous lab should be displayed:<br />
• Server: bisweb.devry.edu<br />
• Port: 21<br />
• Directory: coursefolder/yourname, where coursefolder = folder on the Weblab server for your course (provided by<br />
your professor), and yourname = your first initial and last name, (e.g. jsmith for student, John Smith).<br />
• Passive Mode and Anonymous Login: both unchecked.<br />
• Username: acadDnnnnnnnn, where Dnnnnnnnn = your DSI number.<br />
• Password: Enter the same password that you use for Citrix i<strong>Lab</strong> (must be re-entered each time).<br />
Click Open.<br />
STEP 2: Modify Web.config File.


