Hyperbit-BW-L21-Intsallation-Guide
You also want an ePaper? Increase the reach of your titles
YUMPU automatically turns print PDFs into web optimized ePapers that Google loves.
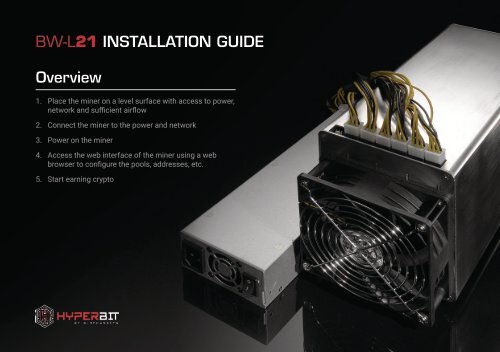
<strong>BW</strong>-<strong>L21</strong> INSTALLATION GUIDE<br />
Overview<br />
1. Place the miner on a level surface with access to power,<br />
network and sufficient airflow<br />
2. Connect the miner to the power and network<br />
3. Power on the miner<br />
4. Access the web interface of the miner using a web<br />
browser to configure the pools, addresses, etc.<br />
5. Start earning crypto
POWER SUPPLY<br />
STEP01<br />
Connect power supply (PSU) with cable to the mains electricity supply. Do not power on the PSU yet. First, check the specifications<br />
on base of PSU matches your requirements. Depending on the voltage, you may need to use a power transformer.
CONNECT ETHERNET<br />
STEP02<br />
Connect the network cable to the miner’s<br />
ethernet port
POWER CONNECTIONS<br />
STEP03<br />
Connect any 6 power cables from the power supply<br />
to the power connections at the top of the miner. Also<br />
ensure that the fan power cable from the fan at the front<br />
of the miner is connected to the 4 pin power output on<br />
the top of the miner.<br />
POWER UP<br />
STEP04<br />
Power on the PSU and wait approximately 30 seconds<br />
for it to boot and commence running.
CONNECTIVITY<br />
STEP05<br />
By default, the miner will obtain a DHCP network<br />
address. If you have a DHCP network running, you can<br />
query the network for the IP address of the miner.<br />
Alternatively, use IP scanning software. For example:<br />
www.advanced-ip-scanner.com<br />
You can connect to the miner using a web browser at<br />
http://IP – where IP is the IP address of the miner.<br />
If you have an internet router you can usually look<br />
at the DHCP leases table of that router to determine<br />
which address it has given to the miner.<br />
Alternatively, press the reset pin on the back of the<br />
miner. When all four LEDs flash, the miner has reset.<br />
This will cause the miner to restart with the default<br />
IP address 10.0.0.10.<br />
For further assistance with factory reset, refer to<br />
Help <strong>Guide</strong>.
NETWORK CONFIGURATION<br />
STEP06<br />
Log in to the miner dashboard by browsing the default<br />
IP or DHCP address.<br />
The miner login name is admin<br />
The password is bw.com<br />
Access the Network configuration screen on the<br />
second tab (pictured left).<br />
Enter the IP address, netmask, and gateway for your<br />
network. You can enter any DNS server address but<br />
8.8.8.8 is usually safe to use.<br />
Alternatively you may select DHCP Net as the Protocol<br />
and your miner will automatically obtain an IP address<br />
from your DHCP server, after Save & Restart.<br />
Network settings must be saved before moving to<br />
mining pools (on the third tab). Click Save & Restart.<br />
The miner will reboot with chosen network settings.<br />
After saving, now log in to the miner dashboard using<br />
the IP address you chose.<br />
For further assistance with personal networks, refer<br />
to Help <strong>Guide</strong>.
POOL SETTINGS<br />
STEP07<br />
Users may configure up to three pools under the<br />
MiningPool tab. Enter the pool, username and<br />
password data here.<br />
Refer to the support information provided by the Scryptbased<br />
pools you wish to configure. List them in order<br />
of priority. The miner attempt to connect to Pool1 by<br />
default, then the second, or third backup pools.<br />
The miner ships at default 648 frequency, equivalant<br />
to 550 MHS (+/- 10%). Changing to the 684 setting<br />
on the frequency dropdown will increase the miner’s<br />
hashrate up to 600 MHS (+/- 10%). The 684 frequency<br />
is not considered overclock. Please monitor<br />
performance on different frequencies to find the<br />
best setting for your environment.<br />
Click Save & Restart. The miner will reboot with chosen<br />
pool and frequency settings.<br />
For an example pool setup, refer to Help <strong>Guide</strong>.
CONNECTING AFTER RESET<br />
HELP GUIDE01<br />
After reset, connect the miner via ethernet cable to a<br />
personal computer.<br />
Configure the network settings on your PC to match<br />
that of the reset miners. Edit the PC ethernet network<br />
settings under IPv4:<br />
IP: 10.0.0.11<br />
Netmask: 255.0.0.0<br />
Gateway: 10.0.0.1<br />
DNS: 8.8.8.8 or 8.8.4.4<br />
After PC network configuration has been saved, use a<br />
web browser to acess the default IP address 10.0.0.11<br />
while miner is still connected by ethernet to the PC.<br />
Log in to the miner dashboard, open the Network tab,<br />
enter your personal network details as per Step06,<br />
then save and reset. Plug the miner into your personal<br />
network and browse your chosen IP address.<br />
You will now be able to access the miner dashboard<br />
from any computer connected to your personal network.
FIND YOUR NETWORK SETTINGS<br />
HELP GUIDE02<br />
How to determine your personal network settings.<br />
For Windows, open the Command Prompt window.<br />
This can be located by typing “command prompt”<br />
into the Windows search bar.<br />
For Mac, open the Terminal window. This can be<br />
opened by typing “terminal” into Spotlight search.<br />
Typing “ipconfig” (for Windows) or “ifconfig” (for<br />
Mac) will return the settings of the personal network<br />
you are connected to (example right).<br />
Using the example (pictured right) you would enter<br />
the following network configurations for Step06<br />
IP: 192.168.7.106<br />
Netmask: 255.255.255.0<br />
Gateway: 192.168.7.3<br />
DNS: 8.8.8.8 or 8.8.4.4<br />
Provided IP 192.168.7.106 is not already taken on<br />
your personal network by another device.<br />
Save & Restart. When the miner has rebooted, you will<br />
now be able to access the dashboard to configure<br />
pools by browsing 192.168.7.106
EXAMPLE POOL SETTINGS<br />
HELP GUIDE03<br />
Below is an example setup using the <strong>BW</strong> Litecoin<br />
pool. You can sign up for this service at<br />
https://ltc.bw.com/pool<br />
Pool 1: stratum+tcp://stratum_ltc.bw.com:8888<br />
Pool 2: stratum+tcp://stratum_ltc.bw.com:8889<br />
Pool 3: stratum+tcp://stratum_ltc.bw.com:8888<br />
Username: username.workername<br />
Replace “username” with your <strong>BW</strong> pool username.<br />
“Workername” can be set to anything (i.e. 1), except special<br />
characters. A password entry is not required for this pool.
<strong>BW</strong>-<strong>L21</strong> WARRANTY<br />
6 MONTHS FROM DATE OF SHIPPING<br />
WARRANTY COVERS<br />
SHIPPING ADDRESS<br />
• Replacement of miner parts that report as faulty on the dashboard.<br />
• Replacement in the event of a failure of the miner while operating<br />
under normal conditions of power, temperature, etc.<br />
• Replacement of power supply unit while operating under normal conditions<br />
of power, temperature, etc.<br />
VOIDED CASES<br />
• Replacement or servicing of miner boards that occasionally or infrequently<br />
report as “not hashing”<br />
Attention: <strong>Hyperbit</strong> Warranty Department<br />
Room 101, 1st Floor, M-10 Building<br />
No. 4, Ke Wen Road, Ma Kuo Ling Industrial Zone<br />
Nanshan District, Shenzhen, China<br />
CONTACT<br />
For further warranty or troubleshooting support email:<br />
support@hyperbitshop.io<br />
• Parts exposed to high temperatures or voltages outside PSU specifications,<br />
including damage from lightning and other voltage surges.<br />
• Replacement or servicing of miner parts exposed to frequent connection<br />
and disconnection from power source.<br />
• When miner is demolished, privately altered or has had components<br />
replaced.<br />
• If components are filled with water, exposed to moisture, or corroded.<br />
If any circuit board or chips are burnt.<br />
• Replacement or servicing of miner parts under conditions where hash<br />
rates, financial returns or accept/reject rates are not within expected<br />
parameters, where this may be caused by the mining conditions at the<br />
pool such as increased difficulty levels, high collision rates with other<br />
miners due to mining pool congestion and network conditions.<br />
• In the case of overclocking or miner modification.


