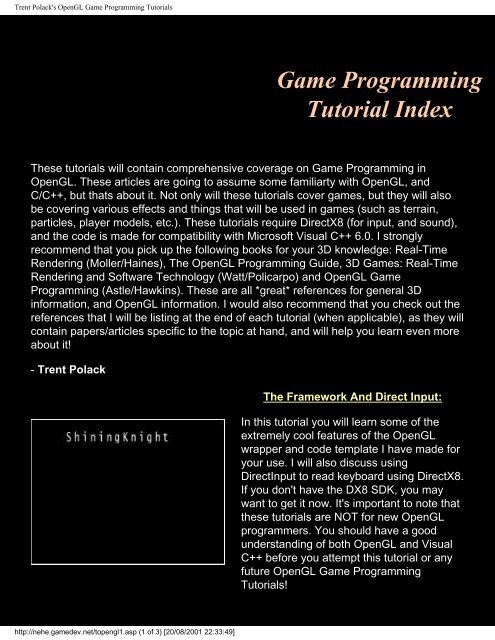
Trent Polack's OpenGL Game Programming Tutorials
Trent Polack's OpenGL Game Programming Tutorials
Trent Polack's OpenGL Game Programming Tutorials

You also want an ePaper? Increase the reach of your titles
YUMPU automatically turns print PDFs into web optimized ePapers that Google loves.
<strong>Trent</strong> <strong>Polack's</strong> <strong>OpenGL</strong> <strong>Game</strong> <strong>Programming</strong> <strong>Tutorials</strong><br />
<strong>Game</strong> <strong>Programming</strong><br />
Tutorial Index<br />
These tutorials will contain comprehensive coverage on <strong>Game</strong> <strong>Programming</strong> in<br />
<strong>OpenGL</strong>. These articles are going to assume some familiarty with <strong>OpenGL</strong>, and<br />
C/C++, but thats about it. Not only will these tutorials cover games, but they will also<br />
be covering various effects and things that will be used in games (such as terrain,<br />
particles, player models, etc.). These tutorials require DirectX8 (for input, and sound),<br />
and the code is made for compatibility with Microsoft Visual C++ 6.0. I strongly<br />
recommend that you pick up the following books for your 3D knowledge: Real-Time<br />
Rendering (Moller/Haines), The <strong>OpenGL</strong> <strong>Programming</strong> Guide, 3D <strong>Game</strong>s: Real-Time<br />
Rendering and Software Technology (Watt/Policarpo) and <strong>OpenGL</strong> <strong>Game</strong><br />
<strong>Programming</strong> (Astle/Hawkins). These are all *great* references for general 3D<br />
information, and <strong>OpenGL</strong> information. I would also recommend that you check out the<br />
references that I will be listing at the end of each tutorial (when applicable), as they will<br />
contain papers/articles specific to the topic at hand, and will help you learn even more<br />
about it!<br />
- <strong>Trent</strong> Polack<br />
http://nehe.gamedev.net/topengl1.asp (1 of 3) [20/08/2001 22:33:49]<br />
The Framework And Direct Input:<br />
In this tutorial you will learn some of the<br />
extremely cool features of the <strong>OpenGL</strong><br />
wrapper and code template I have made for<br />
your use. I will also discuss using<br />
DirectInput to read keyboard using DirectX8.<br />
If you don't have the DX8 SDK, you may<br />
want to get it now. It's important to note that<br />
these tutorials are NOT for new <strong>OpenGL</strong><br />
programmers. You should have a good<br />
understanding of both <strong>OpenGL</strong> and Visual<br />
C++ before you attempt this tutorial or any<br />
future <strong>OpenGL</strong> <strong>Game</strong> <strong>Programming</strong><br />
<strong>Tutorials</strong>!
<strong>Trent</strong> <strong>Polack's</strong> <strong>OpenGL</strong> <strong>Game</strong> <strong>Programming</strong> <strong>Tutorials</strong><br />
http://nehe.gamedev.net/topengl1.asp (2 of 3) [20/08/2001 22:33:49]<br />
Vectors and Matrices:<br />
This tutorial is theory, math and more<br />
theory. In this tutorial you will create two<br />
very useful classes. These classes are for<br />
use with the wrapper from lesson 1. One<br />
class is for vectors, and the other is for 4x4<br />
matrices. You will also learn about operator<br />
overloading to make your code a little bit<br />
easier to read when using the two classes!<br />
This tutorial is a must read for anyone<br />
interested in how matrices work!<br />
Designing a Particle Engine:<br />
Now for some really cool stuff (the first<br />
game tut with graphics). In this tutorial, you<br />
will learn how to design and code a flexible /<br />
powerful particle engine! Create almost any<br />
type of special effect possible with particles.<br />
Particles are affected by gravity and<br />
eachother. Colors can change through<br />
interpolation, etc. This is a long tutorial, so<br />
be prepared :)<br />
Model Mania:<br />
In this tutorial you will learn how to load two<br />
different formats of models: .MD2 (Quake 2<br />
type models) and .MS3D (MilkShape's<br />
native format). The .MD2 format is perfect<br />
for First Person Shooters (being that it was<br />
used in Quake 2), and .MS3D format is<br />
good because MilkShape has support for<br />
the most popular model formats around.<br />
This tutorial is absolutely HUGE! 17 pages<br />
when printed! Be prepared for some wicked<br />
code and ALOT of reading :)
<strong>Trent</strong> <strong>Polack's</strong> <strong>OpenGL</strong> <strong>Game</strong> <strong>Programming</strong> <strong>Tutorials</strong><br />
This code is not guaranteed to be bug free. If you find mistakes or problems<br />
with any of the tutorials, please contact <strong>Trent</strong> Polack.<br />
http://nehe.gamedev.net/topengl1.asp (3 of 3) [20/08/2001 22:33:49]<br />
Back To NeHe Productions!
Jeff Molofee's <strong>OpenGL</strong> Windows Tutorial #1<br />
Introduction:<br />
<strong>Game</strong> <strong>Programming</strong><br />
Lesson 1<br />
<strong>OpenGL</strong> <strong>Game</strong> <strong>Programming</strong> Tutorial One:<br />
The Framework, and DirectInput<br />
By <strong>Trent</strong> "ShiningKnight" Polack<br />
One day while scanning the Internet, I noticed about 10+ different series of <strong>OpenGL</strong> programming tutorials, but I<br />
also noticed the extreme lack of <strong>Game</strong> <strong>Programming</strong> with <strong>OpenGL</strong> tutorials. And we just can't have that. So, this is<br />
where this series comes into play. It will be a series of tutorials on 3D <strong>Game</strong>s and Special Effects. Ranging from<br />
topics such as: Particle Engines, Terrain Engines, Model Loading, and of course, cool games to mess around with.<br />
:-)<br />
You may be asking yourself "why does game programming require special tutorials?" Well, the answer is that<br />
special notice needs to be taken when programming certain things. Such as realism, coolness, playability, good<br />
control, and speed. <strong>Game</strong>s are a completely different ballgame than simple apps, and 'business' apps. An average<br />
game needs to be fun, sound, control, and look good, while having as little amount of slowdown as possible.<br />
Whereas your average business app only needs to fulfill one specific purpose... Wow. ;)<br />
I am going to make these tutorials as easy as possible for anyone to learn, but unfortunately they will require some<br />
previous knowledge. First of all, a good knowledge of C, and a basic knowledge of C++ is needed (and if you don't<br />
know C at all, but rock with C++, don't worry. You actually do know C :) ), as well some decent <strong>OpenGL</strong> knowledge<br />
(all of which you can learn through NeHe's tuts). I will try to use as little math as possible, but when I do need it, I<br />
will explain everything.<br />
This first tutorial is going to seem rather 'boring' compared to the rest of the series, but unfortunately it is<br />
necessary. In this tutorial you will learn some of the extreme coolness of the <strong>OpenGL</strong> wrapper and code template I<br />
have made for your use. I will also be talking about using DirectInput to receive your keyboard input (using<br />
DirectX8, so if you don't have the SDK, you may want to get it now). Sooooo, without further chit-chat, lets start.<br />
The Wrapper:<br />
The wrapper's files (as of right now) are: shining3d.h, shining3d.cpp, math.cpp, and directinput.cpp. shining3d.h is<br />
the header file that: declares the necessary headers we will want to include, code that searches for the necessary<br />
libraries at compile time, preprocessor constants, simple structures, classes, and some global functions. Let me tell<br />
you right now, I will not be going through all of the previous files line by line. I will be skipping the internal code of<br />
the font functions, the initiation/shut down functions, and a lot of the other windows information. I will assume that<br />
you are already familiar with these (and some other <strong>OpenGL</strong> information that you can go learn in NeHe's tutorials. I<br />
will tell you what specific NeHe tutorial to refer to when I do that, go check out his site now at<br />
http://nehe.gamedev.net/gametutorials/lesson01.asp (1 of 11) [20/08/2001 22:34:03]
Jeff Molofee's <strong>OpenGL</strong> Windows Tutorial #1<br />
http://nehe.gamedev.net (though, since you are reading this tutorial now, you are already there). :)<br />
Now, lets start at the top of the shining3d.h header file. It starts by including some necessary files that we will need<br />
at one time or another, and then it include the DirectInput8 header file, as well as some <strong>OpenGL</strong> headers. And in<br />
case, you aren't familiar with the following code, I will explain it briefly:<br />
#pragma comment(lib, "Dxguid.lib") // Search For the DXguid Library At<br />
Compile Time<br />
#pragma comment(lib, "Dinput8.lib") // Search For the DirectInput8<br />
Library At Compile Time<br />
#pragma comment(lib, "<strong>OpenGL</strong>32.lib") // Search For The <strong>OpenGL</strong>32 Library At<br />
Compile Time<br />
#pragma comment(lib, "Glu32.lib") // Search For The Glu32 Library At<br />
Compile Time<br />
Those lines search for the correct library (provided in the quotation marks) at compile time, that way, you don't<br />
have to include those libraries every time you want to compile the program. Sorta helpful. ;)<br />
Next, let's jump to the classes! The first class is the main class that you will always need in your programs.<br />
class SHINING3D<br />
{<br />
Now, lets start by going through the private variables of the class. And just for a little refresher, the private parts of<br />
a class can only be accessed by information IN that class. For example, say you wanted to access a private int<br />
"bob." You could access "bob" in absolutely any function within that class, but if the user wanted to access "bob"<br />
from within their program, it would not be possible. Get it? Hopefully, because I just drank the last Mountain Dew in<br />
my house. Anyway, here are the private variables:<br />
GLuint base;<br />
S3DTGA font_texture;<br />
These are both used for the font functions that we have. Now here are the font functions (you'll notice that I am<br />
jumping around the class a little, so bare with me :) ):<br />
GLvoid glPrint(GLint x, GLint y, const char *string, ...);<br />
GLvoid Font_Init(GLvoid);<br />
GLvoid Font_Shutdown(GLvoid);<br />
You will need to put Font_Init() in the initiation part of the console if you want to use the font printing function.<br />
Similarly, you will need to put Font_Shutdown() in the shutdown part of the console. glPrint(GLint x, GLint y, const<br />
char *string, ...) will print text that you provide for the third argument, at the location you provide for the first two<br />
arguments. You can go to the main console (main.cpp) to see an example of using the function right now. I will fully<br />
explain the main console (I call it a console, you can call it "the main file," "the main template," "the main<br />
framework," or whatever floats your pickle... Or is that "tickles your boat?" I always seem to forget...) later on in the<br />
tutorial. Anyway, now you understand what each font function does, if you want further information on fonts, you<br />
can check out the functions' definition in shining3d.cpp or go to NeHe's tutorials on fonts, which are <strong>Tutorials</strong> 13-15.<br />
Next on the list, (back to the private functions) is the cosine and sine initiation function. Here is the declaration:<br />
GLvoid SIN_COS_Init(GLvoid);<br />
And, even though the function is already called when the program starts (this is accomplished by using the class's<br />
constructor. A quick explanation of this is that anything in the constructor is done when the program starts), I will be<br />
going through the function definition anyway. The definition is in math.cpp. And here it is:<br />
GLvoid SHINING3D::SIN_COS_Init(GLvoid)<br />
{<br />
GLuint loop; // Looping Index, For The<br />
http://nehe.gamedev.net/gametutorials/lesson01.asp (2 of 11) [20/08/2001 22:34:03]
Jeff Molofee's <strong>OpenGL</strong> Windows Tutorial #1<br />
Angle<br />
Angles<br />
GLfloat radian;<br />
for(loop=0; loop
Jeff Molofee's <strong>OpenGL</strong> Windows Tutorial #1<br />
That function completely shuts down <strong>OpenGL</strong>, and the window that you created. You will want to put a call to that<br />
as the last thing in your shutdown function (just because, when it comes to initiation and shut down, the first thing<br />
created will usually want to be shut down last (and vice versa).<br />
The last of the windows functions is shown here:<br />
bool HandleMessages(void);<br />
This function handles all the messages that your window will receive throughout it's lifetime. I will show you where<br />
to put it when we talk about the main console.<br />
SHINING3D()<br />
{ SIN_COS_Init(); }<br />
~SHINING3D()<br />
{ }<br />
Those are the class's constructor, and deconstructor (which is like the constructor, except that it handles all of the<br />
shut down measures. A deconstructor is known by the little tilde, '~,' in front of it). As I said, we put the<br />
SIN_COS_Init(...) in the constructor, so its automatically called.<br />
Now, lets talk briefly about the error log. Here is it's class:<br />
class LOG<br />
{<br />
private:<br />
FILE* logfile;<br />
bool Init(void);<br />
bool Shutdown(void);<br />
public:<br />
bool Output(char* text, ...);<br />
LOG()<br />
{ Init(); }<br />
~LOG()<br />
{ Shutdown(); }<br />
};<br />
The only thing you need to worry about is the text output function:<br />
bool Output(char* text, ...);<br />
This function outputs text to the error log. You will treat it exactly like printf(...). An error log's object is already<br />
created inside the wrapper (so that I can output how things went inside the window creation function, shutdown,<br />
etc.). So if you want to use the output function, use it like this:<br />
S3Dlog.Output("Hi");<br />
That's about it for the classes (except for the DirectInput class, which will be covered very soon, so just be patient ;)<br />
). Now, I am going to go into some very brief details on the macros of the wrapper:<br />
* RANDOM_FLOAT - Finds A Random Float Between -1.0 And 1.0.<br />
* CHECK_RANGE(x,min,max) - Checks The Range Of A Number, To Make Sure That It<br />
Is Within The Min And Max That You Provide<br />
* DEG_TO_RAD(angle) - Converts An Angle That You Provide Into A Radian Value<br />
* RAD_TO_DEG(radians) - Converts A Radian That You Provide Into An Angle<br />
* SQUARE(number) - Multiplies A Number That You Provide By Itself.<br />
Now we are going to go through some of the global functions. You should have an understanding of all of these<br />
http://nehe.gamedev.net/gametutorials/lesson01.asp (4 of 11) [20/08/2001 22:34:03]
Jeff Molofee's <strong>OpenGL</strong> Windows Tutorial #1<br />
functions (except for maybe Random(...)) already.<br />
LRESULT CALLBACK WindowProc(HWND hwnd, UINT msg, WPARAM wparam, LPARAM lparam);<br />
This function is needed for the window, you don't have to worry about calling it anywhere, its all handled for you by<br />
windows.<br />
void Resize_GLScene(GLsizei width, GLsizei height);<br />
This function resizes the <strong>OpenGL</strong> scene so that if the user changes the width or height, the scene's perspective will<br />
not get all screwed up. Though I have designed the window so that the user can't alter the sizes. This may seem<br />
like an odd thing to do, but say that you have your game set up for a certain window resolution and then someone<br />
goes and alters the width. Now, you may not have planned for that, and now the user can see a lot more than you<br />
had wanted them to.<br />
bool TGA_Load(S3DTGA_PTR image, char* filename, GLfloat minfilter, GLfloat<br />
maxfilter);<br />
This function loads a .tga image from a file, into the address of a S3DTGA structure that you provide. You also<br />
need to provide the image's minfilter (if the image is smaller than it's actual size), and the maxfilter (if the image is<br />
larger than it's actual size). The filters are the same as you would use in <strong>OpenGL</strong> (I usually use GL_LINEAR for all<br />
of my textures, as it is the happy medium between speed and quality.<br />
GLint Random(GLint min, GLint max);<br />
This function returns a random value between the range that you provide. So if you wanted to get a random<br />
number between -10, and 11461 you would call the function like this:<br />
Mynumber= Random(-10, 11461);<br />
Yes! Now its time to move on to DirectInput!!! Using DirectInput for the keyboard is really easy, and I will try to<br />
make it even easier than it actually is! :) Sooooo, lets get to it! :)<br />
Pressing Buttons with DirectInput:<br />
DirectInput, as I just said, is really easy. I have already encapsulated the DirectInput information into a class, and<br />
its all ready and waiting for you to use it. I will be going through all of the functions anyway though, because this<br />
may be something new. Just a little bit of information before we get into the code though. All DirectX components<br />
use something called the Component Object Model (COM), which is why some of the functions and conventions<br />
used in DirectX may seem a little odd at first. I could go into explaining what COM actually is, but it is really<br />
confusing, and you really don't need the extra details. Now lets get back to the code! First we are going to go<br />
through the private Dinput variables that are necessary:<br />
LPDIRECTINPUT8 lpdi; //Main DirectInput Object<br />
LPDIRECTINPUTDEVICE8 lpdi_keyboard; //Keyboard's DirectInput<br />
Device<br />
LPDIRECTINPUT8 (a long pointer to a directinput8 object) is the type that DirectInput sets aside for the main<br />
object. lpdi is the main object, which acts as a manager to all of its 'employees,' which are the<br />
LPDIRECTINPUTDEVICE8 types. We must first initialize lpdi before we initialize the 'employee' lpdi_keyboard.<br />
lpdi_keyboard is the DirectInput device that will represent our keyboard once we initialize it. But, before we initialize<br />
the keyboard, we must initialize the main object (to manage the creation of the keyboard device object). We will<br />
want to create a variable to see if any of the initiation stuff will fail, so this is why we do this:<br />
HRESULT hr; //DirectX Result Variable<br />
That is a specific type of variable specifically for DirectX that contains all of the DX's error information. We will<br />
assign the result of a function to that variable, then test that variable to see if something failed, or if everything went<br />
well!<br />
//Create The Main DirectInput Object<br />
http://nehe.gamedev.net/gametutorials/lesson01.asp (5 of 11) [20/08/2001 22:34:03]
Jeff Molofee's <strong>OpenGL</strong> Windows Tutorial #1<br />
hr= (DirectInput8Create(hinstance, DIRECTINPUT_VERSION, IID_IDirectInput8,<br />
(void**)&lpdi, NULL));<br />
That line initiates the main DirectInput object. I will explain the arguments in order of appearance: the first argument<br />
it a handle to our window's instance, so that DInput is familiar with the parameters of the window. The second<br />
argument is a constant that Microsoft just wants us to put there. The third argument tells DirectX what version of<br />
DirectInput we are going to use. The next argument is a pointer to our main Dinput object, and we will set the last<br />
argument to NULL, as it contains extra COM information that we really don't need.<br />
if(FAILED(hr))<br />
{<br />
MessageBox(hwnd, "Could not create main DInput object", TITLE, MB_OK);<br />
return false;<br />
}<br />
This, as I said before, checks to see if the previous function that we assigned hr to, failed or not. FAILED(...) is a<br />
general macro that Microsoft gave us to make our programming life easier. If the hr value does not contain the<br />
correct information that we want it to, then we are going to create a message box, and return false to our function. I<br />
would create a message box, and output error text to our log (which will be there by our next tutorial), but I wanted<br />
you to practice using the log, so this would be a perfect spot to output an error message to it.<br />
hr= (lpdi->CreateDevice(GUID_SysKeyboard, &lpdi_keyboard, NULL));<br />
Now that our main Dinput object has been created, hopefully, we are going to create our keyboard's main object.<br />
We do this by using a method (a function of a class) of our main Dinput object. I will, yet again, go through the<br />
arguments one by one: the first argument passes a GUID constant that Microsoft provides to tell DirectX that we<br />
are using the keyboard. The second argument passes a pointer to our keyboard's object, and yet again, we are<br />
going to pass NULL as the last argument. And being that I just showed you how to detect for an error, I am not<br />
going to do it again.<br />
hr= (lpdi_keyboard->SetDataFormat(&c_dfDIKeyboard));<br />
This sets our keyboard's data format, and all we are going to do is pass yet another constant that tells DirectInput<br />
that we are using the keyboard, and that we need the correct data format for it.<br />
hr= (lpdi_keyboard->SetCooperativeLevel(hwnd, DISCL_FOREGROUND |<br />
DISCL_NONEXCLUSIVE));<br />
This sets our keyboard's behavior (cooperation level) with your computer. We are passing our window's main<br />
handle to tell the keyboard a little bit about our window. For the next argument we logically (bitwise) 'or' the flags for<br />
our keyboard together, so we can create the custom performance that we want. We are setting the keyboard's<br />
focus to the window in the foreground, and we want to make it non-exclusive to the rest of the environment (so that<br />
our program isn't hogging the keyboard).<br />
And finally...<br />
lpdi_keyboard->Acquire();<br />
This is the final step in the keyboard initiation process. We are just going to acquire the keyboard for use! That's all<br />
there is to it Bob. :)<br />
Now we are going to go through the shutdown procedures (which are almost exactly the same for every part of<br />
DirectX). First we need to check to see that the keyboard's object actually has information in it. If it does, then we<br />
unacquire the keyboard from use, and release the information associated with it. This is how you do it:<br />
if(lpdi_keyboard!=NULL)<br />
{<br />
// Unacquire The Keyboard<br />
lpdi_keyboard->Unacquire();<br />
http://nehe.gamedev.net/gametutorials/lesson01.asp (6 of 11) [20/08/2001 22:34:03]
Jeff Molofee's <strong>OpenGL</strong> Windows Tutorial #1<br />
lpdi_keyboard->Release();<br />
lpdi_keyboard=NULL;<br />
}<br />
And, we do the same thing for the main Dinput object, except that we don't have to unacquire this object.<br />
if(lpdi!=NULL)<br />
{<br />
lpdi->Release();<br />
lpdi=NULL;<br />
}<br />
That's it! We now have completely set up, and shut down DirectInput!!! Now, we just have one more thing to do, we<br />
have to update it every frame to make sure that our program still has the keyboard. To check the keyboard object's<br />
state, we are going to do this:<br />
hr= (lpdi_keyboard->GetDeviceState(sizeof(UCHAR[256]),(LPVOID)&key_buffer));<br />
That checks to see if we still have the keyboard. You will understand why we passed the arguments we did in a few<br />
minutes. If the previous function failed, we have to try to reacquire the keyboard, and if still fails, we kill DirectInput.<br />
if(FAILED(hr))<br />
{<br />
if(hr==DIERR_INPUTLOST)<br />
{<br />
//Try To Re-Acquire The Keyboard<br />
hr= (lpdi_keyboard->Acquire());<br />
if(FAILED(hr))<br />
{<br />
MessageBox(hwnd, "Keyboard has been lost", TITLE, MB_OK);<br />
DInput_Shutdown();<br />
}<br />
}<br />
}<br />
Now we just have to learn how to see if a key is being pressed down or not. Well, we have to create a buffer of 256<br />
unsigned chars to hold all of the keyboard's possible keys. Here is how we do it:<br />
UCHAR key_buffer[256]; // The Keyboard's Key Buffer<br />
You don't have to really worry about that too much, but this is what you will really want to burn into your brain:<br />
#define KEY_DOWN(key) (key_buffer[key] & 0x80)<br />
That is probably the most useful macro I have ever seen. It takes a DirectX key constant (which all begin with<br />
DIK_, you can find a complete list in the DirectX8 SDK) and accesses the key's entry in our key buffer, then<br />
logically (bitwise) 'and' it with 0x80 (which is what Dinput requires). If the key is being pressed down, then the<br />
macro returns true, and if it is not being pressed down, it returns false. So, if you wanted to move a ship to the<br />
north when the user presses the up directional button, this is how you would do it:<br />
If(KEY_DOWN(DIK_UP))<br />
{<br />
// Move Ship<br />
}<br />
That's all there is to it! I have created a class to encapsulate all the information, and here it is:<br />
class SHININGINPUT<br />
{<br />
private:<br />
LPDIRECTINPUT8 lpdi; // Main DirectInput Object<br />
http://nehe.gamedev.net/gametutorials/lesson01.asp (7 of 11) [20/08/2001 22:34:03]
Jeff Molofee's <strong>OpenGL</strong> Windows Tutorial #1<br />
LPDIRECTINPUTDEVICE8 lpdi_keyboard; // Keyboard's DirectInput Device<br />
public:<br />
bool DInput_Init(void);<br />
void DInput_Shutdown(void);<br />
void DInput_Update(void);<br />
SHININGINPUT()<br />
{ }<br />
~SHININGINPUT()<br />
{ }<br />
};<br />
Nothing should seem too hard, all you need to do is put a call to the init and shut down functions at the proper<br />
times in your console, and then put a call to the update function at every frame in your program. That's all there is<br />
to it (besides doing all of the checking to see if a key is down or not, which you have to do on your own).<br />
The Console:<br />
Ok, we are almost done! Now we are just going to go through the console! First, we are going to include our<br />
wrapper's header file:<br />
#include "Shining3D.h"<br />
Now, we have to declare all of our wrapper's objects. We are going to create the main object, and our DirectInput<br />
object (remember the log has already been created).<br />
SHINING3D s3d;<br />
SHININGINPUT sinput;<br />
RECT window;<br />
RECT window; will be talked about a little later in the console, when we talk about Orthographic projection.<br />
bool <strong>Game</strong>_Init(void)<br />
{<br />
s3d.<strong>OpenGL</strong>_Init(640,480,16, GIVE_CHOICE);<br />
sinput.DInput_Init();<br />
s3d.Font_Init();<br />
return true;<br />
}<br />
This is your main initiation function. Everything that you want to happen when you initiate your program will go<br />
here. As you can see, we are creating a 640x480 window, with a 16 bit color depth, and we are giving the user a<br />
choice to see if they want full screen or not. Then we create the DirectInput and font stuff! That's all that is going in<br />
this function for now.<br />
bool <strong>Game</strong>_Main(void)<br />
{<br />
This is our main game function. This function is called every frame to do all of the drawing, updates, etc. First we<br />
are going to update DirectInput, and check to see if the user wants to quit the program or not (by checking to see if<br />
he/she is pressing escape).<br />
sinput.DInput_Update(); // Update DirectInput To Make<br />
Sure It's Still Alive<br />
if(KEY_DOWN(DIK_ESCAPE)) // Check To See If The User<br />
http://nehe.gamedev.net/gametutorials/lesson01.asp (8 of 11) [20/08/2001 22:34:03]
Jeff Molofee's <strong>OpenGL</strong> Windows Tutorial #1<br />
Wants To Quit<br />
PostQuitMessage(0);<br />
Now we are going to clear our depth and color buffers, and set our current matrix to the identity matrix (in a way we<br />
are 'resetting' it).<br />
glClear(GL_COLOR_BUFFER_BIT | GL_DEPTH_BUFFER_BIT); // Clear Screen And Depth<br />
Buffer<br />
glLoadIdentity(); // Reset The Current<br />
Modelview Matrix<br />
Now we are going to go into orthographic mode so that we can position our font's location on the screen a lot<br />
easier! Anything that we want to be on the screen at all times will be put after we initiate ortho view. This is how you<br />
do it:<br />
// Get In Ortho View<br />
GetClientRect(hwnd,&window); // Get The Window's<br />
Dimensions<br />
glMatrixMode(GL_PROJECTION); // Select The Projection<br />
Matrix<br />
glPushMatrix(); // Store The Projection<br />
Matrix<br />
glLoadIdentity(); // Reset The Projection<br />
Matrix<br />
glOrtho(0,window.right,0,window.bottom,-1,1); // Set Up An Ortho Screen<br />
glMatrixMode(GL_MODELVIEW); // Select The Modelview<br />
Matrix<br />
If any of this looks unfamiliar, go check out NeHe's tutorial, lesson #33. Now that we are in ortho view, we can<br />
position and draw our font!<br />
glColor4f(1,1,1,1);<br />
// <strong>Game</strong> Title<br />
s3d.glPrint(240,450,"ShiningKnight");<br />
Now that we are done doing things relative to the screen, we can get out of ortho view. Once we are done with<br />
getting out of ortho view, since this is all we are going to be drawing in this tutorial, we are going to swap the<br />
buffers (NeHe lesson #1), and get out of the function.<br />
glMatrixMode(GL_PROJECTION); // Select The Projection<br />
Matrix<br />
glPopMatrix(); // Restore The Old Projection<br />
Matrix<br />
glMatrixMode(GL_MODELVIEW); // Select The Modelview<br />
Matrix<br />
SwapBuffers(hdc); // Finally, Swap The Buffers<br />
return true;<br />
}<br />
Now its time for the shutdown function!<br />
bool <strong>Game</strong>_Shutdown(void)<br />
{<br />
s3d.Font_Shutdown();<br />
sinput.DInput_Shutdown();<br />
s3d.<strong>OpenGL</strong>_Shutdown();<br />
http://nehe.gamedev.net/gametutorials/lesson01.asp (9 of 11) [20/08/2001 22:34:03]
Jeff Molofee's <strong>OpenGL</strong> Windows Tutorial #1<br />
return false;<br />
}<br />
That's it for our shutdown function. We are shutting things down in the opposite order of which we created them.<br />
And that's about all there is to it for now.<br />
Last, and most necessary, we are going to define our WinMain function (which is equivalent to Main(...) in DOS.<br />
First we are going to make sure that our initiation function didn't fail, and if it did, we quit the function. Next we go<br />
into our main game loop, and handle our window's messages, and call <strong>Game</strong>_Main(). If that returns a false value,<br />
we quit the main game loop, call our shutdown function, and quit the program!<br />
int WINAPI WinMain( HINSTANCE hInstance,<br />
HINSTANCE hPrevInstance,<br />
LPSTR lpCmdLine,<br />
int nCmdShow)<br />
{<br />
// Do All Of The Initiation Stuff<br />
if(<strong>Game</strong>_Init()==false)<br />
return 0;<br />
while(TRUE)<br />
{<br />
if(s3d.HandleMessages()==false)<br />
break;<br />
// Go To The <strong>Game</strong>_Main Function To Do Everything<br />
<strong>Game</strong>_Main();<br />
}<br />
// Call <strong>Game</strong>_Shutdown, And Do All The Shutdown Procedures<br />
<strong>Game</strong>_Shutdown();<br />
return 0;<br />
}<br />
That's all there is to the console!<br />
Conclusion:<br />
Well, that was a fairly long tutorial. Sorry that we couldn't do any cool graphics this time, but just wait until the next<br />
one!!! I am putting the finishing touches on the Particle Engine for the next tutorial right now, and I am also working<br />
on the terrain engine a little too. The model tutorial is also going to rock. I also have some really cool ideas for the<br />
first game that we are going to be creating! If you have any questions, comments, ideas for tutorials that you would<br />
like to see, or just want to talk to me, e-mail me at ShiningKnight7@hotmail.com. Annnddddd, until next time:<br />
"Happy coding!" Oh yeah, and check out the some of the sneak preview of some of the stuff that our Particle<br />
Engine will be able to generate with about 10 lines of code. The first is an explosion, the second is a little moving<br />
trail that goes around the screen, and the third is a big ball that bounces around the screen, and the particle's<br />
attraction to each other gets weaker every time, until they fade away.<br />
http://nehe.gamedev.net/gametutorials/lesson01.asp (10 of 11) [20/08/2001 22:34:03]
Jeff Molofee's <strong>OpenGL</strong> Windows Tutorial #1<br />
DOWNLOADS:<br />
* DOWNLOAD the Visual C++ Code For This Lesson.<br />
Back To NeHe Productions!<br />
http://nehe.gamedev.net/gametutorials/lesson01.asp (11 of 11) [20/08/2001 22:34:03]
Jeff Molofee's <strong>OpenGL</strong> Windows Tutorial #2<br />
Introduction:<br />
<strong>Game</strong> <strong>Programming</strong><br />
Lesson 2<br />
<strong>OpenGL</strong> <strong>Game</strong> <strong>Programming</strong> Tutorial Two:<br />
Vectors and Matrices<br />
By <strong>Trent</strong> "ShiningKnight" Polack<br />
Now, before we can get into all of the cool graphics, sounds, and all out games, we must learn a little bit of math<br />
that is necessary for 3D. In this tutorial we are going to add two very useful classes to our wrapper: one for<br />
vectors, and one for 4x4 matrices. We are also going to do a bit of operator overloading to make our code a little<br />
bit easier to read when using these two classes!<br />
Vectors:<br />
Vectors are used to represent direction and length (sometimes referred to as magnitude). Vectors do not have a<br />
set location in 3D space, but they do have a set length. A vector is usually an ordered triple like this:<br />
V = (x, y, z)<br />
Vectors are usually represented as a line, so you can see that each line has its own direction, and length. You<br />
can see this in figure 1.1.<br />
Figure 1.1 - Two examples of vectors<br />
As you can see, each of the above two vectors has it's own direction, and length. Now, lets get on to the math.<br />
First of all, let's start with some simple vector addition:<br />
http://nehe.gamedev.net/gametutorials/lesson02.asp (1 of 7) [20/08/2001 22:34:10]
Jeff Molofee's <strong>OpenGL</strong> Windows Tutorial #2<br />
R= V1 + V2<br />
R= (V1 x + V2 x , V1 y + V2 y , V1 z + V2 z )<br />
As you can most likely see, all you have to do is add the first vector's component by the second vector's<br />
corresponding component. Now, we are going to learn how to multiply a vector by a scalar (single value). This is<br />
used mainly to alter a vector's length. For example, if you multiply a vector by 2, you will have a resulting vector<br />
that is twice as large as the original one. To multiply a vector by a scalar, all you have to do is multiply each<br />
component of the vector by the scalar. Not too hard, see:<br />
V * s = (V x *s, V y *s, V z *s)<br />
Next on our list of 'vector-math-mania' is how to get the magnitude/length (from now on, I'll be using those two<br />
interchangeably). A vector's magnitude is represented as '|V|.' And the magnitude of a vector is also a scalar (a<br />
single variable, instead of the usual ordered triple). Heres how you do it:<br />
Now, once that has been done, you can now normalize a vector! Vector normals are used a lot when it comes to<br />
lighting, so you better be familiar with them. Basically what a normal does is turn a vector into something called a<br />
"unit vector", which is what you need to have the vector in when you send the normal to <strong>OpenGL</strong>. You can<br />
probably get by without knowing them, but if you understand what a normal is, and why they are used, it will help<br />
you out in the long run. So, here is how you get a vector's normal:<br />
U = V / |V|<br />
There you go your vector has now been normalized! Rejoice and be glad, because things are only going to get<br />
more complicated. ;) Now, lets get dotty, and learn about how to get two vector's dot product. The dot product is<br />
also referred to as the inner product. Here is how you get it:<br />
V . D = (V x * D x ) + (V y * D y ) + (V z * D z )<br />
See, not too hard! :) Now, the next thing about vectors is the hardest part of vector math that you will have to<br />
learn, the cross product of two vectors. We will need to know a vector's cross product when we do things such<br />
as collision detection, lighting (you hear that mentioned a lot don't you), and when doing some physics! And here<br />
is the last equation you will need to know for vectors (in this tutorial at least... hehe):<br />
C = VxVX<br />
C = (x, y, z)<br />
C = (((V y * VX z ) - (V z * VX y )), ((V z * VX x ) - (V x * VX z )), ((V x * VX y ) - (V y * VX x )))<br />
The cross product of two vectors returns a normalized vector. And that's it, we are now done with the vector<br />
math theory!!! Next, we are going to make a little vector class for our use.<br />
Coding a Vector Class:<br />
Now, being that we just went over all of the theory, I am not going to talk about every section of the new code,<br />
as most of it is pretty self-explanatory. I have coded a vector class, which you will see in a second, but before<br />
that, lets talk about something that could be useful for increasing your codes clarity! Since your average vertex<br />
requires the same information, I have made a little define to make our vector class, our vertex class also:<br />
#define VERTEX3D VECTOR3D<br />
Now, if you are going to create a vertex, you can use VERTEX3D and always remember that that object is going<br />
to be used for a vertex, not a vector. Now, here is the vector/vertex class:<br />
http://nehe.gamedev.net/gametutorials/lesson02.asp (2 of 7) [20/08/2001 22:34:10]
Jeff Molofee's <strong>OpenGL</strong> Windows Tutorial #2<br />
class VECTOR3D<br />
{<br />
public:<br />
GLfloat vertex[3];<br />
float ComputeLength(void);<br />
friend VECTOR3D operator+ (VECTOR3D v1, VECTOR3D v2);<br />
friend VECTOR3D operator- (VECTOR3D v1, VECTOR3D v2);<br />
friend VECTOR3D operator* (VECTOR3D v1, GLfloat scalar);<br />
friend VECTOR3D operator* (VECTOR3D v1, VECTOR3D v2);<br />
friend VECTOR3D operator/ (VECTOR3D v1, VECTOR3D v2);<br />
VECTOR3D()<br />
{ memset(vertex, 0, sizeof(GLfloat[3])); }<br />
VECTOR3D(GLfloat x, GLfloat y, GLfloat z);<br />
};<br />
That's our little vector/vertex class! vertex[3] is our main vector array. And then we have one member function<br />
for calculating the length of an object's vector array, and it returns the result as a float value. Now, the next parts<br />
may seem unfamiliar to you, what these are doing is a process called "operator overloading." Normally, if you<br />
had two objects of the VECTOR3D class, and you tried to add them together like this:<br />
Result= v1+v2;<br />
You would get an error, but if you overload the '+' operator, then you can do the previous line without any errors.<br />
I am not going to show the definition of all of the overloaded operators, but here is the code to overload the '+'<br />
operator:<br />
VECTOR3D operator+ (const VECTOR3D &v1, const VECTOR3D &v2)<br />
{<br />
VECTOR3D temp_v(0.0f, 0.0f, 0.0f);<br />
temp_v.vertex[0]= v1.vertex[0] + v2.vertex[0];<br />
temp_v.vertex[1]= v1.vertex[1] + v2.vertex[1];<br />
temp_v.vertex[2]= v1.vertex[2] + v2.vertex[2];<br />
return temp_v;<br />
}<br />
Notice that when you overload operators, you declare them as 'friends' to a class, instead of making them be an<br />
actual part of the class. Make sure that you remember that. Also, overloading operators may be cool and easy,<br />
but don't overdo it. I have included code for overloading the following operations:<br />
- Adding two vectors together<br />
- Subtracting two vectors<br />
- Multiplying a vector by a scalar<br />
- Multiplying a vector by another vector<br />
- Dividing two vectors<br />
We also have two different constructors for the vector class, one takes three arguments to initialize a vector's<br />
information the moment it is created, and the other is the default constructor, in case the other is not used. For<br />
instance, these two lines would have the same effect:<br />
VECTOR3D vector(0.0f, 1.0f, 0.0f);<br />
http://nehe.gamedev.net/gametutorials/lesson02.asp (3 of 7) [20/08/2001 22:34:10]
Jeff Molofee's <strong>OpenGL</strong> Windows Tutorial #2<br />
And the equivalent line:<br />
VECTOR3D vector;<br />
vector.vertex[0]=0.0f;<br />
vector.vertex[1]=1.0f;<br />
vector.vertex[2]=0.0f;<br />
Also here are some of the other functions I have created:<br />
void ComputeNormal(VECTOR3D* v1, VECTOR3D* v2, VECTOR3D* v3);<br />
float ComputeDotProduct(VECTOR3D* v1, VECTOR3D* v2);<br />
VECTOR3D ComputeCrossProduct(VECTOR3D* v1, VECTOR3D* v2);<br />
None of the above functions are members of the VECTOR3D class, so remember that. They are pretty easy to<br />
figure out, as we just went through all of the theory! Also, if you want to see some operation overloading in<br />
action, check out <strong>Game</strong>_Main() in main.cpp. It has some samples of it, and the resulting vectors are shown on<br />
this tutorial's exe.<br />
Matrices:<br />
Now its time to talk about the matrix (no references to the movie, please)! A matrix is basically a two dimensional<br />
array containing various data. Here is a quick example:<br />
| 1 2 3 1 |<br />
M = | 2 5 8 8 |<br />
| 1 1 2 7 |<br />
That is a quick example of a 4x4 matrix. Let me say one thing before you start to think the wrong thing.<br />
Declaring a matrix in C/C++ isn't going to be like you would think it is. You may think that to declare a 4x4 matrix<br />
array, you would do it like this:<br />
GLfloat matrix[4][4];<br />
Well, you would be half right, and half wrong with that. First of all, in mathematical terms, the dimensions of a<br />
matrix are like so: ROWSxCOLUMNS. So a 2x3 matrix would look like this:<br />
M = | 2 5 7 |<br />
| 3 6 9 |<br />
Now, back to declaring it in C/C++. <strong>OpenGL</strong> accesses matrices in something that is called column-major form, in<br />
which you access matrices with the 0 component of the matrix being the upper left hand element, and the 1<br />
component being the element below that, like you can see below:<br />
| M 0 M 4 M 8 M 12 |<br />
M = | M 1 M 5 M 9 M 13 |<br />
| M 2 M 6 M 10 M 14 |<br />
| M 3 M 7 M 11 M 15 |<br />
Now, had you declared the 2D array that you did before (Glfloat matrix[4][4]), then you would be accessing the<br />
matrix in row-major form, and access would occur like this:<br />
| M 0 M 1 M 2 M 3 |<br />
M = | M 4 M 5 M 6 M 7 |<br />
| M 8 M 9 M 10 M 11 |<br />
| M 12 M 13 M 14 M 15 |<br />
Which would be bad, and then <strong>OpenGL</strong> would get confused, you would get confused, and it would just be one<br />
big mess. So, when you want to declare a 4x4 matrix in <strong>OpenGL</strong> (and the most prominent matrix that you will be<br />
http://nehe.gamedev.net/gametutorials/lesson02.asp (4 of 7) [20/08/2001 22:34:10]
Jeff Molofee's <strong>OpenGL</strong> Windows Tutorial #2<br />
using is a 4x4) you can just do it like this:<br />
GLfloat matrix[16];<br />
And access would occur in column-major form, as discussed above. Now, we will discuss various types of<br />
matrices, and various operations that you can perform with them. The first type of matrix that we will talk about is<br />
the Zero Matrix, as shown below:<br />
| 0 0 0 0 |<br />
Z = | 0 0 0 0 |<br />
| 0 0 0 0 |<br />
| 0 0 0 0 |<br />
A really complicated matrix to remember isn't it! ;) You will not find much practical use for the zero matrix though,<br />
but its always good to know about it! Now, the identity matrix is very useful in 3D graphics programming<br />
however. Its basically setting a matrix to it's default, and allows you to perform transformations with a "clean<br />
slate." Here is the identity matrix:<br />
| 1 0 0 0 |<br />
I = | 0 1 0 0 |<br />
| 0 0 1 0 |<br />
| 0 0 0 1 |<br />
This is what you set the current matrix in <strong>OpenGL</strong> to when you use glLoadIdentity(). And, as I said, gives you a<br />
clean slate to work with. Setting the current matrix to an identity matrix is like setting your point of focus back to<br />
(0,0,0). Now, onto some operations that you can perform with matrices! First of course, is matrix addition and<br />
subtraction. You treat both addition, and subtraction the same with matrices. You add/subtract one component<br />
of one matrix, by the corresponding component in the other matrix. And one quick note, to add/subtract two<br />
matrices, they need to have the exact same dimensions. See the example below.<br />
| M 0 M 4 M 8 M 12 | | X 0 X 4 X 8 X 12 |<br />
M = | M 1 M 5 M 9 M 13 | X = | X 1 X 5 X 9 X 13 |<br />
| M 2 M 6 M 10 M 14 | | X 2 X 6 X 10 X 14 |<br />
| M 3 M 7 M 11 M 15 | | X 3 X 7 X 11 X 15 |<br />
| M 0 M 4 M 8 M 12 | | X 0 X 4 X 8 X 12 | | X 0 +M 0 X 4 +M 4 X 8 +M 8 X 12 +M 12 |<br />
| M 1 M 5 M 9 M 13 | | X 1 X 5 X 9 X 13 | | X 1 +M 1 X 5 +M 5 X 9 +M 9 X 13 +M 13 |<br />
| M 2 M 6 M 10 M 14 | + | X 2 X 6 X 10 X 14 | = | X 2 +M 2 X 6 +M 6 X 10 +M 10 X 14 +M 14 |<br />
| M 3 M 7 M 11 M 15 | | X 3 X 7 X 11 X 15 | | X 3 +M 3 X 7 +M 7 X 11 +M 11 X 15 +M 15 |<br />
Then, to do subtraction, you would add everything instead of subtracting. Now it is on to 'fake' matrix<br />
multiplication, which is multiplying a matrix by a scalar. All you have to do is multiply every part of the matrix by<br />
the scalar. Here is the example, as always:<br />
| M 0 M 4 M 8 M 12 |<br />
M = | M 1 M 5 M 9 M 13 | S (scalar)<br />
| M 2 M 6 M 10 M 14 |<br />
| M 3 M 7 M 11 M 15 |<br />
| M 0 *S M 4 *S M 8 *S M 12 *S |<br />
| M 1 *S M 5 *S M 9 *S M 13 *S |<br />
M *S= | M 2 *S M 6 *S M 10 *S M 14 *S |<br />
| M 3 *S M 7 *S M 11 *S M 15 *S |<br />
Nothing too hard! But, that's not the 'normal' matrix multiplication. Multiplying one matrix by another matrix is<br />
http://nehe.gamedev.net/gametutorials/lesson02.asp (5 of 7) [20/08/2001 22:34:10]
Jeff Molofee's <strong>OpenGL</strong> Windows Tutorial #2<br />
completely different than you make think it would be. First of all, when you multiply two matrices, the inner<br />
dimensions must be the same. For instance, you can multiply a 2x3 and a 3x5 matrix, but you can not multiply a<br />
3x5 and a 2x3 matrix. The dimensions of the resulting matrix will be equal to the outer dimensions of the matrix<br />
that you are multiplying. For example, if I multiplied a 1x2 matrix and a 2x7 matrix, the resulting matrix would be<br />
a 1x7 matrix.<br />
Now, lets get on with doing the actual matrix multiplication! To do this, you multiply each row of the first matrix by<br />
each column of the second matrix, like the example you see below:<br />
Lets do a quick 2x2 and 2x3 example:<br />
| 1 3 | | 1 3 5 |<br />
M = | 2 4 | X = | 2 4 6 |<br />
M*X= | 7 15 23 |<br />
| 10 22 34 |<br />
Hopefully you can figure out how I got that answer, because if you could, then you are done learning math for<br />
this tutorial!!! Now, all that's left to do is create a matrix class!<br />
Coding a Matrix Class:<br />
And now, lets code the matrix class! It's a lot like the vector class in some senses, except for the array size.<br />
Soooo, lets check it out!<br />
class MATRIX4X4<br />
{<br />
public:<br />
GLfloat matrix[16];<br />
void LoadZero(void);<br />
void LoadIdentity(void);<br />
friend MATRIX4X4 operator+ (MATRIX4X4 m1, MATRIX4X4 m2);<br />
friend MATRIX4X4 operator- (MATRIX4X4 m1, MATRIX4X4 m2);<br />
friend MATRIX4X4 operator* (MATRIX4X4 m1, GLfloat scalar);<br />
friend MATRIX4X4 operator* (MATRIX4X4 m1, MATRIX4X4 m2);<br />
MATRIX4X4()<br />
{ memset(matrix, 0, sizeof(GLfloat[16])); }<br />
};<br />
See, we even have the same operators overloaded in the matrix class (though the definitions are completely<br />
different), with the exception that there is no division. You may want to check out the matrix by matrix<br />
multiplication operator definition, as it is by far the most complicated one. Only one constructor this time, so if<br />
you need to initialize an entire matrix, just do it the long way ;) Also, I have made two member functions to set a<br />
matrix's information, one to load the identity matrix, and one to load the zero matrix. That's about it!<br />
http://nehe.gamedev.net/gametutorials/lesson02.asp (6 of 7) [20/08/2001 22:34:10]
Jeff Molofee's <strong>OpenGL</strong> Windows Tutorial #2<br />
Conclusion:<br />
Well, yet again, another basically graphic-less tutorial. That will all change with the next tutorial though! As I said,<br />
I am sorry about the delay with getting these tutorials up, my computers been broken, but I am getting it back<br />
next week! So expect some really cool tutorials in the next few weeks!<br />
Ok, I have to give a huge thanks to NeHe for giving me the opportunity to do this! I also would like to thank<br />
Voxel, ZealousElixir, Lord Dragonus, and cmx for helping me out.<br />
DOWNLOADS:<br />
* DOWNLOAD the Visual C++ Code For This Lesson.<br />
Back To NeHe Productions!<br />
http://nehe.gamedev.net/gametutorials/lesson02.asp (7 of 7) [20/08/2001 22:34:10]
Jeff Molofee's <strong>OpenGL</strong> Windows Tutorial #3<br />
Introduction:<br />
<strong>Game</strong> <strong>Programming</strong><br />
Lesson 3<br />
<strong>OpenGL</strong> <strong>Game</strong> <strong>Programming</strong> Tutorial Three:<br />
Designing a Particle Engine<br />
By <strong>Trent</strong> "ShiningKnight" Polack<br />
Ok, now that we have the formalities out of the way, we can get to talking about the really cool stuff (neat<br />
graphics). In this tutorial, we are going to be talking about how to design and code a flexible/powerful particle<br />
engine! If you need a little refresher on them, check out NeHe's code for his particle engine<br />
(http://nehe.gamedev.net/tutorials/lesson19.asp). And since this is going to be a rather long tutorial, lets get to it.<br />
Particle Theory and Background:<br />
The whole idea behind particle engines started "back in the day" of 1982 (even before I was born... wow). The<br />
person we have to thank for all of our particle goodness is a man that goes by the name of William T. Reeves [1].<br />
He wanted to come up with an approach, that he called 'fuzzy,' to be able to render such things as explosions, and<br />
fire in a dynamic process. Reeves described the steps to implement a particle engine as the following:<br />
● New particles are generated and placed into the current particle system<br />
● Each new particle is assigned it's own unique attributes><br />
● Any particles that have outlasted their life span are declared 'dead'<br />
● The current particles are moved according to their scripts (or in our case, according to their pre-assigned<br />
velocity vectors)<br />
● The current particles are rendered<br />
In our engine, each particle system (a group of particle's 'master') will have it's own emitter, and some set values to<br />
pass on to each particle. In case you need a quick refresher, the figure below should catch you up on some of the<br />
various ideas behind a particle engine.<br />
As you can see from that picture, there is one big middle circle; this represents the particle system's emitter (a<br />
http://nehe.gamedev.net/gametutorials/lesson03.asp (1 of 14) [20/08/2001 22:34:18]
Jeff Molofee's <strong>OpenGL</strong> Windows Tutorial #3<br />
place in 3D space where all of the particle will start). We also have several smaller circles surrounding it; these<br />
represent individual particles, and the arrows show their directional vector (which describes the direction that the<br />
particle will continually follow unless acted upon by gravity or such). That's it for your crash course in particle<br />
theory. Lets get to the code!<br />
Designing the Particle Class:<br />
I have designed so many different particle engines, and they all were very similar, and although I wasn't very<br />
pleased with any of them, I had a very hard time finding another good engine to check out. Then, one day, Richard<br />
'Keebler' Benson sent me his particle demo entitled "Particle Chamber"[2]. This demo made me rethink the way<br />
that I was designing my engines, and is a very good demo that I recommend everyone to check out (the link is at<br />
the bottom of this tutorial).<br />
Anyway, I have designed my engine with simplicity, flexibility, and power in mind. I have created a TON of different<br />
functions that can be used to form almost any type of special effect possible with particles. Before we check out the<br />
larger, Particle System class, let's check out the Particle class (which is used for EVERY particle). Here it is:<br />
class PARTICLE<br />
{<br />
private:<br />
PARTICLE_SYSTEM* Parent;<br />
public:<br />
VERTEX3D prev_location; // The Particle's Last Position<br />
VERTEX3D location; // The Particle's Current Position<br />
VECTOR3D velocity; // The Particle's Current Velocity<br />
float color[4]; // The Particle's Color<br />
float color_counter[4]; // The Color Counter!<br />
float alpha; // The Particle's Current Transparency<br />
float alpha_counter; // Adds/Subtracts Transparency Over Time<br />
float size; // The Particle's Current Size<br />
float size_counter; // Adds/Subtracts Transparency Over Time<br />
float age; // The Particle's Current Age<br />
float dying_age; // The Age At Which The Particle DIES!<br />
void Set_ParentSystem(PARTICLE_SYSTEM* parent);<br />
void Create(PARTICLE_SYSTEM* parent, float time_counter);<br />
bool Update(float time_counter);<br />
PARTICLE();<br />
~PARTICLE();<br />
};<br />
It may look intimidating, but the class is actually quite simple, and plus, I always like to show the simple class first,<br />
so if you want to see intimidating, check the next one out. ;) We only have one private variable, and this is used to<br />
set the particle's 'parent' system. We need to retrieve some information from the parent when we create a new<br />
particle, so that's why that is there.<br />
You may be wondering why we are keeping track of two different vertices (one for the current, and one for the last).<br />
Well, this engine takes into account some time aspects and incorporates them into the movement of the particles.<br />
That way, if you are on a P75 (ancient) computer, and you are comparing your results to a P4 1.7ghz, the particles<br />
http://nehe.gamedev.net/gametutorials/lesson03.asp (2 of 14) [20/08/2001 22:34:18]
Jeff Molofee's <strong>OpenGL</strong> Windows Tutorial #3<br />
will always be in the same position (though, I'm guessing that the P4 comp's particles will get to their final position a<br />
little more smoothly ;)).<br />
Now, we also have two different color variables, one for the current color, and for the color 'counter.' The current<br />
color is used for, obviously, the particle's current color. The color counter is used to make the particle's current<br />
color transform to the system's specified final color throughout the particle's lifespan. For instance, if I told the<br />
particle system to have each particle color start out as orange, and end up being red (sort of like fire), what the<br />
color counter would do is take the end color (red), subtract it by the starting color (orange), and divide that by the<br />
age at which the particle dies. This comes up with a color away that we are going to use to interpolate the colors<br />
through out the particle's life. We also do this for the particle's size, and alpha value also.<br />
To calculate the dying age of the particle, all we do is take the parent's specified life, add a random float (by the<br />
way, our macro RANDOM_FLOAT gets a value from [0.0f, 1.0f], or from 0 to 1), and multiply that by the parent's<br />
life counter.<br />
Basically, all of the following is used for a particle's transformation throughout its life span. For example, say that<br />
you wanted to use do a smoke trail with particles (assuming that you have the correct texture), you would want to<br />
have the smoke's particle start out small, and pretty dense, but as time goes on, have the particle enlarge, and get<br />
less dense.<br />
Everything that we have just been talking about appears in the particle creation function, shown here:<br />
GLvoid PARTICLE::<br />
Create(PARTICLE_SYSTEM* parent, float time_counter)<br />
{<br />
VECTOR3D temp_velocity;<br />
float random_yaw;<br />
float random_pitch;<br />
float new_speed;<br />
// This Particle Is Dead, So It's Free To Mess Around With.<br />
age=0.0;<br />
dying_age= (parent->life)+(RANDOM_FLOAT*(parent->life_counter));<br />
CHECK_RANGE(dying_age, MIN_LIFETIME, MAX_LIFETIME);<br />
// Now, We Are Going To Set The Particle's Color. The Color<br />
// Is Going To Be The System's Start Color*Color Counter<br />
color[0]= (parent->start_color.vertex[0])+RANDOM_FLOAT*(parent-<br />
>color_counter.vertex[0]);<br />
color[1]= (parent->start_color.vertex[1])+RANDOM_FLOAT*(parent-<br />
>color_counter.vertex[1]);<br />
color[2]= (parent->start_color.vertex[2])+RANDOM_FLOAT*(parent-<br />
>color_counter.vertex[2]);<br />
color[3]= 1.0f;<br />
//Lets Make Sure That The Color Is Legal<br />
CHECK_RANGE(color[0], MIN_COLOR, MAX_COLOR);<br />
CHECK_RANGE(color[1], MIN_COLOR, MAX_COLOR);<br />
CHECK_RANGE(color[2], MIN_COLOR, MAX_COLOR);<br />
// Now, Lets Calculate The Color's Counter, So That By The<br />
// Time The Particle Is Ready To Die, It Will<br />
// Have Reached The System's End Color.<br />
color_counter[0]= ((parent->end_color.vertex[0])-color[0])/dying_age;<br />
http://nehe.gamedev.net/gametutorials/lesson03.asp (3 of 14) [20/08/2001 22:34:18]
Jeff Molofee's <strong>OpenGL</strong> Windows Tutorial #3<br />
color_counter[1]= ((parent->end_color.vertex[1])-color[1])/dying_age;<br />
color_counter[2]= ((parent->end_color.vertex[2])-color[2])/dying_age;<br />
// Calculate The Particle's Alpha From The System's.<br />
alpha= (parent->start_alpha)+(RANDOM_FLOAT*(parent->alpha_counter));<br />
// Make Sure The Result Of The Above Line Is Legal<br />
CHECK_RANGE(alpha, MIN_ALPHA, MAX_ALPHA);<br />
// Calculate The Particle's Alpha Counter So That By The<br />
// Time The Particle Is Ready To Die, It Will Have Reached<br />
// The System's End Alpha<br />
alpha_counter=((parent->end_alpha)-alpha)/dying_age;<br />
// Now, Same Routine As Above, Except With Size<br />
size= (parent->start_size)+(RANDOM_FLOAT*(parent->size_counter));<br />
CHECK_RANGE(size, MIN_SIZE, MAX_SIZE);<br />
size_counter= ((parent->end_size)-size)/dying_age;<br />
// Now, We Calculate The Velocity That The Particle Would<br />
// Have To Move To From prev_location To current_location<br />
// In time_counter Seconds.<br />
temp_velocity.vertex[0]= ((parent->location.vertex[0])-(parent-<br />
>prev_location.vertex[0]))/ time_counter;<br />
temp_velocity.vertex[1]= ((parent->location.vertex[1])-(parent-<br />
>prev_location.vertex[1]))/ time_counter;<br />
temp_velocity.vertex[2]= ((parent->location.vertex[2])-(parent-<br />
>prev_location.vertex[2]))/ time_counter;<br />
// Now Emit The Particle From A Location Between The Last<br />
// Known Location, And The Current Location. And Don't<br />
// Worry, This Function Is Almost Done. Its Mostly Comments<br />
// If You Look At It. Nice To Know I Have Wasted A Lot Of<br />
// Time Typing These Comments For You. Blah. :)<br />
location.vertex[0]= (parent->prev_location.vertex[0])+<br />
temp_velocity.vertex[0]* RANDOM_FLOAT*time_counter;<br />
location.vertex[1]= (parent->prev_location.vertex[1])+<br />
temp_velocity.vertex[1]* RANDOM_FLOAT*time_counter;<br />
location.vertex[2]= (parent->prev_location.vertex[2])+<br />
temp_velocity.vertex[2]* RANDOM_FLOAT*time_counter;<br />
// Now A Simple Randomization Of The Point That The Particle<br />
// Is Emitted From.<br />
location.vertex[0]+=(Random((parent->spread_min), (parent-<br />
>spread_max)))/(parent-> spread_factor);<br />
location.vertex[1]+=(Random((parent->spread_min), (parent-<br />
>spread_max)))/(parent-> spread_factor);<br />
location.vertex[2]+=(Random((parent->spread_min), (parent-<br />
>spread_max)))/(parent-> spread_factor);<br />
// Update The Previous Location So The Next Update Can<br />
// Remember Where We Were<br />
(parent->prev_location.vertex[0])=(parent->location.vertex[0]);<br />
(parent->prev_location.vertex[1])=(parent->location.vertex[1]);<br />
(parent->prev_location.vertex[2])=(parent->location.vertex[2]);<br />
http://nehe.gamedev.net/gametutorials/lesson03.asp (4 of 14) [20/08/2001 22:34:18]
Jeff Molofee's <strong>OpenGL</strong> Windows Tutorial #3<br />
// The Emitter Has A Direction. This Is Where We Find It:<br />
random_yaw = (float)(RANDOM_FLOAT*PI*2.0f);<br />
random_pitch= (float)(DEG_TO_RAD(RANDOM_FLOAT*((parent->angle))));<br />
// The Following Code Uses Spherical Coordinates To Randomize<br />
// The Velocity Vector Of The Particle<br />
velocity.vertex[0]=(cosf(random_pitch))*(parent->velocity.vertex[0]);<br />
velocity.vertex[1]=(sinf(random_pitch)*cosf(random_yaw))*(parent-<br />
>velocity.vertex[1]);<br />
velocity.vertex[2]=(sinf(random_pitch)*sinf(random_yaw))*(parent-<br />
>velocity.vertex[2]);<br />
// Velocity At This Point Is Just A Direction (Normalized<br />
// Vector) And Needs To Be Multiplied By The Speed<br />
// Component To Be Legit.<br />
new_speed= ((parent->speed)+(RANDOM_FLOAT*(parent->speed_counter)));<br />
CHECK_RANGE(new_speed, MIN_SPEED, MAX_SPEED);<br />
velocity.vertex[0]*= new_speed;<br />
velocity.vertex[1]*= new_speed;<br />
velocity.vertex[2]*= new_speed;<br />
// Set The Particle's Parent System<br />
Set_ParentSystem(parent);<br />
}<br />
Phew, I am glad that function is over with! For a quick note, CHECK_RANGE is a macro that checks to make sure<br />
that a variable (the first argument) is within a minimum (second argument) and the maximum (last argument)<br />
range. Also, look at these 3 lines:<br />
velocity.vertex[0]=(cosf(random_pitch))*(parent->velocity.vertex[0]);<br />
velocity.vertex[1]=(sinf(random_pitch)*cosf(random_yaw))*(parent-<br />
>velocity.vertex[1]);<br />
velocity.vertex[2]=(sinf(random_pitch)*sinf(random_yaw))*(parent-<br />
>velocity.vertex[2]);<br />
This may be a speed caution, but it also creates the exact effect that we want. I tried using our SIN and COS<br />
tables, but they created explosions that were TOO perfect (it basically created a perfect sphere, instead of a sphere<br />
with 'bumps'). So, sometimes it is necessary to do dynamic calculations.<br />
Next on our list is to show the particle's update function. This function updates the particle that the class currently<br />
represents ONLY (this is all handled within the particle system's update function). Lets go through this function bit<br />
by bit (or, since this is a pretty large function, byte by byte):<br />
bool PARTICLE::<br />
Update(float time_counter)<br />
{<br />
static VERTEX3D attract_location;<br />
static VECTOR3D attract_normal;<br />
This is the start of our update function, we are going to be using the two variables shown here for our particle<br />
attraction calculations (this is one of the FEW special effects that I have included within the engine, and it is for the<br />
particle's attraction to the emitter).<br />
// Age The Particle By The Time Counter<br />
age+= time_counter;<br />
if(age>=dying_age)<br />
http://nehe.gamedev.net/gametutorials/lesson03.asp (5 of 14) [20/08/2001 22:34:18]
Jeff Molofee's <strong>OpenGL</strong> Windows Tutorial #3<br />
{<br />
//Kill the particle<br />
age=-1.0f;<br />
return false;<br />
}<br />
The first line of this snippet increments our particle's age by how much time has gone by since the last time the<br />
function was executed. The next part will check to see if our particle is dead or not, and if it, we set its age to a<br />
negative number, which informs the system that this particle is ready to be re-created!<br />
// Set The Particle's Previous Location With The Location That<br />
// Will Be The Old One By The Time We Get Through This Function<br />
prev_location.vertex[0]=location.vertex[0];<br />
prev_location.vertex[1]=location.vertex[1];<br />
prev_location.vertex[2]=location.vertex[2];<br />
// Move The Particle's Current Location<br />
location.vertex[0]+= velocity.vertex[0]*time_counter;<br />
location.vertex[1]+= velocity.vertex[1]*time_counter;<br />
location.vertex[2]+= velocity.vertex[2]*time_counter;<br />
// Update The Particle's Velocity By The Gravity Vector By Time<br />
velocity.vertex[0]+= (Parent->gravity.vertex[0]*time_counter);<br />
velocity.vertex[1]+= (Parent->gravity.vertex[1]*time_counter);<br />
velocity.vertex[2]+= (Parent->gravity.vertex[2]*time_counter);<br />
This snippet increases all of the particle's vertices, and it's directional vector by the amount of time that has gone<br />
by since the last time our function has executed (déjà vu, eh?). All of this makes sure that our particle will be in the<br />
same position on slower computers, as the same particle on a faster system.<br />
if(Parent->IsAttracting())<br />
{<br />
// Find Out Where Our Parent Is Located So We Can Track It<br />
attract_location.vertex[0]=Parent->Get_Location(GET_X);<br />
attract_location.vertex[1]=Parent->Get_Location(GET_Y);<br />
attract_location.vertex[2]=Parent->Get_Location(GET_Z);<br />
// Calculate The Vector Between The Particle And The Attractor<br />
attract_normal.vertex[0]= attract_location.vertex[0]-location.vertex[0];<br />
attract_normal.vertex[1]= attract_location.vertex[1]-location.vertex[1];<br />
attract_normal.vertex[2]= attract_location.vertex[2]-location.vertex[2];<br />
// We Can Turn Off Attraction For Certain Axes To Create Some Kewl Effects<br />
(Such As A Tornado!)<br />
// Note: This Is NOT Accurate Gravitation. We Don't Even Look At The<br />
Distance<br />
// Between The 2 Locations!!! But What Can I Say, It Looks Good.<br />
glNormal3fv(attract_normal.vertex);<br />
// If You Decide To Use This Simple Method You Really Should Use A Variable<br />
Multiplier<br />
// Instead Of A Hardcoded Value Like 25.0f<br />
velocity.vertex[0]+= attract_normal.vertex[0]*5.0f*time_counter;<br />
velocity.vertex[1]+= attract_normal.vertex[1]*5.0f*time_counter;<br />
http://nehe.gamedev.net/gametutorials/lesson03.asp (6 of 14) [20/08/2001 22:34:18]
Jeff Molofee's <strong>OpenGL</strong> Windows Tutorial #3<br />
velocity.vertex[2]+= attract_normal.vertex[2]*5.0f*time_counter;<br />
}<br />
All of the previous code calculates our particle's new directional vector, if we have attraction to the emitter on. What<br />
all of this does is alters the particle's vector so that it slowly curves back to the emitter over time, for that attraction<br />
look. If you would like to see this principle in action, execute the included demo, and press 'a' for a particle<br />
explosion, that has attraction turned on.<br />
// Adjust The Current Color<br />
color[0]+= color_counter[0] *time_counter;<br />
color[1]+= color_counter[1] *time_counter;<br />
color[2]+= color_counter[2] *time_counter;<br />
This snippet is the part I was talking about earlier, that interpolates the current color towards the destined end<br />
color.<br />
// Adjust The Alpha Values (For Transparency)<br />
alpha+= alpha_counter*time_counter;<br />
// Adjust Current Size<br />
size+= size_counter*time_counter;<br />
// Fill In Our Color Vector With The Final Alpha Component<br />
color[3]=alpha;<br />
return true; // Yeee-aahhhhh Buddy!<br />
}<br />
This just finishes the update function. We are now done with the particle class!!! Oh yeah, and if you'd like some<br />
humor, check out some of the comments to the above functions... :) I always like to hide the humor from the actual<br />
tutorial, and leave it open for people to discover one day while looking through the code.<br />
Designing the Particle System Class:<br />
This is the turkey and mashed potatoes of the engine (ok... excuse me for not conforming to the classic phrase<br />
"meat and potatoes..." Conformity is a bad thing). This is the class that you will be using the most when you want to<br />
edit the look and feel of the system. I have created several functions for your editing purposes, and I am not going<br />
to describe most of them here, as they are very simple to understand, and if you really do need an explanation, I<br />
fully comment every one in the source, so check it out. Here is the particle system class:<br />
class PARTICLE_SYSTEM<br />
{<br />
private:<br />
bool attracting; // Is The System Attracting Particle<br />
Towards Itself?<br />
bool stopped; // Have The Particles Stopped<br />
Emitting?<br />
Alive<br />
unsigned int texture; // The Particle's Texture<br />
unsigned int particles_per_sec; // Particles Emitted Per Second<br />
unsigned int particles_numb_alive; // The Number Of Particles Currently<br />
float age; // The System's Current Age (In<br />
Seconds)<br />
http://nehe.gamedev.net/gametutorials/lesson03.asp (7 of 14) [20/08/2001 22:34:18]
Jeff Molofee's <strong>OpenGL</strong> Windows Tutorial #3<br />
Updated<br />
float last_update; // The Last Time The System Was<br />
float emission_residue; // Helps Emit Very Precise Amounts Of<br />
Particles<br />
System<br />
System<br />
System<br />
Time<br />
public:<br />
PARTICLE particle[MAX_PARTICLES]; // All Of Our Particles<br />
VERTEX3D prev_location; // The Last Known Location Of The<br />
VERTEX3D location; // The Current Known Position Of The<br />
VECTOR3D velocity; // The Current Known Velocity Of The<br />
float start_size; // The Starting Size Of The Particles<br />
float size_counter; // Adds/Subtracts Particle Size Over<br />
float end_size; // The Particle's End Size (Used For<br />
A MAX Boundry)<br />
float start_alpha; // The Starting Transparency Of The<br />
Particle<br />
float alpha_counter; // Adds/Subtracts Particle's<br />
Transparency Over Time<br />
float end_alpha; // The End Transparency (Used For A<br />
MAX Boundry)<br />
Time<br />
VECTOR3D start_color; // The Starting Color<br />
VECTOR3D color_counter; // The Color That We Interpolate Over<br />
VECTOR3D end_color; // The Ending Color<br />
float speed; // The System's Speed<br />
float speed_counter; // The System's Speed Counter<br />
float life; // The System's Life (In Seconds)<br />
float life_counter; // The System's Life Counter<br />
float angle; // System's Angle (90==1/2 Sphere,<br />
180==Full Sphere)<br />
int spread_min; // Used For Random Positioning Around<br />
The Emitter<br />
int spread_max;<br />
float spread_factor; // Used To Divide Spread<br />
VECTOR3D gravity; // Gravity For The X, Y, And Z Axis<br />
float attraction_percent;<br />
bool Update(float time, int flag, float num_to_create);<br />
void Render(GLvoid);<br />
unsigned int Active_Particles(void);<br />
http://nehe.gamedev.net/gametutorials/lesson03.asp (8 of 14) [20/08/2001 22:34:18]
Jeff Molofee's <strong>OpenGL</strong> Windows Tutorial #3<br />
float Get_Location(int coordinate);<br />
void Set_Location(float x, float y, float z);<br />
void Set_Texture(S3DTGA_PTR texture1);<br />
void Set_ParticlesPerSec(unsigned int number);<br />
void Set_Velocity(float xv, float yv, float zv);<br />
void Set_Size(float startsize, float endsize);<br />
void Set_Alpha(float startalpha, float endalpha);<br />
void Set_Speed(float Speed);<br />
void Set_Angle(float half_angle);<br />
void Set_SystemFlag(int flag, bool state);<br />
void Set_Color(float start_red, float start_green, float start_blue, float<br />
end_red, float end_green, float end_blue);<br />
void Set_Life(float seconds);<br />
void Set_Spread(int Spread_Min, int Spread_Max, float Spread_factor);<br />
void Set_Attraction(unsigned int Attraction_Percent);<br />
void Set_Gravity(float xpull, float ypull, float zpull);<br />
bool IsAttracting(void)<br />
{ return attracting; }<br />
bool IsStopped(void)<br />
{ return stopped; }<br />
PARTICLE_SYSTEM();<br />
~PARTICLE_SYSTEM();<br />
};<br />
A little on the big size isn't it. ;) Now, if you'll notice, I made the array of particle public, 'why' you ask? That way you<br />
can check a particle's position in space, and see if it is colliding with anything. A particle demo with collision ranks<br />
up there in the REALLY cool category. Now, instead of going through the variables one by one, I will just go<br />
through the functions, and describe them as I go (because there are quite a bit of them, and to understand their<br />
true meaning, you may have to see them in action to fully understand them). First, lets go through the particle<br />
system's version of the Update function:<br />
bool PARTICLE_SYSTEM::<br />
Update(float time, int flag, float num_to_create)<br />
{<br />
int loop;<br />
unsigned int particles_created;<br />
float time_counter;<br />
float particles_needed=num_to_create;<br />
This is the beginning of the function. Notice the three arguments, I'll talk about the first argument later when we see<br />
the particle engine in action for our demo, but lets talk about the others now. The flag variable can be one of three<br />
things:<br />
● ONLY_CREATE You will be using this one when you want your current system to generate an effect when a<br />
'cause' is triggered. For our demo, for instance, we use it when we generate an explosion, so when the 'e' key<br />
is pressed, this is what we call:<br />
ps1.Update(time, ONLY_CREATE, 500);<br />
This way, we can generate an explosion of 500 particles when the 'e' key is pressed, and we don't have to<br />
update the whole particle system if we don't want to (that would make the user hold down the 'e' key to see<br />
the actual animation).<br />
● ONLY_UPDATE This is what we are going to use for systems that have effects generated dynamically (such<br />
as the explosion effect discussed above), instead of effects that need to be generated constantly (such as<br />
http://nehe.gamedev.net/gametutorials/lesson03.asp (9 of 14) [20/08/2001 22:34:18]
Jeff Molofee's <strong>OpenGL</strong> Windows Tutorial #3<br />
fire).<br />
● UPDATE_AND_CREATE This is the flag that we want to use when we want to generate dynamic effects<br />
such as fire, and keep the effect constant, refer to this example (which was taken from our demo source):<br />
ps3.Update(time, UPDATE_AND_CREATE, 5);<br />
This will create five particles every time it is called, and add it to the current effect (in this case fire), and also<br />
update the system.<br />
Now, back to the function.<br />
// We Need To Calculate The Elapsed Time<br />
time_counter= (time-last_update);<br />
This calculates the time that has elapsed since the last time the function is called.<br />
if(flag== ONLY_UPDATE || flag== UPDATE_AND_CREATE)<br />
{<br />
// Set The Time Of The Last Update To Now<br />
last_update=time;<br />
// Clear The Particle Counter Variable Before Counting<br />
particles_numb_alive=0;<br />
// Update All Particles<br />
for(loop=0; loop=DEATH_AGE)<br />
{<br />
if(particle[loop].Update(time_counter))<br />
particles_numb_alive++;<br />
}<br />
}<br />
}<br />
This calls the particle's update function (if the correct flag was included), and checks to see if the particle is<br />
currently alive or not, and if it, then we add a number to the total particles that are currently alive.<br />
if(flag== ONLY_CREATE || flag== UPDATE_AND_CREATE)<br />
{<br />
// Now Calculate How Many Particles We Should Create Based On<br />
// Time And Taking The Previous Frame's Emission Residue Into<br />
// Account.<br />
particles_needed+= particles_per_sec*time_counter+emission_residue;<br />
// Now, Taking The Previous Line Into Account, We Now Cast<br />
// particles_needed Into An Unsigned Int, So That We Aren't<br />
// Going To Try To Create Half Of A Particle Or Something.<br />
particles_created= (unsigned int) particles_needed;<br />
if(!stopped)<br />
{<br />
// This Will Remember The Difference Between How Many We Wanted<br />
// To Create, And How Many We Actually Did Create. Doing It<br />
// This Way, We Aren't Going To Lose Any Accuracy.<br />
emission_residue= particles_needed-particles_created;<br />
}<br />
http://nehe.gamedev.net/gametutorials/lesson03.asp (10 of 14) [20/08/2001 22:34:18]
Jeff Molofee's <strong>OpenGL</strong> Windows Tutorial #3<br />
else<br />
{<br />
emission_residue= particles_needed;<br />
particles_created=0;<br />
}<br />
// Lets Make Sure That We Actually Have A Particle To Create<br />
if(particles_created
Jeff Molofee's <strong>OpenGL</strong> Windows Tutorial #3<br />
int loop;<br />
float size;<br />
VERTEX3D vert;<br />
glPushAttrib(GL_DEPTH_BUFFER_BIT | GL_PIXEL_MODE_BIT);<br />
glDisable(GL_DEPTH_TEST);<br />
glBlendFunc(GL_SRC_ALPHA, GL_ONE);<br />
glEnable(GL_BLEND);<br />
The previous lines push the current attributes set (that are related to the depth buffer, and pixel mode only) onto<br />
the attribute stack for later retrieval, then we turn off the depth buffer, and turn on color keying.<br />
glBindTexture(GL_TEXTURE_2D, texture);<br />
for(loop=0; loop=DEATH_AGE)<br />
{<br />
glColor4fv(particle[loop].color);<br />
Now we are going to create the particle's four vertices. You may be asking why we need to have a vertex object to<br />
store things. First of all, the call to glVertex3f with all three calculations for the coordinates would look pretty<br />
bloated. Second, the vector version of glVertex3f (glVertex3fv in case you didn't know) is a little bit faster than the<br />
non-vector version.<br />
}<br />
glBegin(GL_TRIANGLE_STRIP);<br />
glEnd();<br />
}<br />
vert.vertex[0]=particle[loop].location.vertex[0]-size;<br />
vert.vertex[1]=particle[loop].location.vertex[1]+size;<br />
vert.vertex[2]=particle[loop].location.vertex[2];<br />
glTexCoord2d(1,1); glVertex3fv(vert.vertex);<br />
vert.vertex[0]=particle[loop].location.vertex[0]+size;<br />
vert.vertex[1]=particle[loop].location.vertex[1]+size;<br />
vert.vertex[2]=particle[loop].location.vertex[2];<br />
glTexCoord2d(0,1); glVertex3fv(vert.vertex);<br />
vert.vertex[0]=particle[loop].location.vertex[0]-size;<br />
vert.vertex[1]=particle[loop].location.vertex[1]-size;<br />
vert.vertex[2]=particle[loop].location.vertex[2];<br />
glTexCoord2d(1,0); glVertex3fv(vert.vertex);<br />
vert.vertex[0]=particle[loop].location.vertex[0]+size;<br />
vert.vertex[1]=particle[loop].location.vertex[1]-size;<br />
vert.vertex[2]=particle[loop].location.vertex[2];<br />
glTexCoord2d(0,0); glVertex3fv(vert.vertex);<br />
http://nehe.gamedev.net/gametutorials/lesson03.asp (12 of 14) [20/08/2001 22:34:18]
Jeff Molofee's <strong>OpenGL</strong> Windows Tutorial #3<br />
glPopAttrib();<br />
}<br />
Lastly, we retrieve the attributes that we pushed onto the stack, and that's it for the render function!<br />
Using the Particle Engine:<br />
As I said before, there are a lot of functions that we didn't go over. Most of them are pretty self-explanatory, and if<br />
you are confused about one, just check out the source in Particle_System.cpp. Now, I am going to show you how<br />
to create three effects with those functions. First of all, lets create an explosion!<br />
ps1.Set_Alpha(1.0f, 0.0f);<br />
ps1.Set_Velocity(1.0f, 1.0f, 1.0f);<br />
ps1.Set_Texture(&flare);<br />
ps1.Set_Angle(360);<br />
ps1.Set_Attraction(0);<br />
ps1.Set_Color(1.0f, 0.0f, 0.0f, 1.0f, 0.55f, 0.1f);<br />
ps1.Set_Gravity(0.0f, 0.0f, 0.0f);<br />
ps1.Set_Life(4);<br />
ps1.Set_Location(0.0f, 0.0f, 0.0f);<br />
ps1.Set_ParticlesPerSec(0);<br />
ps1.Set_Size(3, 2);<br />
ps1.Set_Speed(10);<br />
ps1.Set_Spread(-100, 100, 200);<br />
ps1.Set_SystemFlag(STOP, SK_OFF);<br />
ps1.Set_SystemFlag(ATTRACTION, SK_OFF);<br />
Ok, first we set the texture that we want (when we get into mesh loading, we will make some mesh loading<br />
functions for the particle engine too). We then set the angle that we want the particles to be able to travel, which in<br />
this case is a full 360° (on all axes). We also don't want attraction at all, so we turn it off, and set the attraction<br />
percentage to 0 (you don't have to do this, but its better for clarity reasons). We also don't need any "particles per<br />
second" since we specify the number that we want to create when we trigger the effect. I think the explosion looked<br />
better if I increased the size, and it slowly dropped a little, so I set the size to start at 3, and end at 2. I also wanted<br />
the explosion to be halfway fast, so I set the speed a little high. And, I set the spread (the allowed distance for<br />
particles to spread from the emitter) to AT MOST -.5f, and .5f away. I also turned off 'stoppage' and the attraction<br />
effects.<br />
That's all there is to using the engine, I also made a few more effects in the demo, so check them out. One last<br />
note, in particle.h, there is a define for MAX_PARTICLES, I set it to be 2000 particles per system. You can change<br />
this to whatever you want, but remember, speed is key in games, and the more particles you use, the better things<br />
will look, but particles are a slight speed hog (I went overboard on the particles I used in the demo, you should<br />
keep the max at most to about 1000).<br />
The Demo Controls:<br />
● 'f' to toggle fire on and off<br />
● 'e' for a nice explosion<br />
● 'a' for an explosion where the particles are attracted to the emitter<br />
Conclusion:<br />
There was some nice graphics for you, instead of the boring math theory, and wrapper explanations. In case you<br />
didn't notice, we are slowly turning our wrapper into an engine, and this is the engine that we will be using when we<br />
start to make our games. We can't make any games with it until we get the wrapper/engine into nice working order<br />
though (sound, collision detection, mesh loading/rendering, etc). So, that is what we are building up to.<br />
I was mowing one day this week, and the inspiration for the first game we will make came into my head (and this<br />
http://nehe.gamedev.net/gametutorials/lesson03.asp (13 of 14) [20/08/2001 22:34:18]
Jeff Molofee's <strong>OpenGL</strong> Windows Tutorial #3<br />
isn't going to be a simple game, its going to cover about 4-6 tutorials), that will incorporate everything that we will<br />
be talking about... So it will be some very cool stuff.<br />
For this tutorial, I would like once again to thank NeHe, and you should too. :) Also, I would like to think Richard<br />
'Keebler' Benson for being a particle expert, and Dave and Kevin of <strong>Game</strong>dev.net for helping me out in their own<br />
unique ways (though they may not have realized it ;)). Thanks guys!<br />
Bibliography:<br />
1. Reeves, William T., "Particle Systems-A Technique for Modeling a Class of Fuzzy Objects," ACM<br />
Transactions on Graphics, vol. 2, no. 2, pp. 91-108, April 1983.<br />
2. Benson, Richard. "Particle Chamber." (http://www.dxcplusplus.co.uk/DemoVault/ParticleChamber.zip)<br />
DOWNLOADS:<br />
* DOWNLOAD the Visual C++ Code For This Lesson.<br />
Back To NeHe Productions!<br />
http://nehe.gamedev.net/gametutorials/lesson03.asp (14 of 14) [20/08/2001 22:34:18]
Jeff Molofee's <strong>OpenGL</strong> Windows Tutorial #4<br />
Introduction:<br />
<strong>Game</strong> <strong>Programming</strong><br />
Lesson 4<br />
<strong>OpenGL</strong> <strong>Game</strong> <strong>Programming</strong> Tutorial Four:<br />
Model Mania<br />
By <strong>Trent</strong> "ShiningKnight" Polack<br />
In this tutorial we are going to be loading two different formats of models: .md2 (Quake 2 model type) and .ms3d<br />
(MilkShape's native format). Each model has it's own pros and cons, but each has a nice purpose in our engine.<br />
First, the .md2 format is perfect for First Person Shooters (being that it was used in Quake 2), and that is what our<br />
engine is going to be optimized for (though, the engine is going to be designed in a way that can be used for any<br />
game). The .ms3d format is good because MilkShape has support for the most popular model formats around, so<br />
it is the perfect medium for model conversions. The .md2 format is the more complicated of the two models<br />
formats, so lets get that over with first.<br />
The .MD2 Model Format:<br />
Ok, we are basically going to need four different structures to read it in: one for the file's header, one for vertex<br />
information, frame, and another vertex structure. Since the header comes first in absolutely any file, lets discuss<br />
that first, so heres the structure:<br />
typedef struct MD2_HEADER_TYP<br />
{<br />
int magic;<br />
int version;<br />
int skinWidth;<br />
int skinHeight;<br />
int frameSize;<br />
int numSkins;<br />
int numVertices;<br />
int numTexcoords;<br />
int numTriangles;<br />
int numGlCommands;<br />
int numFrames;<br />
int offsetSkins;<br />
int offsetTexcoords;<br />
int offsetTriangles;<br />
int offsetFrames;<br />
http://nehe.gamedev.net/gametutorials/lesson04.asp (1 of 15) [20/08/2001 22:34:40]
Jeff Molofee's <strong>OpenGL</strong> Windows Tutorial #4<br />
int offsetGlCommands;<br />
int offsetEnd;<br />
} MD2_HEADER, *MD2_HEADER_PTR;<br />
Now, lets go through each component one by one, to see what it is, and what purpose it serves us.<br />
● magic - The 'magic' number that tells us that the file really is an .md2, this number must be 844121161 if it<br />
really is a valid .md2.<br />
● version - The version number of the file, this should always be 8.<br />
● skinWidth - Tells us the width of the model's skin (not used in our code).<br />
● skinHeight - Tells us the height of the model's skin (not used in our code).<br />
● frameSize - Tells us the size of each frame of the model (more about this, and other frame information<br />
later).<br />
● numSkins - This tells us the number of skins the model has (not used in our code).<br />
● numVertices - This tells us how many vertices the model has... This is really only useful if you want to<br />
display the number of vertices to the screen.<br />
● numTexcoords - This tells us how many texture coordinates the model has, the weird part about this is that<br />
it isn't necessarily the same as the number of vertices.<br />
● numTriangles - Tells us how many triangles the model has (we use this quite a bit).<br />
● numGlCommands - This tells us if the model was optimized for triangle strips, or fans. Not many .md2<br />
loaders utilize this (but of course, ours does), but it's a HUGE performance gain if used correctly.<br />
● numFrames - The number of animation keyframes that the model has.<br />
The following parts of the header are all offsets to the spot in the file where the information you may be looking for<br />
is:<br />
● offsetSkins<br />
● offsetTexcoords<br />
● offsetTriangles<br />
● offsetFrames<br />
● offsetGlCommands<br />
● offsetEnd<br />
Ok, and what we are going to need to do is read the header in first when we load our model (you will see code to<br />
this later), as it tells us how much memory we may need for certain variables, and the way we are going to render<br />
the information. Now we are going to talk about a 'unique' structure to say the least... Unique, in that half of the<br />
variables in this structure are only used to hold information that we don't need. The light normal index is an index<br />
to a table of normals used in Quake 2... In short, don't worry about it, we are only using it as a 'decoy' variable (my<br />
word for variables that we use to stuff information into just so we can continue on in the file).<br />
typedef struct MD2_VERTEX_TYP<br />
{<br />
unsigned char vertex[3];<br />
unsigned char lightNormalIndex;<br />
} MD2_VERTEX, *MD2_VERTEX_PTR;<br />
We will be using the vertex information for each frame though, so keep in mind that half of this structure is useful.<br />
Now, lets talk about frames that each .md2 holds internally. Each .md2 has 198 frames of animation stored inside<br />
it, for animations such as running, crouching, dying, and idling. These are all very useful for first person shooters<br />
(which is why they were used in Quake 2... Ok, I won't say that line again, I promise). Here is the structure:<br />
typedef struct MD2_FRAME_TYP<br />
{<br />
float scale[3];<br />
float translate[3];<br />
char name[16];<br />
MD2_VERTEX vertices[1];<br />
} MD2_FRAME, *MD2_FRAME_PTR;<br />
http://nehe.gamedev.net/gametutorials/lesson04.asp (2 of 15) [20/08/2001 22:34:40]
Jeff Molofee's <strong>OpenGL</strong> Windows Tutorial #4<br />
As you may be able to see, unless you're blind (then I don't understand how or why you are 'reading' this at all),<br />
this structure contains information so that you can scale your models down (as, they are quite large if you don't),<br />
and so you can translate them. Finally, the last structure that we need to talk about is the REAL vertex structure<br />
that you will be using... uhhhhh, nearly constantly. ;) Here it is:<br />
typedef struct MD2_MODELVERTEX_TYP<br />
{<br />
float x,y,z;<br />
float u,v;<br />
} MD2_MODELVERTEX, *MD2_MODELVERTEX_PTR;<br />
As you can see, this structure stores a vertex for <strong>OpenGL</strong> (the (x,y,z) ordered triple), and the texture information<br />
(the (u,v) ordered double). We will be using this structure quite a bit, being that each model has quite a bit of<br />
vertices (which is why you don't want to hard code the entire thing, one screw up, and well, your wife and kids<br />
won't see you for a week).<br />
Now, let me show you the class that we will be using for our .md2 models (you cannot understand my growing<br />
love for classes... C programmers take note: classes are the best):<br />
class MD2<br />
{<br />
private:<br />
MD2_MODELVERTEX vertList[100];<br />
int numGlCommands;<br />
long* glCommands;<br />
int numTriangles;<br />
public:<br />
int stateStart;<br />
int stateEnd;<br />
int frameSize;<br />
int numFrames;<br />
char* frames;<br />
int currentFrame;<br />
int nextFrame;<br />
int endFrame;<br />
float interpolation;<br />
bool Load(char* filename);<br />
void Render(int numFrame);<br />
void Animate(int startFrame, int EndFrame, float Interpolation);<br />
void SetState(int state);<br />
MD2() : stateStart(IDLE1_START), stateEnd(IDLE1_END),<br />
numGlCommands(0), frameSize(0), numFrames(0),<br />
currentFrame(IDLE1_START), nextFrame(currentFrame+1),<br />
endFrame(IDLE1_END), interpolation(0.0f)<br />
{ }<br />
~MD2()<br />
{<br />
http://nehe.gamedev.net/gametutorials/lesson04.asp (3 of 15) [20/08/2001 22:34:40]
Jeff Molofee's <strong>OpenGL</strong> Windows Tutorial #4<br />
if(glCommands)<br />
delete [] glCommands;<br />
if(frames)<br />
delete [] frames;<br />
}<br />
};<br />
That's it, for now, just concentrate on the loading, and rendering functions, we will get to the animation/state<br />
functions a little later. You may be wondering why nearly every variable is a pointer, well, using dynamic<br />
allocations are a nice memory saver as opposed to creating the maximum amount of memory from the start, and<br />
since I will be using the C++ way of allocating memory (its just cleaner that way), I'll show you a quick example.<br />
Say we want to load the glCommands variable, well, here is how we'd go about doing it:<br />
glCommands= new long [header.numGlCommands*sizeof(long)];<br />
That's all there is to it. Lets go through it one by one, 'new' is the C++ way of allocating memory, the form you<br />
need to use it in is this: variablePtr= new variableType [sizeYouWantToCreate]; Easy eh? And to delete<br />
glCommands you just have to do this:<br />
delete [] glCommands;<br />
Tough one eh? If you still don't get it, then go pick up a C++ book slacker. :)<br />
Now, on to the loading code:<br />
bool MD2::<br />
Load(char* filename)<br />
{<br />
FILE* file;<br />
MD2_HEADER header;<br />
We create a file pointer to store the information while we read it in dynamically, and we are also creating a<br />
temporary MD2_HEADER to store our header information in (so we don't have to waste the space for a structure<br />
that we won't use inside our class).<br />
if((file= fopen(filename, "rb"))==NULL)<br />
{<br />
S3Dlog.Output("Could not load %s correctly", filename);<br />
return false;<br />
}<br />
This loads the file that was specified by filename. And if there was a problem opening it, then we get out of the<br />
functions (oh, and in case you were wondering, if we didn't get out of the function after an error, you would be<br />
facing a nice little "illegal operations" message box in front of your eyes when you ran the program.<br />
fread(&header, sizeof(MD2_HEADER), 1, file);<br />
This loads the header into our previously created header structure, we will be using this header a lot in this<br />
function, but we only need it for this function, so once again, that's why we made it specific to the function. We will<br />
need to make a few of the header's variables global (but only 2-3), but that's still less space than storing the whole<br />
thing.<br />
if(header.magic!= 844121161)<br />
{<br />
S3Dlog.Output("%s is not a valid .md2", filename);<br />
return false;<br />
}<br />
if(header.version!=8)<br />
http://nehe.gamedev.net/gametutorials/lesson04.asp (4 of 15) [20/08/2001 22:34:40]
Jeff Molofee's <strong>OpenGL</strong> Windows Tutorial #4<br />
{<br />
S3Dlog.Output("%s is not a valid .md2", filename);<br />
return false;<br />
}<br />
This time, we are checking two of the header's variables that are specific to the type of file that we are loading. If<br />
either of those two if statements returns false, then we have a problem because ALL .md2's have should have the<br />
same magic and version number.<br />
frames= new char[header.frameSize*header.numFrames];<br />
As I was saying earlier about dynamic memory allocations, this is one of the cases where we apply it. While<br />
programming, we don't know the exact number of frames we are going to need, so we need to do it while the<br />
program is running. This fills frames with the correct number of frames (and we multiply that by header.frameSize<br />
so that the variable has adequate amounts of memory).<br />
if(frames==NULL)<br />
return false;<br />
This just checks to make sure that the memory was allocated successfully (and its rare that it isn't allocated right).<br />
Now that we have enough room in frames, we can fill it with the model-specific information:<br />
fseek(file, header.offsetFrames, SEEK_SET);<br />
fread(frames, header.frameSize*header.numFrames, 1, file);<br />
First we advance to the spot in the file where the frame information is, then after that, we fill our frames variable<br />
with the information.<br />
glCommands= new long [header.numGlCommands*sizeof(long)];<br />
if(glCommands==NULL)<br />
return false;<br />
fseek(file, header.offsetGlCommands, SEEK_SET);<br />
fread(glCommands, header.numGlCommands*sizeof(long), 1, file);<br />
This is the same case as before, except this time we are loading the glCommands information (to tell us whether<br />
or not we need triangle strips or fans to render our model).<br />
numFrames = header.numFrames;<br />
numGlCommands = header.numGlCommands;<br />
frameSize = header.frameSize;<br />
numTriangles = header.numTriangles;<br />
This stores the global header information that we need to know for rendering inside our class.<br />
fclose(file);<br />
S3Dlog.Output("Loaded %s correctly", filename);<br />
return true;<br />
}<br />
Now, lets close the file that we had open, output the success information to the log, and get out of the function!!!<br />
Phew, that was a pretty complicated function, especially if you've never had any experience with loading in files,<br />
and allocating memory dynamically. Now, on to the rendering function:<br />
void MD2::<br />
Render(int numFrame)<br />
{<br />
static MD2_MODELVERTEX vertList[100];<br />
http://nehe.gamedev.net/gametutorials/lesson04.asp (5 of 15) [20/08/2001 22:34:40]
Jeff Molofee's <strong>OpenGL</strong> Windows Tutorial #4<br />
MD2_FRAME_PTR currentFrame;<br />
VERTEX v1;<br />
long* command;<br />
float texcoord[2];<br />
int loop;<br />
int vertIndex;<br />
int type;<br />
int numVertex;<br />
int index;<br />
This defines the variables that we will need throughout the rendering function. We have one frame variable, to tell<br />
us the current frame (since each model can only render one frame at a time), and then we have our four<br />
temporary vertices for outputting a vertex as a vector rather than an ordered triple (a very, very slight speed<br />
increase). Also, just a little tidbit, I had vertList as a temporary variable that was created every time the function<br />
was called, instead of being static... Then as I was writing this, I realized that creating a 100 structures every call<br />
may be a little taxing, I made it static (in case you are rusty, that means that once its created, it lasts the rest of<br />
the file), and I was getting about 10-15 frames more per second, not a huge increase, but its nice to have<br />
available.<br />
currentFrame= (MD2_FRAME*) ((char*)frames+frameSize*numFrame);<br />
command = glCommands;<br />
This sets the current frame information, and the glCommand that we are going to need when we output our<br />
vertices to <strong>OpenGL</strong>.<br />
while((*command)!=0)<br />
{<br />
if(*command>0) // This Is A Triangle Strip<br />
{<br />
numVertex= *command;<br />
command++;<br />
type= 0;<br />
}<br />
else // This Is A Triangle Fan<br />
{<br />
numVertex= - *command;<br />
command++;<br />
type= 1;<br />
}<br />
This sets up our vertices for rendering, and also the command variable for, once again, rendering our vertices as<br />
a tri strip or fan.<br />
if(numVertex
Jeff Molofee's <strong>OpenGL</strong> Windows Tutorial #4<br />
command++;<br />
vertList[index].x= ( (currentFrame->vertices[vertIndex].vertex[0]*<br />
currentFrame->scale[0])+<br />
currentFrame->translate[0]);<br />
vertList[index].z= -((currentFrame-> vertices[vertIndex].vertex[1]*<br />
currentFrame->scale[1])+<br />
currentFrame->translate[1]);<br />
vertList[index].y= ( (currentFrame->vertices[vertIndex].vertex[2]*<br />
currentFrame->scale[2])+<br />
currentFrame->translate[2]);<br />
index++;<br />
}<br />
A decently sized snippet of code, but don't let it intimidate you, because all we are doing is filling our vertex list<br />
with the correct vertex positions after scaling and translating them. See, this is one time when size really doesn't<br />
matter, but does a lot to screw with your head.<br />
}<br />
if(type==0)<br />
{<br />
glBegin(GL_TRIANGLE_STRIP);<br />
for(loop=0; loop
Jeff Molofee's <strong>OpenGL</strong> Windows Tutorial #4<br />
Now, that renders the vertices according to the command that they were made for. Nothing too hard! As you may<br />
see, I included a function in the VERTEX class for sending the array that the VERTEX class represents to<br />
<strong>OpenGL</strong> as a 3D vertex. I entitled it "SendToOGL" makes sense, doesn't it?<br />
Ok, now, about the state and animation functions that you saw earlier. I have made a list of predefined constants<br />
for your use with .md2's... You can see them all in the table below:<br />
IDLE1 The first of four idle animations<br />
RUN Animation for the model running. RUN FORREST RUN!<br />
SHOT_STAND Animation for when the model gets shot, but stays standing<br />
SHOT_SHOULDER Animation for when the model gets shot in the shoulder (still standing though)<br />
JUMP Animation for the model jumping<br />
IDLE2 The second of four idle animations<br />
SHOT_FALLDOWN<br />
Animation for the model getting shot, and falling to the ground (used for getting shot by<br />
big weapons)<br />
IDLE3 The third of four idle animations<br />
IDLE4 The fourth of four idle animations<br />
CROUCH Animation for making the model crouch<br />
CROUCH_CRAWL Having the model crawl while crouching<br />
CROUCH_IDLE An idle animation while in a crouching position<br />
CROUCH_DEATH The model dying while in a crouching position<br />
DEATH_FALLBACK The model dying while falling backwards (death shot from the front)<br />
DEATH_FALLFORWARD The model dying while falling forwards (death shot from the back)<br />
DEATH_FALLBACKSLOW The model dying while falling backwards slowly<br />
If you think that was a long list, think about how long it took me to analyze the model to see what it was doing, and<br />
what frame it was in... Can we say 'boring?' Ok, you know the states, "whoop dee frickin' doo bob, now what can I<br />
do with them?" Well, I made a nice little function (I won't show the code, its very redundant, so check it out for<br />
yourself in Loaders.cpp. But, say you have a model class object named, none other than, 'model.' And you want<br />
to put it into a running state, here is how you would do it:<br />
model.SetState(RUN);<br />
Well, while that line doesn't actually produce any visible results, it sets two variables inside the 'model' class to<br />
what they need to be to produce a running animation. And for you to be actually able to see the animation that it<br />
just performed, you need to use the Animate(...) function that I created (the idea came from Kevin Hawkins/Dave<br />
Astle [1], but not the code itself). Here is the line that would allow you to actually see the animation (once again,<br />
you can see the actual function code for yourself in Loaders.cpp, as the code is pretty self-explanatory, and space<br />
is precious):<br />
model.Animate(model.stateStart, model.stateEnd, 0.02f);<br />
http://nehe.gamedev.net/gametutorials/lesson04.asp (8 of 15) [20/08/2001 22:34:40]
Jeff Molofee's <strong>OpenGL</strong> Windows Tutorial #4<br />
That function takes the class's stateStart (the frame number of the starting state), and stateEnd and it will<br />
interpolate the model's animation at a speed of once every 50 frames (this is a great spot for you to use<br />
movement based on timing). Here is another example of using those functions, with a model's included weapon<br />
(use the actual model's information to animate the weapon).<br />
glBindTexture(GL_TEXTURE_2D, hobgoblinSkin.ID);<br />
glScalef(0.05f, 0.05f, 0.05f);<br />
hobgoblin.Animate(hobgoblin.stateStart, hobgoblin.stateEnd, 0.02f);<br />
glBindTexture(GL_TEXTURE_2D, hobgoblinWeaponSkin.ID);<br />
hobgoblinWeapon.Animate(hobgoblin.stateStart, hobgoblin.stateEnd, 0.02f);<br />
You need to load the model's skins (textures) in for that code though, you can check out a lot of it in main.cpp.<br />
Here is what you have done in the last 10 pages:<br />
Amazing isn't it!? And we're not even done yet (which could be viewed as a good or a bad thing).<br />
The .MS3D Model Format:<br />
About a week ago, I didn't even plan on having this model format in my engine, I was just going to use .md2's,<br />
and be happy with it. But one night when I was trying to export an .md2, I found out that I needed to make the<br />
model have joints, and animations. And that's all good and well, except the model I needed didn't need to have<br />
any animations, it just needed to be a static (non-animated) object. Well, I just figured that I would write a simple<br />
.MS3D loading class, and that 'simple' class took me about 6 hours. :) But here it is in all of it's simplistic glory (if<br />
by chance, you are reading this, and think the class needs some more features, drop me a line (references at<br />
bottom), and we'll talk about it). First, the necessary file structures:<br />
typedef struct MS3D_HEADER_TYP<br />
{<br />
char id[10];<br />
int version;<br />
} MS3D_HEADER, *MS3D_HEADER_PTR;<br />
Just like last time, we will be reading the header in first, except this time, the file is structured differently, and<br />
things to need to be read in perfect order for things to work! This header only has two variables for checking to<br />
make sure that the file is a .MS3D format:<br />
● id - Should always be MS3D000000<br />
● version - Should always be 3 or 4<br />
Next is the vertex structure:<br />
http://nehe.gamedev.net/gametutorials/lesson04.asp (9 of 15) [20/08/2001 22:34:40]
Jeff Molofee's <strong>OpenGL</strong> Windows Tutorial #4<br />
typedef struct MS3D_VERTEX_TYP<br />
{<br />
unsigned char flags;<br />
unsigned char refCount;<br />
char boneID;<br />
float vertex[3];<br />
} MS3D_VERTEX, *MS3D_VERTEX_PTR;<br />
This is another class that has some 'decoy' variables. The boneID variable is used for skeletal animation, which is<br />
like the .MD2's animation frames, except the model has joints (just like us) that you can adjust dynamically... A<br />
great feature to say the least, but requires a large amount of hard work and research. I only know of two people<br />
who have researched it, one of which being Brett Porter (http://rsn.gamedev.net).<br />
typedef struct MS3D_TRIANGLE_TYP<br />
{<br />
unsigned short flags;<br />
unsigned short vertexIndices[3];<br />
float vertexNormals[3][3];<br />
float u[3];<br />
float v[3];<br />
unsigned char smoothingGroup;<br />
unsigned char groupIndex;<br />
} MS3D_TRIANGLE, *MS3D_TRIANGLE_PTR;<br />
That is our triangle class, all .MS3D (along with .MD2) files are ONLY composed of triangles, as they are the best<br />
primitive to use speed-wise in games. This is the main structure that we will be using for rendering.<br />
typedef struct MS3D_GROUP_TYP<br />
{<br />
unsigned char flags;<br />
char name[32];<br />
unsigned short numTriangles;<br />
unsigned short* triangleIndices;<br />
char materialIndex;<br />
} MS3D_GROUP, *MS3D_GROUP_PTR;<br />
Also, in MilkShape, you can choose to split the model into 'groups' of polygons. The model I am using for this<br />
demo has about 11 groups. Check it out!<br />
Now, lets check out the .MS3D class:<br />
class MS3D<br />
{<br />
public:<br />
unsigned short numVertices;<br />
MS3D_VERTEX* vertices;<br />
unsigned short numTriangles;<br />
MS3D_TRIANGLE* triangles;<br />
unsigned short numGroups;<br />
MS3D_GROUP* groups;<br />
bool Load(char* filename);<br />
void Render(void);<br />
MS3D()<br />
{ }<br />
http://nehe.gamedev.net/gametutorials/lesson04.asp (10 of 15) [20/08/2001 22:34:40]
Jeff Molofee's <strong>OpenGL</strong> Windows Tutorial #4<br />
~MS3D()<br />
{<br />
if(vertices)<br />
delete vertices;<br />
if(triangles)<br />
delete triangles;<br />
if(groups)<br />
delete groups;<br />
}<br />
};<br />
And that's our incredibly simple .MS3D class! As for variables, we are storing 3 variables to hold the amount of<br />
structures, and then we have a pointer to each structure that we will dynamically allocate memory for while<br />
loading. Speaking of loading, lets check that function out!<br />
bool MS3D::<br />
Load(char* filename)<br />
{<br />
FILE* file;<br />
MS3D_HEADER header;<br />
int loop;<br />
Ok, nothing should look unfamiliar to you, we just went through most of this with the .MD2 loading code! So it<br />
should seem partly like déjà vu!<br />
if((file= fopen(filename, "rb"))==NULL)<br />
{<br />
S3Dlog.Output("Could not load %s correctly", filename);<br />
return false;<br />
}<br />
We open the file for reading, and check to make sure that it actually loaded.<br />
fread(&header.id, sizeof(char), 10, file);<br />
fread(&header.version, 1, sizeof(int), file);<br />
We read both variables of the header in (loaded separately, mainly because it didn't seem to want to work the<br />
normal way).<br />
if(strncmp(header.id, "MS3D000000", 10)!=0)<br />
{<br />
S3Dlog.Output("%s if not a valid .ms3d", filename);<br />
return false;<br />
}<br />
if(header.version!=3 && header.version!=4)<br />
{<br />
S3Dlog.Output("%s if not a valid .ms3d", filename);<br />
return false;<br />
}<br />
This checks to make sure that the file we loaded in is really a valid .MS3D file.<br />
fread(&numVertices, sizeof(unsigned short), 1, file);<br />
vertices= new MS3D_VERTEX [numVertices];<br />
for(loop=0; loop
Jeff Molofee's <strong>OpenGL</strong> Windows Tutorial #4<br />
fread(&vertices[loop].flags, sizeof(BYTE), 1, file);<br />
fread( vertices[loop].vertex, sizeof(float), 3, file);<br />
fread(&vertices[loop].boneID, sizeof(char), 1, file);<br />
fread(&vertices[loop].refCount, sizeof(BYTE), 1, file);<br />
}<br />
First we read in the number of vertices for this model, then we allocate the memory for the exact number of<br />
vertices. Next we fill the vertices with the information from the model file.<br />
fread(&numTriangles, sizeof(unsigned short), 1, file);<br />
triangles= new MS3D_TRIANGLE [numTriangles];<br />
for(loop=0; loop
Jeff Molofee's <strong>OpenGL</strong> Windows Tutorial #4<br />
.MD2's<br />
// Draw By Group<br />
for(loop1=0; loop1
Jeff Molofee's <strong>OpenGL</strong> Windows Tutorial #4<br />
Beautiful, isn't it? Well, that's all there is to loading .MS3D's!!!<br />
The Demo:<br />
This tutorial's source makes a demo that displays two .md2's and one .ms3d. Here are the controls this time:<br />
'1' - Change To Alien .MD2 Model<br />
'2' - Change To Hobgoblin .MD2 Model<br />
'3' - Change To Tank .MS3D Model<br />
'W' - Turn To Aliased Wireframe Mode<br />
'A' - Turn To Antialiased Wireframe Mode (SLOW)<br />
'T' - Turn To Textured/Filled Mode<br />
'R' - To Make One Of The .MD2s Run<br />
And use the arrow keys to rotate the model.<br />
Engine Updates:<br />
Being that this engine is a VERY important tool for our game coding needs, I randomly look through files, finding<br />
errors, changing code, and sometimes completely changing some things all together. I have changed the TGA<br />
loader into a general TEXTURE class that now has TGA and BMP loading support. I am also in the process of<br />
designing another implementation for a particle engine (using inheritance this time), so that you can choose your<br />
favorite method... This new implementation should be ready by the 6 th tut.<br />
Conclusion:<br />
Well, loading models can add a completely new look and feel to your game. And in the next tutorial, we will be<br />
adding a completely new feel and sound to your games. I have been on a coding 'high' for the past week, and<br />
have been coding every spare moment of my time. I also had a really great idea for a tutorial for our intersection<br />
testing tutorial (2 tuts away)! Not only is it going to be fun, but you'll learn a lot from it too.<br />
Ok, in this tutorial the thanks go out to: cmx (for modeling the incredible tank), Reed Hawker (for designing the<br />
alien, and skin at http://www.polycount.com), Hunter, Burnt Kona, Fafner, and Deranged (for a collective effort on<br />
designing the hobgoblin. Also at http://www.polycount.com), and finally I would like to thank Justin "BlackScar"<br />
Eslinger for help with .md2 loading.<br />
DOWNLOADS:<br />
http://nehe.gamedev.net/gametutorials/lesson04.asp (14 of 15) [20/08/2001 22:34:40]
Jeff Molofee's <strong>OpenGL</strong> Windows Tutorial #4<br />
* DOWNLOAD the Visual C++ Code For This Lesson.<br />
Back To NeHe Productions!<br />
http://nehe.gamedev.net/gametutorials/lesson04.asp (15 of 15) [20/08/2001 22:34:40]