


You also want an ePaper? Increase the reach of your titles
YUMPU automatically turns print PDFs into web optimized ePapers that Google loves.
Tech<br />
32<br />
Slide the calliper over the brake disc, and<br />
using a 9/16-inch AF socket and torque<br />
wrench, tighten the two bolts to 38lb ft. If<br />
you’ve removed the brake pads as well then<br />
refit them. Also, make sure the flexible pipe is<br />
not twisted.<br />
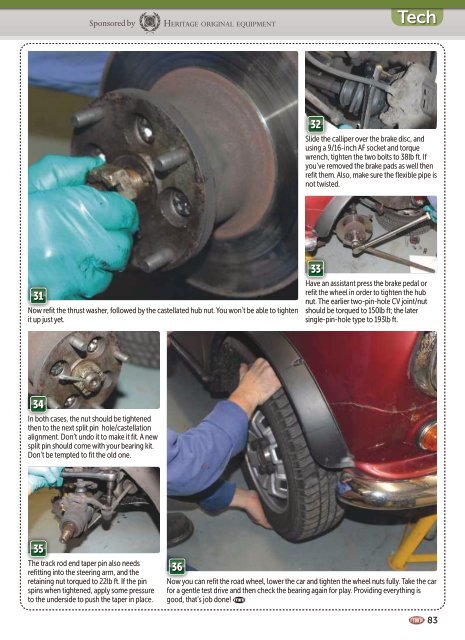
31<br />
Now refit the thrust washer, followed by the castellated hub nut. You won’t be able to tighten<br />
it up just yet.<br />
33<br />
Have an assistant press the brake pedal or<br />
refit the wheel in order to tighten the hub<br />
nut. The earlier two-pin-hole CV joint/nut<br />
should be torqued to 150lb ft; the later<br />
single-pin-hole type to 193lb ft.<br />
34<br />
In both cases, the nut should be tightened<br />
then to the next split pin hole/castellation<br />
alignment. Don’t undo it to make it fit. A new<br />
split pin should come with your bearing kit.<br />
Don’t be tempted to fit the old one.<br />
35<br />
The track rod end taper pin also needs<br />
refitting into the steering arm, and the<br />
retaining nut torqued to 22lb ft. If the pin<br />
spins when tightened, apply some pressure<br />
to the underside to push the taper in place.<br />
36<br />
Now you can refit the road wheel, lower the car and tighten the wheel nuts fully. Take the car<br />
for a gentle test drive and then check the bearing again for play. Providing everything is<br />
good, that’s job done!<br />
83