Instruction manual for VERSATO collection
Doc. VSBAEN-Rev2 (31.07.2018)
Doc. VSBAEN-Rev2 (31.07.2018)

You also want an ePaper? Increase the reach of your titles
YUMPU automatically turns print PDFs into web optimized ePapers that Google loves.
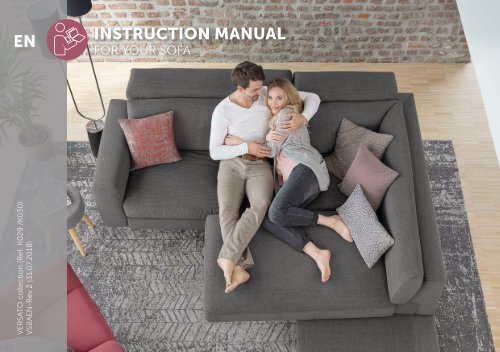
EN<br />
INSTRUCTION MANUAL<br />
FOR YOUR SOFA<br />
<strong>VERSATO</strong> <strong>collection</strong> (Ref. K029 /K030)<br />
VSBAEN-Rev.2 (31.07.2018)
2<br />
VIDEO INSTRUCTIONS<br />
CONTENT<br />
On numerous pages, you will find<br />
a QR code (QR = Quick Response).<br />
These are graphical codes that can<br />
be read by smartphone cameras and<br />
access a video on the Internet via link.<br />
Your advantage: No tiresome typing of<br />
Internet addresses!<br />
You will need a smartphone, a<br />
QR code reader and an Internet<br />
connection <strong>for</strong> this. You can find a<br />
QR code reader free of charge in your<br />
smartphone’s App Store.<br />
1. SITTING COMFORTABLY 7<br />
3. MAINTENANCE OF LEATHER COVERS 45<br />
2. MAINTENANCE OF FABRIC COVERS 31<br />
4. ASSEMBLY AND DISMANTLING 51<br />
You can also look <strong>for</strong> the channel<br />
"20cm sofas” on YouTube. There<br />
you can find all the videos from this<br />
<strong>manual</strong> as well.<br />
Sie finden die Bedienungsanleitung<br />
auch in Ihrer<br />
Sprache hier im Web:<br />
Le mode d'emploi est<br />
aussi disponible dans<br />
votre langue ici sur le web:<br />
U kunt de Gebruiksaanwijzing<br />
ook in uw taal hier op<br />
het web vinden:
THANK<br />
YOU!<br />
Dear customers,<br />
Thank you <strong>for</strong> having chosen a premium manufacturer's high-quality product. For<br />
many years, we have been producing first-class seating furniture <strong>for</strong> living areas.<br />
Years of experience and a great love of detail can also be found in your new piece of<br />
upholstery! It is manufactured according to your wishes and may include electrical<br />
functions (optional).<br />
Ask your retailer’s experienced specialists to assemble your upholstered furniture.<br />
In the last chapter, we will provide you with necessary in<strong>for</strong>mation on assembly<br />
and dismantling <strong>for</strong> when you want to move or renovate. You can also use our<br />
easy video instructions on the Internet, which you can access directly via QR code.<br />
Make yourself com<strong>for</strong>table on your upholstered furniture and get to know it. In<br />
the first chapter, you will learn everything you need to know about casual looking<br />
upholstery. Afterwards, we will explain the optional adjustment functions, which<br />
further increase your com<strong>for</strong>t.<br />
If these convenience features do not work as expected, please refer to section<br />
1.6 <strong>for</strong> help. Please do distinguish between a technical malfunction and a faulty<br />
assembly. The latter can easily be solved with the actions listed and you don't have<br />
to wait <strong>for</strong> a technician. If there is a technical fault, please contact your retailer.<br />
In the following chapters you will learn how to maintain and clean your fabric or<br />
leather covers in a way that they will remain beautiful <strong>for</strong> many years to come. Please<br />
read these pages carefully and follow the instructions. Keep your <strong>manual</strong> handy <strong>for</strong><br />
future reference.<br />
If used correctly, your upholstery set will satisfy you <strong>for</strong> many years. Please contact<br />
your retailer if you have any further questions.<br />
3
4<br />
WARRANTY<br />
Identify goods<br />
On each package, you can see a sheet<br />
of paper listing all your delivered<br />
items. The name of the upholstery element<br />
in the package is stated in bold<br />
letters. The upholstery elements are<br />
listed in their correct order. Viewed<br />
from the front, the first element is on<br />
the far right, the last one on the far<br />
left. A picture shows the assembled<br />
set. Name and sequence are also stated<br />
below each upholstery element.<br />
ZERTIFIKAT • CERTIFICATE • CERTIFICAAT • CERTIFICAT<br />
Warranty<br />
As a premium manufacturer, we care about our furniture's production being modern and<br />
efficient. We thereby guarantee our high quality, which you may expect. In case our product<br />
should not comply with the applicable standards, we are happy to correct your claim<br />
free of charge within the first two years after the product was delivered to the retailer.<br />
In some cases, the product may be damaged during transport to your home. We will take<br />
care of those damages free of charge, if it is proven those damages occurred on the way<br />
from our plant to your retailer.<br />
PLEASE DECLARE SUCH DAMAGES IMMEDIATELY AFTER DELIVERY.<br />
How to check delivered goods:<br />
Kommission: Vorabnahme<br />
Lieferdatum 47/2017<br />
Unsere Auftragsnummer:<br />
123456789<br />
*494361201*<br />
Rom Musterware<br />
Knd. Nr. 90557<br />
INDUSTRIESTRASSE 38<br />
B-4700 EUPEN<br />
Hergestellt in der EU<br />
AUFTRAG CADINI<br />
Der Gesamtauftrag 123456789 besteht aus 5 Teilen (220TB240)<br />
1) 1x K029 1TR80<br />
2) 1x K029 CLK100<br />
3) 1x K029 1Vi70<br />
4) 1x K029 1RKL70<br />
5) 1x A073 BASIC left<br />
5/5<br />
> Using your address label, please verify the complete delivery of your upholstery set. This<br />
is the piece of paper that is glued to each package (s. info)<br />
> Then verify that no damage occurred during transport. Please report any claims or missing<br />
parts directly to your retailer upon delivery.<br />
> Please keep your <strong>manual</strong>, warranty certificate and assembly instructions in a safe place.<br />
ARTIKEL<br />
A073 BASIC left<br />
> Tissu 1: Trentino+ perle > ton sur ton<br />
> Tissu 2: Trentino+ perle > brushed<br />
LP13 (121)<br />
E07630/17
WARRANTY<br />
5<br />
CAUTION:<br />
The right location<br />
Choose the right location <strong>for</strong> your<br />
upholstery. Despite their non-fade<br />
properties, fabric and leather covers<br />
may fade over time if your furniture is<br />
exposed to direct sunlight.<br />
Extensive heat may also damage<br />
it. Keep an adequate distance to<br />
radiators, fireplaces or other heating<br />
devices.<br />
The following claims are excluded<br />
from our warranty:<br />
> Damages caused by sharp or pointy objects or pets<br />
> Staining caused by deficient maintenance<br />
> Staining caused by other manufacturer's textiles that are not colourfast<br />
> Damages caused by heat exposure (hot objects and liquids)<br />
> Damages caused by improper cleaning or use of wrong maintenance products<br />
> Inappropriate use<br />
> Improper use and load of com<strong>for</strong>t functions<br />
> Damages occurring from self-repair of electronic parts<br />
> Wilful damage<br />
Use of signal words:<br />
CAUTION<br />
It identifies a potentially hazardous situation which, if not avoided, may result in minor<br />
injury or in property damage incidents.<br />
NOTICE<br />
It indicates useful tips or additional in<strong>for</strong>mation.
6<br />
HEALTHY LIVING<br />
Models marked with the emission label K029/K030<br />
correspond with the award requirements of Deutsche<br />
Gütegemeinschaft Möbel e. V. (German Quality Association<br />
<strong>for</strong> Furniture) in the category “seating furniture”.<br />
We care about your health and well-being!<br />
Fire retardancy<br />
UK legislation includes fire and safety regulations <strong>for</strong><br />
upholstered furniture.<br />
This legislation defines the standard to be met by both the<br />
filling materials and the covering fabrics. All our furniture<br />
delivered in the UK meet these requirements.
1.<br />
SITTING COMFORTABLY<br />
GET TO KNOW YOUR SOFA<br />
7<br />
CONTENT<br />
CORRECT SITTING 8<br />
MANUAL ADJUSTABLE<br />
FUNCTIONS 9<br />
OPERATING COMFORT<br />
FUNCTIONS 10<br />
ENJOY COMFORT<br />
FUNCTIONS 14<br />
CHARGING EASY POWER 20<br />
FIRST AID 24
8<br />
CORRECT SITTING<br />
CAUTION:<br />
Possible damage to your<br />
piece of furniture<br />
By sitting, kneeling and lying on upholstered backrests,<br />
headrests or footrests of relax elements, the frame or<br />
fittings may be damaged. Damages resulting from this<br />
are excluded from warranty.<br />
> Please only sit on the seats.<br />
> Use all the seats to make sure that your sofa ages evenly.<br />
Com<strong>for</strong>t wrinkles<br />
Your sofa is a com<strong>for</strong>table piece of furniture. As opposed to what<br />
is used <strong>for</strong> car seats or chairs, we there<strong>for</strong>e use soft, casual looking<br />
materials.<br />
The top layer of your cushions will change over the first weeks of<br />
use and become softer, experts call this the settling period. You<br />
will notice slight wrinkles on the seat and back area as well as a<br />
change in seat firmness. Please note that Viscotex sitting com<strong>for</strong>t<br />
reacts to room temperature.<br />
During these first few weeks, cover materials will stretch while the<br />
upper cushion layer is slightly compressed. This process is normal<br />
and not a reason <strong>for</strong> complaint. Com<strong>for</strong>t and longevity will remain<br />
unlimited.<br />
Plump up your cushions and covers by smoothing them out with<br />
gentle striking to the outer sides of your upholstery.<br />
CORRECT<br />
SITTING<br />
FLUFF UP THE<br />
UPHOLSTERY
MANUAL ADJUSTABLE FUNCTIONS<br />
9<br />
Headrest (option Elegant)<br />
The following elements have a fixed back cushion and adjustable<br />
head rest: 1-K, 1GK, 1LK, 1MK, 1RK, 1SK, 1UK, 1TK, 2TK, C-K.<br />
The headrests’ inclination can be <strong>manual</strong>ly and continuously<br />
adjustable. If you also choose option ZEN <strong>for</strong> such an element,<br />
this headrest will only be electrically adjustable.<br />
Take the headrest in both hands and pull it towards you. The headrests<br />
locks in its final position whenever you let go. The headrest<br />
CANNOT be pushed back halfway. Pull it all the way <strong>for</strong>ward be<strong>for</strong>e<br />
you push it back. This will disable the built-in lock and you will be<br />
able to push back the headrest.<br />
Glider (element 1G/1GK)<br />
The <strong>manual</strong>ly adjustable seat depth (GLIDER) continuously moves<br />
the seat <strong>for</strong>ward by about 20cm if you shift your body weight<br />
accordingly. That way, you have more room to sit or put your legs<br />
up. Larger persons benefit most from this function.<br />
The seat depth cannot be pushed back halfway. You need to fully<br />
open it to close it.<br />
The glider function is admitted and functional <strong>for</strong> up to 110 kg<br />
per seat. From 100cm seat width upwards, the Glider function is<br />
approved <strong>for</strong> 2 persons. The total maximum load then is 200 kg.<br />
ADJUST<br />
THE HEADREST<br />
ADJUST<br />
THE GLIDER
10<br />
MANUAL ADJUSTABLE FUNCTIONS<br />
Smartchair turn (element 1U/1UK)<br />
The outer seat of the smart chair with option TURN can be <strong>manual</strong>ly rotated by 90°. Grap<br />
underneath base of seating at the outer end of the smart chair and slightly lift it up. You<br />
will notice immediately how the cushion detaches from its safe position. Then slightly<br />
turn it until it protrudes from the backrest cushion in a 90° angle. When the seat is turned,<br />
a support leg opens automatically.<br />
The turning seat of the TURN function is approved and functional <strong>for</strong> a maximum load of<br />
110 kg.<br />
ADJUST<br />
THE SMARTCHAIR<br />
TURN
OPERATING COMFORT FUNCTIONS<br />
11<br />
CAUTION:<br />
Possible damage<br />
EasyTouch.<br />
High temperatures and humidity can<br />
impair or completely damage the<br />
EASYTOUCH function.<br />
> Avoid exposing Easytouch to extreme<br />
temperatures or direct sunlight.<br />
> Avoid getting it damp or wet.<br />
EASYTOUCH is only protected<br />
against splash water. Do not clean its<br />
touchpad with a wet cloth. If moisture<br />
penetrates its case, the electronics will<br />
be damaged.<br />
CAUTION:<br />
Risk of crushing<br />
When opening and closing parts of<br />
relax elements that are motor-driven,<br />
persons, animals or objects may be<br />
damaged.<br />
> Be<strong>for</strong>e closing, make sure the<br />
fitting’s guideway is unobstructed.<br />
Com<strong>for</strong>t functions<br />
Com<strong>for</strong>t functions are optional electrical<br />
functions. They are motorized adjustable<br />
fittings such as RELAX, MAXRELAX, VARIO<br />
or ZEN, or seat and lumbar heating WARM-<br />
UP. These unique com<strong>for</strong>t functions are<br />
controlled by a processor and they help you<br />
find your best com<strong>for</strong>t position easily.<br />
USB (elements with<br />
com<strong>for</strong>t functions)<br />
As standard, com<strong>for</strong>t functions come with<br />
a USB 2.0 cable <strong>for</strong> you to charge devices<br />
like your smartphone or tablet. You can<br />
find this cable in a pocket between the<br />
back and the seat. The USB cable is only<br />
available if power is supplied via Power<br />
Supply Unit.<br />
Note: Only use the supplied original USB<br />
charging cable from the manufacturer
12<br />
OPERATING COMFORT FUNCTIONS<br />
Operating elements<br />
1. EASYTOUCH:<br />
The innovative touchpad is ready <strong>for</strong><br />
use on every seat with an electric seat<br />
adjustment (Relax 1RK, MaxRelax<br />
1MK or Vario 1VK).<br />
2. ALADIN cosycontrol:<br />
This is an app <strong>for</strong> smartphones or<br />
tablets, which you can download<br />
and then connect to your furniture<br />
(optional).<br />
1. EASYTOUCH<br />
The innovative EASYTOUCH touchpad is positioned vertically between the armrest and<br />
seat with outer seats, and between the seat and its right-hand neighbour with inner seats.<br />
A flexible rubber holds EASYTOUCH in this position and allows easy storing and accessing.<br />
In its vertical resting position on the side of the seat, EASYTOUCH is not sensitive to touch<br />
and will not react to your touch (left picture). To operate, pull it out and lay it down on the<br />
seat. It is now active and responds to your touch (see fig. at right).<br />
Simply activate the handy EASYSAFE child lock to prevent the touchpad from being touched<br />
by a toy or accidentally.<br />
3. EASYMOVE:<br />
These are practical buttons<br />
underneath the backrest cushion,<br />
which allows you to adjust your<br />
electric headrest or start your heating,<br />
if no EASYTOUCH <strong>for</strong> electric seat<br />
adjustment is included.<br />
Vertical position: resting position<br />
Horizontal position: active
OPERATING COMFORT FUNCTIONS<br />
13<br />
OPERATING EASYTOUCH<br />
> <strong>for</strong> all seats with electrical seat adjustment:<br />
1RK, 1MK, 1VK<br />
OPERATING<br />
EASYTOUCH<br />
PROFILES<br />
SAVING YOUR FAVOURITE POSITION:<br />
Move to position,<br />
hold your finger down,<br />
wait <strong>for</strong> short vibration,<br />
keep pressing and release your finger<br />
after long vibration.<br />
RETRIEVING PROFILE: Hold your finger<br />
down and release after short vibration.<br />
MOVE COMFORT FUNCTIONS<br />
TO POSITION<br />
Slide or hold down within the marked<br />
zones.<br />
Stops when you lift your finger.<br />
WARM UP<br />
Press button until it vibrates:<br />
- short vibration confirms “turned-on”<br />
- long vibration confirms “turned-off”<br />
CLOSING ALL SEAT FUNCTIONS<br />
Press button until it vibrates<br />
FOR SETS WITH OPTION ALADIN<br />
Close all set functions: press button until<br />
it vibrates.
14<br />
OPERATING COMFORT FUNCTIONS<br />
EASYSAFE - THE CHILD LOCK<br />
The EASYTOUCH can be operated with or without child lock. At<br />
the time of delivery, this feature is deactivated. Your sofa reacts to<br />
your input as soon as the EASYTOUCH lays down on the seat.<br />
If the child lock is activated, the EASYTOUCH is locked: each entry<br />
is rejected with a double vibration. Unlock the EASYTOUCH be<strong>for</strong>e<br />
each entry.<br />
ACTIVATE EASYSAFE<br />
> Simultaneously press the buttons “1” and “4” <strong>for</strong> six seconds.<br />
The EASYTOUCH confirms the activation with a vibration.<br />
EASYTOUCH UNLOCKING<br />
> Swipe easily from one side of the EASYTOUCH to the other and<br />
back again with one finger. Always keep contact with the screen<br />
during this movement.<br />
OPERATING<br />
WITH<br />
CHILD LOCK<br />
Important to know<br />
if child lock is activated:<br />
The Easytouch locks automatically if no<br />
entry is made <strong>for</strong> 30 seconds. Just unlock<br />
the Easytouch be<strong>for</strong>e the next entry as<br />
described above.<br />
DEACTIVATE EASYSAFE<br />
> First unlock the Easytouch<br />
> Simultaneously press the memory buttons “1” and “4” <strong>for</strong> six<br />
seconds. The EASYTOUCH confirms the deactivation with a<br />
short and a long vibration.<br />
If the power supply is interrupted, the EASYTOUCH confirms<br />
the connection after three seconds with a vibration and the<br />
previously selected mode of "child lock" is active.<br />
When the sofa is taken off the grid and reconnected, the<br />
EASYTOUCH confirms that connection after three seconds with<br />
a vibration. The be<strong>for</strong>e selected mode of "child lock" (active/<br />
inactive) is then on again.
OPERATING COMFORT FUNCTIONS<br />
15<br />
2. ALADIN cosycontrol (option)<br />
Thanks to your upholstered furniture’s intelligent ALADIN control,<br />
you can operate your com<strong>for</strong>t functions easily and save your<br />
favourite positions with your smartphone.<br />
Download the app to your smartphone or tablet. The first time you<br />
launch your Aladin App, you will be fully supported by its handy<br />
menu and able to connect your device to the upholstered furniture<br />
via your home WIFI.<br />
Easytouch takes precedence over the smartphone when it comes<br />
to controlling com<strong>for</strong>t functions. A function seat<br />
that is controlled via Easytouch cannot be<br />
controlled simultaneously via App.<br />
3. EasyMove button<br />
“Easymove", our innovative control buttons, are integrated in the<br />
covers at the bottom of the backrest upholstery:<br />
You can control each com<strong>for</strong>t function with a predetermined<br />
function button.<br />
OPERATING<br />
EASYMOVE<br />
BUTTONS<br />
HOW TO USE THE BUTTONS:<br />
> ZEN: two buttons, one <strong>for</strong> raising and one <strong>for</strong> lowering the<br />
adjustable headrest.<br />
> WARM UP: one button <strong>for</strong> switching the heating function on<br />
and off.
16<br />
ENJOYING COMFORT FUNCTIONS<br />
CAUTION:<br />
Risk of crushing<br />
When opening and closing the motor-driven adjustment<br />
functions Relax 1RK, MaxRelax 1MK, Vario 1VK and Option<br />
ZEN, people or animals may be injured, and objects may be<br />
damaged.<br />
> Do not touch fittings or scissor mechanisms.<br />
> Be<strong>for</strong>e closing, make sure the fitting’s guideway is unobstructed.<br />
> Make sure only adults can use the com<strong>for</strong>t functions.<br />
> Only control your set's com<strong>for</strong>t functions when you can see<br />
all moving parts.<br />
RELAX (1RK) and MAXRELAX (1MK)<br />
The single-motor relax function lowers the back to the rear, while<br />
the footrest move up. This turns the seat into a comfy reclining<br />
surface. With the two-motor MaxRelax version, the seat first lowers<br />
to a com<strong>for</strong>table chill position be<strong>for</strong>e the back lowers and the footrest<br />
ramp up. In combination with the electric headrest adjustment<br />
ZEN, the headrest of both variants moves up synchronously<br />
when the recliner fitting is operated.<br />
Both relax functions are admitted and functional <strong>for</strong> up to 110 kg<br />
per seat. From a seat width of 100cm upwards, the relax functions<br />
are approved <strong>for</strong> two persons. The maximum load then is 200 kg.
ENJOYING COMFORT FUNCTIONS 17<br />
Vario (element 1V/1VK)<br />
The electrically adjustable seat depth ('Vario') continuously<br />
moves the seat <strong>for</strong>ward by about 20cm. That way, you have more<br />
room to sit or put your legs up. Larger persons benefit most from<br />
this function.<br />
The VARIO function is admitted <strong>for</strong> one person and <strong>for</strong> up to 110<br />
kg per seat. From 100cm seat width upwards, the Vario function<br />
is approved <strong>for</strong> 2 persons with a maximum load of 200 kg.<br />
Adjustable headrest (option ZEN)<br />
The electrically adjustable headrest continuously moves to the<br />
desired position. It is operated via EASYTOUCH when combined<br />
with a seat adjustment in the elements 1RK/1MK/1VK. Otherwise,<br />
you can operate your headrest adjustment via EASYMOVE. This<br />
headrest is only electrically adjustable! Avoid <strong>manual</strong>ly adjusting.<br />
If your headrest adjustment is combined with a relax function<br />
(1RK/1MK), the movement sequences are coupled. When controlling<br />
the relax function, your headrest moves along. It can also be<br />
moved independently with EASYTOUCH.<br />
The headrest adjustment’s two EASYMOVE buttons can be found<br />
under the back padding right behind the seam: one <strong>for</strong> opening<br />
and one <strong>for</strong> closing (see p.15).
18<br />
ENJOYING COMFORT FUNCTIONS<br />
CAUTION:<br />
Possible damage to your<br />
piece of furniture<br />
Improper interventions may damage electrical or electronic<br />
components or endanger users.<br />
> Only authorised technicians should repair or exchange<br />
electrical or electronic components.<br />
> Please contact your retailer <strong>for</strong> this.<br />
Heating (option WARM-UP)<br />
The electric seat and lumbar heating system (WARM UP) warms<br />
the seat and lower back area. This guarantees a com<strong>for</strong>table and<br />
warm seat climate even at lower room temperatures.<br />
If there is no seat adjustment in the seat element, heating is operated<br />
with a button under the back padding right behind the seam.<br />
For outer seats, you will find the button on the armrest’s inside,<br />
about one hand’s width to the inside. For inner seats, look <strong>for</strong> the<br />
button on the right side, about one hand’s width to the inside. For<br />
seats with seat adjustment, operate the heater via Easytouch.<br />
If you press the button (indicated by a short beep), heating turns<br />
on and will turn off automatically after 10 minutes. Press the<br />
button again within these ten minutes (long beep) to immediately<br />
turn off heating. You can switch it on again at any time.
19
20<br />
CHARGING EASYPOWER (OPTION BATTERY)<br />
EASY POWER<br />
With the option BATTERY, you receive the detachable battery<br />
EASYPOWER, which you can take out of its pocket on the backrest<br />
<strong>for</strong> charging. If you would like to purchase an additional battery,<br />
please contact your retailer.<br />
REMOVING EASYPOWER<br />
> Close all com<strong>for</strong>t functions be<strong>for</strong>e removing EASYPOWER. You<br />
will find your sofa's battery on its backside in a bag (see picture<br />
below).<br />
> Using one finger, push the battery's mid-section and move<br />
it <strong>for</strong>ward until it inclines in its mounting. Now take out<br />
EASYPOWER.<br />
CHECK REMAINING CAPACITY<br />
EASYPOWER is equipped with an LED display that indicates<br />
the battery levels.<br />
> Press the white button to the left of the LED display. You will<br />
now see the remaining battery in steps of 20%.<br />
A beep signal shows that EASYPOWER’s battery is low. Please<br />
charge it now. If EASYPOWER continues to discharge you will hear<br />
a long-lasting beep signal. Don't let it get that far. Charge EASY-<br />
POWER quickly to increase its lifespan.
(OPTIONAL BATTERY) CHARGING EASYPOWER<br />
21<br />
CHARGING EASYPOWER<br />
> Plug the charging adapter's plug into a socket and plug the cord<br />
into your EASYPOWER's charging socket (see picture below).<br />
Only use supplied EASYPOWER charging adapters <strong>for</strong> charging.<br />
If the charging adapter is connected, your battery is charging.<br />
> Your charger's LED display tells you its status:<br />
red: EASYPOWER is charging. Maximum charging time:<br />
4-5 hours.<br />
green: EASYPOWER is fully charged and can be used.<br />
INSERTING EASYPOWER<br />
Disconnect the charging cable from EASYPOWER after it has been<br />
fully charged. The battery's life span will decrease if it is constantly<br />
plugged in.<br />
> After that, correctly insert EASYPOWER into its storage compartment:<br />
the device has to be set up with the two arrows facing each<br />
other on the left hand.<br />
DO NOT INTERRUPT THE CHARGING PROCESS!<br />
CHARGING<br />
EASYPOWER
22<br />
CHARGING EASYPOWER (OPTIONAL BATTERY)<br />
CAUTION:<br />
Possible damage to EASYPOWER<br />
EASYPOWER will be damaged if its contact points touch<br />
metal.<br />
> Avoid EASYPOWER’s contact points to touch metal.<br />
For use<br />
Only charge EASYPOWER (LLPS-7S PIPP) when the beep signal<br />
sounds. This shows that EASYPOWER has critical battery<br />
levels.<br />
> Use in dry surroundings only! EASYPOWER may not get<br />
damp or wet.<br />
> Use and charge battery at an ambient temperature of +5°C<br />
to +30°C only. Let cool down after heavy strain.<br />
> Risk of short circuit! When disposing, transporting or<br />
storing EASYPOWER, make sure to pack it or to mask all<br />
contacts. Store in dry and cool place only.<br />
> Do not ever open EASYPOWER. Service should be per<strong>for</strong>med<br />
by trained personnel only.<br />
> Only use the delivered charger.<br />
> Do not expose battery to intense heat (e.g. direct sunlight or<br />
fire)<br />
> Do not place battery in microwave or high-pressure container.<br />
Disposing of EASYPOWER<br />
Our battery system was produced following the Directive<br />
2002/96 EC. The Directive controls waste of electric and<br />
electronic equipment to protect and improve the quality of the<br />
environment in a sustainable way. You can emit your battery<br />
packs at <strong>collection</strong> points based on local requirements.
(OPTIONAL BATTERY) CHARGING EASYPOWER 23<br />
CAUTION:<br />
Replacing your<br />
battery system<br />
Only authorised technicians<br />
can replace the EASYPOWER<br />
compartment in your upholstered<br />
furniture.<br />
Please contact your retailer <strong>for</strong> this.<br />
Energy and consumption<br />
Average capacity: a person of approx. 65 kg can open and close one relax function about 140<br />
times. This capacity is reduced <strong>for</strong> people with higher body weight. WARM UP, the optional<br />
seat and lumbar heating system, also requires energy and reduces EASYPOWER’s capacity.<br />
Even when not in use, EASYPOWER requires energy to monitor its battery levels. It loses<br />
less than 2% of its charge per month. Still, after a long vacation, you may there<strong>for</strong>e have to<br />
recharge EASYPOWER, even though you did not use it. Regardless of battery levels, please<br />
recharge it every two months.<br />
Technical specifications:<br />
turn-on threshold beeper 21,8V +/- 0,5V<br />
low voltage threshold 18,5V +/- 0,5V<br />
stand by electricity usage
24<br />
FIRST AID<br />
How to restart the system:<br />
As with a computer, restarting the sofa system may be helpful. Always restart it if<br />
com<strong>for</strong>t functions do not work correctly.<br />
Restart the set’s electronic system:<br />
> Disconnect the power supply: disconnect the plug or remove the battery from the<br />
set.<br />
> Start one electrical function per seat <strong>for</strong> 3 seconds each to discharge the remaining<br />
voltage.<br />
Reconnect the upholstery set to the power supply (insert the main plug or insert<br />
the battery).<br />
> Wait <strong>for</strong> five minutes <strong>for</strong> the system to fully power up.<br />
> Completely open and close ALL electrical seat and headrest adjustments. So, the<br />
system recognises the motors’ position.<br />
The saved profiles of your com<strong>for</strong>t functions remain unaffected by this restart.<br />
RESTART<br />
THE SYSTEM
FIRST AID<br />
25<br />
Descriptions of furniture signals<br />
EasyMove button:<br />
> 1x beep signal: heating is turned on<br />
> 1x long beep signal: heating is turned off<br />
> 1x sweep signal: heating was not turned on or off.<br />
Easytouch<br />
> One brief vibration: stored position is retrieved / heating is switched on / child<br />
lock is unlocked / all com<strong>for</strong>t functions of a seat are closed.<br />
> One long vibration: heating is switched off / all com<strong>for</strong>t functions of a set are<br />
closed (only with Aladin option).<br />
> One short + one long vibration: profile was saved, or child lock was disabled<br />
> Two short vibrations: child lock is activated, or automatic operation could not be<br />
carried out because the fitting is already in position or because child lock is<br />
active.<br />
Battery (optional)<br />
> 1x Beep: battery levels are no longer sufficient. Please charge EASYPOWER<br />
now. The more it discharges, the more often the beep signal will sound until it<br />
becomes a long-lasting signal. Don't let it get that far and charge EASYPOWER<br />
early.<br />
OVERVIEW:<br />
FURNITURE FIRST AID<br />
1. Com<strong>for</strong>t functions do not move, and<br />
no signals can be heard/noticed.<br />
2. Com<strong>for</strong>t functions do not move but<br />
signals can be heard/noticed.<br />
3. Favourite positions cannot be saved<br />
APP CONTROL FIRST AID<br />
4. No connection via Aladin network<br />
5. No connection via home network<br />
6. The app is connected to the set, but it<br />
does not work correctly<br />
7. Com<strong>for</strong>t functions can be operated<br />
via app, but not via the furniture.
26<br />
FIRST AID<br />
1. Com<strong>for</strong>t functions do<br />
not move, and no signals<br />
can be heard/noticed<br />
> Check power supply through the AC adapter or the battery (optional).<br />
> Check whether cables are jammed or damaged<br />
> Check whether the fitting can be extended and retracted freely. Disconnect the plug and<br />
remove all interfering objects.<br />
> If com<strong>for</strong>t functions still do not move and no sound signals are audible: contact your<br />
retailer.<br />
2. Com<strong>for</strong>t functions do<br />
not move but signals can<br />
be heard/felt<br />
> EASYTOUCH vibrates twice in quick succession<br />
- The com<strong>for</strong>t function is already in your desired position:<br />
move the fitting in the opposite direction with the slider<br />
- The parental lock is activated: unlock the child lock.<br />
> After operating EASYMOVE buttons, you can hear a sweep tone (falling sound signal):<br />
heating could not be switched on. Please contact your retailer.<br />
> If you selected the Aladin option, check whether all com<strong>for</strong>t functions can be controlled<br />
via app.<br />
If the com<strong>for</strong>t functions still do not work, contact your retailer.
FIRST AID<br />
27<br />
3. Com<strong>for</strong>t functions<br />
can be operated via<br />
EASYTOUCH, but<br />
favourite positions<br />
cannot be saved<br />
> Restart the system<br />
> If you selected the Aladin option, check your settings and retrieve profiles.<br />
> If you cannot retrieve profiles, save them again.<br />
> If you cannot retrieve profiles after saving them again, please contact your retailer.<br />
4. No connection<br />
between App and Sofa via<br />
Aladin network<br />
> Check if there is an update <strong>for</strong> the Aladin app and install it.<br />
> Restart the system<br />
5. No connection<br />
between App and Sofa via<br />
home network<br />
> Install the update <strong>for</strong> the Aladin app, if available.<br />
> Restart your router<br />
> Check your home network password and settings<br />
> Restart the system<br />
PLEASE NOTE: Your router takes a few minutes to reboot. The control system of your sofa,<br />
on the other hand, only takes a few seconds and then searches <strong>for</strong> the network <strong>for</strong> 2 minutes.<br />
If it doesn't find a network because the router is still booting, its control system stops<br />
searching and the sofa is not connected to the home network<br />
> Allow the router to fully boot be<strong>for</strong>e restarting the system.
28<br />
FIRST AID<br />
6. The app is connected<br />
to the sofa, but the<br />
com<strong>for</strong>t functions cannot<br />
be used, or the app does<br />
not work correctly.<br />
> Install the update <strong>for</strong> the Aladin app, if available.<br />
> Restart the system<br />
7. Com<strong>for</strong>t functions can<br />
be operated via app, but<br />
not via the EASYTOUCH/<br />
EASYMOVE.<br />
Please contact your retailer.
FIRST AID<br />
29<br />
In<strong>for</strong>m your ROM retailer<br />
If you have to contact your retailer, please provide them with the following<br />
in<strong>for</strong>mation:<br />
> Which function/seat is affected?<br />
> What have you already tried to fix the problem?<br />
> Describe exactly what does not work at what time.<br />
> Can batteries be charged via optional USB cable?<br />
> Which control elements do not work correctly: EASYTOUCH/EASYMOVE, the<br />
(optional) app control or both?<br />
> With EASYMOVE buttons: do you feel resistance when you press the buttons?
30
2.<br />
FABRIC CARE<br />
HOW TO MAINTAIN YOUR SOFA COVER<br />
IN PERFECT CONDITION<br />
31<br />
CONTENT<br />
CHARACTERISTICS OF<br />
FABRIC COVERS 32<br />
FABRIC MAINTENANCE<br />
AND CLEANING 34<br />
FLAT WOVEN FABRIC 36<br />
MICROFIBER FABRICS 38<br />
ARTIFICIAL LEATHER 40<br />
AQUACLEAN 41<br />
Q2-COVERS<br />
WITH HITEX-FIBRE 42<br />
FABRIC FINDER:<br />
CAMINO 41<br />
CLASSIQUE 42<br />
GRIMALDI 38<br />
HIPPO 38<br />
KALEIDO 41<br />
MONA 36<br />
NEVADA 40<br />
NEVIO 41<br />
RAVELLO 38<br />
RIVANO 36<br />
RUBIQUE 42<br />
SCALA 36<br />
TESINI 36<br />
TONIQUE 42<br />
UNIQUE 42<br />
VELLUTI 41
32<br />
CHARACTERISTICS OF FABRIC COVERS<br />
Quality<br />
We care a lot about every day functionality<br />
and there<strong>for</strong>e only use lightfast,<br />
low-maintenance products. Depending<br />
on the type of fabric and fibre,<br />
covers have special characteristics.<br />
If you follow these simple steps, you<br />
will extend your sofa's life span significantly.<br />
PILLING<br />
During the first few weeks, fabric knots may <strong>for</strong>m ("pilling"). Remove those knots like you<br />
would with woolen sweaters. A pilling shaver works best.<br />
SITTING MARKS<br />
With flat woven fabrics with microfiber, chenille and velour fabrics, seat shading, the so<br />
called "sitting marks" are unavoidable.<br />
HUMIDITY<br />
In dry rooms, modern synthetic fibres are prone to static charge. Not only your health but<br />
also your sofa will profit from sufficient humidity, especially when rooms are heated a lot.<br />
A quick solution can be to wipe down the cover with a damp cloth.<br />
LOOPS<br />
Interwoven pile loops are not cut open with Bouclé fabrics. There<strong>for</strong>e, cat and dog owners<br />
must be particularly careful because of the risk of loops.
CHARACTERISTICS OF FABRIC COVERS 33<br />
COLOUR DIFFERENCES<br />
When reordering, consider the inevitable colour differences in fabrics. Fabric colours are<br />
slightly different in every production and every fabric fades over time.<br />
STAINING<br />
Note that fabrics may stain onto other fabrics. Jeans is made in a way that during "stone<br />
wash" some pigments dissolve. This also happens when wearing jeans. Especially if your<br />
sofa's cover is made from light fabrics, you better check whether these types of clothing do<br />
stain.<br />
Reversely, furniture fabrics may also slightly stain. Don't place your sofa right in front of a<br />
wall and check staining traits using a white tissue - especially with red upholstery fabrics.<br />
If the sofa does stain, vacuum it with low suction.
34<br />
FABRIC MAINTENANCE AND CLEANING<br />
CAUTION:<br />
Possible damage<br />
to the covers<br />
Stain removers usually contain<br />
aggressive chemicals which may<br />
damage your upholstery fabrics<br />
permanently if used incorrectly.<br />
Please ask a specialist <strong>for</strong> upholstery<br />
cleaning to professionally remove<br />
these stubborn stains.<br />
Refrain from using a steam cleaner. It<br />
damages the covers and foam.<br />
Fabric maintenance<br />
Furniture fabrics are exposed to dust and contact contamination daily. If this contamination<br />
becomes too intense, cleaning will become more difficult and the results will become<br />
less satisfactory. This weekly maintenance is especially important with light fabrics.<br />
HOW TO MAINTAIN YOUR FABRIC COVER:<br />
> Vacuum clean your upholstery weekly.<br />
> Choose low suction and use your vacuum cleaner's special upholstery nozzle.<br />
Basic cleaning<br />
Ask a specialist <strong>for</strong> upholstery treatment to clean your upholstery once a year to remove<br />
oily and greasy dirt particles.<br />
If you want to do the cleaning yourself, please only use foam <strong>for</strong> upholstered furniture and<br />
carefully read the instructions <strong>for</strong> use. Test each product on a hidden area and check the<br />
result after complete drying.
FABRIC MAINTENANCE AND CLEANING 35<br />
Decoratives cushions<br />
If your set comes with loose back or decorative cushions, you can dry-clean most covers.<br />
Please see the care label on the inside of your cushion be<strong>for</strong>e dry-cleaning it.<br />
EXCEPTION: DO NOT EVER DRY-CLEAN COVERS MADE OF LEATHER OR SYN-<br />
THETIC LEATHER.<br />
Stain removal<br />
Please find on the next pages more detailed in<strong>for</strong>mation about the fabric cover you<br />
choose.
36<br />
FLAT WOVEN FABRIC<br />
CAUTION:<br />
Possible damage<br />
to the covers<br />
Stain removers usually contain aggressive<br />
chemicals which may damage<br />
your upholstery fabrics permanently if<br />
used incorrectly.<br />
> Please ask a specialist <strong>for</strong> upholstery<br />
cleaning to professionally<br />
remove these stubborn stains.<br />
> Refrain from using a steam cleaner.<br />
It damages the covers and foam.<br />
Descriptions<br />
Flat woven fabrics result from the classical system of square crossing of warp<br />
and weft threads (two-dimensional fabric). Using fancy yarns like chenille fibres,<br />
their surface can become more exciting.<br />
Flat woven fabrics in our <strong>collection</strong>:<br />
> Flat woven fabric made of pure synthetic fibre<br />
Rivano (flat woven, 100% polyester - not available in the UK).<br />
> Flat woven fabric from synthetic and natural fibre:<br />
Scala (81% polyester, 19% cotton),<br />
Mona (85% polyester, 10% cotton and 5% polyamide),<br />
Tesini (76% polyester, 16% viscose, 8% linen).
FLAT WOVEN FABRIC<br />
37<br />
REMOVING HOUSEHOLD STAINS:<br />
> Act immediately<br />
Fresh stains are easier to remove than dried stains. Obtain an upholstery shampoo in<br />
advance and follow the manufacturer's instructions.<br />
> Remove cause<br />
Carefully remove remains with a spoon and absorb liquids with an absorbent cloth.<br />
Only dab, do not rub. Else you would rub the stain into the cover. Do not use coloured<br />
paper towels which may stain.<br />
> Cleaning and washing out<br />
Apply detergent to a clean cloth or sponge. Wash out the stain from the outside to the<br />
inside. Act carefully but determinedly - your set’s base upholstery is maintained completely<br />
during wet processing. Afterwards, use a wet cloth and fresh water to wipe down<br />
the whole area from one seam to the other to avoid water stains or colour differences.<br />
Make sure to remove all detergent residues with clear or distilled water.<br />
> Drying<br />
Allow the cover to air dry completely overnight and do not use a blow dryer or similar<br />
device.
38<br />
MICROFIBRE FABRIC<br />
CAUTION:<br />
Possible damage<br />
to the covers<br />
Stain removers usually contain<br />
aggressive chemicals which may<br />
damage your upholstery fabrics<br />
permanently if used incorrectly.<br />
> Please ask a specialist <strong>for</strong> upholstery<br />
cleaning to professionally<br />
remove these stubborn stains.<br />
Description<br />
These flat woven fabrics are produced as classic flat woven with the classical system<br />
of square crossing of warp and weft threads. For this, microscopically fine<br />
fibres are used, the microfibres, which are up to 60 times finer than human hair.<br />
The following flat woven fabrics in our <strong>collection</strong> are made from microfibre:<br />
> Ravello: Surface of 100% polyester, support fabric of 100% cotton, with additional<br />
stain protection - not available in the UK.<br />
> Grimaldi: Surface of 100% polyester, support fabric 100% cotton<br />
> Hippo: Surface of 100% polyester, support fabric of 100% cotton, with additional<br />
stain protection - not available in the UK.<br />
> Refrain from using a steam cleaner.<br />
It damages the covers and foam.
MICROFIBRE FABRIC<br />
39<br />
REMOVING HOUSEHOLD STAINS:<br />
> Act immediately<br />
Fresh stains are easier to remove than dried stains. Obtain a padding shampoo in<br />
advance and follow the manufacturer's instructions.<br />
> Remove cause<br />
Carefully remove remains with a spoon and absorb liquids with an absorbent cloth.<br />
Only dab, do not rub. Else you would rub the stain into the cover. Do not use coloured<br />
paper towels which may stain.<br />
> Cleaning and washing out<br />
Apply detergent to a clean cloth or sponge. Wash out the stain from the outside to the<br />
inside. Act carefully but determinedly - your set’s base upholstery is maintained completely<br />
during wet processing. Afterwards, use a wet cloth and fresh water to wipe down<br />
the whole area from one seam to the other to avoid water stains or colour differences.<br />
Make sure to remove all detergent residues with clear water.<br />
> Drying<br />
Allow the cover to air dry completely overnight and do not use a blow dryer or similar<br />
device.
40<br />
ARTIFICIAL LEATHER<br />
CAUTION:<br />
Possible damage:<br />
the covers perish<br />
Do not use any care or cleaning<br />
agents, including mild soaps and<br />
impregnating agents. Over time,<br />
these substances will destroy the PUR<br />
protection.<br />
Avoid direct sunlight or heat from radiators<br />
and fireplaces. They also lower<br />
your cover’s protection.<br />
Description<br />
Artificial leather is a real alternative<br />
<strong>for</strong> authentic leather. The surface<br />
is made of resilient polyurethane<br />
(PUR) and is embossed with typical<br />
leather pitting. Artificial leather<br />
is very low-maintenance: Most<br />
staining can easily be removed<br />
with water.<br />
> NEVADA: Artificial leather, surface<br />
of 100% polyurethane and<br />
support fabric of 45% polyurethane,<br />
25% polyester, 15% cotton<br />
and 15% granulated leather.<br />
Not available in the UK.<br />
HOW TO REMOVE STAINS<br />
FROM ARTIFICIAL LEATHER:<br />
> Only use water to clean and maintain<br />
your covers.<br />
> To do so, use a clean cloth without any<br />
residuals.
AQUACLEAN<br />
41<br />
CAUTION:<br />
Possible damage<br />
to the covers<br />
Do not use any solvents on our Kaleido<br />
flock - they would destroy the cover.<br />
Sticky or hardened areas may not be<br />
scraped or rubbed off - this would<br />
damage your pile.<br />
Even flock fabrics - like Kaleido, our<br />
animal-friendly cover - can be destroyed<br />
by large and powerful dogs with<br />
sufficient strength.<br />
> Train your pet and make sure it does<br />
not use your sofa as a scratching post<br />
or playground.<br />
> Keep your pets' claws short to minimize<br />
scratching.<br />
Description<br />
Aquaclean technology is a progressive<br />
protection <strong>for</strong> upholstery.<br />
Aquaclean fibre treatment<br />
wraps single textile fibres with an<br />
invisible protective coating which<br />
prevents dirt to enter the fabric.<br />
Thanks to Aquaclean, most household<br />
stains (wine, ink, sauce, grease,<br />
mud, chocolate, lotion etc.) can easily<br />
be removed with water in no time.<br />
The following covers have Aquaclean:<br />
> CAMINO: Chenille flat woven -<br />
100% polyester<br />
> NEVIO: Flat woven - 80% polyester,<br />
20% polyacrylic<br />
> VELLUTI: Velour fabric - 100%<br />
polyester.<br />
> KALEIDO: Flock fabric - 50% polyester,<br />
35% polyacrylic and 15%<br />
polyamide<br />
HOW TO REMOVE STAINS FROM<br />
AQUACLEAN COVERS:<br />
> Remove the spillage from the upholstery<br />
fabric.<br />
> Wet the stain (directly applying water<br />
or using a damp cloth) and wait a few<br />
seconds.<br />
> Press the cloth onto the stain and gently<br />
rub it into the fabric by making circular<br />
movements on the whole surface. In case<br />
the stain does not fully disappear, repeat<br />
these steps until the stain is removed.<br />
> To completely remove stubborn stains<br />
like marker stains, add some pH -neutral<br />
soap to your water.<br />
REMOVE<br />
STAINS FROM<br />
AQUACLEAN<br />
COVERS
42<br />
Q2-COVERS WITH HITEX © -FIBRE<br />
CAUTION:<br />
Possible damage<br />
to the covers<br />
> Do not place sources of heat on the<br />
fabric (e.g. hot-water bottles, grain<br />
pillows, electric blankets).<br />
> Velcro straps may get hooked on the<br />
cover material when cleaning. Cover<br />
all Velcro straps to avoid hooking.<br />
Description<br />
Q2 fabrics are made of innovative<br />
Hitex ® fibres that enable easy<br />
maintenance and cleaning of all<br />
common household stains.<br />
The upholstery fabrics are of Q2<br />
quality: washable, easy to clean and<br />
lightfast. Skin-friendly - without<br />
chemical treatment. Practically<br />
faultless. But they do offer complete<br />
protection thanks to our<br />
5-year-warranty. These fabrics are<br />
not available in the UK.<br />
> TONIQUE: Jacquard-chenille.<br />
63% polyester & 37% polyacrylic,<br />
> UNIQUE: Jacquard-chenille.<br />
71% polyester & 29% polyacrylic,<br />
> RUBIQUE: Bouclé fabric;<br />
89% polyester & 11% polyacrylic,<br />
> CLASSIQUE: Velour fabric,<br />
61% polyacrylic & 39% polyester.
Q2-COVERS WITH HITEX © -FIBRE<br />
43<br />
HOW TO REMOVE STAINS FROM Q2-HITEX COVERS:<br />
> Household stains containing fat and protein: Prepare a solution of warm water and mild<br />
detergent - <strong>for</strong> light-coloured coatings, the addition of commercially available stain<br />
removers may be helpful - and wash the stain with plenty of water. Dried, encrusted and<br />
sticky stains should be softened a little be<strong>for</strong>ehand. Do not pluck, as this could damage<br />
the pile. Then remove all soap residues with plenty of clear water, wipe dry with a cloth<br />
and let the cover dry at normal air temperature, preferably overnight.<br />
> Solvent-containing stains: (Pen, marker, lipstick, nail polish). Border the stain with acetone.<br />
This way, you can avoid that the stains you are removing will set somewhere else.<br />
Drizzle some acetone onto the stain and absorb with a cloth.<br />
> Repeat this step until the stain is gone. Then rinse with plenty of clear water.<br />
REMOVE STAINS<br />
FROM Q2 COVERS
44
3.<br />
MAINTAINING LEATHER UPHOLSTERY<br />
A SPECIAL TREATMENT FOR A SPECIAL COVER<br />
45<br />
CONTENT<br />
VALUING LEATHER 32<br />
SMOOTHED LEATHER<br />
TRENTINO AND MONTANA 33<br />
ENHANCED ANILINE<br />
LEATHER 34
46<br />
VALUING LEATHER<br />
A NATURAL PRODUCT<br />
Our leather is made from free-living cattle's<br />
skin. An animal's history is unique,<br />
and their skin tells their story: scars,<br />
insect bites, stretch marks, veining and<br />
brands can be found.<br />
We decided <strong>for</strong> a pristine tanning process,<br />
so you may find some of these features<br />
on your new sofa. They show the<br />
leather's authenticity and are no reason<br />
<strong>for</strong> complaint. The leather's fragrant is<br />
also normal. It will reduce over time.<br />
Different graining<br />
Colour differences<br />
Stretch marks<br />
Leather veins Scars Brands
VALUING LEATHER<br />
47<br />
Types of leather<br />
You can easily find out whether you are<br />
looking at aniline leather or pigmented<br />
smooth leather. Simply place a drop<br />
of water on the leather. If its soaks in<br />
immediately, you are looking at enhanced<br />
aniline leather (VERDI). If it stays on<br />
the leather's surface, you are looking at<br />
pigmented smooth leather (TRENTINO or<br />
MONTANA).<br />
WEEKLY CARE<br />
Regardless of which leather your sofa cover is, you should maintain it weekly:<br />
> Vacuum the leather sofa with the vacuum cleaner with a soft brush attachment and use<br />
a low suction power.<br />
> Wipe the leather cover with a damp cloth. Use lukewarm water and a clean, lint-free<br />
cloth or a wiper's leather.
48<br />
PIGMENTED SMOOTH LEATHER<br />
PROTEC <strong>for</strong> Trentino and Montana<br />
For your high-quality leather furniture, we recommend the<br />
effective cleaning and care PROTEC series <strong>for</strong> pigmented<br />
leather. It contains all the necessary products both <strong>for</strong> regular<br />
basic cleaning every six months and <strong>for</strong> removing soiling. Read<br />
appropriate instructions <strong>for</strong> use be<strong>for</strong>e using the products.<br />
More in<strong>for</strong>mation can be found on the Web at<br />
www.vimeo.com/Protecsofa.<br />
THE PROTEC COMPLETE SET FOR PIGMENTED SMOOTH<br />
LEATHERS CONTAINS THE FOLLOWING PRODUCTS:<br />
> Easy Clean: For deep cleansing<br />
> Longlife Care: For efficient protection<br />
> Noise Reduct: Reduces the leather’s product-specific squeaking<br />
and creaking with adjustable parts<br />
> Magic Roller: For fast removal of ink, pen and lipstick<br />
Online at www.sofa-shop.net, you can order the different PROTEC<br />
maintenance sets or single products.<br />
Please read instructions be<strong>for</strong>e using any product.<br />
HOW TO MAINTAIN YOUR LEATHER COVER:<br />
> Clean the upholstered furniture thoroughly every six to eight<br />
weeks with an appropriate PROTEC Easy Clean cleaning agent.<br />
Please always read the instruction <strong>manual</strong> included. If you<br />
would like to use a different cleaning agent, please test it on a<br />
hidden area in the back of the sofa.<br />
> Let the set dry completely after maintenance. Avoid direct<br />
sunlight and do not use a blow-dryer <strong>for</strong> this.<br />
> Finally, apply a suitable leather<br />
protectant like Protec<br />
Longlife Care.<br />
PROTEC<br />
CLEANING AND<br />
MAINTENANCE
ANILINE LEATHER<br />
49<br />
PROTEC AN <strong>for</strong> Verdi<br />
For your high-quality leather furniture, we recommend the<br />
effective cleaning and care PROTEC AN series <strong>for</strong> Anillin<br />
leather. It contains all the necessary products both <strong>for</strong> regular<br />
basic cleaning every six months and <strong>for</strong> removing soiling. Read<br />
appropriate instructions <strong>for</strong> use be<strong>for</strong>e using the products.<br />
More in<strong>for</strong>mation can be found on the Web at www.vimeo.com/<br />
Protecsofa.<br />
The PROTEC AN complete set is tailored to the specific features<br />
of the open-pored leather and includes:<br />
> Easy Clean: For deep cleansing<br />
> Longlife Care: For efficient protection<br />
> Noise Reduct: Reduces the leather’s product-specific squeaking<br />
and creaking with adjustable parts<br />
Online at www.sofa-shop.net, you can order the different PROTEC<br />
AN maintenance sets or single products.<br />
Please read instructions be<strong>for</strong>e using any product.<br />
HOW TO MAINTAIN YOUR LEATHER COVER:<br />
> Clean the upholstered furniture thoroughly every six to eight<br />
weeks with an appropriate PROTEC AN Easy Clean cleaning<br />
agent. Please always read the instruction <strong>manual</strong> included. If<br />
you would like to use a different cleaning agent, please test it on<br />
a hidden area in the back of the sofa.<br />
> Let the set dry completely after maintenance. Avoid direct<br />
sunlight and do not use a blow-dryer <strong>for</strong> this.<br />
> Finally, apply a suitable leather<br />
protectant like Protec AN<br />
Longlife Care.<br />
PROTEC<br />
CLEANING AND<br />
MAINTENANCE
50
4.<br />
ASSEMBLY AND DISMANTLING<br />
AN EASY TO FOLLOW STEP-BY-STEP-GUIDE<br />
51<br />
CONTENT<br />
GOOD TO KNOW 52<br />
1. ARMREST TO SEAT<br />
ELEMENT 53<br />
2. ACCESSORIES TO<br />
SEAT ELEMENTS 54<br />
3. SEAT ELEMENTS<br />
TO EACH OTHER 55<br />
4. ELECTRICAL<br />
CONNECTIONS 58<br />
5. POWER SUPPLY 59<br />
6. ALIGNING 60<br />
7. COMPLETING<br />
THE ASSEMBLY 61<br />
DISMANTLING<br />
AND MOVING 63
52<br />
GOOD TO KNOW<br />
Initial assembly<br />
When your upholstered furniture is assembled <strong>for</strong> the first time,<br />
the packages are unpacked at their destination. Goods are checked<br />
<strong>for</strong> transport damage and completeness. Assembly accessories<br />
are available in transparent packaging and grouped into compartments<br />
<strong>for</strong> each element. Armrests are separated from seat<br />
elements. Assembly instructions are stuck under the elements.<br />
After dismantling<br />
If the upholstered furniture is reassembled after dismantling,<br />
the assembly accessories should be grouped per seat element or<br />
armrest. If the assembly instructions are no longer available, your<br />
retailer can supply them.<br />
Clean and safe<br />
Use the packaging film or something similar as a base on the floor<br />
and always work with an assistant.<br />
Construction sequence<br />
The elements are built up from right to left. The elements’ order<br />
can be found on the label underneath each element.<br />
5<br />
4 3 2<br />
STEP-BY-STEP:<br />
Now follow a maximum of 7 steps to assemble the upholstered furniture<br />
correctly. Depending on the type of furniture, you can skip<br />
certain steps. Steps 4 and 5, <strong>for</strong> example, only affect upholstered<br />
furniture with electrical functions.<br />
1<br />
BEFORE<br />
ASSEMBLING
1. ARMREST TO SEAT ELEMENT<br />
53<br />
Armrests<br />
Armrests are delivered separately from the seat element in a<br />
separate cardboard box. This makes packages lighter and easier to<br />
handle.<br />
Two versions<br />
Differentiate between the 10cm narrow armrests (COMPACT) and<br />
the 20 or 30cm wide armrests (BASIC). Wooden or metal feet are<br />
already mounted on wide armrests ex works. The way an armrest is<br />
attached depends on the respective element. You can learn how to<br />
attach them in our enclosed assembly instructions.<br />
Single armrest<br />
In most cases, two armrests must be installed per upholstered<br />
piece of furniture: one on the right and one on the left. For<br />
combinations with Terminal (1T/1TK/2T/2T/2TK) or Smartchair<br />
(1S/1SK/1U/1UK), only one armrest must be installed.<br />
HOW TO ASSEMBLE ARMRESTS:<br />
> In twos, lay each element in need of an arm piece on its side. The<br />
armrest is assembled to the side facing up.<br />
> Remove the mounting accessories from the compartment<br />
labelled "Armrest". Up to two armrests can be included <strong>for</strong> each<br />
upholstered furniture.<br />
> Mount the angle/connecting pins on the armrest. For wide<br />
armrests, a straight supporting leg is included. Screw it under its<br />
neighbouring element.<br />
> Assemble the armrest to its<br />
neighbouring element as described<br />
in the enclosed assembly instructions.<br />
ASSEMBLE<br />
NARROW<br />
ARMRESTS<br />
ASSEMBLE<br />
WIDE<br />
ARMRESTS
54<br />
2. ACCESSORIES TO SEAT ELEMENTS<br />
Accessories<br />
Depending on the chosen model, you can find<br />
the following items:<br />
Legs made of metal or wood are part of the<br />
elements Longchair (1L/1LK), Smartchair<br />
(1S/1SK), Terminal (1T/1TK/2T/2TK) and the<br />
corner element (C/C-K).<br />
Straight supporting legs are mounted onto the<br />
elements in pairs (one in the front, one in the<br />
back). They are used <strong>for</strong> a standard element<br />
mounted on a functional element.<br />
Supporting legs with metal latches are assembled<br />
between to elements. They are supplied<br />
with and bolted to the right-hand element.<br />
Trans<strong>for</strong>mer<br />
If the upholstered furniture contains one or more electric function<br />
seats, the trans<strong>for</strong>mer is included in the accessories of one of<br />
these seats. Be<strong>for</strong>e setting up, plan how to wire the function seat to<br />
the nearest socket.<br />
ASSEMBLE THE ACCESSORIES FOR EACH SEAT ELEMENT:<br />
> In twos, lay each element upside down.<br />
> For each element, open the corresponding accessories<br />
compartment and keep it organised <strong>for</strong> each upholstery element.<br />
> Install all feet and connecting pins as shown in the detailed<br />
assembly instructions.<br />
Assemble all legs as shown in our detailed description.<br />
Connecting pins made of steel, which are<br />
screwed into the left element and inserted<br />
into the fitting of the right element.<br />
ASSEMBLE LEGS<br />
AND CONNECTIONS
3. ASSEMBLING SEAT ELEMENTS<br />
55<br />
CAUTION:<br />
Possible damage to your<br />
furniture and floor<br />
Avoid tilting the seat elements on their mounted legs. Excessive<br />
strain can damage your furniture`s legs.<br />
> Lift seat elements with a partner, then turn and carefully<br />
place them on their legs.<br />
Due to their weight, sofas and corner sofas can only be<br />
moved around with difficulty after they are set up. Pushing<br />
your sofa may lead to bending or breaking its legs and your<br />
flooring may also be damaged.<br />
> Assembly of your sofa should take place close to its final<br />
spot.<br />
Connecting pins<br />
The extension elements of your set are firmly connected by<br />
connecting pins and do not need to be screwed together.<br />
Connecting plug<br />
Does your upholstered furniture include two or more of the<br />
elements 1RK, 1MK, 1VK, 1V or elements with the options ZEN<br />
and WARM UP? Then connect all connectors in the sofa when<br />
assembling the elements (see step 4).<br />
Connecting 2 relax seats<br />
Two adjacent Relax elements (1RK and/or 1MK) are additionally<br />
connected by a metal plate. Please refer to the assembly<br />
instruction on the relax elements.<br />
CONNECTING<br />
2 RELAX SEATS
56<br />
3. ASSEMBLING SEAT ELEMENTS<br />
CAUTION:<br />
Possible damage to your piece of<br />
furniture<br />
If you pull apart the elements in the same way you put them<br />
together, you will damage the fittings. Please do not use <strong>for</strong>ce<br />
when separating the elements.<br />
HOW TO SET UP YOUR SET<br />
> Place the first right element (viewed from the front) in their final<br />
spot in an upright position and keep a 40-cm-distance between<br />
the wall and your sofa <strong>for</strong> your assistant to fit in.<br />
> Carefully insert the connecting pins into the element’s black<br />
fitting that is adjoint to the right.<br />
> With the help of your assistant (one of you in front, the other<br />
in the back), lift the LEFT element by 2cm and separate<br />
it slowly from the right element.<br />
> Move the left element towards the right element until they are<br />
flush, then push down the element.
3. ASSEMBLING SEAT ELEMENTS 57<br />
> Sit down on the left element <strong>for</strong> a few seconds <strong>for</strong> the connection<br />
pins to correctly lock.<br />
> Check the backside of the elements to see whether their horizontal<br />
edges are flush. If the elements are not flush, carefully<br />
separate the elements correctly and start over.<br />
HOW TO CONTINUE:<br />
How many seats with electric functions are there?<br />
> none: continue with step 6<br />
> one: continue with step 5<br />
> two or more: continue with step 4<br />
> In the same way, assemble all elements to the left.<br />
ASSEMBLING<br />
SEAT ELEMENTS
58<br />
4. ELECTRICAL CONNECTIONS<br />
Connectors in the sofa<br />
Upholstered sets with two or more electrical functions are also<br />
supplied by a single power source. This power source may be a<br />
power supply unit or a battery (optional). To ensure that the current<br />
is distributed to all function elements, connect them to each<br />
other via built-in cables. Seats without function, which are located<br />
between two functional seats, are also connected via connectors.<br />
HOW TO ESTABLISH ELECTRIC CONNECTIONS<br />
> Connect the connecting cables, which can be found in the<br />
lining.<br />
> The power supply unit is connected to the cables of your upholstery<br />
via an additional connector, the E-Connector. Insert the<br />
E-Connector between two connectors.<br />
> If your furniture stands freely in the room, push the connectors<br />
back into its pocket.<br />
SEVERAL<br />
ELEMENTS WITH<br />
POWER SUPPLY<br />
SEVERAL<br />
ELEMENTS WITH<br />
BATTERY<br />
E-connector between<br />
two connectors<br />
two connectors
5. POWER SUPPLY<br />
59<br />
With Power Supply Unit<br />
CAUTION:<br />
Possible damage to the product<br />
The fitting’s moving parts may clamp or damage the cable.<br />
> When laying the cable, make sure it cannot be clamped.<br />
Or with battery (optional)<br />
CAUTION:<br />
Possible damage to the product<br />
EASYPOWER will be damaged if its contact points<br />
touch metal.<br />
> Avoid EASYPOWER’s contact points to touch metal.<br />
HOW TO CONNECT YOUR<br />
POWER SUPPLY UNIT:<br />
> Connect the 220V power supply unit<br />
- to the cable protruding from the functional<br />
seat<br />
- to the E-Connector, which you have<br />
placed between two connectors in step<br />
4, if there are several function seats<br />
> Plug the power unit into a power plug.<br />
HOW TO ACTIVATE EASYPOWER<br />
> Remove EASYPOWER from its pocket on the back of the upholstered<br />
backrest.<br />
> Remove its adhesive tab from the contact points (serves as transport<br />
protection).<br />
> Check whether EASYPOWER is still sufficiently charged. At least<br />
four bars should light up green. If not, charge battery immediately.<br />
> Insert EASYPOWER back into its pocket so that the two arrows on<br />
the left are facing each other.<br />
CONNECT<br />
THE POWER<br />
SUPPLY<br />
ACTIVATE<br />
THE EASYPOWER<br />
BATTERY
60<br />
6. ALIGNING<br />
CAUTION:<br />
Possible damage<br />
to your furniture<br />
If the furniture is positioned oddly on<br />
a surface, the wooden frame does not<br />
work evenly. It will warp over time.<br />
> Make sure that your sofa is levelled<br />
on an even surface and that all support<br />
legs touch the ground.<br />
If two adjacent seat elements do not stand flush with each other, this may be caused<br />
by an unevenness in the floor. In that case, you should also level out any unevenness by<br />
turning the support legs.<br />
HOW TO ALIGN YOUR FURNITURE:<br />
> Verify that every single leg touches the ground;<br />
> Adjust each foot that does not touch the ground by turning the foot end.<br />
> Please recycle the packaging.<br />
ALIGNING
7. COMPLETING THE ASSEMBLY<br />
61<br />
Casual upholstery<br />
Your sofa just went on a long trip. During<br />
storage and transport, upholstered<br />
parts may be pushed in and stitching<br />
lines move. This is normal <strong>for</strong> casually<br />
patted upholstery.<br />
Complete the assembly and fluff up your upholstered furniture. This applies to all sets,<br />
whether you bought a sofa or corner group, with or without com<strong>for</strong>t function.<br />
HOW TO FLUFF UP YOUR UPHOLSTERY:<br />
> Plump up your cushions and covers by smoothing them out with gentle striking to<br />
the outer sides of your upholstery.<br />
Your upholstery set is now constructed correctly.<br />
FLUFF UP<br />
THE UPHOLSTERY
62<br />
DISMANTLING AND MOVING<br />
CAUTION:<br />
Possible damage to<br />
your furniture<br />
When separating elements, please<br />
note:<br />
You will damage the fittings, if you pull<br />
the elements apart by yourself and in<br />
the same way you put them together!<br />
> Please do not use <strong>for</strong>ce in order not<br />
to damage the connecting fittings!<br />
> Separate the elements correctly, as<br />
described.<br />
> For dismantling, please always have<br />
an assistant help you.<br />
When dismantling, group together the assembly accessories <strong>for</strong> each element. This makes<br />
it easier <strong>for</strong> you to re-assemble later.<br />
HOW TO DISMANTLE YOUR PIECE OF FURNITURE<br />
If your sofa is equipped with several electrical options, separate the connectors first.<br />
> Push the plug's locking lever and pull apart plug and socket.<br />
> With the help of your assistant (one of you in front, the other in the back), lift the LEFT<br />
element by 2cm and separate it slowly from the right element.<br />
> For transport, unscrew the connecting pins, supporting legs and legs and keep all parts<br />
and screws stored in a secure place.<br />
DISMANTLE<br />
THE SEAT<br />
ELEMENTS
DISMANTLING AND MOVING<br />
63<br />
CAUTION:<br />
Possible damage to<br />
your furniture<br />
In some staircases and during loading<br />
and unloading, damages can easily<br />
occur. These may only be repairable at<br />
high expenditures.<br />
> Pack all upholstery elements in a<br />
way that they are protected during<br />
transport.<br />
> Always carry the elements with the<br />
help of your assistant!<br />
When moving, it is important to be able to easily carry the upholstery elements through<br />
doors and stairwells. It may there<strong>for</strong>e be helpful to remove armrests to prevent damage.<br />
HOW TO DISMANTLE ARMRESTS:<br />
> Place the seat element on the side so that the armrest is at the top.<br />
> Remove the two screws underneath the armrest.<br />
> Press the armrest "up" in the direction of the back upholstery while simultaneously<br />
pushing the seat in the opposite direction.<br />
> Now lift the armrest and remove it from the seat element.<br />
DISMANTLE<br />
THE ARMRESTS
64<br />
EC DECLARATION OF CONFORMITY<br />
EC Declaration of con<strong>for</strong>mity<br />
Nr. 201806<br />
in accordance with the Machinery Directive 2006/42/EC,<br />
annex II, no. 1 A<br />
Manufacturer:<br />
ROM AG<br />
Address: Industriestraße 38<br />
B-4700 Eupen<br />
Machinery name:<br />
Type:<br />
The year of manufacturing:<br />
Sofa<br />
Versato <strong>collection</strong><br />
(Ref. K029 /K030)<br />
see Identification label<br />
under the sofa<br />
Complies with the following European Directives:<br />
▶▶<br />
Machinery Directive 2006/42/EC, (OJ L 157, 9.6.2006, p. 24–86)<br />
Complies with the following other European Directives:<br />
▶▶<br />
Electromagnetic Compatibility Directive 2014/30/EU, (OJ L 96,<br />
29.3.2014, p. 79–106)<br />
For the evaluation of the compliance with this Directive, the<br />
following harmonized standards:<br />
▶▶<br />
EN ISO 12100:2010 „Safety of machinery - General principles <strong>for</strong><br />
design - Risk assessment and risk reduction”<br />
▶▶<br />
EN ISO 13857:2008 „Safety of machinery - Safety distances to<br />
prevent hazard zones being reached by upper and lower limbs”<br />
▶▶<br />
EN ISO 14120 „Safety of machinery - Guards - General<br />
requirements <strong>for</strong> the design and construction of fixed and<br />
movable guards”<br />
▶▶<br />
EN 349:1993+A1:2008 „ Safety of machinery — Minimum gaps to<br />
avoid crushing of parts of the human body”
EC DECLARATION OF CONFORMITY 65<br />
Meets the requirements of the following technical standards:<br />
▶▶<br />
EN 12520:2015 „Furniture - Strength, durability and safety -<br />
Requirements <strong>for</strong> domestic seating”<br />
▶▶<br />
EN 1022:2005 „Domestic furniture - Seating - Determination of<br />
stability”<br />
Name and address of the person authorised to compile the<br />
technical file, who must be established in the Community:<br />
Paul Rom, Industriestrasse 38, B-4700 Eupen.<br />
the place and date of the declaration: Eupen, 11.06.2018<br />
signature<br />
the identity of the person empowered to draw up the declaration:<br />
Paul Rom, CEO
66<br />
EC DECLARATION OF CONFORMITY<br />
EC Declaration of con<strong>for</strong>mity<br />
Nr. 201806<br />
Representative object of the declaration:<br />
Apparatus model/Product:<br />
Sofa <strong>collection</strong> Versato (Ref. K029 /K030)<br />
Name and address of the manufacturer<br />
ROM AG<br />
Industriestrasse 38<br />
B-4700 Eupen<br />
fig. 1<br />
electrical<br />
adjustable<br />
headrest<br />
This declaration of con<strong>for</strong>mity is issued under the sole responsibility<br />
of the manufacturer<br />
fig. 2<br />
electrical<br />
adjustable<br />
Recliner-seat
EC DECLARATION OF CONFORMITY 67<br />
The object of the declaration described above is in con<strong>for</strong>mity with the<br />
relevant Union harmonisation legislation:<br />
▶▶<br />
Electromagnetic Compatibility Directive 2014/30/EU, (OJ L 96,<br />
29.3.2014, p. 79–106)<br />
the place and date issue: Eupen, 11.06.2018<br />
signature:<br />
References to the relevant harmonised standards used, including the<br />
date of the standard, or references to the other technical specifications,<br />
including the date of the specification, in relation to which con<strong>for</strong>mity is<br />
declared:<br />
the identity of the person empowered<br />
to draw up the declaration:<br />
Paul Rom, CEO<br />
▶▶<br />
EN 55014-1:2006 + A1:2009 + A2:2011 „Electromagnetic compatibility<br />
- Requirements <strong>for</strong> household appliances, electric tools and similar<br />
apparatus - Part 1: Emission”<br />
▶▶<br />
EN 55014-2:1997 + A1:2001, A2:2008 „Electromagnetic compatibility<br />
- Requirements <strong>for</strong> household appliances , electric tools and similar<br />
apparatus - Part 2: Immunity - Product family standard”<br />
▶▶<br />
EN 61000-3-2:2004 „Electromagnetic compatibility (EMC) - Part 3-2:<br />
Limits; Limits <strong>for</strong> harmonic current emissions (equipment input current<br />
68<br />
*VSBAEN*<br />
VSBAEN-Rev.2 (31.07.2018)