RIC-6584 Exploring Visual Art (Upper)

Create successful ePaper yourself
Turn your PDF publications into a flip-book with our unique Google optimized e-Paper software.
Ages 11 +<br />
Easy-to-use, easy-to-follow art projects<br />
©R.I.C. Publications<br />
Low Resolution Images<br />
Display Copy
<strong>Exploring</strong> visual arts<br />
Ages 11+<br />
Published by<br />
R.I.C. Publications ® Pty Ltd<br />
PO Box 332, Greenwood<br />
Western Australia 6924<br />
Published 2010<br />
<strong>RIC</strong>–<strong>6584</strong><br />
ISBN–978-1-74126-847-8<br />
Copyright © Agnes Russell 2010<br />
Titles available in this series:<br />
<strong>Exploring</strong> visual arts—Ages 5–7<br />
<strong>Exploring</strong> visual arts—Ages 8–10<br />
<strong>Exploring</strong> visual arts—Ages 11 +<br />
Distributed by:<br />
UK/Republic of Ireland:<br />
Prim-Ed Publishing<br />
Bosheen<br />
New Ross<br />
County Wexford<br />
Republic of Ireland<br />
USA:<br />
Didax Education<br />
395 Main Street<br />
Rowley<br />
MA 01969<br />
USA<br />
©R.I.C. Publications<br />
Low Resolution Images<br />
Display Copy<br />
Copyright Information<br />
Only the blackline masters contained within this publication may only be reproduced by the original purchaser for use with their<br />
class(es). The publisher prohibits the loaning or onselling of these blackline masters for purposes of reproduction. No other<br />
part of this publication may be reproduced in any form or by any means, electronic or mechanical, including photocopying or<br />
recording, or by any information storage and retrieval system, without written permission from the publisher.
Foreword<br />
<strong>Exploring</strong> visual arts is a series of three books designed to provide teachers with a range of art<br />
lessons for a variety of age groups. Teaching visual arts can be challenging and rewarding. This<br />
series offers effective teaching strategies and activities providing skills, techniques and ideas<br />
that satisfy curriculum requirements with classroom-tested art projects.<br />
Titles in this series include: <strong>Exploring</strong> visual arts—Ages 5–7<br />
<strong>Exploring</strong> visual arts—Ages 8–10<br />
<strong>Exploring</strong> visual arts—Ages 11+<br />
Contents<br />
Introduction........................................................................ iv<br />
Curriculum links.................................................................. iv<br />
Timesaving tips................................................................... v<br />
Teachers notes..........................................................vi – vii<br />
<strong>Art</strong> projects<br />
Midnight spider............................................................. 2–3<br />
Green tree frog............................................................ .4–5<br />
Australian landscape................................................. 6–7<br />
Boab landscape............................................................8–9<br />
Black and white optical art.................................... 10–11<br />
Positive and negative masks.................................. 12–13<br />
Line house.................................................................... 14–15<br />
The brain...................................................................... 16–17<br />
Chinese dragon...........................................................18–19<br />
Stained glass peacock...........................................20–21<br />
Egyptian sarcophagus...........................................22–23<br />
Fireworks....................................................................24–25<br />
Macaw........................................................................26–27<br />
Scarecrow collage...................................................28–29<br />
Rainforest silhouette..............................................30–31<br />
Tornado......................................................................32–33<br />
Pyramid collage........................................................34–35<br />
Ice-cream sundae....................................................36–37<br />
Mega burger.............................................................38–39<br />
Frosted tree silhouette.........................................40–41<br />
Complementary colour boxes...............................42–43<br />
Hungry fish................................................................44–45<br />
Roman helmet..........................................................46–47<br />
Flower art................................................................. 48–49<br />
Fruit dissection........................................................50–51<br />
Lighthouse silhouette............................................52–53<br />
Newspaper tree collage.........................................54–55<br />
Space circle...............................................................56–57<br />
Wasteland................................................................ 58–59<br />
Polar bear...................................................................60–61<br />
Snowflake..................................................................62–63<br />
Star etching............................................................64–65<br />
©R.I.C. Publications<br />
Low Resolution Images<br />
Display Copy<br />
Teacher resources<br />
Sample assessment checklist...................................66<br />
Blank assessment checklist........................................67<br />
Student self-assessment sheet..............................68<br />
‘Looking at art’ sheet...................................................69<br />
‘Elements of art’ labels.................................................70<br />
Reward ribbons.................................................................. 71<br />
Activity card samples............................................72–73<br />
Templates<br />
Scarecrow body...............................................................74<br />
Lighthouse silhouette....................................................75<br />
Star etching.....................................................................76<br />
R.I.C. Publications ® —www.ricpublications.com.au <strong>Exploring</strong> visual arts iii
Introduction<br />
Being both a classroom teacher and an art specialist requires a lot of hard work and organisation.<br />
This is where an easy-to-use book, full of practical ideas comes in handy!<br />
The activities in this series will provide teachers with a variety of art lessons based on different<br />
topics, suited to a range of age levels. Most art activities can be completed in one or two lessons,<br />
based on hourly lesson blocks.<br />
At the back of the book is an easy-to-use assessment checklist as well as a student selfassessment<br />
sheet which can be adapted to any of the lessons in this book. Some timesaving hints<br />
have also been included to reduce preparation and clean-up time.<br />
The lessons in this book give students the opportunity to create artworks through drawing,<br />
painting, collage and printmaking. The art activities have been used successfully with students<br />
from Years 1 to 7.<br />
Happy art making!<br />
Agnes Russell<br />
Curriculum links<br />
AI 4<br />
ASP 4<br />
AR 4<br />
AIS 4<br />
©R.I.C. Publications<br />
Low Resolution Images<br />
Display Copy<br />
WA NSW QLD VIC. SA<br />
VAS 3.1<br />
VAS 3.2<br />
VAS 3.3<br />
VAS 3.4<br />
VA 4.1<br />
VA 4.2<br />
VA 4.3<br />
ARAR0401<br />
ARAR0402<br />
ARAR0403<br />
ARAR0404<br />
3.1, 4.1<br />
3.2, 4.2<br />
3.3, 4.3<br />
3.4, 4.4<br />
3.5, 4.5<br />
3.6, 4.6<br />
iv <strong>Exploring</strong> visual arts www.ricpublications.com.au
Timesaving tips<br />
Running a classroom is busy work! Here are some ideas to save time and your sanity!<br />
• Don’t spend hours at the sink, washing out paint palettes at the end of the day, egg cartons<br />
make a perfect timesaving alternative to a paint palette as they don’t require washing. Just<br />
close the lid when paint is no longer required. If the paint does dry up, only a quick refill is<br />
needed. Discourage students from mixing colours on the lid as it can glue the egg carton<br />
closed! When the egg cartons become worn out, just throw them away for recycling.<br />
• Ice-cream container lids and styrofoam meat trays are perfect for colour mixing. A quick rinse<br />
makes them reusable.<br />
• Large yoghurt containers make unbreakable water containers for rinsing brushes between<br />
colours. There is no broken glass to worry about if they are dropped!<br />
• The school newsletter is a fantastic way of asking for donations of egg cartons and containers.<br />
You will be pleasantly surprised at what students bring.<br />
• Have a good supply of scrap paper handy for early finishers. Raid the photocopy room for any<br />
photocopy errors. Students can draw on the back of these.<br />
• Stencils and activity cards are a perfect way to occupy early finishers. They provide a little<br />
guidance to create some artwork without wasting paper with aimless scribbling. (Refer to<br />
pages 72–73 for some sample activity cards.) There is an endless number of ideas for artrelated<br />
tasks which the students can complete.<br />
• An art equipment trolley stacked with glue, scissors, lead pencils and erasers means students<br />
have initial equipment ready for beginning their art project and can organise themselves. This<br />
provides time to prepare any additional material that the students require.<br />
• Have laminated pictures of famous artworks on hand. <strong>Art</strong> calendars and the internet are<br />
great resources for images.<br />
©R.I.C. Publications<br />
Low Resolution Images<br />
Display Copy<br />
• Always keep newspapers, some rags and spray cleaner handy for clean-up time. If students<br />
spread newspaper over their desks before an art lesson, it reduces the amount of mess on the<br />
desks.<br />
• Step-by-step ‘how to draw’ books are a great way of teaching students by combining simple<br />
shapes to create an image. Some of the artworks in this book began with ‘guided drawing’.<br />
Use a large sheet of lithograph or butcher’s paper to demonstrate how to draw the object.<br />
Students then follow these instructions, one step at a time, to create their own drawing. This<br />
gives those students who are not very confident at drawing a boost as they can follow step-bystep<br />
instructions quite easily. It also provides the opportunity to discuss art elements such as<br />
line, shape etc.<br />
R.I.C. Publications ® —www.ricpublications.com.au <strong>Exploring</strong> visual arts v
Teachers notes<br />
Each art project is explained over two pages:<br />
• The teacher’s instruction page includes information about the number of lessons required to<br />
complete the project, a list of materials, step-by-step instructions, evaluation suggestions<br />
for all art strands and, where applicable, variations of the project and drawing tips.<br />
• A full-page colour photograph shows an example of the completed art project.<br />
TEACHERS PAGE<br />
Duration*:<br />
number of lessons<br />
required to complete the<br />
project is shown.<br />
Task:<br />
explains what the<br />
student is required to do<br />
to complete each art<br />
project.<br />
Lesson:<br />
gives step-by-step<br />
instructions for completing<br />
the art project.<br />
* Note: The suggested ‘break-up’ of lessons for<br />
projects which take more than one lesson may<br />
change depending on the need to allow painted<br />
work to dry, time constraints, the progress of<br />
the students and the availability of other work<br />
in the project which needs to be completed.<br />
Title:<br />
states the name<br />
of the art project<br />
Materials:<br />
states what<br />
resources or equipment<br />
are required to complete<br />
the art project.<br />
Evaluation:<br />
suggestions for each<br />
art strand are provided.<br />
©R.I.C. Publications<br />
Low Resolution Images<br />
Display Copy<br />
<strong>Art</strong> project photograph<br />
Title<br />
of the art project<br />
is stated.<br />
A fullcolour<br />
photograph* of<br />
the completed art project is<br />
provided.<br />
*<br />
The full-colour photographs of the<br />
completed art projects are also<br />
provided on the accompanying CD.<br />
vi <strong>Exploring</strong> visual arts www.ricpublications.com.au
Teachers notes<br />
Other teacher resource pages at the back of the book include:<br />
• a sample assessment checklist<br />
on page 66, a blank assessment<br />
checklist on page 67, which can be<br />
used with any art project within<br />
the book and a blank student<br />
assessment sheet on page 68,<br />
which can be linked to an art project<br />
of the teacher’s or student’s choice<br />
• resources which can be used as<br />
class stimulus posters including<br />
‘Looking at art’ sheet (page 69) and<br />
‘Elements of art’ labels (page 70)<br />
• reward ribbons (page 71) to pin to<br />
students’ artwork<br />
• samples of art activity cards on pages 72 and 73 that can be used as ‘early finisher’ art<br />
activities, or relief teacher or extra homework activities<br />
©R.I.C. Publications<br />
Low Resolution Images<br />
Display Copy<br />
• templates on pages 74–76 to accompany particular art projects.<br />
R.I.C. Publications ® —www.ricpublications.com.au <strong>Exploring</strong> visual arts vii
Midnight spider<br />
DURATION<br />
One lesson<br />
TASK<br />
Draw a picture of a spider and its surroundings using a white charcoal pencil on<br />
black paper.<br />
Materials<br />
✓✓ black paper or thin black card<br />
✓✓ white charcoal pencil<br />
✓✓ spray fixative<br />
LESSON<br />
1. Use the charcoal pencil to draw a tree trunk to one side of the paper. Shade one side of the<br />
trunk and draw swirling bark patterns in one or two areas on the remaining section.<br />
2. About halfway down the page, draw a hilly horizon line and shade in half.<br />
3. Draw a full moon in the sky, shade half of it and draw crater marks on the remaining half.<br />
4. Starting from the bottom of the page, draw grass and twigs along the bottom edge.<br />
5. Draw a spider’s web from the edge of the tree to the edge of the paper.<br />
6. Draw a vertical line from the web with a spider dangling from the bottom. Discuss spider<br />
body features with the students to ensure their drawing is accurate. Shade one edge of the<br />
spider’s body to create shade, form and depth.<br />
7. Spray artwork with fixative to prevent smudging.<br />
Evaluation<br />
<strong>Art</strong>s ideas <strong>Art</strong>s skills and processes <strong>Art</strong>s responses <strong>Art</strong>s in society<br />
• Generates ideas<br />
based on a<br />
particular theme.<br />
• Uses a charcoal<br />
pencil effectively.<br />
• Uses line to enhance<br />
illusion of shape,<br />
form and depth.<br />
• Evaluates own<br />
artwork and that of<br />
others.<br />
• Understands how<br />
visual arts can<br />
represent particular<br />
themes.<br />
©R.I.C. Publications<br />
Low Resolution Images<br />
Display Copy<br />
2 <strong>Exploring</strong> visual arts www.ricpublications.com.au
Midnight spider<br />
©R.I.C. Publications<br />
Low Resolution Images<br />
Display Copy<br />
R.I.C. Publications ® —www.ricpublications.com.au <strong>Exploring</strong> visual arts 3
Green tree frog<br />
DURATION<br />
Two lessons<br />
TASK<br />
Draw a realistic picture of a green tree frog using oil pastels.<br />
Materials<br />
✓✓ reference pictures of green tree frogs<br />
✓✓ dark blue card<br />
✓✓ lead pencils<br />
✓✓ erasers<br />
✓✓ oil pastels<br />
LESSON 1<br />
1. Look at reference pictures of green tree<br />
frogs and discuss their features with<br />
the students. Focus on body shape and<br />
colours.<br />
2. Students attempt to draw their own<br />
green tree frog using lead pencil on<br />
dark blue card. Encourage students to<br />
press lightly so that mistakes are not<br />
difficult to erase.<br />
3. Once satisfied with their drawing,<br />
students draw a log for the frog to sit<br />
on and some plants and leaves in the<br />
background.<br />
Evaluation<br />
<strong>Art</strong>s ideas <strong>Art</strong>s skills and processes <strong>Art</strong>s responses <strong>Art</strong>s in society<br />
• Develops ideas from<br />
reference materials.<br />
• Draws a realistic<br />
image of a green<br />
tree frog.<br />
• Uses oil pastels<br />
effectively to create<br />
a specific effect.<br />
Lesson 2<br />
Using the reference pictures as a guide,<br />
the students colour their drawing with<br />
oil pastels, blending similar colours to<br />
create a three-dimensional effect. They<br />
will need to press heavily to ensure<br />
good coverage and bold, vibrant colours.<br />
©R.I.C. Publications<br />
Low Resolution Images<br />
Display Copy<br />
• Responds to images<br />
by creating another<br />
artwork.<br />
• Understands<br />
artwork can be<br />
used to record<br />
information, such<br />
as that found<br />
in botanical and<br />
wildlife pictures.<br />
4 <strong>Exploring</strong> visual arts www.ricpublications.com.au
Green tree frog<br />
©R.I.C. Publications<br />
Low Resolution Images<br />
Display Copy<br />
R.I.C. Publications ® —www.ricpublications.com.au <strong>Exploring</strong> visual arts 5
Australian landscape<br />
DURATION<br />
One lesson<br />
TASK<br />
Create a simple abstract landscape of the Australian Outback.<br />
Materials<br />
✓✓ reference pictures of the Australian Outback<br />
✓✓ A4 cartridge paper<br />
✓✓ lead pencils<br />
✓✓ erasers<br />
✓✓ black permanent markers<br />
✓✓ water soluble crayons<br />
✓✓ brushes<br />
✓✓ water and containers<br />
LESSON<br />
1. Look at images of the Australian Outback. Discuss with the students the objects and<br />
colours they would likely see in the Australian Outback.<br />
2. Students draw a simple scene of rocky hills, trees, rocks and perhaps some water.<br />
Encourage students to keep the shapes simple.<br />
3. Once satisfied with their scene, students trace over the lines using black permanent marker.<br />
4. Colour using water-soluble crayon, keeping the colours simple, bright and bold.<br />
5. Paint over the crayon using water, one colour at a time, so that the colours do not smudge.<br />
Allow to dry.<br />
Evaluation<br />
<strong>Art</strong>s ideas <strong>Art</strong>s skills and processes <strong>Art</strong>s responses <strong>Art</strong>s in society<br />
• Develops ideas that<br />
convey thoughts<br />
and feelings about a<br />
particular theme.<br />
• Uses shape and<br />
form to create a<br />
landscape image.<br />
• Selects appropriate<br />
colours to achieve a<br />
specific effect.<br />
• Uses water-soluble<br />
crayons effectively.<br />
• Analyses choices<br />
made, and the<br />
elements and<br />
principles used to<br />
create own artwork.<br />
• Recognises that<br />
artworks can<br />
be inspired by<br />
particular themes.<br />
©R.I.C. Publications<br />
Low Resolution Images<br />
Display Copy<br />
6 <strong>Exploring</strong> visual arts www.ricpublications.com.au
Australian landscape<br />
©R.I.C. Publications<br />
Low Resolution Images<br />
Display Copy<br />
R.I.C. Publications ® —www.ricpublications.com.au <strong>Exploring</strong> visual arts 7
Boab landscape<br />
DURATION<br />
One lesson<br />
TASK<br />
Draw a boab tree landscape using chalk pastels.<br />
Materials<br />
✓✓ reference pictures of boab trees<br />
✓✓ cartridge paper<br />
✓✓ chalk pastels<br />
✓✓ spray fixative<br />
LESSON<br />
1. Discuss and look at images of boab trees, in particular their shape, and the landscape they<br />
grow in.<br />
2. On A4 paper, students use chalk pastels to create their own boab tree landscape:<br />
(a) Begin by drawing a horizon line midway down the page. Colour the ground using a<br />
combination of brown, ochre and orange. Use fingers to blend the colours together.<br />
(b) Blend light and dark blue in the sky in the same way. Use different fingers so that<br />
the brown does not smudge into the blue. (Students may need to wash their hands<br />
frequently to prevent smudging.)<br />
(c) Draw some boab trees in the soil, using reference material to draw their shape correctly.<br />
(d) Use white chalk pastel to highlight some areas in the trunk and branches.<br />
3. Spray with fixative to set.<br />
Evaluation<br />
<strong>Art</strong>s ideas <strong>Art</strong>s skills and processes <strong>Art</strong>s responses <strong>Art</strong>s in society<br />
• Develops ideas from<br />
reference materials.<br />
• Uses chalk pastels<br />
effectively.<br />
• Responds to images<br />
by making another<br />
artwork.<br />
• Understands the<br />
importance of<br />
landscapes within<br />
visual arts.<br />
• Identifies artists<br />
who are well known<br />
for creating<br />
landscape pictures.<br />
©R.I.C. Publications<br />
Low Resolution Images<br />
Display Copy<br />
8 <strong>Exploring</strong> visual arts www.ricpublications.com.au
Boab landscape<br />
©R.I.C. Publications<br />
Low Resolution Images<br />
Display Copy<br />
R.I.C. Publications ® —www.ricpublications.com.au <strong>Exploring</strong> visual arts 9
Black and white optical art<br />
DURATION<br />
Two lessons<br />
TASK<br />
Draw simple optical art by using patterns to trick the eye.<br />
Materials<br />
✓✓ cartridge paper<br />
✓✓ lead pencils<br />
✓✓ erasers<br />
✓✓ rulers<br />
✓✓ black permanent markers<br />
Evaluation<br />
Students can select which optical art piece they would like to complete—one which<br />
involves wavy lines or one with straight lines.<br />
Design 1 Design 2<br />
Wavy line artwork<br />
Straight line pattern<br />
LESSON 1<br />
LESSON 1<br />
1. Draw a circle either in the middle of the 1. Use a ruler to draw a long, narrow<br />
page or slightly to one side.<br />
rectangle in the middle of the page.<br />
2. Draw a series of vertical wavy lines<br />
Draw a slightly larger rectangle around<br />
down the page, ensuring that the edges<br />
the first one.<br />
of the circle are included within the<br />
2. Continue drawing rectangular shapes<br />
wavy lines.<br />
until the final rectangle is as large as<br />
3. Draw a series of wavy lines horizontally<br />
the paper. Ensure that the thickness<br />
across the page, once again ensuring<br />
of each successive rectangle is greater<br />
the edges of the circle are included<br />
than the previous one.<br />
within the wavy lines.<br />
Lesson 2<br />
Trace using black permanent marker,<br />
then colour every second shape black to<br />
create a checkerboard pattern.<br />
<strong>Art</strong>s ideas <strong>Art</strong>s skills and processes <strong>Art</strong>s responses <strong>Art</strong>s in society<br />
• Develops ideas to<br />
create artwork in a<br />
particular style.<br />
• Follows step-bystep<br />
instructions to<br />
create optical art.<br />
Lesson 2<br />
Trace using black permanent marker,<br />
then colour every second shape black,<br />
to create alternating black and white<br />
rectangles.<br />
©R.I.C. Publications<br />
Low Resolution Images<br />
Display Copy<br />
• Evaluates own<br />
artwork and that of<br />
others.<br />
• Understands that<br />
certain artwork is<br />
created to trick the<br />
eye.<br />
10 <strong>Exploring</strong> visual arts www.ricpublications.com.au
Design 1<br />
Black and white optical art<br />
Design 2<br />
©R.I.C. Publications<br />
Low Resolution Images<br />
Display Copy<br />
R.I.C. Publications ® —www.ricpublications.com.au <strong>Exploring</strong> visual arts 11
Positive and negative masks<br />
DURATION<br />
Three lessons<br />
TASK<br />
Create a simple mask design and use positive and negative space for two different<br />
versions of the same picture.<br />
Materials<br />
✓✓ examples of African masks or reference pictures<br />
✓✓ examples of film negatives (optional)<br />
✓✓ two sheets of cartridge paper<br />
✓✓ lead pencils<br />
LESSON 1<br />
1. Look at examples of<br />
African masks and<br />
discuss the patterns<br />
used to decorate them.<br />
2. Students draw their<br />
own decorative mask<br />
on cartridge paper in<br />
lead pencil. Ensure the<br />
patterns are quite thick<br />
and bold. Once satisfied<br />
with their design, they<br />
trace over it using black<br />
permanent marker.<br />
3. Colour using black<br />
permanent marker. This<br />
can be completed easily<br />
if the patterns are<br />
thick.<br />
Evaluation<br />
<strong>Art</strong>s ideas <strong>Art</strong>s skills and processes <strong>Art</strong>s responses <strong>Art</strong>s in society<br />
• Develops ideas from<br />
reference materials.<br />
Lesson 2<br />
1. Discuss the idea of<br />
positive and negative<br />
space. (The space they<br />
have coloured is positive<br />
space; the uncoloured<br />
space is negative.) If<br />
available show examples<br />
of film negatives.<br />
2. Students use the<br />
second sheet of<br />
cartridge paper and<br />
lead pencil to trace<br />
their mask, ensuring<br />
all parts of the same<br />
pattern have been<br />
traced carefully.<br />
3. Trace using black<br />
permanent marker,<br />
leaving the pattern lines<br />
white and colouring all<br />
the surrounding space<br />
black.<br />
• Uses positive and<br />
negative space<br />
within a picture.<br />
• Creates decorative<br />
patterns on a mask.<br />
✓✓<br />
✓✓<br />
✓✓<br />
✓✓<br />
• Responds to images<br />
by making another<br />
artwork.<br />
erasers<br />
black permanent markers<br />
scissors<br />
black card<br />
Lesson 3<br />
1. Cut out the masks,<br />
leaving a thin white<br />
margin around the<br />
outside of each.<br />
2. Glue the two masks<br />
side-by-side on black<br />
card to show differing<br />
uses of space within a<br />
single drawing.<br />
©R.I.C. Publications<br />
Low Resolution Images<br />
Display Copy<br />
• Recognises certain<br />
characteristics and<br />
features of art from<br />
African culture.<br />
12 <strong>Exploring</strong> visual arts www.ricpublications.com.au
Positive and negative masks<br />
©R.I.C. Publications<br />
Low Resolution Images<br />
Display Copy<br />
R.I.C. Publications ® —www.ricpublications.com.au <strong>Exploring</strong> visual arts 13
Line house<br />
DURATION<br />
Two lessons<br />
TASK<br />
Design an interesting house, using only line to enhance detail and shape.<br />
Materials<br />
✓✓ cartridge paper<br />
✓✓ lead pencils<br />
✓✓ erasers<br />
✓✓ rulers<br />
LESSON 1<br />
1. Brainstorm with the students the different types of<br />
patterns that are visible on houses; for example, tiles,<br />
paving, brickwork, windows and doors. The students can<br />
use some of these ideas to decorate their house in the<br />
final stages of drawing, using lines to create patterns.<br />
2. On cartridge paper, the students design an interesting<br />
house. Encourage them to experiment with different<br />
shapes for roofs, windows, paths etc.<br />
3. Draw curved lines to indicate the ground and add tree<br />
outlines on each side (if desired).<br />
4. Once satisfied with their designs, the students trace over<br />
the main lines using black permanent marker. Use fine<br />
black marker to draw pattern details.<br />
Evaluation<br />
<strong>Art</strong>s ideas <strong>Art</strong>s skills and processes <strong>Art</strong>s responses <strong>Art</strong>s in society<br />
• Develops ideas<br />
from brainstorming<br />
sessions.<br />
✓✓<br />
✓✓<br />
✓✓<br />
✓✓<br />
fine black markers<br />
black permanent markers<br />
black edicol dye<br />
brushes<br />
• Uses line to create<br />
pattern and<br />
enhance detail.<br />
• Uses fine black<br />
marker effectively<br />
to create line<br />
patterns.<br />
✓✓<br />
✓✓<br />
• Evaluates own work<br />
and that of others.<br />
water and containers<br />
black cardboard for<br />
mounting<br />
Lesson 2<br />
Paint the background<br />
sky area using black<br />
edicol dye and mount on<br />
black cardboard when<br />
dry.<br />
• Understands that<br />
visual arts can be a<br />
good way for people<br />
to relax.<br />
©R.I.C. Publications<br />
Low Resolution Images<br />
Display Copy<br />
14 <strong>Exploring</strong> visual arts www.ricpublications.com.au
Line house<br />
©R.I.C. Publications<br />
Low Resolution Images<br />
Display Copy<br />
R.I.C. Publications ® —www.ricpublications.com.au <strong>Exploring</strong> visual arts 15
The brain<br />
Duration<br />
Three lessons<br />
Task<br />
Use a variety of shapes to create a ‘mechanical brain’ inside a profile outline.<br />
Materials<br />
✓✓ large sheet of lithograph paper<br />
✓✓ overhead projector<br />
✓✓ coloured markers<br />
✓✓ lead pencils<br />
✓✓ erasers<br />
Lesson 1<br />
1. Use an overhead<br />
projector to trace each<br />
student’s profile with<br />
lead pencil on litho<br />
paper.<br />
2. Students use black<br />
permanent marker to<br />
trace over the pencil<br />
lines.<br />
Evaluation<br />
<strong>Art</strong>s ideas <strong>Art</strong>s skills and processes <strong>Art</strong>s responses <strong>Art</strong>s in society<br />
• Develops ideas from<br />
imagination.<br />
✓✓<br />
✓✓<br />
✓✓<br />
✓✓<br />
• Selects, creates<br />
and uses shapes.<br />
• Draws using a<br />
variety of tools and<br />
techniques.<br />
black permanent markers<br />
coloured pencils<br />
scraps of coloured paper<br />
variety of round shapes for<br />
tracing (e.g. bottle tops, lids)<br />
Lesson 2<br />
Using a ruler and<br />
round shapes, create<br />
a mechanical system<br />
inside the head, drawing<br />
cogs, wheels, pulleys<br />
etc. (Some images<br />
from the internet may<br />
provide inspiration.)<br />
• Understands<br />
that artworks are<br />
created for a range<br />
of purposes.<br />
✓✓<br />
✓✓<br />
✓✓<br />
✓✓<br />
rulers<br />
coloured<br />
cardboard<br />
scissors<br />
glue<br />
Lesson 3<br />
1. Students use a variety<br />
of media, including<br />
pencils and coloured<br />
markers, to colour the<br />
mechanical system.<br />
Coloured paper can be<br />
cut and glued to create<br />
cogs etc.<br />
2. Cut around head profile<br />
and glue onto coloured<br />
card.<br />
• Understands that<br />
skills learnt in visual<br />
arts can assist us<br />
in other parts of<br />
our school lives; for<br />
example, maths.<br />
©R.I.C. Publications<br />
Low Resolution Images<br />
Display Copy<br />
16 <strong>Exploring</strong> visual arts www.ricpublications.com.au
The brain<br />
©R.I.C. Publications<br />
Low Resolution Images<br />
Display Copy<br />
R.I.C. Publications ® —www.ricpublications.com.au <strong>Exploring</strong> visual arts 17
Chinese dragon<br />
DURATION<br />
Three lessons<br />
TASK<br />
Draw a symmetrical image of a dragon’s face and complete it<br />
using bright colour combinations.<br />
Materials<br />
✓✓ reference pictures of Chinese<br />
dragons<br />
✓✓ litho paper<br />
✓✓ black permanent markers<br />
✓✓ lead pencils<br />
Lesson 2<br />
1. Once satisfied with their image, the students trace over the halfface<br />
with black permanent marker. They then flip the page over and<br />
trace the other side which should now be clearly visible through the<br />
paper.<br />
2. Unfold the paper to see the complete symmetrical image.<br />
3. Colour using warm or cool colour combinations for the larger<br />
sections of the face (warm: red, orange, yellow, pink; cool: blue,<br />
green, purple) and warm colours for the eyebrows, beard, mouth<br />
and nose. Students can use oil pastels or water-soluble crayons,<br />
which will need to be painted with water. This medium allows<br />
students to blend colours together.<br />
Lesson 3<br />
Carefully cut out the Chinese dragon’s face and glue onto black<br />
card for display.<br />
Evaluation<br />
TIPS FOR DRAWING<br />
<strong>Art</strong>s ideas <strong>Art</strong>s skills and processes <strong>Art</strong>s responses <strong>Art</strong>s in society<br />
• Develops ideas from<br />
reference materials.<br />
✓✓<br />
✓✓<br />
✓✓<br />
✓✓<br />
• Creates a<br />
symmetrical image.<br />
• Combines colours<br />
to achieve a specific<br />
effect.<br />
erasers<br />
water soluble crayons or<br />
oil pastels<br />
brushes<br />
water and containers<br />
LESSON 1<br />
1. Gather as many images as possible from books, the internet,<br />
clip art etc. of different Chinese dragons. Students will use<br />
these reference pictures to create their own drawing of a Chinese<br />
dragon’s face. Discuss the features of a Chinese dragon’s face<br />
(cat-like eyes, moustache, flame-like eyebrows, horns, teeth,<br />
colours, patterning etc.).<br />
2. To achieve the symmetrical aspect, students will fold their paper<br />
in half and draw only half of a Chinese dragon’s face. Ensure that<br />
the dragon’s mouth and nose are drawn on the fold line so that<br />
the image is doubled once the paper is folded out. (Otherwise, the<br />
students will have two separate halves of a face at either end of<br />
the page.)<br />
• Responds to images<br />
by making another<br />
artwork.<br />
✓✓<br />
✓✓<br />
✓✓<br />
scissors<br />
glue<br />
black card<br />
When drawing the face<br />
of any animal, follow<br />
these simple steps:<br />
• Sketch a light<br />
horizontal line to<br />
show the centre of<br />
the face. (It should<br />
run between the<br />
ears and eyes and<br />
through the middle<br />
of the nose.)<br />
• Sketch a line to<br />
show eyes, nose and<br />
mouth position.<br />
• Sketch the head<br />
shape and add<br />
the eyes, nose and<br />
mouth details.<br />
©R.I.C. Publications<br />
Low Resolution Images<br />
Display Copy<br />
• Add highlights<br />
or shading where<br />
shadows fall.<br />
• Add fur, feathers<br />
etc.<br />
• Recognises that<br />
artworks have<br />
different purposes<br />
and meanings in<br />
different cultures.<br />
18 <strong>Exploring</strong> visual arts www.ricpublications.com.au
Chinese dragon<br />
©R.I.C. Publications<br />
Low Resolution Images<br />
Display Copy<br />
R.I.C. Publications ® —www.ricpublications.com.au <strong>Exploring</strong> visual arts 19
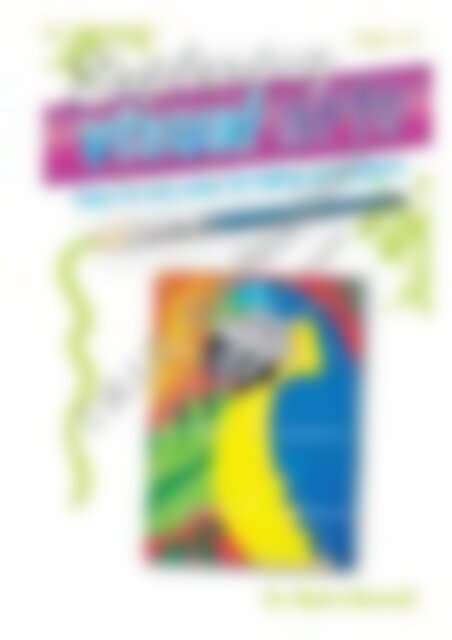
Stained glass peacock<br />
Duration<br />
Four lessons<br />
Task<br />
Create a stained glass image based on a drawing of<br />
a peacock.<br />
Materials<br />
✓✓ reference pictures of<br />
stained glass windows<br />
✓✓ cartridge paper<br />
✓✓ lead pencils<br />
✓✓<br />
✓✓<br />
✓✓<br />
brushes<br />
water and containers<br />
black card<br />
Lesson 1<br />
1. Look at examples of stained glass windows and discuss the way that images have been<br />
segmented to create a variety of shapes.<br />
2. Use guided drawing to demonstrate how to complete a peacock using simple shapes.<br />
3.<br />
Students draw their own version. Once the main image is drawn, students divide the drawing<br />
into large segments, like a jigsaw puzzle. Trace over the pencil lines using black permanent<br />
marker.<br />
Lesson 2 and 3<br />
Colour each segment individually, using cool colours for the peacock and warm colours for<br />
the background. Paint watercolour pencil areas with water. Allow to dry.<br />
Lesson 4<br />
Mount onto black card to highlight the effect of the thick black lines of a stained glass<br />
window.<br />
Evaluation<br />
<strong>Art</strong>s ideas <strong>Art</strong>s skills and processes <strong>Art</strong>s responses <strong>Art</strong>s in society<br />
• Uses own ideas to<br />
create patterns<br />
and shapes based<br />
on stained glass<br />
window images.<br />
✓✓<br />
✓✓<br />
✓✓<br />
• Applies colour<br />
using a variety<br />
of mediums and<br />
groups colours<br />
appropriately.<br />
• Selects and creates<br />
shapes to achieve<br />
specific results.<br />
erasers<br />
black permanent markers<br />
watercolour pencils<br />
©R.I.C. Publications<br />
Low Resolution Images<br />
Display Copy<br />
• Understands<br />
artworks are<br />
created for a range<br />
of purposes and in a<br />
variety of mediums,<br />
such as glass.<br />
• Understands that<br />
visual arts can be<br />
incorporated into<br />
everyday objects,<br />
such as windows.<br />
20 <strong>Exploring</strong> visual arts www.ricpublications.com.au
Stained glass peacock<br />
©R.I.C. Publications<br />
Low Resolution Images<br />
Display Copy<br />
R.I.C. Publications ® —www.ricpublications.com.au <strong>Exploring</strong> visual arts 21
Egyptian sarcophagus<br />
DURATION<br />
Three lessons<br />
TASK<br />
Draw and decorate an Egyptian sarcophagus.<br />
Materials<br />
✓✓ examples of Egyptian symbols<br />
✓✓ large sheet of cartridge paper<br />
✓✓ lead pencils<br />
✓✓ erasers<br />
LESSON 1<br />
1. Look at examples of Egyptian<br />
symbols, such as pyramids,<br />
scarabs, eyes etc. that the<br />
students can use in their<br />
sarcophagus picture. (Refer to<br />
and other websites<br />
for some suggestions.)<br />
2. The students then draw a<br />
large sarcophagus shape on<br />
cartridge paper as directed.<br />
Draw a head piece and face in<br />
the top section, then decorate<br />
the body section using the<br />
ideas generated from looking at<br />
Egyptian symbols.<br />
3. Once the students are<br />
satisfied with their design,<br />
they trace over it using black<br />
permanent marker.<br />
Evaluation<br />
Variation<br />
<strong>Art</strong>s ideas <strong>Art</strong>s skills and processes <strong>Art</strong>s responses <strong>Art</strong>s in society<br />
• Develops ideas from<br />
stimulus material.<br />
✓✓<br />
✓✓<br />
✓✓<br />
• Draws symbols and<br />
patterns based on<br />
a particular subject<br />
matter.<br />
• Uses oil pastels<br />
effectively.<br />
black permanent markers<br />
oil pastels<br />
gold crayon<br />
• Evaluates own<br />
artwork and that of<br />
others.<br />
✓✓<br />
✓✓<br />
✓✓<br />
scissors<br />
glue<br />
black card<br />
Lesson 2<br />
1. Colour the face using gold crayon and select a<br />
few patterns to also colour in gold.<br />
2. Use oil pastels to colour the remaining<br />
sarcophagus, pressing hard to ensure bold,<br />
bright colours.<br />
Lesson 3<br />
When the sarcophagus is complete, cut out and<br />
glue onto black card.<br />
Ask the students to draw their own facial<br />
features on the mask of the sarcophagus<br />
and use symbols which indicate their own<br />
interests—drawing, music, sports, reading<br />
etc.<br />
©R.I.C. Publications<br />
Low Resolution Images<br />
Display Copy<br />
• Understands that<br />
artworks have<br />
different purposes<br />
and meanings in<br />
different cultures.<br />
22 <strong>Exploring</strong> visual arts www.ricpublications.com.au
Egyptian sarcophagus<br />
©R.I.C. Publications<br />
Low Resolution Images<br />
Display Copy<br />
R.I.C. Publications ® —www.ricpublications.com.au <strong>Exploring</strong> visual arts 23
Fireworks<br />
DURATION<br />
Two lessons<br />
TASK<br />
Create a city landscape with a fireworks sky background.<br />
Materials<br />
✓✓ cartridge paper<br />
✓✓ yellow, orange, red and blue paint<br />
✓✓ strip of heavy card<br />
✓✓ lead pencils<br />
✓✓ erasers<br />
✓✓ rulers<br />
✓✓ glue<br />
LESSON 1<br />
1. To create the sky background, the<br />
students use a sheet of cartridge<br />
paper in landscape position and put<br />
blobs of paint along one side in the<br />
following order from the bottom of the<br />
page: yellow, orange, red and blue.<br />
2. Use the heavy card strip to spread<br />
the paint across the page. A screenprinting<br />
squeegee may be used for this.<br />
3. Leave sky background to dry.<br />
Evaluation<br />
✓✓<br />
✓✓<br />
✓✓<br />
✓✓<br />
✓✓<br />
strip of black paper or card<br />
(approximately 42 x 14 cm)<br />
paintbrushes<br />
water and containers<br />
scissors<br />
glitter in various colours<br />
Lesson 2<br />
1. On the strip of black paper or card,<br />
draw a city skyline. Cut out and glue<br />
onto the sky background, lining up the<br />
bottom of the page with the bottom of<br />
the city skyline.<br />
2. Use a paintbrush and glue to create<br />
firework patterns in the sky, sprinkle<br />
them with different coloured glitter and<br />
shake off the excess.<br />
<strong>Art</strong>s ideas <strong>Art</strong>s skills and processes <strong>Art</strong>s responses <strong>Art</strong>s in society<br />
• Generates images<br />
inspired by special<br />
events.<br />
©R.I.C. Publications<br />
Low Resolution Images<br />
Display Copy<br />
• Mixes and applies<br />
colours to create a<br />
specific effect.<br />
• Evaluates own<br />
artwork and that of<br />
others.<br />
• Understands that<br />
visual arts can be a<br />
good way for people<br />
to relax.<br />
24 <strong>Exploring</strong> visual arts www.ricpublications.com.au
Fireworks<br />
©R.I.C. Publications<br />
Low Resolution Images<br />
Display Copy<br />
R.I.C. Publications ® —www.ricpublications.com.au <strong>Exploring</strong> visual arts 25
Macaw<br />
DURATION<br />
Two lessons<br />
TASK<br />
Draw and colour a detailed, accurate close-up picture of a<br />
macaw after studying photographs.<br />
Materials<br />
✓✓ photographs of macaws or<br />
images from the internet<br />
✓✓ cartridge paper<br />
✓✓<br />
✓✓<br />
lead pencils<br />
erasers<br />
LESSON 1<br />
1. Demonstrate drawing a close-up image of a macaw.<br />
Use the photographs as an aid to discuss the features<br />
with the students. Plan the colours with the students’<br />
assistance, constantly referring to the photographs or<br />
images.<br />
2. The students use lead pencil on cartridge paper to<br />
lightly sketch their own drawing. Ensure they use the<br />
entire page for their drawing and include all details and<br />
features.<br />
3. Once satisfied with their sketch, the students trace over<br />
the pencil lines using black permanent marker.<br />
4. The students select oil pastel colours to complete their<br />
sketch, matching them as closely as possible to the<br />
actual colours of the macaw.<br />
5. To achieve a three-dimensional effect, the students<br />
will need to blend light and dark versions of the same<br />
colour. For example, black and grey will need to be blended<br />
to create a curved effect on the macaw’s beak; in the<br />
example shown, dark yellow has been blended with bright<br />
yellow to create the shadow cast by the macaw’s wing.<br />
TIPS FOR DRAWING<br />
Lesson 2<br />
Once satisfied with their picture, the students can create a jungle background by drawing<br />
tropical, broadleaf plants. Choose different tones of the same colour to create a threedimensional<br />
effect. A contrasting background colour will make the macaw stand out from its<br />
surroundings.<br />
Evaluation<br />
<strong>Art</strong>s ideas <strong>Art</strong>s skills and processes <strong>Art</strong>s responses <strong>Art</strong>s in society<br />
• Develops ideas from<br />
stimulus materials.<br />
• Draws an accurate<br />
representation of a<br />
particular image.<br />
• Uses the space on a<br />
page effectively.<br />
• Chooses colours to<br />
represent a specific<br />
effect.<br />
✓✓<br />
✓✓<br />
• Responds to images<br />
by making another<br />
artwork.<br />
black permanent markers<br />
oil pastels<br />
When drawing birds, circular<br />
shapes are most commonly<br />
involved.<br />
The head is usually an egg<br />
shape turned sideways on an<br />
oval body. Start with basic<br />
shapes and overlay with<br />
details such as feathers.<br />
Feathers can be ‘hinted at’<br />
by using long strokes. Every<br />
feather does not need to be<br />
drawn—only the important<br />
ones.<br />
Beaks are almost always<br />
curved.<br />
Markings on a bird make it<br />
more believable.<br />
©R.I.C. Publications<br />
Low Resolution Images<br />
Display Copy<br />
• Realises that visual<br />
arts can be used<br />
to record visual<br />
information.<br />
26 <strong>Exploring</strong> visual arts www.ricpublications.com.au
Macaw<br />
©R.I.C. Publications<br />
Low Resolution Images<br />
Display Copy<br />
R.I.C. Publications ® —www.ricpublications.com.au <strong>Exploring</strong> visual arts 27
Scarecrow collage<br />
DURATION<br />
Three lessons<br />
TASK<br />
Make a 3-D collage of a scarecrow, using paper and cloth.<br />
Materials<br />
✓✓ thick card<br />
✓✓ scarecrow body template<br />
from page 74<br />
✓✓ lead pencils<br />
✓✓ medium-sized styrofoam<br />
balls cut in half<br />
✓✓ PVA glue<br />
✓✓ scissors<br />
✓✓<br />
✓✓<br />
✓✓<br />
✓✓<br />
✓✓<br />
✓✓<br />
brown paper such as<br />
that from lunch bags<br />
cloth scraps<br />
black permanent<br />
markers<br />
glue brushes<br />
felt scraps<br />
string<br />
LESSON 1 and 2<br />
1. Trace the scarecrow body template onto the thick card<br />
and cut out.<br />
2. Use the body template to trace clothes shapes onto<br />
cloth scraps.<br />
3. Cut out and glue onto the scarecrow’s body using PVA<br />
glue.<br />
4. Cut a length of string and use as the scarecrow’s belt.<br />
5. Use black permanent marker to colour the scarecrow’s<br />
shoes.<br />
6. Cut small lengths of straw or yellow wool and glue on for<br />
the scarecrow’s hands.<br />
7. Brush the half styrofoam ball with PVA glue and glue a<br />
square of brown paper over the top, tucking the excess<br />
paper behind, to create the head.<br />
8. Glue the head onto the neck.<br />
9. Draw a hat shape onto a scrap of felt and cut out.<br />
10. Glue lengths of straw or wool onto the scarecrow’s<br />
head for hair; glue the felt hat on top.<br />
11. Attach googly eyes to the scarecrow’s face and draw a<br />
nose and mouth using black permanent marker.<br />
Evaluation<br />
✓✓<br />
✓✓<br />
✓✓<br />
✓✓<br />
✓✓<br />
✓✓<br />
straw or yellow wool<br />
small googly eyes<br />
blue card for<br />
background<br />
oil pastels<br />
coloured cupcake<br />
papers<br />
yellow crepe paper<br />
Lesson 3<br />
1. To create the<br />
background, use green<br />
and yellow oil pastels to<br />
draw long grass almost<br />
halfway up from the<br />
base of the blue card.<br />
2. Cut the ruffled edges<br />
of the cupcake papers,<br />
stopping at the centre<br />
circle, to create flowers.<br />
3. Glue the flowers<br />
onto the grass. Glue<br />
scrunched up pieces of<br />
crepe paper into the<br />
centre of each flower.<br />
4. Glue the scarecrow<br />
onto the background.<br />
<strong>Art</strong>s ideas <strong>Art</strong>s skills and processes <strong>Art</strong>s responses <strong>Art</strong>s in society<br />
• Develops ideas<br />
to create an<br />
artwork based on a<br />
particular theme.<br />
©R.I.C. Publications<br />
Low Resolution Images<br />
Display Copy<br />
• Ues a range of<br />
materials to make a<br />
3-D image.<br />
• Evaluates own<br />
artwork and that of<br />
others.<br />
• Understands that<br />
artwork can be<br />
created from a wide<br />
range of materials.<br />
28 <strong>Exploring</strong> visual arts www.ricpublications.com.au
Scarecrow collage<br />
©R.I.C. Publications<br />
Low Resolution Images<br />
Display Copy<br />
R.I.C. Publications ® —www.ricpublications.com.au <strong>Exploring</strong> visual arts 29
Rainforest silhouette<br />
DURATION<br />
Two lessons<br />
TASK<br />
Create a rainforest silhouette picture.<br />
Materials<br />
✓✓ pictures or photographs of rainforest<br />
leaves and trees<br />
✓✓ long sheet of purple paper<br />
approximately 22 cm x 52 cm<br />
(or a sheet of cartridge paper cut to<br />
size and painted purple)<br />
✓✓ lead pencils<br />
LESSON 1<br />
1. Look at pictures and discuss the<br />
features of rainforest trees, vines and<br />
plants. In particular, identify trees and<br />
leaves with interesting shapes.<br />
2. The students use lead pencil to draw a<br />
scene of trees, vines and large foliage<br />
leaves on the purple paper.<br />
3. Once satisfied with their work, the<br />
students trace over it using black<br />
permanent marker and fill in the outline<br />
to make a rainforest silhouette. When<br />
colouring large areas black, use strokes<br />
in one direction only.<br />
Evaluation<br />
✓✓<br />
✓✓<br />
✓✓<br />
✓✓<br />
✓✓<br />
✓✓<br />
erasers<br />
black permanent markers<br />
white paper<br />
yellow and orange oil pastels<br />
scissors<br />
glue<br />
Lesson 2<br />
1. Draw a medium-sized circle on the white<br />
paper to represent the sun. Colour the<br />
bottom half yellow and the top half<br />
orange, blending the two colours in the<br />
middle.<br />
2. Cut out and glue the sun onto the<br />
rainforest picture.<br />
<strong>Art</strong>s ideas <strong>Art</strong>s skills and processes <strong>Art</strong>s responses <strong>Art</strong>s in society<br />
• Develops ideas<br />
to create images<br />
based on a<br />
particular theme.<br />
©R.I.C. Publications<br />
Low Resolution Images<br />
Display Copy<br />
• Draws a realistic<br />
silhouette image.<br />
• Evaluates own work<br />
and that of others.<br />
• Understands that<br />
visual arts can be a<br />
good way to relax.<br />
30 <strong>Exploring</strong> visual arts www.ricpublications.com.au
Rainforest silhouette<br />
©R.I.C. Publications<br />
Low Resolution Images<br />
Display Copy<br />
R.I.C. Publications ® —www.ricpublications.com.au <strong>Exploring</strong> visual arts 31
Tornado<br />
DURATION<br />
Two lessons<br />
TASK<br />
Draw and colour a tornado scene.<br />
Materials<br />
✓✓ A3 sheet light blue card<br />
✓✓ oil pastels<br />
LESSON 1<br />
1. Use purple oil pastel to lightly sketch<br />
some hills in the background.<br />
2. Draw a large barn on the bottom half of<br />
the page, either on the left- or righthand<br />
side.<br />
3. Draw a field behind and in front of the<br />
barn.<br />
4. Use grey oil pastel to draw the tornado<br />
shape, starting in large oval shapes<br />
at the top of the page, progressively<br />
getting smaller as the tornado reaches<br />
the ground.<br />
5. To give the tornado a three–dimensional<br />
look, draw curved black lines from<br />
one side of the tornado and white<br />
curved lines from the other side of the<br />
tornado, blending the two in the middle.<br />
Evaluation<br />
Lesson 2<br />
1. Colour the purple hills and green field<br />
appropriately, ensuring there are no<br />
gaps.<br />
2. Colour the barn using two shades of<br />
brown to give it some dimension. Draw<br />
windows in black oil pastel, then outline<br />
the edges of the windows in white to<br />
add some highlighted areas.<br />
3. Use black oil pastel to draw debris<br />
flying from the tornado.<br />
4. Use fingers to smudge the debris from<br />
the bottom of the tornado, where it<br />
touches the ground.<br />
<strong>Art</strong>s ideas <strong>Art</strong>s skills and processes <strong>Art</strong>s responses <strong>Art</strong>s in society<br />
• Develops ideas to<br />
create images that<br />
convey thoughts<br />
and feelings.<br />
©R.I.C. Publications<br />
Low Resolution Images<br />
Display Copy<br />
• Uses oil pastels<br />
effectively to create<br />
three-dimensional<br />
effects.<br />
• Evaluates own<br />
artwork and that of<br />
others.<br />
• Understands that<br />
visual arts can be a<br />
form of story telling.<br />
32 <strong>Exploring</strong> visual arts www.ricpublications.com.au
Tornado<br />
©R.I.C. Publications<br />
Low Resolution Images<br />
Display Copy<br />
R.I.C. Publications ® —www.ricpublications.com.au <strong>Exploring</strong> visual arts 33
Pyramid collage<br />
DURATION<br />
One lesson<br />
TASK<br />
Create a collage of an Egyptian pyramid scene using coloured paper.<br />
Materials<br />
✓✓ A3 pink card<br />
✓✓ purple or dark blue, yellow and orange origami paper<br />
✓✓ glue<br />
✓✓ scissors<br />
✓✓ rulers<br />
✓✓ lead pencils<br />
LESSON<br />
1. Rule two large triangles—one on the yellow paper and one on the blue paper.<br />
2. Cut out both triangles and overlap them until they form a pyramid shape with a light side<br />
and a shadow side.<br />
3. Glue the triangle shapes onto the pink card, about 5 cm from the bottom edge.<br />
4. Make two smaller pyramid shapes and glue them 5 cm from the bottom edge.<br />
5. Tear a sandhill shape from the orange paper and glue onto the bottom edge, overlapping the<br />
bottom of the pyramids.<br />
6. Tear some cloud shapes from the yellow and orange paper and glue them, overlapping each<br />
other, in the sky.<br />
Evaluation<br />
<strong>Art</strong>s ideas <strong>Art</strong>s skills and processes <strong>Art</strong>s responses <strong>Art</strong>s in society<br />
• Develops ideas to<br />
create artwork in a<br />
particular style.<br />
• Selects, creates<br />
and uses shapes.<br />
• Uses paper to<br />
create an image for<br />
a collage.<br />
• Evaluates own work<br />
and that of others.<br />
• Understands that<br />
skills we learn in<br />
visual arts can<br />
assist us in other<br />
parts of our lives;<br />
for example, in<br />
mathematics.<br />
©R.I.C. Publications<br />
Low Resolution Images<br />
Display Copy<br />
34 <strong>Exploring</strong> visual arts www.ricpublications.com.au
Pyramid collage<br />
©R.I.C. Publications<br />
Low Resolution Images<br />
Display Copy<br />
R.I.C. Publications ® —www.ricpublications.com.au <strong>Exploring</strong> visual arts 35
Ice-cream sundae<br />
DURATION<br />
Two lessons<br />
TASK<br />
Create a collage from drawn pieces to make an ice-cream sundae picture.<br />
Materials<br />
✓✓ blue paper or card<br />
✓✓ cartridge paper<br />
✓✓ oil pastels, including white<br />
✓✓ scissors<br />
✓✓ glue<br />
✓✓ A3 black paper or card<br />
LESSON 1<br />
1. Discuss ice-cream flavours with the<br />
students and ways they could be drawn<br />
using oil pastels. Demonstrate one or<br />
two examples if necessary.<br />
2. On cartridge paper, using oil pastels,<br />
the students draw several scoops of<br />
different flavoured ice-cream as well<br />
as any other decorations they wish to<br />
include; for example, a Flake ® chocolate<br />
bar, a cherry etc.<br />
Evaluation<br />
Lesson 2<br />
1. Using white oil pastel on blue paper<br />
or card, the students draw a sundae<br />
glass.<br />
2. Cut out the glass and glue it onto black<br />
card or paper, leaving the top edge of<br />
the glass unglued so that some of the<br />
ice-cream scoops can be slipped in<br />
behind.<br />
3. Cut out the ice-cream scoops and<br />
decorations and arrange them in the<br />
sundae glass, overlapping the scoops.<br />
Once the students are satisfied with<br />
their arrangement, they glue them in<br />
place, adding the decorations last.<br />
<strong>Art</strong>s ideas <strong>Art</strong>s skills and processes <strong>Art</strong>s responses <strong>Art</strong>s in society<br />
• Develops ideas<br />
from brainstorming<br />
sessions.<br />
©R.I.C. Publications<br />
Low Resolution Images<br />
Display Copy<br />
• Combines colours<br />
to achieve a specific<br />
effect.<br />
• Creates a collage of<br />
a familiar image.<br />
• Evaluates own<br />
artwork and that of<br />
others.<br />
• Understands that<br />
artwork can be<br />
used to advertise<br />
products; for<br />
example, chalk<br />
drawings on menu<br />
boards for cafes.<br />
36 <strong>Exploring</strong> visual arts www.ricpublications.com.au
Ice-cream sundae<br />
©R.I.C. Publications<br />
Low Resolution Images<br />
Display Copy<br />
R.I.C. Publications ® —www.ricpublications.com.au <strong>Exploring</strong> visual arts 37
Mega burger<br />
DURATION<br />
Two lessons<br />
TASK<br />
Draw and colour a picture of a hamburger.<br />
Materials<br />
✓✓ cartridge paper<br />
✓✓ lead pencils<br />
✓✓ erasers<br />
✓✓ black permanent markers<br />
LESSON 1<br />
1. Brainstorm to list the different types<br />
of ingredients that can be found in a<br />
hamburger.<br />
2. With the cartridge paper in portrait<br />
position, the students draw the top<br />
and bottom bun pieces at each end of<br />
the page.<br />
3. In the space between the bun pieces,<br />
draw the filling for the hamburger—<br />
lettuce, tomato, beef patties, cheese,<br />
egg etc.<br />
4. Trace over the drawing using black<br />
permanent marker.<br />
Evaluation<br />
✓✓<br />
✓✓<br />
✓✓<br />
✓✓<br />
oil pastels<br />
scissors<br />
glue<br />
coloured card<br />
Lesson 2<br />
1. The students use oil pastels to colour<br />
the hamburger. Encourage them to mix<br />
lighter and darker colours together<br />
to create a more realistic effect. For<br />
example, light and dark brown can be<br />
blended together to create the illusion<br />
of shape and form for the bun.<br />
2. When all sections have been coloured,<br />
the hamburger can be cut out and<br />
glued onto coloured card.<br />
<strong>Art</strong>s ideas <strong>Art</strong>s skills and processes <strong>Art</strong>s responses <strong>Art</strong>s in society<br />
• Develops ideas from<br />
a brainstorming<br />
session.<br />
• Uses oil pastels<br />
effectively.<br />
• Evaluates own<br />
artwork and that of<br />
others.<br />
• Understands that<br />
art can be used to<br />
advertise products;<br />
for example, chalk<br />
drawings on menu<br />
boards in cafes.<br />
©R.I.C. Publications<br />
Low Resolution Images<br />
Display Copy<br />
38 <strong>Exploring</strong> visual arts www.ricpublications.com.au
Mega burger<br />
©R.I.C. Publications<br />
Low Resolution Images<br />
Display Copy<br />
R.I.C. Publications ® —www.ricpublications.com.au <strong>Exploring</strong> visual arts 39
Frosted tree silhouette<br />
DURATION<br />
One lesson<br />
TASK<br />
Create a collage of winter trees by drawing, adding tissue paper and glitter to create a<br />
frosted effect.<br />
Materials<br />
✓✓ lead pencils<br />
✓✓ erasers<br />
✓✓ blue card<br />
✓✓ black permanent markers<br />
✓✓ paste*<br />
✓✓ white tissue paper<br />
✓✓ silver glitter<br />
✓✓ PVA glue<br />
LESSON<br />
1. On blue card, the students draw a large leafless tree either on the left- or right-hand side of<br />
the page, ensuring the tree extends from the top to the bottom of the page.<br />
2. Draw a slightly smaller tree in the background.<br />
3. Trace over the trees in black permanent marker and colour them in.<br />
4. Tear strips of tissue paper and glue over the entire tree picture.<br />
5. Once the entire page is covered with tissue paper, sprinkle the section of the trees where the<br />
leaves would be with silver glitter and leave to dry.<br />
6. Use PVA glue in a squeeze bottle and apply along sections of the tree trunks and branches.<br />
Sprinkle with silver glitter. Allow to dry.<br />
Evaluation<br />
<strong>Art</strong>s ideas <strong>Art</strong>s skills and processes <strong>Art</strong>s responses <strong>Art</strong>s in society<br />
• Develops ideas to<br />
create images that<br />
convey particular<br />
moods.<br />
• Uses materials<br />
to create specific<br />
effects on a collage.<br />
* Paste glue works best as it wets the<br />
tissue paper, making it see-through so<br />
that the tree images can still be seen<br />
when the artwork is dry.<br />
©R.I.C. Publications<br />
Low Resolution Images<br />
Display Copy<br />
• Uses appropriate<br />
terminology when<br />
describing artwork<br />
and art processes.<br />
• Understands that<br />
visual arts practice<br />
and processes can<br />
provide therapy.<br />
40 <strong>Exploring</strong> visual arts www.ricpublications.com.au
Frosted tree silhouette<br />
©R.I.C. Publications<br />
Low Resolution Images<br />
Display Copy<br />
R.I.C. Publications ® —www.ricpublications.com.au <strong>Exploring</strong> visual arts 41
Complementary colour boxes<br />
DURATION<br />
Two lessons<br />
TASK<br />
Colour a geometric abstract picture using complementary colour combinations.<br />
Materials<br />
✓✓ cartridge paper<br />
✓✓ rulers<br />
✓✓ lead pencils<br />
✓✓ erasers<br />
✓✓ black permanent markers<br />
✓✓ oil pastels<br />
LESSON 1<br />
1. On cartridge paper, students use a<br />
ruler and pencil to draw a series of<br />
boxes, two or three boxes across and<br />
four down.<br />
2. Inside each box, draw a smaller box.<br />
Vary the position of the smaller boxes<br />
inside the larger ones to create a more<br />
interesting picture.<br />
3. Trace over all the lines and boxes in<br />
black permanent marker. Ensure a ruler<br />
is used for the tracing so the lines<br />
remain straight.<br />
Evaluation<br />
Complementary<br />
colours<br />
Lesson 2<br />
Before colouring with oil pastel, discuss<br />
complementary colours (colours that<br />
are opposite to each other on the<br />
colour wheel—red and green, yellow and<br />
purple, orange and blue). The students<br />
use these colour combinations to<br />
complete their picture. Ensure that the<br />
students use the oil pastels carefully<br />
and appropriately so that the colours<br />
are bright and bold with no white<br />
spaces visible.<br />
<strong>Art</strong>s ideas <strong>Art</strong>s skills and processes <strong>Art</strong>s responses <strong>Art</strong>s in society<br />
• Develops ideas to<br />
create artwork in a<br />
particular style.<br />
©R.I.C. Publications<br />
Low Resolution Images<br />
Display Copy<br />
• Selects appropriate<br />
complementary<br />
colours.<br />
• Uses and<br />
understands art<br />
terminology, such<br />
as complementary<br />
colours.<br />
• Understands that<br />
art can be a good<br />
way for people to<br />
relax.<br />
42 <strong>Exploring</strong> visual arts www.ricpublications.com.au
Complementary colour boxes<br />
©R.I.C. Publications<br />
Low Resolution Images<br />
Display Copy<br />
R.I.C. Publications ® —www.ricpublications.com.au <strong>Exploring</strong> visual arts 43
Hungry fish<br />
DURATION<br />
Three lessons<br />
TASK<br />
Draw, pattern and paint a deep-sea fish.<br />
Materials<br />
✓✓ images of deep-sea fish, such as the<br />
deep sea angler fish, from books or the<br />
internet<br />
✓✓ large sheet of cartridge paper<br />
✓✓ lead pencils<br />
✓✓ erasers<br />
✓✓ black permanent markers<br />
LESSON 1<br />
1. Look at images of deep-sea fish and<br />
discuss their features.<br />
2. The students draw their own version of<br />
a deep-sea fish, including the features<br />
discussed.<br />
3. The students draw lines to break up<br />
areas of the fish’s body into segments.<br />
In each segment, draw a variety of<br />
patterns.<br />
4. Trace over the completed design using<br />
black permanent marker.<br />
Evaluation<br />
✓✓<br />
✓✓<br />
✓✓<br />
✓✓<br />
✓✓<br />
✓✓<br />
edicol dye<br />
brushes<br />
water and containers<br />
glue<br />
scissors<br />
black card<br />
Lesson 2<br />
Use various colours of edicol dye to<br />
paint the patterns on the sections of<br />
the fish.<br />
Lesson 3<br />
When dry, cut out the fish and glue<br />
onto black card.<br />
<strong>Art</strong>s ideas <strong>Art</strong>s skills and processes <strong>Art</strong>s responses <strong>Art</strong>s in society<br />
• Develops ideas from<br />
stimulus materials.<br />
©R.I.C. Publications<br />
Low Resolution Images<br />
Display Copy<br />
• Uses shape and line<br />
to draw a variety of<br />
patterns.<br />
• Evaluates own<br />
artwork and that of<br />
others.<br />
• Understands that<br />
skills learnt in visual<br />
arts can assist us<br />
in other areas; for<br />
example, in maths.<br />
44 <strong>Exploring</strong> visual arts www.ricpublications.com.au
Hungry fish<br />
©R.I.C. Publications<br />
Low Resolution Images<br />
Display Copy<br />
R.I.C. Publications ® —www.ricpublications.com.au <strong>Exploring</strong> visual arts 45
Roman helmet<br />
DURATION<br />
One lesson<br />
TASK<br />
Make a collage of a Roman helmet using paper.<br />
Materials<br />
✓✓ examples of profile portraits<br />
✓✓ reference pictures of Roman helmets<br />
✓✓ red card<br />
✓✓ lead pencils<br />
✓✓ erasers<br />
✓✓<br />
✓✓<br />
✓✓<br />
✓✓<br />
black card<br />
silver and gold paper<br />
scissors<br />
glue<br />
LESSON<br />
1. Look at examples of profile portraits and discuss features of the side view of a face. If<br />
necessary, model drawing a simple example.<br />
2. The students then draw a profile on black card. Cut out the profile and glue it onto red card<br />
leaving space at the top for a helmet.<br />
3. Draw a helmet shape on the red card around the head after looking at stimulus pictures of<br />
Roman helmets.<br />
4. Cut out the helmet and face shape, leaving a thin margin of red card around the face.<br />
5. Tear the gold paper into small pieces and glue onto the helmet, leaving the crest of the<br />
helmet red.<br />
6. Fringe the crest of the helmet by cutting lines some 3–4 mm apart.<br />
7. Cut out and glue decorative patterns onto the gold helmet, using silver paper.<br />
8. Draw an ear and eye shape on silver paper, cut out and glue onto the appropriate areas. To<br />
complete the picture, glue a small black circle into the middle of the eye for the pupil. Allow<br />
to dry.<br />
Evaluation<br />
<strong>Art</strong>s ideas <strong>Art</strong>s skills and processes <strong>Art</strong>s responses <strong>Art</strong>s in society<br />
• Develops ideas<br />
inspired by specific<br />
historical attire.<br />
©R.I.C. Publications<br />
Low Resolution Images<br />
Display Copy<br />
• Creates and<br />
assembles a collage<br />
of a particular<br />
image.<br />
• Responds to images<br />
by making another<br />
artwork.<br />
• Understands that<br />
there are different<br />
types of portraiture.<br />
46 <strong>Exploring</strong> visual arts www.ricpublications.com.au
Roman helmet<br />
©R.I.C. Publications<br />
Low Resolution Images<br />
Display Copy<br />
R.I.C. Publications ® —www.ricpublications.com.au <strong>Exploring</strong> visual arts 47
Flower art<br />
DURATION<br />
Two lessons<br />
TASK<br />
Make a print of a vase of flowers using various paper tubes dipped in black paint; use<br />
coloured dye to paint the completed print.<br />
Materials<br />
✓✓ reference pictures of still life of vases<br />
of flowers<br />
✓✓ thick strips of card<br />
✓✓ paper tubes of various sizes<br />
✓✓ black paint<br />
LESSON 1<br />
1. Look at various artworks depicting<br />
vases of flowers as still life subject<br />
matter by artists such as Vincent<br />
Van Gogh and Margaret Preston. The<br />
students use these reference pictures<br />
to assist them to create their own<br />
artwork.<br />
2. Dip thick card strips into black paint<br />
and use the edge to create a print of a<br />
vase. Draw a line to represent the table<br />
top just above the bottom of the vase.<br />
3. Use the card strips and paper tubes to<br />
create pattern prints on the vase.<br />
4. Print the stems coming out of the<br />
vase and use paper tubes to create<br />
flower heads and petals. Squeeze round<br />
paper tubes at the edges to make leaf<br />
shapes. Leave print to dry.<br />
Evaluation<br />
✓✓<br />
✓✓<br />
✓✓<br />
✓✓<br />
cartridge paper<br />
brushes<br />
water and containers<br />
edicol dye<br />
Lesson 2<br />
Paint the finished print in bright colours<br />
using edicol dye. The students may<br />
also paint the background if they wish.<br />
This looks most effective if a colour is<br />
chosen that has not been used for the<br />
flowers or vase.<br />
<strong>Art</strong>s ideas <strong>Art</strong>s skills and processes <strong>Art</strong>s responses <strong>Art</strong>s in society<br />
• Develops ideas from<br />
stimulus material.<br />
©R.I.C. Publications<br />
Low Resolution Images<br />
Display Copy<br />
• Uses effective<br />
printing techniques<br />
to create an image.<br />
• Evaluates own work<br />
and that of others.<br />
• Discusses the use<br />
of flowers as still<br />
life subjects in art.<br />
• Discusses how<br />
some artists have<br />
used flowers as<br />
subject matter.<br />
48 <strong>Exploring</strong> visual arts www.ricpublications.com.au
Flower art<br />
©R.I.C. Publications<br />
Low Resolution Images<br />
Display Copy<br />
R.I.C. Publications ® —www.ricpublications.com.au <strong>Exploring</strong> visual arts 49
Fruit dissection<br />
DURATION<br />
Two lessons<br />
TASK:<br />
Draw and colour a selection of dissected fruits.<br />
Materials<br />
✓✓ reference pictures of still life using food<br />
by various artists such as Matisse<br />
(still life with oranges), Picasso<br />
(tomato plant) and Cauchois (still life<br />
with pomegranate)<br />
✓✓ a variety of fruit, such as oranges,<br />
apples, lemon, kiwifruit, watermelon<br />
and strawberries, cut in half for the<br />
students to observe<br />
LESSON 1<br />
1. Look at and discuss images of a variety<br />
of still life paintings with fruit.<br />
2. Look at and discuss the selection of<br />
dissected fruit. Discuss the shapes<br />
and colours and the patterns of the<br />
seeds that can be seen inside.<br />
3. The students then compose their own<br />
picture using some of the fruit they<br />
have observed. Encourage them to use<br />
the whole page and fill in any smaller<br />
areas with stems and leaves. Fruits of<br />
various colours and differing shapes<br />
look most effective.<br />
Evaluation<br />
✓✓<br />
✓✓<br />
✓✓<br />
✓✓<br />
✓✓<br />
✓✓<br />
✓✓<br />
cartridge paper<br />
lead pencils<br />
erasers<br />
black permanent markers<br />
watercolour pencils<br />
brushes<br />
water and containers<br />
Lesson 2<br />
1. Once students are satisfied with their<br />
design, they use watercolour pencils to<br />
colour the artwork. Darker shades of<br />
colour should be used on the outside<br />
edges of the fruit and leaves to create<br />
a three-dimensional effect.<br />
2. Choose one colour to complete the<br />
background, preferably one that has<br />
not been used for the fruit.<br />
3. Paint the watercolour pencil area<br />
carefully with water and allow to dry.<br />
<strong>Art</strong>s ideas <strong>Art</strong>s skills and processes <strong>Art</strong>s responses <strong>Art</strong>s in society<br />
• Develops ideas from<br />
stimulus materials.<br />
©R.I.C. Publications<br />
Low Resolution Images<br />
Display Copy<br />
• Uses shape and<br />
form to create a<br />
composition.<br />
• Uses watercolour<br />
pencils effectively.<br />
• Analyses choices<br />
made and the<br />
elements and<br />
principles used to<br />
create own artwork.<br />
• Understands the<br />
importance of food<br />
as a still life art<br />
subject.<br />
• Identifies artists<br />
who are well known<br />
for using food as a<br />
subject matter in<br />
their art.<br />
50 <strong>Exploring</strong> visual arts www.ricpublications.com.au
Fruit dissection<br />
©R.I.C. Publications<br />
Low Resolution Images<br />
Display Copy<br />
R.I.C. Publications ® —www.ricpublications.com.au <strong>Exploring</strong> visual arts 51
Lighthouse silhouette<br />
DURATION<br />
One lesson<br />
TASK<br />
Create a collage of a lighthouse silhouette using paper.<br />
Materials<br />
✓✓ A3 orange paper or card<br />
✓✓ black, dark blue and yellow paper<br />
✓✓ lead pencils<br />
✓✓ erasers<br />
✓✓ rulers<br />
✓✓ scissors<br />
✓✓ glue<br />
✓✓ template on page 75 (optional)<br />
LESSON<br />
1. Draw a lighthouse shape on black paper and a base of rocks on which the lighthouse is<br />
standing. Ensure that the lighthouse is tall enough to come near the top of the orange card.<br />
The template on page 75 may be used if desired.<br />
2. Cut the silhouette out carefully and then cut out the windows. Glue about 5 cm up from the<br />
base of the orange card, but do not glue the top half of the lighthouse down.<br />
3. Draw wave shapes on the dark blue card, carefully tear out and glue so that the waves<br />
overlap the bottom edge of the lighthouse. (Tearing creates white edges on the waves for a<br />
greater 3-D effect.)<br />
4. Draw a large circle shape on the yellow paper, cut out and glue behind the top half of the<br />
lighthouse.<br />
5. Glue the top of the lighthouse on top of the yellow circle and allow to dry.<br />
Evaluation<br />
<strong>Art</strong>s ideas <strong>Art</strong>s skills and processes <strong>Art</strong>s responses <strong>Art</strong>s in society<br />
• Develops ideas<br />
to create an<br />
artwork based on a<br />
particular theme.<br />
©R.I.C. Publications<br />
Low Resolution Images<br />
Display Copy<br />
• Selects, creates<br />
and uses shapes.<br />
• Uses paper to<br />
create a collage.<br />
• Evaluates own work<br />
and that of others.<br />
• Understands that<br />
skills learnt in visual<br />
arts can assist us<br />
in other parts of our<br />
lives; for example, in<br />
maths.<br />
52 <strong>Exploring</strong> visual arts www.ricpublications.com.au
Lighthouse silhouette<br />
©R.I.C. Publications<br />
Low Resolution Images<br />
Display Copy<br />
R.I.C. Publications ® —www.ricpublications.com.au <strong>Exploring</strong> visual arts 53
Newspaper tree collage<br />
DURATION<br />
Two lessons<br />
TASK<br />
Create a collage of a tree using coloured paper and newspaper.<br />
Materials<br />
✓✓ A4 cartridge paper<br />
✓✓ brown and black paper<br />
✓✓ light and dark shades of green paper<br />
✓✓<br />
newspaper (The classifieds section<br />
works best as its predominantly black<br />
and white and has small print.)<br />
LESSON 1<br />
1. Cut the newspaper into small squares<br />
(approximately 2 cm x 2 cm) and glue<br />
onto the cartridge paper so that there<br />
are no white gaps.<br />
2. On the brown paper, draw a sloping<br />
shape for the ground or to represent<br />
sandhills. The slope should cover<br />
somewhat less than one-quarter of<br />
the height of the newspaper-covered<br />
cartridge paper. Cut to fit the<br />
newspaper background and glue onto<br />
the bottom edge of the newspaper<br />
sheet.<br />
3. Mount onto black card.<br />
Evaluation<br />
Lesson 2<br />
1. Draw a tree trunk, branches and tree<br />
roots onto the black paper. Cut out and<br />
glue onto the newspaper background.<br />
2. Draw a variety of leaf shapes onto the<br />
light and dark green paper. Cut out and<br />
glue onto the ends of the branches. To<br />
make the collage look most effective,<br />
glue some of the outer leaves extending<br />
over the black mounting card.<br />
<strong>Art</strong>s ideas <strong>Art</strong>s skills and processes <strong>Art</strong>s responses <strong>Art</strong>s in society<br />
• Generates ideas<br />
based on a<br />
particular theme.<br />
• Uses a variety of<br />
paper to create a<br />
collage.<br />
✓✓<br />
✓✓<br />
✓✓<br />
✓✓<br />
✓✓<br />
lead pencils<br />
erasers<br />
scissors<br />
glue<br />
black card for mounting<br />
©R.I.C. Publications<br />
Low Resolution Images<br />
Display Copy<br />
• Evaluates own<br />
artwork and that of<br />
others.<br />
• Understands<br />
that artwork<br />
can be created<br />
from everyday<br />
objects, such as<br />
newspapers.<br />
54 <strong>Exploring</strong> visual arts www.ricpublications.com.au
Newspaper tree collage<br />
©R.I.C. Publications<br />
Low Resolution Images<br />
Display Copy<br />
R.I.C. Publications ® —www.ricpublications.com.au <strong>Exploring</strong> visual arts 55
Space circle<br />
DURATION<br />
One lesson<br />
TASK<br />
Draw and colour a space scene on a circular piece of paper using oil pastels.<br />
Materials<br />
✓✓ black paper circle (approximately 30 cm in diameter)<br />
✓✓ oil pastels in various colours, including white<br />
LESSON<br />
1. Brainstorm the objects that can be seen in space. Research to find images of these<br />
to generate ideas. (The students, given sufficient time, may complete this activity as a<br />
homework exercise.) The students will use these ideas to create their own space scene.<br />
2. At the bottom edge of the circle, draw a semi circular planet shape in the foreground. The<br />
planet should cover about one-quarter of the circle.<br />
3. Colour the planet using a selection of similar shades of colours, blending them.<br />
4. Draw additional planet and moon shapes and use the same blending technique to colour<br />
them.<br />
5. Use white oil pastel to ‘dot’ the background to create a star effect.<br />
Evaluation<br />
<strong>Art</strong>s ideas <strong>Art</strong>s skills and processes <strong>Art</strong>s responses <strong>Art</strong>s in society<br />
• Develops ideas<br />
from brainstorming<br />
sessions.<br />
• Uses oil pastels<br />
effectively to create<br />
a specific effect.<br />
• Evaluates own<br />
artwork and that of<br />
others.<br />
• Understands art<br />
terms, such as<br />
background and<br />
foreground, which<br />
relate to position.<br />
©R.I.C. Publications<br />
Low Resolution Images<br />
Display Copy<br />
56 <strong>Exploring</strong> visual arts www.ricpublications.com.au
Space circle<br />
©R.I.C. Publications<br />
Low Resolution Images<br />
Display Copy<br />
R.I.C. Publications ® —www.ricpublications.com.au <strong>Exploring</strong> visual arts 57
Wasteland<br />
DURATION<br />
Two lessons<br />
TASK<br />
Create a collage of a dry desert scene using paper.<br />
Materials<br />
✓✓ A3 yellow card<br />
✓✓ light brown paper<br />
✓✓ fine black markers<br />
Evaluation<br />
<strong>Art</strong>s ideas <strong>Art</strong>s skills and processes <strong>Art</strong>s responses <strong>Art</strong>s in society<br />
• Generates ideas<br />
based on a<br />
particular theme.<br />
✓✓<br />
✓✓<br />
✓✓<br />
LESSON 1<br />
1. Cut a strip of light brown paper the<br />
same width and approximately a third<br />
of the height of the yellow card.<br />
2. Draw a long hill shape on the brown<br />
paper. Cut out and glue onto the middle<br />
of the yellow paper.<br />
3. Use the remainder of the brown paper<br />
to tear various sizes of ‘cracked mud’<br />
shapes. Glue these on, leaving a space<br />
between them, starting with smaller<br />
ones just beneath the hillscape and<br />
progressing to larger ones near the<br />
bottom of the yellow card.<br />
• Uses paper to<br />
create a collage<br />
image.<br />
lead pencils<br />
erasers<br />
glue<br />
Lesson 2<br />
1. Draw a dead tree using the fine black<br />
marker on the light brown hill shape.<br />
2. Cut out a circle from orange paper and<br />
glue it onto the sky area of the picture.<br />
• Evaluates own<br />
artwork and that of<br />
others.<br />
✓✓<br />
✓✓<br />
scissors<br />
orange paper<br />
• Understands<br />
how visual arts<br />
can represent<br />
environmental<br />
issues.<br />
©R.I.C. Publications<br />
Low Resolution Images<br />
Display Copy<br />
58 <strong>Exploring</strong> visual arts www.ricpublications.com.au
Wasteland<br />
©R.I.C. Publications<br />
Low Resolution Images<br />
Display Copy<br />
R.I.C. Publications ® —www.ricpublications.com.au <strong>Exploring</strong> visual arts 59
Polar bear<br />
DURATION<br />
One lesson<br />
TASK<br />
Draw a polar bear and its Arctic surroundings using chalk pastels.<br />
Materials<br />
✓✓ reference pictures of polar bears<br />
✓✓ A3 dark blue card<br />
✓✓ white, cream, blue and black chalk pastels<br />
✓✓ spray fixative<br />
LESSON<br />
1. Look at reference pictures of polar bears and discuss their features and the environment<br />
they live in. Revise cool colours (white, blue, green, purple) and how they can be used to<br />
create a cold climate landscape.<br />
2. The students use the reference pictures to assist them as they complete their own drawing<br />
of a polar bear in the centre of the dark blue card.<br />
3. Use the white chalk pastel to colour the polar bear, cream along the top of the bear’s back<br />
and light blue for shadows near the bear’s legs. Add nose, eyes and ear features carefully,<br />
using black pastel.<br />
4. Draw an iceberg for the polar bear to stand on and other icebergs in the background and<br />
foreground, blending white and blue chalk pastels when colouring.<br />
5. Draw a black horizon line to separate the water from the sky, blending it into the water<br />
section of the picture. Use black chalk pastel to colour the top section of the sky, blending it<br />
gradually downwards from darker to lighter.<br />
6. Use light blue chalk pastel to draw water ripple lines and white chalk pastel to complete dot<br />
shapes in the sky to represent stars.<br />
7. Spray with fixative so that the picture does not smudge.<br />
Evaluation<br />
<strong>Art</strong>s ideas <strong>Art</strong>s skills and processes <strong>Art</strong>s responses <strong>Art</strong>s in society<br />
• Develops ideas from<br />
stimulus materials.<br />
©R.I.C. Publications<br />
Low Resolution Images<br />
Display Copy<br />
• Uses chalk pastels<br />
effectively.<br />
• Responds to images<br />
by creating another<br />
artwork.<br />
• Understands that<br />
artwork can be<br />
used to record<br />
information, such<br />
as that found<br />
in botanical and<br />
wildlife pictures.<br />
60 <strong>Exploring</strong> visual arts www.ricpublications.com.au
Polar bear<br />
©R.I.C. Publications<br />
Low Resolution Images<br />
Display Copy<br />
R.I.C. Publications ® —www.ricpublications.com.au <strong>Exploring</strong> visual arts 61
Snowflake<br />
DURATION<br />
Two lessons<br />
TASK<br />
Create a colourful collage background for a Christmas snowflake centrepiece.<br />
Materials<br />
✓✓ A4 cartridge paper<br />
✓✓ coloured origami paper<br />
✓✓ glue<br />
LESSON 1<br />
Cut squares, approximately 2 cm x 2<br />
cm, from various colours of origami<br />
paper. Glue onto the cartridge paper,<br />
leaving no gaps. Ensure all edges of the<br />
squares are glued down flat.<br />
Evaluation<br />
Variations<br />
✓✓<br />
✓✓<br />
scissors<br />
white paper circle<br />
(approximately 15 cm diameter)<br />
folded segment<br />
edges<br />
<strong>Art</strong>s ideas <strong>Art</strong>s skills and processes <strong>Art</strong>s responses <strong>Art</strong>s in society<br />
• Develops ideas<br />
to create images<br />
based on a<br />
particular theme.<br />
• Uses shapes to<br />
create a collage<br />
image.<br />
Lesson 2<br />
1. Fold the white paper circle in half, three<br />
times (eighths). Cut shapes from the<br />
folded segment edges.<br />
Open out the snowflake shape and glue<br />
onto the coloured square background.<br />
• Evaluates own<br />
artwork and that of<br />
others.<br />
• Discusses the<br />
different artwork<br />
that can be created<br />
at Christmas time<br />
(e.g. cards, wrapping<br />
paper).<br />
• Use coloured paper in only cool colours to create the background, reinforcing knowledge<br />
of cool colours or to support learning about the seasons (winter), climate or harsh<br />
environments.<br />
• Use tissue paper instead of origami paper to create a more ‘subtle’, softer background.<br />
2.<br />
©R.I.C. Publications<br />
Low Resolution Images<br />
Display Copy<br />
62 <strong>Exploring</strong> visual arts www.ricpublications.com.au
Snowflake<br />
©R.I.C. Publications<br />
Low Resolution Images<br />
Display Copy<br />
R.I.C. Publications ® —www.ricpublications.com.au <strong>Exploring</strong> visual arts 63
Star etching<br />
DURATION<br />
Two lessons<br />
TASK<br />
Create a decorative star on a self-made etching sheet.<br />
Materials<br />
✓✓ star template on page 76 photocopied onto cartridge paper<br />
✓✓ yellow, orange and red oil pastels<br />
✓✓ gold paint<br />
✓✓ wooden skewer<br />
✓✓ black paper or card<br />
LESSON 1<br />
1. Colour the photocopied star using<br />
small sections of yellow, orange and red<br />
oil pastel, ensuring there are no white<br />
gaps. Cut out the star shape.<br />
2. Paint the star with thick gold paint and<br />
leave to dry.<br />
Evaluation<br />
Lesson 2<br />
1. Use the wooden skewer to scratch out<br />
a variety of circle shapes in various<br />
sizes in the coloured sections.<br />
2. Glue the star onto black card.<br />
<strong>Art</strong>s ideas <strong>Art</strong>s skills and processes <strong>Art</strong>s responses <strong>Art</strong>s in society<br />
• Generates ideas<br />
based on a<br />
particular theme.<br />
• Uses pattern to<br />
create a decorative<br />
effect.<br />
• Evaluates own<br />
artwork and that of<br />
others.<br />
• Discusses how<br />
visual arts can be<br />
used at Christmas<br />
for items, such as<br />
cards and wrapping<br />
paper.<br />
©R.I.C. Publications<br />
Low Resolution Images<br />
Display Copy<br />
64 <strong>Exploring</strong> visual arts www.ricpublications.com.au
Star etching<br />
©R.I.C. Publications<br />
Low Resolution Images<br />
Display Copy<br />
R.I.C. Publications ® —www.ricpublications.com.au <strong>Exploring</strong> visual arts 65
Teacher resources:<br />
Sample visual arts assessment checklist<br />
7<br />
Year<br />
Assessment<br />
checklist<br />
25/02/2010<br />
Date<br />
art project<br />
Develops ideas from reference materials.<br />
Uses oil pastels effectively to create a<br />
specific effect.<br />
Responds to images by creating another<br />
artwork.<br />
Understands artwork can be used to record<br />
information.<br />
Develops ideas from reference materials.<br />
Uses chalk pastels effectively.<br />
Responds to images by making another<br />
artwork.<br />
Identifies artists who are well known for<br />
creating landscape pictures.<br />
Develops ideas from reference materials.<br />
Creates a symmetrical image.<br />
Responds to images by making another<br />
artwork.<br />
AI ASP AR AIS AI ASP AR AIS AI ASP AR AIS<br />
STUDENTS Green tree frog Boab landscape Chinese dragon<br />
Stuart<br />
David<br />
Ally<br />
Steve<br />
Beau<br />
Lilly<br />
Mona<br />
Abdul<br />
Priya<br />
James<br />
Elsie<br />
Faisal<br />
Michael<br />
Sasha<br />
Troy<br />
Melissa<br />
Josh<br />
Xin<br />
Pippa<br />
Kaine<br />
Recognises that artworks have different<br />
purposes and meanings in different cultures.<br />
©R.I.C. Publications<br />
Low Resolution Images<br />
Display Copy<br />
KEY: demonstrated still developing AI—<strong>Art</strong>s ideas AR—<strong>Art</strong>s responses ASP—<strong>Art</strong>s skills and processes AIS—<strong>Art</strong>s in society<br />
66 <strong>Exploring</strong> visual arts R.I.C. Publications ® —www.ricpublications.com.au
Teacher resources:<br />
Blank visual arts assessment checklist<br />
Year<br />
Assessment<br />
checklist<br />
STUDENTS<br />
Date<br />
art project<br />
AI ASP AR AIS AI ASP AR AIS AI ASP AR AIS<br />
©R.I.C. Publications<br />
Low Resolution Images<br />
Display Copy<br />
KEY: demonstrated still developing AI—<strong>Art</strong>s ideas AR—<strong>Art</strong>s responses ASP—<strong>Art</strong>s skills and processes AIS—<strong>Art</strong>s in society<br />
R.I.C. Publications ® —www.ricpublications.com.au <strong>Exploring</strong> visual arts 67
Teacher resources:<br />
Student self-assessment sheet<br />
Name:<br />
Date:<br />
Title of artwork:<br />
Materials used:<br />
How I created my artwork:<br />
The part of the art activity I enjoyed most was:<br />
My opinion of the final result:<br />
©R.I.C. Publications<br />
Low Resolution Images<br />
Display Copy<br />
Star rating of my artwork:<br />
68 <strong>Exploring</strong> visual arts R.I.C. Publications ® —www.ricpublications.com.au
Teacher resources:<br />
Looking at art<br />
Description:<br />
What do you see?<br />
Use as a worksheet for the students to complete when looking at a particular piece of artwork, or as a poster to aid discussion of artworks.<br />
Analysis:<br />
How is the picture or sculpture organised?<br />
colour<br />
line<br />
texture<br />
foreground<br />
middle-ground<br />
background<br />
©R.I.C. Publications<br />
Low Resolution Images<br />
Display Copy<br />
Interpretation: What is the artist showing or telling us?<br />
Judgment:<br />
Do you like or dislike the artwork? Why?<br />
R.I.C. Publications ® —www.ricpublications.com.au <strong>Exploring</strong> visual arts 69
Teacher resources:<br />
Elements of art labels<br />
Different tools make different kinds of lines.<br />
Lines can be straight, curved, wavy, thick, thin, long or<br />
short. Lines can show size, colour, shape and direction.<br />
Lines can change.<br />
Texture is how the surface of something looks or<br />
feels. Texture can be real or implied.<br />
Every colour can be bright, dull, dark or light.<br />
Colours can change when mixed together.<br />
Colours can show and make us feel emotion.<br />
Form is three-dimensional and takes up space.<br />
Space exists around us.<br />
We use illusions to make space in art.<br />
Tone refers to darkness and lightness in a<br />
painting or drawing.<br />
©R.I.C. Publications<br />
Low Resolution Images<br />
Display Copy<br />
Enlarge and display these elements of art explanations around the room near artworks that depict each particular element.<br />
Students become familiar with the terminology if it is displayed near a visual reference.<br />
Shapes come in many types and sizes.<br />
Shapes can change size, colour, texture and pattern.<br />
Shapes can change into symbols.<br />
70 <strong>Exploring</strong> visual arts R.I.C. Publications ® —www.ricpublications.com.au
Teacher resources:<br />
Reward ribbons<br />
Photocopy onto coloured paper and pin onto displayed artwork.<br />
©R.I.C. Publications<br />
Low Resolution Images<br />
Display Copy<br />
R.I.C. Publications ® —www.ricpublications.com.au <strong>Exploring</strong> visual arts 71
Teacher resources:<br />
Activity card samples—1<br />
Use coloured paper scraps to<br />
create a collage of all your<br />
favourite foods.<br />
Use a large paper plate<br />
and coloured paper to<br />
make a mask.<br />
©R.I.C. Publications<br />
Low Resolution Images<br />
Display Copy<br />
Activity cards, such as the examples provided, can be completed by the students as ‘early finisher’ tasks, or as part of their art project.<br />
Photocopy onto card and laminate for durability.<br />
72 <strong>Exploring</strong> visual arts R.I.C. Publications ® —www.ricpublications.com.au
Teacher resources:<br />
Activity card samples—2<br />
Design a new CD cover for your favourite band or singer.<br />
Activity cards, such as the examples provided, can be completed by the students as ‘early finisher’ tasks, or as part of their art project.<br />
Photocopy onto card and laminate for durability.<br />
Invent a new surf logo.<br />
Give it a name and colour<br />
it using eye-catching colours.<br />
©R.I.C. Publications<br />
Low Resolution Images<br />
Display Copy<br />
R.I.C. Publications ® —www.ricpublications.com.au <strong>Exploring</strong> visual arts 73
Teacher resources:<br />
Scarecrow body – template<br />
©R.I.C. Publications<br />
Low Resolution Images<br />
Display Copy<br />
Enlarge to appropriate size if necessary.<br />
74 <strong>Exploring</strong> visual arts R.I.C. Publications ® —www.ricpublications.com.au
Teacher resources:<br />
Lighthouse silhouette – template<br />
Enlarge to appropriate size if necessary.<br />
©R.I.C. Publications<br />
Low Resolution Images<br />
Display Copy<br />
R.I.C. Publications ® —www.ricpublications.com.au <strong>Exploring</strong> visual arts 75
Teacher resources:<br />
Star etching – template<br />
©R.I.C. Publications<br />
Low Resolution Images<br />
Display Copy<br />
Enlarge to appropriate size if necessary.<br />
76 <strong>Exploring</strong> visual arts R.I.C. Publications ® —www.ricpublications.com.au
©R.I.C. Publications<br />
Low Resolution Images<br />
Display Copy
©R.I.C. Publications<br />
Low Resolution Images<br />
Display Copy