
Create successful ePaper yourself
Turn your PDF publications into a flip-book with our unique Google optimized e-Paper software.
DIY<br />
Step 14 - Insert 6mm x 100mm screws through<br />
the holes in the wall plate and hang galvanised or<br />
plastic washers on the end. Use enough washers<br />
to ensure a 10mm gap between the wall and the<br />
wall plate.<br />
Step 4 - Measure 75mm from each side of the<br />
join and mark the wood. Then measure 150mm<br />
from each side of the join and again, mark the<br />
wood. From each of the four marks, use a set<br />
square to draw a straight vertical line.<br />
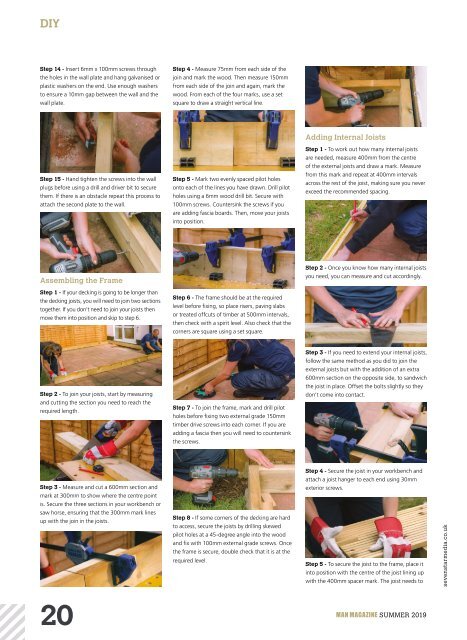
Adding Internal Joists<br />
Step 1 - To work out how many internal joists<br />
are needed, measure 400mm from the centre<br />
of the external joists and draw a mark. Measure<br />
Step 15 - Hand tighten the screws into the wall<br />
plugs before using a drill and driver bit to secure<br />
them. If there is an obstacle repeat this process to<br />
attach the second plate to the wall.<br />
Step 5 - Mark two evenly spaced pilot holes<br />
onto each of the lines you have drawn. Drill pilot<br />
holes using a 6mm wood drill bit. Secure with<br />
100mm screws. Countersink the screws if you<br />
are adding fascia boards. Then, move your joists<br />
into position.<br />
from this mark and repeat at 400mm intervals<br />
across the rest of the joist, making sure you never<br />
exceed the recommended spacing.<br />
Step 2 - Once you know how many internal joists<br />
Assembling the Frame<br />
you need, you can measure and cut accordingly.<br />
Step 1 - If your decking is going to be longer than<br />
the decking joists, you will need to join two sections<br />
together. If you don’t need to join your joists then<br />
move them into position and skip to step 6.<br />
Step 6 - The frame should be at the required<br />
level before fixing, so place risers, paving slabs<br />
or treated offcuts of timber at 500mm intervals,<br />
then check with a spirit level. Also check that the<br />
corners are square using a set square.<br />
Step 3 - If you need to extend your internal joists,<br />
follow the same method as you did to join the<br />
external joists but with the addition of an extra<br />
600mm section on the opposite side, to sandwich<br />
Step 2 - To join your joists, start by measuring<br />
and cutting the section you need to reach the<br />
required length.<br />
Step 7 - To join the frame, mark and drill pilot<br />
holes before fixing two external grade 150mm<br />
timber drive screws into each corner. If you are<br />
adding a fascia then you will need to countersink<br />
the screws.<br />
the joist in place. Offset the bolts slightly so they<br />
don’t come into contact.<br />
Step 4 - Secure the joist in your workbench and<br />
Step 3 - Measure and cut a 600mm section and<br />
mark at 300mm to show where the centre point<br />
is. Secure the three sections in your workbench or<br />
saw horse, ensuring that the 300mm mark lines<br />
up with the join in the joists.<br />
Step 4 - Measure 75mm from each side of the<br />
Step 8 - If some corners of the decking are hard<br />
to access, secure the joists by drilling skewed<br />
pilot holes at a 45-degree angle into the wood<br />
and fix with 100mm external grade screws. Once<br />
the frame is secure, double check that it is at the<br />
required level.<br />
attach a joist hanger to each end using 30mm<br />
exterior screws.<br />
Step 5 - To secure the joist to the frame, place it<br />
into position with the centre of the joist lining up<br />
with the 400mm spacer mark. The joist needs to<br />
sevenstarmedia.co.uk<br />
20<br />
<strong>MAN</strong> MAGAZINE SUMMER <strong>2019</strong>