Operating and Safety Instructions - Sauer
Operating and Safety Instructions - Sauer
Operating and Safety Instructions - Sauer

You also want an ePaper? Increase the reach of your titles
YUMPU automatically turns print PDFs into web optimized ePapers that Google loves.
<strong>Operating</strong> <strong>and</strong><br />
<strong>Safety</strong> <strong>Instructions</strong><br />
(Version 10.08)
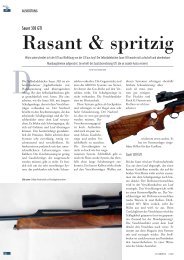
New Dimensions<br />
S 303 – superior technology, luxurious<br />
craftsmanship, perfected styling.<br />
Leading innovations from the field now<br />
set new st<strong>and</strong>ards in safety, function <strong>and</strong><br />
accuracy. Logical operations <strong>and</strong> perfect<br />
control combine for hunting success. The<br />
styling is testament to the sportsman's<br />
passion for the hunt <strong>and</strong> the result is a superior<br />
hunting rifle with the heart of a<br />
SAUER.
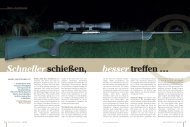
S303<br />
• A receiver milled from a solid block of metal<br />
is at its foundation. All other component<br />
parts are of modular design.<br />
• The manual cocking feature on the upper<br />
wrist provides a premium on safety in any<br />
situation. All manual operations for loading,<br />
unloading <strong>and</strong> magazine removal as well as<br />
closing or opening the breech may be<br />
performed while the gun is decocked.<br />
• The "IntraLock" firing pin safety engages<br />
automatically if the breech is not 100% in<br />
battery.<br />
• Soldered or screwed-on barrel blocks are<br />
not necessary for gas management.<br />
Additionally, the automatic loading<br />
sequence cannot influence barrel vibrations<br />
since the forward part of the barrel is fully<br />
free-floating. The S 303 has inherited the<br />
accuracy for which SAUER is famous.<br />
• The single-stage trigger sets new st<strong>and</strong>ards<br />
in its class. Creep is minimal <strong>and</strong> the shot<br />
breaks at 1,300 g like glass. With this<br />
unparalleled performance, the S 303 does<br />
as well from the blind as from the st<strong>and</strong>.<br />
• The proprietary "isi-Mount" is perfectly<br />
tailored to the needs of today's hunter. With<br />
a 100% repeatable point of impact after<br />
removal, it puts the scope lower than ever<br />
before <strong>and</strong> only two motions are needed to<br />
adjust the eye relief by ca. 1 cm.<br />
• The contrasting open sights consist of a<br />
triangular yellow rear blade <strong>and</strong> a red front<br />
bead which instinctively lead the eye to the<br />
target. The front sight is click-adjustable for<br />
windage <strong>and</strong> elevation. The optional Battue<br />
rib with its long sight line helps you make<br />
those tough snap shots.<br />
• Snow, rain, cold <strong>and</strong> a pile of thorns –<br />
"NITROBOND X" is the new steel surface<br />
treatment that scoffs at the elements. Two<br />
elaborate plasma treatments ensure<br />
uncompromising protection against rust<br />
<strong>and</strong> scratching.
Table of contents<br />
1 General instructions 2<br />
2 <strong>Safety</strong> regulations 3<br />
2.1 Safe h<strong>and</strong>ling of the rifle 3<br />
2.2 Risks for the user <strong>and</strong> how to<br />
avoid them 3<br />
2.3 Risks for other people <strong>and</strong> how to<br />
avoid them 3<br />
2.4 Ensure proper use 4<br />
2.5 Personal protective equipment 4<br />
2.6 Graphical representation of<br />
safety indications 4<br />
3 Product description 5<br />
3.1 Main parts 5<br />
3.1.1 Version with removable magazine 5<br />
3.1.2 Version with fixed fold out cover<br />
magazine 5<br />
3.2 Technical Specifications 6<br />
3.3 Main features 7<br />
3.4 Scope of delivery 7<br />
3.5 Accessories 8<br />
3.6 Extras 8<br />
3.7 Spare parts 9<br />
4 Transporting, storing <strong>and</strong><br />
shipping the rifle 9<br />
4.1 Transporting the rifle 9<br />
4.1.1 Transport in assembled condition 9<br />
4.1.2 Transport in the carrying case 10<br />
4.2 Storing the rifle 10<br />
4.3 Shipping the rifle 10<br />
5 H<strong>and</strong>ling the rifle 11<br />
5.1 Initial preparation 11<br />
5.2 Ammunition 11<br />
5.3 Loading the rifle (ready to fire) 12<br />
5.3.1 Loading from the magazine 12<br />
5.3.2 Loading from your h<strong>and</strong> 12<br />
5.3.3 Silent loading 12<br />
5.4 Discharging a shot 13<br />
5.5 Reloading during shooting 14<br />
5.6 Unloading the rifle 14<br />
5.7 Slide 15<br />
5.7.1 Open slide 15<br />
5.7.2 Close the slide 15<br />
5.7.3 Closing the slide silently 15<br />
5.8 Magazine 16<br />
5.8.1 Version with removable magazine 16<br />
5.8.2 Version with fixed fold out magazine 16<br />
5.8.3 Loading the magazine 16<br />
5.9 Trigger 17<br />
5.9.1 Rifle trigger 17<br />
5.10 Sights 17<br />
5.10.1 Height adjustment of the sight 17<br />
5.10.2 Side adjustment of the sight 18<br />
6 H<strong>and</strong> cocking 18<br />
6.1 Cocking the rifle 18<br />
6.2 Decocking rifle 19<br />
7 Dismantling 20<br />
7.1 Removing the sling attachment 20<br />
7.2 Removing the main stock 20<br />
7.3 Front stock removal 20<br />
7.4 Barrel removal 21<br />
8 Care 22<br />
8.1 General 22<br />
8.2 Cleaning the barrel 22<br />
8.3 Cleaning the slide 23<br />
8.4 External metal <strong>and</strong> wood surfaces 23<br />
9 Assembly 24<br />
9.1 Fitting the barrel 24<br />
9.2 Fitting the main stock 24<br />
9.3 Fitting the front stock 24<br />
9.4 Fitting the sling attachment 25<br />
10 Mounting telescopic isi-Mount 25<br />
10.1 Putting on the telescopic sight 25<br />
10.2 Removing telescopic sight 26<br />
10.3 Changing eye distance 26<br />
11 Malfunctions 27<br />
11.1 Detecting a malfunction 27<br />
11.2 Cause <strong>and</strong> remedy of malfunctions 28<br />
12 Spare parts 29<br />
1 GB<br />
10.08
General instructions<br />
1 General instructions<br />
Be sure to read through these instructions<br />
carefully before any manipulation on this<br />
SAUER rifle.<br />
Keep this instructions carefully with the<br />
SAUER rifle for later use.<br />
If the rifle changes h<strong>and</strong>s these instructions<br />
must be given to the new owner.<br />
Underst<strong>and</strong>ing these instructions <strong>and</strong> the<br />
technically correct implementation of the<br />
information contained therein are imperative to<br />
correct preparation <strong>and</strong> safety during h<strong>and</strong>ling,<br />
maintenance <strong>and</strong> care of this SAUER rifle.<br />
Do not use the rifle until you have fully understood<br />
all safety instructions <strong>and</strong> its h<strong>and</strong>ling procedures.<br />
Should you require further information, do not<br />
hesitate to contact your dealer, importer or the<br />
manufacturer.<br />
Please observe the local <strong>and</strong> national legislation<br />
governing the ownership, carrying <strong>and</strong> use of<br />
firearms.<br />
The owner of the rifle must have a valid firearms<br />
licence in order to buy <strong>and</strong> own the rifle.<br />
Permission to shoot the rifle is given by way of a<br />
permit.<br />
Be aware that rifles, like all firearms, are<br />
dangerous. The rifle accompanying these<br />
<strong>Operating</strong> <strong>and</strong> <strong>Safety</strong> <strong>Instructions</strong> has been sold<br />
under the express underst<strong>and</strong>ing that the<br />
manufacturer <strong>and</strong> the importer of the rifle decline<br />
any responsibility for consequences of<br />
manipulations on the rifle or use of the rifle.<br />
This applies in particular to liability for bodily harm<br />
or damage to property resulting in part or in whole<br />
to:<br />
– use with criminal intent or negligent use,<br />
– improper or careless h<strong>and</strong>ling,<br />
– defective, incorrect, h<strong>and</strong>-loaded or reloaded<br />
ammunition,<br />
– inadequate care of the rifle (e.g. corrosion,<br />
damage),<br />
– disregard of malfunctions,<br />
– resale in contradiction of regional legislation<br />
<strong>and</strong> regulations,<br />
– other circumstances beyond our direct <strong>and</strong><br />
immediate control.<br />
These limitation apply regardless of whether<br />
liability is asserted on the basis of contract,<br />
negligence or strict liability (including any failure to<br />
warn).<br />
The manufacturer <strong>and</strong> the importers are not liable<br />
for incidental or consequential damages such as<br />
loss of use of property, commercial loss or loss of<br />
earnings <strong>and</strong> profits.<br />
10.08 GB<br />
2
<strong>Safety</strong> regulations<br />
2 <strong>Safety</strong> regulations<br />
Be sure to read through these instructions<br />
carefully before each h<strong>and</strong>ling or use of this<br />
SAUER rifle <strong>and</strong> that you have understood<br />
them.<br />
2.1 Safe h<strong>and</strong>ling of the rifle<br />
• Never try to modify or convert the rifle yourself.<br />
Only use approved original accessories.<br />
• Always think of the rifle as being loaded <strong>and</strong><br />
with the safety off until you have established<br />
the opposite through the unloading procedure.<br />
• Never shoot with a rifle which has been<br />
penetrated by water, s<strong>and</strong>, dirt or other foreign<br />
bodies.<br />
• Always keep the rifle <strong>and</strong> the ammunition<br />
separate from one another, <strong>and</strong> ensure that<br />
neither is obtained by unauthorised persons or<br />
children.<br />
• Always treat your rifle as if the safety<br />
mechanisms were not functioning. The best<br />
safety precaution is a correct, well-trained <strong>and</strong><br />
safe h<strong>and</strong>ling of the rifle.<br />
• Never rely on safety mechanisms alone.<br />
<strong>Safety</strong> mechanisms are not a substitute for<br />
careful, correct <strong>and</strong> secure h<strong>and</strong>ling of the rifle.<br />
• Never store the rifle loaded, but remove the<br />
magazine <strong>and</strong> verify that there is no cartridge<br />
left in the chamber of the barrel by following<br />
the unloading procedure.<br />
• Never check the safety lock of the rifle by<br />
pulling the trigger.<br />
2.2 Risks for the user <strong>and</strong> how to avoid<br />
them<br />
• Never use the rifle under the influence of drugs<br />
or alcohol, while ill or suffering other such<br />
difficulties. These conditions can impair your<br />
powers of judgment <strong>and</strong> reflexes.<br />
• Never aim at yourself or other people.<br />
• Never place your h<strong>and</strong> in front of the muzzle,<br />
above the barrel chamber or behind the slide.<br />
• Always unload the rifle immediately after firing,<br />
before putting the rifle away, putting into a<br />
holster or h<strong>and</strong>ing it to another authorised<br />
person.<br />
• Never point the rifle at doors, panes of glass,<br />
walls, concrete, stone or flat surfaces<br />
(including water). A bullet can penetrate such<br />
surfaces or be ricocheted in an unsafe<br />
direction.<br />
• Take care not to breathe in the developing<br />
gunpowder smoke or get it into the eyes.<br />
Should this happen, stop shooting<br />
immediately.<br />
2.3 Risks for other people <strong>and</strong> how to avoid<br />
them<br />
• Never let a loaded rifle out of your h<strong>and</strong>.<br />
• Never leave the rifle unattended <strong>and</strong> protect<br />
the rifle against unauthorised access.<br />
• Never give the rifle to a person who has not<br />
thoroughly familiarised himself or herself with<br />
the safety instructions <strong>and</strong> h<strong>and</strong>ling of the rifle,<br />
by reading the corresponding instructions.<br />
3 GB<br />
10.08
<strong>Safety</strong> regulations<br />
• Always keep the muzzle of the rifle in a safe<br />
direction with all h<strong>and</strong>ling. A safe direction is<br />
towards an area where there are no people,<br />
other living beings or property that is not a<br />
recognised target.<br />
• Also make sure what lies behind your target.<br />
• Point out any dangers from noise, empty<br />
cartridges <strong>and</strong> gunpowder smoke to those<br />
present. Stop shooting immediately if such<br />
dangers occur.<br />
2.4 Ensure proper use<br />
• The owner of the rifle must ensure that it is<br />
only used for its intended purpose.<br />
• The incorrect, careless or improper use of the<br />
rifle causes risks for the life <strong>and</strong> limb of the<br />
user <strong>and</strong> for other people or living beings.<br />
2.5 Personal protective equipment<br />
• When shooting, always wear ear protection<br />
<strong>and</strong> protective glasses. Inform other people<br />
close to you about the need to wear ear<br />
protection <strong>and</strong> protective glasses.<br />
2.6 Graphical representation of safety<br />
indications<br />
In the individual sections of these<br />
instructions, the following safety indications<br />
alert you to risks:<br />
DANGER!<br />
Information on dangers, which if not<br />
scrupulously observed, will result in immediate<br />
severe bodily harm or death.<br />
WARNING!<br />
Information on dangers, which if not<br />
scrupulously observed, can lead to severe<br />
bodily harm or death.<br />
CAUTION!<br />
Information on dangers, which if not<br />
scrupulously observed, can lead to bodily harm,<br />
damage to property <strong>and</strong> damage to the rifle.<br />
CAUTION!<br />
Information on technical requirements, which if<br />
not scrupulously observed, can lead to damage<br />
to the rifle.<br />
• Each of these safety indications consists of:<br />
– a headline with a signal word, a signal<br />
pictorial <strong>and</strong> a corresponding colour code<br />
– a description of the danger type <strong>and</strong> source<br />
– a description of possible consequences if<br />
the safety indications message is ignored<br />
– a description of actions or regulations for<br />
danger prevention<br />
10.08 GB<br />
4
Product description<br />
3 Product description<br />
3.1 Main parts<br />
3.1.1 Version with removable magazine<br />
800<br />
Fig. 1 Figure with closed slide<br />
500<br />
600<br />
3.1.2 Version with fixed fold out cover magazine<br />
100 400<br />
200<br />
Item Description Item Description Item Description<br />
100 Receiver 400 Slide 700 Front stock<br />
200 Barrel 500 Trigger mechanism 800 Main stock<br />
300 Gas chamber with<br />
sights<br />
600 Magazine<br />
800<br />
Fig. 2 Figure with open slide<br />
100 400<br />
200<br />
500<br />
Item Description Item Description Item Description<br />
100 Receiver 400 Slide 700 Front stock<br />
200 Barrel 500 Trigger mechanism 800 Main stock<br />
300 Gas chamber with<br />
sights<br />
600 Spring magazine<br />
600<br />
5 GB<br />
10.08<br />
700<br />
700<br />
300<br />
300
Product description<br />
3.2 Technical Specifications<br />
Functional principle Self loading rifle/gas pressure loader<br />
Action type Rotary bolt lock, locking in barrel<br />
Calibre Medium:<br />
7x64; .30-06; 8x57 IS; 9.3x62<br />
Magnum:<br />
.300 Win. Mag.<br />
Length, overall approx. 1065 mm (with barrel length 510 mm)<br />
approx. 1115 mm (with barrel length 560 mm)<br />
Barrel length Medium: 510, 560 mm<br />
Magnum: 510, 560 mm<br />
Stock length (Monte Carlo stock) approx. 355 mm<br />
Stock indentation (Monte Carlo<br />
stock); from top edge of receiver<br />
Stock offset 5 mm<br />
Subject to change without notice<br />
Front: 32 mm<br />
Center: 25 mm<br />
Back: 50 mm<br />
Trigger weight approx. 13 N - 15 N<br />
Magazine content Medium: 2 rounds<br />
Magnum: 2 rounds<br />
Replacement magazine Medium: 5 rounds / 2 rounds<br />
Magnum: 5 rounds / 2 rounds Magnum:<br />
Weight without telescopic sights,<br />
510 mm barrel length <strong>and</strong> Monte<br />
Carlo stock.<br />
Medium: approx. 3,25 kg<br />
Magnum: approx. 3.25 kg<br />
10.08 GB<br />
6
Product description<br />
3.3 Main features<br />
The SAUER 303 is a high precision hunting rifle<br />
built to the latest technology. It is a self-loading<br />
rifle with manual clamping mechanism <strong>and</strong> flint<br />
trigger that is simple <strong>and</strong> safe to operate.<br />
The housing is prepared for the installation of the<br />
new SAUER telescopic sight isiMount. In addition<br />
the modular design allows the installation of<br />
various main stocks, as well alternative rear sight<br />
devices or optical sight correction.<br />
The SAUER 303 is also available with left-h<strong>and</strong><br />
stocks, so that by its ability to be operated from<br />
both sides <strong>and</strong> the controlled case ejection, which<br />
is oblivious to left-h<strong>and</strong> shooters, a "real" left h<strong>and</strong><br />
rifle is made available.<br />
Fig. 3, St<strong>and</strong>ard scope of delivery<br />
3.4 Scope of delivery<br />
The st<strong>and</strong>ard scope of delivery includes:<br />
– 1 x rifle<br />
– 1 x magazine<br />
– 1 x special socket spanner (2 parts)<br />
– 1 x Torx spanner to dismantle the front stock<br />
<strong>and</strong> barrel.<br />
– 1 x <strong>Operating</strong> <strong>and</strong> <strong>Safety</strong> <strong>Instructions</strong> manual<br />
– 1 x Warranty card<br />
7 GB<br />
10.08
Product description<br />
3.5 Accessories<br />
Your SAUER 303 is a modular hunting rifle which<br />
can be easily adapted to new uses at a later date.<br />
The complete <strong>and</strong> current option selection <strong>and</strong><br />
individual possibilities can be found in the price<br />
list, the SAUER hunting catalogue or most<br />
conveniently on the SAUER homepage<br />
(www.sauer.de). There you will also find all<br />
telescopic sight assemblies, replacement<br />
magazines, sights <strong>and</strong> any other rifle accessories.<br />
In addition <strong>Sauer</strong> & Sohn offers accessories for<br />
the perfect transport <strong>and</strong> stylish presentation of<br />
your rifle <strong>and</strong> for successful hunting. More precise<br />
information can be found in the catalogue or on<br />
the internet (www.sauer.de).<br />
3.6 Extras<br />
Hunting track - Battue<br />
For instinct shooting using the open sight, the<br />
hunting track -Battue is offered which can be<br />
retrofitted on every SAUER 303.<br />
Procedure:<br />
1. Remove front stock (see section 7.3).<br />
2. Remove the barrel (see section 7.4).<br />
3. Unscrew the slotted screw on the sight base in<br />
front of the rear sight <strong>and</strong> slide the rear sight<br />
out of the base from the side (see Fig. 4).<br />
10.08 GB<br />
Fig. 4<br />
4. Slide the hunting track in the base from the<br />
side <strong>and</strong> attach using the screw on front of the<br />
track with the correct<br />
SW 1.5 mm Allen key (see Fig. 5).<br />
Fig. 5<br />
5. Mount the barrel (see section 9.1). Be careful<br />
that the rear end of the hunting track enters the<br />
groove of the housing (see Fig. 6).<br />
8
Product description Transporting, storing, shipping<br />
Fig. 6<br />
6. Shoot the rifle using the open sight (see<br />
section 5.10).<br />
3.7 Spare parts<br />
J. P. <strong>Sauer</strong> & Sohn GmbH only supplies to<br />
authorised dealers in Germany or to the<br />
respective SAUER importer abroad. For ordering<br />
spare parts always contact your dealer who will<br />
then forward your order accordingly to the<br />
importer (abroad) or <strong>Sauer</strong> & Sohn (Germany). To<br />
enable the speedy <strong>and</strong> focused processing of your<br />
order, always provide the following information<br />
when ordering spare parts:<br />
– Model, caliber, barrel length, extras<br />
– Rifle number<br />
– Item number from the spare parts list<br />
– Designation of the desired spare part<br />
4 Transporting, storing <strong>and</strong><br />
shipping the rifle<br />
4.1 Transporting the rifle<br />
WARNING!<br />
Careless actions may cause uncontrolled<br />
discharge of shot<br />
May lead to death or severe injuries<br />
• For your own safety <strong>and</strong> for the safety of<br />
others, always transport the rifle in the<br />
unloaded condition, <strong>and</strong> decocked.<br />
• Never carry a cocked rifle containing a round<br />
in the barrel chamber.<br />
• Always carry the rifle in such a manner that,<br />
should you fall or otherwise slip, you are able<br />
to control the direction of the muzzle.<br />
• Transport the rifle separate from the<br />
ammunition in a locked carrying case.<br />
• The rifle <strong>and</strong> ammunition must not be<br />
accessible to children <strong>and</strong> other inexperienced<br />
or unauthorized persons.<br />
• Ensure that you comply with all regional <strong>and</strong><br />
national laws relating to the transport of<br />
firearms.<br />
4.1.1 Transport in assembled condition<br />
Procedure:<br />
1. Decock the rifle (see section 6.2).<br />
2. Remove / open the magazine <strong>and</strong> empty if<br />
necessary (see section 5.8.1).<br />
3. Unload the rifle (see section 5.6).<br />
4. For models with fixed fold out cover magazine,<br />
close the empty magazine (see section 5.8.2).<br />
5. Remove the sling attachment if necessary<br />
(see section 7.1).<br />
6. Clean the rifle (see section 8).<br />
9 GB<br />
10.08
Transporting, storing, shipping<br />
4.1.2 Transport in the carrying case<br />
Procedure:<br />
1. Decock the rifle (see section 6.2).<br />
2. Remove/open the magazine <strong>and</strong> empty if<br />
necessary (see section 5.8.1).<br />
3. Unload the rifle (see section 5.6).<br />
4. For models with fixed fold out cover magazine,<br />
close the empty magazine.<br />
5. Remove the sight correction (see section<br />
10.2).<br />
6. Remove the sling attachment (see section 7.1).<br />
7. Clean the rifle (see section 8).<br />
8. Remove the main stock (see section 7.2).<br />
4.2 Storing the rifle<br />
• Never leave the rifle lying around when not in<br />
use.<br />
• The rifle <strong>and</strong> ammunition must not be<br />
accessible to children <strong>and</strong> other inexperienced<br />
or unauthorised persons.<br />
• Clean the rifle <strong>and</strong> keep it in a locked case<br />
during storage.<br />
• Prior to prolonged storage the rifle must be<br />
greased with rifle grease. Ordinary oiling is not<br />
sufficient in this case.<br />
4.3 Shipping the rifle<br />
Note:<br />
• Familiarise yourself fully with regional<br />
legislation governing the shipping <strong>and</strong><br />
transportation of firearms.<br />
Procedure:<br />
1. Check the rifle to ensure that it is unloaded <strong>and</strong><br />
decocked.<br />
2. Pack the rifle well (if possible in its original<br />
packaging) to prevent damage in transit.<br />
3. Do not include any accessories in the<br />
shipment.<br />
4. To prevent the rifle being recognised as such<br />
during shipping, wrap the original packaging in<br />
a second outer layer.<br />
5. Enclose a letter stating the following:<br />
– your full name<br />
– your full address (street, not P.O. Box)<br />
– your daytime telephone number<br />
– model <strong>and</strong> serial numbers of the rifle<br />
– detailed description of the problem<br />
encountered or the service work to be<br />
performed.<br />
6. Send the rifle properly insured <strong>and</strong> carriagepaid<br />
(packages without correct postage will not<br />
be accepted) to:<br />
– the sales outlet from which you purchased<br />
the rifle<br />
– the local <strong>Sauer</strong> & Sohn dealer,<br />
– the <strong>Sauer</strong> & Sohn agent (importer) for your<br />
country<br />
– if there is no local appointed <strong>Sauer</strong> & Sohn<br />
dealer or <strong>Sauer</strong> & Sohn agent in your<br />
country, to J.P. <strong>Sauer</strong> & Sohn GmbH.<br />
10.08 GB<br />
10
H<strong>and</strong>ling<br />
5 H<strong>and</strong>ling the rifle<br />
For safety reasons the magazine must not be<br />
installed or flipped in during:<br />
– first commissioning <strong>and</strong><br />
– taking possession of the rifle.<br />
Note:<br />
• The rifle is generally delivered preserved<br />
with a thin, protective grease <strong>and</strong> oil<br />
coating <strong>and</strong> must be stripped before being<br />
used for the first time, protective oil or<br />
grease removed <strong>and</strong> lubricated again.<br />
5.1 Initial preparation<br />
Note:<br />
• For your own safety the rifle must always<br />
be subjected to this initial preparation. This<br />
alone guarantees the faultless operation of<br />
the rifle.<br />
WARNING!<br />
Undefined condition of the rifle may cause<br />
uncontrolled discharge of shot<br />
May lead to death or severe injuries<br />
• If the shooter takes possession of the rifle in<br />
any other condition it must be treated as<br />
loaded.<br />
Procedure:<br />
1. Unload the rifle (see section 5.6).<br />
2. Check whether ammunition is still in the barrel<br />
chamber or in the magazine.<br />
3. Clean the barrel (see section 8.2).<br />
4. In addition during first commissioning:<br />
– Clean external metal surfaces<br />
(see section 8).<br />
5. If supplied in compact case:<br />
– Fit the main stock (see section 9.2).<br />
5.2 Ammunition<br />
WARNING!<br />
Malfunction due to inadmissible ammunition<br />
May lead to death or severe injuries <strong>and</strong><br />
damage to the rifle<br />
• For your rifle, use only commercial grade<br />
ammunition according to CIP resp. SAAMI<br />
specifications in its original packing which<br />
corresponds with the caliber of the rifle.<br />
• Never use recharged, "reconditioned", h<strong>and</strong>charged<br />
or non-st<strong>and</strong>ard ammunition in your<br />
rifle.<br />
• Never use dirty, wet, corroded, bent, damaged<br />
or oiled ammunition.<br />
• Never spray lubricants, preservatives or<br />
cleaning agents directly onto the rounds.<br />
• Never leave the ammunition lying around<br />
unattended.<br />
11 GB<br />
10.08
H<strong>and</strong>ling<br />
5.3 Loading the rifle (ready to fire)<br />
WARNING!<br />
Insufficient awareness of the risks may lead<br />
to careless actions<br />
May lead to death or severe injuries<br />
• Never load or unload the rifle inside a vehicle,<br />
inside a building or any other confined space<br />
(except in a designated firing range).<br />
• Never rely on safety mechanisms. They are<br />
never a substitute for careful <strong>and</strong> correct<br />
h<strong>and</strong>ling of the rifle.<br />
• Never let a loaded rifle out of your h<strong>and</strong>s.<br />
Preparation:<br />
1. Before loading, always wipe off any excess<br />
grease <strong>and</strong> oil <strong>and</strong> check that there is no<br />
obstruction in the bore of the barrel.<br />
2. Always keep the muzzle of the rifle pointed in a<br />
safe direction.<br />
3. Do not place the finger onto the trigger tongue,<br />
but outside the trigger guard.<br />
4. Do not load the rifle by inserting the magazine<br />
until immediately before shooting.<br />
5.3.1 Loading from the magazine<br />
Procedure:<br />
1. Decock the rifle (see section 6.2).<br />
2. Remove/open magazine<br />
(see section 5.8.1/ 5.8.2).<br />
3. Open slide (see section 5.7.1).<br />
4. Fill the magazine (see section 5.8.3).<br />
5. Install magazine or close<br />
(see section 5.8.1/ 5.8.2).<br />
6. Close slide (see section 5.7.2).<br />
Condition of the rifle:<br />
The rifle is loaded <strong>and</strong> ready to fire.<br />
5.3.2 Loading from your h<strong>and</strong><br />
Procedure:<br />
1. Decock the rifle (see section 6.2).<br />
2. Remove/open magazine<br />
(see section 5.8.1/ 5.8.2).<br />
3. Open slide <strong>and</strong> lock (see section 5.7.1).<br />
4. Hold the rifle with the muzzle pointing down.<br />
5. Slide the round through the ejector window in<br />
the barrel chamber.<br />
6. Close slide.<br />
Condition of the rifle:<br />
The rifle is loaded <strong>and</strong> ready to fire.<br />
Fig. 7<br />
5.3.3 Silent loading<br />
Procedure:<br />
1. Depending on the procedure, complete Steps<br />
1 to 5 from section 5.3.1 or 5.3.2.<br />
2. Close slide silently (see section 5.7.3).<br />
10.08 GB<br />
12
H<strong>and</strong>ling<br />
5.4 Discharging a shot<br />
WARNING!<br />
Insufficient awareness of the risks may lead<br />
to careless actions<br />
May lead to death or severe injuries<br />
• Ensure that the target <strong>and</strong> the environment<br />
allow shots to be fired without danger.<br />
• When discharging shots, ensure that neither<br />
your h<strong>and</strong>s nor any other parts of the body<br />
are not located in front of, over or adjacent to<br />
the barrel muzzle or the ejection port.<br />
• Immediately stop shooting <strong>and</strong> unload the<br />
rifle if you suspect that a round has not been<br />
chambered properly, a case is jammed, a<br />
bullet is lodged in the bore or a discharge<br />
sounded or felt weak or abnormal.<br />
• Never attempt to dislodge a blockage in the<br />
barrel by firing another round.<br />
Procedure:<br />
1. Put on ear protection <strong>and</strong> protective glasses.<br />
2. Never allow a third person to st<strong>and</strong> next to you<br />
where they could be hit by ejected cartridge<br />
cases.<br />
3. Aim the rifle at a safe target.<br />
4. Cock the rifle (see section 6.1).<br />
DANGER!<br />
Shot will be fired<br />
Risk of immediate death or severe injuries<br />
• Only discharge the shot after you have aimed<br />
at your target <strong>and</strong> are sure that there is no<br />
risk to you <strong>and</strong> others caused by the<br />
discharge of the shot.<br />
5. Place finger on trigger tongue <strong>and</strong> pull back<br />
the trigger tongue to discharge the shot.<br />
6. Keep the rifle aimed at the target <strong>and</strong> fire<br />
further shots as required.<br />
7. If the magazine is empty, reload the rifle (see<br />
section 5.5).<br />
8. Uncock the rifle <strong>and</strong> unload<br />
(see section 5.6).<br />
WARNING!<br />
Uncontrolled discharge of shot as the rifle is<br />
ready to fire<br />
May lead to death or severe injuries<br />
• If you decide to end the shooting session,<br />
immediately uncock <strong>and</strong> unload the rifle.<br />
13 GB<br />
10.08
H<strong>and</strong>ling<br />
5.5 Reloading during shooting<br />
WARNING!<br />
Insufficient awareness of the risks may lead<br />
to careless actions<br />
May lead to death or severe injuries<br />
• Never let the rifle out of your h<strong>and</strong>s.<br />
• Keep the rifle pointed at the safe target.<br />
Procedure:<br />
1. Decock the rifle (see section 6.2).<br />
2. Remove or open the empty magazine<br />
(see section 5.8.1/ 5.8.2).<br />
3. Fill the magazine (see section 5.8.3).<br />
4. Install or close full magazine <strong>and</strong> check the<br />
catch (see section 5.8.1 / 5.8.2).<br />
5. Close the slide.<br />
Condition of the rifle:<br />
The rifle is loaded <strong>and</strong> ready to fire.<br />
5.6 Unloading the rifle<br />
WARNING!<br />
Uncontrolled discharge of shot as the rifle is<br />
ready to fire<br />
May lead to death or severe injuries<br />
• Never let the rifle out of your h<strong>and</strong>s before it<br />
is unloaded.<br />
• The rifle is loaded, a round is located in the<br />
chamber of the barrel.<br />
• Never place your h<strong>and</strong> over the ejection port<br />
of the bolt.<br />
Procedure:<br />
1. Decock the rifle (see section 6.2).<br />
2. Aim the rifle at a stop-butt.<br />
3. Remove or open the magazine<br />
(see section 5.8.1/ 5.8.2).<br />
4. Open slide (see section 5.7.1) <strong>and</strong> lock. The<br />
cartridge is pulled out of the barrel chamber<br />
<strong>and</strong> is ejected.<br />
5. Check that the round has been ejected <strong>and</strong><br />
that there are no further rounds in the barrel<br />
chamber.<br />
6. Empty magazine.<br />
7. Pick up ejected round <strong>and</strong> clean the rifle.<br />
WARNING!<br />
Malfunction due to not properly cleaned rifle<br />
May lead to death or severe injuries <strong>and</strong><br />
damage to the rifle<br />
• The rifle must be cleaned after every shooting<br />
session (see section 8).<br />
Condition of the rifle:<br />
The rifle is unloaded.<br />
10.08 GB<br />
14
H<strong>and</strong>ling<br />
5.7 Slide<br />
WARNING!<br />
Uncontrolled discharge of shot as the rifle is<br />
ready to fire<br />
May lead to death or severe injury<br />
• The rifle must be decocked before every<br />
manipulation on the slide!<br />
5.7.1 Open slide<br />
Procedure:<br />
1. Decock the rifle (see section 6.2).<br />
2. Remove/open magazine<br />
(see section 5.8.1 / 5.8.2).<br />
3. Hold loading lever 416.<br />
4. Pull the slide straight back out until the stop<br />
(see Fig. 8).<br />
5. Hold the slide tight <strong>and</strong> pull the slide lock 106<br />
down.<br />
Fig. 8<br />
Fig. 9<br />
106<br />
5.7.2 Close the slide<br />
Vorgehe<br />
WARNING!<br />
Careless actions may cause uncontrolled<br />
discharge of shot<br />
May lead to death or severe injuries<br />
• The rifle must be unloaded.<br />
1. Decock the rifle (see section 6.2).<br />
2. Remove/open magazine (see section 5.8.1).<br />
3. Press slide lock.<br />
CAUTION!<br />
Possible injury or damage to the rifle<br />
• Never move the slide towards the front if<br />
there is a finger or foreign object in or in front<br />
of the ejection window!<br />
• Never use force to close the slide.<br />
5.7.3 Closing the slide silently<br />
In some situations it can be an advantage to close<br />
the slide silently.<br />
Procedure:<br />
1. Decock the rifle (see section 6.2).<br />
2. Remove/open magazine<br />
(see section 5.8.1 / 5.8.2).<br />
3. Hold the loading lever tightly.<br />
4. Press slide lock.<br />
5. Move the slide slowly forward until it stops.<br />
6. Push the slide forward with the loading lever<br />
until it is completely locked (see Fig. 10).<br />
15 GB<br />
10.08
H<strong>and</strong>ling<br />
Fig. 10<br />
5.8 Magazine<br />
The SAUER 303 is available in two versions:<br />
1. Version with removable magazine<br />
2. Version with fixed fold out magazine<br />
(so called FM model)<br />
5.8.1 Version with removable magazine<br />
Removing the magazine<br />
CAUTION!<br />
Magazine may fall out<br />
Magazine may be damaged<br />
• When removing the magazine always keep<br />
your h<strong>and</strong> exactly underneath the magazine.<br />
1. Press the stud with the pointer finger 107.<br />
2. Remove magazine.<br />
3. Empty magazine.<br />
Fig. 11<br />
Inserting the magazine<br />
Procedure:<br />
1. Insert the magazine into the magazine shaft<br />
<strong>and</strong> push upwards until the magazine engages<br />
audibly. Do not jam the magazine.<br />
5.8.2 Version with fixed fold out magazine<br />
Open magazine<br />
Procedure:<br />
1. Press the stud with the pointer finger 107.<br />
2. Open magazine downwards.<br />
3. Empty magazine.<br />
Fig. 12<br />
Inserting the magazine<br />
Procedure:<br />
1. Open magazine upwards, until the magazine<br />
audibly catches.<br />
5.8.3 Loading the magazine<br />
Procedure:<br />
1. Push the rear feeder down.<br />
2. Push the round from the front under the<br />
magazine lip.<br />
10.08 GB<br />
16
H<strong>and</strong>ling<br />
Fig. 13<br />
5.9 Trigger<br />
An adjusted flint trigger suitable for use is<br />
available for the SAUER 303.<br />
5.9.1 Rifle trigger<br />
Note:<br />
• The trigger weight has been set to<br />
approx. 13 N (1300 g) at the factory.<br />
The flint trigger is a direct trigger with a design<br />
dependent minimum stage.<br />
– The shot is fired after the resistance has been<br />
overcome.<br />
WARNING!<br />
Careless actions may cause uncontrolled<br />
discharge of shot<br />
May lead to death or severe injuries<br />
• The weight of the flint trigger must not be<br />
changed for safety reasons.<br />
5.10 Sights<br />
Depending on the selected model, the SAUER<br />
303 is supplied with various sight devices. In each<br />
case the rifle is shot in the factory with open sight<br />
at 50 meters. A subsequent change of the sight<br />
device is possible.<br />
5.10.1Height adjustment of the sight<br />
Procedure:<br />
1. Place the correct 1.5 mm WAF Allen key in the<br />
screw on top of the front sight ramp before the<br />
front sight (see Fig. 14).<br />
• Turn the screw with click-stop clockwise: Front<br />
sight moves higher, firing sits lower.<br />
• Turn the screw with click-stop counterclockwise:<br />
Front sight moves lower, firing sits<br />
higher.<br />
Fig. 14<br />
17 GB<br />
10.08
H<strong>and</strong>ling H<strong>and</strong> cocking<br />
5.10.2Side adjustment of the sight<br />
Procedure:<br />
1. Place the correct Allen key in the front screw<br />
on the front sight base.<br />
2. Loosen screw <strong>and</strong> move the front sight to the<br />
desired position.<br />
3. Retighten screw.<br />
Alternatively, the side adjustment can be also be<br />
done on the rear sight (only with normal rear sight<br />
slide, not with hunting track Battue) (see Fig. 15).<br />
Fig. 15<br />
Procedure:<br />
1. Loosen the slotted screw on the rear sight<br />
ramp with the proper screwdriver<br />
2. Move the rear sight to the side as desired.<br />
3. Retighten screw (see Fig. 16).<br />
Fig. 16<br />
6 H<strong>and</strong> cocking<br />
The SAUER 303 is equipped with a manual h<strong>and</strong><br />
cocker on the stock h<strong>and</strong>le. This enables the<br />
marksman to cock the lock of the rifle right before<br />
discharging a shot. In decocked condition the<br />
mainspring is relaxed, it is impossible to fire a<br />
shot.<br />
Along with the manual h<strong>and</strong> cocker, to be<br />
operated by the marksman, the SAUER 303<br />
additionally has an internal firing pin safety lock<br />
intraLock, which automatically activates if the<br />
slide is not completely locked. Because of this a<br />
discharged shot is impossible with a rifle that is not<br />
completely locked. The safety lock intraLock can<br />
not be actively influenced by the marksman.<br />
The cocking slide is found easily, both visually <strong>and</strong><br />
by touch, above on the h<strong>and</strong>le of the stock. The<br />
modern Silent Cocking System SCS allows the<br />
cocking cycle to be made without making<br />
disturbing noise.<br />
6.1 Cocking the rifle<br />
Procedure:<br />
1. Lay the thumb of the ribbed surface of the<br />
cocking slide 116 so that the tip of the thumb<br />
half covers the cocking slide pin 117<br />
(see Fig. 18).<br />
2. Press the cocking slide forward to the stop.<br />
Fig. 17<br />
10.08 GB<br />
117<br />
116<br />
18
H<strong>and</strong> cocking<br />
3. Lift the tip of the thumb so that the cocking<br />
slide pin 117 leaves the cocking slide silently<br />
(see Fig. 19).<br />
Fig. 18<br />
4. Remove the thumb from the cocking slide.<br />
Condition of the rifle:<br />
Rifle is cocked:<br />
– Red point on the stock h<strong>and</strong>le under the<br />
cocking slide is visible.<br />
– Cocking slide pin 117 protrudes visibly <strong>and</strong> by<br />
touch out of the cocking slide (see Fig. 19).<br />
Fig. 19<br />
117<br />
6.2 Decocking rifle<br />
Procedure:<br />
1. Lay the thumb on the ribbed surface of the<br />
cocking slide116 so that the tip of the thumb<br />
half covers the cocking slide pin 117<br />
(see Fig. 18).<br />
2. Press the cocking slide slightly forward <strong>and</strong><br />
simultaneously press in the cocking slide pin<br />
117 with the tip of the thumb (see Fig. 18).<br />
3. Move the cocking slide slowly backwards.<br />
4. Remove the thumb from the cocking slide.<br />
Condition of the rifle:<br />
Rifle is decocked:<br />
– Red point on the stock h<strong>and</strong>le under the<br />
cocking slide is not visible.<br />
– Cocking slide pin 117 is level with cocking<br />
slide.<br />
19 GB<br />
10.08
Dismantling<br />
7 Dismantling<br />
7.1 Removing the sling attachment<br />
Procedure:<br />
1. Firmly press in the spring bolt.<br />
2. Turn the sling attachment gently <strong>and</strong> pull out.<br />
Note:<br />
WARNING!<br />
Uncontrolled discharge of shot as the rifle is<br />
ready to fire<br />
May lead to death or severe injuries<br />
• There must be no magazine in the rifle.<br />
• Before stripping your rifle, ensure once again<br />
that it is unloaded (see section 5.6).<br />
Fig. 20, rear sling attachment bushing<br />
• Clean <strong>and</strong> oil the sling attachment<br />
regularly.<br />
7.2 Removing the main stock<br />
Procedure:<br />
1. Remove the sling attachment<br />
(see section 7.1).<br />
2. Unscrew the main stock screw in the hole of<br />
the main stock 800 counter-clockwise using<br />
the long end of the special spanner supplied.<br />
3. Remove the main stock by pulling downwards.<br />
Fig. 21<br />
7.3 Front stock removal<br />
Procedure:<br />
1. Remove the sling attachment<br />
(see section 7.1).<br />
2. Insert the special Torx spanner with the short<br />
end through the sling attachment bushing 702.<br />
3. Turn the front stock screw with the special<br />
spanner clockwise until the resistance at the<br />
spanner disappears.<br />
4. Remove the front stock 701 by pulling it to the<br />
front.<br />
10.08 GB<br />
714<br />
800<br />
20
Dismantling<br />
Fig. 22<br />
7.4 Barrel removal<br />
Procedure:<br />
1. Remove/open magazine<br />
(see sections 5.8.1 / 5.8.2).<br />
2. Open slide <strong>and</strong> lock<br />
(see section 5.7.2).<br />
3. Remove the front stock<br />
(see section 7.3).<br />
4. Loosen the clamping screws with the supplied<br />
Torx spanner 102 by approx. a half turn,<br />
however do not remove.<br />
5. Turn the Torx spanner 102 with the long end in<br />
opening between the two screws until the stop,<br />
so that the housing is slightly pryed open.<br />
6. Remove the barrel 201 from the housing 100.<br />
Fig. 23<br />
Fig. 24<br />
102<br />
21 GB<br />
10.08
Care<br />
8 Care<br />
8.1 General<br />
Proper functioning <strong>and</strong> precision of the rifle can<br />
only be maintained through regular <strong>and</strong> expert<br />
care. The rifle must be cleaned <strong>and</strong> protected<br />
against corrosion after each use. The bore must<br />
be cleaned <strong>and</strong> protected against corrosion after<br />
each firing. The slide <strong>and</strong> the slide rail must<br />
always be cleaned <strong>and</strong> lightly lubricated after each<br />
firing. Wooden stocks must be treated with a<br />
suitable agent in accordance with the<br />
corresponding instructions <strong>and</strong> must be protected<br />
against the weather.<br />
For the optimum care for your SAUER 303 we<br />
recommend care products such as a Premium rifle<br />
grease.<br />
For a normal cleaning it is sufficient to remove or<br />
dismantle the following rifle parts:<br />
• Magazine<br />
• Rifle sling<br />
If the rifle has been exposed to extreme moisture<br />
or is heavily soiled, it is recommended to remove<br />
or dismantle the following rifle components:<br />
• Magazine<br />
• Telescopic sights<br />
• Rifle sling<br />
• Main stock<br />
• Front stock<br />
WARNING!<br />
Uncontrolled discharge of shot as the rifle is<br />
ready to fire<br />
May lead to death or severe injuries<br />
• There must be no magazine in the rifle.<br />
• Before stripping your rifle for cleaning, ensure<br />
once again that it is unloaded<br />
(see section 5.6).<br />
8.2 Cleaning the barrel<br />
CAUTION!<br />
Rifle may be damaged<br />
• Never clean the barrel from the front with a<br />
cleaning chain or a steel cable <strong>and</strong> do not use<br />
steel or brass brushes, because these will<br />
damage the surface of the barrel. Use a<br />
suitable cleaning string or the proper cleaning<br />
rod <strong>and</strong> brush of the proper calibre.<br />
• Detergents can damage the surface of the<br />
rifle. Read the manufacturer's indications <strong>and</strong><br />
warnings before using solvents or cleansers.<br />
Procedure:<br />
1. Unload the rifle (see section 5.6).<br />
2. Open slide (see section 5.7.1).<br />
3. Slide the cleaning string with a brush of the<br />
proper calibre through the ejection window in<br />
the barrel <strong>and</strong> pull it from the muzzle through<br />
the barrel.<br />
4. When the barrel is removed clean from behind<br />
with a suitable cleaning rod.<br />
5. Basically use only suitable cleaning agent, oil<br />
or grease.<br />
6. Check whether deposits of the rounds have<br />
collected in the sections. If necessary, clean<br />
the barrel with a commercial grade barrel<br />
cleaning agent (observe the respective<br />
instructions for use) designed for firing residue.<br />
7. Coat the barrel bore <strong>and</strong> the barrel chamber<br />
with a little rifle oil or rifle grease.<br />
8. With installed barrel: Rub the barrel bore <strong>and</strong><br />
barrel chamber dry by pulling through a<br />
suitable cleaning string several times.<br />
9. With dismounted barrel: Rub the barrel bore<br />
<strong>and</strong> barrel chamber dry from behind with a<br />
plastic sheathed cleaning rod of the proper<br />
calibre.<br />
10.08 GB<br />
22
Care<br />
8.3 Cleaning the slide<br />
Proper functioning of SAUER 303 is only<br />
guarenteed when the slide <strong>and</strong> its rail are always<br />
maintained absolutely clean <strong>and</strong> lightly lubricated.<br />
– Open slide (see section 5.7.1).<br />
– Clean everything accessible through the<br />
ejection window with a clean cloth.<br />
– Clean locking head <strong>and</strong> base with a clean<br />
cloth.<br />
– Thinly apply appropriate rifle oil to the<br />
surface of the slide rail.<br />
– Close the slide (see section 5.7.2).<br />
– Apply few drops of oil on the slide cover in<br />
the ejection window.<br />
– Open <strong>and</strong> close the slide several times in<br />
order to achieve an optimum lubrication.<br />
Attention:<br />
Only a small amount of oil is required to obtain<br />
perfect function. Too much oil can lead to<br />
malfunction <strong>and</strong> to impairment of precision.<br />
8.4 External metal <strong>and</strong> wood surfaces<br />
For the care <strong>and</strong> preservation of the external metal<br />
<strong>and</strong> wood surfaces we recommend a Premium<br />
rifle grease. Minute spherical Teflon ® particles<br />
seal the pores of all wood <strong>and</strong> metal surfaces <strong>and</strong><br />
provide perfect protection <strong>and</strong> optimal sliding<br />
characteristics.<br />
Benefits:<br />
• dry surfaces - dust etc. does not adhere;<br />
• water <strong>and</strong> salt water proof;<br />
• absolute corrosion protection;<br />
• perfect sliding characteristics, reduced wear;<br />
• resistant to sweaty palms;<br />
• pressure resistant up to 57.000 kg/cm 2 ;<br />
• temperature resistant from -50 to +230 °C;<br />
• perfect protection <strong>and</strong> care for steel <strong>and</strong> wood;<br />
• neutral smell;<br />
CAUTION!<br />
Rifle may be damaged<br />
• Caring for the external metal surfaces is<br />
particularly important in wet weather or if the<br />
metal surfaces have come into contact with<br />
sweaty body parts.<br />
• Always wipe dry the rifle prior to preservation.<br />
Procedure:<br />
1. Thoroughly clean the rifle using suitable cloths<br />
<strong>and</strong> cleaning agents.<br />
2. Thinly apply the grease with a cloth or sponge<br />
over the whole rifle (including the stock)<br />
including all mechanical <strong>and</strong> moveable parts.<br />
3. After a reaction time of at least 60 minutes<br />
wipe dry <strong>and</strong> polish the rifle with a clean cloth.<br />
4. Dependent on the weather <strong>and</strong> frequency of<br />
use the protective effect will last between two<br />
to six months.<br />
Note:<br />
• The sling attachments must also be<br />
cleaned regularly <strong>and</strong> their locking<br />
mechanism oiled.<br />
• So-called "water stains" on the stock after<br />
rain cannot be avoided. Depending on the<br />
calcium content <strong>and</strong> dust <strong>and</strong> dirt particle<br />
content of the rain water, this phenomenon<br />
is stronger or weaker. It is not a defect in<br />
the stock finish.<br />
23 GB<br />
10.08
Assembly<br />
9 Assembly<br />
CAUTION!<br />
Rifle may be damaged<br />
• Only assemble cleaned rifle parts.<br />
• Only tighten the screws for the stock<br />
attachment by h<strong>and</strong> (only operate the special<br />
spanner with two fingers), (see Fig. 26).<br />
9.1 Fitting the barrel<br />
CAUTION!<br />
Rifle may be damaged<br />
• Do not use force when inserting the barrel<br />
into the receiver.<br />
• Tighten the screws only so tight as is possible<br />
with three fingers.<br />
• The spanner must not be extended by<br />
attaching a tube.<br />
• When using a torque spanner tighten the<br />
screw to 8 Nm.<br />
Procedure:<br />
1. Turn the Torx spanner 102 with the long end in<br />
opening between the two screws until the stop,<br />
so that the housing is slightly pryed open (see<br />
Fig. 24).<br />
2. Push the barrel 201 up to the stop in the<br />
housing so that the spring guidance rod 113<br />
comes through the provided opening under the<br />
gas cylinder housing (see Fig. 25).<br />
3. Twist the torx-spanner completely out of the<br />
housing.<br />
4. Alternatively, tighten the clamping screws 102<br />
a little more until the barrel is held without<br />
tension (alternative: tightening with a torque<br />
spanner: torque 8 Nm).<br />
Fig. 25<br />
Note:<br />
• After every barrel removal <strong>and</strong> installation a<br />
test shot is necessary.<br />
9.2 Fitting the main stock<br />
Corresponding figure, see Fig. 21.<br />
1. Slide the main stock onto the rifle.<br />
2. H<strong>and</strong>-tighten the main stock screw clockwise<br />
with the long end of the special spanner<br />
supplied (approx. 5 turns).<br />
3. Fit the sling attachment (see section 9.4).<br />
9.3 Fitting the front stock<br />
Corresponding figure, see Fig. 26.<br />
Procedure:<br />
1. Slide the front stock 701 onto the rifle <strong>and</strong><br />
press the sides of the front stock into the sides<br />
of the receiver.<br />
2. H<strong>and</strong>-tighten the front stock screw clockwise<br />
with the short end of the special Torx spanner<br />
supplied. If you are using a torque wrench, the<br />
tightening torque should be 3 Nm.<br />
3. Fit the sling attachment (see section 9.4).<br />
10.08 GB<br />
24
Assembly Mounting telescopic isi-Mount<br />
Fig. 26<br />
9.4 Fitting the sling attachment<br />
Corresponding figure, see Fig. 20.<br />
Procedure:<br />
1. Insert the bolt of the rear sling attachment into<br />
the sling attachment bushing 808.<br />
2. Press in the spring bolt.<br />
3. Gently turn the sling attachment until the bolt<br />
safety lock engages.<br />
4. Insert the bolt of the front sling attachment into<br />
the front sling attachment bushing 702.<br />
Note:<br />
• The sling attachment must be aligned<br />
exactly 90° to the orientation of the barrel.<br />
• The bolts must protrude clearly above the<br />
edge of the sling attachment body.<br />
10 Mounting telescopic isi-Mount<br />
CAUTION!<br />
Rifle may be damaged<br />
• Do not use force when putting on <strong>and</strong> taking<br />
off the telescopic sight.<br />
The housing of the SAUER 303 is already<br />
prepared for the mounting of the new SAUER<br />
telescopic sight "isi-Mount“ (individual, selective,<br />
integrated) (see Fig. 27).<br />
Fig. 27<br />
This new mount guarantees the lowest design<br />
type, highest shot strength <strong>and</strong> absolute<br />
repeatability after taking off <strong>and</strong> putting on the<br />
telescopic sight. In addition the glass can always<br />
be mounted with the proper spacing due to the<br />
availability of 3 grooves in the front area of the<br />
housing.<br />
Also the glass can be moved from the front to the<br />
rear groove (or opposite) without point of impact<br />
relocation. In this way the marksman can adjust<br />
the eye distance to the current conditions or his<br />
clothing thickness.<br />
10.1 Putting on the telescopic sight<br />
Procedure:<br />
1. Lift up the locking lever of the mounting upper<br />
section <strong>and</strong> turn counter-clockwise.<br />
2. Guide the telescopic sight slanted from the<br />
side into the housing grooves, so that the<br />
cross ribs of the mounting upper section lies<br />
congruent with the desired groove.<br />
3. Tip the telescopic sight in the housing grooves.<br />
4. Turn the locking lever with the thumb<br />
counterclockwise until the stop.<br />
25 GB<br />
10.08
Mounting telescopic isi-Mount<br />
5. Fold down the locking lever frontwards (in<br />
firing direction).<br />
Fig. 28<br />
10.2 Removing telescopic sight<br />
CAUTION!<br />
Rifle may be damaged<br />
• When taking off the telescopic sight, the h<strong>and</strong><br />
must always be placed on the telescopic sight<br />
so that it is held after loosening the mounting<br />
<strong>and</strong> does not fall.<br />
Procedure:<br />
1. Lift out the locking lever of the mounting<br />
surface towards the rear (opposite to firing<br />
direction).<br />
2. Turn the locking lever counter-clockwise to the<br />
stop.<br />
3. Tip the telescopic sight to the side upward from<br />
the housing grooves.<br />
Fig. 29<br />
10.3 Changing eye distance<br />
1. Remove telescopic sight (see section 10.2).<br />
2. The telescopic sight is to be set on the housing<br />
so that the rear mounting top section is<br />
congruent with the other of the two back<br />
grooves.<br />
3. Set on telescopic sight (see section 10.1).<br />
Fig. 30<br />
For mounting other than is described here, the<br />
J.P. <strong>Sauer</strong> & Sohn GmbH takes no guarantee for<br />
function <strong>and</strong> shooting performance.<br />
10.08 GB<br />
26
Malfunctions<br />
11 Malfunctions<br />
11.1 Detecting a malfunction<br />
Rifle maintenance (cleaning <strong>and</strong> inspection)<br />
according to the instructions can prevent<br />
malfunctions.<br />
Should, nevertheless, a malfunction occur during<br />
shooting, proceed as follows:<br />
WARNING!<br />
Careless actions may cause uncontrolled<br />
discharge of shot<br />
May lead to death or severe injuries<br />
• Hold the rifle pointed in the firing direction<br />
(safe direction) <strong>and</strong> keep your finger off<br />
trigger tongue while you carry out the steps<br />
described below.<br />
1. Immediately stop shooting <strong>and</strong> alert others to<br />
the malfunction.<br />
2. Decock the rifle.<br />
3. Remove magazine or open (see section 5.8.1)<br />
<strong>and</strong> dispose of safely.<br />
4. Open slide <strong>and</strong> lock. The cartridge or cartridge<br />
case is pulled out of the barrel chamber <strong>and</strong><br />
ejected.<br />
5. Check that no bullet, round, cartridge case or<br />
foreign matter is in the barrel chamber or<br />
barrel.<br />
6. If the malfunction is listed in the table below<br />
<strong>and</strong> its remedy is described, then the user is<br />
allowed to remedy the malfunction in<br />
accordance with the table.<br />
7. Clean, lubricate <strong>and</strong> assemble the rifle.<br />
8. Have the rifle inspected by an armourer or<br />
gunsmith.<br />
Note:<br />
• For malfunctions not listed in the table, the<br />
user must under no circumstances remedy<br />
the malfunction.<br />
• In this case the rifle must be checked <strong>and</strong><br />
repaired by a qualified armourer or<br />
gunsmith.<br />
WARNING!<br />
Improper servicing of the rifle<br />
Possibly death or serious injuries<br />
• Never force a bullet stuck in the barrel<br />
(jammed bullet) by „firing it free” with another<br />
bullet.<br />
• Never repair broken or worn components<br />
yourself. Broken or worn components must<br />
be disposed of.<br />
27 GB<br />
10.08
Malfunctions<br />
11.2 Cause <strong>and</strong> remedy of malfunctions<br />
Fault Possible cause of<br />
malfunction<br />
No round chambered. Magazine not properly inserted<br />
or closed, deformed or dirty.<br />
Rifle is loaded <strong>and</strong> cocked.<br />
When trigger is pulled, no shot<br />
is fired.<br />
Rifle does not advance a new<br />
round automatically or clamps it<br />
tight.<br />
Rifle decocks automatically<br />
when firing.<br />
Cocking slide is in front position,<br />
when trigger is pulled no shot is<br />
fired <strong>and</strong> no cut off of the<br />
hammer.<br />
Rifle faulty.<br />
Possible remedy of<br />
malfunction<br />
Insert magazine completely until<br />
catch or close (see section 5.8.2).<br />
Repair by manufacturer.<br />
Rifle is not completely unlocked. Close slide completely (see<br />
section 5.7.2).<br />
Pull cocking slide manually back<br />
<strong>and</strong> cock again.<br />
Rifle is not held properly in the<br />
shoulder.<br />
Rifle faulty.<br />
When cocking the bolt for<br />
cocking slide (117) did not<br />
emerge completely out of the<br />
cocking slide.<br />
Rifle is not decocked.<br />
Rifle faulty.<br />
Decock the rifle<br />
(see section 6.2).<br />
Open slide<br />
(see section 5.7.1).<br />
Load new round.<br />
Pull rifle tight into the shoulder.<br />
Repair by manufacturer.<br />
When cocking the cocking bolt<br />
for cocking slide must emerge<br />
completely out of the cocking<br />
slide.<br />
Pull cocking slide back until it<br />
engages audibly. Then cocking<br />
according to h<strong>and</strong>ling <strong>and</strong><br />
safety instructions.<br />
Repair by manufacturer.<br />
10.08 GB<br />
28
Spare parts<br />
12 Spare parts<br />
Item Designation<br />
1 Housing<br />
2 Clamping screw M6<br />
3 Colour mark red<br />
4 Cocking slide<br />
5 Cylinder pin 3x20<br />
6 Pressure spring for cocking slide<br />
7 Bolt for cocking slide<br />
8 Heavy adapter sleeve 2.5x18<br />
9 Bolt for knurl barrel position<br />
10 Spring bolt<br />
11 Pressure spring for spring bolt<br />
12 Ball Ø4<br />
13 Bolt for magazine holder<br />
14 Magazine holder<br />
15 Locking bolt<br />
16 Slide catch lever<br />
17 Leaf spring for slide catch<br />
18 Slider for slide catch<br />
19 Spring for magazine ejection<br />
20 Trigger housing<br />
21 Hammer<br />
22 Cylinder pin 4m6 x 16<br />
23 Bolt for hammer<br />
24 Spring bolt<br />
25 Mainspring<br />
26 Bolt for chain<br />
27 Nut M2.5<br />
28 Catch lever<br />
29 Cylinder pin 3m6 x 16<br />
30 Spring bolt<br />
31 Spring for magazine holder<br />
32 Discharge lever<br />
33 Cylinder pin 3m6 x 8<br />
34 Trigger<br />
35 Cylinder pin 2m6 x 14<br />
Item Designation<br />
36 Pin for tolerance compensation Ø3<br />
37 Cocking lever<br />
38 Chain 36.7 mm<br />
39 Chain 16.3 mm<br />
40 Cocking pin DIN7346 4x24<br />
41 Cocking pin DIN7346 4x20<br />
42 Chamber medium<br />
43 Firing pin spring<br />
44 Firing pin<br />
45 Stop bolt<br />
46 Pressure spring for lock slide<br />
47 <strong>Safety</strong> insert<br />
48 Pressure spring for ejector<br />
49 Ejector pin<br />
50 Ejector lock<br />
51 Extractor<br />
52 Extractor spring medium<br />
53 Control sleeve<br />
54 Control bolt<br />
55 Slide lock<br />
56 Cover plate<br />
57 Loading lever<br />
58 Slide rod<br />
59 Slide weight part 1<br />
60 Retention sleeve<br />
61 Pressure spring for split slide weight<br />
62 Slide weight part 2<br />
63 Cylinder pin 4m6x16.9<br />
64 Clamp for weight<br />
65 Insert with anti-squeal plate<br />
66 Spring guidance rod<br />
67 Slide spring<br />
68 Barrel<br />
69 Housing for gas cylinder<br />
70 Spiral cocking pin 2x18<br />
29 GB<br />
10.08
Spare parts<br />
Item Designation<br />
71 Gas piston<br />
72 Bearing<br />
73 Butt<br />
74 LPA aligning sight<br />
75 Spring collet<br />
76 Pan head screw M2.5x3.7<br />
77 20 Adjustable front sight<br />
78 Pan head screw M3 x 6 - 8.8<br />
79 Magazine case 2 shot 30-06<br />
80 Engaging piece for slide catch<br />
81 Feeder medium<br />
82 Magazine spring 2 shot medium<br />
83 Magazine floor 2 cartridges<br />
84 Main stock MC with jaw<br />
85 Washer<br />
86 Crown washer DIN6797 A6,4<br />
87 Pan head screw DIN912 M6x120<br />
88 Retention sleeve<br />
89 Butt plate compl.<br />
90 Rounded head screw 4.5x30<br />
91 Sling attachment bushing<br />
92 Flat head wood screw 4x20<br />
93 Front stock<br />
94 Sling attachment bushing<br />
95 Nut for front stock<br />
96 Retainer ring DIN7993 - B10<br />
97 Cylinder pin DIN6325 4m6x24<br />
98 Grommet<br />
10.08 GB<br />
30
Spare parts<br />
Abb. 31, Spare parts for S 303<br />
31 GB<br />
10.08
Spare parts<br />
10.08 GB<br />
32
J. P. <strong>Sauer</strong> & Sohn GmbH<br />
Ziegelstadel 20<br />
D-88316 Isny im Allgäu<br />
Germany<br />
Telefon +49 7562 97554 0<br />
Telefax +49 7562 97554 801<br />
www.sauer.de