

Genisys User Guide - OTC
Genisys User Guide - OTC
Genisys User Guide - OTC

You also want an ePaper? Increase the reach of your titles
YUMPU automatically turns print PDFs into web optimized ePapers that Google loves.
15: System Setup<br />
Contrast Adjust<br />
8 Wait while the tool checks for updates on the portable<br />
USB drive and for the Instructions screen to appear.<br />
Figure 15.3: Instructions Screen<br />
9 Read the instructions on the screen.<br />
10 Press the ENTER key. The tool checks the external<br />
power source, starts the update, and then displays an<br />
update progress screen.<br />
Figure 15.4: Update Progress Screen<br />
11 Notice the remaining time status bar at the top<br />
of the screen. This time changes after the update of<br />
each application.<br />
12 Notice that when a System update completes,<br />
the scan tool reboots, checks the file systems, and<br />
then displays the update progress screen again.<br />
13 Wait for all updates to complete and for the USB Drive<br />
Tool Update Completed message to appear.<br />
Figure 15.5: Tool Update Complete Message Screen<br />
14 Remove the portable USB drive from the tool.<br />
15 Remove the Smart Card from the tool (if used).<br />
16 Press the ENTER key to complete the update.<br />
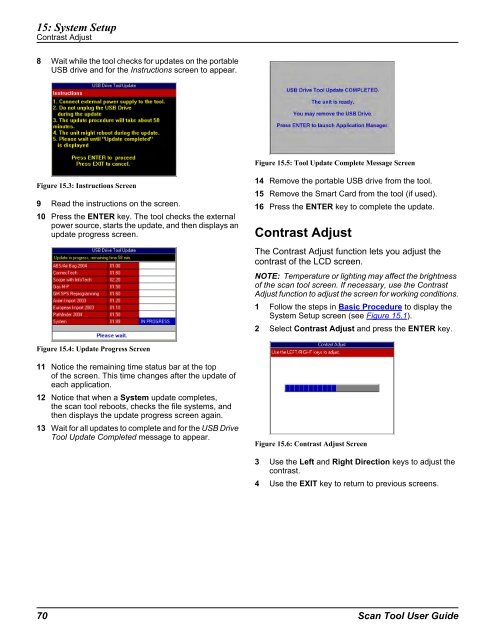
Contrast Adjust<br />
The Contrast Adjust function lets you adjust the<br />
contrast of the LCD screen.<br />
NOTE: Temperature or lighting may affect the brightness<br />
of the scan tool screen. If necessary, use the Contrast<br />
Adjust function to adjust the screen for working conditions.<br />
1 Follow the steps in Basic Procedure to display the<br />
System Setup screen (see Figure 15.1).<br />
2 Select Contrast Adjust and press the ENTER key.<br />
Figure 15.6: Contrast Adjust Screen<br />
3 Use the Left and Right Direction keys to adjust the<br />
contrast.<br />
4 Use the EXIT key to return to previous screens.<br />
70 Scan Tool <strong>User</strong> <strong>Guide</strong>


