Organic Chemistry Laboratory Techniques, 2016a
Organic Chemistry Laboratory Techniques, 2016a
Organic Chemistry Laboratory Techniques, 2016a

You also want an ePaper? Increase the reach of your titles
YUMPU automatically turns print PDFs into web optimized ePapers that Google loves.
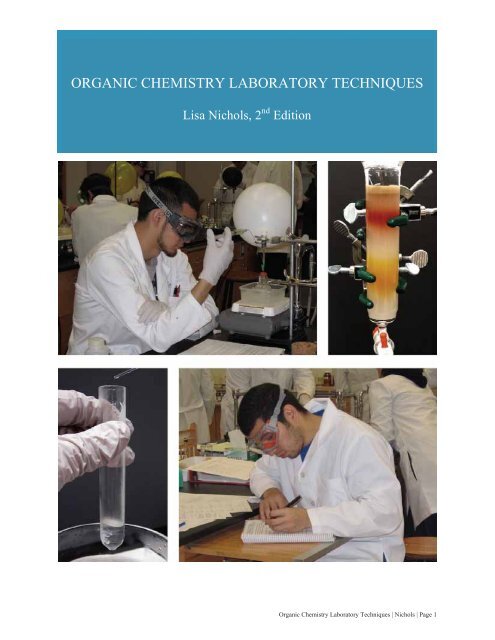
ORGANIC CHEMISTRY LABORATORY TECHNIQUES<br />
Lisa Nichols, 2 nd Edition<br />
<strong>Organic</strong> <strong>Chemistry</strong> <strong>Laboratory</strong> <strong>Techniques</strong> | Nichols | Page 1
<strong>Organic</strong> <strong>Chemistry</strong> <strong>Laboratory</strong> <strong>Techniques</strong> | Nichols | Page 2
TABLE OF CONTENTS, IN BRIEF<br />
Preface<br />
Chapter 1<br />
General <strong>Techniques</strong><br />
Pg. 15<br />
Chapter 2<br />
Chromatography<br />
Pg. 81<br />
Chapter 3<br />
Crystallization<br />
Pg. 155<br />
• Table of Contents<br />
• About the Author<br />
• Using this Resource<br />
• Glassware, Clamping<br />
• Transferring Solids<br />
and Liquids<br />
• Inert Atmospheric<br />
• Generalities<br />
• Thin Layer<br />
Chromatography<br />
• Column<br />
• Single Solvent<br />
Crystallization<br />
• Mixed Solvent<br />
Crystallization<br />
Methods<br />
Chromatography<br />
• Heating<br />
• Gas Chromatography<br />
• Refluxing<br />
• Filtering<br />
Chapter 4<br />
Extraction<br />
Pg. 201<br />
Chapter 5<br />
Distillation<br />
Pg. 247<br />
Chapter 6<br />
Miscellaneous<br />
<strong>Techniques</strong><br />
Pg. 307<br />
Chapter 7<br />
Technique Summaries<br />
Pg. 361<br />
• Single Extraction<br />
• Simple Distillation<br />
• Melting Point<br />
Technique Summaries<br />
• Multiple Extractions<br />
• Fractional Distillation<br />
• Boiling Point<br />
• Reaction Work-ups<br />
• Vacuum Distillation<br />
• Sublimation<br />
• Drying Agents<br />
• Steam Distillation<br />
• Chemical Tests<br />
• Rotary Evaporation<br />
<strong>Organic</strong> <strong>Chemistry</strong> <strong>Laboratory</strong> <strong>Techniques</strong> | Nichols | Page 3
Copyright © 2017 Lisa Nichols<br />
Butte Community College<br />
All photographs (unless otherwise indicated) were taken by Lisa Nichols.<br />
The author has received written permission to use the photograph of all students appearing in this textbook.<br />
<strong>Organic</strong> <strong>Chemistry</strong> <strong>Laboratory</strong> <strong>Techniques</strong> | Nichols | Page 4
TABLE OF CONTENTS, IN DETAIL<br />
Chapter 0: Preface 3<br />
About the Author 11<br />
Using this Resource 12<br />
Chapter 1: General <strong>Techniques</strong> 15<br />
1.1 Glassware and Equipment 17 1.3 Heating and Cooling Methods 44<br />
1.1.A Pictures of Glassware + Equipment 17 1.3.A Methods and Flammability 44<br />
1.1.B Ground Glass Joints 20 1.3.B Controlled Boiling 46<br />
1.1.C Clamping 21 Boiling Stones (Boiling Chips) 46<br />
1.1.D Greasing Joints 23 Boiling Sticks (Wood Splints) 47<br />
1.1.E Cleaning Glassware 24 Stir Bars and Spin Vanes 47<br />
1.1.F Drying Glassware 24 1.3.C Adjustable Platforms 48<br />
Quick Drying 24 1.3.D Bunsen Burners 49<br />
Oven and Flame Drying 25 1.3.E Hotplates 51<br />
Drying Tubes 26 1.3.F Steam Baths 52<br />
1.1.G Storing Samples (Parafilm/Teflon Tape) 26 1.3.G Heating Mantles 53<br />
1.3.H Water, Sand, and Oil Baths 54<br />
1.2 Transferring Methods 27 1.3.I Heat Guns 56<br />
1.2.A Solids 27 1.3.J Cooling Baths 57<br />
1.2.B Liquids 28 1.3.K Reflux 58<br />
Pouring Liquids 28 Overview of Reflux 58<br />
Comments Re: Measurements 28 Step-by-Step Procedures 58<br />
Using Pasteur Pipettes 29 Reflux Summary 62<br />
Using Calibrated Pipettes 30<br />
Calibrated Plastic Pipettes 30 1.4 Filtering Methods 63<br />
Calibrated Glass Pipettes 30 1.4.A Overview of Methods 63<br />
Calibrated Pipettes Summary 34 1.4.B Decanting 63<br />
Dispensing Highly Volatile Liquids 35 1.4.C Gravity Filtration 64<br />
Pouring Hot Liquids 35 1.4.D Suction Filtration 65<br />
1.2.C Inert Atmospheric Methods 36 Suction Filtration Overview 65<br />
Step-by-Step Procedures 37 Rinsing 66<br />
Inert Atmospheric Methods Summary 43 Water Aspirator 67<br />
Step-by-Step Procedures 68<br />
Suction Filtration Summary 72<br />
1.4.E Hot Filtration 73<br />
Hot Filtration Overview 73<br />
Step-by-Step Procedures 75<br />
Hot Filtration Summary 77<br />
1.4.F Pipette Filtration (Microscale) 78<br />
1.4.G Centrifugation 79<br />
<strong>Organic</strong> <strong>Chemistry</strong> <strong>Laboratory</strong> <strong>Techniques</strong> | Nichols | Page 5
Chapter 2: Chromatography 81<br />
2.1 Chromatography Generalities 83 2.3 Column Chromatography 119<br />
2.1.A Overview of Chromatography 84 2.3.A Macroscale Columns 120<br />
2.1.B General Separation Theory 85 Procedural Generalities 120<br />
Step-by-Step Procedures 121<br />
2.2 Thin Layer Chromatography (TLC) 86 Macroscale Column Summary 131<br />
2.2.A Overview of TLC 86 Troubleshooting 132<br />
2.2.B Uses of TLC 87 2.3.B Microscale (Pipette) Columns 133<br />
Assessing Purity 87 Step-by-Step Procedures 133<br />
Assessing Reaction Progress 88 Microscale Column Summary 138<br />
Use of a Co-spot 88<br />
Monitoring a Reaction by TLC 89 2.4 Gas Chromatography (GC) 139<br />
Obtaining an Aliquot 90 2.4.A Overview of GC 139<br />
2.2.C The Retention Factor (R f ) 91 2.4.B Uses of GC 140<br />
2.2.D Separation Theory 93 Assessing Purity 140<br />
General Theory 93 Identifying Components 141<br />
Structural Considerations 95 2.4.C Separation Theory 142<br />
Mobile Phase Polarity 97 General Theory 142<br />
2.2.E Step-by-Step Procedures 98 Structural Considerations 144<br />
General TLC Procedure 98 2.4.D Quantitating with GC 145<br />
Thin Layer Chromatography Summary 102 Quantitative Challenges 145<br />
Troubleshooting 103 Using a Calibration Curve 147<br />
Making Capillary TLC Spotters 104 Using Response Factors 148<br />
Notebook Record of TLC’s 105 2.4.E GC Parameters 149<br />
2.2.F Visualizing TLC Plates 106 Dilution 149<br />
Visualization Summary 106 Solvent Delay 150<br />
Ultraviolet Absorption 107 Oven Temperature 151<br />
Iodine 108 Using a Temperature Ramp 152<br />
Chemical Stains 109 2.4.F Sample Preparation 153<br />
General Staining Procedure 109<br />
p-Anisaldehyde / Vanillin Stains 110<br />
Permanganate Stain 112<br />
Phosphomolybdic Acid Stain 113<br />
Iron(III) Chloride Stain 113<br />
Bromocresol Green Stain 114<br />
Visualization Troubleshooting 115<br />
<strong>Organic</strong> <strong>Chemistry</strong> <strong>Laboratory</strong> <strong>Techniques</strong> | Nichols | Page 6
Chapter 3: Crystallization 155<br />
3.1 Overview of Crystallization 157 3.5 Procedural Generalities 179<br />
3.2 Uses of Crystallization 158 3.5.A General Procedure 179<br />
3.3 Choice of Solvent 160 3.5.B Heat Source and Bump Prevention 180<br />
3.3.A Ideal Temperature Profile 160 3.5.C Charcoal 181<br />
3.3.B General Procedures for Removing 161 3.5.D Cooling Slowly 183<br />
Impurities<br />
3.3.C Determining Which Solvent to Use 162 3.5.E Initiating Crystallization 184<br />
3.3.D Using Solubility Data 163<br />
3.3.E Experimentally Testing Solvents 164 3.6 Step-by-Step Procedures 186<br />
3.3.F Mixed Solvents 165 3.6.A Single Solvent Crystallization 186<br />
3.6.B Crystallization Summary 190<br />
3.4 Crystallization Theory 167 3.6.C Using Solvents Other Than Water 191<br />
3.4.A Purification 167 Ethanol, Methanol, Ethyl Acetate, 191<br />
and Hexanes<br />
3.4.B Cooling Slowly 167 Diethyl Ether, Acetone, and 192<br />
Petroleum Ether (Low-Boiling)<br />
3.4.C Using the Minimum Amount of Hot 169 3.6.D Mixed Solvent Crystallization 193<br />
Solvent<br />
3.4.D The Unavoidable Loss of Recovery 171 3.6.E Mixed Solvent Summary 195<br />
3.4.E Quantitating Crystallization 173 3.6.F Troubleshooting 196<br />
With a Soluble Impurity 173 Crystallization is too Quick 196<br />
With an Impurity of Similar Solubility 175 Crystallization Doesn’t Happen 197<br />
3.4.F Second Crop Crystallization 176 The Yield is Poor 198<br />
Liquid Droplets Form (The Solid<br />
Oils Out)<br />
199<br />
<strong>Organic</strong> <strong>Chemistry</strong> <strong>Laboratory</strong> <strong>Techniques</strong> | Nichols | Page 7
Chapter 4: Extraction 201<br />
4.1 Overview of Extraction 203 4.5 Step-by-Step Procedures 215<br />
4.2 Uses of Extraction 204 4.5.A Single Extraction 215<br />
4.2.A Extracting Natural Compounds 204 4.5.B Single Extraction Summary 221<br />
4.2.B Transferring Compounds from Layers 204 4.5.C Multiple Extractions 222<br />
4.2.C Selective Removal of Components 205 <strong>Organic</strong> Layer is on the Top 222<br />
<strong>Organic</strong> Layer is on the Bottom 224<br />
4.3 Which Layer is Which? 206 4.5.D Troubleshooting 225<br />
4.3.A Density 206 There is Only One Layer 225<br />
4.3.B How To Determine the Aqueous Layer 207 There are Three Layers 225<br />
There in Insoluble Material at the 225<br />
Interface<br />
4.4 Extraction Theory 208 The Interface Cannot Be Seen 226<br />
4.4.A Partition / Distribution Coefficient (K) 208 The Layers Don't Separate Well 226<br />
(An Emulsion Formed)<br />
4.4.B Choosing a Solvent with Solubility Data 209 4.5.E Microscale Extractions 228<br />
4.4.C Quantitating Single Extraction 210<br />
4.4.D Multiple Extractions 211 4.6 Reaction Work-ups 230<br />
Overview of Multiple Extraction 211 4.6.A Purpose of a Work-up 230<br />
Quantitating Multiple Extraction 213 4.6.B Common Washes 230<br />
Water 230<br />
Sodium Bicarbonate and Sodium 232<br />
Carbonate<br />
Brine (Saturated NaCl) 234<br />
4.6.C Drying Agents 237<br />
Why They are Used 237<br />
Types of Drying Agents 238<br />
Drying Agents Procedure 240<br />
4.7 Acid-Base Extraction 242<br />
4.7.A How They Work 242<br />
4.7.B Sodium Bicarbonate Washes 243<br />
4.7.C Mixtures of Acids and Bases 244<br />
Extracting Bases 244<br />
Extracting Carboxylic Acids Vs. 244<br />
Phenols<br />
Extracting Acid, Base, and Neutral<br />
Components<br />
245<br />
<strong>Organic</strong> <strong>Chemistry</strong> <strong>Laboratory</strong> <strong>Techniques</strong> | Nichols | Page 8
Chapter 5: Distillation 247<br />
5.1 Overview of Distillation 249 5.4 Vacuum Distillation 285<br />
5.2 Simple Distillation 251 5.4.A Overview of Vacuum Distillation 285<br />
5.2.A Uses of Simple Distillation 251 5.4.B Predicting the Boiling Temperature 286<br />
Concentration of Alcohol 251 5.3.C Step-by-Step Procedures 287<br />
Distilled Water 252 Vacuum Distillation Procedure 287<br />
Purification of Reagents + Products 252 Vacuum Distillation Summary 291<br />
5.2.B Separation Theory 254<br />
Raoult’s and Dalton’s Laws 254 5.5 Steam Distillation 292<br />
Purification Potential 255 5.5.A Overview of Steam Distillation 292<br />
Distillation Curves 258 5.5.B Uses of Steam Distillation 292<br />
Distilling Temperatures 260 5.5.C Separation Theory 293<br />
Azeotropes 262 5.5.D Step-by-Step Procedures 294<br />
5.2.C Step-by-Step Procedures 264 Steam Distillation Procedure 294<br />
Condenser Hoses 264 Steam Distillation Summary 299<br />
Simple Distillation Procedure 265<br />
Simple Distillation Summary 272 5.6 Rotary Evaporation 300<br />
Variations 273 5.6.A Overview of Rotary Evaporation 300<br />
Troubleshooting 274 5.6.B Step-by-Step Procedures 301<br />
Insulation 274 Rotary Evaporation Procedure 301<br />
5.2.D Microscale Distillation 276 Rotary Evaporation Summary 304<br />
Semi-Microscale 276 5.6.C Troubleshooting 305<br />
Hickman Head 276<br />
Short-Path Distillation 277<br />
5.3 Fractional Distillation 278<br />
5.3.A Theory of Fractional Distillation 278<br />
5.3.B Fractionating Columns 279<br />
5.3.C Uses of Fractional Distillation 281<br />
Oil Refining 281<br />
Purification of Reagents + Products 281<br />
5.3.D Step-by-Step Procedures 282<br />
Fractional Distillation Procedure 282<br />
Fractional Distillation Summary 284<br />
<strong>Organic</strong> <strong>Chemistry</strong> <strong>Laboratory</strong> <strong>Techniques</strong> | Nichols | Page 9
Chapter 6: Miscellaneous <strong>Techniques</strong> 307<br />
6.1 Melting Point 309 6.3 Sublimation 330<br />
6.1.A Overview of Melting Point 309 6.3.A Overview of Sublimation 331<br />
6.1.B Uses of Melting Point 310 6.3.B Step-by-Step Procedures 332<br />
Identification 310 Under Atmospheric Pressure 332<br />
Assessing Purity 311 Under Reduced Pressure (Vacuum 334<br />
Sublimation)<br />
6.1.C Melting Point Theory 313 Vacuum Sublimation Summary 337<br />
Melting Point Diagrams 313<br />
Impurities Effect on the Melting Point 314 6.4 Chemical Tests 338<br />
Melting Point Depression 314 6.4.A Overview of Chemical Tests 338<br />
Broadening of the Melting Point 315 6.4.B Flowcharts 339<br />
6.1.D Step-by-Step Procedures 316 6.4.C Chemical Test Summary 342<br />
Sample Preparation 316 6.4.D Individual Tests 344<br />
Melting Point Apparatus 317 Beilstein Test 344<br />
Thiele Tube Method 320 Benedict’s Test 345<br />
Melting Point Summary 322 Bicarbonate Test 347<br />
6.1.E Mixed Melting Points 323 Bromine Test 348<br />
Chromic Acid (Jones) Test 349<br />
6.2 Boiling Point 324 2,4-DNPH (Brady’s) Test 350<br />
6.2.A Overview of Boiling Point 324 Ferric Hydroxamate Test 351<br />
6.2.B Step-by-Step Procedures 324 Iodoform Test 352<br />
Distillation Method 324 Lucas Test 353<br />
Reflux Method 325 Permanganate (Baeyer) Test 354<br />
Thiele Tube Method 326 pH Test 355<br />
Thiele Tube Theory 326 Phenol Test 356<br />
Thiele Tube Procedure 327 Silver Nitrate Test 357<br />
Thiele Tube Summary 329 Sodium Iodide (Finkelstein) Test 358<br />
Tollens Test 359<br />
Chapter 7: Technique Summaries 361<br />
7.1 Flame-Drying Glassware 362 7.15 Single Extraction 376<br />
7.2 Using Calibrated Glass Pipettes 363 7.16 Multiple Extraction 377<br />
7.3 Inert Atmospheric Methods 364 7.17 Microscale Extraction 378<br />
7.4 Reflux 365 7.18 Testing the pH After a Wash 379<br />
7.5 Suction Filtration 366 7.19 Using Drying Agents 380<br />
7.6 Hot Filtration 367 7.20 Acid-Base Extraction 381<br />
7.7 Thin Layer Chromatography 368 7.21 Simple Distillation 382<br />
7.8 TLC Visualization Methods 369 7.22 Fractional Distillation 383<br />
7.9 Macroscale Column Chromatography 370 7.23 Vacuum Distillation 384<br />
7.10 Pipette Column Chromatography 371 7.24 Steam Distillation 385<br />
7.11 Testing Solvents for Crystallization 372 7.25 Rotary Evaporation 386<br />
7.12 Testing Mixed Solvents for<br />
373 7.26 Melting Points 387<br />
Crystallization<br />
7.13 Single Solvent Crystallization 374 7.27 Boiling Points (Thiele Tube) 388<br />
7.14 Mixed Solvent Crystallization 375 7.28 Vacuum Sublimation 389<br />
<strong>Organic</strong> <strong>Chemistry</strong> <strong>Laboratory</strong> <strong>Techniques</strong> | Nichols | Page 10
ABOUT THE AUTHOR LISA NICHOLS<br />
This resource is the result of an academic sabbatical leave<br />
in the 2015-2016 academic year. The goal of the project<br />
was twofold: a) to create a free electronic laboratory<br />
resource for students, b) to show greater step-by-step detail<br />
for organic chemistry lab techniques than is usually shown<br />
in print textbooks, so that students could come to lab with<br />
greater confidence.<br />
Lisa Nichols (Figure 1) obtained a Bachelor’s of Science<br />
degree in chemistry from California State University,<br />
Chico in 2001 and a Master’s degree in organic chemistry<br />
from Stanford University in 2003. At the time of the<br />
second edition (2017) she had taught chemistry full-time<br />
for 14 years at Butte Community College (in Oroville,<br />
northern California, near C.S.U. Chico), with an emphasis<br />
on teaching majors-level organic chemistry.<br />
Figure 1: Author running a chromatography column for<br />
this project.<br />
Lisa Nichols would like to express gratitude to the many people who made this project possible and/or<br />
enhanced the final product:<br />
•<br />
•<br />
•<br />
•<br />
•<br />
•<br />
•<br />
•<br />
•<br />
The administration and LTPA committee at Butte College that selected her to receive the sabbatical.<br />
Special thanks to Dr. David Ball, Professor Emeritus at C.S.U. Chico, who was the primary editor for<br />
this textbook. Dr. Ball was always willing to discuss best practices and was also a source of occasional<br />
supplies.<br />
Special thanks to the secondary editors of this textbook: Dr. Carolynn Arpin, Dr. Christopher Nichols<br />
(faculty at C.S.U. Chico), Dr. Michael Lodewyk, and Dr. Kristin Milinkevich (faculty at Butte College).<br />
Dave Carr and Rusty Bogart (staff at Butte College) who were often asked to take pictures when both<br />
hands were needed in the photograph. Some of Mr. Carr’s best work is shown in Figure 2.<br />
Occasional photography assistance: Dr. Elizabeth Wannenmacher, Martin Wallace (faculty at Butte<br />
College), Dr. Monica So, and Jana Burgess-Henry (faculty at C.S.U. Chico).<br />
Discussion of physics-related phenomena: Dr. Robert White (faculty at Butte College).<br />
Advice on publishing and multimedia: Jerry Garcia and Peter Dahl (staff at Butte College).<br />
Advice on online curricular materials: Matt Evans and Mark Blaser (faculty at Shasta College).<br />
For help on improving the accessibility of the textbook: Suzanne Wakim (faculty at Butte College).<br />
Figure 2: Some excellent photographs taken by Dave Carr.<br />
<strong>Organic</strong> <strong>Chemistry</strong> <strong>Laboratory</strong> <strong>Techniques</strong> | Nichols | Page 11
USING THIS RESOURCE<br />
NOTE TO INSTRUCTORS<br />
This resource is a PDF of an organic chemistry laboratory textbook designed for the undergraduate organic<br />
chemistry student who has never before taken a college-level organic chemistry course. It can also be used<br />
for students engaging in upper division courses or independent research who wish to have a refresher in<br />
basic laboratory techniques. This resource was not designed with graduate students in mind, and therefore<br />
may not be all inclusive in laboratory techniques experienced at that level.<br />
One of the main goals of this project was to provide a free, yet quality resource for organic chemistry<br />
students. With that in mind, the author Lisa Nichols welcomes feedback on typos, errors, or differences in<br />
opinion that readers come across. Please send comments to: nicholsli@butte.edu.<br />
It was not practical to show every conceivable iteration of every lab technique, and focus was placed on<br />
what was considered to be the most commonly encountered methods. Consideration was made to what<br />
materials are likely available in teaching labs. For example, a balloon technique was presented for inert<br />
atmospheric work as it was thought that gas manifolds are less common in academic labs.<br />
COPYRIGHT ISSUES<br />
Figure 3: Creative Commons logo.<br />
This work is licensed under a Creative Commons Attribution-NonCommercial-NoDerivatives 4.0<br />
International License.<br />
In other words, you are allowed to copy and distribute the material under the following terms:<br />
• Attribution: Please give appropriate credit to the author, for example in the following way:<br />
From: <strong>Organic</strong> <strong>Chemistry</strong> <strong>Laboratory</strong> <strong>Techniques</strong>, Nichols, 2017<br />
• Non-Commercial: This work may not be used for commercial purposes, or those primarily intended<br />
for monetary compensation. An exception is that the author allows for reproduction of this text in print<br />
format either at cost, or with small profit margins by academic bookstores.<br />
• No Derivatives: This work is not intended to be remixed, transformed, or built upon. However, the<br />
author allows for the following exceptions: a) Photograph screenshots and paragraphs from the text<br />
can be used in student or instructor presentations, lectures, and handouts with appropriate credit, b) The<br />
final chapter on technique summaries may be removed in print copies.<br />
<strong>Organic</strong> <strong>Chemistry</strong> <strong>Laboratory</strong> <strong>Techniques</strong> | Nichols | Page 12
NOTE TO STUDENTS<br />
This resource is a PDF of an organic chemistry laboratory textbook designed for the undergraduate organic<br />
chemistry student who has never before taken a college-level organic chemistry course. It can also be used<br />
for students engaging in upper division courses or independent research who wish to have a refresher in<br />
basic laboratory techniques. This resource was not designed with graduate students in mind, and therefore<br />
may not be all inclusive in laboratory techniques experienced at that level.<br />
All topics listed in the table of contents of each chapter are active links, and upon selection will take you to<br />
the beginning of each topic in the PDF. Some paragraphs in the text also contain links, and they will be<br />
underlined and a different color than the text (for example a link may look like this - this link takes you to<br />
the cover).<br />
In many PDF readers, there is a method to return to a previous section after a link has sent you elsewhere<br />
in the document. In Adobe Reader, this can be accomplished by selecting View < Page Navigation <<br />
Previous View, while in Preview this can be accomplished by selecting Go < Back. This method will<br />
work even if you have scrolled rather far from where the link sent you.<br />
There are several ways to find specific information in this text:<br />
1. Use the links in any Table of Contents<br />
(In Brief, In Detail, or at the beginning of<br />
each chapter) to jump to chapter headings<br />
or the topic of interest.<br />
The chapter headings can also be accessed<br />
through the Bookmarks view in Adobe<br />
Reader (Figure 4a), or the Table of<br />
Contents view in Preview (Figure 4b).<br />
2. Skip to the page number of interest (for<br />
example if a page has been assigned<br />
reading). In Adobe Reader, this can be Figure 4: a) Bookmarks icon in Adobe Reader (indicated with an<br />
accomplished by entering the page arrow), b) Table of contents icon in Preview (indicated with an arrow),<br />
number in the toolbar that looks like c) Skipping to a page icon in Reader, d) Thumbnail icon in Reader.<br />
Figure 4c. In Preview this is accomplished by using the Go < Go to Page option.<br />
3. Use the Search function in the PDF reader to search for keywords. In Adobe Reader, this can be<br />
accomplished by using the Edit < Find option, and in Preview a search box is located in the top right<br />
toolbar with a magnifying glass icon. The keyword hits can be scrolled through to find the topic of<br />
interest. Note that in Preview searching for water bath will show separate hits for water and bath,<br />
while using quotation marks to enclose “water bath” will shows hits only when the two words are<br />
found together. In Adobe Reader, a search for water bath will only show hits when the two words are<br />
found together.<br />
4. View the PDF as page thumbnails (in Adobe Reader select the icon in Figure 4d, and in Preview select<br />
View < Thumbnails) and scan through small images of each page to find the appropriate section.<br />
There are many ways to maximize your experience with a PDF. In many PDF readers, you may<br />
highlight text or add notes. Students are encouraged to learn about different options in their individual<br />
PDF reader.<br />
<strong>Organic</strong> <strong>Chemistry</strong> <strong>Laboratory</strong> <strong>Techniques</strong> | Nichols | Page 13
<strong>Organic</strong> <strong>Chemistry</strong> <strong>Laboratory</strong> <strong>Techniques</strong> | Nichols | Page 14
CHAPTER 1<br />
GENERAL TECHNIQUES<br />
A Grignard<br />
reaction is<br />
run under a<br />
balloon<br />
containing<br />
an inert gas.<br />
<strong>Organic</strong> <strong>Chemistry</strong> <strong>Laboratory</strong> <strong>Techniques</strong> | Nichols | Page 15
CHAPTER 1: GENERAL TECHNIQUES, TABLE OF CONTENTS<br />
1.1 Glassware and Equipment 17 1.3 Heating and Cooling Methods 44<br />
1.1.A Pictures of Glassware + Equipment 17 1.3.A Methods and Flammability 44<br />
1.1.B Ground Glass Joints 20 1.3.B Controlled Boiling 46<br />
1.1.C Clamping 21 Boiling Stones (Boiling Chips) 46<br />
1.1.D Greasing Joints 23 Boiling Sticks (Wood Splints) 47<br />
1.1.E Cleaning Glassware 24 Stir Bars and Spin Vanes 47<br />
1.1.F Drying Glassware 24 1.3.C Adjustable Platforms 48<br />
Quick Drying 24 1.3.D Bunsen Burners 49<br />
Oven and Flame Drying 25 1.3.E Hotplates 51<br />
Drying Tubes 26 1.3.F Steam Baths 52<br />
1.1.G Storing Samples (Parafilm/Teflon Tape) 26 1.3.G Heating Mantles 53<br />
1.3.H Water, Sand, and Oil Baths 54<br />
1.2 Transferring Methods 27 1.3.I Heat Guns 56<br />
1.2.A Solids 27 1.3.J Cooling Baths 57<br />
1.2.B Liquids 28 1.3.K Reflux 58<br />
Pouring Liquids 28 Overview of Reflux 58<br />
Comments Re: Measurements 28 Step-by-Step Procedures 58<br />
Using Pasteur Pipettes 29 Reflux Summary 62<br />
Using Calibrated Pipettes 30<br />
Calibrated Plastic Pipettes 30 1.4 Filtering Methods 63<br />
Calibrated Glass Pipettes 30 1.4.A Overview of Methods 63<br />
Calibrated Pipettes Summary 34 1.4.B Decanting 63<br />
Dispensing Highly Volatile Liquids 35 1.4.C Gravity Filtration 64<br />
Pouring Hot Liquids 35 1.4.D Suction Filtration 65<br />
1.2.C Inert Atmospheric Methods 36 Suction Filtration Overview 65<br />
Step-by-Step Procedures 37 Rinsing 66<br />
Inert Atmospheric Methods Summary 43 Water Aspirator 67<br />
Step-by-Step Procedures 68<br />
Suction Filtration Summary 72<br />
1.4.E Hot Filtration 73<br />
Hot Filtration Overview 73<br />
Step-by-Step Procedures 75<br />
Hot Filtration Summary 77<br />
1.4.F Pipette Filtration (Microscale) 78<br />
1.4.G Centrifugation 79<br />
<strong>Organic</strong> <strong>Chemistry</strong> <strong>Laboratory</strong> <strong>Techniques</strong> | Nichols | Page 16
1.1 GLASSWARE AND EQUIPMENT<br />
1.1.A PICTURES OF GLASSWARE + EQUIPMENT<br />
Glassware used in all chemistry courses:<br />
Item Name:<br />
1. Graduated cylinders<br />
2. Wash bottle<br />
3. Side arm<br />
Erlenmeyer flask<br />
4. Erlenmeyer flask<br />
5. Beaker<br />
6. Funnels<br />
7. Test tubes<br />
8. Watch glasses<br />
Glassware commonly used in organic chemistry for conducting reactions and purifications:<br />
Item Name:<br />
1. Cork ring<br />
2. Fractionating<br />
column<br />
3. West condenser<br />
4. Separatory funnel<br />
5. Stopper<br />
6. Round bottomed<br />
flask<br />
7. Three-way adapter<br />
(distilling head)<br />
8. Claisen adapter<br />
9. Vacuum adapter<br />
10.Thermometer<br />
adapter<br />
11.Plastic clip<br />
(Keck clip)<br />
12.Rubber fitting for<br />
thermometer adapter<br />
Table 1.1: Pictures of glassware in general and organic chemistry.<br />
<strong>Organic</strong> <strong>Chemistry</strong> <strong>Laboratory</strong> <strong>Techniques</strong> | Nichols | Page 17
Tools used in all chemistry courses:<br />
Item Name:<br />
1. Crucible tongs<br />
2. Test tube holder<br />
3. Striker<br />
4. Forceps<br />
5. Spatulas<br />
6. Scoopula<br />
7. Glass stirring rod<br />
8. Pasteur pipette<br />
9. Dropper bulb<br />
Various equipment in the organic chemistry lab:<br />
Item Name:<br />
1. Evaporating dish<br />
2. TLC chamber<br />
3. Buchner funnel<br />
4. Hirsch funnel<br />
5. Rubber sleeves for<br />
funnels<br />
(filter adapters)<br />
6. Clay tile<br />
7. Vials for storage<br />
8. Stir bars and spin vane<br />
9. Drying tube<br />
Clamps for securing apparatuses:<br />
Item Name:<br />
1. Extension clamps<br />
(with and without<br />
vinyl sleeves)<br />
2. Three-fingered clamps<br />
(vinyl and fireresistant<br />
sleeves)<br />
3. Ring clamp (iron ring)<br />
4. Wire mesh<br />
Table 1.2: Pictures of tools, equipment, and clamps.<br />
<strong>Organic</strong> <strong>Chemistry</strong> <strong>Laboratory</strong> <strong>Techniques</strong> | Nichols | Page 18
Burners and tubing:<br />
Item Name:<br />
1. Thick-walled<br />
vacuum tubing<br />
2. Bunsen burner<br />
3. Wood blocks<br />
4. Rubber tubing<br />
Glassware used in microscale work:<br />
Item Name:<br />
1. Drying Tube<br />
2. Hickman head<br />
3. Water condenser<br />
4. Air condenser<br />
5. Conical vial<br />
6. Claisen adapter<br />
7. Spin vane<br />
Table 1.3: Pictures of burners, tubing, and glassware used in microscale work.<br />
<strong>Organic</strong> <strong>Chemistry</strong> <strong>Laboratory</strong> <strong>Techniques</strong> | Nichols | Page 19
1.1.B GROUND GLASS JOINTS<br />
Most organic glassware uses “ground glass joints,” which have a frosted appearance. They are precisely<br />
ground to a certain size (which makes them expensive) and have outer (female) and inner (male) joints so<br />
that pieces can be connected together with a tight fit (Figure 1.1a). Common joint sizes are TS 14/20, 19/22,<br />
and 24/40. The first number refers to the inner diameter (in millimeters) of a female joint or outer diameter<br />
of a male joint. The second number refers to the length of the joint (Figure 1.1b).<br />
It is best if ground glass joints are free of chemicals when pieces are connected, or else the compounds may<br />
undergo reactions that cause the joints to “freeze” together, or become inseparable. Solid in the joint can<br />
also compromise the seal between the pieces. If chemical residue were to get on the joint during transfer<br />
(Figure 1.1c), the joint should be wiped clean with a KimWipe (lint-free tissue, Figure 1.2a) before<br />
connecting with another piece. Spillage on the joint can be minimized by using a funnel.<br />
Figure 1.1: a) Connections of ground glass joints, b) Ground glass joint measurements (for a 14/20 piece of glassware), c) Pouring<br />
liquid into a flask.<br />
Figures 1.2 b+c shows a “frozen” joint (notice the residue on the frosted joint), where benzaldehyde crept<br />
into the joint during storage and probably oxidized to seal the round bottomed flask and stopper together.<br />
To separate a frozen joint, first try to gently twist the two pieces apart from one another. If that fails, gently<br />
tap on the joint with a spatula or other piece of equipment (Figure 1.2c). If that fails, next try heating the<br />
joint in a hot water bath (heat may cause expansion of the outer joint), or sonicating the flask if a sonicator<br />
is available. As a last resort, see your instructor, and they may heat the joint briefly with a heat gun. The<br />
frozen joint in Figure 1.2 had to be heated to separate the pieces.<br />
Figure 1.2: a) Wiping the joint free of residue, b) Frozen joint, c) Attempting to separate a frozen joint.<br />
<strong>Organic</strong> <strong>Chemistry</strong> <strong>Laboratory</strong> <strong>Techniques</strong> | Nichols | Page 20
1.1.C CLAMPING<br />
<strong>Organic</strong> chemistry glassware is often segmented so that pieces can be arranged in a variety of ways to create<br />
setups that achieve different goals. It is important that the pieces are securely fastened in an apparatus so<br />
that flammable vapors don’t escape and pieces don’t fall (whereupon the glassware may break or contents<br />
may be spilled). Some chemistry labs have a lattice-work of metal bars (Figure 1.3c) secured to the<br />
benchtop that can be used for clamping apparatuses, and other labs rely on ring stands (Figure 1.3a). Ring<br />
stands should be positioned so that the apparatus is clamped directly over the heavy metal base, not in the<br />
opposite direction as the base (Figure 1.3a, not 1.3b)<br />
Figure 1.3: a) Correct clamping of an apparatus to a ring stands, with the apparatus directly over the metal base, b) Incorrect use<br />
of a ring stand, where the apparatus is not directly over the metal base, c) Metal lattice-work for clamping apparatuses.<br />
Metal clamps are used to connect glassware to ring stands or the metal lattice work. Two common type of<br />
clamps are “extension clamps” and “three-fingered clamps” (Figure 1.4a). Although in many situations<br />
the clamps can be used interchangeably, an extension clamp must be used when clamping to a round<br />
bottomed flask (Figure 1.4b), as 3-fingered clamps do not hold well. The extension clamp should securely<br />
grasp the neck of a round bottomed flask below the glass protrusion (Figure 1.4b, not Figure 1.4c). Threefingered<br />
clamps are generally used to hold condensers (Figure 1.3b), suction flasks, and chromatography<br />
columns (Figure 1.5).<br />
Figure 1.4: a) Extension and three-fingered clamps, b) Correct use of an extension clamp on a round bottomed flask, c) Incorrect<br />
clamping (flask may slip).<br />
<strong>Organic</strong> <strong>Chemistry</strong> <strong>Laboratory</strong> <strong>Techniques</strong> | Nichols | Page 21
Figure 1.5: Examples where three-fingered clamps are used to hold: a) Flasks, b) Chromatography columns, c) Pipette columns.<br />
Both types of clamps often come with vinyl sleeves that may be removed if desired. The vinyl sleeves<br />
provide a gentle grasp for glassware, but should not be used with hot pieces as they may melt (or in the<br />
author’s experience catch on fire!). Sometimes fire resistant sleeves are also provided with clamps as an<br />
alternative (right-most clamp in Figure 1.4a).<br />
Ring clamps (or iron rings) are also commonly used in the organic lab. They are used to hold separatory<br />
funnels (Figure 1.6a), and can be used to secure funnels when filtering or pouring liquids into narrow joints<br />
(Figure 1.6b). Furthermore, they can be used along with a wire mesh to serve as a platform for supporting<br />
flasks (Figure 1.6c).<br />
Figure 1.6: Using ring clamps for: a) Holding separatory funnels, b) Holding funnels, c) Assembly of an adjustable platform.<br />
Plastic clips (sometimes called “Keck clips” or<br />
“Keck clamps”) are also commonly used to secure<br />
the connections between joints (Figure 1.7). The clips<br />
are directional, and if they don’t easily snap on, they<br />
are probably upside down. Plastic clips should not be<br />
used on any part of an apparatus that will get hot, as<br />
they may melt at temperatures above 140 ˚C (Figure<br />
1.7b). Metals versions of these clips can be used<br />
alternatively in hot areas. Clips should not be relied<br />
upon to hold any substantial weight, as they can easily<br />
fail (especially if they have been warmed). Therefore,<br />
Figure 1.7: a) Using a plastic clip, b) Melted clip.<br />
reaction flasks should not be held with just clips, but<br />
always supported in some more significant way (e.g. with an extension clamp attached to a ring stand).<br />
<strong>Organic</strong> <strong>Chemistry</strong> <strong>Laboratory</strong> <strong>Techniques</strong> | Nichols | Page 22
1.1.D GREASING JOINTS<br />
Ground glass joints are manufactured to fit quite well with one another, and yet they are not perfectly air<br />
tight. In some situations (e.g. when using reduced pressure inside an apparatus), grease must be applied to<br />
each joint to ensure a good seal. Grease is also used whenever the joint may be in contact with a highly<br />
basic solution, as basic solutions can form sodium silicates and etch glass.<br />
Grease can be applied with a syringe full of grease (Figure 1.8a), wood splint, or toothpick. Grease should<br />
be lightly applied in portions around the male joint, closer to the glass end than the end which will be in<br />
contact with the reagents (Figure 1.8a). If grease is allowed near the end which will contact the reagents,<br />
there is a possibility the reagent will dissolve the grease and become contaminated. The female joint should<br />
then be connected, and the joints twisted to spread the grease in a thin layer. The joint should become<br />
transparent all the way around the joint, but to a depth of only one-third to one-half of the joint (Figure<br />
1.8b). If the entire joint becomes transparent or if grease is seen spilling out of the joint, too much grease<br />
has been used (Figure 1.8c). Excess grease should be wiped off with a Kimwipe (one is used in Figure 1.9).<br />
Figure 1.8: a) Applying grease by syringe, b) Properly greased joint, c) Too much grease in the joint, as indicated with an arrow.<br />
To clean grease from a joint after a process is complete, wipe off the majority<br />
of the grease using a paper towel or Kimwipe. Then wet a KimWipe with<br />
some hydrocarbon solvent and rub the moistened KimWipe onto the joint to<br />
dissolve the grease (Figure 1.9). Hydrocarbon solvents (e.g. hexanes) work<br />
much better than acetone to dissolve residual grease.<br />
Figure 1.9: Removing grease with<br />
a KimWipe soaked in hexanes.<br />
<strong>Organic</strong> <strong>Chemistry</strong> <strong>Laboratory</strong> <strong>Techniques</strong> | Nichols | Page 23
1.1.E CLEANING GLASSWARE<br />
Glassware should be dismantled and cleaned as soon as possible. Experience with home dishwashing can<br />
tell you that dishes are more difficult to clean when allowed to dry. If there is a time constraint, it’s best to<br />
leave glassware in a tub of soapy water.<br />
To clean glassware, use the following procedures:<br />
•<br />
Use 2-3 mL solvent to rinse residual organic compounds from the glassware into a waste beaker. The<br />
compounds should be highly soluble in the solvent. The default solvent is often acetone as it is<br />
inexpensive, relatively nontoxic, and dissolves most organic compounds. Some institutions reuse their<br />
acetone (“wash acetone”) as the solvation ability is not spent after a few uses.<br />
As it will soon become second-nature for most students to use acetone as part of their cleaning ritual,<br />
it is worth reminding that the purpose of an acetone rinse is to dissolve organic residue in a flask. Not<br />
everything dissolves in acetone, for example ionic salts are insoluble in acetone and are more<br />
successfully rinsed out with water.<br />
•<br />
After a preliminary rinse, glassware should then be washed with soap and water<br />
at the bench.<br />
Residual acetone will likely evaporate from the flask, but it is acceptable for small<br />
quantities of residual acetone to be washed down the drain. Acetone is a normal<br />
biological byproduct of some metabolic processes, 1 and has low toxicity as it can<br />
be easily excreted by most organisms.<br />
If using undiluted detergent from the store, it is best to use small amounts during<br />
washing as they tend to form thick foams that need lots of rinsing (Figure 1.10).<br />
Some institutions instead use dilute soap solutions at their cleaning stations for<br />
this reason. For cleaning of glassware, the biodegradable detergent “Alconox” is<br />
the industry standard.<br />
Figure 1.10: Detergent<br />
foaming during washing.<br />
•<br />
Rinse all glassware with a few mL of distilled water, then store wet glassware in a locker atop paper<br />
towels to evaporate by the next lab period.<br />
1.1.F DRYING GLASSWARE<br />
1.1.F.1 QUICK DRYING<br />
If dry glassware is not needed right away, it should be rinsed with distilled water and allowed to dry<br />
overnight (in a locker). If dry glassware is promptly needed, glassware can be rinsed with acetone and the<br />
residual acetone allowed to evaporate. Rinsing with acetone works well because water is miscible with<br />
acetone, so much of the water is removed in the rinse waste. Evaporation of small amounts of residual<br />
acetone can be expedited by placing the rinsed glassware in a warm oven for a short amount of time or by<br />
using suction from a tube connected to the water aspirator. Residual acetone should not be evaporated<br />
1 R. Boyer, Concepts in Biochemistry, 2 nd edition, 2002, Brooks-Cole, p 565.<br />
<strong>Organic</strong> <strong>Chemistry</strong> <strong>Laboratory</strong> <strong>Techniques</strong> | Nichols | Page 24
inside a hot oven (> 100 ˚C) as acetone may polymerize and/or ignite under these conditions. It should also<br />
not be evaporated using the house compressed air lines, as this is likely to contaminate the glassware with<br />
dirt, oil, and moisture from the air compressor.<br />
1.1.F.2 OVEN AND FLAME DRYING<br />
Glassware that appears “dry” actually contains a thin film of water condensation on its surface. When using<br />
reagents that react with water (sometimes violently!), this water layer needs to be removed. To evaporate<br />
the water film, glassware can be placed in a 110 ˚C oven overnight, or at the least for several hours. The<br />
water film can also be manually evaporated using a burner or heat gun, a process called “flame drying.”<br />
Both methods result in extremely hot glassware that must be handled carefully with tongs or thick gloves.<br />
Figure 1.11: Flame drying glassware: a) Removal of vinyl sleeves, b) Clamped, c) First moments with a flame, d) After the flame.<br />
To flame dry glassware, first remove any vinyl sleeves on an extension clamp (Figure 1.11a), as these can<br />
melt or catch on fire. Clamp the flask to be dried, including a stir bar if using (Figure 1.11b). Apply the<br />
burner or heat gun to the glass, and initially fog will be seen as water vaporizing from one part of the<br />
glassware condenses elsewhere (Figure 1.11c). Continue waving the heat source all over the glassware for<br />
several minutes until the fog is completely removed and glassware is scorching hot (Figure 1.11d). If the<br />
glass is only moderately hot, water will condense from the air before you are able to fully exclude it.<br />
Safety Note: glassware will be extremely hot after flame drying<br />
Regardless of the manner in which glassware is heated (oven or flame drying), allow the glassware to cool<br />
in a water-free environment (in a desiccator, under a stream of inert gas, or with a drying tube, Figure 1.12)<br />
before obtaining a mass or adding reagents.<br />
Figure 1.12: Drying hot glassware: a) In a desiccator, b) Under a balloon of inert gas, c) With a drying tube.<br />
<strong>Organic</strong> <strong>Chemistry</strong> <strong>Laboratory</strong> <strong>Techniques</strong> | Nichols | Page 25
1.1.F.3 DRYING TUBES<br />
A drying tube is used when moderately but not meticulously dry conditions are desired in an apparatus. If<br />
meticulously dry conditions are necessary, glassware should be oven or flame dried, then the air displaced<br />
with a dry, inert gas.<br />
Drying tubes are pieces of glassware that can be filled with a drying agent (often anhydrous CaCl 2 or CaSO 4<br />
in the pellet form) and connected to an apparatus either through a thermometer adapter (Figures 1.13 b+c)<br />
or rubber tubing (Figure 1.13d). Air passing through the tube is removed of water when it comes in contact<br />
with the drying agent. Since it is important that air can flow through the drying tube, especially so the<br />
apparatus is not a closed system, the drying agent should be fresh as used drying agents can sometimes<br />
harden into a plug that restricts air flow. Drying tubes can also be filled with basic solids such as Na 2 CO 3<br />
to neutralize acidic gases.<br />
Figure 1.13: a) Drying tube with anhydrous CaCl 2 , b) Inserting drying tube into a thermometer adapter, Drying tube attached to a:<br />
c) round bottomed flask, d) distillation apparatus.<br />
1.1.G STORING SAMPLES (PARAFILM / TEFLON TAPE)<br />
When samples must be stored for a period of time, they are best stored upright in screw-capped vials.<br />
Samples may evaporate through the joint over time, and if a highly volatile sample is used, the joint should<br />
be wrapped in Teflon tape (semi-stretchy white film, Figures 1.14 a+b) or Parafilm (stretchy plastic film,<br />
Figures 1.14 c-e) to create a better seal. Teflon tape is less permeable to solvents than Parafilm, and volatile<br />
samples wrapped in Parafilm may still evaporate over a period of weeks. If a sample is to be stored in a<br />
round bottomed flask for some time, it should be stoppered with a cork stopper or plastic cap. A rubber<br />
stopper should not be used as it will tend to swell when exposed to organic vapors, and a glass stopper may<br />
freeze.<br />
Figure 1.14: a+b) Stretching Teflon tape to seal a joint, c) Removing Parafilm from the roll, d+e) Stretching Parafilm over a joint.<br />
<strong>Organic</strong> <strong>Chemistry</strong> <strong>Laboratory</strong> <strong>Techniques</strong> | Nichols | Page 26
1.2 TRANSFERRING METHODS<br />
1.2.A SOLIDS<br />
A solid can be dispensed from its reagent jar directly into a vessel or onto a weighing boat or creased piece<br />
of paper. If a solid is to be transferred into a vessel containing a narrow mouth (such as a round bottomed<br />
flask), a “powder funnel” or wide-mouth funnel can be used (Figure 1.15a). Alternatively, the solid can be<br />
nudged off a creased piece of paper in portions using a spatula (Figures 1.15 b+c).<br />
Figure 1.15: a) Transferring a solid using a powder funnel, b+c) Transferring a solid using a creased piece of glossy paper.<br />
If the solid is the limiting reagent in a chemical reaction, it should ideally be dispensed from the reagent jar<br />
directly into the vessel (Figure 1.16a). However, if using a weighing boat, residue should be rinsed off with<br />
the solvent that will be used in the reaction (only if the boat is unreactive to the solvent) in order to transfer<br />
the reagent in its entirety.<br />
Residue clinging to ground glass joints should also be dislodged with a KimWipe or rinsed into the flask<br />
with solvent to prevent joints from sticking, and to make sure the entire reagent makes it to the reaction<br />
vessel.<br />
Certain solid compounds (e.g. KOH, K 2 CO 3 , CaCl 2 ) are sticky or hygroscopic (readily absorb water from<br />
the air), and these reagents should be dispensed onto glossy weighing paper (used in Figure 1.15b). This<br />
weighing paper has a wax coating so that sticky reagents more easily slide off its surface.<br />
For transfer into vessels with very narrow mouths (e.g. NMR tubes), it is sometimes easier to dissolve solids<br />
in their eventual solvent and transfer a solution via pipette (Figures 1.16 b+c).<br />
Figure 1.16: a) Students transferring solid onto balances, b+c) Pipetting a solution into a narrow glass tube (NMR tube).<br />
<strong>Organic</strong> <strong>Chemistry</strong> <strong>Laboratory</strong> <strong>Techniques</strong> | Nichols | Page 27
1.2.B LIQUIDS<br />
1.2.B.1 POURING LIQUIDS<br />
Figure 1.17: a) Pouring liquid, b) Pouring into a funnel held with ring clamp, c) Pouring into a funnel held by hand.<br />
When transferring liquids with volumes greater than 5 mL, they can be poured directly into vessels.<br />
Graduated cylinders and beakers have an indentation in their mouth, so they can be poured controllably as<br />
long as the two pieces of glass touch one another (Figure 1.17a). If pouring from an Erlenmeyer flask, or<br />
transferring a liquid into a vessel containing a narrow mouth (e.g. a round bottomed flask), a funnel should<br />
be used. Funnels can be securely held with a ring clamp (Figure 1.17b), or held with one hand while pouring<br />
with the other (Figure 1.17c).<br />
1.2.B.2 COMMENTS REGARDING MEASUREMENTS<br />
In order to determine a meaningful yield for a chemical reaction, it is important to have precise<br />
measurements on the limiting reactant. It is less important to be precise when manipulating a reagent that<br />
is in excess, especially if the reagent is in several times excess.<br />
A portion of the liquid measured by a graduated cylinder always clings to the glassware after pouring,<br />
meaning that the true volume dispensed is never equivalent to the markings on the cylinder. Therefore,<br />
graduated cylinders can be used for dispensing solvents or liquids that are in excess, while more accurate<br />
methods (e.g. mass, calibrated pipettes or syringes) should be used when dispensing or measuring the<br />
limiting reactant. A graduated cylinder may be used to dispense a limiting reactant if a subsequent mass<br />
will be determined to find the precise quantity actually dispensed.<br />
When determining the mass of a vessel on a<br />
balance, it’s best to not include the mass of a<br />
cork ring (Figure 1.18a) or other support (e.g.<br />
the beaker in Figure 1.18b). A cork ring might<br />
get wet, have reagents spilled on it, or have<br />
pieces of cork fall out, leading to changes in<br />
mass that cannot be accounted for. Beakers<br />
used to support flasks can get mixed up, and<br />
every 100-mL beaker does not have the same<br />
mass. It is also best to transport vessels Figure 1.18: Round bottomed flasks supported by: a) Cork ring on<br />
an analytical balance, b) Beaker on a pan balance.<br />
containing chemicals to the balance in sealed<br />
containers, so as to minimize vapors and prevent possible spillage during transport.<br />
<strong>Organic</strong> <strong>Chemistry</strong> <strong>Laboratory</strong> <strong>Techniques</strong> | Nichols | Page 28
1.2.B.3 USING PASTEUR PIPETTES<br />
Pasteur pipettes (or pipets) are the most commonly used<br />
tool for transferring small volumes of liquids (< 5 mL) from<br />
one container to another. They are considered disposable,<br />
although some institutions may clean and reuse them if<br />
they have a method for preventing the fragile tips from<br />
breaking.<br />
Pasteur pipettes come in two sizes (Figure 1.19a): short<br />
(5.75”) and long (9”). Each can hold about 1.5 mL of<br />
liquid, although the volume delivered is dependent on the<br />
size of the dropper bulb. The general guideline that “1 mL<br />
is equivalent to 20 drops” does not always hold for Pasteur<br />
pipettes, and may be inconsistent between different<br />
pipettes. The drop ratio for a certain pipette and solution<br />
can be determined by counting drops until 1 mL is<br />
accumulated in a graduated cylinder. Alternatively, a<br />
Figure 1.19: a) Short and long pipettes, b) 1 mL marked<br />
on a pipette with a permanent marker.<br />
pipette can be roughly calibrated by withdrawing 1 mL of liquid from a graduated cylinder and marking<br />
the volume line with a permanent marker (Figure 1.19b).<br />
Figure 1.20: a+b) Creating suction with a Pasteur pipette, c) Delivering liquid from a Pasteur pipette, d) Incorrect delivering of<br />
reagent (liquid should not touch the sides of the glass).<br />
To use a pipette, attach a dropper bulb and place the pipette tip into a liquid. Squeeze then release the bulb<br />
to create suction, which will cause liquid to withdraw into the pipette (Figures 1.20 a+b). Keeping the<br />
pipette vertical, bring it to the flask where it is to be transferred, and position the pipette tip below the joint<br />
of the flask but not touching the sides before depressing the bulb to deliver the material to the flask (Figure<br />
1.20c). The bulb can be squeezed a few times afterward to “blow out” residual liquid from the pipette.<br />
If the receiving flask has a ground glass joint, the pipette tip should be below the joint while delivering so<br />
that liquid does not splash onto the joint, which sometimes causes pieces to freeze together when connected.<br />
If the pipette is to be reused (for example is the designated pipette for a reagent bottle), the pipette should<br />
be held so it does not touch the glassware, where it may become contaminated by other reagents in the flask<br />
(Figure 1.20d).<br />
<strong>Organic</strong> <strong>Chemistry</strong> <strong>Laboratory</strong> <strong>Techniques</strong> | Nichols | Page 29
1.2.B.4 USING CALIBRATED PIPETTES<br />
1.2.B.4.A CALIBRATED PLASTIC PIPETTES<br />
When some precision is needed in dispensing small volumes of liquid (1-2 mL), a graduated cylinder is not<br />
ideal as the pouring action results in a significant loss of material. Calibrated plastic pipettes have markings<br />
at 0.25 mL increments for a 1 mL pipette, and are economical ways to dispense relatively accurate volumes.<br />
Figure 1.21: a) 1 mL calibrated plastic pipette, b) Suction of liquid, c) Depressing bulb to required volume (the arrow points to the<br />
1 mL mark), d+e) Transfer of liquid.<br />
To use a calibrated plastic pipette, withdraw some of the liquid to be transferred into the bulb as usual<br />
(Figure 1.21b). Then squeeze the bulb just enough so that the liquid drains to the desired volume (Figure<br />
1.21c), and maintain your position. While keeping the bulb depressed so the liquid still reads to the desired<br />
volume, quickly move the pipette to the transfer flask (Figure 1.21d), and depress the bulb further to deliver<br />
liquid to the flask (Figure 1.21e).<br />
1.2.B.4.B CALIBRATED GLASS PIPETTES<br />
When a high level of precision is needed while dispensing liquids, calibrated glass pipettes (volumetric or<br />
graduated) can be used. Volumetric pipettes have a glass bulb at the top of their neck, and are capable of<br />
dispensing only one certain volume (for example, the top pipette in Figure 1.22 is a 10.00 mL pipette).<br />
Graduated pipettes (Mohr pipettes) have markings that allow them to deliver many volumes. Both pipettes<br />
need to be connected to a pipette bulb to provide suction.<br />
Figure 1.22: Volumetric and graduated pipettes.<br />
<strong>Organic</strong> <strong>Chemistry</strong> <strong>Laboratory</strong> <strong>Techniques</strong> | Nichols | Page 30
The volume markings on a graduated pipette indicate the delivered volume, which may seem a bit<br />
“backward” at first. For example, when a graduated pipette is held vertically, the highest marking is 0.0<br />
mL, which indicates that no volume has been delivered when the pipette is still full. As liquid is drained<br />
into a vessel, the volume markings increase on the pipette, with the lowest marking often being the total<br />
capacity of the pipette (e.g. 1.0 mL for a 1.0 mL pipette).<br />
Graduated pipettes can deliver any volume of liquid made possible by differences in the volume markings.<br />
For example, a 1.0 mL pipette could be used to deliver 0.4 mL of liquid by: a) Withdrawing liquid to the<br />
0.0 mL mark, then draining and delivering liquid to the 0.4 mL mark, or b) Withdrawing liquid to the 0.2<br />
mL mark and draining and delivering liquid to the 0.6 mL mark (or any combination where the difference<br />
in volumes is 0.4 mL).<br />
It is important to look carefully at the markings on a graduated pipette. Three different 1 mL pipettes are<br />
shown in Figure 1.23a. The left-most pipette has markings every 0.1 mL, but no intermediary markings so<br />
is less precise than the other two pipettes in Figure 1.23a. The other two pipettes differ in the markings on<br />
the bottom. The lowest mark on the middle pipette is 1 mL, while the lowest mark on the right-most pipette<br />
is 0.9 mL. To deliver 1.00 mL with the middle pipette, the liquid must be drained from the 0.00 mL to the<br />
1.00 mL mark, and the final inch of liquid should be retained. To deliver 1.00 mL with the right-most<br />
pipette, liquid must be drained from the 0.00 mL mark completely out the tip, with the intent to deliver its<br />
total capacity.<br />
Pipettes are calibrated “to-deliver” (TD) or “to-contain” (TC) the marked volume. Pipettes are marked<br />
with T.C. or T.D. to differentiate between these two kinds, and to-deliver pipettes are also marked with a<br />
double ring near the top (Figure 1.23b). After draining a “to-deliver” pipette, the tip should be touched to<br />
the side of the flask to withdraw any clinging drops, and a small amount of residual liquid will remain in<br />
the tip. A “to-deliver” pipette is calibrated to deliver only the liquid that freely drains from the tip. However,<br />
after draining a “to-contain” pipette, the residual liquid in the tip should be “blown out” with pressure from<br />
a pipette bulb. “To-contain” pipettes may be useful for dispensing viscous liquids, where solvent can be<br />
used to wash out the entire contents.<br />
Figure 1.23: Three 1 mL graduated pipettes with different markings: a) Bottom of pipettes, b) Top of pipettes.<br />
<strong>Organic</strong> <strong>Chemistry</strong> <strong>Laboratory</strong> <strong>Techniques</strong> | Nichols | Page 31
Figure 1.24: a+b) Applying suction to the pipette, c) Liquid withdrawn above the desired volume, d) The bulb is released and tip<br />
of the pipette sealed with a finger to maintain the liquid’s position.<br />
In this section are described methods on how to use a calibrated glass pipette. These methods are for use<br />
with a clean and dry pipette. If residual liquid is in the tip of the pipette from water or from previous use<br />
with a different solution, a fresh pipette should be used.<br />
Alternatively, if the reagent is not particularly expensive or reactive, the pipette can be “conditioned” with<br />
the reagent to remove residual liquid. To condition a pipette, rinse the pipette twice with a full volume of<br />
the reagent and collect the rinsing in a waste container. After two rinses, any residual liquid in the pipette<br />
will have been replaced by the reagent. When the reagent is then withdrawn into the pipette it will not be<br />
diluted or altered in any way.<br />
To use a calibrated glass pipette:<br />
1. Place the pipette tip in the reagent, squeeze the bulb and connect it to the top of the pipette (Figures<br />
1.24 a+b).<br />
2. Partially release pressure on the bulb to create suction, but do not fully release your hand or you may<br />
create too great a vacuum, causing liquid to be violently withdrawn into the pipette bulb. Suction<br />
should be applied until the liquid rises to just past the desired mark (Figure 1.24c).<br />
3. Break the seal and remove the pipette bulb, then quickly place your finger atop the pipette to prevent<br />
the liquid from draining (Figure 1.24d).<br />
<strong>Organic</strong> <strong>Chemistry</strong> <strong>Laboratory</strong> <strong>Techniques</strong> | Nichols | Page 32
Figure 1.25: a) Red liquid to the 0 mL mark, b) Delivering reagent, c) Final volume, d) Volumetric pipette (arrow indicates the fill<br />
mark).<br />
4. With a slight wiggling motion or slight release of pressure from your finger, allow tiny amounts of air<br />
to be let into the top of the pipette in order to slowly and controllably drain the liquid until the meniscus<br />
is at the desired volume (Figure 1.25a shows a volume of 0.00 mL).<br />
5. Holding the top of the pipette tightly with your finger, bring the pipette to the flask where the liquid is<br />
to be delivered and again allow tiny amounts of air into the top of the pipette in order to slowly drain<br />
the liquid to the desired mark (Figure 1.25b; Figure 1.25c shows the delivered volume to be slightly<br />
below 0.20 mL).<br />
6. Touch the pipette tip to the side of the container to dislodge any hanging drops and remove the pipette.<br />
7. If liquid was drained to the bottom of the pipette with a T.C. pipette, use pressure from a pipette bulb<br />
to blow out the residual drop. Do not blow out the residual drop when using a T.D. pipette.<br />
8. If a volumetric pipette is used, the liquid should be withdrawn with suction to the marked line above<br />
the glass bulb (indicated in Figure 1.25d). The liquid can be drained into the new container with your<br />
finger fully released from the top. When the liquid stops draining, the tip should be touched to the side<br />
of the flask to withdraw any clinging drops, but the residual drop should not be forced out (similar to a<br />
T.D. pipette).<br />
<strong>Organic</strong> <strong>Chemistry</strong> <strong>Laboratory</strong> <strong>Techniques</strong> | Nichols | Page 33
1.2.B.4.C CALIBRATED PIPETTES SUMMARY<br />
Place pipette tip in<br />
reagent bottle, squeeze<br />
pipette bulb, and<br />
connect to the pipette.<br />
Partially release your<br />
hand to create suction.<br />
Do not let go<br />
completely or liquid<br />
will withdraw forcibly<br />
and possibly into the<br />
bulb.<br />
Apply suction until<br />
liquid is withdrawn to<br />
just past the desired<br />
mark.<br />
Remove the pipette bulb<br />
and place your finger<br />
atop the pipette.<br />
Allow tiny amounts of<br />
air to be let into the top<br />
of the pipette by<br />
wiggling your finger or<br />
a slight release of<br />
pressure.<br />
Drain the liquid to the<br />
desired mark.<br />
Tightly hold the pipette<br />
with your finger, bring<br />
it to the transfer flask<br />
and deliver the reagent<br />
to the desired mark.<br />
Touch the pipette to the<br />
side of the container to<br />
dislodge the drip at the<br />
end of the pipette.<br />
If a pipette is drained to<br />
the tip,<br />
•<br />
To-deliver (T.D.)<br />
pipettes and<br />
volumetric pipettes<br />
should not be<br />
blown out.<br />
Note: If pipette is wet<br />
with a different solution<br />
before use, obtain a<br />
fresh one or “condition”<br />
the pipette with two<br />
rinses of the reagent.<br />
•<br />
To-contain (T.C.)<br />
pipettes should be<br />
“blown out”<br />
Table 1.4: Procedural summary for using calibrated pipettes.<br />
<strong>Organic</strong> <strong>Chemistry</strong> <strong>Laboratory</strong> <strong>Techniques</strong> | Nichols | Page 34
1.2.B.5 DISPENSING HIGHLY VOLATILE LIQUIDS<br />
When attempting to dispense highly volatile liquids (e.g. diethyl ether) via pipette, it is very common that<br />
liquid drips out of the pipette even without pressure from the dropper bulb! This occurs as the liquid<br />
evaporates into the pipette’s headspace, and the additional vapor causes the headspace pressure to exceed<br />
the atmospheric pressure.<br />
To prevent a pipette from dripping, withdraw and expunge the liquid into the pipette several times. Once<br />
the headspace is saturated with solvent vapors, the pipette will no longer drip.<br />
1.2.B.6 POURING HOT LIQUIDS<br />
It may be difficult to manipulate a vessel of hot liquid with your bare hands. If pouring a hot liquid from a<br />
beaker, a silicone hot hand protector can be used (Figure 1.26a) or beaker tongs (Figures 1.26 b+c).<br />
Figure 1.26: Pouring liquid with a: a) hot hand protector, b+c) Beaker tongs, d) paper towel holder.<br />
When pouring a hot liquid from an Erlenmeyer flask, hot hand protectors can also be used, but do not hold<br />
the awkward shape of the flask very securely. Pouring from hot Erlenmeyer flasks can be accomplished<br />
using a makeshift “paper towel holder.” A long section of paper towel is folded several times in one<br />
direction to the thickness of approximately one inch (and secured with lab tape if desired, Figure 1.27a).<br />
This folded paper towel can be wrapped around the top of a beaker or Erlenmeyer flask and pinched to hold<br />
the flask (Figures 1.26d + 1.27b).<br />
When pouring hot liquid from an Erlenmeyer flask, the paper towel holder should be narrow enough that<br />
the towel does not reach the top of the flask. If it does, liquid will wick toward the paper as it is poured,<br />
thus weakening the holder and also removing possibly valuable solution (Figure 1.27c). When the paper<br />
towel is a distance away from the top of the flask, liquid can be poured from the flask without absorbing<br />
the liquid (Figure 1.27d).<br />
Figure 1.27: a) Paper towel holder, b) Holding an Erlenmeyer flask with a paper towel holder, c) A too-wide holder, causing liquid<br />
to wick onto the paper as it is poured, d) A narrower holder, which pours without wicking.<br />
<strong>Organic</strong> <strong>Chemistry</strong> <strong>Laboratory</strong> <strong>Techniques</strong> | Nichols | Page 35
1.2.C INERT ATMOSPHERIC METHODS<br />
Meticulously dry or oxygen-free conditions are sometimes necessary<br />
when using reagents that react with water or oxygen in the air. To safely<br />
and effectively use these reagents, glassware should be oven or flame<br />
dried, then the air displaced with a dry, inert gas (often nitrogen or<br />
argon). This creates an “inert atmosphere” inside an apparatus, one<br />
that will not react with the reagents. Inert gases can be delivered to a<br />
flask through gas lines and a gas manifold (in a research setting, Figure<br />
1.28), or through a balloon of inert gas (more common in teaching labs,<br />
Figure 1.29).<br />
Figure 1.28: Gas manifold.<br />
Figure 1.29: <strong>Organic</strong> chemistry students using inert gas balloons.<br />
<strong>Organic</strong> <strong>Chemistry</strong> <strong>Laboratory</strong> <strong>Techniques</strong> | Nichols | Page 36
1.2.C.1 STEP-BY-STEP PROCEDURES<br />
The techniques shown in this section use balloons of nitrogen gas to create inert atmospheric conditions in<br />
a round bottomed flask, and syringes to transfer liquids from dry reagent bottles. These techniques can be<br />
easily adapted to use with a gas manifold if available.<br />
Figure 1.30: a) Attaching the balloon to a tank of nitrogen gas, b) Filling the balloon, c) Attaching the needle, d) Temporarily<br />
plugging the needle with a rubber stopper.<br />
Prepare a balloon of inert gas<br />
1. Prepare a needle attachment for a balloon: Cut the end off a plastic 1 mL syringe and fit the barrel into<br />
a piece of thick rubber tubing. Attach a helium-quality balloon to the rubber tubing, and seal all joints<br />
with Parafilm. Alternatively, attach a balloon directly to a 2-3 mL plastic syringe.<br />
2. Fill the balloon by connecting to a hose on the regulator of a tank of inert gas (nitrogen or argon, Figure<br />
1.30a). Open the gas regulator to fill the balloon to between 7” – 8” in diameter (Figure 1.30b).<br />
[For use with very sensitive reagents, the gas should first be passed through a column of drying agent.]<br />
3. While holding the balloon close to your body, twist the balloon to prevent gas from escaping. Then<br />
attach a green needle (#21 gauge, 0.8 mm × 25 mm, safety note: very sharp!) securely to the end of<br />
the syringe (Figure 1.30c).<br />
4. To prevent gas from escaping when the balloon is untwisted, insert the needle into a rubber stopper<br />
(Figure 1.30d). The balloon can now be set aside while other parts of the setup are prepared.<br />
Figure 1.31: a) Inserting rubber septum into the joint of a hot flask, b-d) Folding septum flaps over the joint.<br />
<strong>Organic</strong> <strong>Chemistry</strong> <strong>Laboratory</strong> <strong>Techniques</strong> | Nichols | Page 37
Prepare the reagent flask<br />
5. Remove the surface water from a reagent flask (with stir bar if applicable), by either flame drying the<br />
flask or placing it in a hot oven for several hours. Safety note: flask will be very hot! Use thick gloves<br />
to handle the hot glass.<br />
6. Immediately insert a rubber septum (Figure 1.31a) into the ground glass joint. Fold one side of the<br />
septum over the lip of the flask and hold it in place while folding the opposite sides over as well (Figures<br />
1.31b–d). This can be difficult to do with thick gloves. An alternative is to hold the flask against your<br />
body with the thick gloves, and fold the septum flaps over while using your bare hands (or thinner<br />
gloves, Figures 1.32 a+b).<br />
7. Immediately secure the reaction flask to a ring stand or latticework using an extension clamp and insert<br />
the needle of the inert gas balloon into the inner circle on the septum (Figure 1.32c, see Figure 1.31d<br />
for the circle on the septum).<br />
8. Insert a single needle into the circle on the septum (called an “exit needle”) to “flush” the air from the<br />
reaction flask (Figure 1.32d). The goal is to use the pressure from the balloon to force inert gas into<br />
the reaction flask and displace the air in the flask out the exit needle.<br />
9. Allow the system to flush for at least 5 minutes if using nitrogen gas and perhaps 1-2 minutes if using<br />
argon gas (argon is denser than air so will displace the air more easily than nitrogen). Then remove the<br />
exit needle and allow the flask to fully cool under the balloon of inert gas.<br />
Figure 1.32: a+b) Alternative way to hold a hot flask and attach the rubber septum, c) Flushing a reaction flask with a gas balloon,<br />
d) Close-up of the “exit needle.”<br />
10.If a mass is required of the empty flask, remove the inert gas balloon (insert the needle into a rubber<br />
stopper) and obtain the mass of the cool, empty flask with septum.<br />
<strong>Organic</strong> <strong>Chemistry</strong> <strong>Laboratory</strong> <strong>Techniques</strong> | Nichols | Page 38
Figure 1.33: a) Screwing the needle onto the syringe head, b) Wrapping the joint with Parafilm, c) Inserting the needle into a flask<br />
filled with inert gas, d) Withdrawing inert gas in order to flushing the syringe.<br />
Prepare the syringe for reagent transfer<br />
11.Remove a long, flexible needle from a hot oven and immediately screw it into the barrel of a plastic<br />
syringe, freshly opened from its packaging (Figure 1.33a).<br />
The syringe needs to be able to hold a volume larger than the volume of reagent intended to deliver in<br />
order to have enough flexibility to properly manipulate the reagent. For example, a 10-mL syringe is<br />
too small to deliver 10 mL of reagent, but could be used to deliver 7 mL of reagent.<br />
Hold the syringe such that the volume markings are visible, and connect the bent needle pointed<br />
upwards, so that when screwed on (which normally requires roughly a half turn) the bent needle points<br />
downwards with the numbers visible. With this approach, the volume markings can be seen while<br />
withdrawing liquid, instead of being inconveniently on the back face of the syringe (as in Figure 1.33d).<br />
Glass syringes are often used with air-sensitive reagents dissolved in nonpolar solvents (e.g. hexanes),<br />
and require some further considerations that are not described in this section. Consult with your<br />
instructor for further instructions if you are to use a glass syringe.<br />
12.Wrap the joint between the needle and syringe with Teflon tape or Parafilm (Figure 1.33b).<br />
13.Flush the needle with inert gas: Insert the needle into the septum of an empty, dry flask attached to a<br />
balloon of inert gas (Figure 1.33c), withdraw a full volume of inert gas (Figure 1.33d), then expunge it<br />
into the air.<br />
14.Immediately insert the flushed syringe into the reagent flask septum if nearby, or into a rubber stopper<br />
until the syringe is to be used.<br />
<strong>Organic</strong> <strong>Chemistry</strong> <strong>Laboratory</strong> <strong>Techniques</strong> | Nichols | Page 39
Figure 1.34: a) Inserting the flushed syringe into the air-sensitive reagent, b) Inevitable gas bubble after withdrawal, c) Removal<br />
of slightly more liquid than is needed, d) Adjustment to the correct volume.<br />
Withdraw the reagent<br />
15.A balloon of inert gas must be inserted into the reagent bottle in order to equalize pressures during<br />
withdrawal of liquid. A platform (e.g. ring clamp / wire mesh) should also be used beneath the reagent<br />
bottle if positioned above the bench, to provide support in case the bottle slips from the grasp of the<br />
clamp.<br />
16.Insert the needle of the flushed syringe into the septum of the air-sensitive reagent, and into the liquid<br />
(Figure 1.34a).<br />
17.Slowly withdraw some liquid into the syringe. If the plunger is pulled back too quickly, the low<br />
pressure inside the syringe may cause air to seep through the joint between the needle and syringe<br />
(through or around the Teflon tape or Parafilm).<br />
18.Inevitably a bubble will form in the syringe. Keeping the syringe upside down and vertical (Figure<br />
1.34b), push on the plunger to force the gas pocket back into the bottle.<br />
19.Slowly withdraw liquid to 1-2 mL greater than the desired volume (Figure 1.34c), then keeping the<br />
syringe vertical, expunge liquid back to the desired volume (Figure 1.34d shows 2.0 mL of liquid).<br />
Withdrawing greater than the desired volume at first allows you to be confident that no gas bubbles are<br />
in the needle, and that you have measured an accurate volume.<br />
<strong>Organic</strong> <strong>Chemistry</strong> <strong>Laboratory</strong> <strong>Techniques</strong> | Nichols | Page 40
20.The needle should be full of the air-sensitive reagent at this point, and if it were removed from the bottle<br />
the reagent would come into contact with the atmosphere at the needle tip. This can have disastrous<br />
consequences if the reagent is quite reactive (smoking or potentially fire). Safety note: It is therefore<br />
essential that a “buffer” of inert gas (Figure 1.36) is placed between the air-sensitive reagent and the<br />
atmosphere before removing the needle.<br />
Figure 1.35: a) Headspace of a bottle, b) Inserting needle into the headspace of the reagent bottle, c) Inert gas buffer in the syringe,<br />
d) Placing the needle tip in a rubber stopper for transport.<br />
21.To create the “inert gas buffer”:<br />
a. Place the needle into the headspace of the reagent bottle (Figures 1.35 a+b).<br />
b. Keeping the syringe upside down and vertical, gently pull back on the plunger until a bubble is<br />
seen in the barrel (approximately 20% of the syringe capacity, Figure 1.35c).<br />
c. Immediately insert the syringe into the reaction flask septum if nearby, or into a rubber stopper if<br />
the flask if a distance away (Figure 1.35d).<br />
inert gas<br />
buffer<br />
needle full of<br />
inert gas<br />
reactive<br />
reagent<br />
rubber<br />
stopper<br />
Figure 1.36: Syringe full of air-sensitive reagent ready for transport.<br />
<strong>Organic</strong> <strong>Chemistry</strong> <strong>Laboratory</strong> <strong>Techniques</strong> | Nichols | Page 41
Figure 1.37: a) Inserting the syringe into the reagent flask, b) Delivering the liquid, c) Rinsing the needle and syringe.<br />
Deliver the reagent<br />
22.With an inert gas balloon inserted in the reaction flask, place the syringe with reagent into the reaction<br />
flask septum. Keeping the syringe vertical, push on the plunger to first deliver the inert gas buffer<br />
(Figure 1.37a), then slowly deliver reagent to the flask.<br />
23.Stop delivering reagent when the rubber plunger of the syringe meets the end of the barrel (Figure<br />
1.37b). Do not invert the syringe and push out the residual liquid: this would result in delivering a<br />
larger volume of reagent than measured by the syringe.<br />
24.The needle will still be full of the air-sensitive reagent, so with the needle tip still in the headspace of<br />
the reaction flask, withdraw an inert gas buffer into the syringe. Insert the needle tip into a rubber<br />
stopper if the cleaning station is not nearby.<br />
Clean the needle and syringe<br />
25.The syringe and needle should be cleaned as soon as possible, as over time deposits may form in the<br />
needle creating a plug. To clean the syringe and needle:<br />
a. Withdraw into the syringe a few mL of clean solvent similar to the solvent used in the air-sensitive<br />
solution (Figure 1.37c). For example, the pictures in this section show transfer of a BH 3 reagent<br />
dissolved in THF. An ideal rinse solvent would then be THF. As THF was not available, diethyl<br />
ether was a good substitute as the two solvents are structurally similar (they are both ethers).<br />
b. Expunge the solvent into a waste beaker. Repeat with another solvent rinse, being sure to rinse the<br />
entire area in the syringe where the reagent touched.<br />
c. Rinse the syringe once with water to dissolve and remove any inorganic salts.<br />
d. Further rinse the syringe and needle twice with a few mL of acetone.<br />
e. Remove the needle from the syringe and retain for future use. The plastic syringe should not be<br />
reused, but instead thrown away: solvent present in many air-sensitive solutions degrade the rubber<br />
plunger on the syringe, causing them to swell and be ineffective after one use.<br />
<strong>Organic</strong> <strong>Chemistry</strong> <strong>Laboratory</strong> <strong>Techniques</strong> | Nichols | Page 42
1.2.C.2 INERT ATMOSPHERIC METHODS SUMMARY<br />
Prepare the balloon<br />
Fill a balloon with an<br />
inert gas (nitrogen or<br />
argon) to 7 – 8 inches in<br />
diameter.<br />
Twist the balloon to<br />
prevent gas from<br />
escaping, then attach a<br />
needle and insert into a<br />
rubber stopper to plug.<br />
Prepare the reaction<br />
flask<br />
Flame or oven dry a<br />
reaction flask (with stir<br />
bar), and fold a rubber<br />
septum over the joint<br />
while wearing thick<br />
gloves.<br />
Clamp the hot flask to<br />
the ring stand or<br />
latticework and insert the<br />
balloon of inert gas.<br />
Insert an “exit needle”<br />
and allow the flask to<br />
flush for ~5 minutes (to<br />
displace the air).<br />
Remove the exit needle<br />
and allow the flask to<br />
cool.<br />
Prepare the syringe<br />
Obtain a needle from the<br />
hot oven and screw it into<br />
the tip of a freshly opened<br />
plastic syringe.<br />
Wrap the needle / syringe<br />
joint with Teflon tape or<br />
Parafilm.<br />
Flush the syringe with<br />
inert gas by using an<br />
empty flask attached to a<br />
balloon of inert gas.<br />
Withdraw a volume of<br />
gas and expunge into the<br />
air.<br />
Insert the needle tip into a<br />
rubber stopper to plug.<br />
Withdraw the reagent<br />
Use the prepared syringe<br />
to slowly withdraw some<br />
reagent (or air may enter<br />
the syringe).<br />
Push out the gas bubble.<br />
Withdraw reagent to a<br />
slightly greater volume<br />
than needed, then<br />
expunge liquid to the<br />
exact volume.<br />
Place the needle in the<br />
headspace of the bottle<br />
and withdraw an “inert<br />
gas buffer,” ~20% of the<br />
volume of the syringe.<br />
Insert the needle into a<br />
rubber stopper for<br />
transport.<br />
Deliver the reagent<br />
Into the reaction flask<br />
(with inert gas balloon),<br />
deliver first the inert gas<br />
buffer, then the airsensitive<br />
reagent.<br />
Don’t push out the<br />
residual liquid.<br />
Withdraw an inert gas<br />
buffer into the mostly<br />
empty syringe.<br />
Clean by rinsing with two<br />
portions (few mL each) of<br />
solvent (similar to reagent<br />
solvent), then one portion<br />
of water and two portions<br />
of acetone.<br />
inert gas<br />
buffer<br />
reactive<br />
reagent<br />
Table 1.5: Procedural summary for inert atmospheric methods.<br />
<strong>Organic</strong> <strong>Chemistry</strong> <strong>Laboratory</strong> <strong>Techniques</strong> | Nichols | Page 43
1.3 HEATING AND COOLING METHODS<br />
As reaction rate increases with temperature, it is very common to heat solutions in the organic laboratory.<br />
There are many heat sources available to the organic chemist, although some methods are better than others<br />
depending on the situation. Described in this section are some concepts that are common to all heating<br />
methods (e.g. how to boil controllably), followed by specifics on each heat source. Also included are<br />
methods used to cool solutions.<br />
1.3.A METHODS AND FLAMMABILITY<br />
Table 1.6 shows the many ways to heat compounds in the organic laboratory.<br />
Bunsen Burner Hotplate Steam Bath Heating Mantle<br />
Sand Bath Water Bath Oil Bath Heat Gun<br />
Table 1.6: Summary of heating methods.<br />
In some contexts, the choice of what heat source to use is critical while in other contexts several could work<br />
equally well. The choice of which heat source to use depends on several factors:<br />
•<br />
•<br />
•<br />
•<br />
•<br />
Availability (does your institution own the equipment?)<br />
Rate of heating (do you want to heat gradually or quickly?)<br />
Flexibility of heating (does the heat need to be waved around an apparatus?)<br />
Final temperature required (low boiling liquids require a different approach than high boiling<br />
liquids)<br />
Flammability of the contents<br />
<strong>Organic</strong> <strong>Chemistry</strong> <strong>Laboratory</strong> <strong>Techniques</strong> | Nichols | Page 44
As safety is an important factor in making laboratory<br />
choices, it’s important to consider the flammability of<br />
the liquid to be heated. Almost all organic liquids are<br />
considered “flammable,” meaning they are capable of<br />
catching on fire and sustaining combustion (an<br />
important exception is that halogenated solvents tend<br />
to be non-flammable). However, this doesn’t mean<br />
that all organic liquids will immediately ignite if<br />
placed near a heat source. Many liquids require an Figure 1.38: Ignition of ethanol in an evaporating dish.<br />
ignition source (a spark, match, or flame) in order for<br />
their vapors to catch on fire, a property often described by the liquid’s flash point. The flash point is the<br />
temperature where the vapors can be ignited with an ignition source. For example, the flash point of 70%<br />
ethanol is 16.6 ˚C, 2 meaning it can catch on fire at room temperature using a match (Figure 1.38). A Bunsen<br />
burner is an excellent ignition source (and can reach temperatures of approximately 1500 ˚C), 3 making<br />
burners a serious fire hazard with organic liquids, and a heat source that should often be avoided.<br />
Another important property in discussing flammability is a liquid’s autoignition temperature: the<br />
temperature where the substance spontaneously ignites under normal pressure and without the presence of<br />
an ignition source. This property is particularly insightful because it does not require a flame (which is<br />
often avoided in the organic lab), but only a hot area. A hotplate surface turned up to “high” can reach<br />
temperatures up to 350 ˚C. 3 Safety note: as diethyl ether, pentane, hexane, and low-boiling petroleum ether<br />
have autoignition temperatures below this value (Table 1.7), it would be dangerous to boil these solvents<br />
on a hotplate as vapors could spill out of the container and ignite upon contact with the surface of the<br />
hotplate. In general, caution should be used when using a hotplate for heating any volatile, flammable<br />
liquid in an open vessel as it’s possible that vapors can overrun the hotplate’s ceramic covering and contact<br />
the heating element beneath, which may be hotter than 350 ˚C. It is for this reason that hotplates are not<br />
the optimal choice when heating open vessels of volatile organic liquids, although in some cases they may<br />
be used cautiously when set to “low” and used in a well-ventilated fume hood.<br />
Compound<br />
Boiling<br />
Point (˚C)<br />
Autoignition<br />
Temperature (˚C)<br />
Compound<br />
Boiling<br />
Point (˚C)<br />
Autoignition<br />
Temperature (˚C)<br />
Diethyl Ether 34 180 Hexane 69 225<br />
Pentane 36 260 Ethyl Acetate 77 426<br />
Low boiling<br />
Petroleum Ether<br />
30-40 246<br />
Carbon<br />
Tetrachloride<br />
77 n/a<br />
Acetone 56 465 Ethanol 78 363<br />
Methanol 65 464 Benzene 80 498<br />
Table 1.7: Autoignition temperature data for selected solvents. 4<br />
As combustion is a reaction in the vapor phase, liquids with low boiling points (< 40 ˚C) tend to have low<br />
flash points and autoignition temperatures as they have significant vapor pressures (Table 1.7). All low<br />
boiling liquids should be treated more cautiously than liquids with moderate boiling points (> 60 ˚C).<br />
2 From the SDS (Safety Data Sheets) of 70% denatured ethanol.<br />
3 As reported in the Fischer Scientific catalog.<br />
4 Data from Handbook of <strong>Chemistry</strong> and Physics, 84 th ed., CRC Press, 2003-2004, 16-16 to 16-31. Petroleum ether autoignition<br />
temperature is from the SDS.<br />
<strong>Organic</strong> <strong>Chemistry</strong> <strong>Laboratory</strong> <strong>Techniques</strong> | Nichols | Page 45
1.3.B CONTROLLED BOILING<br />
Boiling solutions always have the potential to “bump,” where bubbles vigorously erupt from superheated<br />
areas of the solution: areas where the temperature is above the boiling point of the solvent, but gas bubbles<br />
have not yet formed due to lack of a nucleation site. Bumping can splash hot material out of a flask: onto<br />
your hand or onto a hotplate surface where it might start a fire. Bumping is hazardous, not to mention<br />
frightening when a bubble unexpectedly erupts. Several methods can be used to prevent bumping and<br />
ensure smooth boiling.<br />
1.3.B.1 BOILING STONES (BOILING CHIPS)<br />
Figure 1.39: a) Boiling stones in water, b) Vigorous boiling, c) Boiling stones used in crystallization.<br />
Boiling stones (or boiling chips) are small pieces of black porous rock (often silicon carbide) that are added<br />
to a solvent or solution. They contain trapped air that bubbles out as a liquid is heated, and have high<br />
surface area that can act as nucleation sites for formation of solvent bubbles. They should be added to a<br />
cool liquid, not one that is near its boiling point, or a vigorous eruption of bubbles may ensue. When a<br />
liquid is brought to a boil using boiling stones, the bubbles tend to originate primarily from the stones<br />
(Figure 1.39b). Boiling stones cannot be reused, as after one use, their crevices fill with solvent and they<br />
can no longer create bubbles.<br />
Boiling stones should not be used when heating concentrated solutions of sulfuric or phosphoric acid, as<br />
they may degrade and contaminate the solution. For example, Figure 1.40 shows a Fischer esterification<br />
reaction that uses concentrated sulfuric acid. When a stir bar is used for bump prevention, the solution<br />
remains colorless (Figure 1.40a). When the same reaction is conducted using a boiling stone, the solution<br />
darkens during heating (Figure 1.40b) and eventually turns the entire solution a deep purple-brown color<br />
(Figure 1.40c). Besides contaminating the solution, the dark color makes manipulation of the material with<br />
a separatory funnel difficult: two layers are present in Figure 1.40d, although it is very difficult to see.<br />
Figure 1.40: a) Fischer esterification reaction using a stir bar (solution is colorless), b) Same reaction using boiling stones, c)<br />
Same reaction after a few minutes of heating, d) Two dark layers in the separatory funnel as a result of the darkened solution.<br />
<strong>Organic</strong> <strong>Chemistry</strong> <strong>Laboratory</strong> <strong>Techniques</strong> | Nichols | Page 46
1.3.B.2 BOILING STICKS (WOOD SPLINTS)<br />
Figure 1.41: Use of a wood splint to promote smooth boiling, a+b) Bubbles originating from the wood splint, c) Removal of the<br />
splint before crystallization, d) Crystallization.<br />
“Boiling sticks” (wood splints) are also used to encourage smooth boiling. They are plunged directly into<br />
a solvent or solution, and act much the same as boiling stones: they too are highly porous and contain<br />
nucleation sites. When a liquid is brought to a boil using a boiling stick, the bubbles tend to originate<br />
primarily from the surface of the stick (Figure 1.41b).<br />
When choosing between boiling stones and boiling sticks, the main advantage of boiling stones is that they<br />
are small and so will fit in any flask. They also absorb very little compound, unlike boiling sticks. The<br />
main advantage of boiling sticks is that they can be easily removed from a solution. This is useful in<br />
crystallization, as the stick can be easily removed before crystals form (Figures 1.41 c+d).<br />
1.3.B.3 STIR BARS AND SPIN VANES<br />
Stir bars (stirring bars, or spin vanes in microscale work, Figure 1.42a) are Teflon-coated magnets that can<br />
be made to spin with a magnetic stir plate (Figure 1.42b). Stirring is often used with heating as stirring<br />
encourages homogeneity, allowing for liquids to more quickly heat or cool, and disrupts superheated areas.<br />
In the context of chemical reactions, stirring also increases the rate of mixing (especially for heterogeneous<br />
mixtures) and thus increases reaction rates.<br />
A stir bar can be removed from a flask with a magnet, called a “stir bar retriever” (Figure 1.42d). If a<br />
solution is to be subsequently poured through a funnel and into a separatory funnel, they are also easily<br />
removed by the funnel.<br />
Figure 1.42: a) Stir bars and spin vanes, b) Stir plate, c) Stirring solution, d) Removal of a stir bar using a magnet (stir bar retriever).<br />
<strong>Organic</strong> <strong>Chemistry</strong> <strong>Laboratory</strong> <strong>Techniques</strong> | Nichols | Page 47
1.3.C ADJUSTABLE PLATFORMS<br />
It is quite useful for an apparatus to rest on a platform that can be adjusted up or down. For example, when<br />
heating a round bottomed flask in a distillation or reflux, the heat source should be held in such a way that<br />
it can be easily lowered and removed from the flask. This is an important safety measure, as it allows for<br />
adjustment if the system heats too rapidly (as is evidenced by bumping or foaming), or if anything<br />
unexpected occurs (smoking or charring). Removal of the heat source is also of course necessary at the end<br />
of a process, and it is best if the heat can be removed while leaving the apparatus intact to cool.<br />
Figure 1.43: Adjustable platforms: a) Lab jack, b) Wood blocks and KimWipe boxes, c) Ring clamp with wire mesh, d) Airsensitive<br />
reagent held in place with a ring clamp / wire mesh platform.<br />
Adjustable platforms come in many forms. A lab jack (Figure 1.43a) is the easiest to manipulate, and can<br />
be adjusted up or down by turning the knob. Unfortunately, lab jacks are expensive so are likely to be used<br />
in research settings but not in teaching labs. A simple platform can be made from anything stackable, such<br />
as wood blocks or KimWipe boxes (Figure 1.43b), although at some height they can be easily tipped. A<br />
more secure platform can be created by placing a wire mesh atop a ring clamp (Figure 1.43c).<br />
Adjustable platforms should be used underneath any flask that is clamped in an apparatus well above the<br />
benchtop and contains chemicals, especially if they are to be heated or are extremely reactive. If a clamp<br />
were to fail for some reason, a platform is a fail-safe and prevents hot or reactive chemicals from falling<br />
onto a heat source or splashing on the benchtop where they may become a hazard. Figure 1.43d shows<br />
withdrawal of an air-sensitive reagent by syringe, and the reagent bottle is secured by a clamp and supported<br />
with a ring clamp / wire mesh platform. If the reagent were to slip from the grip of the clamp, the platform<br />
ensures that the hazardous material will not fall.<br />
<strong>Organic</strong> <strong>Chemistry</strong> <strong>Laboratory</strong> <strong>Techniques</strong> | Nichols | Page 48
1.3.D BUNSEN BURNERS<br />
Bunsen burners are generally used to rapidly heat high-boiling liquids with low flammability (such as water).<br />
Safety note: It is important to know that they can reach temperatures of approximately 1500 ˚C, 5 and can<br />
easily ignite most organic compounds. If an apparatus is improperly set up, or if there is a small gap that<br />
allows organic vapors to escape from an apparatus, these vapors can ignite with a burner. Therefore, it is<br />
generally recommended to use other heat sources to warm flammable organic liquids (for example in<br />
distillation or reflux). Bunsen burners should never be used with highly flammable solvents such as diethyl<br />
ether.<br />
However, burners do have their place in the organic lab. Burners are often used in steam distillation (Figure<br />
1.44a) as the vapors are generally not flammable. In this context, a wire mesh set atop a ring clamp is often<br />
used under the flask to dissipate the heat and avoid overheating one area. Burners are also used in the<br />
Beilsten test for halogens (Figure 1.44b), with Thiele tubes in melting and boiling point determinations<br />
(Figure 1.44c), and for softening pipettes to create capillary TLC spotters (Figure 1.44d). They may also<br />
be used in sublimations.<br />
Figure 1.44: Uses of Bunsen burners in: a) Steam distillation, b) Beilstein test, c) Thiele tube, d) Softening pipettes.<br />
Burners come in several different forms. The common Bunsen burner is six inches tall and has two models<br />
differing in how the gas and air are adjusted (a Bunsen burner is in Figure 1.45a, and a Tirrill burner is in<br />
Figure 1.45b). Small burners (microburners, Figure 1.45c) and large burners (Meker burners, Figure 1.45d)<br />
are also sometimes used.<br />
Figure 1.45: a) Bunsen burner, b) Tirrill burner, c) Microburner, d) Meker burner.<br />
5 As reported in the Fischer Scientific catalog.<br />
<strong>Organic</strong> <strong>Chemistry</strong> <strong>Laboratory</strong> <strong>Techniques</strong> | Nichols | Page 49
Figure 1.46: Air valves and closed / partially opened positions on two styles of Bunsen burner: a+b) Tirrill burner, c+d) Bunsen<br />
burner.<br />
To light a burner:<br />
1. Connect the rubber tubing on the burner to the gas line on the benchtop.<br />
2. Open the gas valve on the burner one “turn” from closed, by either turning the gold arm on a Tirrill<br />
burner (Figure 1.46a) or notched dial near the bottom of a Bunsen burner (Figure 1.46c).<br />
3. Open the air valve slightly so that a small opening is observed in the slats or on the screw portion of<br />
the burner (Figures 1.46 b+d).<br />
4. Open the gas valve on the benchtop until a faint hiss of gas can be heard, then use a striker to create a<br />
spark and light the burner. If matches are instead used, first light the match and then turn on the gas.<br />
If the burner fails to light, there is either too much or too little of either gas or air. Try adjusting both<br />
and observe the effect.<br />
5. Once the burner is lit, adjust the gas and air until a blue triangular flame appears (a “blue cone,” Figure<br />
1.47d). The flame should be 1-2 inches high and accompanied with an audible hissing of the flame.<br />
An orange flame (Figure 1.47b) forms when there is incomplete combustion of the fuel, is cooler than<br />
a blue flame, and if used to heat glassware will deposit black charcoal onto the glass. To convert an<br />
orange flame into a blue conic flame, allow more air into the burner. The tip of the blue cone is the<br />
hottest part of the flame.<br />
Figure 1.47: a) Lighting a burner with a striker, b) Too orange of a flame, c) No blue cone, d) Properly lit burner.<br />
<strong>Organic</strong> <strong>Chemistry</strong> <strong>Laboratory</strong> <strong>Techniques</strong> | Nichols | Page 50
1.3.E HOTPLATES<br />
Hotplates are perhaps the most versatile heat source in the laboratory (Figure 1.46) and can be used to heat<br />
beakers, Erlenmeyer flasks, and various hot baths (water, sand, and oil baths). They can also be used to<br />
develop stained TLC plates.<br />
Hotplates work by passing electricity through a heating element covered by a ceramic top. Safety note:<br />
the hotplate surface can reach temperatures up to 350 ˚C, 6 which is hot enough to ignite many low-boiling<br />
solvents. Diethyl ether, pentane, hexane, low-boiling petroleum ether, and acetone should therefore never<br />
be heated in an open vessel with a hotplate.<br />
Caution should be used when heating any flammable organic liquid in an open vessel on a hotplate, as<br />
organic vapors may spill out of containers and ignite upon contact with the heating element, which may be<br />
hotter than the ceramic surface. This can be especially true if the hotplate is turned to “high.” Therefore,<br />
a low setting must be used when cautiously heating certain flammable organic liquids (e.g. ethanol) with a<br />
hotplate.<br />
Figure 1.48: Various uses for hot plates: a) Hot filtration, b) Crystallization, c) Benedict’s test, d) Visualization of a TLC plate.<br />
6 As reported in the Fischer Scientific catalog.<br />
<strong>Organic</strong> <strong>Chemistry</strong> <strong>Laboratory</strong> <strong>Techniques</strong> | Nichols | Page 51
1.3.F STEAM BATHS<br />
A steam bath (Figure 1.49) is a relatively safe way to heat<br />
flammable organic liquids. They are designed to heat beakers,<br />
Erlenmeyer flasks, and round-bottomed flasks, and have a series of<br />
concentric rings that can be removed to adjust to the size of the<br />
flask. Many science buildings have in house steam lines in their<br />
labs, allowing for this convenient and safe method to heat various<br />
solvents.<br />
The steam line should be connected to the upper arm of the steam<br />
bath, and condensation should be allowed to drain from the lower Figure 1.49: Steam bath.<br />
arm of the bath to the sink (Figure 1.50a). The steam tap should be<br />
adjusted so that a moderate amount of steam can be seen coming only from the central opening in the bath,<br />
then a flask should be set atop the opening to warm the flask (Figure 1.50b). Steam should only warm the<br />
bottom of the flask, and steam should not be visible coming out anywhere else in the bath. When warming<br />
highly volatile solvents, the flask may need to be held above the opening of the bath to control the rate of<br />
heating (Figure 1.50c), or the steam rate lowered.<br />
Figure 1.50: a) Steam bath, b) Heating a flask on the bath, c) Hovering the flask over the opening if the heating rate is too great.<br />
<strong>Organic</strong> <strong>Chemistry</strong> <strong>Laboratory</strong> <strong>Techniques</strong> | Nichols | Page 52
1.3.G HEATING MANTLES<br />
Heating mantles are a relatively safe way to heat flammable organic liquids in a round bottomed flask<br />
(Figure 1.52). The mantles are cup-shaped and designed for different sizes of round bottomed flask (Figure<br />
1.51a). If a mantle does not fit a round bottomed flask perfectly, sand can be added to ensure good thermal<br />
contact (Figure 1.51c).<br />
The mantles should never be connected directly to the outlet, but first to a “Variac” (blue piece of<br />
equipment in Figure 1.51b) which then connects to the outlet and delivers variable voltage to the mantle.<br />
A Variac set to “100” would be equivalent to plugging the mantle directly into the wall (100%), while a<br />
setting of “50” means the delivered voltage is halved (50%). By controlling the delivered voltage, Variacs<br />
are used to regulate the temperature of a heating mantle. There is variation between devices, and settings<br />
must be experimented with to determine appropriate heating rates.<br />
Figure 1.51: a) Three sizes of heating mantle, b) Heating mantle connected to a Variac, c) Filling a heating mantle with sand.<br />
Heating mantles take some time to warm up (so may be pre-heated during setup of an apparatus), and also<br />
take some time to cool down. The mantle will remain warm even after turning off the Variac, and therefore<br />
flasks have to be removed from the mantle in order to cool (Figure 1.52c).<br />
Figure 1.52: a+b) Distillation using a heating mantle, c) Cooling of a flask after heating.<br />
Safety note: the main hazard with heating mantles is that flammable organic liquids spilled on the surface<br />
of a hot mantle do have the possibility of ignition.<br />
<strong>Organic</strong> <strong>Chemistry</strong> <strong>Laboratory</strong> <strong>Techniques</strong> | Nichols | Page 53
1.3.H WATER, SAND, AND OIL BATHS<br />
Water, sand, and oil baths are related heat sources as they envelop a flask in a warm material (liquid or<br />
sand). A thermometer is often used to monitor the temperature of the bath, and is used to approximate the<br />
internal temperature of liquid in a flask (the bath is often slightly hotter than the liquid in the flask).<br />
Water baths, heated on a hotplate, are most commonly used to heat solutions<br />
to 100 ˚C (boiling baths, Figures 1.53 + 1.54a). They may also be used to<br />
heat to lower temperatures, although it can be difficult to maintain a constant<br />
temperature. Water baths can be covered with aluminum foil to prevent<br />
excessive evaporation, or to prevent excess moisture from entering open<br />
vessels. Cold water baths can also be used to cool apparatuses in a quick<br />
manner (Figure 1.54b).<br />
Sand baths, also heated on a hotplate, can be used to heat solutions to a wide<br />
variety of temperatures, including very high temperatures (> 250 ˚C). Sand<br />
can be placed inside Pyrex crystallizing dishes (as is used with the water bath<br />
in Figure 1.54b), although Pyrex may crack if heated at too fast a rate. Sand<br />
Figure 1.53: Boiling water bath.<br />
can also be heated to moderate temperatures inside thin aluminum foil pie<br />
dishes, but should not be used at high temperatures as aluminum will then oxidize, causing the thin foil to<br />
disintegrate. Thick metal pie tins (Figure 1.54c) are indestructible alternatives when high temperatures are<br />
required (but may interfere with the stirring mechanism if used).<br />
A vessel should be buried in a sand bath as much as possible as the surface is often much cooler than the<br />
sand below. A scoopula or metal spatula can be used to pile the sand up to at least the height of liquid<br />
inside the flask. Sand takes a long time to heat up, and a long time to cool down. To save time, a sand bath<br />
may be preheated while an apparatus is assembled as long as it is preheated a distance away from volatile<br />
organic liquids.<br />
If the sand overheats and causes a liquid to boil uncontrollably, the flask can be partially lifted out of the<br />
sand, or the sand moved with a metal spatula away from contact with the liquid. Sand will remain warm<br />
even after turning off the hotplate, and therefore flasks have to be lifted out of the sand bath in order to cool<br />
(Figure 1.54d). Hot sand baths can be cooled atop a ceramic tile.<br />
Figure 1.54: a) Boiling water bath, b) Water bath to cool an apparatus, c) Heating a flask with a sand bath, d) Allowing a flask to<br />
cool.<br />
<strong>Organic</strong> <strong>Chemistry</strong> <strong>Laboratory</strong> <strong>Techniques</strong> | Nichols | Page 54
Oil baths are much like water baths, but use silicone or mineral oils in order to enable temperatures hotter<br />
than the boiling point of water (> 100 ˚C). Silicone oil baths can be heated to 250 ˚C, while mineral oil<br />
baths can be heated to 300 ˚C. 7 Mineral oil is composed of mixtures of long-chain alkanes, and so is<br />
combustible. Direct contact with open flames should therefore be avoided.<br />
Oil baths can be heated in a Pyrex crystallizing dish atop a hotplate. It is also quite common for the oil to<br />
be electrically heated, through immersion of a coiled wire connected to a “Variac” (light blue piece of<br />
equipment in Figure 1.55a). A Variac connects to the outlet and can deliver variable voltage through the<br />
wire. A Variac set to “100” would be equivalent to plugging the system directly into the wall (100%),<br />
while a setting of “50” means the delivered voltage is halved (50%). By controlling the delivered voltage,<br />
Variacs are used to regulate the temperature of the oil. If you have previous experience using a Variac with<br />
heating mantles, the settings will not translate to the oil bath as oil bath wires heat more rapidly than a<br />
heating mantle’s wires. A paper clip can also be used in an oil bath (Figure 1.55c) and stirred with a stirring<br />
plate in order to dissipate heat. This allows for the temperature of an oil bath to quickly respond to<br />
adjustments up or down.<br />
Figure 1.55: a) Oil bath connected to a Variac, b) Oil bath, c) Paper clip in the bath for stirring.<br />
7 J.A. Dean, Lange’s Handbook of <strong>Chemistry</strong>, 15 th ed., McGraw-Hill, 1999, Sect. 11.3. Additionally, the boiling point of mineral<br />
oil is 310 ˚C.<br />
<strong>Organic</strong> <strong>Chemistry</strong> <strong>Laboratory</strong> <strong>Techniques</strong> | Nichols | Page 55
1.3.I HEAT GUNS<br />
Heat guns are inexpensive tools for delivering strong heat in a more flexible manner than other heating<br />
methods. Heat can be directed from every direction, and the gun can be manually waved about in order to<br />
dissipate the heating intensity. Heat guns are commonly used to quickly develop stained TLC plates<br />
(Figures 1.56a+b), and result in more even heating and less charring than when using a hotplate. They are<br />
also ideal for sublimations (Figure 1.56c), as the heat can be directed to the sides of the flask to coax off<br />
crystals deposited on the sides. A disadvantage of using heat guns is that they must be continually held,<br />
which makes them most ideal for short processes.<br />
Figure 1.56: a+b) Using a heat gun to develop a TLC plate, c) Using a heat gun for a sublimation.<br />
Safety note: A heat gun is not simply a hair dryer, and the nozzle gets quite hot (temperatures can be<br />
between 150 – 540 ˚C)! 8 Care should be taken to not touch the nozzle after use, and the gun should be set<br />
down carefully, as it may mark the benchtop or cord.<br />
8 As reported in the Fischer Scientific catalog.<br />
<strong>Organic</strong> <strong>Chemistry</strong> <strong>Laboratory</strong> <strong>Techniques</strong> | Nichols | Page 56
1.3.J COOLING BATHS<br />
On occasion a solution may need to be cooled: to minimize evaporation of volatile liquids, induce<br />
crystallization, or to favor a certain reaction mechanism. Several cold baths are used for certain applications,<br />
with the simplest being an ice bath. When preparing an ice bath, it is important to use a mixture of ice and<br />
water, as an ice-water slurry has better surface contact with a flask than ice alone.<br />
Sometimes salts are added to ice in order to create baths colder than 0 ˚C (freezing point depression). It is<br />
also quite common to cool a solvent with dry ice (solid CO 2 ) in order to achieve dramatically colder baths.<br />
In dry ice baths, dry ice is added to the solvent until a portion of dry ice remains. The most common dry<br />
ice bath is made with acetone and dry ice, and achieves a cold bath of -78 ˚C. Other cold baths are shown<br />
in Table 1.8.<br />
Cold Bath Composition T (˚C) Cold Bath Composition T (˚C)<br />
36 g NaCl + 100 g ice -10.0 Acetone + dry ice -78<br />
75 g NaNO 3 + 100 g ice -5.3 Ethyl acetate + dry ice -84<br />
66 g NaBr + 100 g ice -28 Hexane + dry ice -95<br />
Acetonitrile + dry ice -40 Methanol + dry ice -98<br />
Table 1.8: Commonly used cold baths. 9<br />
Ice baths can be made in Tupperware containers, beakers, or almost any container (Figure 1.57a). Baths<br />
colder than -10 ˚C should be made in an insulating container or else they cannot be easily handled and will<br />
lose heat too quickly to the room. The most common cold bath container is a wide-mouthed Dewar (Figure<br />
1.57b), which has a vacuum jacket between the bath and the exterior. An inexpensive homemade insulating<br />
bath can be made by nesting two crystallizing dishes, filling the gap with vermiculite (a packing material)<br />
and sealing the gap with silicone caulking (Figure 1.57c).<br />
Figure 1.57: Cold baths: a) Ice-water slurry, b) a vacuum Dewar, c) a homemade insulating bath.<br />
Safety note: dry ice should not be handled with your bare hands or else you may get frostbite. Also avoid<br />
direct contact with baths colder than -10 ˚C.<br />
9 J.A. Dean, Lange’s Handbook of <strong>Chemistry</strong>, 15 th ed., McGraw-Hill, 1999, Sect 11.1.<br />
<strong>Organic</strong> <strong>Chemistry</strong> <strong>Laboratory</strong> <strong>Techniques</strong> | Nichols | Page 57
1.3.K REFLUX<br />
1.3.K.1 OVERVIEW OF REFLUX<br />
A reflux setup (Figure 1.58) allows for liquid to boil and condense, with<br />
the condensed liquid returning to the original flask. A reflux setup is<br />
analogous to a distillation, with the main difference being the vertical<br />
placement of the condenser. The liquid remains at the boiling point of the<br />
solvent (or solution) during active reflux.<br />
A reflux apparatus allows for facile heating of a solution, but without the<br />
loss of solvent that would result from heating in an open vessel. In a reflux<br />
setup, solvent vapors are trapped by the condenser, and the concentration<br />
of reactants remains constant throughout the process.<br />
The main purpose of refluxing a solution is to heat a solution in a<br />
controlled manner at a constant temperature. For example, imagine that<br />
you want to heat a solution to 60 ˚C for one hour in order to conduct a<br />
Figure 1.58: Reflux apparatus.<br />
chemical reaction. It would be difficult to maintain a warm water bath at<br />
60˚C without special equipment, and it would require regular monitoring. However, if methanol was the<br />
solvent, the solution could be heated to reflux, and it would maintain its temperature without regular<br />
maintenance at the boiling point of methanol (65 ˚C). True, 65 ˚C is not 60˚C and if the specific temperature<br />
were crucial to the reaction, then specialized heating equipment would be necessary. But often the boiling<br />
point of the solvent is chosen as the reaction temperature because of its practicality.<br />
1.3.K.2 STEP-BY-STEP PROCEDURES<br />
Figure 1.59: a) Pouring in solution, b) Reaction using a stir bar (solution is colorless), c+d) Same reaction using boiling stones.<br />
1. Pour the solution to be refluxed into a round bottomed flask, and clamp it to the ring stand or latticework<br />
with an extension clamp (Figure 1.59a). The flask should be no more than half full.<br />
2. Add a stir bar or few boiling stones for bump prevention.<br />
Boiling stones should not be used when refluxing concentrated solutions of sulfuric or phosphoric acid,<br />
as they will colorize the solution. For example, when a stir bar is used for bump prevention with<br />
concentrated sulfuric acid, the solution remains colorless (Figure 1.59b). When the same reaction is<br />
conducted using a boiling stone, the solution darkens during heating (Figure 1.59c) and eventually turns<br />
the entire solution a deep purple-brown color (Figure 1.59d).<br />
<strong>Organic</strong> <strong>Chemistry</strong> <strong>Laboratory</strong> <strong>Techniques</strong> | Nichols | Page 58
Figure 1.60: a) Reflux apparatus, with arrows indicating the direction of water flow, b) Reflux diagram, c) Incorrect clamping of<br />
a reflux apparatus.<br />
3. Place rubber hoses on a condenser (wet the ends first to allow them to slide on), then attach the<br />
condenser vertically to the round bottomed flask. If using a tall condenser, clamp the condenser to the<br />
ring stand or latticework (Figure 1.60a).<br />
Be sure the condenser fits snugly into the flask. Safety note: if the pieces are not properly connected<br />
and flammable vapors escape, they may be ignited by the heat source.<br />
Do not connect the round bottomed flask and condenser with a plastic clip, as shown in Figure 1.60c.<br />
Plastic clips can sometimes fail (especially when they are heated), and this setup does not allow for the<br />
flask to be reliably removed from the heat source at the end of the reflux.<br />
4. Connect the hose on the lower arm of the condenser to the water faucet and allow the hose on the upper<br />
arm to drain to the sink (Figure 1.60b). It is important that water goes in the bottom of the condenser<br />
and out the top (so water flows against gravity) or else the condenser will be ineffective as it will not<br />
fill completely.<br />
Figure 1.61: Reactions using reflux.<br />
<strong>Organic</strong> <strong>Chemistry</strong> <strong>Laboratory</strong> <strong>Techniques</strong> | Nichols | Page 59
Figure 1.62: Connecting reflux condensers in series.<br />
5. If multiple solutions will be refluxed at the same time (e.g. if many students are performing a reflux side<br />
by side), the hoses from each reflux setup can be connected in series (Figure 1.62). To accomplish this,<br />
the upper arm of “Setup A” which normally drains to the sink is instead connected to the lower arm of<br />
“Setup B.” The upper arm of Setup B then drains to the sink.<br />
Connecting apparatuses in series minimizes the use of water, as water exiting one condenser enters the<br />
next. Several reflux setups can be connected in series, and the water flow should be monitored to ensure<br />
that all setups are adequately cooled.<br />
6. Begin circulating a steady stream of water<br />
through the hoses (not so strong that the<br />
hose flops around from the high water<br />
pressure). Check again that the pieces of<br />
glassware securely fit together, then<br />
position the heat source under the flask.<br />
Turn on the stirring plate if using a stir bar.<br />
a. If using a heating mantle, hold it in<br />
place with an adjustable platform (e.g.<br />
a wire mesh / ring clamp). Allow a<br />
few inches below the mantle so when<br />
the reaction is complete, the mantle<br />
can be lowered and the flask cooled.<br />
Figure 1.63: a) Filling a heating mantle with sand to ensure a perfect<br />
fit, b) Heating a reflux apparatus with a sand bath.<br />
If the heating mantle is not a perfect fit for the size of the round bottomed flask, surround the flask<br />
with sand to create a better contact (Figure 1.63a).<br />
b. If using a sand bath, bury the flask in the sand so that sand is at least as high as the level of liquid<br />
in the flask (Figure 1.63b).<br />
c. If the setup will eventually be left unattended for a long period of time (e.g. overnight), tighten<br />
copper wire over the hose attachments to the condenser to prevent changes in water pressure from<br />
causing them to pop off.<br />
<strong>Organic</strong> <strong>Chemistry</strong> <strong>Laboratory</strong> <strong>Techniques</strong> | Nichols | Page 60
Figure 1.64: a+b) Condensation seen in the condenser when refluxing water, c) Reflux ring of ethanol seen subtly in the bottom<br />
third of the condenser, d) Distortion of the ring stand in the condenser due to the refluxing ethanol solution.<br />
7. If the heat source was preheated (optional), the solution should begin to boil within five minutes. If it<br />
does not, increase the rate of heating.<br />
The appropriate heating rate occurs when the solution is vigorously boiling and a “reflux ring” is seen<br />
roughly one-third of the way up the condenser. A “reflux ring” is the upper limit of where hot vapors<br />
are actively condensing.<br />
With some solutions (e.g. aqueous solution), the reflux ring is obvious with easily visible droplets in<br />
the condenser (Figures 1.64 a+b). With other solutions (e.g. many organic solvents) the reflux ring is<br />
subtler, but can be seen with close observation (Figure 1.64c). Subtle movement may be seen in the<br />
condenser as liquid drips down the sides of the condenser, or background objects may appear distorted<br />
from refraction of light through the condensing liquid (in Figure 1.64d the ring stand pole is distorted).<br />
8. If following a procedure in which you are to reflux for a certain time period (e.g. “reflux for one hour”),<br />
the time period should begin when the solution is not just boiling but actively refluxing in the bottom<br />
third of the condenser.<br />
9. The heat should be turned down if the reflux<br />
ring climbs to half-way up the condenser or<br />
higher, or else vapors could escape the flask.<br />
10.After the reflux is complete, turn off the heat<br />
source and remove the flask from the heat by<br />
either lifting the reflux apparatus up, or<br />
dropping the heat source down (Figure<br />
1.65a).<br />
Do not turn off the water flowing through the<br />
condenser until the solution is only warm to Figure 1.65: a) Raising the flask to cool, b) Cooling quickly in tap<br />
the touch. After a few minutes of air cooling, water bath.<br />
the round bottomed flask can be immersed in<br />
a tap water bath to accelerate the cooling process (Figure 1.65b).<br />
<strong>Organic</strong> <strong>Chemistry</strong> <strong>Laboratory</strong> <strong>Techniques</strong> | Nichols | Page 61
1.3.K.3 REFLUX SUMMARY<br />
Pour liquid into the<br />
flask along with a stir<br />
bar or boiling stones.<br />
Use an extension clamp<br />
on the round bottomed<br />
flask to connect to the<br />
ring stand or<br />
latticework.<br />
Attach the condenser,<br />
and connect the hoses<br />
so that water travels<br />
against gravity (cooling<br />
water comes into the<br />
bottom and drains out<br />
the top).<br />
Circulate water through<br />
the condenser, then<br />
begin heating the flask<br />
(by using a heating<br />
mantle, sand, water, or<br />
oil bath).<br />
Use an adjustable<br />
platform so the heat can<br />
be lowered and<br />
removed at the end of<br />
the reflux, or if<br />
something unexpected<br />
occurs.<br />
Heat so that the “reflux<br />
ring” is seen in the<br />
lower third of the<br />
condenser.<br />
Turn down the heat if<br />
the refluxing vapors<br />
reach higher than<br />
halfway up the<br />
condenser.<br />
At the end of the reflux<br />
period, lower the heat<br />
source from the flask or<br />
raise the apparatus.<br />
Keep circulating water<br />
in the condenser until<br />
the flask is just warm to<br />
the touch.<br />
After air cooling<br />
somewhat, the flask can<br />
be quickly cooled by<br />
immersing in a<br />
container of tap water.<br />
Be sure there is a secure<br />
connection between the<br />
round bottomed flask<br />
and condenser, as<br />
vapors escaping this<br />
joint have the potential<br />
to catch on fire.<br />
Table 1.9: Procedural summary for reflux.<br />
<strong>Organic</strong> <strong>Chemistry</strong> <strong>Laboratory</strong> <strong>Techniques</strong> | Nichols | Page 62
1.4 FILTERING METHODS<br />
1.4.A OVERVIEW OF METHODS<br />
There are many methods used to separate a mixture<br />
containing a solid and liquid. If the solid settles well,<br />
the liquid can sometimes be poured off (decanted).<br />
If the solid has very small sized particles or forms a<br />
cloudy mixture, the mixture can sometimes be<br />
centrifuged or passed through a filter pipette (on the<br />
microscale, < 5 mL).<br />
The most common methods of solid-liquid<br />
separation in the organic lab are gravity and suction<br />
filtration. Gravity filtration refers to pouring a solidliquid<br />
mixture through a funnel containing a filter<br />
Figure 1.66: a) Gravity filtration, b) Suction filtration.<br />
paper, allowing the liquid to seep through while<br />
trapping the solid on the paper (Figure 1.66a). Suction filtration is a similar process with the difference<br />
being the application of a vacuum beneath the funnel in order to pull liquid through the filter paper with<br />
suction (Figure 1.66b).<br />
Gravity and suction filtration have pros and cons, but what helps decide which method to use is generally<br />
whether the solid or filtrate is to be retained. The “filtrate” refers to the liquid that has passed through a<br />
filter paper (as indicated in Figure 1.66a). Gravity filtration is typically used when the filtrate is retained,<br />
while suction filtration is used when the solid is retained.<br />
Gravity filtration is preferred when the filtrate is retained as suction has the potential of pulling small solid<br />
particles through the filter paper pores, potentially producing a filtrate contaminated with the solid<br />
compound. Suction filtration is preferred when the solid is retained as gravity filtration is much less<br />
efficient at removing residual liquid from the solid on the filter paper.<br />
1.4.B DECANTING<br />
When there is a need to separate<br />
a solid-liquid mixture, on<br />
occasion it is possible to pour off<br />
the liquid while leaving the solid<br />
behind. This process is called<br />
decanting, and is the simplest<br />
separation method. Decanting is<br />
often used to remove hydrated<br />
sodium sulfate (Na 2 SO 4 ) from an<br />
organic solution. The sodium<br />
sulfate often clings to the<br />
glassware (Figure 1.67a),<br />
Figure 1.67: a) Sodium sulfate sticking to the glassware, b) Decanting a solid-liquid<br />
mixture, c) Using a glass stirring rod during decanting.<br />
enabling the liquid to be poured off (Figure 1.67b). If liquid is to be poured into a small vessel, a funnel<br />
could be used or liquid poured down a glass stirring rod to direct the flow (Figure 1.67c). Unfortunately,<br />
there are many mixtures that do not decant well.<br />
<strong>Organic</strong> <strong>Chemistry</strong> <strong>Laboratory</strong> <strong>Techniques</strong> | Nichols | Page 63
1.4.C GRAVITY FILTRATION<br />
When there is a need to separate a solid-liquid mixture, it is common that the particles are so fine that they<br />
swirl and disperse when the flask is tilted. These mixtures cannot be decanted, and an alternative method<br />
is gravity filtration. Gravity filtration is generally used when the filtrate (liquid that has passed through<br />
the filter paper) will be retained, while the solid on the filter paper will be discarded.<br />
A common use for gravity filtration is for separating anhydrous magnesium sulfate (MgSO 4 ) from an<br />
organic solution that it has dried (Figure 1.68b). Anhydrous magnesium sulfate is powdery, and with<br />
swirling in an organic solvent creates a fine dispersal of particles like a snow globe.<br />
Figure 1.68: a) An organic solution dried with anhydrous magnesium sulfate, b) Gravity filtration of this solution.<br />
To gravity filter a mixture, pour the mixture through a quadrant-folded filter paper (Figure 1.69) or fluted<br />
filter paper in a funnel and allow the liquid to filter using only the force of gravity (Figure 1.68c). It is best<br />
to pour as if attempting to decant, meaning to keep the solid settled in the flask for as long as possible.<br />
When solid begins to pour onto the filter paper, it has the possibility of clogging the filter paper pores or<br />
slowing filtration. After finished pouring, rinse the solid on the filter paper (and in the flask) with a few<br />
portions of fresh solvent to remove residual compound adhering to the solid.<br />
Figure 1.69: Creating a quadrant-folded filter paper. The dotted lines represent locations to crease and fold the filter paper. The<br />
arrows show the direction of folding.<br />
<strong>Organic</strong> <strong>Chemistry</strong> <strong>Laboratory</strong> <strong>Techniques</strong> | Nichols | Page 64
1.4.D SUCTION FILTRATION<br />
1.4.D.1 SUCTION FILTRATION OVERVIEW<br />
Suction filtration (vacuum filtration) is the standard technique used for<br />
separating a solid-liquid mixture when the goal is to retain the solid (for example<br />
in crystallization). Similar to gravity filtration, a solid-liquid mixture is poured<br />
onto a filter paper, with the main difference being that the process is aided by<br />
suction beneath the funnel (Figures 1.70 + 1.71).<br />
The process has advantages and disadvantages in comparison to gravity<br />
filtration.<br />
Advantages: 1) Suction filtration is much faster than gravity filtration, often<br />
taking less than one minute with good seals and a good vacuum source. 2)<br />
Suction filtration is more efficient at removing residual liquid, leading to a purer<br />
Figure 1.70: Suction filtration.<br />
solid. This is especially important in crystallization, as the liquid may contains<br />
soluble impurities which could adsorb back onto the solid surface when the solvent evaporates.<br />
Disadvantages: The force of suction may draw fine crystals through the filter paper pores, leading to a<br />
quantity of material that cannot be recovered from the filter paper, and possibly an additional quantity that<br />
is lost in the filtrate. This method therefore works best with large crystals. On small scales, the loss of<br />
material to the filter paper and filtrate is significant, and so other methods are recommended for microscale<br />
work.<br />
Figure 1.71: Suction filtration.<br />
<strong>Organic</strong> <strong>Chemistry</strong> <strong>Laboratory</strong> <strong>Techniques</strong> | Nichols | Page 65
1.4.D.2 RINSING<br />
As the goal of suction filtration is to fully separate a solid from it surrounding liquid, rinsing the solid is<br />
necessary if the liquid cannot easily evaporate. In the case of crystallization, the liquid may contain<br />
impurities that can reincorporate into the solid if not removed.<br />
To rinse a suction-filtered solid, the vacuum is removed and a small portion of cold solvent is poured over<br />
the solid (the “filter cake”). In the case of crystallization, the same solvent from the crystallization is used.<br />
The solid is then delicately slushed around in the solvent with a glass rod, and the vacuum is reapplied to<br />
remove the rinse solvent.<br />
To demonstrate the importance of a rinse, Figure 1.72 shows the recovery of a white solid from a yellow<br />
liquid using suction filtration. The yellow liquid seemed to be somewhat retained by the solid, as the first<br />
crystals collected had a yellow tint (Figure 1.72b). However, rinsing with a few portions of cold solvent<br />
were effective at removing the yellow liquid (Figure 1.72d), which could have been reincorporated into the<br />
solid without the rinse.<br />
Figure 1.72: Recovery of acetanilide (white crystals) from a solution that contained yellow (methyl red) impurities. The crystals<br />
were originally tinted yellow (b), and the color faded after rinsing with cold water (c+d).<br />
<strong>Organic</strong> <strong>Chemistry</strong> <strong>Laboratory</strong> <strong>Techniques</strong> | Nichols | Page 66
1.4.D.3 WATER ASPIRATOR<br />
A vacuum source is necessary for suction filtration (and vacuum distillation). Although many science<br />
buildings come equipped with a house vacuum system (Figure 1.73a), solvents evaporating from a suction<br />
filter flask over time can degrade the oil pumps used in a house vacuum. Therefore, it is recommended to<br />
instead connect a suction flask to a water aspirator.<br />
A water aspirator is an inexpensive attachment to a water spigot, and the nub on the aspirator connects with<br />
tubing to the vessel to be evacuated (Figure 1.73b). As water flows through the faucet and the aspirator,<br />
suction is created in the flask.<br />
Figure 1.73: a) House vacuum system at Butte College, b) Water Aspirator (indicated with an arrow), c) Diagram of an aspirator.<br />
A water aspirator creates suction through the Bernoulli Principle (or Venturi Effect, for liquids). Water<br />
coming from the faucet is constricted inside the aspirator (Figure 1.73c). As the water flow must be the<br />
same going into the aspirator as it is going out, the water speed must increase in the constricted area in the<br />
direction of flow. A similar phenomenon can be seen in creeks and rivers where water flows the fastest at<br />
the narrowest portions of streams. When the water increases its velocity in the direction of the water flow,<br />
conservation of energy dictates that its velocity in perpendicular directions must decrease. The result is a<br />
lowered pressure adjacent to the fast-moving liquid. In other words, the gain in velocity of the constricted<br />
liquid is balanced by a reduction in pressure on the surrounding material (the gas).<br />
For this reason, the speed at which the water flows through the faucet is correlated with the amount of<br />
suction experienced in the connected flask. A strong flow of water will have the fastest speeds through the<br />
aspirator and the greatest reduction in pressure.<br />
<strong>Organic</strong> <strong>Chemistry</strong> <strong>Laboratory</strong> <strong>Techniques</strong> | Nichols | Page 67
1.4.D.4 STEP-BY-STEP PROCEDURES<br />
Figure 1.74: Suction filtration flask attached to a vacuum trap and water aspirator. The arrows show the direction of suction.<br />
Assemble the suction filtration flask<br />
1. Clamp a side-arm Erlenmeyer flask to a ring stand or latticework and attach a thick-walled rubber hose<br />
to its side arm. Connect this thick tubing to a “vacuum trap” (Figure 1.74) and then to the water<br />
aspirator. It is best to not bend or strain the tubing as much as is practical, as this may cause poor<br />
suction.<br />
A vacuum trap is necessary when connecting apparatuses to a vacuum source as changes in pressure<br />
can cause back-suction. When using a water aspirator, back-suction might cause water from the sink<br />
to be pulled into the vacuum line and flask (ruining the filtrate), or the filtrate to be pulled into the water<br />
stream (contaminating the water supply).<br />
<strong>Organic</strong> <strong>Chemistry</strong> <strong>Laboratory</strong> <strong>Techniques</strong> | Nichols | Page 68
Figure 1.75: a) Placing the Buchner funnel in a rubber sleeve and Erlenmeyer flask, b) Concavity of a filter paper, c) Placing filter<br />
paper in a Buchner funnel, d) Placing filter paper in a Hirsch funnel.<br />
2. Place a rubber sleeve (or filter adapter) and Buchner funnel atop the side-arm Erlenmeyer flask (Figure<br />
1.75a). Alternatively use a Hirsch funnel for small scales (Figure 1.75d).<br />
3. Obtain a filter paper that will fit perfectly into the Buchner or Hirsch funnel. Filter papers are not<br />
completely flat and have a subtle arc to their shape (Figure 1.75b). Place the filter paper inside the<br />
funnel concave side down (Figures 1.75 b+c). The paper should cover all the holes in the funnel, and<br />
with the paper arching downward (Figure 1.76a), solid will be less likely to creep around the edges.<br />
Figure 1.76: a) Filter paper in the funnel, b) Wetting the filter paper with solvent, c) Pressing the Buchner funnel to create a good<br />
seal, d) Testing the suction of the aspirator.<br />
4. Turn on the faucet connected to the water aspirator to create a strong flow of water (the degree of<br />
suction is related to the water flow). Wet the filter paper with cold solvent (using the same solvent used<br />
in crystallization, if applicable, Figure 1.76b).<br />
5. Suction should drain the liquid and hold the moist filter paper snugly over the holes in the filter. If the<br />
solvent does not drain or suction is not occurring, you may need to press down on the funnel (Figure<br />
1.76c) to create a good seal between the glass and rubber sleeve.<br />
Lack of suction may also be from a faulty aspirator or a leak in the system: to test for suction remove<br />
the tubing from the suction flask and place your finger over the end (Figure 1.76d).<br />
<strong>Organic</strong> <strong>Chemistry</strong> <strong>Laboratory</strong> <strong>Techniques</strong> | Nichols | Page 69
Figure 1.77: a) Using a spatula to dislodge a thick solid from the glass, b) Filtering, c) Using a spatula to scoop a thick solid onto<br />
the filter paper, d) Rinsing residual solid from the flask using cold solvent.<br />
Filter and Rinse the Mixture<br />
6. Swirl the mixture to be filtered in order to dislodge solid from the sides of the flask. If the solid is very<br />
thick, use a spatula or stirring rod to free it from the glass (Figure 1.77a).<br />
In the context of crystallization, the flask will have previously been in an ice bath. Use a paper towel<br />
to dry water residue from the outside of the flask so water does not accidentally pour onto the solid.<br />
7. With a quick motion, swirl and dump the solid into the funnel in portions (Figure 1.77b). If the solid<br />
is very thick, scoop it out of the flask onto the filter paper (Figure 1.77c).<br />
It’s best if the solid can be directed toward the middle of the filter paper, as solid near the edges may<br />
creep around the filter paper.<br />
8. A small amount of chilled solvent (1-2 mL for macroscale work) can be used to help rinse any residual<br />
solid from the flask into the funnel (Figure 1.77d). In crystallizations, it is not wise to use an excessive<br />
amount of solvent as it will decrease the yield by dissolving small amounts of crystals. Again, press<br />
on the funnel to create a good seal and efficient drainage if necessary.<br />
Figure 1.78: a) Breaking the vacuum by opening the pinch clamp on the vacuum trap, b) Adding rinse solvent, c) Breaking up the<br />
solid.<br />
<strong>Organic</strong> <strong>Chemistry</strong> <strong>Laboratory</strong> <strong>Techniques</strong> | Nichols | Page 70
9. Rinse the solid on the filter paper to remove contaminants that may remain in the residual liquid.<br />
a. Break the vacuum on the flask by opening the pinch clamp at the vacuum trap (Figure 1.78a) or by<br />
removing the rubber tubing on the filter flask. If adjusting the pinch clamp, you will know the<br />
system is open when there is an increase in water flow by the faucet. Then turn off the water on<br />
the aspirator. It is always important to open the system to the atmosphere before turning off the<br />
aspirator in order to prevent back-suction.<br />
b. Add 1-2 mL of cold solvent (Figure 1.78b). Use a glass stirring rod to break up any solid chunks<br />
and distribute the solvent to all portions of the solid (Figure 1.78c), taking care to not rip or dislodge<br />
the filter paper.<br />
c. Reapply the vacuum to the flask, and dry the solid with suction for a few minutes.<br />
10.After filtration is complete, again open the flask to the atmosphere by releasing the pinch clamp or<br />
opening it elsewhere, and turn off the water connected to the aspirator.<br />
Figure 1.79: a) Removing the crystals and filter paper from a Buchner funnel, b) Drying the crystals on a watch glass, c) Scraping<br />
crystals off filter paper before obtaining a mass (note: these are different crystals than those in b).<br />
11.Transfer the solid, filter paper and all, to a pre-weighed watch glass using a spatula (Figures 1.79a+ b).<br />
The filter cake shouldn’t be mushy, and if it is, the liquid was not adequately removed (try a different<br />
aspirator and repeat suction filtration).<br />
12.Allow the solid to dry overnight if possible before recording a final mass or melting point. The solid<br />
will flake off the filter paper more easily when completely dry (Figure 1.79c).<br />
13.If pressed for time, a solid can be quickly dried in the following ways:<br />
•<br />
•<br />
If the solid is wet with water, it can be placed in a 110 ˚C oven (if the melting point is not below<br />
this temperature). If the solid is wet with organic solvent, it should never be placed in an oven as<br />
it may ignite.<br />
If the solid is wet with organic solvent, it can be pressed between fresh pieces of filter paper<br />
(multiple times if needed) to quickly dry them. Inevitably some solid will be lost on the filter paper.<br />
<strong>Organic</strong> <strong>Chemistry</strong> <strong>Laboratory</strong> <strong>Techniques</strong> | Nichols | Page 71
1.4.D.5 SUCTION FILTRATION SUMMARY<br />
Figure 1.80: Suction filtration vacuum trap apparatus.<br />
Clamp a side-armed<br />
Erlenmeyer flask.<br />
Connect thick-walled<br />
hosing from the side arm<br />
to a vacuum trap and the<br />
water aspirator.<br />
Place a vacuum sleeve on<br />
the Buchner (or Hirsch)<br />
funnel, then filter paper<br />
on the funnel so it arches<br />
downward.<br />
Turn on the aspirator.<br />
Add a few mL of the<br />
same solvent used in the<br />
flask to wet the filter.<br />
The solvent should drain<br />
with suction.<br />
Swirl the mixture to be<br />
filtered to dislodge the<br />
solid from the sides of<br />
flask.<br />
With a quick motion,<br />
pour the slurry into the<br />
funnel in portions.<br />
In some applications (e.g.<br />
crystallization), rinse with<br />
solvent:<br />
• Open the apparatus to<br />
the atmosphere, then<br />
turn off the aspirator.<br />
• Add a few mL of cold<br />
solvent to the filter<br />
paper.<br />
• Delicately swirl the<br />
solid in the solvent<br />
with a glass rod.<br />
Apply suction again for a<br />
few minutes (repeat the<br />
rinse step if necessary).<br />
Dry the solid on a watch<br />
glass along with the filter<br />
paper, overnight if<br />
possible. The solid will<br />
flake off the paper when<br />
dried.<br />
Table 1.10: Procedural summary for suction filtration.<br />
<strong>Organic</strong> <strong>Chemistry</strong> <strong>Laboratory</strong> <strong>Techniques</strong> | Nichols | Page 72
1.4.E HOT FILTRATION<br />
1.4.E.1 HOT FILTRATION OVERVIEW<br />
A hot filtration is generally used in some crystallizations, when a solid contains impurities that are insoluble<br />
in the crystallization solvent. It is also necessary in crystallization when charcoal is used to remove highly<br />
colored impurities from a solid, as charcoal is so fine that it cannot be removed by decanting.<br />
A hot filtration is performed by first pouring a few mL of solvent through a funnel containing a “fluted<br />
filter paper.” A fluted filter paper has many indentations and high surface area, which allows for a fast<br />
filtration. The funnel is allowed to get hot, while the mixture to be filtered is brought to a boil. The boiling<br />
mixture is then poured through the filter paper in portions (Figures 1.81 b+d).<br />
Figure 1.81: a) Pouring solvent through the funnel to get funnel hot (note: hotplate is used in this situation as the solvent is water),<br />
b) Filtering a solution containing insoluble impurities, c+d) Variations using a paper clip instead of a ring clamp to hold the funnel.<br />
It is best to use a ring clamp to secure the filtration funnel, although the funnel could also be simply placed<br />
atop the flask. If not using a ring clamp, it is recommended to place a bent paper clip between the flask and<br />
funnel to allow for displaced air to escape the bottom flask as liquid drains (Figures 1.81 c+d). Without a<br />
ring clamp, the setup is more prone to tipping and so using a ring clamp is considerably safer.<br />
A hot filtration is used for filtering solutions that will crystallize when allowed to cool. It is therefore<br />
important that the funnel is kept hot during filtration through contact with hot solvent vapors, or crystals<br />
may prematurely form on the filter paper or in the stem of the funnel (Figure 1.82).<br />
Figure 1.82: A filtration that was conducted at too low a temperature: a) Crystallization occurred in the stem of the funnel, b) A<br />
sheer can be seen on the filter paper, representing solid that has crystallized somewhat on the filter paper, c) Obvious crystals<br />
formed on the filter paper.<br />
<strong>Organic</strong> <strong>Chemistry</strong> <strong>Laboratory</strong> <strong>Techniques</strong> | Nichols | Page 73
Crystallization on the filter paper can clog the setup<br />
and cause a loss of yield (as the filter paper will be later<br />
thrown away). Crystallization in the stem hinders<br />
filtration, and can act as a plug on the bottom of the<br />
funnel. An advantage of hot filtration is that the<br />
boiling solvent in the filter flask helps to dissolve<br />
crystals that prematurely form in the stem of the<br />
funnel. With hot filtration, it is advised to use a shortstemmed<br />
funnel (Figure 1.82a) or stemless funnel if<br />
available, instead of a long-stemmed funnel (Figure<br />
1.83b), as material is less likely to crystallize in a short<br />
or absent stem.<br />
Figure 1.83: a) Short-stemmed funnel, b) Long-stemmed<br />
funnel (don’t use for hot filtration).<br />
As it is essential that a solution filters quickly before it has a chance to cool off in the funnel, a “fluted<br />
filter paper” (Figures 1.84 b+c) is commonly used instead of the quadrant-folded filter paper sometimes<br />
used with gravity filtration (Figure 1.84a). The greater number of bends on the fluted filter paper translate<br />
into increased surface area and quicker filtration. The folds also create space between the filter paper and<br />
glass funnel, allowing for displaced air to more easily exit the flask as liquid drains.<br />
Figure 1.84: a) Quadrant-folded filter paper (not recommended for hot filtration), b) A fluted filter paper after folding, c) Unfolded<br />
fluted filter paper during hot filtration.<br />
<strong>Organic</strong> <strong>Chemistry</strong> <strong>Laboratory</strong> <strong>Techniques</strong> | Nichols | Page 74
1.4.E.2 STEP-BY-STEP PROCEDURES<br />
Hot filtration is often used with crystallization, and this procedure should be inserted after the dissolution<br />
step, but before setting aside the solution to slowly cool.<br />
Figure 1.85: a) Short-stemmed funnel, b) If not using a ring clamp, place a bent paper clip between the funnel and Erlenmeyer<br />
flask, c) Fluted filter paper (unfolded), d) Pouring solvent through the funnel to get the funnel hot.<br />
Prepare the Filtration Setup<br />
1. Obtain a stemless or short-stemmed funnel (Figure 1.85a), and insert it into a ring clamp attached to a<br />
ring stand or latticework (or alternatively, obtain a bent paper clip for the purpose shown in Figure<br />
1.85b).<br />
2. Flute a filter paper of the correct size for your funnel into an accordion shape (instructions are in Figure<br />
1.86 and the resulting accordion is in Figure 1.85c). When placed in the funnel, the paper should not<br />
be shorter than the top of the funnel, or the solution might slip past the filter paper when poured.<br />
Figure 1.86: Creating a fluted filter paper. The dotted lines represent locations to crease and fold the filter paper. The arrows<br />
show the direction of folding.<br />
3. With a clean Erlenmeyer flask of the correct size for the crystallization beneath the funnel and on the<br />
heat source, pour a few mL of hot solvent into the funnel (Figure 1.85d).<br />
a. If using a ring clamp, adjust the clamp so that there is a small gap between the mouth of the<br />
Erlenmeyer and bottom of the funnel: this allows for air to be displaced when liquid flows into the<br />
flask. If the gap is too large, hot vapors will escape without heating the funnel.<br />
b. If not using a ring clamp, place a bent paper clip between the flask and funnel (Figure 1.85b).<br />
4. Allow the solvent to boil and get the entire setup hot. If using charcoal, insert that procedure now.<br />
<strong>Organic</strong> <strong>Chemistry</strong> <strong>Laboratory</strong> <strong>Techniques</strong> | Nichols | Page 75
Figure 1.87: a) Hot filtering, b) Holding a hot flask with a paper towel holder, c) Liquid wetting the too wide paper towel holder.<br />
Filter the Solution in Portions<br />
5. When the filter flask is quite hot, and the solution to be filtered is boiling, pour the boiling mixture into<br />
the filter funnel in portions. Touch the flask to the filter paper in the funnel as you pour (Figure 1.87a).<br />
6. Safety note: the flask may be quite hot, and hot vapors may scald your hand as you pour (pour sideways<br />
so your hand is not above the funnel). If the flask is too hot to hold with your hands, use a “paper towel<br />
holder” to hold the flask (Figure 1.87b):<br />
a. Fold a section of paper towel over several times such that the resulting strip is roughly one inch<br />
wide. If desired, secure the strip together using a few pieces of tape.<br />
b. When holding a flask, the paper towel holder should be below the lip of the flask. In this way,<br />
liquid will not wick toward the paper towel when pouring (towel remains dry in Figure 1.87a, but<br />
wet with the too wide towel in Figure 1.87c).<br />
Figure 1.88: a) Flask is returned to the heat source in between pouring, Filter papers that b) should be rinsed, c) should not be<br />
rinsed.<br />
7. When not pouring the mixture to be filtered, return the flask to the heat source (Figure 1.88a).<br />
8. When the mixture is completely filtered, set the empty flask on the benchtop (safety note: do not heat<br />
an empty flask, or it may crack). Inspect the funnel: if crystals are seen on the filter paper (as in Figure<br />
1.88b), rinse with a few mL of boiling solvent to dissolve them. A rinse is not needed in Figure 1.88c.<br />
9. Inspect the filtrate (the liquid that has gone through the filter paper). If charcoal was used and the<br />
filtrate is grey, or you can see fine black particles, then charcoal passed through the filter paper either<br />
through a hole or by using the wrong filter mesh size. If classmates do not have grey in their solutions,<br />
it was likely a hole. Repeat the hot filtration step with a new filter paper and flask.<br />
<strong>Organic</strong> <strong>Chemistry</strong> <strong>Laboratory</strong> <strong>Techniques</strong> | Nichols | Page 76
1.4.E.3 HOT FILTRATION SUMMARY<br />
Prepare a fluted filter<br />
paper and stemless or<br />
short-stemmed funnel<br />
clamped above the filter<br />
flask.<br />
Pour a few mL of<br />
solvent through the<br />
funnel, and allow the<br />
solvent to boil and get<br />
the funnel hot.<br />
When the mixture to be<br />
filtered is boiling, pour<br />
the mixture into the<br />
funnel in portions,<br />
returning it to the heat<br />
source in between<br />
additions.<br />
Rinse the filter paper<br />
with hot solvent if<br />
crystals are seen on the<br />
paper.<br />
Table 1.11: Procedural summary for hot filtration.<br />
<strong>Organic</strong> <strong>Chemistry</strong> <strong>Laboratory</strong> <strong>Techniques</strong> | Nichols | Page 77
1.4.F PIPETTE FILTRATION (MICROSCALE)<br />
For the separation of small volumes (< 10 mL) of solid-liquid mixtures, pipette filters are ideal as filter<br />
papers adsorb a significant amount of material. Pipette filtration may also be used if small amounts of solid<br />
are noticed in NMR or GC samples, as both instruments require analysis of liquids without suspended solids.<br />
Figure 1.89: Creating and using a filter pipette: a) Piece of cotton, b+c) shoving cotton to the bottom of the pipette, d) Filtering a<br />
mixture into a GC vial, e) GC vial held with an upside down large septum.<br />
To create a pipette filter, use a long rod to wedge a small piece of cotton into the bottom of a Pasteur pipette<br />
(Figures 1.89 a–c). For very small volumes (< 2 mL), a GC vial makes a nice receiving flask. These vials<br />
are very easy to tip over, but can be held in place by an upside-down large septum (Figure 1.89e).<br />
Pipette the solution to be filtered through the top of the filter pipette (Figure 1.89d). It’s best to allow the<br />
liquid to trickle through the filter on its own, and to at first not use pressure from a dropper bulb, or else<br />
solid may be forced through. After the majority of the liquid has filtered, the residual liquid that stays in<br />
the pipette (Figure 1.89e), can then be gently pushed through with pressure from a dropper bulb.<br />
Pipette filters can be filled with a centimeter or two of solid material on top of the cotton plug to achieve<br />
more than just a solid-liquid separation. They can be filled with drying agents (e.g. Na 2 SO 4 ) to remove<br />
small amounts of water from a solution, or basic solids (e.g. Na 2 CO 3 ) to neutralize a slightly acidic solution.<br />
With the addition of solid to the pipette filter, the liquid must then be gently pushed through with pressure<br />
from a dropper bulb as it will not drip through on its own.<br />
<strong>Organic</strong> <strong>Chemistry</strong> <strong>Laboratory</strong> <strong>Techniques</strong> | Nichols | Page 78
1.4.G CENTRIFUGATION<br />
Centrifugation is used for the separation of solid-liquid mixtures that are stubborn to settle or difficult to<br />
otherwise filter. It uses centrifugal force by rapidly spinning samples so that the solid is forced to the<br />
bottom of the tube. In this section is shown centrifugation of a suspension of yellow lead(II) iodide in water<br />
(Figures 1.90b).<br />
As a centrifuge (Figure 1.90a) can spin up to 10,000<br />
rotations per minute, an unbalanced load will cause the<br />
centrifuge to knock and wobble. If severely unbalanced,<br />
the centrifuge can even wobble off the benchtop, causing<br />
harm to anything in its way (they are heavy!). To prevent<br />
wobbling, every sample in the centrifuge needs to be<br />
balanced by an equal volume of liquid in the opposite<br />
chamber in the centrifuge.<br />
Figure 1.90: a) Centrifuge, b) Formation of solid lead(II)<br />
iodide.<br />
Special test tubes or centrifuge tubes must be used that<br />
exactly fit the width of the chambers in the centrifuge.<br />
Each tube should be filled to no greater than threequarters<br />
full as the samples will be tilted in the centrifuge and could spill out (Figure 1.91b). If only one<br />
sample is to be centrifuged, a tube of water that contains an equal height of liquid should be placed into an<br />
opposing slot in the centrifuge (Figures 1.91 a–c). More than one sample can be centrifuged at a time, with<br />
the only requirement being that each opposing tube must have nearly the same volume. It is acceptable for<br />
one pair of tubes to have different volumes as another pair, as long as the entire centrifuge is symmetrically<br />
balanced.<br />
To operate the centrifuge, close the lid and turn on the centrifuge. Set the rotation speed if your instrument<br />
allows for it (a good general speed is 8,000 rotations per minute) and turn the dial to the recommended<br />
amount of time (set by your instructor or experimentation). Allow the system to spin for the designated<br />
time and turn it off. Although a centrifuge has a braking mechanism, it is not recommended to use it as the<br />
jostling can stir up sediments. After the set amount of time has expired, simply let a centrifuge slow and<br />
come to a stop on its own. The solid can then be separated from the liquid by decantation or by pipette.<br />
Figure 1.91: a) Lead(II) iodide suspension next to a tube of water with an equal volume, b+c) Placement of the tubes opposite one<br />
another.<br />
<strong>Organic</strong> <strong>Chemistry</strong> <strong>Laboratory</strong> <strong>Techniques</strong> | Nichols | Page 79
<strong>Organic</strong> <strong>Chemistry</strong> <strong>Laboratory</strong> <strong>Techniques</strong> | Nichols | Page 80
CHAPTER 2<br />
CHROMATOGRAPHY<br />
A mixture of<br />
ferrocene and<br />
acetylferrocene<br />
is purified with<br />
column<br />
chromatography.<br />
<strong>Organic</strong> <strong>Chemistry</strong> <strong>Laboratory</strong> <strong>Techniques</strong> | Nichols | Page 81
CHAPTER 2: CHROMATOGRAPHY, TABLE OF CONTENTS<br />
2.1 Chromatography Generalities 83 2.3 Column Chromatography 119<br />
2.1.A Overview of Chromatography 84 2.3.A Macroscale Columns 120<br />
2.1.B General Separation Theory 85 Procedural Generalities 120<br />
Step-by-Step Procedures 121<br />
2.2 Thin Layer Chromatography (TLC) 86 Macroscale Column Summary 131<br />
2.2.A Overview of TLC 86 Troubleshooting 132<br />
2.2.B Uses of TLC 87 2.3.B Microscale (Pipette) Columns 133<br />
Assessing Purity 87 Step-by-Step Procedures 133<br />
Assessing Reaction Progress 88 Microscale Column Summary 138<br />
Use of a Co-spot 88<br />
Monitoring a Reaction by TLC 89 2.4 Gas Chromatography (GC) 139<br />
Obtaining an Aliquot 90 2.4.A Overview of GC 139<br />
2.2.C The Retention Factor (R f ) 91 2.4.B Uses of GC 140<br />
2.2.D Separation Theory 93 Assessing Purity 140<br />
General Theory 93 Identifying Components 141<br />
Structural Considerations 95 2.4.C Separation Theory 142<br />
Mobile Phase Polarity 97 General Theory 142<br />
2.2.E Step-by-Step Procedures 98 Structural Considerations 144<br />
General TLC Procedure 98 2.4.D Quantitating with GC 145<br />
Thin Layer Chromatography Summary 102 Quantitative Challenges 145<br />
Troubleshooting 103 Using a Calibration Curve 147<br />
Making Capillary TLC Spotters 104 Using Response Factors 148<br />
Notebook Record of TLC’s 105 2.4.E GC Parameters 149<br />
2.2.F Visualizing TLC Plates 106 Dilution 149<br />
Visualization Summary 106 Solvent Delay 150<br />
Ultraviolet Absorption 107 Oven Temperature 151<br />
Iodine 108 Using a Temperature Ramp 152<br />
Chemical Stains 109 2.4.F Sample Preparation 153<br />
General Staining Procedure 109<br />
p-Anisaldehyde / Vanillin Stains 110<br />
Permanganate Stain 112<br />
Phosphomolybdic Acid Stain 113<br />
Iron(III) Chloride Stain 113<br />
Bromocresol Green Stain 114<br />
Visualization Troubleshooting 115<br />
<strong>Organic</strong> <strong>Chemistry</strong> <strong>Laboratory</strong> <strong>Techniques</strong> | Nichols | Page 82
2.1 CHROMATOGRAPHY GENERALITIES<br />
Chromatography is a technique used to separate the components of a mixture. It can be used as an analytical<br />
technique to gain information about what is present in a mixture, or as a purification technique to separate<br />
and collect the components of a mixture.<br />
Chromatography in the organic chemistry laboratory can be classified into several broad categories:<br />
Thin Layer<br />
Chromatography (TLC)<br />
analytical method for<br />
testing mixtures<br />
Column<br />
Chromatography<br />
purification method for<br />
separating and collecting<br />
components<br />
Gas<br />
Chromatography<br />
instrumental technique for analyzing<br />
mixtures<br />
Table 2.1: Variations of chromatography.<br />
These techniques follow the same general principles in terms of how they are able to separate mixtures, and<br />
so will be discussed collectively in this section. Details specific to each technique will then be further<br />
discussed in their own sections.<br />
<strong>Organic</strong> <strong>Chemistry</strong> <strong>Laboratory</strong> <strong>Techniques</strong> | Nichols | Page 83
2.1.A OVERVIEW OF CHROMATOGRAPHY<br />
The first uses of chromatography involved separating the colored components of plants in the early 1900’s.<br />
The pigments in a plant can be separated into yellow, orange and green colors (xanthophylls, carotenes and<br />
chlorophylls respectively) through this method. The Greek name for color is chroma, and graphein is ‘to<br />
write,’ so chromatography can be thought of as “color writing.”<br />
The general idea of chromatography can be demonstrated with food dyes in your kitchen. Commercial<br />
green food dye does not contain any green colored components at all, and chromatography can show that<br />
green food dye is actually a mixture of blue and yellow dyes. If a drop of green food dye is placed in the<br />
middle of a paper towel followed by a few drops of water, the water will creep outwards as it wets the paper<br />
(Figure 2.1). As the water expands, the dye will travel with it. If you let the dye expand long enough,<br />
you’ll see that the edges will be tinted with blue (Figure 2.1d). This is the beginning of the separation of<br />
the blue and yellow components in the green dye by the paper and water.<br />
Figure 2.1: Time-lapse sequence of a drop of green food dye on a paper towel, followed by a drop of water.<br />
A complete separation of the green food dye can be accomplished using paper chromatography. A dilute<br />
sample is deposited on the bottom edge of a piece of paper, the paper is rolled in a cylinder, stapled, and<br />
placed vertically in a closed container containing a small amount of solvent 1 (Figure 2.2a). The solvent is<br />
allowed to wick up the paper through capillary action (called “elution,” Figure 2.2b), and through this<br />
method complete separation of the blue and yellow components can be achieved (Figure 2.2d).<br />
Figure 2.2: Paper chromatography of diluted green food dye: a) Before elution, b) After elution, c) Zoom in before elution, d)<br />
Zoom in after elution.<br />
1 The solvent used in this separation is a solution made from a 1:3:1 volume ratio of 6 M NH4 OH:1-pentanol:ethanol.<br />
<strong>Organic</strong> <strong>Chemistry</strong> <strong>Laboratory</strong> <strong>Techniques</strong> | Nichols | Page 84
2.1.B GENERAL SEPARATION THEORY<br />
The main chromatographic techniques (thin layer chromatography, column chromatography, and gas<br />
chromatography) follow the same general principles in terms of how they are able to separate mixtures.<br />
In all chromatographic methods, a sample is first applied onto a stationary material that either absorbs or<br />
adsorbs the sample: adsorption is when molecules or ions in a sample adhere to a surface, while absorption<br />
is when the sample particles penetrate into the interior of another material. A paper towel absorbs water<br />
because the water molecules form intermolecular forces (in this case hydrogen bonds) with the cellulose in<br />
the paper towel. In chromatography, a sample is typically adsorbed onto a surface, and can form a variety<br />
of intermolecular forces with this surface.<br />
After adsorption, the sample is then exposed to a liquid or gas traveling in one direction. The sample may<br />
overcome its intermolecular forces with the stationary surface and transfer into the moving material, due to<br />
some attraction or sufficient thermal energy. The sample will later readsorb to the stationary material, and<br />
transition between the two materials in a constant equilibrium (equation 1). If there is to be any separation<br />
between components in a mixture, it is crucial that there are many equilibrium “steps” in the process<br />
(summarized in Figure 2.3).<br />
X (stationary) X (mobile) (1)<br />
The material the sample adsorbs onto is referred to as the “stationary phase” because it retains the sample’s<br />
position. The moving material is called the “mobile phase” because it can cause the sample to move from<br />
its original position.<br />
Figure 2.3: Generic chromatography sequence for compound X: a) Adsorption, b) Exposure to a mobile phase, c) Sample X breaks<br />
its attachment to the stationary phase, d) Movement with the mobile phase, e) Reattachment to the stationary phase. Steps c-e are<br />
equilibrium steps and constantly repeated.<br />
The main principle that allows chromatography to separate components of a mixture is that components<br />
will spend different amounts of time interacting with the stationary and mobile phases. A compound that<br />
spends a large amount of time mobile will move quickly away from its original location, and will separate<br />
from a compound that spends a larger amount of time stationary. The main principle that determines the<br />
amount of time spent in the phases is the strength of intermolecular forces experienced in each phase. If<br />
a compound has strong intermolecular forces with the stationary phase it will remain adsorbed for a longer<br />
amount of time than a compound that has weaker intermolecular forces. This causes compounds with<br />
different strengths of intermolecular forces to move at different rates.<br />
How these general ideas apply to each chromatographic technique (thin layer chromatography, column<br />
chromatography, and gas chromatography) will be explained in greater detail in each section.<br />
<strong>Organic</strong> <strong>Chemistry</strong> <strong>Laboratory</strong> <strong>Techniques</strong> | Nichols | Page 85
2.2 THIN LAYER CHROMATOGRAPHY (TLC)<br />
Many students enter organic chemistry having already done a form of<br />
chromatography in their academic career, either in grade school or in general<br />
chemistry. Most likely, this will have been paper chromatography (Figure 2.4),<br />
as the materials are cheap but still effective. Paper chromatography can be used<br />
to separate the dyes in pens, markers, and food coloring.<br />
When components separate in paper chromatography it is because the components<br />
of the mixtures have different attractions to the stationary phase (the cellulose in<br />
the paper) and the mobile phase (the solvent wicking up the paper), and spend<br />
different amounts of time in each. Thin layer chromatography (TLC) is an<br />
extension of paper chromatography and uses a different stationary phase.<br />
Figure 2.4: Paper chromatography.<br />
2.2.A OVERVIEW OF TLC<br />
Two commonly used stationary phases in chromatography are silica (SiO 2 xH 2 O) and alumina<br />
(Al 2 O 3 xH 2 O). Both of these materials are fine white powders that, unlike paper, do not stand up by<br />
themselves, so they are deposited in a thin layer on some sort of backing (either glass, aluminum, or plastic).<br />
Using these thin layers of stationary phase for separations is called “thin layer chromatography” (TLC),<br />
and is procedurally performed much the same way as paper chromatography (Figure 2.5).<br />
Figure 2.5: TLC sequence to separate the components of a purple sample.<br />
It is very common for organic compounds to appear colorless on the white adsorbent background, which<br />
poses the challenge of seeing the separation that occurs in a TLC. TLC plates often have to be “visualized,”<br />
meaning something has to be done to the plate in order to temporarily see the compounds. Common<br />
methods of visualization are to use UV light (Figures 2.6 a+b) or a chemical stain (Figure 2.6c).<br />
Figure 2.6: a) Visualization of a TLC plate using UV light, b) Compounds appear dark against a fluorescent green background,<br />
c) Use of a chemical stain to visualize a plate.<br />
<strong>Organic</strong> <strong>Chemistry</strong> <strong>Laboratory</strong> <strong>Techniques</strong> | Nichols | Page 86
2.2.B USES OF TLC<br />
TLC is a common technique in the organic chemistry laboratory because it can give quick and useful<br />
information about the purity of a sample and whether or not a reaction in progress is complete. When low<br />
polarity solvents are used, a TLC plate can be complete in less than 5 minutes.<br />
2.2.B.1 ASSESSING PURITY<br />
One of the uses of TLC is to assess the purity of a sample. In Figure 2.7 are TLC plates of acetophenone<br />
and cinnamaldehyde: samples that were diluted from their reagent bottle, run, and visualized with UV light.<br />
Acetophenone appeared as only one spot on the TLC plate, indicating the reagent is likely pure. Conversely,<br />
cinnamaldehyde is unquestionably impure as its TLC showed two large spots, and had a few fainter spots<br />
as well. Aldehydes are prone to air oxidation, and it is common for aldehydes to be found in their reagent<br />
bottles alongside with their corresponding carboxylic acids. TLC is one method that can be used to<br />
determine how much an aldehyde has degraded.<br />
Figure 2.7: Eluted TLC plates visualized with UV light of: a) Acetophenone, b) Cinnamaldehyde.<br />
<strong>Organic</strong> <strong>Chemistry</strong> <strong>Laboratory</strong> <strong>Techniques</strong> | Nichols | Page 87
2.2.B.2 ASSESSING REACTION PROGRESS<br />
2.2.B.2.A USE OF A CO-SPOT<br />
TLC can be used to analyze a chemical reaction, for example to determine if the reactants have been<br />
consumed and a new product has formed. A pure sample of the reactant can be spotted in one lane of a<br />
TLC, and the product mixture in another lane. Often the central lane is used for reference, where both<br />
reactant and product mixture are spotted over top of one another, in what is called the “co-spot.”<br />
For example, the reaction shown in Figure 2.8a is analyzed by TLC in Figure 2.8b. In the first lane of<br />
Figure 2.8b (labeled F) is spotted a pure sample of the reactant ferrocene. In the last lane (labeled AF) is<br />
spotted the product mixture, which is assumed to be acetylferrocene. In the central lane (labeled co) is<br />
spotted both pure ferrocene and the product mixture. The right-most “AF” lane shows that the reaction<br />
appears to be a success: the higher spot of ferrocene is absent (meaning it has been consumed), and a new<br />
product spot is present. More tests would have to be done to confirm that the lower spot is the expected<br />
product of acetylferrocene, but the TLC results look promising.<br />
Figure 2.8: a) Reaction scheme of the acetylation of ferrocene, b) TLC plate (visualized with UV light) with 3 lanes: F for pure<br />
ferrocene, Co for the co-spot, and AF for the acetylferrocene product.<br />
The co-spot is used for reference, and can be useful in interpreting certain situations. For example, at times<br />
the solvent may run with a slight diagonal, causing identical components to elute to slightly different heights.<br />
The co-spot can be useful in tracking these variations. It can also be helpful in identifying spots as different<br />
if they have similar R f values (a feature difficult to be certain of in Figure 2.9a). Two compounds with<br />
slightly different R f values eluted over top of one another in the co-spot lane may produce a spot with an<br />
elongated shape (Figure 2.9b), making it more obvious they are different compounds. Furthermore, a cospot<br />
can be helpful in deciphering a TLC plate if the reaction solvent persists in the product mixture lane<br />
(for example if the solvent has a relatively high boiling point like DMF or DMSO), such that the residual<br />
solvent has an effect on the component’s R f values.<br />
Figure 2.9: a) Two compounds with similar R f values (Re stands for reactant and Pr stands for the product), b) How the co-spot<br />
lane may appear if the reactant and product lanes contain different compounds.<br />
<strong>Organic</strong> <strong>Chemistry</strong> <strong>Laboratory</strong> <strong>Techniques</strong> | Nichols | Page 88
2.2.B.2.B MONITORING A REACTION BY TLC<br />
TLC can be used to monitor the progress of a reaction. This<br />
method is often used in research, and one such journal article<br />
reporting its usage is shown in Figure 2.10.<br />
To use TLC in this manner, three lanes are spotted on a TLC plate:<br />
one for the limiting reactant, one for the co-spot, and one for the<br />
reaction mixture. The goal is to note the disappearance of the<br />
limiting reactant in the reaction mixture lane and the appearance of<br />
a new product spot. When the limiting reactant has completely<br />
disappeared, the chemist deduces that the reaction is complete, and<br />
can then be “worked up.”<br />
To demonstrate how TLC can be used to monitor a reaction, the<br />
transesterification reaction in Figure 2.11 was studied over time<br />
(Figure 2.12). In the first lane of each TLC plate (marked “BA”)<br />
was spotted a dilute sample of the reactant benzyl acetate, while in Figure 2.10: From: K.A. Milinkevich, M.J.<br />
the third lane of each was spotted the reaction mixture (marked Kurth, J. Comb. Chem. 2008, 10, 521–525.<br />
“Pr”) at different times. In the central lane (marked “Co” for the<br />
co-spot), both benzyl acetate and the reaction mixture were delivered over top of one another.<br />
O<br />
O<br />
CH 3 CH 2 OH<br />
KOH<br />
O<br />
O<br />
+<br />
HO<br />
benzyl acetate ethyl acetate benzyl alcohol<br />
Figure 2.11: Reaction scheme of transesterification reaction.<br />
Figure 2.12 shows the progress of the reaction over time. In Figure 2.12a, with the third lane representing<br />
the reaction mixture after one minute of mixing, a faint spot near the middle of the plate corresponds to<br />
unreacted benzyl acetate. A new spot appears below it, representing the benzyl alcohol product. Over time<br />
(Figures 2.12b-e), the top benzyl acetate spot disappears in the reaction mixture lane, and the lower benzyl<br />
alcohol spot intensifies. It is apparent from the TLC plates that the reaction was nearing completion at 10<br />
minutes, and was complete at 20 minutes. The TLC demonstrates that the reaction mixture could be worked<br />
up after 20 minutes of mixing.<br />
Figure 2.12: Monitoring of the transesterification reaction of benzyl acetate with TLC at 5-minute increments (using 4:1 hexanes:<br />
ethyl acetate and visualized with UV light): a) After 1 minute, b) 5 minutes, c) 10 minutes, d) 15 minutes, e) 20 minutes.<br />
<strong>Organic</strong> <strong>Chemistry</strong> <strong>Laboratory</strong> <strong>Techniques</strong> | Nichols | Page 89
2.2.B.2.C OBTAINING AN ALIQUOT OF A REACTION IN PROGRESS<br />
To monitor a reaction’s progress by TLC, an “aliquot” (or tiny sample) of the reaction mixture is necessary.<br />
If the reaction is run at room temperature or with only mild heating, and the concentration of reactants is<br />
conducive to TLC, a capillary spotter can be directly inserted into the flask where the reaction is taking<br />
place (Figure 2.13a). A long spotter is ideal if one is available. The aliquot can then be directly spotted on<br />
the TLC plate.<br />
If the sample is expected to be UV active, it is a good idea to view the TLC plate under UV light before<br />
eluting the plate. If the sample spot is not visible before elution it will not be visible afterwards, as<br />
compounds diffuse during elution.<br />
If the sample is expected to be UV active, and only a faint hint of material is seen on the baseline, the<br />
material can be deposited multiple times before elution (Figure 2.13b): deliver a small spot of sample on<br />
the baseline, and let it fully dry before delivering another spot over top of the first. If the spots are not<br />
allowed to dry in between applications, the spot will be too large. Check the plate under UV light again,<br />
and if necessary spot more times.<br />
It is important to fully allow a spot to dry on the TLC plate before placement in the TLC chamber. In Figure<br />
2.13c the spot for the reaction mixture (labeled Pr) was not fully dry before elution, and the ethanol solvent<br />
likely affected the appearance of the lower R f spot. In Figure 2.13d the sample was allowed to fully dry<br />
before elution, and the lower R f spot was more distinct. Furthermore, residual ethanol was likely the reason<br />
why the compound spotted in the reagent lane (labeled “BA”) had a different R f than it did in the central<br />
co-spot lane (“Co”).<br />
Figure 2.13: a) Obtaining an “aliquot” from a reaction mixture, b) Spotting the reaction mixture multiple times in the same lane,<br />
c) The appearance of the reaction mixture when it was not fully dried before elution, d) When the sample was fully dried before<br />
elution, e) Obtaining an aliquot for a refluxing solution.<br />
To obtain an aliquot of a refluxing solution, briefly remove the condenser and insert a spotter into the<br />
reaction mixture (Figure 2.13e). Immediately re-connect the condenser and adjust the clamps while holding<br />
the aliquot. Alternatively, lift the flask from the heat source to temporarily cease the reflux before inserting<br />
the spotter. The sample may be able to be spotted directly on the TLC plate, but if too concentrated it can<br />
be first diluted by running an appropriate solvent (e.g. acetone) through the pipette and into a small vial.<br />
<strong>Organic</strong> <strong>Chemistry</strong> <strong>Laboratory</strong> <strong>Techniques</strong> | Nichols | Page 90
2.2.C THE RETENTION FACTOR (R F )<br />
A convenient way for chemists to report the results of a TLC plate in lab notebooks is through a “retention<br />
factor,” 2 or R f value, which quantitates a compound’s movement (equation 2).<br />
R f =<br />
distance traveled by the compound<br />
distance traveled by the solvent front<br />
(2)<br />
Figure 2.14: a) Sample R f calculation, b) Appearance of the solvent front on an eluting TLC plate.<br />
To measure how far a compound traveled, the distance is measured from the compound’s original location<br />
(the baseline marked with pencil) to the compound’s location after elution (the approximate middle of the<br />
spot, Figure 2.14a). Due to the approximate nature of this measurement, ruler values should be recorded<br />
only to the nearest millimeter. To measure how far the solvent traveled, the distance is measured from the<br />
baseline to the solvent front.<br />
The solvent front (Figure 2.14b) is essential to this R f calculation. When removing a TLC plate from its<br />
chamber, the solvent front needs to be marked immediately with pencil, as the solvent will often evaporate<br />
rapidly.<br />
The R f value is a ratio, and it represents the relative distance the spot traveled compared to the distance it<br />
could have traveled if it moved with the solvent front. An R f of 0.55 means the spot moved 55% as far as<br />
the solvent front, or a little more than halfway.<br />
2 Sometimes the Rf is called the retardation factor, as it is a measurement of how the movement of the spots is slowed, or retarded.<br />
<strong>Organic</strong> <strong>Chemistry</strong> <strong>Laboratory</strong> <strong>Techniques</strong> | Nichols | Page 91
Since an R f is essentially a percentage, it is not particularly important to let a TLC run to any particular<br />
height on the TLC plate. In Figure 2.15, a sample of acetophenone was eluted to different heights, and the<br />
R f was calculated in each case to be similar, although not identical. Slight variations in R f arise from error<br />
associated with ruler measurements, but also different quantities of adsorbed water on the TLC plates that<br />
alter the properties of the adsorbent. R f values should always be regarded as approximate.<br />
Figure 2.15: Acetophenone run to different heights on the TLC plate, using 6:1 hexanes:ethyl acetate and visualized with<br />
anisaldehyde stain.<br />
Although in theory a TLC can be run to any height, it’s customary to let the solvent run to approximately<br />
0.5 cm of the top of the plate to minimize error in the R f calculations, and to achieve the best separation of<br />
mixtures. A TLC plate should not be allowed to run completely to the top of the plate as it may affect the<br />
results. However, if using a saturated, sealed TLC chamber, the R f can still be calculated.<br />
<strong>Organic</strong> <strong>Chemistry</strong> <strong>Laboratory</strong> <strong>Techniques</strong> | Nichols | Page 92
2.2.D SEPARATION THEORY<br />
2.2.D.1 GENERAL THEORY<br />
TLC is an excellent analytical tool for separating mixtures in a sample. In this section are discussed the<br />
details of the separation, and expand upon the general discussion of Section 2.1.B.<br />
In all forms of chromatography, samples equilibrate between stationary and mobile phases. In almost all<br />
applications of TLC, the stationary phase is a silica or alumina adsorbent and the mobile phase is an organic<br />
solvent or solvent mixture (the “eluent”) that rises up the plate (equation 3).<br />
X (silica / alumina) X (solvent) (3)<br />
Silica gel (shown in Figure 2.16) is composed of a network of silicon-oxygen bonds, with O-H bonds on<br />
its surface, as well as a layer of water molecules. Silica gel (SiO 2 xH 2 O) is used in this discussion, but is<br />
structurally analogous to alumina (Al 2 O 3 xH 2 O). This very polar stationary phase is paired with a relatively<br />
nonpolar mobile phase (an organic solvent or solution), in what is referred to as “normal phase” TLC.<br />
Although this is the most common form of TLC (and what will be focused on in this section), “reverse<br />
phase” TLC (with a nonpolar stationary phase and a polar mobile phase) is sometimes used.<br />
Figure 2.16 shows how acetophenone would cling to the surface of silica gel through intermolecular forces<br />
(IMF’s). In this case, acetophenone can hydrogen bond (the IMF indicated in Figure 2.16a) to the silica<br />
surface through its oxygen atom. As eluent flows over the sample (Figure 2.16b), an equilibrium is<br />
established between the sample being adsorbed on the stationary phase and dissolved in the mobile phase.<br />
When in the mobile phase, the compound moves up the plate with the flow of liquid (Figure 2.16c) to later<br />
readsorb on the stationary phase further up the plate. The resulting R f of the compound is dependent on the<br />
amount of time spent in the stationary and mobile phases.<br />
Figure 2.16: Structural diagrams of compounds bound to a silica coated TLC plate (side view). In reality the silica layer is much<br />
thicker than shown (0.25 mm of powder), and the surface is more porous and uneven than implied. a) Acetophenone spotted on<br />
the baseline of the TLC plate, b) Eluent crawling up the TLC plate, c) Acetophenone in the mobile phase after breaking its IMF’s<br />
with the silica surface.<br />
<strong>Organic</strong> <strong>Chemistry</strong> <strong>Laboratory</strong> <strong>Techniques</strong> | Nichols | Page 93
The equilibrium distribution between the two phases depends on several factors:<br />
1. It depends on the strength of intermolecular forces between the sample and the stationary phase.<br />
A compound that forms strong IMF’s with the silica or alumina will often favor the stationary phase,<br />
and will spend much of the elution time adhered to the plate. This means it will spend less time in the<br />
mobile phase (which is the only means for it to travel up the plate), causing it to end up low on the TLC<br />
plate, and have a low R f .<br />
Compounds that have oxygen or nitrogen atoms should be able to hydrogen bond with the stationary<br />
phase (have strong IMF’s with the stationary phase), and thus will have lower R f values than compounds<br />
of similar size that can only interact through London dispersion forces (LDF’s).<br />
2. It depends on the strength of interaction between the sample and the mobile phase.<br />
As the mobile phase is always less polar than the stationary phase in normal phase TLC, polar<br />
compounds will tend to have a lesser affinity for the mobile phase than nonpolar compounds (based on<br />
the “like dissolves like” principle). Therefore, polar compounds tend to spend less of the elution time<br />
mobile than a nonpolar compound, so will travel “slower” up the plate, and have a low R f .<br />
The degree of attraction by a compound to the stationary and mobile phases lead to the same conclusion:<br />
•<br />
•<br />
The stronger IMF’s possible with the stationary phase (often the more polar functional groups on a<br />
compound), the more time the compound will be stationary lower R f .<br />
The more polar functional groups present on a compound, the less it tends to be attracted to the less<br />
polar eluent, and the less time the compound will be mobile lower R f .<br />
Thus, a compound with a lower R f tends to have more polar functional groups than a compound with<br />
a higher R f (summarized in Figure 2.17).<br />
less polar compound<br />
more polar compound<br />
Figure 2.17: Relation of polarity to R f .<br />
<strong>Organic</strong> <strong>Chemistry</strong> <strong>Laboratory</strong> <strong>Techniques</strong> | Nichols | Page 94
2.2.D.2 STRUCTURAL CONSIDERATIONS<br />
To demonstrate the effect of structural features on R f , an eluted TLC plate of benzyl alcohol, benzaldehyde,<br />
and ethylbenzene is shown in Figure 2.18. The relative order of R f reflects the polarity trend in the series.<br />
Figure 2.18: TLC of benzyl alcohol (lane 1), benzaldehyde (lane 2), and ethylbenzene (lane 3). The plate was eluted using 6:1<br />
hexanes:ethyl acetate and visualized with UV light.<br />
Benzyl alcohol and benzaldehyde have polar functional groups so thus had lower R f values than<br />
ethylbenzene, which is completely nonpolar. Both compounds are able to hydrogen bond to the polar<br />
stationary phase (Figures 2.19 a+b), so are more strongly attracted to the stationary phase than ethylbenzene,<br />
which interacts through only weak London dispersion forces (Figure 2.19c). As the least “polar” of the<br />
series, ethylbenzene is also the best dissolved by the weakly polar eluent. For these reasons, ethylbenzene<br />
spent the least time in the stationary phase and most time in the mobile phase, which is why it traveled the<br />
furthest up the plate and had the highest R f of the series.<br />
Figure 2.19: Intermolecular forces between silica gel and: a) benzyl alcohol, b) benzaldehyde, c) ethylbenzene.<br />
Both benzaldehyde and benzyl alcohol are capable of hydrogen bonding with the stationary phase, but<br />
benzyl alcohol had the lower R f because it can form more hydrogen bonds (through both the oxygen and<br />
hydrogen atoms of the OH group, Figure 2.19a). This caused benzyl alcohol to be more strongly adhered<br />
to the silica/alumina than benzaldehyde, causing it to spend more time in the stationary phase.<br />
<strong>Organic</strong> <strong>Chemistry</strong> <strong>Laboratory</strong> <strong>Techniques</strong> | Nichols | Page 95
To demonstrate a different structural effect on R f , an eluted TLC plate of acetophenone and benzophenone<br />
is shown in Figure 2.20. Both compounds are similar in that they can hydrogen bond to the stationary phase<br />
through their oxygen atom. However, the larger size of benzophenone causes it to have a slightly higher R f<br />
than acetophenone.<br />
Figure 2.20: a) TLC plate of acetophenone (lane 1) and benzophenone (lane 2), using 6:1 hexanes:ethyl acetate and UV light<br />
visualization. Interaction with the stationary phase and: b) Acetophenone, c) Benzophenone.<br />
This result can be explained in multiple ways:<br />
•<br />
•<br />
The oxygen atom in benzophenone is more crowded by the aromatic rings than the oxygen atom of<br />
acetophenone, which may impede its ability to strongly hydrogen bond with the silica gel. This can<br />
lead to a smaller amount of time adsorbed by the stationary phase.<br />
The additional nonpolar bulk of benzophenone makes it dissolve better in the weakly polar eluent,<br />
causing it to spend more time in the mobile phase.<br />
<strong>Organic</strong> <strong>Chemistry</strong> <strong>Laboratory</strong> <strong>Techniques</strong> | Nichols | Page 96
2.2.D.3 MOBILE PHASE POLARITY<br />
The ability of chromatography to separate components in a mixture depends on equilibration of a compound<br />
between the stationary and mobile phases. Since the mobile phase is an important factor, it is possible to<br />
change the R f of a compound by changing the polarity of the mobile phase.<br />
When a mobile phase is made more polar than originally, all compounds travel further and have a<br />
higher R f .<br />
This general trend is demonstrated in Figures 2.21 b+c, where the TLC of three UV-active compounds<br />
(lanes 2-4) was run using two different mixed solvents. The first plate was run using a 6:1 hexane:ethyl<br />
acetate mixture, which means the solvent was created by using 6 volumes of hexane for every 1 volume of<br />
ethyl acetate. This mixed solvent is mostly nonpolar due to the high percentage of hexane, but is more<br />
polar than straight hexane, due to the presence of some ethyl acetate (which has polar bonds, Figure 2.21a).<br />
The second plate was run using a 3:2 hexane:ethyl acetate mixture, which is more polar than the 6:1 mixture<br />
because there is a higher percentage of ethyl acetate present.<br />
Lane<br />
R f in 6:1<br />
(less polar)<br />
R f in 3:2<br />
(more polar)<br />
2 0.33 0.54<br />
3 (bottom spot) 0.02 0.17<br />
3 (top spot) 0.28 0.52<br />
4 0.49 0.65<br />
Figure 2.21: a) Structures of hexane and ethyl acetate, b) Three compounds visualized by UV light and run with 6:1 hexanes: ethyl<br />
acetate mixtures, c) Same three compounds with a 3:2 ratio (more polar).<br />
Table 2.2: Summary of R f values for Figure 2.22.<br />
Note that in Figure 2.21c all spots maintained their relative order but traveled to a greater height on the<br />
plate and increased their R f values (Table 2.2) in the more polar eluent.<br />
An increase in solvent polarity increases R f values for two reasons:<br />
1. Moderately polar compounds have a greater attraction to the mobile phase.<br />
When equilibrating between a polar stationary phase and nonpolar eluent, a polar compound tends to<br />
favor the polar stationary phase and have a low R f . If the eluent is made to be moderately polar, polar<br />
compounds are then more attracted to the mobile phase, causing the equilibrium to change such that<br />
the compound spends more time in the mobile phase, resulting in a higher R f .<br />
2. The polar solvent may occupy binding sites on the silica or alumina surface, such that they displace the<br />
sample from the stationary phase.<br />
If a polar solvent is able to hydrogen bond and therefore strongly associate with the stationary phase, it<br />
may “lock up” binding sites, and force less polar compounds to spend more time in the mobile phase.<br />
The result is an increased R f for polar and nonpolar compounds alike.<br />
<strong>Organic</strong> <strong>Chemistry</strong> <strong>Laboratory</strong> <strong>Techniques</strong> | Nichols | Page 97
2.2.E STEP-BY-STEP PROCEDURES<br />
2.2.E.1 GENERAL TLC PROCEDURE<br />
Figure 2.22: a) Red food dye spotted at different dilutions, b) Elution, c) Developed TLC plate.<br />
The TLC pictured in this section shows elution of a TLC plate containing several samples of red food dye<br />
at different aqueous dilutions (0 = undiluted, 3 = 1 drop dye + 3 drops water, etc.).<br />
Figure 2.23: a) Prepared samples, b) TLC chamber made with a beaker and watch glass, c) Adding eluent to a TLC chamber, d)<br />
Prepared plate.<br />
Dissolve the Samples<br />
1. Dissolve all the samples you want to run (solids and liquids) in small vials using a volatile solvent in<br />
which they are soluble (e.g. acetone, diethyl ether, or dichloromethane). Ideally the vials will have a<br />
lid to minimize vapors and preserve the samples if tipped over (Figure 2.23a).<br />
The optimal concentration for TLC is typically determined empirically, but a good place to start is to<br />
use 50-100 times as much solvent as sample (i.e. 1 drop sample for ~1 mL solvent). If you have already<br />
prepared an NMR sample (~5mg / 0.75 mL for high field NMR), you can use that sample directly.<br />
Label the vials. Also prepare a vial of clean acetone (or other solvent, e.g. CH 2 Cl 2 ) to be used to rinse<br />
the spotters in a later step. (A rinse vial of water is pictured in Figure 2.23a, as the dye solutions are<br />
water soluble.)<br />
<strong>Organic</strong> <strong>Chemistry</strong> <strong>Laboratory</strong> <strong>Techniques</strong> | Nichols | Page 98
Prepare the TLC Chamber and Plate<br />
2. Obtain a TLC chamber with lid. An inexpensive chamber can be made using a beaker and watch glass<br />
(Figure 2.23b). Cut a piece of filter paper (or two) so that when placed in the chamber, the filter paper<br />
fits inside the chamber and is flat on the bottom but not obscuring your view of the inside (Figure 2.23c).<br />
The filter paper keeps the chamber saturated with vapors so when the eluent rises on the plate it doesn’t<br />
easily evaporate, but continues to climb and undergo the chromatography. If the eluent evaporated,<br />
movement would stop, but could also change the local composition of a mixed eluent and affect the<br />
results.<br />
3. Add a portion of a prepared solvent for chromatography (Figure 2.23c, 5-10 mL for this type of TLC<br />
chamber). Close the lid (or place the watch glass) and tilt the chamber to wet the filter paper.<br />
4. Obtain a TLC plate, touching the plate only on the back or edges, but not on the white surface. Use a<br />
ruler to lightly draw a straight line with a pencil 3 roughly 1 cm from the bottom. Do not gouge the<br />
silica or alumina.<br />
5. Label the areas with pencil where you plan to place the samples (Figure 2.23d). A one-inch wide TLC<br />
plate can comfortably accommodate three samples (have three lanes), and if the spot size is kept small<br />
it can fit at maximum five spots. If more than five spots are necessary on one plate, TLC plates can be<br />
purchased in sheets and cut wider than one inch.<br />
The lanes should not be placed too close to the edge (keep at least 5 mm away from each edge), as it is<br />
not unusual for solvent to travel slightly “fast” at the edge where capillary action of the solvent is greater<br />
(Figure 2.24).<br />
The lanes should also not be placed<br />
too close to one another, or the spots<br />
may overlap after elution. A spot is<br />
always larger after elution compared<br />
to its original size (Figures 2.24 b+c)<br />
because diffusion occurs in all<br />
directions (contact with a liquid<br />
spreads the material in both the<br />
horizontal and vertical directions).<br />
Broadening also occurs as solutes in<br />
the mobile phase move at different<br />
rates as the flow of eluent is weaker<br />
near the adsorbent surface. This can<br />
even sometimes cause compounds to<br />
get stuck in adsorbent pores where the<br />
flow of eluent is especially weak. 4<br />
Figure 2.24: a) Red food dye sample spotted many times, with arrow<br />
indicating the creep of sample on the edges, b) Diluted red food dye samples<br />
at different dilutions- before elution, c) after elution.<br />
Spot broadening means that samples deposited right next to each<br />
other on the baseline of a TLC plate will probably bleed together during elution.<br />
3 The graphite in pencil will not travel with the eluent, but pen ink would.<br />
4 J. Sherman and B. Fried, Handbook of Thin Layer Chromatography, 1991.<br />
<strong>Organic</strong> <strong>Chemistry</strong> <strong>Laboratory</strong> <strong>Techniques</strong> | Nichols | Page 99
Figure 2.25: a) Tipping the vial to withdraw liquid into the spotter, b) Spotting samples onto a TLC plate, c) Excess sample drained<br />
on a paper towel, d) Rinsing the spotter with solvent (water in this case).<br />
Spot the TLC plate with sample<br />
6. Obtain a capillary spotter (a very thin hollow piece of glass open at both ends). In some institutions,<br />
you may need to make your own spotter by stretching a softened pipette. Place your spotter into the<br />
diluted sample you want to analyze to withdraw liquid into the spotter through capillary action. If the<br />
liquid level is low in your vial and your spotter short, you may have to tip the vial to withdraw liquid<br />
(Figure 2.25a).<br />
7. Keeping the spotter mostly vertical, make a practice “spot” on a paper towel or scrap piece of silica or<br />
alumina to familiarize yourself with how the liquid delivers from the spotter. The spots should be very<br />
small, around 2 mm in diameter. Deliver a very small spot of material on the pencil line of the<br />
appropriate lane (Figure 2.25b) using a quick “up and down” motion with your hand. Don’t gouge the<br />
silica or alumina with the spotter.<br />
8. Still keeping the spotter vertical, immediately touch the spotter to a paper towel to expunge all of the<br />
liquid remaining in the spotter (Figure 2.25c). If the spotter is set down without immediately draining<br />
the liquid, air may get into the spotter making it impossible to dispense and use again.<br />
9. Rinse the spotter with acetone (or another volatile solvent with which your compounds are soluble,<br />
Figure 2.25d). Place the empty spotter in your rinse vial to withdraw liquid and drain the solvent onto<br />
a paper towel. Rinse once or twice before reusing the spotter for other samples.<br />
<strong>Organic</strong> <strong>Chemistry</strong> <strong>Laboratory</strong> <strong>Techniques</strong> | Nichols | Page 100
Figure 2.26: a) Using forceps to place the TLC plate into the chamber, b-d) Elution, e) Marking the solvent line with a pencil.<br />
Place the TLC plate in the chamber to “elute”<br />
10.Use forceps to delicately place the TLC plate into the chamber (Figure 2.26a). Don’t allow the liquid<br />
to splash onto the plate.<br />
The liquid level must be below the pencil line where the samples are spotted or the compounds will<br />
dissolve in the pool of eluent instead of traveling up the plate. Cap the chamber delicately while keeping<br />
it vertical, and don’t touch it again until the TLC is complete.<br />
11.Allow the TLC to develop (Figures 2.26 b–d). As liquid moves up the TLC plate it will appear<br />
transparent and wet. A dark background will allow the solvent front to be more easily seen. If the<br />
eluent is very polar (e.g. contains large amounts of ethanol or water), elution will take a relatively long<br />
time (can be 30-40 minutes). If the eluent is very nonpolar (e.g. contains large amounts of hexane or<br />
petroleum ether), elution will be relatively quick (can be 2-5 minutes for a 10 cm tall plate).<br />
12.Depending on the goals of the TLC experiment, the chromatography can be stopped when the solvent<br />
level is anywhere between halfway to roughly 0.5 cm from the top of the plate. It is best to let the TLC<br />
run to around 0.5 cm from the top of the plate to get the best separation of spots and to minimize error<br />
in R f calculations.<br />
Remove the TLC plate from the chamber<br />
13.Open the TLC chamber, and remove the TLC plate with forceps. Immediately mark the solvent line<br />
with a pencil (Figure 2.26e) to enable an R f calculation, as the solvent often readily evaporates.<br />
Alternatively, the silica can be lightly gouged with the forceps to mark the solvent front.<br />
14.If the compounds on the TLC plate are colored, the process is complete. If the compounds are colorless,<br />
they need to next be visualized.<br />
<strong>Organic</strong> <strong>Chemistry</strong> <strong>Laboratory</strong> <strong>Techniques</strong> | Nichols | Page 101
2.2.E.2 THIN LAYER CHROMATOGRAPHY SUMMARY<br />
Place a small portion of<br />
solvent (5-10 mL for<br />
this chamber) into a<br />
TLC chamber with lid,<br />
along with a cut piece<br />
of filter paper.<br />
Dissolve liquid or solid<br />
samples (1 drop per ~1<br />
mL solvent) using a low<br />
boiling solvent (e.g.<br />
acetone or<br />
dichloromethane).<br />
Draw a pencil line on a<br />
TLC plate ~1 cm from<br />
the bottom with a ruler,<br />
and mark the lanes.<br />
Don’t put lanes too<br />
close to the edge or to<br />
each other.<br />
Place the sample in the<br />
TLC chamber with<br />
forceps, cap it, and<br />
leave it alone.<br />
Remove the plate when<br />
the solvent line is ~0.5<br />
cm from the top.<br />
Spot a dilute sample on<br />
the pencil line of the<br />
correct lane, making<br />
very small spots (2 mm<br />
in diameter).<br />
Immediately mark the<br />
solvent line with a<br />
pencil.<br />
Visualize if necessary.<br />
Rinse the spotter with a<br />
solvent (e.g. acetone) if<br />
going to use it for<br />
another sample.<br />
Table 2.3: Procedural summary for TLC.<br />
<strong>Organic</strong> <strong>Chemistry</strong> <strong>Laboratory</strong> <strong>Techniques</strong> | Nichols | Page 102
2.2.E.3 TLC TROUBLESHOOTING<br />
2.2.E.3.A THE SPOTS ARE STREAKY OR “BLOBBY”<br />
The components of a sample can appear as long streaks or “blobby” spots on a TLC plate if the samples are<br />
run at too high a concentration.<br />
For example, Figure 2.27b shows an eluted TLC plate containing five red food dye samples of different<br />
concentrations (lane 0 contains the dye in the concentration found at the grocery store; lane 3 contains 1<br />
drop of dye diluted with 3 drops of water, etc.). After elution, the red and pink components from the<br />
undiluted dye (lane 0) streaked severely, as the TLC plate was “overloaded.” When this happens proper<br />
equilibration between stationary and mobile phases does not occur. With further dilution (lane 12), the<br />
streaking disappeared and the spot shapes sharpened.<br />
If streaking is seen on a TLC plate, the sample should be diluted and run again.<br />
Figure 2.27: a) Before elution of red food dye samples at different aqueous dilutions, b) After elution, c) Alkene and alkyne<br />
samples too concentrated (visualized with KMnO 4 stain), d) Alkene and alkyne samples at proper dilutions.<br />
Figure 2.27c also demonstrates how dilution can improve the shape of a spot after elution. In this TLC,<br />
alkene and alkyne samples were spotted at somewhat high concentrations, while an improved dilution was<br />
used in Figure 2.27d. Note how the R f appears to change in the two TLC plates. The more accurate R f is of<br />
the diluted sample. Running TLC on concentrated samples gives inaccurate R f values and may hide multiple<br />
spots.<br />
2.2.E.3.B THE SPOTS RAN UNEVENLY<br />
At times the solvent front may run unevenly on a TLC plate. This may occur if the plate was placed in the<br />
chamber at a slight tilt, if eluent splashed onto the plate during placement in the chamber, or if the chamber<br />
was jostled during elution. In cases where the front is dramatically different from one position to the other,<br />
the front should be measured for each lane of the plate (if calculating an R f ) instead of only once.<br />
<strong>Organic</strong> <strong>Chemistry</strong> <strong>Laboratory</strong> <strong>Techniques</strong> | Nichols | Page 103
2.2.E.4 MAKING CAPILLARY TLC SPOTTERS<br />
Although capillary spotters for TLC can be purchased, some chemists prefer to create their own by<br />
stretching Pasteur pipettes (Figure 2.28). To make a spotter, hold a pipette by the edges while wearing<br />
thick gloves and position the middle of the pipette into the flame of a large Meker burner (Figure 2.28a).<br />
Warm the pipette until the glass becomes quite pliable (borosilicate glass softens at 820 ˚C, 5 so this will<br />
take some time). Only rotate, but do not stretch the pipette at all while the pipette is in the flame. Then<br />
remove the pipette from the flame and immediately and rapidly pull the pipette to an arm’s length. The<br />
thin sections can be broken into 6-12 inch segments and used for TLC.<br />
Figure 2.28: a) Warming a pipette in a Meker burner, b+c) Stretching the pipette.<br />
5 G. L. Weissler, Vacuum Physics and Technology, 2 nd edition, 1979, p. 315.<br />
<strong>Organic</strong> <strong>Chemistry</strong> <strong>Laboratory</strong> <strong>Techniques</strong> | Nichols | Page 104
2.2.E.5 NOTEBOOK RECORD OF TLC’S<br />
Some chemists scan, photograph or electronically record their developed TLC plates, but it is much more<br />
common to copy a likeness of a TLC plate by hand into a laboratory notebook. It is important to copy a<br />
TLC plate “to scale,” meaning the dimensions should be the same in the notebook as they are in actuality.<br />
To accomplish this, the TLC plate can be placed atop a notebook page and a rendering created beside it<br />
(Figure 2.29c). The back of the TLC plate should previously be wiped clean or else staining reagents may<br />
degrade the paper. It is important to copy the TLC plate as accurately as possible, drawing the spots exactly<br />
as they appear, even if they are streaky or blobby. All spots seen in a lane should be recorded, even if they<br />
are faint. Good record keeping means to record all observations, even if the importance is unknown; a faint,<br />
unexpected spot may become relevant at a later time.<br />
Figure 2.29: Record of a TLC plate into a lab notebook: a) Plate under UV light, b) Plate stained with p-anisaldehyde, as it appeared<br />
directly after heating, c) Copying the TLC into the notebook, d) Final record in the notebook.<br />
Several other notations should be made along with the sketch of the TLC plate (Figure 2.29d). The solvent<br />
system and identity of what was spotted in each lane must be recorded. For each spot, an R f should be<br />
calculated (some chemists like to write the measurements on the TLC plate; see the plate in Figure 2.29d)<br />
along with notation of UV activity and stain color. If a spot changes appearance over time, as the orange<br />
spot in Figure 2.29b faded to light green over time (Figure 2.29d), the initial appearance should be recorded.<br />
Figure 2.30: <strong>Organic</strong> chemistry students making entries in their notebooks.<br />
<strong>Organic</strong> <strong>Chemistry</strong> <strong>Laboratory</strong> <strong>Techniques</strong> | Nichols | Page 105
2.2.F VISUALIZING TLC PLATES<br />
<strong>Organic</strong> compounds most commonly appear colorless on the white background of a TLC plate, which<br />
means that after running a TLC, chemists often cannot simply see where compounds are located. The<br />
compounds have to be “visualized” after elution, which means to temporarily convert them into something<br />
visible.<br />
Visualization methods can be either non-destructive (compound is unchanged after the process) or<br />
destructive (compound is converted into something new after the process). Viewing a TLC plate under<br />
ultraviolet light is non-destructive, while using a chemical stain is destructive.<br />
2.2.F.1 VISUALIZATION SUMMARY<br />
Below is a summary of various visualization techniques, and the functional groups that generally react with<br />
each. A more detailed discussion of each technique is provided later in this section.<br />
UV Light Iodine p-Anisaldehyde Vanillin<br />
For aromatics +<br />
conjugated systems<br />
Visualizes ~half the time.<br />
Strongly reacts with<br />
aromatics<br />
For many aldehydes,<br />
ketones, and alcohols<br />
For many aldehydes,<br />
ketones, and alcohols<br />
Permanganate<br />
Phosphomolybdic Acid<br />
(PMA)<br />
Iron(III) Chloride<br />
Bromocresol Green<br />
For alkenes, alkynes, or<br />
oxidizable groups<br />
(aldehydes, alcohols)<br />
For alcohols, phenols,<br />
alkenes, and many<br />
carbonyl compounds<br />
For phenols<br />
For acidic compounds<br />
Table 2.4: Summary table for TLC visualization methods.<br />
<strong>Organic</strong> <strong>Chemistry</strong> <strong>Laboratory</strong> <strong>Techniques</strong> | Nichols | Page 106
2.2.F.2 ULTRAVIOLET ABSORPTION<br />
The most common non-destructive visualization method for TLC plates is ultraviolet (UV) light. A UV<br />
lamp can be used to shine either short-waved (254 nm) or long-waved (365 nm) ultraviolet light on a TLC<br />
plate with the touch of a button. Most commercially bought TLC plates contain a fluorescent material (e.g.<br />
zinc sulfide) in the silica or alumina, so the background of the plate will appear green when viewing with<br />
short-waved UV light. If a compound absorbs 254 nm UV light, it will appear dark, as the compound<br />
prevents the fluorescent material from receiving the UV light.<br />
This method is so quick and easy that it is often the first visualization method tried. It is most useful for<br />
visualizing aromatic compounds and highly conjugated systems, as these strongly absorb UV. Most other<br />
functional groups do not absorb UV light at the wavelengths used and will not appear dark under the UV<br />
lamp even though they are still there. It doesn’t hurt to try UV after performing TLC with all compounds<br />
just in case. Since the compounds remain unchanged after viewing with UV light, a further visualization<br />
technique can be used afterwards on the same plate.<br />
Figure 2.31: a) Tilting a UV lamp to visualize a TLC plate, b) Box to protect eyes from UV damage, c) Appearance under UV.<br />
Procedure:<br />
1. Use a UV lamp to look at your developed TLC plate by pressing the short-waved button. Depending<br />
on what is available at your institution, you might tilt the UV lamp at an angle in a darkened area of<br />
the room (Figure 2.31a), or you might look at the plate inside a box designed to protect eyes from<br />
UV damage (Figure 2.31b).<br />
Safety note: Care should be taken to never look directly at the UV source, and<br />
to minimize exposure to eyes.<br />
2. The plate background will appear green under short waved UV light, and UVactive<br />
compounds will appear dark (Figure 2.31c). Use a pencil to lightly circle<br />
spots, as they will disappear when the UV light is removed.<br />
3. Some compounds themselves fluoresce (Figure 2.32), appearing a variety of<br />
colors when exposed to either short or long waved UV light (bright purple or<br />
blue is the most common). Record these types of observations in your notebook<br />
if you see them, as they are rare, and are therefore an excellent identification<br />
tool. They are most common with highly conjugated compounds.<br />
4. The TLC plate can be further visualized with some other method if desired<br />
(iodine or a chemical stain).<br />
Figure 2.32: Fluorescein and<br />
rhodamine B solutions viewed<br />
with: a) Visible light, b) Shortwave<br />
UV, c) Long-wave UV.<br />
<strong>Organic</strong> <strong>Chemistry</strong> <strong>Laboratory</strong> <strong>Techniques</strong> | Nichols | Page 107
2.2.F.3 IODINE<br />
A commonly used semi-destructive visualization method is to expose a developed TLC plate to iodine (I 2 )<br />
vapor. An “iodine chamber” can be created by adding a few iodine crystals to a TLC chamber, or by adding<br />
a few iodine crystals to a chamber containing a portion of powdered silica or alumina (Figure 2.33a). When<br />
a developed TLC plate is placed in the chamber and capped, the iodine sublimes and reacts with the<br />
compounds on the plate, forming yellow-brown spots (Figure 2.33d). The coloration occurs because iodine<br />
forms colored complexes with many organic compounds. This stain will work with approximately half the<br />
compounds you may encounter.<br />
This method is considered “semi-destructive” because complexation is reversible, and the iodine will<br />
eventually evaporate from the TLC plate, leaving the original compound behind. When the coloration fades,<br />
it is theoretically possible to use another visualization technique on the TLC plate, although it’s possible<br />
the compound may have also evaporated by that time.<br />
Figure 2.33: a) An iodine chamber using silica gel, b-d) Inserting a plate into the chamber and jostling, e) Developed TLC plate<br />
with iodine.<br />
Procedure:<br />
1. If not already prepared, make an “iodine chamber” (Figure 2.33a): in a fume hood, place a few<br />
centimeters of powdered silica or alumina in a screw-capped TLC chamber and add a few crystals of<br />
solid iodine (safety note: silica and alumina are lung irritants, and iodine vapor is considered an irritant<br />
and toxic). A beaker and watch glass will not work in this context as the iodine vapors will escape.<br />
Let the silica or alumina and iodine sit together for a while with periodic swirling, and eventually the<br />
powder will become orange from adsorbing the iodine vapor.<br />
2. In a fume hood, place the developed TLC plate in the iodine chamber with forceps (Figure 2.33b) and<br />
close the lid. Gently shake the chamber to bury the TLC plate in the iodine-stained silica or alumina<br />
(Figure 2.33c) until the spots become colored (Figure 2.33d). Many spots will appear yellow-brown<br />
almost immediately, and may darken with extended time. For many compounds, it takes less than 10<br />
seconds to develop a plate, but some compounds require 10 minutes or longer. (Note: alcohols,<br />
carboxylic acids, and alkyl halides often do not stain.)<br />
3. Promptly record appropriate observations of the TLC in your notebook, or circle the spots with a pencil,<br />
as the colors will soon fade as the iodine evaporates from the plate. Further visualization may be<br />
attempted after the color fades.<br />
<strong>Organic</strong> <strong>Chemistry</strong> <strong>Laboratory</strong> <strong>Techniques</strong> | Nichols | Page 108
2.2.F.4 CHEMICAL STAINS<br />
There are a variety of destructive visualization methods that can turn colorless compounds on a TLC plate<br />
into colored spots. A plate is either sprayed with or dipped in a reagent that undergoes a chemical reaction<br />
with a compound on the TLC plate to convert it into a colored compound, enabling the spot to be seen with<br />
the naked eye. Since a chemical reaction is occurring in the process, it is common to gently heat a plate<br />
after exposure to the reagent to speed up the reaction, although this may be unnecessary with some stains.<br />
Not every compound can be visualized with every reagent if they do not react together, and stains are often<br />
designed to work with only certain functional groups. The specific stain should be chosen based on the<br />
presumed structure of the compounds you want to visualize.<br />
2.2.F.4.A GENERAL STAINING PROCEDURE<br />
Figure 2.34: Staining sequence using permanganate stain: a) Inserting plate into the dip, b) Letting it drip, c) Wiping the back, d)<br />
Heating the plate with a heat gun.<br />
1. While wearing gloves and holding the TLC plate with forceps in a fume hood, quickly dip the plate<br />
into and out of the chemical dip jar so that the stain covers the area where the solvent traveled on the<br />
plate (Figure 2.34b).<br />
2. Let excess liquid drip off the plate for a few seconds, then wipe the back of the<br />
plate with a paper towel (Figure 2.34c).<br />
3. Gently heat the plate to develop the spots. Preferably use a heat gun (Figure<br />
2.34d), but a hotplate can also be used (Figure 2.35, charring is common).<br />
a. If using a heat gun, hold the TLC plate with forceps and wave the heat gun<br />
back and forth onto the front of the plate. The “high” setting can be used<br />
at first, with the setting turned to “low” if the plate begins to char.<br />
Figure 2.35: Using a<br />
Safety note: Heat guns are not simple hair dryers, and can get quite hot. hotplate to develop spots.<br />
Be careful to not touch the nozzle, and remember that it remains hot for a long time after heating<br />
has ceased. The hot nozzles can even mar benchtops, so be cautious when setting the gun down.<br />
b. If using a hot plate, place the TLC plate on the warm surface (set between low and medium-low,<br />
and covered in foil to prevent dip residue from staining the ceramic surface). Periodically move<br />
the plate around to distribute the heat.<br />
4. A TLC plate cannot be further visualized after using a stain.<br />
<strong>Organic</strong> <strong>Chemistry</strong> <strong>Laboratory</strong> <strong>Techniques</strong> | Nichols | Page 109
2.2.F.4.B p-ANISALDEHYDE / VANILLIN STAINS<br />
1) GENERALITIES<br />
The p-anisaldehyde and vanillin stains are general purpose, and work for many strong and weak<br />
nucleophiles (alcohols, amines), and for many aldehydes and ketones. They do not work on alkenes,<br />
aromatics, esters, or carboxylic acids. The TLC plates need to be mildly heated, and will develop a light<br />
pink to dark pink background.<br />
A TLC of four samples visualized with three different techniques is shown in Figure 2.36. The plate is<br />
visualized with UV light (Figure 2.36b), p-anisaldehyde stain (Figure 2.36c) and vanillin stain (Figure<br />
2.36d). 4-heptanone (lane #1) and acetophenone (lane #2) showed similar colorations using the two stains.<br />
Ethyl benzoate (lane #4) was unreactive to both. Cinnamaldehyde (lane #3) was reactive to p-anisaldehyde<br />
but not vanillin, while its impurity (cinnamic acid, on the baseline of lane #3) showed the opposite behavior.<br />
Figure 2.36: a) Structures of p-anisaldehyde and vanillin. 4-Heptanone (lane 1), acetophenone (lane 2), cinnamaldehyde (lane 3),<br />
and ethyl benzoate (lane 4) visualized with: b) UV light, c) p-Anisaldehyde stain, d) Vanillin stain.<br />
Recipe (p-Anisaldehyde): 135 mL absolute ethanol, 5 mL concentrated H 2 SO 4 , 1.5 mL glacial acetic acid,<br />
and 3.7 mL p-anisaldehyde. This stain is susceptible to degradation by light, so store wrapped in aluminum<br />
foil (Figure 2.37e), ideally in the refrigerator when not in use. Compared to other stains, this stain has a<br />
somewhat short shelf life (approximately half year). The stain will at first be colorless (Figure 2.37a), but<br />
over time will turn to a light then dark pink (Figures 2.37 b–d). The stain is less potent when it darkens,<br />
but is often still usable. Safety note: wear gloves while using this highly acidic stain.<br />
Recipe (Vanillin): 250 mL ethanol, 15 g vanillin, and 2.5 mL concentrated H 2 SO 4 . This stain is light<br />
sensitive and should be stored wrapped in aluminum foil in the refrigerator. It is originally light yellow,<br />
but darkens over time (Figures 2.37 f+g). It should be discarded if it acquires a blue color. Safety note:<br />
wear gloves while using this highly acidic stain.<br />
Figure 2.37: a) p-Anisaldehyde stain, within 1 week of preparation, b) After 10 weeks (covered with foil and in the refrigerator),<br />
c) After 20 weeks, d) After 30 weeks, e) Stain covered in foil for storage, f) Vanillin stain, as it appeared immediately after<br />
preparation, g) After 9 weeks.<br />
<strong>Organic</strong> <strong>Chemistry</strong> <strong>Laboratory</strong> <strong>Techniques</strong> | Nichols | Page 110
2) REACTION PATHWAYS<br />
The p-anisaldehyde and vanillin stains react in a similar manner, and commonly undergo Aldol and<br />
acetalization reactions to produce highly conjugated (and thus colored) compounds on TLC plates.<br />
1. Aldol Reactions<br />
Under the acidic conditions of the stain, some aldehydes or ketones can undergo a keto-enol<br />
tautomerism, and the enol can undergo acid-catalyzed nucleophilic addition to p-anisaldehyde or<br />
vanillin through an aldol mechanism. Dehydration of the aldol product (encouraged by heating the TLC<br />
plate), results in a highly-conjugated compound (Figure 2.38d), which is why spots becomes colored.<br />
For example, a TLC plate containing acetophenone and benzophenone (as seen with UV, Figure 2.38a),<br />
are stained with p-anisaldehyde and vanillin stains. Acetophenone produced a colored spot with these<br />
stains (Figures 2.38 b+c) while benzophenone did not. The main difference is that benzophenone<br />
cannot form an enol, or be a nucleophile to p-anisaldehyde, so the stain is unreactive.<br />
Figure 2.38: TLC’s of acetophenone (lane 1) and benzophenone (lane 2), using 6:1 hexanes:ethyl acetate and visualized with: a)<br />
UV light, b) p-Anisaldehyde stain, c) Vanillin stain, d) A proposed reaction of acetophenone with p-anisaldehyde stain.<br />
2. Acetalization Reactions<br />
Some alcohols react with p-anisaldehyde and vanillin stains through acetalization reactions. A proposed<br />
reaction of p-cresol with p-anisaldehyde is shown in Figure 2.39b to produce a highly-conjugated cation,<br />
a possible structure of the pink spot on the TLC plate in lane #2 of Figure 2.39a. This cationic structure<br />
may look unusual, but it is a feasible structure in the highly acidic conditions of the stain.<br />
Figure 2.39: a) TLC of various phenols visualized with p-anisaldehyde stain, b) Proposed reaction of p-cresol (lane 2) with the<br />
stain.<br />
<strong>Organic</strong> <strong>Chemistry</strong> <strong>Laboratory</strong> <strong>Techniques</strong> | Nichols | Page 111
2.2.F.4.C PERMANGANATE STAIN<br />
The permanganate ion (MnO 4 – ) is a deep purple color, and when it reacts with compounds on a TLC plate<br />
(and is consumed), the plate is left with a yellow color (Figure 2.40a). The stain easily visualizes alkenes<br />
and alkynes by undergoing addition reactions (Figure 2.40d), and the color change is often immediate with<br />
these functional groups.<br />
Permanganate is also capable of oxidizing many functional groups (e.g. aldehydes, lane 1 in Figure 2.40c),<br />
and so is considered by some to be a universal stain. Heat may be required to visualize some functional<br />
groups, and often improves the contrast between spots and the background. Heating may be done (if<br />
needed) until the background color just begins to yellow, but a brown background means the plate was<br />
overheated.<br />
Figure 2.40: a) Crude product of a Grignard reaction stained with KMnO 4 , b) KMnO 4 Reagent jar, c) TLC plate stained with<br />
KMnO 4 (lane 1: heptaldehyde, lane 2: 2-methyl-3-butyn-2-ol, lane 3: 1-methylcyclohexene), d) Partial mechanism for reaction of<br />
alkenes with KMnO 4 .<br />
Recipe: 1.5 g KMnO 4 , 10 g K 2 CO 3 , 1.25 mL 10% NaOH (aq), and 200 mL water. Safety note: wear<br />
gloves while using this stain, as permanganate is corrosive and will stain skin brown.<br />
<strong>Organic</strong> <strong>Chemistry</strong> <strong>Laboratory</strong> <strong>Techniques</strong> | Nichols | Page 112
2.2.F.4.D PHOSPHOMOLYBDIC ACID STAIN<br />
The phosphomolybdic acid stain (PMA) is considered by some a universal stain, able to visualize a wide<br />
variety of compounds (alcohols, alkenes, alkyl iodides, and many carbonyl compounds). The yellow-green<br />
PMA reagent (Mo 6+ ) oxidizes the compound on the plate while itself being reduced to molybdenum blue<br />
(Mo 5+ or Mo 4+ ). Vigorous heating is required to develop the spots, but the plate is overheated when the<br />
background begins to darken. There is typically no color differentiation between spots, as most compounds<br />
visualize as green or blue spots (Figure 2.41c).<br />
Figure 2.41: a+b) Phosphomolybdic acid reagent jar, c) TLC plate stained with the reagent (#1: benzoic acid, #2: 2,6-di-tbutylphenol,<br />
#3: 1-methylcyclohexene- not seen, but impurities stain, #4: benzyl alcohol, d) Formula of phosphomolybdic acid.<br />
Recipe: 5 g phosphomolybdic acid in 500 mL ethanol. The stain is light sensitive and so should be stored<br />
in a jar under aluminum foil. The reagent is expensive, but the stain has a very long shelf life (5 + years).<br />
2.2.F.4.E IRON(III) CHLORIDE STAIN<br />
The ferric chloride (FeCl 3 ) stain is highly specific, and is used mainly to visualize phenols (ArOH). Some<br />
carbonyl compounds with high enol content may also be visualized. Fe 3+ forms colored complexes with<br />
phenols (often faint blue), in the general sense of what is shown in Figure 2.42c. The actual structure of<br />
these complexes is debated. 6 The coloration fades rather quickly with this stain, so observations should be<br />
recorded immediately.<br />
Figure 2.42: a) FeCl 3 reagent jar, b) TLC plate with various phenols stained with FeCl 3 , c) Generic phenol-Fe 3+ colored complex.<br />
Recipe: 1% FeCl 3 in water and CH 3 OH (50% each). This stain has a high shelf life (5 + years).<br />
6 See Nature 165, 1012 (24 June 1950); doi:10.1038/1651012b0<br />
<strong>Organic</strong> <strong>Chemistry</strong> <strong>Laboratory</strong> <strong>Techniques</strong> | Nichols | Page 113
2.2.F.4.F BROMOCRESOL GREEN STAIN<br />
The bromocresol green stain is specific for acidic compounds, and should be able to visualize compounds<br />
that produce a solution lower than pH 5. Experience has shown that carboxylic acids work moderately well<br />
(first lane in Figure 2.43d) but phenols are only barely visible (indicated with an arrow in Figure 2.43d). In<br />
theory, the plate does not need to be heated after exposure to this stain, but in practice it often improves the<br />
contrast between the spots and the background.<br />
Figure 2.43: a) A plate stained with bromocresol green, b) Bromocresol green stain jar, c) Benzoic acid (lane 1) and p-cresol (lane<br />
2) stained with p-anisaldehyde to show position of p-cresol, d) Same plate stained with bromocresol green (p-cresol is very faint<br />
and is indicated with an arrow).<br />
Recipe: 100 mL absolute ethanol, 0.04 g bromocresol green, and 0.10 M NaOH (aq) drop wise until<br />
solution turns from yellow to blue (green works as well, as in Figure 2.43b).<br />
This stain uses an acid-base indicator, which works in a similar manner to phenolphthalein. Bromocresol<br />
green is yellow below pH 3.8 and blue above pH 5.4 (Figure 2.44a). When an acidic compound is spotted<br />
on the plate, the acid lowers the pH and causes the indicator to shift to the lower pH yellow form (Figure<br />
2.44b).<br />
Figure 2.44: a) The colors of the bromocresol green stain (left = very acidic, middle = color of reagent jar, right = higher pH), b)<br />
The chemical structures of the yellow and blue forms of bromocresol green.<br />
<strong>Organic</strong> <strong>Chemistry</strong> <strong>Laboratory</strong> <strong>Techniques</strong> | Nichols | Page 114
2.2.F.5 VISUALIZATION TROUBLESHOOTING<br />
2.2.F.5.A THE COMPOUND DIDN’T SHOW UP<br />
Even when a compound has certainly been applied on the baseline of a TLC plate, it is possible that the<br />
compound is not seen on the plate after elution. There are several possible reasons for this:<br />
1. The compound may be too dilute.<br />
A simple solution to a dilution problem is to add more compound to the original sample and run the<br />
TLC again using a new plate. If the compound is expected to be UV active (i.e. if it contains an aromatic<br />
ring), it is a good idea to view the TLC plate under UV light before eluting the plate (Figure 2.45a). If<br />
the sample spot is not visible before elution it will not be visible afterwards, as compounds diffuse<br />
during elution.<br />
If the sample is determined to be only slightly too dilute, the material can be deposited multiple times<br />
before elution (Figure 2.45b). To do this, deliver a small spot of sample on the baseline, and let it fully<br />
dry (it helps to blow on it) before delivering another spot over top of the first. If the spots are not<br />
allowed to dry in between applications, the spot will be too large. If the compound is expected to be<br />
UV active, check the plate under UV light, and if necessary spot more times before elution.<br />
Figure 2.45: a) Using a UV lamp to see if enough sample was spotted before elution, b) Multiple spotting, c) TLC visualized with<br />
KMnO 4 (2-pentene was in lane 1 and was not seen), d) Undiluted 2-pentene spotted on a scrap TLC plate and visualized with<br />
KMnO 4 .<br />
2. The compound may have evaporated.<br />
A TLC plate should be visualized immediately after elution, so if a moderate amount of time was left<br />
between running the TLC and visualizing it, evaporation may be the cause of the problem. A solution<br />
to this problem is to run the TLC again and visualize it immediately.<br />
If the compound has a low boiling point, it probably evaporated during elution. For example, 2-pentene<br />
(boiling point 36 ˚C), was spotted in lane #1 of Figure 2.45c. It did not stain with permanganate after<br />
elution even though the compound is reactive to the stain (an undiluted, uneluted sample of 2-pentene<br />
did stain somewhat on a scrap TLC plate, Figure 2.45d). Compounds with boiling points lower than<br />
approximately 120 ˚C are difficult to analyze through TLC.<br />
<strong>Organic</strong> <strong>Chemistry</strong> <strong>Laboratory</strong> <strong>Techniques</strong> | Nichols | Page 115
3. The compound may be unreactive to the visualization technique.<br />
Visualization techniques are often tailored toward certain functional groups. For example, ultraviolet<br />
light is generally good at visualizing aromatic compounds but poor at other functional groups. If UV,<br />
iodine, or a stain fails to visualize a compound, it could mean the compound is simply not reactive to<br />
the technique, and another method should be tried.<br />
For example, Figure 2.46 show four different compounds visualized with UV (Figure 2.46a), p-<br />
anisaldehyde stain (Figure 2.46b) and iodine (Figure 2.46c). The compound in lane #1 of all the plates<br />
(4-heptanone) was only visible with anisaldehyde stain (blue spot), and not with UV or I 2 . The<br />
compound in lane #4 of all the plates (ethyl benzoate) was unreactive to anisaldehyde stain, but could<br />
be visualized with UV and I 2 . The impurity present on the baseline of lane #3 (the impurity cinnamic<br />
acid) was strongly UV active, but could hardly be seen with the other stains.<br />
Figure 2.46: Four compounds eluted with 6:1 hexanes:ethyl acetate and visualized with 3 methods: a) UV, b) p-anisaldehyde, c)<br />
iodine. 7 The compounds were: #1: 4-heptanone, #2: acetophenone, #3: cinnamaldehyde, and #4: ethyl benzoate.<br />
2.2.F.5.B THE PENCIL MARKING FROM UV IS DIFFERENT THAN THE STAIN<br />
Ultraviolet light is often the first visualization technique attempted on an eluted TLC plate because it is<br />
nondestructive and rather simple to carry out. If a dark spot is seen with a UV lamp, it is customary to<br />
circle the spot with pencil (as in Figure 2.46b), as the spot will be invisible when the lamp is removed.<br />
Another visualization technique is often carried out after viewing the plate under UV, and it is not<br />
uncommon that the subsequent stain extends to a smaller or larger region than the pencil marking.<br />
For example, the compound in lane 2 of Figure 2.46 (acetophenone) can be easily seen with ultraviolet light<br />
(Figure 2.46a), but on the plate visualized with iodine (Figure 2.46c), the pencil markings encapsulate a<br />
larger region than is seen darkened by the iodine. This is because acetophenone is very strongly UV active,<br />
but only mildly complexes with iodine. It is not uncommon for one technique to visualize a compound<br />
more effectively than another technique.<br />
It is therefore important to be cautious in using TLC to interpret the quantity of material present in a sample,<br />
for example when assessing the quantity of an impurity (such as in lane #3 of Figure 2.46, which contains<br />
cinnamaldehyde and its impurity cinnamic acid). It is likely that a large spot is present in a greater quantity<br />
than a small spot, but it could also be that the large spot is more responsive to the visualization technique.<br />
7 The TLC plate was left in the I2 chamber for only about 2 minutes, and the spots may have developed further with additional<br />
time.<br />
<strong>Organic</strong> <strong>Chemistry</strong> <strong>Laboratory</strong> <strong>Techniques</strong> | Nichols | Page 116
2.2.F.5.C A STAIN’S COLOR FADED OR CHANGED WITH TIME<br />
It is very common for the coloration produced by a stain to fade with time, as the compounds eventually<br />
evaporate from the plate or other slower reactions take place. For this reason, it may be a good idea to<br />
circle the spots with pencil immediately after a plate is visualized, although as spots are generally circled<br />
after viewing with UV, additional markings may cause confusion as to which compounds are UV-active.<br />
Another alternative is to place clear tape across the plate to prevent the spots from evaporating.<br />
It is possible that the coloration produced by a stain will change with extended heating, or with time. For<br />
example, the plate in Figure 2.47 was visualized with p-anisaldehyde stain, and Figure 2.47a shows how<br />
the plate appeared immediately after heating. Figure 2.47b shows how the same plate appeared after sitting<br />
at room temperature for 30 minutes. The compound in lane #2 (acetophenone) had the most dramatic<br />
change in color during that time, changing from a bright orange to a green color. Observations recorded<br />
into a lab notebook should be of the original color of a spot.<br />
Figure 2.47: The same four compounds used in Figure 2.47, all visualized with p-anisaldehyde: a) The plate as it looked<br />
immediately after heating, b) After 30 minutes, c) Another trial of this same system after time.<br />
<strong>Organic</strong> <strong>Chemistry</strong> <strong>Laboratory</strong> <strong>Techniques</strong> | Nichols | Page 117
2.2.F.5.D THE STAINING DOESN’T MAKE SENSE<br />
Certain visualization methods work best for certain functional groups, so a positive result with a stain can<br />
give clues about the identity of an unknown spot. However, sometimes a compound stains when it isn’t<br />
“supposed to,” and this can be confusing.<br />
Figure 2.48: TLC plates of: a) Benzaldehyde with UV light, b) Benzaldehyde with bromocresol green stain, c) Cinnamaldehyde<br />
with UV light, d) Cinnamaldehyde with bromocresol green stain.<br />
For example, a TLC of benzaldehyde visualized with UV light (Figure 2.48a) shows two spots, and based<br />
on relative R f values, it would make sense that the dark spot is benzaldehyde and the fainter spot near the<br />
baseline is benzoic acid (caused by an oxidation of benzaldehyde). Staining of the plate with bromocresol<br />
green (a stain for acidic compounds), supports this hypothesis as the lower acidic spot is visualized with<br />
this method (Figure 2.48b). This is an example of when the staining results “make structural sense,” and<br />
can even support the identification of unknown spots.<br />
However, in a similar experiment with cinnamaldehyde, both aldehyde and carboxylic acid spots were<br />
strongly visualized with bromocresol green (Figure 2.48d), even though only one is an acidic compound.<br />
This result does not at first “make sense,” and theories can only be postulated for why the aldehyde reacted<br />
with the stain.<br />
The significance of Figure 2.48 is that interpretation of staining or lack of staining can sometimes be used<br />
to infer structure, but there may be exceptions that are difficult to explain.<br />
<strong>Organic</strong> <strong>Chemistry</strong> <strong>Laboratory</strong> <strong>Techniques</strong> | Nichols | Page 118
2.3 COLUMN CHROMATOGRAPHY<br />
Column chromatography is an extension of thin layer chromatography (TLC). Instead of applying a sample<br />
on a thin layer of silica or alumina, a sample is deposited on a cylinder of adsorbent and solvent is<br />
continually applied with pressure until the components completely drain from the cylinder. With this<br />
modification, components can be not only separated but collected into different containers, allowing for<br />
purification of mixtures (Figure 2.49).<br />
add sample<br />
add eluent continually<br />
silica or<br />
alumina,<br />
wet<br />
with<br />
eluent<br />
Figure 2.49: Schematic of column chromatography.<br />
Column chromatography (also known as “flash chromatography”), is frequently used in research settings,<br />
as is evidenced by its common occurrence in the procedural sections of journal articles (one example is in<br />
Figure 2.50c).<br />
Figure 2.50: a+c) Students performing flash column chromatography, b) From: K.A. Milinkevich, M.J. Kurth, J. Comb. Chem.<br />
2008, 10, 521–525.<br />
<strong>Organic</strong> <strong>Chemistry</strong> <strong>Laboratory</strong> <strong>Techniques</strong> | Nichols | Page 119
2.3.A MACROSCALE COLUMNS<br />
2.3.A.1 PROCEDURAL GENERALITIES<br />
The same underlying principles of thin layer chromatography (TLC) apply to column chromatography. In<br />
fact, a TLC is always run before performing a column to assess the situation and determine the proper<br />
solvent ratio. In order to get good separation, it is ideal if the desired component has an R f around 0.35<br />
and is separated from other components by at least 0.2 R f units. 8 If the spots to be separated are very close<br />
(if the difference in R f is < 0.2), it’s best if the middle of the spots has an R f of 0.35. An R f near 0.35 is ideal<br />
because it is slow enough that stationary-mobile phase equilibration can occur, but fast enough to minimize<br />
band widening from diffusion.<br />
There are a few variables which aren’t applicable to TLC, but which affect the separation of components<br />
in column chromatography. These include the column diameter, quantity of adsorbent used, and solvent<br />
flow rate. Table 2.5 summarizes variable recommendations based on the sample size and degree of<br />
separation between components. In all scenarios, the columns are to be prepped between 5-6 inches high.<br />
Column diameter<br />
(mm)<br />
Volume of eluent<br />
(mL)<br />
Sample size (mg)<br />
If ΔR f > 0.2<br />
Sample size (mg)<br />
If ΔR f > 0.1<br />
Typical fraction<br />
size (mL)<br />
10 100 100 40 5<br />
20 200 400 160 10<br />
30 400 900 360 20<br />
40 600 1600 600 30<br />
Table 2.5: Summary of recommended values for column chromatography. 9<br />
For example, a column of one-inch diameter (1” is 25.4 mm) should be able to purify around 400 mg of<br />
material if the separation is good (ΔR f > 0.2, third column in Table 2.5), or around 160 mg if the separation<br />
is difficult (ΔR f > 0.1). The column should be able to be prepared and eluted using around 200 mL of<br />
solvent, and the fractions can be collected with approximately 10 mL of solution each. 9<br />
There are multiple variations on how to physically run a column, and your instructor may prefer a certain<br />
method. One large difference in methods is how the column is prepared. In the “dry packing” method, dry<br />
silica or alumina is added directly to a column, and solvent is allowed to trickle through in portions, then<br />
with pressure. In the “wet packing” method, the column is filled with solvent first, then dry silica or alumina<br />
is lightly shaken in, then packed with pressure. In the “slurry” method, solvent is added to the silica or<br />
alumina in an Erlenmeyer flask, poured onto the column as a sludgy material, then packed with pressure.<br />
It is important to know that heat is liberated when solvent is added to silica or alumina (they have an<br />
exothermic heat of solvation). The slurry method is presented in this section, with the main reason being<br />
that it allows this exothermic step to happen in an Erlenmeyer flask instead of on the column. If heat is<br />
liberated during the packing of the column, it may generate bubbles from the boiling of solvent. These can<br />
interfere with the separation of the column if they are not adequately removed, and can crack the adsorbent<br />
material in the column.<br />
8 W.C. Still, M. Kahn, A. Mitra, J.Org.Chem., Vol.43, No.14, 1978.<br />
9 A typical small test tube (13 × 100 mm) has a capacity of 9 mL, and a typical medium test tube (18 × 150 mm) has a capacity of<br />
27 mL.<br />
<strong>Organic</strong> <strong>Chemistry</strong> <strong>Laboratory</strong> <strong>Techniques</strong> | Nichols | Page 120
2.3.A.2 STEP-BY-STEP PROCEDURES<br />
Figure 2.51: a) TLC of ferrocene / acetylferrocene mixture, b) Column chromatography.<br />
The column pictured in this section shows purification of a 0.20 g sample containing a mixture of ferrocene<br />
and acetylferrocene (crude TLC is in Figure 2.51a). Roughly 8 mL fractions were collected into small test<br />
tubes, and roughly 400 mL of eluent was used.<br />
Figure 2.52: a) TLC plate of crude ferrocene/ acetylferrocene mixture before elution, b) After elution, c) Column with frit, d)<br />
Column with cotton wedged in the bottom, e) Column lacking the cotton wedge (would need to be inserted before use).<br />
Run a TLC<br />
<br />
<br />
Run a TLC of the sample to be purified (Figures 2.52 a+b) to determine the appropriate solvent for<br />
chromatography. The desired component should have an R f around 0.35 and should ideally be<br />
separated from all other spots by at least 0.2 R f units.<br />
Prepare a batch of eluent that gives the proper R f value. The quantity prepared depends on the quantity<br />
of sample, the size of the column, and whether or not the solvent composition is planned to be changed<br />
midway. (See Table 2. for guidelines and the elutropic series for trends in “solvent power.”)<br />
Prepare the packed column<br />
3. Obtain an appropriate column (see Table 2.), and be sure there is something near the stopcock that<br />
will allow liquid to pass through, but not solid. Columns may have a sintered disk (also known as a<br />
“frit,” Figure 2.52c), or a plug of cotton or glass wool remaining from the previous user (Figure 2.52d).<br />
If no disk or plug is present (Figure 2.52e), wedge a small wad of cotton or glass wool into the bottom<br />
of the column using a long rod.<br />
<strong>Organic</strong> <strong>Chemistry</strong> <strong>Laboratory</strong> <strong>Techniques</strong> | Nichols | Page 121
Figure 2.53: a) Pouring in silica to 5-6” high in the fume hood, b) Pouring the silica into an Erlenmeyer flask, c+d) Making a slurry.<br />
4. Secure your column perfectly vertically to a ring stand or latticework, clamping it with three-fingered<br />
clamps in two locations. In the fume hood, pour silica gel or alumina adsorbent into the column to<br />
between 5-6 inches high (Figure 2.53a).<br />
Safety note: Powdered silica and alumina are lung irritants, and should always be handled carefully in<br />
a fume hood. Spilled dust should be disposed of by mopping it with a wet paper towel (if wet, the fine<br />
particles are less dispersive).<br />
5. In the fume hood, pour the adsorbent measured in the column into an Erlenmeyer flask (Figure 2.53b),<br />
then add some eluent (Figure 2.53c). Make a loose slurry by swirling and stirring with a glass stirring<br />
rod (Figure 2.53d) until all of the adsorbent is completely wet, gas bubbles are released, and the<br />
consistency is somewhat thick but pourable.<br />
Figure 2.54: a) Pouring the slurry into the column, b) Rinsing the flask, c) Adsorbent adhered to the sides of the column, d) Rinsing<br />
off the clinging adsorbent.<br />
6. Put a beaker or Erlenmeyer flask beneath the clamped column and open the stopcock. In one quick<br />
motion, swirl and pour the silica or alumina slurry into the column using a large-mouthed funnel (Figure<br />
2.54a). Immediately use more eluent to rinse residual slurry out of the Erlenmeyer flask (Figure 2.54b)<br />
and onto the column.<br />
7. Immediately rinse any silica or alumina off the sides of the column reservoir using eluent and a swirling<br />
motion from a Pasteur pipette (Figures 2.54 c+d). If allowed to dry, the adsorbent will cling to the glass<br />
and won’t easily be rinsed down.<br />
<strong>Organic</strong> <strong>Chemistry</strong> <strong>Laboratory</strong> <strong>Techniques</strong> | Nichols | Page 122
Figure 2.55: a) Jostling the column to remove air bubbles, b) Applying air pressure, c) Adding sand, d) Rinsing sand from the<br />
sides.<br />
8. Jostle the column firmly using a cork ring or your knuckles (Figure 2.55a) to dislodge any air bubbles<br />
in the column (which could cause poor separation or cracking of the adsorbent in the column), and to<br />
promote an even deposition of adsorbent.<br />
9. Apply gentle air pressure to the top of the column (Figure 2.55b) to compress it, stopping when the<br />
eluent level is 1 cm from the top of the column. If a T-adapter is used with the air line as in Figure<br />
2.55b, fine control of the airflow can be accomplished by adjustment of the pinch clamp on the rubber<br />
tubing.<br />
Throughout the entire elution process, keep the white column of adsorbent wet, with the eluent<br />
level above the top of the silica or alumina.<br />
Gently break the seal to cease application of pressure, and close the stopcock to prevent liquid from<br />
dripping out further.<br />
10.Add a thin layer of sand (Figure 2.55c), approximately 0.5 cm high. Rinse the sides of the column with<br />
eluent using a swirling motion to dislodge the sand off the sides of the glass (Figure 2.55d). Open the<br />
stopcock and allow liquid to drip out until the liquid is just above the sand layer. Apply air pressure if<br />
the dripping is too slow.<br />
<strong>Organic</strong> <strong>Chemistry</strong> <strong>Laboratory</strong> <strong>Techniques</strong> | Nichols | Page 123
Add the sample<br />
Once the sample is applied to the column, there is a race against time, as diffusion will start to broaden the<br />
material. A sample should not be applied until you are ready to complete the column immediately and in<br />
its entirety. This process may take between 15 and 90 minutes! If using test tubes to collect fractions, the<br />
test tubes should be arranged in a rack prior to adding the sample, and the column height should be adjusted<br />
so that the test tube rack can slide underneath.<br />
Figure 2.56: a) Dissolving a solid with a small amount of dichloromethane, b) Applying the sample, c) Rinsing the sample in its<br />
flask, d) Applying pressure to push the sample onto the column just past the sand layer.<br />
11.If the crude sample is a liquid, use it directly (go on to step 13).<br />
12.If the crude sample is a solid, do one of the following things:<br />
a. Ideal situation: dissolve the solid in the minimum amount of the eluent (a few mL at most).<br />
b. If the solid is not particularly soluble, or will not dissolve in a few mL of the eluent, dissolve it in<br />
the minimum amount of dichloromethane (few mL at most, Figure 2.56a).<br />
c. If the solid is insoluble in the eluent, an alternate procedure is also possible. Dissolve the solid in<br />
a round-bottomed flask using a few mL of a low-boiling solvent (e.g. dichloromethane or acetone).<br />
Add to the flask approximately 1 g of silica or alumina, then remove the solvent on the rotary<br />
evaporator in order to leave a solid that contains the sample deposited on the adsorbent. With an<br />
inch of eluent resting atop the packed column (skip adding the sand layer if this method is used),<br />
pour the silica-adsorbed sample onto the column using a wide mouthed funnel. If any dust clings<br />
to the glass, rinse it down with more eluent (go on to step 15.)<br />
13.Delicately add the sample to the column via pipette, dripping the liquid or solution directly onto the<br />
sand with the pipette tip as close as you can manage, not down the sides (Figure 2.56b). Take care to<br />
not squirt liquid in forcibly such that indentations would be caused in the sand or silica /alumina column.<br />
14.Rinse the sample container with a little solvent (or dichloromethane if used, Figure 2.56c) and add the<br />
rinsing to the column using the same pipette (in order to rinse the pipette as well).<br />
15.Open the stopcock and allow liquid to drip out until the sample is just past the sand layer (Figure 2.56d)<br />
and into the white area of the column (apply air pressure if this takes more than 20 seconds).<br />
<strong>Organic</strong> <strong>Chemistry</strong> <strong>Laboratory</strong> <strong>Techniques</strong> | Nichols | Page 124
16.Gently rinse the sides of the column with a swirling motion using 1-2 pipettes-full of eluent to rinse<br />
any splashed sample. Again, allow liquid to drip out (or apply air pressure) until the sample is pushed<br />
into the white adsorbent.<br />
Repeat the rinsing step until you feel confident that the entire sample is deposited on the adsorbent. If<br />
some of the sample is still located in the sand layer, it may dissolve in the eluent when more solvent is<br />
added, leading to a loss of yield. If the compound is colored, the rinsing should be completely clear.<br />
Figure 2.57: a+b) Filling the solvent reservoir, c+d) Eluting the column.<br />
Fill with Eluent and Elute the Column<br />
17.Delicately add more eluent via pipette (Figure 2.57a), swirling down the sides, and then when the sand<br />
layer would no longer be disturbed with the additions, carefully pour in larger quantities (Figure 2.57b)<br />
of the prepared eluent to fill the reservoir (or fill with as much as may be needed). Clean eluent<br />
collected during the packing of the column can be reused.<br />
18.Use air pressure to gently and steadily elute the sample through the column (Figures 2.57 c+d). The<br />
more times the pressure is started and stopped, the more likely the column may crack. It’s best if the<br />
pressure can be kept gentle and steady the entire time.<br />
The optimal drip rate during elution depends on the size of the column. The ideal flow of eluent is<br />
when the solvent in the cylindrical section of the column above the adsorbent drops at a rate of 2.0<br />
inches per minute. 10 Therefore, the drip rate should be slower with a narrow column compared to a<br />
wider column.<br />
The drip rate for a one-inch column should be where individual drops can be barely distinguished. A<br />
stream of liquid pouring out the stopcock with this size of column is slightly too fast.<br />
10 W.C. Still, M. Kahn, A. Mitra, J.Org.Chem., Vol.43, No.14, 1978.<br />
<strong>Organic</strong> <strong>Chemistry</strong> <strong>Laboratory</strong> <strong>Techniques</strong> | Nichols | Page 125
Figure 2.58: a-c) Collecting fractions, d) Author running a column.<br />
Collect fractions<br />
19.Immediately start collecting the eluting liquid into test tubes on a rack (Figure 2.58a). See Table 2.5<br />
for recommendations on volumes to collect in each test tube.<br />
20.When the first test tube fills, or if a certain height of liquid has been collected as recommended by your<br />
instructor or Table 2.5, move the rack over to start collecting into a different tube (Figures 2.58 b+c).<br />
Fill and keep the tubes in order on the rack.<br />
These different tubes are called “fractions.” The goal of a column is to collect small enough fractions<br />
that most (or some) fractions contain pure material. If the separation of the mixture is difficult (if the<br />
ΔR f of the components is low), it may be best to collect small fractions (e.g. half-filled tubes).<br />
Figure 2.59: a-c) Rinsing material splashed onto the tip of the column, d) Students running a column.<br />
21.As liquid drains off the column, it often splashes onto the outsides of the tip of the column, and when<br />
the solvent evaporates you may see a ring of material on the tip (you will see a ring of solid if the<br />
component is a solid as in Figure 2.59b, or oily droplets if the component is a liquid). If the components<br />
are colored, the column tip should be rinsed (Figure 2.59c) when it appears as if one component has<br />
completely eluted and before the other component approaches.<br />
22.Periodically keep an eye on the eluent level, and refill before it drops below the sand layer.<br />
<strong>Organic</strong> <strong>Chemistry</strong> <strong>Laboratory</strong> <strong>Techniques</strong> | Nichols | Page 126
Figure 2.60: a) Elution, b) Addition of ethyl acetate to increase the solvent polarity, c) Solvent level nears the sand layer, d)<br />
Refilling.<br />
Possibly Increase the Solvent Polarity<br />
23.One eluent may be used throughout the entire column, especially if the<br />
components to be separated have similar R f values. However, if the components<br />
have very different R f values, the solvent polarity may be increased after one<br />
component has eluted from the column (Figure 2.60a).<br />
Increasing the solvent polarity will make components travel “faster.” There are<br />
several reasons a faster elution is desired. First, if one component has already<br />
exited the column, the column has already done its job with separation, so<br />
speeding up the process will not affect the purity of the collected fractions.<br />
Second, the longer it takes to run a column, the wider will be the component<br />
bands (due to diffusion), and collecting a broad band of material will use (and<br />
waste) a lot of solvent.<br />
Eluotropic Series<br />
Least Polar<br />
Petroleum ether /<br />
hexanes<br />
Dichloromethane<br />
Diethyl ether<br />
Ethyl acetate<br />
Acetone<br />
Methanol<br />
Most Polar<br />
Table 2.6 contains a partial list of the eluotropic series, a list of common<br />
solvents ranked according to their “solvent power” in normal phase Table 2.6: Elutotropic series.<br />
chromatography. The more polar solvent causes the most dramatic increase in R f .<br />
24.To increase the solvent polarity, the polar solvent can be dripped directly into the eluent on the column<br />
reservoir (Figure 2.60b). For example, if using a hexanes:ethyl acetate mixture, addition of pure ethyl<br />
acetate to the eluent currently in the reservoir would increase its polarity. If the eluent level is running<br />
low, a solution could be prepared that contains a higher percentage of the more polar component. For<br />
example, if the column first used a 4:1 hexanes:ethyl acetate mixture, using a 1:1 mixture would be a<br />
more polar solvent.<br />
25.Elute the column with the more polar solvent as before, and always remember to watch the eluent<br />
level, and refill (Figure 2.60d) before it drops below the sand layer.<br />
<strong>Organic</strong> <strong>Chemistry</strong> <strong>Laboratory</strong> <strong>Techniques</strong> | Nichols | Page 127
Figure 2.61: a) Original TLC plate, b) Fractions collected by the column, c) Spotting fractions onto a TLC plate, d) A visualized<br />
TLC plate of samples of each fraction.<br />
Find and Concentrate the Desired Component<br />
26.In finding the desired component in the test tube fractions, it is helpful to understand the relationship<br />
between R f and elution order in column chromatography.<br />
In column chromatography, the sample is deposited on the top of the column and eluted down, while<br />
in thin layer chromatography the sample is spotted on the bottom of the plate and eluted up. Therefore,<br />
a column can be thought of like an upside-down TLC plate. A compound with a higher R f runs “faster,”<br />
meaning it will end up higher on a TLC plate, and will be collected first with a column.<br />
In the column pictured in this section, the component with the lower R f (orange on the TLC plate in<br />
Figure 2.61a), is the component collected second from the column.<br />
27.First determine which test tubes contain dissolved compound.<br />
a. Spot a sample of each fraction on a TLC plate labeled with fraction numbers corresponding to the<br />
order in which they were collected (Figure 2.61c). It may be best to spot each sample 2-3 times<br />
over top of one another in case the fractions are dilute.<br />
b. If many fractions have been collected, making you<br />
hesitant to sample every fraction, one method to<br />
identify colorless fractions that may contain<br />
compound is to look for a hint of residue on the top<br />
of the test tubes. After evaporation, a solid residue<br />
(Figure 2.62) or oily droplets are sometimes left on<br />
the top of the test tube, making obvious that those<br />
fractions contain more than just solvent. Sample all<br />
fractions near the tubes containing visible residue.<br />
c. Visualize the spotted TLC plate using UV light<br />
and/or a stain to determine which fractions contain<br />
compound (Figure 2.61d).<br />
Figure 2.62: Ring of solid seen on tube rims after<br />
evaporation.<br />
<strong>Organic</strong> <strong>Chemistry</strong> <strong>Laboratory</strong> <strong>Techniques</strong> | Nichols | Page 128
Figure 2.63: a) Eluted TLC plates of fractions containing possible compound, b) Combining fractions, c) Rinsing a fraction tube.<br />
28.Run a TLC of all fractions that contain compound, spotting up to five samples per 1-inch wide TLC<br />
plate. Wider TLC plates may be used for this purpose if available.<br />
29.Identify the compound with the desired R f by comparison with the original crude TLC plate. Choose<br />
to retain the fractions that have the desired compound in pure form, as evidenced by the eluted TLC<br />
plate. For example, if the compound with the higher R f is desired in Figure 2.63a, fractions 6-10 should<br />
be kept.<br />
30.Combine the pure fractions into an appropriately sized round-bottomed flask (no more than half-full,<br />
Figure 2.63b). Rinse each test tube with a small amount of eluent (or other solvent if solubility is an<br />
issue), and add the rinsing to the round-bottomed flask (Figure 2.63c).<br />
31.Evaporate the solvent on the rotary evaporator to leave the purified compound in the flask.<br />
<strong>Organic</strong> <strong>Chemistry</strong> <strong>Laboratory</strong> <strong>Techniques</strong> | Nichols | Page 129
Figure 2.64: a) Using air pressure to dry the column, b) Allowing the column to dry upside-down, c) Collecting the waste silica.<br />
Clean Up the Column<br />
32.To dry the column, apply air pressure to drain the majority of eluent from the column into a waste<br />
container. Then further dry the column using one of these methods:<br />
a. Leave connected a gentle stream of air running through the column to further dry it as you clean<br />
up other things (Figure 2.64a).<br />
b. Clamp the column upside down over a large waste beaker in the fume hood, so that the adsorbent<br />
will fall when it has dried (Figure 2.64b). This will take a long time (until the next class period),<br />
but is an option.<br />
33.When dry, the adsorbent can be poured out of the column into a waste container in the fume hood<br />
(Figure 2.64c).<br />
Safety note: Powdered adsorbents are a lung irritant, and their hazard is exacerbated if the column<br />
contains residual compounds that can now make their way into your lungs. Pouring silica or alumina<br />
powders should always be done in the fume hood.<br />
34.When the majority of the adsorbent has been collected in a waste container, use water to rinse any<br />
residual solid into the sink, and then rinse the column with acetone into a waste beaker. Further clean<br />
the column with soap and water and dry with the stopcock parts separated.<br />
<strong>Organic</strong> <strong>Chemistry</strong> <strong>Laboratory</strong> <strong>Techniques</strong> | Nichols | Page 130
2.3.A.3 MACROSCALE COLUMN SUMMARY<br />
Make sure there is a frit<br />
or cotton plug in the<br />
bottom of the column.<br />
Fill the column with<br />
silica or alumina to 5-6<br />
inches in the fume hood.<br />
Pour the adsorbent into<br />
an Erlenmeyer flask and<br />
add eluent to make a<br />
pourable slurry.<br />
The eluent should give<br />
the desired component<br />
an R f of 0.35 by TLC.<br />
Pour in the slurry and<br />
immediately rinse the<br />
sides of the column with<br />
eluent and a pipette.<br />
Jostle the column to<br />
remove air bubbles.<br />
Use air pressure to pack<br />
the column. Keep it<br />
perfectly vertical.<br />
Add 0.5 cm of sand.<br />
Rinse the sand off the<br />
sides carefully with a<br />
swirling motion.<br />
Don’t disrupt the top<br />
surface of the silica or<br />
alumina with rinsing.<br />
Adjust the eluent level to<br />
the sand layer, and then<br />
add the sample (pure<br />
liquid, dissolved in<br />
CH 2 Cl 2 , or solid<br />
adsorbed onto a portion<br />
of silica).<br />
Rinse the sides and use<br />
air pressure to force the<br />
eluent down onto the<br />
silica / alumina layer.<br />
Fill the reservoir with<br />
eluent (carefully to not<br />
disrupt the top surface).<br />
Use steady air pressure<br />
to elute the column.<br />
Collect fractions in test<br />
tubes in a rack (keep in<br />
order).<br />
Rinse the column tip if a<br />
component has finished<br />
coming off the column.<br />
Possibly increase the<br />
eluent polarity to make<br />
components elute faster.<br />
Never allow the eluent<br />
to drop below the top of<br />
the adsorbent column.<br />
Use TLC to determine<br />
the purity of the<br />
fractions, and combine<br />
appropriate fractions.<br />
Remove the solvent with<br />
the rotary evaporator.<br />
Table 2.7: Procedural summary for macroscale column chromatography.<br />
<strong>Organic</strong> <strong>Chemistry</strong> <strong>Laboratory</strong> <strong>Techniques</strong> | Nichols | Page 131
2.3.A.4 TROUBLESHOOTING<br />
2.3.A.4.A THE PIPETTE BROKE IN THE COLUMN<br />
It is quite common to break the tip of a Pasteur pipette while rinsing the column,<br />
which often falls and wedges itself into the delicate column. Unfortunately, a<br />
broken pipette in a column can cause problems with the separation of<br />
components.<br />
For example, Figure 2.65 shows the effect of a broken pipette on the separation<br />
of two components. A broken pipette is embedded in the column and is the nearly<br />
vertical line of orange seen between the two bands on the column. Since<br />
stationary-mobile phase equilibration does not occur on the glass surface of the<br />
pipette, compounds stream down quickly and move faster than they should based<br />
on their R f . The orange vertical line is the top component draining into the band<br />
of the bottom component, contaminating it.<br />
If a broken pipette pierces the column, and the sand or sample has not yet been<br />
applied, attempt to remove the pipette with long forceps. After removal,<br />
vigorously jostle the column to pack it again and continue on with the column. If<br />
the pipette cannot be removed with forceps, you may consider redoing the<br />
column.<br />
Figure 2.65: Effect of a<br />
broken pipette on a column.<br />
If the sand has already been applied, removal of the pipette and jostling the column will often ruin the<br />
horizontal surface of the adsorbent, so it will be necessary to re-pack the column.<br />
If the sample has already been applied, there isn’t anything to do but continue on and hope for the best. If<br />
the column results in an unsuccessful separation, all fractions containing the compound of interest can be<br />
combined, solvent evaporated by the rotary evaporator, and another purification method (or a second<br />
column) can be attempted.<br />
2.3.A.4.B AIR BUBBLES ARE SEEN IN THE COLUMN<br />
Like a broken pipette, an air bubble is an empty pocket where<br />
stationary-mobile phase equilibration does not happen, so<br />
components move quicker around an air bubble than they should.<br />
This may lead to uneven eluting bands, which can cause overlap<br />
if the separation of the mixture is difficult (if the components<br />
have very close R f values, as in Figure 2.66).<br />
If air bubbles are seen in the column and the sand or sample has<br />
not yet been applied, give the column a good jostling during<br />
packing to remove all air bubbles. See your instructor if the<br />
bubbles are not budging as you may be approaching the task too<br />
delicately. If the sand or sample has already been applied, it’s<br />
best to leave the column as is and hope the air bubbles do not<br />
affect the separation.<br />
Figure 2.66: Effect of an air bubble on the<br />
separation in a column.<br />
<strong>Organic</strong> <strong>Chemistry</strong> <strong>Laboratory</strong> <strong>Techniques</strong> | Nichols | Page 132
2.3.A.4 C THE BANDS ARE ELUTING UNEVENLY<br />
If the components of a mixture are colored, it may be obvious<br />
when the bands elute in a crooked manner. This is most likely<br />
due to the column being clamped at a slight diagonal.<br />
If the column is clamped in a slanted manner, components will<br />
travel in a slanted manner (Figure 2.67). This may cause<br />
separation problems if the components have a similar R f .<br />
There is no way to fix this problem midway through a column,<br />
but if the components have very different R f values, the slanted<br />
bands may have no effect on the separation. In the future, be<br />
sure to check that the column is perfectly vertical in both the<br />
side-to-side and front-back directions.<br />
Figure 2.67: Effect of a crooked column on separation.<br />
2.3.B MICROSCALE (PIPETTE) COLUMNS<br />
A macroscale column is much too big for very small quantities of material (< 20 mg). Instead, a column<br />
can be constructed using a disposable Pasteur pipette.<br />
In order to get good separation, it is ideal if the desired component has an R f around 0.35 and is separated<br />
from other components by at least 0.2 R f units. 11 If the spots to be separated are very close (< 0.2 ΔR f ), it’s<br />
best if the middle of the spots has an R f of 0.35. An R f near 0.35 is ideal because it is slow enough that<br />
stationary-mobile phase equilibration can occur, but fast enough to minimize band widening from diffusion.<br />
2.3.B.1 STEP-BY-STEP PROCEDURES<br />
Figure 2.68: a) TLC plate of purple dye, b) Elution with a pipette column.<br />
The column pictured in this section shows purification of a drop of dilute purple food dye (made from 1<br />
drop red dye, 1 drop blue dye and 15 drops water). The dye is separated as best as possible into its three<br />
components: blue, red and pink (as seen in the TLC plate of Figure 2.68a). A 2.5” column of silica gel is<br />
used and eluted with a solution made from a 1:3:1 volume ratio of 6 M NH 4 OH:1-pentanol:ethanol.<br />
11 W.C. Still, M. Kahn, A. Mitra, J. Org. Chem., Vol.43, No.14, 1978.<br />
<strong>Organic</strong> <strong>Chemistry</strong> <strong>Laboratory</strong> <strong>Techniques</strong> | Nichols | Page 133
Figure 2.69: a) Purple dye spotted on the baseline of a TLC plate, b) after elution, c-e) Inserting cotton into the pipette tip.<br />
1. Run a TLC of the sample to be purified (Figures 2.69 a+b) to determine the appropriate solvent for<br />
chromatography. The desired component should have an R f around 0.35.<br />
Prepare the dry column<br />
2. Use a metal rod or hanger (Figure 2.69d) to wedge a bit of cotton or glass wool into the narrow end of<br />
a short-stemmed Pasteur pipette. The cotton should be moderately tight so liquid can trickle through,<br />
but not solid.<br />
Figure 2.70: a) Scooping silica gel into the pipette column, b+c) Using a pipette as a funnel, d) Scooping sand, e) Complete dry<br />
column.<br />
3. Scoop silica or alumina into the wide end of the pipette column (Figure 2.70a), then invert and raise<br />
the column so the powder falls to the bottom. Continue to use this scooping method to fill the pipette<br />
column to 2 - 2.5 inches high with silica or alumina (this quantity can be altered depending on the<br />
amount of sample).<br />
Alternatively, scoop adsorbent into the wide end of a fresh pipette and use it as a funnel to deliver<br />
adsorbent through the narrow tip and into the pipette column secured to a ring stand with a threefingered<br />
clamp (Figures 2.70 a–c).<br />
Safety note: As silica and alumina are fine powders and lung irritants, be sure to work in a fume hood<br />
when handling silica or alumina. Also tap the pipette after scooping to dislodge adsorbent on the<br />
outside of the pipette (so it doesn’t spill when vertical).<br />
<strong>Organic</strong> <strong>Chemistry</strong> <strong>Laboratory</strong> <strong>Techniques</strong> | Nichols | Page 134
4. Gently clamp the pipette column to a ring stand or latticework using a three-fingered clamp (note: they<br />
are fragile!) and tap it to make sure the silica / alumina is settled and the top edge is horizontal.<br />
5. Add approximately 0.5 cm of sand atop the silica / alumina layer. If using very fine sand, use another<br />
pipette to act as a funnel, as described in step 3. For coarse sand, use a small scooper or the wide end<br />
of another pipette to aid in its delivery (Figure 2.70d). A complete pipette column is in Figure 2.70e.<br />
Figure 2.71: a) Adding eluent, b-d) Applying bulb pressure and correctly breaking the seal, e) Eluting the column.<br />
Wet the column<br />
6. Position a test tube supported in a small beaker beneath the column. Add a squirt-full of the appropriate<br />
eluent (previously determined by TLC in Step 1), gently above the sand layer of the pipette column<br />
(Figure 2.71a).<br />
7. Use a pipette bulb (or dropper bulb) to apply gentle air pressure and push the eluent through the column<br />
(Figure 2.71b), stopping when the liquid level is in the sand layer. Throughout the entire elution<br />
process, keep this white column section wet with eluent.<br />
To apply air pressure using a pipette bulb, create a strong connection between the column and the bulb,<br />
and then squeeze the bulb. It is important when releasing the pressure to first break the seal while still<br />
keeping your hand clenched (Figure 2.71c) and THEN release your hand (Figure 2.71d). If you release<br />
your hand while still connected to the column, the bulb will create suction that can violently pull liquid<br />
into the bulb and disrupt the column.<br />
8. Add more eluent if needed, and use bulb pressure until the entire column is saturated with eluent (Figure<br />
2.71e), and the eluent level is in the sand layer.<br />
<strong>Organic</strong> <strong>Chemistry</strong> <strong>Laboratory</strong> <strong>Techniques</strong> | Nichols | Page 135
Figure 2.72: a) Adding sample, b) Applying pressure, c) Dye pushed onto the adsorbent, d) Filling with eluent, e) Eluting.<br />
Add the sample<br />
9. Use a pipette to add the entire sample to the sand layer. If the sample is a liquid, add it directly. If it<br />
is a solid, dissolve it in the smallest amount of solvent possible, preferably the eluent. If the solid is<br />
not soluble in the eluent, use the minimum amount of dichloromethane. Position the pipette tip near<br />
the sand layer and add the sample carefully, trying not to splash compound onto the sides (Figure<br />
2.72a).<br />
10.Rinse the original container with a little solvent and add the rinsing to the column using the same<br />
pipette (in order to rinse the pipette as well).<br />
11.Apply pressure with the bulb to force the sample just past the sand layer (Figures 2.72 b+c).<br />
12.Add more eluent (approximately 0.5 cm high) to rinse the sides of the column (Figure 2.72d). Again<br />
use bulb pressure to force the dye onto the adsorbent (Figure 2.72e), and then fill the pipette above the<br />
sand layer as high as possible with eluent.<br />
Figure 2.73: a) Eluting, b) Collecting the pink fraction, c) Changing the collection tube, d) Storing fractions in a rack, e) Collecting<br />
the red fraction.<br />
<strong>Organic</strong> <strong>Chemistry</strong> <strong>Laboratory</strong> <strong>Techniques</strong> | Nichols | Page 136
Elute the Column and Collect Fractions<br />
13.Apply gentle bulb pressure to begin eluting the sample through the column (Figure 2.73a), refilling the<br />
pipette whenever the solvent level nears the sand layer.<br />
14.Immediately begin collecting the liquid eluting beneath the column into an empty test tube. Change<br />
the test tube for a fresh one periodically (Figure 2.73c), based on your judgment or your instructor’s<br />
guidance (perhaps when a small test tube fills to about 1 cm high).<br />
These different tubes are called “fractions.” The goal of a column is to collect small enough fractions<br />
that most (or some) fractions contain pure material. If the separation of the mixture is difficult (if the<br />
ΔR f of the components is low), it may be best to collect even smaller fractions (e.g. 0.5 cm high).<br />
15.Keep the test tubes in order on a test tube rack (Figure 2.73d).<br />
Figure 2.74: a) Original TLC plate, b+c) Resulting fractions (left to right in order of elution).<br />
Find and Concentrate the Desired Component<br />
16.In finding the desired component in the test tube fractions, it is helpful to understand the relationship<br />
between R f and elution order in column chromatography.<br />
In column chromatography, the sample is deposited on the top of the column and eluted down, while<br />
in thin layer chromatography the sample is spotted on the bottom of the plate and eluted up. Therefore,<br />
a column can be thought of like an upside-down TLC plate. A compound with a higher R f runs “faster,”<br />
meaning it will end up higher on a TLC plate, and will be collected first with a column.<br />
In the pipette column pictured in this section, the pink component had the highest R f on the TLC plate<br />
(Figure 2.74a), and was collected first from the column (Figure 2.74b). A purple fraction was also<br />
collected (Figure 2.74c), due to incomplete separation of the red and blue components.<br />
17.Use TLC as described in the section on macroscale columns to determine which tubes contain the<br />
desired component.<br />
18.Combine the pure fractions into an appropriately sized round-bottomed flask using a funnel, rinse each<br />
tube with a small amount of eluent (or other solvent if solubility is an issue), and add the rinsing to the<br />
flask. Remove the solvent on the rotary evaporator.<br />
19.To clean up the pipette column, use bulb pressure to force the excess liquid out of the pipette column,<br />
and dispose of the semi-dry column (silica gel and all) in the broken glass container.<br />
<strong>Organic</strong> <strong>Chemistry</strong> <strong>Laboratory</strong> <strong>Techniques</strong> | Nichols | Page 137
2.3.B.2 MICROSCALE (PIPETTE) COLUMN SUMMARY<br />
Wedge a bit of cotton<br />
into the bottom of a<br />
pipette.<br />
Use a scooping method<br />
to fill silica or alumina to<br />
2 - 2.5 inches high.<br />
Add a 0.5 cm layer of<br />
sand.<br />
Add eluent to the column<br />
and apply pressure with<br />
a pipette bulb to force<br />
eluent through the<br />
column to completely<br />
wet it.<br />
Remember to break the<br />
seal before letting go of<br />
the pipette bulb, or<br />
suction will ruin the<br />
column.<br />
Refill the column with<br />
eluent as necessary.<br />
Adjust the eluent level to<br />
the sand layer, and then<br />
delicately add the<br />
sample.<br />
Use pressure to push the<br />
eluent down onto the<br />
silica/ alumina layer.<br />
Rinse with one portion<br />
of eluent and push the<br />
solvent onto the column.<br />
Fill the pipette with<br />
eluent and apply pressure<br />
to elute the column.<br />
Collect liquid into test<br />
tubes.<br />
Always keep the white<br />
column section wet<br />
(refill whenever the<br />
eluent level nears the<br />
sand layer).<br />
Switch test tubes<br />
periodically (perhaps<br />
when they are 1 cm high<br />
in small test tubes) to<br />
collect different<br />
fractions.<br />
Keep fractions organized<br />
in a test tube rack in the<br />
order they are eluted.<br />
Use TLC to determine<br />
the purity of the<br />
fractions, and combine<br />
appropriate fractions.<br />
Remove the solvent with<br />
the rotary evaporator.<br />
Table 2.8: Procedural summary for microscale (pipette) column chromatography.<br />
<strong>Organic</strong> <strong>Chemistry</strong> <strong>Laboratory</strong> <strong>Techniques</strong> | Nichols | Page 138
2.4 GAS CHROMATOGRAPHY (GC)<br />
2.4.A OVERVIEW OF GC<br />
Gas chromatography (GC) is a powerful instrumental technique used to separate and analyze mixtures. A<br />
gas chromatograph is a standard piece of equipment in forensics, medical, and environmental testing<br />
laboratories (Figure 2.75).<br />
Figure 2.75: a) Gas chromatograph with mass spectrometer detector, b) GC-MS alongside a computer, which runs the instrument<br />
and can be used to manipulate the spectrum.<br />
To run a GC, a sample is diluted then injected into the instrument where it is vaporized. The gaseous sample<br />
is pushed through a long, thin capillary column (typically 30 meters or approximately 100 feet long) by an<br />
inert carrier gas. The column separates components of a mixture, detects them, and a spectrum is generated<br />
displaying peaks that correspond to material that has exited the column at certain times. A GC spectrum of<br />
87 octane gasoline is shown in Figure 2.76. Every peak represents one or more compounds, and since there<br />
are at least 50 peaks, this GC spectrum demonstrates that gasoline contains at least 50 different compounds!<br />
Figure 2.76: GC spectrum of 87 octane gasoline.<br />
The quantity of time a compound spends inside a GC column before it is detected is called its “retention<br />
time,” which represents the time a compound is “retained” on the column. This value is the x-axis of the<br />
GC spectrum in minutes. In many instruments, the retention time of each peak can be labeled on the spectra<br />
with the click of a button, and the value is displayed above each peak maxima. A compound’s retention<br />
time is similar to R f in thin layer chromatography, and should be reproducible between identical runs.<br />
Unlike R f , however, retention times are very precise, and retention times typically vary by no more than<br />
0.01 minute between identical runs (when the spectra have good peak shapes).<br />
<strong>Organic</strong> <strong>Chemistry</strong> <strong>Laboratory</strong> <strong>Techniques</strong> | Nichols | Page 139
2.4.B USES OF GC<br />
2.4.B.1 ASSESSING PURITY<br />
A GC instrument is very good at verifying (or disproving) the purity of samples, and it can often spot trace<br />
quantities of impurity. In Figure 2.77, the GC spectra of “n-hexane” and “hexanes” are shown, two reagents<br />
that can often be found in a chemical stockroom. The GC spectrum of n-hexane (Figure 2.77b) shows one<br />
prominent peak, although there are hints of three other peaks on the baseline. The bottle of n-hexane claims<br />
it to be 95% pure, which is consistent with what is seen in its GC spectrum. “Hexanes” however, is a true<br />
mixture, as there are multiple significant peaks in its GC spectrum (Figure 2.77d). Hexanes contains n-<br />
hexane as the major component, but also contains closely related isomers (2-methylpentane, 3-<br />
methylpentane, and methylcyclopentane). 12 Hexanes is a commonly used solvent, where its lack of purity<br />
is not crucial, and it is considerably cheaper than pure n-hexane.<br />
Figure 2.77: a) Bottle of n-hexane, b) GC spectrum of n-hexane, c) Bottle of “hexanes,” d) GC spectrum of “hexanes.” The<br />
compounds present in hexanes are: 2-methylpentane, 3-methylpentane, n-hexane and methylcyclopentane (in order of elution). 13<br />
A sample that produces a GC spectrum with only one peak is not always<br />
pure. In Figure 2.78 is the GC spectrum of a sample containing both 2-<br />
pentanol and 3-pentanol, even though only a single peak is observed.<br />
The GC column used for this run separates based on differences in<br />
boiling point, and these isomers differ in boiling point by only 4 ˚C,<br />
causing them to co-elute.<br />
An impure sample can also produce a GC spectrum with only one peak<br />
if some components elute outside of the window of time detected by the<br />
instrument. For example, the GC spectrum in Figure 2.78 begins<br />
collecting data at 1.50 min (the value on the x axis), and any compounds<br />
that elute before that time will not be detected. Components of a mixture<br />
may also not exit the column before the run is ceased, in which case they<br />
remain on the column and sometimes elute overtop of a subsequent run!<br />
Figure 2.78: GC spectrum of a sample<br />
containing 2-pentanol and 3-pentanol.<br />
Both compounds are represented by the<br />
peak at 2.510 min.<br />
12 Methylcyclopentane (C6 H 12 ) is not a true isomer of n-hexane (C 6 H 14 ).<br />
13 Complete removal of hexanes by rotary evaporation is sometimes difficult, and evidence of its persistence can be seen in 1 H<br />
NMR samples by a doublet present around 0.9 ppm from the methyl of the methylcyclopentane impurity.<br />
<strong>Organic</strong> <strong>Chemistry</strong> <strong>Laboratory</strong> <strong>Techniques</strong> | Nichols | Page 140
2.4.B.2 IDENTIFYING COMPONENTS<br />
Due to the precision of retention times, GC can be used to identify components of a mixture if pure samples<br />
are acquired and if the components separate on the column.<br />
For example, Figure 2.79a shows a GC spectrum of a sample containing both 3-pentanol and 1-pentanol.<br />
Boiling points can be used to predict which peak represents which isomer, but another definitive method is<br />
to run a GC of one of the pure components. Figure 2.79b shows a GC spectrum of 1-pentanol, and its<br />
retention time closely matches one of the two peaks in the original mixture, thus enabling its identification.<br />
Figure 2.79: a) GC spectrum of a sample containing 3-pentanol and 1-pentanol, b) GC spectrum of pure 1-pentanol.<br />
Injection of known standards can be helpful in deciphering confusing mixtures, and for identifying closely<br />
eluting components, such as cis-trans isomers, where the difference in boiling points may be minimal. If<br />
using a mass spectrometer detector, a mass spectrum computer database is also helpful in identifying<br />
components.<br />
<strong>Organic</strong> <strong>Chemistry</strong> <strong>Laboratory</strong> <strong>Techniques</strong> | Nichols | Page 141
2.4.C SEPARATION THEORY<br />
2.4.C.1 GENERAL THEORY<br />
GC is an excellent analytical tool for separating mixtures in a sample. In this section are discussed the<br />
details of the separation, and expand upon the general discussion of Section 2.1.B.<br />
The GC column is what allows for the separation of a mixture’s components by the instrument. It is<br />
composed of a thin, hollow tube approximately 0.5 mm thick, and is lined with a very thin polymeric coating<br />
0.1-5 μm thick 14 (Figure 2.80a). Columns can be 15-100 meters long 14 (although commonly are 30 meters<br />
in length) and can be swapped in and out of an instrument depending on an experimenter’s goals. There<br />
are columns specifically designed for analyzing poisons, biodiesel samples, or chiral compounds. An<br />
example of a typical academic capillary column is shown in Figure 2.80b, which is lined with a “dimethyl<br />
polysiloxane” polymer.<br />
Figure 2.80: a) GC instrument opened to show the oven and column: the glass column is indicated with an arrow, and looks like<br />
a thin copper coil, b) Schematic of the dimethyl polysiloxane inner coating of a GC column.<br />
Like all forms of chromatography, compounds equilibrate between a stationary and mobile phase. In GC,<br />
the stationary phase is the polymeric inner coating of the column, and compounds can interact with this<br />
high boiling liquid through various types of intermolecular forces (IMF’s). The mobile phase is the carrier<br />
gas (usually helium), which is continually pushed through the column. Samples enter the column in the<br />
gas phase, subsequently adhere to the column coating, and establish an equilibrium between the stationary<br />
and mobile phases (equation 4).<br />
X (polymeric coating) X (gas) (4)<br />
Compounds move into the mobile phase if thermal energy from the oven provides sufficient energy to<br />
overcome the intermolecular forces between the compound and the column coating. When in the mobile<br />
phase, compounds are swept with the flow of the carrier gas, and re-adhere to the column coating further<br />
down the column. Compounds can be thought of as bouncing from one position to the next until they exit<br />
the column.<br />
As all compounds have the same length to travel before they exit the column, they all spend the same<br />
amount of time in the mobile phase. Thus, separation is due to the varying amount of time spent in the<br />
stationary phase, or how long compounds adhere to the column coating. Compounds that have weak<br />
14 D.C. Harris, Quantitative Chemical Analysis, 5 th edition, 1982, p 676.<br />
<strong>Organic</strong> <strong>Chemistry</strong> <strong>Laboratory</strong> <strong>Techniques</strong> | Nichols | Page 142
IMF’s with the column coating spend little time “hung up” in the stationary phase, as heat from the oven<br />
allows for their IMF’s to be broken. They quickly emerge from the column and thus have a short retention<br />
time. Conversely compounds that can form strong IMF’s with the column coating will favor the stationary<br />
phase, and take a long time to emerge from the column (they will have a long retention time).<br />
The type of IMF’s experienced with the column coating often parallel the type of IMF’s experienced in the<br />
pure liquid phase, meaning a compound that can hydrogen-bond in its liquid phase (Figure 2.81a) can also<br />
hydrogen bond with the column coating (Figure 2.81b). Therefore, the strength of interaction with the<br />
column coating correlates closely with a compound’s boiling point, and boiling points can be used to<br />
predict the order of elution in GC.<br />
Figure 2.81: a) Hydrogen bonding shown for 1-propanol in the liquid phase, b) Hydrogen bonding shown between 1-propanol and<br />
the polymeric coating of the GC column.<br />
In summary:<br />
•<br />
•<br />
Compounds that have weak IMF’s with the column coating (low boiling points), spend little time in the<br />
stationary phase, exit the column early, and have shorter retention times.<br />
Compounds that have strong IMF’s with the column coating (high boiling points), have longer retention<br />
times.<br />
<strong>Organic</strong> <strong>Chemistry</strong> <strong>Laboratory</strong> <strong>Techniques</strong> | Nichols | Page 143
2.4.C.2 STRUCTURAL CONSIDERATIONS<br />
To demonstrate the effect of structural considerations, Figure 2.82 shows the GC spectrum of a mixture<br />
containing heptane, octane, nonane, and decane. The order of elution closely follows the trend in increasing<br />
boiling point. Heptane has the lowest boiling point of the series, and exits the column first (has the shortest<br />
retention time). As the chain length increases, so does the boiling point, and the retention times increase as<br />
well (Table 2.9).<br />
Compound<br />
b.p.<br />
(˚C)<br />
Ret. Time<br />
(min)<br />
Heptane (C 7 H 16 ) 98 1.858<br />
Octane (C 8 H 18 ) 125 2.584<br />
Nonane (C 9 H 20 ) 150 3.526<br />
Decane (C 10 H 22 ) 174 4.446<br />
Figure 2.82: GC spectrum of a mixture containing heptane, octane, nonane, and decane (Method: held at 65 ˚C for 2 min, then<br />
ramped 25 ˚C /min).<br />
Table 2.9: Boiling point and retention time data for the GC spectrum in Figure 2.82.<br />
In another example, Figure 2.83 shows the GC spectrum of a mixture containing heptane, hexanal, and 1-<br />
hexanol. The order of elution again follows the trend in boiling point. 1-hexanol has the strongest IMF’s,<br />
as it can interact with the column coating through both London dispersion forces (LDF’s) and hydrogen<br />
bonds. This causes it to adhere to the stationary phase most strongly, resulting in the longest retention time.<br />
Heptane interacts with the column coating through weaker LDF’s, so spends the least amount of time in the<br />
stationary phase and elutes first (Table 2.10).<br />
Compound<br />
b.p.<br />
(˚C)<br />
Ret. Time<br />
(min)<br />
Heptane 98 2.474<br />
Hexanal 130 3.544<br />
1-hexanol 155 4.288<br />
Figure 2.83: GC spectrum of a mixture containing heptane, hexanal, and 1-hexanol.<br />
Table 2.10: Boiling point and retention time data for the GC spectrum in Figure 2.83.<br />
<strong>Organic</strong> <strong>Chemistry</strong> <strong>Laboratory</strong> <strong>Techniques</strong> | Nichols | Page 144
2.4.D QUANTITATING WITH GC<br />
2.4.D.1 QUANTITATIVE CHALLENGES<br />
Most modern GC instruments allow for integration of the peaks in a GC spectrum with the click of a button.<br />
If an older instrument is used, triangulation may be used to calculate the area under a peak, or the peaks<br />
may be cut out from a paper spectrum and weighed on an analytical balance to integrate. Peak integrations<br />
are useful because it is possible to correlate the area under a peak to the quantity of material present in a<br />
sample. Note it is the area of a peak that is relevant, not the height. A tall, narrow peak may have a smaller<br />
area than a short, wide one. It would be very useful if peak areas would directly reflect mixture composition,<br />
but that is unfortunately not always the case. The reason for this has to do with how compounds are detected<br />
upon exit from a column.<br />
Common detectors at undergraduate institutions are flame-ionization detectors (FID) and mass<br />
spectrometry detectors (MS). With an FID, a sample is ignited upon exit from the column, and the ions<br />
produced in the flame are “counted” by the amount of electric current. Unfortunately, different compounds<br />
produce different amounts of ions when burned, meaning the ion count will not be directly equivalent to<br />
the molar quantity. Similarly, a mass spectrometer counts the number of ions produced from all the<br />
fragments detected in the instrument (called the “Total Ion Count,” TIC, the y axis on Figure 2.84), which<br />
does not always directly represent the quantity of the original material. Some compounds fragment more<br />
than others in a mass spectrometer, causing them to be detected in a manner that does not represent their<br />
true abundance.<br />
Figure 2.84: a) GC spectrum of a sample containing equimolar quantities of 1-butanol and 2-butanol, b) GC spectrum of a sample<br />
containing equimolar quantities of 2-butanol and 1-heptanol. Method for both runs: 60 ˚C, ramp 20˚C/min, MS detector. Arrows<br />
indicate the percentages reported by the GC for each spectrum.<br />
<strong>Organic</strong> <strong>Chemistry</strong> <strong>Laboratory</strong> <strong>Techniques</strong> | Nichols | Page 145
To demonstrate how peak integration does not always correlate with actual abundance, GC spectra of two<br />
samples containing equimolar quantities of two compounds is shown in Figure 2.84. Figure 2.84a contains<br />
equal molar amounts of 1-butanol and 2-butanol, while Figure 2.84b contains equal molar amounts of 2-<br />
butanol and 1-heptanol.<br />
The area under the peaks was tabulated by the mass spectrometer (represented by the column indicated by<br />
an arrow in each Figure), and was nearly 50% for each component in the butanol system (Figure 2.84a). In<br />
this case, the percentages generated by the instrument were nearly identical to the true composition<br />
(although not likely to five significant figures!).<br />
However, the sample containing equimolar quantities of 2-butanol and 1-heptanol was reported as a ~20%-<br />
80% composition (Figure 2.84b). The true composition of the mixture is 50% of each component, but the<br />
compounds are “counted” disproportionately. In this situation, the integrations do not represent the true<br />
abundance as 1-heptanol forms more fragments in its mass spectrum than 2-butanol, so is “counted” more<br />
frequently.<br />
It is a general rule that the integrations in a GC spectrum (the percentages) can be used directly as a first<br />
approximation of the true composition when comparing isomers (e.g. 1-butanol and 2-butanol). When<br />
compounds are compared that are of different sizes (e.g. 2-butanol and 1-heptanol), the reported percentages<br />
may need to be translated into actual percentages using either a calibration curve or response factors.<br />
<strong>Organic</strong> <strong>Chemistry</strong> <strong>Laboratory</strong> <strong>Techniques</strong> | Nichols | Page 146
2.4.D.2 USING A CALIBRATION CURVE<br />
One method to translate the integration values given by the GC instrument into meaningful percentages that<br />
reflect the mixture’s composition is to use a calibration curve. To generate a calibration curve, standard<br />
samples of known molar or mass ratios are injected into the GC and the percentages reported by the<br />
instrument recorded. The graph in Figure 2.85 shows such a calibration curve for a 2-butanol / 1-heptanol<br />
mixture, as detected by a mass spectrometer.<br />
For example, if a mixture known to be 60 mol% 2-butanol and 40 mol% 1-heptanol was injected into the<br />
instrument, and the resulting GC spectrum reported the mixture to be 42% 2-butanol and 58% 1-heptanol,<br />
this data point would be recorded on the graph as (60,42), using only the percentage of 2-butanol to simplify<br />
the situation. More data points could be analyzed using several known molar ratios of 2-butanol and 1-<br />
heptanol.<br />
Figure 2.85: Known molar percentages of 2-butanol in a 2-butanol/1-heptanol mixture are correlated to the reported GC % of 2-<br />
butanol.<br />
The calibration curve can then be used to correlate values reported by the GC instrument into true<br />
abundances. Imagine that a sample containing only 2-butanol and 1-heptanol is injected into the GC and<br />
reported by the instrument to be 70% 2-butanol. Using the calibration curve in Figure 2.85, a measured<br />
value of 70% 2-butanol (y axis) correlates with an actual value of approximately 87 mol% 2-butanol (x<br />
axis). Therefore, a sample reported by the GC instrument to be 70/30% 2-butanol / 1-heptanol, is actually<br />
closer to 87/13% 2-butanol / 1-heptanol.<br />
Due to the approximate nature of this method, percentage values should never be reported with more<br />
precision than the one’s place, and probably the true error is on the order of ± 5%.<br />
<strong>Organic</strong> <strong>Chemistry</strong> <strong>Laboratory</strong> <strong>Techniques</strong> | Nichols | Page 147
2.4.D.3 USING RESPONSE FACTORS<br />
Another method that can be used to translate the integration values given by the GC instrument into<br />
meaningful percentages is to use a response factor. A sample containing equimolar quantities of the<br />
compounds to be analyzed is injected into the GC and the peak areas are numerically translated into<br />
compound sensitivities.<br />
This process will be demonstrated with a mixture containing only 2-butanol and 1-heptanol. Figure 2.86<br />
shows the GC spectrum of a sample that contains equimolar quantities of 2-butanol and 1-heptanol.<br />
Figure 2.86: GC spectrum generated from a sample that contained equimolar quantities of 2-butanol and 1-heptanol.<br />
The peaks should have equal integrations because the compounds are present in equal molar amounts, but<br />
the peak at 2.38 min (1-heptanol) is “counting” more than it should. In the quantitative report, the column<br />
with the header “corr.area” can be used, as this shows the calculated area of each peak. The ratio of these<br />
area counts (see calculation below) gives a value of 3.86, which means that 1-heptanol is detected 3.86<br />
times “better” than 2-butanol in these mixtures.<br />
Ratio of corrected areas =<br />
34558086 area counts for 1-heptanol<br />
= 3.86<br />
8955039 area counts for 2-butanol<br />
To use this response factor in correlating values reported by the GC instrument into true abundances,<br />
imagine that a sample containing only 2-butanol and 1-heptanol is reported by the GC to be 30% 1-heptanol<br />
(30 area counts of 1-heptanol for every 70 area counts of 2-butanol). As 1-heptanol is 3.86 times more<br />
responsive than 2-butanol, the true area counts would be more accurately represented as 30 / 3.86 = 7.77<br />
area counts of 1-heptanol for every 70 area counts by 2-butanol. 15<br />
30 area counts for 1-heptanol<br />
70 area counts for 2-butanol<br />
<br />
30 / 3.86 (1-heptanol)<br />
70 (2-butanol)<br />
7.77 (1-heptanol)<br />
=<br />
70 (2-butanol)<br />
These hypothetical (and yet more accurate) area counts can then be turned into percentages, as follows:<br />
7.77 1-heptanol (100%)<br />
% 1-heptanol =<br />
70 + 7.77 (total)<br />
= 10 % 1-heptanol, (meaning 90% 2-butanol)<br />
Therefore, a sample reported by the GC instrument to be 70/30% 2-butanol / 1-heptanol, is actually closer<br />
to 90/10% 2-butanol / 1-heptanol, which is a similar value to what could be found using a calibration curve.<br />
15 These calculations could be done more succinctly and with more precision using the actual area counts for each peak, found in<br />
the “corr.area” column of a quantitative GC report.<br />
<strong>Organic</strong> <strong>Chemistry</strong> <strong>Laboratory</strong> <strong>Techniques</strong> | Nichols | Page 148
2.4.E GC PARAMETERS<br />
There are many factors that affect the separation (and/or retention times) in gas chromatography, including<br />
the type of column, sample concentration, oven temperature, and flow rate of carrier gas. The factors<br />
controllable by a student are described in this section, and are related to concentration and temperature.<br />
2.4.E.1 DILUTION<br />
GC runs must be conducted on very dilute samples. A dilute sample enables adequate stationary-mobile<br />
phase equilibration inside the column, resulting in narrow Gaussian-shaped peaks. If samples are too<br />
concentrated, the peak shapes will often be broad and flattened on top (Figure 2.87a), indicating the column<br />
(and/or detector) has been overwhelmed. Appropriate abundances (the y axis on GC spectra) using a massspectrometer<br />
detector should be in the low millions (e.g. 1,500,000 TIC’s or so, see Figure 2.87b).<br />
Figure 2.87: a) An overloaded sample with bad peak shape (note the y axis has abundances around 4.5 million), b) The same<br />
sample diluted appropriately (abundances around 2 million). A too dilute sample will have abundances less than 100,000 (MS<br />
detector).<br />
A GC should never be run on undiluted liquid. Overly concentrated samples do not only cause peaks to<br />
broaden and possibly overlap, they can also be harmful to detectors. Mass spectrometers require very small<br />
quantities of liquid, or over time, their filaments degrade.<br />
To prepare a routine GC sample, 1.5 mL of a low-boiling solvent (e.g. methanol, clean<br />
acetone, diethyl ether, or dichloromethane) is added to a GC vial (Figure 2.88) along with<br />
one drop of compound. The instrument then injects roughly 1μL of this dilute solution into<br />
the instrument, which is further diverted internally, resulting in very small quantities entering<br />
the narrow capillary column and detector. The normal function of a GC instrument requires<br />
tiny quantities of material, which is a major advantage to this technique.<br />
Figure 2.88: GC vial.<br />
<strong>Organic</strong> <strong>Chemistry</strong> <strong>Laboratory</strong> <strong>Techniques</strong> | Nichols | Page 149
2.4.E.2 SOLVENT DELAY (WITH MASS SPECTROMETERS)<br />
A properly prepared GC sample contains a small amount of compound dissolved in a solvent, and yet GC<br />
spectra (when paired with a mass spectrometer detector) often do not show any solvent peaks. The reason<br />
is that GC methods often include a “solvent delay,” where the detector is turned off until a certain amount<br />
of time has passed after injection. Even with the dilution inside the GC-MS instrument, the quantity of<br />
solvent reaching the detector would overwhelm and eventually degrade it. Therefore, the detector is left<br />
inactive until the solvent has passed through the column, and activated afterwards.<br />
If you look at any GC-MS spectrum, the retention time (x-axis) never starts at zero minutes, which<br />
represents the time the sample is injected on the column. In the GC spectrum of hexanes, the spectrum<br />
starts at 1.40 minutes (as is indicated with an arrow in Figure 2.89). The solvent would have eluted from<br />
the column before this time.<br />
Figure 2.89: GC spectrum of hexanes, with arrow indicating the time the solvent delay is turned off.<br />
The GC solvent must be chosen such that the solvent will elute before the compound of interest (the solvent<br />
must have a significantly lower boiling point than the compound), so that the solvent delay may be set<br />
between elution of the solvent and sample. For example, methanol (b.p. 65 ˚C) would have been an<br />
unsuitable solvent for the sample of hexanes (b.p. 68 ˚C). If the solvent delay was set such that the hexane<br />
signals could be detected, the GC spectrum would have been overwhelmed by signals from the methanol,<br />
as the two compounds have very similar boiling points and would elute rather closely. If the detector was<br />
activated after the methanol had eluted, the instrument would likely miss detection of the closely eluting<br />
hexanes. Therefore, a significantly lower boiling solvent was used (diethyl ether, b.p. 35 ˚C) to produce<br />
the GC spectrum of hexanes in Figure 2.89, and this solvent would have eluted before the solvent delay of<br />
1.40 minutes.<br />
<strong>Organic</strong> <strong>Chemistry</strong> <strong>Laboratory</strong> <strong>Techniques</strong> | Nichols | Page 150
2.4.E.3 OVEN TEMPERATURE<br />
The temperature of the GC oven is an easily adjusted variable (although it should be adjusted by an<br />
instructor, not student). The oven temperature has a dramatic effect on retention times, much in a similar<br />
way that changing the mobile phase in TLC has on R f .<br />
To demonstrate, a sample containing heptane, octane, nonane, and decane was run using three GC methods,<br />
differing only in their starting temperature (65 ˚C, 45 ˚C, or 35 ˚C). The order of elution of the compounds<br />
was the same in all methods (Figure 2.90), but the components eluted faster with a hotter oven temperature<br />
(had lower retention times). This result can be explained in that the compounds were more able to overcome<br />
their intermolecular attraction with the stationary phase (the coating of the GC column) when there was<br />
more available thermal energy. This resulted in compounds spending less time adhering to the stationary<br />
phase, and less time retained by the column.<br />
Figure 2.90: GC runs of a mixture containing heptane, octane, nonane, and decane at different oven temperatures. Each run was<br />
held at X ˚C (X = 65, 45, or 35) for 2 min, then ramped 25 ˚C /min.<br />
<strong>Organic</strong> <strong>Chemistry</strong> <strong>Laboratory</strong> <strong>Techniques</strong> | Nichols | Page 151
2.4.E.4 USING A TEMPERATURE RAMP<br />
A GC can be run at one oven temperature the entire time (an “isothermal” run), or the method may include<br />
temperature programming. In a programmed method, the temperature may remain fixed for a certain length<br />
of time, and then may include a “ramp,” where the temperature is increased at a steady rate during the run.<br />
A graphical display of a ramp generated by the GC instrument is shown in Figure 2.91.<br />
Figure 2.91: Graphical display of the GC method, which includes a “ramp.”<br />
Temperature programming is useful because the longer a compound stays in the column, the wider it elutes<br />
as diffusion broadens the sample (analogously to how spots broaden during elution in TLC). Figure 2.92a<br />
shows an isothermal GC run of four compounds, and the peak shape significantly broadens as the retention<br />
time increases. Figure 2.92b shows a GC run of the same four compounds eluted using a temperature ramp.<br />
The ramp allows the compounds to elute faster, and for peak shape to sharpen and improve. The optimal<br />
ramp for each situation often takes experimentation to achieve the best peak shape and separation of<br />
components.<br />
Figure 2.92: A sample composed of heptane, octane, nonane, and decane, run with two different GC methods. a) The run was kept<br />
under isothermal conditions, at a steady 65 ˚C, b) The method utilized a “ramp” after 2 minutes.<br />
<strong>Organic</strong> <strong>Chemistry</strong> <strong>Laboratory</strong> <strong>Techniques</strong> | Nichols | Page 152
2.4.F SAMPLE PREPARATION<br />
Liquid GC samples:<br />
Figure 2.93: a) GC vial, b) GC-MS instrument, c) Small amount of solid in a GC vial.<br />
1. Fill a GC vial to the 1.5 mL mark (Figure 2.93a) with a low boiling solvent (e.g. methanol, clean acetone,<br />
diethyl ether, or dichloromethane). Add one drop of the sample to be analyzed. If you think you<br />
possibly only added a half-drop, it’s probably enough. Two drops are really too much.<br />
2. Cap the vial and invert once or twice to dissolve the sample. If it appears like the sample drop did not<br />
dissolve fully, prepare another sample using a different solvent.<br />
3. Alternatively, if you have already prepared a high-field NMR sample, use one-third of this sample and<br />
dilute it further with a low-boiling solvent.<br />
4. Run the GC, as demonstrated by your instructor. Procedures vary at each institution.<br />
Solid GC samples:<br />
5. Some relatively volatile solids (never ionic solids!) can be analyzed by GC. Add one or two “specks”<br />
of solid 16 (a pile approximately 2 mm in diameter), or a very small spatula-tip of solid to a GC vial<br />
(Figure 2.93c). Then add a low boiling solvent (e.g. methanol, clean acetone, diethyl ether, or<br />
dichloromethane) to the 1.5 mL mark.<br />
6. Cap the vial and invert several times to fully dissolve the solid. If the solid dissolves, run the GC.<br />
7. If the solid does not dissolve, do NOT run the GC anyway! Solids can plug the very small microliter<br />
syringes used by the instrument.<br />
a. If the quantity of solid does not appear to have changed at all after adding the solvent, try making<br />
another sample with a different low boiling solvent.<br />
b. If it appears the solid has decreased in quantity but is not fully dissolved, it is likely enough of it<br />
has dissolved to analyze. Use a pipette filter to filter the solution, and run the GC on the filtered<br />
liquid.<br />
16 The quantity of solid may need to be adjusted if the solid is “fluffy.” A GC is at the ideal dilution when it produces abundances<br />
around one million using a mass spectrometer detector.<br />
<strong>Organic</strong> <strong>Chemistry</strong> <strong>Laboratory</strong> <strong>Techniques</strong> | Nichols | Page 153
<strong>Organic</strong> <strong>Chemistry</strong> <strong>Laboratory</strong> <strong>Techniques</strong> | Nichols | Page 154
CHAPTER 3<br />
CRYSTALLIZATION<br />
Time-lapse<br />
formation of<br />
needle-like<br />
crystals of<br />
benzil from<br />
ethanol solution<br />
as it cools.<br />
<strong>Organic</strong> <strong>Chemistry</strong> <strong>Laboratory</strong> <strong>Techniques</strong> | Nichols | Page 155
CHAPTER 3: CRYSTALLIZATION, TABLE OF CONTENTS<br />
3.1 Overview of Crystallization 157 3.5 Procedural Generalities 179<br />
3.2 Uses of Crystallization 158 3.5.A General Procedure 179<br />
3.3 Choice of Solvent 160 3.5.B Heat Source and Bump Prevention 180<br />
3.3.A Ideal Temperature Profile 160 3.5.C Charcoal 181<br />
3.3.B General Procedures for Removing 161 3.5.D Cooling Slowly 183<br />
Impurities<br />
3.3.C Determining Which Solvent to Use 162 3.5.E Initiating Crystallization 184<br />
3.3.D Using Solubility Data 163<br />
3.3.E Experimentally Testing Solvents 164 3.6 Step-by-Step Procedures 186<br />
3.3.F Mixed Solvents 165 3.6.A Single Solvent Crystallization 186<br />
3.6.B Crystallization Summary 190<br />
3.4 Crystallization Theory 167 3.6.C Using Solvents Other Than Water 191<br />
3.4.A Purification 167 Ethanol, Methanol, Ethyl Acetate, 191<br />
and Hexanes<br />
3.4.B Cooling Slowly 167 Diethyl Ether, Acetone, and 192<br />
Petroleum Ether (Low-Boiling)<br />
3.4.C Using the Minimum Amount of Hot 169 3.6.D Mixed Solvent Crystallization 193<br />
Solvent<br />
3.4.D The Unavoidable Loss of Recovery 171 3.6.E Mixed Solvent Summary 195<br />
3.4.E Quantitating Crystallization 173 3.6.F Troubleshooting 196<br />
With a Soluble Impurity 173 Crystallization is too Quick 196<br />
With an Impurity of Similar Solubility 175 Crystallization Doesn’t Happen 197<br />
3.4.F Second Crop Crystallization 176 The Yield is Poor 198<br />
Liquid Droplets Form (The Solid<br />
Oils Out)<br />
199<br />
<strong>Organic</strong> <strong>Chemistry</strong> <strong>Laboratory</strong> <strong>Techniques</strong> | Nichols | Page 156
3.1 OVERVIEW OF CRYSTALLIZATION<br />
In many people’s opinion, crystals are beautiful specimens of nature (Figure 3.1). Many crystals have long<br />
lines and edges, form geometric patterns, and have sheer surfaces that reflect light and cause them to sparkle.<br />
The macroscopic appearance of a crystal is a direct result of its microscopic structure, where a regular,<br />
repeating unit forms a three-dimensional crystal lattice. The uniformity and structural repetition<br />
differentiate a crystal from an amorphous solid. For this reason, there is a difference between precipitation<br />
(the rapid formation of a solid), and crystallization (the slow growth of a solid with regular microscopic<br />
structure). Precipitated solids tend to have lower purity than crystals, which is why crystallization is of<br />
interest to organic chemists (and geologists!).<br />
Figure 3.1: Various crystals.<br />
Crystallization is used in the chemistry laboratory as a purification technique for solids. An impure solid is<br />
completely dissolved in a minimal amount of hot, boiling solvent, and the hot solution is allowed to slowly<br />
cool. The developing crystals ideally form with high purity, while impurities remain in the saturated<br />
solution surrounding the solid (called the “mother liquor”). The crystallized solid is then filtered away<br />
from the impurities. A diagram of the crystallization procedure is shown in Figure 3.2.<br />
1) Add some<br />
boiling solvent<br />
2) Add minimum<br />
hot solvent to fully<br />
dissolve<br />
3) Slowly<br />
cool<br />
solvent<br />
impure solid<br />
"mother<br />
liquor"<br />
Figure 3.2: Procedural sequence for crystallization.<br />
As an impure solid may have originally formed through partial crystallization, some call this procedure a<br />
“recrystallization,” as the solid is allowed to crystallize a second time under more careful conditions. In<br />
this chapter the technique will be referred to as crystallization, which does not imply any previous process.<br />
<strong>Organic</strong> <strong>Chemistry</strong> <strong>Laboratory</strong> <strong>Techniques</strong> | Nichols | Page 157
3.2 USES OF CRYSTALLIZATION<br />
The main use of crystallization in the organic chemistry laboratory is for purification of impure solids:<br />
either reagents that have degraded over time, or impure solid products from a chemical reaction.<br />
3.2.A REAGENT PURIFICATION<br />
N-bromosuccinimide (NBS) is a reagent used for benzylic and allylic radical bromination, among other<br />
things. It is commonly found in its reagent jar as a yellow or orange solid (Figure 3.3a), as over time the<br />
solid degrades and generates Br 2 , the source of the color. Before use, NBS should be crystallized from hot<br />
water, and the resulting crystals are pure white (Figure 3.3c). If NBS were used without previous<br />
crystallization, yields would undoubtedly suffer as the quantity of active reagent would be unknown, and<br />
side products might form due to the presence of excess bromine.<br />
Figure 3.3: a) An old sample of N-bromosuccinimide (NBS), b) Crystallization of NBS using hot water, c) Crystallized NBS.<br />
3.2.B PURIFICATION OF PRODUCT MIXTURES<br />
If the crude product of a chemical reaction is a solid, it may be crystallized in order to remove impurities.<br />
For example, benzoic acid can be brominated to produce m-bromobenzoic acid (Figure 3.4). The crude<br />
solid product could very likely contain unreacted benzoic acid, and this impurity could be removed through<br />
crystallization.<br />
O<br />
O<br />
OH<br />
Br 2<br />
OH<br />
FeBr 3<br />
<strong>Organic</strong> <strong>Chemistry</strong> <strong>Laboratory</strong> <strong>Techniques</strong> | Nichols | Page 158<br />
Figure 3.4: Bromination of benzoic acid to produce m-bromobenzoic acid.<br />
Br
To demonstrate, a mixture containing roughly 85 mol% p-bromobenzoic acid 1 (a solid) contaminated with<br />
15 mol% benzoic acid (another solid) had a yellow tint (Figure 3.5a), and after crystallization the resulting<br />
solid was pure white (Figure 3.5c). The crystallization appeared to purify the mixture based on the slight<br />
improvement in color.<br />
Figure 3.5: a) A mixed solid containing 85 mol% p-bromobenzoic acid and 15 mol% benzoic acid, b) Crystallization of the mixture<br />
using ethanol, c) Crystallized solid.<br />
More reliable than appearance, the crystallization was proven to have indeed purified the mixture through<br />
melting point and 1 H NMR analysis of the crude and crystallized solids. The melting point of the crude<br />
solid was 221-250 ˚C while the melting point of the purified solid was 248-259 ˚C (literature melting point<br />
of p-bromobenzoic acid from Aldrich is 252-254 ˚C). The melting point of the crystallized solid sharpened<br />
significantly, indicating greater purity. Additionally, in the crude solid’s 1 H NMR spectrum (Figure 3.6a),<br />
there are signals from both p-bromobenzoic acid and benzoic acid, and the integrations correlate reasonably<br />
well with the original composition of the mixture. In the crystallized solid’s 1 H NMR spectrum (Figure<br />
3.6b), the benzoic acid signals are entirely gone, demonstrating that the crystallization successfully purified<br />
the p-bromobenzoic acid. An analogous purification could be done if a bromination reaction produced a<br />
mixture of m-bromobenzoic acid and benzoic acid.<br />
Figure 3.6: a) 300 MHz 1 H NMR spectrum of the crude mixture of benzoic acid and p-bromobenzoic acid (taken in DMSO-d 6 ;<br />
carboxylic acid hydrogen is at 13.0 ppm and is not shown), b) 1 H NMR spectrum of solid after crystallization from ethanol, showing<br />
the sample is mostly p-bromobenzoic acid.<br />
1 p-Bromobenzoic acid was used instead of m-bromobenzoic acid for analysis purposes.<br />
<strong>Organic</strong> <strong>Chemistry</strong> <strong>Laboratory</strong> <strong>Techniques</strong> | Nichols | Page 159
3.3 CHOICE OF SOLVENT<br />
3.3.A IDEAL TEMPERATURE PROFILE<br />
The crystallization procedure is possible as most solids tend to become more soluble in solvents as their<br />
temperature is increased (Figure 3.7 shows a yellow solid dissolving in ethanol as the temperature<br />
increases on a hotplate).<br />
Figure 3.7: Time-lapse dissolving of benzil (yellow solid) in ethanol as the temperature increases on a hotplate. The boiling stick<br />
is used for bump prevention.<br />
Caffeine is a white solid that follows this usual pattern, as 1 gram of caffeine dissolves in 46 mL of room<br />
temperature water, 5.5 mL of 80 ˚C water, and 1.5 mL of boiling water. 2 If you have ever had a difficult<br />
time cleaning solidified starch residue from a kitchen colander (perhaps after you have strained pasta water),<br />
you may have learned that the colander is more easily cleaned in hot water than cold. Starch has an<br />
increased solubility in hot water, and this trend in solubility is partly what makes a dishwasher so effective.<br />
The solubility profile of compounds is an empirical determination. Some solids increase solubility regularly<br />
with temperature (Figure 3.8a), and others increase in an exponential fashion (Figure 3.8b). In unusual<br />
cases, a solid’s solubility can decrease with temperature. For the best crystallization, the compound should<br />
be very soluble in the hot solvent and minimally soluble (or insoluble) in the cold solvent.<br />
Figure 3.8: Solubility versus temperature data for glutaric acid in water (left) and diphenyl amine in hexane (right). 3 In both sets,<br />
solubility increases with temperature. Note that glutaric acid could not be crystallized from water, as it is highly soluble even at<br />
cold temperatures.<br />
2 From: The Merck Index, 12 th edition, Merck Research Laboratories, 1996.<br />
3 Data from: A. Seidell, Solubilities of Inorganic and <strong>Organic</strong> Substances, D. Van Nostrand Company, 1907.<br />
<strong>Organic</strong> <strong>Chemistry</strong> <strong>Laboratory</strong> <strong>Techniques</strong> | Nichols | Page 160
3.3.B GENERAL PROCEDURES FOR REMOVING IMPURITIES<br />
Crystallization works well as a purification technique if impurities are present in very small quantities (less<br />
than 5 mol% of the solid), or if the impurities have a very different solubility profile from the desired<br />
compound. Impurities can be easily removed if they are either much more soluble or much less soluble in<br />
the solvent than the compound of interest.<br />
Figure 3.9 shows the procedural sequence used to remove a “soluble impurity” from an impure solid,<br />
meaning an impurity that is embedded in the crystalline matrix, but would be completely soluble in the<br />
crystallization solvent. The impure solid is first fully dissolved in the minimum amount of hot solvent to<br />
liberate impurities trapped in the solid’s interior. Upon cooling, a completely soluble impurity will remain<br />
dissolved in the mother liquor while the desired compound crystallizes. The crystallized solid can then be<br />
collected by suction filtration.<br />
= Desired<br />
Compound<br />
= Soluble<br />
Impurity<br />
Desired<br />
Compound<br />
add hot<br />
solvent<br />
Soluble<br />
Impurity<br />
Impure<br />
Solid<br />
Heated<br />
(Dissolved)<br />
Cooled<br />
(Crystallized)<br />
Suction<br />
Filtration<br />
Figure 3.9: Crystallization sequence in order to remove a soluble impurity, using black circles and white squares to represent<br />
individual particles. As in reality individual particles are too small to see, the liquids in each of these scenarios would appear<br />
completely transparent.<br />
Figure 3.10 shows the procedural sequence used to remove an “insoluble impurity” from an impure solid,<br />
meaning an impurity that is embedded in the crystalline matrix, but would be insoluble in the crystallization<br />
solvent. The impure solid is heated in the minimum amount of hot solvent needed to dissolve the desired<br />
compound. The insoluble material is then filtered while the solution is kept hot (called “hot filtration”),<br />
and then the desired compound is crystallized and collected by suction filtration.<br />
= Desired<br />
Compound<br />
= Insoluble<br />
Impurity<br />
Insoluble<br />
Impurity<br />
Desired<br />
Compound<br />
add hot<br />
solvent<br />
Impure<br />
Solid<br />
Heated<br />
(Dissolved)<br />
Hot<br />
Filtration<br />
Cooled<br />
(Crystallized)<br />
Suction<br />
Filtration<br />
Figure 3.10: Crystallization sequence to remove an insoluble impurity. In the second flask, the white circles aggregate as an<br />
insoluble material, while the black circles are dispersed and therefore dissolved and invisible.<br />
<strong>Organic</strong> <strong>Chemistry</strong> <strong>Laboratory</strong> <strong>Techniques</strong> | Nichols | Page 161
3.3.C DETERMINING WHICH SOLVENT TO USE<br />
The most important factor in the success of crystallization is probably the chosen solvent. Besides having<br />
the crucial solubility properties for crystallization (the compound should be soluble in the hot solvent and<br />
as insoluble as possible in the cold solvent), there are other factors that determine an appropriate solvent.<br />
An ideal crystallization solvent should be unreactive, inexpensive, and have low toxicity. It is also<br />
important that the solvent have a relatively low boiling point (b.p. often < 100 ˚C) as it’s best if the solvent<br />
readily evaporates from the solid once recovered. Table 3.1 shows a list of common solvents used with<br />
crystallization. Toluene has the highest boiling point (111 ˚C) of the list, and should be avoided if<br />
alternatives exist for this reason (as well as its toxicity and smell). Along with fast evaporation, a relatively<br />
low boiling solvent is also ideal for crystallization as it minimizes the probability of a compound “oiling<br />
out,” where material comes out of solution above its melting point and forms a liquid instead of a solid.<br />
When a compound liquefies first, it rarely crystallizes well.<br />
Solvent b.p. (˚C) Solvent b.p. (˚C) Solvent b.p. (˚C)<br />
Diethyl ether 35 Methanol 65 Ethanol 78<br />
Acetone 56 Hexanes 69 Water 100<br />
Petroleum Ether<br />
(low boiling)<br />
Ligroin (high boiling<br />
petroleum ether)<br />
30-60 Ethyl Acetate 77 Toluene 111<br />
60-90<br />
Table 3.1: Boiling point of common solvents in crystallization. Note: petroleum ether is a mixture of hydrocarbons, and is very<br />
nonpolar. The term “ether” comes from its volatility, not the functional groups present.<br />
Solvents with very low boiling points (e.g. diethyl ether, acetone, and low-boiling petroleum ether) are<br />
highly flammable and can be difficult to work with as they readily evaporate. They can still be used with<br />
care, but if alternatives exist, they are often preferable.<br />
There are some general trends in predicting the appropriate solvent for a particular compound. As the<br />
compound needs to be soluble in the boiling solvent, it helps if the compound and solvent have similar<br />
intermolecular forces. For example, if a compound can hydrogen bond (alcohols, carboxylic acids, and<br />
amines), it sometimes can be crystallized from water. If a compound has moderate polarity it sometimes is<br />
crystallized from ethanol. If a compound is mostly nonpolar, it sometimes is crystallized from petroleum<br />
ether or hexanes, or may require a mixed solvent.<br />
As it can be difficult to predict the ideal solvent for crystallization, often a published procedure from a<br />
journal article will indicate the appropriate solvent. If no solvent is listed, an appropriate solvent can be<br />
predicted using solubility data (next section), determined experimentally, or chosen from Perrin’s<br />
Purification of <strong>Organic</strong> Chemicals, 4 a reference book which lists purification procedures for roughly 5700<br />
known compounds.<br />
4 D.D. Perrin, W.L.F. Armarego, Purification of <strong>Organic</strong> Chemicals, Pergamon Press, 3 rd edition, 1988.<br />
<strong>Organic</strong> <strong>Chemistry</strong> <strong>Laboratory</strong> <strong>Techniques</strong> | Nichols | Page 162
3.3.D USING SOLUBILITY DATA<br />
If you are not following a procedure where a crystallization solvent has been specified, it may be helpful to<br />
consult solubility data for the desired compound. Qualitative (and sometimes quantitative) solubility data<br />
can be found for many compounds in the CRC 5 and Merck Index. 6<br />
If the goal is to use just one solvent for crystallization, it’s best to look for a solvent in which the desired<br />
compound is slightly soluble. Although the percent recovery will be less than 100% (a portion will remain<br />
in the mother liquor), there is a good chance that a slightly soluble solid will dissolve when heated. It is<br />
possible that solvents listed as insoluble will not dissolve the compound at any temperature.<br />
For example, below are entries in the CRC and Merck Index for the compound 1,4-dinitrobenzene:<br />
•<br />
CRC Handbook: “i H 2 O; sl EtOH, chl; s ace, bz, tol”<br />
Translation: The compound is insoluble in water; slightly soluble in ethanol and chloroform; and<br />
soluble in acetone, benzene and toluene.<br />
•<br />
Merck Index: “White crystals… one gram dissolves in 12,500 mL cold water, 555 mL boiling water,<br />
300 mL alcohol; sparingly soluble in benzene, chloroform, ethyl acetate.”<br />
Translation: The compound is very insoluble in cold water, but much more soluble in hot water. It is<br />
slightly soluble in ethanol, and basically insoluble in benzene, chloroform and ethyl acetate.<br />
1,4-dinitrobenzene is slightly soluble in ethanol, making it a good “first guess” as a crystallization solvent.<br />
Indeed Perrin’s Purification of <strong>Organic</strong> Chemicals 7 recommends crystallization of 1,4-dinitrobenzene<br />
using ethanol or ethyl acetate.<br />
5 Handbook of <strong>Chemistry</strong> and Physics, CRC Press, 84 th edition, 2003-2004.<br />
6 The Merck Index, Merck Research Laboratories, 12 th edition, 1996.<br />
7 D.D. Perrin, W.L.F. Armarego, Purification of <strong>Organic</strong> Chemicals, Pergamon Press, 3 rd edition, 1988.<br />
<strong>Organic</strong> <strong>Chemistry</strong> <strong>Laboratory</strong> <strong>Techniques</strong> | Nichols | Page 163
3.3.E EXPERIMENTALLY TESTING SOLVENTS<br />
To experimentally determine a single solvent for crystallization, use the following procedure. A flow chart<br />
describing this process is shown in Figure 3.11.<br />
•<br />
•<br />
•<br />
•<br />
•<br />
Place 100 mg of the solid to be crystallized in a test tube and add 3 mL of solvent. (These quantities<br />
correspond with the usual guideline of solubility, where a compound is deemed “soluble” if 3 g of<br />
compound dissolves in 100 mL solvent.) Note: quantities may be scaled back depending on compound<br />
availability.<br />
While holding the test tube by the top, flick the tube to vigorously mix the contents.<br />
If the solid completely dissolves at room temperature, the solvent will not work for crystallization since<br />
it needs to be insoluble when cold. If the solid appears to remain insoluble, the solvent may work.<br />
Bring the solid suspended in the solvent to a boil using a steam bath or hot water bath. If the solid<br />
dissolves when the solvent is boiling, it may work for crystallization since it needs to be soluble when<br />
hot. If it never dissolves in the hot solvent, the solvent won’t work.<br />
If the solid dissolves in the hot solvent, allow it to cool to room temperature, and then submerge it in<br />
an ice bath for 10-20 minutes. If most of the crystals return, the solvent should work for crystallization.<br />
If few or no crystals return, try to scratch the flask with a glass stirring rod to initiate crystallization. If<br />
crystals still don’t return, the solvent won’t work for crystallization.<br />
Room<br />
Temperature<br />
Stays solid:<br />
YES<br />
Boiling<br />
Temperature<br />
Dissolves:<br />
YES<br />
Room Temp,<br />
then in Ice<br />
Solid Forms:<br />
YES<br />
the solvent<br />
should work<br />
Dissolves:<br />
NO<br />
Stays solid:<br />
NO<br />
Stays dissolved:<br />
NO<br />
the solvent won't work<br />
Figure 3.11: Flow chart for testing a crystallization solvent by mixing solid and solvent, as described on this page.<br />
This testing procedure is shown for N-bromosuccinimide in Figure 3.12, using water as the solvent.<br />
Figure 3.12: Testing the crystallization of N-bromosuccinimide (NBS) using water: a) NBS is insoluble in cold water, b+c)<br />
Dissolving NBS in hot water, d+e) Cooling and crystallization (ice bath was not needed, as crystals returned).<br />
<strong>Organic</strong> <strong>Chemistry</strong> <strong>Laboratory</strong> <strong>Techniques</strong> | Nichols | Page 164
3.3.F MIXED SOLVENTS<br />
When no single solvent can be found that meets all of the criteria for crystallization, it may be possible to<br />
use a mixed solvent. A pair of solvents is chosen: one in which the compound is soluble (called the “soluble<br />
solvent”), and one in which the compound is insoluble (called the “insoluble solvent”). The two solvents<br />
must be miscible in one another so that their solubility with one another does not limit the proportions used.<br />
Table 3.2 shows a list of common mixed solvents used in crystallization.<br />
Solvent Pair<br />
Methanol / Water<br />
Ethanol / Water<br />
Acetone / Water<br />
Solvent Pair<br />
Methanol / Diethyl ether<br />
Petroleum Ether (or hexanes) / Diethyl ether<br />
Hexanes / Ethyl acetate<br />
Table 3.2: Common mixed solvent pairs in crystallization.<br />
To perform a crystallization using a mixed solvent, the solid to be crystallized is first dissolved in the<br />
minimum amount of hot “soluble solvent,” then hot “insoluble solvent” is added dropwise until the solution<br />
becomes slightly cloudy. An additional small portion of hot soluble solvent is then added to clarify the<br />
solution, and the solution is set aside to slowly cool and crystallize. A diagram describing this process is<br />
shown in Figure 3.13.<br />
"Insoluble<br />
solvent"<br />
"Soluble<br />
solvent"<br />
Add minimum<br />
amount of hot<br />
"soluble solvent"<br />
Add "insoluble<br />
solvent" dropwise<br />
until cloudy<br />
Add "soluble<br />
solvent" to<br />
clarify<br />
Cool<br />
dissolved<br />
cloudy<br />
dissolved<br />
Figure 3.13: Schematic for using a mixed solvent in crystallization.<br />
Although this procedure can produce good results, when possible it is often best to use a single solvent for<br />
crystallization. As a mixed solvent is heated, the composition can change as the solvents evaporate at<br />
different rates, which can affect the solubility of the compound in the mixed solvent. Also, crystallizations<br />
from mixed solvents sometimes “oil out,” where the dissolved compound comes out of solution above its<br />
melting point and forms a liquid instead of a solid.<br />
<strong>Organic</strong> <strong>Chemistry</strong> <strong>Laboratory</strong> <strong>Techniques</strong> | Nichols | Page 165
To test a mixed solvent for crystallization, use the procedure that follows. This process is demonstrated by<br />
crystallizing trans-cinnamic acid from a mixed solvent of water and methanol (Figures 3.14 + 3.15)<br />
Figure 3.14: a) 100 mg of trans-cinnamic acid in each test tube, b) Left tube contains trans-cinnamic acid with water (insoluble)<br />
and right tube contains trans-cinnamic acid with methanol (soluble).<br />
1. Use the previously described method (100 mg compound in 3 mL solvent), to find a pair of solvents:<br />
one solvent in which the compound is soluble and one solvent in which the compound is insoluble<br />
(Figure 3.14). The solvents must be miscible with one another.<br />
2. Place a fresh 100 mg of the solid to be crystallized in a test tube and add the “soluble solvent” dropwise<br />
while heating (with a steam bath or hot water bath, Figure 3.15a) until the solid just dissolves. The<br />
suspension should be immersed in the heat source after each drop, and some time should be allowed in<br />
between additions for the sometimes slow dissolving process.<br />
3. Add the “insoluble solvent” dropwise while heating until the solution becomes faintly cloudy (Figure<br />
3.15c).<br />
4. Add the “soluble solvent” dropwise while heating until the solution is clarified (clear).<br />
5. Allow the system to cool to room temperature (Figure 3.15e), and then submerge in an ice bath for 10-<br />
20 minutes. If crystals return, the mixed solvent may work for the crystallization.<br />
Figure 3.15: a) Addition of methanol (soluble solvent) to trans-cinnamic acid, b) Addition of water (insoluble solvent) to the<br />
solution, c) Sustained cloudiness / fine crystals after enough water was added, d) Tube set aside to cool after a few drops of methanol<br />
were added to clarify the solution, e) The return of crystals after cooling.<br />
<strong>Organic</strong> <strong>Chemistry</strong> <strong>Laboratory</strong> <strong>Techniques</strong> | Nichols | Page 166
3.4 CRYSTALLIZATION THEORY<br />
3.4.A PURIFICATION<br />
Crystallization is an excellent purification technique for solids because a crystal slowly forming from a<br />
saturated solution tends to selectively incorporate particles of the same type into its crystal structure (a<br />
model of a crystal lattice is in Figure 3.16a). A pure crystal is often slightly lower in energy than an impure<br />
crystal (or has a higher lattice energy), as packing identical particles into a lattice allows for maximized<br />
intermolecular forces.<br />
Figure 3.16: a) An example of a crystal lattice (this model is of NaCl), b) granite, a heterogeneous rock.<br />
If an impurity is smaller than the majority of particles in a crystal lattice, there may be a “dead space”<br />
around the impurity, resulting in a region with unrealized intermolecular forces. If the impurity is larger<br />
than the other particles, it may instead disrupt intermolecular forces by forcing other particles in the lattice<br />
out of alignment.<br />
A developing solid will tend to incorporate particles of the same type in order to create the lowest energy<br />
solid, and exclude impurities that disrupt the idealized packing of the solid. This process works best if the<br />
impurity is present as a minor component of the crude solid. When higher quantities of impurities are<br />
present, the resulting crystal tends to be heterogeneous, with pure regions of compound and pure regions<br />
of “impurity” intermixed with impure regions. This sort of heterogeneity is often seen in the crystallization<br />
of minerals (Figure 3.16b).<br />
3.4.B COOLING SLOWLY<br />
The difference in crystal lattice energy between pure and impure solids is marginal, so a solution must be<br />
cooled SLOWLY to allow for differentiation. If a hot solution is plunged immediately into an ice bath, the<br />
system will favor the formation of a solid (any solid!) so strongly that there may be little preference for<br />
purity. Impurities can become engulfed in the developing solid and trapped as solutes are deposited<br />
unselectively onto the growing solid. It is only when enough time is allowed for equilibration between the<br />
developing solid and the solution that the lowest energy pure solid is favored.<br />
As a metaphor for the slow crystallization process, imagine that you have won a prize and are allowed to<br />
go into a tube, where money in the form of $1 and $100 bills will be blown around for you to grab. The<br />
prize rules state that you’re only allowed to keep a total of twenty bills. Imagine you are given just 30<br />
seconds in the money tube to grab twenty bills: you would likely grab whatever bills you can get your hands<br />
on, and hope that most of them are $100 bills. If instead given more time in the money tube (perhaps 10<br />
minutes), you could be less frenzied and more selective about choosing $100 bills while excluding $1 bills.<br />
<strong>Organic</strong> <strong>Chemistry</strong> <strong>Laboratory</strong> <strong>Techniques</strong> | Nichols | Page 167
In a similar way, the crystallization process can be thought of as the crystal lattice “grabbing” solutes from<br />
solution. If the process is hurried, solutes may be “grabbed” indiscriminately, and once embedded in the<br />
interior of the solid they become trapped as the equilibrium between solid and solution happens only on the<br />
surface.<br />
Along with increased purity, a slow crystallization process also encourages the growth of larger crystals.<br />
Figure 3.17 shows crystallization of acetanilide from water with two different rates. The crystals grown in<br />
Figure 3.17a were formed much more quickly, and are smaller than the slower grown, larger crystals in<br />
Figure 3.17b.<br />
Figure 3.17: a) These crystals of acetanilide formed from water are perfectly acceptable, but small, b) These crystals of acetanilide<br />
were grown much more slowly, and are larger (note crystal indicated with the arrow).<br />
There are several benefits to larger crystals. Most importantly they tend to be<br />
purer than small crystals. They also have a lower surface area exposed to the<br />
mother liquor, which makes washing of the crystals more effective. Finally, they<br />
are more easily collected by suction filtration (Figure 3.18), as very small<br />
crystals may pass through or wedge themselves into the pores of the filter paper,<br />
preventing solvent from easily trickling through and leading to crystals that are<br />
irrecoverable.<br />
Figure 3.18: Suction filtration.<br />
<strong>Organic</strong> <strong>Chemistry</strong> <strong>Laboratory</strong> <strong>Techniques</strong> | Nichols | Page 168
3.4.C USING THE MINIMUM AMOUNT OF HOT SOLVENT<br />
The quantity of solvent used in crystallization is usually kept to a minimum, to<br />
support the goal of recovering the maximum amount of crystals.<br />
Every solid has partial solubility in the solvents used, even at cold temperatures.<br />
In Figure 3.19 the cold solvent surrounding a yellow solid is tinted yellow as<br />
some compound dissolves. Solids that appear insoluble in a solvent do in fact<br />
have a (normally small) portion of material that dissolves. This is analogous to<br />
how “water-insoluble” ionic compounds (such as AgCl) have a non-zero<br />
solubility product constant (K sp ).<br />
Crystallization is most common with solids that have moderate solubility at low<br />
temperatures, so that heat can “tip them over the edge” to completely dissolve.<br />
This means that in practice there will be a quantity of compound that dissolves in<br />
Figure 3.19: Yellow solid<br />
(benzil) in contact with cold<br />
ethanol.<br />
the mother liquor at low temperatures, which can be significant depending on the compound’s solubility<br />
profile. Use of the minimal amount of hot solvent lessens the quantity of compound that is lost to the<br />
mother liquor.<br />
To demonstrate the importance of using the minimum amount of hot solvent<br />
during a crystallization, imagine you are to crystallize 5.0 g 2-furoic acid using<br />
hot water. 8 The calculations from this example are described below, and<br />
summarized in Figure 3.21.<br />
2-furoic acid has an increased solubility in boiling water compared to cold water,<br />
as shown by the solubility data in Figure 3.20. The quantity of hot solvent needed<br />
to dissolve this sample can be calculated using the compound’s solubility in hot<br />
water, as shown below. This represents the “minimum amount of hot solvent”<br />
needed for the crystallization.<br />
4 mL hot water<br />
5.0 g 2-furoic acid (FA) × = 20. mL hot water<br />
1 g FA<br />
O<br />
O<br />
2-Furoic Acid<br />
OH<br />
Solubility:<br />
1 g / 26 mL water at 15 ˚C<br />
1 g / 4 mL boiling water<br />
Figure 3.20: Solubility data for<br />
2-furoic acid (Merck Index).<br />
When the 2-furoic acid is dissolved in 20 mL of hot water and is allowed to cool, the compound will<br />
crystallize as it has a lower solubility in the cold solvent. Ideally the solution would be placed in an ice<br />
bath (0 ˚C), but as 0 ˚C solubility data is not provided, let’s imagine the solution is cooled to 15 ˚C. The<br />
solubility of 2-furoic acid in this cold water is as follows.<br />
20. mL cold water ×<br />
1 g FA<br />
= 0.77 g FA dissolves in 15 ˚C water<br />
26 mL cold water<br />
This calculation shows that a portion of the 2-furoic acid will remain dissolved in the mother liquor even<br />
when placed in the cold bath. Any compound present that exceeds this quantity will crystallize, in this case<br />
4.2 g of 2-furoic acid (5.0 g – 0.77 g). Note that because of the loss of material to the mother liquor, the<br />
maximum theoretical recovery from this process is only 84% (100 × 4.2 g / 5.0 g).<br />
8 As recommended in D.D. Perrin, W.L.F. Armarego, Purification of <strong>Organic</strong> Chemicals, Pergamon Press, 3 rd edition, 1988.<br />
<strong>Organic</strong> <strong>Chemistry</strong> <strong>Laboratory</strong> <strong>Techniques</strong> | Nichols | Page 169
(84% possible recovery)<br />
dissolve<br />
cool<br />
5.0 g<br />
20. mL<br />
a) b) T = 100 ˚C c) T = 15 ˚C<br />
0.77 g stays dissolved<br />
4.2 g solidifies<br />
Figure 3.21: Calculations using the minimum amount of hot water to dissolve 5.0 g of 2-furoic acid.<br />
Next imagine that instead of using the minimum amount of hot solvent, we use double the volume of hot<br />
solvent (40 mL in this example). The calculations from this example are described below, and summarized<br />
in Figure 3.22.<br />
When the solvent volume is doubled, the quantity of material dissolved in the mother liquor also doubles,<br />
as shown in the calculation below.<br />
40. mL cold water ×<br />
1 g FA<br />
= 1.5 g FA dissolves in 15 ˚C water<br />
26 mL cold water<br />
If a 5.0 g sample of 2-furoic acid were instead dissolved in 40 mL (double the minimal amount of hot<br />
solvent necessary), only 3.5 g would crystallize (5.0 g – 1.5 g). The maximum theoretical recovery for this<br />
process is only 70%.<br />
Notice when additional solvent is used than the minimum, more compound is soluble in the solvent<br />
and lost to the mother liquor, leading to a lower theoretical recovery.<br />
(70% possible recovery)<br />
dissolve<br />
cool<br />
5.0 g<br />
40 mL<br />
a) b) T = 100 ˚C c) T = 15 ˚C<br />
1.5 g stays dissolved<br />
3.5 g solidifies<br />
Figure 3.22: Calculations using twice the volume of hot water as the minimum amount needed to dissolve 5.0 g of 2-furoic acid.<br />
As you might imagine, there is also a quantity of solvent in which the entire 5.0 g sample of 2-furoic acid<br />
dissolves (in this case 130 mL, see calculation below). If 130 mL were used for the crystallization instead<br />
of the minimal amount of hot solvent, no crystals would form at all when cooled to 15 ˚C (0% recovery).<br />
Thus the quantity of solvent used in crystallization should be monitored and restricted when possible.<br />
26 mL cold water<br />
5.0 g FA (2-furoic acid) × = 130 mL of 15 ˚C water dissolves the whole sample<br />
1 g FA<br />
<strong>Organic</strong> <strong>Chemistry</strong> <strong>Laboratory</strong> <strong>Techniques</strong> | Nichols | Page 170
To demonstrate the importance of using the minimum amount of hot solvent, two samples of benzil (each<br />
roughly 1.8 g), were crystallized from hot ethanol (Figure 3.23). The first was dissolved in the minimum<br />
amount of hot solvent (approximately 8 mL), and resulted in a 92% recovery after crystallization. The<br />
second was dissolved in roughly double the quantity of hot solvent (approximately 15 mL) and resulted in<br />
an 87% recovery. The solubility profile of benzil led to an excellent recovery in both trials, but the recovery<br />
was compromised somewhat when an excess of solvent was used.<br />
Figure 3.23: a) Original sample of benzil (1.8 g), b) Crystallization using the minimum amount of hot ethanol needed to dissolve<br />
the sample, c) Crystallization using double the minimal amount of hot solvent.<br />
3.4.D THE UNAVOIDABLE LOSS OF RECOVERY<br />
A loss of recovery should be expected when performing a crystallization. Although there are ways to<br />
maximize the return of crystals, a portion of the desired compound will always be lost. The reasons for this<br />
are both inherent to the design of the process and mechanical.<br />
As previously discussed, a portion of the compound of interest will remain dissolved in the mother liquor<br />
and be filtered away. Figure 3.24 shows suction filtration in order to recover benzil (a yellow solid) that<br />
had been crystallized from ethanol. In Figure 3.26c it is apparent that the filtrate is also yellow (the liquid<br />
that has passed through the filter paper), making obvious that some benzil remained dissolved in the solvent.<br />
Further evidence that some compound is always lost to the mother liquor can be seen when solvent<br />
evaporates from drips on glassware or the benchtop, revealing residual solid (Figures 3.25 a+b).<br />
Figure 3.24: Loss of yield due to the solubility of compound in the cold solvent: a) Suction filtration, b) Recovered yellow solid,<br />
c) Yellow filtrate, indicating some yellow compound remained dissolved in the mother liquor.<br />
<strong>Organic</strong> <strong>Chemistry</strong> <strong>Laboratory</strong> <strong>Techniques</strong> | Nichols | Page 171
The loss of solid material can also be witnessed with every manipulation of the solid. Only the majority of<br />
the crystals can be delicately scraped off the glassware, Buchner funnel, and filter paper, and there will<br />
always be a residue that is left behind (Figure 3.25c).<br />
Figure 3.25: a) Streak of solid (benzoic acid) from an evaporated drip on the outside of a flask, b) A magnificent crystal pattern<br />
from an evaporated drip on the benchtop, c) Residual solid (benzil) on a flask after collection by suction filtration.<br />
When there is such an obvious loss of yield from solid clinging to glassware, it may seem wise to use<br />
solvent to rinse additional solid out of the flasks. A few rinses with cold solvent are indeed recommended,<br />
but it is not recommended to use solvent excessively in an attempt to recover every granule of solid. The<br />
more solvent that is used, the more compound will dissolve in the cold mother liquor, decreasing the yield.<br />
The loss of material due to residue on the glassware is an unfortunate, but accepted aspect of this technique.<br />
To demonstrate the loss of yield with crystallization, several pure<br />
samples of acetanilide and benzil were crystallized. Using pure<br />
samples allowed for any loss of material to be only due to the<br />
solubility in the mother liquor and adhesion to the glassware, not<br />
by the exclusion of impurities, which also have mass. From<br />
many trials of crystallizing acetanilide from hot water using<br />
different scales (between 0.5 g – 1.5 g each time), the recoveries<br />
were surprisingly consistent, between 60-65% (Figure 3.26).<br />
From many trials of crystallizing benzil from hot ethanol using<br />
different scales (between 0.5 g – 4.5 g each time), the recoveries<br />
were also quite consistent, between 87-92% (benzil is the yellow<br />
solid in Figure 3.24). In all situations, the recovery of solid was<br />
never 100%. Also, the typical recovery for the two systems was Figure 3.26: Crystallized acetanilide.<br />
different, with the most logical explanation being that there was<br />
a larger percentage of compound lost to the mother liquor with acetanilide than with benzil.<br />
It is common for new organic chemistry students to be disappointed by a low yield (anything less than<br />
95%!), and to worry that it is somehow their fault. Students are often inclined to cite “user error” as a main<br />
cause for a loss of yield in any process. Although spilling solid on the benchtop or addition of too much<br />
solvent will of course compromise the yield, the modest recovery of acetanilide in this section should<br />
demonstrate that sometimes low yields are inherent to the process and the chosen solvent.<br />
<strong>Organic</strong> <strong>Chemistry</strong> <strong>Laboratory</strong> <strong>Techniques</strong> | Nichols | Page 172
3.4.E QUANTITATING CRYSTALLIZATION<br />
In this section, real solubility data for compounds is used to quantitatively describe the purification of<br />
impure solids that contain either a “soluble impurity” or an impurity with similar solubility to the compound<br />
of interest.<br />
3.4.E.1 WITH A “SOLUBLE IMPURITY”<br />
The simplest crystallization in terms of purification is when an impurity is very soluble in the cold solvent<br />
while the compound of interest is not (see procedural sequence in Figure 3.27). In this situation, the<br />
impurity is trapped in the crystal matrix of the impure solid, and needs only be liberated by dissolution.<br />
After adding hot solvent to dissolve the impure solid then cooling, the soluble impurity remains dissolved<br />
in the mother liquor while the compound of interest crystallizes and can be collected by suction filtration.<br />
= Desired<br />
Compound<br />
= Soluble<br />
Impurity<br />
Desired<br />
Compound<br />
add hot<br />
solvent<br />
Soluble<br />
Impurity<br />
Impure<br />
Solid<br />
Heated<br />
(Dissolved)<br />
Cooled<br />
(Crystallized)<br />
Suction<br />
Filtration<br />
Figure 3.27: Crystallization Sequence to remove a soluble impurity.<br />
An example of this type of system is a sample containing 4.00 g acenapthene and 0.50 g acetanilide.<br />
According to Perrin’s Purification of <strong>Organic</strong> Compounds, 9 acenapthene can be purified by crystallization<br />
using ethanol, and even though this sample contains a considerable quantity of acetanilide impurity (13<br />
mol%), the calculations in this section will show that this process should work well.<br />
The solubility values of acenapthene and acetanilide in ethanol are shown in Figure 3.28.<br />
Acenapthene (AN)<br />
Solubility in ethanol:<br />
1.5 g / 100 mL solvent at 0 ˚C<br />
32.0 g / 100 mL solvent at 70 ˚C<br />
H<br />
N<br />
O<br />
Acetanilide (AT)<br />
Solubility in ethanol:<br />
11.6 g / 100 mL solvent at 0 ˚C<br />
68.6 g / 100 mL solvent at 70 ˚C<br />
Figure 3.28: Ethanol solubility for acenapthene and acetanilide. 10<br />
9 D.D. Perrin, W.L.F. Armarego, Purification of <strong>Organic</strong> Chemicals, Pergamon Press, 3 rd edition, 1988.<br />
10 Adapted from data found in: A. Seidell, Solubilities of Inorganic and <strong>Organic</strong> Substances, D. Van Nostrand Company, 1907.<br />
<strong>Organic</strong> <strong>Chemistry</strong> <strong>Laboratory</strong> <strong>Techniques</strong> | Nichols | Page 173
4.00 g of pure acenapthene (AN) should completely dissolve in 12.5 mL (see calculation below) of nearly<br />
boiling ethanol (the boiling point of ethanol is 78 ˚C). 11<br />
100 mL hot ethanol<br />
4.00 g Acenapthene (AN) × = 12.5 mL hot ethanol (70 ˚C) to dissolve<br />
32.0 g AN<br />
Since acetanilide (AT) is more soluble than acenapthene at this same temperature (see Figure 3.28), it<br />
should also completely dissolve in 12.5 mL of hot ethanol.<br />
If the hot ethanolic solution containing these two components is then cooled in an ice bath, acenapthene<br />
should crystallize as it has low solubility in cold ethanol. The calculation below shows how much<br />
acenapthene would remain dissolved in the cold ethanol (0.19 g). Any quantity of acenapthene present<br />
greater than 0.19 g would form a solid, in this case 3.81 g (4.00 g – 0.19 g).<br />
12.5 mL cold ethanol ×<br />
1.5 g acenapthene (AN)<br />
= 0.19 g AN remains dissolved in 0 ˚C ethanol<br />
100 mL cold ethanol<br />
The acetanilide impurity, however, should not crystallize. The calculation below shows that 1.45 g of<br />
acetanilide can dissolve in the cold ethanol, and since only 0.50 g was originally present, the entire portion<br />
would remain dissolved.<br />
12.5 mL cold ethanol ×<br />
11.6 g AT<br />
100 mL cold ethanol<br />
= 1.45 g AT can dissolve in 0 ˚C ethanol<br />
This process is summarized in Figure 3.29. As only the acenapthene crystallizes, it could be collected<br />
through filtration and separated from the acetanilide impurity in the mother liquor.<br />
= Acenapthene (AN)<br />
= Acetanilide (AT)<br />
(soluble impurity)<br />
add 12.5 mL<br />
hot ethanol<br />
cool<br />
4.00 g AN<br />
0.50 g AT<br />
0.50 g AT stays dissolved<br />
0.19 g AN stays dissolved<br />
3.81 g AN solidifies<br />
Figure 3.29: Crystallization of an impure sample containing 4.00 g acenapthene and 0.50 g acetanilide from nearly boiling ethanol.<br />
This represents a crystallization with a “soluble” impurity.<br />
Purification of this mixture works well in theory because the acetanilide is so much more soluble<br />
(approximately ten times as much) in the cold ethanol than the acenapthene, and so can be removed. In<br />
practice if the crystallization is done too quickly, there is still the possibility of acetanilide being<br />
incorporated into the developing solid.<br />
11 It is very possible that the acenapthene/acetanilide mixture might require a slightly different quantity of hot ethanol to dissolve<br />
than pure samples, but the calculations in this section provide a rough estimate of the solvent volumes needed.<br />
<strong>Organic</strong> <strong>Chemistry</strong> <strong>Laboratory</strong> <strong>Techniques</strong> | Nichols | Page 174
3.4.E.2 WITH AN IMPURITY OF SIMILAR SOLUBILITY<br />
If an impure solid contains an impurity that has similar solubility properties as the desired compound, it is<br />
still possible to purify the mixture through crystallization if the impurity is present in a small amount. An<br />
example is a sample containing 4.00 g acenapthene and 0.30 g phenanthrene (phenanthrene is 6 mol%<br />
of the sample). The solubility of these compounds in ethanol is shown in Figure 3.30.<br />
Acenapthene (AN)<br />
Solubility in ethanol:<br />
1.5 g / 100 mL solvent at 0 ˚C<br />
32.0 g / 100 mL solvent at 70 ˚C<br />
Phenanthrene (PH)<br />
Solubility in ethanol:<br />
2.88 g / 100 mL solvent at 0 ˚C<br />
26.0 g / 100 mL solvent at 70 ˚C<br />
Figure 3.30: Ethanol solubility for acenapthene and phenanthrene. 12<br />
4.00 g of pure acenapthene (AN) should completely dissolve in 12.5 mL (see calculation below) of nearly<br />
boiling ethanol (the boiling point of ethanol is 78 ˚C). 0.30 g of pure phenanthrene (PH) would dissolve in<br />
1.2 mL of hot ethanol (see calculation below), and so would also dissolve if 12.5 mL were used.<br />
100 mL hot ethanol<br />
4.00 g Acenapthene (AN) × = 12.5 mL hot ethanol (70 ˚C) to dissolve AN<br />
32.0 g AN<br />
100 mL hot ethanol<br />
0.30 g Phenanthrene (PH) × = 1.2 mL hot ethanol (70 ˚C) to dissolve PH<br />
26.0 g PH<br />
If this hot solution is then cooled in an ice bath, the calculations below show the quantity of each compound<br />
that would remain dissolved in the cold ethanol.<br />
12.5 mL cold ethanol ×<br />
12.5 mL cold ethanol ×<br />
1.5 g acenapthene (AN)<br />
= 0.19 g AN remains dissolved in 0 ˚C ethanol<br />
100 mL cold ethanol<br />
2.88 g acenapthene (PH)<br />
= 0.360 g PH remains dissolved in 0 ˚C ethanol<br />
100 mL cold ethanol<br />
Since greater than this quantity of acenapthene is present, most of it will crystallize (3.81 g). However,<br />
since only 0.30 g of phenanthrene is present, the entire portion should remain in the mother liquor. The<br />
two components can then be separated through filtration.<br />
In essence, impurities that have a similar solubility to the compound of interest can be removed like soluble<br />
impurities as long as they are present in small enough quantities. It is a general guide that solids<br />
containing less than 5 mol% of impurity can be purified in this manner. The crystallization process<br />
essentially “sacrifices” a portion of each component to the mother liquor in order to produce a pure crystal.<br />
12 Adapted from data found in: A. Seidell, Solubilities of Inorganic and <strong>Organic</strong> Substances, D. Van Nostrand Company, 1907.<br />
<strong>Organic</strong> <strong>Chemistry</strong> <strong>Laboratory</strong> <strong>Techniques</strong> | Nichols | Page 175
3.4.F SECOND CROP CRYSTALLIZATION<br />
As previously discussed, a portion of the compound of interest always remains dissolved in the mother<br />
liquor and is filtered away. This is not to say that this portion is lost, as it is possible to recover additional<br />
compound from the mother liquor. The solvent can be concentrated in the original vessel or on a rotary<br />
evaporator, and a second crystallization can be attempted. A second crystallization from the mother liquor<br />
of the first crystallization is called a “second crop crystallization.”<br />
To demonstrate this process, a 1.16 g sample of trans-cinnamic acid was crystallized from a methanol/water<br />
mixed solvent system (Figure 3.31). 0.95 g of a “first crop” of crystals was collected, representing an 82%<br />
recovery.<br />
Figure 3.31: Crystallization of trans-cinnamic acid from water and methanol.<br />
To collect a second crop of crystals, the filtrate was pipetted into an Erlenmeyer flask (Figure 3.32a) and<br />
boiled to reduce the volume by half (Figures 3.32 b+c). When this solution was cooled, another 0.08 g of<br />
compound crystallized out (Figure 3.32d), making the combined recovery of trans-cinnamic acid 1.03 g,<br />
or 89%.<br />
Figure 3.32: Crystallization of a “second crop” of trans-cinnamic acid from water and methanol.<br />
<strong>Organic</strong> <strong>Chemistry</strong> <strong>Laboratory</strong> <strong>Techniques</strong> | Nichols | Page 176
A “second crop” solid should always be kept separate from a “first crop” solid until its purity can be verified.<br />
A second crop crystal is usually more impure than a first crop crystal, as it crystallizes from a solution<br />
that contains a higher percentage of impurities (the first crop removed more compound, leaving more<br />
impurities behind).<br />
To demonstrate the relative purity of first crop and second crop crystals, a 1.5 g mixture of 4-<br />
bromoacetophenone contaminated with a small amount of acetophenone was crystallized using ethanol. A<br />
GC spectrum of the original mixture (Figure 3.33b) shows the sample to have approximately 7 mol%<br />
acetophenone impurity.<br />
Figure 3.33: a) Initial solid mixture, b) GC spectrum of solid mixture. 13<br />
Quantitation by a GC-MS instrument can sometimes be inaccurate, so the composition was also calculated<br />
through 1 H NMR integrations. The partial 1 H NMR spectrum of this sample is in Figure 3.34, and<br />
integrations indicate the sample is 5.6 mol% acetophenone. There is good agreement between the two<br />
quantitative methods.<br />
Figure 3.34: Partial 300 MHz 1 H NMR spectrum of the original mixture of 4-bromoacetophenone and acetophenone (two signals<br />
for the methyl groups are at 2.58 and 2.61 ppm). The integrations show a similar composition as the GC data.<br />
13 GC method: 100 ˚C hold for 2 min, 25 ˚C ramp per min to 210 ˚C (6.4 min), solvent delay 2.00 min.<br />
<strong>Organic</strong> <strong>Chemistry</strong> <strong>Laboratory</strong> <strong>Techniques</strong> | Nichols | Page 177
After the mixture was crystallized from ethanol, a GC spectrum of the resulting solid (0.93 g, 63% recovery)<br />
showed a dramatic reduction in the acetophenone impurity, to almost negligible amounts (Figure 3.35b).<br />
The crystallization purified the 4-bromoacetophenone very well.<br />
Figure 3.35: a) First crop of 4-bromoacetophenone crystals coming out of solution, b) GC spectrum of the crystallized mixture.<br />
The filtrate from the first crystallization was boiled to reduce the solvent level, and a second crop of crystals<br />
was obtained (0.18 g, combined recovery of 77%). The second crop crystals had a noticeable yellow tint<br />
while the first crop crystals were pure white. A GC spectrum of the second crop crystals (Figure 3.36b)<br />
showed the acetophenone had incorporated somewhat into the crystalline solid, demonstrating that second<br />
crop crystals are less pure than first crop crystals.<br />
Figure 3.36: a) Second crop of 4-bromoacetophenone crystals coming out of solution, b) GC spectrum of the second crop solid.<br />
Recovery of a second crop of crystals is not commonly done in<br />
undergraduate settings as the additional recovery from a second crop is<br />
usually modest (Figure 3.37). However, the process may be done if the<br />
material is quite expensive, or if a large amount remains dissolved in the<br />
mother liquor. For the latter reason, it is a good idea to save the mother<br />
liquor until a yield can be calculated. If the recovery is quite low, a<br />
second crystallization might be attempted.<br />
Figure 3.37: First crop crystals of 4-<br />
bromoacetophenone (left) and second<br />
crop crystals (right).<br />
<strong>Organic</strong> <strong>Chemistry</strong> <strong>Laboratory</strong> <strong>Techniques</strong> | Nichols | Page 178
3.5 PROCEDURAL GENERALITIES<br />
3.5.A GENERAL PROCEDURE<br />
Most often you will be asked to follow a published crystallization procedure that may be written in one of<br />
two varieties:<br />
•<br />
•<br />
Solid A was crystallized using Y solvent, or<br />
Solid A was crystallized using X mL of Y solvent<br />
When no volume of solvent is specified, the process should be conducted using the minimum volume of<br />
boiling solvent to dissolve the solid. If a volume is specified, it probably means the crystallization is tricky<br />
and previous trials have shown that a greater than minimal solvent volume produce higher quality crystals,<br />
or attempting to dissolve common impurities leads to using too great a quantity of solvent.<br />
The standard crystallization process (Figure 3.38a) is summarized as follows:<br />
1) Dissolve the impure solid in the minimum amount of hot solvent.<br />
2) Slowly cool the solution to induce crystallization.<br />
3) Further cool the solution in an ice bath.<br />
4) Collect the solid by suction filtration.<br />
Figure 3.38: a) General procedure for crystallization, b) Modification when insoluble impurities are present.<br />
An additional step may be inserted into this general process (between steps 1 and 2) if insoluble impurities<br />
are present, or if impurities will be removed with charcoal (Figure 3.38b). After the compound is dissolved<br />
in the minimal amount of hot solvent, charcoal can be used, or insoluble impurities removed with hot<br />
filtration. The general process can then be continued on to next cool the solution and induce crystallization.<br />
<strong>Organic</strong> <strong>Chemistry</strong> <strong>Laboratory</strong> <strong>Techniques</strong> | Nichols | Page 179
3.5.B HEAT SOURCE AND BUMP PREVENTION<br />
Crystallizations are generally conducted using a hotplate or steam bath, and the crystallization solvent may<br />
affect which heat source is appropriate (Table 3.3). If the crystallization solvent is water, a hotplate can be<br />
used as there is no issue of flammability. If the crystallization solvent is highly flammable or volatile (e.g.<br />
diethyl ether, low-boiling petroleum ether, or acetone), the vapors produced during boiling could ignite on<br />
the hot surface of a hotplate, and it is therefore essential to use a steam bath. Solvents with moderate<br />
volatility (e.g. ethanol or ethyl acetate), should be preferably heated with a steam bath, but can be safely<br />
heated with a hotplate if extreme care and caution is utilized.<br />
Solvent<br />
Water<br />
Diethyl ether, Acetone,<br />
Petroleum Ether (low-boiling)<br />
Ethanol, Methanol, Ethyl<br />
Acetate, Hexanes<br />
Heat<br />
source<br />
Use a hotplate.<br />
Use steam bath, never a hotplate.<br />
Use steam bath preferably.<br />
Can use hotplate with caution.<br />
Table 3.3: Solvent and preferred heat source.<br />
Boiling stones, boiling sticks, or stir bars must be used for “bump” protection as crystallization involves<br />
heating solutions to a boil. Boiling stones are often used for solvents, and may be used with solutions if a<br />
hot filtration step is planned (or if the plan is to pick the stones out of the crystallized solid). If no filtration<br />
step is planned, it may be easier to use a boiling stick or stir bar for bump protection, as these can be easily<br />
removed from the hot solution before crystallization.<br />
<strong>Organic</strong> <strong>Chemistry</strong> <strong>Laboratory</strong> <strong>Techniques</strong> | Nichols | Page 180
3.5.C CHARCOAL<br />
Activated charcoal is sometimes used to remove small amounts of colored impurities from solution.<br />
Activated charcoal has a high affinity for conjugated compounds, whose flat structures wedge themselves<br />
well between the graphene sheets. The quantity used should be limited, as charcoal adsorbs all compounds<br />
to some extent and could lead to a lower recovery of the desired compound. Charcoal should of course not<br />
be used if the product is itself colored.<br />
Decolorizing charcoal (Norit) is added after a solid has been dissolved in the minimum amount of hot<br />
solvent. A small portion should be used at first; just as much that can fit on the tip of a spatula (the size of<br />
half a pea, see Figure 3.39b). When adding charcoal, it’s recommended to temporarily remove the<br />
solution from the heat source or the charcoal’s high surface area may cause superheated areas to<br />
immediately boil. Superheated areas are regions where the temperature is above the boiling point of the<br />
solvent, but lack a nucleation site to create a bubble and initiate the phase change. If charcoal is added<br />
directly to a near boiling solution, the solution may boil over.<br />
Figure 3.39: a) Solution before addition of charcoal, b) An appropriate quantity of charcoal to start with (tip of the spatula), c)<br />
Solution after swirling with charcoal.<br />
For faintly colored solutions, the first portion of charcoal is likely all that is necessary, and the resulting<br />
solution should be a faint grey (Figure 3.39c). Additional charcoal can be added if the color remains (Figure<br />
3.40c). Charcoal particles are so fine that hot filtration is necessary to remove them before crystallization.<br />
Figure 3.40: Use of charcoal with a highly-colored impurity (acetanilide contaminated with methyl red): a) Addition of charcoal<br />
to the aqueous solution, b) Pre-swirling, c) After swirling (color remains), d) Addition of another small scoop of charcoal to fully<br />
decolorize.<br />
<strong>Organic</strong> <strong>Chemistry</strong> <strong>Laboratory</strong> <strong>Techniques</strong> | Nichols | Page 181
Charcoal does not need to be used with every solution that’s colored, even if the desired compound is white.<br />
Colored impurities may remain in the mother liquor after filtration. For example, the sequence in Figure<br />
3.41 shows the purification of acetanilide (a white solid) that has been contaminated with several drops of<br />
methyl red solution to produce an orange solid (Figure 3.41a). The solid was crystallized from hot water<br />
without the use of charcoal, and even though the mother liquor was yellow (Figure 3.41b), the crystallized<br />
solid was still a pure white color (Figure 3.41c). The methyl red “impurity” remained in the mother liquor<br />
and was not obviously incorporated into the crystal lattice of acetanilide.<br />
Figure 3.41: a) Crude solid of acetanilide mixed with several drops of methyl red, b) Crystallization, noting the mother liquor is<br />
highly colored, c) Crystallized solid with no obvious color.<br />
As a comparison, the same solid was decolorized with charcoal, filtered and crystallized, as shown in Figure<br />
3.42. The charcoal removed the methyl red color, and the mother liquor was colorless (as indicated with<br />
an arrow in Figure 3.42b), but there was no obvious improvement of color in the resulting crystallized solid<br />
(Figure 3.42c). Additionally, there was a loss of yield when using charcoal. When charcoal was not used,<br />
the recovery was 63%, which was consistent with various other trials of acetanilide. However, when<br />
charcoal was used, the recovery was 53%. The loss of yield may be attributed to charcoal’s absorption of<br />
the target compound along with the colored impurity, as well as loss of compound on the filter paper during<br />
the hot filtration. For this reason, charcoal should only be used if specified in a procedure, or if previous<br />
crystallization trials failed to remove colored impurities.<br />
Figure 3.42: a) Crude solid, b) Hot filtration of the solution after addition of decolorizing charcoal (mother liquor is colorless, as<br />
indicated by the arrow), c) Crystallized solid with no obvious color.<br />
<strong>Organic</strong> <strong>Chemistry</strong> <strong>Laboratory</strong> <strong>Techniques</strong> | Nichols | Page 182
3.5.D COOLING SLOWLY<br />
After a solution is dissolved in the minimum amount of hot solvent and filtered (if applicable), the solution<br />
should be cooled as slowly as possible (keeping in mind time limitations in a lab). To achieve this goal:<br />
•<br />
•<br />
The mouth of the Erlenmeyer flask should be covered with a watch glass (Figure 3.43a). This retains<br />
heat just like placing a lid on a boiling pot. The watch glass also prevents excess evaporation of lowboiling<br />
solvents. Condensation can often be seen on the watch glass as the solution cools, which is<br />
evidence that warm vapors are trapped with this method.<br />
The flask should be placed on a non-conductive surface so heat is not wicked away from the bottom of<br />
the flask. The flask can be placed atop a paper towel folded several times, a wood block, or on an<br />
inverted cork ring (Figures 3.43 a–c). For solutions that cool very quickly (e.g. when using solvents<br />
with low boiling points like diethyl ether and acetone), the flask may also be covered by an inverted<br />
beaker (Figure 3.43d) to create an insulating atmosphere around the flask. This is not generally<br />
necessary for solvents with relatively high boiling points like water and ethanol.<br />
Figure 3.43: Methods to prevent a flask from cooling too quickly: a) Paper towel, b) Wood block, c) Cork ring, d) Inverted beaker.<br />
•<br />
The correct flask size should be used so that the quantity of hot solvent used reaches a height of more<br />
than 1 cm in the flask. If the solvent level is too shallow during crystallization, the high surface area<br />
will cause the solution to cool and evaporate too quickly (Figure 3.44b). It will also be difficult to filter<br />
a shallow volume. Ideally the solution should be to a height of at least 2 cm in the flask, which allows<br />
for maintenance of heat by the solution’s interior (Figure 3.44d). It is common to use between 10-50<br />
times as much solvent as sample, and a rough guide is to use a flask where the sample just covers the<br />
bottom in a thin layer.<br />
Figure 3.44: a) The flask is too large for the sample, and the solvent is too shallow, b) After crystallization the solvent is completely<br />
absorbed (or evaporated), c) The flask is the correct size for the amount of sample, d) The solvent is an appropriate height in the<br />
flask.<br />
<strong>Organic</strong> <strong>Chemistry</strong> <strong>Laboratory</strong> <strong>Techniques</strong> | Nichols | Page 183
3.5.E INITIATING CRYSTALLIZATION<br />
At times, crystals will not form even when a solution is supersaturated, as there is a kinetic barrier to crystal<br />
formation. At times crystallization may need to be initiated, for example if the solution becomes faintly<br />
cloudy as it cools, or if the solution fails to produce crystals even when it is noticeably cooler than originally.<br />
The methods described in this section preferably should be used on solutions that are still warm, as initiating<br />
crystallization on already cool (or cold) solutions will cause too rapid a crystallization.<br />
Figure 3.45: a) Scratching to initiate crystallization for acetanilide in water, b+c) Crystallization.<br />
The easiest method to initiate crystallization is to scratch the bottom or side of the flask with a glass stirring<br />
rod (Figure 3.45a), with enough force that the scratching is audible (but of course not so much that you<br />
break the glass!). Crystallization often begins immediately after scratching, and lines may be visible<br />
showing crystal growth in the areas of the glass that were scratched (Figure 3.46).<br />
Figure 3.46: Lines of crystals seen in the initial stages of crystal growth, originating from where the glass was scratched: a+b) N-<br />
bromosuccinimide crystallizing from water, c) Acetanilide crystallizing from water.<br />
Although there is no doubt that this method works, there are differences in opinion as to the mechanism of<br />
action. One theory is that scratching initiates crystallization by providing energy from the high-frequency<br />
vibrations. Another theory is that tiny fragments of glass are dislodged during scratching that provide<br />
nucleation sites for crystal formation. Another hypothesis is that the solvent may evaporate from the glass<br />
stirring rod after it is removed, and a speck of solid may fall into solution and act as a “seed crystal” (see<br />
next paragraph). It is not well understood how scratching initiates crystallization, but it is in every chemist’s<br />
arsenal of “tricks.”<br />
<strong>Organic</strong> <strong>Chemistry</strong> <strong>Laboratory</strong> <strong>Techniques</strong> | Nichols | Page 184
There are a few others methods that can be used to initiate crystallization when scratching fails:<br />
•<br />
•<br />
Add a “seed crystal”: a small speck of crude solid saved from before the crystallization was begun, or<br />
a bit of pure solid from a reagent jar. Seed crystals create a nucleation site where crystals can begin<br />
growth.<br />
Dip a glass stirring rod into the supersaturated solution, remove it, and allow the solvent to evaporate<br />
to produce a thin residue of crystals on the rod (Figure 3.47a). Then touch the rod to the solution’s<br />
surface, or stir the solution with the rod to dislodge small seed crystals.<br />
Figure 3.47: a) A glass stirring rod dipped into a solution of benzil, and residual solid formed on the rod after evaporation of the<br />
ethanol solvent, b-d) Crystallization, which began after the rod was stirred in the solution to dislodge the seed crystals.<br />
•<br />
If scratching and seed crystals do not initiate crystallization, it’s possible there is too much solvent<br />
present that the compound remains completely soluble (Figure 3.48). To test if this is the case, return<br />
the solution to a boil and reduce the volume of solvent, perhaps by half (Figure 3.48c). Allow the<br />
reduced solution to cool and see if solid forms. If it does (Figure 3.48d), the quantity of solvent was<br />
definitely the problem, and solvent volumes can be experimented with to achieve the best growth of<br />
crystals.<br />
Figure 3.48: a) No crystals formed when cooled, b+c) Reducing the solvent volume on a steam bath, d) Crystals then formed when<br />
cooled.<br />
•<br />
Use a lower temperature bath to try and encourage crystal formation. A salt water-ice bath (-10 ˚C) or<br />
chemical freezer are some options.<br />
<strong>Organic</strong> <strong>Chemistry</strong> <strong>Laboratory</strong> <strong>Techniques</strong> | Nichols | Page 185
3.6 STEP-BY-STEP PROCEDURES<br />
3.6.A SINGLE SOLVENT CRYSTALLIZATION<br />
Figure 3.49: a) An old sample of N-bromosuccinimide (NBS), b) Crystallization of NBS using hot water, c) Crystallized NBS.<br />
The crystallization pictured in this section shows purification of a roughly 1 g sample of old N-<br />
bromosuccinimide (NBS), which was found in its reagent bottle as an orange powder. The crystallization<br />
uses water as the solvent, which has no flammability issues, and so a hotplate is used.<br />
If a crystallization is to be performed using flammable organic solvents, a steam bath is recommended and<br />
in some situations necessary (when using diethyl ether, acetone, or low-boiling petroleum ether). The<br />
following procedure should be used as a guideline for the process, and some key differences between using<br />
water and organic solvents are discussed in a future section.<br />
<strong>Organic</strong> <strong>Chemistry</strong> <strong>Laboratory</strong> <strong>Techniques</strong> | Nichols | Page 186
Figure 3.50: a) Impure NBS added to the flask, b) Heating water on a hotplate, c) Addition of hot water to the solid, using a paper<br />
towel holder to hold the beaker, d) Addition of hot water to the solid (not NBS, a different system) using a silicone hot hand<br />
protector.<br />
Prepare the Setup<br />
1. Transfer the impure solid to be crystallized into an appropriately sized Erlenmeyer flask (Figure 3.50a).<br />
If the solid is granular, first pulverize with a glass stirring rod.<br />
It is not recommended to perform crystallizations in a beaker. The narrow mouth of an Erlenmeyer<br />
flask allows for easier swirling and minimized evaporation during the process as solvent vapors instead<br />
condense on the walls of the flask (they “reflux” on the sides of the flask). The narrow mouth of an<br />
Erlenmeyer also allows for a flask to be more easily covered during the cooling stage, or even<br />
potentially stoppered for long crystallizations. A round-bottomed flask is also not ideal for<br />
crystallization as the shape of the flask makes it difficult to recover solid at the end of the process.<br />
It is important that the flask be not too full or too empty during the crystallization. If the flask will be<br />
greater than half-full with hot solvent, it will be difficult to prevent the flask from boiling over. If the<br />
flask will contain solvent to a height less than 1 cm, the solution will cool too quickly. It is common<br />
to use between 10-50 times as much solvent as sample, and a rough guide is to use a flask where the<br />
sample just covers the bottom in a thin layer.<br />
2. Place some solvent in a beaker or Erlenmeyer flask along with a few boiling stones on the heat source,<br />
and bring to a gentle boil. Use a beaker if the solvent will be poured and an Erlenmeyer flask if the<br />
solvent will be pipetted. If a hot filtration step is anticipated for later in the procedure, also prepare a<br />
ring clamp containing a funnel with fluted filter paper (Figure 3.50b).<br />
Add the Minimum Amount of Hot Solvent<br />
3. When the solvent is boiling, grasp the beaker with a hot hand protector (Figure 3.50d), cotton gloves,<br />
or a paper towel holder made by rolling a sheet of paper towel into a long rectangle (Figure 3.50c). To<br />
the side of the heat source, pour a small portion of boiling solvent into the flask containing the impure<br />
solid, to coat the bottom of the flask. If the crystallization is being performed on a small scale (using a<br />
50 mL Erlenmeyer flask or smaller), it may be easier to use a pipette to transfer portions of the solvent<br />
to the flask.<br />
It’s customary to not place the dry solid atop the heat source before adding solvent or the solid may<br />
decompose. When the solid is dispersed in a small amount of solvent, it can then be placed on the heat<br />
source.<br />
<strong>Organic</strong> <strong>Chemistry</strong> <strong>Laboratory</strong> <strong>Techniques</strong> | Nichols | Page 187
Figure 3.51: Dissolving NBS in the minimum amount of hot water (boiling stones are also present).<br />
4. Place the flask containing the impure solid and solvent atop the heat source. Use some method to<br />
prevent bumping (boiling stones if you plan to “hot filter,” a boiling stick or stir bar if you don’t), and<br />
bring the solution to a gentle boil (Figure 3.51a).<br />
5. Add solvent in portions (Figure 3.51b), swirling to aid in dissolution, until the solid just dissolves<br />
(Figure 3.51d). For 100 mg – 1 g of compound, add 0.5 - 2 mL portions at a time. Note that it may<br />
take time for a solid to completely dissolve as there is a kinetic aspect to dissolution. Each addition<br />
should be allowed to come completely to a boil before adding more solvent, and some time should be<br />
allowed between additions. Not allowing time for dissolution and consequently adding too much<br />
solvent is a main source of error in crystallization.<br />
It is not uncommon for droplets of liquid to be seen during the heating process (Figure 3.52). This is<br />
when the material “oils out,” or melts before it dissolves. If this happens, the liquid droplets are now<br />
the compound you are crystallizing, so continue adding solvent in portions until the liquid droplets fully<br />
dissolve as well.<br />
Watch the solution carefully to judge whether the size of the solid pieces (or liquid droplets) change<br />
with additional solvent: if they don’t, they may be an insoluble impurity. Addition of excess solvent in<br />
an attempt to dissolve insoluble impurities will negatively affect the recovery. If insoluble solid<br />
impurities are present, the solution should be filtered (insert a hot filtration step at this point). Colored<br />
impurities can also be removed at this point with charcoal.<br />
Figure 3.52: Examples of samples “oiling out” during dissolving: a) Oily droplets of acetanilide in a solution decolorized with<br />
charcoal, b+c) Oily droplets containing methyl red and acetanilide in water.<br />
<strong>Organic</strong> <strong>Chemistry</strong> <strong>Laboratory</strong> <strong>Techniques</strong> | Nichols | Page 188
Figure 3.53: a-c) Cooling and crystallization of NBS, d) Further cooling in an ice bath along with some solvent (in the bottle) for<br />
rinsing.<br />
Allow the Solution to Slowly Cool<br />
6. When the solid is just dissolved, remove the flask from the heat source using a hot hand protector, paper<br />
towel holder, or glove, and set it aside to cool. Remove the boiling stick or stir bar if used for bump<br />
protection (boiling stones can be picked out of the solid at a later point if used).<br />
To encourage slow cooling, set the flask atop a surface that does not conduct heat well, such as a folded<br />
paper towel. Cover the mouth of the Erlenmeyer flask with a watch glass to retain heat and solvent<br />
(Figure 3.53a). Allow the solution to slowly come to room temperature.<br />
7. As the solution cools, eventually solid crystals should form (Figure 3.53b). If the solution is only warm<br />
to the touch or cloudy and no crystals have formed, use a glass stirring rod to scratch the glass and<br />
initiate crystallization.<br />
After crystallization has begun, the crystals should slowly grow as the temperature decreases. An ideal<br />
crystallization takes between 5-20 minutes to fully crystallize, depending on the scale. Complete<br />
crystallization in less than 5 minutes is too quick (see Troubleshooting section for advice on how to<br />
slow it down).<br />
8. When the solution is at room temperature, place the flask into an ice bath (ice-water slurry) for 10-20<br />
minutes to lower the compound’s solubility even more and maximize crystal formation (Figure 3.53d).<br />
Also place a portion of solvent in the ice bath, to be used later for rinsing during suction filtration.<br />
9. Use suction filtration to recover the solid from the mixture.<br />
<strong>Organic</strong> <strong>Chemistry</strong> <strong>Laboratory</strong> <strong>Techniques</strong> | Nichols | Page 189
3.6.B CRYSTALLIZATION SUMMARY<br />
Heat some solvent on a<br />
heat source to a boil<br />
(include boiling stones).<br />
To the impure solid in<br />
an Erlenmeyer flask,<br />
add a small portion of<br />
hot solvent.<br />
If a hot filtration step is<br />
expected, use boiling<br />
stones with the impure<br />
solid, or a boiling stick<br />
or stir bar if a filtration<br />
is not expected.<br />
Put both flasks on the<br />
heat source and bring to<br />
a boil.<br />
Add the minimum<br />
amount of boiling<br />
solvent needed to<br />
dissolve the impure<br />
solid, with swirling:<br />
For 100 mg – 1 g<br />
quantities, add 0.5 – 2<br />
mL solvent each time.<br />
For smaller scales, add<br />
solvent dropwise.<br />
Wait for each portion of<br />
solvent to come to a<br />
boil before adding<br />
more.<br />
Possibly use charcoal<br />
and hot filtration at this<br />
point if colored or<br />
insoluble impurities are<br />
present.<br />
When dissolved,<br />
remove the solution<br />
from the heat source<br />
and remove the boiling<br />
stick or stir bar if used.<br />
Allow the solution to<br />
slowly cool atop some<br />
paper towels, and with a<br />
small watch glass over<br />
the mouth of the<br />
Erlenmeyer.<br />
If a hint of cloudiness is<br />
seen in the solution, or<br />
if the solution has<br />
cooled a good deal<br />
without crystallizing,<br />
scratch with a glass<br />
stirring rod to initiate<br />
crystallization.<br />
A proper crystallization<br />
takes between 5-20<br />
minutes to complete.<br />
When the solution is at<br />
room temperature, place<br />
it in an ice bath for at<br />
least 10 minutes to<br />
maximize crystal<br />
formation.<br />
Also chill a rinse<br />
solvent in the ice bath.<br />
Collect the crystals by<br />
suction filtration.<br />
Table 3.4: Procedural summary for single solvent crystallization.<br />
<strong>Organic</strong> <strong>Chemistry</strong> <strong>Laboratory</strong> <strong>Techniques</strong> | Nichols | Page 190
3.6.C USING SOLVENTS OTHER THAN WATER<br />
This section describes a few key differences between a crystallization using water and one using volatile<br />
organic solvents. It is expected that readers have previously read or performed a crystallization using water<br />
as the solvent.<br />
3.6.C.1 ETHANOL, METHANOL, ETHYL ACETATE, AND HEXANES<br />
Ethanol, methanol, ethyl acetate, and hexanes are flammable and have moderate volatility, thus these<br />
solvents necessitate some different approaches than when using water as the crystallization solvent.<br />
Figure 3.54: a) Hotplate set to low (for ethanol), b+c) Adding solvent via pipette, d) Crystallizing atop some paper towels to<br />
encourage slow cooling.<br />
1. Although a steam bath is the preferred heat source for these solvents, if a hotplate is chosen to be used<br />
carefully it’s essential that you:<br />
a. Keep the hotplate on low (Figure 3.54a) and monitor the temperature of the solvent with a<br />
thermometer, being sure to patiently wait for the solvent to come to a boil instead of “cranking” up<br />
the heat.<br />
b. Use the hotplate in a fume hood to prevent a “blanket” of solvent vapors from forming around the<br />
hotplate, which have the potential to ignite.<br />
c. Monitor the hotplate the entire time while the solvent is heating.<br />
2. It may be more controllable to use a pipette to transfer portions of hot solvent to the solid instead of<br />
pouring (Figures 3.54 b+c). Pouring has a greater possibility of spilling, and if solvent drips onto the<br />
hotplate surface, it has the potential to ignite. Since solvent tends to cool in a pipette, care must be<br />
taken to be sure the solution is returned to a boil before adding more solvent.<br />
3. All organic solvents have lower heat capacities than water, so tend to cool more quickly. Be sure to set<br />
the cooling sample atop several paper towels to encourage a slow crystallization (Figure 3.54d).<br />
<strong>Organic</strong> <strong>Chemistry</strong> <strong>Laboratory</strong> <strong>Techniques</strong> | Nichols | Page 191
3.6.C.2 DIETHYL ETHER, ACETONE, AND PETROLEUM ETHER (LOW-BOILING)<br />
Diethyl ether, acetone, and low-boiling petroleum ether are flammable and highly volatile, and thus<br />
necessitate further considerations than when using water or other organic solvents as the crystallization<br />
solvent.<br />
Figure 3.55: a) Hovering a flask above the steam bath, b) Adding solvent by pipette, c) Inevitable vigorous boiling, d) Using an<br />
inverted beaker during crystallization.<br />
•<br />
•<br />
•<br />
As these solvents have very low boiling points, they MUST be heated with a steam bath (Figure 3.55a),<br />
not a hotplate, or ignition may occur on the hotplate’s surface.<br />
Steam is much hotter than is necessary to bring these solvents to a boil, and they must therefore be<br />
closely monitored during heating. To prevent too vigorous boiling, flasks may need to be lifted<br />
periodically off the steam bath, or simply hovered above the steam bath (Figure 3.55a) instead of resting<br />
directly atop the bath (Figure 3.55c). To control boiling, the steam rate should also be turned down.<br />
Using a Pasteur pipette with warm solvent is impractical with very volatile solvents, as liquid will<br />
undoubtedly drip out the end of the pipette before it is able to be delivered. Instead of heating the<br />
solvent beforehand, simply add cold solvent to the solid by pipette each time (Figure 3.55b), and then<br />
be sure to allow each portion to come to a boil before adding more.<br />
Liquid may drip out the tip of a pipette even when dispensing cold solvent, which happens as solvent<br />
evaporates into the pipette’s headspace, and the additional vapor causes the headspace pressure to<br />
exceed the atmospheric pressure. To prevent a pipette from dripping, withdraw and expunge solvent<br />
into the pipette several times. Once the headspace is saturated with solvent vapors, the pipette will no<br />
longer drip.<br />
•<br />
•<br />
These solvents boil so readily that it’s possible they will vaporize as quickly as a new portion of solvent<br />
is added (Figure 3.55c shows vigorous boiling). It may feel as if you keep adding solvent and are<br />
“getting nowhere” with the additions. It is important to be watchful of the solvent volume in the flask,<br />
and if the additions appear to be quickly “disappearing,” raise the flask above the steam bath or turn<br />
down the steam to moderate the rate of heating.<br />
As these solvents are not much warmer than room temperature when boiling, they will cool very quickly.<br />
Thus, it may be helpful to cover the flask with an inverted beaker to create an insulating atmosphere in<br />
addition to setting the cooling flask atop several paper towels (Figure 3.55d).<br />
<strong>Organic</strong> <strong>Chemistry</strong> <strong>Laboratory</strong> <strong>Techniques</strong> | Nichols | Page 192
3.6.D MIXED SOLVENT CRYSTALLIZATION<br />
Figure 3.56: a) Initial sample of trans-cinnamic acid, b) Crystallization using methanol/water, c) Crystallized trans-cinnamic acid.<br />
The crystallization pictured in this section shows purification of a roughly 1 g sample of trans-cinnamic<br />
acid. Trans-cinnamic acid is soluble in methanol and insoluble in water, and this crystallization uses a<br />
mixed solvent of methanol and water to give a 74% recovery.<br />
It is assumed that students performing this technique have previously performed or read about a singlesolvent<br />
crystallization.<br />
Figure 3.57: a) Trans-cinnamic acid is insoluble in water and soluble in methanol, b) Adding solid to the flask, c) Adding methanol<br />
off the heat source, d) Adding enough methanol to dissolve the solid.<br />
1. Determine two miscible solvents that can be used for the crystallization (Figure 3.57a): the desired<br />
compound should be soluble in one solvent (called the “soluble solvent”) and insoluble in the other<br />
solvent (called the “insoluble solvent”).<br />
2. Transfer the impure solid to be crystallized into an appropriately sized Erlenmeyer flask (Figure 3.57b).<br />
3. Place some of the “soluble solvent” into the flask (Figure 3.57c), add a boiling stick (or boiling stones<br />
if preferred), then heat atop a steam bath (Figure 3.57d). A hotplate can be used cautiously if using the<br />
mixed solvents methanol / water or ethanol / water.<br />
<strong>Organic</strong> <strong>Chemistry</strong> <strong>Laboratory</strong> <strong>Techniques</strong> | Nichols | Page 193
Figure 3.58: a) Addition of just enough soluble solvent (methanol) to dissolve the solid, b) Addition of the insoluble solvent (water)<br />
dropwise, c) Sustained cloudiness after addition of enough insoluble solvent, d) Addition of soluble solvent to clarify.<br />
4. Add more of the “soluble solvent” in portions until the solid just dissolves (Figure 3.58a). Be sure to<br />
allow time in between additions, and allow each addition to come completely to a boil before adding<br />
more.<br />
5. Add the “insoluble solvent” in portions with heating until the solution becomes just cloudy (Figure<br />
3.58c).<br />
6. Add the “soluble solvent” dropwise with heating until the solution again clarifies (Figure 3.58d).<br />
Figure 3.59: a) Cooling, b+c) Crystallization.<br />
7. Remove the flask from the heat source, remove the boiling stick and set the flask atop a paper towel<br />
folded several times. Cover the mouth of the Erlenmeyer flask with a watch glass, and allow the<br />
solution to slowly cool to room temperature (Figure 3.59a).<br />
8. As the solution cools, eventually solid crystals should form (Figure 3.59b). Use a glass stirring rod to<br />
scratch the flask and initiate crystallization if necessary. Place the crystals in an ice-water bath for 10-<br />
20 minutes and collect the solid by suction filtration.<br />
<strong>Organic</strong> <strong>Chemistry</strong> <strong>Laboratory</strong> <strong>Techniques</strong> | Nichols | Page 194
3.6.E MIXED SOLVENT SUMMARY<br />
Find a miscible pair of<br />
solvents: one in which<br />
the desired compound<br />
is soluble (called the<br />
“soluble solvent”) and<br />
one in which the<br />
compound is insoluble<br />
(called the “insoluble<br />
solvent”)<br />
Place the impure solid<br />
in an Erlenmeyer flask<br />
along with a boiling<br />
stick (or boiling stones<br />
if preferred).<br />
Add the soluble solvent<br />
in portions while<br />
heating until the solid<br />
just dissolves.<br />
Add the insoluble<br />
solvent in portions with<br />
heating until the<br />
solution becomes<br />
faintly cloudy.<br />
Add the “soluble<br />
solvent” dropwise with<br />
heating until the<br />
solution is clarified<br />
(transparent).<br />
Allow time in between<br />
additions, and allow<br />
each addition to come<br />
completely to a boil<br />
before adding more.<br />
Remove the boiling<br />
stick (if used) and allow<br />
the system to come to<br />
room temperature while<br />
sitting atop some paper<br />
towels and with the<br />
flask’s mouth covered<br />
by a watch glass.<br />
Scratch with a glass<br />
stirring rod to initiate<br />
crystallization if<br />
necessary.<br />
Submerge in an ice bath<br />
for 10-20 minutes.<br />
Collect the crystals by<br />
suction filtration.<br />
Table 3.5: Procedural summary for mixed solvent crystallization.<br />
<strong>Organic</strong> <strong>Chemistry</strong> <strong>Laboratory</strong> <strong>Techniques</strong> | Nichols | Page 195
3.6.F TROUBLESHOOTING<br />
3.6.F.1 CRYSTALLIZATION IS TOO QUICK<br />
Rapid crystallization is discouraged because impurities tend to become incorporated into the crystal,<br />
defeating the purpose of this purification technique. It may be acceptable for crystallization to start<br />
immediately after removing the flask from the heat source, but if a large amount of solid is formed then the<br />
compound is crystallizing too fast.<br />
An ideal crystallization has some crystals forming in approximately 5 minutes, and growth continuing over<br />
a period of 20 minutes. Below are methods that can be used to slow the growth of crystals:<br />
1. Place the solid back on the heat source and add extra solvent (perhaps 1-2 mL for 100 mg of solid), so<br />
that you have exceeded the minimum amount of hot solvent needed to dissolve the solid. Although<br />
more compound will dissolve in the mother liquor, the compound will stay soluble longer once set aside<br />
to cool.<br />
For example, in the crystallization of trans-cinnamic acid with a mixed solvent of methanol and water,<br />
use of the minimum amount of hot solvent to dissolve the solid (Figure 3.60a) resulted in the solid<br />
immediately crashing out of solution when the solution was taken off the heat source (Figure 3.60b).<br />
To remedy this problem, the solid was placed back on the steam bath, additional methanol (soluble<br />
solvent) was added, brought to a boil to dissolve the solid, and then cooled. The solid then began to<br />
crystallize much more slowly (Figure 3.60e), taking a period of 15 minutes to fully crystallize.<br />
Figure 3.60: a) The minimal amount of methanol/water was used to dissolve a sample of trans-cinnamic acid, b) Upon cooling,<br />
the solid immediately crashed out, c) The cloudy solution was placed back on the heat source and extra methanol was added, d)<br />
The solid dissolved, e+f) The solid crystallized more slowly when using more solvent.<br />
2. If the minimal amount of hot solvent needed to dissolve the solid reached a height of less than 1 cm in<br />
the flask, the flask may be too big for the crystallization. A shallow solvent pool has a high surface<br />
area, which leads to fast cooling. Transfer the solution to a smaller flask (using some solvent to rinse<br />
the flask, and then boil away the same amount of solvent used for rinsing) and repeat the crystallization.<br />
3. Be sure to use a watch glass over the top of the Erlenmeyer flask to trap heat, and set the flask atop<br />
some material to insulate the bottom (several paper towels, a wood block, or cork ring). An inverted<br />
beaker could also be tried to create an insulating atmosphere around the cooling flask.<br />
<strong>Organic</strong> <strong>Chemistry</strong> <strong>Laboratory</strong> <strong>Techniques</strong> | Nichols | Page 196
3.6.F.2 CRYSTALLIZATION DOESN’T HAPPEN<br />
It can be quite frustrating to set aside the dissolved solution to cool and have no crystals form at all. Methods<br />
to initiate crystallization were discussed in great detail previously. To summarize, here are methods that<br />
can be tried (in hierarchical order) to form crystals depending on the appearance of the solution:<br />
1. If the solution is cloudy, scratch the flask with a glass stirring rod.<br />
2. If the solution is clear,<br />
a. First try scratching the flask with a glass stirring rod.<br />
b. Add a seed crystal (a small speck of crude solid saved from before<br />
the crystallization was begun, or a bit of pure solid from the reagent<br />
jar).<br />
c. Dip a glass stirring rod into the solution, remove it, and allow the<br />
solvent to evaporate to produce a thin residue of crystals on the rod<br />
(Figure 3.61). Then touch the rod to the solution’s surface, or stir<br />
the solution with the rod to dislodge small seed crystals.<br />
d. Return the solution to the heat source and boil off a portion of solvent<br />
(perhaps half), then cool again.<br />
e. Lower the temperature of the cooling bath.<br />
Figure 3.61: A glass stirring rod<br />
dipped into a solution of benzil in<br />
ethanol, to initiate crystallization.<br />
3. If very few crystals are seen, there is likely too much solvent. Return the solution to the heat source<br />
and boil off a portion of solvent, then cool again.<br />
4. If all else fails, the solvent can always be removed by rotary evaporation to recover the crude solid.<br />
Another crystallization can be attempted, perhaps with a different solvent system.<br />
<strong>Organic</strong> <strong>Chemistry</strong> <strong>Laboratory</strong> <strong>Techniques</strong> | Nichols | Page 197
3.6.F.3 THE YIELD IS POOR<br />
A crystallization may result with a really poor yield (e.g. less than 20%). There are several reasons why<br />
this might happen:<br />
1. Too much solvent may have been used during the crystallization, and therefore large quantities of<br />
compound were lost to the mother liquor. If the mother liquor (the filtrate after suction filtration) has<br />
not been disposed of, this can be tested by dipping a glass stirring rod into the mother liquor and letting<br />
it dry. If the solvent evaporates to leave a large residue on the rod, there is a lot of compound left in<br />
solution. Additional compound may be recovered by boiling away some of the solvent and repeating<br />
the crystallization (this is called “second crop crystallization”), or by removing all of the solvent by<br />
rotary evaporation and repeating the crystallization with a different solvent.<br />
2. Too much solvent may have been used while attempting to dissolve semi-insoluble impurities. If this<br />
may have been the case, a hot filtration could have been attempted to remove the impurities. (The solid<br />
would have to be recovered from the mother liquor first through rotary evaporation in order to attempt<br />
the crystallization again.)<br />
3. Too much charcoal may have been used to decolorize the solution (a pitch black solution has too much<br />
charcoal). Too much charcoal decreases the yield as charcoal can adsorb the desired compound along<br />
with impurities. There is no way to recover the product once it is adsorbed by charcoal.<br />
4. If a hot filtration step were used, compound may have been lost in the filter paper and/or on the stem<br />
of the funnel. Additionally, too much solvent may have been used when adding a portion to get the<br />
system hot before filtration. The extra solvent before filtration adds to the “minimum amount of hot<br />
solvent” and if in substantial excess, can cause a loss of compound to the mother liquor.<br />
5. If the impure solid was the product of a chemical reaction, the<br />
reaction may not have worked well. This could be assessed if a<br />
crude mass had been obtained: if the crude mass was very low to<br />
begin with, then the low crystallized yield was due to problems with<br />
the reaction, not the crystallization.<br />
If a crude mass was not obtained, assessment of the rough volumes<br />
of solid before and after crystallization can be used. If the volumes<br />
were similar, the loss of yield may not be due to problems with the<br />
crystallization. Note that crystallized solids tend to be a lot<br />
“fluffier” than crude solids (Figure 3.62), so “eyeballing” solid<br />
volumes are only a very rough assessment of quantity.<br />
Figure 3.62: Two 6.5 mg samples of<br />
benzil: (left) from reagent jar, (right)<br />
crystallized sample.<br />
<strong>Organic</strong> <strong>Chemistry</strong> <strong>Laboratory</strong> <strong>Techniques</strong> | Nichols | Page 198
3.6.F.4 LIQUID DROPLETS FORM (THE SOLID “OILS OUT”)<br />
When cooling, a compound may come out of solution as a liquid rather than a solid (Figure 3.63). This<br />
process is called “oiling out” and happens when the melting point of the solid is lower than the solution’s<br />
temperature. This is a problem in crystallization because when compounds liquefy first, they rarely form<br />
pure crystals. This is due to the fact that impurities often dissolve better in the liquid droplets than they do<br />
in the solvent. Figure 3.63c shows a sample of crude acetanilide that has oiled out (the droplets are impure<br />
liquid acetanilide), and the sample is contaminated with a methyl red impurity (which appears red in the<br />
low pH of the solution, an artifact of how the crude solid was synthesized). The oily acetanilide droplets<br />
appear more colored than the solution, indicating a higher quantity of dissolved methyl red impurity. If an<br />
oiled out liquid eventually solidifies, it often forms an impure glass-like non-crystalline solid.<br />
Figure 3.63: Examples of a sample “oiling out” during the heating process (which would look similar as a sample cools): a) Oily<br />
droplets in a tan acetanilide crude solid, b+c) Oily droplets containing methyl red and acetanilide in water.<br />
The reasons for oiling out are several, and it can happen while dissolving the solid and during crystallization.<br />
It may be that the melting point of the solid is naturally low. It may also be that a solid is so impure that its<br />
melting point is dramatically lowered (as impurities lower the melting point).<br />
There are several ways to attempt to fix an oiled out solution:<br />
1. Return the sample to the heat source and add a bit more solvent, then cool the solution again. (If using<br />
a mixed solvent system, add more of the “soluble solvent”). The solid may have been coming out of<br />
solution too quickly (and thus at a temperature above its melting point), so it may stay soluble longer<br />
if there is more solvent.<br />
2. Add a charcoal step if it was not already a part of the crystallization. The solid may be melting because<br />
there are large quantities of impurities, which charcoal can remove. This especially might work if a<br />
colored tint is noticed in the hot solution.<br />
If either of these methods fail, recover the crude solid by rotary evaporation and attempt another<br />
crystallization. If the failed attempt used a mixed solvent, try a single solvent if possible. Or choose<br />
another solvent with similar solubility properties, but with a lower boiling point. For example, if<br />
ethanol were used as the solvent the first time, repeat the crystallization using methanol. Methanol has<br />
similar solubility properties as ethanol, but its lower boiling point may allow for the solid to come out<br />
of solution above its melting point.<br />
<strong>Organic</strong> <strong>Chemistry</strong> <strong>Laboratory</strong> <strong>Techniques</strong> | Nichols | Page 199
<strong>Organic</strong> <strong>Chemistry</strong> <strong>Laboratory</strong> <strong>Techniques</strong> | Nichols | Page 200
CHAPTER 4<br />
EXTRACTION<br />
<strong>Organic</strong><br />
solvents and<br />
colored aqueous<br />
solutions in<br />
separatory<br />
funnels.<br />
Food dyes<br />
dissolving in<br />
aqueous<br />
solution.<br />
<strong>Organic</strong> <strong>Chemistry</strong> <strong>Laboratory</strong> <strong>Techniques</strong> | Nichols | Page 201
CHAPTER 4: EXTRACTION, TABLE OF CONTENTS<br />
4.1 Overview of Extraction 203 4.5 Step-by-Step Procedures 215<br />
4.2 Uses of Extraction 204 4.5.A Single Extraction 215<br />
4.2.A Extracting Natural Compounds 204 4.5.B Single Extraction Summary 221<br />
4.2.B Transferring Compounds from Layers 204 4.5.C Multiple Extractions 222<br />
4.2.C Selective Removal of Components 205 <strong>Organic</strong> Layer is on the Top 222<br />
<strong>Organic</strong> Layer is on the Bottom 224<br />
4.3 Which Layer is Which? 206 4.5.D Troubleshooting 225<br />
4.3.A Density 206 There is Only One Layer 225<br />
4.3.B How To Determine the Aqueous Layer 207 There are Three Layers 225<br />
There in Insoluble Material at the<br />
Interface<br />
225<br />
4.4 Extraction Theory 208 The Interface Cannot Be Seen 226<br />
4.4.A Partition / Distribution Coefficient (K) 208 The Layers Don't Separate Well 226<br />
(An Emulsion Formed)<br />
4.4.B Choosing a Solvent with Solubility Data 209 4.5.E Microscale Extractions 228<br />
4.4.C Quantitating Single Extraction 210<br />
4.4.D Multiple Extractions 211 4.6 Reaction Work-ups 230<br />
Overview of Multiple Extraction 211 4.6.A Purpose of a Work-up 230<br />
Quantitating Multiple Extraction 213 4.6.B Common Washes 230<br />
Water 230<br />
Sodium Bicarbonate and Sodium 232<br />
Carbonate<br />
Brine (Saturated NaCl) 234<br />
4.6.C Drying Agents 237<br />
Why They are Used 237<br />
Types of Drying Agents 238<br />
Drying Agents Procedure 240<br />
4.7 Acid-Base Extraction 242<br />
4.7.A How They Work 242<br />
4.7.B Sodium Bicarbonate Washes 243<br />
4.7.C Mixtures of Acids and Bases 244<br />
Extracting Bases 244<br />
Extracting Carboxylic Acids Vs. 244<br />
Phenols<br />
Extracting Acid, Base, and Neutral<br />
Components<br />
245<br />
<strong>Organic</strong> <strong>Chemistry</strong> <strong>Laboratory</strong> <strong>Techniques</strong> | Nichols | Page 202
4.1 OVERVIEW OF EXTRACTION<br />
“Extraction” refers to transference of compound(s) from a solid or liquid into a different solvent or phase.<br />
When a tea bag is added to hot water, the compounds responsible for the flavor and color of tea are extracted<br />
from the grounds into the water (Figure 4.1a). Decaffeinated coffee is made by using solvents or<br />
supercritical carbon dioxide to extract the caffeine out of coffee beans. Bakers use the extract of vanilla,<br />
almond, orange, lemon, and peppermint in their dishes, essences that have been extracted from plant<br />
materials using alcohol (Figure 4.1b).<br />
Figure 4.1: Examples of extraction: a) Tea, b) Baking extracts, c) Plant pigments extracted into water droplets after sprinklers hit<br />
a fallen leaf on the sidewalk.<br />
In the chemistry lab, it is most common to use liquid-liquid extraction, a process that occurs in a separatory<br />
funnel (Figure 4.2). A solution containing dissolved components is placed in the funnel and an immiscible<br />
solvent is added, resulting in two layers that are shaken together. It is most common for one layer to be<br />
aqueous and the other an organic solvent. Components are “extracted” when they move from one layer to<br />
the other. The shape of the separatory funnel allows for efficient drainage and separation of the two layers.<br />
add immiscible<br />
solvent<br />
shake layers<br />
Figure 4.2: Schematic of extraction.<br />
Compounds move from one liquid to another depending on their relative solubility in each liquid. A<br />
quick guide to solubility is the “like dissolves like” principle, meaning that nonpolar compounds should be<br />
readily extracted into nonpolar solvents (and vice versa). The compounds responsible for the taste and<br />
color of tea must be polar if they are readily extracted into hot water. When allowed to equilibrate between<br />
two liquids in a separatory funnel, the majority of a compound often ends up in the layer that it is more<br />
soluble.<br />
<strong>Organic</strong> <strong>Chemistry</strong> <strong>Laboratory</strong> <strong>Techniques</strong> | Nichols | Page 203
4.2 USES OF EXTRACTION<br />
There are several reasons to use extraction in the chemistry lab. It is a principal method for isolating<br />
compounds from plant materials. Extraction moves compounds from one liquid to another, so that they<br />
can be more easily manipulated or concentrated. It also enables the selective removal of components in a<br />
mixture.<br />
4.2.A EXTRACTING NATURAL COMPOUNDS<br />
Fruit and plant leaves are primarily composed of cellulose and water, but also contain “essential oils.” a<br />
greasy mixture of compounds that capture the “essence” of the plant material’s smell and taste. Orange oil<br />
is roughly 95% limonene (Figure 4.3b), and due to its nonpolar structure, can be extracted from its rind into<br />
an organic solvent like hexanes or dichloromethane (Figure 4.3a). The oil can then be concentrated and<br />
used to flavor or scent foods, cleaning supplies, and candles.<br />
Figure 4.3: a) Orange rind extracted into dichloromethane, b) GC spectrum of orange oil.<br />
In the chemistry lab, essential oils are often extracted from their source using solvents, and analyzed using<br />
gas chromatography or spectroscopy.<br />
4.2.B TRANSFERRING COMPOUNDS FROM LAYERS<br />
Another method for extracting essential oils from fragrant plant materials is through steam distillation<br />
(Figure 4.4b). This process often results in the lovely smelling compounds suspended in the aqueous<br />
distillate (Figure 4.4c). In order to concentrate the oil, the aqueous suspension is often extracted with a<br />
low-boiling organic solvent (Figure 4.4d), which can then be easily removed from the oil.<br />
Figure 4.4: a) Whole cloves, b) Steam distillation of cloves, c) Milky distillate composed of oil and water, d) Using extraction to<br />
separate the oil from the water.<br />
<strong>Organic</strong> <strong>Chemistry</strong> <strong>Laboratory</strong> <strong>Techniques</strong> | Nichols | Page 204
4.2.C SELECTIVE REMOVAL OF COMPONENTS<br />
When conducting an experiment that synthesizes a chemical product, a reaction is often complete whenever<br />
stirring or heating is ceased. And yet, there are always more steps in the procedure! What commonly<br />
happens directly afterwards is to “work-up” the reaction in some way. A work-up refers to methods aimed<br />
at isolating the product from the reaction mixture, and often begins by using a separatory funnel and<br />
extractions.<br />
For example, imagine that acetic acid and isopentanol have been heated in the<br />
presence of an acid catalyst for one hour (Figure 4.5) in order to make isopentyl<br />
acetate, an ester that smells of bananas (see reaction scheme in Figure 4.6). After<br />
the one-hour time period, there is unfortunately not just the banana-smelling<br />
ester in the flask. The flask will also contain byproducts (the water in this case),<br />
leftover starting materials if the reaction is incomplete, as well as any catalysts<br />
used (H 2 SO 4 in this case). In this example, there could be five compounds in the<br />
reaction flask after heating is ceased (Figure 4.7)!<br />
O<br />
+<br />
H 2 SO 4<br />
O<br />
OH HO<br />
O<br />
acetic acid isopentanol isopentyl acetate<br />
+ H 2 O<br />
Figure 4.5: Reaction to make<br />
isopentyl acetate.<br />
Figure 4.6: Reaction scheme to produce isopentyl acetate.<br />
When “working up” this reaction, the resulting mixture is often poured into a separatory funnel along with<br />
some water and organic solvent. This produces two layers in the separatory funnel: an aqueous layer and<br />
an organic layer.<br />
After shaking this heterogeneous mixture, the<br />
compounds distribute themselves based on their<br />
solubility. Compounds that have high water<br />
solubility favor the aqueous layer while less<br />
polar compounds favor the organic layer. In this<br />
example, the acid catalyst and residual<br />
carboxylic acid or alcohol would likely be drawn<br />
into the water layer. The ester would have a<br />
greater affinity for the organic layer than the<br />
aqueous layer, causing it to be isolated from the<br />
other components in the reaction mixture (Figure<br />
4.7).<br />
H O 2 O<br />
O<br />
HO<br />
H 2 SO 4<br />
O<br />
OH<br />
O<br />
O<br />
H 2 SO 4<br />
HO<br />
O<br />
OH<br />
aqueous<br />
organic<br />
In this example, it is possible that small amounts<br />
of alcohol are also drawn into the organic layer,<br />
but they could likely be removed with a water<br />
“wash.” In a wash, the desired compound (e.g.<br />
Figure 4.7: Extraction using water and an organic solvent to isolate<br />
isopentyl acetate from the reaction mixture.<br />
the isopentyl acetate), remains in its current layer of the separatory funnel (in this example the organic<br />
layer), and unwanted compounds are removed, or “washed away” into another layer (e.g. the aqueous layer).<br />
A wash is different than an extraction, because in an extraction the desired compound moves from its current<br />
location (i.e. moves from an aqueous layer to an organic layer), while in washing the desired compound<br />
stays in its current layer.<br />
<strong>Organic</strong> <strong>Chemistry</strong> <strong>Laboratory</strong> <strong>Techniques</strong> | Nichols | Page 205
4.3 WHICH LAYER IS WHICH?<br />
4.3.A DENSITY<br />
It is essential that you know whether the aqueous layer is above or below the organic layer in the separatory<br />
funnel, as it dictates which layer is kept and which is eventually discarded.<br />
Two immiscible solvents will stack atop one another based on differences in density. The solution with the<br />
lower density will rest on top, and the denser solution will rest on the bottom.<br />
Most non-halogenated organic solvents have densities less than 1 g/mL, so will float atop an aqueous<br />
solution (if they are immiscible). A notable exception is that halogenated solvents are denser than water<br />
(have densities > 1 g/mL), and so will instead sink below aqueous solutions (Table 4.1 and Figure 4.8).<br />
Solvent<br />
Density<br />
(g/mL)<br />
Pentane 0.626<br />
Petroleum Ether<br />
(mixture of C 5 -C 6 hydrocarbons)<br />
0.653<br />
Hexanes<br />
(mixture of C 6 hydrocarbons)<br />
0.655<br />
Diethyl ether 0.713<br />
Ethyl acetate 0.902<br />
Water 0.998<br />
Dichloromethane (CH 2 Cl 2 ) 1.33<br />
Chloroform (CHCl 3 ) 1.49<br />
Diethyl ether<br />
Aqueous<br />
Aqueous<br />
Dichloromethane<br />
Table 4.1: Density of common solvents at room temperature. 1<br />
Figure 4.8: Relative position of aqueous and organic layers. Most organic solvents are on top, except for halogenated solvents,<br />
which are typically on bottom.<br />
Many solutions used in separatory funnels are fairly dilute, so the density of the solution is approximately<br />
the same as the density of the solvent. For example, if mixing diethyl ether and a 10% NaOH (aq) solution<br />
in a separatory funnel, knowledge of the exact density of the 10% NaOH solution is not necessary. A 10%<br />
NaOH (aq) solution is 90% water (by mass), meaning the density should be fairly close to the density of<br />
water (approximately 1 g/mL). The actual density of a 10% NaOH (aq) solution is 1.1089 g/mL, a value<br />
only slightly greater than the density of water. The diethyl ether will be the top layer in this situation.<br />
There are times, however, when so many solute particles are dissolved that a solution’s density is much<br />
greater than the solvent density. For example, a saturated NaCl (aq) solution has a density around 1.2<br />
g/mL (significantly greater than the density of water), and can cause separation problems with solvents of<br />
similar densities like dichloromethane.<br />
1 The solvents listed in Table 4.1 are pure compounds except for petroleum ether and hexanes. “Petroleum Ether” contains pentane,<br />
2-methylbutane, 2,2-dimethylpropane, n-hexane, 2-methylpentane, 3-methylpentane, 2,2-dimethylbutane, and 2,3-dimethylbutane.<br />
“Hexanes” contains 2-methylpentane, 3-methylpentane, n-hexane and methylcyclopentane.<br />
<strong>Organic</strong> <strong>Chemistry</strong> <strong>Laboratory</strong> <strong>Techniques</strong> | Nichols | Page 206
4.3.B HOW TO DETERMINE THE AQUEOUS LAYER<br />
Solvent densities may be used to predict which layer is organic and which is aqueous in a separatory funnel,<br />
but there are other methods that can be useful in this determination. If unsure which layer is aqueous and<br />
which layer is organic, do one of the following things:<br />
1. Add a bit of water from a squirt bottle to the separatory funnel (Figure 4.9a) and watch where the water<br />
droplets go.<br />
If the top layer is aqueous, the water droplets should mix with the top layer, and they will look as if<br />
they disappear. If the bottom layer is aqueous, the water droplets will fall through the top layer to mix<br />
with the bottom layer (as indicated by an arrow in Figures 4.9 b+c). If it is difficult to track where the<br />
water droplets go, also keep track of the volume of the layers: whichever layer increases with the<br />
addition of water is the aqueous layer.<br />
Figure 4.9: a) Adding water from a squirt bottle to determine which layer is aqueous, b) Water colored with green food dye is<br />
dropped into the funnel and falls to the bottom layer (aqueous), c) Water falling to the bottom layer, as indicated by the arrow.<br />
2. Consider relative volumes of aqueous and organic solvents, based on quantities used in the experiment.<br />
Figure 4.10a shows a 125 mL separatory funnel containing 10 mL hexane and 100 mL water (tinted<br />
with blue dye). If these were the quantities used in an experiment, the aqueous layer would have to be<br />
the lower layer as it is so much larger. Although unequivocal in this case, it is important to know that<br />
the odd shape of the separatory funnel may cause you to misjudge volumes. A separatory funnel with<br />
equal volumes of aqueous and organic layers is shown in Figure 4.10b, although the layers rise to<br />
different heights in the funnel.<br />
Figure 4.10: a) 10 mL organic solvent (hexanes) with 100 mL water (colored with blue dye) in a 125 mL separatory funnel, a) 40<br />
mL each of organic solvent (ethyl acetate), and water (colored with blue dye).<br />
<strong>Organic</strong> <strong>Chemistry</strong> <strong>Laboratory</strong> <strong>Techniques</strong> | Nichols | Page 207
4.4 EXTRACTION THEORY<br />
4.4.A PARTITION / DISTRIBUTION COEFFICIENT (K)<br />
When a solution is placed in a separatory funnel and shaken with an immiscible solvent, solutes often<br />
dissolve in part into both layers. The components are said to “partition” between the two layers, or<br />
“distribute themselves” between the two layers. When equilibrium has established, the ratio of<br />
concentration of solute in each layer is constant for each system, and this can be represented by a value K<br />
(called the partition coefficient or distribution coefficient).<br />
Molarity in organic phase<br />
K=<br />
Molarity in aqueous phase<br />
For example, morphine has a partition coefficient of roughly 6 in ethyl acetate and water. 2 If dark circles<br />
represent morphine molecules, 1.00 g of morphine would distribute itself as shown in Figure 4.11.<br />
Figure 4.11: Distribution of morphine in ethyl acetate and water.<br />
Note that with equal volumes of organic and aqueous phases, the partition coefficient represents the ratio<br />
of particles in each layer (Figure 4.11a). When using equal volumes, a K of ~6 means there will be six<br />
times as many morphine molecules in the organic layer as there are in the water layer. The particulate ratio<br />
is not as simple when the layer volumes are different, but the ratio of concentrations always equals the K<br />
(Figure 4.11b).<br />
The partition coefficients reflect the solubility of a compound in the organic and aqueous layers, and so is<br />
dependent on the solvent system used. For example, morphine has a K of roughly 2 in petroleum ether and<br />
water, and a K of roughly 0.33 in diethyl ether and water. 2 When the K is less than one, it means the<br />
compound partitions into the aqueous layer more than the organic layer.<br />
2 The partition coefficients were approximated using solubility data found in: A. Seidell, Solubilities of Inorganic and <strong>Organic</strong><br />
Substances, D. Van Nostrand Company, 1907.<br />
<strong>Organic</strong> <strong>Chemistry</strong> <strong>Laboratory</strong> <strong>Techniques</strong> | Nichols | Page 208
4.4.B CHOOSING A SOLVENT WITH SOLUBILITY DATA<br />
The partition coefficient K is the ratio of the compound’s concentration in the organic layer compared to<br />
the aqueous layer. Actual partition coefficients are experimental, but can be estimated by using solubility<br />
data.<br />
K=<br />
Molarity in organic phase<br />
Molarity in aqueous phase<br />
K~<br />
Solubility in organic phase<br />
Solubility in aqueous phase<br />
The K’s calculated using molarity and solubility values are not identical since different equilibria are<br />
involved. The true K represents the equilibrium between aqueous and organic solutions, while solubility<br />
data represent the equilibrium between a saturated solution and the solid phase. The two systems are related<br />
however, and K’s derived from solubility data should be similar to actual K’s.<br />
Solubility data can therefore be used to choose an appropriate solvent for an extraction. For example,<br />
imagine that caffeine (Figure 4.12) is intended to be extracted from tea grounds into boiling water, then<br />
later extracted into an organic solvent. Solubility data for caffeine is shown in Table 4.2.<br />
Solvent<br />
Water<br />
Diethyl Ether<br />
Benzene<br />
Chloroform<br />
1 g caffeine dissolves in<br />
(25 ˚C)<br />
46 mL<br />
530 mL<br />
100 mL<br />
5.5 mL<br />
Table 4.2: Solubility of caffeine in different solvents. 3<br />
Figure 4.12: Caffeine.<br />
Both diethyl ether and benzene at first glance appear to be poor choices for extraction because caffeine is<br />
more soluble in water than in either solvent (if a gram of caffeine dissolves in 46 mL water, but 100 mL of<br />
benzene, caffeine is more soluble in water). When extracting with either of these solvents, the K would be<br />
less than one (see calculation below) and it would be an “uphill battle” to draw out the caffeine from the<br />
water. However, caffeine is more soluble in chloroform than water, so chloroform would be the best choice<br />
of the solvents shown in terms of the maximum extraction of caffeine.<br />
K benzene ~<br />
1 g caffeine<br />
100 mL benzene<br />
1 g caffeine<br />
46 mL water<br />
~ 0.46 K chloroform ~<br />
1 g caffeine<br />
5.5 mL chloroform<br />
1 g caffeine<br />
46 mL water<br />
~ 8.4<br />
Another consideration when choosing a solvent for extraction is toxicity: chloroform is carcinogenic and<br />
therefore is probably not be the best option despite its excellent solvation ability. A further consideration<br />
is the solubility of other components present in a mixture. If the goal is to extract caffeine preferentially<br />
and leave behind other components in the tea, one solvent may be more selective in this regard.<br />
3 From: The Merck Index, 12 th edition, Merck Research Laboratories, 1996.<br />
<strong>Organic</strong> <strong>Chemistry</strong> <strong>Laboratory</strong> <strong>Techniques</strong> | Nichols | Page 209
4.4.C QUANTITATING SINGLE EXTRACTION<br />
Hyoscyamine is an alkaloid from a plant in<br />
the nightshade family (Figure 4.13a), and is<br />
used medicinally to provide relief for a<br />
variety of gastrointestinal disorders. Its<br />
solubility data is shown in Figure 4.13b.<br />
Imagine that a nearly saturated solution of<br />
0.50 g hyoscyamine in 150 mL water is to<br />
be extracted into 150 mL diethyl ether.<br />
How much hyoscyamine would be extracted<br />
into the diethyl ether layer in this process?<br />
Figure 4.13: a) Deadly nightshade plant (photo public domain from<br />
pixabay.com), b) Solubility data for hyoscyamine (Ref. 2).<br />
This quantity can be approximated using the solubility data. Taking the ratio of the compound’s solubility<br />
in diethyl ether compared to water gives an approximate K of 4.<br />
K ~<br />
organic solubility<br />
water solubility<br />
~<br />
1.44 g hyoscyamine / 100 mL diethyl ether<br />
0.354 g hyoscyamine / 100 mL water<br />
~ 4.07 (approximate K)<br />
If “x” is the gram quantity of hyoscyamine extracted into the diethyl ether layer, then “0.50 g – x” would<br />
remain in the aqueous layer after equilibrium is established. Knowing the value of K, the value of x can be<br />
solved for using the equation below.<br />
4.07 =<br />
x<br />
150 mL ether<br />
0.50 g-x<br />
150 mL water<br />
After solving the algebra, x = 0.40 g<br />
This result means that 0.40 g of the original 0.50 g of hyoscyamine is extracted into the diethyl ether using<br />
a single extraction. This process is summarized in Figure 4.14.<br />
Add 150<br />
mL ether<br />
150 mL<br />
Ether<br />
x<br />
150 mL<br />
Ether<br />
0.40 g<br />
150 mL<br />
Aqueous<br />
0.50 g<br />
150 mL<br />
Aqueous<br />
0.50 - x<br />
150 mL<br />
Aqueous<br />
0.10 g<br />
Figure 4.14: Single extraction of hyoscyamine (K ~ 4) from water into diethyl ether.<br />
In this example, a single extraction resulted in extraction of 80% of the hyoscyamine (100% × 0.40 g / 0.50<br />
g) from the aqueous layer into the organic layer. The partitioning of the compound between the two layers<br />
caused the sample to be incompletely extracted.<br />
<strong>Organic</strong> <strong>Chemistry</strong> <strong>Laboratory</strong> <strong>Techniques</strong> | Nichols | Page 210
4.4.D MULTIPLE EXTRACTIONS<br />
4.4.D.1 OVERVIEW OF MULTIPLE EXTRACTION<br />
Depending on the partition coefficient for a compound in a solvent, a single extraction may be all that is<br />
needed to effectively extract a compound. However, more often than not a procedure calls for a solution<br />
to be extracted multiple times in order to isolate a desired compound, as this method is more efficient than<br />
a single extraction (see journal article in Figure 4.15b for an example of where this process is used).<br />
Figure 4.15: a+c) Students using a separatory funnel, b) Journal article from: K.A. Milinkevich, M.J. Kurth, J. Comb. Chem. 2008,<br />
10, 521–525.<br />
In a multiple extraction procedure, a quantity of solvent is used to extract one layer (often the aqueous<br />
layer) multiple times in succession. The extraction is repeated two to three times, or perhaps more times if<br />
the compound has a low partition coefficient in the organic solvent. Figure 4.16 shows a diagram of an<br />
aqueous solution being extracted twice with diethyl ether. Diethyl ether has a density less than 1 g/mL, so<br />
is the top organic layer in the funnel.<br />
Figure 4.16: Multiple Extractions of an aqueous layer when the organic layer is on the top: a) First extraction, b) Second extraction.<br />
<strong>Organic</strong> <strong>Chemistry</strong> <strong>Laboratory</strong> <strong>Techniques</strong> | Nichols | Page 211
In a multiple extraction of an aqueous layer, the first extraction is procedurally identical to a single<br />
extraction. In the second extraction, the aqueous layer from the first extraction is returned to the separatory<br />
funnel (Figure 4.16b), with the goal of extracting additional compound. Since the organic layer from the<br />
first extraction had already reached equilibrium with the aqueous layer, it would do little good to return it<br />
to the separatory funnel and expose it to the aqueous layer again. Instead, fresh diethyl ether is added to<br />
the aqueous layer, since it has the potential to extract more compound.<br />
The process is often repeated with a third extraction (not shown in Figure 4.16), with the aqueous layer<br />
from the second extraction being returned to the separatory funnel, followed by another portion of fresh<br />
organic solvent. In multiple extractions, the organic layers are combined together, as the goal is to extract<br />
the compound into the organic solvent.<br />
When an aqueous solution is extracted with an organic solvent that is denser than water (for example<br />
dichloromethane, CH 2 Cl 2 ), the only procedural difference is that there is no need to ever drain the aqueous<br />
layer from the separatory funnel. After draining the organic layer from the first extraction, fresh solvent<br />
can be added to the aqueous layer remaining in the funnel to begin the second extraction (Figure 4.17b).<br />
Figure 4.17: Multiple Extractions of an aqueous layer when the organic layer is on the bottom: a) First extraction, b) Second<br />
extraction.<br />
<strong>Organic</strong> <strong>Chemistry</strong> <strong>Laboratory</strong> <strong>Techniques</strong> | Nichols | Page 212
4.4.D.2 QUANTITATING MULTIPLE EXTRACTION<br />
To demonstrate the effectiveness of a multiple extraction, let’s return to the problem from the single<br />
extraction section, where a solution of 0.50 g hyoscyamine in 150 mL water is to be extracted into diethyl<br />
ether. Instead of using one 150 mL portion, let’s instead split the solvent into three 50 mL portions of<br />
diethyl ether. How much hyoscyamine would be extracted with this method?<br />
In the previous section, solubility data was used to estimate the partition coefficient K, and it was found to<br />
be 4.07. As before, we can assign the quantity of hyoscyamine extracted into the diethyl ether the value<br />
“x,” which would leave “0.50 g – x” remaining in the aqueous layer of the first extraction. Using K, the<br />
calculation is identical to the previous discussion, differing only in the smaller volume of the organic layer<br />
(50 mL instead of 150 mL).<br />
4.07 =<br />
<br />
<br />
<br />
<br />
<br />
After solving the algebra, x = 0.29 g<br />
This result means that 0.29 g is extracted into the diethyl ether in the first extraction and 0.21 g remains in<br />
the aqueous layer (0.50 g – 0.29 g). As the aqueous layer is returned to the separatory funnel, the residual<br />
0.21 g is the quantity to be further extracted, which alters the calculation for the second extraction by<br />
replacing the 0.50 g value.<br />
4.07 =<br />
<br />
<br />
<br />
<br />
<br />
After solving the algebra, x = 0.12 g<br />
This result means that 0.12 g is extracted into the diethyl ether in the second extraction and 0.09 g remains<br />
in the aqueous layer (0.21 g – 0.12 g). The calculation for the third extraction is as follows:<br />
4.07 =<br />
<br />
<br />
<br />
<br />
<br />
After solving the algebra, x = 0.05 g<br />
This result means 0.04 g remains in the aqueous layer (0.09 g – 0.05 g) after the third extraction. The results<br />
of the calculations in this section are summarized in Figure 4.18.<br />
<strong>Organic</strong> <strong>Chemistry</strong> <strong>Laboratory</strong> <strong>Techniques</strong> | Nichols | Page 213
a) First extraction: b) Second extraction:<br />
c) Third extraction:<br />
Add ether<br />
Add fresh<br />
ether<br />
Add fresh<br />
ether<br />
Ether<br />
0.29 g<br />
Ether<br />
0.12 g<br />
Ether<br />
0.05 g<br />
Aq<br />
0.50 g<br />
Aq<br />
0.21 g<br />
Aq<br />
0.09 g<br />
Aq<br />
0.04 g<br />
0.21 g<br />
Aqueous<br />
0.29 g<br />
Ether<br />
0.09 g<br />
Aqueous<br />
0.12 g<br />
Ether<br />
0.04 g<br />
Aqueous<br />
0.05 g<br />
Ether<br />
Figure 4.18: Multiple Extractions of hyoscyamine (K ~ 4) from water into diethyl ether.<br />
If the 50 mL diethyl ether extracts are combined in this example (Figure 4.19), there would be a total of<br />
0.46 g of hyoscyamine in the combined organic extracts. Of the 0.50 g of hyoscyamine in the original<br />
aqueous layer, 92% of the material is extracted into the organic layer (100% × 0.46 g / 0.50 g). This is a<br />
greater quantity than was obtained using a single extraction of 150 mL diethyl ether, which resulted in only<br />
0.40 g of hyoscyamine extracted (80%).<br />
+ +<br />
0.29 g<br />
Ether<br />
0.12 g<br />
Ether<br />
0.05 g<br />
Ether<br />
0.46 g<br />
Combined Ether<br />
Extracts<br />
Figure 4.19: Combined organic layers containing hyoscyamine from multiple extractions into diethyl ether.<br />
These calculations demonstrate that using multiple portions of a solvent maximizes the extractive power<br />
of the solvent. In general, three extractions are the optimal compromise between expended effort and<br />
maximizing the recovery of material.<br />
<strong>Organic</strong> <strong>Chemistry</strong> <strong>Laboratory</strong> <strong>Techniques</strong> | Nichols | Page 214
4.5 STEP-BY-STEP PROCEDURES<br />
4.5.A SINGLE EXTRACTION<br />
Figure 4.20: Progress of the extraction of methyl red (the colored compound) from the acidic aqueous layer (bottom) into the<br />
organic layer (top). The inversions were done very slowly in order to see the extraction stepwise. With even gentle mixing, the<br />
methyl red extracts rapidly.<br />
The pictures in this section show a single extraction of methyl red<br />
(colored compound, Figure 4.21) from an aqueous solution (bottom<br />
layer) into 25 mL of ethyl acetate (top layer). The aqueous solution<br />
originally has a pink color, as the methyl red appears red in acidic<br />
solution (the aqueous solution was made from 50 mL water, 5 drops of<br />
0.1 M HCl and 5 drops of 1% methyl red indicator solution). The methyl<br />
red has a large partition coefficient and is extracted from the aqueous<br />
layer into the ethyl acetate in this process.<br />
H 3 C<br />
N<br />
CH 3<br />
N N<br />
O<br />
OH<br />
Figure 4.21: Structure of methyl red in<br />
highly acidic solution.<br />
Figure 4.22: <strong>Organic</strong> chemistry students using separatory funnels.<br />
<strong>Organic</strong> <strong>Chemistry</strong> <strong>Laboratory</strong> <strong>Techniques</strong> | Nichols | Page 215
Figure 4.23: a) Separatory funnel, b) Correct order of stopcock components, c) Glass stopcock, d) Funnel in cushioned ring clamp.<br />
Prepare the Setup<br />
1. Obtain a separatory funnel (Figure 4.23a).<br />
a. If the separatory funnel has a Teflon stopcock, reassemble the stopcock if it was taken apart to dry,<br />
placing the parts in the appropriate order (Figure 4.23b). Be sure that the Teflon stopcock is<br />
moderately tight so that it can still easily turn, but is not so loose that liquid can seep around the<br />
joint.<br />
b. If using a glass stopcock (Figure 4.23c), it likely needs no further preparation. There should be a<br />
very thin layer of grease used to seal the stopcock and prevent freezing. If both glass and Teflon<br />
stopcocks are available, Teflon is a better choice as there is always a possibility that solvent can<br />
dissolve the grease used with glass stopcocks and contaminate the sample.<br />
c. Also obtain a stopper (Teflon or ground glass) that fits well in the top joint of the funnel (Figure<br />
4.23a).<br />
2. Place the separatory funnel in a ring clamp attached to a ring stand or latticework. The funnels are easy<br />
to break, so cushion the funnel in the metal clamp using pieces of slit rubber or plastic tubing (Figure<br />
4.23d).<br />
<strong>Organic</strong> <strong>Chemistry</strong> <strong>Laboratory</strong> <strong>Techniques</strong> | Nichols | Page 216
Figure 4.24: a) Closed and open stopcocks, b) Pouring in liquid with a funnel: notice the Erlenmeyer flask positioned below as a<br />
fail-safe, c) Pouring in the organic solvent, d) Separatory funnel before mixing.<br />
Add the Solutions<br />
3. Before pouring anything into a separatory funnel, be sure that the stopcock is in the “closed” position,<br />
where the stopcock is horizontal (Figure 4.24a).<br />
As a fail-safe, always position an Erlenmeyer flask beneath the separatory funnel before pouring<br />
(Figure 4.24b). This can catch liquid in case the stopcock is accidentally left open, or if the stopcock<br />
is loose and liquid leaks through unintentionally.<br />
4. Using a funnel, pour the liquid to be extracted into the separatory<br />
funnel (Figures 4.24b + 4.25). A separatory funnel should never<br />
be used with a hot or warm liquid.<br />
The ground glass joint atop a separatory funnel is more prone to<br />
stick to the stopper if there was liquid in the joint at some point.<br />
Pouring liquid into the separatory funnel using a short-stemmed<br />
funnel avoids getting the joint wet, so that it will be less likely to<br />
freeze during mixing.<br />
5. Pour a quantity of the extractive solvent into the separatory funnel,<br />
as indicated by the procedure (Figure 4.24c).<br />
Figure 4.25: Student adds liquid to a<br />
separatory funnel.<br />
It is unnecessary to use precise quantities of solvent for extractions, and the volumes can be measured<br />
in a graduated cylinder. If a procedure calls for 20 mL of solvent, it is acceptable if between 20-25 mL<br />
of solvent is used each time.<br />
<strong>Organic</strong> <strong>Chemistry</strong> <strong>Laboratory</strong> <strong>Techniques</strong> | Nichols | Page 217
Figure 4.26: a) Holding the separatory funnel before shaking, b) Inverting the funnel to mix the components, c) Venting to release<br />
pressure.<br />
Mix the Solutions<br />
6. Place the stopper on the funnel, and hold the funnel such that the fingers of one hand securely cover<br />
the stopper, while the other hand grips the bottom of the funnel (Figure 4.26a).<br />
7. Gently invert the funnel (Figure 4.26b), and swirl the mixture a little.<br />
Although it is not uncommon for some liquid to creep into the ground glass joint when inverted, it<br />
should be minimal. If liquid drips onto your fingers or gloves when you invert the funnel, the stopper<br />
is probably the wrong size.<br />
8. Pressure may build up inside the separatory funnel when solutions are mixed, so immediately after<br />
swirling, and with the funnel still inverted, “vent” the funnel by briefly opening the stopcock to allow<br />
for a release of pressure (Figure 4.26c).<br />
Pressure builds in the funnel as solvent evaporates into the headspace and contributes additional vapor<br />
to the initial ~1 atmosphere of air pressure in the funnel. With highly volatile solvents (like diethyl<br />
ether), a definite “swoosh” can be heard upon venting, and small amounts of liquid may even sputter<br />
out the stopcock. If liquid spits out the stopcock, try to allow it to drain back into the funnel. The noise<br />
associated with venting normally ceases after the second or third inversions, as the headspace becomes<br />
saturated with solvent vapors and the pressures inside and outside the funnel are equalized.<br />
Safety note: Never point the stopcock toward someone as you vent, as it’s possible some liquid may<br />
splatter onto him or her.<br />
9. Close the stopcock and mix the solutions a bit more vigorously, periodically stopping to vent the system.<br />
There are differences of opinion on how vigorously solutions should be mixed in separatory funnels,<br />
and for how long. As a general guide, a mild mixing for 10-20 seconds should be enough. With some<br />
solutions (e.g. dichloromethane), care should be taken to not shake too vigorously, as these solutions<br />
often form emulsions (where the interface between the solutions doesn’t clarify). With solutions prone<br />
to emulsions, a funnel should be gently rocked for one minute.<br />
10.Place the separatory funnel upright in the ring clamp to allow the layers to fully separate. The interface<br />
between the layers should settle rather quickly, often within 10 seconds or so. If the interface is clouded<br />
or not well defined (an emulsion has formed), see the troubleshooting section for tips.<br />
<strong>Organic</strong> <strong>Chemistry</strong> <strong>Laboratory</strong> <strong>Techniques</strong> | Nichols | Page 218
Figure 4.27: a) Taking the stopper off before draining the funnel, b) Draining to the interface, c) Clinging droplets (using a different<br />
system), d) Stopping when the interface is in the stopcock.<br />
Separate the Layers<br />
11.Liquid will not drain well from a separatory funnel if the stopper remains on, as air cannot enter the<br />
funnel to replace the displaced liquid. If liquid did drain from the funnel without replacement by an<br />
equal volume of air, a negative pressure would form in the funnel. Thus, before draining liquid from a<br />
separatory funnel, remove the stopper (Figure 4.27a).<br />
12.Drain the majority of the bottom layer into a clean Erlenmeyer flask, positioning the ring clamp so that<br />
the tip of the separatory funnel is nestled in the Erlenmeyer flask to prevent splashing (Figure 4.27b).<br />
Stop draining when the interface is within 1 cm of the bottom of the stopcock.<br />
13.Gently swirl the funnel to dislodge any droplets clinging to the glass (Figure 4.27c). A glass stirring<br />
rod can be used to knock down stubborn clinging droplets.<br />
14.Further drain the bottom layer, stopping when the interface just enters the stopcock chamber (Figure<br />
4.27d). Label the Erlenmeyer flask (e.g. “bottom layer”).<br />
When labeling flasks, it’s often best to use terminology that is without question correct, such as “top<br />
layer” or “bottom layer.” If the layers are labeled with statements like “organic layer” or “aqueous<br />
layer,” it’s possible that the layers have been incorrectly identified. It may be best to use combined<br />
statements like “top organic layer,” as it’s quite useful to track the aqueous and organic layers. If the<br />
layers have been incorrectly identified, at least the “top” part of the label will always be correct.<br />
Flasks can be labeled using labeling tape or by writing directly on the glass with a permanent marker<br />
(e.g. Sharpie). Marker ink can be removed from glass by rubbing it with a KimWipe moistened with a<br />
bit of acetone.<br />
<strong>Organic</strong> <strong>Chemistry</strong> <strong>Laboratory</strong> <strong>Techniques</strong> | Nichols | Page 219
Figure 4.28: a) Pouring out the top layer, b) Labeled layers, c) Drying the separatory funnel with a disassembled stopcock.<br />
15.Pour out the top layer from the top of the separatory funnel into another clean Erlenmeyer flask (Figure<br />
4.28a), making sure to again label this flask (Figure 4.28b).<br />
It is proper technique to drain the bottom layer through the stopcock, and to pour out the top layer from<br />
the top of the funnel. This method minimizes re-mixing the solutions, as only the lower layer touches<br />
the stem of the funnel.<br />
16.Never throw away any liquids from an extraction until you are absolutely sure that you have the<br />
desired compound. Undesired layers can be properly disposed of when the desired compound is in<br />
your hands (e.g. after the rotary evaporator has removed the solvent).<br />
Mistakes made during extractions (e.g. carrying on with the wrong layer), can be solved as long as the<br />
solutions have not been placed in the waste container! The layers should also be saved until after<br />
evaporation because the desired compound may not be very soluble in the solvent used. If the<br />
compound failed to extract in one solvent, a different solvent could be tried later, again only if the layers<br />
had not yet been thrown away.<br />
Clean Up<br />
17.To clean a separatory funnel, first rinse it with acetone into a waste container. Then wash the funnel<br />
with soap and water at your benchtop. Disassemble the Teflon stopcock (if used). After rinsing with<br />
distilled water, allow the parts to dry separated in your locker (Figure 4.28c).<br />
<strong>Organic</strong> <strong>Chemistry</strong> <strong>Laboratory</strong> <strong>Techniques</strong> | Nichols | Page 220
4.5.B SINGLE EXTRACTION SUMMARY<br />
Use slit tubing to<br />
cushion the separatory<br />
funnel in the ring<br />
clamp.<br />
Close the stopcock on<br />
the separatory funnel<br />
and position an<br />
Erlenmeyer flask<br />
beneath the setup, in<br />
case it drips.<br />
Into the separatory<br />
funnel pour the liquid to<br />
be extracted using a<br />
funnel: this prevents<br />
liquid from getting on<br />
the ground glass joint<br />
which can cause it to<br />
stick.<br />
Pour the extractive<br />
solvent into the funnel.<br />
Hold the separatory<br />
funnel so that your<br />
fingers firmly cover the<br />
stopper.<br />
Invert the funnel and<br />
shake gently for 10-20<br />
seconds.<br />
Periodically “vent” the<br />
funnel (open the<br />
stopcock while inverted<br />
to release pressure).<br />
Never point the tip at<br />
someone while venting.<br />
Return the separatory<br />
funnel to the ring<br />
clamp, and allow the<br />
layers to separate.<br />
Remove the stopper (it<br />
won’t drain otherwise).<br />
Drain the majority of<br />
the bottom layer into an<br />
Erlenmeyer flask.<br />
Stop when roughly 1<br />
cm of the bottom layer<br />
is in the funnel, and<br />
swirl to dislodge<br />
clinging droplets.<br />
Drain the rest of the<br />
bottom layer, stopping<br />
when the interface is<br />
inside the stopcock.<br />
Label the flask (e.g.<br />
“bottom aqueous<br />
layer”).<br />
Pour out the top layer<br />
into another Erlenmeyer<br />
flask (and label it).<br />
Don’t throw away<br />
either layer until you<br />
are sure you’ve<br />
accomplished the goal<br />
of the extraction.<br />
Table 4.3: Procedural summary for single extraction.<br />
<strong>Organic</strong> <strong>Chemistry</strong> <strong>Laboratory</strong> <strong>Techniques</strong> | Nichols | Page 221
4.5.C MULTIPLE EXTRACTIONS<br />
4.5.C.1 ORGANIC LAYER IS ON THE TOP<br />
In this section are stepwise instructions on how to extract an aqueous solution with an organic solvent that<br />
is less dense than water (the organic layer will be on the top). As an example, the instructions are written<br />
to extract an aqueous solution three times using 25 mL diethyl ether each time (3 × 25 mL diethyl ether).<br />
A procedural summary of the first two extractions is in Figure 4.29.<br />
First extraction:<br />
Second extraction:<br />
Add 25 mL<br />
ether<br />
Aqueous<br />
from 1st<br />
extraction<br />
25 mL fresh<br />
ether<br />
Shake and<br />
separate layers<br />
Ether<br />
Shake and<br />
separate layers<br />
50 mL<br />
Aqueous<br />
25 mL<br />
Ether<br />
50 mL<br />
Aqueous<br />
Aqueous<br />
Ether<br />
Aqueous<br />
Ether<br />
Aqueous<br />
combine organic layers<br />
Figure 4.29: Two extractions when the organic layer is on the top.<br />
Extraction #1<br />
1. Perform a single extraction using approximately 25 mL of diethyl ether (an exact amount is not<br />
necessary), as described previously, making sure to appropriately label each layer (e.g. “top organic<br />
layer” and “bottom aqueous layer”).<br />
Extraction #2<br />
2. Return the aqueous layer to the separatory funnel. There is no need to wash the funnel in between<br />
extractions.<br />
3. Add a fresh 25 mL portion of diethyl ether to the separatory funnel. Stopper the funnel, invert and<br />
shake with venting, then allow the layers to separate.<br />
At this step, there should be two layers in the separatory funnel. If two layers aren’t present, it’s likely<br />
that the wrong layer was added to the funnel in step 2 (a common mistake). One way to test if this was<br />
the mistake is to add a bit of water from a squirt bottle. If the layer returned to the separatory funnel is<br />
the organic layer (incorrect), the squirt bottle water will not mix with the solution, and will instead fall<br />
as droplets to the bottom.<br />
<strong>Organic</strong> <strong>Chemistry</strong> <strong>Laboratory</strong> <strong>Techniques</strong> | Nichols | Page 222
If the organic layer (incorrect) was accidentally returned to the separatory funnel, there is no harm done,<br />
as the organic layer was simply diluted. Pour the liquid back into the flask designated for the organic<br />
layer, and instead add the aqueous solution to the funnel.<br />
4. Drain the bottom aqueous layer into an Erlenmeyer flask: it is acceptable to use the same flask that was<br />
used for the aqueous layer in the first extraction (that may have been labeled “bottom aqueous layer”).<br />
5. Since it is most common to combine the organic layers in multiple extractions, the top organic layer<br />
can be poured out of the separatory funnel into the same flask that was used for the organic layer in the<br />
first extraction (that may have been labeled “top organic layer”). In this flask, there should be roughly<br />
50 mL of diethyl ether from the two extractions.<br />
Extraction #3<br />
6. Repeat the extraction a third time by adding the aqueous layer from the second extraction into the<br />
separatory funnel, followed by another fresh 25 mL portion of diethyl ether. Stopper the funnel, invert<br />
and shake with venting, then allow the layers to separate.<br />
7. Drain the aqueous layer into the appropriate flask, and again pour the top layer into the organic layer<br />
flask, where there should be roughly 75 mL of diethyl ether from the three extractions.<br />
<strong>Organic</strong> <strong>Chemistry</strong> <strong>Laboratory</strong> <strong>Techniques</strong> | Nichols | Page 223
4.5.C.2 ORGANIC LAYER IS ON THE BOTTOM<br />
In this section are stepwise instructions on how to extract an aqueous solution with an organic solvent that<br />
is denser than water (the organic layer will be on the bottom). As an example, the instructions are written<br />
to extract an aqueous solution three times using 25 mL CH 2 Cl 2 each time (3 × 25 mL CH 2 Cl 2 , Figure 4.28).<br />
First extraction:<br />
Second extraction:<br />
Add 25 mL<br />
CH 2 Cl 2<br />
Add 25 mL<br />
fresh CH 2 Cl 2<br />
50 mL<br />
Aqueous<br />
Shake and<br />
drain bottom<br />
Aqueous<br />
Shake and<br />
drain bottom<br />
50 mL<br />
Aqueous<br />
25 mL<br />
CH 2 Cl 2<br />
Aqueous Aqueous CH 2 Cl 2<br />
Aqueous<br />
combine organic layers<br />
CH 2 Cl 2<br />
CH 2 Cl 2<br />
Figure 4.30: Two extractions when the organic layer is on the bottom.<br />
Extraction #1<br />
1. Perform a single extraction using approximately 25 mL of dichloromethane (CH 2 Cl 2 , an exact amount<br />
is not necessary), as described previously, with the following differences:<br />
a. As CH 2 Cl 2 is prone to emulsions, invert the funnel and shake gently for one minute with venting.<br />
b. After allowing the layers to separate in the funnel, drain the bottom organic layer into a clean<br />
Erlenmeyer flask (and label the flask, e.g. “bottom organic layer”). Do not drain the top aqueous<br />
layer from the funnel.<br />
Extraction #2<br />
2. To the aqueous layer remaining in the funnel, add a fresh 25 mL portion of dichloromethane. Stopper<br />
the funnel, invert and shake gently for 1 minute with venting, then allow the layers to separate.<br />
3. Since it is most common to combine the organic layers in multiple extractions, the bottom organic layer<br />
can be drained from the separatory funnel into the same flask that was used for the organic layer in the<br />
first extraction (that may have been labeled “bottom organic layer”). In this flask, there should be<br />
roughly 50 mL of dichloromethane from the two extractions.<br />
Extraction #3<br />
4. Repeat the extraction by adding another fresh 25 mL portion of dichloromethane to the aqueous layer<br />
in the separatory funnel. Stopper the funnel, invert and shake gently with venting, then allow the layers<br />
to separate.<br />
5. Drain the bottom organic layer into flask used previously, where there should be roughly 75 mL of<br />
dichloromethane from the three extractions.<br />
<strong>Organic</strong> <strong>Chemistry</strong> <strong>Laboratory</strong> <strong>Techniques</strong> | Nichols | Page 224
4.5.D TROUBLESHOOTING<br />
This section describes common problems and solutions in extractions.<br />
4.5.D.1 THERE IS ONLY ONE LAYER<br />
The most common reason for having only one layer in a separatory funnel when there should be two (as in<br />
when the procedure tells you to “separate the layers”), is to have made a mistake. What likely happened is<br />
that the wrong layer was added to the separatory funnel- for example the organic layer was unknowingly<br />
added instead of the aqueous layer. When organic solvent is added to an organic layer in the separatory<br />
funnel, the result is only one layer. The mistake can be remedied as long as the layers have not yet been<br />
thrown away! If the correct layer is added to the funnel, everything will work out as planned.<br />
To prevent making this mistake in the future, be sure to label the Erlenmeyer flasks. Also, be sure to never<br />
throw away a layer until you are absolutely sure that you’ve done everything correctly.<br />
An occasional reason that only one layer forms in a separatory funnel is if there are large quantities of<br />
compounds present that dissolve in both solvents, for example if large amounts of ethanol are present,<br />
which dissolve well in both aqueous and organic solvents. In this situation, the best approach is to remove<br />
the troublesome compound (i.e. the ethanol) on a rotary evaporator before extraction.<br />
4.5.D.2 THERE ARE THREE LAYERS<br />
The most common reason for three layers in a<br />
separatory funnel is inadequate mixing (Figure 4.31a).<br />
If the funnel is shaken with more vigor it will likely<br />
settle into two layers (Figure 4.31b).<br />
It is also possible that a middle third layer is an<br />
emulsion, where the two layers are not fully separated.<br />
Figure 4.31: a) Three initial layers from inadequate mixing,<br />
b) Two layers resulting from more vigorous mixing.<br />
4.5.D.3 THERE IS INSOLUBLE MATERIAL AT THE INTERFACE<br />
A small amount of insoluble film between two layers is not uncommon during an extraction. Polymeric<br />
materials tend to rest between layers as solvent interactions are minimized at the interface. A minor film is<br />
not something to worry about because if a small amount does make it into the organic layer, a subsequent<br />
drying and filtration step will often remove it.<br />
<strong>Organic</strong> <strong>Chemistry</strong> <strong>Laboratory</strong> <strong>Techniques</strong> | Nichols | Page 225
4.5.D.4 THE INTERFACE CANNOT BE SEEN<br />
On occasion the compounds in a separatory funnel are so dark that they obscure the interface between the<br />
two layers. If this happens, there are several methods that might help you see the interface. One is to hold<br />
the separatory funnel up to the light, or to shine a flashlight onto the glass (Figure 4.32b). Additional light<br />
sometimes allows you to see the interface. A second method is to carefully observe the layers while tilting<br />
the funnel back and forth to the side (Figure 4.32c). Your eye can sometimes pick up on subtle differences<br />
in the way the liquids flow. A third method is to add a bit more solvent to the funnel to somewhat dilute<br />
one of the layers, or to add a different solvent to alter the index of refraction.<br />
Figure 4.32: a) Interface is too dark to easily see, b) Flashlight visualizes the interface, c) Tilting also subtly visualizes the interface,<br />
although it is much less dramatic.<br />
4.5.D.5 THE LAYERS DON’T SEPARATE WELL (AN EMULSION FORMED)<br />
Emulsions are when tiny droplets of one layer are suspended in the other<br />
layer, resulting in no distinct interface between the two layers (Figure<br />
4.33). Often an emulsion looks like a bubbly mess near the interface, and<br />
can even appear to be an odd-looking third layer.<br />
Emulsions can happen for several reasons:<br />
1) The density of each layer may be so similar that there is weak<br />
motivation for the liquids to separate.<br />
2) There may be soap-like compounds or other emulsifying agents<br />
present that dissolve some of the components in one another.<br />
Figure 4.33: Emulsion formed between<br />
dichloromethane and brine (with food<br />
coloring).<br />
<strong>Organic</strong> <strong>Chemistry</strong> <strong>Laboratory</strong> <strong>Techniques</strong> | Nichols | Page 226
Figure 4.34: a) An emulsion with biodiesel and methanol, b) An emulsion with brine and ethyl acetate, c) An emulsion with<br />
dichloromethane and brine (as well as food coloring, d) The emulsion is resolved after addition of water that decreases the density<br />
of the top brine layer.<br />
Emulsions can be very difficult to rectify, and it’s best if they are avoided in the first place by shaking<br />
solutions that are prone to emulsions (e.g. dichloromethane with highly basic or dense solutions) gently in<br />
the separatory funnel. Nonetheless, if an emulsion does form, there are some ways to attempt to clarify<br />
them:<br />
a) For mild emulsions, gently swirl the layers and try to knock down suspended droplets with a glass<br />
stirring rod.<br />
b) Allow the solution to sit for a period of time (even until the next lab period) if possible. With enough<br />
time, some solutions do settle out on their own. This of course may not be practical.<br />
c) For small volumes, use a centrifuge if one is available. A centrifuge hastens the process of letting an<br />
emulsion settle on its own. Remember that a centrifuge needs to be balanced or it may wobble off the<br />
benchtop. Divide the solutions equally, putting tubes of equal volume opposite one another inside the<br />
centrifuge.<br />
d) If an emulsion is formed because the two layers having similar densities, try to alter the density of each<br />
layer to make them more different. To help clarify an emulsion, try to decrease the density of the top<br />
layer or increase the density of the bottom layer.<br />
For example, if an emulsion occurs with ethyl acetate (top layer) and an aqueous solution (bottom layer),<br />
add some NaCl. NaCl will dissolve in the aqueous layer and increase the density of the aqueous solution.<br />
Alternatively add additional ethyl acetate, which will dilute the organic layer and lower its density. As<br />
a last resort add some pentane, which will mix with the top organic layer and decrease its density<br />
(pentane is one of the least dense organic solvents). The addition of pentane is used as a final effort as<br />
it will negatively affect the ability of the organic layer to extract somewhat polar compounds.<br />
If an emulsion occurs with an aqueous solution (top layer) and dichloromethane (bottom layer), add<br />
some water from a squirt bottle to dilute the top layer and decrease its density. This method worked<br />
well to clarify the emulsion in Figure 4.32c, as evidenced by Figure 4.32d.<br />
e) Try decreasing the solubility of one component in the other. One method is to add NaCl or NH 4 Cl to<br />
the separatory funnel, which dissolves in the aqueous layer and decreases the ability of organic<br />
compounds to dissolve in water (“salting out”).<br />
<strong>Organic</strong> <strong>Chemistry</strong> <strong>Laboratory</strong> <strong>Techniques</strong> | Nichols | Page 227
4.5.E MICROSCALE EXTRACTIONS<br />
Microscale work involves the manipulation of less than 300 mg of compound, and usually involves solvent<br />
volumes of 5 mL or less. A separatory funnel would be impractical when working with such small<br />
quantities, and conical vials (Figure 4.35) or centrifuge tubes are typically used instead.<br />
Figure 4.35: Progress of the extraction of methyl red from the acidic aqueous layer (bottom) into the organic layer (top). The<br />
inversions were done very slowly in order to see the extraction stepwise. With even gentle mixing, the methyl red (and thus color)<br />
extracts rapidly.<br />
The pictures in this section show the extraction of 2 mL of a mildly acidic aqueous solution containing a<br />
single drop of methyl red solution into 2 mL of ethyl acetate. The color (the methyl red), is extracted from<br />
the aqueous layer (bottom) into the ethyl acetate layer (top).<br />
Figure 4.36: a) Adding solvent to the conical vial by pipette, and using a beaker to support the vial, b) Supporting the vial with a<br />
cork ring, c+d) Attaching the Teflon-lined cap to the vial, e) Manual mixing of layers (using a different system).<br />
Mix the solutions<br />
1. Pour the contents to be extracted into a conical vial, or a glass tube with a tapered end (e.g. centrifuge<br />
tube). As these containers are prone to tip, use a beaker (Figure 4.36a) or inverted cork ring (Figure<br />
4.36b) for support.<br />
2. Add the extractive solvent by pipette (Figure 4.36a). If using a conical vial, the volume markings on<br />
the glass maybe be helpful.<br />
<strong>Organic</strong> <strong>Chemistry</strong> <strong>Laboratory</strong> <strong>Techniques</strong> | Nichols | Page 228
3. Gently mix the two solutions using one of the following methods:<br />
a. Secure a cap firmly on the vial (Figures 4.36 c+d) then invert and shake the tube for 10-20 seconds<br />
(Figure 4.35). Conical vials and centrifuge tubes tend to be less airtight than separatory funnels,<br />
so there should be no need to vent the system during shaking unless NaHCO 3 or Na 2 CO 3 solutions<br />
are used.<br />
b. Alternatively, manually mix the layers using a pipette. Withdraw a pipette-full of the bottom layer<br />
from the vial, and then vigorously expunge the solution through the top layer (Figure 4.36e). Do<br />
this repeatedly for at least one minute. Manual mixing is not recommended when using low-boiling<br />
solvents (e.g. diethyl ether), as the volume often decreases dramatically after mixing. Instead use<br />
the first mixing method described.<br />
Figure 4.37: a+b) Withdrawal of the bottom layer, with pipette into the tip of the vial, c) Removal of a residual drop of the bottom<br />
layer by allowing the layers to separate inside a Pasteur pipette, d) Separated layers.<br />
Separate the layers<br />
4. Separate the layers with a Pasteur pipette. The design of conical vials and centrifuge tubes allows for<br />
efficient separation of the layers through withdrawal of the bottom layer by pipette. This means that<br />
even if the top layer is to be reserved, the bottom layer still needs to be removed first.<br />
a. Hold the conical vial or tapered tube in the same hand as a container for the bottom layer (label it).<br />
Withdraw the majority of the bottom layer by Pasteur pipette, and dispense into the container<br />
(Figure 4.37a).<br />
b. When withdrawing, always place the pipette tip to the point of the conical vial or tapered tube<br />
(Figure 4.37b).<br />
c. It may be difficult to remove the very last drop of bottom layer from the point of the vial. To do<br />
so, withdraw the entirety of the bottom layer and a small amount of top layer into the pipette. Allow<br />
the layers to separate inside the pipette (Figure 4.37c), then delicately expel the bottom layer from<br />
the pipette into the container. Return the rest of the top layer to the conical vial.<br />
5. If the bottom layer is the desired layer, and another extraction is to be done, add fresh organic solvent<br />
to the top layer still in the conical vial and repeat the extraction and separation.<br />
6. If the top layer is the desired layer, remove it from the conical vial using a fresh pipette into a clean<br />
container. If another extraction is to be done, return the bottom layer to the conical vial, add fresh<br />
solvent and repeat the extraction and separation.<br />
<strong>Organic</strong> <strong>Chemistry</strong> <strong>Laboratory</strong> <strong>Techniques</strong> | Nichols | Page 229
4.6 REACTION WORK-UPS<br />
4.6.A PURPOSE OF A WORK-UP<br />
When the goal of an experiment is to conduct a reaction and isolate the product, the general sequence of<br />
events is shown in Table 4.4.<br />
a) Conduct the reaction. b) Perform multiple<br />
extractions and/or<br />
washes to partially<br />
purify the desired<br />
product.<br />
c) Remove trace water<br />
with a drying agent.<br />
d) Filter or decant the<br />
drying agent.<br />
e) Remove the solvent<br />
with a rotary evaporator.<br />
f) Further purify if<br />
necessary.<br />
Table 4.4: Typical reaction sequence of events.<br />
A key step in this sequence comes immediately after the reaction is complete, and is called the reaction<br />
“work-up” (step b in Table 4.4). The work-up refers to methods aimed at purifying the material, and most<br />
commonly occur in a separatory funnel. Solutions are added to the funnel to either extract or wash the<br />
mixture, with the goal of isolating the product from excess reagents, catalysts, side products, solvents or<br />
compounds formed from side reactions.<br />
4.6.B COMMON WASHES<br />
4.6.B.1 WATER<br />
The most common wash in separatory funnels is probably water. Water is cheap, non-hazardous, and works<br />
well to remove many impurities found alongside a desired product.<br />
Water can potentially remove water-soluble impurities from an organic layer, as long as they are present in<br />
quantities that do not exceed their water solubility. The following are common materials that can be<br />
removed with a water wash: unconsumed acid or base, many ionic salts, and compounds that can hydrogen<br />
bond with water (have an oxygen or nitrogen atom) and are relatively small (e.g. CH 3 CH 2 OH or<br />
CH 3 COCH 3 ).<br />
To demonstrate the effectiveness of a water wash, a Fischer esterification reaction was conducted to produce<br />
isoamyl acetate (Figure 4.38). In this reaction, an excess of acetic acid is used to drive the reaction through<br />
Le Châtelier’s principle, and the acetic acid had to be removed from the product during the purification<br />
process.<br />
<strong>Organic</strong> <strong>Chemistry</strong> <strong>Laboratory</strong> <strong>Techniques</strong> | Nichols | Page 230
O<br />
+<br />
cat. H 2 SO 4<br />
O<br />
OH HO<br />
O<br />
acetic acid isoamyl alcohol isoamyl acetate<br />
+ H 2 O<br />
Figure 4.38: Reaction scheme for the synthesis of isoamyl acetate.<br />
The 1 H NMR spectrum in Figure 4.39a was taken of the reaction mixture immediately after ceasing heating<br />
and before the work-up. As expected, a significant signal for acetic acid is seen at 2.097 ppm.<br />
The reaction was then “worked up” by<br />
pouring the reaction mixture into a<br />
separatory funnel and washing the organic<br />
layer with water, sodium bicarbonate, and<br />
brine in succession. The main purpose of<br />
the water wash was to remove the majority<br />
of the catalytic sulfuric acid and the excess<br />
acetic acid, while the sodium bicarbonate<br />
wash neutralized the rest. The 1 H NMR<br />
spectrum of the final product (Figure<br />
4.39b) showed the washes were effective<br />
as the acetic acid signal at 2.097 ppm is<br />
absent.<br />
Figure 4.39: 300 MHz 1 H NMR spectra of the Fischer esterification mixture,<br />
a) Before the work-up, b) After the complete work-up (water, sodium<br />
bicarbonate, and brine washes).<br />
The sodium bicarbonate wash in this<br />
example was necessary (and discussed in<br />
the next section) because a water wash<br />
alone may not fully remove the acetic acid.<br />
It’s important to know that when a<br />
compound is “water soluble” it does not<br />
necessarily mean it is “organic insoluble,”<br />
a common misconception that arises from<br />
the “like dissolves like” principle. For<br />
example, acetic acid has a K of 0.5 when<br />
partitioning between diethyl ether and<br />
water, meaning acetic acid favors the<br />
aqueous layer only twice as much as the<br />
organic layer. 4 The ability of acetic acid<br />
and other polar compounds to dissolve in<br />
the organic layer of a separatory funnel<br />
should not be ignored.<br />
4 A. Seidell, Solubilities of Inorganic and <strong>Organic</strong> Substances, D. Van Nostrand Company, 1907.<br />
<strong>Organic</strong> <strong>Chemistry</strong> <strong>Laboratory</strong> <strong>Techniques</strong> | Nichols | Page 231
4.6.B.2 SODIUM BICARBONATE AND SODIUM CARBONATE<br />
How They Work<br />
A normal part of many work-ups includes neutralization. It is important to<br />
neutralize any organic solvent that was exposed to an acidic or basic solution<br />
as trace acid or base may cause undesired reactions to occur when the solutions<br />
are concentrated. Also, samples intended for GC analysis must be neutral as<br />
acidic solutions degrade the polymeric coating of the GC column. In addition,<br />
it is preferable to manipulate neutral materials rather than acidic or basic ones,<br />
as spills are then less hazardous.<br />
Aqueous solutions of saturated sodium bicarbonate (NaHCO 3 ) and sodium<br />
carbonate (Na 2 CO 3 ) are basic, and the purpose of these washes is to neutralize<br />
an organic layer that may contain trace acidic components. Even if an<br />
organic layer should not in theory dissolve very polar components such as acid,<br />
acid sometimes “hitches a ride” on polar components that may dissolve in an<br />
organic layer, such as small amounts of alcohols or water.<br />
Figure 4.40: Bottle of<br />
saturated sodium bicarbonate.<br />
The following reactions occur between bicarbonate ion (1), carbonate ion (2) and acid (H + ) during a wash:<br />
(1) HCO 3 – (aq) + H + (aq) H 2 CO 3 (aq) H 2 O (l) + CO 2 (g)<br />
(2) CO 3 2– (aq) + H + (aq) HCO 3 – (aq)<br />
The initial product of reaction (1) is carbonic acid (H 2 CO 3 ), which is in equilibrium with water and carbon<br />
dioxide gas. This means that solutions of bicarbonate ion often bubble during a neutralization wash in a<br />
separatory funnel. The product of reaction (2) is the bicarbonate ion, which can subsequently undergo<br />
reaction (1). This means that solutions of carbonate ion also often bubble during neutralizations.<br />
Safety note: To prevent excess pressure from being generated by the release of carbon dioxide gas into a<br />
separatory funnel during neutralization, the layers should be gently swirled together before placement of<br />
the stopper. They should be vented directly after inversion, and more frequently than usual. Figure<br />
4.41 shows a strongly acidic organic layer (top) in contact with an aqueous solution of 10% sodium<br />
bicarbonate (bottom). A vigorous stream of bubbles is seen originating from a small portion of organic<br />
layer trapped on the bottom of the funnel. The bubbling was even more vigorous when the layers were<br />
mixed together.<br />
Figure 4.41: Dilute NaHCO 3 solution (bottom layer) bubbling during the wash of an acidic organic (top) layer.<br />
<strong>Organic</strong> <strong>Chemistry</strong> <strong>Laboratory</strong> <strong>Techniques</strong> | Nichols | Page 232
Testing the pH After a Wash<br />
To test whether a base wash with NaHCO 3 or Na 2 CO 3 was effective at removing all the acid from an organic<br />
layer, it is helpful to test the pH. It is not possible to test the pH of an organic solution directly, however it<br />
is possible to test the pH of an aqueous solution that the organic solution has been in contact with. If the<br />
aqueous layer is on the top of a separatory funnel, insert a glass stirring rod into the top layer and touch the<br />
wet rod to blue litmus paper. An acidic solution turns blue litmus paper pink (or red), while a neutral or<br />
basic solution gives blue litmus paper only a darkened “wet” appearance (Figure 4.42d). If the litmus paper<br />
turns pink at all 5 , the base wash has not fully neutralized the organic layer, and subsequent base washes are<br />
needed.<br />
If the aqueous layer is on the bottom of the separatory funnel, test an “aliquot” of the aqueous layer (or<br />
tiny sample) on litmus paper through the following method:<br />
Figure 4.42: a) Positioning a finger on the pipette, b) Lifting the finger off, c) Positioning the finger on again and removal of an<br />
aliquot, d) Testing the aliquot on blue litmus paper.<br />
1. With a finger placed atop a glass pipette, insert the pipette into the separatory funnel so the tip is<br />
positioned in the bottom aqueous layer (Figure 4.42a).<br />
2. Remove the finger on the pipette to allow a sample of the aqueous layer to enter the pipette through<br />
capillary action (Figure 4.42b).<br />
3. With a finger placed atop the glass pipette again, remove the pipette from the separatory funnel. A bit<br />
of liquid should remain in the pipette tip, an aliquot of the bottom layer (Figure 4.42c).<br />
4. Touch the aliquot to blue litmus paper and observe the color (Figure 4.42d).<br />
5. If the litmus paper turns pink at all, the base wash has not fully neutralized the organic layer, and<br />
subsequent base washes are needed.<br />
5 When assessing the result of a litmus paper test, look at the center of the drop. The center is the most concentrated spot, and it’s<br />
possible a color change may not be seen on the outside where the solution has spread and diluted. Any pink seen on blue litmus<br />
paper means the solution is acidic.<br />
<strong>Organic</strong> <strong>Chemistry</strong> <strong>Laboratory</strong> <strong>Techniques</strong> | Nichols | Page 233
4.6.B.3 BRINE (SATURATED NaCl)<br />
Removing Water<br />
In some experiments, an organic layer may be washed with brine, which is a saturated solution of NaCl<br />
(aq). The purpose of this wash is to remove large amounts of water that may be dissolved in the organic<br />
layer. Although the organic layer should always be later exposed to a drying agent (e.g. anhydrous sodium<br />
sulfate, magnesium sulfate, or calcium chloride), these reagents do best to remove only small amounts of<br />
water.<br />
The organic solvents that require a brine wash before exposure to a solid drying agent are diethyl ether and<br />
ethyl acetate. These solvents dissolve large quantities of water in comparison to other solvents (Table 4.5).<br />
Solvent<br />
Diethyl ether<br />
Ethyl acetate<br />
Dichloromethane (CH 2 Cl 2 )<br />
Hexanes<br />
Grams water dissolved<br />
in 100 mL solvent<br />
1.24 g<br />
2.92 g<br />
0.32 g<br />
0.007 g<br />
Table 4.5: Quantity of water dissolved in various solvents. 6<br />
Figure 4.43: Bottle of brine.<br />
Brine works to remove water from an organic layer because it is highly concentrated (since NaCl is so<br />
highly water soluble). A saturated NaCl (aq) solution is highly ordered, causing a large motivation for water<br />
to draw into the solution from the organic layer to increase the entropy of the salt solution (to dilute the<br />
solution).<br />
Figure 4.44 shows a qualitative difference in the amount of water present in an organic layer with and<br />
without the use of a brine wash. Ethyl acetate was shaken with water (Figure 4.42a), then dried with a<br />
portion of anhydrous MgSO 4 . The large clumps of drying agent in Figure 4.44b indicate that this ethyl<br />
acetate layer is still noticeably wet. Ethyl acetate was then shaken with brine (Figure 4.44c), and dried with<br />
the same quantity of anhydrous MgSO 4 . There is little clumping of the drying agent in this ethyl acetate<br />
layer, and fine particles are seen (Figure 4.44d), signifying this layer contained very little water.<br />
Figure 4.44: a) Ethyl acetate and water layers shaken together, b) Appearance of the ethyl acetate layer upon addition of anhydrous<br />
MgSO 4 , c) Ethyl acetate and brine layers shaken together, d) Appearance of the ethyl acetate layer with anhydrous MgSO 4 .<br />
6 From: Fessenden, Fessenden, Feist, <strong>Organic</strong> <strong>Laboratory</strong> <strong>Techniques</strong>, 3 rd ed., Brooks-Cole, 2001.<br />
<strong>Organic</strong> <strong>Chemistry</strong> <strong>Laboratory</strong> <strong>Techniques</strong> | Nichols | Page 234
If drying agents are used to remove water, you might wonder “Why bother with brine; why not use lots of<br />
drying agent when the time comes?” The main reason to limit the amount of water present in an organic<br />
solution before the drying agent step is that the drying agent will often adsorb compound along with water.<br />
Using as little as possible will maximize the yield.<br />
To demonstrate, Figure 4.45 shows an ethyl acetate solution that has a faint pink tint because it contains<br />
some dissolved red food dye. The solution was swirled with white anhydrous MgSO 4 , and the drying agent<br />
turned pink as it adsorbed the red food dye compound (Figure 4.45a). Addition of more anhydrous MgSO 4<br />
made the drying agent pinker (Figure 4.45b), as more dye was removed from solution. In this example,<br />
even after filtering and rinsing the drying agent with additional solvent, the drying agent remained pink<br />
(Figure 4.45c). Thus, the more drying agent that is used, the more compound that may be irrecoverably lost.<br />
Figure 4.45: a) Ethyl acetate layer with a small amount of dissolved red food dye. With addition of white anhydrous MgSO 4 , the<br />
drying agent turned pink, showing that the drying agent has adsorbed the dye, b) With more MgSO 4 , the drying agent became<br />
pinker, c) Even after a rinsing step, the drying agent retained its pink color.<br />
<strong>Organic</strong> <strong>Chemistry</strong> <strong>Laboratory</strong> <strong>Techniques</strong> | Nichols | Page 235
Decreasing Water Solubility of <strong>Organic</strong> Compounds (“Salting Out”)<br />
Saturated ionic solutions may be used to decrease the solubility of organic compounds in the aqueous layer,<br />
allowing more of a compound to dissolve in the organic layer. If a desired product can hydrogen bond with<br />
water and is relatively small, it may be difficult to keep it in the organic layer when partitioning with an<br />
aqueous phase (K will be < 1). However, the equilibrium can favor the organic layer if all aqueous washes<br />
contain high concentrations of ions (e.g. saturated NaHCO 3 , NaCl, or NH 4 Cl). With water being so tightly<br />
“occupied” in dissolving the ions in these solutions, they are less capable of dissolving organic compounds.<br />
Additionally, ionic solutions have high dielectric constants, making them less compatible with organic<br />
compounds.<br />
Figure 4.47 shows how brine affects the partitioning of red food dye in ethyl acetate and aqueous solutions.<br />
Figure 4.47a shows addition of one drop of red food dye to a layer of water in a separatory funnel, and the<br />
dye dissolves easily even without swirling. Figure 4.47b shows the water layer containing the dye after<br />
shaking with a portion of ethyl acetate. The organic layer has only a very faint pink color, signifying that<br />
little dye has dissolved. The dye has obviously partitioned toward the aqueous layer, which is consistent<br />
with its very polar structure (Figure 4.46).<br />
NaO<br />
I<br />
I<br />
O<br />
I<br />
O<br />
I<br />
CO 2 Na<br />
O<br />
S<br />
NaO<br />
O<br />
HO<br />
OCH 3<br />
N<br />
N<br />
O<br />
S<br />
ONa<br />
O<br />
F,D&C Red No. 3 F,D&C Red No. 40<br />
Figure 4.46: Structure of the two components in red food dye.<br />
Figure 4.47c shows addition of one drop of red food dye to a brine solution, and the dye does not appear to<br />
mix with the brine at all. Figure 4.47d shows the brine layer containing the dye after shaking with a portion<br />
of ethyl acetate. The organic layer is pinker, signifying that more dye has now partitioned toward the<br />
organic layer. The polar dye molecules are much less soluble in the brine solution than in pure water (they<br />
have been “salted out”). In fact, some of the dye precipitated in the funnel (Figure 4.47d) as it had such<br />
low solubility in both brine and ethyl acetate.<br />
Figure 4.47: a) Water with the addition of one drop of red food dye, before swirling, b) Ethyl acetate, water and dye at equilibrium,<br />
c) Brine with the addition of one drop of red food dye, before swirling, d) Ethyl acetate, brine and dye at equilibrium.<br />
<strong>Organic</strong> <strong>Chemistry</strong> <strong>Laboratory</strong> <strong>Techniques</strong> | Nichols | Page 236
4.6.C DRYING AGENTS<br />
4.6.C.1 WHY THEY ARE USED<br />
The general sequence of events for most reactions is shown in Table 4.6.<br />
a) Conduct the reaction. b) Perform multiple<br />
extractions and/or washes<br />
to partially purify the<br />
desired product.<br />
c) Remove trace water<br />
with a drying agent.<br />
d) Filter or decant the<br />
drying agent.<br />
e) Remove the solvent<br />
with a rotary evaporator.<br />
f) Further purify if<br />
necessary.<br />
Table 4.6: Typical reaction sequence of events.<br />
An organic layer is always treated with a drying agent after having been exposed to water in a separatory<br />
funnel (step c in Table 4.6). Drying agents are anhydrous inorganic materials that favorably form “hydrates,”<br />
which incorporate water molecules into their solid lattice structure (for example Na 2 SO 4 7 H 2 O). A drying<br />
agent is swirled with an organic solution to remove trace amounts of water.<br />
Many organic solvents dissolve a significant<br />
portion of water (Table 4.7 7 that must be removed<br />
Solvent<br />
before rotary evaporation, or else water will be<br />
Diethyl ether<br />
found in the concentrated product. After solvent<br />
removal using a rotary evaporator, it occasionally Ethyl acetate<br />
happens that so much water is present that droplets<br />
Dichloromethane (CH<br />
or a second layer is seen amongst the oily liquid in<br />
2 Cl 2 )<br />
a round-bottomed flask. The presence of water Hexanes<br />
with the product makes the yield inaccurate, and<br />
water also must be removed before GC-MS<br />
analysis, as water is incompatible with mass-spectrometer detectors.<br />
Grams water dissolved<br />
in 100 mL solvent<br />
1.24 g<br />
2.92 g<br />
0.32 g<br />
0.007 g<br />
Table 4.7: Quantity of water dissolved in various solvents.<br />
Drying agents must be used with even relatively nonpolar organic solvents that do not theoretically dissolve<br />
much water, as water may cling to the sides of the separatory funnel and inadvertently travel with the<br />
organic layer while draining. Additionally, solutes dissolved in an organic layer with polar functional<br />
groups (e.g. alcohols, carboxylic acids) can hydrogen-bond with water and increase the likelihood of water<br />
dissolving in the organic layer.<br />
7 From: Fessenden, Fessenden, Feist, <strong>Organic</strong> <strong>Laboratory</strong> <strong>Techniques</strong>, 3 rd ed., Brooks-Cole, 2001.<br />
<strong>Organic</strong> <strong>Chemistry</strong> <strong>Laboratory</strong> <strong>Techniques</strong> | Nichols | Page 237
4.6.C.2 TYPES OF DRYING AGENTS<br />
Figure 4.48: Various drying agents.<br />
Drying agents (Figure 4.48) remove trace amounts of water from organic solutions by forming hydrates.<br />
The most useful drying agents indicate when they have completely absorbed all of the water from the<br />
solution. Anhydrous magnesium sulfate (MgSO 4 ) is a fine, loose powder (Figure 4.49a), but its hydrate is<br />
clumpy and often clings to the glass (Figure 4.49b). A typical drying procedure is to add anhydrous MgSO 4<br />
to an organic solution until it stops clumping and fine particles are seen, which indicate that there is no<br />
longer water available to form the clumpy hydrates.<br />
Figure 4.49: a) Ethyl acetate solution containing fine particles of anhydrous MgSO 4 , b) Ethyl acetate with clumpy MgSO 4 hydrate,<br />
c) Dry Drierite (blue), d) Wet Drierite (pink).<br />
Anhydrous calcium sulfate (CaSO 4 ), can be purchased containing a cobalt compound that is blue when dry<br />
and pink when wet (this is then sold under the name Drierite, Figures 4.49 c+d). In this way, blue Drierite<br />
can be used as a visual indicator for the presence of water. 8<br />
The most common drying agents used to remove water from organic solutions are anhydrous sodium sulfate<br />
(Na 2 SO 4 ) and anhydrous magnesium sulfate (MgSO 4 ). Many chemists consider MgSO 4 the “go-to” drying<br />
agent as it works quickly, holds a lot of water for its mass, and the hydrates are noticeably chunkier<br />
compared to the anhydrous form, making it easy to see when you’ve added enough. A drawback to using<br />
MgSO 4 is that it is a fine powder, and so the solutions must be subsequently filtered to remove the drying<br />
agent. Another drawback to MgSO 4 is that all fine powders heavily adsorb product on their surface (which<br />
is why they must be rinsed with solvent after filtration), and sometimes more granular drying agents are<br />
used to minimize the loss of product by adsorption.<br />
8 Blue Drierite is expensive, so is commonly used by mixing it together with white Drierite (CaSO4 without the cobalt indicator).<br />
Pink (wet) Drierite can be dried by spreading it on a watch glass and drying in a 110 ˚C oven overnight.<br />
<strong>Organic</strong> <strong>Chemistry</strong> <strong>Laboratory</strong> <strong>Techniques</strong> | Nichols | Page 238
In some procedures Na 2 SO 4 or CaCl 2 are used if they<br />
seem to work just as well as MgSO 4 , or if the solution<br />
is incompatible with MgSO 4 (see Table 4.8). A<br />
procedural advantage to these drying agents is that<br />
their granules are not easily dispersed, allowing for the<br />
solutions to be easily decanted (poured). In many<br />
situations drying agents are interchangeable (see Table<br />
4.5 for a survey of drying agents). However, it is most<br />
common for desiccators and drying tubes to use CaSO 4<br />
or CaCl 2 (Figure 4.50), as they can be easily<br />
manipulated in their pellet or rock forms.<br />
Figure 4.50: a) Drying tube filled with CaCl 2 , b) Desiccator<br />
using CaSO 4 .<br />
Drying Agent<br />
Hydrate<br />
formula(s)<br />
Practical Comments<br />
Magnesium sulfate MgSO 4 7 H 2 O Quickly removes most water, and can<br />
hold a lot for its mass (0.15-0.75 g water<br />
per g desiccant). 9 Is a fine powder, so<br />
must be gravity filtered. Its high surface<br />
area means it will somewhat adsorb<br />
compound: be sure to rinse after filtering.<br />
Sodium sulfate<br />
Calcium chloride<br />
Calcium sulfate<br />
(Drierite)<br />
Na 2 SO 4 7 H 2 O<br />
Na 2 SO 4 10 H 2 O<br />
CaCl 2 2 H 2 O<br />
CaCl 2 6 H 2 O<br />
CaSO 4 ½ H 2 O<br />
CaSO 4 2 H 2 O<br />
Removes water at a moderate rate, so the<br />
solution should be allowed to sit with the<br />
drying agent for some time. Can hold a<br />
lot of water for its mass (1.25 g water per<br />
g desiccant), but may leave small amounts<br />
of water remaining. Solutions with<br />
Na 2 SO 4 can usually be decanted.<br />
Quickly removes water well, although<br />
larger quantities are needed than other<br />
drying agents (holds 0.30 g water per g<br />
desiccant). If using a fine powder, the<br />
solution must be gravity filtered and<br />
drying agent rinsed. If using pellets, the<br />
solution should be allowed to sit for a few<br />
minutes, then decanted.<br />
Quickly removes water, but needs large<br />
quantities as it holds little water per gram.<br />
Are most often used in desiccators and<br />
drying tubes, not with solutions.<br />
Other Comments<br />
Mg(H 2 O) 4 2+ is<br />
somewhat acidic,<br />
so is incompatible<br />
with highly acidsensitive<br />
groups.<br />
Cannot dry<br />
diethyl ether well<br />
unless a brine<br />
wash was used.<br />
Absorbs water as<br />
well as methanol<br />
and ethanol.<br />
Table 4.8: Survey of drying agents.<br />
9 Grams water per gram of desiccant values are from: J.A. Dean, Lange’s Handbook of <strong>Chemistry</strong>, 15 th ed., McGraw-Hill, 1999,<br />
Sect. 11.2. CaCl 2 value is quoted for the formation of CaCl 2 2 H 2 O.<br />
<strong>Organic</strong> <strong>Chemistry</strong> <strong>Laboratory</strong> <strong>Techniques</strong> | Nichols | Page 239
4.6.C.3 DRYING AGENTS PROCEDURE<br />
Figure 4.51: a) Pipetting out a droplet of water at the bottom of a flask, b) Addition of an initial portion of drying agent, c) Swirling.<br />
1. The organic solution to be dried must be in an Erlenmeyer flask, as solutions can easily splash out of<br />
beakers when swirled.<br />
2. First inspect the solution to see if it’s homogeneous, or if there is a second layer of liquid (typically a<br />
puddle on the bottom). If a second layer is noticed, this is probably water and the majority of it should<br />
be pipetted out before continuing on (Figure 4.51a). It can be difficult to completely remove a water<br />
layer by pipette, so leaving a tiny bit is acceptable.<br />
3. Add a small portion of drying agent to the flask, the size of one pea for macroscale work (Figure 4.51b),<br />
and swirl the solution (Figure 4.51c). Be sure to close the jar of drying agent when not in use, as the<br />
reagents are hygroscopic. After a short period of time, inspect the mixture closely.<br />
a. If the entire drying agent clumps into pieces that are much larger than the original size (Figures<br />
4.52 b+c), there is still water remaining in the flask. Add another portion of drying agent and swirl.<br />
b. A solution is nearing dryness when fine particles are noticed that don’t cling to other particles<br />
(Figures 4.52 a+c) or to the glass when swirled (Figure 4.53a). A wet organic solution can be<br />
cloudy, and a dry one is always clear.<br />
c. If using anhydrous Na 2 SO 4 , allow the solution to sit for at least 5 minutes before declaring the<br />
solution dry, as this reagent takes time to work.<br />
Figure 4.52: Drying ethyl acetate with anhydrous MgSO 4 and Na 2 SO 4 : a) Dry MgSO 4 (very fine particles), b) Wet MgSO 4 (hydrate<br />
clumps), c) Dry Na 2 SO 4 (small particles), d) Wet Na 2 SO 4 (hydrate clumps).<br />
<strong>Organic</strong> <strong>Chemistry</strong> <strong>Laboratory</strong> <strong>Techniques</strong> | Nichols | Page 240
Figure 4.53: a) Wet hydrate of Na 2 SO 4 can stick to the glass, b) Decanting a solution, c) Gravity filtering a solution, d) Rinsing<br />
the residual drying agent in the flask.<br />
4. When the solution is dry, separate the drying agent from the solution:<br />
a. If using Na 2 SO 4 , CaCl 2 pellets, or CaSO 4 rocks, carefully decant the solution into an appropriately<br />
sized round-bottomed flask (Figure 4.53b), being sure to fill the flask no more than half way.<br />
Reminder: a mass of the empty flask should be obtained if the solvent will be evaporated on the<br />
rotary evaporator.<br />
b. If using MgSO 4 , gravity filter the solution into an appropriately sized round bottomed flask (Figure<br />
4.53c). When pouring, leave the solid behind as long as possible (essentially decant the solution,<br />
but into a funnel lined with filter paper). Solid can slow drainage in the filter paper.<br />
c. With all drying agents, rinse the drying agent (in the flask and in the filter funnel) with a few mL<br />
of fresh organic solvent, and add the rinsing to the round-bottomed flask (Figure 4.53d). Remove<br />
the solvent using a rotary evaporator.<br />
<strong>Organic</strong> <strong>Chemistry</strong> <strong>Laboratory</strong> <strong>Techniques</strong> | Nichols | Page 241
4.7 ACID-BASE EXTRACTION<br />
4.7.A HOW THEY WORK<br />
A modification of the extractions previously discussed in this chapter is to perform a chemical reaction in<br />
the separatory funnel in order to change the polarity and therefore partitioning of a compound in the aqueous<br />
and organic layers. A common method is to perform an acid-base reaction, which can convert some<br />
compounds from neutral to ionic forms (or vice versa).<br />
For example, imagine that a mixture of benzoic acid and cyclohexane is dissolved in an organic solvent<br />
like ethyl acetate in a separatory funnel. To separate the components, a water wash may be attempted to<br />
remove benzoic acid, but benzoic acid is not particularly water-soluble due to its nonpolar aromatic ring,<br />
and only small amounts would be extracted into the aqueous layer (Figure 4.54a).<br />
Figure 4.54: Washing a mixture of benzoic acid and cyclohexane with: a) water, b) aqueous NaOH.<br />
Separation of a mixture of benzoic acid and cyclohexane is however possible using a wash with a base such<br />
as NaOH. Due to its acidic nature, benzoic acid can undergo a reaction with NaOH as follows, resulting in<br />
the carboxylate salt sodium benzoate.<br />
PhCO 2 H (aq) + NaOH (aq) H 2 O (l) + PhCO 2 Na (aq) (or PhCO 2 – Na + )<br />
Benzoic acid<br />
Sodium benzoate<br />
The solubility properties of carboxylic acids are substantially<br />
different than their corresponding carboxylate salts. Sodium<br />
salicylate is roughly 350 times more soluble in water than salicylic<br />
acid due to its ionic character (Figure 4.55), and it is rather<br />
insoluble in organic solvents such as diethyl ether.<br />
Therefore, a wash with NaOH would convert benzoic acid into its<br />
ionic carboxylate form, which would then be more soluble in the<br />
aqueous layer, allowing for the sodium benzoate to be extracted into<br />
salicylic acid<br />
Figure 4.55: Aqueous solubility data for<br />
salicylic acid and sodium salicylate (Ref 4).<br />
the aqueous layer. Cyclohexane would remain in the organic layer as it has no affinity for the aqueous<br />
phase, nor can react with NaOH in any way. In this manner, a mixture of benzoic acid and cyclohexane<br />
can be separated (Figure 4.54b). The aqueous layer may be later acidified with HCl (aq) if desired to convert<br />
the benzoic acid back to its neutral form.<br />
O<br />
OH<br />
OH<br />
Water solubility (15 ˚C):<br />
0.184 g / 100 mL soln<br />
O<br />
ONa<br />
OH<br />
sodium salicylate<br />
Water solubility(15 ˚C):<br />
64.7 g / 100 mL soln<br />
<strong>Organic</strong> <strong>Chemistry</strong> <strong>Laboratory</strong> <strong>Techniques</strong> | Nichols | Page 242
4.7.B SODIUM BICARBONATE WASHES<br />
An acid-base extraction can be used to extract carboxylic acids from the organic layer into the aqueous<br />
layer. As was discussed in the previous section, NaOH can be used to convert a carboxylic acid into its<br />
more water-soluble ionic carboxylate form. However, if the mixture contains a desired compound that can<br />
react with NaOH, a milder base such as sodium bicarbonate should be used. A similar reaction occurs:<br />
PhCO 2 H (aq) + NaHCO 3 (aq) PhCO 2 Na (aq) + H 2 CO 3 (aq)<br />
Benzoic acid<br />
Sodium benzoate<br />
H 2 O (l) + CO 2 (g)<br />
One difference in using the base NaHCO 3 instead of NaOH is that the byproduct carbonic acid (H 2 CO 3 )<br />
can decompose to water and carbon dioxide gas. When shaking an acidic solution with sodium bicarbonate<br />
in a separatory funnel, care should be taken to swirl gently and vent more frequently to release pressure<br />
from the gas.<br />
An example of a reaction that often uses a sodium bicarbonate wash in the work-up is a Fischer<br />
Esterification reaction. To demonstrate, benzoic acid was refluxed in ethanol along with concentrated<br />
sulfuric acid in order to form ethyl benzoate (Figures 4.56 a+b). A TLC plate of the reaction mixture at 1<br />
hour of reflux showed residual unreacted carboxylic acid (Figure 4.56c), which is not uncommon due to<br />
the energetics of the reaction.<br />
Figure 4.56: a) Refluxing reagents, b) Reaction scheme, c) TLC after 1 hour reflux, where the first lane (BA) is benzoic acid, the<br />
second lane (Co) is the co-spot and the third lane (Pr) is the reaction mixture (ran with 1:1 hexanes:ethyl acetate and visualized<br />
with UV light).<br />
The residual carboxylic acid can be removed from the<br />
desired ester product using an acid-base extraction in a<br />
separatory funnel. A wash with sodium bicarbonate<br />
converts benzoic acid into its more water-soluble<br />
sodium benzoate form, extracting it into the aqueous<br />
layer (Figure 4.57). Additionally, the sodium<br />
bicarbonate neutralizes the catalytic acid in this<br />
reaction.<br />
organic<br />
O<br />
OCH 2 CH 3<br />
O<br />
OH<br />
add saturated<br />
NaHCO 3 (aq)<br />
organic<br />
aqueous<br />
O<br />
OCH 2 CH 3<br />
O<br />
O<br />
Na +<br />
Sodium bicarbonate is preferable to NaOH in this<br />
process, as it is a much weaker base; washing with<br />
NaOH could cause hydrolysis of the ester product.<br />
Figure 4.57: Saturated sodium bicarbonate wash to remove<br />
residual carboxylic acid from the reaction mixture of a Fischer<br />
esterification. The ester is then isolated in the organic layer.<br />
<strong>Organic</strong> <strong>Chemistry</strong> <strong>Laboratory</strong> <strong>Techniques</strong> | Nichols | Page 243
4.7.C MIXTURES OF ACIDS AND BASES<br />
As has been discussed previously, the acid-base properties of compounds can be utilized to selectively<br />
extract certain compounds from mixtures. This strategy can be extended to other examples.<br />
4.7.C.1 EXTRACTING BASES<br />
Basic compounds such as amines can be extracted from organic solutions by shaking them with acidic<br />
solutions to convert them into more water-soluble salts. In this way, they can be extracted from an organic<br />
layer into an aqueous layer.<br />
PhNH 2 (aq) + HCl (aq) PhNH 3 Cl (aq) (or PhNH 3<br />
+<br />
Basic amine<br />
Ammonium salt<br />
Cl – )<br />
4.7.C.2 EXTRACTING CARBOXYLIC ACIDS VS. PHENOLS<br />
As previously discussed, carboxylic acids can be extracted from an organic layer into an aqueous layer by<br />
shaking them with basic solutions, which converts them into their more water-soluble salts.<br />
PhCO 2 H (aq) + NaOH (aq) H 2 O (l) + PhCO 2 Na (aq) (or PhCO 2 – Na + )<br />
Carboxylic acid<br />
Carboxylate salt<br />
A similar reaction occurs with phenols (PhOH), and they too can be extracted into an aqueous NaOH layer<br />
(Figure 4.58a).<br />
However, phenols are considerably less acidic than carboxylic acids, and are not acidic enough to react<br />
completely with NaHCO 3 , a weaker base. Therefore, a solution of bicarbonate can be used to separate<br />
mixtures of phenols and carboxylic acids (Figure 4.58b).<br />
Figure 4.58: a) Extraction of both carboxylic acids and phenols into 5% NaOH (aq), b) Extraction of only carboxylic acids into<br />
5% NaHCO 3 (aq).<br />
<strong>Organic</strong> <strong>Chemistry</strong> <strong>Laboratory</strong> <strong>Techniques</strong> | Nichols | Page 244
4.7.C.3 EXTRACTING ACID, BASE, AND NEUTRAL COMPONENTS<br />
The acid-base properties previously discussed allow for a mixture containing acidic (e.g. RCO 2 H), basic<br />
(e.g. RNH 2 ), and neutral components to be purified through a series of extractions, as summarized in Figure<br />
4.59 (which uses an organic solvent less dense than water).<br />
a) Extract the Acidic Component<br />
Add 5%<br />
NaOH (aq)<br />
Org<br />
Neutral<br />
RCO 2 H<br />
RNH 2<br />
Neutral<br />
Org RNH 2<br />
NaOH (aq)<br />
RCO - 2 Na +<br />
Use 2 M HCl<br />
to give pH 3-4<br />
Org<br />
Aq.<br />
RCO 2 H<br />
Add HCl<br />
(aq)<br />
Extract into<br />
organic solvent<br />
Neutral<br />
RNH 2<br />
b) Extract the Basic Component<br />
Neutral<br />
RNH 2<br />
Org<br />
Add 5%<br />
HCl (aq)<br />
RCO 2 Na<br />
RCO 2 H<br />
Org NaOH (aq) Aq.<br />
Filter if solid<br />
RCO 2 H<br />
Org<br />
Neutral<br />
HCl (aq) RNH 3 + Cl -<br />
Neutral<br />
RNH 2<br />
RNH 3 Cl<br />
RNH 2<br />
Org<br />
RNH 2<br />
Use 2 M NaOH<br />
to give pH 9-11<br />
Aq.<br />
Extract into<br />
Add NaOH organic solvent<br />
(aq)<br />
Filter if solid<br />
Org HCl (aq) Aq.<br />
Figure 4.59: Flowchart for separating a mixture containing acidic, basic and neutral components.<br />
<strong>Organic</strong> <strong>Chemistry</strong> <strong>Laboratory</strong> <strong>Techniques</strong> | Nichols | Page 245
It is assumed that readers conducting this type of experiment are familiar with performing single and<br />
multiple extractions. In this section are described differences between general extraction procedures and<br />
the process as summarized in Figure 4.59.<br />
1. Isolating the Acidic component:<br />
a. When the acidic component is in the aqueous layer in an Erlenmeyer flask, it can be converted back<br />
to the neutral component through addition of 2 M HCl (aq) until the solution gives a pH of 3-4 (as<br />
determined by pH paper). If large quantities of acid are present such that acidification would<br />
require too great a volume of 2 M HCl (aq), concentrated HCl (aq) may be instead added dropwise.<br />
Lower concentrations of HCl (aq) are less hazardous, but increasing the volume of the aqueous<br />
layer by a large amount would affect the efficiency of subsequent extractions and filtering steps.<br />
b. After acidification, two routes may be taken, depending on if the acidic component is solid or liquid.<br />
•<br />
•<br />
If a solid forms upon acidification of the ionic salt, it can be collected through suction filtration.<br />
This method should only be used if large quantities of large-sized crystals are seen. If fine<br />
crystals form (which are quite common), they will clog the filter paper and interfere with<br />
adequate drainage. If only a small amount of solid is seen compared to the theoretical quantity,<br />
it is likely the compound is quite water-soluble, and filtration would lead to low recovery.<br />
If no solid forms upon acidification (or if fine crystals or low quantity of solid forms), extract<br />
the acidic component back into an organic solvent (×3). As a general rule of thumb, use onethird<br />
as much solvent for the extractions as the original layer (e.g. if using 100 mL aqueous<br />
solution, extract with 33 mL organic solvent each time). Be sure to first cool the aqueous<br />
solution in an ice bath before extraction if the acidification created noticeable heat. Follow up<br />
with a brine wash (×1) if using diethyl ether or ethyl acetate, dry with a drying agent, and<br />
remove the solvent via rotary evaporator to leave the pure acidic component.<br />
2. Isolating the Basic component:<br />
Use a similar process as the isolation of the acidic component, except basify the solution using 2 M<br />
NaOH (aq) until it gives a pH of 9-10 as determined by pH paper.<br />
3. Isolating the Neutral component:<br />
The neutral component will be the “leftover” compound in the organic layer. To isolate, wash with<br />
brine (×1) if using diethyl ether or ethyl acetate, dry with a drying agent, and remove the solvent via<br />
rotary evaporator to leave the pure neutral component.<br />
<strong>Organic</strong> <strong>Chemistry</strong> <strong>Laboratory</strong> <strong>Techniques</strong> | Nichols | Page 246
CHAPTER 5<br />
DISTILLATION<br />
Steam<br />
distillation of<br />
mint leaves.<br />
<strong>Organic</strong> <strong>Chemistry</strong> <strong>Laboratory</strong> <strong>Techniques</strong> | Nichols | Page 247
CHAPTER 5: DISTILLATION, TABLE OF CONTENTS<br />
5.1 Overview of Distillation 249 5.4 Vacuum Distillation 285<br />
5.2 Simple Distillation 251 5.4.A Overview of Vacuum Distillation 285<br />
5.2.A Uses of Simple Distillation 251 5.4.B Predicting the Boiling Temperature 286<br />
Concentration of Alcohol 251 5.3.C Step-by-Step Procedures 287<br />
Distilled Water 252 Vacuum Distillation Procedure 287<br />
Purification of Reagents + Products 252 Vacuum Distillation Summary 291<br />
5.2.B Separation Theory 254<br />
Raoult’s and Dalton’s Laws 254 5.5 Steam Distillation 292<br />
Purification Potential 255 5.5.A Overview of Steam Distillation 292<br />
Distillation Curves 258 5.5.B Uses of Steam Distillation 292<br />
Distilling Temperatures 260 5.5.C Separation Theory 293<br />
Azeotropes 262 5.5.D Step-by-Step Procedures 294<br />
5.2.C Step-by-Step Procedures 264 Steam Distillation Procedure 294<br />
Condenser Hoses 264 Steam Distillation Summary 299<br />
Simple Distillation Procedure 265<br />
Simple Distillation Summary 272 5.6 Rotary Evaporation 300<br />
Variations 273 5.6.A Overview of Rotary Evaporation 300<br />
Troubleshooting 274 5.6.B Step-by-Step Procedures 301<br />
Insulation 274 Rotary Evaporation Procedure 301<br />
5.2.D Microscale Distillation 276 Rotary Evaporation Summary 304<br />
Semi-Microscale 276 5.6.C Troubleshooting 305<br />
Hickman Head 276<br />
Short-Path Distillation 277<br />
5.3 Fractional Distillation 278<br />
5.3.A Theory of Fractional Distillation 278<br />
5.3.B Fractionating Columns 279<br />
5.3.C Uses of Fractional Distillation 281<br />
Oil Refining 281<br />
Purification of Reagents + Products 281<br />
5.3.D Step-by-Step Procedures 282<br />
Fractional Distillation Procedure 282<br />
Fractional Distillation Summary 284<br />
<strong>Organic</strong> <strong>Chemistry</strong> <strong>Laboratory</strong> <strong>Techniques</strong> | Nichols | Page 248
5.1 OVERVIEW OF DISTILLATION<br />
Distillation is a purification method for liquids, and can separate components of a mixture if they have<br />
significantly different boiling points. A distillation may appear to beginning students as very complex<br />
because the apparatus is composed of many pieces of odd-shaped glassware. However, the basic idea of a<br />
distillation is quite simple. In a distillation, a liquid is boiled in the “distilling flask,” then the vapors travel<br />
to another section of the apparatus where they come into contact with a cool surface. The vapors condense<br />
on this cool surface, and the condensed liquid (called the “distillate”) drips into a reservoir separated from<br />
the original liquid. In the simplest terms, a distillation involves boiling a liquid, then condensing the gas<br />
and collecting the liquid elsewhere (Figure 5.1).<br />
Figure 5.1: Basic process of a distillation (simple).<br />
<strong>Organic</strong> <strong>Chemistry</strong> <strong>Laboratory</strong> <strong>Techniques</strong> | Nichols | Page 249
Several distillation variations are used in the organic laboratory depending on the properties of the mixture<br />
to be purified. The apparatus in Figure 5.1 is used to perform a simple distillation and is used if the<br />
components have widely different boiling points (greater than a 100 ˚C difference in boiling points). If a<br />
simple distillation is attempted on a mixture where the components have more similar boiling points (less<br />
than a 100 ˚C difference in boiling points), it will fail to purify the mixture completely. Instead, fractional<br />
distillation can be used to improve the chances of purification. Vacuum distillation may be used when<br />
the boiling points of the mixture’s components are very high (>150 ˚C), or steam distillation if the<br />
components are very water insoluble. The distillation variations are summarized in Table 5.1, and are<br />
discussed in detail in this chapter.<br />
Simple Distillation<br />
Fractional Distillation<br />
Separation of components with very different<br />
boiling points<br />
(when the difference in b.p. is >100 ˚C)<br />
Separation of components with similar boiling<br />
points<br />
(when the difference in b.p. is 150 ˚C)<br />
Isolation of water-insoluble components, often<br />
with high boiling points and from plant materials<br />
(when b.p. are >150 ˚C)<br />
Table 5.1: Summary of various distillation techniques.<br />
<strong>Organic</strong> <strong>Chemistry</strong> <strong>Laboratory</strong> <strong>Techniques</strong> | Nichols | Page 250
5.2 SIMPLE DISTILLATION<br />
5.2.A USES OF SIMPLE DISTILLATION<br />
5.2.A.1 CONCENTRATION OF ALCOHOL<br />
Fermented grains can produce a maximum alcohol content of about<br />
16%, the upper limit of most beers and wines, as the yeast organism<br />
used in fermentation cannot survive in more concentrated alcoholic<br />
solutions. However, spirits such as gin, vodka, and rum usually have<br />
an alcohol content of roughly 40% by volume. Distillation is the<br />
method used to concentrate fermented solutions and produce hard<br />
liquors. A distillation of fermented grape juice is commonly done in<br />
academic laboratories (Figure 5.2).<br />
Figure 5.3 shows the distillation of red wine. Notice how the wine<br />
is noticeably purified in the process as the distillate is clear (Figure<br />
Figure 5.2: Distillation of fermented grape<br />
juice during a lab at Butte College.<br />
5.3d). All concentrated alcoholic products at first distill clear, but some become colored during the aging<br />
process (from components leaching out of the barrels they are stored in, or from oxidation).<br />
Figure 5.3: a) Red wine, b) Distillation of red wine, c) Distilling flask during the process, d) Distillate (brandy).<br />
The distillation of red wine can be proven to have concentrated the alcohol through a flame test, which is<br />
the origin of the term “proof.” In the 16 th century when rum was a bartering item, it was regularly tested to<br />
ensure that it had not been watered down. An alcoholic sample that is 57% alcohol by volume is capable<br />
of catching on fire, while more dilute solutions cannot, enabling ignition to serve as “proof” of alcohol<br />
content. The red wine used in Figure 5.3 did not ignite, which is consistent with its label that states it to be<br />
only 13% alcohol (Figure 5.4a). The distillate easily caught on fire (Figures 5.4 c+d), and density analysis<br />
showed it to be 67% alcohol.<br />
Figure 5.4: a) Unsuccessful ignition of red wine, b) Successful ignition of the distillate, c+d) The distillate aflame (faint blue).<br />
<strong>Organic</strong> <strong>Chemistry</strong> <strong>Laboratory</strong> <strong>Techniques</strong> | Nichols | Page 251
5.2.A.2 DISTILLED WATER<br />
Access to clean, fresh water is a major<br />
problem facing the world today. In<br />
countries neighboring the ocean, seawater<br />
desalination is sometimes used to provide<br />
the country with drinkable water.<br />
Distillation is one of the main methods 1<br />
used to purify ocean water and works well<br />
since salt, microorganisms, and other<br />
components of seawater are non-volatile.<br />
The main disadvantage of distilling water is<br />
that the process requires a lot of energy, and<br />
unless engineered creatively, the<br />
economics can be a major deterrent to using<br />
the method. Heat released from a power Figure 5.5: a) Distilled water generator at Butte College. The top metallic<br />
plant is often used to provide the energy for box is the actual generator, and the bottom cylindrical container is the<br />
reservoir, b) Distilled water carboy and wash bottle.<br />
the distillation of seawater, and Saudi<br />
Arabia and Israel mainly use coupled power plants and distilleries to obtain roughly half the fresh water<br />
needed for their countries. 2<br />
Along with drinking water, distilled water is necessary for scientific lab work as dissolved salts in tap water<br />
may interfere with some experiments. Many science buildings have their own distilled water generators<br />
(Figure 5.5a), enabling wash bottles and carboys to be filled with a turn of the spigot (Figure 5.5b).<br />
5.2.A.3 PURIFICATION OF REAGENTS AND PRODUCTS<br />
Distillation is an excellent purification tool for many liquids, and can be used to purify products from a<br />
chemical reaction. Figure 5.6 shows the distillation of a crude sample of isoamyl acetate, formed through<br />
a Fischer esterification reaction. The crude sample was originally yellow (Figure 5.6a), but the distillate<br />
was colorless (Figure 5.6d), making obvious the removal of some materials through the process.<br />
Figure 5.6: a) Crude yellow isoamyl acetate formed from a Fischer esterification, b+c) Simple distillation, d) Colorless distillate.<br />
1 More often, vacuum distillation is used for desalination, as the lowered pressure allows for boiling to occur at a lower temperature<br />
(which then requires less energy). Vacuum distillation of seawater is still energy intensive. Reverse osmosis is also used for<br />
seawater desalination.<br />
2 Pyper, Julia, “Israel is creating a water surplus using desalination,” E+E News, February 7, 2014.<br />
<strong>Organic</strong> <strong>Chemistry</strong> <strong>Laboratory</strong> <strong>Techniques</strong> | Nichols | Page 252
Figure 5.7: a) Benzaldehyde reagent with crystals of benzoic acid seen on the glassware (indicated with an arrow), b+c) Distillation.<br />
Distillation can also be used to purify reagents that have degraded over time. Figure 5.7a shows a bottle of<br />
benzaldehyde that has partially oxidized, as evidenced by the crystals of benzoic acid seen adhering to the<br />
inside of the glass (indicated with an arrow). A simple distillation purified the benzaldehyde sample, and<br />
its effectiveness was demonstrated through comparison of the infrared (IR) spectra of the original material<br />
(Figure 5.8a) and the distillate (Figure 5.8b). The broad region indicated by an arrow in Figure 5.8a<br />
represent the O-H stretch of a carboxylic acid (benzoic acid), and the distillate’s IR spectrum lacks this<br />
feature.<br />
Figure 5.8: a) IR spectrum of benzaldehyde before distillation (arrow points to the O-H signal from the benzoic acid impurity), b)<br />
IR spectrum of benzaldehyde after distillation.<br />
<strong>Organic</strong> <strong>Chemistry</strong> <strong>Laboratory</strong> <strong>Techniques</strong> | Nichols | Page 253
5.2.B SEPARATION THEORY<br />
5.2.B.1 RAOULT’S AND DALTON’S LAWS<br />
Distillation of mixtures may or may not produce relatively pure samples. As distillation involves boiling a<br />
solution and condensing its vapors, the composition of the distillate is identical to the composition of the<br />
vapors. Several equations can be used to describe the composition of vapor produced from a solution.<br />
Raoult’s law states that a compound’s vapor pressure is lessened when it is part of a solution, and is<br />
proportional to its molar composition. Raoult’s law is shown in equation (1). The equation means that a<br />
solution containing 80 mol% compound “A” and 20 mol% of another miscible component would at<br />
equilibrium produce 80% as many particles of compound A in the gas phase than if compound A were in<br />
pure form.<br />
(1)<br />
where <br />
<br />
is the vapor pressure 3 of a sample of pure A, and χ A is the mole fraction of A in the mixture.<br />
Dalton’s law of partial pressures states that the total pressure in a closed system can be found by addition<br />
of the partial pressures of each gaseous component. Dalton’s law is shown in equation (2).<br />
(2)<br />
A combination of Raoult’s and Dalton’s laws is shown in equation (3), which describes the vapor produced<br />
by a miscible two-component system (compounds A + B). This combined law shows that the vapors<br />
produced by distillation are dependent on each component’s vapor pressure and quantity (mole fraction).<br />
(3)<br />
A compound’s vapor pressure reflects the temperature of the solution as well as the compound’s boiling<br />
point. As temperature increases, a greater percentage of molecules have sufficient energy to overcome the<br />
intermolecular forces (IMF’s) holding them in the liquid phase. Therefore, a compound’s vapor pressure<br />
always increases with temperature (see Table 5.2), although not in a linear fashion.<br />
Compound Boiling Point (˚C) Vapor Pressure at 0 ˚C Vapor Pressure at 20 ˚C<br />
Diethyl Ether 34.6 183 mmHg 439 mmHg<br />
Methanol 64.7 30 mmHg 94 mmHg<br />
Benzene 80.1 24.5 mmHg 75 mmHg<br />
Toluene 110.6 6.8 mmHg 22 mmHg<br />
Table 5.2: Vapor pressure data for selected compounds. 4<br />
When comparing two compounds at the same temperature, the compound with weaker IMF’s (the one with<br />
the lower boiling point) should more easily enter the gas phase. Therefore, at any certain temperature, a<br />
compound with a lower boiling point always has a greater vapor pressure than a compound with a<br />
higher boiling point (see Table 5.2). This last concept is the cornerstone of distillation theory.<br />
3 Recall that vapor pressure is the partial pressure of a compound formed by evaporation of a pure liquid into the head space of a<br />
closed container.<br />
4 Data from Handbook of <strong>Chemistry</strong> and Physics, 50 th ed., CRC Press, Cleveland, 1970, p.148.<br />
<strong>Organic</strong> <strong>Chemistry</strong> <strong>Laboratory</strong> <strong>Techniques</strong> | Nichols | Page 254
5.2.B.2 PURIFICATION POTENTIAL<br />
A simple distillation works well to purify certain mixtures, specifically to separate a liquid from nonvolatile<br />
impurities (e.g. solids or salts), or from small amounts of significantly higher or lower boiling<br />
impurities. A general guideline is that a simple distillation is capable of separating components if the<br />
difference in boiling point of the components is greater than 100 ˚C. A simple distillation does not<br />
work well to purify a mixture that contains components with similar boiling points (when the difference in<br />
b.p. is < 100 ˚C).<br />
To demonstrate, a mixture containing 75 mol% 1-chlorobutane (normal b.p. 78 ˚C) and 25 mol% p-cymene<br />
(normal b.p. 177 ˚C, Figure 5.10b) was purified using a simple distillation to collect the first two mL of<br />
distillate. The difference in boiling point of these two components is 99 ˚C.<br />
Gas chromatograph (GC) analysis of the initial mixture and distillate allowed for quantitation, although the<br />
reported percentages were not proportional to the mol% values because of the detector used (often higher<br />
molecular weight compounds have abnormally high integration values with mass spectrometers). A<br />
calibration curve was necessary to translate the reported percentages into accurate values (Figure 5.9). To<br />
generate the calibration curve, the GC integration values were recorded for several known mixtures of 1-<br />
chlorobutane and p-cymene. For example, a sample with 95 mol% 1-chlorobutane (x axis) and 5 mol% p-<br />
cymene was reported by the GC instrument to be 42% 1-chlorobutane (y axis). This was recorded as the<br />
data point (95,42).<br />
Sample<br />
Component<br />
Recorded<br />
GC%<br />
Actual<br />
%<br />
Initial Soln. 1-chlorobutane 22% 75%<br />
p-cymene 78% 25%<br />
Distillate 1-chlorobutane 86% 99.5%<br />
p-cymene 14% 0.5%<br />
Figure 5.9: Calibration curve for GC analysis of a 1-chlorobutane / p-cymene mixture.<br />
Table 5.3: Recorded GC% for the simple distillation of a 75 mol% 1-chlorobutane (CB) and 25 mol% p-cymene (PC) mixture.<br />
The actual % were estimated using the calibration curve in Figure 5.9.<br />
GC analysis (Figure 5.10) and a calibration cure (Figure 5.9) showed the distillate to be nearly pure 1-<br />
chlorobutane (~99.5 mol%, Table 5.3). This is an example of a mixture that is purified well through simple<br />
distillation.<br />
Figure 5.10: a) GC spectrum of a 75 mol% 1-chlorobutane and 25 mol% p-cymene mixture- note GC% need to be interpreted by<br />
a calibration curve. 1-chlorobutane is the peak at 2.1 min and p-cymene is the peak at 5.6 min, b) GC spectrum of the distillate<br />
from a simple distillation, c) Structures of 1-chlorobutane (CB) and p-cymene (PC).<br />
<strong>Organic</strong> <strong>Chemistry</strong> <strong>Laboratory</strong> <strong>Techniques</strong> | Nichols | Page 255
A second distillation was performed in a similar manner using a mixture containing 75 mol% ethylbenzene<br />
(normal b.p. 136 ˚C) and 25 mol% p-cymene (normal b.p. 177 ˚C, Figure 5.12b). The difference in boiling<br />
point of these two components is 41 ˚C.<br />
Sample<br />
Component<br />
Recorded<br />
GC%<br />
Actual<br />
%<br />
Initial Soln. ethylbenzene 56% 75%<br />
p-cymene 44% 25%<br />
Distillate ethylbenzene 68% 90%<br />
p-cymene 32% 10%<br />
Figure 5.11: Calibration curve for GC analysis of an ethylbenzene / p–cymene mixture.<br />
Table 5.4: Recorded GC% for the simple distillation of a 75 mol% ethylbenzene (EB) and 25 mol% p-cymene (PC) mixture. The<br />
actual % were estimated using the calibration curve in Figure 5.11.<br />
GC analysis (Figure 5.12) and a calibration curve (Figure 5.11) showed the simple distillation did increase<br />
the quantity of ethylbenzene in the mixture (from 75 mol% to 90 mol%, see Table 5.4), but a significant<br />
portion of p-cymene remained in the distillate. This is an example of a mixture that is not completely<br />
purified by simple distillation.<br />
Figure 5.12: a) GC spectrum of a 75 mol% ethylbenzene and 25 mol% p-cymene mixture, note GC% need to be interpreted by a<br />
calibration curve. Ethylbenzene is the peak at 4.2 min and p-cymene is the peak at 5.6 min, b) GC spectrum of the distillate, c)<br />
Structures of ethylbenzene (EB) and p-cymene (PC).<br />
The two distillations in this section both started with 75 / 25 mol% mixtures, and yet the two distillations<br />
resulted in distillates with different purity. This result can be explained by analysis of Raoult’s and Dalton’s<br />
laws. The equation describing the composition of vapor produced from the 75 mol% 1-chlorobutane / 25<br />
mol% p-cymene mixture is shown in equation (4).<br />
<br />
<br />
<br />
<br />
(4)<br />
In this distillation, the distillate was “enriched” in 1-chlorobutane, as it changed from 75 mol% 1-<br />
chlorobutane in the distilling flask to 99.5 mol% 1-chlorobutane in the distillate. The distillate contained<br />
nearly pure 1-chlorobutane, as it had the greater contribution to the solution’s vapor. This is because:<br />
•<br />
•<br />
1-chlorobutane was present in a greater quantity in the distilling flask (75%, or had a mole fraction of<br />
0.75)<br />
1-chlorobutane had the lower boiling point of the components (78 ˚C compared to 177 ˚C) and so had<br />
<br />
<br />
a significantly higher vapor pressure than p-cymene ( .<br />
<strong>Organic</strong> <strong>Chemistry</strong> <strong>Laboratory</strong> <strong>Techniques</strong> | Nichols | Page 256
In this distillation, the difference in boiling point of the components was so large (Δ b.p. of 99 ˚C), that the<br />
vapor pressure of p-cymene (and thus its contribution to the vapor phase) was essentially insignificant<br />
during the distillation. The vastly different vapor pressures (along with the differences in mole fraction),<br />
were the reason the simple distillation resulted in a nearly pure distillate.<br />
In the distillation of the 75 mol% ethylbenzene / 25 mol% p-cymene mixture, the distillate was also enriched<br />
in the lower boiling component (ethylbenzene) as it had the greater vapor pressure. However, the distillate<br />
still contained 10 mol% p-cymene, because there was only a 41 ˚C difference in boiling point between the<br />
two components. This meant that the higher boiling component (p-cymene) had a smaller but not negligible<br />
vapor pressure, leading to a significant quantity of p-cymene in the distillate.<br />
<strong>Organic</strong> <strong>Chemistry</strong> <strong>Laboratory</strong> <strong>Techniques</strong> | Nichols | Page 257
5.2.B.3 DISTILLATION CURVES<br />
Equation (5) describes the vapor produced by a miscible two-component system (compounds A + B). This<br />
mathematical equation can be used to generate phase diagrams, or distillation curves, which graphically<br />
correlate temperature to the molar composition of the liquid and vapor phases.<br />
(5)<br />
Figure 5.13 shows a generic distillation curve for a two-component system. Molar composition is on the x<br />
axis, with the left side of the plot corresponding to a sample that is pure compound A and the right side of<br />
the plot corresponding to a sample of pure compound B. In between the two sides represent mixtures of A<br />
and B. Temperature is on the y axis, and the boiling point of each compound are marked (“bp A” and “bp<br />
B”).<br />
You may have been previously exposed to phase diagrams for pure compounds (e.g. of water or carbon<br />
dioxide), where only a single line would be used to denote a liquid-gas equilibrium. In the distillation of<br />
mixtures, there is a difference in composition between the liquid and gas phases, which is the reason for the<br />
tear-shaped appearance of the phase diagram. The tear-shaped region represents conditions where both<br />
liquid and gas coexist, during boiling of the liquid.<br />
Figure 5.13: a) Generic distillation curve for a two-component system of A+B, b) Same curve with additional markings.<br />
Imagine a 25 mol% A / 75 mol% B mixture is to be distilled, and this mixture is described by the distillation<br />
curve in Figure 5.13a. When the temperature reaches the lower line of the tear drop (temperature x and<br />
point a in Figure 5.13b), the solution begins to boil. Since liquid and gas have the same temperature during<br />
boiling, the vaporization process can be thought of as following the horizontal line from position a to b in<br />
Figure 5.13b. After vaporization, the gas condenses into the distillate, which can be thought of as following<br />
the vertical line from position b to c in Figure 5.13b. Under perfect equilibrating conditions, the distillate<br />
in this example would be 74 mol% A / 25 mol% B, and is “enriched” in A as it has the lower boiling point<br />
and thus the higher vapor pressure.<br />
In a distillation curve, the leftward horizontal “movement” followed by downward vertical “movement”<br />
represents one vaporization-condensation event (see Figure 5.13b). This is often referred to as a<br />
“theoretical plate,” historical terminology related to the collection of distillate onto plates or trays, and<br />
represents the purification potential of a simple distillation.<br />
<strong>Organic</strong> <strong>Chemistry</strong> <strong>Laboratory</strong> <strong>Techniques</strong> | Nichols | Page 258
Every mixture has its own distillation curve, reflective of the boiling points of the components. A mixture<br />
containing two components whose boiling points are vastly different (Δ b.p. > 100 ˚C) is shown in Figure<br />
5.14.<br />
Figure 5.14: a) Generic distillation curve for a two-component system of A+B with widely different boiling points, b) Same curve<br />
with additional markings.<br />
Imagine a 25 mol% A / 75 mol% B mixture is to be distilled, and this mixture is described by the distillation<br />
curve in Figure 5.14a, where the components have significantly different boiling points. One vaporizationcondensation<br />
cycle (from a to b to c in Figure 5.14b) will produce a distillate that is nearly 100% A, the<br />
compound with the much lower boiling point. When distilling a mixture with vastly different boiling points,<br />
the two components act almost independently and can be easily separated by simple distillation.<br />
<strong>Organic</strong> <strong>Chemistry</strong> <strong>Laboratory</strong> <strong>Techniques</strong> | Nichols | Page 259
5.2.B.4 DISTILLING TEMPERATURES<br />
A pure compound distills at a constant temperature, its boiling point. When distilling mixtures,<br />
however, the temperature does not often remain steady. This section describes why mixtures distill over a<br />
range of temperatures, and the approximate temperatures at which solutions can be expected to boil. These<br />
concepts can be understood by examination of the equation that describes a solution’s vapor pressure<br />
(equation 6) and distillation curves.<br />
(6)<br />
Imagine an ideal solution that has equimolar quantities of compound “A” (b.p. = 50 ˚C) and compound “B”<br />
(b.p. = 100 ˚C). A common misconception is that this solution will boil at 50 ˚C, at the boiling point of the<br />
lower-boiling compound. The solution does not boil at A’s boiling point because A has a reduced partial<br />
pressure when part of a solution. In fact, the partial pressure of A at 50 ˚C would be half its normal boiling<br />
pressure, as shown in equation (7):<br />
At 50 ˚C: (7)<br />
Since the partial pressures of A and B are additive, the vapor contribution of B at 50˚C is also important.<br />
The partial pressure of B at 50 ˚C would equal its vapor pressure at this temperature multiplied by its mole<br />
fraction (0.50). Since B is below it’s boiling point (100˚C), its vapor pressure would be smaller than 760<br />
torr, and the exact value would need to be looked up in a reference book. Let’s say that the vapor pressure<br />
of B at 50 ˚C is 160 torr.<br />
At 50 ˚C: (8)<br />
The solution boils when the combined pressure of the components equals the atmospheric pressure (let’s<br />
assume 760 torr for this calculation). This equimolar solution would therefore not boil at 50 ˚C, as its<br />
combined pressure is less than the external pressure of 760 torr (equation 9).<br />
At 50 ˚C: (9)<br />
The initial boiling point of this solution is 66 ˚C, which is the temperature where the combined pressure<br />
matches the atmospheric pressure (equation 10, note: all vapor pressures would have to be found in a<br />
reference book).<br />
At 66 ˚C: <br />
(10)<br />
These calculations demonstrate that a solution’s boiling point occurs at a temperature between the<br />
component’s boiling points. 5<br />
This can also be seen by examination of the distillation curve for this system, where the solution boils when<br />
the temperature reaches position a in Figure 5.15a, a temperature between the boiling point of the<br />
components.<br />
It is important to realize that mixtures of organic compounds containing similar boiling points (Δ b.p. < 100<br />
˚C) boil together. They do not act as separate entities (not “A boils at 50 ˚C, then B boils at 100 ˚C”).<br />
5 Azeotropic solutions do not follow this same pattern, as they do not obey Raoult’s law.<br />
<strong>Organic</strong> <strong>Chemistry</strong> <strong>Laboratory</strong> <strong>Techniques</strong> | Nichols | Page 260
Figure 5.15: a) Distillation curve for a two-component mixture of A (b.p. 50 ˚C) and B (b.p. 100 ˚C), b) Additional markings.<br />
The mixture in this example begins boiling at 66 ˚C, but after a period of time boiling would cease if<br />
maintained at this temperature. This happens because the composition of the distilling pot changes over<br />
time. Since distillation removes more of the lower boiling A, the higher boiling B will increase<br />
percentagewise in the distilling pot. Imagine that after some material has distilled, the distilling pot is now<br />
42.2% A and 57.8% B. This solution no longer boils at 66 ˚C, as shown in equation (11).<br />
At 66 ˚C: <br />
(11)<br />
At the new composition in this example, the temperature must be raised to 70 ˚C to maintain boiling, as<br />
shown in equation (12). This can also be shown by examination of the distillation curve in Figure 5.15b,<br />
where boiling commences at temperature c, but must be raised to temperature e as the distilling pot becomes<br />
more enriched in the higher boiling component (shifts to the right on the curve).<br />
At 70 ˚C: <br />
(12)<br />
These calculations and analysis of distillation curves demonstrate why a mixture distills over a range of<br />
temperatures: 6 as the composition in the distilling pot changes with time (which affects the mole fraction<br />
or the x axis on the distillation curve), the temperature must be adjusted to compensate. These calculations<br />
also imply why a pure compound distills at a constant temperature: the mole fraction is one for a pure liquid,<br />
and the distilling pot composition remains unchanged during the distillation.<br />
The calculations and distillation curves in this section enable discussion of another aspect of distillation.<br />
The partial pressures of each component at the boiling temperatures can be directly correlated to the<br />
composition of the distillate. Therefore, the distillate at 66 ˚C is 81 mol% A (100% × 619 torr / 760 torr,<br />
see Equation 10) while the distillate at 70 ˚C is 76 mol% A (100% × 578 torr / 760 torr, see Equation 12).<br />
The initial distillate contains the greatest quantity of the lowest boiling component, and the distillate<br />
degrades in purity as the distillation progresses. This can also be seen in the distillation curve in Figure<br />
5.15b, where the initial distillate composition corresponds to position d (purer), while the distillate at 70 ˚C<br />
corresponds to position f (less pure).<br />
6 Azeotropic solutions again do not follow this generalization, and instead boil at a constant temperature.<br />
<strong>Organic</strong> <strong>Chemistry</strong> <strong>Laboratory</strong> <strong>Techniques</strong> | Nichols | Page 261
5.2.B.5 AZEOTROPES<br />
Pure compounds distill at a constant temperature, while most solutions containing more than one volatile<br />
component distill over a range of temperatures. There is an exception to this statement, as some mixtures<br />
of certain composition also distill at a constant temperature. These mixtures are called “azeotropes,” which<br />
display non-ideal behavior and do not follow Raoult’s law (equation 13).<br />
One of the best-known azeotropes is a mixture containing 95.6% ethanol and 4.4% water. When distilling<br />
a mixture containing ethanol and water (for example when concentrating fermented grains to produce hard<br />
liquor), 95.6% is the highest percentage of ethanol possible in the distillate. It is impossible to distill 100%<br />
pure ethanol when water is in the distilling pot, as the ethanol and water co-distill, acting as a pure substance.<br />
For this reason, most ethanol used by chemists is the 95% version as it can be purified through distillation<br />
and is the least expensive. “Absolute ethanol” can also be purchased (which is > 99% ethanol), but is more<br />
expensive as further methods (e.g. drying agents) are required to remove residual water before or after<br />
distillation.<br />
Many compounds form azeotropes, which are specific ratios of compounds that co-distill at a constant<br />
composition and temperature. Lange’s Handbook of <strong>Chemistry</strong> 7 lists roughly 860 known azeotropes<br />
composed of two or three components each. A selection of these azeotropic mixtures are in Table 5.5.<br />
Azeotropic Composition b.p. (˚C) Azeotropic Composition b.p. (˚C)<br />
91% Benzene, 9% Water 69 69% Cyclohexane, 31% Ethanol 65<br />
92% Cyclohexane, 8% Water 70 68% Benzene, 32% Ethanol 68<br />
96% Ethanol, 4% Water 78 32% Toluene, 68% Ethanol 77<br />
80% Toluene, 20% Water 84 61% Benzene, 39% Methanol 58<br />
59% Acetone, 41% Hexane 50 29% Toluene, 71% Methanol 64<br />
74% Benzene, 19% Ethanol,<br />
7% Water<br />
65 83% Ethyl acetate, 9% Water,<br />
8% Ethanol<br />
70<br />
Table 5.5: Select azeotropes from Lange’s Handbook of <strong>Chemistry</strong>. 7<br />
Azeotropes form when a solution deviates from Raoult’s law (equation 13), meaning that the vapor pressure<br />
produced from an azeotropic solution does not directly correlate to its mole fraction. Deviations occur<br />
when the components are either attracted to or repelled by one another, namely if they have significantly<br />
different strengths of intermolecular forces (IMF’s) to themselves (e.g. A-A or B-B) as they do with the<br />
other components (e.g. A-B). In other words, a solution will deviate from Raoult’s law if the enthalpy of<br />
mixing is not zero.<br />
(13)<br />
7 J.A. Dean, Lange’s Handbook of <strong>Chemistry</strong>, 15 th ed., McGraw-Hill, 1999, Sect. 5.78 and 5.79.<br />
<strong>Organic</strong> <strong>Chemistry</strong> <strong>Laboratory</strong> <strong>Techniques</strong> | Nichols | Page 262
Azeotropic mixtures come in two forms: ones whose boiling point is lower than any of its constituents<br />
(called a “minimum boiling azeotrope”) or ones whose boiling point is higher than any of its constituents<br />
(called a “maximum boiling azeotrope”). For example, the 61% benzene / 39% methanol azeotrope is a<br />
minimum boiling azeotrope as its boiling point is 58 ˚C, which is lower than the boiling point of benzene<br />
(80 ˚C) and methanol (65 ˚C). Minimum boiling azeotropes are much more common than maximum boiling<br />
azeotropes.<br />
Minimum boiling azeotropes occur when the component’s IMF’s are stronger to themselves (A-A / B-B)<br />
than to each other (A-B). This generally occurs with components that lack an affinity for one another, for<br />
example when one component can hydrogen bond but the other cannot. In these situations, the components<br />
aggregate somewhat in solution, which decreases the solution’s entropy and makes it more favorable to<br />
become a gas. These solutions therefore have a higher vapor pressure than predicted by Raoult’s law,<br />
leading to a lower boiling temperature. Maximum boiling azeotropes have the opposite effect, resulting<br />
from attractions in the solution that lead to lower vapor pressures than predicted, and thus higher boiling<br />
temperatures.<br />
A distillation curve for an ethanol-water mixture is shown in Figure 5.16 (not drawn to scale in order to<br />
show detail). The minimum boiling azeotrope is represented by the intersection of the two tear-drop shapes,<br />
as indicated in Figure 5.16a. This curve demonstrates why an ethanol-water mixture cannot be distilled to<br />
produce a distillate with greater than 95.6% ethanol. Imagine distilling an ethanol/water mixture of the<br />
composition at position a in Figure 5.16b. After each vaporization-condensation event (a to b to c, then c<br />
to d to e in Figure 5.16b), the ethanol concentration increases. However, material is always funneled toward<br />
the lowest point on the curve, the azeotropic composition. Concentrations higher than 95.6% ethanol can<br />
only be distilled when there is no longer any water in the system (at which point the phase diagram in Figure<br />
5.16 is no longer applicable). Since water forms minimum-boiling azeotropes with many organic<br />
compounds, it should be clear why water must always be carefully removed with drying agents before<br />
distillation: failure to remove trace water will result in a wet distillate.<br />
Figure 5.16: a) Distillation curve for the ethanol-water azeotrope (not drawn to scale), b) Same diagram with additional markings.<br />
<strong>Organic</strong> <strong>Chemistry</strong> <strong>Laboratory</strong> <strong>Techniques</strong> | Nichols | Page 263
5.2.C STEP-BY-STEP PROCEDURES<br />
5.2.C.1 CONDENSER HOSES<br />
The condenser is an intricate piece of glassware, and allows for cold water to circulate through the<br />
distillation apparatus. The circulating water does not mix with the sample to be purified, but instead passes<br />
through another jacket surrounding the hollow tube where the gaseous sample travels. It is important that<br />
the water jacket be full of cold water, to maximize the efficiency of condensing the gaseous sample. It is<br />
for this reason that the water hoses must be attached to the condenser in a certain way.<br />
A hose should connect from the water spigot to the lower arm of the condenser, forcing water to travel<br />
against gravity through the condenser (this is shown correctly in Figure 5.17b). The hose connecting the<br />
upper arm of the condenser should then drain to the sink. By forcing the water uphill, it will completely<br />
fill the condenser. The hoses are connected incorrectly in Figure 5.17a, with water flowing into the upper<br />
arm of the condenser. With a downhill flow of water, only the lower portion of the condenser fills with the<br />
circulating water, leading to inefficient cooling of gas traveling through the inner tube.<br />
Figure 5.17: a) Condenser hoses connected incorrectly: notice that water does not fill the condenser’s jacket (as indicated with the<br />
small arrow), b) Condenser hoses connected correctly.<br />
Whether the condenser hoses point up or down seems to be a personal choice, as there are pros and cons to<br />
both orientations. When the hoses point downward, there is a small portion of the condenser that does not<br />
fill with cooling water (Figure 5.18a), but the effect is likely minimal. When the hoses point upwards, there<br />
is sometimes a tendency for the hoses to bend and pop off, spraying water all over the lab (this can<br />
sometimes be avoided by securing wire around the hose joints). Personal judgment may be applied to<br />
whether the condenser hoses point up or down.<br />
Figure 5.18: a) Condenser hoses pointed downward: notice the small pocket where water does not circulate, b) Hoses upwards.<br />
<strong>Organic</strong> <strong>Chemistry</strong> <strong>Laboratory</strong> <strong>Techniques</strong> | Nichols | Page 264
5.2.C.2 SIMPLE DISTILLATION PROCEDURE<br />
An assembled simple distillation apparatus is shown in Figure 5.19. Assembly of this complicated<br />
apparatus is shown in this section piece by piece. The glassware used for this apparatus is quite expensive,<br />
and undoubtedly your instructor would appreciate care being taken when using this equipment. A single<br />
condenser costs $72, and a complete kit containing all the glassware needed for distillation costs $550! 8<br />
Figure 5.19: Simple distillation apparatus.<br />
Figure 5.20: <strong>Organic</strong> chemistry students perform distillations.<br />
8 Prices were found in the Chemglass catalog in March 2016.<br />
<strong>Organic</strong> <strong>Chemistry</strong> <strong>Laboratory</strong> <strong>Techniques</strong> | Nichols | Page 265
Figure 5.21: a) Distillation apparatus arranged on the benchtop, b) Correct clamping of the round bottomed flask, c) Incorrect<br />
clamping.<br />
Assemble the Apparatus:<br />
1. To visualize the assembly of the apparatus, it may be helpful to first lay out the glassware on the<br />
benchtop before assembling the parts (Figure 5.21a).<br />
2. Pour the liquid to be distilled into a round bottomed flask, trying to avoid pouring liquid on the ground<br />
glass joint. If liquid drips onto the joint, wipe it off with a KimWipe. Alternatively use a funnel to be<br />
sure no liquid ends up on the joint, which can sometimes cause the joint to freeze.<br />
The flask should ideally be between one-third to one-half full of the liquid to be distilled. If the flask<br />
is more than half full, it will be difficult to control the boil. If less than a third full, the recovery may<br />
be compromised, as there is a quantity of vapor required to fill the flask that will not distill over (this<br />
is called the “holdup volume,” and later condenses when the flask is cooled).<br />
3. Add a few boiling stones or magnetic stir bar to the solution to prevent bumping during heating.<br />
4. Use a metal extension clamp to secure the round bottomed flask containing the sample to the ring stand<br />
or latticework at least 4 inches above the benchtop (to leave room for the heat source). The clamp<br />
should securely hold the joint below the glass protrusion on the flask (Figure 5.21b, not Figure 5.21c).<br />
Figure 5.22: a) Flask and three-way adapter, b) Attachment of rubber fitting to thermometer adapter, c) Correct way to insert the<br />
thermometer, d) Incorrect way (thermometer will break), e) Assembled thermometer piece.<br />
<strong>Organic</strong> <strong>Chemistry</strong> <strong>Laboratory</strong> <strong>Techniques</strong> | Nichols | Page 266
5. Attach a three-way adapter (or “distilling adapter”) to the round bottomed flask (Figure 5.22a).<br />
[If using grease as recommended by your instructor, lightly grease all joints.]<br />
6. Attach a rubber fitting to the top of a thermometer adapter (a cylindrical tube, Figure 5.22b) by<br />
stretching it over the glass. Then delicately insert a thermometer into the hole of the rubber fitting.<br />
Safety note: while inserting the thermometer, position your hands near the joint (Figure 5.22c), not far<br />
from the joint or it may snap (Figure 5.22d). A prepared thermometer adapter with inserted<br />
thermometer is shown in Figure 5.22e.<br />
Figure 5.23: a) Connecting a plastic clip to secure a joint, b) Incorrect clamping: a plastic clip should not be used to connect the<br />
distilling flask to the three-way adapter (as indicated with the arrow), c) Correct positioning of thermometer in the three-way adapter,<br />
d) Preparing the condenser.<br />
7. Connect the thermometer adapter to the three-way adapter, securing the joint with a plastic clip<br />
(sometimes called a “Keck clip,” the yellow clip in Figure 5.23a). The clip is directional, and if it<br />
doesn’t easily snap on it is probably upside down. Check that the clip is not broken, and if it is, replace<br />
it.<br />
A plastic clip should not be used to connect the round bottomed flask to the three-way adapter (Figure<br />
5.23b) for two reasons. First, this is one of the hottest parts of the apparatus, and could cause the plastic<br />
to melt (especially if the compound has a high boiling point or a strong heat source is used). Secondly,<br />
a plastic clip in this location interferes with a secure grip by the metal extension clamp. A secure clamp<br />
on the flask is necessary in order to maintain the integrity of the system while lowering the heat source<br />
at the end of the distillation.<br />
8. Adjust the thermometer so the bulb is just below the arm of the adapter (Figure 5.23c). If the bulb is<br />
positioned too high, it will not register the correct temperature of the vapors as they make their turn<br />
toward the condenser.<br />
9. Prepare the condenser: inspect two rubber hoses and cut off any cracked sections in the rubber with<br />
scissors. Wet the ends of two hoses using the faucet or by dipping into a beaker of water, then twist the<br />
wet ends onto the two arms of the condenser. The hoses should fit onto the condenser arms higher than<br />
one centimeter or else water pressure may cause them to pop off.<br />
10.Use another clamp to secure the condenser to the ring stand or latticework (not so tight or it may crack),<br />
and position the condenser at roughly the location it will eventually be, with a slight downward angle<br />
(Figure 5.23d).<br />
<strong>Organic</strong> <strong>Chemistry</strong> <strong>Laboratory</strong> <strong>Techniques</strong> | Nichols | Page 267
Figure 5.24: a) Connection of the condenser to the three-way adapter (with arrow pointing to the joint that needs to be very secure<br />
for safety reasons), b) Securing water hoses to the sink with lab tape, c) Attachment of the vacuum adapter and receiving flask.<br />
11.Connect the condenser to the rest of the apparatus (Figure 5.24a); this is probably the most difficult<br />
part of the whole distillation assembly. While keeping the clamp’s arm connected to the condenser,<br />
slightly loosen the clamp’s attachment to the ring stand or latticework so that it can rotate in all<br />
directions. Then wiggle the condenser toward the three-way adapter, holding onto the clamp near the<br />
ring stand. When the two joints connect in a perfect match, secure them with a plastic clip (must not<br />
be broken!), then tighten the clamps attached to the ring stand.<br />
12.Adjust the clamps and height of the condenser so that the thermometer is perfectly vertical in the<br />
apparatus. A tilted distillation apparatus sometimes refluxes instead of distilling (where gas condenses<br />
and drips back into the distilling flask).<br />
Safety note: Be sure that there is a secure connection between the distilling flask and the three-way<br />
adapter (as pointed to in Figure 5.24a). This connection can be enforced by a strong hold on the<br />
condenser. If there is an opening between the distilling flask and adapter, vapors can escape. Being so<br />
close to the heat source, the vapors have the greatest potential to ignite at this location.<br />
13.Connect the rubber hose attached to the lower arm of the condenser to the water spigot and allow the<br />
hose attached to the upper arm of the condenser to drain to the sink. The hoses may point either up or<br />
down. If the drainage hose just barely reaches the sink, secure it with lab tape (Figure 5.24b) so that it<br />
does not spray all over the benchtop.<br />
14. Connect a vacuum adapter to the end of the condenser with a plastic clip. Then use another clip to<br />
connect a round bottomed flask (receiving flask) that has enough volume to just hold the quantity of<br />
expected distillate (Figure 5.24c). Variations in receiving flasks are shown in a later section.<br />
<strong>Organic</strong> <strong>Chemistry</strong> <strong>Laboratory</strong> <strong>Techniques</strong> | Nichols | Page 268
15.A completed distillation apparatus is shown in Figure 5.25. No parts should be able to jiggle or they<br />
are not adequately clamped. Although it may appear to be a closed system (which would be dangerous<br />
to heat), the system is actually open to the atmosphere at the arm in the vacuum adapter.<br />
16.Prepare the heat source beneath the flask:<br />
Figure 5.25: Completed simple distillation setup.<br />
a. Heating mantles, oil baths, and heat guns are recommended heat sources for distillation. Bunsen<br />
burners are not recommended for use with volatile organic compounds, but may be used in some<br />
situations at the discretion of the instructor.<br />
b. Position the heat source beneath the flask, using an adjustable platform that allows for some<br />
mechanism by which the heat can be lowered and removed at the end of the distillation. A ring<br />
clamp and wire mesh platform is a good way to hold a heating mantle or oil bath beneath the flask.<br />
Begin Distilling<br />
17.When ready to begin the distillation, start circulating water in the condenser. The flow of water should<br />
be more than a trickle, but should not be so strong that the hose flops around from the high water<br />
pressure.<br />
18.Since it is so important, check once again that there is a secure connection between the distilling flask<br />
and the three-way adapter (as indicated in Figure 5.26). If there is a crack between the distilling flask<br />
and adapter, vapors can escape the apparatus and possibly ignite!<br />
<strong>Organic</strong> <strong>Chemistry</strong> <strong>Laboratory</strong> <strong>Techniques</strong> | Nichols | Page 269
19.Begin heating the flask. Depending on the size of the flask and the<br />
necessary temperature, the liquid may start boiling between 1 - 20<br />
minutes. Condensation will eventually be seen on the sides of the<br />
flask, but the reading on the thermometer will not increase until the<br />
vapors immerse the thermometer bulb. It is not unusual that the liquid<br />
boils while the thermometer remains at room temperature.<br />
20.Eventually condensation should be seen in the three-way adapter, and<br />
the thermometer temperature will rise. Not all compounds produce<br />
obvious droplets (as in Figure 5.26), but condensation may be seen by<br />
close inspection and subtle movement near the thermometer.<br />
Safety note: if the compound’s boiling point is > 75 ˚C, the three-way<br />
adapter will be hot to the touch!<br />
Figure 5.26: Active distillation.<br />
Arrow indicates the joint that needs<br />
to be secure to prevent fire.<br />
21.Eventually a droplet may be seen traveling down the length of the<br />
condenser and liquid will begin to collect in the receiving flask. An appropriate distillation collects<br />
distillate at a rate of 1 drop per second. Distilling at too fast a rate prevents proper equilibration<br />
between liquid and gas phases, and results in poor separation.<br />
Although a slow distillation is necessary, heating the solution such that nothing is dripping into the<br />
receiving flask simply wastes time. There is no reason to heat so gradually that nothing distills.<br />
Figure 5.27: Gradual ascension of the vapor ring (pointed to with an arrow in each progression), to immerse the thermometer.<br />
Note: not all compounds behave in this manner.<br />
Record the Temperature and Pressure<br />
22.Pay attention to the temperature on the thermometer throughout the entire time that liquid is distilling.<br />
Record the temperature when it has plateaued, or the highest temperature seen. If you know a mixture<br />
is distilling, record the temperature range over which liquid is actively dripping into the receiving flask.<br />
<strong>Organic</strong> <strong>Chemistry</strong> <strong>Laboratory</strong> <strong>Techniques</strong> | Nichols | Page 270
The thermometer bulb must be fully immersed in vapors to register an accurate temperature (Figure<br />
5.27d). Therefore, the temperature near the very beginning and end of the distillation tends to be<br />
inaccurate. Only record temperatures that correspond to active distillation and full immersion of the<br />
thermometer with vapor.<br />
23.As boiling points are so dependent on pressure, also record the barometric pressure.<br />
Stop Distilling<br />
24.Cease the distillation when one of the following takes place:<br />
a. If the liquid is nearly gone in the distilling flask.<br />
Safety note: It is unsafe to distill a flask to dryness as side reactions can occur when components<br />
are concentrated. This is especially dangerous with compounds that can form peroxides, 9 as these<br />
can become explosive when reacting with concentrated solutions. Additionally, when the entire<br />
sample is in the gas phase, the system is no longer restricted to the boiling point of the liquid and<br />
may reach dangerous temperatures.<br />
b. If the thermometer temperature was higher during the distillation but has dropped significantly.<br />
This normally corresponds to a lull between distilling two components, and means that one<br />
component has essentially completed distilling.<br />
c. If the thermometer temperature has a dramatic spike. This normally corresponds to the beginning<br />
of distillation of a higher boiling component, and would contaminate the distillate if allowed to<br />
continue.<br />
d. If anything surprising or unusual happens, such as thick smoke, darkening / thickening in the<br />
distilling flask, or uncontrollable bumping.<br />
25.To stop the distillation, lower and remove<br />
the heat source from the round bottomed<br />
flask (Figure 5.28a).<br />
26.Keep water circulating in the condenser<br />
until the liquid in the distilling flask is just<br />
warm to the touch, then turn off the<br />
condenser water and disassemble the<br />
apparatus. After a few minutes of air<br />
cooling, cooling of the flask can be<br />
hastened by immersion with a container of<br />
tap water (Figure 5.28b).<br />
Figure 5.28: a) Raising the flask to cool, b) Cooling in a tap water bath.<br />
9 Certain compounds (e.g. ethers, dioxanes, tetrahydrofuran) are well known to form peroxides when left in contact with air over<br />
a period of time. However, many compounds are somewhat susceptible to peroxide formation, including compounds with allylic<br />
hydrogen atoms (e.g. cyclohexene). A more complete listing of compounds that form peroxides can be found in: Handbook of<br />
<strong>Chemistry</strong> and Physics, CRC Press, 84 th edition, 2003-2004, 16-6.<br />
<strong>Organic</strong> <strong>Chemistry</strong> <strong>Laboratory</strong> <strong>Techniques</strong> | Nichols | Page 271
5.2.C.3 SIMPLE DISTILLATION SUMMARY<br />
Figure 5.29: Simple distillation apparatus.<br />
Assembly tips<br />
Begin distillation<br />
Cease distillation<br />
Fill the distilling flask<br />
with sample 1/3 – 1/2<br />
full. Always use an<br />
extension clamp on the<br />
distilling flask.<br />
Add a few boiling<br />
stones or stir bar to<br />
flask.<br />
Position the<br />
thermometer bulb just<br />
below the arm of the<br />
three-way adapter,<br />
where vapors turn<br />
toward the condenser.<br />
Wet condenser hoses<br />
with water before<br />
attaching.<br />
Connect the condenser<br />
hoses such that water<br />
flows uphill: bring<br />
water from the faucet<br />
into the lower arm, and<br />
drain out the upper arm.<br />
Be sure all of the<br />
connections are secure<br />
(especially between the<br />
distilling flask and 3-<br />
way adapter: potential<br />
of fire!)<br />
Turn on the condenser<br />
water.<br />
Apply the heat source<br />
to the distilling flask.<br />
Collect distillate at a<br />
rate of 1 drop per<br />
second.<br />
Record the temperature<br />
where liquid is actively<br />
distilling and<br />
thermometer bulb is<br />
immersed.<br />
Record the pressure.<br />
Stop the distillation<br />
when the temperature<br />
changes dramatically or<br />
if the distilling flask is<br />
nearly empty (never<br />
distill to dryness!)<br />
Lower and remove the<br />
heat source, but keep<br />
water circulating until<br />
the flask is just warm to<br />
the touch.<br />
Table 5.6: Procedural summary of simple distillation.<br />
<strong>Organic</strong> <strong>Chemistry</strong> <strong>Laboratory</strong> <strong>Techniques</strong> | Nichols | Page 272
5.2.C.4 VARIATIONS<br />
A few variations of the simple distillation setup are commonly encountered:<br />
A. When a certain volume of distillate is desired, the distillate may be collected directly into a graduated<br />
cylinder (Figure 5.30a). This method allows for cylinders to be easily exchanged, perhaps for analysis<br />
of different fractions of distillate.<br />
B. The receiving flask is sometimes submerged in an ice bath (Figure 5.30b), particularly when the<br />
distillate is volatile (has a boiling point < 100 ˚C). Any container can be used for the ice bath. Be sure<br />
to use a combination of both ice and water in the bath, as ice alone does not have as good contact with<br />
the flask as a slurry of ice-water.<br />
Figure 5.30: a) Distillation with graduated cylinder receiving flask, b) Distillation with receiving flask submerged in an ice bath,<br />
c) Distillation using a Claisen adapter, d) Attachment of a drying tube.<br />
C. A Claisen adapter (Figure 5.30c) may be inserted between the round bottomed flask and three-way<br />
adapter in anticipation of foaming or bumping. The Claisen adapter acts as a buffer so that uncontrolled<br />
activity in the distilling flask does not immediately carry over to the receiving flask. If the solution<br />
foams, the Claisen adapter provides time to adjust the heat without ruining the distillate. A Claisen<br />
adapter also potentially allows for more vaporization-condensation events (or theoretical plates).<br />
D. For distillation of water-sensitive materials, glassware can be oven or flame dried, and a drying tube<br />
can be attached to the vacuum adapter (Figure 5.30d).<br />
<strong>Organic</strong> <strong>Chemistry</strong> <strong>Laboratory</strong> <strong>Techniques</strong> | Nichols | Page 273
5.2.C.5 TROUBLESHOOTING<br />
5.2.C.5.A BOILING, BUT TEMPERATURE ISN’T RISING / HOW TO INSULATE<br />
It is not uncommon for new organic chemistry<br />
students to expect the temperature to rise on the<br />
thermometer the very moment boiling is seen in the<br />
distilling flask. Students should remember that the<br />
thermometer measures the temperature at the<br />
location of the bulb, which is a distance away from<br />
the boiling liquid. Therefore, when a solution<br />
begins to boil, it may still take a while for the<br />
thermometer to register anything other than room<br />
temperature.<br />
It is important to record a temperature only when<br />
the thermometer bulb is fully engulfed by vapors. Figure 5.31: a) Before the solution is actively distilling, b) Actively<br />
distilling solution where the thermometer is registering the vapors.<br />
Figure 5.31a shows a solution that is boiling but not<br />
yet distilling- the temperature at this point would not represent the boiling point of the liquid. Figure 5.31b<br />
shows an actively distilling solution, and notice that the thermometer bulb is completely enveloped in<br />
vapors and condensation; the temperature at this point would correspond to the boiling point of the solution.<br />
For high-boiling liquids, it may be difficult for vapors to reach the condenser as they too quickly are cooled<br />
by the glassware which is in contact with the air in the room. It may be helpful to insulate the distilling<br />
flask and three-way adapter to better retain heat and allow the sample to remain in the gas phase longer.<br />
To insulate a portion of the distillation, wrap the parts prior to the condenser with glass wool (Figure 5.32c),<br />
then secure with an outer wrapping of aluminum foil (Figure 5.32d). A small gap can be left in the<br />
insulation in order to “peek in” on activity inside the apparatus. Glass wool has an appearance similar to<br />
cotton, but unlike cotton is not flammable so is useful as an insulating material when an apparatus is to be<br />
heated. Glass wool comes in two forms: a fibrous form and a cottony form. The fibrous form (Figure<br />
5.32a) has tiny fibers that can become embedded in skin in the most painful way, similar to several<br />
simultaneous paper cuts. This type of glass wool should not be manipulated with bare hands, but only when<br />
wearing thick gloves. The more cotton-like glass wool (Figure 5.32b), however, does not hurt when<br />
handling with bare hands.<br />
Figure 5.32: a) Fibrous glass wool, b) Cotton-like glass wool, c) Wrapping flask and three-way adapter with glass wool, d) Foil<br />
over top of glass wool.<br />
<strong>Organic</strong> <strong>Chemistry</strong> <strong>Laboratory</strong> <strong>Techniques</strong> | Nichols | Page 274
If glass wool is unavailable, aluminum foil can be used alone to insulate a portion of the distillation. It will<br />
not insulate well if the foil is wrapped too tightly to the glass, but works well if a small pocket of air is<br />
allowed between the foil and glass.<br />
If the expected boiling point of the compound to be distilled is quite high (> 150 ˚C) and distillation<br />
continues to be difficult, vacuum distillation might be attempted.<br />
5.2.C.5.B VAPOR IS ESCAPING FROM VACUUM ADAPTER<br />
If vapor is noticed escaping out of the vacuum adapter like a tea kettle, the<br />
condenser is not doing a good enough job of trapping the gas (Figure 5.33).<br />
Reasons for this may be that you have forgotten to turn on the water in the<br />
condenser, the water stream is too weak, or the heating is too vigorous.<br />
Figure 5.33: Vapor escaping<br />
from vacuum adapter.<br />
<strong>Organic</strong> <strong>Chemistry</strong> <strong>Laboratory</strong> <strong>Techniques</strong> | Nichols | Page 275
5.2.D MICROSCALE DISTILLATION<br />
There are a variety of methods used to distill small amounts of material (< 10 mL). The goal of all of these<br />
variations is to minimize the loss of material. A certain amount of sample is always necessary to fill the<br />
apparatus before distillation occurs, and this quantity (called the “holdup volume”) normally condenses<br />
after cooling, often back into the original distilling flask. Therefore, minimizing the path length between<br />
distilling and receiving flasks can increase the recovery with distillation. Another approach to increase<br />
recovery on the microscale is to minimize the number of joints in the apparatus, which may not be perfectly<br />
airtight, and can contribute to leaking of material.<br />
Most microscale versions are simple distillations, as use of a fractional column adsorbs too much material.<br />
Therefore, these techniques are generally used to remove non-volatile or very high-boiling or low-boiling<br />
impurities.<br />
5.2.D.1 SEMI-MICROSCALE<br />
A semi-microscale apparatus is essentially a macroscale apparatus but lacks the<br />
condenser (Figure 5.34). This shortens the path length between distilling and<br />
receiving flask. It can be used for 5-10 mL of material.<br />
The distillation needs to be done with care, as too high of temperatures may cause<br />
vapor to be lost out of the vacuum adapter.<br />
5.2.D.2 HICKMAN HEAD<br />
Figure 5.34: Semi-microscale<br />
apparatus.<br />
A Hickman head is provided in many microscale kits, and can be used to distill 1-3 mL of material. It is<br />
often connected to a conical vial, using an O-ring and screw-capped connector to secure the joint (Figure<br />
5.35a). The solution boils, condenses on the sides of the flask and collects in the lip of the Hickman head<br />
(indicated with an arrow in Figure 5.35b). The bulb of the thermometer should be positioned below the<br />
lip (Figure 5.35a), although it may be difficult to accurately measure the vapor temperature as so little<br />
material is used. After cooling, the flask must be tilted to retrieve the distillate by pipette (Figure 5.35c),<br />
and the lip holds at the most 1 mL of distillate so may need to be emptied several times. Some Hickman<br />
heads have a side port so distillate can be removed without stopping the distillation (Figure 5.35d).<br />
Figure 5.35: a) Microscale distillation using a Hickman head, b) Collection of distillate in the lip of the head (indicated with an<br />
arrow), c) Retrieval of the distillate by pipette, d) Hickman head with a side arm port.<br />
<strong>Organic</strong> <strong>Chemistry</strong> <strong>Laboratory</strong> <strong>Techniques</strong> | Nichols | Page 276
5.2.D.3 SHORT-PATH DISTILLATION<br />
An all-in-one distillation apparatus, called a “short-path distilling head,” is sometimes used to distill small<br />
quantities of material (Figure 5.36). These pieces of glassware are quite expensive ($200 each), 10 and so<br />
are normally used in research settings, not teaching labs.<br />
When assembling the glassware, it is important that the joint connecting the distilling flask to the apparatus<br />
is held securely: verify it is not loose by grasping the pieces with your fingers (Figure 5.36b). The apparatus<br />
requires a thermometer that has a ground-glass fitting (Figure 5.36d).<br />
Figure 5.36: a) Clamping prior to assembly, b) Adjusting tightness of the joint, c) Distillation setup, d) Thermometer with ground<br />
glass fitting.<br />
10 Prices were found in the Chemglass catalog in March 2016.<br />
<strong>Organic</strong> <strong>Chemistry</strong> <strong>Laboratory</strong> <strong>Techniques</strong> | Nichols | Page 277
5.3 FRACTIONAL DISTILLATION<br />
5.3.A OVERVIEW + THEORY OF FRACTIONAL DISTILLATION<br />
A simple distillation is incapable of significant purification if the boiling points of the components are too<br />
close. When the difference in boiling points is less than 100 ˚C, a modification is necessary, namely<br />
insertion of a fractionating column between the distilling flask and three-way adapter (Figure 5.37a).<br />
Figure 5.37: a) Fractional distillation setup, b) Zoom in of fractionating column during distillation, with condensation dripping<br />
from the glass indentations.<br />
The distillate of a simple distillation is always enriched in the lower boiling compound. As previously<br />
discussed, the simple distillation of a 75 mol% ethylbenzene / 25 mol% p-cymene mixture resulted in a<br />
distillate that was 90 mol% ethylbenzene (ethylbenzene had the lower boiling point). Imagine if a<br />
subsequent distillation were performed on the 90 mol% solution: the distillate of that process would contain<br />
an even higher percentage of ethylbenzene.<br />
A fractionating column essentially allows for many successive distillations to take place at once, without<br />
dismantling the apparatus. A fractionating column contains indentations (a Vigreux column, Figure 5.37)<br />
or a packing material with lots of surface area. The vapors temporarily condense on these surfaces (see<br />
Figure 5.37b) and the heat of the distillation allows those pools of liquid to vaporize again. Every<br />
vaporization-condensation event (called a “theoretical plate”) is similar to a simple distillation, and each<br />
event enriches the distillate in the lower boiling component.<br />
<strong>Organic</strong> <strong>Chemistry</strong> <strong>Laboratory</strong> <strong>Techniques</strong> | Nichols | Page 278
The concepts of a fractional distillation can be shown<br />
through a distillation curve. In the distillation of an<br />
equimolar mixture of compounds A + B (which is<br />
described by the distillation curve in Figure 5.38), one<br />
vaporization-condensation event is represented in<br />
Figure 5.38 by following points a to b to c. This<br />
process represents one theoretical plate, and would<br />
produce a distillate that is 81% A and 19% B. A<br />
second vaporization-condensation event is represented<br />
in Figure 5.38 by following points c to d to e, and<br />
would produce a distillate that is 96% A and 4% B.<br />
A 50% / 50% mixture of two components whose<br />
boiling points differ by only 20-30 ˚C would require at<br />
least three theoretical plates to obtain a distillate with<br />
> 95% purity. In practice, fractional distillations still often produce mixtures. The best chance of obtaining<br />
purity via fractional distillation is when there is very little impurity to begin with.<br />
Temperature<br />
bp A<br />
d<br />
e<br />
b<br />
c<br />
Gas<br />
96% A 81% A<br />
4% B 19% B<br />
Liquid<br />
bp B<br />
100% B<br />
Composition<br />
Figure 5.38: Distillation curve of a two-component system<br />
of A+B, showing two theoretical plates.<br />
a<br />
50% A<br />
50% B<br />
5.3.B FRACTIONATING COLUMNS<br />
The choice of what fractionating column to use for which application depends in part on availability and<br />
the task at hand. Several columns are shown in Figure 5.39: a) Vigreux column with glass indentations, b)<br />
Steel wool column made simply by loosely inserting steel wool into the cavity of a fractionating column<br />
(similar to a West condenser, but wider), c) Glass beads filled in the cavity of a fractionating column.<br />
Figure 5.39: Different fractionating columns: a) Vigreux, b) Steel wool, c) Glass beads.<br />
These columns have different surface areas and numbers of theoretical plates, and thus differ in their ability<br />
to separate close-boiling components. They also differ somewhat in the quantity of compound that will be<br />
sequestered through wetting the column. A Vigreux column has the least surface area, making it the least<br />
capable of separating close-boiling components. And yet with the lowest surface area, it can have the<br />
highest recovery, making it the optimal choice if a separation is not particularly difficult. Glass beads have<br />
a high surface area, so are a good choice for separation of close-boiling components. And yet, beads will<br />
suffer the greatest loss of material. Steel wool columns have intermediate surface areas and their<br />
effectiveness can depend on how tightly the wool is packed in the column. Steel wool columns also cannot<br />
be used with corrosive vapors like those containing acid.<br />
<strong>Organic</strong> <strong>Chemistry</strong> <strong>Laboratory</strong> <strong>Techniques</strong> | Nichols | Page 279
To demonstrate the effectiveness of different fractionating columns, a mixture containing 75 mol%<br />
ethylbenzene (normal b.p. 136 ˚C) and 25 mol% p-cymene (normal b.p. 177 ˚C) was distilled using several<br />
methods. The first two mL of distillate was collected in each process (Figure 5.40).<br />
Gas chromatograph analysis of the initial mixture and distillates allowed for quantitation of the mixtures,<br />
although a calibration curve was necessary to translate the reported percentages into meaningful values. As<br />
the two components had only a 41 ˚C difference in boiling points, a fractional distillation was more effective<br />
than a simple distillation, although in some cases only slightly (see Table 5.7). The distillate was never ><br />
98% pure with any method as there was a large quantity of the minor component in the distilling pot.<br />
Method Components GC% Actual %<br />
Initial Solution ethylbenzene 55.6% 75%<br />
p-cymene 44.4% 25%<br />
Simple Distillation ethylbenzene 67.6% 90%<br />
p-cymene 32.4% 10%<br />
Fractional (Beads) ethylbenzene 87.7% 97%<br />
p-cymene 12.3% 3%<br />
Fractional (Steel Wool) ethylbenzene 71.4% 92%<br />
p-cymene 28.6% 8%<br />
Fractional (Vigreux) ethylbenzene 70.4% 92%<br />
p-cymene 29.6% 8%<br />
Table 5.7: GC results for various distillations of a 75 mol% ethylbenzene (EB) and 25 mol% p-cymene (PC) mixture. The actual<br />
percentage values were estimated from the calibration curve in Figure 5.11.<br />
Figure 5.40: Simple and fractional distillation of a 75 mol% ethylbenzene / 25 mol% p-cymene mixture, with GC analysis. In<br />
each GC spectrum, ethylbenzene is the peak at 4.192 min and p-cymene is the peak at 5.640 min.<br />
<strong>Organic</strong> <strong>Chemistry</strong> <strong>Laboratory</strong> <strong>Techniques</strong> | Nichols | Page 280
5.3.C USES OF FRACTIONAL DISTILLATION<br />
5.3.C.1 OIL REFINING<br />
Crude oil (petroleum) is composed of mostly hydrocarbons (alkanes and aromatics), and is a tremendous<br />
mixture of compounds consisting of between 5 and 40 carbon atoms. 11 The components in oil are incredibly<br />
useful as fuels and lubricants, but not when they are mixed together. Fractional distillation is used in oil<br />
refineries (Figure 5.41) to separate the complex mixture into fractions that contain similar boiling points<br />
and therefore similar molecular weights and properties. Gasoline, diesel fuel, kerosene, and jet fuel are<br />
some of the different fractions produced by an oil refinery.<br />
Figure 5.41: San Francisco Refinery in Rodeo, California.<br />
5.3.C.2 PURIFICATION OF REAGENTS AND PRODUCTS<br />
Cyclopentadiene is used in many chemical reactions, including Diels-Alder reactions and polymerizations.<br />
The reagent is so reactive however, that it undergoes a Diels-Alder reaction with itself in the reagent bottle<br />
to form dicyclopentadiene (Figure 5.42a). Therefore, chemical companies do not sell cyclopentadiene, and<br />
chemists are instead required to distill commercial dicyclopentadiene (Figure 5.42b) to reverse the<br />
dimerization reaction and obtain cyclopentadiene (Figure 5.42c).<br />
Figure 5.42: a) Dimerization reaction of cyclopentadiene, b) Dicyclopentadiene reagent, b) Retro Diels-Alder reaction.<br />
At temperatures above 150 ˚C the dimer reverts to the monomer through a retro Diels-Alder reaction (driven<br />
by the favorable change in entropy, Figure 5.42c). Distillation can be used to remove the monomer as it<br />
forms. Although the two components (dimer and monomer) have dramatically different boiling points, the<br />
temperature required for the reverse reaction is too similar to the boiling point of the dicyclopentadiene that<br />
its vapor pressure cannot be ignored. Therefore, a fractional distillation is required for this process.<br />
11 About 6% of crude oil contains hydrocarbons with greater than 40 carbon atoms, a fraction that eventually becomes used for<br />
asphalt.<br />
<strong>Organic</strong> <strong>Chemistry</strong> <strong>Laboratory</strong> <strong>Techniques</strong> | Nichols | Page 281
5.3.D STEP-BY-STEP PROCEDURES<br />
5.3.D.1 FRACTIONAL DISTILLATION PROCEDURE<br />
An assembled fractional distillation apparatus is shown in Figure 5.43, using glass beads in the fractionating<br />
column. Other columns may be substituted. It is assumed that readers have previously performed a simple<br />
distillation, so in this section are described differences between simple and fractional distillation.<br />
Figure 5.43: Fractional distillation apparatus.<br />
<strong>Organic</strong> <strong>Chemistry</strong> <strong>Laboratory</strong> <strong>Techniques</strong> | Nichols | Page 282
Figure 5.44: a) Removal of glass wool plug on a beaded fractionating column, b) Insulating the column, c+d) Condensation on the<br />
beads of a fractionating column.<br />
1. If a beaded fractionating column is used, sometimes a wad of glass wool is inserted into the top so that<br />
the beads do not spill out. Before using the column, remove this wad as it may interfere with the<br />
passage of vapors (Figure 5.44a). If using a Vigreux column, check for broken glass indentations<br />
(which would case a leak in the column).<br />
2. The distilling pot will need to be heated much more vigorously than with a simple distillation, as there<br />
is a greater distance for the vapors to travel before reaching the condenser. The vapors will tend to<br />
reflux in the column (condense and drip back into the distilling pot) unless stronger heating is applied.<br />
A rule of thumb is that the distilling pot needs to be 30 ˚C hotter than the top of the column in order for<br />
material to ascend the column. If it is difficult to achieve more than a reflux, the column can be<br />
insulated by wrapping it with glass wool then aluminum foil (Figure 5.44b). This allows the column to<br />
maintain heat and the sample to remain in the gas phase longer. A small gap can be left in the foil or<br />
glass wool if desired to “peek in” on the activity in the column.<br />
3. Ideally both liquid and gas should be seen in the fractionating column, as the sample needs to undergo<br />
many vaporization-condensation events (Figures 5.44 c+d). Droplets of liquid should be seen on the<br />
surfaces of the packing material, but there should never be a large pool of liquid. A “river” of liquid<br />
traveling up the column is called flooding (Figures 5.45). If a column floods, remove the heat until the<br />
liquid drains back into the distilling flask, then resume heating at a gentler rate.<br />
4. Cleaning of a fractionating column:<br />
a. Vigreux column: rinse with acetone. Don’t use a<br />
scrub brush or the glass indentations may break.<br />
b. Steel wool column: rinse with large amounts of<br />
acetone. Don’t rinse with water as wet steel will<br />
rust over time.<br />
c. Glass bead column: rinse with acetone, then<br />
replace the glass wool wad to prevent the beads<br />
from pouring out when horizontal. Alternatively,<br />
pour out the glass beads to be cleaned separately.<br />
Figure 5.45: Flooding of a fractionating column.<br />
Be delicate when using a scrub brush on the<br />
fractionating column as there are fragile indentations near the bottom joint which can break.<br />
<strong>Organic</strong> <strong>Chemistry</strong> <strong>Laboratory</strong> <strong>Techniques</strong> | Nichols | Page 283
5.3.D.2 FRACTIONAL DISTILLATION SUMMARY<br />
Figure 5.46: Fractional distillation setup.<br />
Most comments for a simple<br />
distillation apply to fractional as<br />
well.<br />
The distilling pot will need to be<br />
heated more vigorously than<br />
with a simple distillation, as<br />
there is a greater distance for the<br />
vapors to travel before reaching<br />
the condenser.<br />
Commonly the column will need<br />
to be insulated to maintain heat:<br />
wrap the column (and three-way<br />
adapter if desired) in glass wool<br />
followed by an outer layer of<br />
aluminum foil.<br />
Droplets of liquid should be seen<br />
in the fractional column, but<br />
there should never be a large<br />
pool of liquid (flooding). If the<br />
column floods, allow the liquid<br />
to drain back into the distilling<br />
flask and heat at a gentler rate.<br />
Table 5.8: Procedural summary of fractional distillation.<br />
<strong>Organic</strong> <strong>Chemistry</strong> <strong>Laboratory</strong> <strong>Techniques</strong> | Nichols | Page 284
5.4 VACUUM DISTILLATION<br />
5.4.A OVERVIEW OF VACUUM DISTILLATION<br />
Boiling commences when the vapor pressure of a liquid or solution equals the external or applied pressure<br />
(often the atmospheric pressure). Thus, if the applied pressure is reduced, the boiling point of the liquid<br />
decreases (see the graph for cinnamyl alcohol in Figure 5.47a). This behavior occurs because a lower<br />
vapor pressure is necessary for boiling, which can be achieved at a lower temperature. For example, water<br />
produces a vapor pressure of 760 mmHg at 100 ˚C (see Figure 5.47b), and so water boils at sea level at 100<br />
˚C. However, if water was subjected to a reduced pressure of only 100 mmHg, it would boil at roughly 50<br />
˚C as this is the temperature that it produces a vapor pressure of 100 mmHg (see Figure 5.47b).<br />
Figure 5.47: a) Graph of boiling point vs. pressure of cinnamyl alcohol, 12 b) Graph of vapor pressure vs. temperature of water. 13<br />
The dependence of boiling point on<br />
applied pressure can be exploited in<br />
the distillation of very high boiling<br />
compounds (normal b.p. > 150 ˚C),<br />
which may decompose if heated to<br />
their normal boiling point. A vacuum<br />
distillation is performed by applying<br />
a vacuum source to the vacuum<br />
adapter of either a simple or<br />
fractional distillation (Figure 5.48).<br />
When the pressure is lowered inside<br />
the apparatus, solutions boil at a<br />
lower temperature.<br />
Figure 5.48: Vacuum distillation variation with a simple distillation.<br />
12 Data from The Merck Index, 12 th edition, Merck Research Laboratories, 1996.<br />
13 Data from J.A. Dean, Lange’s Handbook of <strong>Chemistry</strong>, 15 th ed., McGraw-Hill, 1999, Sect 5.28.<br />
<strong>Organic</strong> <strong>Chemistry</strong> <strong>Laboratory</strong> <strong>Techniques</strong> | Nichols | Page 285
5.4.B PREDICTING THE BOILING TEMPERATURE<br />
The boiling point of a liquid or solution drops when the pressure is reduced in a distillation apparatus. It is<br />
helpful to be able to predict the altered boiling point depending on the pressure inside the apparatus.<br />
The lowest pressure attainable inside the apparatus depends largely on the vacuum source and the integrity<br />
of the seal on the joints. Lower pressures are attainable when using a portable vacuum pump 14 than when<br />
using a water aspirator or the building’s house vacuum (Figure 5.49). Due to the very low pressures possible<br />
with oil pumps in portable vacuums, these vacuum distillations should be conducted in the fume hood<br />
behind a blast shield.<br />
Figure 5.49: Vacuum sources: a) Portable vacuum pump, b) Water aspirator, c) House vacuum.<br />
Water aspirators are the most common vacuum source in teaching labs because they are inexpensive. When<br />
a water aspirator is used, the vacuum pressure is always limited by the intrinsic vapor pressure of water,<br />
which is often between 17.5 mmHg (20 ˚C) and 23.8 mmHg (25 ˚C). 15 The vacuum pressure is also very<br />
dependent on water flow, which can vary greatly. If an entire lab section uses the water lines at the same<br />
time, the water flow can be significantly compromised, leading to a much higher pressure than 25 mmHg<br />
inside an apparatus. The number of students using aspirators at one time should be limited as much as<br />
possible.<br />
If a manometer is available, the distillation apparatus should be set up and evacuated without heating to<br />
measure the pressure. The expected boiling point of a compound can then be roughly estimated using a<br />
nomograph (found in a CRC or online) or through the general guidelines in Table 5.9. If a manometer is<br />
not available and a water aspirator is to be used, the expected boiling point can be estimated using an<br />
approximate pressure of 20 mmHg, although the pressure will likely be higher than this.<br />
b.p. at 760 mmHg 150 170 200 220 250 270 300<br />
b.p. at 20 mmHg 62 78 101 117 141 157 181<br />
b.p. at 18 mmHg 60 76 99 115 139 154 178<br />
b.p. at 16 mmHg 58 73 97 112 136 151 174<br />
b.p. at 14 mmHg 56 71 94 108 133 148 171<br />
b.p. at 12 mmHg 52 68 90 104 129 144 167<br />
Table 5.9: Approximate boiling point of compounds at reduced pressure (all in ˚C). 16<br />
14 A Kugelrohr apparatus can obtain pressures as low as 0.05 mmHg, as reported by the Sigma-Aldrich operating instructions.<br />
15 J.A. Dean, Lange’s Handbook of <strong>Chemistry</strong>, 15 th ed., McGraw-Hill, 1999, Sect 5.28.<br />
16 Selected values from: A.J. Gordon and R.J. Ford, The Chemist’s Companion. A Handbook of Practical Data, <strong>Techniques</strong> and<br />
References, Wiley & Sons, 1972, p 32-33.<br />
<strong>Organic</strong> <strong>Chemistry</strong> <strong>Laboratory</strong> <strong>Techniques</strong> | Nichols | Page 286
5.4.C STEP-BY-STEP PROCEDURES<br />
5.4.C.1 VACUUM DISTILLATION PROCEDURE<br />
A vacuum distillation apparatus is shown in Figure 5.50, using a simple distillation setup. A fractional<br />
distillation can also be used. It is assumed that readers have previously performed a simple distillation under<br />
atmospheric pressure, so in this section are described differences between atmospheric and reduced pressure<br />
distillations.<br />
Figure 5.50: a) Vacuum distillation setup, b) Apparatus connected to a vacuum trap and water aspirator. Arrows show direction<br />
of suction.<br />
<strong>Organic</strong> <strong>Chemistry</strong> <strong>Laboratory</strong> <strong>Techniques</strong> | Nichols | Page 287
Figure 5.51: a) Applying grease to a joint, b) Adequately greased joint, c) Testing an aspirator’s suction, d) Vacuum tubing attached<br />
to the vacuum adapter.<br />
Prepare the apparatus<br />
1. Safety note: Inspect every piece of glassware to be used with the vacuum distillation, checking for<br />
stars, cracks, or other weaknesses in the glass, as these may allow for implosion when the pressure is<br />
reduced.<br />
2. A stir bar needs to be used for bump prevention. Boiling stones cannot be used with vacuum distillation<br />
as air trapped in the stone’s pores is rapidly removed under vacuum, causing the stones to fail to produce<br />
bubbles.<br />
3. Although greasing is somewhat of a personal choice with simple and fractional distillations, all joints<br />
must be greased in vacuum distillations or the system will leak and fail to achieve a low pressure<br />
(Figures 5.51 a+b).<br />
4. Begin assembly of the apparatus near the vacuum source. If using a water aspirator, test to be sure that<br />
the aspirator works well as some are more functional than others. To test an aspirator, apply thick<br />
vacuum hosing to the nub on the aspirator, turn on the water and feel for suction at the end of the hose<br />
with your finger (Figure 5.51c).<br />
5. A Claisen adapter should be included in the apparatus as solutions under vacuum tend to bump<br />
violently (a Claisen adapter is labeled in Figure 5.50a).<br />
6. Attach thick-walled tubing to the vacuum adapter on the distillation apparatus (Figure 5.51d) and<br />
connect to a vacuum trap. A trap suitable for a water aspirator is shown in Figure 5.50b, but a more<br />
substantial trap cooled with dry ice and acetone should be used with a portable vacuum to prevent<br />
solvent vapors from degrading the oil pump.<br />
Connect the trap to the vacuum source (aspirator or vacuum pump). It is best to not bend or strain the<br />
tubing as much as is practical, as this may create a leak in the system.<br />
<strong>Organic</strong> <strong>Chemistry</strong> <strong>Laboratory</strong> <strong>Techniques</strong> | Nichols | Page 288
Figure 5.52: a) Stir plate with wood block to allow for lowering of the apparatus, b) Active distillation, c) Insulating the Claisen<br />
and three-way adapters with foil.<br />
7. Insert a wood block (Figure 5.52a) or lab jack beneath the stirring plate to allow for lowering of the<br />
heat source when the distillation is complete.<br />
Begin the distillation<br />
8. Before heating, turn on the vacuum source to begin reducing pressure inside the apparatus. There<br />
should not be a hissing sound or else there is a leak in the system.<br />
The purpose of reducing the pressure before heating is for removal of very low-boiling liquids (e.g.<br />
residual solvent). If the system were heated at the same time, the low-boiling liquids might boil<br />
violently in the flask.<br />
If a manometer is available, take note of the pressure inside the apparatus. This may be used to predict<br />
the boiling point of the sample.<br />
9. When confident that the apparatus is adequately evacuated and any low-boiling compounds have been<br />
removed, begin heating the sample (Figure 5.52b).<br />
10. If it is difficult to achieve more than a reflux, the Claisen and three-way adapter can be insulated by<br />
wrapping them tightly with glass wool then aluminum foil (Figure 5.52c). Insulation allows the column<br />
to maintain heat and the sample to remain in the gas phase longer. A small gap should be left in the<br />
insulation near the distilling flask to “peek in” and make sure the stirring mechanism continues to work<br />
properly.<br />
11. Record the temperature over which material is collected, making sure the value corresponds to a<br />
temperature when the thermometer bulb is fully immersed in vapors. If a manometer is used, also<br />
record the pressure. If no manometer is used, record the vacuum source (e.g. aspirator).<br />
Pure liquids do not always distill at a constant temperature when under vacuum, as variations in pressure<br />
so easily occur and affect the boiling temperature. A range of 5 ˚C is not uncommon for pure liquids.<br />
This is especially true when the vacuum source is a water aspirator, where variations in water flow alter<br />
the pressure.<br />
<strong>Organic</strong> <strong>Chemistry</strong> <strong>Laboratory</strong> <strong>Techniques</strong> | Nichols | Page 289
12. If more than one fraction of distillate is desired, the distillation must be stopped before changing the<br />
receiving flask (see the next section for how). If available, a “cow” receiving flask can be used to<br />
collect different fractions without ceasing the vacuum (Figure 5.53a).<br />
Figure 5.53: a) “Cow” receiving flask for collecting multiple fractions: when a new fraction is distilling, the flask is rotated to<br />
allow for the distillate to collect into an empty section of the “udder,” b) Cooling the flask with a tap water bath, c) Opening the<br />
vacuum on the trap before turning off the vacuum, d) Alternative way to open the apparatus before turning off the vacuum.<br />
Stop the distillation<br />
13.To stop the distillation, first remove the heat source, cool the flask to room temperature then further<br />
cool in a tap water bath (Figure 5.53a).<br />
14.Slowly reinstate the atmospheric pressure into the flask by opening the pinch clamp at the vacuum trap<br />
(Figure 5.53c), or by removing the rubber tubing at the vacuum adapter or aspirator (Figure 5.53d).<br />
You will know the system is open to the atmosphere when there is an increase in water flow at the<br />
aspirator, or if a hissing sound is heard. Then turn off the vacuum source.<br />
It is important to first cool the system before allowing air back in as the superheated residue in the flask<br />
may react unexpectedly with oxygen in the air.<br />
It is also important to first allow air back into the<br />
system before turning off the vacuum source. If the<br />
vacuum is turned off first, sometimes changes in<br />
pressure inside the apparatus (as it cools) cause backsuction.<br />
If a water aspirator is used, this may cause<br />
water from the sink to be pulled into the vacuum line.<br />
The vacuum trap prevents this back suction from<br />
ruining the distillate.<br />
15.Disassemble and clean up the distillation apparatus as<br />
quickly as is practical, as the joints can sometimes<br />
freeze if left connected for prolonged periods.<br />
Figure 5.54: Student performs a vacuum distillation.<br />
<strong>Organic</strong> <strong>Chemistry</strong> <strong>Laboratory</strong> <strong>Techniques</strong> | Nichols | Page 290
5.4.C.2 VACUUM DISTILLATION SUMMARY<br />
Figure 5.55: Vacuum distillation connection to a vacuum trap and the aspirator.<br />
Always use a stir bar, not<br />
boiling stones.<br />
Grease all joints.<br />
Turn on the vacuum first,<br />
before heating, to<br />
remove very volatile<br />
components.<br />
Record the temperature<br />
and pressure if using a<br />
manometer during active<br />
distillation.<br />
To stop the distillation,<br />
remove the heat and cool<br />
the flask in a tap water<br />
bath.<br />
Use a Claisen adapter, as<br />
solutions tend to bump<br />
under vacuum.<br />
Connect thick-walled<br />
hosing at the vacuum<br />
adapter to a trap, then to<br />
the vacuum source<br />
(water aspirator or<br />
vacuum pump).<br />
When confident the<br />
apparatus is maintaining<br />
a reduced pressure, then<br />
heat the sample.<br />
Use glass wool or foil<br />
insulation if the sample<br />
is stubbornly refluxing<br />
instead of distilling.<br />
Pure compounds may not<br />
distill over a constant<br />
temperature due to<br />
changes in pressure.<br />
If multiple fractions will<br />
be collected, the system<br />
needs to be vented and<br />
cooled in between (or a<br />
cow receiving flask<br />
used).<br />
Then open the apparatus<br />
to the atmosphere by<br />
opening the pinch clamp<br />
on the trap, or removing<br />
the tubing on the vacuum<br />
adapter.<br />
Lastly turn off the<br />
vacuum.<br />
Correct order: cool,<br />
open to atmosphere, then<br />
turn off vacuum.<br />
Table 5.10: Procedural summary of vacuum distillation.<br />
<strong>Organic</strong> <strong>Chemistry</strong> <strong>Laboratory</strong> <strong>Techniques</strong> | Nichols | Page 291
5.5 STEAM DISTILLATION<br />
5.5.A OVERVIEW OF STEAM DISTILLATION<br />
Steam distillation is analogous to simple distillation, the main<br />
difference being that steam (or water) is used in the distilling flask<br />
along with the material to be distilled. Experimentally the setups<br />
are arranged more or less the same (Figure 5.56), with small<br />
differences being how the steam is added to the flask: either<br />
indirectly if a steam line is available in the building, or directly by<br />
boiling water in the flask.<br />
Figure 5.56: Steam distillation of mint.<br />
5.5.B USES OF STEAM DISTILLATION<br />
The most common use of steam distillation is the extraction of natural products from plant materials. This<br />
is the main industrial method for obtaining plant essential oils, used in fragrances and personal hygiene<br />
products. As so many products can be isolated in this way, this technique is regularly performed in teaching<br />
labs. An extraction and GC analysis of the essential oil in bay leaves is shown in Figure 5.57.<br />
Figure 5.57: Steam distillation of bay leaves. The main peaks in the GC spectrum of the essential oil are eucalyptol (5.69 min,<br />
14%), umbellulone (6.70 min, 54%), and 4-terpineol (6.74 min, 19%).<br />
<strong>Organic</strong> <strong>Chemistry</strong> <strong>Laboratory</strong> <strong>Techniques</strong> | Nichols | Page 292
5.5.C SEPARATION THEORY<br />
Although steam distillation appears almost identical to “regular” distillation, the principles behind the<br />
separation of components are quite different. In a “regular” distillation, separation is attempted on a mixture<br />
of components that dissolve in one another. The vapor produced from these mixtures can be described by<br />
a combination of Raoult’s and Dalton’s law, as shown in equation (14) for a two-component mixture.<br />
Miscible components: (14)<br />
When the components in the distilling flask do not dissolve in one another, such as when water and nonpolar<br />
organic compounds are present, the vapor produced from these mixtures is different. The components act<br />
independently from one another (which makes sense considering they do not mix), and the partial pressure<br />
from each component is no longer determined by its mole fraction. The partial pressure of each component<br />
is simply its vapor pressure, and the vapor composition for a two-component mixture is described by<br />
equation (15). Although the components do not mix in the liquid phase, they do in the gas phase, which<br />
allows for co-distillation of “incompatible components.”<br />
Immiscible components:<br />
<br />
<br />
(15)<br />
The implications of equation (15) are several. First, since mole fraction is not a factor, it is possible that a<br />
minor component in the distilling flask can be a major component in the distillate if it has an appreciable<br />
vapor pressure. In the steam distillation of volatile plant materials, this means that the distillate composition<br />
is independent of the quantity of water or steam used in the distilling flask.<br />
Secondly, since the vapor pressures of each component add, the mixture will always boil at a lower<br />
temperature than the boiling point of the lowest boiling component. For example, at 100 ˚C water has<br />
a vapor pressure of 760 torr since it is at its normal boiling point. If another volatile, non-water-soluble<br />
component was present with the water in a distilling flask at 100 ˚C (for example toluene, which has a<br />
boiling point of 111 ˚C), it too would produce vapors that contributed to the total pressure. As boiling<br />
occurs when the combined pressure matches the atmospheric pressure (let’s say 760 torr for the sake of this<br />
calculation), boiling would occur below 100 ˚C. For example, a mixture of toluene and water boils at 85<br />
˚C, as shown in equation (16).<br />
Water / toluene mix at 85 ˚C:<br />
<br />
<br />
<br />
<br />
(16)<br />
The distilling temperature in steam distillation is always below 100 ˚C (the boiling point of water), although<br />
in many cases the distilling temperature is very near or just under 100 ˚C. This feature allows for plant<br />
essential oils (complex mixtures that often include components with very high boiling points, > 250 ˚C), to<br />
be extracted at lower temperatures than their normal boiling points, and thus without decomposition.<br />
<strong>Organic</strong> <strong>Chemistry</strong> <strong>Laboratory</strong> <strong>Techniques</strong> | Nichols | Page 293
5.5.D STEP-BY-STEP PROCEDURES<br />
5.5.D.1 STEAM DISTILLATION PROCEDURE<br />
A steam distillation apparatus is shown in Figure 5.58 that uses boiling water in the distilling flask. An<br />
apparatus using a steam line is shown in Figure 5.59. It is assumed that readers have previously performed<br />
a simple distillation, so in this section are described differences between simple and steam distillations.<br />
Figure 5.58: Steam distillation of orange peel using water in the distilling flask and a Bunsen burner.<br />
<strong>Organic</strong> <strong>Chemistry</strong> <strong>Laboratory</strong> <strong>Techniques</strong> | Nichols | Page 294
Figure 5.59: Steam distillation variation using a steam line from the building. Arrows show the direction of the steam.<br />
Prepare the setup<br />
1. Place the plant material to be extracted into a large round bottomed flask with a 24/40 joint (wide<br />
mouth), no more than half full. A large amount of material is often necessary as the bulk of plants is<br />
cellulose, not oil. Use of a 14/20 flask (more narrow mouth) would make it difficult to remove the<br />
plant materials after distillation.<br />
2. Use an extension clamp to secure the large flask to the ring stand or latticework. If desired, further<br />
secure the setup with a platform (e.g. ring clamp and wire mesh as in Figure 5.58).<br />
3. Add water to the distilling flask to just cover the plant material.<br />
4. Always use a Claisen adapter in the setup as plant materials commonly foam with heating and there<br />
is often a great amount of turbulence in the distilling flask (see splashing in the flask of Figure 5.59).<br />
5. Two variations of steam distillation are regularly used: one where steam is directly generated by heating<br />
water in the distilling flask with a Bunsen burner (Figure 5.58), and another where steam is indirectly<br />
generated by a steam line in the building (Figure 5.59).<br />
Although burners are not commonly used with the distillation of organic compounds, they are relatively<br />
safe in steam distillations because: a) the majority of the vapor produced by the solution is typically<br />
water rather than organic compounds, so the vapor is not particularly flammable, b) The distillate may<br />
be somewhat flammable, but is a distance away from the heat source.<br />
<strong>Organic</strong> <strong>Chemistry</strong> <strong>Laboratory</strong> <strong>Techniques</strong> | Nichols | Page 295
6. To the top of the Claisen adapter, connect one of the<br />
following, depending on the variation of distillation used:<br />
a. If water will be heated in the distilling flask along with<br />
a burner:<br />
•<br />
Attach a stopper to close the system (indicated by<br />
the arrow in Figure 5.60) if the quantity of water<br />
will be sufficient for the distillation.<br />
• Attach a 125 mL separatory funnel (which must<br />
have a ground glass joint below the stopcock) if it<br />
is anticipated that water will need to be<br />
replenished during the distillation. Clamp and<br />
partially fill this separatory funnel with water<br />
(Figure 5.58).<br />
b. If a steam line will be used:<br />
•<br />
Figure 5.60: Steam distillation variation where<br />
sufficient water will be used. The arrow indicates a<br />
stopper used to close the system.<br />
Insert a steam inlet tube, and position it so the outlet is just raised above the bottom of the flask.<br />
Connect this tube to a separatory funnel trap attached to the steam line (Figure 5.59).<br />
7. The receiving flask can be a graduated cylinder, Erlenmeyer flask, or round bottomed flask.<br />
Figure 5.61: a) Waving the burner to heat the distilling flask (with mint), b) Draining the water from the steam trap after opening<br />
the steam line, c) Steam bubbling through the distilling flask (with orange peels).<br />
Begin distilling<br />
8. Begin heating the flask:<br />
a. If using a Bunsen burner, initially heat the flask at a rapid rate (it takes a lot of energy to boil water),<br />
but once the solution is boiling or foaming, turn down the burner and/or wave the burner in order<br />
to moderate the distillation rate (Figure 5.61a).<br />
b. If using a steam line, open the stopcock in the separatory funnel steam trap. Turn on the steam,<br />
and allow the water in the steam line to drain through the funnel and into a container (Figure 5.61b).<br />
Close the stopcock when it appears that most of what is coming out of the steam line is steam and<br />
not water. Adjust the steam rate so that the steam bubbles vigorously through the liquid in the<br />
distilling flask (Figure 5.61c).<br />
<strong>Organic</strong> <strong>Chemistry</strong> <strong>Laboratory</strong> <strong>Techniques</strong> | Nichols | Page 296
Figure 5.62: a+b) Distillate with organic oil atop water (orange oil in both), c) Milky distillate (clove oil).<br />
9. Collect distillate at a rate of 1 drop every second. The distillate will contain both water and oil, and<br />
may look one of two ways.<br />
a. A second layer may form, or the distillate may appear to have oily droplets clinging to the sides of<br />
the flask. This happens when the oil is very nonpolar (e.g. Figures 5.62 a+b show the distillate of<br />
orange oil, which is almost entirely composed of hydrocarbons).<br />
b. The distillate may also appear cloudy or “milky” (Figure 5.62c shows the cloudy distillate of clove<br />
oil). A cloudy mixture forms when tiny insoluble particles are dispersed throughout the suspension.<br />
This tends to happen when the oil is water-insoluble but contains some polar functional groups (e.g.<br />
large compounds with a few alcohol or ether functional groups).<br />
10.If using a steam line, the steam rate will need to be reduced once the distillation begins.<br />
11.If not using a steam line, be sure to replenish the water in the distilling flask if the level gets too low (if<br />
the liquid in the distilling flask is getting thick). Heating a solution which is too concentrated can<br />
sometimes cause sugars in the plant material to caramelize, making cleanup difficult. To replenish<br />
water either:<br />
a. Temporarily open the stopper on the Claisen adapter and add water via wash bottle.<br />
b. If using a separatory funnel on the Claisen adapter, turn the stopcock to gradually pour in water. If<br />
water is drained too quickly so that it pools in the Claisen adapter, it will be difficult to drain into<br />
the distilling flask for the same reason that a separatory funnel doesn’t drain with its stopper in<br />
place. Draining water from the separatory funnel slowly prevents this from happening.<br />
<strong>Organic</strong> <strong>Chemistry</strong> <strong>Laboratory</strong> <strong>Techniques</strong> | Nichols | Page 297
Stop the distillation<br />
12.If following a procedure, collect the recommended quantity of distillate. If the distillate is milky, the<br />
distillation can be ceased when the distillate dripping from the vacuum adapter clarifies, indicating that<br />
only water is condensing.<br />
13.If using a steam line, fully drain the liquid in the separatory funnel steam trap (and leave open) before<br />
turning off the steam. If water is in the funnel when the steam line is turned off, suction formed by the<br />
trap cooling faster than the distilling flask may pull liquid from the distilling flask into the steam trap<br />
(sometimes violently).<br />
Isolate the oil<br />
14.If the oil separates from the distillate as in Figure 5.62a, it can be removed via pipette, dried with a<br />
drying agent (such as Na 2 SO 4 ) and analyzed directly. If milky as in Figure 5.62c, the oil must be<br />
extracted into an organic solvent, dried with a drying agent (such as MgSO 4 ), and solvent removed with<br />
the rotary evaporator.<br />
Figure 5.63: a) First extraction of clove oil distillate into ethyl acetate, b) Second extraction.<br />
Three extractions are typically necessary to fully extract the oil from a milky distillate into an organic<br />
solvent. In the extraction of the milky clove oil distillate from Figure 5.62c, notice how the aqueous<br />
layer (bottom) remains milky after the first extraction (Figure 5.63a). This milky appearance shows<br />
that the oil was not fully removed with one extraction. The aqueous layer clarifies with the second<br />
extraction (Figure 5.63b) demonstrating the importance of multiple extractions.<br />
<strong>Organic</strong> <strong>Chemistry</strong> <strong>Laboratory</strong> <strong>Techniques</strong> | Nichols | Page 298
5.5.D.2 STEAM DISTILLATION SUMMARY<br />
Figure 5.64: Steam distillation apparatus.<br />
Place large amount of<br />
plant materials in a large<br />
round bottomed flask (no<br />
more than half full), and<br />
just cover with water.<br />
Always use a Claisen<br />
adapter, as there is often<br />
turbulence in the flask.<br />
Two variations are<br />
common:<br />
•<br />
•<br />
Heat the water with<br />
a Bunsen burner to<br />
create steam<br />
directly.<br />
Add steam indirectly<br />
through a steam line<br />
from the building.<br />
Collect the distillate at a<br />
rate of 1 drop per<br />
second.<br />
The distillate may appear<br />
cloudy, or a second layer<br />
may form on the top.<br />
If milky, the distillation<br />
can be ceased when the<br />
distillate is clear.<br />
If a steam line was used,<br />
be sure to drain the<br />
liquid from the steam<br />
trap before turning off<br />
the steam, to prevent<br />
back suction.<br />
Separated oil can be<br />
pipetted (then dried with<br />
Na 2 SO 4 ), while milky<br />
distillates need to be<br />
extracted.<br />
Table 5.11: Procedural summary of steam distillation.<br />
<strong>Organic</strong> <strong>Chemistry</strong> <strong>Laboratory</strong> <strong>Techniques</strong> | Nichols | Page 299
5.6 ROTARY EVAPORATION<br />
5.6.A OVERVIEW OF ROTARY EVAPORATION<br />
It is very common for a desired compound to be dissolved<br />
in a solvent during regular manipulations in the laboratory.<br />
Solvents are used in separatory funnel extractions and<br />
column chromatography, and the solvent must be removed<br />
in order to isolate the desired compound. Solvents are<br />
regularly chosen that have lower boiling points than the<br />
compound of interest, so that there is some mechanism for<br />
their removal. In theory, a solution could simply be placed<br />
on a heat source to boil away the lower-boiling solvent, but<br />
this approach is not often used.<br />
The preferred method for solvent removal in the laboratory<br />
is by use of a rotary evaporator (Figure 5.65), also known<br />
as a “rotovap.” A rotary evaporator is essentially a reduced<br />
pressure distillation: a solution in a round bottomed flask is<br />
placed in the water bath of the apparatus (Figure 5.66a), and<br />
rotated while the system is partially evacuated (by a water<br />
aspirator or vacuum pump). The reduced pressure in the<br />
apparatus causes the solvent to boil at a lower temperature<br />
than normal (see vacuum distillation), and rotating the flask<br />
increases the liquid’s surface area and thus the rate of<br />
evaporation. The solvent vapor condenses when it comes<br />
into contact with a water condenser (Figure 5.65) and drips<br />
Figure 5.65: Rotary evaporator, water aspirator, and<br />
water circulator.<br />
into a receiving flask (Figure 5.66b). When the solvent is removed, the concentrated compound is left in<br />
the flask. One difference between distillation and rotary evaporation is that the distillate is most often<br />
retained in distillation while the residue is retained in rotary evaporation.<br />
Removal of solvent by a rotary evaporator is superior to evaporation under atmospheric pressure for many<br />
reasons. The process is much quicker (often takes less than 5 minutes), uses lower temperatures (so<br />
decomposition is unlikely), and uses less energy than boiling with a heat source. Since low pressure is used,<br />
a rotary evaporator is also quite efficient at removing the last traces of residual solvent from a solution.<br />
Figure 5.66: a) Solution is placed on a rotary evaporator, b) After evaporation (solvent is in the receiving flask).<br />
<strong>Organic</strong> <strong>Chemistry</strong> <strong>Laboratory</strong> <strong>Techniques</strong> | Nichols | Page 300
5.6.B STEP-BY-STEP PROCEDURES<br />
5.6.B.1 ROTARY EVAPORATION PROCEDURE<br />
Figure 5.67: a) Sample to be evaporated, b) Attachment of sample to bump trap on rotary evaporator, c) Lowering of sample into<br />
water bath.<br />
1. If your institution uses a water circulator connected to the condenser to minimize water usage (open<br />
cabinet of Figure 5.65), be sure that there is ice in the water reservoir.<br />
2. Pre-weigh a round bottomed flask, and fill it no more than half-full with the solution to be evaporated<br />
(Figure 5.67a).<br />
3. Connect the flask to the evaporator’s “bump trap” using a plastic clip (“Keck clip,” Figure 5.67b).<br />
The bump trap prevents foaming or splashing solutions<br />
(“bumping”) from dirtying the condenser or collecting in the<br />
receiving flask where components cannot be recovered. A bump<br />
trap should be kept clean so that if solutions do collect there, they<br />
can be rinsed back into the original flask without worry about<br />
contamination from previously evaporated samples.<br />
4. Use the joystick knob on the apparatus to lower the flask into the<br />
water (Figure 5.67c) so that the flask is partially submerged. Be<br />
sure the flask is not positioned so low that the joint with the plastic<br />
clip is in the water.<br />
Figure 5.68: Student uses the rotary<br />
evaporator.<br />
<strong>Organic</strong> <strong>Chemistry</strong> <strong>Laboratory</strong> <strong>Techniques</strong> | Nichols | Page 301
Figure 5.69: a) Turning on the water aspirator, b) Adjustment of the flask’s rotation, c) Closing the stopcock to further reduce the<br />
pressure.<br />
5. Turn on the vacuum source (Figure 5.69a), which may be a water aspirator or vacuum pump. A hissing<br />
sound should be heard from air being pulled through the stopcock. The partial vacuum will help hold<br />
the flask securely onto the bump trap.<br />
6. Begin rotating the flask at a medium rate by adjusting the rotation notch (to roughly 110 rpm, or to onethird<br />
of the maximum rotation value, Figure 5.69b).<br />
7. Close the stopcock on the evaporator by turning it perpendicular to the bleed valve (Figure 5.69c). The<br />
hissing sound should stop, and the pressure inside the apparatus will decrease further.<br />
Figure 5.70: a) Evaporating a solution (with arrow pointing to the solvent reservoir), b) Formation of solid in the flask.<br />
8. Allow the solution to evaporate. Solvent should collect in the large round bottomed flask reservoir<br />
(indicated in Figure 5.70a). There is no set amount of time required for complete evaporation.<br />
a. If the expected compound is a solid, keep evaporating until a solid or thin film appears (Figure<br />
5.70b). A film may form if the temperature of the bath is above the solid’s melting point, if<br />
crystallization is slow, or if the warmth of the bath prevents crystallization (Figure 5.71b shows a<br />
film that crystallized into Figure 5.71c after a day).<br />
<strong>Organic</strong> <strong>Chemistry</strong> <strong>Laboratory</strong> <strong>Techniques</strong> | Nichols | Page 302
. If the expected compound is a liquid, evaporate until the approximate expected volume is seen and<br />
it appears that the liquid level is no longer changing (Figure 5.71a). Evaporation can also be tested<br />
for by lifting the flask out of the water bath, drying the outside with paper towels, and feeling the<br />
flask with your hand as it rotates. If solvent continues to evaporate, the flask will feel cool.<br />
c. If solvent bumps from the flask into the bump trap (Figure 5.67b), raise the flask slightly out of the<br />
water bath, and/or allow small amounts of air into the apparatus by partially turning the stopcock<br />
(Figure 5.69c). If large amounts of liquid have bumped, stop the evaporation and rinse the trap<br />
with solvent such that the rinsing is added back to the flask. Evaporate the solvent.<br />
d. It is acceptable if solvent pools in the bump trap during normal evaporation (not bumping). It will<br />
sometimes later vaporize, and if it doesn’t, it’s still been removed from the flask. Pooling often<br />
happens if the solvent has a relatively high boiling point.<br />
9. When it appears that the sample has completed evaporating, allow it to remain in the reduced pressure<br />
system an extra few minutes to remove any final solvent residue.<br />
Figure 5.71: a) Residual liquid after evaporation, b) A sample after evaporation that left a film on the flask, c) The same sample<br />
that crystallized after allowing the flask to dry overnight.<br />
10.To stop the evaporation, reverse all the previous steps: open the stopcock, stop the rotation, turn off<br />
the vacuum source, lift the flask from the water bath, and remove the flask. Turn the evaporator off<br />
completely if you are the final user of the day.<br />
11. The residue in the round bottomed flask should contain the desired compound, but may still contain<br />
trace amounts of solvent. If the compound is not particularly volatile (or if it’s a non-volatile solid),<br />
the flask can be left open in a locker until a future lab session. After fully dry, the mass can be obtained<br />
and the compound analyzed.<br />
<strong>Organic</strong> <strong>Chemistry</strong> <strong>Laboratory</strong> <strong>Techniques</strong> | Nichols | Page 303
5.6.B.2 ROTARY EVAPORATION SUMMARY<br />
Figure 5.72: Rotary evaporation setup.<br />
Be sure there is ice in<br />
the water circulator (if<br />
used).<br />
Fill a round bottomed<br />
flask no greater than<br />
half-full.<br />
Connect to the bump<br />
trap with a plastic clip.<br />
Lower the flask into the<br />
water bath to submerge<br />
the liquid (don’t<br />
submerge the plastic<br />
clip).<br />
Turn on the vacuum<br />
source (vacuum will<br />
hiss).<br />
Rotate the flask at a<br />
moderate rate (one-third<br />
the maximum value).<br />
Close the stopcock in<br />
the apparatus (hissing<br />
will stop).<br />
Evaporate until solid<br />
forms or liquid level<br />
doesn’t appear to<br />
change anymore, then<br />
evaporate an extra few<br />
minutes for good<br />
measure.<br />
To stop evaporation,<br />
reverse all steps:<br />
•<br />
•<br />
•<br />
•<br />
•<br />
Open the stopcock<br />
Stop the rotation<br />
Turn off the<br />
vacuum<br />
Lift the flask from<br />
the water bath<br />
Remove the flask<br />
Table 5.12: Procedural summary of rotary evaporation.<br />
<strong>Organic</strong> <strong>Chemistry</strong> <strong>Laboratory</strong> <strong>Techniques</strong> | Nichols | Page 304
5.6.C TROUBLESHOOTING<br />
1. If the solvent fails to boil on the rotary evaporator even after one minute, consider whether a mistake<br />
may have been made. For example, it may be that you are trying to evaporate the aqueous layer from<br />
a separatory funnel step instead of the organic layer. Alternatively, the water bath may need to be<br />
heated to a higher temperature depending on the boiling point of the solvent.<br />
2. If droplets are seen among the liquid residue in the flask after evaporation (Figure 5.73), most likely<br />
water was not effectively removed from the sample prior to evaporation. To remedy this problem,<br />
dissolve the sample in a portion of the previously used solvent, use a drying agent (e.g. anhydrous<br />
MgSO 4 ), filter if necessary, and again evaporate the solvent.<br />
Figure 5.73: a) Bubble of water seen amongst an organic liquid after rotary evaporation, b) Zoom-in of the bubble (indicated by<br />
the arrow).<br />
<strong>Organic</strong> <strong>Chemistry</strong> <strong>Laboratory</strong> <strong>Techniques</strong> | Nichols | Page 305
<strong>Organic</strong> <strong>Chemistry</strong> <strong>Laboratory</strong> <strong>Techniques</strong> | Nichols | Page 306
CHAPTER 6<br />
MISCELLANEOUS TECHNIQUES<br />
Time-lapse<br />
melting of parabromobenzoic<br />
acid in a<br />
melting point<br />
apparatus.<br />
<strong>Organic</strong> <strong>Chemistry</strong> <strong>Laboratory</strong> <strong>Techniques</strong> | Nichols | Page 307
CHAPTER 6: MISCELLANEOUS TECHNIQUES, TABLE OF CONTENTS<br />
6.1 Melting Point 309 6.3 Sublimation 330<br />
6.1.A Overview of Melting Point 309 6.3.A Overview of Sublimation 331<br />
6.1.B Uses of Melting Point 310 6.3.B Step-by-Step Procedures 332<br />
Identification 310 Under Atmospheric Pressure 332<br />
Assessing Purity 311 Under Reduced Pressure (Vacuum 334<br />
Sublimation)<br />
6.1.C Melting Point Theory 313 Vacuum Sublimation Summary 337<br />
Melting Point Diagrams 313<br />
Impurities Effect on the Melting Point 314 6.4 Chemical Tests 338<br />
Melting Point Depression 314 6.4.A Overview of Chemical Tests 338<br />
Broadening of the Melting Point 315 6.4.B Flowcharts 339<br />
6.1.D Step-by-Step Procedures 316 6.4.C Chemical Test Summary 342<br />
Sample Preparation 316 6.4.D Individual Tests 344<br />
Melting Point Apparatus 317 Beilstein Test 344<br />
Thiele Tube Method 320 Benedict’s Test 345<br />
Melting Point Summary 322 Bicarbonate Test 347<br />
6.1.E Mixed Melting Points 323 Bromine Test 348<br />
Chromic Acid (Jones) Test 349<br />
6.2 Boiling Point 324 2,4-DNPH (Brady’s) Test 350<br />
6.2.A Overview of Boiling Point 324 Ferric Hydroxamate Test 351<br />
6.2.B Step-by-Step Procedures 324 Iodoform Test 352<br />
Distillation Method 324 Lucas Test 353<br />
Reflux Method 325 Permanganate (Baeyer) Test 354<br />
Thiele Tube Method 326 pH Test 355<br />
Thiele Tube Theory 326 Phenol Test 356<br />
Thiele Tube Procedure 327 Silver Nitrate Test 357<br />
Thiele Tube Summary 329 Sodium Iodide (Finkelstein) Test 358<br />
Tollens Test 359<br />
<strong>Organic</strong> <strong>Chemistry</strong> <strong>Laboratory</strong> <strong>Techniques</strong> | Nichols | Page 308
6.1 MELTING POINT<br />
6.1.A OVERVIEW OF MELTING POINT<br />
Measurement of a solid compound’s melting point is a standard practice in<br />
the organic chemistry laboratory. The melting point is the temperature where<br />
the solid-liquid phase change occurs. In some reference books it is listed as<br />
a single value (e.g. 98 ˚C), but in chemical catalogs it is more often listed as<br />
a range of values (e.g. 96-98 ˚C). The melting “point” is therefore more of<br />
a melting “range,” and in part, reflects how melting points are experimentally<br />
determined.<br />
A melting point is determined by loading a small amount of sample into a<br />
capillary tube (Figure 6.1), and then slowly heating the sample. Figure 6.2<br />
shows a close-up view of a sample inside a melting point apparatus, where<br />
the sample is slowly heated through contact with hot vertical metal blocks<br />
on either side of the capillary tube. The sample is kept small in this technique<br />
to ensure adequate heat transfer between the metal and sample.<br />
Figure 6.1: White solid (indicated<br />
with an arrow) in a capillary tube.<br />
The first value recorded for the melting range is with the very first appearance of liquid. As this temperature<br />
is approached, the solid may begin to glisten (Figure 6.2b), and the temperature is recorded with the first<br />
hint of liquid movement (a droplet) inside the tube (Figure 6.2c). The second value recorded for the melting<br />
range is with the melting of the entire sample, which occurs when all areas of opaque solid have turned into<br />
a transparent liquid (Figure 6.2h).<br />
Figure 6.2: Time-lapse melting of benzoic acid: a) Well below the melting point, b) “Glistening” of the solid, c) First liquid droplet<br />
is seen (the temperature is recorded as the lower value of the melting range), d-g) Melting, h) Sample is completely melted (the<br />
temperature is recorded as the upper value of the melting range).<br />
<strong>Organic</strong> <strong>Chemistry</strong> <strong>Laboratory</strong> <strong>Techniques</strong> | Nichols | Page 309
6.1.B USES OF MELTING POINT<br />
There are several reasons to determine a compound’s melting point: it is useful in supporting the<br />
identification of a compound, as well as serving as a rough guide to the relative purity of the sample.<br />
6.1.B.1 IDENTIFICATION<br />
As a compound’s melting point is a physical constant, it can be used to support the identity of an unknown<br />
solid. The melting point can be looked up in a reference book (this value would then be called the<br />
“literature melting point”), and compared to the experimental melting point. For example, the literature<br />
melting point of ferrocene, is 172-174 ˚C. 1 The author found the melting point of a ferrocene sample<br />
(Figure 6.3) to be 176-178 ˚C, 2 and there is good agreement between these two values.<br />
Figure 6.3: Melting of ferrocene inside a melting point apparatus.<br />
Care must be taken to refrain from jumping to conclusions about the identity of a compound based solely<br />
on a melting point. Millions of solid organic compounds exist, and most have melting points below 250<br />
˚C. It is not uncommon for two different compounds to have coincidentally similar or identical melting<br />
points. Therefore, a melting point should be used as simply one piece of data to support the identification<br />
of an unknown.<br />
Although coincidentally similar melting points are not unheard of, when used in the context of assessing<br />
the product of a chemical reaction, melting points can be a powerful identification tool. For example, three<br />
possible products of the nitration of benzaldehyde are 2, 3, or 4-nitrobenzaldehyde (Figure 6.4). Since these<br />
products have very different melting points, the melting point of the resulting solid (if pure) could be used<br />
to strongly suggest which product was formed.<br />
O<br />
O<br />
O<br />
O<br />
H<br />
HNO 3<br />
H 2 SO 4<br />
NO 2<br />
H<br />
H<br />
+ +<br />
O 2 N<br />
H<br />
Benzaldehyde<br />
2-nitrobenzaldehyde<br />
mp 42-44 ˚C<br />
NO 2<br />
3-nitrobenzaldehyde<br />
mp 55-58 ˚C<br />
4-nitrobenzaldehyde<br />
mp 103-106 ˚C<br />
Figure 6.4: Nitration of benzaldehyde. 1<br />
1 Melting points are from the Aldrich Chemical Catalog.<br />
2 As determined using a MelTemp melting point apparatus. The temperature values are uncorrected.<br />
<strong>Organic</strong> <strong>Chemistry</strong> <strong>Laboratory</strong> <strong>Techniques</strong> | Nichols | Page 310
6.1.B.2 ASSESSING PURITY<br />
A second reason to determine a compound’s melting point is for a rough measure of purity. In general,<br />
impurities lower and broaden the melting range.<br />
For example, the melting points of samples of benzoic acid contaminated with known quantities of<br />
acetanilide are summarized in Table 6.1. As the quantity of impurity increased, melting began at a lower<br />
temperature, and the breadth of the melting range increased.<br />
Mol % Benzoic Acid Mol % Acetanilide Melting Point (˚C)<br />
100% 0% 120 - 122<br />
95% 5% 114 - 121<br />
90% 10% 109 - 120<br />
85% 15% 105 - 117<br />
80% 20% 94 - 116<br />
Table 6.1: Melting points of benzoic acid / acetanilide mixtures (taken with a MelTemp apparatus).<br />
Figure 6.5 shows the time-lapse melting of three samples side by side in a melting point apparatus: pure<br />
benzoic acid (left), benzoic acid with 10 mol% acetanilide impurity (middle), and benzoic acid with 20<br />
mol% acetanilide impurity (right). As the samples are heated, the sample with the greatest impurity (on the<br />
right) melts first. Interestingly, both of the impure samples complete melting before the pure sample (on<br />
the left) begins to melt.<br />
Figure 6.5: Time-lapse melting of three samples side by side in a melting point apparatus. Pure benzoic acid (left), benzoic acid<br />
with 10 mol% acetanilide (middle), benzoic acid with 20 mol% acetanilide (right).<br />
<strong>Organic</strong> <strong>Chemistry</strong> <strong>Laboratory</strong> <strong>Techniques</strong> | Nichols | Page 311
A solid’s melting point may be so reduced by impurity that it becomes a liquid at room temperature. For<br />
example, when piperonal (melting point of 35-39 ˚C) is mixed with resorcinol (melting point of 109-112<br />
˚C) in a 4:1 ratio by mass, 3 the mixture become slushy and eventually melts at room temperature (Figure<br />
6.6). This sort of behavior is not uncommon for solids whose melting points are only marginally higher<br />
than room temperature.<br />
Figure 6.6: Time-lapse melting of a mixture of piperonal and resorcinol at room temperature (both are white solids when pure).<br />
Note: no heat is applied in the process. The mixture eventually melts as a result of its depressed melting point.<br />
3 As published in Di Pippo, A.G., J. Chem. Ed, 1965, 42(5), p A413.<br />
<strong>Organic</strong> <strong>Chemistry</strong> <strong>Laboratory</strong> <strong>Techniques</strong> | Nichols | Page 312
6.1.C MELTING POINT THEORY<br />
6.1.C.1 MELTING POINT DIAGRAMS<br />
The typical behavior of an impure solid containing two components is summarized by the general phase<br />
diagram in Figure 6.7a. The furthest left side of the graph represents a sample that is pure compound “A,”<br />
while the furthest right side of the graph represents a sample of pure compound “B.” The lines mark the<br />
solid-liquid transition temperature (melting points). The melting point decreases the further the<br />
composition is from purity, toward the middle of the graph. In many mixtures, the minimum melting<br />
temperature for a mixture occurs at a certain composition of components, and is called the eutectic point<br />
(Figure 6.7a). Some systems do not have any eutectic points and some have multiple eutectic points.<br />
Figure 6.7: a) Generic phase diagram of a two-component system (A+B), b) Same diagram with additional markings.<br />
An impure solid is typically heterogeneous on the microscopic level, with pure regions of each component<br />
distributed through the bulk solid much like granite. When an impure solid is warmed, microscopic melting<br />
first occurs in a pure region by the component with the lower melting point (compound A in Figure 6.7a).<br />
This microscopic melting is not visible to the eye.<br />
The preliminary melting of compound A in Figure 6.7a forms tiny pools of liquid that begin to dissolve<br />
compound B from the bulk solid. As compound B is dissolved into the melt (causing it to become more<br />
impure), the freezing point of this mixture is depressed. Compound B will continue to dissolve in the melt,<br />
until it reaches the eutectic composition (point a in Figure 6.7b), and the system will continue to melt at<br />
this composition until the entirety of the minor component (the impurity) is dissolved. Once the minor<br />
component is completely dissolved, further melting continues of the bulk component. This increases the<br />
purity of the melt, so the melting temperature increases somewhat. The system follows the melting line in<br />
Figure 6.7b either to the left or right of the eutectic temperature (depending on which side of the eutectic<br />
point is started), adjusting its melting temperature as the bulk component increases its concentration in the<br />
melt. This continues until the entire sample is melted.<br />
Although microscopic melting begins at the eutectic temperature, the first value of the melting range (when<br />
a droplet of liquid is seen with the eye) is not necessarily recorded at this temperature. A droplet of liquid<br />
is not seen until approximately 10-20% of the sample has melted. Depending on the quantity of impurity,<br />
the system may have progressed far from the eutectic temperature (perhaps to point b in Figure 6.7b) before<br />
liquid becomes visible to the eye. The final value of the melting range is at the highest the melting point<br />
of the pure solid, but is often lower, reflecting the depressed melting point of the bulk solid. For example,<br />
a solid that is 20% compound A and 80% compound B would have a final melting temperature of point c<br />
<strong>Organic</strong> <strong>Chemistry</strong> <strong>Laboratory</strong> <strong>Techniques</strong> | Nichols | Page 313
in Figure 6.7b. The recorded melting range for this system would be at the maximum between temperatures<br />
a and c, but if the first droplet is seen at point b, the recorded melting range would be between temperatures<br />
b and c.<br />
6.1.C.2 IMPURITIES EFFECT ON THE MELTING POINT<br />
A melting point is a useful indicator of purity as there is a general lowering and broadening of the melting<br />
range as impurities increase. In this section is described the theory behind the phenomenon of melting point<br />
depression (which is identical to freezing point depression since freezing and melting are the same processes<br />
in reverse) and why an impure sample has a broad melting range.<br />
6.1.C.2.A MELTING POINT DEPRESSION (LOWERING THE M.P.)<br />
Melting of a pure solid occurs at a higher temperature than melting of an impure solid, a concept called<br />
melting point depression. The melting point is the temperature where the solid and liquid phases are in<br />
equilibrium with each other, and the change in free energy (ΔG˚) for the process (solid liquid) is zero.<br />
ΔG˚ is dependent on both the changes in enthalpy (ΔH˚) and entropy (ΔS˚) during the process (see versions<br />
of the Gibbs free energy equation in Figure 6.8b), but the changes in enthalpy are similar when melting a<br />
pure and impure solid as similar intermolecular forces are broken. Melting point depression is the result of<br />
different changes in entropy when melting a pure and impure solid.<br />
As solids are restricted in atomic motion, there is little difference in entropy between a pure and impure<br />
solid. However, there is a more significant difference in entropy between a pure and impure liquid, and an<br />
impure liquid has greater disorder and greater entropy. Melting of an impure solid into an impure liquid<br />
therefore has a larger change in entropy than melting a pure solid into a pure liquid (Figure 6.8a). A<br />
larger change in entropy corresponds to a lower melting temperature. This can be rationalized either<br />
mathematically or conceptually. A mathematical description is in Figure 6.8b: as ΔS˚ is the denominator<br />
in the final equation, a larger ΔS˚ corresponds to a smaller T melting . A conceptual approach is to consider<br />
that melting occurs when the enthalpy (ΔH˚) and entropy components (TΔS˚) are equal in magnitude (when<br />
ΔG˚ = 0). A larger ΔS˚ means that a smaller temperature will be required to “match” the enthalpy<br />
component.<br />
<br />
Figure 6.8: a) Entropy changes for melting of a pure and impure solid, b) Rearranged Gibbs free energy equation for melting.<br />
<strong>Organic</strong> <strong>Chemistry</strong> <strong>Laboratory</strong> <strong>Techniques</strong> | Nichols | Page 314
6.1.C.2.B BROADENING OF THE MELTING POINT<br />
The breadth of an experimentally determined melting point can often be correlated to the purity of the solid.<br />
Although all samples start melting at the eutectic temperature, the first droplet of liquid is not seen until<br />
approximately 10-20% of the sample has microscopically melted. As the melting temperature does not rise<br />
above the eutectic temperature until the entirety of the impurity has melted, the quantity of impurity will<br />
determine how far the system will have progressed along the melting point line in the phase diagram before<br />
reaching the visible minimum of 10-20% of solid.<br />
For example, if a solid has a minor amount of impurity, the impurity will quickly melt at the eutectic<br />
temperature (point a in Figure 6.9a), and the melting temperature will increase, following the melting point<br />
line in the phase diagram. When 10-20% of solid has melted and a droplet is visible, the system may have<br />
progressed far from the eutectic composition (perhaps to begin visibly melting at point b in Figure 6.9a).<br />
The solid will continue melting until perhaps point c in Figure 6.9a, to give a relatively narrow melting<br />
range (between points b and c). If instead the solid has a significant amount of impurity, it may take melting<br />
of nearly 10% of the solid to fully dissolve the impurity, which means the melting temperature may not<br />
have progressed far from the eutectic temperature when a droplet becomes visible. A more impure solid<br />
may first visibly melt at perhaps point d in Figure 6.9b, to give a broader melting range (between points d<br />
and e).<br />
Figure 6.9: Melting point diagrams showing the melting range for: a) Fairly pure sample, b) More impure sample.<br />
It is for these reasons that a low melting range (< 2 ˚C) is associated with purity, although it is also possible<br />
that the solid’s composition could be coincidentally near a eutectic point. If the eutectic composition is, for<br />
example, 40% A / 60% B, and the solid’s composition is 45% A / 55 % B, nearly all of the impure solid<br />
will melt before the melting temperature will change from the eutectic temperature in the phase diagram.<br />
Therefore, mixtures with compositions near the eutectic composition also give a sharp melting range, even<br />
though they may be far from pure.<br />
Whether a system is in fact pure, or sharply melting because it is at the eutectic composition, can be proven<br />
by performing a mixed melting point.<br />
<strong>Organic</strong> <strong>Chemistry</strong> <strong>Laboratory</strong> <strong>Techniques</strong> | Nichols | Page 315
6.1.D STEP-BY-STEP PROCEDURES<br />
There are a variety of methods by which a sample’s melting point can be measured, with the newest being<br />
electrical probes (e.g. Vernier MeltStation). Presented in this section are traditional methods that use an<br />
electrical melting point apparatus and Thiele tube. Both methods use capillary samples that are prepared<br />
in the same manner.<br />
6.1.D.1 SAMPLE PREPARATION<br />
Figure 6.10: a) Depositing sample into the open end of a capillary tube, b) Inverting and tapping the tube on the benchtop, c)<br />
Dropping the sample through a long tube, d) Correct height of sample in the tube.<br />
1. Obtain a glass capillary melting point tube, which has one end sealed and the other end open. Jab the<br />
open end of the tube into a pile of the solid to be analyzed (Figure 6.10a). The solid must be dry or the<br />
results will be affected as solvent can act as an impurity and affect the melting range. If the solid is<br />
granular, pulverize the solid somewhat before packing.<br />
2. Invert the capillary tube and gently tap the tube on the benchtop to cause the solid to fall to the closed<br />
end (Figure 6.10b). Then, drop the capillary tube closed side down several times through a long narrow<br />
tube (glass tube or cut PVC pipe, Figure 6.10 c). The capillary tube will bounce as it hits the benchtop,<br />
and pack the solid into the bottom of the tube. Failure to pack the solid well may cause it to shrink<br />
when heating, which can cause confusion as to the correct melting temperature.<br />
3. If needed, repeat the previous steps to load sample until it is a height of 2-3 mm in the tube (when<br />
packed, Figure 6.10d). It is important that the sample be no higher than 3 mm or the melting range will<br />
be artificially broad.<br />
<strong>Organic</strong> <strong>Chemistry</strong> <strong>Laboratory</strong> <strong>Techniques</strong> | Nichols | Page 316
6.1.D.2 MELTING POINT APPARATUS<br />
Figure 6.11: a) Insertion of capillary sample into the melting point apparatus, b) Adjustment of the heating rate, c) Monitoring of<br />
the sample through the viewfinder, d) Cooling down the apparatus.<br />
1. Insert the capillary tube containing the sample into a slot behind the viewfinder of a melting point<br />
apparatus (Figure 6.11a). There are usually three slots in each apparatus, and multiple melting points<br />
can be taken simultaneously after gaining experience with the technique.<br />
2. Turn on the apparatus and adjust the setting to an appropriate heating rate (Figure 6.11b). The rate of<br />
heating is often experimental and should be adjusted by careful monitoring of the thermometer on the<br />
apparatus.<br />
3. Look through the viewfinder (Figure 6.11c) to see a magnified view of the sample in the apparatus,<br />
which should be illuminated.<br />
4. If the expected melting point of the compound is known, heat at a medium rate to 20 ˚C below the<br />
expected melting point, then slow the rate of heating such that the temperature increases no more than<br />
1 ˚C every 30 seconds (i.e., very slowly).<br />
The temperature must be incremental as the melting point is approached so the system can reach<br />
equilibrium, making the thermometer temperature an accurate gauge of the solid’s true temperature.<br />
5. If the expected melting point of the compound is NOT known, heat the sample at a medium rate the<br />
entire time and determine an approximate melting point. Repeat the process with a fresh sample after<br />
allowing the apparatus to cool and use the recommendations in prompt 4 to perform a more careful<br />
assessment of the melting point.<br />
A fresh sample is necessary for a second melting point trial; even if the first sample solidifies after<br />
cooling it should not be used again. Differences in crystal structure between the original solid and the<br />
previously melted solid could lead to different melting ranges.<br />
<strong>Organic</strong> <strong>Chemistry</strong> <strong>Laboratory</strong> <strong>Techniques</strong> | Nichols | Page 317
Figure 6.12: a) Monitoring the sample by looking through the viewfinder, b) Initial melting of a sample, c) Midway, d) Mostly<br />
melted sample.<br />
6. The solid may be approaching its melting point if the solid is seen pulling away from the walls of the<br />
tube to form a cone of solid (Figure 6.12b), which is called “sintering.” Melting will normally occur<br />
within a few degrees of this point. The solid may also shrink or compact before melting.<br />
Figure 6.13: Melting of benzoic acid: a) Well below the melting point, b) Glistening, c) First liquid droplet seen, d) Sample is<br />
completely melted. Additional pictures for the melting of this sample can be seen in Figure 6.2.<br />
7. Record the first temperature of the melting range with the appearance of the first visible drop of liquid.<br />
At first it may seem as if the sides of the solid glisten (Figure 6.13b), and the temperature should be<br />
recorded when a droplet is seen on the side or bottom of the tube (a hint of movement will be noticed<br />
in the tube, Figure 6.13c).<br />
Record the temperature reading to the nearest degree. Although some thermometers may read to greater<br />
precision, the imperfect heat transfer between the metal block and sample leaves the error larger than<br />
0.1 ˚C.<br />
8. Record the second temperature of the melting range when the entire sample has just melted (Figure<br />
6.13d), which occurs when all portions of the opaque solid have turned to a transparent liquid.<br />
9. The following unusual situations may occur in the process:<br />
a. The sample may begin to darken, which indicates decomposition is occurring before the sample is<br />
melting. Take note of the decomposition temperature, as it is sometimes as reliable a reference<br />
point as a compound’s melting point. Use the letter “d” after a melting point to indicate<br />
decomposition (e.g. 251 ˚C d).<br />
<strong>Organic</strong> <strong>Chemistry</strong> <strong>Laboratory</strong> <strong>Techniques</strong> | Nichols | Page 318
. The sample may sublime instead of melting. Sublimation may be noticed by a ring of solid above<br />
where the sample is heated. Take note of this behavior in your lab notebook.<br />
10.If another melting point trial is to be performed directly after the first, the metal block should be rapidly<br />
cooled to at least 20 ˚C below the next melting point by touching it with wet paper towels (Figure 6.11d)<br />
or cooling it with a jet of air.<br />
Figure 6.14: <strong>Organic</strong> chemistry students determine the melting point of samples.<br />
<strong>Organic</strong> <strong>Chemistry</strong> <strong>Laboratory</strong> <strong>Techniques</strong> | Nichols | Page 319
6.1.D.3 THIELE TUBE METHOD<br />
Figure 6.15: a) Capillary sample attached to a thermometer with a small rubber band, b) Placement of the sample in the Thiele<br />
tube, c) Correct location of the sample, with an arrow indicating the minimal height of mineral oil in the tube, d) Heating the Thiele<br />
tube with a burner, and arrows showing the oil current.<br />
1. Obtain a Thiele tube and clamp it to a ring stand or latticework (Figure 6.15b). The tube is normally<br />
filled with clear mineral oil, but it may have darkened from oxidation or spilled compounds. If the oil<br />
is quite dark, it should be replaced. The oil should be filled to at least 1 cm higher than the top triangular<br />
arm (an appropriate oil level is pointed to in Figure 6.15c), and if too low the oil will not circulate as<br />
needed (Figure 6.15d).<br />
2. Insert a thermometer into a one-holed rubber stopper with a slit down one side. Attach the capillary<br />
sample to the thermometer with a tiny rubber band (as indicated in Figure 6.15a). These tiny rubber<br />
bands are often made by cutting pieces of small rubber tubing.<br />
3. Position the capillary tube so that the solid sample is lined up with the middle of the thermometer bulb<br />
(Figure 6.15a).<br />
4. Place the rubber stopper and thermometer assembly into the Thiele tube, adjusting the height so that<br />
the sample is midway inside the tube (Figure 6.15c). The rubber band should be adjusted so it is not<br />
submerged in the mineral oil, keeping in mind that the oil may expand somewhat during heating. The<br />
thermometer should not touch the sides of the glass, and if it does it should be clamped in such a way<br />
that it no longer touches.<br />
5. Heat the apparatus gently on the side arm of the Thiele tube with a microburner if available or Bunsen<br />
burner using a back and forth motion (Figure 6.15d). As the oil warms and becomes less dense, it will<br />
rise and travel up the triangular portion of the tube. The cooler, denser oil will sink, thereby creating<br />
an oil current as shown in Figure 6.15d. This method is an excellent way to indirectly and slowly heat<br />
the sample.<br />
6. Although bubbles should not be seen in the Thiele tube as it warms, they commonly are seen if the tube<br />
is used for other purposes (bubbles are seen in Figure 6.15d). For example, Thiele tubes can be used<br />
for boiling point determinations, and on occasion a sample falls into the oil and contaminates it. If the<br />
oil is not subsequently changed, the sample may boil when heated in the tube. If bubbles are seen upon<br />
heating a Thiele tube, the entire setup should be conducted in the fume hood.<br />
<strong>Organic</strong> <strong>Chemistry</strong> <strong>Laboratory</strong> <strong>Techniques</strong> | Nichols | Page 320
7. If the expected melting point of the compound is known, heat at a medium rate to 20 ˚C below the<br />
expected melting point, then slow the rate of heating such that the temperature increases no more than<br />
1 ˚C every 30 seconds (i.e., very slowly).<br />
The temperature must be incremental as the melting point is approached so the system can reach<br />
equilibrium, making the thermometer temperature an accurate gauge of the solid’s true temperature.<br />
8. If the expected melting point of the compound is NOT known, heat the sample at a medium rate the<br />
entire time and determine an approximate melting point. Repeat the process with a fresh sample after<br />
allowing the oil to cool to at least 20 ˚C below the previous melting point, and use the recommendations<br />
in prompt 7 to perform a more careful assessment of the melting point.<br />
A fresh sample is necessary for a second melting point trial; even if the first sample solidifies after<br />
cooling it should not be used again. Differences in crystal structure between the original solid and the<br />
previously melted solid could lead to different melting ranges.<br />
Figure 6.16: a) Solid sample inside a Thiele Tube, as indicated with an arrow, b) Initial melting of the sample, c) Midway, d)<br />
Melted sample.<br />
9. Record the first temperature of the melting range with the appearance of the first visible drop of liquid.<br />
At first it may seem as if the sides of the solid glisten (Figure 6.13b), and the temperature should be<br />
recorded when a droplet is seen on the side or bottom of the tube (a hint of movement will be noticed<br />
in the tube, Figure 6.16b).<br />
Record the temperature reading to the nearest degree. Although some thermometers may read to greater<br />
precision, the imperfect heat transfer between the oil and sample leaves the error larger than 0.1 ˚C.<br />
10.Record the second temperature of the melting range when the entire sample has just melted (Figure<br />
6.16d), which occurs when all portions of the opaque solid have turned to a transparent liquid.<br />
11.Take note if darkening or sublimation occur.<br />
12.If another melting point trial is to be performed directly after the first, be sure to allow the oil to cool<br />
to at least 20 ˚C below the next melting point beforehand.<br />
13.Cleanup note: drops of mineral oil on the benchtop do not easily wipe away, but can be cleaned by a<br />
paper towel soaked with either window cleaner or hexanes.<br />
<strong>Organic</strong> <strong>Chemistry</strong> <strong>Laboratory</strong> <strong>Techniques</strong> | Nichols | Page 321
6.1.D.4 MELTING POINT SUMMARY<br />
Load the sample by<br />
jabbing the open end of<br />
a capillary tube into a<br />
pile of the sample.<br />
With closed end down,<br />
drop the tube down a<br />
long hollow tube so that<br />
it hits the benchtop and<br />
packs the sample into<br />
the closed end of the<br />
tube.<br />
Load the sample to a<br />
height of 2-3 mm.<br />
Place the sample into a<br />
slot in the MelTemp.<br />
Turn the dial to begin<br />
heating.<br />
Heat at a medium rate<br />
to 20 ˚C below the<br />
expected melting point.<br />
Then heat very slowly<br />
(1 ˚C every 30<br />
seconds).<br />
Record the temperature<br />
where the first droplet<br />
of liquid is seen (there<br />
is movement in the<br />
tube).<br />
Record the second<br />
temperature when the<br />
entire sample liquefies<br />
(the entire sample<br />
changes from opaque to<br />
transparent).<br />
Record a melting range,<br />
e.g. 120-122 ˚C.<br />
If another melting point<br />
trial is to be performed,<br />
cool the metal block to<br />
at least 20 ˚C below the<br />
next melting point, by<br />
wiping it with a wet<br />
paper towel or cooling<br />
with a jet of air.<br />
Thiele Tube<br />
Variation:<br />
Attach the sample to a<br />
thermometer with a tiny<br />
rubber band,<br />
positioning the sample<br />
flush with the bottom of<br />
the thermometer.<br />
Insert the sample into a<br />
Thiele tube, so that the<br />
sample is near the<br />
middle of the tube.<br />
Table 6.2: Procedural summary for obtaining a melting point.<br />
<strong>Organic</strong> <strong>Chemistry</strong> <strong>Laboratory</strong> <strong>Techniques</strong> | Nichols | Page 322
6.1.E MIXED MELTING POINTS<br />
As previously discussed, there are a large number of compounds that have coincidentally identical melting<br />
points. Therefore, caution should be used in identifying a compound based solely on matching the literature<br />
melting point. However, mixed melting points offer an ability to almost certainly identify an unknown<br />
compound.<br />
Imagine that the nitration of benzaldehyde (Figure 6.17), produces a solid that is determined to have a<br />
melting point of 54-57 ˚C. This solid would be assumed to be 3-nitrobenzaldehyde due to the proximity of<br />
the experimental melting point to the literature melting point.<br />
O<br />
O<br />
O<br />
O<br />
H<br />
HNO 3<br />
H 2 SO 4<br />
NO 2<br />
H<br />
H<br />
+ +<br />
O 2 N<br />
H<br />
Benzaldehyde<br />
2-nitrobenzaldehyde<br />
mp 42-44 ˚C<br />
NO 2<br />
3-nitrobenzaldehyde<br />
mp 55-58 ˚C<br />
4-nitrobenzaldehyde<br />
mp 103-106 ˚C<br />
Figure 6.17: Nitration of benzaldehyde. The melting point data is from the Aldrich Chemical Catalog.<br />
Although the product likely is as identified, if a pure sample of 3-nitrobenzaldehyde is available, there is a<br />
possibility of more strongly identifying the product. A mixed melting point can be taken, by measuring<br />
the melting point of a sample composed of roughly equal volumes of the unknown product and of known<br />
3-nitrobenzaldehyde (ground together well with a mortar and pestle, as in Figure 6.18a). If the product is<br />
indeed 3-nitrobenzaldehyde, then this “mixture” would not be a mixture at all. Its melting point would be<br />
sharp and around the literature range of 55-58 ˚C. If this result occurs, the two samples are almost certainly<br />
the same compound. If the product however is not 3-nitrobenzaldehyde, then this “mixture” would truly<br />
be very impure (50% of each component), and the resulting melting point would have a much lowered and<br />
broadened range.<br />
Figure 6.18: a) Mortar and pestle in front of sample, b) A student prepares a sample for a mixed melting point.<br />
<strong>Organic</strong> <strong>Chemistry</strong> <strong>Laboratory</strong> <strong>Techniques</strong> | Nichols | Page 323
6.2 BOILING POINT<br />
6.2.A OVERVIEW OF BOILING POINT<br />
The boiling point of a compound is the temperature where the liquid-gas phase change occurs. In more<br />
technical terms, it is when a liquid’s vapor pressure equals its applied pressure (typically the atmospheric<br />
pressure). Boiling points are very sensitive to changes in applied pressure, so all boiling points should be<br />
reported along with the measured pressure. A compound’s “normal boiling point” refers to its boiling point<br />
at a pressure of 760 mmHg.<br />
A compound’s boiling point is a physical constant just like melting point, and so can be used to support the<br />
identification of a compound. Unlike melting points however, boiling points are not generally used as a<br />
gauge of purity. Impure liquids do boil over a range of temperatures (similar to how melting points have<br />
breadth), but the temperature span does not correlate well to purity. Thus, measurement of a compound’s<br />
boiling point is mainly used to support its identification.<br />
An experimental boiling point is often compared to the literature boiling point, which are typically reported<br />
for 1 atmosphere of pressure. If a boiling point is determined at any pressure significantly different than 1<br />
atmosphere, the pressure should be corrected. A general rule of thumb is that for pressures within 10% of<br />
one atmosphere, a 10 mmHg drop in pressure will account for a 0.3 - 0.5 ˚C drop in boiling point. 4 Another<br />
rule of thumb is that for every halving of pressure, the boiling point drops by about 10 ˚C.<br />
6.2.B STEP-BY-STEP PROCEDURES<br />
There are a variety of methods by which a sample’s boiling point can be determined, including distillation,<br />
reflux and by using a Thiele tube. The most straight-forward method uses a Thiele tube, and has the<br />
advantage of using less than 0.5 mL of material.<br />
6.2.B.1 DISTILLATION METHOD<br />
There are simpler methods than a distillation to measure a compound’s boiling point, and it is recommended<br />
to explore other options (e.g. Thiele tube) if this is the only goal. However, if materials are limited, or if a<br />
purification is planned anyhow, a distillation can be used to determine a compound’s boiling point. The<br />
distillation technique is discussed in great detail in Chapter 5.<br />
A simple distillation should suffice for most situations (Figure<br />
6.19), and at least 5 mL of sample should be used in the distilling<br />
flask along with a few boiling stones or stir bar. As the bulk of the<br />
material distills, the highest temperature noted on the thermometer<br />
corresponds to the boiling point. A major source of error with this<br />
method is recording too low a temperature, before hot vapors fully<br />
immerse the thermometer bulb. 5 Be sure to monitor the<br />
thermometer periodically, especially when the distillation is active.<br />
Record the barometric pressure along with the boiling point.<br />
Figure 6.19: Simple distillation.<br />
4 This generality is based on tables in the Handbook of <strong>Chemistry</strong> and Physics, CRC Press, 84 th edition, 2003-2004, 15-19.<br />
5 The author found the boiling point of ethanol to be 76 ˚C (765 mmHg) with distillation (literature boiling point is 78 ˚C).<br />
<strong>Organic</strong> <strong>Chemistry</strong> <strong>Laboratory</strong> <strong>Techniques</strong> | Nichols | Page 324
6.2.B.2 REFLUX METHOD<br />
A reflux setup can also be used to determine a compound’s boiling point. Reflux is when a liquid is actively<br />
boiling and condensing, with the condensed liquid returning to the original flask. It is analogous to a<br />
distillation setup, with the main difference being the vertical placement of the condenser.<br />
Figure 6.20: a) Reflux setup, b) Insertion of digital thermometer into condenser, c) Position of thermometer, d) Cooling the setup.<br />
If materials are available, the best reflux setup for this application is shown in Figure 6.20b and uses a<br />
microscale condenser and digital thermometer. The setup uses 5 mL of liquid, and a few boiling stones or<br />
stir bar. The condenser is attached to the round bottomed flask, with the lower water hose connected to the<br />
water spigot and the upper water hose draining to the sink. It is important to check that the joint connecting<br />
the flask and condenser is securely fastened. The liquid is brought to a boil on a sand bath, and the<br />
thermometer is placed low into the apparatus (Figure 6.20c) such that the bottom inch is between the boiling<br />
liquid and the bottom of the condenser. In this position, the thermometer can accurately measure the hot<br />
vapors and the temperature will stabilize at the compound’s boiling point 6 . Record the barometric pressure<br />
along with the boiling point.<br />
Although it might seem prudent to plunge the thermometer directly into the<br />
boiling liquid, it is possible the liquid may be superheated, or hotter than its<br />
boiling point. After determining the boiling point, the flask should be raised<br />
from the sand bath (Figure 6.20d) to cool, and condenser kept running until the<br />
flask is only warm to the touch. At this point the setup can be dismantled.<br />
If a microscale condenser is not available, an alternative reflux method can also<br />
be used as shown in Figure 6.21. Roughly 5 mL of sample is placed in a medium<br />
test tube (18 × 150 mm) with thermometer clamped inside so it does not touch<br />
the sides of the glass. The apparatus is carefully heated on a sand bath such that<br />
reflux happens controllably and vapors do not escape from the tube. The<br />
temperature during reflux will eventually stabilize (this takes some time), and<br />
the highest temperature noted corresponds to the compound’s boiling point. 6 The<br />
boiling points measured with this method may have significant error if the<br />
boiling point is very low or high (< 70 ˚C or > 150 ˚C) as low boiling compounds<br />
boil away too easily and high boiling compounds tend to cool too easily.<br />
Figure 6.21: Reflux apparatus<br />
using a sand bath and test tube.<br />
6 The author found the boiling point of ethanol (literature boiling point of 78 ˚C) to be 77.2 ˚C with the microscale condenser setup<br />
and 76 ˚C with the test tube reflux setup (765 mmHg). Note: Different thermometers were used with each method.<br />
<strong>Organic</strong> <strong>Chemistry</strong> <strong>Laboratory</strong> <strong>Techniques</strong> | Nichols | Page 325
6.2.B.3 THIELE TUBE METHOD<br />
6.2.B.3.A THIELE TUBE THEORY<br />
The Thiele Tube method is<br />
one of the simplest<br />
methods to determine a<br />
compound’s boiling point,<br />
and has the advantage of<br />
using small amounts of<br />
material (less than 0.5 mL<br />
of sample). The sample is<br />
placed in a small tube<br />
along with an inverted<br />
capillary tube. The setup is<br />
attached to a thermometer<br />
Figure 6.22: a) Thiele tube apparatus, b) Students perform the boiling point technique in the hood.<br />
(Figure 6.23a) and heated<br />
inside a Thiele tube (Figure 6.22a) to slightly higher than the compound’s boiling point (which is evidenced<br />
by a continuous stream of bubbles emerging from the capillary tube). The tube is then allowed to cool, and<br />
the moment liquid is drawn into the capillary tube, the temperature is the compound’s boiling point.<br />
This method utilizes the definition of boiling point: the temperature where the compound’s vapor pressure<br />
equals the applied (atmospheric) pressure. The inverted capillary tube acts as a reservoir to trap the<br />
compound’s vapors. As the apparatus is heated, the air initially trapped in the capillary tube expands and<br />
causes bubbles to emerge from the tube (Figure 6.23b). With further heating, the compound’s vapors<br />
eventually displace all of the trapped air, which is why heat is applied until there is a continuous stream of<br />
bubbles.<br />
When the apparatus is cooled, eventually the pressure inside the capillary tube (due solely to the<br />
compound’s vapors) will match the atmospheric pressure, at which point the bubbles will slow and liquid<br />
will be drawn into the tube. The temperature where this begins is the compound’s boiling point (Figure<br />
6.23d).<br />
Figure 6.23: Boiling point determination: a) Initial setup, b) After heating past the boiling point, c) Cooling, d) Liquid just enters<br />
the capillary tube (temperature is the boiling point), e) Liquid is inside the capillary tube (temperature is lower than the boiling<br />
point).<br />
<strong>Organic</strong> <strong>Chemistry</strong> <strong>Laboratory</strong> <strong>Techniques</strong> | Nichols | Page 326
6.2.B.3.B THIELE TUBE PROCEDURE<br />
Figure 6.24: a) Thiele tube, with arrow indicating the minimum height of oil, b) Tube attached to the thermometer with a rubber<br />
band, c) Addition of sample, d) Insertion of the capillary tube.<br />
1. Obtain a Thiele tube and clamp it to a ring stand in the fume hood (Figure 6.24a). The tube is normally<br />
filled with clear mineral oil, but it may have darkened from oxidation or spilled compounds. If the oil<br />
is quite dark, it should be replaced. The oil should be filled to at least 1 cm higher than the top triangular<br />
arm (an appropriate oil level is indicated in Figure 6.24a), and if too low the oil will not circulate as<br />
needed (Figure 6.25c).<br />
2. Insert a thermometer into a one-holed rubber stopper with a slit down one side. Attach a small glass<br />
vial (“Durham tube,” or 6 × 50 mm culture tube) to the thermometer with a small rubber band (Figure<br />
6.24b). The bottom of the vial should be flush with the bottom of the thermometer.<br />
3. Fill the vial about half-full with sample, which will require between 0.25 – 0.5 mL of sample (Figure<br />
6.24c).<br />
4. Insert a capillary tube into the sample (the same type that is used for melting points), open end down<br />
and sealed end up (Figure 6.24d).<br />
Figure 6.25: a) Insertion of the assembly into the Thiele tube, b) Rubber band is above the oil, c) Heating, d) Vigorous bubbling<br />
of sample.<br />
<strong>Organic</strong> <strong>Chemistry</strong> <strong>Laboratory</strong> <strong>Techniques</strong> | Nichols | Page 327
5. Place the rubber stopper and thermometer assembly into the Thiele tube, adjusting the height so that<br />
the sample is midway (if possible) inside the tube (Figure 6.25a). The rubber band should be higher<br />
than the top of the mineral oil (Figure 6.25b), keeping in mind that the oil may expand somewhat during<br />
heating. The thermometer should not touch the sides of the glass, and if it does it should be clamped<br />
in such a way that it no longer touches.<br />
6. Heat the oil gently on the side arm of the Thiele tube with a microburner if available, or Bunsen burner<br />
using a back and forth motion (Figure 6.25c). As the oil warms and becomes less dense, it will rise and<br />
travel up the triangular portion of the tube. The cooler, denser oil will sink, thereby creating a current<br />
as shown in Figure 6.25c. This method is an excellent way to indirectly and slowly heat the sample.<br />
7. Although bubbles should not be seen in the Thiele tube as it warms, they commonly are seen if the tube<br />
had been used previously for boiling point determinations. In this method, the rubber band occasionally<br />
breaks causing the sample to fall into the oil and contaminate it. If the oil is not subsequently changed,<br />
the sample may boil when heated in the tube. It is okay to continue heating a Thiele tube if bubbles are<br />
seen.<br />
8. Studies of this method 7 have determined that it is best to heat the oil gently and in a continual manner,<br />
as stopping and starting have caused the results to suffer.<br />
9. Continue heating until a vigorous stream of bubbles emerges from the tip of the capillary tube (Figure<br />
6.25d), such that individual bubbles can barely be distinguished. The purpose of this step is to expunge<br />
the air originally present in the capillary tube and replace it with the sample’s vapor. Do not heat so<br />
vigorously that the entire sample boils away. When bubbles are vigorously emerging from the capillary<br />
tube, the vapor pressure inside the tube is greater than the atmospheric pressure (the oil is at a higher<br />
temperature than the boiling point).<br />
10.Turn off the burner and allow the apparatus to cool. The bubbles will slow and eventually stop. At<br />
some point the vapor pressure inside the capillary tube will equal the atmospheric pressure and liquid<br />
will be drawn into the tube. The boiling point should be recorded as the temperature when liquid just<br />
begins to enter the capillary tube (Figure 6.26b).<br />
Figure 6.26: Time-lapse entry of liquid into the capillary tube. The boiling point should be recorded as the temperature at b).<br />
11.Record the atmospheric pressure along with the boiling point.<br />
7 Blank, E.W., Ind. Eng. Chem. Anal. Ed., 1933, 5(1), p 74-75.<br />
<strong>Organic</strong> <strong>Chemistry</strong> <strong>Laboratory</strong> <strong>Techniques</strong> | Nichols | Page 328
6.2.B.3.C THIELE TUBE SUMMARY<br />
Fill a small tube about<br />
half-full with sample<br />
and insert a capillary<br />
tube, closed end up.<br />
Attach the tube to a<br />
thermometer with a<br />
small rubber band.<br />
Insert the sample into a<br />
Thiele tube, so that the<br />
sample is near the<br />
middle of the oil.<br />
Heat the arm of the<br />
Thiele tube with a<br />
burner, gently and<br />
continuously.<br />
Heat until a vigorous<br />
stream of bubbles<br />
emerges from the<br />
capillary tube, such that<br />
individual drops can be<br />
barely distinguished.<br />
Remove the heat and<br />
allow the oil to cool.<br />
The boiling point is the<br />
temperature when the<br />
oil just begins to enter<br />
the capillary tube.<br />
Table 6.3: Procedural summary for obtaining a boiling point.<br />
<strong>Organic</strong> <strong>Chemistry</strong> <strong>Laboratory</strong> <strong>Techniques</strong> | Nichols | Page 329
6.3 SUBLIMATION<br />
Figure 6.27: Time-lapse large scale sublimation of camphor.<br />
<strong>Organic</strong> <strong>Chemistry</strong> <strong>Laboratory</strong> <strong>Techniques</strong> | Nichols | Page 330
6.3.A OVERVIEW OF SUBLIMATION<br />
Some compounds are capable of sublimation, which is the direct phase change from solid to gas. Solid<br />
carbon dioxide is an example of a substance that sublimes readily at atmospheric pressure, as a chunk of<br />
dry ice will not melt, but will seem to “disappear” as it turns directly into carbon dioxide gas. Sublimation<br />
is an analogous process to boiling, as it occurs when a compound’s vapor pressure equals its applied<br />
pressure (often the atmospheric pressure). The difference is that sublimation involves a solid’s vapor<br />
pressure instead of a liquid’s. Most solids do not have an appreciable vapor pressure at easily accessible<br />
temperatures, and for this reason the ability to sublime is uncommon. Compounds that are capable of<br />
sublimation tend to be those with weak intermolecular forces in the solid state. These include compounds<br />
with symmetrical or spherical structures. Examples of compounds that can be sublimed are in Figure 6.28.<br />
O<br />
O<br />
camphor<br />
benzophenone<br />
naphthalene<br />
anthracene<br />
pyrene<br />
Figure 6.28: Compounds that can be vacuum sublimed. 8<br />
As relatively few solids are capable of sublimation, the process can be an excellent purification method<br />
when a volatile solid is contaminated with non-volatile impurities. The impure solid is heated in the bottom<br />
of a vessel in close proximity to a cold surface, called a “cold finger” (Figure 6.29). As the volatile solid<br />
sublimes, it is deposited on the surface of the cold finger (where it can later be recovered), and is thus<br />
separated from the non-volatile substance left in the vessel. Sublimation is an example of a “green<br />
chemistry” technique, as no solvents are used and no waste is generated. The process, however, is not<br />
particularly efficient at separating volatile solids from one another.<br />
Of the solids with appreciable vapor pressures at room<br />
temperature, many still require rather high temperatures<br />
to actively sublime (when their vapor pressure equals<br />
the atmospheric pressure of nearly 760 mmHg). If these<br />
solids are heated to their sublimation points under<br />
atmospheric pressure, some will char and decompose<br />
during the process. For this reason, it is very common<br />
to perform sublimation under a reduced pressure<br />
(vacuum sublimation). Analogous to vacuum<br />
distillation in which liquid boils when its vapor pressure<br />
equals the reduced pressure in the apparatus, in vacuum<br />
sublimation solid sublimes when its vapor pressure<br />
equals the reduced pressure in the apparatus. In vacuum<br />
distillation, reducing the pressure allows for liquids to<br />
cold<br />
finger<br />
impure<br />
solid<br />
Figure 6.29: Diagram of the sublimation process.<br />
boil at a lower temperature. Similarly, reducing the pressure in vacuum sublimation allows for solids to<br />
sublime at a lower temperature, one which avoids decomposition.<br />
heat<br />
sublimed<br />
solid<br />
8 As reported in D.D. Perrin, W.L.F. Armarego, Purification of <strong>Organic</strong> Chemicals, Pergamon Press, 3 rd edition, 1988.<br />
<strong>Organic</strong> <strong>Chemistry</strong> <strong>Laboratory</strong> <strong>Techniques</strong> | Nichols | Page 331
6.3.B STEP-BY-STEP PROCEDURES<br />
6.3.B.1 UNDER ATMOSPHERIC PRESSURE<br />
The sublimation pictured in this section shows purification of 0.29 g of ferrocene, which grew in long<br />
needles on the bottom and top of the petri dishes (90% recovery).<br />
Figure 6.30: a) Ferrocene before sublimation, b) Sample with top petri dish in place, and on a wire mesh on a hotplate, c) Petri<br />
dishes with cold beaker.<br />
1. Spread the crude, dry solid to be sublimed in a thin layer on a “bottom” petri dish (Figure 6.30a). If<br />
chunky, first crush with a mortar and pestle. Determine the empty mass of the top petri dish.<br />
It is important that the solid to be purified is dry: if the sample is wet with solvent, condensation may<br />
form on the top petri dish during the sublimation. In the beginning stages of the sublimation, small<br />
amounts of condensation can be wiped off the top petri dish with a paper towel. However, too much<br />
condensation may wash crystals off from the top dish.<br />
2. Cover the bottom petri dish with the top dish and set atop a wire mesh on a hotplate in the fume hood<br />
(Figure 6.30b) set to the appropriate temperature (depending on the sublimation point of the compound<br />
of interest, perhaps medium low). The wire mesh helps dissipate the heat evenly to the dish and<br />
minimizes charring.<br />
3. Place a large 600 mL beaker filled with ice water atop the petri dish (Figure 6.30c).<br />
<strong>Organic</strong> <strong>Chemistry</strong> <strong>Laboratory</strong> <strong>Techniques</strong> | Nichols | Page 332
Figure 6.31: Time-lapse sublimation of ferrocene from the bottom petri dish onto the top petri dish.<br />
4. Over time the sample will sublime and collect on the upper petri dish (Figure 6.31). Monitor the<br />
sublimation as compounds may char during the process (if it starts to blacken, turn down the heat).<br />
Continue the sublimation until it appears as if little (or no) solid remains on the bottom petri dish. It is<br />
very common for crystals to also grow along the sides of the bottom dish.<br />
5. Delicately remove the petri dishes from the hotplate using cotton gloves (Figure 6.32a) or a silicone<br />
hot hand protector. Jostling the dishes will cause sublimed crystals to fall from the top petri dish.<br />
Safety note: Allow the two dishes to cool intact on a ceramic tile in the fume hood (Figure 6.32b). Do<br />
not remove the top petri dish right away or noxious fumes may escape.<br />
6. The crystals on the top petri dish are purified and should be retained (and their mass determined).<br />
Sometimes material on the bottom dish may also be saved if it appears crystalline (signifying it<br />
underwent a sublimation process) and doesn’t appear contaminated with char (Figure 6.32c).<br />
Figure 6.32: a) Removal of the sublimation apparatus from the hotplate, b) Cooling on a ceramic tile, c) Separated petri dishes:<br />
bottom dish (left), top dish (right).<br />
<strong>Organic</strong> <strong>Chemistry</strong> <strong>Laboratory</strong> <strong>Techniques</strong> | Nichols | Page 333
6.3.B.2 UNDER REDUCED PRESSURE (VACUUM SUBLIMATION)<br />
The sublimation in this section shows purification of camphor on two scales: 2.28 g (large scale, 77%<br />
recovery), and roughly 0.2 g (small scale).<br />
Figure 6.33: a) Camphor ground in a mortar, b) Adding camphor to a small scale sublimator, c) Large scale sublimator with<br />
camphor in the bottom, d) Greasing the ground glass joint.<br />
1. If the solid to be sublimed is chunky, first crush with a mortar and pestle (Figure 6.33a). Then place<br />
the crude, dry solid in the bottom of the sublimation apparatus (Figure 6.33b).<br />
It is important that the solid is dry: if the sample is wet with solvent, condensation may form on the<br />
cold finger during the sublimation. Too much condensation may wash crystals off the cold finger.<br />
2. Secure the apparatus to a ring stand or latticework (Figures 6.33 c+d). For small scales, support the<br />
apparatus with a platform (Figure 6.33d). A large scale sublimator is shown in Figure 6.33c.<br />
3. Lightly grease the joint that connects the two pieces of sublimation glassware. Grease can be easily<br />
applied with a syringe full of grease. If using ground glass, lightly grease the joint near the end that<br />
will not be in contact with the sample (Figure 6.33d).<br />
<strong>Organic</strong> <strong>Chemistry</strong> <strong>Laboratory</strong> <strong>Techniques</strong> | Nichols | Page 334
Figure 6.34: a) Small scale sublimation apparatus greased appropriately, b) Large scale sublimation apparatus with the cold finger<br />
filled with ice water, c) Heating the apparatus with a heat gun, d) Solid deposits on the outside of the glassware.<br />
4. Insert the top piece of the sublimation apparatus (cold finger), and twist the two pieces of glassware<br />
together to spread the grease in the joint. When using ground glass, the grease should cause the bottom<br />
half of the joint to become transparent all the way around (Figure 6.34a). If the entire joint becomes<br />
transparent, too much grease has been used and some should be wiped off.<br />
5. Use thick-walled rubber tubing (clear hose in Figure 6.34a) to connect the apparatus to a vacuum source<br />
(vacuum line or water aspirator). Apply the vacuum. The setup should not hiss or there is a leak in the<br />
system.<br />
6. Prepare the cold finger:<br />
a. If the cold finger has a condenser, connect water hoses such that the lower arm connects to the<br />
water spigot and the upper arm drains to the sink (tan hoses in Figure 6.34a). Begin circulating<br />
water through the condenser.<br />
b. If the cold finger is an empty tube, fill the cold finger to the brim with ice, then pour in enough<br />
water to fill the finger about three-quarters of the way (Figure 6.34b). In some cases, the cold finger<br />
could be filled with dry ice and acetone.<br />
c. It is proper technique to apply the vacuum before cooling the finger to prevent water condensation<br />
from forming, which could wash crystals off the cold finger.<br />
7. Heat the solid with a heat gun (Figure 6.34c) or Bunsen burner, beginning slowly with a back and forth<br />
motion and low heat. It is not recommended to use a sand bath or heating mantle for sublimation, as<br />
heating is often too slow and can only direct heat to the bottom of the apparatus, not the sides. Increase<br />
the rate of heating if the sublimation does not begin within a few minutes.<br />
8. Over a short amount of time, solid should begin to deposit on the cold finger. It will undoubtedly also<br />
deposit on the outsides of the glassware (Figure 6.34d). Solid can be coaxed away from the outside of<br />
the glassware and toward the cold finger by waving the heat gun or burner periodically up the sides of<br />
the glass.<br />
<strong>Organic</strong> <strong>Chemistry</strong> <strong>Laboratory</strong> <strong>Techniques</strong> | Nichols | Page 335
Figure 6.35: Time-lapse sublimation of camphor (small scale).<br />
9. Continue the sublimation until all of the volatile substance is transferred from the bottom piece of<br />
glassware to the cold finger (Figure 6.35). If the compound begins to darken, decrease the rate of<br />
heating to prevent decomposition.<br />
10.Remove the coolant from the cold finger:<br />
a. If a condenser was used, turn off the circulating water and remove the water hoses from the<br />
apparatus (carefully, without making a large mess).<br />
b. If an ice water coolant was used, scoop out the ice if possible, and remove the water by pipette (or<br />
for large scales with a turkey baster, Figure 6.36a).<br />
11.Allow the system to come to room temperature.<br />
12.Delicately reinstate air pressure to the apparatus (Figure 6.36b), noting that an abrupt opening of the<br />
system will cause air to violently enter the apparatus and will likely cause crystals to dislodge from the<br />
cold finger.<br />
13.Delicately remove the emptied cold finger from the apparatus, and scrape the sublimed crystals onto a<br />
watch glass (Figure 6.36c). Alternatively, rinse the crystals from the cold finger with solvent through<br />
a funnel and into a round bottomed flask (Figure 6.36d), to later remove the solvent using a rotary<br />
evaporator.<br />
Figure 6.36: a) Removing ice water from the cold finger using a turkey baster, b) Releasing the pressure after the sublimation, c)<br />
Scraping the crystals from the cold finger, d) Rinsing the cold finger into a round bottomed flask for later evaporation.<br />
<strong>Organic</strong> <strong>Chemistry</strong> <strong>Laboratory</strong> <strong>Techniques</strong> | Nichols | Page 336
6.3.B.3 VACUUM SUBLIMATION SUMMARY<br />
Place the sample to be<br />
sublimed in the bottom<br />
of the sublimation<br />
apparatus.<br />
Lightly grease all joints.<br />
Use thick walled tubing<br />
to attach to the vacuum<br />
arm, and apply the<br />
vacuum.<br />
The setup should not<br />
hiss or there is a leak.<br />
Fill the cold finger, or<br />
run water through the<br />
condenser.<br />
Be sure to apply the<br />
vacuum first, then<br />
coolant. If cooled<br />
before the vacuum,<br />
condensation may occur<br />
on the cold finger.<br />
Wave a heat gun or<br />
Bunsen burner on the<br />
apparatus to heat the<br />
sample.<br />
Sublimation should<br />
begin within a few<br />
minutes.<br />
Coax solid deposited on<br />
the side of the<br />
glassware toward the<br />
cold finger by waving<br />
the heat gun / burner on<br />
the sides of the glass.<br />
When the sublimation is<br />
complete:<br />
Remove the coolant.<br />
Allow the apparatus to<br />
come to room<br />
temperature.<br />
Delicately reinstate the<br />
air pressure, noting that<br />
an abrupt opening of<br />
the vessel will cause air<br />
to knock crystals off the<br />
cold finger.<br />
Remove the cold finger.<br />
Table 6.4: Procedural summary for vacuum sublimation.<br />
<strong>Organic</strong> <strong>Chemistry</strong> <strong>Laboratory</strong> <strong>Techniques</strong> | Nichols | Page 337
6.4 CHEMICAL TESTS<br />
6.4.A OVERVIEW OF CHEMICAL TESTS<br />
Figure 6.37: a) Addition of orange chromic acid reagent to a solution of 2-butanol in acetone (before and after), b) Negative and<br />
positive results for the chromic acid test.<br />
Before spectroscopic analysis (IR, NMR) became commonplace in the organic chemistry lab, chemical<br />
tests were heavily relied upon to support compound identification. A chemical test is typically a fast<br />
reaction performed in a test tube that gives a dramatic visual clue (a color change, precipitate, or gas<br />
formation) as evidence for a chemical reaction. For example, addition of an orange chromic acid reagent<br />
to some compounds causes the chromium reagent to change to a blue-green color (Figure 6.37a). This is<br />
considered a “positive” test result, and in this case indicates the presence of a functional group that can be<br />
oxidized (alcohol or aldehyde). A negative test result is retention of the original color of the reagent, in this<br />
case the orange color (Figure 6.37b).<br />
Performing chemical tests is commonly done in the teaching lab.<br />
Although the tests work well in general, when using a chemical test to<br />
support identification of a structure, caution should be used in<br />
interpretation of the results. For example, aldehydes are stated to give<br />
a positive result in the bromine test, which is when the compound turns<br />
the orange bromine solution clear. Figure 6.38 shows the reaction of<br />
two aldehydes with the bromine test: one gives a positive result (the<br />
left tube), and one gives a negative result (the right tube). Variation in<br />
chemical structure can sometimes interfere with “typical” results,<br />
leading to both false positives and false negatives. It is for this reason<br />
that spectroscopic methods are often more reliable in structure<br />
determination than chemical tests. Nonetheless, the ease of<br />
administration makes chemical tests preferable in certain applications,<br />
for example in roadside drug testing by police officers, and in<br />
environmental and chemical laboratories.<br />
Figure 6.38: Results of two aldehydes in the<br />
bromine test (left tube is isobutyraldehyde<br />
and right tube is benzaldehyde).<br />
<strong>Organic</strong> <strong>Chemistry</strong> <strong>Laboratory</strong> <strong>Techniques</strong> | Nichols | Page 338
6.4.B FLOWCHARTS<br />
In some teaching labs, a combination of spectroscopy and chemical<br />
tests are used in determination of an unknown. If available, an infrared<br />
spectrometer (Figure 6.39) is very useful in determining possible<br />
functional groups present in an unknown. The following flowcharts<br />
summarize key signals present in an IR spectrum, and chemical tests<br />
that can be used to support or narrow down<br />
structural identification.<br />
Figure 6.39: Student using an<br />
Infrared spectrometer.<br />
1. O-H Bond<br />
Figure 6.40: IR spectra of: a) cyclohexanol (alcohol), b) heptanoic acid (carboxylic acid).<br />
An O-H bond strongly absorbs infrared radiation over a broad range of wavenumbers (2400-3400 cm –1 ),<br />
and has a characteristic shape in IR spectra. The specific range of absorption can be used to identify whether<br />
the O-H is part of an alcohol or carboxylic acid functional group: a broad absorption centering around 3300<br />
cm -1 corresponds to an alcoholic O-H bond (Figure 6.40a), while a broader absorption centering around<br />
3000 cm -1 corresponds to a carboxylic acid O-H bond (Figure 6.40b).<br />
Chemical tests (pH and bicarbonate tests) can be done to support the identification of a carboxylic acid.<br />
Specific structural features of alcohols (1˚, 2˚, or 3˚) can be determined using a variety of chemical tests, as<br />
summarized by the flowchart in Figure 6.41.<br />
OH<br />
(Alcohol)<br />
Chromic<br />
Acid Test<br />
Lucas Test<br />
Iodoform<br />
Test<br />
Positive:<br />
1˚ ROH,<br />
2˚ ROH<br />
Negative:<br />
3˚ ROH<br />
Positive:<br />
3˚ ROH or<br />
allylic/benzylic<br />
ROH<br />
Negative:<br />
2˚ ROH (slow),<br />
1˚ ROH<br />
Positive:<br />
2˚ ROH<br />
adjacent to a<br />
methyl<br />
Negative:<br />
Other ROH<br />
Figure 6.41: Flowchart summarizing chemical tests that support identification of an alcohol.<br />
<strong>Organic</strong> <strong>Chemistry</strong> <strong>Laboratory</strong> <strong>Techniques</strong> | Nichols | Page 339
2. Carbonyl, C=O Bond<br />
The carbonyl bond absorbs infrared radiation very<br />
strongly and sharply in the 1700 cm -1 region (Figure<br />
6.42). The specific wavenumber (1715 cm -1 or 1735<br />
cm -1 for example) often correlates well to a specific<br />
functional group (aldehyde, ketone, ester, amide, or<br />
carboxylic acid), but it is not uncommon for<br />
compounds to absorb outside of their “expected”<br />
range. Chemical tests can be useful in narrowing<br />
down the specific functional group once a carbonyl<br />
bond is identified in an IR spectrum, as summarized<br />
by the flowchart in Figure 6.43.<br />
Figure 6.42: IR spectrum of 2-butanone.<br />
C=O<br />
(Carbonyl)<br />
2,4-DNPH<br />
Test<br />
Positive:<br />
Aldehyde or<br />
Ketone<br />
Negative:<br />
Ester, Amide,<br />
Carboxylic Acid<br />
Tollens Test<br />
Chromic Acid,<br />
Permanganate,<br />
Bromine Test<br />
Iodoform<br />
Test<br />
Ferric<br />
Hydroxamate<br />
Test<br />
pH or<br />
Bicarbonate Test<br />
Positive:<br />
Aldehyde<br />
Negative:<br />
Ketone<br />
Positive:<br />
Aldehyde<br />
Negative:<br />
Ketone<br />
Positive:<br />
Methyl ketone<br />
Negative:<br />
Other Ketones,<br />
or aldehydes<br />
Positive: Ester<br />
Negative: No<br />
ester<br />
Positive:<br />
Carboxylic Acid<br />
Negative: No<br />
Carboxylic Acid<br />
Figure 6.43: Flowchart summarizing chemical tests that support identification of a carbonyl compound.<br />
<strong>Organic</strong> <strong>Chemistry</strong> <strong>Laboratory</strong> <strong>Techniques</strong> | Nichols | Page 340
3. Unsaturated Hydrocarbons (Alkenes, Alkynes, Aromatics)<br />
Figure 6.44: IR spectra of: a) 1-hexene (alkene), b) 1-hexyne (alkyne).<br />
Unsaturated compounds have the following characteristic signals in their IR spectrum:<br />
Alkenes / Aromatics (Figure 6.44a):<br />
• C-H stretch involving sp 2 hybridized carbon atom: medium strength signal slightly above 3000 cm -1 ,<br />
normally appearing as a shoulder on the C-H block of signals around 3000 cm -1 .<br />
• C=C stretch: medium strength signals in the 1480-1680 cm -1 region.<br />
Alkynes (Figure 6.44b):<br />
•<br />
•<br />
C-H stretch involving sp hybridized carbon atom (terminal alkynes only): strong, sharp signal around<br />
3300 cm -1 . This signal is in the same region as an O-H signal, but is much sharper.<br />
CC triple bond stretch: around 2100 cm -1 , where few other signals occur. The signal is often weak,<br />
and may be absent if the compound is mostly symmetric about the triple bond.<br />
Verification of the presence of an alkene or alkyne can be accomplished with the Permanganate and<br />
Bromine tests. Aromatic groups give no reaction in these tests.<br />
4. Alkyl Halide<br />
Presence of an alkyl halide is not obvious from an IR spectrum, as the C-X signals occur in the “fingerprint<br />
region” (< 1500 cm -1 ) and near the lower limit of the IR spectrum (C-Cl stretches occur at 550-850 cm -1<br />
while C-Br stretches occur at 515-690 cm -1 ). However, several chemical tests can be used to verify the<br />
presence of halogens, the most reliable being the Beilstein test. Two other tests can be used to infer<br />
structural features (1˚, 2˚, 3˚), as shown by the flowchart in Figure 6.45.<br />
RX<br />
(Alkyl Halide)<br />
Beilstein<br />
Test<br />
Silver<br />
Nitrate Test<br />
Sodium<br />
Iodide Test<br />
Positive:<br />
Contains chlorine,<br />
bromine or iodine<br />
Negative:<br />
No halogen<br />
Positive:<br />
3˚ RX,<br />
2˚ RX (slow)<br />
Negative:<br />
1˚ RX<br />
Positive:<br />
1˚ RX,<br />
2˚ RX (slow)<br />
Negative:<br />
3˚ RX<br />
Figure 6.45: Flowchart summarizing chemical tests that support identification of a halogenated compound.<br />
<strong>Organic</strong> <strong>Chemistry</strong> <strong>Laboratory</strong> <strong>Techniques</strong> | Nichols | Page 341
6.4.C CHEMICAL TEST SUMMARY<br />
To follow is a visual summary of the various chemical tests. Procedures and details are provided for each<br />
in the following section.<br />
Beilstein Test Benedict’s Test Bicarbonate Test<br />
Positive<br />
Negative<br />
Positive<br />
Negative<br />
Positive<br />
Negative<br />
Chlorine,<br />
bromine or<br />
iodine<br />
compounds<br />
Many groups<br />
Reducing<br />
Carbohydrates<br />
(contain<br />
hemiacetal)<br />
Non-reducing<br />
Carbohydrates<br />
(contain acetal)<br />
+ many groups<br />
Carboxylic<br />
Acids<br />
Many groups<br />
Bromine Test Chromic Acid (Jones) Test 2,4-DNPH (Brady’s) Test<br />
Positive<br />
Negative<br />
Positive<br />
Negative<br />
Positive<br />
Negative<br />
Alkenes,<br />
alkynes,<br />
aldehydes<br />
Aromatics +<br />
many groups<br />
1˚ and 2˚<br />
alcohols,<br />
aldehydes<br />
3˚ alcohols +<br />
many groups<br />
Aldehydes,<br />
ketones<br />
Esters + many<br />
groups<br />
Ferric Hydroxamate Test Iodoform Test Lucas Test<br />
Positive<br />
Negative<br />
Positive<br />
Negative<br />
Positive<br />
Negative<br />
Esters<br />
Aldehydes,<br />
Ketones +<br />
Many groups<br />
Methyl<br />
ketones and 2˚<br />
alcohols<br />
adjacent to a<br />
methyl group<br />
Many groups<br />
3˚ alcohols,<br />
allylic/benzylic<br />
alcohols, some<br />
2˚ alcohols<br />
1˚ alcohols +<br />
many groups<br />
<strong>Organic</strong> <strong>Chemistry</strong> <strong>Laboratory</strong> <strong>Techniques</strong> | Nichols | Page 342
Permanganate (Baeyer) Test pH Test Phenol Test<br />
Positive<br />
Negative<br />
Positive<br />
Negative<br />
Positive<br />
Negative<br />
Alkenes,<br />
alkynes, some<br />
alcohols +<br />
aldehydes<br />
Aromatics +<br />
Many groups<br />
Carboxylic<br />
acids, sulfonic<br />
acids<br />
Many groups<br />
Phenols<br />
Many groups<br />
Silver Nitrate Test<br />
Sodium Iodide<br />
(Finkelstein) Test<br />
Tollens Test<br />
Positive<br />
Negative<br />
Positive<br />
Negative<br />
Positive<br />
Negative<br />
3˚ alkyl<br />
halides,<br />
allylic/benzylic<br />
RX, some 2˚<br />
alkyl halides<br />
1˚ alkyl halides<br />
+ many groups<br />
1˚ alkyl<br />
halides,<br />
allylic/benzyli<br />
c RX, some 2˚<br />
alkyl halides<br />
3˚ alkyl halides<br />
+ Many groups<br />
Aldehydes<br />
Ketones,<br />
esters + many<br />
groups<br />
Table 6.5: Chemical tests summary.<br />
<strong>Organic</strong> <strong>Chemistry</strong> <strong>Laboratory</strong> <strong>Techniques</strong> | Nichols | Page 343
6.4.D INDIVIDUAL TESTS<br />
6.4.D.1 BEILSTEIN TEST<br />
The Beilstein Test confirms the presence of a halogen in solution, although it does not distinguish between<br />
chlorine, bromine, or iodine. A copper wire is dipped into the halogen-containing solution and thrust into<br />
a flame. The copper oxide on the wire reacts with the organic halide to produce a copper-halide compound<br />
that gives a blue-green color to the flame.<br />
Procedure: In the fume hood, clean a looped copper wire by thrusting it into the tip of the blue cone of a<br />
Bunsen burner flame until it glows (Figure 6.46a). Be sure to “burn off” any residual liquid on the wire<br />
(make sure any green flames from previous tests are gone before you begin).<br />
Allow the copper to cool to room temperature, then dip it into a test tube containing 5-10 drops of your<br />
sample, coating it as much as possible (Figure 6.46b). If the sample is a solid, adhere some of the solid to<br />
the copper wire by first wetting the wire with distilled water then touching it to the solid.<br />
Immediately plunge the wire with sample into the blue cone of the flame. A positive result is a green flame,<br />
although it might be short-lived and faint (it may be easier to see if the fume hood light is turned off). A<br />
negative result is the absence of this green color (Figures 6.46 c+d).<br />
Figure 6.46: a) Cleaning copper wire in a flame, b) Dipping copper wire into the reagent, c) Negative result (hexanes), d) Positive<br />
result (1-chlorobutane).<br />
<strong>Organic</strong> <strong>Chemistry</strong> <strong>Laboratory</strong> <strong>Techniques</strong> | Nichols | Page 344
6.4.D.2 BENEDICT’S TEST<br />
The Benedict’s test can verify the presence of reducing carbohydrates: compounds that have hemiacetals<br />
in their structures and are therefore in equilibrium with the free carbonyl form (aldehyde or α-<br />
hydroxyketone). The carbonyl forms are oxidized by the Cu 2+ in the Benedict’s reagent (which complexes<br />
with citrate ions to prevent the precipitation of Cu(OH) 2 and CuCO 3 ). An insoluble Cu 2 O is the inorganic<br />
product of this reaction, which usually has a red-brown color (Figure 6.47). Carbohydrates with only acetal<br />
linkages are non-reducing sugars and give a negative result with this test.<br />
O<br />
OH<br />
hemiacetals<br />
O<br />
OH<br />
O<br />
OCH3<br />
acetals<br />
O<br />
OCH3<br />
HO<br />
HO<br />
HO<br />
CH 2 OH<br />
O<br />
OH<br />
OH<br />
H<br />
O<br />
OH - HO<br />
OH H<br />
HO OH<br />
HO<br />
H<br />
CH 2 OH<br />
O<br />
Cu 2+ HO<br />
OH O<br />
HO<br />
+ Cu 2 O (s)<br />
OH<br />
HO<br />
Often red ppt<br />
Figure 6.47: Structure of hemiacetal and acetals, along with the reaction of a hemiacetal with the Benedict’s reagent.<br />
Procedure: Dissolve 10-30 mg of solid or 3 drops liquid sample in a minimal amount of water (0.5 mL)<br />
in a small test tube (13 × 100 mm). Add 2 mL of Benedict’s reagent. 9 Warm the blue solution in a boiling<br />
water bath for 2 minutes (Figure 6.48a). A positive result is the formation of a reddish-brown solution or<br />
precipitate after some time, while a negative result is retention of the blue color (Figures 6.48 c+d).<br />
Figure 6.48: a) Heating the Benedict’s solution in a boiling water bath, b) Benedict’s test results: left tube is sucrose (negative),<br />
right tube is glucose (positive), c) Negative result, d) Positive result.<br />
9 The Benedict’s reagent is prepared as follows, as published by the Flinn Scientific catalog: 173 g of hydrated sodium citrate and<br />
100 g of anhydrous sodium carbonate is added to 800 mL of distilled water with heating. The mixture is filtered, then combined<br />
with a solution of 17.3 g copper(II) sulfate pentahydrate dissolved in 100 mL distilled water. The combined solutions are diluted<br />
to 1L.<br />
<strong>Organic</strong> <strong>Chemistry</strong> <strong>Laboratory</strong> <strong>Techniques</strong> | Nichols | Page 345
Conjugated aldehydes are unreactive in the Benedict’s test, and the author found many non-conjugated<br />
aldehydes to also be unreactive. Formation of colloids seem to prevent the formation of the red precipitate<br />
(Figure 6.49 shows the appearance of propionaldehyde in the hot water bath, forming a cloudy colloid).<br />
Figure 6.49: Reaction of propionaldehyde in the Benedict’s test: a) In the beginning, colloid formation on the surface, b) After<br />
time. Notice orange solid on the test tube rim, indicating a reaction is possible when exposed to the atmosphere.<br />
The reaction may only work for compounds that are water soluble (like carbohydrates), as the reaction<br />
seems to initiate at the surface (Figure 6.50), and the author found aldehydes that formed an insoluble layer<br />
on the surface to be unreactive.<br />
Figure 6.50: Time-lapse reaction progress of the Benedict’s reagent reacting with glucose.<br />
The Benedict’s test is related to the Fehling’s test, which uses different ligands on the copper oxidizing<br />
species. The Fehling’s reagent uses a Cu 2+ ion complexed with two tartrate ions.<br />
<strong>Organic</strong> <strong>Chemistry</strong> <strong>Laboratory</strong> <strong>Techniques</strong> | Nichols | Page 346
6.4.D.3 BICARBONATE TEST<br />
Carboxylic acids and sulfonic acids can react with sodium bicarbonate (NaHCO 3 ) to produce carbon dioxide<br />
and water (Figure 6.51). Other mainstream functional groups (most phenols and alcohols) are not acidic<br />
enough to produce a gas with bicarbonate.<br />
R<br />
O<br />
OH<br />
O<br />
NaHCO 3<br />
R O<br />
O O<br />
+ H 2 O + CO 2 (g) R S OH<br />
NaHCO 3<br />
O O<br />
R S O<br />
+ H 2 O + CO 2 (g)<br />
Figure 6.51: Reaction of carboxylic and sulfonic acids with bicarbonate ion.<br />
Procedure: Add 2 mL of 5% NaHCO 3 (aq) into a test tube and add 5 drops or 50 mg of your sample. Mix<br />
the solution by agitating the test tube. A positive test for carboxylic acids is the formation of bubbles or<br />
frothing (Figure 6.52).<br />
Figure 6.52: a) Negative result (acetone), b) Positive result (lactic acid), c) Positive result (octanoic acid).<br />
<strong>Organic</strong> <strong>Chemistry</strong> <strong>Laboratory</strong> <strong>Techniques</strong> | Nichols | Page 347
6.4.D.4 BROMINE TEST<br />
A solution of bromine in CH 2 Cl 2 is a test for unsaturation (alkenes and alkynes) and in some cases the<br />
ability to be oxidized (aldehydes). The bromine solution is orange and upon reaction the solution turns<br />
colorless due to the consumption of bromine. Bromine reacts with alkenes and alkynes through addition<br />
reactions and with aldehydes through oxidation (Figure 6.53). It gives no reaction with aromatics, making<br />
this a good test to distinguish alkenes from aromatics.<br />
R<br />
O<br />
Br<br />
Br<br />
R 2<br />
R<br />
R C C R<br />
R<br />
orange<br />
Br<br />
colorless<br />
O<br />
Br 2<br />
orange<br />
Br Br<br />
R<br />
R<br />
Br Br<br />
colorless<br />
R<br />
H<br />
R<br />
Br 2<br />
<strong>Organic</strong> <strong>Chemistry</strong> <strong>Laboratory</strong> <strong>Techniques</strong> | Nichols | Page 348<br />
OH<br />
Figure 6.53: Reaction of an alkene, alkyne, and aldehyde with bromine.<br />
Procedure: Dissolve 4 drops or 50 mg of sample in 1 mL of dichloromethane (CH 2 Cl 2 ) or 1,2-<br />
dimethoxyethane. Add 2 drops of the orange 5% Br 2 in CH 2 Cl 2 solution to the test tube and observe. A<br />
positive result is the immediate disappearance of the orange color to produce a clear or slightly yellow<br />
solution (Figure 6.54). A negative result is the retention of the orange color. An aldehyde may require a<br />
small amount of time to decolorize the solution and produce a positive result (approximately 1 min, Figure<br />
6.55) and conjugated aldehydes are unreactive (Figure 6.55).<br />
Figure 6.54: a) Addition of the bromine solution (orange liquid) to a test tube, b) Bromine results: hexanes (left tube), 1-hexene<br />
(right tube), c) Negative result, d) Positive result.<br />
Figure 6.55: Bromine results for isobutyraldehyde (left tube) and benzaldehyde, a conjugated aldehyde (right tube): a) Immediately<br />
after addition of the bromine reagent, b) After 1 minute.
6.4.D.5 CHROMIC ACID (JONES) TEST<br />
A solution of CrO 3 in H 2 SO 4 is a test for polar functional groups that can be oxidized, which includes<br />
aldehydes, 1˚ alcohols, and 2˚ alcohols (Figure 6.57). 3˚ alcohols give a negative result with this test (Figure<br />
6.56). The orange Cr 6+ reagent converts to a blue-green Cr 3+ species, which often precipitates in acetone.<br />
R<br />
CH 2 OH<br />
1˚ ROH<br />
CrO 3 , H +<br />
orange<br />
R<br />
O<br />
OH<br />
+ Cr 3+<br />
blue/green<br />
R<br />
OH<br />
R'<br />
R<br />
O<br />
R'<br />
+ Cr 3+<br />
2˚ ROH<br />
orange<br />
blue/green<br />
O<br />
R H<br />
Aldehyde<br />
CrO 3 , H + R OH<br />
orange<br />
O<br />
+ Cr 3+<br />
blue/green<br />
Figure 6.56: Negative (a) and positive (b)<br />
results for the chromic acid test.<br />
Figure 6.57: Reaction of a primary alcohol, secondary alcohol, and aldehyde with the chromic acid reagent.<br />
Procedure: Place 1 mL of acetone in a small test tube (13 × 100 mm) and add 2 drops or 20 mg of your<br />
sample. While wearing gloves, add 2 drops of the orange chromic acid reagent 10 (safety note: the reagent<br />
is highly toxic!) and mix by agitating. A positive result is a blue-green color or dark precipitate, while a<br />
negative result is a yellow-orange solution or precipitate with no dark-colored precipitate (Figure 6.58).<br />
Water works better than acetone to rinse chromium reagents into the waste beaker, although some time<br />
needs to be allowed for dissolution of the Cr 3+ species.<br />
Figure 6.58: a) Chromic acid results (left to right): t-butanol (3˚, negative), 1-propanol (1˚, positive), 2-propanol (2˚, positive),<br />
benzaldehyde (positive), b) Immediate reaction of benzaldehyde, c) Benzaldehyde reaction after 1 minute.<br />
10 The chromic acid reagent is prepared as follows: 25.0 g of chromium(VI) oxide is added to 25 mL concentrated sulfuric acid,<br />
which is then added in portions to 75 mL of water. The reagent has a very long shelf life (10 + years).<br />
<strong>Organic</strong> <strong>Chemistry</strong> <strong>Laboratory</strong> <strong>Techniques</strong> | Nichols | Page 349
6.4.D.6 2,4-DNPH (BRADY’S) TEST<br />
A solution of 2,4-dinitrophenylhydrazine (2,4-DNPH) in ethanol is a test for aldehydes or ketones (Figure<br />
6.59). Most aldehydes or ketones will react with the orange reagent to give a red, orange, or yellow<br />
precipitate. Esters and other carbonyl compounds are generally not reactive enough to give a positive result<br />
for this test.<br />
The color of the precipitate may give evidence for the amount of conjugation present in the original<br />
carbonyl: an orange precipitate forms for non-conjugated carbonyls (Figure 6.60c shows the result for 2-<br />
butanone), and a red precipitate forms for conjugated carbonyls (Figure 6.60d shows the result for<br />
cinnamaldehyde).<br />
O 2 N NO 2<br />
O 2 N NO 2<br />
O<br />
R H<br />
Aldehyde<br />
O 2 N NO 2<br />
H 2 SO 4<br />
HN<br />
HN<br />
R N<br />
NH 2<br />
2,4-DNPH<br />
H<br />
brightly colored<br />
ppt<br />
O<br />
R R'<br />
Ketone<br />
O 2 N NO 2<br />
H 2 SO 4<br />
HN<br />
NH 2 2,4-DNPH<br />
R<br />
R'<br />
HN<br />
N<br />
brightly colored<br />
ppt<br />
Figure 6.59: Reaction of an aldehyde and ketone with 2,4-DNPH.<br />
Procedure: Add 3 drops of sample to a small test tube (13 × 100 mm), or dissolve 10 mg of solid sample<br />
in a minimal amount of ethanol in the test tube. While wearing gloves, add about 1 mL of the orange 2,4-<br />
DNPH reagent 11 (safety note: the reagent is highly toxic!) and mix the test tube by agitating.<br />
A positive result is the immediate formation of a large amount of brightly colored precipitate (red, orange,<br />
or yellow). A negative result is the absence of this precipitate and a transparent yellow-orange solution<br />
(Figure 6.60).<br />
Figure 6.60: a) 2,4-DNPH results for (left to right) ethyl acetate (negative), 2-butanone (positive), benzaldehyde (positive),<br />
cinnamaldehyde (positive), b) Negative result, c) Positive result from a non-conjugated carbonyl, d) Positive result from a<br />
conjugated carbonyl.<br />
11 Preparation of the 2,4-DNPH reagent, as published in B. Ruekberg, J. Chem. Ed, 2005, 82(9), p. A1310, is as follows: To a dry<br />
125 mL Erlenmeyer flask is added 3 g 2,4-dinitrophenylhydrazine, 20 mL water and 70 mL of 95% ethanol. The solution is cooled<br />
in an ice bath with stirring, and when at 10 ˚C, 15 mL of concentrated sulfuric acid is added slowly in portions. If the temperature<br />
exceeds 20 ˚C during the addition, the solution should be allowed to cool to 10 ˚C before continuing. The solution is then warmed<br />
to 60 ˚C with stirring, and if solids remain, they are filtered. Finally, the solution is cooled.<br />
<strong>Organic</strong> <strong>Chemistry</strong> <strong>Laboratory</strong> <strong>Techniques</strong> | Nichols | Page 350
6.4.D.7 FERRIC HYDROXAMATE TEST<br />
The ferric hydroxamate procedure is a probe for the ester functional group. Esters heated with<br />
hydroxylamine produce hydroxamic acids, which form intense, colored complexes (often dark maroon)<br />
with Fe 3+ . A possible structure of these complexes is shown in Figure 6.61. This test is related to the phenol<br />
test, and as in that test, compounds with high enolic character can give a colored complex with Fe 3+ .<br />
Therefore, a preliminary test is performed to see if the carbonyl compound being tested produces enough<br />
enol to form a colored complex with Fe 3+ , which would lead to a false positive result.<br />
R<br />
O<br />
OR'<br />
R<br />
HN<br />
3+<br />
H O O<br />
OH - O<br />
+ NH 2 OH<br />
OH FeCl 3<br />
H<br />
Fe<br />
R N<br />
O<br />
O<br />
colored<br />
H<br />
R<br />
complex<br />
NH<br />
hydroxylamine hydroxamic acid<br />
HN O O<br />
H R<br />
Figure 6.61: Reaction of ester with hydroxamic acid.<br />
Procedure: Perform a preliminary test to be sure that this test will not give a false positive. Add the<br />
following to a small test tube (13 × 100 mm): 1 mL ethanol, 2 drops or 20 mg of your sample, 1 mL of 1<br />
M HCl (aq), and 2 drops of 5% FeCl 3 (aq) solution. If the solution is clear or yellow (the color of the FeCl 3 ,<br />
Figure 6.62a), this test will work and not produce a false positive (continue on). If a definite color other<br />
than yellow appears, this test will not work for your sample, as it forms a colored complex with Fe 3+ even<br />
without hydroxylamine.<br />
Into a clean medium sized test tube (18 × 150 mm), add 1 mL of 0.5 M aqueous hydroxylamine<br />
hydrochloride (NH 2 OH·HCl), 0.5 mL of 6 M NaOH (aq), and 5 drops or 50 mg of sample. Heat the mixture<br />
in a boiling water bath for about 3 minutes (the volume will reduce by about half, Figure 6.62b).<br />
Quickly cool the solution by immersing it in a tap water bath, then add 2 mL of 1 M HCl (aq). If the<br />
solution becomes cloudy, add enough ethanol to clarify it. Then add 6-10 drops of a yellow 5% FeCl 3 (aq)<br />
solution. Vigorously mix the tube.<br />
A positive result is a deep burgundy, umber, or magenta color (red/brown) while a negative result is any<br />
other color (Figures 6.62 c+d). Note: use water to rinse out the test tubes, and if a red result won’t easily<br />
clean up, add a few drops of 6 M HCl.<br />
Figure 6.62: a) Preliminary procedure to be sure the test will not give a false positive, b) Heating the solution, c) Negative result<br />
(2-pentanone), d) Positive result (ethyl acetate).<br />
<strong>Organic</strong> <strong>Chemistry</strong> <strong>Laboratory</strong> <strong>Techniques</strong> | Nichols | Page 351
6.4.D.8 IODOFORM TEST<br />
A solution of iodine (I 2 ) and iodide (I – ) in NaOH can be used to test for methyl ketones or 2˚ alcohols<br />
adjacent to a methyl group. This is a very specific test that will give a positive result (formation of a canary<br />
yellow precipitate) only for compounds with the structure RCH(OH)CH 3 or RC=OCH 3 (Figure 6.63). It<br />
does not work for all alcohols or ketones, and does not work well for water-insoluble compounds.<br />
OH<br />
R CH 3<br />
or<br />
O<br />
R CH 3<br />
I 2 , KI<br />
NaOH<br />
O<br />
R CI 3<br />
OH –<br />
R<br />
O<br />
O<br />
+ CHI 3 (s)<br />
Iodoform<br />
(Yellow ppt)<br />
Figure 6.63: Reaction of secondary alcohol or methyl ketone with the iodoform reagent.<br />
Procedure: Add 10 drops sample to a small test tube (13 × 100 mm) or 0.10 g sample dissolved in the<br />
minimal amount of 1,2-dimethoxyethane followed by 1 mL of 10% NaOH (aq). Next add 10 drops of the<br />
dark brown iodoform reagent 12 (I 2 / KI solution) and vigorously mix the test tube by agitating.<br />
A positive result is a cloudy yellow solution, or a yellow precipitate. A negative result is a clear, yellow,<br />
or orange solution with no precipitate (Figure 6.64).<br />
If the sample is not water soluble, a small organic layer separate from the solution may be seen (it will<br />
likely be on top). This layer may become dark yellow or brown from dissolving the iodine. Vigorously mix<br />
the tube to encourage a reaction, but if the darkened organic layer remains and no precipitate forms, this is<br />
still a negative result (Figure 6.64d).<br />
Note: a false positive result may occur if the test tube was cleaned with acetone before use, and residual<br />
acetone remained in the tube.<br />
Figure 6.64: a) Iodoform results (left to right): 1-propanol, 2-propanol, acetone, 1-octanol, b) Negative result, c) Positive result, d)<br />
Negative result when the sample is insoluble in the reagent.<br />
12 Preparation of the iodoform reagent is as follows: 10 g KI and 5 g I2 is dissolved in 100 mL water.<br />
<strong>Organic</strong> <strong>Chemistry</strong> <strong>Laboratory</strong> <strong>Techniques</strong> | Nichols | Page 352
6.4.D.9 LUCAS TEST<br />
The Lucas Reagent (concentrated HCl and ZnCl 2 ) is a test for some alcohols. Alcohols can react through<br />
an S N 1 mechanism to produce alkyl halides that are insoluble in the aqueous solution and appear as a white<br />
precipitate or cloudiness. The test cannot be used for water-insoluble alcohols (generally > 5 carbon atoms),<br />
as they may produce a cloudiness or second layer regardless if any reaction occurred or not.<br />
2˚ or 3˚ ROH + HCl / ZnCl 2 RCl (s)<br />
As the mechanism is S N 1, a 3˚ alcohol should react immediately, a 2˚ alcohol should react more slowly<br />
(perhaps in 5 minutes if at all) and 1˚ alcohols often don’t react at all. Benzylic alcohols (Ph-C-OH), allylic<br />
alcohols (C=C-C-OH) and propargylic alcohols (CC-C-OH) often give immediate results just like 3˚<br />
alcohols.<br />
Procedure: Place 2 mL of the Lucas reagent 13 (safety note: the reagent is highly acidic and corrosive!)<br />
into a small test tube (13 × 100 mm). Add 10 drops of sample, and mix by agitating the test tube.<br />
A positive result is a white cloudiness within 5 minutes or a new organic layer (RCl) formation on the top. 14<br />
A negative result is the absence of any cloudiness or only one layer (Figure 6.65).<br />
Figure 6.65: a) Lucas test results (left to right): 1-propanol (1˚, negative), 2-propanol (2˚, negative), t-butanol (3˚, positive), benzyl<br />
alcohol (benzylic, positive), b) Negative result, c) Positive result.<br />
13 Preparation of the Lucas reagent is as follows: 160 g of fresh anhydrous ZnCl2 is dissolved in 100 mL of cold concentrated HCl.<br />
14 Although chlorinated organics are typically denser than water, the Lucas reagent has a high quantity of solute, and chlorinated<br />
compounds tend to be less dense than the reagent.<br />
<strong>Organic</strong> <strong>Chemistry</strong> <strong>Laboratory</strong> <strong>Techniques</strong> | Nichols | Page 353
6.4.D.10 PERMANGANATE (BAEYER) TEST<br />
A potassium permanganate (KMnO 4 ) solution is a test for unsaturation (alkenes and alkynes) or functional<br />
groups that can be oxidized (aldehydes and some alcohols, Figure 6.66). The permanganate ion (MnO 4 – )<br />
is a deep purple color, and upon reduction converts to a brown precipitate (MnO 2 ). Permanganate cannot<br />
react with aromatics, so is a good test to discern between alkenes and aromatics. A positive reaction with<br />
alcohols is not always dependable (a negative result is seen with benzyl alcohol in Figure 6.67).<br />
R<br />
R<br />
KMnO 4 (aq)<br />
purple<br />
R<br />
OH<br />
OH<br />
R<br />
MnO 2<br />
brown ppt<br />
R<br />
O<br />
H<br />
KMnO 4 (aq)<br />
R<br />
O<br />
OH<br />
Figure 6.66: Reaction of an alkene and aldehyde with permanganate ion.<br />
Procedure: Dissolve 4 drops or 40 mg of sample in 1 mL of ethanol (or 1,2-dimethoxyethane) in a small<br />
test tube (13 × 100 mm). While wearing gloves, add 3 drops of the deep purple 1% KMnO 4 (aq) solution<br />
to the test tube (safety note: reagent is corrosive and will stain skin brown!). Mix the test tube with agitation,<br />
and allow it to sit for 1 minute. A positive result is the appearance of a brown color or precipitate. A<br />
negative result is a deep purple color with no precipitate (unreacted KMnO 4 , Figure 6.67).<br />
Figure 6.67: a) Baeyer test results for (left to right) ethyl benzene (negative), 1-hexene (positive), isobutyraldehyde (positive),<br />
benzyl alcohol (mostly negative), b) Negative result, c+d) Positive results.<br />
<strong>Organic</strong> <strong>Chemistry</strong> <strong>Laboratory</strong> <strong>Techniques</strong> | Nichols | Page 354
6.4.D.11 pH TEST<br />
Carboxylic acids and sulfonic acids produce acidic aqueous solutions (Figure 6.68a), which can be<br />
confirmed by turning blue litmus paper pink. The paper changes color (Figure 6.68c) as the indicator<br />
molecules react in the lowered pH and form a structure that has a different color.<br />
Figure 6.68: a) Reaction of carboxylic acid with water to produce a slightly acidic solution, b) Results of a negative pH test, c)<br />
Results of a positive pH test.<br />
Procedure: Dissolve 3 drops or 30 mg of sample in 1 mL of water. Dip a glass stirring rod into the solution<br />
and touch the rod to blue litmus paper. A positive result is a pink or red color on the litmus paper (Figure<br />
6.68c). If the sample doesn’t dissolve in water, instead dissolve the same amount of unknown in 1 mL of<br />
ethanol. Add enough water to make the solution barely cloudy. Then add a few drops of ethanol to turn<br />
the solution clear again, and test with the litmus paper.<br />
<strong>Organic</strong> <strong>Chemistry</strong> <strong>Laboratory</strong> <strong>Techniques</strong> | Nichols | Page 355
6.4.D.12 PHENOL TEST<br />
A ferric chloride solution is a test for phenols, as they form intensely<br />
colored complexes with Fe 3+ (often dark blue). The actual structure<br />
of these complexes is debated, 15 but may be of the general form in<br />
Figure 6.69. Some carbonyl compounds with high enol content can<br />
give false positives with this test.<br />
Fe 3+ Fe(OH 2 ) 3+ 6<br />
PhO OPh<br />
OPh<br />
O<br />
PhO =<br />
Figure 6.69: Proposed structure of color<br />
complex of Fe 3+ with phenol.<br />
Procedure: Place 1 mL water in a small test tube (13 × 100 mm) along with either 3 drops or 30 mg of<br />
sample. Add 3 drops of the yellow 5% FeCl 3 (aq) solution, and mix by agitating.<br />
A positive result is an intense blue, purple, red, or green color while a negative result is a yellow color (the<br />
original color of the FeCl 3 solution, Figure 6.70).<br />
Figure 6.70: a) Phenol test results (left to right) lactic acid (negative), p-cresol (positive), pyrogallol (positive), b) Negative result,<br />
c) Positive result (typical color), d) Positive result (less common color, by pyrogallol, a bidentate ligand).<br />
15 See Nature, 24 June 1950, 165, 1012.<br />
PhO<br />
OPh<br />
OPh<br />
<strong>Organic</strong> <strong>Chemistry</strong> <strong>Laboratory</strong> <strong>Techniques</strong> | Nichols | Page 356
6.4.D.13 SILVER NITRATE TEST<br />
A dilute solution of silver nitrate in ethanol is a test for some alkyl halides. Silver has a high affinity for<br />
halogens (forms strong AgX ionic bonds), and so encourages an S N 1 mechanism. For this reason, 3˚ alkyl<br />
halides react faster than 2˚ alkyl halides (which may or may not react, even with heating), and 1˚ alkyl<br />
halides or aromatic halides give no reaction. Benzylic (PhCH 2 X) and allylic (CH 2 =CHCH 2 X) alkyl halides<br />
will also give a fast reaction. A positive test result is the formation of the insoluble AgX (Figure 6.71).<br />
AgCl and AgBr are white solids, while AgI is a yellow solid.<br />
X AgNO 3 AgX (s) CH 3 CH 2 OH OCH 2 CH 3<br />
white/yellow solid<br />
Figure 6.71: Reaction of alkyl halides with the silver nitrate solution.<br />
Procedure: In a small test tube (13 × 100 mm), add 2 mL of 1% AgNO 3 in ethanol solution. Add 4 drops<br />
of liquid sample or 40 mg of solid dissolved in the minimal amount of ethanol. Mix the test tube by agitating.<br />
Some compounds will have an initial insolubility when first mixed, but the solid often dissolves with<br />
swirling. A positive result is a sustaining white or yellow cloudiness. If cloudiness does not occur within<br />
5 minutes, heat the tube in a 100 ˚C water bath for 1 minute (Figure 6.72b). Absence of cloudiness even at<br />
100 ˚C is a negative result (Figures 6.72 + 6.73).<br />
Figure 6.72: a) Silver nitrate results at room temperature, (left to right) 1-chlorobutane (1˚, negative), 2-chlorobutane (2˚, negative),<br />
2-chloro-2-methylpropane (3˚, positive), b) Boiling water bath, c) Results after boiling water, middle tube is faintly cloudy (2˚,<br />
positive).<br />
For reactions that produce an intense precipitate, the solution may also turn blue litmus paper pink (Figures<br />
6.73 c+d). An analysis of the reaction mechanism can explain the source of this acidity.<br />
Figure 6.73: a) Negative result, b) Positive result, c) Litmus test on a negative AgNO 3 test, d) Litmus test (acidic) on a positive<br />
AgNO 3 test.<br />
<strong>Organic</strong> <strong>Chemistry</strong> <strong>Laboratory</strong> <strong>Techniques</strong> | Nichols | Page 357
6.4.D.14 SODIUM IODIDE (FINKELSTEIN) TEST<br />
A solution of sodium iodide in acetone is a test for some alkyl chlorides and bromides. The mechanism is<br />
largely S N 2, so 1˚ alkyl halides react faster than 2˚ alkyl halides, and 3˚ alkyl halides generally give no<br />
reaction. The reaction is driven by the precipitation of the NaCl or NaBr in the acetone solvent. Therefore,<br />
a positive test result is the appearance of a white cloudiness (NaX solid).<br />
CH 3 CH 2 X + NaI (acetone) CH 3 CH 2 I + NaX (s)<br />
white solid<br />
(X = Cl, Br)<br />
Procedure: In a small test tube (13 × 100 mm), add 2 mL of 15% NaI in acetone solution. 16 Add 4 drops<br />
of liquid sample or 40 mg of solid dissolved in the minimal amount of ethanol. Mix the test tube by agitating.<br />
A positive result is a sustaining white cloudiness. If cloudiness does not occur within 5 min, heat the tube<br />
in a 50 ˚C water bath for 1 minute. Absence of cloudiness even at 50 ˚C is a negative reaction (Figure 6.74<br />
+ 6.75).<br />
Figure 6.74: Sodium iodide results at room temperature, (left to right) 1-chlorobutane (1˚, positive), 2-chlorobutane (2˚, negative),<br />
2-chloro-2-methylpropane (3˚, negative), b) Heating in a warm water bath, using a thermometer to monitor the temperature, c)<br />
Results after the warm water bath water, resulting in the clouding of the middle tube (2˚, positive).<br />
Figure 6.75: a) Positive result (1˚ alkyl halide), b) Positive result after heating in a 50 ˚C water bath (2˚), c) Negative result (3˚).<br />
16 This solution often has a yellow tint to it.<br />
<strong>Organic</strong> <strong>Chemistry</strong> <strong>Laboratory</strong> <strong>Techniques</strong> | Nichols | Page 358
6.4.D.15 TOLLENS TEST<br />
The Tollens reagent (Ag(NH 3 ) 2 + ) is a mild oxidizing agent that can oxidize aldehydes, but not alcohols or<br />
other carbonyl compounds. A positive test result is the formation of elemental silver (Figure 6.76), which<br />
precipitates out as a “silver mirror” on the test tube, or as a black colloidal precipitate.<br />
R<br />
O Ag(NH 3 ) 2<br />
+<br />
H<br />
R<br />
O<br />
O<br />
+ Ag (s)<br />
OH - <strong>Organic</strong> <strong>Chemistry</strong> <strong>Laboratory</strong> <strong>Techniques</strong> | Nichols | Page 359<br />
Silver mirror<br />
Figure 6.76: Reaction of an aldehyde with the Tollens reagent.<br />
Procedure: While wearing gloves, mix 1 mL of 5% AgNO 3 (aq) (safety note: toxic!) with 1 mL of 10%<br />
NaOH (aq) in a medium-sized test tube (18 × 150 mm). A dark precipitate of silver oxide will form (Figure<br />
6.77b). Add dropwise enough 10% NH 4 OH (aq) to just dissolve the precipitate (note some time should be<br />
allowed in between additions). This solution is now the Tollens reagent Ag(NH 3 ) 2 + (Figure 6.77c).<br />
Dissolve 3 drops or 30 mg of sample in a few drops of diethyl ether (omit solvent if compound is water<br />
soluble). Add this solution to the 2-3 mL of previously prepared Tollens reagent. Mix the test tubes by<br />
agitating. A positive result is a silver mirror on the edges of the test tube, or formation of a black precipitate.<br />
A negative result is a clear solution (Figures 6.77d + 6.78).<br />
Clean-up: The reagent may form a very explosive substance (silver fulminate) over time, so the test should<br />
be immediately cleaned up. Acidify the solution with 5% HCl (aq), then dispose in a waste beaker. A<br />
silver mirror can be removed from the glassware by adding a small amount of 6 M HNO 3 (aq).<br />
Figure 6.77: a) Silver nitrate solution, b) Ag 2 O precipitate formed after addition of NaOH, c) Clarified solution after the addition<br />
of ammonium hydroxide, d) Tollens test results: (left to right) 2-pentanone (negative), isobutyraldehyde, benzaldehyde (positive).<br />
Figure 6.78: a) Negative result, b+c) Positive results.
<strong>Organic</strong> <strong>Chemistry</strong> <strong>Laboratory</strong> <strong>Techniques</strong> | Nichols | Page 360
CHAPTER 7<br />
SUMMARIES<br />
7.1 Flame-Drying Glassware 362 7.15 Single Extraction 376<br />
7.2 Using Calibrated Glass Pipettes 363 7.16 Multiple Extraction 377<br />
7.3 Inert Atmospheric Methods 364 7.17 Microscale Extraction 378<br />
7.4 Reflux 365 7.18 Testing the pH After a Wash 379<br />
7.5 Suction Filtration 366 7.19 Using Drying Agents 380<br />
7.6 Hot Filtration 367 7.20 Acid-Base Extraction 381<br />
7.7 Thin Layer Chromatography 368 7.21 Simple Distillation 382<br />
7.8 TLC Visualization Methods 369 7.22 Fractional Distillation 383<br />
7.9 Macroscale Column<br />
Chromatography<br />
370 7.23 Vacuum Distillation 384<br />
7.10 Pipette Column Chromatography 371 7.24 Steam Distillation 385<br />
7.11 Testing Solvents for Crystallization 372 7.25 Rotary Evaporation 386<br />
7.12 Testing Mixed Solvents for<br />
Crystallization<br />
373 7.26 Melting Points 387<br />
7.13 Single Solvent Crystallization 374 7.27 Boiling Points (Thiele Tube) 388<br />
7.14 Mixed Solvent Crystallization 375 7.28 Vacuum Sublimation 389<br />
<strong>Organic</strong> <strong>Chemistry</strong> <strong>Laboratory</strong> <strong>Techniques</strong> | Nichols | Page 361
CHAPTER 7: TECHNIQUE SUMMARIES<br />
The following summary sheets are not intended as a substitute for reading the sections on each technique.<br />
The purpose of these summary sheets is to review the main points for students who have already read the<br />
sections. They can also be useful for students who have previously performed these techniques (earlier in<br />
a semester or in recent years) and wish to remind themselves about minor details.<br />
7.1 FLAME DRYING GLASSWARE<br />
Clamp the flask to be<br />
dried (and stir bar if<br />
using) to a ring stand or<br />
latticework with an<br />
extension clamp.<br />
Remove any vinyl<br />
sleeves on the clamps<br />
as they will catch on<br />
fire.<br />
Heat the flask with a<br />
Bunsen burner or heat<br />
gun for several minutes<br />
until all the fog is<br />
removed and glassware<br />
is scorching hot.<br />
Handle hot glassware<br />
with thick gloves.<br />
Cool in a water-free<br />
environment (in a<br />
desiccator, under a<br />
stream of inert gas, or<br />
with a drying tube).<br />
Table 7.1: Procedural summary for flame drying glassware.<br />
<strong>Organic</strong> <strong>Chemistry</strong> <strong>Laboratory</strong> <strong>Techniques</strong> | Nichols | Page 362
7.2 USING CALIBRATED GLASS PIPETTES<br />
Place pipette tip in<br />
reagent bottle, squeeze<br />
pipette bulb, and<br />
connect to the pipette.<br />
Partially release your<br />
hand to create suction.<br />
Do not let go<br />
completely or liquid<br />
will withdraw forcibly<br />
and possibly into the<br />
bulb.<br />
Apply suction until<br />
liquid is withdrawn to<br />
just past the desired<br />
mark.<br />
Remove the pipette bulb<br />
and place your finger<br />
atop the pipette.<br />
Allow tiny amounts of<br />
air to be let into the top<br />
of the pipette by<br />
wiggling your finger or<br />
a slight release of<br />
pressure.<br />
Drain the liquid to the<br />
desired mark.<br />
Tightly hold the pipette<br />
with your finger, bring<br />
it to the transfer flask<br />
and deliver the reagent<br />
to the desired mark.<br />
Touch the pipette to the<br />
side of the container to<br />
dislodge the drip at the<br />
end of the pipette.<br />
If a pipette is drained to<br />
the tip,<br />
•<br />
To-deliver (T.D.)<br />
pipettes and<br />
volumetric pipettes<br />
should not be<br />
blown out.<br />
Note: If pipette is wet<br />
with a different solution<br />
before use, obtain a<br />
fresh one or “condition”<br />
the pipette with two<br />
rinses of the reagent.<br />
•<br />
To-contain (T.C.)<br />
pipettes should be<br />
“blown out”<br />
Table 7.2: Procedural summary for using calibrated glass pipettes.<br />
<strong>Organic</strong> <strong>Chemistry</strong> <strong>Laboratory</strong> <strong>Techniques</strong> | Nichols | Page 363
7.3 INERT ATMOSPHERIC METHODS<br />
Prepare the balloon<br />
Fill a balloon with an<br />
inert gas (nitrogen or<br />
argon) to 7 – 8 inches in<br />
diameter.<br />
Twist the balloon to<br />
prevent gas from<br />
escaping, then attach a<br />
needle and insert into a<br />
rubber stopper to plug.<br />
Prepare the reaction<br />
flask<br />
Flame or oven dry a<br />
reaction flask (with stir<br />
bar), and fold a rubber<br />
septum over the joint<br />
while wearing thick<br />
gloves.<br />
Clamp the hot flask to<br />
the ring stand or<br />
latticework and insert the<br />
balloon of inert gas.<br />
Insert an “exit needle”<br />
and allow the flask to<br />
flush for ~5 minutes (to<br />
displace the air).<br />
Remove the exit needle<br />
and allow the flask to<br />
cool.<br />
Prepare the syringe<br />
Obtain a needle from the<br />
hot oven and screw it<br />
into the tip of a freshly<br />
opened plastic syringe.<br />
Wrap the needle /<br />
syringe joint with Teflon<br />
tape or Parafilm.<br />
Flush the syringe with<br />
inert gas by using an<br />
empty flask attached to a<br />
balloon of inert gas.<br />
Withdraw a volume of<br />
gas and expunge into the<br />
air.<br />
Insert the needle tip into<br />
a rubber stopper to plug.<br />
Withdraw the reagent<br />
Use the prepared syringe to<br />
slowly withdraw some<br />
reagent (or air may enter<br />
the syringe).<br />
Push out the gas bubble.<br />
Withdraw reagent to a<br />
slightly greater volume than<br />
needed, then expunge<br />
liquid to the exact volume.<br />
Place the needle in the<br />
headspace of the bottle and<br />
withdraw an “inert gas<br />
buffer,” ~20% of the<br />
volume of the syringe.<br />
Insert the needle into a<br />
rubber stopper for<br />
transport.<br />
Deliver the reagent<br />
Into the reaction flask<br />
(with inert gas balloon),<br />
deliver first the inert gas<br />
buffer, then the airsensitive<br />
reagent.<br />
Don’t push out the<br />
residual liquid.<br />
Withdraw an inert gas<br />
buffer into the mostly<br />
empty syringe.<br />
Clean by rinsing with<br />
two portions (few mL<br />
each) of solvent (similar<br />
to reagent solvent), then<br />
one portion of water and<br />
two portions of acetone.<br />
inert gas<br />
buffer<br />
reactive<br />
reagent<br />
Table 7.3: Procedural summary for inert atmospheric methods.<br />
<strong>Organic</strong> <strong>Chemistry</strong> <strong>Laboratory</strong> <strong>Techniques</strong> | Nichols | Page 364
7.4 REFLUX<br />
Pour liquid into the<br />
flask along with a stir<br />
bar or boiling stones.<br />
Use an extension clamp<br />
on the round bottomed<br />
flask to connect to the<br />
ring stand or<br />
latticework.<br />
Attach the condenser,<br />
and connect the hoses<br />
so that water travels<br />
against gravity (cooling<br />
water comes into the<br />
bottom and drains out<br />
the top).<br />
Circulate water through<br />
the condenser, then<br />
begin heating the flask<br />
(by using a heating<br />
mantle, sand, water, or<br />
oil bath).<br />
Use an adjustable<br />
platform so the heat can<br />
be lowered and<br />
removed at the end of<br />
the reflux, or if<br />
something unexpected<br />
occurs.<br />
Heat so that the “reflux<br />
ring” is seen in the<br />
lower third of the<br />
condenser.<br />
Turn down the heat if<br />
the refluxing vapors<br />
reach higher than<br />
halfway up the<br />
condenser.<br />
At the end of the reflux<br />
period, lower the heat<br />
source from the flask or<br />
raise the apparatus.<br />
Keep circulating water<br />
in the condenser until<br />
the flask is just warm to<br />
the touch.<br />
After air cooling<br />
somewhat, the flask can<br />
be quickly cooled by<br />
immersing in a<br />
container of tap water.<br />
Be sure there is a secure<br />
connection between the<br />
round bottomed flask<br />
and condenser, as<br />
vapors escaping this<br />
joint have the potential<br />
to catch on fire.<br />
Table 7.4: Procedural summary for reflux.<br />
<strong>Organic</strong> <strong>Chemistry</strong> <strong>Laboratory</strong> <strong>Techniques</strong> | Nichols | Page 365
7.5 SUCTION FILTRATION<br />
Figure 7.1: Suction filtration vacuum trap apparatus.<br />
Clamp a side-armed<br />
Erlenmeyer flask.<br />
Connect thick-walled<br />
hosing from the side arm<br />
to a vacuum trap and the<br />
water aspirator.<br />
Place a vacuum sleeve on<br />
the Buchner (or Hirsch)<br />
funnel, then filter paper<br />
on the funnel so it arches<br />
downward.<br />
Turn on the aspirator.<br />
Add a few mL of the<br />
same solvent used in the<br />
flask to wet the filter.<br />
The solvent should drain<br />
with suction.<br />
Swirl the mixture to be<br />
filtered to dislodge the<br />
solid from the sides of<br />
flask.<br />
With a quick motion,<br />
pour the slurry into the<br />
funnel in portions.<br />
In some applications<br />
(e.g. crystallization),<br />
rinse with solvent:<br />
• Open the apparatus to<br />
the atmosphere, then<br />
turn off the aspirator.<br />
• Add a few mL of cold<br />
solvent to the filter<br />
paper.<br />
• Delicately swirl the<br />
solid in the solvent<br />
with a glass rod.<br />
Apply suction again for a<br />
few minutes (repeat the<br />
rinse step if necessary).<br />
Dry the solid on a watch<br />
glass along with the filter<br />
paper, overnight if<br />
possible. The solid will<br />
flake off the paper when<br />
dried.<br />
Table 7.5: Procedural summary for suction filtration.<br />
<strong>Organic</strong> <strong>Chemistry</strong> <strong>Laboratory</strong> <strong>Techniques</strong> | Nichols | Page 366
7.6 HOT FILTRATION<br />
Prepare a fluted filter<br />
paper and stemless or<br />
short-stemmed funnel<br />
clamped above the filter<br />
flask.<br />
Pour a few mL of<br />
solvent through the<br />
funnel, and allow the<br />
solvent to boil and get<br />
the funnel hot.<br />
When the mixture to be<br />
filtered is boiling, pour<br />
the mixture into the<br />
funnel in portions,<br />
returning it to the heat<br />
source in between<br />
additions.<br />
Rinse the filter paper<br />
with hot solvent if<br />
crystals are seen on the<br />
paper.<br />
Table 7.6: Procedural summary for hot filtration.<br />
<strong>Organic</strong> <strong>Chemistry</strong> <strong>Laboratory</strong> <strong>Techniques</strong> | Nichols | Page 367
7.7 THIN LAYER CHROMATOGRAPHY (TLC)<br />
Place a small portion of<br />
solvent (5-10 mL for<br />
this chamber) into a<br />
TLC chamber with lid,<br />
along with a cut piece<br />
of filter paper.<br />
Dissolve liquid or solid<br />
samples (1 drop per ~1<br />
mL solvent) using a low<br />
boiling solvent (e.g.<br />
acetone or<br />
dichloromethane).<br />
Draw a pencil line on a<br />
TLC plate ~1 cm from<br />
the bottom with a ruler,<br />
and mark the lanes.<br />
Don’t put lanes too<br />
close to the edge or to<br />
each other.<br />
Place the sample in the<br />
TLC chamber with<br />
forceps, cap it, and<br />
leave it alone.<br />
Remove the plate when<br />
the solvent line is ~0.5<br />
cm from the top.<br />
Spot a dilute sample on<br />
the pencil line of the<br />
correct lane, making<br />
very small spots (2 mm<br />
in diameter).<br />
Immediately mark the<br />
solvent line with a<br />
pencil.<br />
Visualize if necessary.<br />
Rinse the spotter with a<br />
solvent (e.g. acetone) if<br />
going to use it for<br />
another sample.<br />
Table 7.7: Procedural summary for thin layer chromatography.<br />
<strong>Organic</strong> <strong>Chemistry</strong> <strong>Laboratory</strong> <strong>Techniques</strong> | Nichols | Page 368
7.8 TLC VISUALIZATION METHODS<br />
Ultraviolet Light:<br />
Iodine:<br />
Chemical Stains:<br />
Press the short-waved<br />
button on a UV lamp<br />
positioned on a tilt over<br />
the TLC plate.<br />
Alternatively view the<br />
TLC plate inside a box<br />
designed to protect your<br />
eyes from UV damage.<br />
The TLC plate will<br />
fluoresce green and<br />
spots will be dark.<br />
Circle the spots with a<br />
pencil.<br />
Further visualize with<br />
another method if<br />
desired.<br />
In the fume hood, place<br />
the TLC plate in a jar<br />
containing a few<br />
crystals of iodine (or<br />
alternatively iodine<br />
with silica). Close the<br />
lid.<br />
If using the iodine-silica<br />
powder, submerge the<br />
plate under the powder<br />
for a few minutes.<br />
Spots will appear<br />
yellow-brown.<br />
Remove the plate and<br />
circle the spots as they<br />
will fade rather quickly.<br />
Wear gloves and work<br />
in the fume hood as<br />
many stains are highly<br />
acidic or oxidative.<br />
Hold a TLC plate with<br />
forceps and quickly dip<br />
the plate into and out of<br />
the stain jar to cover the<br />
area where solvent<br />
traveled.<br />
Let excess stain drip<br />
off, then wipe residue<br />
off the back with a<br />
paper towel.<br />
Wave a heat gun set to<br />
“high” (at first) back<br />
and forth over the top of<br />
the TLC plate until<br />
spots appear.<br />
Turn the heat gun down<br />
to “low” if charring<br />
begins on the plate.<br />
Further visualization is<br />
not possible after a TLC<br />
plate has been stained.<br />
Table 7.8: Procedural summary for TLC visualization methods.<br />
<strong>Organic</strong> <strong>Chemistry</strong> <strong>Laboratory</strong> <strong>Techniques</strong> | Nichols | Page 369
7.9 MACROSCALE COLUMN CHROMATOGRAPHY<br />
Make sure there is a frit<br />
or cotton plug in the<br />
bottom of the column.<br />
Fill the column with<br />
silica or alumina to 5-6<br />
inches in the fume hood.<br />
Pour the adsorbent into<br />
an Erlenmeyer flask and<br />
add eluent to make a<br />
pourable slurry.<br />
The eluent should give<br />
the desired component<br />
an R f of 0.35 by TLC.<br />
Pour in the slurry and<br />
immediately rinse the<br />
sides of the column with<br />
eluent and a pipette.<br />
Jostle the column to<br />
remove air bubbles.<br />
Use air pressure to pack<br />
the column. Keep it<br />
perfectly vertical.<br />
Add 0.5 cm of sand.<br />
Rinse the sand off the<br />
sides carefully with a<br />
swirling motion.<br />
Don’t disrupt the top<br />
surface of the silica or<br />
alumina with rinsing.<br />
Adjust the eluent level to<br />
the sand layer, and then<br />
add the sample (pure<br />
liquid, dissolved in<br />
CH 2 Cl 2 , or solid<br />
adsorbed onto a portion<br />
of silica).<br />
Rinse the sides and use<br />
air pressure to force the<br />
eluent down onto the<br />
silica / alumina layer.<br />
Fill the reservoir with<br />
eluent (carefully to not<br />
disrupt the top surface).<br />
Use steady air pressure<br />
to elute the column.<br />
Collect fractions in test<br />
tubes in a rack (keep in<br />
order).<br />
Rinse the column tip if a<br />
component has finished<br />
coming off the column.<br />
Possibly increase the<br />
eluent polarity to make<br />
components elute faster.<br />
Never allow the eluent<br />
to drop below the top of<br />
the adsorbent column.<br />
Use TLC to determine<br />
the purity of the<br />
fractions, and combine<br />
appropriate fractions.<br />
Remove the solvent with<br />
the rotary evaporator.<br />
Table 7.9: Procedural summary for macroscale column chromatography.<br />
<strong>Organic</strong> <strong>Chemistry</strong> <strong>Laboratory</strong> <strong>Techniques</strong> | Nichols | Page 370
7.10 PIPETTE COLUMN CHROMATOGRAPHY<br />
Wedge a bit of cotton<br />
into the bottom of a<br />
pipette.<br />
Use a scooping method<br />
to fill silica or alumina to<br />
2 - 2.5 inches high.<br />
Add a 0.5 cm layer of<br />
sand.<br />
Add eluent to the column<br />
and apply pressure with<br />
a pipette bulb to force<br />
eluent through the<br />
column to completely<br />
wet it.<br />
Remember to break the<br />
seal before letting go of<br />
the pipette bulb, or<br />
suction will ruin the<br />
column.<br />
Refill the column with<br />
eluent as necessary.<br />
Adjust the eluent level to<br />
the sand layer, and then<br />
delicately add the<br />
sample.<br />
Use pressure to push the<br />
eluent down onto the<br />
silica/ alumina layer.<br />
Rinse with one portion<br />
of eluent and push the<br />
solvent onto the column.<br />
Fill the pipette with<br />
eluent and apply pressure<br />
to elute the column.<br />
Collect liquid into test<br />
tubes.<br />
Always keep the white<br />
column section wet<br />
(refill whenever the<br />
eluent level nears the<br />
sand layer).<br />
Switch test tubes<br />
periodically (perhaps<br />
when they are 1 cm high<br />
in small test tubes) to<br />
collect different<br />
fractions.<br />
Keep fractions organized<br />
in a test tube rack in the<br />
order they are eluted.<br />
Use TLC to determine<br />
the purity of the<br />
fractions, and combine<br />
appropriate fractions.<br />
Remove the solvent with<br />
the rotary evaporator.<br />
Table 7.10: Procedural summary for pipette column chromatography.<br />
<strong>Organic</strong> <strong>Chemistry</strong> <strong>Laboratory</strong> <strong>Techniques</strong> | Nichols | Page 371
7.11 TESTING SOLVENTS FOR CRYSTALLIZATION<br />
Figure 7.2: Crystallization testing process.<br />
Room<br />
Temperature<br />
Stays solid:<br />
YES<br />
Boiling<br />
Temperature<br />
Dissolves:<br />
YES<br />
Room Temp,<br />
then in Ice<br />
Solid Forms:<br />
YES<br />
the solvent<br />
should work<br />
Dissolves:<br />
NO<br />
Stays solid:<br />
NO<br />
Stays dissolved:<br />
NO<br />
the solvent won't work<br />
Figure 7.3: Testing process flow-chart.<br />
Place 100 mg of the solid to be<br />
crystallized in a test tube and add<br />
3 mL solvent.<br />
Flick the tube to mix the<br />
contents.<br />
If the solid is soluble, the solvent<br />
will not work for crystallization.<br />
If the solid appears to be<br />
insoluble, the solvent may work.<br />
Bring the solid suspension to a<br />
boil on a steam bath or boiling<br />
water bath.<br />
If the solid dissolves when hot,<br />
the solvent may work for<br />
crystallization. If it remains<br />
insoluble when hot, the solvent<br />
will not work.<br />
Allow the hot solution to cool to<br />
room temperature (scratch the<br />
sides of the test tube to initiate<br />
crystallization if necessary).<br />
Place the solution in an ice bath<br />
for 10-20 minutes.<br />
If large quantities of crystals<br />
return when cool, the solvent<br />
should work for crystallization.<br />
If crystals do not return, the<br />
solvent will not work.<br />
Table 7.11: Procedural summary for testing solvents for crystallization.<br />
<strong>Organic</strong> <strong>Chemistry</strong> <strong>Laboratory</strong> <strong>Techniques</strong> | Nichols | Page 372
7.12 TESTING MIXED SOLVENTS FOR CRYSTALLIZATION<br />
"Insoluble<br />
solvent"<br />
"Soluble<br />
solvent"<br />
Add minimum<br />
amount of hot<br />
"soluble solvent"<br />
Add "insoluble<br />
solvent" dropwise<br />
until cloudy<br />
Add "soluble<br />
solvent" to<br />
clarify<br />
Cool<br />
dissolved<br />
cloudy<br />
dissolved<br />
Figure 7.4: Mixed solvent crystallization flow-chart.<br />
Use 100 mg solid and 3<br />
mL solvent to test the<br />
solubility of the<br />
compound.<br />
Find a miscible pair of<br />
solvents: one in which<br />
the compound is soluble<br />
(called the “soluble<br />
solvent”) and one in<br />
which the compound is<br />
insoluble (called the<br />
“insoluble solvent”).<br />
Place a fresh 100 mg of<br />
the solid to be<br />
crystallized in a test<br />
tube and add the<br />
“soluble solvent”<br />
dropwise with heating<br />
in a steam bath or hot<br />
water bath, until the<br />
solid just dissolves.<br />
Immerse the<br />
suspension in the heat<br />
after each addition, and<br />
allow time in between<br />
additions for the<br />
sometimes slow<br />
dissolving process.<br />
Add the “insoluble<br />
solvent” dropwise with<br />
heating until the<br />
solution becomes<br />
faintly cloudy.<br />
Add the “soluble<br />
solvent” dropwise with<br />
heating until the<br />
solution is clarified<br />
(clear).<br />
Allow the system to<br />
come to room<br />
temperature, then<br />
submerge in an ice bath<br />
for 10-20 minutes.<br />
If crystals return, the<br />
mixed solvent pair may<br />
work for the<br />
crystallization.<br />
Table 7.12: Procedural summary for testing mixed solvents for crystallization.<br />
<strong>Organic</strong> <strong>Chemistry</strong> <strong>Laboratory</strong> <strong>Techniques</strong> | Nichols | Page 373
7.13 SINGLE SOLVENT CRYSTALLIZATION<br />
1) Add minimum hot<br />
solvent to fully<br />
dissolve<br />
2) Slowly<br />
cool<br />
3) Cool in<br />
Ice Bath<br />
4) Suction<br />
Filtration<br />
impure solid<br />
Charcoal and/or<br />
Hot Filtration<br />
Figure 7.5: Single solvent crystallization flow-chart.<br />
Heat some solvent on a<br />
heat source to a boil<br />
(include boiling stones).<br />
To the impure solid in an<br />
Erlenmeyer flask, add a<br />
small portion of hot<br />
solvent.<br />
If a hot filtration step is<br />
expected, use boiling<br />
stones with the impure<br />
solid, or a boiling stick<br />
or stir bar if a filtration is<br />
not expected.<br />
Put both flasks on the<br />
heat source and bring to<br />
a boil.<br />
Add the minimum<br />
amount of boiling<br />
solvent needed to<br />
dissolve the impure<br />
solid, with swirling:<br />
For 100 mg – 1 g<br />
quantities, add 0.5 – 2<br />
mL solvent each time.<br />
For smaller scales, add<br />
solvent dropwise.<br />
Wait for each portion of<br />
solvent to come to a boil<br />
before adding more.<br />
Possibly use charcoal<br />
and hot filtration at this<br />
point if colored or<br />
insoluble impurities are<br />
present.<br />
When dissolved, remove<br />
the solution from the<br />
heat source and remove<br />
the boiling stick or stir<br />
bar if used. Allow the<br />
solution to slowly cool<br />
atop some paper towels,<br />
and with a small watch<br />
glass over the mouth of<br />
the Erlenmeyer.<br />
If a hint of cloudiness is<br />
seen in the solution, or if<br />
the solution has cooled a<br />
good deal without<br />
crystallizing, scratch<br />
with a glass stirring rod<br />
to initiate crystallization.<br />
A proper crystallization<br />
takes between 5-20<br />
minutes to complete.<br />
When the solution is at<br />
room temperature, place<br />
it in an ice bath for at<br />
least 10 minutes to<br />
maximize crystal<br />
formation.<br />
Also chill a rinse solvent<br />
in the ice bath.<br />
Collect the crystals by<br />
suction filtration.<br />
Table 7.13: Procedural summary for single solvent crystallization.<br />
<strong>Organic</strong> <strong>Chemistry</strong> <strong>Laboratory</strong> <strong>Techniques</strong> | Nichols | Page 374
7.14 MIXED SOLVENT CRYSTALLIZATION<br />
Find a miscible pair of<br />
solvents: one in which<br />
the desired compound<br />
is soluble (called the<br />
“soluble solvent”) and<br />
one in which the<br />
compound is insoluble<br />
(called the “insoluble<br />
solvent”)<br />
Place the impure solid<br />
in an Erlenmeyer flask<br />
along with a boiling<br />
stick (or boiling stones<br />
if preferred).<br />
Add the soluble solvent<br />
in portions while<br />
heating until the solid<br />
just dissolves.<br />
Add the insoluble<br />
solvent in portions with<br />
heating until the<br />
solution becomes<br />
faintly cloudy.<br />
Add the “soluble<br />
solvent” dropwise with<br />
heating until the<br />
solution is clarified<br />
(transparent).<br />
Allow time in between<br />
additions, and allow<br />
each addition to come<br />
completely to a boil<br />
before adding more.<br />
Remove the boiling<br />
stick (if used) and allow<br />
the system to come to<br />
room temperature while<br />
sitting atop some paper<br />
towels and with the<br />
flask’s mouth covered<br />
by a watch glass.<br />
Scratch with a glass<br />
stirring rod to initiate<br />
crystallization if<br />
necessary.<br />
Submerge in an ice bath<br />
for 10-20 minutes.<br />
Collect the crystals by<br />
suction filtration.<br />
Table 7.14: Procedural summary for mixed solvent crystallization.<br />
<strong>Organic</strong> <strong>Chemistry</strong> <strong>Laboratory</strong> <strong>Techniques</strong> | Nichols | Page 375
7.15 SINGLE EXTRACTION<br />
Use slit tubing to<br />
cushion the separatory<br />
funnel in the ring<br />
clamp.<br />
Close the stopcock on<br />
the separatory funnel<br />
and position an<br />
Erlenmeyer flask<br />
beneath the setup, in<br />
case it drips.<br />
Into the separatory<br />
funnel pour the liquid to<br />
be extracted using a<br />
funnel: this prevents<br />
liquid from getting on<br />
the ground glass joint<br />
which can cause it to<br />
stick.<br />
Pour the extractive<br />
solvent into the funnel.<br />
Hold the separatory<br />
funnel so that your<br />
fingers firmly cover the<br />
stopper.<br />
Invert the funnel and<br />
shake gently for 10-20<br />
seconds.<br />
Periodically “vent” the<br />
funnel (open the<br />
stopcock while inverted<br />
to release pressure).<br />
Never point the tip at<br />
someone while venting.<br />
Return the separatory<br />
funnel to the ring<br />
clamp, and allow the<br />
layers to separate.<br />
Remove the stopper (it<br />
won’t drain otherwise).<br />
Drain the majority of<br />
the bottom layer into an<br />
Erlenmeyer flask.<br />
Stop when roughly 1<br />
cm of the bottom layer<br />
is in the funnel, and<br />
swirl to dislodge<br />
clinging droplets.<br />
Drain the rest of the<br />
bottom layer, stopping<br />
when the interface is<br />
inside the stopcock.<br />
Label the flask (e.g.<br />
“bottom aqueous<br />
layer”).<br />
Pour out the top layer<br />
into another Erlenmeyer<br />
flask (and label it).<br />
Don’t throw away<br />
either layer until you<br />
are sure you’ve<br />
accomplished the goal<br />
of the extraction.<br />
Table 7.15: Procedural summary for single extraction.<br />
<strong>Organic</strong> <strong>Chemistry</strong> <strong>Laboratory</strong> <strong>Techniques</strong> | Nichols | Page 376
7.16 MULTIPLE EXTRACTIONS<br />
<strong>Organic</strong> layer is on Top:<br />
First extraction:<br />
Second extraction:<br />
Add 25 mL<br />
ether<br />
Aqueous<br />
from 1st<br />
extraction<br />
25 mL fresh<br />
ether<br />
25 mL<br />
Ether<br />
Shake and<br />
separate layers<br />
Ether<br />
Shake and<br />
separate layers<br />
50 mL<br />
Aqueous<br />
50 mL<br />
Aqueous<br />
Aqueous<br />
Ether<br />
Aqueous<br />
Ether<br />
Aqueous<br />
combine organic layers<br />
Figure 7.6: Multiple extraction flow-chart when the organic layer is on the top.<br />
<strong>Organic</strong> layer is on Bottom:<br />
First extraction:<br />
Second extraction:<br />
Add 25 mL<br />
CH 2 Cl 2<br />
Add 25 mL<br />
fresh CH 2 Cl 2<br />
50 mL<br />
Aqueous<br />
Shake and<br />
drain bottom<br />
Aqueous<br />
Shake and<br />
drain bottom<br />
50 mL<br />
Aqueous<br />
25 mL<br />
CH 2 Cl 2<br />
Aqueous Aqueous CH 2 Cl 2<br />
Aqueous<br />
combine organic layers<br />
CH 2 Cl 2<br />
CH 2 Cl 2<br />
Figure 7.7: Multiple extraction flow-chart when the organic layer is on the bottom.<br />
<strong>Organic</strong> <strong>Chemistry</strong> <strong>Laboratory</strong> <strong>Techniques</strong> | Nichols | Page 377
7.17 MICROSCALE EXTRACTIONS<br />
Pour contents and<br />
solvent into a conical<br />
vial or centrifuge tube<br />
with tapered end.<br />
As these containers are<br />
prone to tipping,<br />
stabilize them in a<br />
beaker or inverted cork<br />
ring.<br />
Mix the solutions by<br />
one of these methods:<br />
•<br />
•<br />
Cap and shake the<br />
vial for 10-20<br />
seconds (no need<br />
to vent<br />
periodically).<br />
Withdraw and<br />
vigorously<br />
expunge the<br />
bottom layer<br />
through the top<br />
layer by pipette for<br />
roughly 1 minute.<br />
Separate the layers by<br />
pipette, always<br />
withdrawing the bottom<br />
layer first (even if the<br />
bottom layer is not<br />
desired).<br />
Place the pipette tip all<br />
the way to the bottom<br />
of the tapered end.<br />
If difficulty arises in<br />
removing a residual<br />
drop, withdraw some of<br />
both layers into the<br />
pipette, allow the layers<br />
to separate in the<br />
pipette, then delicately<br />
expunge the bottom<br />
layer.<br />
Remove the top layer<br />
with a fresh pipette if<br />
saving.<br />
Label each layer.<br />
If the top layer is to be<br />
further extracted, leave<br />
it in the vial and add<br />
fresh solvent.<br />
Table 7.16: Procedural summary for microscale extractions.<br />
<strong>Organic</strong> <strong>Chemistry</strong> <strong>Laboratory</strong> <strong>Techniques</strong> | Nichols | Page 378
7.18 TESTING THE pH AFTER A WASH<br />
If a wash was used to<br />
neutralize an organic<br />
layer, test the aqueous<br />
layer it is in contact<br />
with. Most often a<br />
wash is used to<br />
neutralize trace<br />
amounts of acid.<br />
If the aqueous layer is<br />
the top layer, insert a<br />
glass stirring rod, and<br />
touch the rod to blue<br />
litmus paper.<br />
If the aqueous layer is<br />
the bottom layer,<br />
remove and test the pH<br />
of an aliquot:<br />
Place your finger atop a<br />
pipette and insert it so<br />
the tip is in the bottom<br />
layer.<br />
Let go of your finger<br />
and allow a small<br />
amount of the bottom<br />
layer to withdraw into<br />
the pipette.<br />
Place your finger atop<br />
the pipette again, then<br />
remove the aliquot from<br />
the funnel.<br />
Test the pH of the<br />
aliquot on blue litmus<br />
paper.<br />
If still acidic, repeat the<br />
neutralization washes<br />
on the organic layer.<br />
An acidic solution turns<br />
the blue paper pink (or<br />
red), while a neutral<br />
solution makes the<br />
paper look wet.<br />
Table 7.17: Procedural summary for testing the pH after a wash.<br />
<strong>Organic</strong> <strong>Chemistry</strong> <strong>Laboratory</strong> <strong>Techniques</strong> | Nichols | Page 379
7.19 USING DRYING AGENTS<br />
Drying agents are used<br />
to remove trace<br />
amounts of water from<br />
an organic solution.<br />
Always use an<br />
Erlenmeyer flask, not a<br />
beaker.<br />
If a second layer<br />
(water) is seen in the<br />
flask, remove it by<br />
pipette before addition<br />
of the drying agent.<br />
Start by adding a small<br />
portion of drying agent<br />
(size of a pea) to the<br />
flask.<br />
Swirl the flask.<br />
Water will cause the<br />
drying agent to clump<br />
into particles larger<br />
than the original<br />
particle size, and<br />
possibly stick to the<br />
glass.<br />
A solution is dry when<br />
small particles the size<br />
of the original drying<br />
agent are noticed when<br />
the flask is swirled.<br />
Add addition portions<br />
of drying agent until<br />
small particles are seen.<br />
Allow extra time when<br />
exposing a solution to<br />
anhydrous sodium<br />
sulfate (Na 2 SO 4 ), as this<br />
drying agent takes some<br />
time.<br />
To remove the drying<br />
agent from the solution,<br />
decant (pour) the<br />
solution if using<br />
Na 2 SO 4 , pellet CaCl 2 or<br />
CaSO 4 .<br />
Remove the drying<br />
agent with gravity<br />
filtration if MgSO 4 or<br />
granular CaCl 2 are<br />
used.<br />
Rinse the drying agent<br />
with a few portions of<br />
fresh solvent, and<br />
combine the rinsings<br />
with the dried solution.<br />
Table 7.18: Procedural summary for using drying agents.<br />
<strong>Organic</strong> <strong>Chemistry</strong> <strong>Laboratory</strong> <strong>Techniques</strong> | Nichols | Page 380
7.20 ACID-BASE EXTRACTION<br />
a) Extract the Acidic Component<br />
Add 5%<br />
NaOH (aq)<br />
Org<br />
Neutral<br />
RCO 2 H<br />
RNH 2<br />
Neutral<br />
Org RNH 2<br />
NaOH (aq)<br />
RCO - 2 Na +<br />
Use 2 M HCl<br />
to give pH 3-4<br />
Org<br />
Aq.<br />
RCO 2 H<br />
Add HCl<br />
(aq)<br />
Extract into<br />
organic solvent<br />
Neutral<br />
RNH 2<br />
b) Extract the Basic Component<br />
Neutral<br />
RNH 2<br />
Org<br />
Add 5%<br />
HCl (aq)<br />
RCO 2 Na<br />
RCO 2 H<br />
Org NaOH (aq) Aq.<br />
Filter if solid<br />
RCO 2 H<br />
Org<br />
Neutral<br />
HCl (aq) RNH 3 + Cl -<br />
Neutral<br />
RNH 2<br />
RNH 3 Cl<br />
RNH 2<br />
Org<br />
RNH 2<br />
Use 2 M NaOH<br />
to give pH 9-11<br />
Aq.<br />
Extract into<br />
Add NaOH organic solvent<br />
(aq)<br />
Filter if solid<br />
Org HCl (aq) Aq.<br />
Figure 7.8: Flow-charts for acid-base extraction.<br />
<strong>Organic</strong> <strong>Chemistry</strong> <strong>Laboratory</strong> <strong>Techniques</strong> | Nichols | Page 381
7.21 SIMPLE DISTILLATION<br />
Figure 7.9: Simple distillation apparatus.<br />
Assembly tips<br />
Begin distillation<br />
Cease distillation<br />
Fill the distilling flask<br />
with sample 1/3 – 1/2<br />
full. Always use an<br />
extension clamp on the<br />
distilling flask.<br />
Add a few boiling<br />
stones or stir bar to<br />
flask.<br />
Position the<br />
thermometer bulb just<br />
below the arm of the<br />
three-way adapter,<br />
where vapors turn<br />
toward the condenser.<br />
Wet condenser hoses<br />
with water before<br />
attaching.<br />
Connect the condenser<br />
hoses such that water<br />
flows uphill: bring<br />
water from the faucet<br />
into the lower arm, and<br />
drain out the upper arm.<br />
Be sure all of the<br />
connections are secure<br />
(especially between the<br />
distilling flask and 3-<br />
way adapter: potential<br />
of fire!)<br />
Turn on the condenser<br />
water.<br />
Apply the heat source<br />
to the distilling flask.<br />
Collect distillate at a<br />
rate of 1 drop per<br />
second.<br />
Record the temperature<br />
where liquid is actively<br />
distilling and<br />
thermometer bulb is<br />
immersed.<br />
Record the pressure.<br />
Stop the distillation<br />
when the temperature<br />
changes dramatically or<br />
if the distilling flask is<br />
nearly empty (never<br />
distill to dryness!)<br />
Lower and remove the<br />
heat source, but keep<br />
water circulating until<br />
the flask is just warm to<br />
the touch.<br />
Table 7.19: Procedural summary for simple distillation.<br />
<strong>Organic</strong> <strong>Chemistry</strong> <strong>Laboratory</strong> <strong>Techniques</strong> | Nichols | Page 382
7.22 FRACTIONAL DISTILLATION<br />
Figure 7.10: Fractional distillation apparatus.<br />
Most comments for a simple<br />
distillation apply to fractional as<br />
well.<br />
The distilling pot will need to be<br />
heated more vigorously than<br />
with a simple distillation, as<br />
there is a greater distance for the<br />
vapors to travel before reaching<br />
the condenser.<br />
Commonly the column will need<br />
to be insulated to maintain heat:<br />
wrap the column (and three-way<br />
adapter if desired) in glass wool<br />
followed by an outer layer of<br />
aluminum foil.<br />
Droplets of liquid should be seen<br />
in the fractional column, but<br />
there should never be a large<br />
pool of liquid (flooding). If the<br />
column floods, allow the liquid<br />
to drain back into the distilling<br />
flask and heat at a gentler rate.<br />
Table 7.20: Procedural summary for fractional distillation.<br />
<strong>Organic</strong> <strong>Chemistry</strong> <strong>Laboratory</strong> <strong>Techniques</strong> | Nichols | Page 383
7.23 VACUUM DISTILLATION<br />
Figure 7.11: Vacuum distillation connection to a vacuum trap and the aspirator.<br />
Always use a stir bar, not<br />
boiling stones.<br />
Grease all joints.<br />
Turn on the vacuum first,<br />
before heating, to<br />
remove very volatile<br />
components.<br />
Record the temperature<br />
and pressure if using a<br />
manometer during active<br />
distillation.<br />
To stop the distillation,<br />
remove the heat and cool<br />
the flask in a tap water<br />
bath.<br />
Use a Claisen adapter, as<br />
solutions tend to bump<br />
under vacuum.<br />
Connect thick-walled<br />
hosing at the vacuum<br />
adapter to a trap, then to<br />
the vacuum source<br />
(water aspirator or<br />
vacuum pump).<br />
When confident the<br />
apparatus is maintaining<br />
a reduced pressure, then<br />
heat the sample.<br />
Use glass wool or foil<br />
insulation if the sample<br />
is stubbornly refluxing<br />
instead of distilling.<br />
Pure compounds may not<br />
distill over a constant<br />
temperature due to<br />
changes in pressure.<br />
If multiple fractions will<br />
be collected, the system<br />
needs to be vented and<br />
cooled in between (or a<br />
cow receiving flask<br />
used).<br />
Then open the apparatus<br />
to the atmosphere by<br />
opening the pinch clamp<br />
on the trap, or removing<br />
the tubing on the vacuum<br />
adapter.<br />
Lastly turn off the<br />
vacuum.<br />
Correct order: cool,<br />
open to atmosphere, then<br />
turn off vacuum.<br />
Table 7.21: Procedural summary for vacuum distillation.<br />
<strong>Organic</strong> <strong>Chemistry</strong> <strong>Laboratory</strong> <strong>Techniques</strong> | Nichols | Page 384
7.24 STEAM DISTILLATION<br />
Figure 7.12: Steam distillation apparatus.<br />
Place large amount of<br />
plant materials in a large<br />
round bottomed flask (no<br />
more than half full), and<br />
just cover with water.<br />
Always use a Claisen<br />
adapter, as there is often<br />
turbulence in the flask.<br />
Two variations are<br />
common:<br />
•<br />
•<br />
Heat the water with<br />
a Bunsen burner to<br />
create steam<br />
directly.<br />
Add steam indirectly<br />
through a steam line<br />
from the building.<br />
Collect the distillate at a<br />
rate of 1 drop per<br />
second.<br />
The distillate may appear<br />
cloudy, or a second layer<br />
may form on the top.<br />
If milky, the distillation<br />
can be ceased when the<br />
distillate is clear.<br />
If a steam line was used,<br />
be sure to drain the<br />
liquid from the steam<br />
trap before turning off<br />
the steam, to prevent<br />
back suction.<br />
Separated oil can be<br />
pipetted (then dried with<br />
Na 2 SO 4 ), while milky<br />
distillates need to be<br />
extracted.<br />
Table 7.22: Procedural summary for steam distillation.<br />
<strong>Organic</strong> <strong>Chemistry</strong> <strong>Laboratory</strong> <strong>Techniques</strong> | Nichols | Page 385
7.25 ROTARY EVAPORATION<br />
Figure 7.13: Rotary evaporation setup.<br />
Be sure there is ice in<br />
the water circulator (if<br />
used).<br />
Fill a round bottomed<br />
flask no greater than<br />
half-full.<br />
Connect to the bump<br />
trap with a plastic clip.<br />
Lower the flask into the<br />
water bath to submerge<br />
the liquid (don’t<br />
submerge the plastic<br />
clip).<br />
Turn on the vacuum<br />
source (vacuum will<br />
hiss).<br />
Rotate the flask at a<br />
moderate rate (one-third<br />
the maximum value).<br />
Close the stopcock in<br />
the apparatus (hissing<br />
will stop).<br />
Evaporate until solid<br />
forms or liquid level<br />
doesn’t appear to<br />
change anymore, then<br />
evaporate an extra few<br />
minutes for good<br />
measure.<br />
To stop evaporation,<br />
reverse all steps:<br />
•<br />
•<br />
•<br />
•<br />
•<br />
Open the stopcock<br />
Stop the rotation<br />
Turn off the<br />
vacuum<br />
Lift the flask from<br />
the water bath<br />
Remove the flask<br />
Table 7.23: Procedural summary for rotary evaporation.<br />
<strong>Organic</strong> <strong>Chemistry</strong> <strong>Laboratory</strong> <strong>Techniques</strong> | Nichols | Page 386
7.26 MELTING POINTS<br />
Load the sample by<br />
jabbing the open end of<br />
a capillary tube into a<br />
pile of the sample.<br />
With closed end down,<br />
drop the tube down a<br />
long hollow tube so<br />
that it hits the benchtop<br />
and packs the sample<br />
into the closed end of<br />
the tube.<br />
Load the sample to a<br />
height of 2-3 mm.<br />
Place the sample into a<br />
slot in the MelTemp.<br />
Turn the dial to begin<br />
heating.<br />
Heat at a medium rate<br />
to 20 ˚C below the<br />
expected melting point.<br />
Then heat very slowly<br />
(1 ˚C every 30<br />
seconds).<br />
Record the temperature<br />
where the first droplet of<br />
liquid is seen (there is<br />
movement in the tube).<br />
Record the second<br />
temperature when the<br />
entire sample liquefies<br />
(the entire sample<br />
changes from opaque to<br />
transparent).<br />
Record a melting range,<br />
e.g. 120-122 ˚C.<br />
If another melting point<br />
trial is to be performed,<br />
cool the metal block to<br />
at least 20 ˚C below the<br />
next melting point, by<br />
wiping it with a wet<br />
paper towel or cooling<br />
with a jet of air.<br />
Thiele Tube<br />
Variation:<br />
Attach the sample to a<br />
thermometer with a<br />
tiny rubber band,<br />
positioning the sample<br />
flush with the bottom<br />
of the thermometer.<br />
Insert the sample into a<br />
Thiele tube, so that the<br />
sample is near the<br />
middle of the tube.<br />
Table 7.24: Procedural summary for obtaining a melting point.<br />
<strong>Organic</strong> <strong>Chemistry</strong> <strong>Laboratory</strong> <strong>Techniques</strong> | Nichols | Page 387
7.27 BOILING POINTS (THIELE TUBE)<br />
Fill a small tube about<br />
half-full with sample<br />
and insert a capillary<br />
tube, closed end up.<br />
Attach the tube to a<br />
thermometer with a<br />
small rubber band.<br />
Insert the sample into a<br />
Thiele tube, so that the<br />
sample is near the<br />
middle of the oil.<br />
Heat the arm of the<br />
Thiele tube with a<br />
burner, gently and<br />
continuously.<br />
Heat until a vigorous<br />
stream of bubbles<br />
emerges from the<br />
capillary tube, such that<br />
individual drops can be<br />
barely distinguished.<br />
Remove the heat and<br />
allow the oil to cool.<br />
The boiling point is the<br />
temperature when the<br />
oil just begins to enter<br />
the capillary tube.<br />
Table 7.25: Procedural summary for obtaining a boiling point.<br />
<strong>Organic</strong> <strong>Chemistry</strong> <strong>Laboratory</strong> <strong>Techniques</strong> | Nichols | Page 388
7.28 VACUUM SUBLIMATION<br />
Figure 7.14: Vacuum sublimation sequence.<br />
Place the sample to be<br />
sublimed in the bottom<br />
of the sublimation<br />
apparatus.<br />
Lightly grease all joints.<br />
Use thick walled tubing<br />
to attach to the vacuum<br />
arm, and apply the<br />
vacuum.<br />
The setup should not<br />
hiss or there is a leak.<br />
Fill the cold finger, or<br />
run water through the<br />
condenser.<br />
Be sure to apply the<br />
vacuum first, then<br />
coolant. If cooled<br />
before the vacuum,<br />
condensation may occur<br />
on the cold finger.<br />
Wave a heat gun or<br />
Bunsen burner on the<br />
apparatus to heat the<br />
sample.<br />
Sublimation should<br />
begin within a few<br />
minutes.<br />
Coax solid deposited on<br />
the side of the<br />
glassware toward the<br />
cold finger by waving<br />
the heat gun / burner on<br />
the sides of the glass.<br />
When the sublimation is<br />
complete:<br />
Remove the coolant.<br />
Allow the apparatus to<br />
come to room<br />
temperature.<br />
Delicately reinstate the<br />
air pressure, noting that<br />
an abrupt opening of<br />
the vessel will cause air<br />
to knock crystals off the<br />
cold finger.<br />
Remove the cold finger.<br />
Table 7.26: Procedural summary for vacuum sublimation.<br />
<strong>Organic</strong> <strong>Chemistry</strong> <strong>Laboratory</strong> <strong>Techniques</strong> | Nichols | Page 389