Instruction Manual - Audio Pro
Instruction Manual - Audio Pro
Instruction Manual - Audio Pro

You also want an ePaper? Increase the reach of your titles
YUMPU automatically turns print PDFs into web optimized ePapers that Google loves.
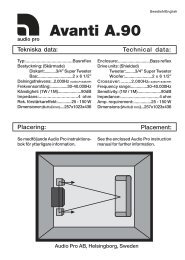
1<br />
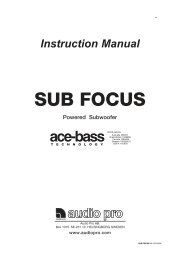
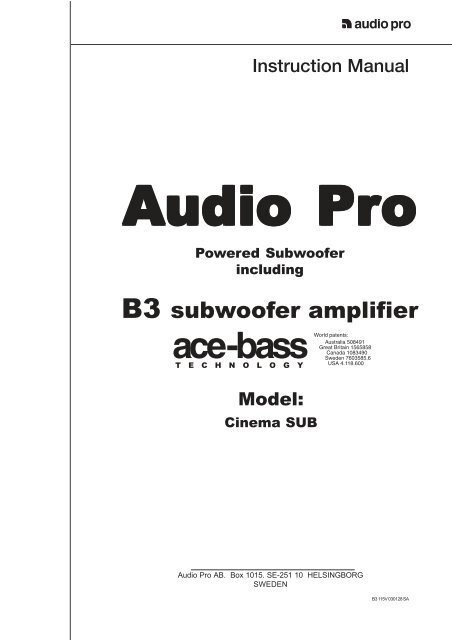
<strong>Instruction</strong> <strong>Manual</strong><br />
<strong>Audio</strong> udio Pr <strong>Pro</strong> Pr<br />
Powered Subwoofer<br />
including<br />
B3 subwoofer amplifier<br />
ace-bass<br />
T E C H N O L O G Y<br />
Model:<br />
Cinema SUB<br />
World patents:<br />
Australia 508491<br />
Great Britain 1565858<br />
Canada 1083490<br />
Sweden 7603585.6<br />
USA 4.118.600<br />
<strong>Audio</strong> <strong>Pro</strong> AB. Box 1015. SE-251 10 HELSINGBORG<br />
SWEDEN<br />
B3 115V 030128 SA
1) Read instructions - All safety and operating instructions should be read<br />
before the product is operated.<br />
2) Retain <strong>Instruction</strong>s - The safety and operating instructions should be<br />
retained for future reference.<br />
3) Heed Warnings - All warnings on the product and in the operating instructions<br />
should be adhered to.<br />
IMPORTANT SAFETY INSTRUCTIONS<br />
4) Follow <strong>Instruction</strong>s - All operating and use instructions should be followed.<br />
5) Cleaning - unplug this product from the wall outlet before cleaning. Do not<br />
use liquid cleaners or aerosol cleaners. Clean only with dry cloth.<br />
Exception: A product that is meant for uninterrupted service and that for some<br />
specific reason, such as the possibility of the loss of an authorizing code for<br />
a CATV Converter, is not intended to be unplugged by the user for cleaning or<br />
any other purpose, may exclude the reference to unplugging the product in the<br />
cleaning description otherwise required in number 5.<br />
6) Attachments - Do not use attachments not recommended by the product<br />
manufacturer as they may cause hazards.<br />
7) Water and Moisture - Do not use this product near water - for example, near<br />
a bathtub, washbowl, kitchen sink, or laundry tub; in a wet basement or near a<br />
swimming pool; and the like.<br />
8) Accessories - Do not place this product on an unstable cart,<br />
stand, tripod, bracket, or table. The product may fall,<br />
causing serious injury to a child or adult, and serious<br />
damage to the product. Use only with a cart, stand, tripod,<br />
bracket, or table recommended by the manufacturer, or<br />
sold with the product. Any mounting of the product should<br />
follow the manufacturer’s instructions, and should use a<br />
mounting accessory recommended by the manufacturer.<br />
9) A product and cart combination should be moved with care. Quick<br />
stop, excessive force, and uneven surfaces may cause the product and cart<br />
combination to overturn.<br />
10) Ventilation - Slots and openings in the cabinet are provided for ventilation<br />
and to ensure reliable operation of the product and to protect it from overheating,<br />
and these openings must not be blocked or covered. Placing the product on a<br />
bed, sofa, rug, or other similar surface should never block the openings. This<br />
product should not be placed in a built-in installation such as a bookcase or rack<br />
unless proper ventilation is provided or the manufacturer’s instructions have<br />
been adhered to.<br />
11) Power Sources - This product should be operated from the type of power<br />
source indicated on the marking label. If you are not sure of the type of power<br />
supply to your home, consult your product dealer or local power company. For<br />
products intended to operate from battery power, or other sources, refer to the<br />
operating instructions.<br />
12) Grounding or Polarization - This product may be equipped with a polarized<br />
alternating-current line plug (a plug having one blade wider than the other). This<br />
plug will fit into the power outlet only one way. This is a safety feature. If you<br />
are unable to insert the plug fully into the outlet, try reversing the plug. If the<br />
plug should still fail to fit, contact your electrician to replace your obsolete<br />
outlet. Do not defeat the safety of the polarized plug.<br />
13) Power-Cord <strong>Pro</strong>tection - Power-supply cords should be routed so that<br />
they are not likely to be walked on or pinched by items placed upon or against<br />
them, paying particular attention to cords at plugs, convenience receptacles,<br />
and the point where they exit from the product.<br />
14) Outdoor Antenna Grounding - If an outside antenna or cable system is<br />
connected to the product, be sure the antenna or cable is grounded so as to<br />
provide some protection against voltage surges and built-up static charges.<br />
Article 810 of the National Electrical Code, ANSI/NFPA 70, provides information<br />
with regard to proper grounding of the mast and supporting structure, grounding<br />
of the lead-in wire to an antenna discharge unit, size for grounding conductors,<br />
location of antenna-discharge unit, connection to grounding electrodes, and<br />
requirements for the grounding electrode. See Figure A.<br />
2<br />
15) Lightning - For added protection for this product during a lightning storm,<br />
or when it is left unattended for a long period of time, unplug it from the wall<br />
outlet and disconnect the antenna or cable system. This will prevent damage to<br />
the product due to lightning and power-line surges.<br />
16) Power Lines - An outside antenna system should not be located in the<br />
vicinity of overhead power lines or other electric light or power circuits, or where<br />
it can fall into such power lines or circuits. When installing an outside antenna<br />
system, extreme care should be taken to keep from touching such power lines<br />
or circuits, as contact with them might be fatal.<br />
17) Overloading - Do not overload wall outlets, extension cords, or integral<br />
convenience receptacles at this can result in risk of fire or electric shock.<br />
18) Object and Liquid Entry - Never push objects of any kind into this<br />
product through openings as they may touch dangerous voltage points or<br />
short-out parts that could result in a fire or electric shock. Never spill liquid of<br />
any kind on the product.<br />
19) Servicing - Do not attempt to service this product yourself as opening or<br />
removing covers may expose you to dangerous voltage or other hazards.<br />
Refer all service to qualified service personnel.<br />
20) Damage Requiring Service - Unplug this product from the wall outlet and<br />
refer servicing to qualified service personnel under the following conditions:<br />
a) When the power-supply cord or plug is damaged.<br />
b) If liquid has been spilled, or objects have fallen into the product.<br />
c) If the product has been exposed to rain or water.<br />
d) If the product does not operate normally by following the operating instructions.<br />
Adjust only those control that are covered by the operating instructions as an<br />
improper adjustments of other controls may result in damage and will often<br />
require extensive work by a qualified technician to restore the product to its<br />
normal operation.<br />
e) If the product has been dropped or damaged in any way.<br />
f) When the product exhibits a distinct change in performance - this indicates<br />
a need for service.<br />
21) Replacement Parts - When replacement parts are required, be sure the<br />
service technician has used replacement parts specified by manufacturer or<br />
that have the same characteristics as the original part. Unauthorized substitutes<br />
may result in fire, electric shock, or other hazards.<br />
22) Safety Check - Upon completion of any service or repairs to this product,<br />
ask the service technician to perform safety checks to determine that the<br />
product is in proper operating condition.<br />
23) Wall or Ceiling Mounting - The product should be mounted to a wall or<br />
ceiling only as recommended by the manufacturer.<br />
24) Heat - The product should be situated away from heat sources such as<br />
radiators, heat registers, stoves, or other products (including amplifiers) that<br />
produce heat.
CONTROLS AND INDICATORS<br />
1<br />
2<br />
3<br />
1) Low level input (MONO)<br />
from amplifier<br />
2) Speaker Level input<br />
(from amplifier)<br />
3) Speaker Level output<br />
(to satellite speakers)<br />
3<br />
6) Fuse<br />
7) Mains switch<br />
8) Mains cord (115V)<br />
WARNING !<br />
To reduce the risk of electric shock, do not open or remove cover or back. Do not expose this appliance to rain or moisture. In case of malfunction consult qualified service<br />
personel.<br />
The lightning flash with arrowhead, within an equilateral triangle, is intended to<br />
alert the user of the presence of uninsulated "dangerous voltage" within the<br />
product´s enclosure; that may be of sufficient magnitude to constitute a risk of<br />
electric shock to persons.<br />
4) Low pass crossover control<br />
5) Volume control<br />
The exclamation point, within an equilateral triangle, is intended to alert the user of the presence<br />
of important operating and maintenance (servicing) instructions in the literature accompanying the<br />
appliance.<br />
4<br />
5<br />
6<br />
7<br />
8
INSTRUCTIONS<br />
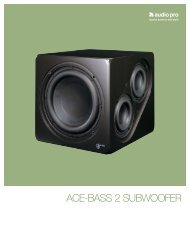
Congratulations to your choise of <strong>Audio</strong> <strong>Pro</strong> subwoofer and to a new sound experience.<br />
<strong>Audio</strong> <strong>Pro</strong> subwoofer is a unique product built with advanced technique. It is very easy to<br />
handle and install. It is equipped with the unique <strong>Audio</strong> <strong>Pro</strong> ace-bass technique that in<br />
combination with the built-in amplifier, the long throw woofer and the extremely solid cabinet<br />
offers a natural and deep bass reproduction at sound levels you never thought existed.<br />
The <strong>Audio</strong> <strong>Pro</strong> subwoofer offers extraordinary performance and lots of possibilities. In order<br />
to get the most out of your new subwoofer, we recommend you to spend time and carefully read<br />
these instructions before you connect and start up your system.<br />
What is ace-bass ?<br />
Normally, speaker design is bound to follow the laws of physics. The consequence will be, to<br />
get deep bass, the speakerbox must be very large. With the ace-bass technique we can "change"<br />
the laws of physics in the way that the driver believes it is placed in a much larger speaker box.<br />
Furthermore, the ace-bass technology improves the driver performance. With the ace-bass<br />
technique, we can design smaller subwoofers with deeper and cleaner bass.<br />
1. UNPACKING<br />
Carefully unpack the <strong>Audio</strong> <strong>Pro</strong> subwoofer and check for any damages. If possible, keep the cartonbox if future<br />
transportation is needed.<br />
You should immediately contact your dealer if the subwoofer is damaged .<br />
2. INSTALLATION<br />
There are different methods to connect your subwoofer<br />
to a HiFi / Home Theater system. In the following<br />
we explain 2 different ways. NOTE! Do not connect<br />
the mains cord until all other installation is<br />
completed.<br />
2.1 To an amplifier / pre-amplifier with<br />
Subwoofer-out terminal.<br />
Connect the enclosed cord from your amplifiers subwoofer-out<br />
terminal to LINE IN on the subwoofer.<br />
The audio signal is passing through the cord from the<br />
subwoofer-out terminal to the built-in amplifier. By using<br />
the LOWPASS control, the upper frequnency of the<br />
subwoofer can be variably selected from 50Hz - 100<br />
Hz.<br />
Note:<br />
Connect the satellite speakers to the main amplifier<br />
speaker terminals.<br />
4<br />
2.2 To Speaker output terminal<br />
(High level)<br />
Connect speaker cables from the speaker terminals of<br />
your amplifier to the Speaker Level input of the subwoofer.<br />
Carefully check the polarity of the cables (+ to<br />
+ and - to -). Connect both Left and Right channels. The<br />
satellite speakers are connected to SPEAKER OUT-<br />
PUT on the subwoofer. Again, carefully check the polarity<br />
(+ to + etc).<br />
In this installation, the satellite speakers HIPASS crossover<br />
frequency is automatically set to 100 Hz. If you<br />
want the speakers to perform full frequency range,<br />
connect them to the main amplifier Speaker Output.
3. FUNCTIONS<br />
Power switch (7):<br />
To switch the subwoofer amplifier to ON or OFF mode.<br />
Make sure it is turned OFF during installation.<br />
In ON mode, the amplifier goes automatically into<br />
standby mode if no signal been detected in 20 minutes.<br />
The amplifier starts again when signal is detected.<br />
Turn OFF the subwoofer when it will not be used for a<br />
longer period of time.<br />
Main Power indicator (on front side)<br />
The red indicator shows the operation status of the<br />
subwoofer. Red light - subwoofer is on.<br />
1<br />
2<br />
3<br />
Volume control (5):<br />
The sound level of the subwoofer can be adjusted. Use<br />
the Level control carefully, remember that<br />
program material may contain very high energy.<br />
LowPass (4):<br />
The Lowpass crossover frequency can be adjusted<br />
variably between 50 and 100Hz. This gives you a<br />
unique possibility to perfectly match the Subwoofer to<br />
your satellite speakers. The lowest frequencies will be<br />
reproduced only by the subwoofer.<br />
5<br />
4<br />
5<br />
6<br />
7<br />
8
4. PLACEMENT<br />
Your <strong>Audio</strong> <strong>Pro</strong> subwoofer is designed to<br />
produce music information in the frequency<br />
range below 100 Hz. The human ear is being<br />
devoided the ability to localize sound of these<br />
low frequencies why the placement of the subwoofer<br />
is not critical. <strong>Audio</strong> <strong>Pro</strong> subwoofers<br />
steep lowpass filters make the placement<br />
easier to fit into your listening room. However<br />
you can use the nature of the acoustic laws in<br />
the following ways:<br />
1. To get the most amplification of the room itself,<br />
place the subwoofer close to a corner at a<br />
distance of about 10 cm from the walls. If you<br />
get to much bass, move the subwoofer slightly<br />
out from the corner or adjust the level.<br />
2. By experimenting with the placement of the<br />
subwoofer, you can optimize the sound quality.<br />
One good rule is to place the subwoofer at the<br />
same wall as the satellite speakers.<br />
3. Never cover the subwoofer or place it where the<br />
built-in amplifier will be covered.<br />
6<br />
5.<br />
TROUBLESHOOTING<br />
If you should face any problem with the subwoofer<br />
function, please check following points.<br />
If the problem remains after checking these<br />
points, please contact your dealer.<br />
1. Check that all connections have been made<br />
properly. Check if any of the cables are<br />
damaged or short-cirquit.<br />
2. <strong>Audio</strong> <strong>Pro</strong> subwoofers has a sophisticated<br />
overload protection. This protects your<br />
subwoofer from damages caused by to high<br />
volume setting.<br />
6. TECHNICAL SPECIFICATIONS<br />
Cinema SUB<br />
Amplifier(RMS): 75 Watt<br />
Woofer: 6,5" woofer<br />
Frequency range: 30-100Hz<br />
Lowpass filter: 50 - 100Hz,<br />
12dB/octave<br />
Highpass filter: 100Hz,<br />
6dB/octave<br />
Dimensions: (W) 240 mm<br />
(H) 290 mm (+30 mm)<br />
(D) 300 mm<br />
Weight:(net) 10 Kg<br />
Specifications may be changed without notice, <strong>Audio</strong> <strong>Pro</strong><br />
follows a policy of continous advancement in development