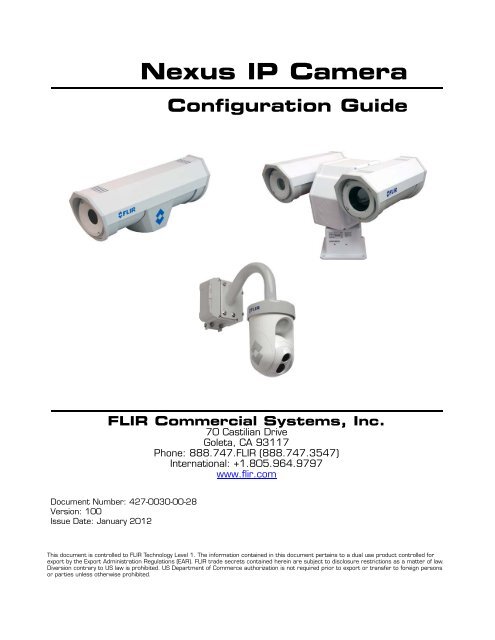
Nexus IP Camera Configuration Guide - Flir Systems
Nexus IP Camera Configuration Guide - Flir Systems
Nexus IP Camera Configuration Guide - Flir Systems

Create successful ePaper yourself
Turn your PDF publications into a flip-book with our unique Google optimized e-Paper software.
<strong>Nexus</strong> <strong>IP</strong> <strong>Camera</strong><br />
<strong>Configuration</strong> <strong>Guide</strong><br />
FLIR Commercial <strong>Systems</strong>, Inc.<br />
70 Castilian Drive<br />
Goleta, CA 93117<br />
Phone: 888.747.FLIR (888.747.3547)<br />
International: +1.805.964.9797<br />
www.flir.com<br />
Document Number: 427-0030-00-28<br />
Version: 100<br />
Issue Date: January 2012<br />
This document is controlled to FLIR Technology Level 1. The information contained in this document pertains to a dual use product controlled for<br />
export by the Export Administration Regulations (EAR). FLIR trade secrets contained herein are subject to disclosure restrictions as a matter of law.<br />
Diversion contrary to US law is prohibited. US Department of Commerce authorization is not required prior to export or transfer to foreign persons<br />
or parties unless otherwise prohibited.
<strong>Nexus</strong> <strong>Configuration</strong> <strong>Guide</strong><br />
© FLIR Commercial <strong>Systems</strong>, Inc., 2011. All rights reserved worldwide. No parts of this manual, in whole or in part,<br />
may be copied, photocopied, translated, or transmitted to any electronic medium or machine readable form without the<br />
prior written permission of FLIR Commercial <strong>Systems</strong>, Inc.<br />
Names and marks appearing on the products herein are either registered trademarks or trademarks of FLIR<br />
Commercial <strong>Systems</strong>, Inc. and/or its subsidiaries. All other trademarks, trade names, or company names referenced<br />
herein are used for identification only and a100re the property of their respective owners.<br />
This product is protected by patents, design patents, patents pending, or design patents pending.<br />
The <strong>Nexus</strong> thermal imaging system is controlled by US export laws. There are special versions of this system that are<br />
approved for international distribution and travel. Please contact FLIR <strong>Systems</strong> if you have any questions.<br />
FLIR Commercial <strong>Systems</strong>, Inc.<br />
70 Castilian Drive<br />
Goleta, CA 93117<br />
Phone: +1.888.747.FLIR (+1.888.747.3547)<br />
http://support.flir.com/<br />
http://www.flir.com/training<br />
-ii January 2012 427-0030-00-28, version 100
1 <strong>Nexus</strong> <strong>IP</strong> <strong>Camera</strong> <strong>Configuration</strong><br />
Table of Contents<br />
1.1 Warnings and Cautions ....................................................................... 1-1<br />
1.2 Introduction ....................................................................................... 1-2<br />
1.3 <strong>Nexus</strong> <strong>IP</strong> <strong>Camera</strong> ................................................................................ 1-2<br />
1.4 <strong>Camera</strong> <strong>Configuration</strong> .......................................................................... 1-2<br />
1.5 Serial and/or <strong>IP</strong> Communications ......................................................... 1-3<br />
1.6 Serial Communications ....................................................................... 1-3<br />
1.7 System Information Displayed at Startup ................................................ 1-4<br />
1.8 FLIR Certified <strong>Systems</strong> Integrator (FCSI) Training ..................................... 1-4<br />
2 Verify <strong>Camera</strong> Operation with FSM<br />
2.1 Power and analog video ....................................................................... 2-1<br />
2.2 Verify <strong>IP</strong> Communications ..................................................................... 2-1<br />
2.3 Using FLIR Sensors Manager (FSM) ...................................................... 2-2<br />
2.3.1 Running FSM ............................................................................. 2-2<br />
2.4 Troubleshooting Tips ........................................................................... 2-5<br />
2.4.1 <strong>Camera</strong> not discovered ................................................................ 2-5<br />
2.4.2 Unable to control the camera ....................................................... 2-6<br />
2.4.3 General Errors ........................................................................... 2-7<br />
2.4.4 Unable to View Video Stream ........................................................ 2-7<br />
2.5 Restoring the Factory Network Settings ................................................. 2-9<br />
3 Web <strong>Configuration</strong> Tool<br />
3.1 Web <strong>Configuration</strong> Overview ................................................................. 3-1<br />
3.1.1 Web <strong>Configuration</strong> Tool login ........................................................ 3-1<br />
3.1.2 Saving <strong>Configuration</strong> Changes ....................................................... 3-3<br />
3.1.3 Restarting the Server .................................................................. 3-3<br />
4 <strong>Nexus</strong> <strong>Camera</strong> <strong>Configuration</strong><br />
4.1 <strong>IP</strong> Communications ............................................................................. 4-1<br />
4.1.1 <strong>IP</strong> <strong>Configuration</strong> Steps ................................................................. 4-1<br />
4.2 Basic Web <strong>Configuration</strong> ..................................................................... 4-2<br />
4.3 Settings ............................................................................................ 4-2<br />
4.4 LAN Settings ..................................................................................... 4-3<br />
4.4.1 D-Series LAN Settings ................................................................. 4-4<br />
4.5 Server Status ..................................................................................... 4-5<br />
4.5.1 Setting the Date and Time ............................................................ 4-5<br />
4.5.2 Software Upgrades ..................................................................... 4-5<br />
427-0030-00-28, version 100 January 2012 -iii
<strong>Nexus</strong> <strong>Configuration</strong> <strong>Guide</strong><br />
4.5.3 Rebooting the <strong>Camera</strong> ................................................................. 4-5<br />
4.6 Serial Remote .................................................................................... 4-6<br />
4.6.1 Serial Extensions ........................................................................ 4-7<br />
4.6.2 Preset Map File .......................................................................... 4-7<br />
4.6.3 AutoPan Function ....................................................................... 4-8<br />
4.7 Network Remote / VMS ..................................................................... 4-9<br />
4.7.1 ONVIF ....................................................................................... 4-9<br />
4.8 Video IR .......................................................................................... 4-10<br />
4.8.1 RTP Settings ............................................................................ 4-11<br />
4.8.2 Network Options (Unicast/Multicast) ...........................................4-11<br />
4.8.3 Settings .................................................................................4-12<br />
4.9 Video DLTV ..................................................................................... 4-13<br />
4.10 Video Matrix .................................................................................. 4-14<br />
4.11 OSD (On Screen Display) .................................................................. 4-15<br />
4.12 Log File ......................................................................................... 4-16<br />
4.13 <strong>Configuration</strong> File ............................................................................ 4-17<br />
4.14 Help ............................................................................................. 4-18<br />
-iv January 2012 427-0030-00-28, version 100
1 <strong>Nexus</strong> <strong>IP</strong> <strong>Camera</strong> <strong>Configuration</strong><br />
This manual provides a brief guide to configuration of FLIR <strong>Nexus</strong> <strong>IP</strong> cameras. If you need help<br />
during the installation and configuration process, contact your local FLIR representative or, call<br />
877-773-3547 inside the US.<br />
For specific information about how to mount and connect the camera, refer to the installation<br />
manual provided with the camera.<br />
This manual includes the following topics:<br />
• <strong>Camera</strong> configuration overview<br />
• Web <strong>Configuration</strong> Tool<br />
• Bench testing the camera<br />
• Troubleshooting Tips<br />
• Basic configuration of the camera<br />
For safety, and to achieve the highest levels of performance from the system, always follow the<br />
warnings and cautions in this manual when handling and operating the camera.<br />
1.1 Warnings and Cautions<br />
WARNING!<br />
If mounting the camera on a pole, tower or any elevated location, use industry standard safe<br />
practices to avoid injuries.<br />
Caution!<br />
Except as described in this manual, do not open the camera for any reason. Disassembly of<br />
the camera (including removal of the cover) can cause permanent damage and will void the<br />
warranty.<br />
Be careful not to leave fingerprints on the camera’s infrared optics.<br />
Operating the camera outside of the specified input voltage range or the specified operating<br />
temperature range can cause permanent damage.<br />
427-0030-00-28, version 100 January 2012 1-1
1—<strong>Nexus</strong> <strong>IP</strong> <strong>Camera</strong> <strong>Configuration</strong> <strong>Nexus</strong> <strong>Configuration</strong> <strong>Guide</strong><br />
1.2 Introduction<br />
The FLIR <strong>Nexus</strong> <strong>IP</strong> <strong>Camera</strong> is both an analog camera and an <strong>IP</strong> camera. In general, the camera<br />
is configured using a web browser to access the Web <strong>Configuration</strong> Tool, and this guide<br />
provides information about how to use that web tool.<br />
The video from the camera can be viewed over a traditional analog video network, and it can be<br />
viewed by streaming it over an <strong>IP</strong> network using MPEG-4, M-JPEG and H.264 encoding. Analog<br />
video requires a connection to a video monitor or an analog matrix/switch. The <strong>IP</strong> video will<br />
require a connection to an Ethernet network switch, and a computer with the appropriate<br />
software for viewing the video.<br />
Some cameras can be controlled through either serial or <strong>IP</strong> communications. For a camera<br />
that uses serial communications, those settings can be configured using hardware D<strong>IP</strong><br />
switches instead. The configuration of serial communications parameters using hardware D<strong>IP</strong><br />
switches is described in the installation manual for the camera, rather than this document.<br />
1.3 <strong>Nexus</strong> <strong>IP</strong> <strong>Camera</strong><br />
When a camera has <strong>Nexus</strong> capabilities, that means there is a microprocessor inside that runs<br />
the <strong>Nexus</strong> server software. The <strong>Nexus</strong> server provides a number of services, including camera<br />
control, video streaming, and geo-referencing capabilities. The <strong>Nexus</strong> communications protocol<br />
is an open, standards-based protocol that allows the camera to communicate with a video<br />
management client, such as FLIR Sensors Manager or with a third-party ONVIF-compatible<br />
Video Management System (VMS) client.<br />
Custom VMS applications can be developed using the open <strong>Nexus</strong> Software Developers Kit<br />
(SDK) components. Applications can also be developed using Extensible Markup Language<br />
(XML) or Common Gateway Interface (CGI) tools.<br />
There are two main components to the <strong>Nexus</strong> Server software. One is a web server known as<br />
the Web <strong>Configuration</strong> Tool that listens on the network for web browser requests, and is used<br />
for the initial (and perhaps ongoing or occasional) configuration changes to the camera. The<br />
other process, known as the <strong>Nexus</strong> Server, listens on the network for connections from clients<br />
such as FSM or other VMS clients. These clients are used to control the camera and stream<br />
video during day-to-day operations of the camera.<br />
1.4 <strong>Camera</strong> <strong>Configuration</strong><br />
In general, it may be necessary for the installer to make a limited number of configuration<br />
changes for each camera, such as setting the serial and/or <strong>IP</strong> communication parameters.<br />
For example, each camera comes from the factory with the same default <strong>IP</strong> address, so adding<br />
more than one camera to an <strong>IP</strong> network requires each camera to be configured with a different<br />
<strong>IP</strong> address, at a minimum. On the other hand, many of the configuration parameters will<br />
remain unchanged from the factory default settings. This document provides a brief guide to<br />
setting the configuration parameters which are most commonly changed in order to get the<br />
camera to communicate and to operate normally.<br />
In order to control the camera, it is necessary to communicate with it either over serial<br />
communications (RS-232 or RS-422), or over Ethernet using Internet Protocol (<strong>IP</strong>). In either<br />
case, it is likely there are some communication parameters that are specific to each<br />
installation.<br />
1-2 January 2012 427-0030-00-28, version 100
<strong>Nexus</strong> <strong>Configuration</strong> <strong>Guide</strong> 1—<strong>Nexus</strong> <strong>IP</strong> <strong>Camera</strong> <strong>Configuration</strong><br />
1.5 Serial and/or <strong>IP</strong> Communications<br />
For a camera that is installed in a legacy-type CCTV network using analog video, the camera will<br />
commonly be controlled with serial communications. The serial cable from the camera will be<br />
connected to a keyboard/joystick device, or to a video switch or DVR that has a serial<br />
communication port. In this case the installer may want to configure parameters such as the<br />
address of the camera, the baud rate, and so on. These parameters can be set either using<br />
hardware D<strong>IP</strong> switches or through software using a web browser.<br />
For a camera installed in an <strong>IP</strong> network, the camera will commonly be controlled over Ethernet<br />
by a PC or laptop running FLIR Sensors Manager (FSM) or a third-party Video Management<br />
System (VMS) software. FSM is an integral part of the <strong>Nexus</strong> architecture—it is a client<br />
program that communicates with the <strong>Nexus</strong> server on the camera. It allows control of the<br />
camera and video streaming and many other sophisticated functions.<br />
In many cases, a camera will be installed with both serial and Ethernet communications. As<br />
such, the camera can be controlled by means of a serial device or through software. When<br />
someone tries to control the camera with a serial device at the same time as someone does<br />
through the software <strong>IP</strong> interface, the serial device takes priority.<br />
If serial control is used, the installer must first decide if the serial communications settings will<br />
be configured via hardware (D<strong>IP</strong> switch settings) or software.<br />
A single D<strong>IP</strong> switch (SW102-9, Software Override) determines whether the serial<br />
communications configuration comes from the hardware D<strong>IP</strong> switches or the software<br />
settings. By default the configuration comes from software settings.<br />
If the camera does not have an Ethernet connection, the D<strong>IP</strong> switches must be used to set the<br />
serial communication options. In the future, configuration changes may require accessing the<br />
camera on a tower or pole, dismounting it, and removing the back and so on. Refer to the<br />
camera installation manual for information about setting the switches.<br />
For a camera installed in an <strong>IP</strong> network, configuration changes (including settings related to<br />
serial communications) are made using a web browser. If the camera has an Ethernet<br />
connection, generally it will be easier (and more convenient in the long run) to make<br />
configuration settings via software. Then configuration changes can be made over the network<br />
without physically accessing the camera. Also the settings can be saved to a file and backed up<br />
or restored as needed.<br />
Refer to Chapter 3 “Web <strong>Configuration</strong> Tool” on page 3-1 for general information about the web<br />
interface and about saving configuration changes. For specific configuration information, refer<br />
to Chapter 4 “<strong>Nexus</strong> <strong>Camera</strong> <strong>Configuration</strong>” on page 4-1.<br />
Not all parameter settings are described in these sections. If you need help during the<br />
configuration process, contact your local FLIR representative or, call 877-773-3547 inside the<br />
US.<br />
1.6 Serial Communications<br />
<strong>Camera</strong>s that have a serial interface support a limited set of zoom and focus commands over<br />
RS-422 or RS-232 serial communications using common protocols (Pelco D or Bosch). By<br />
default, the camera is configured for RS-422 standard, 9600 Baud, 8 bits, no parity, 1 stop<br />
bit, using the Pelco D protocol, and address 1, and configuration changes are made with a web<br />
browser, rather than D<strong>IP</strong> switches.<br />
427-0030-00-28, version 100 January 2012 1-3
1—<strong>Nexus</strong> <strong>IP</strong> <strong>Camera</strong> <strong>Configuration</strong> <strong>Nexus</strong> <strong>Configuration</strong> <strong>Guide</strong><br />
If you are using the <strong>IP</strong> interface to configure the serial communication settings for the camera,<br />
refer to section 4.6 “Serial Remote” on page 4-6.<br />
The D<strong>IP</strong> switches are only used to control serial communications parameters. Other settings,<br />
related to <strong>IP</strong> camera functions etc., must be modified via software (using a web browser).<br />
1.7 System Information Displayed at Startup<br />
When the camera is turned on, the video temporarily displays system information including the<br />
serial number, <strong>IP</strong> address, Pelco address, Baud rate, and setting of the serial control D<strong>IP</strong><br />
switch: SW - software control (the default) or HW - hardware.<br />
S/N: 1234567<br />
<strong>IP</strong> Addr: 192.168.250.116<br />
PelcoD (Addr:1): 9600 SW<br />
1.8 FLIR Certified <strong>Systems</strong> Integrator (FCSI) Training<br />
This configuration guide provides a brief description of the configuration parameters that are<br />
available through the basic user login. For installers and integrators that are interested in a<br />
more advanced level of configuration, the FLIR Certified <strong>Systems</strong> Integrator (FCSI) certification<br />
program offers hands-on training with a variety of FLIR cameras, and focuses on integration<br />
design and installation with other third-party security sensors and equipment. For more<br />
information, contact your local FLIR representative or visit one of the following web sites:<br />
http://support.flir.com/<br />
http://www.flir.com/training<br />
1-4 January 2012 427-0030-00-28, version 100
2 Verify <strong>Camera</strong> Operation with FSM<br />
This chapter provides information on how to perform a bench test with a new camera that has<br />
not yet been configured. A bench test can be used to verify camera operation before the<br />
camera is configured for the local network.<br />
2.1 Power and analog video<br />
Install the camera cables as described in the installation manual. Apply power to the camera<br />
and confirm it is supplying video to the monitor.<br />
After the camera is turned on and finishes the bootup process (after approximately 90<br />
seconds), the video temporarily displays system information including the serial number, <strong>IP</strong><br />
address, Pelco address, Baud rate, and the setting of the Software Override D<strong>IP</strong> switch: SW -<br />
software control (the default) or HW - hardware.<br />
S/N: 1234567<br />
<strong>IP</strong> Addr: 192.168.250.116<br />
PelcoD (Addr:1): 9600 SW<br />
2.2 Verify <strong>IP</strong> Communications<br />
As shipped from the factory, the <strong>Nexus</strong> camera has an <strong>IP</strong> address of 192.168.250.116 with<br />
a netmask of 255.255.255.0.<br />
Step 1 Configure a laptop or PC with another <strong>IP</strong> address from this network (for example,<br />
192.168.250.1).<br />
Step 2 Connect the camera and the laptop to the same Ethernet switch (or back-to-back with<br />
an Ethernet crossover cable). 1<br />
Step 3 Open a web browser 2 ,<br />
enter http://192.168.250.116 in the<br />
address bar, and press Enter.<br />
.The Web <strong>Configuration</strong> tool will start at the Login screen.<br />
The Login screen shows a picture of the camera and allows<br />
you to enter a User and Password. The login screen for the<br />
F-Series camera appears to the right.<br />
If the Login screen appears, then you have established <strong>IP</strong><br />
communications with the camera.<br />
At this time, it is recommended a bench test of the camera<br />
should be performed with the FLIR Sensors Manager<br />
software, using the camera’s factory-configured <strong>IP</strong> address.<br />
1. In some cases, a straight Ethernet cable can be used, because many PCs have auto detect<br />
Ethernet interfaces.<br />
2. FLIR Web <strong>Configuration</strong> Tool is optimized for Microsoft Internet Explorer; other web browsers<br />
may not work as well.<br />
427-0030-00-28, version 100 January 2012 2-1
2—Verify <strong>Camera</strong> Operation with FSM <strong>Nexus</strong> <strong>Configuration</strong> <strong>Guide</strong><br />
2.3 Using FLIR Sensors Manager (FSM)<br />
The following provides a brief description of how to use FSM to control a camera and stream<br />
video from the camera. For more detailed information on how to use FSM, refer to the FLIR<br />
Sensors Manager User Manual (the manual is available as a pdf file from the Start menu, once<br />
the software is installed).<br />
If the FSM software has not been installed yet, locate the CD that came with the camera and<br />
install it on the PC. The latest version of FSM can be dowloaded at http://ns.flir.com.<br />
The installer must have administrative privileges on the PC to install the software and to grant<br />
network access if the Personal Firewall is enabled.<br />
2.3.1 Running FSM<br />
Run the FSM software by double clicking the icon on the desktop, or click on the<br />
Windows Start button and select Programs > FLIR Sensors Manager > FLIR<br />
Sensors Manager.<br />
Initially the FLIR Sensors Manager splash screen will be displayed. The software version may be<br />
different than the version displayed below.<br />
2-2 January 2012 427-0030-00-28, version 100
<strong>Nexus</strong> <strong>Configuration</strong> <strong>Guide</strong> 2—Verify <strong>Camera</strong> Operation with FSM<br />
After a brief while, the FSM main window will appear, and a popup FSM Notification window will<br />
appear in the lower right of the screen indicating that no cameras (servers) have been<br />
discovered yet.<br />
Click on the Accept button to acknowledge the notification.<br />
The FLIR Sensors Manager uses a type of “client/server”<br />
architecture. The FSM software is considered a client, and<br />
the cameras are considered servers (also known as<br />
sensors). Note, in this client/server model there may be<br />
many servers (cameras), and the servers are decentralized since they are distributed around<br />
the network.<br />
The Sensors Panel in the upper left of the window<br />
indicates no sensors have been discovered and added to<br />
the list of Active Sensors. The FSM software can<br />
automatically discover FLIR cameras and other sensors<br />
on the network. Each FSM user can choose to add one or<br />
more discovered sensors to the Sensors Panel as needed.<br />
Use the following steps to add the camera to the Sensors Panel, and to verify the operation of<br />
the camera by opening up a video stream and controlling the camera.<br />
Step 1 Select the Setup tab along the top of the window (it may be selected already by<br />
default) and then the Discovery button on the right side panel to bring up the<br />
Discovery Panel.<br />
Step 2 When the Discovery Panel is displayed, click the Refresh button.<br />
The FLIR camera will appear in the list of Discovered Servers 1 . The asterisk in<br />
parenthesis “(*)” indicates the camera has not been added to the list of Active<br />
Servers on the right.<br />
Step 3 In the Discovered Servers list, click on the name of the camera to select it, and then<br />
click on the center bar “>” to move the camera over to the list of Active Servers on<br />
the right.<br />
By default, the FSM software will automatically:<br />
• discover sensors in the network,<br />
• connect to the first camera it finds,<br />
• take control of the camera, and<br />
• display the video from the camera in Video Wall 0.<br />
1. If the camera is not displayed in the list of Discovered Sensors, there could be a problem with<br />
the network, the PC, or the camera. See “Troubleshooting Tips” on page 2-5.<br />
427-0030-00-28, version 100 January 2012 2-3
2—Verify <strong>Camera</strong> Operation with FSM <strong>Nexus</strong> <strong>Configuration</strong> <strong>Guide</strong><br />
No Sensors Discovered<br />
Control Panel Select camera name<br />
Refresh<br />
Setup<br />
Discovery<br />
Move to Active Servers list<br />
Step 4 Select the Video Wall 0 tab and confirm that video is streamed to the monitor.<br />
Step 5 Confirm it is possible to control the camera using buttons in the Control Panel. For<br />
example, click on the zoom in button (magnifying glass with +), and the video will zoom<br />
to 2X. For a pan/tilt camera, use the up/down and pan left/right controls to move<br />
the camera.<br />
Once you have verified the basic operation of the camera and successfully streamed video, you<br />
may want to make some configuration changes. For example, the camera can be configured<br />
with an <strong>IP</strong> address that matches the installation network. Refer to Chapter 4.1 “<strong>IP</strong><br />
Communications” on page 4-1for a brief guide on how to configure the camera.<br />
When you are ready to install the camera in its final location, confirm the cables are properly<br />
attached and the D<strong>IP</strong> switches are set as desired. Reassemble the rear cover after confirming<br />
the ground wire is connected properly, and tighten the cable gland nuts to ensure a good seal<br />
all around.<br />
2-4 January 2012 427-0030-00-28, version 100
<strong>Nexus</strong> <strong>Configuration</strong> <strong>Guide</strong> 2—Verify <strong>Camera</strong> Operation with FSM<br />
2.4 Troubleshooting Tips<br />
If you need help during the installation process, contact your local FLIR representative or, call<br />
877-773-3547 inside the US.<br />
Before using serial communications, it may be necessary to configure the camera’s serial<br />
interface to operate with the other serial device. For more information, refer to section 4.6<br />
“Serial Remote” on page 4-6.<br />
2.4.1 <strong>Camera</strong> not discovered<br />
By default the camera will broadcast a “discovery” packet two times per second. When FSM<br />
starts up, it listens to the network for the discovery packets. If no cameras are listed in the<br />
Discovered Servers list, press the Refresh button. If the list is still empty, it indicates no<br />
discovery packets were received. This could be due to a wide variety of problems with the<br />
network, the PC, or the camera.<br />
First check to ensure the physical connections are intact and that the camera is powered on<br />
and providing analog video to the monitor. When the camera is turned on, confirm the startup<br />
information is displayed on the analog monitor after approximately 90 seconds. For example:<br />
S/N: 1234567<br />
<strong>IP</strong> Addr: 192.168.250.116<br />
PelcoD (Addr:1): 9600 SW<br />
Confirm that the <strong>IP</strong> address for the PC (for example, 192.168.250.1) is on the same network<br />
as the camera.<br />
Next determine if Windows Personal Firewall is blocking the packets. You can turn off the<br />
firewall or add an exception for the FSM program. Typically when FSM runs for the first time, a<br />
pop-up notification may ask for permission to allow the FLIR Sensors Manager (fsm.exe) to<br />
communicate on the network, as in the following notification. Select the check boxes that are<br />
appropriate for your network.<br />
If necessary, use a packet sniffer utility such as Wireshark to capture packets and confirm the<br />
packets are being received by the PC from the camera.<br />
427-0030-00-28, version 100 January 2012 2-5
2—Verify <strong>Camera</strong> Operation with FSM <strong>Nexus</strong> <strong>Configuration</strong> <strong>Guide</strong><br />
2.4.2 Unable to control the camera<br />
If you are unable to control the camera with serial communications, ensure the communication<br />
parameters of the camera (such as baud rate, address, and communication standard) match<br />
the parameters of the other serial device. If using RS-422, confirm the receive pair on the<br />
camera are connected to the transmit pair of the other device. Also confirm that the Software<br />
Override D<strong>IP</strong> switch (SW102-9) is set correctly. This switch determines whether the serial<br />
configuration comes from the hardware D<strong>IP</strong> switches or the software settings. Refer to the<br />
camera installation manual for information on how to set the D<strong>IP</strong> switches.<br />
If the camera does not respond to commands from FSM (for example, the camera does not<br />
zoom when the zoom in button is clicked), the camera may not be the “Active” camera, or you<br />
may not have control of the camera. By default FSM will automatically request control of the<br />
camera and make it active, but if there are multiple cameras and/or multiple FSM clients, it<br />
may be necessary to manually make the camera active and take control of it.<br />
In the Sensors Panel, if the camera is the active sensor, there will be an<br />
“(Active)” notification next to the name of the camera. Only one camera or<br />
sensor can be active at a time. To make the camera active, right click on the<br />
icon to the left of the camera name and select “Set Active”, or simply doubleclick<br />
on the icon.<br />
The icon to the left of the camera name indicates the status of the sensor. The following is a list<br />
of the possible icons and the meaning of each one.<br />
Connected and Controlled<br />
This icon indicates the camera has been discovered and added to the list of active servers, and<br />
the camera is actively “connected” to the FSM client and receiving status updates. The joystick<br />
in the icon indicates the user has control of the camera. To release control of the camera, right<br />
click on the icon and select “Release Control”.<br />
Discovered<br />
This icon indicates the camera has been discovered and added to the list<br />
of active servers, but the camera is not actively “connected” to FSM, and<br />
therefore FSM is not receiving status updates. To connect to the camera,<br />
right click on the icon and select “Connect”. Alternatively, it is possible to<br />
double-click the icon to connect.<br />
Connected<br />
This icon indicates the camera has been discovered and added to the list<br />
of active servers, and the camera is actively “connected” to FSM and<br />
receiving status updates. To take control of the camera, right click on the<br />
icon and select “Request Control”. Alternatively, it is possible to doubleclick<br />
the icon to take control.<br />
Not Connected<br />
This icon indicates the camera has been discovered and added to the list of active servers, and<br />
the camera is actively “connected” to the FSM client and receiving status updates. To connect<br />
to the camera, right click on the icon and select “Connect”.<br />
2-6 January 2012 427-0030-00-28, version 100
<strong>Nexus</strong> <strong>Configuration</strong> <strong>Guide</strong> 2—Verify <strong>Camera</strong> Operation with FSM<br />
2.4.3 General Errors<br />
In the status bar at the bottom of the screen there may be an indication that an error has<br />
occurred. When you position the cursor over the error icon (exclamation mark), the error will<br />
be displayed in a temporary pop-up. It is possible to view all the error messages by selecting the<br />
Tools tab at the top of he screen, and then select the Log button to the left.<br />
2.4.4 Unable to View Video Stream<br />
If the video stream from the camera is not displayed in FSM, it could be that the packets are<br />
blocked by the firewall, or there could be a conflict with video codecs that are installed for other<br />
video programs.<br />
When displaying video with FSM for the first time, the Windows Personal Firewall may ask for<br />
permission to allow the FLIR Video Player (vp.exe) to communicate on the network, as in the<br />
following notification. Select the check boxes that are appropriate for your network.<br />
427-0030-00-28, version 100 January 2012 2-7
2—Verify <strong>Camera</strong> Operation with FSM <strong>Nexus</strong> <strong>Configuration</strong> <strong>Guide</strong><br />
If necessary, test to make sure the video from the camera can be viewed by a generic video<br />
player such as VLC media player (http://www.videolan.org/vlc/).To view the video stream,<br />
specify RTSP port 554 and the appropriate stream name such as “ch0”. For example:<br />
rtsp://192.168.250.116:554/ch0)<br />
2-8 January 2012 427-0030-00-28, version 100
<strong>Nexus</strong> <strong>Configuration</strong> <strong>Guide</strong> 2—Verify <strong>Camera</strong> Operation with FSM<br />
2.5 Restoring the Factory Network Settings<br />
The camera comes configured from the factory with a default <strong>IP</strong> address (192.168.250.116).<br />
In some cases, it may be necessary to restore the network settings of the camera to the<br />
original factory settings. If necessary, the camera <strong>IP</strong> address can be restored to this factory<br />
default address by connecting a loopback device to the Ethernet port.<br />
At each power-up, the system transmits a packet and then checks to determine if that same<br />
packet has been received. Detection of the received packet indicates the camera has a custom<br />
loopback connector installed on its Ethernet interface. The detection of the loopback packet<br />
cues the camera to restore Factory Defaults and to revert to the same configuration and<br />
behavior as when the camera left the factory.<br />
The custom loopback connector is described below.<br />
Pin # Signal Tied to pin #<br />
1 Transmit + 3<br />
2 Transmit - 6<br />
3 Receive + 1<br />
4 Unused N/A<br />
5 Unused N/A<br />
6 Receive - 2<br />
7 Unused N/A<br />
8 Unused N/A<br />
The RJ45 loopback termination ties pin 1 to pin 3, and pin 2 to pin 6. The other pins are not<br />
connected.<br />
427-0030-00-28, version 100 January 2012 2-9
2—Verify <strong>Camera</strong> Operation with FSM <strong>Nexus</strong> <strong>Configuration</strong> <strong>Guide</strong><br />
2-10 January 2012 427-0030-00-28, version 100
3 Web <strong>Configuration</strong> Tool<br />
This chapter describes the use of the Web <strong>Configuration</strong> Tool to configure camera settings. If<br />
you need help during the installation and configuration process, contact your local FLIR<br />
representative or, call 877-773-3547 inside the US.<br />
3.1 Web <strong>Configuration</strong> Overview<br />
This section provides a brief overview of how to use a web browser to connect to the camera<br />
and make configuration changes using the Web <strong>Configuration</strong> Tool. First familiarize yourself with<br />
the information in this section, and then refer to the following sections for specific information<br />
about how to configure camera settings including the <strong>IP</strong> interface, since the web browser<br />
communicates using the <strong>IP</strong> interface.<br />
3.1.1 Web <strong>Configuration</strong> Tool login<br />
Once you are able to use a web browser to connect to the camera (as described in Chapter 2<br />
“Verify <strong>Camera</strong> Operation with FSM” on page 2-1), the login screen will appear; select Login as<br />
Basic User, or type “basic” as the User and click on Login (there is no password for the Basic<br />
user).<br />
Note<br />
Prior to making changes to the configuration, it may be wise to bench test the camera using<br />
the factory configured <strong>IP</strong> address. See “Verify <strong>IP</strong> Communications” on page 2-1.<br />
It is also possible to open the Web <strong>Configuration</strong> Tool through FSM by right-clicking on the<br />
sensor icon and selecting Admin. Tools > Open Web <strong>Configuration</strong> Tool.<br />
.Although it is also possible to login with the user “admin”,<br />
generally it is better to use the “basic” user login. The “basic”<br />
user login is simpler to use and is less prone to making<br />
configuration changes that lead to unintended results.<br />
427-0030-00-28, version 100 January 2012 3-1
3—Web <strong>Configuration</strong> Tool <strong>Nexus</strong> <strong>Configuration</strong> <strong>Guide</strong><br />
Once you are logged in, the Help screen will appear. If it is necessary to contact FLIR Technical<br />
Support for assistance, it will be helpful to have the information from this page (such as<br />
Software Version) on hand.<br />
The web links available on the left side of the page (Settings, LAN Settings, and so on)<br />
correspond to different groups of configuration parameters.<br />
Figure 3-1: Web <strong>Configuration</strong> Tool Help Screen<br />
The current status of the <strong>Nexus</strong> server is displayed in the upper left (it should show as<br />
“Server Running…”).<br />
Note<br />
Before making any configuration changes, it may be wise to back up the existing configuration.<br />
See “<strong>Configuration</strong> File” on page 4-17.<br />
3-2 January 2012 427-0030-00-28, version 100
<strong>Nexus</strong> <strong>Configuration</strong> <strong>Guide</strong> 3—Web <strong>Configuration</strong> Tool<br />
3.1.2 Saving <strong>Configuration</strong> Changes<br />
After making any configuration changes, it is necessary to save the changes to the server<br />
(there is a Save button at the bottom of each configuration page). Once you save configuration<br />
changes to the server, the changes do not take effect immediately. Generally it is also<br />
necessary to stop and restart the server for the changes to become effective. The server has<br />
a configuration that is active and running, and another configuration that is saved (and possibly<br />
different than the running configuration). The following message indicates the saved<br />
configuration is different than the active (running) configuration: “You must restart the server<br />
for the changes to be effective”.<br />
3.1.3 Restarting the Server<br />
To restart the server, first click on the Stop button at the top of the page, and wait for the page<br />
to refresh.<br />
Note:<br />
It may take up to 20 seconds or more to stop the server, especially when there are multiple<br />
video streams open. Be patient when stopping the server.<br />
When the server is stopped and the page is refreshed, the status will show as “Server<br />
Stopped” and the button at the top of the page will change to Start rather than Stop.<br />
Click on the Start button to restart the server, and when the page refreshes, the status will<br />
again show as “Server Running…”. The Start button will be replaced by a Stop button when the<br />
startup procedure has completed.<br />
When configuration changes are made with the web browser, the settings are saved to a<br />
configuration file. It is a good idea to make a backup of the existing configuration file prior to<br />
making changes. If necessary the camera can be restored to its original factory configuration<br />
also. For more information, refer to section 4.13 “<strong>Configuration</strong> File” on page 4-17.<br />
427-0030-00-28, version 100 January 2012 3-3
3—Web <strong>Configuration</strong> Tool <strong>Nexus</strong> <strong>Configuration</strong> <strong>Guide</strong><br />
3-4 January 2012 427-0030-00-28, version 100
4 <strong>Nexus</strong> <strong>Camera</strong> <strong>Configuration</strong><br />
This chapter describes the <strong>Nexus</strong> configuration parameters that are available through the basic<br />
user login. If you need help during the installation and configuration process, contact your local<br />
FLIR representative or, call 877-773-3547 inside the US.<br />
4.1 <strong>Configuration</strong> using <strong>IP</strong> Communications<br />
The camera has an Ethernet connection that allows for configuration and control of the camera<br />
and for streaming video over an <strong>IP</strong> network. It is possible to control the camera and stream<br />
video from the camera as configured from the factory, without making any changes. However in<br />
most cases the camera will have at least some configuration changes to allow it to connect<br />
with other devices on the existing network. Prior to making changes with the Web <strong>Configuration</strong><br />
Tool, be sure you are familiar with the information in Chapter 3 “Web <strong>Configuration</strong> Tool” on<br />
page 3-1.<br />
Getting the camera <strong>IP</strong> interface set up and working may require a level of familiarity with<br />
managing <strong>IP</strong> networks that is new to many security professionals. Prior to configuring the <strong>IP</strong><br />
interface and streaming video parameters, make sure you know how to manage and configure<br />
the other equipment in the network (for example, any PC or device that will connect to the<br />
camera, any router or firewall that will carry the <strong>IP</strong> traffic, and so on). FLIR technical support<br />
can provide limited support in this regard.<br />
The camera comes configured from the factory with a default <strong>IP</strong> address (192.168.250.116).<br />
If necessary, the camera <strong>IP</strong> address can be restored to this factory default address by<br />
connecting an RJ-45 loopback device to the Ethernet port. See “Restoring the Factory Network<br />
Settings” on page 2-9.<br />
4.1.1 <strong>IP</strong> <strong>Configuration</strong> Steps<br />
Assuming the existing network uses <strong>IP</strong> addresses that are unique and different than the default<br />
address on the camera, configuring the camera for <strong>IP</strong> communications generally involves the<br />
following steps:<br />
Step 1 Connect the Ethernet port to an <strong>IP</strong> network that is isolated from the existing network<br />
(for example, a standalone switch)<br />
Step 2 Connect a PC or laptop to the same network<br />
Step 3 Temporarily set the <strong>IP</strong> address of the PC or laptop to be compatible with the factory<br />
network address of the camera (for example, 192.168.250.1)<br />
Step 4 Perform a bench test of the camera using FSM, prior to making any parameter<br />
changes (this step is optional but recommended)<br />
Step 5 Open a web browser, enter http://192.168.250.116/ in the address bar and<br />
press Enter to connect to the camera<br />
Step 6 Make a backup of the existing configuration<br />
Step 7 Configure the camera settings: configure the <strong>IP</strong> network settings, serial<br />
communications settings, and video streaming parameters so the camera is<br />
compatible with the existing network equipment<br />
Step 8 Test the camera with the new settings<br />
Step 9 Save the configuration changes and restart the server<br />
Step 10 Connect the camera to the existing network and test the camera<br />
Step 11 Make a backup of the new configuration<br />
427-0030-00-28, version 100 January 2012 4-1
4—<strong>Nexus</strong> <strong>Camera</strong> <strong>Configuration</strong> <strong>Nexus</strong> <strong>Configuration</strong> <strong>Guide</strong><br />
4.2 Basic Web <strong>Configuration</strong><br />
To make configuration changes with software, use a web browser to<br />
connect with the camera. If the <strong>IP</strong> address of the camera is known,<br />
you can type the <strong>IP</strong> address into the browser. As shipped from the<br />
factory, the camera has an <strong>IP</strong> address of 192.168.250.116 with a<br />
netmask of 255.255.255.0.<br />
The Web <strong>Configuration</strong> Tool will start at the Login screen, which<br />
shows an image of the camera. When this screen appears, the PC is<br />
successfully connected to the camera over the <strong>IP</strong> network.<br />
4.3 Settings<br />
Select Login as Basic User, or type “basic” as the User and click on<br />
Login (there is no password for the Basic user). Initially, the Help page<br />
will be displayed. This page has information about the camera including<br />
hardware and software revision numbers, part numbers, and serial<br />
numbers. If you need to contact FLIR for support, this information will be<br />
useful to the support engineer. On the left side of the page is a list of<br />
hyperlinks to the web pages that are used to configure the <strong>Nexus</strong><br />
camera.<br />
For most installations, the “basic” login provides access to the<br />
parameters that will typically be changed. For more advanced<br />
configurations, it is also possible to login as “admin”, and that login<br />
provides access to a greater number of configuration parameters. The<br />
“admin” login requires a password (initially “indigo”) and this password<br />
can be changed for security purposes.<br />
The remainder of this guide describes the configuration parameters that<br />
are available to the basic user. The sections are organized in the same<br />
order as the links on the left.<br />
In most cases the Settings page is not used. If necessary, the Log max size can be set to a<br />
non-zero number to allow log messages to be displayed. See “Log File” on page 4-16.<br />
4-2 January 2012 427-0030-00-28, version 100
<strong>Nexus</strong> <strong>Configuration</strong> <strong>Guide</strong> 4—<strong>Nexus</strong> <strong>Camera</strong> <strong>Configuration</strong><br />
4.4 LAN Settings<br />
The LAN Settings page can be used to set the hostname, default gateway, and <strong>IP</strong> address for<br />
the camera. In FSM, the Hostname will appear as the name of the sensor. The default <strong>IP</strong><br />
Address mode is static; the mode can also be set to DHCP.<br />
When the LAN settings are changed and the Save button is clicked, a pop-up message will<br />
appear to indicate the network interface will be restarted.<br />
Note<br />
Once the <strong>IP</strong> address of the camera is changed, the PC may no longer be on the same network<br />
and therefore may not be able to access the camera until the <strong>IP</strong> address on the PC is changed<br />
also. For that reason, you may wish to change the <strong>IP</strong> address after making other configuration<br />
changes.<br />
Note<br />
If the Hostname is changed, the new name may not show up in FSM until the camera is<br />
rebooted. To reboot the camera, save any configuration changes, then select Server Status<br />
and click the Reboot button.<br />
427-0030-00-28, version 100 January 2012 4-3
4—<strong>Nexus</strong> <strong>Camera</strong> <strong>Configuration</strong> <strong>Nexus</strong> <strong>Configuration</strong> <strong>Guide</strong><br />
4.4.1 D-Series LAN Settings<br />
For the D-Series cameras, if the user is logged in as “admin”, there are some important<br />
differences on the LAN Settings page. In particular, there are two Ethernet interfaces (eth0<br />
and eth1). In most cases, the eth1 interface should not be changed. The eth1 interface is used<br />
for internal communications within the camera, and the eth0 interface connects the camera to<br />
the network.<br />
Note<br />
The eth0 and eth1 interfaces must have unique <strong>IP</strong> addresses on separate <strong>IP</strong> networks. Do<br />
not set the eth0 interface to an address that is in the same range of addresses as the eth1<br />
interface.<br />
The eth1 interface has a default address of 192.168.2.101. In some installations that<br />
address is from a range of addresses that are being used already on the network. If it is<br />
necessary for the camera to be connected to a network that uses the 192.168.2.x range of<br />
addresses, contact your local FLIR representative or, call 877-773-3547 inside the US for<br />
information about configuring the <strong>IP</strong> interfaces for that environment. Do not make haphazard<br />
changes to the eth1 interface, as it will interrupt communications with the other internal<br />
Ethernet devices.<br />
4-4 January 2012 427-0030-00-28, version 100
<strong>Nexus</strong> <strong>Configuration</strong> <strong>Guide</strong> 4—<strong>Nexus</strong> <strong>Camera</strong> <strong>Configuration</strong><br />
4.5 Server Status<br />
The Server Status page is used when it is necessary to set or change the camera date and<br />
time, to shutdown or reboot the camera, or to update the server files. The name of the Server<br />
Status page may be somewhat misleading, as it does not provide server status information<br />
when logged in as basic.<br />
4.5.1 Setting the Date and Time<br />
Select the Date Format from the pulldown<br />
menu to either Europe or<br />
America and click Set. This will set<br />
the date format to dd/mm/yyyy or<br />
mm/dd/yyyy, respectively.<br />
Set the Date by typing in the dialog<br />
boxes and click Set. Changing the<br />
date of the camera may cause the<br />
user to be logged out of the Web<br />
<strong>Configuration</strong> Tool.<br />
Set the Time by typing in the dialog<br />
boxes and click Set. Changing the<br />
time of the camera may cause the<br />
user to be logged out of the Web<br />
<strong>Configuration</strong> Tool.<br />
4.5.2 Software Upgrades<br />
If a new version of software becomes<br />
available, the server and web files<br />
can be uploaded to the camera from<br />
a PC using the various Upload<br />
buttons on this page.<br />
4.5.3 Rebooting the <strong>Camera</strong><br />
When the Reboot button is clicked, a pop-up notification<br />
will confirm if you really want to reboot. Another pop-up<br />
notification will indicate it takes about 3 minutes to<br />
reboot the host. After approximately 3 minutes, refresh<br />
the web browser page to connect to the camera again.<br />
427-0030-00-28, version 100 January 2012 4-5
4—<strong>Nexus</strong> <strong>Camera</strong> <strong>Configuration</strong> <strong>Nexus</strong> <strong>Configuration</strong> <strong>Guide</strong><br />
4.6 Serial Remote<br />
In some installations, a serial device such as a keyboard, joystick, or other device is used to<br />
control camera functions such as pan/tilt or zoom. A serial device can also be used to access<br />
functions that are specific to thermal cameras, such as changing the polarity from white hot to<br />
black hot. Refer to section 4.6.1 “Serial Extensions” on page 4-7 for additional information.<br />
The Serial Remote settings are used to configure the serial communication parameters when<br />
the camera is controlled with a serial device. The Serial Remote option is not available on some<br />
cameras that do not have serial communication interfaces.<br />
The settings will take effect if the Software Override D<strong>IP</strong> switch is set to Off (the default),<br />
allowing software settings to control the camera. If the switch is set to On, software<br />
configuration changes through the web browser will have no effect. For more information about<br />
the D<strong>IP</strong> switches, refer to the camera installation manual.<br />
For serial communications, it is necessary to set the parameters such as the signalling<br />
standard (RS-232 or RS-422), baud rate, number of stop bits, parity and so on. It is also<br />
necessary to select the communication protocol used (either Pelco D or Bosch) and the<br />
camera address.<br />
On the Serial Remote <strong>Configuration</strong><br />
page, the pull-down in the upper right<br />
allows configuration of three serial<br />
devices: 0, 1, and 2. Device ID 0 is<br />
used as a switch to select either Pelco<br />
D or Bosch serial communications<br />
protocol. The actual serial parameters<br />
are configured for either Device ID 1<br />
(for Pelco D) or Device ID 2 (for<br />
Bosch).<br />
With Device ID 0 selected, set the<br />
Serial Remote Protocol to either Pelco<br />
D Serial Remote or Bosch Serial Remote. Ensure the Enabled parameter is set to Yes. If<br />
necessary, click Save to save the changes.<br />
If the Pelco D protocol is to be used, select Device ID 1 and<br />
wait for the page to refresh, and then configure the<br />
Remote Port Settings such as Speed (baud rate), Data<br />
Bits, Parity and Stop Bits. Set the Address parameter to<br />
the appropriate Pelco address.<br />
If the Preset Map File is set to yes, then presets can be<br />
used to access certain settings that are specific to the FLIR<br />
thermal camera, such as switching between White Hot and<br />
Black Hot settings. See section 4.6.2 “Preset Map File” on<br />
page 4-7 for information about the Preset Map File.<br />
The Initial Selected <strong>Camera</strong> is used to designate which camera (IR or DLTV) in a multi-sensor<br />
camera is selected as the initial Active camera. Select the appropriate Hardware Protocol (RS-<br />
422 or RS-232).<br />
4-6 January 2012 427-0030-00-28, version 100
<strong>Nexus</strong> <strong>Configuration</strong> <strong>Guide</strong> 4—<strong>Nexus</strong> <strong>Camera</strong> <strong>Configuration</strong><br />
In the Joystick settings, the Mode parameter, when set to FOV Dependant, allows a pan/tilt<br />
camera to adjust the pan speed automatically, depending on the current field of view (FOV). For<br />
a narrow FOV, the camera moves more slowly. If you do not want to limit the pan speed<br />
according to the FOV, set the parameter to Absolute.<br />
The Pilot Mode parameter controls the direction of tilt when the joystick is moved forward or<br />
backward. When Pilot Mode is set to yes, the camera points downward when the joystick is<br />
moved forward, similar to the way an aircraft would move. If the mode is set to no, the joystick<br />
operates as one would expect with a video game controller.<br />
The parameters in the Advanced Settings are related to Scan Lists and the AutoPan feature.<br />
Refer to section 4.6.2 “Preset Map File” and section 4.6.3 “AutoPan Function” below for more<br />
information about these features.<br />
If any of the parameters for Device ID 1 are changed, click Save to save the changes. Generally<br />
most of the other Serial Remote parameters do not need to be changed (for Device ID 1 and<br />
Device ID 2, it is ok if the Enabled parameter is set to no).<br />
If the Bosch protocol is to be used instead, select Device ID 2 and wait for the page to refresh,<br />
and then configure the Remote Port Settings such as Speed (baud rate), Data Bits, Parity and<br />
Stop Bits. Select the appropriate Hardware Protocol (RS-422 or RS-232), and set the Address<br />
parameter to the appropriate Bosch address. If necessary, click Save to save the changes.<br />
4.6.1 Serial Extensions<br />
In addition to the set of standard commands that would be used on an ordinary CCTV camera,<br />
control commands that allow access to more advanced features, or features that are specific<br />
to a particular type of equipment, are available through extensions to the serial protocol. These<br />
extended commands are quite useful when controlling features that are specific to FLIR thermal<br />
cameras.<br />
In the Pelco D protocol, these additional functions can be accessed using the Aux On and Aux<br />
Off extensions and are available by default. Many keyboards that support Pelco protocols have<br />
Aux On and Aux Off buttons for selecting these functions. As an example, the following functions<br />
are typically supported by default.<br />
Table 4-1: Aux Functions<br />
AuX ON 1 IRPolarityBlackHot<br />
AUX OFF 1 IRPolarityWhiteHot<br />
AUX ON 2 DLTVChangeActiveSource<br />
AUX OFF 2 IRChangeActiveSource<br />
AUX ON 3 TogglePlateauValue<br />
AUX OFF 3 IRToggleAGCType<br />
AUX ON 4 ToggleAutofocus<br />
AUX OFF 4 IRStartNUCCalibration<br />
AUX OFF 5 IRToggleLUTPalette<br />
AUX ON 6 IRToggleDDEGain<br />
AUX OFF 6 IRToggleAGCROI<br />
AUX ON 7 IRToggleFOV<br />
AUX OFF 7 IRToggleAGCMaxGain<br />
427-0030-00-28, version 100 January 2012 4-7
4—<strong>Nexus</strong> <strong>Camera</strong> <strong>Configuration</strong> <strong>Nexus</strong> <strong>Configuration</strong> <strong>Guide</strong><br />
AUX ON 8 Switch<strong>Camera</strong>On<br />
AUX OFF 8 Switch<strong>Camera</strong>Off<br />
AUX ON 9 InitializePT<br />
AUX OFF 9 GoToParkPosition<br />
4.6.2 Preset Map File<br />
Most pan/tilt cameras support predetermined pan/tilt locations that are stored as “presets’.<br />
A collection of presets is known as a Scan List (also referred to as a Pattern or Tour), A Scan<br />
List is used to direct the camera to a sequence of locations that are typically viewed, or are<br />
considered important or high-priority. Using the FSM software, multiple scan lists for a camera<br />
can be set up and scheduled according to time of day and other factors.<br />
However, presets can also be used to access other functions. For keyboards that do not have<br />
the Aux buttons, camera presets can be used to accomplish the extended functions described<br />
above. For example, if preset 41 is not being used for an actual preset location, it can be<br />
mapped to one of the above functions, such as IRPolarityBlackHot. To allow mapping of the<br />
serial functions, set the “Use Preset Map File” parameter to yes.<br />
On the Server Status page, use the Download PelcoD Map File link to open the text file that is<br />
used for mapping the functions to Aux commands and Presets. If it is necessary to change the<br />
mapped functions, edit the file and upload the new map file to the camera using the Upload<br />
button. Once a file has been edited and tested, it can also be uploaded to other cameras so<br />
that each camera operates the same way.<br />
4.6.3 AutoPan Function<br />
Table 4-1: Aux Functions<br />
In many cases with a pan/tilt camera, it may be desirable to use a simple back-and-forth (leftright)<br />
scan pattern, rather than a Scan List set of presets. To use the AutoPan feature, set the<br />
left and right pan limits and the pan speed, and then start the AutoPan mode. The functions for<br />
setting up the AutoPan limits and for controlling the AutoPan function are available using<br />
presets and are described in the following table..<br />
Table 4-2: AutoPan functions<br />
PRESET GOTO 90 GoToPanLimitLeft<br />
PRESET GOTO 91 GoToPanLimitRight<br />
PRESET GOTO 92 SetPanLimitLeft<br />
PRESET GOTO 93 SetPanLimitRight<br />
PRESET GOTO 94 IncrementAutoPanSpeed<br />
PRESET GOTO 95 DecrementAutoPanSpeed<br />
PRESET GOTO 96 StopAutoPan<br />
PRESET GOTO 99 StartAutoPan<br />
4-8 January 2012 427-0030-00-28, version 100
<strong>Nexus</strong> <strong>Configuration</strong> <strong>Guide</strong> 4—<strong>Nexus</strong> <strong>Camera</strong> <strong>Configuration</strong><br />
4.7 Network Remote / VMS<br />
Several types of third-party Video Management System (VMS) systems are supported by FLIR<br />
<strong>IP</strong> cameras. Because these systems tend to evolve and change over time, contact your local<br />
FLIR representative or FLIR Technical Support if you have any difficulties or questions about<br />
using this feature.<br />
Select the Network Remote / VMS link on the left side of the page to configure the camera to<br />
operate with a VMS Interface. By default no VMS Interface is configured; use the pull-down to<br />
select the appropriate type of VMS and click the Add button.<br />
The New Device Creation screen will appear. Set the communication parameters to match the<br />
remote system and click on the Create button.<br />
After the device is created, click on the Save button to save the configuration, and then restart<br />
the server.<br />
4.7.1 ONVIF<br />
The most common choice for Network Remote / VMS is ONVIF v2.0. The ONVIF (Open<br />
Network Video Interface Forum) is an open industry forum for the development of a global<br />
standard for the interface of network video products. An ONVIF-compliant VMS can be used to<br />
control a FLIR camera, display video, and access up to 50 pan/tilt presets.<br />
Contact your local FLIR representative or refer to the FLIR web site for application notes on how<br />
to configure the camera to work with specific third-party VMS packages.<br />
427-0030-00-28, version 100 January 2012 4-9
4—<strong>Nexus</strong> <strong>Camera</strong> <strong>Configuration</strong> <strong>Nexus</strong> <strong>Configuration</strong> <strong>Guide</strong><br />
4.8 Video IR<br />
By default, a single video stream is enabled for the thermal (IR) camera, and for multi-sensor<br />
cameras such as the D-Series and PT-Series cameras, a single video stream is enabled for the<br />
second sensor 1 , the daylight camera (the DLTV). To modify parameters that affect the <strong>IP</strong> Video<br />
stream from the thermal camera, select the Video IR link on the left. To modify parameters<br />
that affect the <strong>IP</strong> Video stream from the daylight camera, select the Video DLTV link on the left<br />
(refer to the section 4.9 “Video DLTV” on page 4-13).<br />
The default settings for each video stream provide high-quality, full frame-rate video. In general,<br />
for most installations it will not be necessary to modify the default parameters. However in<br />
some cases, such as when a video stream is sent over a wireless network, it may be useful to<br />
“tune” the video stream to try to reduce the bandwidth requirements. In particular, the RTP<br />
Settings, Network Options and the Settings parameters are described below.<br />
There are some challenges with streaming video over an <strong>IP</strong> network, when compared to other<br />
traditional <strong>IP</strong> applications which are less time-critical, such as email and web browsing. In<br />
particular, there are requirements which must be fulfilled to ensure satisfactory video quality in<br />
professional security environments. There are many parameters and factors related to network<br />
infrastructure, protocols, codecs and so on that can affect the quality and bit rate of a video<br />
stream when it is established between the camera and a client.<br />
The video streaming is done using a protocol generally referred to as Real-time Transport<br />
Protocol (RTP), but there are actually many protocols involved, including Real-Time Transport<br />
Control Protocol (RTCP) and Real Time Streaming Protocol (RTSP). In the background, a<br />
“negotiation” takes place to establish a session between the client (such as FSM, or a third<br />
party VMS or video player) and the camera. The ports which form a session are negotiated<br />
using a protocol such as RTSP. A client typically requests a video stream using its preferred<br />
settings, and the camera can respond with its preferred settings. As a result, many of the<br />
details are established dynamically, which may run contrary to network security requirements.<br />
In some networks, the RTP/RTSP traffic is carried (tunnelled) over Hypertext Transfer Protocol<br />
(HTTP) as that may allow the traffic to cross network boundaries and firewalls. While this<br />
method involves more overhead due to encapsulation, it may be necessary for clients to access<br />
the video streams when HTTP proxies are used.<br />
It is possible to enable a second video stream for a camera and this requires logging in to the<br />
Web <strong>Configuration</strong> Tool as “admin”. Turning on additional video streams places a higher load on<br />
the video microprocessor and could lead to poor performance overall if not done properly. If you<br />
have problems or questions contact your local FLIR representative or FLIR Technical Support.<br />
Each video stream has a Device ID associated with it. The default video stream from the<br />
thermal camera (the Video IR channel) is known as Device ID 0. The second video stream<br />
(disabled by default) from the thermal cameras is Device ID 1. For a multi-sensor camera, the<br />
default video stream from the daylight camera (the Video DLTV channel) is Device ID 2, and the<br />
second DLTV video stream (disabled by default) is Device ID 3.<br />
1. In future product releases, the second sensor could be another thermal camera,<br />
rather than a daylight camera.<br />
4-10 January 2012 427-0030-00-28, version 100
<strong>Nexus</strong> <strong>Configuration</strong> <strong>Guide</strong> 4—<strong>Nexus</strong> <strong>Camera</strong> <strong>Configuration</strong><br />
4.8.1 RTP Settings<br />
According to the specification, RTP is originated and received on even port numbers and the<br />
associated RTCP communication uses the next higher odd port number; the default RTP Port is<br />
554. The Stream Name is used when establishing a session from a client. The default value<br />
recognized by FSM for the thermal camera is ch0; the complete connection string is:<br />
rtsp://192.168.250.116/ch0. If necessary, enter the appropriate Stream Name for your<br />
installation.<br />
By default the video stream uses the <strong>IP</strong> address of the camera. If the Use External <strong>IP</strong><br />
parameter is set to “yes”, an alternate <strong>IP</strong> address can be entered.<br />
Note<br />
Always use an even port number for the RTP Port parameter.<br />
4.8.2 Network Options (Unicast/Multicast)<br />
By default, the video streams from the camera are sent using unicast packets rather than<br />
multicast. This means a given packet of <strong>IP</strong> Video will be sent separately to each client that has<br />
that video stream open (for example, FSM clients, nDVR, and so on). Therefore each additional<br />
client will cause the bandwidth consumption to go up and cause more overhead on the system<br />
in comparison to multicast.<br />
On the other hand, video packets sent using multicast are shared by streaming clients, so<br />
additional clients do not cause bandwidth consumption to go up as dramatically. If the video<br />
streams are used by more than one client/location, it may be wise to use multicast for more<br />
efficient bandwidth usage.<br />
To set the camera to use Multicast, set the Enable Multicast parameter to “yes”, and set the<br />
Destination Network address and Destination Port to a unique combination that will not conflict<br />
with other <strong>IP</strong> Video devices on the network (the Destination Port must be an even number).<br />
Note<br />
If more than one camera is providing multicast streams on the network, be sure to configure<br />
each stream with a unique multicast Destination Network <strong>IP</strong> address and Destination Port<br />
combination. The destination address on each camera will default to 232.0.1.1 when the<br />
Enable Multicast parameter is set to “yes”.<br />
427-0030-00-28, version 100 January 2012 4-11
4—<strong>Nexus</strong> <strong>Camera</strong> <strong>Configuration</strong> <strong>Nexus</strong> <strong>Configuration</strong> <strong>Guide</strong><br />
4.8.3 Settings<br />
The parameters in the Settings section will have a significant impact on the quality and<br />
bandwidth requirements of the video stream. In general it is recommended that the default<br />
values are used initially, and then individual parameters can be modified and tested<br />
incrementally to determine if the bandwidth and quality requirements are met.<br />
For each video stream, the Codec Type<br />
options are MPEG4, H.264 or MJPEG.<br />
MPEG4 requires the least amount of<br />
processing, and MJPEG requires the<br />
most.<br />
The Bit Rate parameter is only used<br />
when the Rate Control parameter is set<br />
to CBR (Constant Bit Rate). With the<br />
CBR setting, the system attempts to<br />
keep the resulting bit rate of the video at or near the target bit rate.<br />
The I-Frame Interval parameter controls the number of P-frames used between I-frames. Iframes<br />
are full frames of video and the P-frames contain the changes that occurred since the<br />
last I-frame. A smaller I-Frame Interval results in higher bandwidth (more full frames sent) and<br />
better video quality. A higher I-Frame Interval number means fewer I-frames are sent and<br />
therefore results in lower bandwidth and possibly lower quality.<br />
The Image Size parameter controls the video resolution size and therefore can have a<br />
considerable impact on bandwidth usage. The larger the size of the frame, the better the<br />
resolution and the larger the network bandwidth required. The following table provides the<br />
corresponding resolution for each Image Size setting.<br />
Table 4-3: Image Size Settings<br />
Image Size NTSC PAL<br />
D1 720x480 720x576<br />
4CIF 704x480 704x576<br />
VGA 640x480 N/A<br />
CIF N/A 320x240<br />
SIF 353x240 352x288<br />
QVGA 320x240 N/A<br />
QCIF N/A 176x144<br />
As a rule of thumb, if the video will be viewed on its own and on a reasonably large screen, a<br />
large image size setting may look better. On the other hand, if the video is shown as a tile in a<br />
video wall, a smaller image size may look as good and consume less bandwidth.<br />
4-12 January 2012 427-0030-00-28, version 100
<strong>Nexus</strong> <strong>Configuration</strong> <strong>Guide</strong> 4—<strong>Nexus</strong> <strong>Camera</strong> <strong>Configuration</strong><br />
4.9 Video DLTV<br />
By default, a single video stream is enabled for the Daylight TV (DLTV) camera. To modify<br />
parameters that affect the <strong>IP</strong> Video stream from this camera, select the Video DLTV link on the<br />
left. The default video stream from the thermal camera is known as Device ID 3.<br />
The default settings for the Video DLTV stream provide high-quality, full frame-rate video. In<br />
general, for most installations it will not be necessary to modify the default <strong>IP</strong> video parameters.<br />
However in some cases, as with the Video IR stream, it may be useful to modify certain<br />
parameters to try to reduce the bandwidth requirements. In particular, the RTP Settings,<br />
Network Options and the Settings parameters are similar to the same parameters that were<br />
described for the thermal camera above.<br />
The Interlaced parameter controls if the video frames are interlaced or not. By default, it is set<br />
to No for the DLTV video stream. Interlacing is defined as the interleaving of two video fields to<br />
produce a frame and is typically adopted to reduce screen flicker for a given frame rate.<br />
For the F-Series camera, the Video DLTV page is not used.<br />
427-0030-00-28, version 100 January 2012 4-13
4—<strong>Nexus</strong> <strong>Camera</strong> <strong>Configuration</strong> <strong>Nexus</strong> <strong>Configuration</strong> <strong>Guide</strong><br />
4.10 Video Matrix<br />
For some multi-sensor cameras (having both thermal and DLTV sensors, or multiple thermal<br />
sensors) such as the PT-Series 1 , the Video Matrix web page allows the configuration of the<br />
parameters that control how the multiple video channels are controlled and displayed.<br />
The Video Matrix (also known as VIDMUX) allows the output video from either sensor (IR or<br />
DLTV) to go to either analog video output. It also allows the output from one sensor to be<br />
displayed as a picture-in-picture (P<strong>IP</strong>) in the other sensor.<br />
In a multi-sensor camera, one video channel is designated as Main (or primary) and the other<br />
channel is designated as Aux (or auxiliary). The Operation Mode parameter can be set to<br />
Manual (default) or Active <strong>Camera</strong>. When the mode is set to Active <strong>Camera</strong>, the active sensor<br />
(as selected in FSM or with a serial control device) is output to the Main analog output, and the<br />
other sensor is output on the Aux analog output. This allows the analog video outputs to toggle<br />
between the two sensors. or when only one monitor is available, to display the Active <strong>Camera</strong><br />
on the primary analog output.<br />
The Initial Video Switch can be used to switch the Main<br />
channel to the second camera at startup. The Video Source<br />
designated as Tube-A CVBS is the IR camera, and Tube-B<br />
CVBS is the DLTV camera. When the Video P<strong>IP</strong> parameter<br />
is set to “yes”, then the video from the other channel is<br />
displayed as an overlay. The Video P<strong>IP</strong> Preset parameter<br />
controls where the smaller P<strong>IP</strong> appears in the larger video.<br />
1. Due to hardware constraints, this feature is not available in the D-Series cameras.<br />
4-14 January 2012 427-0030-00-28, version 100
<strong>Nexus</strong> <strong>Configuration</strong> <strong>Guide</strong> 4—<strong>Nexus</strong> <strong>Camera</strong> <strong>Configuration</strong><br />
4.11 OSD (On Screen Display)<br />
The OSD configuration page allows certain camera-related information such as the camera<br />
name or the date and time to be displayed in the analog video and in the <strong>IP</strong> video streams.<br />
It is possible to display the following<br />
parameters as an overlay on the video<br />
channels: Date, Time, Label, Preset.<br />
The Label can display the Hostname<br />
(as configured on the LAN Settings<br />
page) or a custom text string (using<br />
the Text Mode parameter).<br />
If Preset is displayed, it displays the<br />
number of the preset when the pan/tilt<br />
is positioned at a preset location. Refer<br />
to the FSM Users Manual for<br />
information on how to set presets.<br />
The appearance of each text string can<br />
be controlled with the following<br />
parameters:<br />
• State (on or off)<br />
• Transparency (on indicates only the<br />
letters are displayed, off indicates<br />
the letters are displayed inside an<br />
opaque block)<br />
• Color (changes the color of the letters)<br />
• Style Mode (can be Preset, which<br />
indicates the information is displayed<br />
in certain preset sizes and<br />
locations, or Manual, which<br />
requires additional size and location<br />
settings)<br />
• Size (text size - small, medium or<br />
large)<br />
• Location (preset location on the<br />
screen where the information will<br />
appear)<br />
The Initial System Info parameters<br />
control how the initial system<br />
information is displayed, such as the <strong>IP</strong><br />
address and serial communication<br />
parameters.<br />
427-0030-00-28, version 100 January 2012 4-15
4—<strong>Nexus</strong> <strong>Camera</strong> <strong>Configuration</strong> <strong>Nexus</strong> <strong>Configuration</strong> <strong>Guide</strong><br />
4.12 Log File<br />
The Log File page allows log messages to be displayed. This may be useful when<br />
troubleshooting a problem. In order to display log messages, it is necessary for the Log max<br />
size parameter to be set to a non-zero number. See “Settings” on page 4-2.<br />
The log file can also be saved to a PC or laptop using the Download Log File link.<br />
4-16 January 2012 427-0030-00-28, version 100
<strong>Nexus</strong> <strong>Configuration</strong> <strong>Guide</strong> 4—<strong>Nexus</strong> <strong>Camera</strong> <strong>Configuration</strong><br />
4.13 <strong>Configuration</strong> File<br />
The <strong>Configuration</strong> File web page allows the <strong>Nexus</strong> Server configuration to be displayed or<br />
backed up locally (on the camera). The configuration file can also be downloaded to another<br />
computer for backup, or a new configuration file can be uploaded from a computer to the<br />
camera.<br />
Shown at the top of the screen is<br />
the configuration script file in a<br />
scrollable window. This can be useful<br />
if you ever need help from a support<br />
engineer.<br />
Click Restore in the Factory Backup<br />
& Recovery section to restore the<br />
camera to its factory settings. This<br />
file can not be modified or deleted,<br />
so it is always available.<br />
In the Customer Backup & Recovery<br />
section, use the Backup button to<br />
make a backup of your final settings.<br />
This will make a backup copy of the<br />
configuration file and store it locally<br />
on the camera.<br />
In the Upload & Download section,<br />
the Download <strong>Configuration</strong> File link<br />
can be used to save a copy to a PC<br />
for safe keeping. A pop-up window<br />
will ask for a file name and<br />
destination folder.<br />
The Upload button is used to<br />
transfer a configuration file from a<br />
PC to the camera.<br />
427-0030-00-28, version 100 January 2012 4-17
4—<strong>Nexus</strong> <strong>Camera</strong> <strong>Configuration</strong> <strong>Nexus</strong> <strong>Configuration</strong> <strong>Guide</strong><br />
4.14 Help<br />
Initially, the Help page will be displayed. This page has information about the camera including<br />
hardware and software revision numbers, part numbers, and serial numbers. If you need to<br />
contact FLIR for support, this information will be useful to the support engineer.<br />
The Help information will look similar to the information below.<br />
4-18 January 2012 427-0030-00-28, version 100