
Create successful ePaper yourself
Turn your PDF publications into a flip-book with our unique Google optimized e-Paper software.
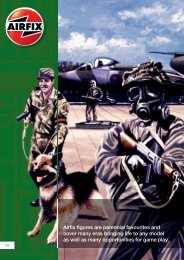
COMPETITION TIME<br />
More superb <strong>Airfix</strong> prizes are waiting for the winners of our<br />
competitions this time, including an exclusive opportunity<br />
to visit the Fleet Air Arm Museum in<br />
Yeovilton, hosted by the Royal Navy.<br />
JUNIOR COMPETITION TIME<br />
COMPETITION RESULTS<br />
The winner of our adult competition in Issue 11 is Mr Roger Hull, Member 504211 from<br />
Berkshire. Congratulations. You have won an example of the A05120 Messerschmitt Bf109E<br />
in 1:48 scale. And the answers to our competition questions were:<br />
1. Werner Mölders. 2. Douglas Bader, Johnnie Johnson and Robert Stanford Tuck. 3. Adolf<br />
Galland died in 1996, aged 83. Your prize is on its way with the compliments of <strong>Airfix</strong>.<br />
Our junior competition winner, carrying away an example of the A50015 RAF Battle of Britain<br />
Airfield set is William Bond, aged 9, Member 503650 from London. Well done, William!<br />
And the answers to the questions were:<br />
1. 18th October 2007. 2. Operation Black Buck.<br />
10% DISCOUNT<br />
FOR CLUB MEMBERS<br />
ANOTHER BENEFIT OF AIRFIX<br />
CLUB MEMBERSHIP!<br />
You can now use your membership card to obtain 10% discount<br />
on purchases featured on the <strong>Airfix</strong> Direct Sales website:<br />
www.airfix.com<br />
Follow the step by step guide to the checkout and give your valid<br />
<strong>Airfix</strong> Collectors Club membership number to claim your discount,<br />
quoting Code: AFCLUB<br />
NOTE: YOU MUST BE A CURRENT MEMBER WITH A<br />
FULLY PAID UP SUBSCRIPTION TO BENEFIT FROM<br />
THIS OFFER!<br />
<strong>Airfix</strong> have secured four pairs of tickets to visit the Royal Navy Fleet Air Arm Museum<br />
at Yeovilton in Somerset. Each ticket is for a Club member and a guest. If the guest is<br />
a child, they must be over eight years of age.<br />
The visit is fixed for Tuesday 26th October 2010 and the winners will be met on site by<br />
an <strong>Airfix</strong> representative, who will accompany the group throughout. The winners will be<br />
responsible for arriving and departing from the venue at their own expense.<br />
The programme will be as follows: Arrival at 10.00 am and begin tour with a visit to<br />
the RN Historic Flight, a front line squadron and the Control Tower, followed by lunch at<br />
around 12.45 pm in the Officers’ Mess. 2 pm. Visit to the Fleet Air Arm Museum, after<br />
which visitors are free to depart.<br />
Our junior competition winner, who must be 14 years or under can expect to receive a<br />
fantastic example of the newly tooled 1:32 scale A50111 Jaguar XKR GT3/Aston Martin<br />
<strong>DBR9</strong> Gift Set as well as one of the 1:76 scale A03306 Bedford QL Trucks, also brand<br />
new into the <strong>Airfix</strong> range.<br />
RULES OF ENTRY FOR BOTH COMPETITIONS<br />
To enter either of our competitions, all we want you to do is answer the following<br />
four questions – you’ll find all the information you need in this issue of the <strong>Airfix</strong><br />
magazine.<br />
1.Who were the three drivers of the Aston Martin <strong>DBR9</strong> – No.<br />
007 - that raced in the 2008 24 Heures Le Mans event?<br />
2.Which racing team has permission from the manufacturers<br />
to race the new Jaguar XKR GT3?<br />
3.The A03306 Bedford QL with the suffix T – QLT - was used<br />
for which specific purpose?<br />
4. When did the Bedford Company cease manufacture of the QL?<br />
Put your answers on a postcard with your name, address and membership number.<br />
Entrants to the Adult Competition also need to give us a daytime telephone number.<br />
Junior Club members must include your age. Send to: <strong>Airfix</strong> Issue 12 Competition,<br />
PO Box 25, Melton Mowbray, Leicestershire LE13 1ZG. Closing date for entries<br />
is 11th October 2010.<br />
1. The winners of the competition will be four adult Club members/one junior (aged 14 or under), whose entries<br />
are drawn at random from the all-correct entries received by the closing date of 11th October 2010.<br />
2. The competitions are limited to one entry per current member of the <strong>Airfix</strong> Club.<br />
3. Duplicate entries will be disregarded.<br />
4. The results of the competitions will be announced in issue 13 of the <strong>Airfix</strong> magazine and the winners notified<br />
by post. In the case of the Adult Competition, we will telephone the four winners.<br />
5. The competitions are not open to employees of Hornby Hobbies Ltd., their agents or families.<br />
6. No correspondence to be entered into in conjunction with the competitions.<br />
7. No cash equivalent is available.<br />
8. The <strong>Airfix</strong> Club accepts no responsibility for entries lost or damaged in the post.<br />
9. Entries defaced or altered in any way will be deemed null and void. The judges’ decision is final.<br />
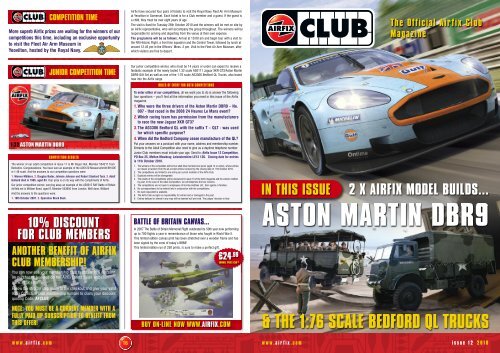
BATTLE OF BRITAIN CANVAS...<br />
In 2007 The Battle of Britain Memorial Flight celebrated its 50th year now performing<br />
up to 700 flights a year in remembrance of those who fought in World War II.<br />
This limited edition canvas print has been stretched over a wooden frame and has<br />
been signed by the crew of today’s BBMF.<br />
This limited edition run of 250 prints, is sure to make a perfect gift.<br />
£24 .99<br />
NORMAL PRICE £59 .95<br />
BUY ON-LINE NOW WWW.AIRFIX.COM<br />
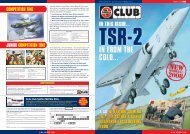
IN THIS ISSUE<br />
The Official <strong>Airfix</strong> Club<br />
Magazine<br />
2 X AIRFIX MODEL BUILDS...<br />
<strong>ASTON</strong> <strong>MARTIN</strong> <strong>DBR9</strong><br />
& THE 1:76 SCALE BEDFORD QL TRUCKS<br />
w w w . a i r f i x . c o m 16 w w w . a i r f i x . c o m<br />
i s s u e 1 2 2 0 1 0
Contents<br />
Book Review............... 2<br />
Diary Dates.................2<br />
Exclusive Hawk Offer ...3<br />
Forthcoming Releases<br />
..............................4 - 5<br />
Aston Martin <strong>DBR9</strong> &<br />
Jaguar XKR GT3 .....6 - 7<br />
Aston Martin <strong>DBR9</strong><br />
Model Build...........8 - 9<br />
Hornby Visitor Centre.10<br />
Bedford QL Truck ......11<br />
Bedford QL Truck<br />
Model Build.......12 - 13<br />
Key Publishing Launches<br />
<strong>Airfix</strong> Model World ....14<br />
Advertorial ................15<br />
Competition Time......16<br />
Consultant Editor:<br />
Susan Pownell.<br />
Design & Production:<br />
DSP Limited.<br />
Membership Organiser:<br />
Sarah Woodhouse.<br />
2010 Subscription Fees:<br />
UK POSTAL Version £24.99.<br />
UK DOWNLOADABLE Version £15.99.<br />
EU DOWNLOADABLE Version £19.49.<br />
Rest of the World DOWNLOADABLE<br />
Version £21.49.<br />
Cheques made payable to:<br />
Hornby Hobbies Limited.<br />
Visa, Access, Mastercard, Maestro<br />
& Switch accepted with valid<br />
expiry date.<br />
Club Address:<br />
<strong>Airfix</strong> Collectors Club,<br />
PO Box 25, Melton Mowbray,<br />
Leicestershire, UK. LE13 IZG.<br />
Tel: 0870 062 4001<br />
Fax: 01664 480 257<br />
The <strong>Airfix</strong> Club Magazine is<br />
published on behalf of Hornby plc,<br />
Westwood, Margate,<br />
Kent CT9 4JX.<br />
The Club accepts no responsibility<br />
for errors or ommissions or for<br />
views and opinions expressed by<br />
contributors to the magazine.<br />
w w w . a i r f i x . c o m<br />
The key features in this issue major on the newly tooled Aston Martin<br />
Editorial <strong>DBR9</strong> and the Jaguar XKR GT3 both in 1:32 scale, due out shortly. We<br />
are sure these prestigious marques will appeal to racing enthusiasts,<br />
as well as those of you who are just top of the range car aficionados.<br />
For military collectors, the appearance of the brand new <strong>Airfix</strong> Bedford QL Trucks will add<br />
further authenticity and atmosphere to your WWII diorama.<br />
BOOK REVIEW...BUY ON-LINE NOW WWW.AIRFIX.COM<br />
Their Finest Hour...<br />
Aircraft of the Battle of Britain.<br />
'The most beautiful aircraft ever designed' is how many would<br />
describe the Spitfire today. Together with the more numerous<br />
and legendary fighter of the era, the Hurricane, in tandem these<br />
aircraft were successfully used to halt the advancing German<br />
war machine.<br />
The Hurricane was often 'the pilot's choice', being a sturdy<br />
aircraft that was also an excellent gun platform. But other<br />
aircraft too played their part in defending the British shores<br />
during the summer of 1940.<br />
This 80-page hardback book, by John G Bentley, takes a closer<br />
look at all of the aircraft that fought during the Battle of Britain,<br />
both British and German.<br />
This special edition has been produced for <strong>Airfix</strong> enthusiasts.<br />
A Special Limited Edition book by John G Bentley.<br />
Why not have a trip out to one of the following attractions,<br />
promising an interesting day out?<br />
We recommend where possible that you contact the organisers<br />
concerned to confirm the details, which are correct at the time<br />
of going to press.<br />
30th October: This is a World Record Attempt on the number<br />
of models made in one place in one day, with talks and displays<br />
DIARY DATES<br />
2<br />
Special pages are included which show illustrations of <strong>Airfix</strong><br />
models that have been released over recent years representing<br />
aircraft which fought in the<br />
Battle of Britain.<br />
AH2899<br />
£6<br />
PLUS POSTAGE<br />
.99<br />
from many <strong>Airfix</strong> related people, including Roy Cross, Arthur<br />
Ward and various Hornby personnel. More participants are<br />
being added all the time.<br />
13-14th November: IPMS Scale Model World - International<br />
Centre, Telford. <strong>Airfix</strong> will be at the event for the duration, so<br />
come along and meet the team. For more information, log on<br />
to the website: www.ipms-uk.co.uk<br />
EXCLUSIVE AIRFIX CLUB KIT<br />
BAE SYSTEMS HAWK T.1A<br />
...with two decal options included!<br />
XX307, No.208 (R) Squadron, Royal Air Force Valley, 2009.<br />
Aircraft specially painted for the 2009 display season to mark the 90th<br />
anniversary of the Royal Air Force Benevolent Fund.<br />
XX184 “Spithawk”, Royal Air Force Valley, May 2008.<br />
Aircraft specially painted for the 70th anniversary of 19(F) Squadron<br />
equipping with the Spitfire.<br />
Buy now for only £7.99<br />
P&P is £2.94 for any number bought (up to a max of 3).<br />
Please photocopy the order form if you don’t wish to cut your Club Magazine.<br />
1:72 SCALE<br />
IT’S SO EASY TO ORDER!... Simply fill in this order form and post to: <strong>Airfix</strong> Club Offer, Hornby Hobbies Ltd, Margate, Kent, CT9 4JX or phone our Credit Card Hotline on<br />
01843 233 519. Alternatively, visit the <strong>Airfix</strong> Club members area at www.airfix.com to order online. If you do not have access to this area, please email club@airfix.com<br />
STEP 1 – Order details<br />
Item Qty Each Total<br />
A73000 BAE Systems Hawk T.1A Club Special* £7.99<br />
P&P is £2.94 for any number bought for UK address only. <strong>Airfix</strong> Club members outside the UK please call us for your P&P price. P&P Total £<br />
*Only 3 kits per <strong>Airfix</strong> Club member, offer while stocks last!<br />
Order Total £<br />
STEP 2 – Your details<br />
Mr/Mrs/Miss<br />
Address<br />
Postcode<br />
Email<br />
Tel No. Club No.<br />
STEP 4 – Payment details<br />
For the first time you lucky <strong>Airfix</strong> Club members are able to<br />
buy an exclusive kit specially produced for you.<br />
This is a one-off chance to buy this limited edition model<br />
and the maximum number each member can buy is 3.<br />
STEP 3 – Delivery details<br />
Please complete the following if the required delivery address is different to that entered<br />
in Step 2<br />
Mr/Mrs/Miss<br />
Address<br />
Postcode<br />
I enclose my Cheque/Postal Order for £ payable to ‘Hornby Hobbies’ Visa Mastercard Maestro<br />
Please charge my Credit/Debit Card for £ Card No.<br />
Expiry Date Switch Issue No. Signature<br />
On the back of your card near the signature is a 7 digit security number.<br />
In order to authorise your card transactions, we require the last 3 digits<br />
Your order should be despatched within 10 days but please allow 28 days for delivery. Offer not open to anyone under the age of 18. Mainland UK and Northern Ireland only.<br />
Yet another fantastic benefit of being an <strong>Airfix</strong> Club member!
FORTHCOMING RELEASES<br />
We review the models available<br />
during the current quarter of the<br />
year, either recently released or planned for release<br />
over the coming quarter of 2010.<br />
The selection includes a lot of the new tooling<br />
promised for 2010, bringing you some superb <strong>Airfix</strong><br />
kits across all categories and levels of expertise, from<br />
Starter and Series 1 kits right up to highly detailed<br />
and intricate model building projects.<br />
Military Aircraft – 1:72 scale<br />
A01071A Supermarine Spitfire Mk1a.<br />
This new tool in 1:72 scale comes with one finish option – that of the 610 Squadron<br />
as flown in 1940. The brand new kit celebrates the first real combat version of the<br />
brilliant WWII fighter plane, probably the most evocative of all the WWII aircraft which<br />
flew during the conflict. The Spitfire was the brainchild of R J Mitchell, developed<br />
and built at the Supermarine Works at Southampton. The Spitfire was the only Allied<br />
warplane kept in production throughout the conflict, with over 40 variants being<br />
developed and put into service. But it nearly didn’t make it. Initially, it was wanted<br />
by neither the Government nor the RAF but Mitchell’s persistence and his faith in<br />
the brilliantly designed aircraft ultimately paid off, with it entering service just in time<br />
to play such a major role in the Battle of Britain and beyond.<br />
A03081 Messerschmitt Bf110E. New Tooling.<br />
With its extended fuselage holding a life-raft at the tail, tropical filter to help prevent<br />
dust entering the engine, larger wheels for rougher airstrips and bomb racks added<br />
to the underside, the ‘E’ version of the Messerschmitt Bf1110 served throughout<br />
the Mediterranean and North Africa from 1941. The <strong>Airfix</strong> kit comes with two finish<br />
options – as flown by ‘8/JG26; or 3U + FR of 7/.ZG 26, Derna in May 1942.<br />
A03082 North American F-86F Sabre. New Tooling.<br />
The North American Aviation F-86 Sabre was a transonic jet fighter which entered<br />
service with the USAAF in 1951. This new <strong>Airfix</strong> kit comes with two finish options<br />
– as ‘The Huff’, 39th FIS, USAAF, Korea or as flown with the Italian Air Force.<br />
w w w . a i r f i x . c o m 4<br />
A03083 North American Sabre Mk 4 – Canadair. New Tooling.<br />
This version of the Sabre was built under licence from the North American Aviation<br />
Inc. Many went into service with the RAF. The two finish options include an RAF<br />
version or as flown with the Greek Air Force.<br />
A02048A Messerschmitt Bf109E. Two new finish options.<br />
A02082A Hawker Hurricane Mk1. Two new finish options.<br />
A03007 Junkers Ju87-B. Two finish options.<br />
A03030A Junkers Ju88. Two finish options.<br />
A03032 Fairey Battle. Two finish options.<br />
A04011 H P Hampton. Three finish options.<br />
A04005 North American B-25 Mitchell. Four finish options.<br />
Military Aircraft – 1:24 scale<br />
This well detailed series of WWII and post-war military aircraft has also been<br />
refreshed with further finish options.<br />
A18003 Hawker Siddeley Harrier GR3. Three finish options, two of which are RAF<br />
and one from the USA.<br />
Military Aircraft – 1:48 scale<br />
A05122 Messerschmitt Bf109E Tropical. New Tooling.<br />
This ‘Tropical’ <strong>Airfix</strong> version of the Messerschmitt Bf109E follows on from A05020,<br />
which included the E-4 variant, reviewed extensively in Issue 11 of the Club<br />
magazine.<br />
The E-7 was the next major production variant after the E-4, entering service in<br />
August 1940. The E-7 had a longer range than the E-4 – a marked improvement -<br />
and was also the first to carry a drop tank.<br />
There are three finish options to choose from.<br />
New finish options on existing <strong>Airfix</strong> tooling in this category include the following:<br />
A05100 Junkers Ju87-B Stuka. Three new finish options to choose from.<br />
Military Vehicles – 1:76 scale<br />
A03306<br />
MODEL KIT • MAQUETTE A MONTER • MODELLBAUSATZ • MODELLO A SCALA • BOUWMODEL • MAQUETA PARA MONTAR • PLASTBYGGSATS • RAKENNUSSARJA • MODELO PARA CONSTRUIR • MODELBYGGESÆT • ΣΥΝΑΡΜOΛOΓOΥΜΕΝO MONTEΛO<br />
A03306 the Bedford Truck. New Tooling.<br />
See our main features in this issue for the full story behind this new addition to the<br />
<strong>Airfix</strong> series of military vehicles.<br />
A<br />
Military Figures – 1:32<br />
A02709 Australian Infantry. 1:32 Scale.<br />
Comprising 14 pieces, this set features the Australian Army in the jungles of South<br />
East Asia.<br />
A04710 British Infantry Support Set. 1:32 Scale. 14 pieces.<br />
A04713 German Mountain Troops. 1:32 Scale. 14 pieces.<br />
A04704 Russian Infantry. 1:32 Scale. 14 pieces.<br />
Dioramas – 1:76 scale<br />
These newly tooled readymade resin ruined buildings come unpainted but completely<br />
built, apart from window glazing. We are pleased to announce the availability of a<br />
further two in the series.<br />
A75003 European Corner House Ruin. A75004 European Country Cottage Ruin.<br />
Cars – 1:32 scale<br />
Two newly tooled cars join the 1:32 Scale <strong>Airfix</strong> series of prestigious marques – the<br />
A03410 Jaguar XKR GT3 - APEX Racing and the A03411 Aston Martin <strong>DBR9</strong> in the<br />
Gulf Oil racing colours, as driven in the 2008 Le Mans 24-hour race. Read the full<br />
story in this issue of the <strong>Airfix</strong> magazine.<br />
Battlefield Diorama Gift Sets – 1:76 scale<br />
Two new sets have been introduced into this gift set range. Both include the paints,<br />
cement and brushes to enable you to start constructing your models straight away!<br />
A50009 Battle Front depicts a typical WWII battle of Northern Europe in 1944 with a<br />
Sherman and Tiger Tank, British Paratroops and German Infantry, a Forward Command<br />
Post and a base to set it all out on.<br />
5<br />
A50060 WWI – The Western Front. With a diorama base typical of a trench layout<br />
on the Western Front, you can complete the scene by constructing the tanks and<br />
troops included in the set, which also comes with paints, cement and brushes.<br />
Battle of Britain 70th Anniversary Gift Sets<br />
– 1:72 scale<br />
A50022 Battle of Britain - 70th Anniversary.<br />
This new set contains the four aircraft that epitomise the Battle of Britain, which<br />
was to become the turning point in WWII. With one finish option, decorate<br />
your own Spitfire, Hurricane, Messerschmitt and Heinkel to commemorate the<br />
action of the summer of 1940.<br />
The Royal Navy – 1:350 & 1:72 scale<br />
A50021 Trafalgar Class Submarine. 1:350 scale. Newly tooled this year, we have<br />
featured this model extensively in Issue 10 of the <strong>Airfix</strong> magazine. It comes with 7<br />
finish options to complete any of the submarines in its class.<br />
1:72 scale<br />
Model kit<br />
• MAQUETTE A MONTER • MODELLBAUSATZ • MAQUETA PARA MONTAR<br />
Official Licensed Product<br />
8 Acrylic Paints<br />
A50017 Sea Harrier FA2. 1:72 Scale.<br />
Both these models come with 1 finish option and include the paints, cement and<br />
brushes to complete the kit.<br />
Starter Sets – 1:32 & 1:72 scale<br />
Each comes with paints, cement and brushes.<br />
Sea Harrier FA2<br />
A50098 Eurofighter Typhoon Gift Set. 1:72 Scale.<br />
A50114 BAe Hawk T1 Gift Set. 1:72 Scale.<br />
A50109 Jaguar XKR GT3 APEX Racing. New Tooling. 1:32 Scale.<br />
A50110 Aston Martin <strong>DBR9</strong> - Gulf. New Tooling. 1:32 Scale.<br />
A50111 Jaguar/Aston Martin Twin pack. New Tooling. 1:32 Scale.<br />
w w w . a i r f i x . c o m
SPEEDING INTO THE AIRFIX RANGE...<br />
Two of the most prestigious marques in the UK motor industry – those of<br />
Aston Martin and Jaguar – roar into the <strong>Airfix</strong> range this summer,<br />
in authentic racing livery options.<br />
Both newly tooled this year, they are modelled in 1:32<br />
scale and comprise fully detailed construction kits<br />
for painting and decorating.<br />
1:32 SCALE<br />
<strong>ASTON</strong> <strong>MARTIN</strong> <strong>DBR9</strong> & JAGUAR XKR GT3<br />
A03411 Aston Martin Racing <strong>DBR9</strong> Gulf Representing the car that<br />
performed superbly in the 2008 Le Mans 24-hour race.<br />
Aston Martin DB9 Facts & Figures...<br />
The 2008 24 Heures Le Mans was the 76th Grand Prix of Endurance, held over the<br />
weekend of 14-15th June at the Circuit de la Sarthe, Le Mans in France.<br />
Aston Martin were returning to Le Mans to defend their GT1 title, won in 2007 when<br />
cars 007 and 009 had worn their traditional green livery. 2008 was also the 40th<br />
Anniversary of Gulf Oil winning Le Mans back in 1968, when Pedro Rodriguez and<br />
Lucien Bianchi drove the No. 9 Ford GT40 in the famous powder blue and orange<br />
livery. Aston Martin therefore saw it as a fitting tribute to the Gulf sponsors to enter<br />
007 and 009 into the 2008 race in the iconic orange and blue colour scheme, at the<br />
same time looking to emulate Gulf’s first victory in the 24-hour race, 40 years on.<br />
Driven by David Brabham – son of the legendary Australian racing driver Jack Brabham<br />
– the Number 009 car came first in the GT1 Class and 13th overall. Team-mates<br />
were Antonio Garcia and Darren Turner. Aston Martin Racing’s second <strong>DBR9</strong> driven<br />
by Heinz-Harald Frenzen/Andrea Piccini and Karl Wendlinger just missed a podium<br />
finish, being pipped at the post by Corvette Racing to come fourth in their class and<br />
16th overall.<br />
The Aston Martin <strong>DBR9</strong> specification is awesome! The car uses the DB9 road car’s<br />
aluminium chassis and the V12 engine’s cylinder block and heads to develop the<br />
race unit. After this, the car is re-engineered for competition use. In the cockpit, a<br />
carbon composite dashboard, lightweight racing seat and the driver’s instrument<br />
panels have replaced all the original car’s trim.<br />
The aerodynamic package of the car has been developed using computational fluid<br />
dynamics (CFD). All the panels have been hand crafted to fit the <strong>DBR9</strong> and are all<br />
manufactured in carbon fibre composite to save weight (except the roof). The large<br />
rear wing is also made from carbon fibre. To complete the aerodynamic features,<br />
the underside of the car is flat from the front to the rear diffuser.<br />
w w w . a i r f i x . c o m 6<br />
A03410 Jaguar XKR GT3 APEX Racing For the first time for many<br />
years, Jaguar enthusiasts are now able to cheer on an officially backed Jaguar. Apex<br />
Motorsport, based in Buckinghamshire have developed the XKR for racing in the FIA<br />
GT3 European Championships, a sports car racing series, organised by the Stéphane<br />
Ratel Organisation (SRO) and regulated by the FIA (Federation Internationale de<br />
l’Automobile).<br />
It is a championship derived from the international FIA GT contest but, launched in<br />
2006, it was seen as a way in which manufacturer involvement in motor sport could<br />
be linked to help amateur drivers across Europe, in which the competitors drove in<br />
more or less production cars.<br />
Unlike the other GT Classes, the GT3 Class cars are not allowed to be developed by<br />
the manufacturers, who simply provide a ready to race car for a customer – in this<br />
case - APEX Racing. The teams are also restricted with regard to modifications to<br />
the production specification.<br />
Against this background, the project, under the direction of APEX Motorsport’s<br />
Richard Lloyd, is independent of Jaguar but has their agreement to the use of the<br />
XKR on the racing circuit under the APEX Motorsport banner. The car made its first<br />
GT appearance on the Rockingham Speedway during the final round of the 2007<br />
Championship, almost as a test run for its debut in the FIA GT3 European<br />
Championships. It finished in 15th place overall.<br />
The XKR GT3 specification retains the same supercharged 4.3 litre quad-cam V8<br />
engine as the road going car, as well as its aluminium body. Beyond that, it complies<br />
with the rules with permitted modifications to some components to fulfil the needs<br />
of high performance racing.<br />
The launch of the newly tooled 1:32 scale <strong>Airfix</strong> A03410 Jaguar XKR GT3 – APEX<br />
Racing now means you can enjoy constructing your own model, which comes with<br />
one finish option.<br />
Performance<br />
0-60 mph in 3.4 secs. 0-100 mph in<br />
6.2 secs.<br />
Configuration<br />
Front engine, rear wheel drive.<br />
Chassis<br />
Modified DB9 aluminium chassis.<br />
Aluminium roof. All other body panels<br />
in carbon fibre composite.<br />
High strength steel roll-cage.<br />
Dimensions<br />
Length: 4687mm + 80mm.<br />
Width: 1978mm.<br />
Wheelbase: 2714mm.<br />
Weight: 1125 kg<br />
Engine<br />
Aston Martin Racing V12 based on<br />
Aston Martin DB9 aluminium block<br />
and cylinder heads.<br />
Dry sump, quad overhead cam, four<br />
valves per cylinder.<br />
Capacity: 6 litres.<br />
Power: 600 bhp<br />
Torque: > 700Nm<br />
ECU/Data system: pi data system.<br />
Engine ECU: Pectel.<br />
Transmission<br />
Xtrac 6 speed sequential gearbox<br />
longitudinally mounted at the rear<br />
axle.<br />
Clutch<br />
Four plate carbon clutch.<br />
Suspension<br />
Double wishbone suspension front<br />
and rear with adjustable Koni dampers<br />
fitted with Eibach springs.<br />
Wheels<br />
OZ forged magnesium.<br />
Brakes<br />
Front and rear Brembo six pot<br />
callipers with 330mm diameter<br />
carbon discs.<br />
7<br />
w w w . a i r f i x . c o m
The last time <strong>Airfix</strong> released their own tooled 1:32 scale model car was way back in 1977, producing the MG K3<br />
Magnette. Now thirty-three years on, we can look forward to two brand newly tooled cars<br />
– the 1:32 scale Aston Martin <strong>DBR9</strong> and the Jaguar XKR GT3, both of which<br />
are racing versions of the road going cars.<br />
1:32 SCALE<br />
1<br />
2<br />
3<br />
w w w . a i r f i x . c o m 8<br />
Model build by: Brian Canell<br />
4<br />
5<br />
6<br />
7<br />
8<br />
9<br />
10<br />
11<br />
12<br />
This build will show you how I made the Aston Martin. The kit comes as five<br />
sprues comprising the body shell and windows and three sprues of car<br />
components. The first thing I did was to lightly sand down a moulding line on<br />
the rear quarter panels (pic 1). After that the body shell was primed with white<br />
primer and then sprayed light blue. Paint the front fascia now as well. The colour<br />
listed in the instructions is Humbrol H47 Sea Blue which is the closest match in<br />
the range. To get the colour slightly more authentic you could add a very small<br />
amount of white (Humbrol H22 Gloss White) to lighten it up (pic 2).<br />
The three main component sprues were then sprayed with Humbrol H1 Primer.<br />
The wheels were sprayed H11 Silver, as were the brake discs and the interior<br />
floor. (pic 3, pic 4). The final sprue was completely sprayed with H33 Matt Black,<br />
as this included the main floor pan, wheel arches, wiper, aerials and steering<br />
column. (pic 5).<br />
Once the paint on the body shell had fully dried it was masked leaving the sills<br />
and the bottom portion of the rear valence that were painted H33 Matt Black.<br />
(pic 6).<br />
The wheel, brake and hub assemblies were painted before gluing. Note that on<br />
the <strong>DBR9</strong>, the rear wheels are larger than the front. The tyres were carefully<br />
hand painted matt black. You need a steady hand for this so as not to get black<br />
paint on the wheels rims. When it came to the brake discs, I painted the disc<br />
centres and the brake callipers H171 Antique Bronze to make them stand out.<br />
The wheel hub mountings were painted silver and black. (pic 7). The parts were<br />
all fitted together - be careful to make sure that the brake callipers are glued in<br />
opposite sides in the wheels because on the real car the rear brake callipers face<br />
forward and the front callipers face towards the rear of the car. Finally I scraped<br />
away the paint where they needed to be glued. (pic 8).<br />
The wheel assemblies were glued to the floor pan (don’t forget the big wheels<br />
are at the back) and then the wheel arches are fitted. (pic 9, pic 10). Before the<br />
interior floor was added, I detailed it with some H85 Semi Gloss Black on the<br />
floor and the stepped area and the panel with the hole was H130 Semi Gloss<br />
White. (pic 11) The four parts to the roll cage were constructed then painted<br />
H11 Silver. (pic 12).<br />
One thing I wanted to do when building this car was to replicate the gloss black<br />
window surrounds. Most modern cars have these particularly on the windscreen<br />
and rear windows. My method was to stick the windows onto post-it notes and<br />
then draw a line around the windows (pic 13). Then using small sharp scissors<br />
I carefully cut about 2mm inside of my line (leaving maybe 3-4mm on the bottom<br />
13<br />
14<br />
15<br />
16<br />
17<br />
18<br />
9<br />
edge of the windscreen which would include the hole for the wiper) and re stuck<br />
the post it notes back on the inside transparencies leaving an equal gap. (pic 14).<br />
I then painted H85 Semi Gloss Black on the inside edges of the windows. (pic 15).<br />
Once dry the post-it notes were removed and any errors or paint seepage<br />
cleaned up with a cocktail stick as this wouldn’t scratch the clear parts. They<br />
were then fitted to the body shell. (pic 16). The tail lights were painted silver on<br />
the inside then Humbrol 1321 Clear red on the lenses and finally light blue<br />
inserts. (pic 17).<br />
Now I paid some attention to the dashboard and instrument panel. The dash<br />
was sprayed matt black and the switches on the centre console were picked<br />
out in silver and a little red, blue and yellow for the upper switches. There isn’t<br />
any detail for the instrument binnacle and I found it hard to find good interior<br />
images on the Internet so I used a little artistic licence and painted two<br />
instrument dials. These won’t really be seen once completed anyway. (pic 18).<br />
The seat and pedal box were added (pic 19) and then finally the dashboard and<br />
roll cage were glued in place. (pic 20). Before the front fascia was fitted it was<br />
masked and the lower section painted Matt Black and the air intake area on the<br />
top of the part Semi Gloss Black (pic 21). Just before the body was mated to<br />
the chassis the headlamps were fitted (Semi Gloss Black with Silver lamps). It’s<br />
now starting to look like a car! (pic 22, pic 23)<br />
All that was left to do now was add the decals and then finish up with the door<br />
mirrors, aerials and headlamp lenses. What a great kit of a fantastic supercar!<br />
19<br />
20<br />
21<br />
w w w . a i r f i x . c o m<br />
22<br />
23<br />
24
TAKE A WALK THROUGH AIRFIX HISTORY AT...<br />
HORNBY’S NEW VISITOR CENTRE!<br />
After months of hard work on this exciting new project, Hornby Hobbies have opened the doors to a fantastic new<br />
Visitor Centre at the Hornby headquarters in Margate.<br />
The Visitor Centre, located through a separate entrance on the right hand side of<br />
the company’s main headquarters on the Westwood Industrial Estate in the town,<br />
has just opened this summer and has already welcomed enthusiasts from around<br />
the world. Its design and development is all the work of in-house expertise and<br />
whilst not every model ever produced is on display – there is simply insufficient<br />
space - you are treated to a carefully selected cross-section of products spanning<br />
the years of Hornby history, across each of the brands now under the Hornby<br />
umbrella. Each section is attractively displayed behind showcase windows, with<br />
incredibly effective LED lighting, carefully aimed to illuminate key features of the<br />
exhibits. One of the attractions of the exhibition is that because the Hornby archive<br />
is so large, future plans include periodically rotating and refreshing the displays by<br />
bringing out the untapped material, so visitors can come along more than once and<br />
see something different.<br />
Each of the brands under the Hornby Group has its own exhibition area, including<br />
Hornby trains, Scalextric, the recently acquired Corgi and - of course - <strong>Airfix</strong>, which<br />
features prominently in this walk-through exhibition. At the start of your tour, you<br />
are looking through a period toyshop window, reminiscent of those that many a<br />
young nose must have pressed against with longing and expectation in days gone<br />
by. The clever graphics encompass the evolution of products and packaging over<br />
the years across all the Hornby brands. Information panels of text, detailing the<br />
history of each Hornby brand stand alongside the model displays at intervals<br />
throughout the exhibition, which takes about two hours of comfortable browsing<br />
before reaching the end of your tour – the Hornby Shop.<br />
The first <strong>Airfix</strong> showcase, complete with background graphics from the period,<br />
reveals the first ever kit, made especially for the Ferguson Tractor Company in 1949.<br />
This kit was not on general sale but was a promotional and exclusive item for<br />
Ferguson’s themselves. The <strong>Airfix</strong> archive example is still in kit form, so it was<br />
amazing to have one of the first visitors to the Centre remark that he had an example<br />
too, as a completed kit. He has kindly donated his model, which now stands<br />
alongside the <strong>Airfix</strong> original. Another ‘first’ on view is the Golden Hind, representing<br />
the first <strong>Airfix</strong> kit that sold in Woolworths in 1952. Look out, too, for the unusual<br />
Bristol SuperFreighter, a 1:72 scale kit of an aircraft car transporter, for the use of<br />
people who did not take the sea ferry.<br />
The original <strong>Airfix</strong> magazines are given pride of place too, dating from Number 1,<br />
dated June 1960, with examples on display going through to the early 1980s. It is<br />
interesting to compare the artwork through the different eras of design, as well as<br />
the content of each issue. The exhibition features some highly detailed <strong>Airfix</strong><br />
dioramas, including tanks, ships, military and naval personnel and aircraft. The<br />
scenes portrayed bring to life a WWII Bomber Command, the Cold War of the<br />
early 1960s, and a WWII Rescue Mission with a Catalina and Short Stirling, amongst<br />
others. The display of 1:32 scale <strong>Airfix</strong> cars is superb. They are so accurately put<br />
together and well decorated, you could mistake them for diecast metal, such is the<br />
perfect finish.<br />
The highlight of the <strong>Airfix</strong> section of the Visitor Centre must be a 1:24 scale De<br />
Havilland Mosquito, which has over 617 pieces. Fully decorated and evocatively<br />
illuminated with the special LED lighting, it is a fitting subject in the collection,<br />
adding to those subjects commemorating the 70th Anniversary of the Battle of<br />
Britain this year. A showcase window devoted to design and development shows<br />
how your <strong>Airfix</strong> models are conceived, designed and developed to perfection prior<br />
to manufacture using the injection moulding technique, from which the kit<br />
components emerge on sprues.<br />
The Gallery is a must for <strong>Airfix</strong> art lovers. Here you can appreciate the box art of the<br />
late Gavin MacLeod, noted for his airbrush work; John D Jones, famous for his<br />
aircraft and ships artwork; and Mike Trim whose <strong>Airfix</strong> box art speciality was ships.<br />
Examples of all these different subjects and styles hang on the walls around the<br />
w w w . a i r f i x . c o m 10<br />
gallery, each being so perfect, it looks more like a photograph than a painting.<br />
We have deliberately only touched the surface in reviewing the new Visitor Centre<br />
as we want you to go along and enjoy the experience firsthand. The Centre is an<br />
ongoing project, with plans still to be realised, including restaurant and a coffee<br />
shop facility; and an area for visiting exhibitions such as private collections, to be<br />
housed in the Gallery area, which also chronicles the life and times at Hornby’s<br />
Margate factory. Round off your tour with a visit to the Hornby Shop, where <strong>Airfix</strong><br />
Club members qualify for a 20% discount upon presentation of your membership<br />
card. Entry to the Visitor Centre is £4 Adult; £2 Children and Senior Citizens; £10<br />
family ticket (2 adults and up to 4 children). Here again, Club members qualify for<br />
a 20% discount against the ticket price but bring your membership card.<br />
For opening times, visit the website at www.Hornby.com/visitorcentre or telephone<br />
01843 233500. Seasonal opening hours apply, so please check before setting off on<br />
your visit. In addition, there promises extended opening in the lead-up to Christmas.<br />
You will really enjoy the Hornby/<strong>Airfix</strong> experience at the Visitor Centre, which<br />
is aimed at pleasing all the family. Come along soon!<br />
THE BEDFORD QL TRUCKS<br />
The Bedford QLD was the GS (general service) cargo truck version of the QL series,<br />
which Bedford Vehicles manufactured for use by the British Armed Forces during<br />
WWII. The QLT was the troop carrier version and between the two variants, Bedford<br />
produced approximately 52,250 before they ceased manufacture in 1945.<br />
Bedford started work on the Bedford QL 3-ton truck back in 1938, following their<br />
engineering department suggestion of a 4x4 truck with off road ability. The design<br />
had its advantages, particularly for military use and the War Office approved the<br />
design just before the outbreak of WWII. From 1941 onwards, the Bedford QL was<br />
at the forefront of any Allied battlefield where they performed a number of uses.<br />
The Bedford variants, mounted on the basic QL chassis were identified by which<br />
body was fitted to the chassis.<br />
The first letter indicated the model and the second letters indicated the version.<br />
H and later S indicated a short wheelbase.<br />
L indicated a long wheelbase.<br />
A third letter indicated a sub type.<br />
D usually indicated a Dropside Cab<br />
T indicated an End Tipper but in military versions it indicated Troop Carrier.<br />
W indicated that the chassis was constructed to wartime specifications.<br />
R again for wartime use – indicated that it carried a radio<br />
After that, numbers were added to indicate the tonnage.<br />
E.g. 0 = under 1 ton. 1 = 1 ton etc.<br />
Therefore the QLB was a Bofors gun tractor, with capacity for ammunition and<br />
11<br />
1:76<br />
SCALE<br />
Military vehicle enthusiasts and collectors of WWII models will be pleased to see the introduction of the newly<br />
tooled 1:76 scale Bedford QL Trucks into the <strong>Airfix</strong> range, which is planned for release any time now.<br />
A03306 Bedford QL Trucks give you the option of<br />
constructing the two vehicles that were produced in<br />
most numbers during the period between 1941-1945,<br />
namely the troop carrier (QLT) as well as the<br />
general-purpose cargo truck (QLD).<br />
A03306<br />
MODEL KIT • MAQUETTE A MONTER • MODELLBAUSATZ • MODELLO A SCALA • BOUWMODEL • MAQUETA PARA MONTAR • PLASTBYGGSATS • RAKENNUSSARJA • MODELO PARA CONSTRUIR • MODELBYGGESÆT • ΣΥΝΑΡΜOΛOΓOΥΜΕΝO MONTEΛO<br />
stores; QLD was the general-purpose dropside truck; QLR was a signals vehicle<br />
(with radio); and the QLT was the Troop Carrier, with bench seats along each side<br />
for the troops. Each featured the long wheelbase. Their capacity was 1 driver and<br />
A<br />
11 passengers and had an operational range of 156 miles (250 kms). They were<br />
not armoured. Even though manufacture ceased in 1945, the Bedford QL series<br />
was used in later conflicts including the Korean War and was in service until as<br />
recently as the 1970s in peacetime army activities.<br />
Other Specifications<br />
Weight: 7,225 lbs (3,277 kg) when empty.<br />
15,400 (6,985 kg) loaded.<br />
Length: 19ft 8 ins (5.99 m).<br />
Width: 7ft 5 ins (2.26 m).<br />
Height: Just under 10 feet. (2.54 m).<br />
Engine: Bedford 6 cylinder 3,519 capacity (214.7 cu in). 72 hp (54 kW).<br />
Payload capacity: 3 tons.<br />
Suspension: Wheel, 4 x 4.<br />
The Bedford QL...at the forefront of any Allied battlefield.<br />
w w w . a i r f i x . c o m
This Bedford QL twin kit is the first all new <strong>Airfix</strong> designed small scale military vehicle kit to be released since the Opel Blitz<br />
and PAk 40 kit was released back in 1979. This all newly tooled kit comprises 4 sprues upon which are a total of 136 cleanly<br />
moulded parts. 62 parts make up the QLD General Service truck and the remaining 74 parts for the longer QLT Troop carrier.<br />
1:76 SCALE<br />
At the time of this pre-production build, the decal sheet was not yet available. However<br />
artwork provided showed that the sheet contains serial numbers for one of each truck<br />
version, along with 4 different British Army divisional markings as well as 3 unit<br />
markings all for use in the North West European Theatre of operations in 1944/45.<br />
The parts themselves are cleanly moulded and nicely detailed with a few ejection pin<br />
marks that require dealing with, more on that later.<br />
The fit of parts is exceptional with no sloppy/ill fitting joints requiring filling. This is<br />
probably due to the CAD origination of the kit's design. However, in a couple of places<br />
the fit of parts is a little on the "tight" side and required a swipe of a sanding stick. I<br />
will highlight these few areas during the build. But if you use the rule of testing the fit<br />
of parts first before applying glue, you shouldn't have any real problems.<br />
Now to the build itself.<br />
Model build by: Adam Cooper<br />
As with most soft skin vehicle kits, the first stages of construction involve the chassis<br />
and suspension as well as all those dangly bits usually hidden out of sight from above.<br />
(You can tell I'm no DIY car mechanic.) Both kits comprise a single piece chassis so<br />
there is no risk of building upon a warped or twisted chassis that you only discover<br />
at the last stages of construction when the cab and body seem to be leaning in<br />
opposite directions. How often does that happen - or is that just me?<br />
The suspension parts all fit together with very positive locations.The only issue I had<br />
was that of the mounting lug on the chassis front end plates (parts A28 and C10)<br />
which seemed a little too long and required about 1mm of the mounting lug to be<br />
removed. The "tight fit" issue came to the fore when mounting the QLT's two petrol<br />
tanks (part B12) to the chassis support brackets.<br />
The brackets needing a very light sanding on their sides so that they slotted into the<br />
grooves on the tops of the fuel tanks.When completed the chassis sub assemblies<br />
were test fitted with their wheels on to ensure that the "weighted" wheels (a nice<br />
design touch by the way) sat on the ground properly. When checked these were put<br />
aside to dry.<br />
The <strong>Airfix</strong> Bedford QL Trucks...<br />
Before starting on the vehicle cabs, I tackled the issue of the ejection pin marks that<br />
are on the inside surfaces of the bodywork and the rear cab wall of both trucks. Rather<br />
than try and fill these shallow indentations with model filler I use correction fluid (ie<br />
Tippex or similar) This comes in a pen like dispenser with a fine metal tip. It's then just<br />
a matter of dispensing the fluid into each depression by "drawing" round the inside<br />
of the ejection pin circle. Apply enough so that the liquid foms a "dome" inside the<br />
depression. This extra amount is required as it tends to shrink a bit when it dries. When<br />
hardened off, provided each depression has been "filled", this can be sanded/scraped<br />
level with the surrounding area. One thing to remember though - give the correction<br />
pen a good shake/rattle before use to ensure its properly mixed. As can be seen in<br />
this picture the white circles are the Tippex filled ejection pin marks.<br />
The cabs of both vehicles are almost identical, the only difference being in the cab<br />
roof styles, One is a standard version, the other is the type with an open "manhole".<br />
Both cabs come with transparency parts for the doors and front windows.The front<br />
windows are a little on the thick side - more like 6 inch armoured glass but they do<br />
fit rather well. I elected to fit these clear parts at the end of the build but in the end I<br />
needed to sand the edges of them to get them to fit properly as the build up of paint<br />
and varnishes during construction had "shrunk" the window apertures.The instructions<br />
would have you fit the windows as the cab is built, which will require them to be<br />
masked off for painting later on.<br />
I painted the cab interiors with the same colour as the outside bodywork - Khaki Drab<br />
(H159). The seat cushions were painted with a 50/50 mix of Khaki Drab (H159) and<br />
Ochre (H93) which makes a rather nice military khaki colour. The steering wheel and<br />
dashboard instruments were painted satin black (H85) - gloss black being a bit too<br />
shiny in this scale for the steering wheel. All the detail was then drybrushed with my<br />
mixed khaki/ochre colour to make the edges stand out a bit more. Both vehicles come<br />
with an optional canvas tilt. These were assembled as well as the vehicle bodies. The<br />
QLT comes with a set of troop seats. Again these parts just fell together, the design<br />
of the joints ensuring a good square corner.<br />
After leaving overnight for all the sub-asemblies to harden, painting was commenced.<br />
This being an overall coat of the main camouflage colour Khaki Drab (H159), a second<br />
and third coat was applied where necessary. Canvas tilts on WW2 trucks were dyed<br />
rather than painted green. Being canvas and exposed to the elements, these tended<br />
to fade and wear quite easily. For a more realistic look I elected to paint the canvas<br />
tilts a slightly different lighter shade of green. Having looked at several WW2 vintage<br />
photographs, I decided that Light Olive (H86) would be a good choice. This gave a<br />
decidedly lighter, faded effect when compared to the main camouflage green. The<br />
Camouflage on British vehicles during the later stages of the war was Khaki Green<br />
with what looks like black "Mickey Mouse" camouflage. This dark colour wasn't in<br />
fact black but a very very dark grey/charcoal colour.<br />
I mixed up my own batch of this dark "charcoal grey" using a 70/30 mix of Sea Grey<br />
(H27) and Matt Black (H33). This produces a distinctly faded black shade. This was<br />
applied in a couple of coats by brushing over the green in the distinctive Mickey<br />
Mouse ears pattern.<br />
The tyres for the trucks had also been painted in my black/grey mix again for a more<br />
realistic look. Sometimes matt black is quoted a colour for vehicle tyres but when<br />
was the last time you ever saw a vehicle with pure black tyres? When dried the tyres<br />
were given a wash of a light grey/tan mud colour. This was done using an inexpensive<br />
water colour set, courtesy of one of my daughters. The water paint mix had a drop of<br />
washing up liquid added to reduce the surface tension, enabling it to be applied in all<br />
the tread of the tyre. When dried, as it was only water colour, some of it could be<br />
wiped away to leave the "mud" in the tyre tread.<br />
The chassis, cab, body and canvas tilts were all dry brushed with Sea Grey (H27) to<br />
enhance the edges and add some depth to the detail. At this point the separate chassis,<br />
cab and wheels were all glued together. After a little drying time, an overall coat of<br />
gloss varnish (H35) was applied. This would provide a base for the subsequent dark<br />
detail washes onto which the decals would be applied. This was then left overnight to<br />
harden. A dark wash was applied next to darken the shadows in the surface<br />
detailing. This combined with the earlier drybrush highlighting, gives the detail a real<br />
3D effect.<br />
The wash comprises a heavily thinned mix of Humbrol enamel thinners plus a drop<br />
of gloss black (H21) , Brunswick Green (H3) as well as a few drops of gloss<br />
varnish (H35).<br />
What you are aiming to mix is a dirty thinners look rather than a thinned paint look.<br />
I find that the paint pigment in gloss paints seems to be finer than that found in matt<br />
paints and so more suitable for extreme thinning for wash purposes. After the wash<br />
had been applied a couple of times and allowed to dry between applications, the<br />
decals were applied.<br />
The production decal sheet wasn't available in time for this build. Using the PDF of<br />
the decal artwork I had been provided with I intended printing off my own decals using<br />
my Alps printer. However time was getting short so I scavenged the Allied stars and<br />
one serial number from my spare decal box and, using a paper printed copy of the<br />
decal sheet artwork, I cut out the unit markings and applied those with some gloss<br />
varnish to bed them down. Final detail painting was applied as and where required.<br />
The Bren Gun, having been painted, was attached to its mount and the miltary bicycle<br />
was also attached, as well as the wheels. A couple of overall coats of Matt Varnish<br />
(M49) dulled everything down to a more realistic appearance.<br />
The wndows were then installed using clearfix. Before installation, the edges of the<br />
clear parts were gently sanded so they fitted into the window apertures, test fitting<br />
all the time. Before committing glue to them, the edges of each of the clear parts were<br />
coloured using a black permanent marker. This helps reduce the internal reflection<br />
of light within the plastic which would otherwise make the edges of the clear parts<br />
"silver" and become more noticeable.<br />
And there you have it. Two very enjoyable vehicles to make. There are some nice<br />
touches like the weighted wheels. The design of the kit makes for speedy assembly<br />
and would be ideal for someone new to the hobby wanting to branch into military<br />
vehicles.<br />
I think that these are excellent value for money with two vehicles in the box. I certainly<br />
will be treating myself to more of these and can only hope that we don't have to wait<br />
another 30 years for the next addition to the range.<br />
w w w . a i r f i x . c o m 12 13<br />
w w w . a i r f i x . c o m
PRESS RELEASE...<br />
Key Publishing Ltd are delighted to announce the<br />
launch of <strong>Airfix</strong> Model World, an exciting new<br />
magazine for scale modellers, published under licence<br />
from <strong>Airfix</strong>.<br />
w w w . a i r f i x . c o m 14<br />
News of a great <strong>Airfix</strong> Club Membership subscription rate will be made<br />
available soon!<br />
KEY PUBLISHING LAUNCHES...<br />
AIRFIX MODEL WORLD<br />
As Europe’s leading publisher of aviation magazines with sector dominant brands<br />
such as FlyPast, Airliner World and AirForces Monthly, Key are ideally placed to<br />
bring this title to market due to their knowledge of the subject area and the<br />
promotional opportunities afforded by their current portfolio.<br />
“We are absolutely delighted to have formed this partnership with <strong>Airfix</strong> in order to<br />
launch <strong>Airfix</strong> Model World. <strong>Airfix</strong> is a massively strong brand with a great history<br />
and following and we are relishing the opportunity to bring something very fresh<br />
and vibrant into the market,” stated Adrian Cox, Managing Director of Key Publishing.<br />
Darrell Burge, <strong>Airfix</strong> Marketing Manager said, ‘’We are very excited about the launch<br />
of <strong>Airfix</strong> Model World which further expands the <strong>Airfix</strong> brand into the magazine<br />
marketplace. Key are the perfect partners for us as they have so much experience<br />
in publishing high quality market leading specialist leisure titles. I am confident that<br />
with the strength of the <strong>Airfix</strong> brand combined with Key’s publishing expertise, we<br />
will have an absolute winner on our hands.’’<br />
<strong>Airfix</strong> Model World will cover all modelling genres but will focus on aviation, the<br />
largest sub-sector within this market. The 100 page magazine, which launches on<br />
4 November 2010 with a monthly frequency and superb production values, will<br />
have a cover price of £3.99.<br />
15<br />
COME AND<br />
MEET THE AIRFIX<br />
TEAM<br />
w w w . a i r f i x . c o m