You also want an ePaper? Increase the reach of your titles
YUMPU automatically turns print PDFs into web optimized ePapers that Google loves.
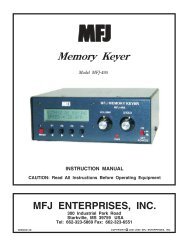
<strong>MFJ</strong>-<strong>447</strong> Instruction <strong>Manual</strong> SlimLine <strong>Deluxe</strong> <strong>Keyer</strong><br />
Introduction<br />
The <strong>MFJ</strong>-<strong>447</strong> SlimLine <strong>Deluxe</strong> <strong>Keyer</strong> with Memory is a microprocessor<br />
controlled keyer that provides iambic key operation and dot-and-dash memory to<br />
make sending perfect code easier. It has tunable code speed, code weight, and<br />
sidetone frequency; it supports both direct and grid-block keying outputs. You<br />
also get to choose between Iambic Type "A" and Type "B" keying. It even has a<br />
non-volatile memory to record and play a message of your choice.<br />
Control Functions<br />
1. The Power button turns the unit ON and OFF. The power is ON when the<br />
button is locked in the "in" position and OFF in the "out" position.<br />
2. The Tune button continuously keys the transmitter for tuning.<br />
3. The Semi-Auto/Auto button allows semi-automatic "bug" and manual<br />
operations. The keyer generates dots automatically when a squeeze or<br />
single lever key is used. Dashes are manually made. The keyer is<br />
completely manual when a straight key is used. Semi-Auto is active when<br />
the switch is in the "in" position and Auto when in the "out" position.<br />
4. The Message button lets you record and play a message from the nonvolatile<br />
memory. It is a momentary push-button that is time sensitive.<br />
5. The Speed control varies the code speed. The speed range is configured<br />
with an internal jumper (JMP9) for 5 to 65 WPM or 10 to 40 WPM. Turn<br />
the control clockwise to increase speed and counter-clockwise to decrease<br />
speed. The unit is factory set to 5 to 65 WPM. To make the speed<br />
adjustment less sensitive, change the speed range to the narrower range of<br />
10 to 40 WPM. To change the speed range the power must be off, then<br />
remove the cover by removing the two screws (one on each side) that secure<br />
it. Locate jumper JMP9 next to the microprocessor and set it to the "H"<br />
position.<br />
Note: Power must be off when changing the jumper settings.<br />
6. The Weight control varies the code weight from approximately 25% to<br />
75%, with the standard dot defined as 50% weight. The standard dot-dashspace<br />
ratio is 1:3:1 (trimpot at mid-range). This control is turned clockwise<br />
to increase dot and dash lengths and counter-clockwise to decrease dot and<br />
dash lengths.<br />
1
<strong>MFJ</strong>-<strong>447</strong> Instruction <strong>Manual</strong> SlimLine <strong>Deluxe</strong> <strong>Keyer</strong><br />
7. The Tone control sets the desired sidetone pitch from approximately 300 to<br />
1200 Hz. This control is turned clockwise to raise the pitch and counterclockwise<br />
to lower the pitch.<br />
8. The Volume control adjusts the sidetone level of the internal speaker. Turn<br />
the control clockwise to increase the volume and counter-clockwise to<br />
decrease the volume.<br />
9. The Direct/Grid-Block Output keying circuit allows keying of grid-block<br />
and solid state transmitters. The <strong>MFJ</strong>-<strong>447</strong> can only key one type of<br />
transmitter at a time. This is an internal jumper selected option. The unit is<br />
factory set to direct keying. To change to grid-block keying the power must<br />
be off, then remove the cover by removing the two screws (one on each<br />
side) that secure it. Locate JMP1 and JMP2. JMP2 is directly behind the<br />
RCA jack and JMP1 is approximately one inch in front of JMP2. Set both<br />
jumpers JMP1 and JMP2 to the "G" position. To key a solid state<br />
transmitter, set both jumpers to the "D" position.<br />
2<br />
Note: Power must be off when changing the jumper settings.<br />
10. The Iambic Type A/B mode is also set inside the unit with a jumper. The<br />
unit is factory set for Type "A" Iambic. If you prefer Type "B" Iambic,<br />
remove the cover by removing the two screws (one on each side) that secure<br />
it. Locate jumper JMP3 and set it to the "B" position. For Type "A"<br />
Iambic, set the jumper to the "A" position.<br />
Note: Power must be off when changing the jumper settings.<br />
When a squeeze is released during an element (dot or dash), type "B" adds<br />
the opposite element. Type "A" just finishes the element in progress and<br />
does not produce a following alternate element. For example, in Type "A"<br />
Iambic, a squeeze release during the "dah" in the letter A will produce "di-<br />
dah" (A). In Type "B" Iambic, a squeeze release during the "dah" in the<br />
letter A will produce "di-dah-dit" (R).<br />
Installation<br />
1. A 9-volt battery (not included) may be installed. Remove the cover by<br />
removing the two screws (one on each side) that secure it.. A battery holder,<br />
located inside the enclosure, is provided for installing a 9-volt battery.<br />
2. A 12 Vdc power supply may also be used to power the <strong>MFJ</strong>-<strong>447</strong>. A 2.1mm<br />
coaxial plug with a positive center and a negative sleeve should be used to
<strong>MFJ</strong>-<strong>447</strong> Instruction <strong>Manual</strong> SlimLine <strong>Deluxe</strong> <strong>Keyer</strong><br />
power this unit. The <strong>MFJ</strong>-1312B, an optional 12 volts adapter, is available<br />
from <strong>MFJ</strong> Enterprises, Inc. The battery is automatically disconnected when<br />
external power is used.<br />
3. A squeeze or single lever key can be used. Squeeze key allows Iambic<br />
operation. A 1/4-inch stereo phono plug and a two-conductor shielded cable<br />
should be used. If separate shielded cables are used, the two shields should<br />
be tied together and connected to ground. The dot wire should be connected<br />
to the tip of the plug and the dash wire to the ring. The <strong>MFJ</strong>-<strong>447</strong> becomes a<br />
manual keyer when a straight key is used. The unit will safely key your<br />
transmitter and eliminate the shock hazard of high voltage being present on<br />
the straight key.<br />
Note: To use a straight key, first switch the keyer to the Semi-Auto mode<br />
(button in). Again a 1/4-inch stereo phono plug should be used<br />
because a mono plug will not work on a straight key in Semi-Auto<br />
mode. Connect one wire to the ring of the plug and another wire to<br />
ground. The tip of the plug should not used.<br />
4. Output keying circuit allows keying of grid-block and solid state<br />
transmitters. Remember this is internally jumper selected (refer to page 2).<br />
The keying output connection is made with a RCA phono plug.<br />
Note: Consult the transmitter's instruction manual to determine which<br />
output to use. When in doubt, try both jumper positions. The<br />
transmitter will key continuously when the jumpers are connected to<br />
the wrong positions.<br />
<strong>Keyer</strong> Operation<br />
1. A 9-volt battery or an optional dc adapter may be used to supply power to<br />
the keyer.<br />
2. The key paddle should be connected to the Key jack on the rear panel of the<br />
unit. A dual paddle squeeze key or a single lever key can be used.<br />
3. An external speaker can be connected to the Speaker jack on the rear panel<br />
of the unit.<br />
4. Next, the keyer should be turned on with the Power switch.<br />
5. The Semi-Auto/Auto switch should be in the "out" position for automatic<br />
operation.<br />
3
<strong>MFJ</strong>-<strong>447</strong> Instruction <strong>Manual</strong> SlimLine <strong>Deluxe</strong> <strong>Keyer</strong><br />
6. The user should now start sending with the paddle and adjust volume, tone,<br />
weight, and speed to his or her preference.<br />
7. The dot and dash memories make sending easier. The memories allow the<br />
user to key a dot before the completion of a dash and vice versa. This<br />
feature can be checked by setting the keyer to the lowest speed and tapping<br />
first the dash lever and then the dot lever before the completion of the dash.<br />
The keyer will provide both the dash and the dot. The dash memory can be<br />
checked in a similar manner. The dot insertion feature allows the user to<br />
insert a dot by tapping the dot lever while holding the dash lever in. The<br />
dash insertion feature allows the user to insert a dash while holding the dot<br />
lever in. The Iambic operation allows sending of alternate dots and dashes<br />
when using squeeze key and with both paddles squeezed. The first paddle<br />
contacted will determine whether a dot or dash occurs first.<br />
8. The user may select either Iambic A or B according to his preference.<br />
Message Memory<br />
The Message button is used to record and play your message. To record the<br />
message, press and hold the Message button until the keyer plays "GO" (dahdah-dit<br />
dah-dah-dah) in Morse code and the LED flashes. You may now key in<br />
the message of your choice. As you pause after every word, the keyer will play a<br />
"W" (di-dah-dah) over the sidetone speaker to show that it is inserting a word<br />
break (uses one unit of memory). If you make a mistake entering a word, you<br />
can back up over it by briefly pressing and releasing the Message button. The<br />
keyer will erase the last word, then play the word before it (if any) to let you<br />
know where you stopped. If deleting the first word of the message, the keyer<br />
will play "GO" instead. At the end of your message, press and hold the Message<br />
button until the keyer sends an end of message character "+" (di-dah-di-dah-dit)<br />
and the LED stops flashing. When there are ten or less units of memory<br />
remaining, the LED will flash faster to let you know the memory is running low.<br />
If you try to save more characters than you have memory, the keyer will<br />
automatically end your message and send you an end of message character. The<br />
speed, weight and tone cannot be changed during message recording. Also, the<br />
output keying circuit is disabled during recording.<br />
Note: A straight or manual key cannot be used to record the message.<br />
To play the recorded message, momentarily press the Message button. Ongoing<br />
message can be stopped by tapping either paddle or pressing the Message<br />
button.<br />
4
<strong>MFJ</strong>-<strong>447</strong> Instruction <strong>Manual</strong> SlimLine <strong>Deluxe</strong> <strong>Keyer</strong><br />
The non-volatile memory is set up for only one message. There are 507 units of<br />
memory, which can record up to 507 characters (nine elements maximum per<br />
character--an element is a dot or a dash). Each normal character uses one unit of<br />
memory; only the rarely used 7-, 8- and 9-element characters require two units of<br />
memory.<br />
Embedded Commands:<br />
While in the message recording mode you may use embedded commands for<br />
special features. To use an embedded command simply store the multi-character<br />
embedded command code within your message.<br />
/D Decrement−decrements the serial number. Serial number 0001 will<br />
decrement to 9999, skipping 0000 since it is not used. This feature<br />
allows a serial number to be sent twice in a message.<br />
Example: UR RST 559 559 SN /N /D SN /N<br />
/G# Gap−inserts a gap of # standard intra-character spaces into the message,<br />
where # is a digit in the range of 1 to 9 (0 can be used but not practical).<br />
Invalid numeral code will automatically default to zero. This command<br />
is used to exaggerate inter-character and word spacing.<br />
/L Loop−creates a message loop (message repeat). Note that any character<br />
recorded after "/L" will not be sent.<br />
Example: BEACON AA5CS 5 W /L<br />
/N Number−inserts a contest serial number, in the range of 001 to 9999,<br />
into the message. Jumpers JMP4 to JMP8 controls the way zeroes and<br />
nines in the serial number are sent. Only three digits are sent for<br />
numbers less than 1000--use leading zeros when appropriate. The<br />
serial number is automatically post-incremented each time it is sent and<br />
updated in the non-volatile memory. Serial number 9999 will wraparound<br />
to 0001, skipping 0000 since it is not used. The serial number is<br />
set to the same one as before when power on. If a different serial<br />
number is desired, it must be programmed during power up. To<br />
initialize the serial number, press and hold the Message button while<br />
turning the power on until the keyer plays "GO" (dah-dah-dit dah-dahdah)<br />
and the LED flashes. You must then enter four numbers in Morse<br />
code for a valid serial number, most-significant digit first (invalid<br />
numeral code will automatically convert to zero). All numbers must be<br />
in the proper Morse code format. For example, the number "1" must be<br />
"di-dah-dah-dah-dah" and the number "0" must be "dah-dah-dah-dahdah".<br />
When four numbers are entered, the keyer will automatically<br />
send an end of message character "+" (di-dah-di-dah-dit). The keyer<br />
then resumes with normal operation when the LED stops flashing. The<br />
5
<strong>MFJ</strong>-<strong>447</strong> Instruction <strong>Manual</strong> SlimLine <strong>Deluxe</strong> <strong>Keyer</strong><br />
serial number can be set from 0000 to 9999 (0000 will automatically<br />
convert to 0001).<br />
Example: YOU ARE CONTACT NR /N<br />
/Pmmss Pause−inserts a timed pause of mm minutes and ss seconds into the<br />
message. Four numbers must follow "/P". Invalid numeral code will<br />
automatically default to zero.<br />
Example: TIMEOUT 1 HOUR /P6000 TIMEOUT 1.5 MIN /P0090 TIMEOUT 1<br />
HR 40 MIN 39 SEC /P9999<br />
/R Resume−suspends message playback to allow insertion of paddle entry.<br />
Once paddle sending is finished, press the Message button again to<br />
continue the message.<br />
/S Space−inserts an extra standard word space into the message. This<br />
command yields the same result as "/G7" but uses one less unit of<br />
memory.<br />
// Slash character−stores the slash character "/" into the message.<br />
6
<strong>MFJ</strong>-<strong>447</strong> Instruction <strong>Manual</strong> SlimLine <strong>Deluxe</strong> <strong>Keyer</strong><br />
Jumper Settings<br />
JMP1 JMP2 Keying Mode<br />
D D Direct *<br />
D G Invalid<br />
G D Invalid<br />
G G Grid Block<br />
* Factory defaults.<br />
JMP3 Iambic Mode<br />
A A *<br />
B B<br />
JMP4 JMP5 Leading Zeroes<br />
L L none<br />
L H 0<br />
H L O *<br />
H H T<br />
JMP6 JMP7 Other Zeroes<br />
L L 0 *<br />
L H 0<br />
H L O<br />
H H T<br />
JMP8 Nines<br />
L 9 *<br />
H N<br />
JMP9 Speed Range<br />
L 5 - 65 WPM *<br />
H 10 - 40 WPM<br />
7
<strong>MFJ</strong>-<strong>447</strong> Instruction <strong>Manual</strong> SlimLine <strong>Deluxe</strong> <strong>Keyer</strong><br />
Self Test<br />
A self test is included to perform testing of the paddle, the buttons, the controls,<br />
and the audio circuitry. At any time, turn off the power to stop the self test.<br />
To perform this test:<br />
1. Turn off the power and remove the power plug.<br />
2. Push all buttons so they are in the out position.<br />
3. Turn all knobs to full clockwise position, except the Volume control. Set<br />
volume to a comfortable listening level.<br />
4. Remove the box cover (2 screws).<br />
5. Remove jumpers JMP4 to JMP7. Set jumper JMP3 to the "B" position. Set<br />
jumpers JMP8 and JMP9 to the "H" position.<br />
6. Reconnect power.<br />
7. Squeeze the paddle while turning the power on. The self test starts by<br />
sending the copyright message "COPYRIGHT 1996-199X <strong>MFJ</strong> ENTERPRISES,<br />
INC. VERSION X.XX" confirming the audio circuitry is working properly.<br />
Release the paddle before the message is finished. For the entire test, the<br />
LED should blink once after each operation. If the LED blinks continuously<br />
the unit fails the test and a Morse code message is sent to indicate the nature<br />
of the failure.<br />
8. The paddle, the Message button, and jumpers JMP3 to JMP9 are<br />
automatically tested for shorts to ground. The LED should be off at this<br />
point.<br />
9. Press and release the dot level; press and release the dash level.<br />
10. Press and release the Message button.<br />
11. Lock in the Semi-Auto/Auto button, then press and release the dash level.<br />
12. Test the Speed control by turning it to full counter-clockwise then to full<br />
clockwise. The LED should blink once at each end.<br />
13. Test the Weight and Tone controls in the same way. The LED should blink<br />
once at each end.<br />
14. Test the jumper connections by placing the plug-in jumpers on the "A"<br />
position of JMP3 and then the "L" positions of JMP4 to JMP9 in ascending<br />
order. The LED should blink once for each jumper.<br />
15. When all is okay, a repetitive message "PASS" is sent to the speaker. A<br />
repetitive message such as "SP FAIL" indicates that you did not follow the<br />
correct order or the unit failed the test.<br />
16. Turn off the power after confirming the audio has good quality and remove<br />
the power plug.<br />
17. Replace all jumpers to their original positions.<br />
18. Replace the cover and secure it with the two (2) screws.<br />
19. Reconnect power and resume with normal operation.<br />
Memory Test<br />
8
<strong>MFJ</strong>-<strong>447</strong> Instruction <strong>Manual</strong> SlimLine <strong>Deluxe</strong> <strong>Keyer</strong><br />
A test is also included to perform testing of the non-volatile memory (EEPROM)<br />
circuitry. This procedure can also be used to reset the contest serial number to<br />
0001.<br />
To test the non-volatile memory:<br />
1. Turn off the power.<br />
2. Press and lock in the Semi-Auto/Auto button.<br />
3. Squeeze the paddle while turning the power on.<br />
4. The non-volatile memory circuitry is then automatically tested. Notice this<br />
step resets the serial number to 0001.<br />
5. If the non-volatile memory is okay, "EE PASS" is sent repetitively. If<br />
something is wrong, "EE FAIL" is sent repetitively.<br />
6. Turn off the power.<br />
Failure Message Meanings:<br />
• DH FAIL Dash level is shorted or improperly connected.<br />
• DT FAIL Dot level is shorted or improperly connected.<br />
• EE FAIL Non-volatile memory circuitry is improperly connected.<br />
• J3 FAIL Jumper JMP3 is shorted or improperly connected.<br />
• J4 FAIL Jumper JMP4 is shorted or improperly connected.<br />
• J5 FAIL Jumper JMP5 is shorted or improperly connected.<br />
• J6 FAIL Jumper JMP6 is shorted or improperly connected.<br />
• J7 FAIL Jumper JMP7 is shorted or improperly connected.<br />
• J8 FAIL Jumper JMP8 is shorted or improperly connected.<br />
• J9 FAIL Jumper JMP9 is shorted or improperly connected.<br />
• MG FAIL Message button is shorted or improperly connected.<br />
• SA FAIL Semi-Auto/Auto button is shorted or improperly connected.<br />
• SP FAIL Speed control is bad.<br />
• TN FAIL Tone control is bad.<br />
• WT FAIL Weight control is bad.<br />
9
<strong>MFJ</strong>-<strong>447</strong> Instruction <strong>Manual</strong> SlimLine <strong>Deluxe</strong> <strong>Keyer</strong><br />
Morse Code Character Set 1<br />
A di-dah •− N dah-dit −•<br />
B dah-di-di-dit −••• O dah-dah-dah −−−<br />
C dah-di-dah-dit −•−• P di-dah-dah-dit •−−•<br />
D dah-di-dit −•• Q dah-dah-di-dah −−•−<br />
E dit • R di-dah-dit •−•<br />
F di-di-dah-dit ••−• S di-di-dit •••<br />
G dah-dah-dit −−• T dah −<br />
H di-di-di-dit •••• U di-di-dah ••−<br />
I di-dit •• V di-di-di-dah •••−<br />
J di-dah-dah-dah •−−− W di-dah-dah •−−<br />
K dah-di-dah −•− X dah-di-di-dah −••−<br />
L di-dah-di-dit •−•• Y dah-di-dah-dah −•−−<br />
M dah-dah −− Z dah-dah-di-dit −−••<br />
1 di-dah-dah-dah-dah •−−−− 6 dah-di-di-di-dit −••••<br />
2 di-di-dah-dah-dah ••−−− 7 dah-dah-di-di-dit −−•••<br />
3 di-di-di-dah-dah •••−− 8 dah-dah-dah-di-dit −−−••<br />
4 di-di-di-di-dah ••••− 9 dah-dah-dah-dah-dit −−−−•<br />
5 di-di-di-di-dit ••••• 0 dah-dah-dah-dah-dah −−−−−<br />
Period [.] di-dah-di-dah-di-dah •−•−•− AAA<br />
Comma [,] dah-dah-di-di-dah-dah −−••−− MIM<br />
Question Mark or Request for Repetition [?] di-di-dah-dah-di-dit ••−−•• IMI<br />
Fraction Bar or Slash Bar [/] dah-di-di-dah-dit −••−• DN<br />
End of Message, Plus Sign, or Cross [+] di-dah-di-dah-dit •−•−• AR<br />
End of Work di-di-di-dah-di-dah •••−•− SK<br />
Double Dash, Equal Sign, Pause, or Break [=] dah-di-di-di-dah −•••− BT<br />
Semicolon [;] dah-di-dah-di-dah-dit −•−•−• KR<br />
Colon [:] dah-dah-dah-di-di-dit −−−••• OS<br />
Apostrophe ['] di-dah-dah-dah-dah-dit •−−−−• WG<br />
Quotation Mark ["] di-dah-di-di-dah-dit •−••−• AF<br />
Hyphen or Dash [-] dah-di-di-di-di-dah −••••− DU<br />
Underline [_] di-di-dah-dah-di-dah ••−−•− IQ<br />
Dollar Sign [$] di-di-di-dah-di-di-dah •••−••− SX<br />
Left Parenthesis or Go Only [(] dah-di-dah-dah-dit −•−−• KN<br />
Right Parenthesis [)] dah-di-dah-dah-di-dah −•−−•− KK<br />
Wait or Stand By di-dah-di-di-dit •−••• AS<br />
Understood di-di-di-dah-dit •••−• SN<br />
Starting Signal dah-di-dah-di-dah −•−•− KA<br />
Error di-di-di-di-di-di-di-dit •••••••• HH<br />
Paragraph [] di-dah-di-dah-di-dit •−•−•• AL<br />
Invitation to Transmit or Go Ahead [K] dah-di-dah −•− K<br />
1. FCC test requirement consists the 26 letters, the 10 numerals, the period, the comma, the question mark, AR , SK, BT and<br />
fraction bar DN .<br />
Signals Used In Other Radio Services<br />
10
<strong>MFJ</strong>-<strong>447</strong> Instruction <strong>Manual</strong> SlimLine <strong>Deluxe</strong> <strong>Keyer</strong><br />
Interrogatory di-di-dah-di-dah ••−•− INT<br />
Emergency Silence di-di-di-di-dah-dah ••••−− HM<br />
Executive Follows di-di-dah-di-di-dah ••−••− IX<br />
Break-in Signal dah-dah-dah-dah-dah −−−−− TTTTT<br />
Emergency Signal di-di-di-dah-dah-dah-di-di-dit •••−−−••• SOS<br />
Relay of Distress dah-di-di-dah-di-di-dah-di-dit −••−••−•• DDD<br />
Technical Assistance<br />
If you have any problem with this unit first check the appropriate section of this<br />
manual. If the manual does not reference your problem or your problem is not<br />
solved by reading the manual you may call <strong>MFJ</strong> Technical Service at 601-323-<br />
0549 or the <strong>MFJ</strong> Factory at 601-323-5869. You will be best helped if you have<br />
your unit, manual and all information on your station handy so you can answer<br />
any questions the technicians may ask.<br />
You can also send questions by mail to <strong>MFJ</strong> Enterprises, Inc., 300 Industrial<br />
Park Road, Starkville, MS 39759; by Facsimile to 601-323-6551; or by email to<br />
techinfo@mfjenterprises.com. Send a complete description of your problem, an<br />
explanation of exactly how you are using your unit, and a complete description<br />
of your station.<br />
Notes<br />
11
<strong>MFJ</strong>-<strong>447</strong> Instruction <strong>Manual</strong> SlimLine <strong>Deluxe</strong> <strong>Keyer</strong><br />
Schematic<br />
12


