
Create successful ePaper yourself
Turn your PDF publications into a flip-book with our unique Google optimized e-Paper software.
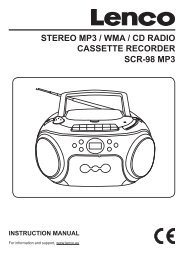
MDV-6<br />
<strong>Home</strong> <strong>Cinema</strong> <strong>Set</strong>
FOREWORD<br />
THANKS<br />
Thank you for purchasing this product.<br />
Your choice of the product sufficiently displays your expertise in acoustic equipment.<br />
We are honored to provide you with more satisfactory products. It is suggested that you<br />
spare some time to read this user manual before connecting and operating your system.<br />
So you can get enhanced enjoyment and pleasure while using this product.<br />
IMPORTANT NOTICE<br />
Please unpack carefully, and keep all the accessories in the same place.<br />
Please check any possibilities in shipping damage. If your devices are damaged<br />
or cannot be operated, please notify your local dealers immediately. If the<br />
device is shipped to your place directly, please contact the carrier as soon as<br />
possible. Only the consignee (individual or company to receive the devices) is<br />
entitled to claim indemnity to the carrier in the light of shipping damages. We<br />
recommend that you keep the original cartons and packing materials soundly for<br />
future shipping.<br />
SPECIAL NOTE<br />
1. Minimum distances around the apparatus for sufficient ventilation;<br />
2. The ventilation should not be impeded by covering the ventilation openings with items,<br />
such as newspapers, table-clothes, curtains, etc;<br />
3. No naked flame sources, such as lighted candles should not be placed on the apparatus;<br />
4. Attention should be draw to the environmental aspects of battery disposal;<br />
5. The use of apparatus in tropical and/or moderate climates;<br />
6. Where the mains plug or an appliance coupler is used as the disconnect device, the<br />
disconnect device shall remain readily operable.<br />
7. This unit is controlled by micro-computer; it may cause error displaying when this unit is<br />
posited in interferential place. In this case, please turn off the power exceed 10 seconds,<br />
and the unit will resume normal after turning on.<br />
-1-
CONTENT<br />
FOREWORD……………………………………………………………………………………..1<br />
CONTENT………………………………………………………………………………………...2<br />
FRONT PANEL...………………………………………………………………………………..3<br />
BACK PANEL……………………………………………………………………………………4<br />
REMOTE CONTROL……………………………………………………………………………5<br />
CONNTECTION WITH TV……………………………………………………………………...6<br />
CONNECTION WITH AMPLIFIER………………………………………………………….….7<br />
SYSTEM CONNECTION…………………………………………………………………….….8<br />
BASIC OPERATION……………………………………………………………………..…..9-16<br />
DVD MENU SETUP…..…………………………………………………………………….17-20<br />
SPECIFICATION…………………………………………………………………………….….21<br />
TROUBLE SHOOTING…………………………………………………………………………22<br />
ACCESSORIES<br />
-2-
FRONT PANEL<br />
1. Remote control sensor<br />
2. Power<br />
3. Stop<br />
4. Disc tray<br />
5. Eject<br />
6. Display screen<br />
7. Fast rewind/Fast forward/(Tune -/+)<br />
8. Volume +/-<br />
9. Previous/Next (Channel -/+)<br />
10. FM/Search<br />
11. DVD/Save<br />
12. Audio/Mono/Stereo<br />
13. Play/Enter<br />
-3-
BACK PANEL<br />
1. Y, Pb/Cb, Pr/Cr component output<br />
2. L/R audio output<br />
3. Coaxial output<br />
4. S-video output<br />
5. Optical fiber output<br />
6. Video output<br />
7. Scart output<br />
8. L/R audio input<br />
9. L/R speaker output<br />
10. Subwoofer output<br />
11. FM antenna interface<br />
12. Power on/off<br />
13. Power supply input<br />
-4-
REMOTE CONTROL<br />
NOTE:<br />
1. Place the batteries in the remote control and turn on the player, put the emitter against the sensor of<br />
player for remote control.<br />
2. The distance of remote control should not exceed 7 meters, or else, it will be invalid.<br />
3. If the sensor or remote control emitter is stuck with foreign matters, it may result in the malfunction in<br />
signal reception or not at all.<br />
4. The remote control function may be affected under the strong interference signals, such as power<br />
supply and other strong high-frequency signals.<br />
REMARK: Remote Control Battery Type: Size: AAA Standard Voltage: 1.5V<br />
-5-
CONNECTION WITH TV<br />
1. If your TV-set has AV terminal, connect this unit to TV-set with A/V cables, and set TV-set to be<br />
AV status after confirming the connection is correct. (Figure 1)<br />
2. If your TV-set has S-Video terminal, please use the S-Video connection cable to connect the<br />
player and TV-set, to obtain a higher quality image. (Figure 2)<br />
3. If your TV-set has chromatics output terminal, please use three connection cables to connect<br />
the player and TV-set, to obtain a more vivid image. (Figure 3)<br />
4. This unit has an output interface for SCART output, which can directly be connected with TV-set.<br />
Note:<br />
(Figure 4)<br />
1. Please turn off the both player and TV before they are connected to the power line from the<br />
socket.<br />
2. You may adjust the corresponding system according to your TV system while watching various<br />
discs.<br />
3. If there are multiple connections between video player and TV, please select one and unplug<br />
others so as not to affect the quality of images and sound.<br />
4. Do not switch on /off or press power switch frequently, switching on and off each time must have<br />
an interval of 3 seconds.<br />
5. Do not connect the digital optical or coaxial output jack of this player with the analogue signal<br />
input terminal for reception.<br />
-6-
CONNECTION WITH AMPLIFIER<br />
<strong>Set</strong>up of Digital Audio Output<br />
Connect the optical or coaxial output jack to the amplifier. While in of play or stop mode,<br />
press the setup button on the remote control to open the system setup page, switch to<br />
audio setup page by pressing the directional buttons, then move the cursor to Audio Out,<br />
select SPDIF/RAW or SPDIF/PCM, press Play/Enter button to finish. Press <strong>Set</strong>up button<br />
again to exit the setup.<br />
-7-
SYSTEM CONNECTION<br />
Please refer to the following figure to connect your acoustic equipment.<br />
To keep all the connection correctly and firmly.<br />
Power supply can be connected finally.<br />
-8-
BASIC OPERATION<br />
PREPARATIVE<br />
1). Before turning on, check whether all the connection are correct and reliable. Plug the power<br />
plug into the corresponding power socket.<br />
2). Press Power button on the front panel to turn on.<br />
3). Press Eject button on the remote control (or on the front panel) to carry the disc tray outside,<br />
and put the disc into the tray, press Eject button again, this unit starts to read and play.<br />
MUTE<br />
In play status, If the Mute button is pressed, there will be no audio output, the sound is<br />
eliminated, however the image will still be played normally. Then press the button again or<br />
press Vol.+/- button to exit the mute status, the sound resumes to be its normal status.<br />
STATUS DISPLAY<br />
In play status, press OSD button, the TV screen will display the following data:<br />
VCD/CD display: single elapsed, single remain, total elapsed, total remain, display off.<br />
DVD display: title elapsed, title remain, chapter elapsed, chapter remain, display off.<br />
SOUNDTRACK SWITCH<br />
In playing VCD/CD, press LANG/(L/R) button to select the multiple output modes such as Mono<br />
L, Mono R, Stereo, and Mix-mono. Press the button once to switch one soundtrack.<br />
In playing DVD, press LANG/(L/R) button can select multiple languages for playback. (Only<br />
applies to the discs like DVD recorded in multiple languages.)<br />
FAST FORWARD & FAST REWIND<br />
In play status, press TU- button or TU+ , there will be various speeds of fast rewind and<br />
fast forward, shown as follows,<br />
FORWARD X 2, FORWARD X 4, FORWARD X 8, FORWARD X 16, FORWARD X 32, PLAY<br />
BACKWARDX2, BACKWARDX4, BACKWARDX8, BACKWARDX16, BACKWARDX32, PLAY<br />
PREVIOUS & NEXT<br />
In play status, press CH- button, the device will skip to the previous one for play, press<br />
CH+ button, the device will skip to the next one.<br />
SUBTITLE SELECTION<br />
When the played DVD disc records multiple subtitles, you can make selections of subtitle<br />
language by pressing SUB button:<br />
English, French, German, Spanish and Dutch.<br />
SLOW<br />
While playing the disc, every time the Slow button is pressed, the speed of the disc will play in<br />
1/2, 1/4, 1/8 or 1/16.<br />
-9-
BASIC OPERATION<br />
TIME SELECTION<br />
In play mode, press T/F button on the remote control, the TV screen displays,<br />
VCD/CD Display: Disc Go To: --/--<br />
Track Go To: --/--<br />
Select Track: --/xx<br />
DVD Display: Title: --/xx Chapter: --/xx<br />
Title: --/xx Time: -/--/--<br />
Chapter: --/xx Time:-/--/--<br />
You can press ◄ ► directional buttons to move the cursor to the time position, then input the<br />
corresponding numbers by pressing the numeric buttons, then press Play/Enter button to enter the<br />
desired part for playing. The optional time range depends on the volume of the played disc.<br />
VCD/CD example: The screen displays “Disc Go To: --/--”.<br />
To select 55 minutes 20 seconds, input 5,5,2,0.<br />
DVD example; The screen displays “Title xx/xx Time”.<br />
REPEAT<br />
To select 1 hour, 30 minutes, and 20 seconds, input 1,3,0,2,0.<br />
In play status, repeatedly press Repeat button to separately select the different contents for<br />
repetition.<br />
1). As for DVD, repeatedly press Repeat button, the TV screen will separately display:<br />
Chapter, Title, All.<br />
2). As for CD, VCD, CD-R discs, Successively press this button, the screen will separately<br />
display: Track, All.<br />
3). As for MP3, JPEG and other media files, there are options: Single, Repeat one, Repeat<br />
folder, Folder.<br />
A-B REPEAT<br />
In play status, press Rep.A-B button to realize the specific section repeat, that is, press this<br />
button once at the beginning of the section (A), and press it again at the end of the section ( B),<br />
this player will automatically return to A and starts to repeat playing the section from A to B.<br />
Press the button again to exit.<br />
TITLE<br />
If the played DVD disc contains a directory column, press the Title button to take out the items<br />
contained in this disc. Use the direction buttons to move the cursor to select the items you want<br />
to play, or directly use the number button to select.<br />
-10-
BASIC OPERATION<br />
LOUDNESS<br />
Press Loud button to set loudness on or off. While set loudness on, it can strength low sound<br />
signal.<br />
SOUND FIELD<br />
In play status, press DSP button, you can select different sound field effect.<br />
RESET<br />
In No Disc status, press Reset button can return the original setup or default value.<br />
STOP<br />
In play mode, press the Stop button, the TV screen will return to the startup screen, press<br />
Play/Enter button, the player will begin to play where it left off. If you successively press<br />
Stop button twice and then press Play/Enter button, the disc will be played from the<br />
beginning.<br />
PAUSE<br />
In play status, press Pause button, the player will pause, and press it again or press<br />
Play/Enter button once to continue playing.<br />
MENU<br />
Pressing Menu button on the remote control opens or closes the PBC menu.<br />
Note: 1). It will go into the Root menu when playing DVD discs.<br />
2). Older discs or some copies don’t support this function.<br />
ANGLE SELECTION<br />
In play status, repeatedly press Angle button, you can enjoy the same action shot in<br />
different angles. (The function depends on the discs.)<br />
VOLUME ADJUSTMENT<br />
You can press the VOL-/+ button to turn up or down the volume of this unit.<br />
DIRECTION BUTTONS<br />
Press the Direction buttons ▲ ▼ ◄ ► to move the cursor to select pictures or menu.<br />
-11-
BASIC OPERATION<br />
PLAY/ENTER<br />
Press this button to enable the selected items.<br />
CLEAR<br />
Press Clear button to cancel the digital you have inputted. For example: the setting of<br />
programmed songs.<br />
STANDBY<br />
Press the Standby button on the remote control can switch to the standby mode. Before<br />
you perform the operation, make sure the main power is on.<br />
Note: This standby function is one kind of saving electricity modes. When the device does<br />
not be used for a long time, please close the main power.<br />
INPUT SELECTION<br />
1) Correctly connect the outer equipment (e.g. PC computer) with this unit, and then<br />
press the Audio-in button on the remote control (or front panel) to enter Audio status to<br />
enjoy the outer audio source.<br />
2) Press the FM button on the remote control (or front panel) to select tuner.<br />
3) Press the DVD button on the remote control (or front panel) to select DVD mode. The<br />
TONE<br />
unit will start playing if there is a disc inserted.<br />
If you want to adjust the volume of Treble, Bass or Subwoofer. First to press the Tone<br />
button, select to the corresponding item and press Vol+/- button on the remote control can<br />
increase or reduce the volume of Treble, Bass or Subwoofer.<br />
ZOOM<br />
In play status every time the Zoom button is pressed, the TV screen will be zoomed in or<br />
out proportionally. In case of zoom proportion more than 1, pressing direction button is able<br />
to move the picture, continuously press the button, the TV screen display will be zoomed in<br />
2 times, 3 times, 4 times.<br />
SHORTCUT<br />
When play DVD discs, press the Shortcut button to jump over the initial title, menu or warnings.<br />
(Only for some discs, subject to the quality or recorded status of the played discs)<br />
-12-
BASIC OPERATION<br />
DITITAL BUTTONS<br />
1). While playing songs, press the Digital buttons to directly select the songs you need.<br />
2). If the desired track number is # 10 or above, you can select it by pressing the 10+ button once, and<br />
then pressing a Digital button (1--10). For example: If the 16th song is needed, you can press the 10+<br />
button followed by the 6 button.<br />
PROGRAM<br />
● In play VCD/CD disc, press ●In play DVD disc, press the Program button,<br />
the Program button, the TV the TV screen shows:<br />
Screen shows:<br />
1. If the player is in the PBC ON status, and the programmed songs are being play, this operation will<br />
result in PBC turning off.<br />
2. Input the number that you want at the place of the cursor; move the cursor to ``START``; press the<br />
Play/Enter button, the songs will play in the specified order.<br />
3. While programming, press the Clear button to eliminate the digitals that you input.<br />
4. To cancel programmed play: press the Program button again, the cursor will move to ``Stop``<br />
automatically; press Play/Enter button, the cursor move to ``EXIT`` automatically, press Play/Enter<br />
again to cancel programmed play.<br />
MP3 DISC PLAYING FUNCTION<br />
1). Press the Eject button on the remote control (or front panel) to open the disc tray, put in<br />
an MP3 disc, then press the Eject button to close the disc tray. This unit begins to read it,<br />
and the TV screen will display the following figure,<br />
-13-
BASIC OPERATION<br />
2). Press the directive keys ▲▼ to move the cursor to a certain directory, and press<br />
Play/Enter button to enter the directory. Press the direction buttons to enter the<br />
subdirectory or the file area, select a song with the cursor, press Play/Enter button to play<br />
the song.<br />
l During playing, press or button to select other songs under the current<br />
directory.<br />
l During playing, press the left direction button, the icon will skip to the directory symbol<br />
, press the up/down direction button to select other directories, press Play/Enter<br />
buttons for confirmation.<br />
Note: When play MP3 discs, this unit also has the functions such as mute, pause, previous<br />
and next selection. The operation is identical with CD playing.<br />
MPEG4、JPEG PICTURE DISC PLAYING FUNCTION<br />
1). Place the MPEG4/JPEG disc into the deck, this unit will begin to read, the main<br />
directory will be displayed on the TV screen.<br />
2). Press the direction button ▲▼ to move the cursor to the corresponding directory, press<br />
Play/Enter button to enter the next layer, and so on, until the desired picture is found for<br />
play.<br />
l During play, number buttons or button can be used to select pictures.<br />
l JPEG pictures may distort at the edge to some TV sets, this is not a unit defect.<br />
l This unit can play the digital photo discs with extension name .JPEG, and also<br />
support the picture that made by Adobe Photoshop.<br />
l If you want to repeat playing some pictures, pressing the Repeat button is OK.<br />
l During browsing , press the Stop button can go back to main menu.<br />
l After go into the subdirectory in playing MPEG4 disc, also you can do the<br />
operation such as fast backward, fast forward, pause. etc,.<br />
-14-
BASIC OPERATION<br />
DVD TITLE MENU SELECTION FUNCTION<br />
DVD disc features high capacity, records more than one movie, background data and<br />
songs. It is hereby given a name of TITLE, while more sections will be given under each<br />
TITLE, which are called Chapters. There are some songs in one chapter. While playing<br />
DVD discs, press the Title button, the TITLE menu will appear on the TV screen. (Available<br />
for DVD discs that contain more than one title menu).<br />
You can use the direction buttons to move the cursor to the desired title menu, press<br />
Play/Enter button to play it. If the title menu is represented by numbers, then press the<br />
number buttons to select directly.<br />
-15-
BASIC OPERATION<br />
FM RADIO OPERATION<br />
1. Enter FM Function<br />
In the turn-on or playing status, press the FM button on the remote control to enter FM status.<br />
2. Select Bands<br />
1) Directly input frequency: press the T/F button on the remote control, and then input the<br />
frequency that you want.<br />
2) Select band by pressing TU- or TU+ button: under some frequency, press the button, the<br />
frequency will be up or down on the step. The step of FM is 0.05 MHz.<br />
3) Select band by pressing number buttons: you may select the bands that have been saved by<br />
pressing the number buttons. For example: press 10+ button twice, 5 button once, you may<br />
select the 25th band. Press the CH- or CH+ button, the band will be switched up or down.<br />
4) Automatically search bands: press the Search button, this unit will start to search bands from<br />
3. Save Bands<br />
the lowest part to highest part automatically. Meanwhile the searched bands will be saved<br />
orderly. Press the button again to stop searching.<br />
Press the Save button, that means saving the current frequency of band. For example: If you want to<br />
save 99.3 MHz in 28th, please press 10+ button twice, 8 button once, then press T/F button to input<br />
993, then press Save button to save this frequency.<br />
4. Soundtrack Selection<br />
Press MO/ST button on the remote control, you may select Mono and Stereo soundtrack output in<br />
FM status. If the signal is not strong enough, you can not select Stereo.<br />
5. Exit FM Status<br />
Press the DVD button to exit FM status and enter the disc playing.<br />
Remark: FM Frequency range: 87.50-108.00MHz<br />
( Beyond the range, input is invalidity.)<br />
NOTE: 1. You may adjust the best radio effect by adjusting the FM antenna.<br />
2. You can search further bands by pressing Search button when adjusted the FM antenna<br />
in a right position.<br />
3. If the band is not clear by auto search, you choose the way manual search adjustment by<br />
press TU-/TU+ button.<br />
-16-
DVD MENU SETUP<br />
Press the <strong>Set</strong>up button on the remote control to open the menu setup function, the TV screen will display<br />
the following figures.<br />
1. DVD <strong>Set</strong>up Page<br />
1). OSD Language<br />
This option is used to select the language for menu and other screen displays, includes English, French,<br />
German, Spanish and Dutch.<br />
2). Audio (Language)<br />
While playing DVD disc, the player will automatically play the Pre-selected language, Includes English,<br />
French, German, Spanish, Dutch and Others. If there is no such option in the disc, the default language<br />
of the disc will be played.<br />
3). Subtitle (Language)<br />
While playing DVD disc, the player will automatically play the pre-selected subtitle if there is such a<br />
language in the disc. The options are as follows, English, French, German, Spanish, Dutch and Others. If<br />
there is no such an option in the disc, the default subtitle language of the disc will be played.<br />
4). Menu (Language)<br />
While playing DVD disc, this unit has the following languages available: English, French, German,<br />
Spanish, Dutch and Others.<br />
Note: If there is no the language you selected in the DVD disc, the player will automatically play the<br />
default recorded in the disc.<br />
-17-
DVD MENU SETUP<br />
2. Video <strong>Set</strong>up Page<br />
1) Video output<br />
This option is used to set the video output modes: S-video, YUV and RGB.<br />
Note: Make sure that you set the player to the correct video mode.<br />
2) Scan Mode<br />
This option is used to select the scan mode: P-scan or interlaced.<br />
(This operation is unavailable when the video output mode is set to S-video.)<br />
3) Aspect Ratio(4:3 PS, 4:3 LB, 16:9)<br />
*No matter which format you select, if the screen is 4:3 displays, the image is displayed in 4:3.<br />
*The DVD screen format is changeable.<br />
*Where the screen displays in4:3, the display format of DVD is 16:9, the image will be compressed<br />
horizontally.<br />
4) TV Output<br />
*This system supports such formats: PAL, AUTO, NTSC.<br />
*The adjustable range of sharpness is: High, Middle and Low.<br />
*The adjustable range of brightness is: +/-20 (the default is 0).<br />
*The adjustable range of contrast is: +/-16 (the default is 0).<br />
3. Audio <strong>Set</strong>up Page<br />
-18-
DVD MENU SETUP<br />
1) Speaker <strong>Set</strong>up<br />
*Downmix mode;<br />
LT/RT: left and right soundtrack audio output;<br />
Stereo: stereo audio signal output<br />
*Dual Mono<br />
This option is used to set the mode of audio output, including L-Mono, R-Mono, Mix-Mono, and Stereo.<br />
*Dynamic Range<br />
This option is used to chosen when Line output is selected for the compression mode. Linear<br />
compression ration is adjusted to acquire different compression effects.<br />
2) SPDIF <strong>Set</strong>up<br />
*Digital Output<br />
When playing the DOLBY or MPEG discs, the optical or coaxial terminal output in SPDIF/RAW format.<br />
Meanwhile the connected amplifier must be able to decode the DOLBY DIGITAL or MPEG.<br />
SPDIF/PCM may be selected when the player is connected with a 2 CH digital stereo amplifier.<br />
3) HDCD<br />
This option has three settings: off, 44.1 K, 88.2 K. Please set it according to the disc.<br />
4. System <strong>Set</strong>up Page<br />
1). Angle Mark<br />
When a disc has multi-angle pictures setting; Angle mark displays a multi angle mark on the screen.<br />
This option has two settings:<br />
ON: Display multi-angle mark<br />
OFF: Multi-angle mark is not display<br />
-19-
DVD MENU SETUP<br />
2). Close Caption<br />
When playing DVD disc, set this option OFF to close caption, choose the ON option to open the<br />
caption.<br />
3). Screen Saver<br />
This option is used to set screen saver on or off.<br />
4). Memory<br />
When the option is set to ON, the system automatically remembers the played disc`s contents. The<br />
disc is not remembered when the OFF option is selected.<br />
5) S/W Version (Software Version)<br />
This option is used to display the mode of this system and its factory name.<br />
6) Default<br />
Only when the player is in EJECT or NO DISC status, choose this option to resume to the DVD player’s<br />
original status.<br />
5. Password <strong>Set</strong>up Page<br />
1) Parental Control<br />
This unit has 8 different age ratings for selecting. You can move the cursor to select one of them, then<br />
press PLAY/ENTER button on the remote control to enter. You are reminded to input the password.<br />
2) Password<br />
The original password of this unit is “138900” and you can change it to a new one.<br />
-20-
SPECIFICATION<br />
Disc type DVD, DVCD, VCD, SVCD, CD, CD-R, MP3,<br />
-21-<br />
MPEG-4<br />
Video format MPEG2 for DVD, and MPEG1 for VCD<br />
Audio format MPEG1, MPEG2, PCM, Stereo<br />
Signal output Video format: NTSC, PAL, AUTO<br />
Video output: 1,0 Vp-p<br />
Audio: stereo,2V (RMS)<br />
Output Joint Video-output,Audio-output,Chromatic<br />
aberation output, S-video output,Optical fiber<br />
output, Coaxial output, Scart output<br />
Input Joint Audio input facility<br />
Power supply ~230 V/ 50 Hz<br />
Max. power 50 W<br />
Frequency 20 Hz – 20 kHz, ±3 dB<br />
S/N ratio for audio signal >=80 dB, Weight A<br />
Operation condition Temperature: 5°C – 35°C<br />
Installation: on the flat horizontal surface<br />
Note: * Some MPEG 4 discs are in *. rm/ * . ra/ * . ram/ *.rmm etc format and are not supported by this<br />
device. Please select carefully before purchase. The specification is for reference only, subject to change<br />
without prior notice.<br />
2
TROUBLESHOOTING<br />
Please use the following methods to solve the following problems while using this unit.<br />
Fault Phenomenon Possible Cause Handing<br />
Power supply can not be<br />
turned on<br />
The remote control does not<br />
work<br />
No image on the TV screen<br />
Play can not be realized<br />
No sound from loudspeaker<br />
Discontinuous sound and<br />
distorted pictures<br />
Invalid displayed on the TV<br />
screen<br />
Operation can not be done<br />
Power plug is not fully inserted into the<br />
socket<br />
-22-<br />
Insert the power plug into the<br />
socket securely<br />
Battery is used up Replace with a new battery<br />
The front end of the remote control is<br />
not aimed at the infrared reception part<br />
of the player<br />
No video cables are connected or not<br />
securely connected<br />
Please aim at the remote<br />
control window<br />
Perform connection<br />
according to system<br />
connection diagram<br />
TV not set at video mode <strong>Set</strong> the TV at the video mode<br />
The scanning mode of the device does<br />
not match the TV scanning mode<br />
No disk is placed into the guide slot<br />
Press line by line/alternate<br />
line key to convert scanning<br />
mode<br />
Place the disk into the guide<br />
slot<br />
No disk is in Place in a disk<br />
Inverse placement of disk<br />
Video cable not connected or not<br />
connected securely<br />
Wrong operations with external amplifier<br />
Disk not clean<br />
Disk scratched<br />
Disk distorted<br />
Wrong Operation<br />
Embedded micro computer fails due to<br />
lightning, static or other interference<br />
Be sure that the side with<br />
pictures of the disk points<br />
upwards<br />
Connect the cable as per the<br />
diagram<br />
Correct operations of<br />
amplifier<br />
Use a piece of clean and soft<br />
cloth to clean the disk<br />
Replace the disk with a new<br />
one<br />
Please refer to the function<br />
operation description for<br />
more details<br />
Power OFF, and restart the<br />
computer
-23-