Operating Instructions Digital Disk Recorder WJ-HL208/G
Operating Instructions Digital Disk Recorder WJ-HL208/G
Operating Instructions Digital Disk Recorder WJ-HL208/G

Create successful ePaper yourself
Turn your PDF publications into a flip-book with our unique Google optimized e-Paper software.
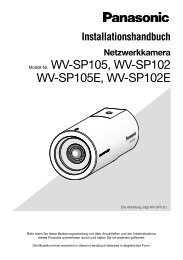
Highlight the “PTZ” tab, and the PTZ setup screen displays.<br />
Figure 38 : Camera - PTZ screen<br />
Note: You will only be able to set up PTZ devices if<br />
the PTZ port is set to RS485.<br />
Highlight the box in the “Product” column for the PTZ camera you wish to configure and<br />
press the button. A list of PTZ devices appears. Select your camera from the list<br />
and press the button. You will need to connect the camera to the RS485 connector<br />
on the back of the recorder following the camera manufacturer’s instructions.<br />
Figure 39 : PTZ device list<br />
You can assign IDs to each camera by highlighting the box under the “ID” heading and pressing the button.<br />
Change the number by highlighting it and using the Up and Down arrow buttons to increase and decrease<br />
the number. The PTZ ID number can be set from 1 to 96.<br />
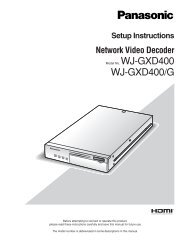
Highlight the “Setup…”and press the button. The Port Setup screen appears.<br />
Figure 40 : Port Setup screen<br />
Configure the port’s setting based on the PTZ camera manufacturer’s<br />
instructions.<br />
You can save your Camera changes by highlighting “Save” and pressing the button. Selecting “Cancel”<br />
exits the screen without saving the changes.<br />
Audio<br />
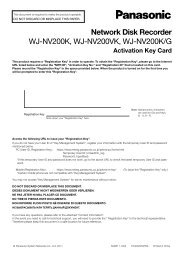
Highlight “Audio” in the Devices menu and press the button. The Audio setup screen appears.<br />
Figure 41 : Audio screen<br />
The recorder can record up to four audio inputs.<br />
Highlight the box in the “Associated Camera” column<br />
and press the button. A list of cameras appears,<br />
and you can select which camera you want associated<br />
with that audio input.<br />
Highlight “Enable Audio-Out” and press the button.<br />
This toggles between enabling and disabling audio out.<br />
You can save your Audio changes by highlighting “Save” and pressing the button. Selecting “Cancel”<br />
exits the screen without saving the changes.<br />
33