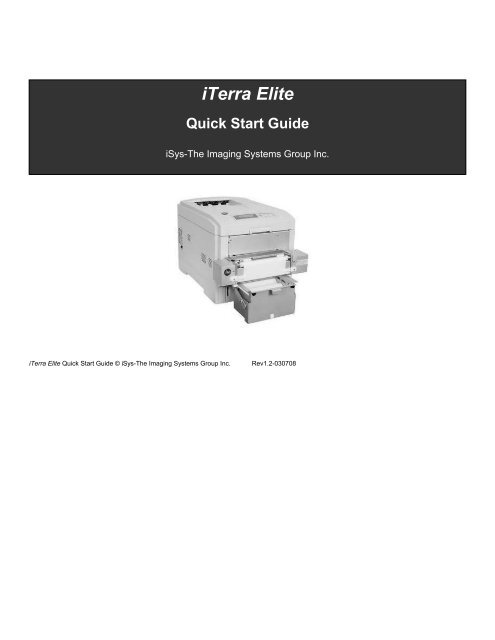
iTerra Elite Quick Start Guide - The Imaging Systems Group Inc.
iTerra Elite Quick Start Guide - The Imaging Systems Group Inc.
iTerra Elite Quick Start Guide - The Imaging Systems Group Inc.

You also want an ePaper? Increase the reach of your titles
YUMPU automatically turns print PDFs into web optimized ePapers that Google loves.
<strong>iTerra</strong> <strong>Elite</strong><br />
<strong>Quick</strong> <strong>Start</strong> <strong>Guide</strong><br />
iSys-<strong>The</strong> <strong>Imaging</strong> <strong>Systems</strong> <strong>Group</strong> <strong>Inc</strong>.<br />
<strong>iTerra</strong> <strong>Elite</strong> <strong>Quick</strong> <strong>Start</strong> <strong>Guide</strong> © iSys-<strong>The</strong> <strong>Imaging</strong> <strong>Systems</strong> <strong>Group</strong> <strong>Inc</strong>. Rev1.2-030708
TABLE OF CONTENTS<br />
1. INSTALLATION<br />
I. INSTALLING CONSUMABLES AND PRINT MEDIA ................................................... 4<br />
II. INSTALLING ACCESSORIES ................................................................................... 11<br />
III. CONNECT TO POWER ........................................................................................... 16<br />
IV. LOADING CONTINUOUS FORM FEED PRINT MEDIA ......................................... 17<br />
V. PRINT MEDIA PROPERTIES ................................................................................... 21<br />
2. ORDERING CONSUMABLE SUPPLIES<br />
I. HOW TO ORDER QUALIFIED MEDIA AND CONSUMABLES ................................. 22<br />
3. INTERFACE SETUP AND INSTALLATION<br />
I. INTERFACES ............................................................................................................. 23<br />
II. LOCAL INSTALLATION ............................................................................................ 24<br />
III. NETWORK INSTALLATION ..................................................................................... 25<br />
IV. PRINT DRIVER INSTALLATION ............................................................................. 26<br />
V. NETWORK CARD IP ADDRESS-CHECKING AND SETTING ................................ 37<br />
VI. WEB BROWSER TO PRINTER (Advanced Users and Administrators) ................. 38<br />
VII. WINDOWS 2000 & XP PRINT DRIVER PROPERTIES ......................................... 39<br />
VIII. GENERAL TAB ...................................................................................................... 39<br />
VIX. SHARING TAB ....................................................................................................... 40<br />
X. PORTS TAB .............................................................................................................. 40<br />
XI. ADVANCED TAB ..................................................................................................... 41<br />
XII. COLOR MANAGEMENT TAB ................................................................................. 41<br />
XIII. SECURITY TAB ..................................................................................................... 42<br />
XIV. DEVICE OPTION TAB ........................................................................................... 42<br />
4. OPERATION – CONTINUOUS PAPER MODE<br />
I. PRINTER CONTROL PANEL OVERVIEW ................................................................ 43<br />
II. FEEDER OPERATING INSTRUCTIONS .................................................................. 45<br />
_________________________________________________________________________________________________________________________<br />
PAGE 2 --- <strong>iTerra</strong> <strong>Elite</strong> <strong>Quick</strong> <strong>Start</strong> <strong>Guide</strong> © 2008 iSys-<strong>The</strong> <strong>Imaging</strong> <strong>Systems</strong> <strong>Group</strong> <strong>Inc</strong>.
III. EXIT SPEEDS AND PRINT CONTROLS ................................................................. 47<br />
IV. OUTPUT VIA BACK ................................................................................................. 50<br />
V. OUTPUT VIA TOP (Using optional top stacker) ....................................................... 51<br />
VI. OUTPUT PROBLEMS .............................................................................................. 53<br />
5. PRINT DRIVER PREFERENCES<br />
I. CHANGING THE iSys CLP825 PRINTING PREFERENCES .................................... 56<br />
II. THE SET UP TAB ...................................................................................................... 57<br />
III. THE JOB OPTIONS TAB ......................................................................................... 65<br />
IV. COLOR TAB ............................................................................................................. 80<br />
V. COLOUR MATCHING ............................................................................................... 82<br />
6. TROUBLESHOOTING<br />
I. ERROR CODES ......................................................................................................... 86<br />
II. CONTROL PANEL MESSAGES ............................................................................... 94<br />
III. PAPER JAMS ........................................................................................................... 97<br />
7. FAQs AND SOLUTIONS FOR COMMON PROBLEMS<br />
I. PAPER FEED PROBLEMS ...................................................................................... 103<br />
II. PROBLEMS PRINTING FROM WINDOWS ............................................................ 104<br />
III. PROBLEMS WITH POOR QUALITY PRINTING ................................................... 108<br />
8. QAN MANAGEMENT<br />
QAN MANAGEMENT PROGRAM .............................................................................. 116<br />
9. JOB MANAGEMENT<br />
JOB MANAGEMENT ................................................................................................... 118<br />
10. SERVICE AND SUPPORT<br />
SERVICE AND SUPPORT .......................................................................................... 119<br />
_________________________________________________________________________________________________________________________<br />
PAGE 3 --- <strong>iTerra</strong> <strong>Elite</strong> <strong>Quick</strong> <strong>Start</strong> <strong>Guide</strong> © 2008 iSys-<strong>The</strong> <strong>Imaging</strong> <strong>Systems</strong> <strong>Group</strong> <strong>Inc</strong>.
1. INSTALLATION<br />
Follow the steps below to properly install the printer consumables and accessories.<br />
I. INSTALLING CONSUMABLES AND PRINT MEDIA<br />
Removing Protective Shipping Materials<br />
1) Remove the two strips of shipping tape from the rear door paper exit.<br />
2) Pull up the release latch and open the cover.<br />
3) Remove the cardboard v-shaped shipping restraint from behind the LED heads.<br />
Preparing the Image Drums<br />
_________________________________________________________________________________________________________________________<br />
PAGE 4 --- <strong>iTerra</strong> <strong>Elite</strong> <strong>Quick</strong> <strong>Start</strong> <strong>Guide</strong> © 2008 iSys-<strong>The</strong> <strong>Imaging</strong> <strong>Systems</strong> <strong>Group</strong> <strong>Inc</strong>.
1) Lift out the four image drums and place them on a flat surface.<br />
2) Remove the protective sheet. Push the tab in the direction of the arrow and remove the orange blanking plate<br />
from each drum.<br />
3) Place the drums back into the printer.<br />
_________________________________________________________________________________________________________________________<br />
PAGE 5 --- <strong>iTerra</strong> <strong>Elite</strong> <strong>Quick</strong> <strong>Start</strong> <strong>Guide</strong> © 2008 iSys-<strong>The</strong> <strong>Imaging</strong> <strong>Systems</strong> <strong>Group</strong> <strong>Inc</strong>.
4) If it is ever necessary to remove the entire drum tray, simply do so by holding the blue handles on either side of<br />
the tray and pull upwards.<br />
CAUTION: Ensure the drums are in their correct color position.<br />
_________________________________________________________________________________________________________________________<br />
PAGE 6 --- <strong>iTerra</strong> <strong>Elite</strong> <strong>Quick</strong> <strong>Start</strong> <strong>Guide</strong> © 2008 iSys-<strong>The</strong> <strong>Imaging</strong> <strong>Systems</strong> <strong>Group</strong> <strong>Inc</strong>.
Installing Toner Cartridges<br />
1) Remove plastic bag from black toner cartridge and lightly shake it back and forth to loosen settled toner.<br />
2) Hold the cartridge in a horizontal position and remove protective tape.<br />
3) Hold the cartridge in the vertical position, with the port on the left and the blue lock lever on the right.<br />
4) Lower the left end of the cartridge into the image drum, closest to the front of the printer and matched to the black<br />
drum, so that the tube on the drum slides into the port on the toner cartridge.<br />
_________________________________________________________________________________________________________________________<br />
PAGE 7 --- <strong>iTerra</strong> <strong>Elite</strong> <strong>Quick</strong> <strong>Start</strong> <strong>Guide</strong> © 2008 iSys-<strong>The</strong> <strong>Imaging</strong> <strong>Systems</strong> <strong>Group</strong> <strong>Inc</strong>.
5) Press the cartridge toward the left slightly, and then lower the right end, aligning the white tab with the groove in<br />
the drum.<br />
6) Push the lock lever toward the back of the printer until it stops.<br />
NOTE: After installing a new toner cartridge, the message TONER LOW or CHANGE TONER may appear on the<br />
display after the printer is turned on. If this message does not disappear after a few pages have been<br />
printed, reinstall the appropriate toner cartridge.<br />
_________________________________________________________________________________________________________________________<br />
PAGE 8 --- <strong>iTerra</strong> <strong>Elite</strong> <strong>Quick</strong> <strong>Start</strong> <strong>Guide</strong> © 2008 iSys-<strong>The</strong> <strong>Imaging</strong> <strong>Systems</strong> <strong>Group</strong> <strong>Inc</strong>.
CAUTION: Repeat the process for each toner cartridge, being careful to match the toner color to the drum.<br />
7) Close the cover.<br />
_________________________________________________________________________________________________________________________<br />
PAGE 9 --- <strong>iTerra</strong> <strong>Elite</strong> <strong>Quick</strong> <strong>Start</strong> <strong>Guide</strong> © 2008 iSys-<strong>The</strong> <strong>Imaging</strong> <strong>Systems</strong> <strong>Group</strong> <strong>Inc</strong>.
Loading Cut Sheet Print Media<br />
1) Pull the paper tray out of the printer and adjust the paper guides and rear paper stopper for the paper size you are<br />
using (see <strong>iTerra</strong> <strong>Elite</strong> Print Media Specifications).<br />
2) Fan the paper (max. 530 sheets 20-lb. paper) and load it. Keep it below the “MAX” mark.<br />
3) If necessary, lift out the paper media indicator and reinsert it with the proper paper size showing.<br />
4) Push the tray back in. <strong>The</strong> paper gauge indicates the amount of paper inserted or remaining in the tray.<br />
_________________________________________________________________________________________________________________________<br />
PAGE 10 --- <strong>iTerra</strong> <strong>Elite</strong> <strong>Quick</strong> <strong>Start</strong> <strong>Guide</strong> © 2008 iSys-<strong>The</strong> <strong>Imaging</strong> <strong>Systems</strong> <strong>Group</strong> <strong>Inc</strong>.
II. INSTALLING ACCESSORIES<br />
<strong>The</strong> items you will need to install your accessories are as follows: feeder, feeder-to-printer cable, media input tray, and top<br />
media stacker (optional).<br />
WARNING: <strong>The</strong> <strong>iTerra</strong> <strong>Elite</strong> printer is very heavy and requires two people when lifting or moving.<br />
Feeder Installation<br />
1) Remove feeder cable from plastic bag and set power cord aside.<br />
2) Using two people, place <strong>iTerra</strong> <strong>Elite</strong> printer on the table’s edge, just slightly, so that the feeder-to-printer cable can<br />
be plugged into its appropriate socket (underneath printer).<br />
3) Return printer to its original position with all four feet in a secure position.<br />
4) Remove feeder from protective packaging.<br />
_________________________________________________________________________________________________________________________<br />
PAGE 11 --- <strong>iTerra</strong> <strong>Elite</strong> <strong>Quick</strong> <strong>Start</strong> <strong>Guide</strong> © 2008 iSys-<strong>The</strong> <strong>Imaging</strong> <strong>Systems</strong> <strong>Group</strong> <strong>Inc</strong>.
5) Insert left and right feeder hooks into corresponding feeder slots on the front opening of the printer.<br />
6) Carefully let feeder down - its weight will secure it to the printer<br />
7) Attach feeder-to-printer cable via connector and secure thumbscrews to the feeder.<br />
_________________________________________________________________________________________________________________________<br />
PAGE 12 --- <strong>iTerra</strong> <strong>Elite</strong> <strong>Quick</strong> <strong>Start</strong> <strong>Guide</strong> © 2008 iSys-<strong>The</strong> <strong>Imaging</strong> <strong>Systems</strong> <strong>Group</strong> <strong>Inc</strong>.
Media Input Tray Installation<br />
1) Remove media input tray from protective packaging.<br />
2) Slide the input tray into the white support brackets of the feeder until the left and right tray locks attach to the<br />
support bracket.<br />
Support Brackets<br />
_________________________________________________________________________________________________________________________<br />
PAGE 13 --- <strong>iTerra</strong> <strong>Elite</strong> <strong>Quick</strong> <strong>Start</strong> <strong>Guide</strong> © 2008 iSys-<strong>The</strong> <strong>Imaging</strong> <strong>Systems</strong> <strong>Group</strong> <strong>Inc</strong>.
3) To release the tray, push up on the locks and pull tray towards you.<br />
Tray Locks<br />
Optional Top Media Stacker Installation<br />
1) Slide the media catcher into the opening on top of the printer. <strong>The</strong> large radius should be towards the front of the<br />
printer.<br />
_________________________________________________________________________________________________________________________<br />
PAGE 14 --- <strong>iTerra</strong> <strong>Elite</strong> <strong>Quick</strong> <strong>Start</strong> <strong>Guide</strong> © 2008 iSys-<strong>The</strong> <strong>Imaging</strong> <strong>Systems</strong> <strong>Group</strong> <strong>Inc</strong>.
2) <strong>The</strong> top media stacker must be parallel with the top of the rear jam sensor box, with a 1mm (1/32”) space<br />
between the top media stacker and the jam sensor box.<br />
_________________________________________________________________________________________________________________________<br />
PAGE 15 --- <strong>iTerra</strong> <strong>Elite</strong> <strong>Quick</strong> <strong>Start</strong> <strong>Guide</strong> © 2008 iSys-<strong>The</strong> <strong>Imaging</strong> <strong>Systems</strong> <strong>Group</strong> <strong>Inc</strong>.
III. CONNECT TO POWER<br />
Note: When cycling the printer power (on-off-on), leave the printer power switch in the off position for at least<br />
10 seconds to allow the printer to fully power down before turning it back on again.<br />
1) Attach the power cord to the back of the printer.<br />
2) Connect to grounded power socket.<br />
3) Turn the printer on and wait for it to warm up. <strong>The</strong> printer will go through its initialization and warm up sequence.<br />
When the printer is ready, the READY indicator comes on and stays on (green) and the LCD indicates ONLINE.<br />
_________________________________________________________________________________________________________________________<br />
PAGE 16 --- <strong>iTerra</strong> <strong>Elite</strong> <strong>Quick</strong> <strong>Start</strong> <strong>Guide</strong> © 2008 iSys-<strong>The</strong> <strong>Imaging</strong> <strong>Systems</strong> <strong>Group</strong> <strong>Inc</strong>.
IV. LOADING CONTINUOUS FORM FEED PRINT MEDIA<br />
1) Push right and left snap latches inward to open the tray door and pull it down.<br />
2) Insert continuous fanfold paper so that the black I-Mark (TOF) is positioned towards the back and to the right side<br />
of the tray (See “Print Media Specifications” for paper size).<br />
Tension Bar<br />
_________________________________________________________________________________________________________________________<br />
PAGE 17 --- <strong>iTerra</strong> <strong>Elite</strong> <strong>Quick</strong> <strong>Start</strong> <strong>Guide</strong> © 2008 iSys-<strong>The</strong> <strong>Imaging</strong> <strong>Systems</strong> <strong>Group</strong> <strong>Inc</strong>.
3) Feed leading edge of the paper behind the tension rod.<br />
Tension Bar<br />
4) Load the leading edge of the paper under the pinch roller in a straight and level manner with even margins at the<br />
left and right of the drive roller collars. Manually hold and push the paper in until the leading edge is secure under<br />
the cutter bar.<br />
Cutter<br />
_________________________________________________________________________________________________________________________<br />
PAGE 18 --- <strong>iTerra</strong> <strong>Elite</strong> <strong>Quick</strong> <strong>Start</strong> <strong>Guide</strong> © 2008 iSys-<strong>The</strong> <strong>Imaging</strong> <strong>Systems</strong> <strong>Group</strong> <strong>Inc</strong>.
5) Close the tray door firmly until latched.<br />
6) Push the right and left white media-limit slides inward. <strong>The</strong>se ensure constant reading of the I-Mark (TOF) by<br />
sensor.<br />
_________________________________________________________________________________________________________________________<br />
PAGE 19 --- <strong>iTerra</strong> <strong>Elite</strong> <strong>Quick</strong> <strong>Start</strong> <strong>Guide</strong> © 2008 iSys-<strong>The</strong> <strong>Imaging</strong> <strong>Systems</strong> <strong>Group</strong> <strong>Inc</strong>.
7) Press and hold the ADVANCE button on the feeder to load paper. (Hold until green LED stops flashing.) Make<br />
sure the paper has tension.<br />
8) If loading paper from a box of more than 800 fanfold sheets, place box directly in front of printer on the floor. Do<br />
not insert paper into tray but simply feed paper through print media slot on bottom of paper tray. Carry on with<br />
steps (2-7).<br />
9) You are now ready to plot.<br />
NOTE: Step 7 must be repeated any time the green light is flashing. Cycling the printer on and off, as well as<br />
removing paper from the feeder after a jam or other unintended operation, will cause this light to flash.<br />
_________________________________________________________________________________________________________________________<br />
PAGE 20 --- <strong>iTerra</strong> <strong>Elite</strong> <strong>Quick</strong> <strong>Start</strong> <strong>Guide</strong> © 2008 iSys-<strong>The</strong> <strong>Imaging</strong> <strong>Systems</strong> <strong>Group</strong> <strong>Inc</strong>.
V. PRINT MEDIA PROPERTIES<br />
Standard Paper<br />
Custom:<br />
• Continuous Fan Fold (8.5” wide)<br />
Single Sheet Only:<br />
• Letter, Executive<br />
• Legal-14, legal 13.5, Legal 13<br />
• A4, A5, A6, B4, B5<br />
Feed Paths:<br />
• Tray 1<br />
• Paper Tray<br />
Exit Paths:<br />
• Top<br />
• Rear<br />
Weight:<br />
• 16-54 lb. US Bond<br />
WARNING: Using certified iSys Media is critical to your day-to-day operation of this printer. Using non-qualified media<br />
will result in print job failures, poor output quality, lost time and down time. Call iSys Media or your Sales<br />
Representative to learn more about this.<br />
_________________________________________________________________________________________________________________________<br />
PAGE 21 --- <strong>iTerra</strong> <strong>Elite</strong> <strong>Quick</strong> <strong>Start</strong> <strong>Guide</strong> © 2008 iSys-<strong>The</strong> <strong>Imaging</strong> <strong>Systems</strong> <strong>Group</strong> <strong>Inc</strong>.
2. ORDERING CONSUMABLE SUPPLIES<br />
I. HOW TO ORDER QUALIFIED MEDIA AND CONSUMABLES<br />
� Using non-Qualified <strong>iTerra</strong> media and<br />
consumables will void the printers’ warranty.<br />
� Toll-free by phone at 1-866-415-4797 within North<br />
America or 1-403-204 5200 globally.<br />
� By fax at 1-403-204-1971 using an iSys <strong>Elite</strong><br />
Media order form.<br />
� All prices in US dollars. Credit Card accepted.<br />
� Sales tax, Shipping & Handling are added where<br />
applicable.<br />
� You can use a purchase order to purchase<br />
products directly from iSys if the order value is over<br />
$500, excluding freight and taxes and if you have<br />
been approved for credit.<br />
Paper<br />
Media iSys Part No.<br />
1000 sht CL85FF1000<br />
3800 sht CL85FF3800<br />
5500 sht CL85FF5500<br />
6000 sht CL85FF6000<br />
3. INTERFACE SETUP AND INSTALLATION<br />
Toner Cartridges<br />
Color iSys Part No.<br />
Black CL2-BKT<br />
Cyan CL2-CYT<br />
Magenta CL2-MGT<br />
Yellow CL2-YWT<br />
Image Drums<br />
Color iSys Part No.<br />
Black CL2-BKD<br />
Cyan CL2-CYD<br />
Magenta CL2-MGD<br />
Yellow CL2-YWD<br />
Fusers<br />
Voltage iSys Part No.<br />
120 Volts CL3-Fuser120<br />
230 Volts CL3-Fuser230<br />
Transfer Belt<br />
Item iSys Part No.<br />
Transfer CL3-Belt<br />
Belt<br />
_________________________________________________________________________________________________________________________<br />
PAGE 22 --- <strong>iTerra</strong> <strong>Elite</strong> <strong>Quick</strong> <strong>Start</strong> <strong>Guide</strong> © 2008 iSys-<strong>The</strong> <strong>Imaging</strong> <strong>Systems</strong> <strong>Group</strong> <strong>Inc</strong>.
I. INTERFACES<br />
Your printer is equipped with a selection of data interfaces. See rear of Printer:<br />
1. Parallel – For direct connection to a PC. This requires a bi-directional parallel port with a (IEEE 1284 compliant)<br />
parallel cable.<br />
2. USB – For connection to a PC running Windows XP or Windows 2000. This port requires a cable conforming to<br />
USB version 1.1 or above.<br />
<strong>The</strong> operation of a printer is not assured if a USB compatible device is connected concurrently with other USBcompatible<br />
devices (USB A Male to USB B Male cable).<br />
3. Ethernet – For network cable connection. Optional Network card is required.<br />
NOTE: Administrator’s authority may be required when installing a network connection.<br />
_________________________________________________________________________________________________________________________<br />
PAGE 23 --- <strong>iTerra</strong> <strong>Elite</strong> <strong>Quick</strong> <strong>Start</strong> <strong>Guide</strong> © 2008 iSys-<strong>The</strong> <strong>Imaging</strong> <strong>Systems</strong> <strong>Group</strong> <strong>Inc</strong>.
II. LOCAL INSTALLATION<br />
A. Parallel Port Connection<br />
1. Turn off both the computer and the printer.<br />
2. Attach a standard IEEE-1284 parallel cable (not supplied) to the parallel port on the printer, securing it<br />
with the spring clips.<br />
3. Attach the other end to the parallel port on the computer and secure it in place with the screws.<br />
B. USB Port Connection<br />
NOTE: No USB interface cable is supplied with the printer. Use a USB cable that is compatible with USB<br />
specification 1.1).<br />
CAUTION: Install Windows Driver before powering up printer with USB interface connected to eliminate incorrect<br />
driver being auto installed.<br />
1. Turn off both the computer and the printer.<br />
2. Connect the USB cable to the USB port on the computer.<br />
3. Connect the other end of the cable to the USB port on the printer.<br />
NOTE: � A USB interface will only operate using Windows 2000, Windows XP, Windows Me and<br />
Windows 98). It will not operate using MS-DOS, Windows 95, 3.1, or NT 4.0.<br />
� Printer operation is not assured if another USB compatible device is connected<br />
concurrently with it.<br />
� If a USB hub is used it must be connected directly to the computer.<br />
_________________________________________________________________________________________________________________________<br />
PAGE 24 --- <strong>iTerra</strong> <strong>Elite</strong> <strong>Quick</strong> <strong>Start</strong> <strong>Guide</strong> © 2008 iSys-<strong>The</strong> <strong>Imaging</strong> <strong>Systems</strong> <strong>Group</strong> <strong>Inc</strong>.
III. NETWORK INSTALLATION<br />
C. Network Port Connection<br />
NOTE: Ethernet® cable is not supplied with the printer. Use an Ethernet cable with two twisted wire pairs and an<br />
RJ45 plug.<br />
1) Turn the printer off.<br />
2) Connect your Ethernet cable to the network port on the printer (1).<br />
3) Connect the other end of the Ethernet cable to the network port, Hub or host system (2).<br />
4) Turn the printer on and wait for the print server status light (3) to stop blinking.<br />
If you are unaware of what the network IP set value is for the printer, follow the instructions below to determine that value.<br />
You will need to know the printer IP before you can load the printer driver.<br />
If a network configuration card is not already installed refer to Trouble Shooting Chapter and/or Accessory installation (if<br />
network card is purchased later than printer).<br />
_________________________________________________________________________________________________________________________<br />
PAGE 25 --- <strong>iTerra</strong> <strong>Elite</strong> <strong>Quick</strong> <strong>Start</strong> <strong>Guide</strong> © 2008 iSys-<strong>The</strong> <strong>Imaging</strong> <strong>Systems</strong> <strong>Group</strong> <strong>Inc</strong>.
IV. PRINT DRIVER INSTALLATION<br />
Overview Windows 2000 & Windows XP<br />
<strong>The</strong> <strong>iTerra</strong> <strong>Elite</strong> (CLP825) Continuous Printer Driver for Windows 2000 & XP allows users to print directly from Windows<br />
applications to the <strong>iTerra</strong> <strong>Elite</strong> printer. <strong>The</strong>se instructions describe installation of drivers from a driver installation CD ROM<br />
or from driver files on your hard disk to the Windows 2000 host system.<br />
Printing can be done through the parallel port, USB port or a network. <strong>The</strong> printer can be set up as a shared device so<br />
that other Windows host systems on the network can access it although drivers will need to be loaded on each of the host<br />
systems.<br />
Preparation<br />
<strong>The</strong> following items will be necessary to complete this installation procedure:<br />
1) Be sure that the IP address of the printer has been properly assigned and set. <strong>The</strong> IP address of the printer is<br />
required in the driver installation. See the next section entitled ‘Network Card IP Address checking and setting’ to<br />
check, change and set the printer’s IP.<br />
2) Ensure that the driver can be accessed on the host system. You may have a CD ROM that was supplied with the<br />
purchase of the printer or you may have downloaded a driver zip file from the www.isys-group.com website. If<br />
you did download a zip file you will have to unpack the files and make note of the location to where you have<br />
unpacked it.<br />
3) It is a good idea to have the Windows 2000 distribution CD available at the time of the driver installation.<br />
_________________________________________________________________________________________________________________________<br />
PAGE 26 --- <strong>iTerra</strong> <strong>Elite</strong> <strong>Quick</strong> <strong>Start</strong> <strong>Guide</strong> © 2008 iSys-<strong>The</strong> <strong>Imaging</strong> <strong>Systems</strong> <strong>Group</strong> <strong>Inc</strong>.
Driver Installation<br />
1) <strong>Start</strong> the Windows 2000 host system.<br />
2) Click <strong>Start</strong>-Settings-Printers, and then double-click on the Add Printer icon.<br />
3) This will start the Add Printer Wizard, Click NEXT to continue to the next diagram.<br />
4) Be sure to click LOCAL PRINTER and be sure the AUTOMATICALLY DETECT…box is unchecked as shown.<br />
Click NEXT to continue to the next diagram:<br />
_________________________________________________________________________________________________________________________<br />
PAGE 27 --- <strong>iTerra</strong> <strong>Elite</strong> <strong>Quick</strong> <strong>Start</strong> <strong>Guide</strong> © 2008 iSys-<strong>The</strong> <strong>Imaging</strong> <strong>Systems</strong> <strong>Group</strong> <strong>Inc</strong>.
5) As shown above, select the type of port to which the printer has been connected. If the port selected is not a<br />
network port such as LPT1 or a USB port continue on to section 10). If you are connected on a network, click on<br />
CREATE A NEW PORT, and then select STANDARD TCP/IP PORT. <strong>The</strong>n click NEXT to continue to the Add<br />
Standard TCP/IP Port Wizard. Click NEXT to continue to the next diagram:<br />
6) In the screen shown above, type the IP address of the printer in the top box (not the same as shown above). A<br />
unique port name will be automatically created in the lower box. This name can be kept (recommended) or it can<br />
be changed to any other name. Click NEXT to continue.<br />
7) Windows will now try to locate and identify the printer on the network. This may take 20-30 seconds. If there is<br />
an error check network connections and IP addresses. If all network connections are correct and Windows<br />
locates the printer, the screen will be displayed, as shown in the next diagram.<br />
_________________________________________________________________________________________________________________________<br />
PAGE 28 --- <strong>iTerra</strong> <strong>Elite</strong> <strong>Quick</strong> <strong>Start</strong> <strong>Guide</strong> © 2008 iSys-<strong>The</strong> <strong>Imaging</strong> <strong>Systems</strong> <strong>Group</strong> <strong>Inc</strong>.
8) This screen indicates that Windows located the printer but does not recognize it. This is not a problem. Click on<br />
CUSTOM and then click on SETTINGS. <strong>The</strong> next diagram will be displayed:<br />
9) As shown above, click the LPR button in the Protocol box. <strong>The</strong>n, in the LPR Settings box type in “LPT1” (no<br />
quotes) for the Queue Name. Click OK. This will return you to the previous screen. Click NEXT and on the<br />
following screen click FINISH to complete setting up the LPR port.<br />
_________________________________________________________________________________________________________________________<br />
PAGE 29 --- <strong>iTerra</strong> <strong>Elite</strong> <strong>Quick</strong> <strong>Start</strong> <strong>Guide</strong> © 2008 iSys-<strong>The</strong> <strong>Imaging</strong> <strong>Systems</strong> <strong>Group</strong> <strong>Inc</strong>.
10) <strong>The</strong> next diagram, should now be displayed.<br />
_________________________________________________________________________________________________________________________<br />
PAGE 30 --- <strong>iTerra</strong> <strong>Elite</strong> <strong>Quick</strong> <strong>Start</strong> <strong>Guide</strong> © 2008 iSys-<strong>The</strong> <strong>Imaging</strong> <strong>Systems</strong> <strong>Group</strong> <strong>Inc</strong>.
In the above screen click HAVE DISK and then on the following screen click BROWSE. A browser screen like the one in<br />
the next diagram will be displayed.<br />
11) In the example shown above, the driver files were found on a floppy disk in drive A. Depending on the situation<br />
these may also be found on a CD drive, on the hard drive of the host system, or at the networked drive location.<br />
In any case, when file Ok71121e.inf is found, click OPEN and on the next screen click OK.<br />
12) <strong>The</strong> screen below should be displayed indicating that the iSys CLP825 drivers were found. Click NEXT.<br />
_________________________________________________________________________________________________________________________<br />
PAGE 31 --- <strong>iTerra</strong> <strong>Elite</strong> <strong>Quick</strong> <strong>Start</strong> <strong>Guide</strong> © 2008 iSys-<strong>The</strong> <strong>Imaging</strong> <strong>Systems</strong> <strong>Group</strong> <strong>Inc</strong>.
13) On the next three screens you will be given the option to enter a name for the printer, to share it over a network<br />
and to print a test page. Make the appropriate entries and click NEXT each time.<br />
NOTE: Printing a test page is recommended, as it will test the LPR connection. However since printing<br />
parameters have not set been set, the print may be less then ideal.<br />
14) On the last screen of the Add Printer Wizard click FINISH. Depending on the system settings a warning screen<br />
may be displayed about the “digital signature” of the drivers. This can be ignored by clicking YES.<br />
NOTE: It is possible that the system could be set to block unsigned drivers. In that case, change the setting<br />
at <strong>Start</strong>-Settings-Control Panel. Or contact your system administrator.<br />
_________________________________________________________________________________________________________________________<br />
PAGE 32 --- <strong>iTerra</strong> <strong>Elite</strong> <strong>Quick</strong> <strong>Start</strong> <strong>Guide</strong> © 2008 iSys-<strong>The</strong> <strong>Imaging</strong> <strong>Systems</strong> <strong>Group</strong> <strong>Inc</strong>.
15) At this point the system will need to copy additional driver files and may need to copy system files for the LPR<br />
service. A prompt like the one shown in the next diagram will be displayed.<br />
<strong>The</strong> exact prompts will depend on settings at the host system. <strong>The</strong> prompt will generally ask for the Windows<br />
2000 CD, but that is not always necessary.<br />
16) When the entire printer installation process has completed successfully, a new printer icon will be added to the<br />
Printers folder.<br />
_________________________________________________________________________________________________________________________<br />
PAGE 33 --- <strong>iTerra</strong> <strong>Elite</strong> <strong>Quick</strong> <strong>Start</strong> <strong>Guide</strong> © 2008 iSys-<strong>The</strong> <strong>Imaging</strong> <strong>Systems</strong> <strong>Group</strong> <strong>Inc</strong>.
Setting Default Properties<br />
<strong>The</strong> default properties for the printer just installed can be set as follows:<br />
1) Click START button, then select SETTINGS-PRINTERS to open the Printers folder.<br />
2) Right click on the icon for the Horizon printer. In the drop-down box select PRINTING PREFERENCES.<br />
NOTE: Another choice in the drop-down box is RENAME. This could be used to change the name of the printer.<br />
Also, SET AS DEFAULT can be used to designate this as the Windows default printer.<br />
3) Click on the Layout tab and then click on the ADVANCED button to access and select default media type and<br />
size, as well as many other settings.<br />
Changing the Printer IP Address<br />
After a printer has been installed on a Windows 2000 host system, its IP address can be changed if that becomes<br />
necessary.<br />
1) Click START-SETTINGS-PRINTERS, then click on the icon for the printer to be changed, select PROPERTIES<br />
and then click on the PORTS tab. <strong>The</strong> screen should look as shown in the next diagram:<br />
_________________________________________________________________________________________________________________________<br />
PAGE 34 --- <strong>iTerra</strong> <strong>Elite</strong> <strong>Quick</strong> <strong>Start</strong> <strong>Guide</strong> © 2008 iSys-<strong>The</strong> <strong>Imaging</strong> <strong>Systems</strong> <strong>Group</strong> <strong>Inc</strong>.
2) Be sure the port with the iSys printer is selected then click CONFIGURE PORT. <strong>The</strong> Configure Port Screen will<br />
look as displayed in the next diagram:<br />
3) On the Configure Port screen change the IP address to the new setting.<br />
NOTE: <strong>The</strong> Port Name cannot be changed by this procedure. If the Port Name was unacceptable, e.g. if it<br />
includes the old IP address, to change it use Delete Port. <strong>The</strong> printer and port will have to be fully installed<br />
again.<br />
4) Click on the General tab and make a Windows test print or close the Properties box altogether and send a test<br />
print from a Windows application.<br />
Making a Printer a Shared Device<br />
_________________________________________________________________________________________________________________________<br />
PAGE 35 --- <strong>iTerra</strong> <strong>Elite</strong> <strong>Quick</strong> <strong>Start</strong> <strong>Guide</strong> © 2008 iSys-<strong>The</strong> <strong>Imaging</strong> <strong>Systems</strong> <strong>Group</strong> <strong>Inc</strong>.
If a printer was installed as an unshared device and it is later desired to share it, its status can be changed as follows:<br />
1) Click START-SETTINGS-PRINTERS then right click on the icon for the printer to be changed, select<br />
PROPERTIES and then click on the SHARING tab. <strong>The</strong> screen should look as shown below.<br />
2) Click the SHARED AS button, which will enable the text box. Type the Share name in the box. Do not click on<br />
ADDITIONAL DRIVERS. Drivers will have to be installed on the client systems that want to share this printer.<br />
Click OK. <strong>The</strong> printer will appear as a shared resource in Network Neighborhood.<br />
_________________________________________________________________________________________________________________________<br />
PAGE 36 --- <strong>iTerra</strong> <strong>Elite</strong> <strong>Quick</strong> <strong>Start</strong> <strong>Guide</strong> © 2008 iSys-<strong>The</strong> <strong>Imaging</strong> <strong>Systems</strong> <strong>Group</strong> <strong>Inc</strong>.
V. NETWORK CARD IP ADDRESS-CHECKING AND SETTING<br />
<strong>The</strong> following section enables you to determine the printer’s IP Address as well as how to set it to the desired value. <strong>The</strong><br />
following actions will only create results if a network card is presently installed in the printer.<br />
From the front operating panel of the printer, follow the instructions below.<br />
Set IP Address<br />
Set Subnet Mask Address<br />
1. Press Button 0 9 times<br />
Display will read “NETWORK MENU”<br />
2. Press Button 1 once<br />
Display will read “IP ADDRESS 000.000.000.000”<br />
3. Press Button 1 or 5 to select address group to change<br />
4. Press Button 2 or 6 to set the desired value<br />
5. Press Button 3 to save changes<br />
6. Press Button 4 to put printer back ONLINE<br />
1. Press Button 0 9 times<br />
Display will read “NETWORK MENU”<br />
2. Press Button 1 5 times<br />
Display will read “SUBNET MASK 255.000.000.000”<br />
3. Press Button 1 or 5 to select address group to change<br />
4. Press Button 2 or 6 to set the desired value<br />
5. Press Button 3 to save changes<br />
6. Press Button 4 to put printer back ONLINE<br />
Set Default Gateway Address<br />
1. Press Button 0 9 times<br />
Display will read “NETWORK MENU”<br />
_________________________________________________________________________________________________________________________<br />
PAGE 37 --- <strong>iTerra</strong> <strong>Elite</strong> <strong>Quick</strong> <strong>Start</strong> <strong>Guide</strong> © 2008 iSys-<strong>The</strong> <strong>Imaging</strong> <strong>Systems</strong> <strong>Group</strong> <strong>Inc</strong>.
2. Press Button 1 9 times<br />
Display will read “SUBNET MASK 000.000.000.000”<br />
3. Press Button 1 or 5 to select address group to change<br />
4. Press Button 2 or 6 to set the desired value<br />
5. Press Button 3 to save changes<br />
6. Press Button 4 to put printer back ONLINE<br />
VI. WEB BROWSER TO PRINTER (Advanced Users and Administrators)<br />
A Network <strong>iTerra</strong> <strong>Elite</strong> printer can also be accessed via a web browser, where default settings can be modified to suit your<br />
User Environment. You will need to know the IP setting (for your web browser URL address input) and the printer name.<br />
<strong>The</strong> printer name is displayed on the Network Information sheet that is printable as part of the Menu Map (see Printing the<br />
Menu Map section). This name can be found under the Auto Discovery section of the Network Information sheet. <strong>The</strong><br />
Username is ‘root’ and the Password is the last six (6) characters of the Printer Name. For example: Printer Name<br />
displayed on the Menu Map printout is ETHERA485C5, therefore the password is A485C5).<br />
NOTE: Password is case sensitive while the username is not.<br />
_________________________________________________________________________________________________________________________<br />
PAGE 38 --- <strong>iTerra</strong> <strong>Elite</strong> <strong>Quick</strong> <strong>Start</strong> <strong>Guide</strong> © 2008 iSys-<strong>The</strong> <strong>Imaging</strong> <strong>Systems</strong> <strong>Group</strong> <strong>Inc</strong>.
VII. WINDOWS 2000 & XP PRINT DRIVER PROPERTIES<br />
Open the printing properties page, through the Printers folder (START � SETTINGS� PRINTERS) then right click on the<br />
printer name, and selecting the PROPERTIES box.<br />
VIII. GENERAL TAB<br />
This will open a window<br />
to the following �<br />
This window tab displays general information such as the printer name<br />
(iSys CLP825), allows the user to view and set the ‘PRINTING<br />
PREFERENCES’ (see the Printing Preferences doc) and lets you print a<br />
windows test page from the ‘PRINT TEST PAGE’ button.<br />
_________________________________________________________________________________________________________________________<br />
PAGE 39 --- <strong>iTerra</strong> <strong>Elite</strong> <strong>Quick</strong> <strong>Start</strong> <strong>Guide</strong> © 2008 iSys-<strong>The</strong> <strong>Imaging</strong> <strong>Systems</strong> <strong>Group</strong> <strong>Inc</strong>.
VIX. SHARING TAB<br />
From this windows screen the user can enable printer sharing on their host<br />
computer.<br />
X. PORTS TAB<br />
Allows the user to select or change the connectivity from the host computer<br />
to the iSys printer (see the driver installation doc for more information on<br />
setting up a TCP/IP port).<br />
_________________________________________________________________________________________________________________________<br />
PAGE 40 --- <strong>iTerra</strong> <strong>Elite</strong> <strong>Quick</strong> <strong>Start</strong> <strong>Guide</strong> © 2008 iSys-<strong>The</strong> <strong>Imaging</strong> <strong>Systems</strong> <strong>Group</strong> <strong>Inc</strong>.
XI. ADVANCED TAB<br />
This window allows the user to change the printers’ availability, which<br />
will spool up the jobs until the appropriate available time; spooler<br />
options and you can have the spooler create a separator page between<br />
jobs if required.<br />
XII. COLOR MANAGEMENT TAB<br />
You can add a color profile if color matching is important. (See Printer<br />
Preferences for more information).<br />
_________________________________________________________________________________________________________________________<br />
PAGE 41 --- <strong>iTerra</strong> <strong>Elite</strong> <strong>Quick</strong> <strong>Start</strong> <strong>Guide</strong> © 2008 iSys-<strong>The</strong> <strong>Imaging</strong> <strong>Systems</strong> <strong>Group</strong> <strong>Inc</strong>.
XIII. SECURITY TAB<br />
You can allow specific users access to the printer on the host computer.<br />
This is usually only changed if the printer is being shared on a network.<br />
XIV. DEVICE OPTION TAB<br />
This window is typically not changed unless a duplexer has been added<br />
and is not used if running continuous media.<br />
_________________________________________________________________________________________________________________________<br />
PAGE 42 --- <strong>iTerra</strong> <strong>Elite</strong> <strong>Quick</strong> <strong>Start</strong> <strong>Guide</strong> © 2008 iSys-<strong>The</strong> <strong>Imaging</strong> <strong>Systems</strong> <strong>Group</strong> <strong>Inc</strong>.
4. OPERATION – CONTINUOUS PAPER MODE<br />
I. PRINTER CONTROL PANEL OVERVIEW<br />
• Attention indicator (red). ON indicates that attention is required, but printing will continue. FLASHING indicates<br />
that attention is required, but printing will stop.<br />
• Ready indicator (green). ON - ready to receive data. FLASHING indicates processing data or error.<br />
• Liquid crystal display (LCD) panel. Two rows of up to 24 alphanumeric characters displaying print status, menu<br />
items in menu mode, and error messages.<br />
_________________________________________________________________________________________________________________________<br />
PAGE 43 --- <strong>iTerra</strong> <strong>Elite</strong> <strong>Quick</strong> <strong>Start</strong> <strong>Guide</strong> © 2008 iSys-<strong>The</strong> <strong>Imaging</strong> <strong>Systems</strong> <strong>Group</strong> <strong>Inc</strong>.
Menu button Press briefly to enter the MENU mode. Press briefly again to select the<br />
next menu. Press for more than 2 seconds to scroll through the<br />
different menus.<br />
Item (+) Press briefly to scroll forward to the next menu item.<br />
button<br />
Value (+) Press briefly to scroll forward to the next value setting for each menu<br />
button item.<br />
Select button Press briefly to select the menu, item or value indicated on the LCD.<br />
Online button Switches between online and offline status<br />
� When pressed in MENU mode, it returns the printer to on line<br />
status.<br />
� When pressed with DATA PRESENT displayed, it forces the<br />
printer to print out the remaining data in the printer.<br />
� When there is an error message indicating wrong paper size,<br />
pressing the ONLINE button forces the printer to print.<br />
Item (–) Press briefly to scroll backward to the previous menu item.<br />
button<br />
Value (–) Press briefly to scroll backward to the previous value setting for each<br />
button menu item.<br />
Cancel Press to cancel a print job.<br />
button<br />
_________________________________________________________________________________________________________________________<br />
PAGE 44 --- <strong>iTerra</strong> <strong>Elite</strong> <strong>Quick</strong> <strong>Start</strong> <strong>Guide</strong> © 2008 iSys-<strong>The</strong> <strong>Imaging</strong> <strong>Systems</strong> <strong>Group</strong> <strong>Inc</strong>.
II. FEEDER OPERATING INSTRUCTIONS<br />
Loading Continuous Media<br />
1) Manually load media<br />
2) Turn on printer<br />
3) <strong>The</strong> switch panel lights will illuminate in sequence during the feeder boot up.<br />
4) Once the green light begins flashing on the feeder switch panel (media pre-load required), push and hold the<br />
ADVANCE button until green light stops flashing and remains on (ready for printing)<br />
NOTE: <strong>The</strong> paper feeder will not automatically load the paper into the printer until Step 4 is completed. Step 4 must be<br />
repeated any time the green light is flashing. This condition will exist if the printer is cycled off and on or if paper is<br />
cleared from the feeder after a paper jam.<br />
Feeder Switch Panel Functions<br />
Cut Button Pressing this button for 2 seconds will actuate a paper cut operation.<br />
Cut paper must be cleared out from paper feeder.<br />
Advance Pressing and holding this button will activate the paper pre-load<br />
Button sequence. This button becomes locked out (inactive) during printing or<br />
if the green light is on steady.<br />
Feeder Switch Panel Indicators<br />
_________________________________________________________________________________________________________________________<br />
PAGE 45 --- <strong>iTerra</strong> <strong>Elite</strong> <strong>Quick</strong> <strong>Start</strong> <strong>Guide</strong> © 2008 iSys-<strong>The</strong> <strong>Imaging</strong> <strong>Systems</strong> <strong>Group</strong> <strong>Inc</strong>.
Red Flashing means an error condition was encountered. Please call iSys<br />
service at 1-866-415-4797. See chapter 6, Troubleshooting, for more<br />
information.<br />
Yellow ON means TOF sensor sees the black I-Mark. OFF means a TOF<br />
sensor sees white paper.<br />
Green Flashing means that a paper pre-load is required. Steady means that<br />
the printer is ready for printing.<br />
_________________________________________________________________________________________________________________________<br />
PAGE 46 --- <strong>iTerra</strong> <strong>Elite</strong> <strong>Quick</strong> <strong>Start</strong> <strong>Guide</strong> © 2008 iSys-<strong>The</strong> <strong>Imaging</strong> <strong>Systems</strong> <strong>Group</strong> <strong>Inc</strong>.
III. EXIT SPEEDS AND PRINT CONTROLS<br />
To select exit location (Back or Top) or to adjust print quality from the front panel of the printer the following steps must be<br />
performed:<br />
1) Push button 4 (online button 1x). Printer must be OFFLINE before working in the extended menu. This will<br />
ensure that a print job does not print while modifying the settings.<br />
2) Push Buttons 6 and 7 together and hold for a few seconds and release. Fan Fold print control.<br />
3) Push Button 1 (item button 1x). This will display the current paper exit location. (Example: Exit: Top<br />
Status: Good)<br />
4) Using Button 2 or 6 (value button + or -) allows the user to scroll through the menu options. <strong>The</strong>re are<br />
currently six options available under Fan Fold Print Control.<br />
Option 1: Exit: Back Status: Stall<br />
Option 2: Exit: Back Status: Smear<br />
Option 3: Exit: Back Status: Good<br />
Option 4: Exit: Top Status: Stall<br />
Option 5: Exit: Top Status: Smear<br />
Option 6: Exit: Top Status: Good<br />
5) To change the current setting scroll through the menu options using buttons 2 and 6 until the desired option<br />
is displayed on the screen.<br />
6) Push button 3 (select button 1x). Option saved.<br />
7) Cycle Print Power. Check print quality. Display on printer will remain blank for up to 45 seconds before<br />
returning Online, this is normal.<br />
(If you continue to experience print quality difficulty, please contact iSys Technical Support at 1-866-415-5797).<br />
Printer Front Panel<br />
How to print test plot on disk:<br />
Press Button 0 once<br />
_________________________________________________________________________________________________________________________<br />
PAGE 47 --- <strong>iTerra</strong> <strong>Elite</strong> <strong>Quick</strong> <strong>Start</strong> <strong>Guide</strong> © 2008 iSys-<strong>The</strong> <strong>Imaging</strong> <strong>Systems</strong> <strong>Group</strong> <strong>Inc</strong>.
Display will read “PRINT JOBS MENU”<br />
Press Button 3 once<br />
Display will read “ENTER PASSWORD ****”<br />
Press Button 2 twice<br />
Display will read “ENTER PASSWORD 1***”<br />
Press Button 1 once<br />
Display will read<br />
Repeat previous<br />
2 steps 3 times<br />
“ENTER PASSWORD 1***”<br />
until Display<br />
reads<br />
“ENTER PASSWORD 1111”<br />
Press Button 3 once<br />
Display will read “SELECT JOB<br />
ALL JOBS”<br />
Press Button 2 until the Display reads<br />
“<strong>iTerra</strong><strong>Elite</strong>_Demo”<br />
Press Button 3 once<br />
Display will read “Set Collating Amount”<br />
1<br />
Press Button 3 to plot test file selected. Printer will go<br />
back ONLINE.<br />
How to print a Menu Map (Printer Configuration):<br />
Press Button 0 2 times<br />
Display will read “INFORMATION MENU”<br />
Press Button 3 once<br />
Display will read “PRINT MENU MAP EXECUTE”<br />
Press Button 3 once more to print the menu map. Printer<br />
_________________________________________________________________________________________________________________________<br />
PAGE 48 --- <strong>iTerra</strong> <strong>Elite</strong> <strong>Quick</strong> <strong>Start</strong> <strong>Guide</strong> © 2008 iSys-<strong>The</strong> <strong>Imaging</strong> <strong>Systems</strong> <strong>Group</strong> <strong>Inc</strong>.
will go back ONLINE.<br />
How to change number of copies:<br />
Press Button 0 4 times<br />
Display will read “PRINT MENU”<br />
Press Button 3 once<br />
Display will read “COPIES 1*”<br />
Press Button 2 to increase # of copies desired<br />
Press Button 6 to decrease # of copies<br />
Press Button 3 to save change<br />
Press Button 4 to put printer back ONLINE<br />
_________________________________________________________________________________________________________________________<br />
PAGE 49 --- <strong>iTerra</strong> <strong>Elite</strong> <strong>Quick</strong> <strong>Start</strong> <strong>Guide</strong> © 2008 iSys-<strong>The</strong> <strong>Imaging</strong> <strong>Systems</strong> <strong>Group</strong> <strong>Inc</strong>.
IV. OUTPUT VIA BACK<br />
Smearing<br />
Press Button 2 once<br />
Display should read “Fanfold Print Control<br />
Exit: Back Status:<br />
Smear ”<br />
Press Button 3 once to save change<br />
Display should read “Fanfold Print Control<br />
Exit: Back Status:<br />
Smear *”<br />
Press Button 4 once to put printer back<br />
ONLINE<br />
Display should read “Cycle Printer Power<br />
Check Print Quality”<br />
Cycle the printer’s power<br />
Run Test Plot to check quality of plot<br />
Repeat these steps until image quality is<br />
acceptable<br />
Press Buttons 6 & 7 at same time<br />
Display should read “Fanfold Print Control”<br />
Press Button 1 once<br />
Display should read “Fanfold Print Control<br />
Exit: Back Status: Good *”<br />
(Default)<br />
NOTE: Ensure you are only changing the Status for where your media is exiting the printer.<br />
Jamming<br />
Press Button 2 twice<br />
Display should read “Fanfold Print Control<br />
Exit: Back Status:<br />
Stall”<br />
Press Button 3 once to save change<br />
Display should read “Fanfold Print Control<br />
Exit: Back Status: Stall<br />
*”<br />
Press Button 4 once to put printer back<br />
ONLINE<br />
Display should read “Cycle Printer Power<br />
Check Print Quality”<br />
Cycle the printer’s power<br />
Run Test Plot to check quality of plot<br />
Repeat these steps until JAMMING in front of fuser<br />
stops<br />
_________________________________________________________________________________________________________________________<br />
PAGE 50 --- <strong>iTerra</strong> <strong>Elite</strong> <strong>Quick</strong> <strong>Start</strong> <strong>Guide</strong> © 2008 iSys-<strong>The</strong> <strong>Imaging</strong> <strong>Systems</strong> <strong>Group</strong> <strong>Inc</strong>.
V. OUTPUT VIA TOP (Using optional top stacker)<br />
Press Buttons 6 & 7<br />
Display should read<br />
at same time<br />
“Fanfold Print Control”<br />
Press Button 1 once<br />
Display should read “Fanfold Print Control<br />
Exit: Back Status: Good *” (Default)<br />
Press Button 6 3 times to select Exit out the Top of the printer.<br />
Display should read<br />
“Fanfold Print Control<br />
Exit: Top Status: Good ”<br />
_________________________________________________________________________________________________________________________<br />
PAGE 51 --- <strong>iTerra</strong> <strong>Elite</strong> <strong>Quick</strong> <strong>Start</strong> <strong>Guide</strong> © 2008 iSys-<strong>The</strong> <strong>Imaging</strong> <strong>Systems</strong> <strong>Group</strong> <strong>Inc</strong>.
Smearing<br />
Press Button 2 once<br />
Display should read “Fanfold Print Control<br />
Exit: Top Status: Smear<br />
”<br />
Press Button 3 once to save change<br />
Display should read “Fanfold Print Control<br />
Exit: Top Status: Smear<br />
*”<br />
Press Button 4 once to put printer back<br />
ONLINE<br />
Display should read “Cycle Printer Power<br />
Check Print Quality”<br />
Cycle the printer’s power<br />
Run Test Plot to check quality of plot<br />
Repeat these steps until image quality is acceptable<br />
Jamming<br />
Press Button 2<br />
Display should read<br />
twice<br />
“Fanfold print Control<br />
Exit: Top Status:<br />
Stall<br />
Press Button 3 once to save change<br />
Display should read “Fanfold Print Control<br />
Exit: Top Status: Stall<br />
*”<br />
Press Button 4 once to put printer back<br />
ONLINE<br />
Display should read<br />
Cycle the printer’s power<br />
“Cycle Printer Power<br />
Check Print Quality”<br />
Run Test Plot to check quality of plot<br />
Repeat these steps until image quality is acceptable<br />
NOTE: Ensure you are only changing the Status for where your media is exiting the printer.<br />
_________________________________________________________________________________________________________________________<br />
PAGE 52 --- <strong>iTerra</strong> <strong>Elite</strong> <strong>Quick</strong> <strong>Start</strong> <strong>Guide</strong> © 2008 iSys-<strong>The</strong> <strong>Imaging</strong> <strong>Systems</strong> <strong>Group</strong> <strong>Inc</strong>.
VI. OUTPUT PROBLEMS<br />
Jamming<br />
For Continuous Plotting Fanfold a JAM could occur in 4 places.<br />
1) Feeder green LED is flashing.<br />
• Media is not loaded-press and hold ADVANCE button until green LED stops flashing.<br />
2) Front of the printer while Feeder is loading.<br />
• Check leading edge of media for damage.<br />
• Check the pinch roller.<br />
• Check to see if media is loaded correctly through the input tray.<br />
• Load motor might need calibration.<br />
3) Front of the Fuser<br />
• Leading edge of paper is damaged (curls or bends).<br />
• EXIT Speed is too slow.<br />
4) Behind the Fuser or past the EXIT of the printer.<br />
TOP<br />
• Paper may not be folding properly in the Top Stacker tray.<br />
• Check to see if the Top Stacker is installed correctly. Check the distance to the JAM box.<br />
BACK<br />
• Check to see if the cable is installed on the Rear Jam block.<br />
• Make sure paper is free to fall to the floor.<br />
_________________________________________________________________________________________________________________________<br />
PAGE 53 --- <strong>iTerra</strong> <strong>Elite</strong> <strong>Quick</strong> <strong>Start</strong> <strong>Guide</strong> © 2008 iSys-<strong>The</strong> <strong>Imaging</strong> <strong>Systems</strong> <strong>Group</strong> <strong>Inc</strong>.
Smearing:<br />
• Consumables not installed correctly or non-iSys brand.<br />
• Paper moisture content is too high. Check for pock<br />
marking.<br />
• Paper width not within specification.<br />
• Paper not tracking properly through the feeder<br />
• Exit Speed too slow.<br />
Creasing or Wrinkling:<br />
• Consumables not installed correctly or non-iSys brand.<br />
• Paper moisture content is too high. Check for pock<br />
marking.<br />
• Paper width not within specification.<br />
• Paper not loading square to the front feed roller in the<br />
printer.<br />
_________________________________________________________________________________________________________________________<br />
PAGE 54 --- <strong>iTerra</strong> <strong>Elite</strong> <strong>Quick</strong> <strong>Start</strong> <strong>Guide</strong> © 2008 iSys-<strong>The</strong> <strong>Imaging</strong> <strong>Systems</strong> <strong>Group</strong> <strong>Inc</strong>.
5. PRINT DRIVER PREFERENCES<br />
This chapter explains how to set up color printing and how to use the printer’s features from within the driver preferences.<br />
Most of these features are designed for sheet operation via Tray 1, yet many also apply to continuous ‘super long page’<br />
operation via modified multi purpose tray.<br />
NOTE: Most applications allow the printer properties to be accessed from within the document print dialog box.<br />
_________________________________________________________________________________________________________________________<br />
PAGE 55 --- <strong>iTerra</strong> <strong>Elite</strong> <strong>Quick</strong> <strong>Start</strong> <strong>Guide</strong> © 2008 iSys-<strong>The</strong> <strong>Imaging</strong> <strong>Systems</strong> <strong>Group</strong> <strong>Inc</strong>.
I. CHANGING THE iSys CLP825 PRINTING PREFERENCES<br />
<strong>The</strong>re are few ways a user can open the printing preferences page:<br />
through the Printers folder<br />
START � SETTINGS� PRINTERS<br />
then right click on the printer name<br />
or when using an applications<br />
FILE � PRINT OPTIONS and<br />
selecting the PROPERTIES box<br />
or from the iSys CLP825<br />
PROPERTIES page<br />
_________________________________________________________________________________________________________________________<br />
PAGE 56 --- <strong>iTerra</strong> <strong>Elite</strong> <strong>Quick</strong> <strong>Start</strong> <strong>Guide</strong> © 2008 iSys-<strong>The</strong> <strong>Imaging</strong> <strong>Systems</strong> <strong>Group</strong> <strong>Inc</strong>.
II. THE SET UP TAB<br />
<strong>The</strong>re are 4 subsections under the SETUP tab:<br />
A. Media<br />
B. Finishing Mode<br />
C. 2-Sided Printing<br />
D. Driver Settings<br />
_________________________________________________________________________________________________________________________<br />
PAGE 57 --- <strong>iTerra</strong> <strong>Elite</strong> <strong>Quick</strong> <strong>Start</strong> <strong>Guide</strong> © 2008 iSys-<strong>The</strong> <strong>Imaging</strong> <strong>Systems</strong> <strong>Group</strong> <strong>Inc</strong>.
A. Media Section<br />
Size<br />
Drop down list of various standard sheet paper sizes and default ‘Super Long Paper’. Select ‘Super Long<br />
Paper’ for continuous printing operation. Default Super Long Paper specification is for 20-24lb paper with a width<br />
of 8.5” and support to 400’ in length. For a complete Super Long Paper specification sheet, notify your sales<br />
Representative. This will open a window as follows:<br />
From here you can toggle the ‘Enable Cut’ option if the user requires a cut between multi-copy jobs. You can<br />
also adjust the ‘START’ field, which changes the distance where the image is placed. You might use this if you<br />
would like to adjust the distance from the leading edge of paper or the initial tear-perforation using continuous<br />
media. This ‘CUT’ field adjusts where the cut occurs.<br />
Source<br />
Allows the user to change the printer paper tray to be used. For continuous plotting the only tray that can be used<br />
is the ‘Multi Purpose Tray’, the remaining standard sheet tray is labeled ‘Tray1’.<br />
Weight<br />
You can change the media weight (media type and thickness). For continuous plotting the default should be<br />
‘Printer Setting’.<br />
_________________________________________________________________________________________________________________________<br />
PAGE 58 --- <strong>iTerra</strong> <strong>Elite</strong> <strong>Quick</strong> <strong>Start</strong> <strong>Guide</strong> © 2008 iSys-<strong>The</strong> <strong>Imaging</strong> <strong>Systems</strong> <strong>Group</strong> <strong>Inc</strong>.
<strong>The</strong> ‘Paper Feed Options’<br />
<strong>The</strong> user should not have to change anything on this menu other than for generating a user defined ‘Custom<br />
Super Long Paper’ size or Custom Size. <strong>The</strong> default settings have been optimized for continuous printing.<br />
Fit to Page<br />
For sheet printing functions, this toggle will resize the image to fit the source paper size.<br />
Cover Printing<br />
For sheet printing, this allows the user to select another source for the first page of the print job. With only one<br />
sheet tray in the printer, this is likely an unused function.<br />
Paper Feed Options<br />
“Auto Tray Change” toggle is likely not used due to only one paper tray available, would allow the printer to<br />
automatically select a second source for same size paper. “Media Check” toggle will let the printer sense the<br />
paper before printing, checking for thickness and adjusting the print properties automatically.<br />
Multi Purpose Tray Settings<br />
Toggle to make the Manual Paper Tray slot to be manual feed with human interaction required. Not for use with<br />
Continuous Media printing, or when an automated feeder is attached.<br />
Custom Size or Custom Super Long Paper Sizes<br />
<strong>The</strong>se two types are virtually the same, with Custom Super Long Paper having the additional functions to activate<br />
or modify the start, cut positions, etc. Custom page sizes can only be printed via the multi purpose tray. <strong>The</strong> paper<br />
(media) size for the multi purpose tray must be manually set in the driver to the custom paper size before use.<br />
Custom page sizes range:<br />
• Width: 3½ to 8½ inches [89 to 216 mm], • Length: 5 to 14 inches [127 to 356 mm]<br />
NOTE: Up to 32 custom page sizes can be defined in the driver.<br />
1.) Open the file in your application. Select FILE � PRINT.<br />
_________________________________________________________________________________________________________________________<br />
PAGE 59 --- <strong>iTerra</strong> <strong>Elite</strong> <strong>Quick</strong> <strong>Start</strong> <strong>Guide</strong> © 2008 iSys-<strong>The</strong> <strong>Imaging</strong> <strong>Systems</strong> <strong>Group</strong> <strong>Inc</strong>.
2.) In the Print dialog box, on the GENERAL tab, click the appropriate driver. Click the SETUP tab.<br />
3.) Under MEDIA, in the SIZE drop-down list, select USER DEFINED SIZE. <strong>The</strong> Set Free Size dialog box<br />
appears.<br />
4.) Select the unit. Enter the width and length measurements. Custom page sizes can be defined provided they<br />
fall within the following ranges:<br />
• Width: 3.0 to 8.5 inches [76.2 to 215.9 mm]<br />
• Length: 0.5 to 51.181 inches [12.7 to 1300.0 mm]<br />
1. Click OK.<br />
2. Make sure that USER DEFINED<br />
now appears in the SIZE list on the SETUP tab.<br />
Default<br />
This button will reset the driver ‘Paper Feed’ preferences to the original or default values.<br />
_________________________________________________________________________________________________________________________<br />
PAGE 60 --- <strong>iTerra</strong> <strong>Elite</strong> <strong>Quick</strong> <strong>Start</strong> <strong>Guide</strong> © 2008 iSys-<strong>The</strong> <strong>Imaging</strong> <strong>Systems</strong> <strong>Group</strong> <strong>Inc</strong>.
B. Finishing Mode Section<br />
If ‘Super Long Paper’ is selected this field is deactivated. If a standard sheet type media is selected for output<br />
the following applies and is available. Use the dropdown style and make a selection or press the ‘Options’ button<br />
to call up the Standard / N –up dialogue box.<br />
Standard / N-up<br />
This allows you to print multiple pages on one sheet, with each page image reduced in size.<br />
Pages per Sheet:<br />
This function reduces the image size of each page so that the desired number of pages will fit on a single<br />
page. With each selection, the preview area will change. Please confirm the page layout in the preview<br />
area.<br />
1: Prints one page on one sheet of paper (default)<br />
2: Prints 2 pages on one sheet of paper<br />
4: Prints 4 pages on one sheet of paper<br />
6: Prints 6 pages on one sheet of paper<br />
8: Prints 8 pages on one sheet of paper<br />
9: Prints 9 pages on one sheet of paper<br />
16: Prints 16 pages on one sheet of paper<br />
_________________________________________________________________________________________________________________________<br />
PAGE 61 --- <strong>iTerra</strong> <strong>Elite</strong> <strong>Quick</strong> <strong>Start</strong> <strong>Guide</strong> © 2008 iSys-<strong>The</strong> <strong>Imaging</strong> <strong>Systems</strong> <strong>Group</strong> <strong>Inc</strong>.
NOTE: Data is not laid out centered on the page. <strong>The</strong> reduced image for the first page will be pasted to the<br />
upper left corner of the actual page. Fit to Page and Scale factor options, if used, will affect the position<br />
of the pages on the printed sheet. Fit to Page is applied first, then N-up, and finally Scale. Use the<br />
Preview area to check the effects of your changes.<br />
Border<br />
For N-up selections other than 1, you may select a page border to surround each individual page image that will<br />
be printed on the single sheet of paper.<br />
Page layout<br />
You can set the page order, if multiple images per page are selected.<br />
Bind Margin<br />
Reduces the size of the image to be printed and ads a margin for binding the document.<br />
Poster Print<br />
When Poster Print is selected one-page print data is enlarged into multiple pages.<br />
Enlarge<br />
2: One page is enlarged into 2 pages.<br />
4: One page is enlarged into 4 pages.<br />
9: One page is enlarged into 9 pages.<br />
Custom: A user can select a number of pages. 1x1 ~ 4x4.<br />
Custom<br />
When Custom is selected the Settings button is enabled. Clicking the Settings button will open the Custom<br />
setting dialog window.<br />
Add Registration Marks<br />
_________________________________________________________________________________________________________________________<br />
PAGE 62 --- <strong>iTerra</strong> <strong>Elite</strong> <strong>Quick</strong> <strong>Start</strong> <strong>Guide</strong> © 2008 iSys-<strong>The</strong> <strong>Imaging</strong> <strong>Systems</strong> <strong>Group</strong> <strong>Inc</strong>.
When checked, crop marks are added.<br />
Specify the color of crop marks, if click Color button.<br />
Add Overlap<br />
When checked, overlap is added.<br />
Sets the amount of pile part.(0.01~0.79 inch , 0.1~20.0 mm)<br />
C. 2-Sided (Duplex) Printing Section<br />
This will always be disabled unless a duplexer is installed. This option can never be used with continuous printing<br />
job. If outfitted with a Duplexing unit, three options are available: None, Long Edge and Short Edge.<br />
None<br />
<strong>The</strong> printer does not print on both sides of the paper.<br />
Long Edge<br />
Pages are bound on the long-edge (length). For portrait orientation, the backside of the page is printed in the<br />
same direction as the front side. This will give a printed result that is easy-to-read when the document is bound<br />
on the left side or the right side. For landscape orientation, the backside of the page is printed in the opposite<br />
direction to the front side. This will give an easy-to-read print result when the document is bound at the top or the<br />
bottom.<br />
Short Edge<br />
Pages are bound on the short-edge (width). For portrait orientation, the backside of pages is printed in the<br />
opposite direction to the front side. This will give an easy-to-read print result when the document is bound at the<br />
_________________________________________________________________________________________________________________________<br />
PAGE 63 --- <strong>iTerra</strong> <strong>Elite</strong> <strong>Quick</strong> <strong>Start</strong> <strong>Guide</strong> © 2008 iSys-<strong>The</strong> <strong>Imaging</strong> <strong>Systems</strong> <strong>Group</strong> <strong>Inc</strong>.
top or the bottom. For landscape orientation, the backside of pages is printed in the same direction as the front<br />
side. This will give an easy-to-read print result when the document is bound on the left side or the right side.<br />
NOTE: This function is not available unless a Duplex Option Unit is installed. Once the Duplex Option Unit is<br />
installed in your printer, open the Paper tab in Printer Properties and press the Device Options button.<br />
Place a check by the Duplex Option Unit to activate it.<br />
D. Driver Settings<br />
This function will SAVE the user defined settings in the driver to a user-controlled filename.<br />
Set Names: Sets the settings selected on the list under the saved set name.<br />
Add: Displays the dialog to enter the set name and saves the driver settings under the set name.<br />
Whether or not to include saving of the settings in Paper <strong>Group</strong> can be selected on the dialog to<br />
enter Set Names.<br />
Remove: Removes the selected Set Names from the list.<br />
_________________________________________________________________________________________________________________________<br />
PAGE 64 --- <strong>iTerra</strong> <strong>Elite</strong> <strong>Quick</strong> <strong>Start</strong> <strong>Guide</strong> © 2008 iSys-<strong>The</strong> <strong>Imaging</strong> <strong>Systems</strong> <strong>Group</strong> <strong>Inc</strong>.
III. THE JOB OPTIONS TAB<br />
<strong>The</strong>re are 4 subsections and 5 subsection buttons under<br />
the Job Options tab:<br />
A. Quality<br />
B. Orientation<br />
C. Job Type<br />
D. Scale<br />
E. Watermark<br />
F. Overlay<br />
G. Font<br />
H. Advanced<br />
I. Default<br />
A. Quality<br />
Used to select the desired resolution. <strong>The</strong> ‘Toner Saving’ check box is used for limiting the amount of toner used during<br />
printing, this will affect the quality of the output and is equivalent to a ‘Draft’ copy.<br />
B. Orientation<br />
Standard printing options are Portrait or Landscape printing. <strong>The</strong> 180º option is for rotating each page 180 degrees. This<br />
does not flip the entire job, but each individual page. When ‘Super Long Page’ is the paper size, this option is restrictive.<br />
C. Job Type<br />
Select the desired job type. Default values of ‘Normal’ with no ‘PIN’ are recommended for regular use.<br />
Normal<br />
_________________________________________________________________________________________________________________________<br />
PAGE 65 --- <strong>iTerra</strong> <strong>Elite</strong> <strong>Quick</strong> <strong>Start</strong> <strong>Guide</strong> © 2008 iSys-<strong>The</strong> <strong>Imaging</strong> <strong>Systems</strong> <strong>Group</strong> <strong>Inc</strong>.
Specify this for normal printing.<br />
Proof and Print<br />
When printing multiple copies of a document, Proof and Print allows you to verify (Proof) the first copy<br />
before printing the remaining copies. <strong>The</strong> first copy is printed normally. <strong>The</strong> remaining copies can be<br />
printed (or deleted) upon entering your PIN and selecting the document at the printer's control panel, via<br />
the ‘Print Jobs Menu’. At the Printers Control Panel, Press the MENU button on the control panel. <strong>The</strong><br />
PRINT JOBS menu is displayed. Press the SELECT button. A password is requested for access to print<br />
jobs (enter value of 1111). <strong>The</strong>n press the VALUE+ button until the job that you want to print is displayed<br />
in the PRINT JOBS menu. Press the SELECT button and you will be prompted to provide the PIN ID that<br />
you gave the print job. Enter the PIN and press SELECT, the proof document will begin printing.<br />
Secure Print<br />
<strong>The</strong> Secure Print selection provides a mechanism for controlling when a confidential or important<br />
document will be printed. Printing will not begin until you enter the security Printer Identification Number<br />
(PIN) that you defined as a part of the print job at the control panel of the printer. Press the MENU button<br />
on the control panel. <strong>The</strong> PRINT JOBS menu is displayed. Press the SELECT button. A password is<br />
requested for access to print jobs (enter value of 1111). <strong>The</strong>n press the VALUE+ button until the job that<br />
you want to print is displayed in the PRINT JOBS menu. Press the SELECT button and you will be<br />
prompted to provide the PIN ID that you gave the print job. Enter the PIN and press SELECT, the secure<br />
document will begin printing.<br />
NOTE: <strong>The</strong> first entry in the list is "ALL JOBS”, so ensure that you have selected the correct job.<br />
_________________________________________________________________________________________________________________________<br />
PAGE 66 --- <strong>iTerra</strong> <strong>Elite</strong> <strong>Quick</strong> <strong>Start</strong> <strong>Guide</strong> © 2008 iSys-<strong>The</strong> <strong>Imaging</strong> <strong>Systems</strong> <strong>Group</strong> <strong>Inc</strong>.
D. Scale<br />
Store to HDD<br />
This command sends and stores the print job on printer hard disk. Job is then printed via the printer control<br />
panel by accessing the ‘Print Jobs Menu’. At the Printers Control Panel, Press the MENU button on the<br />
control panel. <strong>The</strong> PRINT JOBS menu is displayed. Press the SELECT button. A password is requested for<br />
access to print jobs (enter value of 1111). <strong>The</strong>n press the VALUE+ button until the job that you want to print is<br />
displayed in the PRINT JOBS menu. Press the SELECT button and you will be prompted to provide the PIN<br />
ID that you gave the print job. Enter the PIN and press SELECT, the stored document will begin printing.<br />
• For the Proof and Print, Secure Print and Store to HDD functions, an internal printer hard disk must be<br />
installed.<br />
• When you install a printer hard disk, check Printer Hard Disk in Device Option tab. In addition, a PIN is<br />
required.<br />
• If the hard disk memory is insufficient for the spooled data, DISK FULL is displayed and expectant output<br />
maybe compromised.<br />
• If the software application being used has a collate print option, it must be turned OFF for proof and print<br />
to operate correctly. Proof and print may not be available in some software applications.<br />
• Jobs can be deleted off of the printers disk drive by the following procedure:<br />
Press the MENU button to access the PRINT JOBS MENU a press the SELECT button.<br />
1. Enter PASSWORD number using the buttons on the printer control panel. (Password is 1111).<br />
2. Press the VALUE button until ALL JOBS or the required job name is displayed.<br />
3. Press the CANCEL button to delete the job.<br />
4. When the deletion confirmation message appears, confirm by pressing the SELECT button.<br />
Copies<br />
Enter the number of copies you wish to have printed.<br />
Collate<br />
Prints the document with the pages in ascending numerical order for multiple-copy printing.<br />
_________________________________________________________________________________________________________________________<br />
PAGE 67 --- <strong>iTerra</strong> <strong>Elite</strong> <strong>Quick</strong> <strong>Start</strong> <strong>Guide</strong> © 2008 iSys-<strong>The</strong> <strong>Imaging</strong> <strong>Systems</strong> <strong>Group</strong> <strong>Inc</strong>.
This allows you to set a rate to enlarge or reduce your printed image. <strong>The</strong> image size may be adjusted over a range of<br />
25%-400%.<br />
When "Disabled" item is checked, it notifies that the driver does not have a scaling function capability. If ‘Super Long<br />
Paper’ is the media size selection, this option is unavailable. Some software applications may not be able to utilize this<br />
function.<br />
E. Watermarks<br />
In the Watermark dialog, you set watermark print related items. A watermark is a graphic or text that is layered over an<br />
existing image. If you use the Watermark function, you can print the characters on top of the data you have created in an<br />
application program. Select a watermark from the list. <strong>The</strong> selected watermark can be edited. When (None) is selected,<br />
no watermark will be printed. Watermarks can be added, edited and removed from the list. If you wish for the watermark<br />
to appear ONLY on the first page, activate the First Page Only box.<br />
Create a New watermark by pressing the ‘New’ button. Entering the text string that you wish, modify the Font or Color by<br />
activating the buttons and working through the sub-layer dialogue boxes. Modify the Position and the Angle of orientation.<br />
<strong>The</strong> Trim function allows for different border around the text. Press OK to complete the Create New dialogue.<br />
_________________________________________________________________________________________________________________________<br />
PAGE 68 --- <strong>iTerra</strong> <strong>Elite</strong> <strong>Quick</strong> <strong>Start</strong> <strong>Guide</strong> © 2008 iSys-<strong>The</strong> <strong>Imaging</strong> <strong>Systems</strong> <strong>Group</strong> <strong>Inc</strong>.
Edit a watermark follows a similar dialogue as New Watermark. (see diagrams to follow).<br />
Remove a watermark from the list. Select watermark on list and then press ‘Remove’.<br />
Default will return this Tab and the modified values back to the original set values.<br />
_________________________________________________________________________________________________________________________<br />
PAGE 69 --- <strong>iTerra</strong> <strong>Elite</strong> <strong>Quick</strong> <strong>Start</strong> <strong>Guide</strong> © 2008 iSys-<strong>The</strong> <strong>Imaging</strong> <strong>Systems</strong> <strong>Group</strong> <strong>Inc</strong>.
F. Overlay<br />
<strong>The</strong> Overlay tab allows you to apply additional information to your printed documents.<br />
An Overlay is a single page document, or pieces of a document that have been stored on the printer's hard disk or flash<br />
memory. Examples of overlays include company logos, purchase order forms, or commonly used items within your<br />
documents. <strong>The</strong> result is similar to the Watermark feature, but with the ability to be much more elaborate.<br />
As an example, Overlays can be used to create a corporate letterhead that is applied to your business letters. <strong>The</strong> logo<br />
and address that make up the letterhead reside in the printer. This insures that the letterhead appears consistent when<br />
applied by multiple uses, and reduces the amount of data being sent to the printer.<br />
_________________________________________________________________________________________________________________________<br />
PAGE 70 --- <strong>iTerra</strong> <strong>Elite</strong> <strong>Quick</strong> <strong>Start</strong> <strong>Guide</strong> © 2008 iSys-<strong>The</strong> <strong>Imaging</strong> <strong>Systems</strong> <strong>Group</strong> <strong>Inc</strong>.
Basic Steps for Using Overlays:<br />
1. Create the overlay. Many Windows applications can be used to design forms and overlays. After proofing<br />
your overlay, use the 'print to file' feature to create a PRN file representing the overlay.<br />
2. Store the Overlay in the printer's hard disk drive (HDD) or flash memory. <strong>The</strong> Storage Device Manager utility<br />
can be used to download the PRN file to the printer's hard disk or flash memory. Record the ID values<br />
assigned to each overlay stored in the printer. Notify your sales representative to get your free copy of<br />
Storage Device Manger utility.<br />
3. Select the Overlay tab in Printer Properties, then press the Define Overlays button to add information about<br />
the overlays stored in your printer. You can indicate specific pages for applying the overlay and combine<br />
multiple overlay ID values into a single user-defined Overlay name.<br />
4. Add one or more of the Defined Overlays to the list of Active Overlays by selecting the Overlay Names, then<br />
pressing the Add button. Enable Print Using Active Overlays to apply the overlay(s) to the next printed<br />
document. While this is enabled, all future print jobs will use this overlay until the Print Using Active Overlays<br />
function is disabled. This setting can also be enabled from an application for a particular document. After the<br />
document prints, the Print Using Active Overlays option automatically reverts to a disabled state when the<br />
application is closed.<br />
5. To modify an existing Overlay, follow the steps shown below:<br />
a. Select an item to be changed from the Defined Overlays list.<br />
b. Enter an Overlay name to be added to Overlay Name.<br />
c. Enter up to 3 Overlay ID numbers, separated by commas in the ID value(s) edit box.<br />
d. Select the pages that are to be printed using the Overlay from the Print on Pages list.<br />
e. If you selected Custom in Step (4), enter the page numbers or range of pages to be printed,<br />
separated by commas in the Custom Pages edit box.<br />
_________________________________________________________________________________________________________________________<br />
PAGE 71 --- <strong>iTerra</strong> <strong>Elite</strong> <strong>Quick</strong> <strong>Start</strong> <strong>Guide</strong> © 2008 iSys-<strong>The</strong> <strong>Imaging</strong> <strong>Systems</strong> <strong>Group</strong> <strong>Inc</strong>.
f. Press the Apply button to save the changes to an existing Defined Overlay, or press the Add button<br />
if you have created a new Defined Overlay.<br />
g. Press the Close button when you are finished creating or editing Defined Overlays.<br />
6. If you have made changes to the Active Overlays dialog, press either the Apply button or OK button to<br />
preserve these changes. Press the Cancel button to close the dialog without saving your changes.<br />
When you check ‘Print using active overlays’, the active overlay feature is turned on.<br />
Active Overlays<br />
Displays the list of one or more overlays that may be applied to a document. <strong>The</strong> initial settings will display an<br />
empty ‘Active Overlays’ window.<br />
To add to the list of Active Overlays, select one or more of the Defined Overlays and press the Add button. You<br />
may add up to 4 Overlays to the list at one time. Use the Remove button to delete an overlay from the list of<br />
Active Overlays.<br />
_________________________________________________________________________________________________________________________<br />
PAGE 72 --- <strong>iTerra</strong> <strong>Elite</strong> <strong>Quick</strong> <strong>Start</strong> <strong>Guide</strong> © 2008 iSys-<strong>The</strong> <strong>Imaging</strong> <strong>Systems</strong> <strong>Group</strong> <strong>Inc</strong>.
Defined Overlays<br />
Displays the list of user-defined overlays. Defined Overlays can be made Active Overlays by selecting the<br />
desired item(s) and pressing the Add button. Up to 4 Defined Overlays can be added to the Active Overlay list at<br />
one time. Initially this list will be blank.<br />
Edit this list by pressing the Define Overlay button, then provide information about the overlay stored in your<br />
printer. When the information is complete, press the Add button. This adds the current overlay information to the<br />
Defined Overlay list.<br />
<strong>The</strong> Defined Overlay list may contain up to 32 overlays.<br />
_________________________________________________________________________________________________________________________<br />
PAGE 73 --- <strong>iTerra</strong> <strong>Elite</strong> <strong>Quick</strong> <strong>Start</strong> <strong>Guide</strong> © 2008 iSys-<strong>The</strong> <strong>Imaging</strong> <strong>Systems</strong> <strong>Group</strong> <strong>Inc</strong>.
ID Value<br />
Enter the ID of the overlay stored in your printer. This ID represents the PCL macro ID value assigned when<br />
using Storage Device Manager. <strong>The</strong> range of valid ID numbers is from 0 to 32767.<br />
Up to 3 ID values can be specified to create a single overlay from three different PCL macros. Separate the ID<br />
numbers with commas. (Example: 32, 7, 125). Macros will be executed in the order that they are entered.<br />
Specifies the pages that will be printed using the overlay. Select from the list of pre-defined pages shown below,<br />
or select Custom to define specific pages.<br />
Print On Pages<br />
All pages<br />
First page<br />
Even pages<br />
Odd pages<br />
Custom: Overlay is printed on the pages entered in Custom Pages.<br />
Custom Pages<br />
Allows you to define a range of pages or specific pages to be printed with the overlay when Custom is selected<br />
from the Print on pages list.<br />
Enter a range of pages and/or specific page numbers, separated by commas. (Example: 1,3,6, 4-8).<br />
You can specify pages in the range from 1 to 999.<br />
Follow these instructions to transfer your .prn overlay to the <strong>Elite</strong> printers hard drive.<br />
_________________________________________________________________________________________________________________________<br />
PAGE 74 --- <strong>iTerra</strong> <strong>Elite</strong> <strong>Quick</strong> <strong>Start</strong> <strong>Guide</strong> © 2008 iSys-<strong>The</strong> <strong>Imaging</strong> <strong>Systems</strong> <strong>Group</strong> <strong>Inc</strong>.
NOTE: • <strong>The</strong> printer windows driver should be installed first and configured.<br />
• <strong>The</strong> printer should be powered on and connection type configured.<br />
• Use this method if you do not have the Storage Manager Utility.<br />
Connectivity Type<br />
1) Parallel Connect Instructions<br />
• Open a DOS command Prompt window and CD (change directory) to the appropriate host directory<br />
where the overlay file is loaded.<br />
• Type the following to send overlay .prn to printer ‘copy/b filename lpt1:’ and hit return or enter.<br />
2) Network Connect Instructions<br />
• Open a DOS Command Prompt window and CD (change directory) to the appropriate host directory<br />
where the overlay file is loaded.<br />
• Use lpr command to send overlay .prn file to the printer, as follows from command prompt window.<br />
“lpr-S ip_address-P lp1:filename”<br />
3) USB Connect Instructions<br />
• to print via USB connection, you will need to install ‘Free Raw Print’ utility. This is a freeware utility<br />
available on the World Wide Web.<br />
• Use Free Raw Print application to print overlay .prn file. Ensure that printer highlighted is the <strong>iTerra</strong><br />
<strong>Elite</strong> and browse for the demo plot file, select and hit print within FRP utility.<br />
_________________________________________________________________________________________________________________________<br />
PAGE 75 --- <strong>iTerra</strong> <strong>Elite</strong> <strong>Quick</strong> <strong>Start</strong> <strong>Guide</strong> © 2008 iSys-<strong>The</strong> <strong>Imaging</strong> <strong>Systems</strong> <strong>Group</strong> <strong>Inc</strong>.
G. Font<br />
In the Font tab, you set TrueType font and printer font related items.<br />
TrueType Font Output Type<br />
Download as Outline Font<br />
TrueType font is downloaded to the printer as outline font and the font image is created inside the<br />
printer. Using this option, the processing load in the Windows operating system, in general,<br />
becomes small, and the processing load in the printer becomes large. Certain TrueType fonts,<br />
however, are downloaded as bitmap fonts, regardless of this setting.<br />
Download as Bitmap Font:<br />
TrueType font is downloaded as a bitmap font to the printer. In this case, the font image is<br />
created in Windows and sent to the printer. In general, this increases the processing load in<br />
Windows and decreases the processing load in the printer.<br />
_________________________________________________________________________________________________________________________<br />
PAGE 76 --- <strong>iTerra</strong> <strong>Elite</strong> <strong>Quick</strong> <strong>Start</strong> <strong>Guide</strong> © 2008 iSys-<strong>The</strong> <strong>Imaging</strong> <strong>Systems</strong> <strong>Group</strong> <strong>Inc</strong>.
Font Substitution<br />
With this checked, the Font Substitution Table becomes available.<br />
Font Substitution Table<br />
Substitutes Printer Fonts for TrueType Fonts. A printer font is selected on the Printer Font list that<br />
substitutes for a font selected on the TrueType font list. This is enabled only when Font<br />
Substitution is checked.<br />
Default<br />
Returns this tabs values to their original settings.<br />
H. Advanced<br />
This tab contains a cross section of switch type settings. <strong>The</strong> toggled items as displayed in the image below are<br />
the suggested values for Super Long Paper operation.<br />
_________________________________________________________________________________________________________________________<br />
PAGE 77 --- <strong>iTerra</strong> <strong>Elite</strong> <strong>Quick</strong> <strong>Start</strong> <strong>Guide</strong> © 2008 iSys-<strong>The</strong> <strong>Imaging</strong> <strong>Systems</strong> <strong>Group</strong> <strong>Inc</strong>.
Image Quality<br />
This sliding scale makes nominal adjustments balancing Speed versus Quality using an algorithm.<br />
Keep Page Layout with Scale Change<br />
When you use Pages per Sheet (N-up), Fit to page, Bind Margin, or Booklet function, the number of<br />
characters per line or the number of lines per page may change, which results in a different page layout.<br />
When you select this setting, you can use one of these functions without changing the page layout.<br />
However, be aware that you may have a different print result because fill-pattern of a figure or etc. is<br />
enlarged/reduced when you select this setting.<br />
Express Correctly Drawing of Combine<br />
When overlaid colors in a figure, etc. are not precisely printed, selecting this setting may solve the<br />
problem. However, doing so may result in a slower printing speed.<br />
Always create 100% Black (K) Toner<br />
Check this box to have the color Black always generated with black only toner. If un-checked, the color<br />
Black may be generated using a combination of toner colors, creating a poor rendition of black.<br />
Adjust ultra fine lines<br />
By activating this feature, fine lines will be more precisely drawn and displayed.<br />
Priority is given to AP collation<br />
This allows your software application to override the printer preferences collate function, giving priority to<br />
the software application.<br />
Run maintenance cycle before printing<br />
Depending upon printing habits and usage patterns, running the maintenance cycle prior to printing may<br />
insure best possible print quality.<br />
Job Spool<br />
_________________________________________________________________________________________________________________________<br />
PAGE 78 --- <strong>iTerra</strong> <strong>Elite</strong> <strong>Quick</strong> <strong>Start</strong> <strong>Guide</strong> © 2008 iSys-<strong>The</strong> <strong>Imaging</strong> <strong>Systems</strong> <strong>Group</strong> <strong>Inc</strong>.
If a hard disk drive in installed on the printer, this function will move the job print spooling to the printer to<br />
perform and not the host system. This will result in slower printing.<br />
Reduce Size of Spool File<br />
Selecting EMF (Enhanced Metafiles) as a spooling file format reduces the time that the printer needs to<br />
return processing to the application after it starts printing. With some applications, the size of spooling file<br />
becomes huge when EMF is selected as a spooling file format. In that case, select this setting.<br />
This setting is disabled because spooling in EMF format is not available in the following cases:<br />
� When you select Print directly to the printer<br />
� When you select Always spool RAW data type<br />
� When you print from a client side with print server in network environment<br />
This setting is valid only with Windows NT4.0/2000/XP.<br />
I. Default<br />
Returns the values in this tab to the original values.<br />
_________________________________________________________________________________________________________________________<br />
PAGE 79 --- <strong>iTerra</strong> <strong>Elite</strong> <strong>Quick</strong> <strong>Start</strong> <strong>Guide</strong> © 2008 iSys-<strong>The</strong> <strong>Imaging</strong> <strong>Systems</strong> <strong>Group</strong> <strong>Inc</strong>.
IV. COLOR TAB<br />
Factors that Affect Color Printing<br />
<strong>The</strong> PCL printer driver supplied with your printer provides several controls for<br />
changing the color output. For general use the default driver settings produce good<br />
results for most documents. Many applications have their own color settings and<br />
these may override the settings in the printer driver. Please refer to the your<br />
software application documents for details on how that particular program’s color<br />
management functions. If you wish to manually adjust the color settings in your<br />
printer driver, please be aware that color reproduction is a complex topic and there<br />
are many factors to take into consideration. Some of the most important factors are:<br />
� the differences between the range of colors a monitor can reproduce versus<br />
the range of colors that a printer can reproduce<br />
� viewing conditions<br />
� printer driver color settings<br />
� monitor settings<br />
� how your software application displays color<br />
� paper type<br />
Monitor Colors vs. Printer Colors<br />
(Differences between the range of colors a monitor or printer can reproduce)<br />
� Neither a printer nor a monitor is capable of reproducing the full range of colors visible to the human eye. Each<br />
device is restricted to a certain range of colors. In addition to this, a printer cannot reproduce all of the colors<br />
displayed on a monitor and vice versa.<br />
� Both devices use very different technologies to represent color. A monitor uses Red, Green and Blue (RGB)<br />
phosphors (or LCDs), a printer uses Cyan, Yellow, Magenta and Black (CMYK) toner or ink.<br />
_________________________________________________________________________________________________________________________<br />
PAGE 80 --- <strong>iTerra</strong> <strong>Elite</strong> <strong>Quick</strong> <strong>Start</strong> <strong>Guide</strong> © 2008 iSys-<strong>The</strong> <strong>Imaging</strong> <strong>Systems</strong> <strong>Group</strong> <strong>Inc</strong>.
� A monitor can display very vivid colors such as intense reds and blues. <strong>The</strong>se cannot be easily produced on any<br />
printer using toner or ink. Similarly, there are certain colors, (some yellows for example), that can be printed, but<br />
cannot be displayed accurately on a monitor. This disparity between monitors and printers is often the main<br />
reason that printed colors do not match the colors displayed on screen.<br />
Viewing Conditions<br />
A document can look very different under various lighting conditions. For example, the colors may look different when<br />
viewed standing next to a sunlit window, compared to how they look under standard office fluorescent lighting.<br />
Printer Driver Color Settings<br />
<strong>The</strong> driver settings for Manual color can change the appearance of a document. <strong>The</strong>re are several options available to<br />
help match the printed colors with those displayed on screen. <strong>The</strong>se options are explained below.<br />
Monitor Settings<br />
<strong>The</strong> brightness and contrast controls on your monitor can change how your document looks on-screen. Additionally, your<br />
monitor color temperature influences how "warm" or "cool" the colors look. <strong>The</strong>re are several settings found on a typical<br />
monitor:<br />
5000k* Warmest; yellowish lighting, typically used in graphics arts environments.<br />
6500k* Cooler; approximates daylight conditions.<br />
9300k* Cool; the default setting for many monitors and television sets.<br />
*k = degrees Kelvin, a measurement of temperature<br />
How your Software Application Displays Color<br />
Some graphics applications such as CorelDRAW® or Adobe® Photoshop® may display color differently from "office"<br />
applications such as Microsoft® Word. Please see your application’s online help or user manual for more information.<br />
Paper Type<br />
<strong>The</strong> type of paper used can also significantly affect the printed color. For example, a printout on recycled paper can look<br />
duller than one on specially formulated glossy paper.<br />
_________________________________________________________________________________________________________________________<br />
PAGE 81 --- <strong>iTerra</strong> <strong>Elite</strong> <strong>Quick</strong> <strong>Start</strong> <strong>Guide</strong> © 2008 iSys-<strong>The</strong> <strong>Imaging</strong> <strong>Systems</strong> <strong>Group</strong> <strong>Inc</strong>.
V. COLOUR MATCHING<br />
Choosing a Method<br />
<strong>The</strong>re are many factors involved in achieving accurate and reproducible color. <strong>The</strong> following guidelines may help in<br />
achieving good color output from your printer. <strong>The</strong>re are several suggested methods, depending on the type of document<br />
you are printing:<br />
� most common [RGB]<br />
� professional desktop publishing and graphics [CMYK]<br />
� photographic images<br />
� specific colors (i.e., a company logo)<br />
� printing vivid colors<br />
RGB or CMYK?<br />
<strong>The</strong> guidelines for choosing a color matching method make distinctions between Red, Green, Blue (RGB) and Cyan,<br />
Magenta, Yellow, Black (CMYK). Generally, most documents you print are in RGB format. This is the most common<br />
format. If you do not know your document’s color mode, assume that it is RGB. Typically, CMYK documents are only<br />
supported in professional Desktop Publishing and Graphics applications.<br />
Matching Photographs<br />
RGB only Color Matching is a generally a good choice. Select a matching method appropriate to your monitor.<br />
Matching Specific Colors<br />
(Example: Company logo)<br />
RGB only<br />
Color Matching , and the sRGB setting:<br />
� Use the Color Swatch Utility to print out a chart of RGB swatches and enter your desired RGB values in your<br />
application's color picker.<br />
_________________________________________________________________________________________________________________________<br />
PAGE 82 --- <strong>iTerra</strong> <strong>Elite</strong> <strong>Quick</strong> <strong>Start</strong> <strong>Guide</strong> © 2008 iSys-<strong>The</strong> <strong>Imaging</strong> <strong>Systems</strong> <strong>Group</strong> <strong>Inc</strong>.
� If you are printing from a graphics application such as Adobe Photoshop, you may be able to use Soft-<br />
Proofing to simulate the printed image on your monitor. To do this, you can use the ICC profiles provided.<br />
Print using the ICC profiles as the Print Space (or Output space).<br />
Printing Vivid Colors<br />
RGB only Use Color Matching, with the Monitor 6500k Vivid, sRGB or Digital Camera settings.<br />
<strong>The</strong> Color Matching Options in the driver can be used to help match your printed colors to the ones displayed on your<br />
monitor.<br />
Manually set the options in the PCL driver:<br />
1. Click START� SETTINGS � PRINTERS<br />
2. Right click the appropriate printer name. Click PRINTING PREFERENCES<br />
3. Click the COLOR tab<br />
4. Under Color Mode, click MANUAL COLOR<br />
5. Under Color Setting, click NATURAL<br />
6. Select the method you wish to use:<br />
Monitor (6500k) Perceptual<br />
Optimized for printing photographs when using a monitor with a color temperature of 6500K.<br />
Monitor (6500k) Vivid<br />
Optimized for printing bright colors when using a monitor with a color temperature of 6500K. Ideal for<br />
office graphics.<br />
Monitor (9300k)<br />
Optimized for printing photographs when using a monitor with a color temperature of 9300K.<br />
Digital Camera<br />
Optimized for printing photographs taken with a digital camera. This tends to produce prints with lighter<br />
and brighter colors. For some photographs, other settings may be better depending on the subjects and<br />
the conditions under which they were taken.<br />
sRGB<br />
_________________________________________________________________________________________________________________________<br />
PAGE 83 --- <strong>iTerra</strong> <strong>Elite</strong> <strong>Quick</strong> <strong>Start</strong> <strong>Guide</strong> © 2008 iSys-<strong>The</strong> <strong>Imaging</strong> <strong>Systems</strong> <strong>Group</strong> <strong>Inc</strong>.
Optimized for matching specific colors, such as a company logo color. <strong>The</strong> colors within the printer's color<br />
gamut are printed without any modification, and only colors that fall outside the printable colors are<br />
modified.<br />
7. Set any other required parameters. Use the on-line Help for guidance.<br />
8. When you are done, click OK. Close the Printing Preferences dialog box.<br />
Print Color Swatch Utility<br />
For use with applications, which allow you to set your own RGB values for colors. <strong>The</strong> Color Swatch utility prints out<br />
charts of sample colors. Listed below each color are the corresponding RGB (Red, Green, Blue) values to use in your<br />
application to match that printed color. Example: You wish to print a logo in a particular shade of red. Follow these steps:<br />
1. Click START� SETTINGS � PRINTERS<br />
2. Right click the printer name. Click PRINTING PREFERENCES.<br />
3. Click the COLOR tab<br />
4. Click the COLOR SWATCH button to print the color swatch samples<br />
5. Select the shade of red that best suits your needs. Make a note of the RGB value below that particular shade<br />
6. Use your program’s color picker to enter the same RGB values (from step 5). Change the logo to that color<br />
Windows ICM Color Matching<br />
• ICM is the color management system built into Windows<br />
• Affects RGB data only<br />
• Can be associated with the PCL driver Windows ICM uses ICC profiles for your monitor and printer<br />
_________________________________________________________________________________________________________________________<br />
PAGE 84 --- <strong>iTerra</strong> <strong>Elite</strong> <strong>Quick</strong> <strong>Start</strong> <strong>Guide</strong> © 2008 iSys-<strong>The</strong> <strong>Imaging</strong> <strong>Systems</strong> <strong>Group</strong> <strong>Inc</strong>.
<strong>The</strong>se profiles describe the colors that your device is capable of reproducing. ICC profiles can be associated with your<br />
printer via the COLOR MANAGEMENT tab of the printer driver. Depending on how you have installed the printer driver,<br />
the color profiles may already be associated with the driver. To associate ICC Color Profiles with the printer driver:<br />
1. Click START � SETTINGS � PRINTERS<br />
2. Highlight the printer name. Click FILE, then PROPERTIES<br />
3. Click the COLOR MANAGEMENT tab<br />
4. Under “Color Profiles currently associated with this printer”, you should see the names of profiles that match your<br />
printer model. If you do not see any profiles associated with the driver, click “Add…” and locate the ICC profiles<br />
for your printer<br />
Windows ICM uses the information in these profiles to convert colors in your documents to colors that the printer can<br />
reproduce. <strong>The</strong> way in which this conversion is performed can be controlled via the ICM Intent control in the printer<br />
driver.<br />
_________________________________________________________________________________________________________________________<br />
PAGE 85 --- <strong>iTerra</strong> <strong>Elite</strong> <strong>Quick</strong> <strong>Start</strong> <strong>Guide</strong> © 2008 iSys-<strong>The</strong> <strong>Imaging</strong> <strong>Systems</strong> <strong>Group</strong> <strong>Inc</strong>.
6. TROUBLESHOOTING<br />
I. ERROR CODES<br />
<strong>The</strong> <strong>iTerra</strong> <strong>Elite</strong> Troubleshooting Chapter has been created to assist users with the common error messages found on<br />
their units. Please use this chapter to assist you though some of the common errors. If at any time you need further<br />
assistance, contact iSys toll free at 1-866-415-4797 within North America, and 1-403-204-5200 globally, or email<br />
support@iSys-group.com.<br />
Error Code: 123: Error<br />
Description: Improper environment humidity detected by sensor.<br />
Cause: <strong>iTerra</strong> <strong>Elite</strong> printer is being used in a very humid environment. This error often occurs first thing in the<br />
morning and is caused by condensation.<br />
Solution: Place the unit in an area of low humidity to dry out or dehumidify the work area.<br />
Error Code: 382 : Paper jam<br />
Description: Paper jam detected in fuser or during paper ejection from fuser.<br />
Cause 1: <strong>Inc</strong>orrect setting in iSys menu.<br />
Solution 1: Solution:<br />
1. Press the 6 + 7 buttons simultaneously<br />
2. Ensure that the “Fanfold Print Control” item is set correctly.<br />
3. For printing out the top, “Exit : Top Status : Good” should be selected.<br />
4. For printing out the back, “Exit : Back Status : Good” should be selected.<br />
If error persists, <strong>The</strong> “Fanfold Print Control” menu may need to be adjusted:<br />
Select “Status : Stall” to adjust it. This can be repeated until the stalls are alleviated.<br />
If the image starts to appear smeared, you have gone too far:<br />
Select “Status : Smear”.<br />
Note: <strong>The</strong> factory default settings can be loaded by entering ES management in the iSys menu. Select “<br />
_________________________________________________________________________________________________________________________<br />
PAGE 86 --- <strong>iTerra</strong> <strong>Elite</strong> <strong>Quick</strong> <strong>Start</strong> <strong>Guide</strong> © 2008 iSys-<strong>The</strong> <strong>Imaging</strong> <strong>Systems</strong> <strong>Group</strong> <strong>Inc</strong>.
Copy FES to CES? Yes”.<br />
Cause 2 Jam sensor unable to detect paper exiting the printer.<br />
Solution 2: 1. If plotting out the top, ensure that your top stacker is installed correctly and that the wheel near the<br />
jam sensor (small aluminum box on top of printer) is able to turn freely when the paper enters the<br />
stacker. If you do not have a top stacker, you cannot print out the top.<br />
2. If plotting out the back, ensure that the rear jam sensor cable is attached to the back lid of the<br />
printer. Ensure that the paper is able to fall freely from the back of the printer. It should fall all the<br />
way to the floor.<br />
3. Do not help the paper out or attempt to fold it as it is exiting the printer. Any time the paper is lifted<br />
from the wheel of the rear jam sensor, an error will occur.<br />
4. Whether plotting out the top or the back of the printer, you should be able to view the green LED<br />
on the jam sensor board begin to flash when the paper spins the jam sensor wheel during printing.<br />
Error Code: 390 : Paper jam<br />
Description: Paper jam during paper feed from MT (Manual Tray).<br />
Cause 1: Paper not advanced in feeder after power up.<br />
Solution 1: <strong>The</strong> advance button must be pressed on the feeder unit until the paper moves forward and the green LED is<br />
on solid. If the green LED is flashing while a print job is sent, this error will occur.<br />
Cause 2: Piece of paper jammed at MT (Manual Tray) sensor.<br />
Solution 2: 1. Power off printer.<br />
2. Remove piece of paper. It may be necessary to remove the toner and drum carriage consumable<br />
tray and belt to view the jammed piece of paper.<br />
3. It may also be necessary to remove the aluminum MT cover where the feeder attaches to view the<br />
jammed piece of paper.<br />
Power on printer.<br />
Cause 3: Paper feeding forward but not entering the printer.<br />
Solution 3: 1. Check the paper width. <strong>The</strong> correct paper size will be slightly narrower than the white delrin idler<br />
rollers on Feeder (lower bar).<br />
2. Ensure that the paper is loaded correctly in accordance with instructions. found in the <strong>iTerra</strong> <strong>Elite</strong><br />
user manual. If the paper is loaded in the paper tray, try feeding from under the tray.<br />
Error Code: 400: Paper size error.<br />
_________________________________________________________________________________________________________________________<br />
PAGE 87 --- <strong>iTerra</strong> <strong>Elite</strong> <strong>Quick</strong> <strong>Start</strong> <strong>Guide</strong> © 2008 iSys-<strong>The</strong> <strong>Imaging</strong> <strong>Systems</strong> <strong>Group</strong> <strong>Inc</strong>.
Description: Unexpected end of paper.<br />
Cause 1: Paper ran out during print.<br />
Solution 1: This error is normal if the paper runs out during printing.<br />
1. Install new paper, open and close the printer lid.<br />
2. Press the “online” key to reprint the job.<br />
Cause 2: Improper PJL command sent by the host system. User not printing through the Windows driver.<br />
Solution 2: 1. Check the output file to view PJL commands at start of print data. This data must be in accordance<br />
with the <strong>iTerra</strong> <strong>Elite</strong> requirements. <strong>The</strong> provider of the software used will likely have to be involved<br />
to rectify the situation.<br />
2. If using a Windows system, try printing through the iSys windows driver for <strong>iTerra</strong> <strong>Elite</strong>.<br />
Error Code: 480 : Stacker Full<br />
Description: Paper stacker is full<br />
Cause 1: Stacker full after print completed out the top of printer.<br />
Solution 1: This error is normal if the print has completed when paper is exiting out the top.<br />
1. <strong>The</strong> paper must be manually removed from the top stacker.<br />
Cause 2: Stacker sensor lever has popped out of place.<br />
Solution 2: Snap the sensor lever back into place. If the lever is damaged, or the sensor still does not work, the sensor<br />
assembly may require replacement. Authorized service personnel should only attempt this procedure.<br />
Error Code: 490 : No paper in MP tray.<br />
Description: No paper received from feeder.<br />
Solution: Ensure that the following settings are selected in the drive:<br />
1. Select “Super Long Paper” for media type.<br />
2. Select “Multi Purpose Tray” for Source in the Windows driver.<br />
Error Code: <strong>iTerra</strong> Error : 01 ## ##<br />
Description: Printer internal hardware failure.<br />
Solution: Contact <strong>The</strong> <strong>Imaging</strong> <strong>Systems</strong> <strong>Group</strong> <strong>Inc</strong>. Customer Service (see numbers above).<br />
Error Code: <strong>iTerra</strong> Error : 02 ## ##<br />
Description: Printer internal hardware failure.<br />
_________________________________________________________________________________________________________________________<br />
PAGE 88 --- <strong>iTerra</strong> <strong>Elite</strong> <strong>Quick</strong> <strong>Start</strong> <strong>Guide</strong> © 2008 iSys-<strong>The</strong> <strong>Imaging</strong> <strong>Systems</strong> <strong>Group</strong> <strong>Inc</strong>.
Solution: Contact <strong>The</strong> <strong>Imaging</strong> <strong>Systems</strong> <strong>Group</strong> <strong>Inc</strong>. Customer Service (see numbers above).<br />
Error Code: <strong>iTerra</strong> Error : 03 ## ##<br />
Description: Printer internal hardware failure.<br />
Solution: Contact <strong>The</strong> <strong>Imaging</strong> <strong>Systems</strong> <strong>Group</strong> <strong>Inc</strong>. Customer Service (see numbers above).<br />
Error Code: <strong>iTerra</strong> Error : 04 ## ##<br />
<strong>iTerra</strong> Error : 05 ## ##<br />
<strong>iTerra</strong> Error : 08 ## ##<br />
Description: <strong>Imaging</strong> Drum or Transfer Belt problem.<br />
Solution: 1. Turn printer off.<br />
2. Ensure the printer has a complete set of iSys labeled drums and a belt.<br />
3. Make sure that drums and belt are placed correctly in printer and lid is closed properly (take the<br />
drums and belt out and place back in if necessary)<br />
4. Turn printer on.<br />
Note: Consumables from previous <strong>iTerra</strong> Models will not run in your <strong>iTerra</strong> <strong>Elite</strong>. Only consumables purchased for the <strong>iTerra</strong> <strong>Elite</strong> will<br />
work in your <strong>Elite</strong> printer. If any attempt is made to use non-iSys labeled consumables will result in voiding warranties.<br />
Contact iSys Customer Service (see numbers above) if the preceding steps did not fix the error. Please record entire error message.<br />
For example: <strong>iTerra</strong> Error: 04 10 00<br />
Error Code: <strong>iTerra</strong> Error : 06 ## ##<br />
<strong>iTerra</strong> Error : 07 ## ##<br />
<strong>iTerra</strong> Error : 09 ## ##<br />
Description: Toner Cartridge problem.<br />
Solution: 1. Turn printer off.<br />
2. Ensure that the printer has a complete set of iSys labeled toner cartridges installed. <strong>The</strong> <strong>iTerra</strong><br />
<strong>Elite</strong> does not support consumables purchased for another product or model.<br />
3. Make sure that toner cartridges are placed correctly in printer and lid is closed properly (Take the<br />
drums and belt out and place back in if necessary).<br />
4. Turn printer on.<br />
_________________________________________________________________________________________________________________________<br />
PAGE 89 --- <strong>iTerra</strong> <strong>Elite</strong> <strong>Quick</strong> <strong>Start</strong> <strong>Guide</strong> © 2008 iSys-<strong>The</strong> <strong>Imaging</strong> <strong>Systems</strong> <strong>Group</strong> <strong>Inc</strong>.
Contact <strong>The</strong> <strong>Imaging</strong> <strong>Systems</strong> <strong>Group</strong> <strong>Inc</strong>. Customer Service (see numbers above) if the preceding steps did not fix the error. Please<br />
record entire error message. For example: <strong>iTerra</strong> Error: 04 10 00<br />
Error Code: <strong>iTerra</strong> Error : 10 ## ##<br />
<strong>iTerra</strong> Error : 11 ## ##<br />
Cause: Printer internal hardware failure.<br />
Solution: Contact <strong>The</strong> <strong>Imaging</strong> <strong>Systems</strong> <strong>Group</strong> <strong>Inc</strong>. Customer Service (see numbers above).<br />
Error Code: <strong>iTerra</strong> Error : 12 ## ##<br />
Cause: Feeder is not connected to the printer with the feeder cable.<br />
Solution: 1. Turn printer off.<br />
2. Ensure that feeder cable is connected securely to printer and feeder. Refer to the <strong>iTerra</strong> <strong>Elite</strong> User<br />
Manual for further instructions on connecting the feeder if needed.<br />
3. Turn Printer On.<br />
Contact iSys Customer Service (see numbers above) if the preceding steps did not fix the error. Please record entire error message.<br />
For example: <strong>iTerra</strong> Error: 04 10 00<br />
Error Code: <strong>iTerra</strong> Error : 13 ## ##<br />
Cause: Printer sheet count has expired. QAN Number required<br />
Solution: 1. A new QAN must be entered into the <strong>iTerra</strong> <strong>Elite</strong> to renew sheet count. A new QAN can be<br />
purchased by contacting the iSys Media <strong>Group</strong> 1-866-415-4797 or www.iSys-media.com<br />
2. Cycle Printer Power. Refer to the <strong>iTerra</strong> <strong>Elite</strong> User Manual for further instructions on entering a<br />
QAN.<br />
Error Code: <strong>iTerra</strong> Error : 14 ## ##<br />
Cause: Feeder is not reading the Top Of Form (TOF) marks on the paper. (Black I-marks are on the back of paper)<br />
Solution: 1. Ensure the paper is loaded in the feeder with the TOF marks on the correct side and plastic slides<br />
are closed over the paper. Please refer to the <strong>iTerra</strong> <strong>Elite</strong> User Manual for further instructions on<br />
loading paper.<br />
2. If this is not rectified, the printer will eventually error out with error 15 and a new QAN will be<br />
_________________________________________________________________________________________________________________________<br />
PAGE 90 --- <strong>iTerra</strong> <strong>Elite</strong> <strong>Quick</strong> <strong>Start</strong> <strong>Guide</strong> © 2008 iSys-<strong>The</strong> <strong>Imaging</strong> <strong>Systems</strong> <strong>Group</strong> <strong>Inc</strong>.
equired to get the printer running again.<br />
Contact iSys Customer Service (see numbers above) if the preceding steps did not fix the error. Please record entire error message.<br />
For example: <strong>iTerra</strong> Error: 04 10 00<br />
Error Code: <strong>iTerra</strong> Error : 15 ## ##<br />
Cause: Printer has processed multiple jobs with feeder not reading the Top Of Form (TOF) marks on the paper.<br />
Solution: Contact <strong>The</strong> <strong>Imaging</strong> <strong>Systems</strong> <strong>Group</strong> <strong>Inc</strong>. Customer Service (see numbers above).<br />
Error Code: <strong>iTerra</strong> Error : 3C ## ##<br />
<strong>iTerra</strong> Error : 3D ## ##<br />
Cause: Communication failure between printer and feeder.<br />
Solution: Cycle Printer Power. Contact <strong>The</strong> <strong>Imaging</strong> <strong>Systems</strong> <strong>Group</strong> <strong>Inc</strong>. Customer Service (see numbers above).<br />
Error Code: <strong>iTerra</strong> Error : ## ## 31<br />
<strong>iTerra</strong> Error : ## ## 32<br />
<strong>iTerra</strong> Error : ## ## 33<br />
<strong>iTerra</strong> Error : ## ## 34<br />
<strong>iTerra</strong> Error : ## ## 35<br />
Cause: Feeder internal safety limits have been exceeded.<br />
Solution: 1. Turn printer off.<br />
2. Ensure no loose pieces of paper are jammed up in the feeder mechanism.<br />
3. Ensure paper is properly loaded in feeder.<br />
4. Turn printer on.<br />
Contact iSys Customer Service (see numbers above) if the error repeats.<br />
Error Code: <strong>iTerra</strong> Error : ## ## 36<br />
<strong>iTerra</strong> Error : ## ## 37<br />
Cause: Feeder internal hardware failure.<br />
Solution: Contact <strong>The</strong> <strong>Imaging</strong> <strong>Systems</strong> <strong>Group</strong> <strong>Inc</strong>. Customer Service (see numbers above) if the error repeats.<br />
Error Code: <strong>iTerra</strong> Error : 99 ## ##<br />
Cause: Printer powered on with one or more operator panel buttons depressed.<br />
_________________________________________________________________________________________________________________________<br />
PAGE 91 --- <strong>iTerra</strong> <strong>Elite</strong> <strong>Quick</strong> <strong>Start</strong> <strong>Guide</strong> © 2008 iSys-<strong>The</strong> <strong>Imaging</strong> <strong>Systems</strong> <strong>Group</strong> <strong>Inc</strong>.
Solution: Cycle power to printer with no operator panel buttons depressed.<br />
Error Code: XXXX Toner LOW<br />
Cause: <strong>The</strong> color XXXX toner cartridge is getting low<br />
Solution: Have a replacement toner cartridge handy.<br />
Error Code: INSTALL NEW TONER<br />
XXXX TONER EMPTY<br />
Cause: <strong>The</strong> toner cartridge indicated, XXXX, has run out of toner.<br />
Solution: Replace the toner cartridge with another cartridge of the same color.<br />
Error Message: CHANGE XXXX IMAGE DRUM<br />
Cause: <strong>The</strong> color XXXX image drum needs to be replaced.<br />
Solution: Replace the XXXX image drum.<br />
Error Message: INSTALL ADDITIONAL MEMORY<br />
420: MEMORY OVERFLOW<br />
Cause: <strong>The</strong> amount of data in the file being printed has exceeded the printer’s memory.<br />
Solution: Reduce the size of the file being printed (e.g. Print the file as separate groups of pages instead of all the<br />
pages at one time).<br />
Error Message: REMOVE THE PAPER<br />
470: FINISHER STACKER FULL<br />
Cause: <strong>The</strong> rear output tray is full.<br />
Solution: Remove the stack of printed sheets from the rear output tray.<br />
Error Message: FUSER MISSING<br />
Cause: <strong>The</strong> fuser is either not properly installed or not in the printer.<br />
Solution: If fuser is there, press down on it to ensure that it is firmly locked in place. If the message still appears, push<br />
the blue latches at either end of the fuser back and lift the fuser out. Lower fuser back into printer, pushing it<br />
firmly into place, you should feel the latches at either end engage. If fuser is missing, install it.<br />
Error Message: XXXX TONER SENSOR ERROR<br />
_________________________________________________________________________________________________________________________<br />
PAGE 92 --- <strong>iTerra</strong> <strong>Elite</strong> <strong>Quick</strong> <strong>Start</strong> <strong>Guide</strong> © 2008 iSys-<strong>The</strong> <strong>Imaging</strong> <strong>Systems</strong> <strong>Group</strong> <strong>Inc</strong>.
Cause: <strong>The</strong>re is a problem with the color XXXX toner sensor.<br />
Solution: Turn the printer off and then on again. If this does not clear the message, call you local service dealer or<br />
iSys.<br />
Error Message: PRESS ONLINE SW<br />
mmmmmmm<br />
Cause: An interface error has occurred. mmmmmm indicates the nature of the error (e.g., NETWORK ERROR)<br />
Solution: Press the ONLINE BUTTON.<br />
_________________________________________________________________________________________________________________________<br />
PAGE 93 --- <strong>iTerra</strong> <strong>Elite</strong> <strong>Quick</strong> <strong>Start</strong> <strong>Guide</strong> © 2008 iSys-<strong>The</strong> <strong>Imaging</strong> <strong>Systems</strong> <strong>Group</strong> <strong>Inc</strong>.
II. CONTROL PANEL MESSAGES<br />
<strong>The</strong> liquid crystal display (LCD) on the control panel indicates the printer status and if there is a problem with the printer.<br />
Status and<br />
error messages are listed below together with an explanation of what each message means:<br />
LCD<br />
LCD MESSAGE MEANING<br />
***** DRUM NEAR LIFE An image drum is nearing the end of its life (***** indicates color).<br />
***** EMPTY Warning that Tray ***** is empty. MP Tray is Tray 0.<br />
***** NEAR END <strong>The</strong> paper in the selected ***** is nearly finished.(***** indicates paper tray).<br />
***** TONER LOW Toner is low (***** indicates color).<br />
***** TONER SENSOR ERROR Error with the toner sensor (***** indicates<br />
color). Call for service.<br />
BELT UNIT MISSING Transfer belt unit is missing.<br />
CANCELLING JOB Canceling the current job.<br />
CENTRO I/F ERROR Centronics interface error (parallel interface).<br />
CHANGE ***** IMAGE DRUM Change the image drum (***** indicates color).<br />
CHANGE BELT UNIT Change the transfer belt.<br />
CHANGE FUSER UNIT Change the fuser unit.<br />
CHANGE PAPER TO ***** Paper must be changed to correct paper size and/or media type (***** indicates size or<br />
media type).<br />
CHECK ***** Check Tray ***** for paper jam. MP tray is Tray 0.<br />
CHECK BELT UNIT Check the transfer belt for paper jam, correct<br />
installation, etc.<br />
CHECK DUPLEX Check the duplex unit for paper jam, correct<br />
installation, etc.<br />
CHECK FUSER UNIT<br />
Check the fuser unit for paper jam, correct<br />
installation, etc.<br />
CHECK IMAGE DRUM<br />
Check the image drum for correct installation,<br />
etc. Color will be indicated.<br />
COLLATE FAIL Collating of multiple copies has failed.<br />
_________________________________________________________________________________________________________________________<br />
PAGE 94 --- <strong>iTerra</strong> <strong>Elite</strong> <strong>Quick</strong> <strong>Start</strong> <strong>Guide</strong> © 2008 iSys-<strong>The</strong> <strong>Imaging</strong> <strong>Systems</strong> <strong>Group</strong> <strong>Inc</strong>.
COLOR ADJUSTING Adjusting head so that colors do not shift on to each other.<br />
COLOR BALANCE ADJUST Adjust the color balance.<br />
COMMUNICATION ERROR<br />
<strong>The</strong>re is an error with communications to<br />
computer.<br />
DATA ARRIVE Data has been received but processing has not started yet.<br />
DATA PRESENT<br />
Un-printed data remains in buffer. Waiting for<br />
data to follow.<br />
DISK FILE OPERATION FAILED Error with hard disk operations.<br />
DISK FILESYSTEM IS FULL Hard disk/flash memory full.<br />
DISK FULL <strong>The</strong> internal hard drive is full.<br />
EEPROM INITIALIZE ERROR Call for service.<br />
EMPTY Indicates which paper tray is empty.<br />
ERROR POSTSCRIPT A PostScript error has occurred.<br />
FATAL ERROR Call for service.<br />
FUSER UNIT MISSING Fuser unit is missing.<br />
INSTALL ADDITIONAL MEMORY Additional memory is required before job can be printed.<br />
INSTALL NEW IMAGE DRUM Install a new image drum. Color will be<br />
indicated.<br />
INSTALL NEW TONER<br />
Install a new toner cartridge. Color will be<br />
indicated.<br />
INSTALL PAPER CASSETTE<br />
Install the paper cassette. Paper tray will be<br />
indicated.<br />
INVALID DATA Data is incorrect.<br />
LOAD Load correct paper size/type. Size/type will be<br />
indicated.<br />
MEDIA MISMATCH Paper type set via menu does not match that<br />
sent via driver.<br />
NETWORK ERROR Network error.<br />
OFFLINE Shows off line status.<br />
ONLINE Shows on line status.<br />
OPEN UPPER COVER Open the upper cover.<br />
PAPER JAM Indicates there is a paper jam.<br />
_________________________________________________________________________________________________________________________<br />
PAGE 95 --- <strong>iTerra</strong> <strong>Elite</strong> <strong>Quick</strong> <strong>Start</strong> <strong>Guide</strong> © 2008 iSys-<strong>The</strong> <strong>Imaging</strong> <strong>Systems</strong> <strong>Group</strong> <strong>Inc</strong>.
PAPER SIZE ERROR Indicates wrong paper size.<br />
PLEASE POWER OFF Printer must be switched off after disk/flash<br />
initialization.<br />
POWER SAVE <strong>The</strong> printer is in power save mode.<br />
PRINTING Data is being printed.<br />
PROCESSING Data is being processed.<br />
RAM CHECK RAM is being checked after switching printer on.<br />
REGISTRATION ADJUST TEST Registration adjustment being tested.<br />
REGISTRATION ERROR An error has occurred setting up the registration.<br />
REMOVE THE PAPER Indicates wrong paper being used.<br />
RS232C FRAMING ERROR Serial framing error. Check configuration of serial card.<br />
RS232C OVERFLOW ERROR Serial overflow error. Check configuration of serial card.<br />
RS232C OVERRUN ERROR Serial overrun error. Check configuration of serial card.<br />
RS232C PARITY ERROR Serial parity error. Check configuration of serial card.<br />
SERVICE CALL A serious error has occurred. Call for service.<br />
SHUTDOWN <strong>Start</strong>s the shutdown procedure to protect the file system on hard disk.<br />
SIZE MISMATCH Change paper to correct size/type. Press Online to continue.<br />
STACKER FULL Stacker is full. Remove the paper.<br />
UNSUITABLE SIZE Indicates wrong paper size.<br />
USB I/F ERROR USB interface error has occurred.<br />
WARMING UP <strong>The</strong> printer is warming up.<br />
_________________________________________________________________________________________________________________________<br />
PAGE 96 --- <strong>iTerra</strong> <strong>Elite</strong> <strong>Quick</strong> <strong>Start</strong> <strong>Guide</strong> © 2008 iSys-<strong>The</strong> <strong>Imaging</strong> <strong>Systems</strong> <strong>Group</strong> <strong>Inc</strong>.
III. PAPER JAMS<br />
Paper jams are indicated by an error message on the display. Paper<br />
jams are cleared as follows:<br />
If continuous sheet printing when jam occurs, <strong>The</strong>n:<br />
1. Press cutter switch on feeder unit to activate a cut.<br />
2. Open the top cover of the printer.<br />
NOTE: Do not close the top cover completely (until it latches) during this process. If the top cover is closed too soon, the paper<br />
jam error will not be cleared. To minimize possible damage to the drums due to exposure to light, lower the top cover<br />
when appropriate, but do not press down to latch it.<br />
_________________________________________________________________________________________________________________________<br />
PAGE 97 --- <strong>iTerra</strong> <strong>Elite</strong> <strong>Quick</strong> <strong>Start</strong> <strong>Guide</strong> © 2008 iSys-<strong>The</strong> <strong>Imaging</strong> <strong>Systems</strong> <strong>Group</strong> <strong>Inc</strong>.
OR<br />
If single sheet printing when jam occurs, <strong>The</strong>n:<br />
1. Remove continuous input media tray from underside of continuous feed unit (caution concerning feeder<br />
data/power cable).<br />
2. Check paper tray – Pull out the paper tray and remove any jammed paper from the printer, then gently push the<br />
paper tray back in.<br />
3. For both operation modes:<br />
Check the transfer belt – (a)Remove all four image drums as one unit in their cradle and place the cradle<br />
on a flat surface to prevent damage to the shiny green surface on the bottom of the drums. (b) Carefully<br />
remove any jammed paper from the transfer belt and top paper exit. (c) Replace all four image drums as<br />
one unit into he printer.<br />
_________________________________________________________________________________________________________________________<br />
PAGE 98 --- <strong>iTerra</strong> <strong>Elite</strong> <strong>Quick</strong> <strong>Start</strong> <strong>Guide</strong> © 2008 iSys-<strong>The</strong> <strong>Imaging</strong> <strong>Systems</strong> <strong>Group</strong> <strong>Inc</strong>.
Caution<br />
To avoid damage to the drums:<br />
• Be careful to place the drums on a flat surface so that nothing contacts the shiny green surface in the<br />
bottom of the drum.<br />
• Keep the image drums away from light.<br />
4. Check behind the rear cover: open the rear cover and remove any jammed paper, then close the rear cover.<br />
_________________________________________________________________________________________________________________________<br />
PAGE 99 --- <strong>iTerra</strong> <strong>Elite</strong> <strong>Quick</strong> <strong>Start</strong> <strong>Guide</strong> © 2008 iSys-<strong>The</strong> <strong>Imaging</strong> <strong>Systems</strong> <strong>Group</strong> <strong>Inc</strong>.
5. Check fuser unit:<br />
a) If necessary, lift out the toner/drum cradle to access the<br />
jammed page.<br />
b) Release the fuser roller lock levers at either end of the fuser and<br />
slowly remove the jammed paper.<br />
c) Re-lock the levers at either end of the fuser.<br />
WARNING: <strong>The</strong> fuser unit is very hot after printing. Always use the handle when lifting it.<br />
6. If printer is equipped with Duplex unit:<br />
a) Instructions for safe removal of continuous input media on tray and feeder, including cable conditions.<br />
b) Open the front cover, then slide out the duplex unit.<br />
_________________________________________________________________________________________________________________________<br />
PAGE 100 --- <strong>iTerra</strong> <strong>Elite</strong> <strong>Quick</strong> <strong>Start</strong> <strong>Guide</strong> © 2008 iSys-<strong>The</strong> <strong>Imaging</strong> <strong>Systems</strong> <strong>Group</strong> <strong>Inc</strong>.
c) Open the duplex top cover and remove any jammed paper.<br />
d) Close the duplex top cover and slide the duplex unit back into<br />
the printer.<br />
e) Check any additional paper trays: if any optional paper tray(s) are installed, pull them out and check that no<br />
paper is jammed along the various parts of the exit path.<br />
7. Close the top cover.<br />
_________________________________________________________________________________________________________________________<br />
PAGE 101 --- <strong>iTerra</strong> <strong>Elite</strong> <strong>Quick</strong> <strong>Start</strong> <strong>Guide</strong> © 2008 iSys-<strong>The</strong> <strong>Imaging</strong> <strong>Systems</strong> <strong>Group</strong> <strong>Inc</strong>.
_________________________________________________________________________________________________________________________<br />
PAGE 102 --- <strong>iTerra</strong> <strong>Elite</strong> <strong>Quick</strong> <strong>Start</strong> <strong>Guide</strong> © 2008 iSys-<strong>The</strong> <strong>Imaging</strong> <strong>Systems</strong> <strong>Group</strong> <strong>Inc</strong>.
7. FAQs AND SOLUTIONS FOR COMMON PROBLEMS<br />
I. PAPER FEED PROBLEMS<br />
If paper feed problems are frequent (i.e. More than one sheet feeds at a time, paper curls, or paper feeds at an angle)<br />
then the following are possible causes and solutions:<br />
POSSIBLE CAUSE REMEDY<br />
<strong>The</strong> printer is not horizontal. Place the printer on a stable, level surface.<br />
<strong>The</strong> paper is too thin.<br />
Use the correct type of paper (see<br />
Specifications).<br />
<strong>The</strong> paper is moist or affected by static. Store paper within specified temperature and<br />
humidity levels.<br />
<strong>The</strong> paper is creased or wrinkled. Remove the creased/wrinkled paper from the<br />
feed tray.<br />
<strong>The</strong> paper is not aligned correctly. Adjust tray or manual feed guides.<br />
Paper doesn’t feed. Correct paper feed selection in the printer<br />
driver.<br />
Paper Jam Cleared- But No Printing<br />
POSSIBLE CAUSE REMEDY<br />
<strong>The</strong> top cover has not remained open until all<br />
paper jams have been cleared.<br />
Removing a paper jam is not sufficient.<br />
<strong>The</strong>refore, raise and gently lower the top cover,<br />
especially if the paper jam has been removed<br />
from behind the front cover.<br />
_________________________________________________________________________________________________________________________<br />
PAGE 103 --- <strong>iTerra</strong> <strong>Elite</strong> <strong>Quick</strong> <strong>Start</strong> <strong>Guide</strong> © 2008 iSys-<strong>The</strong> <strong>Imaging</strong> <strong>Systems</strong> <strong>Group</strong> <strong>Inc</strong>.
II. PROBLEMS PRINTING FROM WINDOWS<br />
Cannot Configure for Parallel Connection<br />
POSSIBLE CAUSE REMEDY<br />
<strong>The</strong> computer does not support bi-directional<br />
parallel interface.<br />
<strong>The</strong>re is no fix for this problem. You should<br />
only use a computer that does support a bidirectional<br />
parallel interface.<br />
Parallel cable does not meet specifications. Use a bi-directional parallel cable to IEEE<br />
1284– 1994 standard.<br />
<strong>The</strong> interface is disabled. Check that the parallel interface is set to<br />
Configuration procedure was not correctly<br />
followed or cancelled.<br />
enable.<br />
Configure again from the beginning.<br />
Parallel cable is disconnected or faulty. Reconnect or try another cable.<br />
A converter, buffer or extension cable Test by connecting printer and computer<br />
is being used.<br />
directly.<br />
Cannot Configure for USB Connection<br />
iSys Driver only supports Windows 2000 + XP operating systems.<br />
POSSIBLE CAUSE REMEDY<br />
Computer does not support USB interface. Check if there is a USB controller in the<br />
Windows device manager.<br />
USB cable does not meet Specifications. Use USB cable to specification Ver.1.1.<br />
Interface is disabled.<br />
Check that USB interface is set to Enable.<br />
Configuration procedure was not correctly<br />
followed or cancelled.<br />
Configure again from the beginning.<br />
_________________________________________________________________________________________________________________________<br />
PAGE 104 --- <strong>iTerra</strong> <strong>Elite</strong> <strong>Quick</strong> <strong>Start</strong> <strong>Guide</strong> © 2008 iSys-<strong>The</strong> <strong>Imaging</strong> <strong>Systems</strong> <strong>Group</strong> <strong>Inc</strong>.
USB cable is disconnected or faulty.<br />
A USB hub is being used.<br />
Printout Is Garbled or <strong>Inc</strong>orrect With Parallel Connection<br />
POSSIBLE CAUSE REMEDY<br />
Possible mismatch on parallel connection<br />
between computer and printer.<br />
Cannot print<br />
• LPT WRITE ERROR is displayed.<br />
• PRNUSBX WRITE ERROR is displayed.<br />
Reconnect or try another cable.<br />
<strong>The</strong> printer cannot be used with a USB hub.<br />
Connect the printer and computer directly.<br />
Change parallel transmission mode (see<br />
Parallel Transmission Mode above).<br />
POSSIBLE CAUSE REMEDY<br />
Interface is disabled.<br />
In the printer menu settings, enable Parallel or<br />
USB interface.<br />
Printer is switched OFF. Switch ON.<br />
Printer interface cable is disconnected. Reconnect the printer interface cable.<br />
A converter, buffer, extension cable or<br />
USB hub is being used.<br />
Printer driver output port is incorrect.<br />
Printer is not selected in the printer driver.<br />
Test by connecting the printer and computer<br />
directly.<br />
Set correct output port to which the printer<br />
interface cable is connected.<br />
Select the printer or set to default printer.<br />
_________________________________________________________________________________________________________________________<br />
PAGE 105 --- <strong>iTerra</strong> <strong>Elite</strong> <strong>Quick</strong> <strong>Start</strong> <strong>Guide</strong> © 2008 iSys-<strong>The</strong> <strong>Imaging</strong> <strong>Systems</strong> <strong>Group</strong> <strong>Inc</strong>.
<strong>Inc</strong>orrect printer driver is being used.<br />
Application Error or General Protection Fault Is Displayed<br />
Delete this printer driver and install correct<br />
printer driver.<br />
POSSIBLE CAUSE REMEDY<br />
Application is not suitable for Windows<br />
version.<br />
Upgrade the application.<br />
Memory is insufficient for number of<br />
applications running.<br />
Close all other applications.<br />
Print file is corrupted. Correct or recreate the file.<br />
Memory is insufficient for application. <strong>Inc</strong>rease computer’s memory.<br />
Insufficient free space on hard disk. Delete unnecessary files.<br />
Printer driver is <strong>Inc</strong>orrectly configured.<br />
Printing Is Slow<br />
Correctly configure printer driver.<br />
POSSIBLE CAUSE REMEDY<br />
Print processing is carried out by the<br />
computer.<br />
Use a computer with a faster processor.<br />
Print resolution is set high<br />
Set lower print resolution in the printer driver.<br />
Data is too complex. Simplify data<br />
Printer Requests Paper Size Change to Continue Printing<br />
_________________________________________________________________________________________________________________________<br />
PAGE 106 --- <strong>iTerra</strong> <strong>Elite</strong> <strong>Quick</strong> <strong>Start</strong> <strong>Guide</strong> © 2008 iSys-<strong>The</strong> <strong>Imaging</strong> <strong>Systems</strong> <strong>Group</strong> <strong>Inc</strong>.
POSSIBLE CAUSE REMEDY<br />
Paper loaded in tray is different size from that<br />
formatted in software application.<br />
Either change paper in tray to match size<br />
formatted in application and press ONLINE to<br />
continue, or continue printing on existing paper<br />
by<br />
ressing ONLINE<br />
_________________________________________________________________________________________________________________________<br />
PAGE 107 --- <strong>iTerra</strong> <strong>Elite</strong> <strong>Quick</strong> <strong>Start</strong> <strong>Guide</strong> © 2008 iSys-<strong>The</strong> <strong>Imaging</strong> <strong>Systems</strong> <strong>Group</strong> <strong>Inc</strong>.
III. PROBLEMS WITH POOR QUALITY PRINTING<br />
Longitudinal White Stripes<br />
POSSIBLE CAUSE REMEDY<br />
LED head is dirty. Clean LED head with lens cleaner or soft<br />
tissue.<br />
Toner is low. Change toner cartridge.<br />
Image drum damaged. Change image drum.<br />
Longitudinal Fading<br />
POSSIBLE CAUSE REMEDY<br />
LED head is dirty. Clean LED head with lens cleaner or soft<br />
tissue.<br />
Toner is low.<br />
Change toner cartridge.<br />
Paper is unsuitable for printer. Use recommended paper.<br />
_________________________________________________________________________________________________________________________<br />
PAGE 108 --- <strong>iTerra</strong> <strong>Elite</strong> <strong>Quick</strong> <strong>Start</strong> <strong>Guide</strong> © 2008 iSys-<strong>The</strong> <strong>Imaging</strong> <strong>Systems</strong> <strong>Group</strong> <strong>Inc</strong>.
Faint Printing<br />
POSSIBLE CAUSE REMEDY<br />
<strong>The</strong> toner cartridge is incorrectly installed. Reinstall the toner cartridge.<br />
Toner is low. Change toner cartridge<br />
<strong>The</strong> paper is moist.<br />
Store paper within specified temperature and<br />
Paper is unsuitable for printer. Use<br />
recommended paper.<br />
Fading in Patches<br />
humidity levels.<br />
Use recommended paper.<br />
POSSIBLE CAUSE REMEDY<br />
<strong>The</strong> paper is moist.<br />
Store paper within specified temperature and<br />
humidity levels.<br />
_________________________________________________________________________________________________________________________<br />
PAGE 109 --- <strong>iTerra</strong> <strong>Elite</strong> <strong>Quick</strong> <strong>Start</strong> <strong>Guide</strong> © 2008 iSys-<strong>The</strong> <strong>Imaging</strong> <strong>Systems</strong> <strong>Group</strong> <strong>Inc</strong>.
Longitudinal Black Stripes<br />
POSSIBLE CAUSE REMEDY<br />
Image drum is damaged. Replace image drum.<br />
Toner is low. Change toner cartridge. Change toner cartridge.<br />
Periodic black lateral lines or spots.<br />
• If the lines or spots occur at intervals of<br />
approximately 44 - 94 mm, the image drum<br />
(green tube) is damaged or dirty. If damaged,<br />
replace the image drum cartridge. If dirty, wipe<br />
the image drum gently with soft tissue. If this<br />
does not work, replace the image drum.<br />
• If the lines or spots occur at intervals of<br />
approximately 113 mm, the fuser roller is<br />
damaged. Change the fuser unit.<br />
<strong>The</strong> image drum has been exposed to light. Remove the image drum from the printer and<br />
store it in a dark place for several hours. If this<br />
does not work, replace the image drum.<br />
Faint Shading on Unprinted Sections<br />
POSSIBLE CAUSE REMEDY<br />
Paper has been affected by static electricity. Store paper within specified temperature and<br />
humidity levels<br />
Paper is too thick.<br />
Use recommended paper.<br />
Toner is low. Change toner cartridge.<br />
_________________________________________________________________________________________________________________________<br />
PAGE 110 --- <strong>iTerra</strong> <strong>Elite</strong> <strong>Quick</strong> <strong>Start</strong> <strong>Guide</strong> © 2008 iSys-<strong>The</strong> <strong>Imaging</strong> <strong>Systems</strong> <strong>Group</strong> <strong>Inc</strong>.
Blurred Letter Edges<br />
POSSIBLE CAUSE REMEDY<br />
LED is dirty. Clean LED with lens cleaner or soft tissue.<br />
Cannot print desired color because toner is<br />
low.<br />
Replace toner cartridge.<br />
Black formation method does not match Open the printer driver and set black formation<br />
application.<br />
to<br />
CMYK.<br />
_________________________________________________________________________________________________________________________<br />
PAGE 111 --- <strong>iTerra</strong> <strong>Elite</strong> <strong>Quick</strong> <strong>Start</strong> <strong>Guide</strong> © 2008 iSys-<strong>The</strong> <strong>Imaging</strong> <strong>Systems</strong> <strong>Group</strong> <strong>Inc</strong>.
IV. MISCELLANEOUS PROBLEMS<br />
Power Is On-Printer Does Not Go Online<br />
POSSIBLE CAUSE REMEDY<br />
Bad connection<br />
Switch off the printer and disconnect the power<br />
cable. Reconnect power cable and switch<br />
printer on. If this does not clear the fault, call<br />
for service.<br />
Print Processing Does Not <strong>Start</strong><br />
POSSIBLE CAUSE REMEDY<br />
Printer error<br />
Check the control panel. If an error message is<br />
displayed, correct the problem.<br />
Print Processing Cancels<br />
POSSIBLE CAUSE REMEDY<br />
<strong>The</strong> printer interface cable is faulty. Replace the printer interface cable.<br />
<strong>The</strong> time out setting is too short. Reset time out to a higher value.<br />
Printer Makes a Strange Noise<br />
POSSIBLE CAUSE REMEDY<br />
<strong>The</strong> printer is not horizontal. Place the printer on a stable, level surface.<br />
<strong>The</strong>re are scraps of paper or other foreign Check the inside of the printer and remove any<br />
matter inside the printer.<br />
such objects<br />
<strong>The</strong> top cover is not firmly shut. Press the left and right sides of the top cover.<br />
_________________________________________________________________________________________________________________________<br />
PAGE 112 --- <strong>iTerra</strong> <strong>Elite</strong> <strong>Quick</strong> <strong>Start</strong> <strong>Guide</strong> © 2008 iSys-<strong>The</strong> <strong>Imaging</strong> <strong>Systems</strong> <strong>Group</strong> <strong>Inc</strong>.
An Asterisk (*) Appears On Display, Repeatedly Moving Across First <strong>The</strong>n Second Line<br />
POSSIBLE CAUSE REMEDY<br />
<strong>The</strong> main board is not properly seated in the<br />
printer.<br />
Turn the printer off, then reseat the main board<br />
and turn the printer back on again.<br />
_________________________________________________________________________________________________________________________<br />
PAGE 113 --- <strong>iTerra</strong> <strong>Elite</strong> <strong>Quick</strong> <strong>Start</strong> <strong>Guide</strong> © 2008 iSys-<strong>The</strong> <strong>Imaging</strong> <strong>Systems</strong> <strong>Group</strong> <strong>Inc</strong>.
Printer Takes a Long Time to <strong>Start</strong> Printing<br />
POSSIBLE CAUSE REMEDY<br />
<strong>The</strong> printer has to warm up returning from<br />
power save mode.<br />
<strong>The</strong> image drum carries out a cleaning<br />
process to ensure print quality, which takes<br />
time.<br />
<strong>The</strong> fuser unit adjusts temperature, which<br />
takes time.<br />
<strong>The</strong> printer is processing data from another<br />
interface.<br />
In the printer menu settings, set power save to<br />
a higher value to increase the length of time<br />
before entering power save mode.<br />
Wait until this process has been completed.<br />
Wait until this process has been completed.<br />
Wait until this data is processed.<br />
_________________________________________________________________________________________________________________________<br />
PAGE 114 --- <strong>iTerra</strong> <strong>Elite</strong> <strong>Quick</strong> <strong>Start</strong> <strong>Guide</strong> © 2008 iSys-<strong>The</strong> <strong>Imaging</strong> <strong>Systems</strong> <strong>Group</strong> <strong>Inc</strong>.
Toner Rubs Off <strong>The</strong> Printed Surface<br />
POSSIBLE CAUSE REMEDY<br />
Media Weight and Media Type settings Set the value of media weight to the next<br />
may not be appropriate.<br />
heaviest one<br />
Packing materials were left on the fuser when Warning: Fuser may be HOT!<br />
it was installed.<br />
Open the top cover and check to be sure that all<br />
the packing materials were removed from the<br />
fuser.<br />
_________________________________________________________________________________________________________________________<br />
PAGE 115 --- <strong>iTerra</strong> <strong>Elite</strong> <strong>Quick</strong> <strong>Start</strong> <strong>Guide</strong> © 2008 iSys-<strong>The</strong> <strong>Imaging</strong> <strong>Systems</strong> <strong>Group</strong> <strong>Inc</strong>.
8. QAN MANAGEMENT<br />
Your <strong>iTerra</strong> <strong>Elite</strong> has been designed, developed, and tested with qualified media and consumables to give you maximum<br />
quality and uptime. <strong>The</strong> benefits of using qualified media and consumables on the <strong>iTerra</strong> <strong>Elite</strong> are higher quality, greater<br />
consistency and repeatability than untested, unqualified media. iSys has established a framework to provide the highest<br />
possible image quality.<br />
iSys as part of the media imaging qualification program, has established the Quality Assurance Number (QAN)<br />
Management Program. <strong>The</strong> QAN Management Program allows you to optimize the performance of your <strong>iTerra</strong> <strong>Elite</strong>.<br />
iSys tests and qualifies media and consumables for its ability to consistently image trouble free with the <strong>iTerra</strong> <strong>Elite</strong>.<br />
QAN MANAGEMENT PROGRAM<br />
<strong>The</strong> QAN is designed to work in conjunction with your <strong>iTerra</strong> <strong>Elite</strong>. You will need to have your Product Identification (PID)<br />
Number when you order <strong>iTerra</strong> <strong>Elite</strong> Fanfold paper from iSys or, a certified <strong>iTerra</strong> <strong>Elite</strong> media supplier.<br />
When you provide your PID and order quantity, you are given a QAN for the total amount of sheets you have ordered.<br />
Your PID is located on your feeder. Your PID number is also located at the rear of the printer, alongside the serial<br />
number.<br />
Once you receive your media order, you will need to enter the QAN into your <strong>iTerra</strong> <strong>Elite</strong>. <strong>The</strong> QAN is entered into the<br />
<strong>iTerra</strong> <strong>Elite</strong> to verify that the media loaded is a qualified <strong>iTerra</strong> <strong>Elite</strong> media.<br />
_________________________________________________________________________________________________________________________<br />
PAGE 116 --- <strong>iTerra</strong> <strong>Elite</strong> <strong>Quick</strong> <strong>Start</strong> <strong>Guide</strong> © 2008 iSys-<strong>The</strong> <strong>Imaging</strong> <strong>Systems</strong> <strong>Group</strong> <strong>Inc</strong>.
NOTE: Unqualified media will NOT operate in your <strong>iTerra</strong> <strong>Elite</strong>. It is necessary for the QAN to be entered into your<br />
<strong>iTerra</strong> <strong>Elite</strong> concurrently when media is loaded. Enter the 22 digit QAN into your <strong>iTerra</strong> <strong>Elite</strong>, enabling you<br />
to print from 1,000 to 1,000,000 sheets. For more information on the Quality Assurance Number (QAN)<br />
Management Program, contact your authorized <strong>iTerra</strong> <strong>Elite</strong> media supplier or your iSys Sales<br />
Representative. Your <strong>iTerra</strong> <strong>Elite</strong> has been designed, developed, and tested with qualified media and<br />
consumables to give you maximum quality and uptime. Using unqualified or non-<strong>iTerra</strong> media,<br />
consumables or refilled toner cartridge voids the printers’ warranty.<br />
Entering Quality Assurance Numbers (QAN)<br />
To enter new QAN’s the following steps must be performed. This allows the user to increase the number of sheets in the<br />
QAN.<br />
<strong>The</strong> QAN must be entered sequentially, if not, preceding QAN’s will be rejected. A maximum of 1,000,000 sheets can be<br />
stored in the <strong>iTerra</strong> <strong>Elite</strong>. Exceeding the 1,000, 000 sheet limit will invalidate remaining amount.<br />
Entering QAN<br />
1. Push Button 4 once. Printer must be OFFLINE before working in the extended menu. This will insure that a print<br />
job does not print while modifying <strong>iTerra</strong> <strong>Elite</strong> settings.<br />
2. Push Buttons 6 & 7 together and hold for a few seconds and release.<br />
3. Push Button 0 twice. Display shows: QAN Management.<br />
4. Push Button 1 once. <strong>The</strong> maximum # of sheets in the QAN Management is 1,000,000 sheets.<br />
Display shows: QAN Management Remaining: ### Sheets<br />
5. Push Button 1 once. Display shows: QAN Management Enter: QAN<br />
6. Push Button 2 once. 22 digit QAN can now be entered. If a mistake occurred during entering this number use<br />
Button 7 (Cancel Button) to space across and exit from QAN Management menu. Display shows: QAN<br />
Management --------------------------<br />
7. Once the QAN is entered push Button 3 once. Display will read accepted if a valid QAN is entered and invalid if<br />
an incorrect QAN is entered.<br />
8. Once a valid QAN is entered, the sheet count will increase by the amount of the QAN.<br />
_________________________________________________________________________________________________________________________<br />
PAGE 117 --- <strong>iTerra</strong> <strong>Elite</strong> <strong>Quick</strong> <strong>Start</strong> <strong>Guide</strong> © 2008 iSys-<strong>The</strong> <strong>Imaging</strong> <strong>Systems</strong> <strong>Group</strong> <strong>Inc</strong>.
9. JOB MANAGEMENT<br />
JOB MANAGEMENT<br />
<strong>The</strong> Job Management menu tracks the number of print jobs and the number of printed continuous fanfold paper pages<br />
(8.5” x 6.25”) successfully printed through the <strong>iTerra</strong> <strong>Elite</strong>. <strong>The</strong>re are four independent counters:<br />
User Jobs / Pages<br />
Total Jobs / Pages<br />
<strong>The</strong> User Jobs / Pages can be reset to zero at any time by a user to allow custom tracking of weekly or monthly usage.<br />
<strong>The</strong> Total Jobs / Pages cannot be reset to zero which allows tracking the usage statistics for the entire life of the printer.<br />
To access this function, follow these steps:<br />
1. Take printer offline (Press button 4 once) – display shows OFFLINE.<br />
2. Press button 0 4 times – display shows Job Management.<br />
3. Press button 1 once – display shows User Jobs: ## – this is the number of jobs printed since the<br />
User Counts were reset.<br />
4. Press button 1 once – display shows User Pages: ## – this is the number of pages printed since the<br />
User Counts were reset.<br />
5. Press button 1 once – display shows Total Jobs: ## – this is the total number of jobs printed.<br />
6. Press button 1 once – display shows Total Pages: ## – this is the total number of pages printed.<br />
7. Press button 1 once – display shows Reset User Counts? No* - by pressing button 2 once,<br />
No* changes to Yes.<br />
8. To reset the user counts, Press button 3 once. To return to the Job Management items without<br />
resetting, press button 5 once.<br />
9. To exit back out to ONLINE, press button 4 once.<br />
10. SERVICE AND SUPPORT<br />
_________________________________________________________________________________________________________________________<br />
PAGE 118 --- <strong>iTerra</strong> <strong>Elite</strong> <strong>Quick</strong> <strong>Start</strong> <strong>Guide</strong> © 2008 iSys-<strong>The</strong> <strong>Imaging</strong> <strong>Systems</strong> <strong>Group</strong> <strong>Inc</strong>.
SERVICE AND SUPPORT<br />
Please visit our website for t he most recent version of the User <strong>Guide</strong> (www.isys-group.com). If at any time you wish to<br />
contact iSys – <strong>The</strong> <strong>Imaging</strong> <strong>Systems</strong> <strong>Group</strong> <strong>Inc</strong>., please do so in any of the following ways:<br />
Via the web: www.iSys-group.com or www.iSys-media.com<br />
Via e-mail: support@iSys-group.com<br />
Via phone: 1-866-415-4797 (toll free in North America)<br />
Via phone: 1-403-204-5200 (globally)<br />
Via fax: 1-403-204-1971<br />
Via Mail:<br />
iSys - <strong>The</strong> <strong>Imaging</strong> <strong>Systems</strong><br />
<strong>Group</strong> <strong>Inc</strong>.<br />
#911 – 28 th Street N.E.<br />
Calgary, Alberta T2A 7X1<br />
Canada<br />
_________________________________________________________________________________________________________________________<br />
PAGE 119 --- <strong>iTerra</strong> <strong>Elite</strong> <strong>Quick</strong> <strong>Start</strong> <strong>Guide</strong> © 2008 iSys-<strong>The</strong> <strong>Imaging</strong> <strong>Systems</strong> <strong>Group</strong> <strong>Inc</strong>.