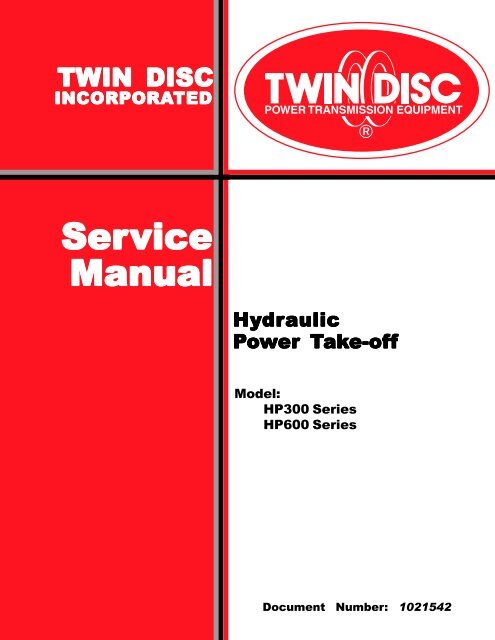
Twin Disc HP 300, 600 service manual - Morbark
Twin Disc HP 300, 600 service manual - Morbark
Twin Disc HP 300, 600 service manual - Morbark

Create successful ePaper yourself
Turn your PDF publications into a flip-book with our unique Google optimized e-Paper software.
TWIN TWIN DISC<br />
DISC<br />
INCORPORA<br />
INCORPORATED<br />
INCORPORA TED<br />
Ser Service Ser vice<br />
Manual<br />
Manual<br />
Hy Hydr Hy dr draulic dr aulic<br />
Power er Tak ak ake-of ak e-of e-off e-of<br />
Model:<br />
<strong>HP</strong><strong>300</strong> Series<br />
<strong>HP</strong><strong>600</strong> Series<br />
Document Number: 1021542
NOTICE<br />
<strong>Twin</strong> <strong>Disc</strong>, Incorporated makes no warranty or guaranty of any kind,<br />
expressed, implied or otherwise, with regard to the information contained<br />
within this <strong>manual</strong>. <strong>Twin</strong> <strong>Disc</strong>, Incorporated has developed this <strong>manual</strong><br />
through research and testing of the information contained therein. <strong>Twin</strong><br />
<strong>Disc</strong>, Incorporated assumes no responsibility for any errors that may<br />
appear in this <strong>manual</strong> and shall not be liable under any circumstances<br />
for incidental, consequential or punitive damages in connection with, or<br />
arising out of, the use of this <strong>manual</strong>. The information contained within<br />
this <strong>manual</strong> is subject to change without notice.
Hydraulic Power Take-off Service Manual<br />
Document Number<br />
1021542<br />
Issued<br />
August, 2004<br />
Hydraulic Power Take-off<br />
Service Manual<br />
3
REVISION AND REISSUE DATA<br />
Original Issue August, 2004<br />
BEFORE YOU START<br />
This <strong>manual</strong> replaces:<br />
Preliminary Manual #1021542 dated January, 2004 for use with<br />
Hydraulic Power Take-Off model <strong>HP</strong><strong>300</strong> & <strong>HP</strong><strong>600</strong>.<br />
4 Hydraulic Power Take-off Service Manual
A. <strong>Twin</strong> <strong>Disc</strong>, Incorporated warrants all assembled products and parts, (except component products or parts<br />
on which written warranties issued by the respective manufacturers thereof are furnished to the original<br />
customer, as to which <strong>Twin</strong> <strong>Disc</strong>, Incorporated makes no warranty and assumes no liability) against defective<br />
materials or workmanship for a period of twenty-four (24) months from the date of original shipment by <strong>Twin</strong><br />
<strong>Disc</strong>, Incorporated to the original customer, but not to exceed twelve (12) months of <strong>service</strong>, whichever<br />
occurs first. This is the only warranty made by <strong>Twin</strong> <strong>Disc</strong>, Incorporated and is in lieu of any and all other<br />
warranties, express or implied, including the warranties of merchantability or fitness for a particular purpose<br />
and no other warranties are implied or intended to be given by <strong>Twin</strong> <strong>Disc</strong>, Incorporated.<br />
The original customer does not rely upon any tests or inspections by <strong>Twin</strong> <strong>Disc</strong>, Incorporated or on <strong>Twin</strong><br />
<strong>Disc</strong>, Incorporated*s application engineering.<br />
B. The exclusive remedy provided by <strong>Twin</strong> <strong>Disc</strong>, Incorporated whether arising out of warranty within the applicable<br />
warranty period as specified, or otherwise (including tort liability), shall at the sole option of <strong>Twin</strong> <strong>Disc</strong>,<br />
Incorporated be either the repair or replacement of any <strong>Twin</strong> <strong>Disc</strong>, Incorporated part or product found by<br />
<strong>Twin</strong> <strong>Disc</strong>, Incorporated to be defective and the labor to perform that work and to remove and reinstall (or<br />
equivalent credit). In this context, labor is defined as the flat rate labor hours established by <strong>Twin</strong> <strong>Disc</strong>,<br />
Incorporated in the published <strong>Twin</strong> <strong>Disc</strong> Flat Rate Schedule, required to remove, disassemble, inspect,<br />
repair, reassemble, reinstall and test the <strong>Twin</strong> <strong>Disc</strong>, Incorporated product only. Under no circumstances,<br />
including a failure of the exclusive remedy, shall <strong>Twin</strong> <strong>Disc</strong>, Incorporated be liable for economic loss,<br />
consequential, incidental or punitive damages. The above warranty and remedy are subject to the following<br />
terms and conditions:<br />
1. Complete parts or products upon request must be returned transportation prepaid and also the claims<br />
submitted to <strong>Twin</strong> <strong>Disc</strong>, Incorporated within sixty (60) days after completion of the in-warranty repair.<br />
2. The warranty is void if, in the opinion of <strong>Twin</strong> <strong>Disc</strong>, Incorporated, the failure of the part or product resulted<br />
from abuse, neglect, improper maintenance or accident.<br />
3. The warranty is void if any modifications are made to any product or part without the prior written consent of<br />
<strong>Twin</strong> <strong>Disc</strong>, Incorporated.<br />
4. The warranty is void unless the product or part is properly transported, stored and cared for from the date of<br />
shipment to the date placed in <strong>service</strong>.<br />
5. The warranty is void unless the product or part is properly installed and maintained within the rated capacity<br />
of the product or part with installations properly engineered and in accordance with the practices, methods<br />
and instructions approved or provided by <strong>Twin</strong> <strong>Disc</strong>, Incorporated.<br />
6. The warranty is void unless all required replacement parts or products are of <strong>Twin</strong> <strong>Disc</strong> origin or equal, and<br />
otherwise identical with components of the original equipment. Replacement parts or products not of <strong>Twin</strong><br />
<strong>Disc</strong> origin are not warranted by <strong>Twin</strong> <strong>Disc</strong>, Incorporated.<br />
C. As consideration for this warranty, the original customer and subsequent purchaser agree to indemnify and<br />
hold <strong>Twin</strong> <strong>Disc</strong>, Incorporated harmless from and against all and any loss, liability, damages or expenses for<br />
injury to persons or properly, including without limitation, the original customer*s and subsequent purchaser*s<br />
employees and property, due to their acts or omissions or the acts or omissions of their agents, and employees<br />
in the installation, transportation, maintenance, use and operation of said equipment.<br />
D. Only a <strong>Twin</strong> <strong>Disc</strong>, Incorporated authorized factory representative shall have authority to assume any cost or<br />
expense in the <strong>service</strong>, repair or replacement of any part or product within the warranty period, except when<br />
such cost or expense is authorized in advance in writing by <strong>Twin</strong> <strong>Disc</strong>, Incorporated.<br />
E. <strong>Twin</strong> <strong>Disc</strong>, Incorporated reserves the right to improve the product through changes in design or materials<br />
without being obligated to incorporate such changes in products of prior manufacture. The original customer<br />
and subsequent purchasers will not use any such changes as evidence of insufficiency or inadequacy of<br />
prior designs or materials.<br />
F. If failure occurs within the warranty period, and constitutes a breach of warranty, repair or replacement parts<br />
will be furnished on a no-charge basis and these parts will be covered by the remainder of the unexpired<br />
warranty which remains in effect on the complete unit.<br />
January 16, 2002 TDWP0002<br />
Hydraulic Power Take-off Service Manual<br />
TWIN TWIN TWIN DISC DISC, DISC INCORPORA<br />
INCORPORATED<br />
INCORPORA TED<br />
EX EXCL EX CL CLUSIVE CL USIVE LIMITED LIMITED WARRANTY<br />
ARRANTY<br />
GENERAL GENERAL UNITS<br />
UNITS<br />
5
6 Hydraulic Power Take-off Service Manual
<strong>Twin</strong> <strong>Disc</strong>, Incorporated Table of Contents<br />
Hydraulic Power Take-off Service Manual<br />
Table of Contents<br />
Introduction .........................................................11<br />
General Information .......................................................................... 11<br />
Replacement Parts ............................................................................ 12<br />
Preventive Maintenance/Troubleshooting .................................... 13<br />
Safety .................................................................................................. 14<br />
Sources of Service Information ...................................................... 15<br />
Warranty.............................................................................................. 15<br />
Description and Specifications .........................17<br />
General Information .......................................................................... 17<br />
Identifying the <strong>HP</strong>TO model, serial and BOM numbers ............... 18<br />
Construction Features...................................................................... 19<br />
Specifications .................................................................................... 21<br />
Maximum safe operating speed ................................................. 21<br />
Approximate dry weight ............................................................... 21<br />
Oil Cooling requirements ............................................................. 21<br />
Oil type and oil viscosity .............................................................. 21<br />
Oil sump-basic information ......................................................... 22<br />
Oil scavenge pump, oil pump information ................................ 22<br />
Oil pressure specifications ......................................................... 22<br />
Fittings, Hose types ...................................................................... 24<br />
Electronic Module......................................................................... 24<br />
Output and Input speed sensor air gap..................................... 24<br />
Torque on input and output speed sensor nuts ...................... 24<br />
Remote mounted electronic control cable ................................ 24<br />
Shim tolerance for bearing carrier in idler gear ....................... 24<br />
<strong>Twin</strong> <strong>Disc</strong> PTO support plate specifications ................................. 25<br />
Torque values for U.S. fasteners..................................................... 26<br />
Wear limits .......................................................................................... 29<br />
Operation..............................................................31<br />
General................................................................................................ 31<br />
General Overview of GP Control Valve with Electronic Interface 32<br />
7
Table of Contents<br />
8<br />
<strong>Twin</strong> <strong>Disc</strong>, Incorporated<br />
GP Control Valve hydraulic portion ................................................ 33<br />
Hydraulic System with GP Control Valve ....................................... 36<br />
GP Control Valve Electronic Control Interface (Profile Module) ....... 38<br />
Clutch Engagement Logic (Closed Loop) ...................................... 39<br />
Brake engagement ....................................................................... 39<br />
Power Take-off Clutch engagement........................................... 39<br />
Installation............................................................41<br />
Identifying the <strong>Twin</strong> <strong>Disc</strong> Power Take-off Model Number............ 41<br />
Identifying the SAE Housing Size .................................................... 42<br />
Prior to Installation ............................................................................ 43<br />
Preliminary Checks ........................................................................... 44<br />
Torsional Input Coupling Installation ............................................. 47<br />
<strong>HP</strong>TO Installation to Engine ............................................................ 51<br />
Final Checks....................................................................................... 56<br />
Check and Adjust Main Pressure ............................................... 56<br />
Check Clutch Operation Pressures ........................................... 58<br />
Plumbing - <strong>HP</strong><strong>300</strong>I, <strong>HP</strong><strong>300</strong>S, <strong>HP</strong><strong>300</strong>S, <strong>HP</strong><strong>600</strong>S .............................. 59<br />
Maintenance .........................................................61<br />
Allowable Side Loads........................................................................ 61<br />
Lubrication ......................................................................................... 64<br />
Grease Specifications .................................................................. 64<br />
Oil Specifications .......................................................................... 65<br />
Oil System ...................................................................................... 65<br />
Torsional Coupling............................................................................ 66<br />
Overhaul Interval ............................................................................... 67<br />
Periodic Visual Inspection........................................................... 67<br />
Deflection Alignment Adjustment .................................................... 68<br />
Alignment - U-Joint Installation ........................................................ 70<br />
Disassembly ........................................................73<br />
Power Take-off Removal From The Engine ................................... 73<br />
Remove and disassemble the GP Control Valve .......................... 75<br />
Remove the Coupling Housing and disassemble<br />
the Gear Towers ............................................................................ 76<br />
Hydraulic Power Take-off Service Manual
<strong>Twin</strong> <strong>Disc</strong>, Incorporated Table of Contents<br />
Remove and Front Housing from the Clutch Housing ................. 78<br />
Disassemble the Clutch Housing .................................................... 79<br />
Cleaning and Inspection ....................................83<br />
Cleaning and Inspection................................................................... 83<br />
Assembly..............................................................89<br />
Clutch Shaft and Clutch Housing Assembly .................................. 90<br />
Clutch housing .............................................................................. 90<br />
Clutch shaft .................................................................................... 90<br />
Belt Sheave Housing Assembly .................................................... 100<br />
Clutch Assembly .............................................................................. 105<br />
Clutch piston, piston carrier and back plate unit ................... 109<br />
Clutch hub, clutch plates and gear & ring assembly ............ 117<br />
Assemble the Front Housing Unit/Install the Idler Gear ............. 124<br />
Install the Front Housing on the Clutch Housing ........................ 131<br />
Coupling housing ....................................................................... 132<br />
Assemble the Gear Drive Towers ................................................. 135<br />
General information.................................................................... 135<br />
Tower #1....................................................................................... 136<br />
Tower #2....................................................................................... 143<br />
Assemble the Control Valve Assembly......................................... 144<br />
Install the Speed Sensor Pickups ................................................. 151<br />
Output speed sensor.................................................................. 151<br />
Input speed sensor..................................................................... 152<br />
Install the Pump ............................................................................... 153<br />
Plumbing........................................................................................... 154<br />
<strong>HP</strong>TO Series Parts Identification List ........................................... 156<br />
Cross Section Views:<br />
<strong>HP</strong><strong>300</strong>I & <strong>HP</strong><strong>600</strong>I .......................................................................... 158<br />
<strong>HP</strong><strong>300</strong>S & <strong>HP</strong><strong>600</strong>S ....................................................................... 159<br />
Exploded Views and Illustrations:<br />
<strong>HP</strong><strong>300</strong>S & <strong>HP</strong><strong>600</strong>S Sheave Housing Front Bearing Area ...... 160<br />
<strong>HP</strong><strong>300</strong>S & <strong>HP</strong><strong>600</strong>S Sheave Housing Output Bearing Area.... 161<br />
<strong>HP</strong><strong>300</strong>I & <strong>HP</strong><strong>600</strong>I Rear Bearing Area......................................... 162<br />
<strong>HP</strong><strong>300</strong>I, <strong>HP</strong><strong>600</strong>I, <strong>HP</strong><strong>300</strong>S, <strong>HP</strong><strong>600</strong>S Clutch Area ....................... 163<br />
<strong>HP</strong><strong>300</strong>I, <strong>HP</strong><strong>600</strong>I, <strong>HP</strong><strong>300</strong>S, <strong>HP</strong><strong>600</strong>S Front Bearing Area .......... 164<br />
Hydraulic Power Take-off Service Manual<br />
9
Table of Contents<br />
10<br />
<strong>Twin</strong> <strong>Disc</strong>, Incorporated<br />
<strong>HP</strong><strong>300</strong>I, <strong>HP</strong><strong>600</strong>I, <strong>HP</strong><strong>300</strong>S, <strong>HP</strong><strong>600</strong>S Idler Gear Area ................. 165<br />
<strong>HP</strong><strong>300</strong>I, <strong>HP</strong><strong>600</strong>I, <strong>HP</strong><strong>300</strong>S, <strong>HP</strong><strong>600</strong>S Tower #1 Area................... 166<br />
<strong>HP</strong><strong>300</strong>I, <strong>HP</strong><strong>600</strong>I, <strong>HP</strong><strong>300</strong>S, <strong>HP</strong><strong>600</strong>S Tower #2 Area................... 167<br />
<strong>HP</strong><strong>300</strong>I, <strong>HP</strong><strong>600</strong>I, <strong>HP</strong><strong>300</strong>S, <strong>HP</strong><strong>600</strong>S<br />
GP Control Valve Area Illustration ....................................... 168<br />
<strong>HP</strong><strong>300</strong>I, <strong>HP</strong><strong>600</strong>I, <strong>HP</strong><strong>300</strong>S, <strong>HP</strong><strong>600</strong>S<br />
GP Control Valve Area Exploded View (Valve 1020729) ... 169<br />
<strong>HP</strong><strong>300</strong>I, <strong>HP</strong><strong>600</strong>I, <strong>HP</strong><strong>300</strong>S, <strong>HP</strong><strong>600</strong>S<br />
GP Control Valve Area Exploded View (Valve 1021658) ... 170<br />
<strong>HP</strong><strong>300</strong>I, <strong>HP</strong><strong>600</strong>I, <strong>HP</strong><strong>300</strong>S, <strong>HP</strong><strong>600</strong>S Pipes and Fittings ............ 171<br />
<strong>HP</strong><strong>300</strong>I, <strong>HP</strong><strong>600</strong>I, <strong>HP</strong><strong>300</strong>S, <strong>HP</strong><strong>600</strong>S Pipes and Fittings ............ 172<br />
Troubleshooting................................................173<br />
Troubleshooting of GP Control Valve & Electronic Interface ... 173<br />
Troubleshooting Charts ................................................................. 174<br />
Engineering Drawings ......................................177<br />
List of Engineering Drawings ........................................................ 177<br />
<strong>Twin</strong> <strong>Disc</strong> Hydraulic Power Take-off Cut-away illustration ....... 178<br />
102668G Sheet 2 of 3: <strong>HP</strong><strong>300</strong>I ........................................................ 179<br />
102668G Sheet 3 of 3: <strong>HP</strong><strong>300</strong>I ........................................................ 180<br />
102668B Sheet 2 of 3: <strong>HP</strong><strong>300</strong>S ...................................................... 181<br />
102668B Sheet 3 of 3: <strong>HP</strong><strong>300</strong>S ...................................................... 182<br />
102668F Sheet 2 of 3: <strong>HP</strong><strong>600</strong>I ........................................................ 183<br />
102668F Sheet 3 of 3: <strong>HP</strong><strong>600</strong>I ........................................................ 184<br />
102668C Sheet 2 of 3: <strong>HP</strong><strong>600</strong>S ...................................................... 185<br />
102668C Sheet 3 of 3: <strong>HP</strong><strong>600</strong>S ...................................................... 186<br />
1020696: Control Valve Assembly ................................................ 187<br />
1020686: <strong>HP</strong>TO Control Module.................................................... 188<br />
1021292 Sheet 1 of 3: <strong>HP</strong>TO Plumbing......................................... 189<br />
1021292 Sheet 2 of 3: <strong>HP</strong>TO Plumbing......................................... 190<br />
1021292 Sheet 3 of 3: <strong>HP</strong>TO Plumbing......................................... 191<br />
1021295: Plumbing Schematic ...................................................... 192<br />
Hydraulic Power Take-off Service Manual
<strong>Twin</strong> <strong>Disc</strong>, Incorporated Introduction<br />
General Information<br />
Hydraulic Power Take-off Service Manual<br />
Introduction<br />
This publication provides the information necessary for the operation and<br />
maintenance of the <strong>Twin</strong> <strong>Disc</strong>, Incorporated equipment specified on the cover<br />
of this <strong>manual</strong>. Specific engineering details and performance characteristics<br />
can be obtained from the Product Service Department of <strong>Twin</strong> <strong>Disc</strong>,<br />
Incorporated, Racine, Wisconsin, USA.<br />
Operation and maintenance personnel responsible for this equipment should<br />
have this <strong>manual</strong> at their disposal and be familiar with its contents. Applying<br />
the information in the <strong>manual</strong> will result in consistent performance from the<br />
unit and help reduce downtime.<br />
11
Introduction<br />
Replacement Parts<br />
12<br />
Parts Lists<br />
<strong>Twin</strong> <strong>Disc</strong>, Incorporated<br />
See the engineering assembly drawings in Engineering Drawings and parts<br />
identification and exploded views in the Assembly section to facilitate ordering<br />
spare or replacement parts.<br />
Ordering Parts<br />
All replacement parts or products (including hoses and fittings) must<br />
be of <strong>Twin</strong> <strong>Disc</strong> origin or equal, and otherwise identical with components<br />
of the original equipment. Use of any other parts or products will void<br />
the warranty and may result in malfunction or accident, causing injury<br />
to personnel and /or serious damage to the equipment.<br />
Renewal parts and <strong>service</strong> parts kits may be obtained from any authorized<br />
<strong>Twin</strong> <strong>Disc</strong> distributor or <strong>service</strong> dealer.<br />
Parts Shipment<br />
Note: Do not order parts from the part numbers on the crosssectional<br />
drawings. These numbers may be referenced<br />
for part identification; however, they should be verified<br />
on the bill of material (BOM) before an order is placed.<br />
BOM numbers are stamped on the unit nameplate.<br />
Furnish the complete shipping information and postal address. All parts<br />
shipments made from the factory will be FOB factory location, USA. State<br />
specifically whether the parts are to be shipped by freight, express, etc. If<br />
shipping instructions are not specified, the equipment will be shipped the<br />
best way, considering time and expense. <strong>Twin</strong> <strong>Disc</strong>, Incorporated will not be<br />
responsible for any charges incurred by this procedure.<br />
<strong>Twin</strong> <strong>Disc</strong>, Incorporated having stipulated the bill of material number on the<br />
unit’s nameplate absolves itself of any responsibility resulting from any<br />
external, internal or installation changes made in the field without the express<br />
written approval of <strong>Twin</strong> <strong>Disc</strong>. All returned parts, new or old, emanating from<br />
any of the above-stated changes will not be accepted for credit. Furthermore,<br />
any equipment which has been subjected to such changes will not be covered<br />
by a <strong>Twin</strong> <strong>Disc</strong> warranty.<br />
Hydraulic Power Take-off Service Manual
<strong>Twin</strong> <strong>Disc</strong>, Incorporated Introduction<br />
Preventive Maintenance/Troubleshooting<br />
Refer to the maintenance and troubleshooting sections of this <strong>manual</strong>.<br />
Frequent reference to the information provided in this <strong>manual</strong> regarding daily<br />
operation and limitations of this equipment will assist in obtaining troublefree<br />
operation. Schedules are provided for the recommended maintenance<br />
of the equipment and, if observed, minimum repairs (aside from normal wear)<br />
will result.<br />
In the event a malfunction does occur, a troubleshooting table is provided to<br />
help identify the problem area and lists information that will help determine<br />
the extent of the repairs necessary to get a unit back into operation.<br />
Lifting Bolt Holes<br />
Most <strong>Twin</strong> <strong>Disc</strong> products have provisions for attaching lifting bolts. The holes<br />
provided are always of adequate size and number to safely lift the <strong>Twin</strong> <strong>Disc</strong><br />
product.<br />
These lifting points must not be used to lift the complete power unit.<br />
Lifting excessive loads at these points could cause failure at the lift<br />
point (or points) and result in damage or personal injury.<br />
Select lifting eyebolts to obtain maximum thread engagement with bolt<br />
shoulder tight against housing. Bolts should be near but should not<br />
contact bottom of bolt hole.<br />
Hydraulic Power Take-off Service Manual<br />
13
Introduction<br />
Safety<br />
14<br />
General<br />
<strong>Twin</strong> <strong>Disc</strong>, Incorporated<br />
Safe practices must be employed by all personnel operating and servicing<br />
this unit. <strong>Twin</strong> <strong>Disc</strong>, Incorporated will not be responsible for personal injury<br />
resulting from careless use of hand tools, lifting equipment, power tools, or<br />
unaccepted maintenance/operating practices.<br />
Important Safety Notice<br />
Because of the possible danger to person(s) or property from accidents which<br />
may result from the use of manufactured products, it is important that correct<br />
procedures be followed. Products must be used in accordance with the<br />
engineering information specified. Proper installation, maintenance, and<br />
operation procedures must be observed. Inspection should be made as<br />
necessary to assure safe operations under prevailing conditions. Proper<br />
guards and other suitable safety codes should be provided. These devices<br />
are neither provided by <strong>Twin</strong> <strong>Disc</strong>, Incorporated nor are they the responsibility<br />
of <strong>Twin</strong> <strong>Disc</strong>, Incorporated.<br />
To prevent accidental starting of the engine when performing routine<br />
transmission maintenance, disconnect the battery cables from the<br />
battery and remove ignition key from the switch.<br />
Hydraulic Power Take-off Service Manual
<strong>Twin</strong> <strong>Disc</strong>, Incorporated Introduction<br />
Sources of Service Information<br />
Warranty<br />
Each series of <strong>manual</strong>s issued by <strong>Twin</strong> <strong>Disc</strong>, Incorporated is current at the<br />
time of printing. When required, changes are made to reflect advancing<br />
technology and improvements in state-of-the-art.<br />
Individual product <strong>service</strong> bulletins are issued to provide the field with<br />
immediate notice of new <strong>service</strong> information.<br />
For the latest <strong>service</strong> information on <strong>Twin</strong> <strong>Disc</strong> products, contact any <strong>Twin</strong><br />
<strong>Disc</strong> distributor or <strong>service</strong> dealer. This can be done on the <strong>Twin</strong> <strong>Disc</strong> corporate<br />
web site found at [http://www.twindisc.com]. Provide your model number,<br />
serial number and bill of material number to obtain information on your unit.<br />
If necessary, contact the Product Service Department of <strong>Twin</strong> <strong>Disc</strong>,<br />
International S.A., Nivelles, Belgium, or <strong>Twin</strong> <strong>Disc</strong>, Incorporated, Racine,<br />
Wisconsin, 53405-3698, USA by e-mail at <strong>service</strong>@twindisc.com.<br />
Equipment for which this <strong>manual</strong> was written has a limited warranty. For<br />
details of the warranty, refer to the warranty statement at the front of this<br />
<strong>manual</strong>.<br />
Hydraulic Power Take-off Service Manual<br />
15
Introduction<br />
16<br />
<strong>Twin</strong> <strong>Disc</strong>, Incorporated<br />
Hydraulic Power Take-off Service Manual
<strong>Twin</strong> <strong>Disc</strong>, Incorporated Description and Specifications<br />
General Information<br />
Hydraulic Power Take-off Service Manual<br />
Description and Specifications<br />
The <strong>Twin</strong> <strong>Disc</strong> Hydraulic Power Take-Off (<strong>HP</strong>TO) is an engine-mounted<br />
hydraulic power take off that contains an integral clutch for engagement of<br />
the PTO, and a brake to keep the output shaft stopped when the clutch is<br />
not engaged. Some models include an engine driven multiple pump drive to<br />
provide hydraulic fluid for operation of the pto, and other customer<br />
requirements.<br />
These Power Take Offs are controlled by hydraulics through the electronic<br />
control module. Both the clutch and the brake are operated by main pressure<br />
oil supply. The bearings, clutches, and gears are lubricated and cooled with<br />
low pressure oil. The output end bearing on “straddle” units is grease<br />
lubricated.<br />
17
Description and Specifications<br />
18<br />
Identifying the <strong>Twin</strong> <strong>Disc</strong> Hydraulic Power Take-Off Model Number<br />
<strong>Twin</strong> <strong>Disc</strong>, Incorporated<br />
The nameplate identifies the model, bill of material (BOM) and the serial<br />
number of the unit. These numbers are necessary to identify the correct<br />
parts for your transmission.<br />
Hydraulic Power Take-off Service Manual
<strong>Twin</strong> <strong>Disc</strong>, Incorporated Description and Specifications<br />
Construction Features<br />
Housings<br />
Bearings<br />
The <strong>HP</strong>TO housing consists of a front SAE 1 or SAE 0 engine housing<br />
adapter, and a front and rear housing. The front and rear housings are sealed<br />
together with a gasket. Straddle units have a rear bearing support housing.<br />
The input end and pump drive bearings are a combination of ball and<br />
cylindrical roller bearings. The rear main housing bearings are either<br />
spherical, tapered or cylindrical roller bearings. The rear bearing on straddle<br />
type units is a grease lubricated cylindrical roller design.<br />
Oil Pump Drive<br />
The oil pump is spline driven by the pump drive gear. Customer supplied<br />
auxiliary oil pumps can also be driven by the splined adapters in the pump<br />
drive gears.<br />
Lubrication Features<br />
Oil is directed by the control valve through horizontal drillings in the main<br />
shafts to orifices through which the front and rear bearings on the main shaft<br />
are lubricated. There are also orifices in the shafts through which both clutch<br />
and brake are cooled. The pump drive gears are lubricate by orifices in an<br />
external plumbing circuit. The rear bearing on straddle type units must be<br />
grease lubricated externally.<br />
Suction Strainer and Baffle<br />
A customer supplied <strong>service</strong>able suction strainer should be located between<br />
the customer supplied oil sump and the oil pump. A customer-supplied baffle<br />
installed in the sump allows aerated oil to settle prior to recirculation.<br />
Hydraulic Power Take-off Service Manual<br />
19
Description and Specifications<br />
20<br />
Filter Assembly<br />
Gears<br />
<strong>Twin</strong> <strong>Disc</strong>, Incorporated<br />
A customer supplied oil filter must be installed between the heat exchanger<br />
and the control valve. The filter must have a Beta removal efficiency rating<br />
of 2/20/75 for particle sizes 5 micron/13 micron/16 micron. A typical filter<br />
element should say 5 micron nominal or 16 micron absolute.<br />
All gears are hardened spur gears, and are in constant mesh.<br />
Flexible Torsional Input Coupling<br />
The purpose of the torsional coupling is to transmit power from the engine to<br />
the Power Take Off through a rubber or silicone element that will:<br />
� Dampen torsional vibrations.<br />
� Change the natural frequencies of a system to move critical<br />
frequencies out of the operating speed range.<br />
� Accommodate a certain amount of misalignment.<br />
� Absorb shock and reduce noise.<br />
� Minimize gear “rattle.”<br />
Heat Exchanger<br />
The customer supplied heat exchanger is required to maintain the oil in the<br />
hydraulic system of the Hydraulic Power Take Off at the proper temperature.<br />
An air to oil cooler is typical.<br />
The heat exchanger should be capable of dissipating 28,000 BTU/ hr.<br />
Recommended inlet temperature of heat exchanger: 170 o F. (77 o C.)<br />
Recommended outlet temperature of heat exchanger: 150 o F. (66 o C.)<br />
Oil flow from standard <strong>Twin</strong> <strong>Disc</strong> pump is 0.0085 gal/rev.<br />
Customer-supplied Support Plate Requirement<br />
<strong>Twin</strong> <strong>Disc</strong>, Inc. requires that a support plate be used with all <strong>HP</strong>TOs.<br />
See specifications and figure 2 of this <strong>manual</strong>.<br />
Hydraulic Power Take-off Service Manual
<strong>Twin</strong> <strong>Disc</strong>, Incorporated Description and Specifications<br />
Specifications<br />
Maximum Safe Operating Speed for <strong>Twin</strong> <strong>Disc</strong> Hydraulic Power Take-offs<br />
<strong>HP</strong><strong>300</strong>I (in-line) 2100 RPM<br />
<strong>HP</strong><strong>300</strong>S (straddle-bearing) 2100 RPM<br />
<strong>HP</strong><strong>600</strong>I (in-line) 2100 RPM<br />
<strong>HP</strong><strong>600</strong>S (straddle-bearing) 2100 RPM<br />
Approximate Dry Weight<br />
Approximate Dry Weight: 590 Kg. (1,<strong>300</strong> Lbs.)<br />
Oil Cooling Requirements (see engineering drawing for additional specs.)<br />
Customer supplied, air to oil cooling is typical.<br />
Minimum oil temperature at start up: -40 o C. (-40 o F.)<br />
Oil temp. at steady operating conditions: 66 o C.- 85 o C.(150 o F.-185 o F.)<br />
Maximum oil sump temperature: 93 o C. (200 o F.)<br />
Oil Type and Oil Viscosity<br />
Oil type and viscosity:<br />
SAE-API <strong>service</strong> class CD or CC engine oil certified to meet Caterpillar TO-<br />
2 transmission oil specification and/or Allison type C-4 transmission fluid. A<br />
10W, 30W, or 40W can be used, dependent on ambient temperature. See<br />
table 1.<br />
Hydraulic Power Take-off Service Manual<br />
Note: If SAE 40 viscosity oil is used, all three drain lines<br />
must be used.<br />
Note: Multi-viscosity oils (i.e. 10W-30W, etc.) can be used<br />
under certain conditions, but require TWIN DISC<br />
approval.<br />
Table 1 - Recommended Oil Viscosity<br />
Ambient Start-up<br />
Temperature<br />
Steady Operating<br />
Temperature<br />
Suggested Oil<br />
Viscosity<br />
-40O C. 38OC. to 66OC. SAE 10<br />
-40O F. 100OF. to 150OF. SAE 10<br />
2O C. 49OC. to 77OC. SAE 30<br />
35O F. 120OF. to 170OF. SAE 30<br />
>40O C. 60OC. to 85OC. SAE 40<br />
>50O F. 140OF. to 185OF. SAE 40<br />
21
Description and Specifications<br />
22<br />
<strong>Twin</strong> <strong>Disc</strong>, Incorporated<br />
Oil Sump-Basic Information (See engineering drawing for additional<br />
specs.)<br />
Capacity: Minimum 8 gallons in customer-supplied sump.<br />
Location: Below the <strong>HP</strong>TO, and allow for gravity drain from at least two<br />
1 1/2 NPTF drain ports.<br />
Breather: (optional) Can be integrated with fill cap.<br />
Breather Ports: When the sump has a breather, a 19.05 mm. (3/4”) port<br />
is used to connect a hose from the <strong>HP</strong>TO to the sump. Do<br />
not integrate with drain ports.<br />
Drain Ports: Use maximum possible diameter drain hoses (1 1/2 inch<br />
diameter) with least restrictive fittings. All three drain hoses<br />
must be used with SAE 40 viscosity oil to prevent overheating<br />
from entrapped oil.<br />
Suction: Use suitable suction screen to prevent pump damage. Use<br />
suitable suction hose to prevent cavitation.<br />
Baffles: Use baffles to allow return oil to settle away from suction<br />
port.<br />
Oil Scavenge Pump (See engineering drawing for additional specs.)<br />
If sump cannot be located below the <strong>HP</strong>TO, a customer supplied scavenge<br />
pump that is approximately two times the size of the charge pump must be<br />
used to adequately remove the oil from the pto housing.<br />
Oil Pump (See engineering drawing for additional specs.)<br />
Capacity: Oil flow of 8.5 GPM is required at 1000 rpm. Standard <strong>Twin</strong><br />
<strong>Disc</strong> supplied pump supplies 0.0085 gal/rev.<br />
Rotation: The pump rotates in engine speed direction when mounted<br />
on the output side of the pump drive, or opposite engine speed<br />
direction when mounted on the input side of the pump drive.<br />
Oil Pressure<br />
See table 2. Oil temperature must be in the normal operating range. The<br />
range of values shown on the chart is based upon specific flow rates,<br />
temperatures and oil used. Contact <strong>Twin</strong> <strong>Disc</strong> engineering for guidance<br />
regarding modified parameters.<br />
Hydraulic Power Take-off Service Manual
<strong>Twin</strong> <strong>Disc</strong>, Incorporated Description and Specifications<br />
Limits for <strong>HP</strong>TO with 0.0085 Gallons/Rev. pump attached to <strong>HP</strong>TO gear housing<br />
rpm<br />
700<br />
2100<br />
Range<br />
Clutch<br />
Brake<br />
Neutral<br />
Clutch<br />
Neutral<br />
Min.<br />
kPa<br />
(psi.)<br />
Hydraulic Power Take-off Service Manual<br />
Table 2. Oil Pressure Specification<br />
Main Clutch Brake Lube Cooling<br />
Act.<br />
kPa<br />
(psi.)<br />
Max.<br />
kPa<br />
(psi.)<br />
Min.<br />
kPa<br />
(psi.)<br />
Act.<br />
kPa<br />
(psi.)<br />
Min.<br />
kPa<br />
(psi.)<br />
Act.<br />
kPa<br />
(psi.)<br />
Min.<br />
kPa<br />
(psi.)<br />
Act.<br />
kPa<br />
(psi.)<br />
Max.<br />
kPa<br />
(psi.)<br />
1650 1790 1650 0 276 414<br />
(240) (260) (240) (0) (40) (60)<br />
1650 1790 0 1650 276 414<br />
(240) (260) (0) (240) (40) (60)<br />
1650 1790 0 0 276 414<br />
(240) (260) (0) (0) (40) (60)<br />
1650 1790 1650 0 414 552<br />
(240) (260) (240) (0) (60) (80)<br />
1650 1790 0 0 414 552<br />
(240) (260) (0) (0) (60) (80)<br />
Cooling temperature range: Delvac 10W Oil at 29 o C. - 35 o C. (85 o F. - 95 o F.) or Mobilkote 501 at 32 o C. - 38 o C. (90 o F. - 100 o F.)<br />
Required: Clutch lube pressure = Brake lube pressure within 21 kPa (3 psi)<br />
Rear support is required for testing.<br />
Figure 1. Oil pressure pickup points<br />
Lube Pressure Port<br />
Brake Pressure Port<br />
Clutch Pressure Port<br />
Main Pressure Port<br />
Lube Pressure Port<br />
Temp<br />
o C.<br />
( o F.)<br />
23
Description and Specifications<br />
24<br />
Fittings (See engineering drawing for additional specs.)<br />
Fittings must meet SAE 514, SAE J476, J518 standards.<br />
Hose Type (See engineering drawing for additional specs.)<br />
<strong>Twin</strong> <strong>Disc</strong>, Incorporated<br />
Hoses must meet SAE 517 specifications for 100R17 or similar type for<br />
hydraulic applications.<br />
Electronic Control Module<br />
Operating voltage range. 9 to 32 Volts DC<br />
Operating temperature range. -40 o C. (-40 o F.) to 85 o C. (185 o F.)<br />
Output Speed Sensor Air Gap<br />
Two turns out from touching the outer diameter of the gear.<br />
Input Speed Sensor Air Gap<br />
One and one half turns out from the outer diameter of the gear.<br />
Torque on input and output speed sensor lock nuts<br />
27 Nm. (20 lb.-ft.)<br />
Remote Mounted Electronic Control Cable<br />
See information contained in Installation section.<br />
Shim Tolerance for bearing carrier (65) in idler gear (58).<br />
Refer to the parts list and exploded view illustration.<br />
The designed shim tolerance is .1016 mm. loose to .0254 mm. tight<br />
(.004” loose to .001” tight).<br />
Hydraulic Power Take-off Service Manual
<strong>Twin</strong> <strong>Disc</strong>, Incorporated Description and Specifications<br />
<strong>Twin</strong> <strong>Disc</strong> PTO Support Plate Specifications<br />
For Straddle-bearing type<br />
For In-Line type<br />
PTO<br />
Model<br />
Engine Bed<br />
Frame<br />
Figure 2. Support plate dimensions<br />
A<br />
Bore<br />
+.127/.025mm<br />
(+.005/+.001”)<br />
<strong>HP</strong>TO<strong>300</strong>S 238.15 mm 28.58 cm 16.21 cm ** 8 17.46 mm 19.05 mm<br />
9.376” 11.250” 6.38” ** 8 11/16” 3/4”<br />
<strong>HP</strong>TO<strong>600</strong>S 238.15 mm 28.58 cm 16.81 cm ** 8 17.46 mm 19.05 mm<br />
9.376” 11.250” 6.62” ** 8 11/16” 3/4”<br />
* Based upon an 8-hole bolt pattern without bolt holes in the 12 and 6 o’clock<br />
positions.<br />
** Angular offset of thru holes (D) must be calculated with respect to orientation of<br />
sheave housing. Holes are evenly spaced, i.e. 360/8 = angular spacing of thru<br />
holes.<br />
Hydraulic Power Take-off Service Manual<br />
G<br />
Shim to<br />
within<br />
.12 cm.<br />
(.005”)<br />
13.49 mm. (17/32”) dia.<br />
thru holes 30<br />
Plate<br />
thickness = G<br />
0 apart on<br />
449.99 mm. (17.716”)<br />
dia. B.C.<br />
NOTE: One possible mounting method provides installation<br />
ease. Use angle iron to couple the support plate to the<br />
engine frame.<br />
B<br />
Bolt<br />
Circle<br />
A<br />
B<br />
C<br />
Radius<br />
C* D<br />
Width<br />
43.18 cm. (17.0”) min.<br />
D<br />
Degree<br />
E<br />
Hole<br />
Quantity<br />
F<br />
Hole<br />
Diameter<br />
E (qty.)<br />
F (dia.)<br />
41.91 cm. (16.500”) R<br />
NOTE: PTO deflection due to loads imposed by the application<br />
should not exceed .25 mm (.010”). Deflection should<br />
be measured at the support plate pilot with the dial<br />
indicator base mounted on a rigid part of the engine.<br />
G<br />
Recommended<br />
Thickness<br />
25
Description and Specifications<br />
Torque Values for U.S. Fasteners<br />
26<br />
Table 3. - Coarse Thread Capscrews, Bolts and Nuts<br />
<strong>Twin</strong> <strong>Disc</strong>, Incorporated<br />
Thread<br />
SAE Grade 5 SAE Grade 8<br />
Diameter Nm lb-ft Nm lb-ft<br />
1/4 8 - 11 6 - 8 10 - 12 14 - 16<br />
5/16 18 - 23 13 - 17 20 -24 27 - 32<br />
3/8 34 - 39 25 - 29 35 - 41 48 - 55<br />
7/16 51 - 58 37 - 43 55 - 65 75 - 88<br />
1/2 81 - 95 60 - 70 83 - 97 113 - 131<br />
9/16 111 - 132 82 - 98 120 - 140 163 - 190<br />
5/8 163 - 190 120 - 140 165 - 195 224 - 264<br />
3/4 278 - 332 205 - 245 295 - 345 400 - 467<br />
7/8 448 - 528 330 - 390 470 - 550 638 - 745<br />
1 495 - 595 671 - 806 715 - 845 970 - 1145<br />
1 1/8 615 - 745 834 - 1010 1015 - 1185 1377 - 1606<br />
1 1/4 850 - 1000 1163 - 1355 1375 - 1625 1865 - 2203<br />
Hydraulic Power Take-off Service Manual
<strong>Twin</strong> <strong>Disc</strong>, Incorporated Description and Specifications<br />
Table 4. - Metric Coarse Thread Capscrews, Bolts and Nuts<br />
Thread Property Class 8.8 Property Class 10.9 Property Class 12.9<br />
Size lb-ft Nm lb-ft Nm lb-ft Nm<br />
M6 6.5 - 7.5 9 - 10 9 - 10 12 - 14 10 - 12 14 - 16<br />
M8 16 - 18 21 - 25 23 - 26 31 - 35 25 - 29 34 - 40<br />
M10 32 - 36 43 - 49 44 - 51 60 - 68 51 - 59 70 - 80<br />
M12 55 - 63 74 - 86 77 - 88 104 - 120 89 - 103 121 - 139<br />
M16 132 - 151 179 - 205 189 - 217 256 - 294 219 - 253 298 - 342<br />
M20 257 - 295 348 - 400 364 - 418 493 - 567 429 - 493 581 - 669<br />
M24 445 - 511 603 - 693 626 - 720 848 - 976 737 - 848 1000 - 1150<br />
M30 714 - 820 987 - 1113 1235 - 1421 1674 - 1926 1475 - 1697 2000 - 2301<br />
Table 5. - Tapered Pipe Plugs (with thread lubricant)<br />
In cast iron or steel In aluminum<br />
NPTF Size (in) Nm (+ or - 5%) lb-ft (+ or - 5%) Nm (+ or - 5%) lb-ft (+ or - 5%)<br />
1/16-27 11.5 8.5 7.5 5.5<br />
1/8-27 14 10.5 9 6.5<br />
1/4-18 34 25 21.5 16<br />
3/8-18 36.5 27 23 17<br />
1/2-14 68 50 40.5 30<br />
3/4-14 73 54 46 34<br />
1 - 11 1/2 108 80 68 50<br />
1 1/4 - 11 1/2 115 85 75 55<br />
1 1/2 - 11 1/2 115 85 75 55<br />
Hydraulic Power Take-off Service Manual<br />
27
Description and Specifications<br />
28<br />
<strong>Twin</strong> <strong>Disc</strong>, Incorporated<br />
Table 6. - Straight Threaded Tube Fittings, Hose Fittings, and O-Rings<br />
Nominal<br />
Thread<br />
Diameter<br />
Nm<br />
(+ or - 5%)<br />
lb-ft<br />
(+ or - 5%)<br />
5/16 5 3.5<br />
3/8 11.5 8.5<br />
7/16 16 12<br />
1/2 20 15<br />
9/16 24.5 18<br />
5/8 24.5 18<br />
11/16 34 25<br />
3/4 40.5 30<br />
7/8 54 40<br />
1 1/16 75 55<br />
1 3/16 88 65<br />
1 1/4 88 65<br />
1 5/16 108 80<br />
1 3/8 108 80<br />
1 5/8 135 100<br />
1 7/8 162 120<br />
2 1/2 312 230<br />
Nominal<br />
Thread<br />
Diameter<br />
Nm<br />
(+ or - 5%)<br />
lb-ft<br />
(+ or - 5%)<br />
M10X1.0 26 19<br />
M12X1.5 37 27<br />
M14X1.5 47 35<br />
M16X1.5 58 43<br />
M18X1.5 74 55<br />
M22X1.5 105 77<br />
M27X2.0 179 132<br />
IN IRON<br />
M27X2.0<br />
IN ALUM.<br />
85 63<br />
M33X2.0 326 240<br />
M42X2.0 347 256<br />
M48X2.0 441 325<br />
Hydraulic Power Take-off Service Manual
<strong>Twin</strong> <strong>Disc</strong>, Incorporated Description and Specifications<br />
Wear Limits<br />
Item<br />
Maximum Diameter<br />
mm. inches<br />
A Bearing Bore 150.0251 5.9065<br />
B Bearing Bore<br />
Hsg. #1020659 215.0466 8.4664<br />
Hsg. #1020659b 215.0466 8.4664<br />
Hsg. #1020659c 215.9762 8.5030<br />
C Bearing Bore<br />
Hsg. #1019124 160.0225 6.<strong>300</strong>1<br />
Hsg. #A7576 170.0378 6.6944<br />
Hsg. #1020654 215.0466 8.4664<br />
Front Housing<br />
A<br />
Bearing Bore<br />
Model I Bearing Carrier<br />
Refer to the parts list and exploded view illustration.<br />
The following list maximum diameters sizes for bearing bores and minimum<br />
diameters for bearing journals and seal contact surfaces.<br />
Hydraulic Power Take-off Service Manual<br />
Table 7. Bearing Bores and Bearing Journals<br />
D<br />
Bearing Bore<br />
Clutch Housing<br />
B<br />
Bearing Bore<br />
E<br />
Bearing Bore<br />
Maximum Diameter<br />
Item<br />
mm. inches<br />
D Bearing Bore 215.9762 8.5030<br />
E Bearing Bore 125.0112 4.9217<br />
H Bearing Bore<br />
SAE “A” size 90.0227 3.5442<br />
SAE “B” size 90.2767 3.5542<br />
SAE “C” size 90.2767 3.5542<br />
Minimum Diameter<br />
Item<br />
mm. inches<br />
F Bearing Journal 100.0023 3.9371<br />
G Bearing Journal 50.0024 1.9686<br />
Gear & Drive<br />
Ring Asy.<br />
F<br />
Bearing<br />
Journal<br />
Belt Sheave<br />
Housing<br />
C<br />
Bearing Bore<br />
SAE Mounting<br />
Plate<br />
H<br />
Bearing Bore<br />
G<br />
Bearing<br />
Journal<br />
Driven Gear<br />
29
Description and Specifications<br />
Bearing Journal Seal Contact Surface<br />
M<br />
N<br />
Shaft Minimum Diameter Minimum Diameter<br />
Part Number mm. inches mm. inches<br />
30<br />
Table 8. Bearing Journals and Seal Contact Surfaces on Shafts<br />
Seal Contact Surface<br />
P<br />
Minimum Diameter<br />
mm. inches<br />
<strong>Twin</strong> <strong>Disc</strong>, Incorporated<br />
Seal Contact Surface<br />
Q<br />
Minimum Diameter<br />
mm. inches<br />
#1020660b 70.1010 2.7563 107.7341 4.2415 101.4095 3.9925 95.0595 3.7425<br />
#1020678c 70.1010 2.7563 107.7341 4.2415 101.4095 3.9925 95.0595 3.7425<br />
#1020678d 70.1010 2.7563 107.7341 4.2415 101.4095 3.9925 95.0595 3.7425<br />
#1020678e 70.1010 2.7563 107.7341 4.2415 101.4095 3.9925 95.0595 3.7425<br />
#1020678f 70.1010 2.7563 107.7341 4.2415 101.4095 3.9925 95.0595 3.7425<br />
#1020678g 70.1010 2.7563 107.7341 4.2415 101.4095 3.9925 95.0595 3.7425<br />
N<br />
Seal Contact<br />
Surface<br />
Shaft<br />
Typical<br />
Model <strong>300</strong>S & <strong>600</strong>S<br />
Shaft<br />
Bearing Journal Seal Contact Surface Bearing Journal<br />
J<br />
K<br />
L<br />
Shaft Minimum Diameter Minimum Diameter Minimum Diameter<br />
Part Number mm. inches mm. inches mm. inches<br />
#1020660b 120.523 4.7450 130.0988 5.1220 120.0581 4.7267<br />
#1020678c 71.374 2.8100 130.0988 5.1220 120.0581 4.7267<br />
#1020678d 80.010 3.1500 130.0988 5.1220 120.0581 4.7267<br />
#1020678e 80.010 3.1500 130.0988 5.1220 120.0581 4.7267<br />
#1020678f n/a n/a n/a n/a 139.7406 5.5016<br />
#1020678g n/a n/a n/a n/a 139.7406 5.5016<br />
P<br />
Seal Contact<br />
Surface<br />
J<br />
Bearing Journal<br />
Q<br />
Seal Contact<br />
Surface<br />
K<br />
Seal Contact<br />
Surface<br />
L<br />
Bearing<br />
Journal<br />
M<br />
Bearing Journal<br />
Shaft<br />
Typical<br />
Model <strong>300</strong>I & <strong>600</strong>I<br />
Shaft<br />
Hydraulic Power Take-off Service Manual
<strong>Twin</strong> <strong>Disc</strong>, Incorporated Operation<br />
General<br />
Power Take-off Service Manual<br />
Operation<br />
A Flexible Torsional Input Coupling is bolted to the engine flywheel. The<br />
coupling’s internal spline meshes with an external spline on the drive gear.<br />
External teeth on a series of Clutch Friction Plates are in constant contact with<br />
internal teeth of the drive gear. These and related components comprise the<br />
basic input drive portion of the Power Take-off and are in rotation at engine<br />
speed whenever the engine is running.<br />
A series of internally splined Steel Clutch Plates are located between the Clutch<br />
Friction Plates. Their internal teeth mesh with external teeth on the Clutch Hub,<br />
which is, in turn, splined to the Clutch Shaft. These and related components<br />
comprise the basic output portion of the Power Take-off and are in rotation<br />
when partial or full clutch is engagement occurs (see below).<br />
The Back Plate is contained within the Clutch Piston forming an operating cavity<br />
into which high-pressure oil is directed by the GP Control Valve. A Piston Carrier,<br />
located inside the Clutch Piston separates the clutch-engagement side from<br />
the brake-engagement side of the cavity.<br />
Multiple accessory drives (on some models) are in rotation whenever the engine<br />
is running. Their output speed is always the same as engine speed.<br />
The General Purpose (GP) Control Valve with its electronic interface is used to<br />
obtain brake engagement, coast, and clutch engagement in this hydraulic power<br />
take off. When these positions are selected by the operator, and the proper<br />
conditions exist, the control valve directs high-pressure oil through internal<br />
passages to instantaneously and smoothly apply the brake, or to engage the<br />
hydraulic clutch. The pressure-rate of rise, controlled by the electronic module,<br />
provides a rapid, smooth, clutch engagement.<br />
On initial startup and <strong>service</strong>, closely monitor the pressure while starting<br />
the engine to ensure that the pump primes. Do not run the engine for<br />
longer than 10 seconds if measurable main pressure does not register.<br />
31
Operation<br />
32<br />
<strong>Twin</strong> <strong>Disc</strong>, Incorporated<br />
General Overview of GP Control Valve with Electronic Interface<br />
The General Purpose (GP) control valve is a hydraulic valve assembly designed<br />
for use with this power take-off, that includes a remotely mounted electronic<br />
interface control module. The valve assembly contains electrical-currentcontrolled<br />
proportional cartridges.<br />
Power Take-off Service Manual
<strong>Twin</strong> <strong>Disc</strong>, Incorporated Operation<br />
GP Control Valve Hydraulic Portion<br />
Power Take-off Service Manual<br />
The hydraulic portion of the GP Control Valve is made up of two blocks, a lower<br />
main regulator valve body, and an upper valve body. These valve bodies contain<br />
two electrically-actuated proportional valves, and a hydraulic pressure regulator<br />
(consisting of a pilot relief valve assembly and a main spool valve assembly).<br />
Separate identical proportional valves are used for the brake and the clutch<br />
engagement. When the power take-off clutch is selected to be engaged, the<br />
control valve directs high-pressure oil through internal passages to operate the<br />
clutch. When brake engagement is selected, the brake control valve directs<br />
high-pressure oil to operate the brake. (The clutch and brake are never engaged<br />
at the same time.) The pressure-rate of rise (profile) is controlled electronically<br />
by the GP Control Valve electronic interface to provide a rapid, smooth, oil<br />
pressure increase in the clutch or brake hydraulic passages during engagement.<br />
The proportional valve coils are low resistance devices that are electrical<br />
current driven. The use of an uncontrolled power source may supply<br />
too much current and damage the proportional valve.<br />
Note: Installations with this valve must include an oil filter<br />
with the proper filtering characteristics. This valve<br />
requires a filtration level of 16 micron at an efficiency<br />
of 98% (beta ratio = 75) or better. Besides the valve's<br />
requirement on filtration, the filter must meet the<br />
requirements of the power take-off (operating<br />
pressure, flow, etc.)<br />
33
Operation<br />
34<br />
Figure 3. Hydraulic Schematic (GP control valve)<br />
<strong>Twin</strong> <strong>Disc</strong>, Incorporated<br />
Power Take-off Service Manual
<strong>Twin</strong> <strong>Disc</strong>, Incorporated Operation<br />
Power Take-off Service Manual<br />
Figure 4. Top Hydraulic Valve Body Assembly<br />
Pressure Regulator<br />
Figure 5. Main Regulator Hydraulic Valve Assembly<br />
Valve section<br />
used with valve<br />
assembly 1020729<br />
Valve section<br />
used with valve<br />
assembly 1021658<br />
35
Operation<br />
Hydraulic System with GP Control Valve<br />
36<br />
<strong>Twin</strong> <strong>Disc</strong>, Incorporated<br />
The oil pump draws oil from the oil sump and discharges it to the heat exchanger,<br />
and on through the oil filter. Filtered oil enters the control valve through the inlet<br />
port. The incoming oil is supplied to the main pressure regulating relief pilot<br />
valve and the main regulating valve cartridge, satisfying the main pressure<br />
requirements of the <strong>HP</strong>TO and cascading all remaining oil flow into the<br />
lubrication circuit. Oil not used for clutch or brake engagement flows past the<br />
regulator piston to become lubrication oil. Lubrication oil flows through the<br />
lubrication oil circuit in the pto to lubricate and cool the clutches and bearings.<br />
Main pressure is supplied to the inlet of each proportional valve. Prior to<br />
engagement, the areas behind the clutch piston and brake piston are open to<br />
sump when the solenoids are not energized. The clutch and brake are<br />
hydraulically disengaged, but springs in the clutch unit cause the brake to be<br />
mechanically engaged. (The clutch is disengaged at that time.)<br />
When the clutch is commanded to engage, the proportional valve directs main<br />
pressure to a passageway in the clutch shaft. The oil is directed between the<br />
carrier and the apply piston. The apply pistons for the power take off clutch and<br />
the brake are connected so that when the clutch is hydraulically applied, the<br />
apply piston for the brake is pulled away from the clutch plate(s), preventing<br />
brake engagement. The clutch engagement, including the rate-of-rise, is<br />
controlled electronically utilizing a closed loop logic that is programmed into<br />
the <strong>HP</strong>TO Control Module.<br />
Clutch release occurs when the proportional valve is de-energized. (At that<br />
time, the springs in the clutch unit will mechanically engage the brake.<br />
The electronic interface portion of the control valve allows only one proportional<br />
valve to be energized at a time, thus, apply oil can only be supplied to either the<br />
brake or the clutch at one time, and the oil from the disengaged unit is vented to<br />
sump (atmospheric pressure). The pto clutch release springs move the clutch’s<br />
apply piston to the disengaged position minimizing clutch plate drag.<br />
See the Hydraulic Piping Diagram on the following page.<br />
Note: The breather (108) that is located on the top of the<br />
pump drive tower can be moved to the sump,<br />
provided that a line is connected from the vent<br />
location on the pump tower to the sump, and the<br />
sump breather is located in a baffled “quiet” area<br />
where the oil flow path does not affect the sump area<br />
by the breather.<br />
Power Take-off Service Manual
<strong>Twin</strong> <strong>Disc</strong>, Incorporated Operation<br />
Pump Outlet<br />
Port<br />
Pump Inlet<br />
Port<br />
1 1/4”Hose<br />
1 1/2-11 1/2 NPTF<br />
Thread<br />
Drain Port<br />
Power Take-off Service Manual<br />
1 1/2”Hose<br />
1”Hose<br />
Pump<br />
Pump Inlet Port<br />
Valve Inlet Port<br />
Control Valve<br />
Assembly<br />
Figure 6. Hydraulic Piping Diagram<br />
Breather<br />
1”Hose<br />
3/4”Hose<br />
Valve Inlet Port<br />
1 1/2-11 1/2 NPTF<br />
Thread<br />
1 1/2”Hose<br />
1 1/2-11 1/2 NPTF<br />
Thread<br />
Pump Outlet Port<br />
37
Operation<br />
38<br />
GP Control Valve Electronic Control Interface (Profile Module)<br />
<strong>Twin</strong> <strong>Disc</strong>, Incorporated<br />
The electronic portion of the GP Control Valve must be remotely mounted from<br />
the hydraulic portion of the GP Control Valve, because of the ambient<br />
temperature in most applications.<br />
If the ambient temperature of this mounting location exceeds 82 o C.<br />
(180 o F.), the Electronic Control Interface must be relocated to a cooler<br />
area. See Remote Mounted Electronic Control Cable in the Installation<br />
Section of this <strong>manual</strong><br />
This module contains the electronic circuitry to control the proportional cartridges<br />
that are used to engage the clutch and brake, based on the commands from<br />
the operator, and the programmed logic. Clutch apply pressure rate of rise<br />
(profile) is factory set with the use of internal circuitry. Closed loop logic is used<br />
for all clutch engagements. There are no user adjustments on the <strong>HP</strong>TO Profile<br />
Module. All electrical wiring for the Hydraulic Power Take Off system controls<br />
are routed through this interface module. The machine’s battery power (12 vdc<br />
or 24 vdc) is supplied to the electronic interface only, and never directly to the<br />
hydraulic proportional valves. Two red led lights are used to identify the<br />
proportional cartridge valve that is energized, and a green led is used to identify<br />
when power is provided to the electronic module. Flashing lights are used in<br />
troubleshooting. Engine speed and clutch output speed sensors are required<br />
for the control logic. The following figure shows the Electronic <strong>HP</strong>TO Module.<br />
Do not connect valve coils directly to battery power supply voltage.<br />
Use an approved <strong>Twin</strong> <strong>Disc</strong> Control System.<br />
Figure 7. Electronic <strong>HP</strong>TO Module<br />
Power Take-off Service Manual
<strong>Twin</strong> <strong>Disc</strong>, Incorporated Operation<br />
Clutch Engagement Logic (Closed Loop)<br />
Brake Engagement<br />
Power Take-off Service Manual<br />
Any time that the PTO Output Speed is below a preset speed, and the Power<br />
Take Off Clutch is not commanded to be on, the Brake Valve Coil will be<br />
commanded on by a pre-programmed profile. When the clutch is engaged,<br />
the brake will be commanded to be off. Also, if the PTO Output Speed increases<br />
at any time a small amount above this preset speed, the Brake Valve Coil will<br />
be commanded off.<br />
Power Take Off Clutch Engagement<br />
Any time that the customer supplied PTO Engage Switch is closed, indicating<br />
that the operator wishes to engage the Power Take Off, the Control Module<br />
commands the brake to be off and begins two simultaneous logic processes.<br />
These are a Clutch Engagement process, and a Clutch Lockup Check process.<br />
Input Speed and Output Speed are monitored continuously. The following briefly<br />
describes the steps in the processes.<br />
The engine must be below a preset speed before any clutch engagement will<br />
be commanded. If the engine speed is proper, the clutch is engaged at a<br />
preset level, while engine speed and output speeds are monitored. The clutch<br />
pressure will be increased as fast as possible without reducing the engine<br />
speed below a preset speed. If no output speed is detected, the PTO clutch<br />
will be disengaged and reapplied. If no output speed is detected after four<br />
attempts, the warning relay will be closed, and no further engagements<br />
attempted for five minutes, allowing the clutch components to cool sufficiently.<br />
Do not shut off the power to bypass the five minute cool down period.<br />
Mechanical damage can occur if the clutch is not allowed to cool after<br />
each engagement. After five minutes, turn off the engine and determine<br />
why the output did not rotate.<br />
After five minutes, another clutch engagement can be attempted. The<br />
PTO Engagement Switch must be turned off to reset the warning relay.<br />
If an input speed sensor failure is detected, engagements of the PTO Valve<br />
Coil will not be allowed.<br />
If an output speed sensor failure is detected, engagements of the Brake Valve<br />
Coil will not be allowed.<br />
39
Operation<br />
40<br />
<strong>Twin</strong> <strong>Disc</strong>, Incorporated<br />
Power Take-off Service Manual
<strong>Twin</strong> <strong>Disc</strong>, Incorporated Installation<br />
Identifying the <strong>Twin</strong> <strong>Disc</strong> Power Take-off Model<br />
Power Take-Off Service Manual<br />
Installation<br />
The nameplate identifies the model, bill of material (BOM) and the serial number<br />
of the unit. These numbers are necessary to identify the correct parts for your<br />
transmission.<br />
41
Installation<br />
Identifying the SAE Housing Size<br />
42<br />
SAE<br />
Housing<br />
Size<br />
B<br />
A<br />
Figure 8. Basic dimensions for SAE housings<br />
Table 9. SAE Housing Identification<br />
<strong>Twin</strong> <strong>Disc</strong>, Incorporated<br />
A<br />
B<br />
C<br />
D<br />
Housing Housing Bolt Circle Bolt Holes<br />
Pilot Diameter<br />
mm. inches<br />
Flange O.D.<br />
mm. inches<br />
Diameter<br />
mm. inches<br />
Qty.<br />
Dia.<br />
mm. inches<br />
00 787.40 31.000 876.3 34.50 850.90 33.500 16 13.49 .531<br />
0 647.70 25.500 711.2 28.00 678.18 26.750 16 13.89 .547<br />
1 511.18 20.125 552.5 21.75 530.23 20.875 12 12.29 .484<br />
D<br />
C<br />
Power Take-Off Service Manual
<strong>Twin</strong> <strong>Disc</strong>, Incorporated Installation<br />
Prior to Installation<br />
Power Take-Off Service Manual<br />
The <strong>Twin</strong> <strong>Disc</strong> Hydraulic Power Take Off mounts directly onto the flywheel<br />
of the engine. Flywheel-to-Power take off interference is possible due<br />
to mismatch of components or other reasons. Therefore, engine<br />
crankshaft endplay as well as flywheel alignment checks must be made<br />
before the Hydraulic Power Take Off is installed.<br />
After installation of the Hydraulic Power Take Off, the crankshaft endplay should<br />
be measured again. The endplay at the second measurement should be the<br />
same as the first. A difference in these two endplay measurements could be<br />
an indication of interference. Consequently, the Hydraulic Power Take Off should<br />
be removed and the source of interference found and corrected.<br />
<strong>Twin</strong> <strong>Disc</strong> will not be responsible for system damage caused by engine to <strong>Twin</strong><br />
<strong>Disc</strong> Hydraulic Power Take Off interference regardless of the cause of<br />
interference. This engine crankshaft endplay check is considered mandatory.<br />
The power take off housing flange and pilot, the engine flywheel and the flywheel<br />
housing must be checked for trueness. Clean the engine flywheel and flywheel<br />
housing mounting surfaces thoroughly before any measurements are made.<br />
Filtration prior to start-up (new or rebuilt unit)<br />
1) Proper cleaning of hydraulic hoses prior to installing them on the <strong>HP</strong>TO.<br />
2) Insure cooler has been flushed and is indeed clean.<br />
3) Always install a filter at the inlet of the valve body in case residual debris<br />
was missed in the cooler after cleaning.<br />
4) At first start-up with new or rebuilt <strong>HP</strong>TO, check main and lube pressure<br />
to ensure pump has primed and producing oil pressure.<br />
43
Installation<br />
Preliminary Checks<br />
44<br />
Refer to Identifying the SAE Housing size in table 9.<br />
<strong>Twin</strong> <strong>Disc</strong>, Incorporated<br />
Note: All measurements must be taken with the engine or<br />
motor mounted on its supports after the flywheel and<br />
housing have been thoroughly cleaned.<br />
1. Measure and record the engine crankshaft or motor shaft endplay using<br />
a dial indicator. Record this value, as it will be used later._______<br />
2. Bolt the indicator to the flywheel so the indicator is perpendicular to the<br />
flywheel housing face and the indicator stem rides on the flywheel housing<br />
face. See Figure 9.<br />
Figure 9. Checking Flywheel Housing Face<br />
3. Rotate the shaft through on entire revolution and note the runout. The<br />
total indicator reading (T.I.R.) must not exceed:<br />
SAE #0 Housing .41 mm. (.016”).<br />
SAE #1 Housing .30 mm. (.012”).<br />
Note: The flywheel and crankshaft of the engine must be<br />
held against either the front or rear of the crankshaft<br />
thrust bearing while the total indicator sweep (T.I.R.)<br />
is being made.<br />
Power Take-Off Service Manual
<strong>Twin</strong> <strong>Disc</strong>, Incorporated Installation<br />
Power Take-Off Service Manual<br />
4. Readjust the indicator so the stem rides on the pilot bore of the flywheel<br />
housing face. See Figure 10.<br />
Figure 10. Checking Flywheel Housing Bore<br />
5. Rotate the shaft through one entire revolution and note the runout. The<br />
total indicator reading (T.I.R.) should not exceed:<br />
SAE #0 Housing .41 mm. (.016”).<br />
SAE #1 Housing .30 mm. (.012”).<br />
6. Remove the indicator base from the flywheel and bolt it to the flywheel<br />
housing face. Position the indicator stem so that it rides where the drive<br />
ring will set on the flywheel face. See Figure 11.<br />
Figure 11. Checking Driving Ring Surface of Flywheel<br />
7. Rotate the shaft through one entire revolution and note the face runout of<br />
the flywheel. The total indicator reading (T.I.R.) must not exceed .01mm.<br />
(.0005”) per 25.4 mm. (per inch) of flywheel diameter.<br />
Note: The flywheel and crankshaft of the engine must be<br />
held against either the front or rear of the crankshaft<br />
thrust bearing while the total indicator sweep (T.I.R.)<br />
is being made.<br />
45
Installation<br />
46<br />
<strong>Twin</strong> <strong>Disc</strong>, Incorporated<br />
8. Readjust the indicator stem so it rides on the torsional input coupling<br />
pilot bore of the flywheel. See Figure 12.<br />
Figure 12. Checking Torsional Input Coupling Pilot Bore of Flywheel<br />
9. Rotate the shaft through one entire revolution and note the torsional input<br />
coupling bore eccentricity. The total indicator reading (T.I.R.) must not<br />
exceed .13 mm. (.005”).<br />
Power Take-Off Service Manual
<strong>Twin</strong> <strong>Disc</strong>, Incorporated Installation<br />
Torsional Input Coupling Installation<br />
Power Take-Off Service Manual<br />
Refer to the cleaning and inspection section of this <strong>manual</strong> before proceeding.<br />
1. Clean the flywheel and the input coupling face and outside pilot diameter<br />
of any dirt or debris as necessary.<br />
2. Use crocus cloth or emery cloth to remove any surface imperfections<br />
such as nicks, burrs, and sharp edges on the O.D. or the surface that<br />
will be mounted against the flywheel face.<br />
3. Use crocus cloth or emery cloth to remove any surface imperfections<br />
such as nicks, burrs, and sharp edges in the I.D. of the flywheel pilot<br />
bore or on the face that will be in contact with the input coupling.<br />
4. Position the input coupling against the flywheel, piloted in the mounting<br />
bore, and secure with eight hex-head capscrews. Torque the capscrews<br />
to the proper specifications given in Torque Values for U.S. Fasteners<br />
in the Description and Specifications section of this <strong>manual</strong>.<br />
Torsional Input Coupling attachment screws must be grade 8. Do not<br />
use substitutes.<br />
Be sure the internal retaining ring is properly installed inside the<br />
torsional input coupling hub. See Engineering Drawings section of this<br />
<strong>manual</strong> for correct ring location.<br />
47
Installation<br />
48<br />
<strong>Twin</strong> <strong>Disc</strong>, Incorporated<br />
Assembly Instructions for CENTAFLEX - R on Flange Mounted<br />
transmission. Information Taken from CENTA Drawing 26-<strong>600</strong>62-91-3.<br />
1. Bolt flywheel flange onto flywheel and tighten bolts as follows.<br />
Flywheel<br />
Figure 13. Assemble Flywheel Flange to Flywheel<br />
Table 10. Centa Tightening Torque Chart<br />
Thread Property Class 8.8<br />
Size Nm ft.-lbs.<br />
M10 50 37<br />
M12 85 63<br />
M16 215 159<br />
Mounting Bolt<br />
Flywheel Flange portion of<br />
the Torsional Input Coupling<br />
Tightening torque is for slightly oiled bolts, tolerance is + or - 5%.<br />
Securing of the bolts by adhesives (e.g. Loctite) is possible.<br />
Power Take-Off Service Manual
<strong>Twin</strong> <strong>Disc</strong>, Incorporated Installation<br />
Power Take-Off Service Manual<br />
2. Place rubber rollers in the deepest section of the cam in the output hub.<br />
Normally they stick there by friction.<br />
Figure 14. Insert Rollers and Note Alignment<br />
3. In case they do not stick, place a tape or a cord with a slip knot around<br />
all rollers close to the gear side. Leave the end of the tape or cord long<br />
enough so that it extends outside the flange. Turn the two coupling halves<br />
so that the arrows of both halves are opposite one another. See Figure<br />
14 (View X).<br />
Flywheel<br />
Figure 15. Coupling into Flywheel Flange<br />
Flywheel Flange portion of<br />
the Torsional Input Coupling<br />
Tape or Cord<br />
Rollers<br />
Internal portion of the<br />
Torsional Input<br />
Coupling<br />
49
Installation<br />
50<br />
<strong>Twin</strong> <strong>Disc</strong>, Incorporated<br />
4. Then push the output side of the coupling with the hub into the outer<br />
flange. If necessary apply lubricant on the outer flange. Suitable<br />
lubricants are soap water, detergents, etc. DO NOT USE OIL OR<br />
GREASE. If tape or a cord was used, push the coupling only half way<br />
together and remove the tape or cord. Then complete the installation.<br />
Figure 16. Assemble part way and remove the tape or cord.<br />
Figure 17. Final Assembly<br />
Remove<br />
Tape or Cord<br />
Power Take-Off Service Manual
<strong>Twin</strong> <strong>Disc</strong>, Incorporated Installation<br />
<strong>HP</strong>TO Installation to Engine<br />
Power Take-Off Service Manual<br />
Refer to the cleaning and inspection section of this <strong>manual</strong> before proceeding.<br />
When mounting the engine and Hydraulic Power Take Off in the machine,<br />
the six mounting bolts on each side of the mounting pads of the In-Line<br />
power take off must be used. The power take off mounting brackets<br />
should not be used to support the engine. A support plate must be<br />
used to support the output end of the Straddle Bearing Units. Failure<br />
to follow this guideline may result in damage to the power take off or<br />
the engine flywheel housing.<br />
See Engineering Drawings for installation dimensions and the locations of the<br />
required connections for power take off installation.<br />
<strong>HP</strong><strong>300</strong>I <strong>HP</strong><strong>300</strong>S <strong>HP</strong><strong>600</strong>I <strong>HP</strong><strong>600</strong>S<br />
The connections include the following:<br />
� Output shaft connection<br />
� Electrical connection for Control Module<br />
� Oil connection to the oil pump and heat exchanger<br />
� Oil connection from the heat exchanger to the oil filter<br />
� Speed pickups and pressure gauges<br />
1. Clean the PTO housing flange, flywheel housing flange of any debris.<br />
2. Make sure the housing flange and flywheel housing flange are free of<br />
surface imperfections such as nicks, burrs, and sharp edges. Remove<br />
them using fine emery cloth or crocus cloth.<br />
3. Install a minimum of 3 guide studs in the flywheel housing, located<br />
approximately 120 o apart. Using a suitable hoist, position the PTO on<br />
the guide studs and slide it against the flywheel housing, carefully aligning<br />
the teeth of the drive gear (12) with the internal teeth of the coupling (1).<br />
Do not force the pto unit onto the engine. If any resistance is noted,<br />
51
Installation<br />
52<br />
identify and correct all sources of interference.<br />
<strong>Twin</strong> <strong>Disc</strong>, Incorporated<br />
4. Secure the PTO housing to the flywheel housing with 12 hex-head<br />
capscrews (SAE #1 housing) or 16 capscrews (SAE #0 housing) .<br />
Torque the capscrews to the proper specifications given in Torque<br />
Values for U.S. Fasteners in the Description and Specifications<br />
section of this <strong>manual</strong>.<br />
Note: PTO housing to flywheel housing attachment screws<br />
must be grade 5 or better.<br />
5. Rap the end of the output shaft with a soft hammer to remove any preload<br />
on the main bearings and/or pilot bearing.<br />
Note: This step must not be omitted. Bearing failure may<br />
result.<br />
6. Measure the crankshaft endplay again. The measurement must be the<br />
same value as recorded from step 1 under Preliminary Checks. Locate<br />
and correct the source of preload if the endplay is not the same value.<br />
Engine and/or PTO failure will result from any excessive preload on<br />
components.<br />
7. Install the drive sheave, u-joint flange or other driven components as the<br />
application requires.<br />
<strong>HP</strong><strong>300</strong>S and <strong>HP</strong><strong>600</strong>S only: (Models <strong>300</strong>I & <strong>600</strong>I skip to step 8.)<br />
Note: Straddle bearing units only - refer to V-belt installation in<br />
the maintenance section and the Engineering Drawings<br />
towards the back of this <strong>manual</strong>. (Proceed at step 8.)<br />
<strong>HP</strong><strong>300</strong>S, <strong>HP</strong><strong>600</strong>S, <strong>HP</strong><strong>300</strong>I and <strong>HP</strong><strong>600</strong>I<br />
8. A PTO support plate mounted at the output bearing retainer must be<br />
used. Install the support plate. Refer to Support Plate Specifications<br />
in the Description and Specifications section and the Engineering<br />
Drawings towards the back of this <strong>manual</strong>.<br />
9. Measure and adjust for proper deflection and alignment. (See<br />
instructions near back of this section.)<br />
10. Attach hoses, hose fittings and other plumbing circuit components<br />
including the sump, oil filter and heat exchanger. (See plumbing<br />
illustrations near back of this section.)<br />
Power Take-Off Service Manual
<strong>Twin</strong> <strong>Disc</strong>, Incorporated Installation<br />
Power Take-Off Service Manual<br />
11. Attach the speed pickup(s) and pressure gauge(s). (See details<br />
contained in drawings in the Engineering Drawings section of this<br />
<strong>manual</strong>.)<br />
12. Mount the Electronic Control Module.<br />
The Electronic Control Module must be remotely mounted from the<br />
Hydraulic Power Take Off unit because of the possible temperatures<br />
reached at the power take off. See Figure 18 .<br />
Figure 18. Electronic Control Module<br />
53
Installation<br />
54<br />
13. Attach all electrical connections for the Control Module.<br />
Figure19. Wiring Schematic<br />
<strong>Twin</strong> <strong>Disc</strong>, Incorporated<br />
Power Take-Off Service Manual
<strong>Twin</strong> <strong>Disc</strong>, Incorporated Installation<br />
Power Take-Off Service Manual<br />
14. Attach the optional cables for remotely locating the control module are<br />
listed in the table 11.<br />
Length<br />
Figure 20. Cable for remote control operation<br />
Electrical Controls: All electrical wires and connectors must be<br />
adequately supported to prevent rubbing, chafing, or distress from<br />
relative movement. All electrical connections must be tight and free<br />
from any corrosion. See Figure 18 for the wiring connector.<br />
Part<br />
Length<br />
Number millimeters inches<br />
1021351A 1500 59<br />
1021351B 1800 71<br />
1021351C 2100 83<br />
1021351D 2400 94<br />
1021351E 2700 106<br />
1021351F <strong>300</strong>0 118<br />
1021351G 3<strong>300</strong> 130<br />
1021351H 3<strong>600</strong> 142<br />
1021351J 3900 154<br />
1021351K 4200 165<br />
1021351L 4500 177<br />
1021351M 4800 189<br />
1021351N 5100 201<br />
1021351P 5400 213<br />
1021351Q 5700 224<br />
Table 11. Cable Lengths<br />
Part<br />
Number<br />
Length<br />
millimeters inches<br />
1021351R <strong>600</strong>0 236<br />
1021351S 6<strong>300</strong> 248<br />
1021351T 6<strong>600</strong> 260<br />
1021351U 6900 272<br />
1021351V 7200 283<br />
1021351W 7500 295<br />
1021351X 7800 307<br />
1021351Y 8400 331<br />
1021351Z 9000 354<br />
1021351AA 9<strong>600</strong> 378<br />
1021351AB 10200 402<br />
1021351AC 10800 425<br />
1021351AD 11400 449<br />
1021351AE 12000 472<br />
1021351AF 12<strong>600</strong> 496<br />
55
Installation<br />
Final Checks<br />
56<br />
<strong>Twin</strong> <strong>Disc</strong>, Incorporated<br />
Before starting the engine, be sure the sump is properly filled with oil and the<br />
rear main bearing is properly greased. See Description and Specifications<br />
and Maintenance sections for the proper oil specification and filling procedure.<br />
Monitor the pressure while starting the engine to ensure that the pump<br />
primes. Do not run the engine for longer than 10 seconds if the pump<br />
does not prime, resulting in measurable main pressure.<br />
Check and Adjust Main Pressure (as needed)<br />
It is recommended that following the servicing of the valve assembly a procedure<br />
be followed to ensure the flushing of oil through the valve assembly, followed by<br />
adjustment of the main pressure.<br />
1. Install a main pressure gauge into the port on top of the Top Valve body.<br />
Top View<br />
Pilot Relief Valve<br />
Assembly<br />
Side View<br />
Figure 21. Main Pressure Port in Valve Body<br />
Main Pressure<br />
Port<br />
Valve Inlet Port<br />
Valve assembly<br />
1020729 is<br />
illustrated.<br />
2. Remove protective cover cap located at the end of the pilot relief valve<br />
assembly. This will expose a 1/4" hex head adjustment screw. Loosen<br />
the jam nut on the stem.<br />
Power Take-Off Service Manual
<strong>Twin</strong> <strong>Disc</strong>, Incorporated Installation<br />
Power Take-Off Service Manual<br />
Cap<br />
Used with valve<br />
assembly<br />
1021658<br />
Jam Nut<br />
Used with valve<br />
assembly<br />
1020729<br />
Figure 22. Pilot Relief Valve Assembly/Pressure Regulator<br />
The Hydraulic Power Take-Off must be in the disengaged position before<br />
the engine is started.<br />
3. Turn this adjustment screw counterclockwise until it reaches a positive<br />
stop. This allows the engine to be started and flush any debris past the<br />
relief valve.<br />
4. Start engine with the <strong>HP</strong>TO control in set in the disengaged position.<br />
Main pressure should be approximately 689 kPa (100 psi.) or less. Allow<br />
the fluid to flush the valve for approximately 1 minute.<br />
Monitor the pressure while starting the engine to ensure that the pump<br />
primes. Do not run the engine for longer than 10 seconds if measurable<br />
main pressure does not register.<br />
5. Turn the 1/4" hex head adjustment screw clockwise to achieve the main<br />
pressure setting. A helpful practice is to turn the screw approximately<br />
35 kPa (approximately 5 psi.) beyond the desired setting and then adjust<br />
for the target pressure. This aids in reducing variance in pressure setting<br />
due to torsional wind-up of the internal pressure spring.<br />
Note: If main pressure is to be set with cold oil, adjust the<br />
main pressure to approximately 35 - 70 kPa (5 - 10<br />
psi.) higher than the desired hot oil value.<br />
6. Tighten the jam nut to a torque of 20 Nm. (15 ft.-lb.), install the protective<br />
cap, and torque it to14 Nm. (10 ft.-lb.)<br />
57
Installation<br />
58<br />
Check Clutch Operation and Pressures<br />
<strong>Twin</strong> <strong>Disc</strong>, Incorporated<br />
7. After the engine and Hydraulic Power Take-Off are warmed up, check<br />
oil pressures in accord with the pressures shown in the Oil Pressure<br />
Specification table in the Description and Installation section of this<br />
<strong>manual</strong>.<br />
Note: Read and become completely familiar with the Power<br />
Take-Off Clutch Engagement explanation in the<br />
Operation Section of this <strong>manual</strong>.<br />
8. Engage the clutch. Automatic brake disengagement should allow shaft<br />
rotation to reach full speed.<br />
Note: Read and become completely familiar with the Brake<br />
Engagement explanation in the Operation Section<br />
of this <strong>manual</strong>.<br />
9. Disengage the clutch. Check to be sure shaft rotation slows to a stop<br />
when the clutch is disengaged. Automatic brake engagement will<br />
eventually stop shaft rotation when the clutch is disengaged.<br />
Power Take-Off Service Manual
<strong>Twin</strong> <strong>Disc</strong>, Incorporated Installation<br />
Plumbing - <strong>HP</strong><strong>300</strong>I, <strong>HP</strong><strong>300</strong>S, <strong>HP</strong><strong>600</strong>I, <strong>HP</strong><strong>600</strong>S<br />
Pump Outlet<br />
Port<br />
Pump Inlet<br />
Port<br />
1 1/4”Hose<br />
1 1/2-11 1/2 NPTF<br />
Thread<br />
Drain Ports<br />
Power Take-Off Service Manual<br />
1 1/2”Hose<br />
1”Hose<br />
Pump<br />
Pump Inlet Port<br />
Valve Inlet Port<br />
Control Valve<br />
Assembly<br />
Breather<br />
1”Hose<br />
3/4”Hose<br />
Valve Inlet Port<br />
1 1/2-11 1/2 NPTF<br />
Thread<br />
1 1/2”Hose<br />
1 1/2-11 1/2 NPTF<br />
Thread<br />
Pump Outlet Port<br />
59
Installation<br />
60<br />
<strong>Twin</strong> <strong>Disc</strong>, Incorporated<br />
Power Take-Off Service Manual
<strong>Twin</strong> <strong>Disc</strong>, Incorporated Maintenance<br />
Allowable Side Loads<br />
Power Take-off Service Manual<br />
S<br />
Maintenance<br />
Figure 22. Allowable Side Pull and Formula to Determine Applied Load<br />
Formula values for Figure 22.<br />
� L = actual applied load (Lbs.)<br />
� N = shaft speed (RPM)<br />
CENTERLINE<br />
OF SIDE<br />
LOAD<br />
� D = pitch diameter (in.) at sheave, etc.<br />
� F = load factor<br />
− 1.0 for chain or gear drive − 2.5 for all V belts<br />
− 1.5 for timing belts − 3.5 for flat belts<br />
� LF = 2.1 for reciprocating compressors and other severe shock drivers<br />
and 1.8 for large inertia type drive (crushers, chippers, planers)<br />
A support plate must be attached at the rear of the PTO.<br />
Note: <strong>HP</strong><strong>300</strong>I and <strong>HP</strong><strong>600</strong>I Hydraulic Power Take-offs are<br />
recommended for in-line, not side-loaded,<br />
applications.<br />
L=<br />
126,000 x H.P.<br />
N x D<br />
x F x LF<br />
61
Maintenance<br />
62<br />
Allowable Side Loads <strong>HP</strong><strong>300</strong>S<br />
Maximum Load, Lbs.<br />
15000<br />
14000<br />
1<strong>300</strong>0<br />
12000<br />
11000<br />
10000<br />
9000<br />
RPM<br />
1500<br />
1800<br />
2100<br />
2400<br />
Table 12 - <strong>HP</strong><strong>300</strong>S Side Load Capacity Values<br />
N<br />
Lbs.<br />
N<br />
Lbs.<br />
N<br />
Lbs.<br />
N<br />
Lbs.<br />
Side Load Chart - <strong>HP</strong>TO <strong>300</strong>S<br />
“S” Dimension<br />
<strong>Twin</strong> <strong>Disc</strong>, Incorporated<br />
127 (5.0) 152.4 (6.0) 177.8 (7.0) 203.2 (8.0) 228.6 (9.0) 254 (10.0)<br />
"X" Distance, mm. (inches)<br />
1500 RPM 1800 RPM 2100 RPM 2400 RPM<br />
127.0 mm. 152.4 mm. 177.8 mm. 203.2 mm. 228.6 mm. 254.0 mm.<br />
5.0 inches 6.0 inches 7.0 inches 8.0 inches 9.0 inches 10.0 inches<br />
47149 52931 60493 65385 56934 50485<br />
10<strong>600</strong> 11900 13<strong>600</strong> 14700 12800 11350<br />
44480 50040 56834 61827 54043 47816<br />
10000 11250 12800 13900 12150 10750<br />
42478 47816 54488 59158 51597 45814<br />
9550 10750 12250 13<strong>300</strong> 11<strong>600</strong> 10<strong>300</strong><br />
40744 45814 52486 56934 48595 44035<br />
9160 10<strong>300</strong> 11800 12800 11150 9900<br />
Power Take-off Service Manual
<strong>Twin</strong> <strong>Disc</strong>, Incorporated Maintenance<br />
Allowable Side Loads <strong>HP</strong><strong>600</strong>S<br />
Maximum Load, Lbs.<br />
22000<br />
20000<br />
18000<br />
1<strong>600</strong>0<br />
14000<br />
RPM<br />
1200<br />
1800<br />
2100<br />
Power Take-off Service Manual<br />
N<br />
Lbs.<br />
N<br />
Lbs.<br />
N<br />
Lbs.<br />
Side Load Chart - <strong>HP</strong>TO <strong>600</strong>S<br />
127.0 (5.0) 152.4 (6.0) 177.8 (7.0) 203.2 (8.0) 228.6 (9.0) 254.0 (10.0) 279.0 (11.0)<br />
"X" Distance, mm. (inches)<br />
"1200 RPM" 1800 RPM 2100 RPM<br />
Table 13 - <strong>HP</strong><strong>600</strong>S Side Load Capacity Values<br />
“S” Dimension<br />
127.0 mm. 152.4 mm. 177.8 mm. 203.2 mm. 228.6 mm. 254.0 mm. 279.0 mm.<br />
5.0 inches 6.0 inches 7.0 inches 8.0 inches 9.0 inches 10.0 inches 11.0 inches<br />
79619 87181 96966 97856 90274 82510 74726<br />
17900 19<strong>600</strong> 21800 22000 20700 18560 16800<br />
70278 77396 56834 87626 82288 73837 66720<br />
15800 17400 19<strong>300</strong> 19700 18500 16<strong>600</strong> 15000<br />
67165 73837 54488 83622 78730 70723 64051<br />
15100 16<strong>600</strong> 18400 18800 17700 15900 14400<br />
63
Maintenance<br />
Lubrication<br />
64<br />
<strong>Twin</strong> <strong>Disc</strong>, Incorporated<br />
Refer to Engineering Drawings and figure 23 below for location of fittings.<br />
Grease Specifications (rear-straddle type - <strong>HP</strong><strong>300</strong>S & <strong>HP</strong><strong>600</strong>S)<br />
NLGI grades 0, 1, or 2 with allowable continuous use up to 135 o C.<br />
(275 o F.) are acceptable. Recommended greases include Mobilgrease<br />
X<strong>HP</strong> 222, Mobilgrease CM-S, Mobilux EP-2 or equivalent.<br />
Grease Specifications (rear-straddle type - <strong>HP</strong><strong>300</strong>S & <strong>HP</strong><strong>600</strong>S)<br />
Add 1cc every 10 hours of use. See figure 23 for location of grease fitting.<br />
Enlarged View<br />
(Typical)<br />
Side View (Typical)<br />
Lubrication Point<br />
Hydraulic PTO (Rear StraddleType)<br />
Figure 23. Location of lubrication points<br />
Lubricate the rear<br />
Main Bearing (grease)<br />
Rear View (Typical)<br />
Power Take-off Service Manual
<strong>Twin</strong> <strong>Disc</strong>, Incorporated Maintenance<br />
Oil Specifications<br />
Oil System<br />
Power Take-off Service Manual<br />
Note: The remaining portion of the <strong>HP</strong>TO Straddle-Bearing<br />
unit is oil-lubricated. <strong>HP</strong>TO In-Line units are oillubricated<br />
and require no grease lubrication.<br />
See specifications contained in Description and Specifications section.<br />
Oil Level<br />
The customer supplied sump oil level should be checked daily or every 10<br />
hours. A dipstick or sight glass is the preferred means of checking oil level.<br />
Oil and Filter Change Interval<br />
With a new unit, change the oil and filter element within the first 50 hours of<br />
operation. Change oil and filter element after each 1000 hours thereafter or<br />
more often if conditions warrant. The oil and filter should be changed every six<br />
months if less than 1000 hours has accumulated since the last oil change.<br />
For a repaired unit, check the filter element after eight hours of operation. If the<br />
filter is clean, install a new filter element and then change the oil and filter element<br />
after 1000 hours of <strong>service</strong>. If the filter is dirty, change the element and operate<br />
for another eight hours. Check the filter again. Continue this cycle until the filter<br />
is clean and then change the oil and filter after 1000 hours of <strong>service</strong> or more<br />
often if conditions warrant.<br />
Oil Suction Strainer<br />
Remove and clean the pump suction strainer at every oil change or sooner if<br />
necessary. The suction strainer is customer provided, and should be located<br />
in the suction line near the sump.<br />
65
Maintenance<br />
Torsional Coupling<br />
66<br />
<strong>Twin</strong> <strong>Disc</strong>, Incorporated<br />
1. Do not obstruct the flywheel housing vents preventing the free flow of air<br />
for cooling the coupling. The ambient temperature of the air around the<br />
coupling should be between -6 o C. (22 o F.) and 80 o C. (176 o F.). Assure<br />
baffles are installed properly so hot air is ported out of the housing.<br />
2. Visually inspect the element after the first 100 hours of operation and<br />
every 2000 hours thereafter, or every six months, whichever comes first.<br />
Torsional vibration, misalignment, degradation by contaminants (oil),<br />
heat, ultraviolet radiation, and excessive system torque can cause cracks<br />
or other signs of distress to appear on the surface of the rubber. The<br />
above-described items affect the life of the coupling element.<br />
When inspecting the flexible coupling, look for evidence or conditions<br />
identified in the following steps:<br />
A. Cracks in the surface of the rubber. May be caused by torsional<br />
vibrations, excessive misalignment or exposure to contaminants<br />
(heat, petroleum products, chemicals, ozone, ultraviolet radiation,<br />
etc.) excessive system torques.<br />
B. Deterioration of the rubber element, as evidenced by sponginess<br />
or by black carbon-like dust on rubber surface. May be caused<br />
by contaminants or excessive heat, either external or internal to<br />
the coupling.<br />
C. Cracked, bent or otherwise damaged flex plate or coupling plate.<br />
D. Bolt holes in flex plate or coupling plate are elongated oval<br />
shaped, not round. This could be caused by improperly<br />
assembled parts, loose parts, vibration or improperly torqued<br />
parts.<br />
E. Bolts/nuts—bent, worn or stripped threads.<br />
3. Inspect the hub, looking for the following:<br />
A. Damaged or worn splines.<br />
B. Cracked parts.<br />
4. Replace any defective parts including defective fasteners that are found.<br />
Power Take-off Service Manual
<strong>Twin</strong> <strong>Disc</strong>, Incorporated Maintenance<br />
Overhaul Interval<br />
Power Take-off Service Manual<br />
A complete overhaul of the unit should be made at the same time that<br />
the engine is overhauled.<br />
Periodic Visual Inspection<br />
1. Check the mountings for tightness or damage such as cracks.<br />
Tighten loose mountings and replace damaged parts.<br />
2. Check pressure and temperature gauge where applicable.<br />
3. Inspect the oil lines and heat exchanger for leaky connections,<br />
cracks, or other damage. Replace damaged lines.<br />
4. Periodically, inspect the drive line and the input and output shaft<br />
oil seals for leakage. Replace parts as required.<br />
67
Maintenance<br />
Deflection Alignment Adjustment<br />
68<br />
<strong>Twin</strong> <strong>Disc</strong>, Incorporated<br />
1. Proper alignment of an engine and the Hydraulic Power Take Off is<br />
critical, both during the initial installation and following the reinstallation<br />
after removal for servicing. The following steps may be taken to secure<br />
proper power take off alignment.<br />
2. When reinstalling a Hydraulic Power Take Off after a repair, or when<br />
installing a new Hydraulic Power Take Off to an engine already mounted<br />
in the bed rails, the flywheel housing should be checked for deflection<br />
using the following procedure:<br />
3. Install the mounting brackets on the side mounting pads of the Hydraulic<br />
Power Take Off. Install the driving ring on the engine flywheel. Bolt an<br />
indicator to the engine block and set the indicator stem on the engine<br />
flywheel housing<br />
Support plate<br />
Figure 24. Hydraulic Power Take Off Alignment (In-line version illustrated)<br />
4. Set the indicator gauge at zero (0). Lift the Hydraulic Power Take Off<br />
with a hoist, or other suitable means, and place the unit in position against<br />
the engine flywheel housing. Secure the flange of the Hydraulic Power<br />
Take Off housing to the engine flywheel housing.<br />
Power Take-off Service Manual
<strong>Twin</strong> <strong>Disc</strong>, Incorporated Maintenance<br />
Power Take-off Service Manual<br />
5. Use a feeler gauge between each mounting bracket and engine bed<br />
rail. Add shims between the brackets and bed rails to equal the feeler<br />
gauge readings.<br />
6. Carefully release the lifting force on the Power Take Off while observing<br />
the indicator. The indicator gauge must remain steady at the zero mark.<br />
Torque the mounting bracket to bed rail bolts to the proper rating. If the<br />
reading moves from zero, lift the Hydraulic Power Take Off and insert<br />
additional shims.<br />
7. Continue this procedure until the Hydraulic Power Take Off is completely<br />
at rest on the bed rails and the gauge maintains a steady zero reading.<br />
8. After obtaining the correct zero reading, indicating no distortion of the<br />
engine flywheel housing, secure the mounting brackets to the engine<br />
bed rails.<br />
Verify the PTO is properly lubricated prior to starting the engine. All<br />
bearings within the main unit are oil lubricated, supplied by the oil charge<br />
pump feeding the <strong>HP</strong>TO. Be sure to check oil pressures in accord with<br />
Table 2 in the Description and Specifications section of this <strong>manual</strong>.<br />
The rear main bearing of <strong>HP</strong><strong>300</strong>S and <strong>HP</strong><strong>600</strong>S (straddle bearing designs)<br />
are lubricated by grease and have a hydraulic (“zerk”) grease fitting.<br />
See Lubrication in the Maintenance section for more information.<br />
69
Maintenance<br />
Alignment - U-Joint-Type Installation<br />
70<br />
Refer to figure 25 on next page.<br />
<strong>Twin</strong> <strong>Disc</strong>, Incorporated<br />
To realize the longest possible life of the power take-off bearings, the best<br />
possible alignment must be maintained between the center line of the power<br />
take-off shaft and the center line of the driven unit shaft.<br />
1. It is extremely important that the forks of the drive shaft between the pto<br />
and the driven unit lie in the same plane. This will prevent severe<br />
vibrations from occuring in the drive shaft.<br />
2. The center lines of the pto shaft and the driven unit input shaft must be<br />
offset within the limits recommended by the u-joint manufacturer to<br />
prolong the life of the universal joint needle bearings.<br />
3. It is extremely important that the center lines of the pto shaft and driven<br />
unit input shaft be parallel. This will further prevent vibrations which cause<br />
premature pto bearing failure.<br />
4. Proper lubrication of the pto is important for satisfactory <strong>service</strong>. Refer<br />
to lubrication specifications in the Maintenance section.<br />
Align the centerlines of the pto shaft and the input shaft of the driven<br />
unit. (One possible method is described below.)<br />
5. To align the engine and gear head by this method, two accurate straight<br />
edges at least 91 cm. (36”) long and a tape measure are required.<br />
6. Place the straight edges horizontally along the face of the pto and gear<br />
head hubs. Measure distances A and B. These two distances should<br />
be equal within 3.17 mm. (.125”) at a point 45.7 cm. (18”) from the<br />
centerline of the shaft. Move the engine and/or driven unit to obtain this<br />
specification.<br />
7. Rotate the shafts so the straight edges are in a vertical position. Measure<br />
the distances C and D as was done for A and B in step 2. These two<br />
distances should be equal within 3.17 mm. (.125”) at a point 45.7 cm.<br />
(18”) from the centerline of the shaft. Move the engine and/or driven unit<br />
to obtain this specification.<br />
Power Take-off Service Manual
<strong>Twin</strong> <strong>Disc</strong>, Incorporated Maintenance<br />
Engine<br />
Power Take-off Service Manual<br />
PTO<br />
45.7cm<br />
(18”)<br />
45.7cm<br />
(18”)<br />
Figure 25. Alignment - U-Joint-Type Installation<br />
B<br />
Vertical Position<br />
Horizontal Position<br />
Fork<br />
D<br />
Driven<br />
Unit<br />
8. Secure the engine and driven unit. Recheck A and B, C and D as<br />
described in steps 5 through 7 above. All measurements must be within<br />
the specifications. If not, repeat steps 5 through 7 until specifications<br />
are met.<br />
C<br />
A<br />
Fork<br />
Parallel Centerlines<br />
71
Maintenance<br />
72<br />
<strong>Twin</strong> <strong>Disc</strong>, Incorporated<br />
Power Take-off Service Manual
<strong>Twin</strong> <strong>Disc</strong>, Incorporated Disassembly<br />
Power Take-off Removal From The Engine<br />
Power Take-off Service Manual<br />
Disassembly<br />
Refer to the exploded view illustrations near the back of this <strong>manual</strong>.<br />
1. <strong>Disc</strong>onnect all electrical and electronic connections. Remove all oil hoses<br />
and cap all open fittings to prevent oil from leaking out. Remove all<br />
attached parts from the output end of the power take-off.<br />
Models <strong>HP</strong><strong>300</strong>S and <strong>HP</strong><strong>600</strong>S: (Models <strong>HP</strong><strong>300</strong>I and <strong>HP</strong><strong>600</strong>I skip to step<br />
13.)<br />
2. Remove the support plate from the output end of the power take-off.<br />
3. Attach lifting equipment to the belt sheave housing (46) and take out the<br />
slack just enough to begin to support the weight of the housing. Do not<br />
apply too much force.<br />
Lifting devices and their capacity must be capable of supporting the<br />
weight of the power take-off and all attached devices and equipment.<br />
Suspend the pto with the lifting devices securely attached at 3 positions<br />
(minimum) so it remains with the main drive shaft in a horizontal position<br />
until it is safely lowered and resting on a secure bed.<br />
4. Remove the hex-head capscrews (53) securing the rear bearing retainer<br />
(50) to the belt sheave housing (46). Remove the rear bearing retainer<br />
with the grease fitting (49).<br />
Models <strong>HP</strong><strong>300</strong>S only: (Model <strong>HP</strong><strong>600</strong>S skip to step 9.)<br />
5. Remove the snapring (52) from the output shaft (12).<br />
6. Remove 12 hex head screws (47) securing the belt sheave housing<br />
(46) to the clutch housing (37).<br />
7. Separate the sheave housing from the clutch housing (37), slide it off<br />
the shaft and set it aside. The roller bearing (51) will be removed with<br />
the sheave housing.<br />
8. Remove the roller bearing (51) from the sheave housing. (Proceed to<br />
step 12.)<br />
73
Disassembly<br />
74<br />
<strong>Twin</strong> <strong>Disc</strong>, Incorporated<br />
Models <strong>HP</strong><strong>600</strong>S only:<br />
9. Remove 12 hex head screws (47) securing the belt sheave housing<br />
(46) to the clutch housing (37).<br />
10. Separate the sheave housing from the clutch housing (37), slide it off<br />
the shaft and set it aside. The outer race of the spherical roller bearing<br />
(51) will be removed with the sheave housing.<br />
11. Remove the outer race (51) from the sheave housing. (Proceed to step<br />
12.)<br />
Note: The inner race of bearing (51) will be removed later, if it<br />
must be replaced.<br />
Models <strong>HP</strong><strong>300</strong>S and <strong>HP</strong><strong>600</strong>S<br />
12. Remove the belt sheave (customer component) and the output key (55).<br />
(Proceed to step 13.)<br />
All Models:<br />
13. Attach lifting equipment to the power take-off and take out the slack just<br />
enough to begin to support the weight of the pto. Do not apply too much<br />
force.<br />
Lifting devices and their capacity must be capable of supporting the<br />
weight of the power take-off and all attached devices and equipment.<br />
Suspend the pto with the lifting devices securely attached at 3 positions<br />
(minimum) so it remains with the main drive shaft in a horizontal position<br />
until it is safely lowered and resting on a secure bed.<br />
14. Remove all bolts, brackets and devices supporting the power take-off<br />
to the bed frame.<br />
15. Remove the bolts securing the coupling housing (2) to the engine.<br />
16. Carefully pull the hydraulic power take-off back from the engine and move<br />
to the disassembly area.<br />
17. Remove the bolts securing the flexible coupling (1) to the flywheel.<br />
Remove the coupling.<br />
18. Do not remove the internal snapring (10) from the I.D. of the coupling<br />
spline unless visible damage has occured.<br />
Power Take-off Service Manual
<strong>Twin</strong> <strong>Disc</strong>, Incorporated Disassembly<br />
Remove and disassemble the GP Control Valve<br />
Power Take-off Service Manual<br />
Refer to the parts list and exploded view illustrations.<br />
1. Support the power take-off on a bench with the GP control valve up. Use<br />
fixtures or blocks under the power take-off to secure the unit in position.<br />
2. Remove six hex head capscrews (113) securing the (top) valve body<br />
(134) to the main regulator (center) valve body (115). Remove the valve<br />
body and the gasket (114).<br />
3. Remove four socket head capscrews (127) securing the main regulator<br />
valve body (115) to the ditch plate (131). Remove the valve body and<br />
the gasket (133).<br />
4. Remove the 6 socket head capscrews (130) securing the ditch plate<br />
(131) to the clutch housing (37). Remove the ditch plate and ditch plate<br />
gasket (137).<br />
Note: Do not remove the ditch plate unless visible damage has<br />
occured.<br />
5. Remove the socket head capscrew (123) and lock plate (122) and<br />
remove the proportional valve assemblies (125) from the valve body.<br />
6. Remove plug (126) from the valve body.<br />
7. Using a wrench on the hex body of the hydraulic relief valve (124), remove<br />
it from the valve body.<br />
Alternate design center section.<br />
8. Remove four hex head capscrews (146 & 154) from the covers. Remove<br />
the covers (145 & 153), hex nut (155), piston (152), spool (147), springs<br />
(149 & 150), washer (148) and o-ring (151).<br />
9. Remove the filter (142) and valve (143) from the valve body (115).<br />
10. Remove all remaining plugs, fittings, gaskets and o-rings.<br />
75
Disassembly<br />
76<br />
<strong>Twin</strong> <strong>Disc</strong>, Incorporated<br />
Remove the Coupling Housing, and disassemble the Gear Towers<br />
Refer to the parts list and exploded view illustrations.<br />
Remove the coupling housing.<br />
1. Remove 13 hex head capscrews (5) and remove the coupling housing<br />
from the front housing (6).<br />
Disassemble the first tower.<br />
Note: The gear towers may be configured to utilize one, two,<br />
three or four of the available drives. Those drives not used<br />
will be covered with steel plates and gaskets. the<br />
procedure below describes a typical gear tower<br />
configuration. The <strong>HP</strong>TO you are working on may be<br />
different, but the procedure will remain approximately the<br />
same for all configurations.<br />
2. Remove all pipes and fittings from the gear towers.<br />
3. If a pump is mounted on the tower, remove 4 hex head capscrews (102)<br />
and pull the pump (109) and gasket (101) from the tower.<br />
4. If there is no pump mounted on the tower, remove 4 hex head capscrews<br />
(102) and remove the cover (104) with gasket (101) from the tower.<br />
5. Remove 6 hex head capscrews (99) with copper washers (100) and<br />
remove the SAE mounting plate (98) with plate gasket (97) from the<br />
tower.<br />
6. Remove the driven gear (103) with ball bearings (96 & 105 ) from the<br />
housing.<br />
7. Remove 4 hex head capscrews (95) and remove the cover (93) with<br />
cover gasket (92) from the other side of the tower.<br />
8. Remove 6 hex head capscrews (90) with copper washers (91) and<br />
remove the SAE mounting plate (89) with plate gasket (88) from the<br />
tower.<br />
9. Using a bearing puller, remove the ball bearings ( 96 & 105) from the<br />
driven gear (103).<br />
Power Take-off Service Manual
<strong>Twin</strong> <strong>Disc</strong>, Incorporated Disassembly<br />
Power Take-off Service Manual<br />
Disassemble the second tower (in the same manner as steps 2 through 9).<br />
10. If a pump is mounted on the tower, remove 4 hex head capscrews (102)<br />
and pull the pump (109) and gasket (101) from the tower.<br />
11. If there is no pump mounted on the tower, remove 4 hex head capscrews<br />
(82) and remove the cover (94) with gasket (81) from the tower.<br />
12. Remove 6 hex head capscrews (79) with copper washers (80) and<br />
remove the SAE mounting plate (78) with plate gasket (77) from the<br />
gear tower.<br />
13. Remove the driven gear (83) with ball bearings (76 & 84) from the<br />
housing.<br />
14. Remove 4 hex head capscrews (75) and remove the cover (74) with<br />
cover gasket (73) from the other side of the tower.<br />
15. Remove 6 hex head capscrews (71) with copper washers (72) and<br />
remove the SAE mounting plate (70) with plate gasket (69) from the<br />
tower.<br />
16. Using a bearing puller, remove the ball bearings ( 76 & 84) from the<br />
driven gear (108).<br />
77
Disassembly<br />
Remove the Front Housing from the Clutch Housing<br />
78<br />
Refer to the parts list and exploded view illustrations.<br />
1. Position the <strong>HP</strong>TO with the front housing up.<br />
<strong>Twin</strong> <strong>Disc</strong>, Incorporated<br />
2. Remove 12 hex head capscrews (4) securing the front housing to the<br />
clutch housing (37).<br />
3. Using a hoist, carefully lift the front housing off the unit.<br />
Do not damage the idler gear (58), nor the splines of the gear and drive<br />
rings assy. (9) when the housing is being removed.<br />
4. Remove the housing gasket (56).<br />
Remove the idler gear<br />
5. Remove pipe plug (67) and drive out the dowel pin (66).<br />
6. Remove three 12 pt. capscrews (68) from the housing and idler gear.<br />
7. Remove the idler gear (58) with the bearing carrier (65), bearing (63),<br />
shims (57) and other components from the housing.<br />
8. Remove 4 hex head capscrews (62), 4 hex head capscrews (60), and<br />
the idler gear washers (61 & 59) from the idler gear (58).<br />
8. Remove the bearing carrier snapring (64) from the bearing carrier (65).<br />
9. Press the bearing carrier out of the idler gear.<br />
Power Take-off Service Manual
<strong>Twin</strong> <strong>Disc</strong>, Incorporated Disassembly<br />
Disassemble the Clutch Housing<br />
Power Take-off Service Manual<br />
Refer to the parts list and exploded view illustrations.<br />
1. Remove pipe plug (3) from the input end of the gear and drive ring assy.<br />
(9).<br />
2. Using a hoist and eyebolts, lift off the gear and drive ring assy.<br />
Note: The cylindrical bearing (11) outer race will be removed<br />
with the gear and drive ring assembly. The cylindrical<br />
bearing’s inner race will stay with the shaft.<br />
3. Remove the cylindrical bearing (11) outer race from the gear and drive<br />
ring assy. (9).<br />
4. Using a bearing puller, remove the outer race of cylindrical bearing (11)<br />
from the shaft.<br />
5. Remove the external snapring (15) from the shaft.<br />
6. Lift off the clutch hub (16).<br />
7. Lift off the stack of clutch friction plates (18) and steel clutch plates (17).<br />
8. Using a hoist and eyebolts, lift off the clutch piston (22). The piston carrier<br />
(20) and back plate (26) will be lifted off at the same time.<br />
9. Locate and dowel pin (33), which is located in the pocket of the shaft<br />
between the piston carrier and the shaft.<br />
10. Turn the clutch piston over on a bench. Remove the internal snapring<br />
(25) from the clutch piston.<br />
Note: The 9 springs (23) may have to be compressed to allow<br />
removal of the snapring.<br />
11. Support under the piston carrier. Using a soft mallet, carefully tap the<br />
clutch piston down off the carrier.<br />
12. Remove the back plate (26), 9 springs (23) and o-rings<br />
Note: Do not remove the 3 anti-rotation pins (29) unless<br />
damaged.<br />
79
Disassembly<br />
80<br />
13. Remove the last friction plate (28).<br />
<strong>Twin</strong> <strong>Disc</strong>, Incorporated<br />
14. Do not remove the 3 dowel pins (27) unless they are damaged.<br />
15. Turn the clutch housing unit over. Securly support the clutch housing unit<br />
with the output end of the shaft up.<br />
Models <strong>HP</strong><strong>300</strong>S and <strong>HP</strong><strong>600</strong>S only: (Models <strong>HP</strong><strong>300</strong>I and <strong>HP</strong><strong>600</strong>I skip to<br />
step 30.)<br />
16. Remove 6 hex head capscrews (43) and remove the front bearing<br />
retainer (44) with the oil seal (45).<br />
17. Remove the oil seal (45) from the retainer.<br />
18. Remove the retainer gasket (40).<br />
Model <strong>300</strong>S only: (Models <strong>HP</strong><strong>600</strong>S skip to step 25.)<br />
19. Remove the spacer (41) and second retainer gasket (40).<br />
20. Attach a hoist to the end of the shaft. Lift the shaft out of the clutch housing.<br />
The spherical bearing (38) will be removed with the shaft.<br />
21. Remove 4 seal rings (34) from the shaft (12).<br />
22. Remove the snapring (35) and the bearing spacer (36) from the shaft<br />
(12).<br />
23. Place the shaft and bearing in a press with press with the input end up<br />
and plates supporting beneath the inner race of the spherical bearing.<br />
Press the shaft out of the bearing.<br />
24. Remove the pipe plug (39) and pipe plug (48) from the clutch housing<br />
(37).<br />
Note: Remove the pipe plug (39) ONLY to clean the passageway<br />
in the event a catastrophic failure has occurred within the<br />
<strong>HP</strong>TO.<br />
Note: Do not remove the dowel pins (42), the housing spacer<br />
(140) or dowel pins (141) unless they are damaged.<br />
Models <strong>HP</strong><strong>600</strong>S only:<br />
25. Remove inner race of bearing (51) from the end of the clutch shaft (12).<br />
Note: Remove the bearing race ONLY if it must be replaced.<br />
Power Take-off Service Manual
<strong>Twin</strong> <strong>Disc</strong>, Incorporated Disassembly<br />
Power Take-off Service Manual<br />
26. Attach a hoist to the end of the shaft. Lift the shaft out of the clutch housing.<br />
The inner race of bearing (38) will be removed with the shaft.<br />
27. Remove 4 seal rings (34) from the shaft (12).<br />
28. Place the shaft and bearing in a press with press with the input end up<br />
and plates supporting beneath the inner race of the bearing. Press the<br />
shaft out of the bearing.<br />
29. Remove the pipe plug (39) and pipe plug (48) from the clutch housing<br />
(37).<br />
Note: Remove the pipe plug (39) ONLY to clean the passageway<br />
in the event a catastrophic failure has occurred withing<br />
the <strong>HP</strong>TO.<br />
Note: Do not remove the dowel pins (42), the housing spacer<br />
(140) or dowel pins (141) unless they are damaged.<br />
Models <strong>HP</strong><strong>300</strong>I and <strong>HP</strong><strong>600</strong>I only:<br />
30. Remove 6 hex head capscrews (47) and remove the front bearing<br />
retainer (46) with the oil seal (45).<br />
31. Remove the oil seal (45) from the retainer.<br />
32. Tap the bearing outer race (38) out of the retainer bore.<br />
33. Attach a hoist to the end of the shaft. Lift the shaft out of the clutch housing.<br />
The double cup bearing assembly (38) will be removed with the shaft.<br />
34. Remove 4 seal rings (34) from the shaft (12).<br />
35. Using a small chisel, bend the tab(s) of the bearing lock washer (110)<br />
out of the slot (s) of the bearing lock nut (111).<br />
36. Remove the bearing lock nut.<br />
37. Remove the double cup bearing (38), including 2 cups, 2 cones and the<br />
spacer from the shaft<br />
81
Disassembly<br />
82<br />
<strong>Twin</strong> <strong>Disc</strong>, Incorporated<br />
Power Take-off Service Manual
<strong>Twin</strong> <strong>Disc</strong>, Incorporated Cleaning and Inspection<br />
Cleaning and Inspection<br />
Refer to the parts list and exploded view illustrations.<br />
General.<br />
Hydraulic Power Take-off Service Manual<br />
Cleaning and Inspection<br />
Note: Replace all oil seals, gaskets, o-rings, piston rings, seal<br />
rings, snap rings, etc. as a part of any maintenance or<br />
overhaul procedure. Replace shims that are damaged or<br />
destroyed in disassembly.<br />
1. Clean all parts using EPA/OSHA-approved solvents or by steam<br />
cleaning. Parts must be dried and oiled immediately.<br />
Note: Do not steam clean clutch friction plates. If they are worn<br />
beyond use, replace them.<br />
2. Examine all parts carefully for grit, dirt and abrasives and reclean them<br />
if necessary.<br />
3. Clean all oil passages by working a piece of wire back and forth through<br />
them, and then flushing them with cleaning solvent.<br />
4. Use clean solvent to flush oil pumps, valves, etc.<br />
5. Flush all hoses, tubing, coolers, etc. particularly if the unit is being<br />
disassembled because of an internal failure.<br />
6. De-burr the housing and bearing carrier with a stone or file in the vicinity<br />
of all pusher screw locations.<br />
7. For previously sealed joints and joint surfaces, scrape surfaces to remove<br />
old gasket material or sealant.<br />
8. Clean surfaces with solvent to remove oil and grease residue.<br />
9. Test for clean surfaces by applying a few drops of cool water to the<br />
surfaces. Parts are sufficiently clean if water covers the surface in a film.<br />
If the water puddles or forms beads, use fresh solvent and reclean. These<br />
reactions indicate presence of an oil or other lubricant film.<br />
83
Cleaning and Inspection<br />
84<br />
Bearings.<br />
<strong>Twin</strong> <strong>Disc</strong>, Incorporated<br />
Note: <strong>Twin</strong> <strong>Disc</strong>, Inc. recommends replacing all used bearings<br />
as a normal practice during repair or rebuild of the <strong>HP</strong>TO.<br />
However, if the bearing will be reused, the following<br />
provides pertinent information prior to the bearing’s reuse.<br />
10. Thoroughly wash bearings in clean solvent if they have been in <strong>service</strong>.<br />
Soak bearings in solvent if they are particularly dirty.<br />
If a permanently-sealed bearing is used, never soak it in solvent.<br />
(Permanently-sealed bearings were not originally used in the <strong>HP</strong>TO<br />
design, but later engineering changes may have incorporated their use.)<br />
Never dry bearing with compressed air. Do not spin bearings while they<br />
are not lubricated. Oil bearings with SAE 10 engine oil immediately after<br />
cleaning. Be sure bearings are oiled before inspection. Protect clean<br />
bearings, whether they are new or have been in <strong>service</strong>, from dirt, dust,<br />
grit or any other contaminant.<br />
11. Inspect bearings for roughness of rotation. Replace the bearing if<br />
roughness is found.<br />
12. Inspect bearings for corrosion, scored, scratched, cracked, pitted or<br />
chipped races, and for indication of excessive wear of balls or rollers. If<br />
one of the these defects is found, replace the bearing.<br />
Preventing Entrance of Dirt Into Bearings.<br />
13. Dirt and grit in bearings are often responsible for bearing failure.<br />
Consequently, it is important to keep bearings clean. Do not remove<br />
grease from new bearings. Keep the wrapper on new bearings until<br />
immediately before they are to be installed. Do not expose new clean<br />
bearings until they are ready to be used in the assembly. Keep them<br />
wrapped in clean lint-free cloth or paper to keep out dust and debris.<br />
Protect bearings from contamination even after they are installed on the<br />
shaft or in the bore.<br />
Hydraulic Power Take-off Service Manual
<strong>Twin</strong> <strong>Disc</strong>, Incorporated Cleaning and Inspection<br />
Housings, Cast Parts and Machined Surfaces.<br />
14. Replace cast parts or housings that are cracked.<br />
15. Inspect bearing bores for grooved, burred or galled conditions that would<br />
indicate that the bearing has been turning in its housing. If the damage<br />
cannot be repaired to like-new condition with a fine crocus cloth, replace<br />
the part. Bore diameters must not exceed the maximum dimension<br />
shown under wear limits in the Description and Specifications<br />
section of this <strong>manual</strong>.<br />
16. Inspect bearing journals for grooved, burred or galled conditions that<br />
would indicate that the bearing inner race has been turning on the journal.<br />
If the damage cannot be repaired to like-new condition with a fine crocus<br />
cloth, replace the part. Bearing journals must not be less than the<br />
minimum diameters shown under wear limits in the Description and<br />
Specifications section of this <strong>manual</strong>.<br />
17. Inspect oil passages for obstructions. If an obstruction is found, remove<br />
it with compressed air or by working a wire or wire brush back and forth<br />
through the passage and flushing it with solvent.<br />
18. Inspect machined surfaces for burrs, nicks or scratches that have<br />
material that extends above the surface, and foreign matter. If such<br />
defects cannot be removed with crocus cloth or a soft stone, replace the<br />
part.<br />
19. Inspect threaded openings for damaged threads. Chase damaged<br />
threads with a tap of the correct size.<br />
20. Inspect dowel pins and dowel pin holes for wear or damage. Replace<br />
defective dowels. If a dowel pin hole is worn, re-bore and sleeve the<br />
hole when possible. If this cannot be done accurately, replace the part.<br />
Hydraulic Power Take-off Service Manual<br />
Note: This applies where a matched set of parts is not involved.<br />
Shafts, seal lip contact surfaces and bearing journals.<br />
21. Inspect bearing journals for grooved, burred or galled conditions that<br />
would indicate that the bearing inner race has been turning on the journal.<br />
If the damage cannot be repaired to like-new condition with a fine crocus<br />
cloth, replace the part. Bearing journals must not be less than the<br />
minimum diameters shown under wear limits in the Description and<br />
Specifications section of this <strong>manual</strong>.<br />
85
Cleaning and Inspection<br />
86<br />
<strong>Twin</strong> <strong>Disc</strong>, Incorporated<br />
22. Inspect seal ring and seal lip contact surfaces. Look especially for<br />
scratches or nicks that intersect with or cross the contact area. If they<br />
cannot be removed using a very fine crocus cloth, replace the part. Seal<br />
contact area diameters must not be less than the minimum dimension<br />
shown under wear limits in the Description and Specifications<br />
section of this <strong>manual</strong>.<br />
23. Be sure the seal ring grooves and snapring grooves have straight sides,<br />
especially if a bearing failure has occurred. See figure 27.<br />
Figure 27. Inspect sealring grooves and snapring grooves<br />
24. Inspect threaded openings for damaged threads. Chase damaged<br />
threads with a tap of the correct size.<br />
Valve Seats.<br />
25. Inspect valve seats for burrs, nicks and scratches. If they cannot be<br />
removed with very fine crocus cloth, replace the part. Check to be sure<br />
that the valve is seating properly after reworking the valve seat.<br />
Splined parts.<br />
26. Inspect splines for stripped, twisted, chipped or burred splines. Remove<br />
burrs with a soft stone. If wear exists on the sides of the tooth, replace<br />
the part. Replace the part if other defects are found.<br />
Springs.<br />
Straight sides Damaged Wall<br />
Undamaged Groove Damaged Groove<br />
27. Inspect the springs for broken or distorted coils. Replace the spring if<br />
these or other defects are found.<br />
Hydraulic Power Take-off Service Manual
<strong>Twin</strong> <strong>Disc</strong>, Incorporated Cleaning and Inspection<br />
Clutch Plates.<br />
28. Inspect clutch plates, both friction plates and steel plates, for signs of<br />
overheating, pitting or excessive wear. Plates must be flat, not dished,<br />
distorted or bent. Inspect the steel clutch plates for wear on the external<br />
teeth. If wear exists on the sides of the tooth, replace the part. Replace<br />
the plates if these or other defects are found.<br />
Gears.<br />
29. Inspect gears for scuffed, nicked, burred or broken teeth. Inspect gear<br />
teeth for wear that may have destroyed the original tooth shape. Inspect<br />
internal bores or splines for wear or damage. If these or other defects<br />
cannot be removed with fine crocus cloth or a soft stone, replace the<br />
gear.<br />
Flexible Hoses.<br />
30. Inspect all hoses for cracks and sponginess. Replace damaged hoses.<br />
Pipes and Pipe Fittings<br />
31. Inspect all metal pipes for cracks and damage. If the pipe has been<br />
distorted or bent, especially if it has a crease or sharp bend in it, replace<br />
the pipe. Replace damaged pipe plugs or pipe fittings that have been<br />
damaged. Inspect for stripped threads and broken fittings. Replace all<br />
damaged parts.<br />
Hydraulic Power Take-off Service Manual<br />
87
Cleaning and Inspection<br />
88<br />
<strong>Twin</strong> <strong>Disc</strong>, Incorporated<br />
Hydraulic Power Take-off Service Manual
<strong>Twin</strong> <strong>Disc</strong>, Incorporated Assembly<br />
Hydraulic Power Take-off Service Manual<br />
Assembly Hint:<br />
Several components must be heated in an oven at 121° C. (250°<br />
F.) for one hour prior to assembly. Other components must be<br />
frozen in a freezer or dry ice for one hour prior to assembly. It is<br />
recommended that these components be prepared (heated or<br />
frozen) in advance of beginning the assembly process to avoid<br />
costly delays. Those components are:<br />
To be heated:<br />
(<strong>HP</strong><strong>300</strong>S & <strong>HP</strong><strong>600</strong>S only).<br />
Inner race of bearing (38). See figure 29.<br />
(<strong>HP</strong><strong>300</strong>I & <strong>HP</strong><strong>600</strong>I only.)<br />
Bearing (38). See Assembly step #10. (Clutch housing)<br />
(<strong>HP</strong><strong>600</strong>S only).<br />
Inner race of bearing (51). See figure 42.<br />
(<strong>HP</strong><strong>300</strong>S, <strong>HP</strong><strong>600</strong>S, <strong>HP</strong><strong>300</strong>I & <strong>HP</strong><strong>600</strong>I).<br />
Inner race of bearing (11). See figure 46.<br />
Bearing (8). See figure 83.<br />
To be frozen:<br />
(<strong>HP</strong><strong>300</strong>S & <strong>HP</strong><strong>600</strong>S only).<br />
Dowel pins (42). See figure 40.<br />
Dowel pins (141). See figure 41.<br />
(<strong>HP</strong><strong>300</strong>S, <strong>HP</strong><strong>600</strong>S, <strong>HP</strong><strong>300</strong>I & <strong>HP</strong><strong>600</strong>I).<br />
Dowel pins (27). See figure 49.<br />
Dowel pins (29). See figure 57.<br />
Dowel pin (66). See figure 95<br />
Assembly<br />
89
Assembly<br />
Clutch Shaft and Clutch Housing Assembly<br />
90<br />
Refer to the parts list and exploded view illustration.<br />
Clutch housing.<br />
<strong>Twin</strong> <strong>Disc</strong>, Incorporated<br />
<strong>HP</strong><strong>600</strong>S, <strong>HP</strong><strong>300</strong>S, <strong>HP</strong><strong>300</strong>I and <strong>HP</strong><strong>600</strong>I<br />
1. Position the clutch housing (37) so the bearing bore (output end) is up.<br />
<strong>HP</strong><strong>600</strong>S only: (<strong>HP</strong><strong>300</strong>S-skip to step 6, <strong>HP</strong><strong>300</strong>I & <strong>HP</strong><strong>600</strong>I-skip to step 10.)<br />
2. Tap or press the bearing outer race (38) straight into the bore with the<br />
back end of the bearing up. See figure 28. (Proceed to step 3.)<br />
Be sure to tap or press only on the outer race of the bearing. Do not<br />
Bearing<br />
contact the rollers. If the rollers become damaged, replace the bearing.<br />
Figure 28. Install the bearing in the clutch housing (<strong>HP</strong><strong>600</strong>S)<br />
Clutch shaft.<br />
<strong>HP</strong><strong>600</strong>S only<br />
3. Clean the bearing race I.D. (38) and clutch shaft (12) with EPA/OSHAapproved<br />
solvent to remove any oil or grease residue.<br />
4. Position the clutch shaft (12) with the input end up.<br />
Hydraulic Power Take-off Service Manual
<strong>Twin</strong> <strong>Disc</strong>, Incorporated Assembly<br />
5. Heat the inner race of the bearing (38) in an oven at 121° C. (250° F.) for<br />
one hour and install it immediately on the clutch shaft. Install the race<br />
from the input end of the shaft. See figure 29. The wide end of the<br />
bearing race must rest tightly against the shoulder of the shaft. Let the<br />
bearing race cool to room temperature after installation while continuing<br />
to apply downward force as it cools. This is necessary to ensure that it<br />
remains properly seated. (Proceed to step 18.)<br />
Hydraulic Power Take-off Service Manual<br />
Note: An alternate method to install the bearing race is to use<br />
an arbor press to install the inner race of bearing (38) on<br />
the clutch shaft (12). Use a flat plate on top of a piece of<br />
steel tubing approximately 25 cm. (10 inches) long. The<br />
inside diameter of the tube must be just slightly larger than<br />
the O.D. of the bearing journal on the shaft. Press the race<br />
straight onto the shaft until it stops solidly against the shaft<br />
shoulder.<br />
Small end<br />
of race.<br />
Wide end<br />
of race.<br />
Figure 29. Install the bearing inner race on the shaft.<br />
<strong>HP</strong><strong>300</strong>S only:<br />
6. Clean the bearing (38) and clutch shaft (12) with EPA/OSHA-approved<br />
solvent to remove any oil or grease residue.<br />
7. Heat the bearing (38) in an oven at 121° C. (250° F.) for one hour and<br />
install it immediately on the clutch shaft. Install the from the input end of<br />
the shaft. Let the bearing cool to room temperature after installation<br />
while continuing to apply downward force as the bearing cools. This is<br />
necessary to ensure that it remains properly seated.<br />
Note: An alternate method to install the bearing (38) is to use<br />
an arbor press to install it on the clutch shaft (12). Use a<br />
flat plate on top of a piece of steel tubing approximately<br />
91
Assembly<br />
92<br />
<strong>Twin</strong> <strong>Disc</strong>, Incorporated<br />
27 cm. (10.5 inches) long. The inside diameter of the tube<br />
must be just slightly larger than the O.D. of the bearing<br />
journal on the shaft. Press the bearing straight onto the<br />
shaft until it stops solidly against the shaft shoulder.<br />
8. After the race has cooled, install spacer (36) resting against the race.<br />
9. Securely install the snap ring (35) in the groove against the race.<br />
(Proceed to step 18.)<br />
Note: Prior to installation, feel the two edges of the I.D. of the<br />
snap ring to locate the sharpest edge. Install the snap ring<br />
so that sharpest edge is toward the input end of the shaft,<br />
away from the bearing and spacer.<br />
Be sure the snap ring is completely and securely seated<br />
all the way around the groove.<br />
<strong>HP</strong><strong>300</strong>I and <strong>HP</strong><strong>600</strong>I only:<br />
10. Support the clutch shaft (12) with the output end up. Heat the bearing<br />
(38) in an oven at 121° C. (250° F.) for one hour.<br />
Note: The bearing (38) used in <strong>HP</strong><strong>300</strong>I and <strong>HP</strong><strong>600</strong>I is a double<br />
-cup assembly. The components are furnished in matched<br />
sets. Do not mix or substitute components from other<br />
bearings.<br />
11. Quickly and carefully install the bearing cone, then a bearing cup,<br />
followed by the bearing spacer, a second bearing cone and the second<br />
bearing cup on the shaft. Immediately install the bearing lock washer<br />
(110) and the bearing lock nut (111) on the shaft and securely tighten it<br />
against the bearing. This is necessary to ensure that it remains properly<br />
seated tightly against the shoulder on the shaft while it is cooling to room<br />
temperature. Periodically retighten the nut to continue to apply downward<br />
force as the bearing cools.<br />
12. After the bearing has cooled to room temperature, usually requiring<br />
several hours, the nut must again be retightened. Using a spanner wrench<br />
or a large chisel and mallet, tighten the nut further.<br />
Hydraulic Power Take-off Service Manual
<strong>Twin</strong> <strong>Disc</strong>, Incorporated Assembly<br />
13. Use a .0381 mm. (.0015”) feeler gage to insure there is no gap between<br />
the bearing’s inner race and the shaft shoulder. Check all around the<br />
circumference of the shoulder. The feeler gage must not fit anywhere in<br />
the gap.<br />
Hydraulic Power Take-off Service Manual<br />
Note: If the feeler gage reveals that the bearing is not tightly<br />
seated against the shoulder, the nut must be tightened<br />
more or the bearing must be seated in a press, using a<br />
heavy metal tube with an I.D. just slightly larger than the<br />
diameter of the shaft to press the bearing down further<br />
and eliminate the gap.<br />
The tube must press only against the inner race of the bearing.<br />
14. Next use the .0381 mm. (.0015”) feeler gage to insure there is no gap<br />
on either side of the bearing lock washer, between the lock washer and<br />
the upper bearing cone, or between the lock washer and lock nut. Again,<br />
check all around the circumference and use a spanner wrench or a large<br />
chisel and mallet to tighten the nut to eliminate both gaps, if they exist.<br />
15. When it is insured that no gap exists in any of the three locations<br />
described above, find the lock washer tab that most closely aligns in the<br />
middle of one of the four notches in the lock nut. Matchmark the tab and<br />
it nearest slot.<br />
16. Tighten the nut a partial turn more, just until a different notch<br />
becomes aligned with a tab.<br />
17. Using a hammer and chisel, carefully bend that tab of the bearing lock<br />
washer (110) up into the notch of the bearing lock nut (111). (Proceed to<br />
step 18.)<br />
<strong>HP</strong><strong>300</strong>S, <strong>HP</strong><strong>600</strong>S, <strong>HP</strong><strong>300</strong>I and <strong>HP</strong><strong>600</strong>I<br />
18. Install four seal rings (34) in the grooves of the shaft. See figure 30.<br />
Lubricate the seal rings with an assembly lubricant to help prevent<br />
breakage when the shaft is installed into the clutch housing later in this<br />
procedure.<br />
93
Assembly<br />
94<br />
Figure 30. Install the seal rings on the shaft<br />
<strong>Twin</strong> <strong>Disc</strong>, Incorporated<br />
Note: After installation, rotate the seal rings in the grooves so<br />
the split lines of adjacent seal rings are 180 o apart. See<br />
figure 31.<br />
Split lines must<br />
be 180 o apart.<br />
Figure 31. Position the seal rings in the grooves<br />
Split lines must<br />
be 180 o apart.<br />
<strong>HP</strong><strong>300</strong>S, <strong>HP</strong><strong>600</strong>S, <strong>HP</strong><strong>300</strong>I and <strong>HP</strong><strong>600</strong>I<br />
19. Position the clutch housing (37) so the bearing bore (output end) is up.<br />
Lubricate the seal ring bore of the housing to help prevent damage to<br />
the seal rings (34) as the shaft is installed into the housing.<br />
20. Using lifting equipment attached to the output end of the clutch shaft<br />
(12) lower the shaft unit into the clutch housing, taking special precautions<br />
to prevent damage to the seal rings (34) as they enter the housing bore.<br />
See figure 32. Gently lower the shaft until it stops.<br />
Lifting devices and their capacity must be capable of supporting the<br />
weight of the item being lifted.<br />
Hydraulic Power Take-off Service Manual
<strong>Twin</strong> <strong>Disc</strong>, Incorporated Assembly<br />
Hydraulic Power Take-off Service Manual<br />
Note: <strong>HP</strong><strong>600</strong>S: the shaft will be stopped when the bearing races<br />
come in contact with each other.<br />
Lubricate seal<br />
rings to prevent<br />
damage during<br />
assembly.<br />
<strong>HP</strong><strong>300</strong>S: the shaft will be stopped when the bearing (38)<br />
seats in the housing bearing bore.<br />
<strong>HP</strong><strong>300</strong>I and <strong>HP</strong><strong>600</strong>I: the shaft will be stopped when the<br />
bearing race stops in the clutch housing bore.<br />
Figure 32. Install the shaft in the clutch housing.<br />
Do not damage<br />
seal rings.<br />
(Model <strong>HP</strong><strong>300</strong>S<br />
is shown in<br />
illustration.)<br />
21. Install the (orifice) plug (48) in the clutch housing threaded hole<br />
immediately adjacent to the O.D. of the bearing (38). Install plug (39) in<br />
the housing if it was previously removed. See figure 33.<br />
Pipe Plug (48)<br />
Pipe Plug (39)<br />
Figure 33. Install the orifice plug (48) and plug (39) in the clutch housing.<br />
95
Assembly<br />
96<br />
<strong>Twin</strong> <strong>Disc</strong>, Incorporated<br />
<strong>HP</strong><strong>600</strong>S and <strong>HP</strong><strong>300</strong>S only: (<strong>HP</strong><strong>300</strong>I & <strong>HP</strong><strong>600</strong>I-skip to step 27.)<br />
22. Install oil seal (45) in the front bearing retainer (44). Coat the O.D. of the<br />
seal with sealant M2828 before installation. Rest the oil seal in the<br />
bore; the seal lip should be down, with the outer shell of the oil seal up.<br />
See figure 34. Use a flat steel plate slightly larger in diameter than the<br />
O.D. of the seal. Using the flat plate on top of the seal, press the seal<br />
straight into the bore until the steel plate stops against the surface of the<br />
carrier. The rear of the outer shell of the seal should be flush with the<br />
surface. Pre-lubricate the seal lip with clean No. 30 engine oil.<br />
Note: Press only against the outer shell of the seal. Do not<br />
damage the seal lip.<br />
Flat plate will stop<br />
against back of<br />
bearing carrier.<br />
Flat plate<br />
Oil seal (45)<br />
Bearing<br />
retainer (44)<br />
Figure 34. Install the oil seal in the bearing carrier (<strong>HP</strong><strong>300</strong>S & <strong>HP</strong><strong>600</strong>S).<br />
23. Place gasket (40) in position on the clutch housing. See figures 35 &<br />
36.<br />
The gasket must be positioned so the notch in the gasket is aligned<br />
with the (orifice) plug (48). See figures 35 & 36. THE ORIFICE IN THE<br />
PLUG MUST NOT BE COVERED, which would prevent lubricating oil<br />
flow to the bearing.<br />
Align the notch<br />
with the orifice<br />
fitting (48).<br />
Figure 35. Install the gasket with the notch aligned with the orifice.<br />
Hydraulic Power Take-off Service Manual
<strong>Twin</strong> <strong>Disc</strong>, Incorporated Assembly<br />
Figure 36. Install the gasket with the notch aligned with the orifice.<br />
<strong>HP</strong><strong>300</strong>S only: (<strong>HP</strong><strong>600</strong>S-skip to step 26.)<br />
24. Place the spacer (41) on top of the first gasket (40). Again, align the<br />
notch with the notch in the gasket and the orifice fitting.<br />
25. Place a second gasket (40) on the spacer. Align the notch as described<br />
above. (Proceed to step 26.)<br />
<strong>HP</strong><strong>600</strong>S and <strong>HP</strong><strong>300</strong>S only:<br />
26. Place the bearing carrier (44) on top of the gasket, install 6 hex head<br />
capscrews (43) to secure the bearing carrier to the clutch housing. See<br />
figure 37. Torque the capscrews to the proper specifications given in<br />
Torque Values for U.S. Fasteners in the Description and<br />
Specifications section of this <strong>manual</strong>.<br />
Do not cut the seal lip as is passes over the keyway of the shaft.<br />
Figure 37. Install the bearing retainer (44) (<strong>HP</strong><strong>300</strong>S & <strong>HP</strong><strong>600</strong>S).<br />
Hydraulic Power Take-off Service Manual<br />
Align the notch<br />
with the orifice<br />
fitting (48).<br />
97
Assembly<br />
98<br />
<strong>Twin</strong> <strong>Disc</strong>, Incorporated<br />
<strong>HP</strong><strong>600</strong>I and <strong>HP</strong><strong>300</strong>I only:<br />
27. Install oil seal (45) in the bearing carrier (44). Coat the O.D. of the seal<br />
with sealant M2828 before installation. Rest the oil seal in the bore; the<br />
seal lip should be down, with the outer shell of the oil seal up. Use a flat<br />
steel plate slightly larger in diameter than the O.D. of the seal. See figure<br />
38. Using the flat plate on top of the seal, press the seal straight into the<br />
bore until the steel plate stops against the surface of the carrier. The<br />
rear of the outer shell of the seal should be flush with the surface. Prelubricate<br />
the seal lip with clean No. 30 engine oil.<br />
Note: Press only against the outer shell of the seal. Do not<br />
damage the seal lip.<br />
Flat Plate<br />
Flat plate will stop<br />
against back of<br />
bearing carrier.<br />
Oil Seal (45)<br />
Bearing<br />
Carrier (44)<br />
Figure 38. Install the oil seal in the bearing carrier (<strong>HP</strong><strong>300</strong>I & <strong>HP</strong><strong>600</strong>I).<br />
28. Install the pipe plug (39) in the threaded hole near the bolt circle. See<br />
figure 39. Install the shaft in the clutch housing.<br />
Note: Check to be sure the plug is below the surface.<br />
Figure 39. Install the pipe plug (39).<br />
Pipe Plug (39)<br />
Hydraulic Power Take-off Service Manual
<strong>Twin</strong> <strong>Disc</strong>, Incorporated Assembly<br />
29. Install the o-ring seal (132) on the groove on the pilot of the bearing<br />
carrier. Lubricate the o-ring with assembly lubricant to help prevent it<br />
from being damaged during assembly.<br />
30. Using a hoist and lifting equipment, place the bearing retainer in position<br />
on the shaft and clutch housing.<br />
Use extreme caution to prevent damaging the o-ring and oil seal.<br />
31. Install 6 hex head capscrews (47) to secure the bearing carrier (44) to<br />
the clutch housing (37). Torque the capscrews to the proper specifications<br />
given in Torque Values for U.S. Fasteners in the Description and<br />
Specifications section of this <strong>manual</strong>.<br />
Hydraulic Power Take-off Service Manual<br />
99
Assembly<br />
Belt Sheave Housing Assembly<br />
100<br />
Refer to the parts list and exploded view illustration.<br />
<strong>HP</strong><strong>600</strong>S and <strong>HP</strong><strong>300</strong>S only:<br />
Note: <strong>HP</strong><strong>300</strong>I & <strong>HP</strong><strong>600</strong>I do not use belt sheave housings.<br />
<strong>Twin</strong> <strong>Disc</strong>, Incorporated<br />
Note: Freeze dowel pins (42), and dowel pins (141) if used, in<br />
a freezer or dry ice for approximately 1 hour prior to<br />
installation.<br />
1. Multiple dowel pin holes are provided to allow orientation of the belt<br />
sheave housing in any of several desired positions. If not already<br />
installed, drive 2 dowel pins (42) in the appropriate dowel pin holes to<br />
properly position the belt sheave housing for the application.<br />
2. If used, install the housing spacer (140), locating it on the appropriate<br />
dowel pins (42). See figure 40.<br />
Housing<br />
spacer<br />
Figure 40. Install the housing spacer (140) (<strong>HP</strong><strong>300</strong>S & <strong>HP</strong><strong>600</strong>S).<br />
3. Install two dowel pins (141) in the housing spacer, if used, locating them<br />
in the same holes as dowel pins (42). Again, leave 1/2 of each dowel<br />
pin protruding from the surface.<br />
Hydraulic Power Take-off Service Manual
<strong>Twin</strong> <strong>Disc</strong>, Incorporated Assembly<br />
4. Using a hoist and lifting equipment, install the belt sheave housing (46)<br />
on the clutch housing, carefully aligning it on the dowel pins (42 or 141).<br />
See figure 41. Secure with 6 hex head capscrews (47). Tighten the<br />
capscrews alternately and evenly. Torque the capscrews to the proper<br />
specifications given in Torque Values for U.S. Fasteners in the<br />
Description and Specifications section of this <strong>manual</strong>.<br />
Belt<br />
Sheave<br />
Housing<br />
Dowel<br />
Pin (141)<br />
Figure 41. Install the belt sheave housing (<strong>HP</strong><strong>300</strong>S & <strong>HP</strong><strong>600</strong>S).<br />
<strong>HP</strong><strong>600</strong>S only: (<strong>HP</strong><strong>300</strong>S-skip to step 10.)<br />
5. Heat the inner race of the bearing (51) in an oven at 121° C. (250° F.) for<br />
one hour and install it immediately on the clutch shaft. Install the race<br />
from the output end of the shaft. See figure 42. The wide end of the<br />
bearing race must rest tightly against the shoulder of the shaft. Let the<br />
bearing race cool to room temperature after installation while continuing<br />
to apply downward force as it cools. This is necessary to ensure that it<br />
remains properly seated.<br />
Hydraulic Power Take-off Service Manual<br />
Dowel<br />
Pin (141)<br />
101
Assembly<br />
102<br />
Figure 42. Install the output bearing race (<strong>HP</strong><strong>600</strong>S only).<br />
<strong>Twin</strong> <strong>Disc</strong>, Incorporated<br />
6. After the bearing inner race is cool, install the outer race of the output<br />
bearing (38) in the bore of the belt sheave housing (46). Tap into the<br />
bore but leave the race extending above the surface approximately 12.7<br />
mm. (1/2”). See figures 43 & 44. It will be properly positioned when the<br />
bearing retainer (50) is installed and securely bolted to the sheave<br />
housing.<br />
Note: Tap only against the outer race of the bearing. Do not<br />
damage the bearing rollers.<br />
Figure 43. Install the output bearing race (<strong>HP</strong><strong>600</strong>S).<br />
Rear bearing<br />
inner race<br />
Rear bearing<br />
outer race<br />
Leave the<br />
rear bearing<br />
approx. 12.7<br />
mm. (1/2”)<br />
above the<br />
surface.<br />
Figure 44. Leave the output bearing extending out of the bore ( <strong>HP</strong><strong>600</strong>S).<br />
Hydraulic Power Take-off Service Manual
<strong>Twin</strong> <strong>Disc</strong>, Incorporated Assembly<br />
7. Place the rear bearing retainer (50) in position on top of the bearing,<br />
aligning the bolt holes and orienting the grease fitting (49) at the top 12<br />
o’clock position. See figure 45.<br />
Rear<br />
bearing<br />
retainer<br />
Figure 45. Install the rear bearing retainer ( <strong>HP</strong><strong>600</strong>S).<br />
8. Install 6 hex head capscrews (53) to secure the bearing retainer to the<br />
sheave housing. Tighten the screws alternately and evenly to draw the<br />
rear bearing race into the bore while the retainer is tightened against<br />
the sheave housing. Torque the capscrews to the proper specifications<br />
given in Torque Values for U.S. Fasteners in the Description and<br />
Specifications section of this <strong>manual</strong>.<br />
9. Install the grease fitting (49).<br />
<strong>HP</strong><strong>300</strong>S only:<br />
10. Install the rear bearing (51) in the bore of the belt sheave housing (46).<br />
Tap the bearing to the bottom of the bore. See figure 46.<br />
Hydraulic Power Take-off Service Manual<br />
Note: Tap only against the outer race of the bearing. Do not<br />
damage the bearing rollers.<br />
Figure 46. Install the rear bearing (<strong>HP</strong><strong>300</strong>S ).<br />
103
Assembly<br />
104<br />
<strong>Twin</strong> <strong>Disc</strong>, Incorporated<br />
11. Install snap ring (52) in the groove on the shaft to retain the rear bearing<br />
(51).<br />
Note: Prior to installation, feel the two edges of the I.D. of the<br />
snap ring to locate the sharpest edge. Install the snap ring<br />
so that sharpest edge is toward the input end of the shaft,<br />
away from the bearing and spacer.<br />
Be sure the snap ring is completely and securely seated<br />
all the way around the groove.<br />
12. Place the rear bearing retainer (50) in position on top of the bearing,<br />
aligning the bolt holes and orienting the grease fitting (49) at the top 12<br />
o’clock position. See figure 47.<br />
Rear<br />
bearing<br />
retainer<br />
Figure 47. Install the rear bearing retainer ( <strong>HP</strong><strong>300</strong>S).<br />
13. Install 6 hex head screws (53) to secure the bearing retainer to the sheave<br />
housing. Tighten the screws alternately and evenly to tighten the retainer<br />
against the sheave housing. Torque the capscrews to the proper<br />
specifications given in Torque Values for U.S. Fasteners in the<br />
Description and Specifications section of this <strong>manual</strong>.<br />
14. Install the pipe plug (54) in the threaded hole in the inside of the sheave<br />
housing.<br />
15. Install the grease fitting (49).<br />
Hex Head<br />
Capscrews<br />
Hex Head<br />
Capscrews<br />
Hydraulic Power Take-off Service Manual
<strong>Twin</strong> <strong>Disc</strong>, Incorporated Assembly<br />
Clutch Assembly<br />
Refer to the parts list and exploded view illustration.<br />
<strong>HP</strong><strong>300</strong>S, <strong>HP</strong><strong>600</strong>S, <strong>HP</strong><strong>600</strong>I and <strong>HP</strong><strong>300</strong>I:<br />
1. Turn the unit over so the front of the clutch housing is up. See figure 48.<br />
Note:<br />
Typical <strong>HP</strong><strong>300</strong>S or<br />
<strong>HP</strong><strong>600</strong>S model is<br />
illustrated.<br />
Figure 48. Turn the unit over with the clutch housing up.<br />
2. If 4 anti-rotation dowel pins (27) were removed, install them in the dowel<br />
holes on the inside of the clutch housing. The dowels must be installed<br />
with 10.92 mm. (.430 inches) max. extending above the surface of the<br />
clutch housing. See figures 49, 50 & 51.<br />
Hydraulic Power Take-off Service Manual<br />
Note: Freeze dowel pins (27) in a freezer or dry ice for<br />
approximately 1 hour prior to installation.<br />
105
Assembly<br />
106<br />
Installation tool<br />
with dowel pin<br />
in place ready<br />
to be installed.<br />
Figure 49. Dowel pins (27) and installation tool.<br />
10.92 mm. (.430”) Max.<br />
Figure 50. Position the dowel pin in the clutch housing hole.<br />
Figure 51. Install 4 anti-rotation dowel pins (27).<br />
<strong>Twin</strong> <strong>Disc</strong>, Incorporated<br />
Anti-rotation<br />
Dowel Pins<br />
Clutch housing<br />
surface<br />
Dowel Pin<br />
Anti-rotation<br />
Dowel Pin<br />
Hydraulic Power Take-off Service Manual
<strong>Twin</strong> <strong>Disc</strong>, Incorporated Assembly<br />
3. Place 1 friction plate (28) inside the clutch housing (37) with the external<br />
teeth meshing with the 4 dowel pins. See figures 52, 53, & 54.<br />
Figure 52. Install friction plate (28).<br />
Figure 53. Friction plate teeth aligned with dowel pins.<br />
Dowel pin<br />
Figure 54. Friction plate installed and aligned on dowel pins.<br />
Hydraulic Power Take-off Service Manual<br />
Friction Plate<br />
Dowel pin<br />
Friction plate<br />
Dowel pin<br />
107
Assembly<br />
108<br />
<strong>Twin</strong> <strong>Disc</strong>, Incorporated<br />
4. Install the pin (33) in the pocket in the side of the shaft. Stick the pin in<br />
the groove using an assembly grease. The grease will hold the pin in<br />
place during assembly. Mark the shaft with a black marker to indicate<br />
the location of the pin during further assembly procedures. See figures<br />
55 & 56.<br />
Mark the<br />
shaft.<br />
Pin (36)<br />
Assembly<br />
Grease<br />
Figure 55. “Stick the pin (33) in the hole of the shaft. Mark the shaft.<br />
Figure 56. Matchmark the shaft in line with dowel pin (33).<br />
Be sure to<br />
also<br />
matchmark<br />
the shaft near<br />
the splines.<br />
Hydraulic Power Take-off Service Manual
<strong>Twin</strong> <strong>Disc</strong>, Incorporated Assembly<br />
Clutch Piston, Piston Carrier and Back Plate Unit.<br />
Figure 58. Dowels installed from side opposite the notch.<br />
6. Place the piston carrier in the clutch piston (22) (before the o-rings are<br />
installed). The three dowels must enter the holes in the clutch piston.<br />
See figure 59.<br />
Hydraulic Power Take-off Service Manual<br />
Note: If previously were removed, freeze dowel pins (29) in a<br />
freezer or dry ice for approximately 1 hour prior to<br />
installation.<br />
5. Position the piston carrier (20) with the notch down. Brace beneath the<br />
carrier at a location just outside the 3 pin holes. When frozen, quickly<br />
press three dowel pins (29) in the piston carrier (20). See figures 57 &<br />
58.<br />
Support just<br />
outside the<br />
dowel pin<br />
holes.<br />
Figure 57. Install dowels in piston carrier.<br />
Side without<br />
the notch is<br />
up.<br />
Press tight<br />
against the<br />
surface.<br />
Notch<br />
Dowel is<br />
installed from<br />
the side<br />
without the<br />
notch.<br />
Note: The clutch piston is installed in the piston carrier before<br />
the seal rings are installed ONLY for the purpose of<br />
alignment and match-marking the parts. The seal rings<br />
must be installed for final assembly.<br />
109
Assembly<br />
110<br />
Large end of<br />
dowel pins<br />
must enter<br />
holes in the<br />
piston.<br />
Figure 59. Dowels must enter holes in the clutch piston.<br />
Figure 60. Matchmark the clutch piston and piston carrier.<br />
<strong>Twin</strong> <strong>Disc</strong>, Incorporated<br />
7. Matchmark the piston carrier (20) and clutch piston (22) to facilitate later<br />
assembly. See figure 60. (Before the o-rings are installed.)<br />
Matchmark<br />
the piston<br />
carrier and<br />
clutch piston.<br />
8. Remove the match-marked piston carrier from the clutch piston. Install<br />
one seal ring (19) and one seal ring (21) on the piston carrier (20). Be<br />
careful the seal rings are not damaged during installation. Lubricate the<br />
seal rings with an assembly lubricant in preparation for further assembly.<br />
See figure 61.<br />
Note: Install the smaller of the seal rings in the groove on the<br />
side opposite the notch.<br />
Note: The remaining seal ring (19) will not be installed at this<br />
time, to avoid damage that can occur during assembly.<br />
Hydraulic Power Take-off Service Manual
<strong>Twin</strong> <strong>Disc</strong>, Incorporated Assembly<br />
Install seal ring<br />
(21) in the large<br />
groove of the<br />
piston carrier.<br />
Seal ring.<br />
Hydraulic Power Take-off Service Manual<br />
Install one seal ring<br />
(19) in the groove on<br />
the piston carrier.<br />
Notch.<br />
Figure 61. Install seal rings on the piston carrier.<br />
9. Generously lubricate the bore of the clutch piston (22) and the seal rings.<br />
Place the piston and piston carrier on the bed of a press. Perfectly<br />
align the matchmarks and press the piston carrier in the clutch piston.<br />
Press the piston carrier to the bottom of the bore. See figures 59 & 60.<br />
10. Install the back plate (26) (before the seal ring (24) is installed, aligning<br />
the dowel pin holes. Matchmark the back plate and clutch piston (22).<br />
See note in step 8 above.<br />
11. Now remove the back plate and install the 2nd seal ring (19). See figure<br />
61.<br />
12. Install the seal ring (24) in the external groove of the back plate (26). Be<br />
careful the seal ring is not damaged during installation. Lubricate the<br />
seal ring with an assembly lubricant in preparation for further assembly.<br />
See figure 62.<br />
Figure 62. Install the seal ring on the back plate.<br />
Do not install 2nd<br />
seal ring here until<br />
later in this assembly<br />
procedure.<br />
Back<br />
Plate.<br />
111
Assembly<br />
112<br />
<strong>Twin</strong> <strong>Disc</strong>, Incorporated<br />
13. Install the nine springs (23) in the back plate (26). See figure 63.<br />
Note: It is imperative that the springs “stick” in the holes. Use an<br />
oil-soluble assembly grease to hold the springs in the<br />
holes during assembly.<br />
Use assembly<br />
grease to<br />
“stick” the<br />
springs in the<br />
pockets.<br />
Figure 63. “Stick” the springs in the back plate.<br />
14. Install the back plate (26) in the clutch piston (22), aligning the marks so<br />
the dowel pins enter the 3 pockets. Press the back plate down as far as<br />
it will go. Using a small arbor press, compress the springs until the back<br />
plate is below the snap ring groove. See figure 64.<br />
Note: If the dowels are not perfectly aligned with the holes in the<br />
clutch piston, the back plate cannot be moved to a point<br />
below the snap ring groove.<br />
Springs<br />
Seal ring<br />
(24)<br />
Do not damage the dowel pins or dowel pin holes in the clutch piston. If<br />
excessive resistance is met while compressing the back plate into the<br />
clutch piston, the dowels may not be properly aligned with the holes.<br />
Relieve the pressure on the back plate, align the matchmarks and<br />
reinstall. It may be necessary to repeat steps 9 thru 14 to more precisely<br />
match-mark the parts.<br />
Hydraulic Power Take-off Service Manual
<strong>Twin</strong> <strong>Disc</strong>, Incorporated Assembly<br />
Press tool Press tool<br />
Snapring (25)<br />
Figure 64. Compress the springs.<br />
15. While holding the back plate in that position install the internal snap ring<br />
(25) in the groove of the clutch piston. See figure 65.<br />
Hydraulic Power Take-off Service Manual<br />
Note: Be sure the snap ring is completely and securely seated<br />
all the way around the groove.<br />
Snapring<br />
securely<br />
seated in<br />
groove.<br />
Figure 65. Install the snap ring in the clutch piston.<br />
Note: A pre-check of piston function and a check for leaks with<br />
air pressure is advised.<br />
16. Check to be sure the seals have not been damaged during assembly<br />
and the clutch functions properly. Direct approximately 30 p.s.i. air into<br />
the clutch pressure passageway in the I.D. of the piston carrier. See<br />
figure 66. Listen and look for signs of leakage in the clutch area. Use<br />
approximately 207 kPa. (30 psi.) air pressure to operate the piston and<br />
check for air leaks.<br />
113
Assembly<br />
114<br />
Clutch<br />
pressure port<br />
Notch<br />
Seal ring<br />
<strong>Twin</strong> <strong>Disc</strong>, Incorporated<br />
Figure 66. Location of clutch pressure port in the I.D. of the piston carrier.<br />
17. Turn the clutch piston unit over. Install seal rings (30, 31 and 32) in the<br />
grooves located in the bore of the piston carrier (20). Be careful the<br />
seal rings are not damaged during installation. Lubricate the seal rings<br />
with an assembly lubricant in preparation for further assembly. See<br />
figures 66, 67 & 68.<br />
Figure 67. Install seal rings in the I.D. of the piston carrier.<br />
Seal ring<br />
Notch<br />
Figure 68. Install seal rings in the clutch piston bore.<br />
Sealring<br />
grooves<br />
Mark the<br />
Piston Carrier.<br />
Seal ring<br />
grooves<br />
Hydraulic Power Take-off Service Manual
<strong>Twin</strong> <strong>Disc</strong>, Incorporated Assembly<br />
18. Locate the notch in the I.D. of the piston carrier. See figures 66 & 68.<br />
That notch will fit over the pin that was “stuck” in the shaft with grease in<br />
a previous step. See figure 55. Place a mark on the piston carrier to<br />
indicate the location of the notch. Align the piston carrier notch with the<br />
black mark previously drawn on the shaft and install the piston carrier<br />
unit on the shaft. See figure 69.<br />
Hydraulic Power Take-off Service Manual<br />
Note: Use lifting equipment to lower the unit onto the shaft.<br />
Do not force the clutch piston unit into position. Use a slight rocking<br />
motion to “help” the seal rings move over the shoulders on the shaft.<br />
DO NOT MOVE THE PART ROTATIONALLY. A slight imperfection on the<br />
shoulder could cause the seal rings to be cut during assembly.<br />
Figure 69. Align the matchmarks during assembly.<br />
Figure 70. Install the piston carrier on the shaft.<br />
Align<br />
matchmarks<br />
115
Assembly<br />
116<br />
<strong>Twin</strong> <strong>Disc</strong>, Incorporated<br />
Note: Check carefully to be sure the dowel pin (36) was not<br />
dislodged from its pocket during assembly. When properly<br />
seated, the top edge at the I.D. of the piston carrier will be<br />
located even with the shoulder of the clutch shaft and the<br />
dowel pin will prevent rotation of the clutch piston assembly<br />
on the shaft. See figure 71.<br />
Shaft<br />
shoulder<br />
Piston carrier<br />
top surface<br />
Figure 71. Check to be sure clutch piston unit is properly seated.<br />
19. Check to be sure seals have not been damaged during assembly and<br />
the clutch functions properly. See figure 72. Plumb an air source into<br />
the clutch pressure port located in the side of the clutch housing (37).<br />
Use approximately 207 kPa. (30 psi.) of air pressure. While pressurizing<br />
the port, listen and look for signs of leakage in the clutch area.<br />
Assembly hint:<br />
Add a small amount of oil in the pressure port to help seal the<br />
shaft rings.<br />
Plumb air into<br />
the clutch<br />
pressure port<br />
to test.<br />
Figure 72. Check for pressure leaks.<br />
Hydraulic Power Take-off Service Manual
<strong>Twin</strong> <strong>Disc</strong>, Incorporated Assembly<br />
Clutch Hub, Clutch Plates and Gear & Ring Assembly.<br />
See assembly hint in step 23 and note in step 24 before proceeding.<br />
20. Place the clutch hub on the bench (or in an assembly fixture similar to<br />
the one described in step 24 below) with the splined portion up. Install<br />
one clutch friction plate (18) on the hub. Visually center the plate on the<br />
hub.<br />
21. Install one steel clutch plate (17) on the top of the friction plate. Use the<br />
steel plate to center the friction plate more exactly.<br />
22. Alternately install the remaining 7 friction plates and 7 steel clutch plates<br />
on the clutch hub until a total of 8 friction and 8 steel plates are on the<br />
stack. A steel clutch plate will be the top plate on the stack.<br />
23. Perfectly align the stack of plates before assembly onto the clutch shaft.<br />
Hydraulic Power Take-off Service Manual<br />
Assembly hint:<br />
The gear and drive ring assembly (9) may be used as an alignment<br />
guide. Carefully place the clutch hub with the plate stack into the<br />
gear and drive ring assembly, meshing the external teeth and<br />
visually centering the plates and hub in the process.<br />
24. While preventing the plates from moving relative to each other and the<br />
clutch hub, turn the hub over and place the stack on the clutch shaft.<br />
Note: Although the plates may also be aligned using 2 or 3 dowel<br />
pins, small rods or flat plates spaced evenly in the teeth to<br />
align the plates, a fixture similar to the one in figures 73<br />
& 74 may be used to aid this process. The black “handles”<br />
are attached to tubes that rotate. The bottom end of each<br />
tube has a “foot” that retains the plates and clutch hub.<br />
The I.D. of the fixture housing is splined to locate the friction<br />
plates. After the components are installed on the clutch<br />
shaft, rotate the “handles” to release the plates and remove<br />
the fixture.<br />
117
Assembly<br />
118<br />
Figure 73. Fixture being used for assembly.<br />
<strong>Twin</strong> <strong>Disc</strong>, Incorporated<br />
Fixture<br />
Handles<br />
rotate<br />
Figure 74. Using an alignment and installation fixture for installation.<br />
25. While compressing the springs (23) install the external snap ring (15) to<br />
retain the hub and plates on the clutch shaft. See figure 75.<br />
Note: The following installation (see figures 75 & 76) shows a<br />
simple method of holding the springs in a compressed<br />
position to allow for installation of the snap ring. A threaded<br />
rod was installed in the hole in the end of the clutch shaft.<br />
A straddle fixture was used to press against the piston<br />
carrier. Spacers were used on the threaded rod beneath<br />
a washer and nut. When the nut is tightened against the<br />
spacers, the straddle fixture presses against the piston<br />
carrier to compress the springs.<br />
Hydraulic Power Take-off Service Manual
<strong>Twin</strong> <strong>Disc</strong>, Incorporated Assembly<br />
Rod threaded<br />
into end of<br />
clutch shaft<br />
Figure 75. Compress the springs to install the snap ring (15)<br />
Figure 76. Install the snap ring (15)<br />
26. Heat the inner race of the bearing (11) in an oven at 121° C. (250° F.) for<br />
one hour and install it immediately on the clutch shaft. Install the race<br />
from the input end of the shaft. See figures 77 & 78. The wide end of<br />
the bearing race must rest tightly against the shoulder of the shaft. Let<br />
the bearing race cool to room temperature after installation while<br />
continuing to apply downward force as it cools. This is necessary to<br />
ensure that it remains properly seated.<br />
Inner race of<br />
the bearing<br />
Figure 77. Bearing inner race.<br />
Hydraulic Power Take-off Service Manual<br />
Spacers<br />
Straddle<br />
Fixture<br />
119
Assembly<br />
120<br />
Bearing<br />
outer race<br />
Bearing<br />
inner race<br />
Figure 78. Install the bearing inner race.<br />
<strong>Twin</strong> <strong>Disc</strong>, Incorporated<br />
27. If previously removed, install the pipe plug (13) and press two ball plugs<br />
(14) in the end of the clutch shaft (12). See figure 79.<br />
Pipe plug<br />
Ball plug<br />
Figure 79. Ball plugs and pipe plug.<br />
Ball plug<br />
Assembly hint:<br />
If carefully used in a manner that prevents damage of the<br />
components, the gear and ring assembly may be used as a tool<br />
to align the friction plates prior to installation of the bearing outer<br />
race.<br />
Hydraulic Power Take-off Service Manual
<strong>Twin</strong> <strong>Disc</strong>, Incorporated Assembly<br />
28. Apply assembly grease to the bore of the gear and ring assembly (9) to<br />
prevent the outer race from falling out during further assembly. See figure<br />
80. Install the outer race of the bearing (11) in the bore of the gear and<br />
ring assembly (9). See figure 81.<br />
Hydraulic Power Take-off Service Manual<br />
Generously<br />
apply<br />
assembly<br />
grease in the<br />
bore to hold<br />
the race<br />
during further<br />
assembly<br />
Figure 80. Apply assembly grease the gear and drive ring bore.<br />
Bearing outer<br />
race<br />
Figure 81. Install the bearing outer race in the gear and drive ring bore.<br />
Note: The friction plates (18) must be perfectly aligned and<br />
centered before the gear and drive ring assembly (9) is<br />
installed. A pair of straight edged measurement scales,<br />
flat plates or metal dowel rod may be used to perfectly<br />
align the teeth and center the plates for further assembly.<br />
29. Install the gear and drive ring assembly (9) on the clutch shaft. The internal<br />
teeth must mesh with the teeth of the clutch friction plates (18). The inner<br />
and outer races of the bearing (11) will position the components when<br />
they come into contact. See figure 82.<br />
121
Assembly<br />
122<br />
<strong>Twin</strong> <strong>Disc</strong>, Incorporated<br />
Lower the unit gently onto the shaft to prevent damage to the bearing.<br />
DO NOT FORCE the gear and drive ring assembly into position on the<br />
shaft. If resistance is met, the external teeth of the clutch friction plates<br />
may be misaligned. STOP, realign the plates and continue to install the<br />
gear and drive ring assembly.<br />
Do not<br />
damage the<br />
bearing.<br />
Bottom plate.<br />
Use lifting<br />
equipment.<br />
Gear and<br />
drive ring<br />
assembly<br />
Carefully<br />
mesh the<br />
teeth.<br />
Figure 82. Install the gear and drive ring assembly on the shaft.<br />
Warning:<br />
Check the bottom plate to make sure its teeth are engaged inside the<br />
gear and ring assembly. This can be done both visually and by feeling<br />
all around the circumference of the gear and drive ring assembly with<br />
the hands to be sure the teeth do not protrude in any area.<br />
Hydraulic Power Take-off Service Manual
<strong>Twin</strong> <strong>Disc</strong>, Incorporated Assembly<br />
30. Heat the bearing (8) in an oven at 121° C. (250° F.) for one hour and<br />
install it immediately on the clutch shaft. Install the race from the input<br />
end of the shaft. Install the bearing on the gear and drive ring assembly<br />
(9) See figure 83. Let the bearing race cool to room temperature after<br />
installation while continuing to apply downward force as it cools. This is<br />
necessary to ensure that it remains properly seated.<br />
Figure 83. Install the bearing (8).<br />
Hydraulic Power Take-off Service Manual<br />
Bearing<br />
123
Assembly<br />
Assemble the Front Housing Unit/Install Idler Gear<br />
124<br />
Refer to the parts list and exploded view illustrations.<br />
Front housing<br />
<strong>Twin</strong> <strong>Disc</strong>, Incorporated<br />
1. Apply a thread sealant on the pipe plug (orificed) (85) and install it in the<br />
bottom of the manifold hole in the front housing (6). See figure 84.<br />
Figure 84. Install the (orifice) plug.<br />
Pipe plug<br />
(orifice) (85)<br />
2. Position the front housing on the bench with the output end up. Place<br />
the bearing carrier (65) in the housing. Align the three bolt holes, but it is<br />
not imperative that they be perfectly aligned until later assembly.<br />
Note: Be sure the surfaces of the front housing and the bearing<br />
carrier are clean.<br />
3. Using a feeler gauge, measure the shim gap between the top of the<br />
bearing carrier and the under side of the housing. See figure 85. Record<br />
the width of the gap as determined by the feeler gage reading.<br />
Use feeler<br />
gauge to<br />
measure<br />
the gap.<br />
Bearing<br />
carrier (65)<br />
Figure 85. Measure for shims.<br />
Front<br />
housing (6)<br />
Hydraulic Power Take-off Service Manual
<strong>Twin</strong> <strong>Disc</strong>, Incorporated Assembly<br />
4. Select shims (57) equal to the amount of the gap. Set the shims aside<br />
for later installation. Refer to Shim Tolerance for bearing carriers (65)<br />
in idler gear (58) in the Description and Operation section for exact<br />
designed shim tolerance.<br />
5. Press the bearing (63) in the idler gear (58). See figures 86 & 87.<br />
Press until the bearing is flush with the surface of the gear.<br />
Hydraulic Power Take-off Service Manual<br />
Note: Press only against the outer race of the bearing.<br />
Tool stops against<br />
surface of idler gear.<br />
Figure 86. Install the bearing (63) in the idler gear (58).<br />
Pressing tool<br />
Bearing (63)<br />
Pressing tool<br />
Bearing (63)<br />
Bearing is<br />
flush with<br />
surface of<br />
gear.<br />
Figure 87. Bearing (63) installed flush with the idler gear (58) surface.<br />
125
Assembly<br />
126<br />
<strong>Twin</strong> <strong>Disc</strong>, Incorporated<br />
6. Press the bearing carrier (65) into the bearing (63). See figure 88.<br />
Press until the shoulder is tight against the I.D. of the bearing.<br />
Support beneath the inner race of the bearing before pressing in the<br />
bearing carrier. Failure to do so may cause the bearing to be damaged,<br />
resulting in premature, catastrophic failure.<br />
Figure 88. Installed the bearing carrier.<br />
7. Place the idler gear washer (59) on the gear and secure with four hex<br />
head capscrews (60). See figures 89 & 90. Torque the capscrews to<br />
the proper specifications given in Torque Values for U.S. Fasteners<br />
in the Description and Specifications section of this <strong>manual</strong>.<br />
Assembly Hint:<br />
Rest the lower end of the bearing carrier on the bed of the press<br />
and hold tight with the press ram while tightening the capscrews.<br />
Press ram<br />
Press ram<br />
Bearing<br />
carrier<br />
12345678<br />
12345678<br />
12345678<br />
12345678<br />
123456789012345678<br />
123456789012345678<br />
123456789012345678<br />
123456789012345678<br />
Figure 89. Install the idler gear washer (59).<br />
Bearing<br />
carrier<br />
Idler gear<br />
washer (59)<br />
Hex head<br />
capscrew (60)<br />
Support directly<br />
beneath the<br />
bearing carrier.<br />
Hydraulic Power Take-off Service Manual
<strong>Twin</strong> <strong>Disc</strong>, Incorporated Assembly<br />
Figure 90. Hold the unit while torquing the hex head capscrews (60).<br />
8. Turn the gear over on the bed of the press. Install the other idler gear<br />
washer (61) on the gear and secure with four hex head capscrews (62).<br />
Torque the capscrews to the proper specifications given in Torque<br />
Values for U.S. Fasteners in the Description and Specifications<br />
section of this <strong>manual</strong>.<br />
Hydraulic Power Take-off Service Manual<br />
Assembly Hint:<br />
Again, rest the lower end of the bearing carrier on the bed of the<br />
press and hold tight while tightening the capscrews.<br />
9. Install the snap ring (64) on the bearing carrier (65). See figure 91.<br />
Note: Prior to installation, feel the two edges of the I.D. of the<br />
snap ring to locate the sharpest edge. Install the snap ring<br />
so that sharpest edge is up, away from the gear.<br />
Sharp side<br />
of snap ring<br />
to be up.<br />
Be sure the snap ring is completely and securely seated<br />
all the way around the groove.<br />
Figure 91. Install the snap ring.<br />
Snap ring (64)<br />
Snap ring<br />
groove<br />
127
Assembly<br />
128<br />
<strong>Twin</strong> <strong>Disc</strong>, Incorporated<br />
10. Place the idler gear unit in position in the front housing (6). Align the<br />
three bolt holes with the holes in the housing. See figure 92.<br />
Note: The wide shoulder of the bearing carrier must be up,<br />
toward the output side of the front housing (6).<br />
11. Place the proper amount of shims (57) as previously determined by<br />
measuring the shim gap on top of the bearing carrier. Align the bolt<br />
holes in the shims with the holes in the bearing carrier and front housing.<br />
See figure 92.<br />
Align holes<br />
with 2 large<br />
punches.<br />
Figure 92. Place the gear unit and shims in the housing.<br />
Output side<br />
of front<br />
housing (6)<br />
is up.<br />
Install<br />
shims (57).<br />
Wide side<br />
of bearing<br />
carrier (65)<br />
12. Place two large punches or tapered rods into the bolt holes as alignment<br />
tools while the first of three 12 pt. capscrews (68) is installed.<br />
Raise the housing to gain access to the under side (input side) of the<br />
housing. See figures 93 & 94. Coat the threads of the first capscrew<br />
with thread sealant and install it in one of the three bolt holes. Hand<br />
tighten.<br />
Figure 93. Raise the housing for access to the lower side.<br />
Hydraulic Power Take-off Service Manual
<strong>Twin</strong> <strong>Disc</strong>, Incorporated Assembly<br />
13. Remove one of the alignment tools and install a second 12 pt. capscrew<br />
(68). Again, use thread sealant on the threads before it is installed. Hand<br />
tighten.<br />
14. Remove the second alignment tool and install the remaining 12 pt.<br />
capscrew (68) with sealant on the threads. Hand tighten.<br />
15. Torque the capscrews to the proper specifications given in Torque<br />
Values for U.S. Fasteners in the Description and Specifications<br />
section of this <strong>manual</strong>. See figure 94. Lower the housing to rest securely<br />
on the bench.<br />
Thread<br />
sealant<br />
Torque<br />
wrench<br />
Figure 94. Install, tighten and torque three 12 pt. capscrews (68).<br />
16. Freeze the dowel pin (66) in a freezer or dry ice for one hour. When the<br />
dowel is frozen, quickly install and drive the dowel into the hole in the<br />
middle of the three 12 pt. capscrews. See figure 95.<br />
Hydraulic Power Take-off Service Manual<br />
12 pt.<br />
capscrews<br />
(68)<br />
Note: Lubricate the dowel pin hole with anti-seize compound<br />
prior to installing the dowel pin.<br />
Figure 95. Insure that the dowel is below the surface.<br />
Dowel pin<br />
must be<br />
installed<br />
below the<br />
surface.<br />
Capscrew<br />
holes<br />
129
Assembly<br />
130<br />
<strong>Twin</strong> <strong>Disc</strong>, Incorporated<br />
17. Coat the threads of pipe plug (67) and install it in the threaded hole at<br />
the front side of the dowel pin hole.<br />
18. Coat the threads on both ends of the pipe nipple (87) and install it in the<br />
housing. Install the manifold (86) on the pipe nipple. Rotate the manifold<br />
so it’s bottom side will be parallel to a horizontal centerline when the<br />
<strong>HP</strong>TO is installed on the engine. See figure 96.<br />
Figure 96. Install manifold (86).<br />
Bottom of<br />
manifold to be<br />
horizontal<br />
Imaginary<br />
horizontal line.<br />
Manifold (86)<br />
Bottom of<br />
manifold<br />
Pipe nipple<br />
(87)<br />
Hydraulic Power Take-off Service Manual
<strong>Twin</strong> <strong>Disc</strong>, Incorporated Assembly<br />
Install the Front Housing on the Clutch Housing<br />
Refer to the parts list and exploded view illustrations.<br />
Turn the front housing over on the bench with the front side up.<br />
1. Install guide dowels in two threaded holes of the front housing (6). See<br />
figure 97. Locate the guides 180 o apart.<br />
2. Install the gasket (56) on the clutch housing (37). See figure 97. Align<br />
the holes. Use a small amount of assembly grease to “stick” the gasket<br />
on the housing so it does not move during assembly.<br />
3. Using lifting equipment, and with the housing suspended in a horizontal<br />
position, install front housing (6) on the clutch housing (37). See figures<br />
97 & 98. Be sure the front housing is aligned so the gear towers will be<br />
at the top of the unit (see note below) aligned with the control valve<br />
assembly when the <strong>HP</strong>TO is installed on the engine.<br />
Hydraulic Power Take-off Service Manual<br />
Note: Suspend the front housing in a perfect horizontal position.<br />
Use hoisting equipment attached at three points as shown<br />
in figure 97.<br />
Note: As the gear housing is lowered onto the clutch housing,<br />
the guides dowels will first enter the bolt holes in the clutch<br />
housing. Then the bearing (8) will enter the bore of the<br />
gear housing and the idler gear will contact the teeth of<br />
the gear and drive ring assembly. Rotate the idler gear so<br />
the teeth mesh properly. When properly aligned the gear<br />
housing will rest properly on the clutch housing.<br />
Note: On some applications the gear housing is rotated as much<br />
as two (2) bolt holes from the top. (See caution and<br />
warning that follow.)<br />
Regarding repositioning of the gear housing: DO NOT ROTATE MORE<br />
THAN two (2) bolt holes from the top as described in step 3 above. To<br />
do so would cause the drain holes to be mislocated at the bottom of the<br />
housing and would prohibit proper gravity drainage of the oil from the<br />
housing.<br />
Units that do not drain properly will overheat, resulting in malfunction<br />
and/or catastrophic failure.<br />
131
Assembly<br />
132<br />
Guide<br />
dowel<br />
Guide dowel<br />
<strong>Twin</strong> <strong>Disc</strong>, Incorporated<br />
Figure 97. Hoist equipment should be attached at three points.<br />
Figure 98. Guide dowels enter holes in clutch housing.<br />
Front<br />
housing<br />
Clutch<br />
housing<br />
4. Install 12 hex head capscrews (4) from the bottom side to secure the<br />
housing. Torque the capscrews to the proper specifications given in<br />
Torque Values for U.S. Fasteners in the Description and<br />
Specifications section of this <strong>manual</strong>.<br />
Coupling Housing<br />
Suspend from<br />
three points.<br />
Gasket is “stuck”<br />
to underside with<br />
grease. (May also<br />
be placed on the<br />
clutch housing but<br />
do not damage<br />
with the guide<br />
pins.)<br />
5. Install the coupling housing (2) on the front housing. See figure 99.<br />
Secure with 13 hex head capscrews (5). Torque the capscrews to the<br />
proper specifications given in Torque Values for U.S. Fasteners in<br />
the Description and Specifications section of this <strong>manual</strong>.<br />
Hydraulic Power Take-off Service Manual
<strong>Twin</strong> <strong>Disc</strong>, Incorporated Assembly<br />
Figure 99. Install the coupling housing.<br />
Hydraulic Power Take-off Service Manual<br />
Coupling<br />
housing<br />
Front<br />
housing<br />
6. Install the oil seal (7) in the bore of the front housing (6). Coat the O.D. of<br />
the seal with sealant M2828 before installation. Rest the oil seal in the<br />
bore; the seal lip should be down, with the outer shell of the oil seal up.<br />
See figure 100. Press the seal straight into the bore until the assembly<br />
tool stops against the surface of the carrier. The rear of the outer shell of<br />
the seal should be flush with the surface. Pre-lubricate the seal lip with<br />
clean No. 30 engine oil.<br />
Assembly Hint:<br />
Figure 100 shows an assembly tool that will safely and correctly<br />
install the oil seal. It consists of two parts, an inner shaft protector<br />
and seal lip guide that fits over the end of the shaft and an outer<br />
component that is designed to contact the outer shell of the seal.<br />
The outer component must have an O.D. greater than the O.D. of<br />
the seal so the tool will be stopped by the surface of the housing<br />
to properly locate the seal.<br />
If such tool is not available, it is recommended that a flat ring with<br />
an I.D. slightly larger in diameter than the seal lip and O.D. slightly<br />
larger than the O.D. of the seal be used to install the seal. Press<br />
or tap on the flat plate working 360 o around the ring a little at a<br />
time until the ring stops against the surface of the housing.<br />
Do not tap directly on the seal housing to install it. The seal housing will<br />
become damaged and bent, resulting in oil leaks.<br />
Note: Press only against the outer shell of the seal. Do not<br />
damage the seal lip.<br />
133
Assembly<br />
134<br />
Outer<br />
component of<br />
assembly tool<br />
Inner<br />
component of<br />
assembly tool<br />
Hex head<br />
capscrews (5)<br />
Figure 100. Install the oil seal.<br />
Figure 101. Install the pipe plug.<br />
<strong>Twin</strong> <strong>Disc</strong>, Incorporated<br />
O.D. must be<br />
larger than<br />
O.D. of the oil<br />
seal.<br />
Press oil seal<br />
flush with<br />
housing<br />
surface.<br />
7. Install the pipe plug (3) in the end of the shaft (12). See figure 101.<br />
Pipe plug<br />
Hydraulic Power Take-off Service Manual
<strong>Twin</strong> <strong>Disc</strong>, Incorporated Assembly<br />
Assemble the Gear Drive Towers<br />
Refer to the parts list and exploded view illustrations.<br />
General Information<br />
Hydraulic Power Take-off Service Manual<br />
Note: <strong>HP</strong>TOs that are designed with gear drive towers may be<br />
equipped to drive from either the front or rear of either of<br />
the towers, depending upon the BOM and design<br />
parameters of the installation. In such cases, one, two,<br />
three and/or four drives may be used. Refer to the BOM<br />
for your unit for exact design features.<br />
Note: The SAE plates are of two basic designs; flat and<br />
contoured. See figure 102.<br />
Flat design<br />
(plate side illustrated)<br />
Figure 102. SAE plate configurations.<br />
Note: The SAE plates are of two basic thicknesses; a wide<br />
thickness and a narrower thickness. One wide SAE plate<br />
and one narrow SAE plate are used on each tower. See<br />
figures 102 & 103.<br />
Wide<br />
SAE plate<br />
Narrow<br />
SAE plate<br />
“Countoured” design<br />
(bearing side illustrated)<br />
Narrow<br />
thickness<br />
Wide<br />
thickness<br />
Use one wide SAE<br />
plate and one<br />
narrow SAE plate<br />
on each tower.<br />
Figure 103. Top view of tower with wide and narrow SAE plates.<br />
135
Assembly<br />
136<br />
<strong>Twin</strong> <strong>Disc</strong>, Incorporated<br />
Note: The SAE plates are available in several SAE sizes “A,”<br />
“B,” and “C.” Flat designs and contoured designs are not<br />
necessarily available in all SAE sizes. Refer to the BOM<br />
for your unit for exact design features.<br />
Note: Driven gears have a “long” side and a “short” side. It is<br />
imperative that the “long” side of the gear be installed<br />
on the side with the wider SAE plate.<br />
Note: The assembly procedure as described below refers to<br />
typical tower configurations. The procedure describes a<br />
typical installation and is applicable to any of the<br />
configurations or combinations of components. The<br />
photos used show typical contoured SAE plates being<br />
used at both front and rear positions of both towers.<br />
Hex head<br />
capscrew<br />
Copper<br />
washer<br />
Refer to the specific BOM for your <strong>HP</strong>TO; the drives may<br />
be designed with the drives in different locations.<br />
Figure 104. SAE mounting plate and associated components.<br />
Tower #1<br />
Hex head<br />
capscrew<br />
Cover<br />
Gasket<br />
SAE Mounting<br />
Plate<br />
Gasket<br />
1. Install two guide dowels in the front housing (6), 180 0 apart from one<br />
another. See figure 105.<br />
Hydraulic Power Take-off Service Manual
<strong>Twin</strong> <strong>Disc</strong>, Incorporated Assembly<br />
2. Install the gasket (69) on the front side of the tower. See figures 105<br />
and 106.<br />
Gasket<br />
Figure 105. Install guide dowels to align the SAE plate.<br />
3. Locate the SAE mounting plate (70) on the guide bolts. See figure<br />
106.<br />
Hydraulic Power Take-off Service Manual<br />
Note: The hole for the fitting must be toward the outside.<br />
Figure 106. Set the SAE mounting plate in position on the guides.<br />
4. Carefully tap the SAE plate down tight against the gasket. See figure<br />
107.<br />
Figure 107. Tap the SAE mounting plate into position.<br />
Use guide<br />
dowels to<br />
align the<br />
gasket and<br />
SAE plate.<br />
Note location<br />
of hole for<br />
the fitting.<br />
137
Assembly<br />
138<br />
<strong>Twin</strong> <strong>Disc</strong>, Incorporated<br />
5. Install 5 hex head capscrews (71) with copper washers (72) to secure<br />
the plate to the housing. See figure 108. Torque the capscrews to 48.8<br />
Nm. (36 lb. ft.).<br />
Assembly Hint:<br />
Do not install the copper washer and hex head capscrew nearest<br />
the hole for the fitting until after the fitting is installed. The head of<br />
the capscrew will interfere with the fitting as is rotated into the<br />
hole. See illustrations in figure 109.<br />
Figure 108. Install one copper washer with each hex head capscrew.<br />
6. Install the pipe fitting in the hole. See figure 109.<br />
Fitting<br />
Capscrew<br />
prevents<br />
rotation of<br />
the fitting<br />
Hex head<br />
capscrew<br />
Copper<br />
washer<br />
Figure 109. Install the fitting before the hex head capscrew and washer.<br />
7. Install the last hex head capscrew (71) with copper washer (72). See<br />
figure 109. Torque the capscrew to 48.8 Nm. (36 lb. ft.)<br />
8. Install the cover (74) with gasket (73) on the plate. Install 4 hex head<br />
capscrews (75) to secure the plate to the SAE mounting plate (70). See<br />
figure 110. Torque the capscrews to the proper specifications given in<br />
Torque Values for U.S. Fasteners in the Description and<br />
Specifications section of this <strong>manual</strong>.<br />
Hydraulic Power Take-off Service Manual
<strong>Twin</strong> <strong>Disc</strong>, Incorporated Assembly<br />
Typical<br />
4-bolt cover<br />
Figure 110. Install the fitting before the hex head capscrew and washer.<br />
9. Identify the “long” and “short” ends of the driven gear (83). See figures<br />
111 & 112.<br />
Figure 111. Identify the long and short ends of the driven gears.<br />
Bearing<br />
Figure 112. Driven gear and bearings<br />
Hydraulic Power Take-off Service Manual<br />
Driven Gear<br />
Bearing<br />
journal<br />
Long<br />
End<br />
Short<br />
End<br />
Long Short<br />
Cover<br />
SAE<br />
mounting plate<br />
Note:<br />
2-bolt cover<br />
is shown.<br />
Bearing<br />
Bearing<br />
journal<br />
139
Assembly<br />
140<br />
<strong>Twin</strong> <strong>Disc</strong>, Incorporated<br />
10. Press the bearing (63) onto the long end of the driven gear (83). See<br />
figure 113. Press the bearing tight against the shoulder on the gear<br />
Press only against the inner race of the bearing to prevent damage that<br />
may result in premature catastrophic failure.<br />
Assembly Hint:<br />
Figure 113 shows a metal pipe being used as a press tool. The<br />
I.D. of the tool is just slightly larger than the I.D. of the bearing<br />
inner race and the O.D. of the tool does not contact the bearing<br />
balls, cages or outer race.<br />
Figure 113. Press the first bearing on the gear.<br />
11. Press the bearing (84) onto the short end of the driven gear (83). See<br />
figures 114 & 115. Press the bearing tight against the shoulder on the<br />
gear.<br />
Figure 114. Install the 2nd bearing on the driven gear.<br />
Press tool<br />
Bearing<br />
Gear<br />
Press tool<br />
2nd Bearing<br />
Gear<br />
1st Bearing<br />
Hydraulic Power Take-off Service Manual
<strong>Twin</strong> <strong>Disc</strong>, Incorporated Assembly<br />
Figure 115. Both bearings seated on the gear.<br />
Figure 116. Install the driven gear in the housing.<br />
Hydraulic Power Take-off Service Manual<br />
2nd Bearing<br />
1st Bearing<br />
12. Install the driven gear into the front SAE mounting plate through the hole.<br />
See figure 116. The long end of the gear must be toward the side with<br />
the wide SAE plate. See information with figures 111 & 112.<br />
Note: When the bearing on the lower side of the driven gear is<br />
properly seated in the bearing bore of the SAE plate, the<br />
teeth of the driven gear will be located in the middle of the<br />
teeth of the idler gear. See figures 116 & 117. If they are<br />
not aligned so contact is in the middle of the tooth, the<br />
driven gear is improperly installed or the wrong SAE plate<br />
is installed on the front side of the tower.<br />
Idler gear<br />
teeth<br />
Driven gear<br />
teeth<br />
141
Assembly<br />
142<br />
Figure 117. Gear teeth must mesh properly.<br />
<strong>Twin</strong> <strong>Disc</strong>, Incorporated<br />
13. Install two guide dowels in the front housing (6), 180 0 apart from one<br />
another. See figure 116.<br />
14. Install the gasket (96) on the back side (sheave housing side) of the<br />
Tower. See figure 116.<br />
15. Locate the SAE mounting plate (93) on the guide bolts. Similar to figure<br />
106.<br />
Note: The hole for the fitting must be toward the outside.<br />
16. Carefully tap the SAE plate down tight against the gasket. Similar to<br />
figure 107.<br />
17. Install 5 hex head capscrews (94) with copper washers (95) to secure<br />
the plate to the housing. Similar to figure 108. Torque the capscrews<br />
to 48.8 Nm. (36 lb. ft.).<br />
Assembly Hint:<br />
Do not install the copper washer and hex head capscrew nearest<br />
the hole for the fitting until after the fitting is installed. The head of<br />
the capscrew will interfere with the fitting as is rotated into the<br />
hole. Similar to illustrations in figure 109.<br />
18. Install the pipe fitting in the hole. Similar to figure 109.<br />
Idler gear<br />
teeth<br />
Driven gear<br />
teeth<br />
19. Install the last hex head capscrew (94) with copper washer (95). Similar<br />
to figure 109. Torque the capscrew to 48.8 Nm. (36 lb. ft.)<br />
Hydraulic Power Take-off Service Manual
<strong>Twin</strong> <strong>Disc</strong>, Incorporated Assembly<br />
20. Install the cover (97) with gasket (96) on the plate. Install 4 hex head<br />
capscrews (98) to secure the cover to the SAE mounting plate (93).<br />
Similar to figure 110. Torque the capscrews to the proper specifications<br />
given in Torque Values for U.S. Fasteners in the Description and<br />
Specifications section of this <strong>manual</strong>.<br />
Tower #2<br />
Hydraulic Power Take-off Service Manual<br />
Note: Do not install the pump (109) at this time. It will be installed<br />
later.<br />
21. Assemble the components of Tower #2. Follow the instructions as<br />
previously described in steps 1 through 20 for the first pump tower.<br />
See figures 102 through 117.<br />
143
Assembly<br />
Assemble the Control Valve Assembly<br />
144<br />
Refer to the parts list and exploded view illustrations.<br />
Position the <strong>HP</strong>TO with the towers and control valve area up.<br />
<strong>Twin</strong> <strong>Disc</strong>, Incorporated<br />
1. If it was removed, install the ditch plate (131) onto the clutch housing<br />
with ditch plate gasket (142). See figures 118 & 119. Secure with 6<br />
socket head capscrews (130). Torque the capscrews to the proper<br />
specifications given in Torque Values for U.S. Fasteners in the<br />
Description and Specifications section of this <strong>manual</strong>.<br />
Note: Be sure the gasket is properly aligned so no hole or port<br />
is restricted or covered.<br />
Ditch plate<br />
Figure 118. Install the ditch plate and gasket.<br />
Figure 119. Ditch plate and gasket installed.<br />
Ditch plate<br />
gasket<br />
Clutch<br />
housing<br />
Assembly 1020729 only: (Assembly 1021658-skip to step 9.)<br />
2. Install the hydraulic relief valve (124) and plug (126) in the center section<br />
Hydraulic Power Take-off Service Manual
<strong>Twin</strong> <strong>Disc</strong>, Incorporated Assembly<br />
Hydraulic Power Take-off Service Manual<br />
of the control valve assembly. See figure 120. Tighten securely.<br />
Note: The hydraulic pressure will be adjusted later as described<br />
in the Installation section of this <strong>manual</strong>.<br />
For valve assembly 1020729<br />
Pipe Plug<br />
Plug<br />
Gasket<br />
o-ring<br />
Elbow<br />
Hydraulic<br />
Relief Valve<br />
Figure 120. Assemble the regulator section. (Assembly 1020709)<br />
3. Lubricate the o-ring on the elbow fitting (112) with an assembly grease.<br />
See figure 121. Install the fitting in the center section of the control valve<br />
assembly. Tighten securely. The fitting should point horizontally toward<br />
the right side (viewed from the rear) of the <strong>HP</strong>TO .<br />
Note: Be careful to prevent damage to the o-ring during<br />
assembly.<br />
4. Install the main regulator (center section) valve body (115) onto the ditch<br />
plate with gasket (133). See figure 121. Secure with 4 socket head<br />
capscrews (127). Torque the capscrews to the proper<br />
specifications given in Torque Values for Fasteners in Table 8 of<br />
the Installation section.<br />
Note: Be sure the gasket is properly aligned so no hole or port<br />
is restricted or covered.<br />
145
Assembly<br />
146<br />
Capscrew<br />
<strong>Twin</strong> <strong>Disc</strong>, Incorporated<br />
Assembly hint:<br />
See figure 121. Install the four socket head capscrews (127)<br />
into the ditch plate and install the gasket (133) on the plate aligned<br />
on the capscrews to assist in being sure the gasket is properly<br />
positioned and aligned.<br />
Center<br />
(main regulator)<br />
section<br />
Elbow fitting<br />
Gasket<br />
Ditch plate<br />
Figure 121. Install the elbow fitting and gasket on the valve body.<br />
5. Lubricate the o-rings of the two 3-way proportional valves (125) with an<br />
assembly grease. See figure 122. Install the proportional valves in the<br />
top section of the control valve assembly. Use a twisting motion while<br />
pushing each valve into the bore. Position the connectors horizontally,<br />
pointing directly opposite each other. Secure with lock plate (122) and<br />
hex head capscrew (123). Torque the capscrews to the proper<br />
specifications given in Torque Values for U.S. Fasteners in the<br />
Description and Specifications section of this <strong>manual</strong>.<br />
Note: Be careful to prevent damage to the o-rings during<br />
assembly.<br />
Pipe Plug<br />
Cartridge<br />
Plug o-rings<br />
Pipe Plug<br />
Gasket<br />
Figure 122. Install the 3-way proportional valves.<br />
Pipe Plug<br />
3-way Proportional<br />
Valve o-rings<br />
Hydraulic Power Take-off Service Manual
<strong>Twin</strong> <strong>Disc</strong>, Incorporated Assembly<br />
6. Lubricate the o-rings of the valve cartridge plug (128) with an assembly<br />
grease. Install the cartridge in the top section of the control valve<br />
assembly.<br />
Hydraulic Power Take-off Service Manual<br />
Note: Be careful to prevent damage to the o-rings during<br />
assembly.<br />
7. Install the (top section) valve body (134) onto the center (main regulator)<br />
valve body section with gasket (114). See figure 123. Secure with 6<br />
hex head capscrews (113). Torque the capscrews to the proper<br />
specifications given in Torque Values for Fasteners in Table 8 of the<br />
Installation section.<br />
Note: Be sure the gasket is properly aligned so no hole or port<br />
is restricted or covered.<br />
Assembly hint:<br />
See figure 123. Install the six socket head capscrews (113) into<br />
the valve body and install the gasket (114) on the plate aligned<br />
on the capscrews to assist in being sure the gasket is properly<br />
positioned and aligned.<br />
Capscrew<br />
Top valve<br />
section<br />
Figure 123. Install the top valve body and gasket.<br />
3-way<br />
proportional<br />
valves<br />
Gasket<br />
Center<br />
(main regulator)<br />
section<br />
8. Install the remaining pipe plugs, in the control valve assembly. See figure<br />
124.<br />
147
Assembly<br />
148<br />
156<br />
Pipe plug<br />
Lock plate<br />
Proportional<br />
valve<br />
Hydraulic<br />
relief valve<br />
Figure 124. Install the remaining plugs. (Early design)<br />
<strong>Twin</strong> <strong>Disc</strong>, Incorporated<br />
Valve assembly 1021658 only:<br />
9. Install the filter (142) in the end of the body (115). See figure 125.<br />
155<br />
154<br />
153<br />
152 151<br />
150 149<br />
Figure 125. Assemble the regulator section. (Assembly 1021658)<br />
10. Install the valve (143) in the hole in the body.<br />
148<br />
147<br />
157 142<br />
Top section<br />
Center<br />
section (main<br />
regulator)<br />
Ditch plate<br />
11. While holding the filter and valve in the body install the cover (145) with<br />
gasket (144) and secure with four hex head capscrews (146). Torque<br />
the capscrews to the proper specifications given in Torque Values<br />
for Fasteners in Table 8 of the Installation section.<br />
12. Install the o-ring (151) on the piston and thread the piston into the cover<br />
(153). Place the inner spring (150), outer spring (149), washer (148) on<br />
the spool (147). See figure 126.<br />
115<br />
158<br />
144<br />
145<br />
146<br />
143<br />
Hydraulic Power Take-off Service Manual
<strong>Twin</strong> <strong>Disc</strong>, Incorporated Assembly<br />
Hydraulic Power Take-off Service Manual<br />
Cover Spool Springs Piston Jam Nut Cap<br />
Figure 126. Pressure regulator (Used with assembly 1021658)<br />
13. Lubricate the o-ring with oil or an assembly lubricant and install the piston<br />
unit into the body. Secure with four hex head capscrews (154). Torque<br />
the capscrews to the proper specifications given in Torque Values<br />
for Fasteners in Table 8 of the Installation section.<br />
Note: Be careful to prevent damage to the o-ring during<br />
assembly.<br />
14. Install the jam nut (155) and hand-tighten it against the cover. Install the<br />
cap (156) and hand-tighten.<br />
Note: The hydraulic pressure will be adjusted later as described<br />
in the Installation section of this <strong>manual</strong>.<br />
15. Lubricate the o-rings of the two 3-way proportional valves (125) with an<br />
assembly grease. See figure 126. Install the proportional valves in the<br />
top section of the control valve assembly. Use a twisting motion while<br />
pushing each valve into the bore. Position the connectors horizontally,<br />
pointing directly opposite each other. Secure with lock plate (122) and<br />
hex head capscrew (123). Torque the capscrews to the proper<br />
specifications given in Torque Values for U.S. Fasteners in the<br />
Description and Specifications section of this <strong>manual</strong>.<br />
Note: Be careful to prevent damage to the o-rings during<br />
assembly.<br />
149
Assembly<br />
150<br />
159<br />
113<br />
116<br />
134<br />
<strong>Twin</strong> <strong>Disc</strong>, Incorporated<br />
Figure 127. Assemble the top valve section. (Used with assembly<br />
1021658.)<br />
16. Install the (top section) valve body onto the center (main regulator) valve<br />
body section with gasket (114) between the sections. See figures 126<br />
& 127. Then, install both sections on the ditch plate with gasket (133)<br />
between the center section and the ditch plate.<br />
Note: Be sure both gaskets are properly aligned so no hole or<br />
port is restricted or covered.<br />
Assembly hint:<br />
Install the six socket head capscrews (113) through the top valve<br />
body and install the gasket (114) aligned on the capscrews to<br />
assist in being sure the gaskets are properly positioned and<br />
aligned. Then install the center section on the capscrews followed<br />
by the gasket (133). Finally, place the whole unit on the ditch<br />
plate.<br />
17. Lubricate the o-rings of the directional control valve (159) with an<br />
assembly grease. Install the valve in the top section of the control valve<br />
assembly. Torque the valve to 36 N-m (26.5 ft.-lbs.)<br />
Note: Be careful to prevent damage to the o-rings during<br />
assembly.<br />
18. Install the remaining pipe plugs, in the control valve assembly. See figure<br />
127.<br />
122<br />
123<br />
125<br />
118<br />
114<br />
125<br />
Hydraulic Power Take-off Service Manual
<strong>Twin</strong> <strong>Disc</strong>, Incorporated Assembly<br />
Install the Speed Sensor Pickups<br />
Refer to the parts list and exploded view illustrations.<br />
Output speed sensor<br />
1. View into the output speed sensor in the hole in the side of the clutch<br />
housing just below the control valve. See figure 128. Rotate the main<br />
output shaft so a tooth on the O.D. of the gear and ring assembly (9) is<br />
directly aligned with the center of the hole. Install the speed sensor until<br />
it just touches the tooth. Then back it out as specified in the Description<br />
and Specification section of this <strong>manual</strong>.<br />
Double<br />
lock nuts<br />
Figure 128. Install the output speed sensor.<br />
Hydraulic Power Take-off Service Manual<br />
Speed<br />
sensor<br />
2. Mark the exact location of the speed sensor. Then back it out an additional<br />
6 turns so thread sealant MA908 can be applied to the threads.<br />
3. Apply thread sealant MA908 to the threads. Thread the sensor back to<br />
the original position.<br />
4. Tighten the lock nut closest to the housing. Torque the nut to the<br />
specifications contained in the Description and Specification section<br />
of this <strong>manual</strong>. Then tighten the second lock nut against the first and<br />
torque it as specified in the Description and Specification section<br />
of this <strong>manual</strong>.<br />
151
Assembly<br />
152<br />
Input speed sensor<br />
<strong>Twin</strong> <strong>Disc</strong>, Incorporated<br />
5. View into the driven gear speed sensor in the hole in the side of tower<br />
#2. See figure 129. Rotate the driven gear so a tooth is directly aligned<br />
with the center of the hole. Install the speed sensor until it just touches<br />
the tooth. Then back it out as specified in the Description and<br />
Specification section of this <strong>manual</strong>.<br />
Tower<br />
#2<br />
Double<br />
lock nuts<br />
Figure 129. Install the input speed sensor.<br />
Speed<br />
sensor<br />
6. Mark the exact location of the speed sensor. Then back it out an additional<br />
6 turns so thread sealant MA908 can be applied to the threads.<br />
7. Apply thread sealant MA908 to the threads. Thread the sensor back to<br />
the original position.<br />
8. Tighten the lock nut closest to the housing. Torque the capscrews to the<br />
proper specifications given in the Description and Specifications section<br />
of this <strong>manual</strong>. Then tighten the second lock nut against the first and<br />
torque the capscrews to the proper specifications given in the<br />
Description and Specifications section of this <strong>manual</strong>.<br />
Hydraulic Power Take-off Service Manual
<strong>Twin</strong> <strong>Disc</strong>, Incorporated Assembly<br />
Install the Pump<br />
Refer to the parts list and exploded view illustrations.<br />
1. If used, install the pump (109), meshing the splines of the pump and<br />
driven gear (83). Position the pump with the long flange section at the<br />
bottom.<br />
2. Secure the pump to the front housing using 4 hex head capscrews (82).<br />
Torque the capscrews to the proper specifications given in Torque<br />
Values for U.S. Fasteners in the Description and Specifications<br />
section of this <strong>manual</strong>.<br />
Hydraulic Power Take-off Service Manual<br />
153
Assembly<br />
Plumbing<br />
154<br />
Refer to the parts list and exploded view illustrations.<br />
Double<br />
lock nuts<br />
<strong>Twin</strong> <strong>Disc</strong>, Incorporated<br />
1. The various applications may use slightly different pump and gear tower<br />
locations, which result in slightly different plumbing configurations. Refer<br />
to the engineering drawings at the back of this <strong>manual</strong> and the typical<br />
plumbing illustrations near the back of this section for exact plumbing<br />
components and configurations. See figures 130 through 134.<br />
Note: The illustrations below show various fittings, plumbing<br />
configurations, and components to complete the assembly<br />
of the <strong>HP</strong>TO. These illustrations are provided as a<br />
convenience to clarify questions not specifically covered<br />
in this <strong>manual</strong>.<br />
It is likely that the <strong>HP</strong>TO you are working on is not the<br />
same model or BOM illustrated. Refer to the engineering<br />
drawings for your specific unit.<br />
Figure 130. Typical installation of components.<br />
Figure 131. Typical installation of components.<br />
Ditch plate<br />
Hydraulic Power Take-off Service Manual
<strong>Twin</strong> <strong>Disc</strong>, Incorporated Assembly<br />
Figure 132. Typical installation of components.<br />
Figure 133. Typical installation of components.<br />
Figure 134. Typical installation of components.<br />
Hydraulic Power Take-off Service Manual<br />
Speed<br />
sensor<br />
Speed<br />
sensor<br />
Speed<br />
sensor<br />
155
Assembly<br />
<strong>HP</strong>TO Series Parts Identification List<br />
156<br />
<strong>Twin</strong> <strong>Disc</strong>, Incorporated<br />
Item Description Qty. Item Description Qty.<br />
1 Coupling, flexible 1<br />
2 Housing, coupling 1<br />
3 Plug, pipe 1-11 1/2 NPTF 1<br />
4 Capscrew, hex. hd. 7/16”-14 x 1.38” 12<br />
5 Capscrew, hex. hd. 1/2”-13 x 1.25” 13<br />
6 Housing, front 1<br />
7 Seal, radial 1<br />
8 Bearing, ball 1<br />
9 Gear & drive ring assy. 1<br />
10 Ring, snap, internal (<strong>service</strong>) 1<br />
11 Bearing, cylindrical 1<br />
12 Shaft 1<br />
13 Plug, pipe, shaft 1<br />
14 Plug, ball, shaft 2<br />
15 Ring, external snap, shaft 1<br />
16 Hub, clutch 1<br />
17 Plate, steel, clutch 8<br />
18 Plate, friction, clutch 8<br />
19 Ring, seal 2<br />
20 Carrier, piston 1<br />
21 Ring, seal 1<br />
22 Piston, clutch 1<br />
23 Spring 9<br />
24 O-ring, plate 1<br />
25 Ring, internal snap, piston 1<br />
26 Plate, back 1<br />
27 Pin, dowel, .157” x 1.0” 4<br />
28 Plate, friction, clutch 1<br />
29 Pin, anti-rotation, piston 4<br />
30 O-ring, shaft 1<br />
31 O-ring, shaft 1<br />
32 O-ring, shaft 1<br />
33 Pin, dowel, 1/4 x .38 1<br />
34 Ring, seal 1<br />
35 Ring, spacer 1<br />
36 Spacer, bearing 1<br />
37 Housing, clutch 1<br />
38 Bearing, double cup assy (Model I) 1<br />
38 Bearing, spherical (Model S) 1<br />
39 Plug, pipe, clutch housing 1<br />
40 Gasket, spacer 2<br />
41 Spacer 1<br />
42 Pin, dowel, 12mm. x 24mm. 2<br />
43 Capscrew, hex. hd. 1/2” - 13 x 1.75 6<br />
44 Retainer, bearing, front bearing 1<br />
45 Seal, radial 1<br />
46 Carrier, bearing (Model I) 1<br />
46 Housing, belt, sheave (Model S) 1<br />
47 Capscrew, hex. hd. 1/2” - 13 x 1.25 6<br />
48 Plug, pipe, clutch housing 1<br />
49 Fitting, grease 1<br />
50 Retainer, bearing, rear bearing 1<br />
51 Bearing, spherical 1<br />
52 Ring, bearing 1<br />
53 Screw, hex. hd. M12 x 1.75 6<br />
54 Plug, pipe, 1/8 1<br />
55 Key, output 1<br />
56 Gasket 1<br />
57 Shims A/R<br />
58 Gear, idler 1<br />
59 Washer, idler gear 1<br />
60 Capscrew, hex. hd. 3/8”-24 x 5/8” 4<br />
61 Washer, idler gear 1<br />
62 Capscrew, hex. hd. 3/8”-24 x 5/8” 4<br />
63 Bearing, Roller 1<br />
64 Ring, snap, bearing carrier 1<br />
65 Carrier, bearing 1<br />
66 Pin, dowel, 3/8” x .250” 1<br />
67 Plug, pipe, 1/4 1<br />
68 Capscrew, 12 pt. 3/8”-11 x 3.50” 3<br />
69 Gasket, plate 1<br />
70 Plate, SAE mounting 1<br />
71 Capscrew, hex. hd. 3/8” - 16 x 1.25 6<br />
72 Washer, copper 6<br />
73 Gasket, cover 1<br />
74 Cover 1<br />
75 Capscrew, hex. hd. 2” - 13 x 1.0 4<br />
76 Bearing, Ball 1<br />
77 Gasket, plate 1<br />
78 Plate, SAE mounting 1<br />
79 Capscrew, hex. hd. 3/8” - 16 x 1.75 6<br />
80 Washer, copper 6<br />
81 Gasket, cover 1<br />
82 Capscrew, hex. hd. 1/2” - 13 x 1.25 4<br />
Hydraulic Power Take-off Service Manual
<strong>Twin</strong> <strong>Disc</strong>, Incorporated Assembly<br />
<strong>HP</strong>TO Parts Identification List<br />
Item Description Qty. Item Description Qty.<br />
83 Gear, driven 1<br />
84 Bearing, Ball 1<br />
85 Plug, pipe 1<br />
86 Manifold 1<br />
87 Nipple, pipe 1<br />
88 Gasket, plate 1<br />
89 Plate, SAE mounting 1<br />
90 Capscrew, hex. hd. 3/8” - 16 x 1.25 6<br />
91 Washer, copper 6<br />
92 Gasket, cover 1<br />
93 Cover 1<br />
94 Cover 1<br />
95 Capscrew, hex. hd. 2” - 13 x 1.0 4<br />
96 Bearing, Ball 1<br />
97 Gasket, plate 1<br />
98 Plate, SAE mounting 1<br />
99 Capscrew, hex. hd. 3/8” - 16 x 1.75 6<br />
100 Washer, copper 6<br />
101 Gasket, cover 1<br />
102 Capscrew, hex. hd. 1/2” - 13 x 1.25 4<br />
103 Gear, driven 1<br />
104 Cover 1<br />
105 Bearing, Ball 1<br />
106 Fitting, elbow 1<br />
107 Fitting, elbow 1<br />
108 Breather 1<br />
109 Pump 1<br />
110 Washer, bearing lock 1<br />
111 Nut, bearing lock 1<br />
112 Fitting 1-1/16-20 to M27 X 2 elbow 1<br />
113 Capscrew, hex hd. M10 X 1.5 X 70.0 6<br />
114 Gasket, cartridge valve body 1<br />
115 Body, valve, main regulator 1<br />
116 Plug, o-ring M12 X 1.5 1<br />
117 Plug, o-ring M12 X 1.5 1<br />
118 Plug, o-ring M12 X 1.5 1<br />
119 O-ring 1<br />
120 O-ring 1<br />
Hydraulic Power Take-off Service Manual<br />
121 O-ring 1<br />
122 Plate, lock 1<br />
123 Capscrew, socket hd. M6 X 1.0 X 16.0 1<br />
124 Valve, cartridge, hydraulic relief 1<br />
125 Valve assy. 3-way proportional valve 2<br />
126 Plug 1<br />
127 Capscrew, socket hd. M10 X 1.5 X 50.0 4<br />
128 Valve, cartridge, plug 1<br />
129 Plug, pipe, valve body 1<br />
130 Capscrew, socket hd. 3/8”-16 6<br />
131 Plate, ditch 1<br />
132 O-ring, carrier 1<br />
133 Gasket, ditch plate 1<br />
134 Body, valve 1<br />
135 Cover, inspection 1<br />
136 Screw, cover, M6 hex. hd. 4<br />
137 Gasket, ditch plate-to Clutch Hsg. 1<br />
138 Plug, pipe, 1/4 1<br />
139 Reducer, pipe 1<br />
140 Housing Spacer 1<br />
141 Dowel Pin 2<br />
142 Filter 1<br />
143 Valve 1<br />
144 Gasket 1<br />
145 Cover 1<br />
146 Capscrew, hex hd. 4<br />
147 Spool 1<br />
148 Washer 1<br />
149 Spring, outer 1<br />
150 Spring, inner 1<br />
151 O-ring, piston 1<br />
152 Piston 1<br />
153 Cover 1<br />
154 Capscrew, hex hd. 4<br />
155 Nut, hex 1<br />
156 Cap 1<br />
157 Plug 1<br />
158 Plug 1<br />
157
Assembly<br />
158<br />
<strong>Twin</strong> <strong>Disc</strong>, Incorporated<br />
Models <strong>HP</strong><strong>300</strong>I & <strong>HP</strong><strong>600</strong>I Cross-Section View<br />
Gear Tower Area<br />
(see following pages)<br />
Front<br />
Bearing Area<br />
(see following pages)<br />
2<br />
1<br />
5<br />
10<br />
9<br />
135 136<br />
Clutch<br />
Area<br />
(see following<br />
pages)<br />
6 56 4<br />
GP Control<br />
Valve Area<br />
(see following<br />
pages)<br />
37<br />
Rear Bearing Area<br />
(see following pages)<br />
Note: Some parts not shown<br />
Hydraulic Power Take-off Service Manual<br />
55<br />
12
<strong>Twin</strong> <strong>Disc</strong>, Incorporated Assembly<br />
Models <strong>HP</strong><strong>300</strong>S & <strong>HP</strong><strong>600</strong>S Cross-Section View<br />
Gear Tower Area<br />
(see following pages)<br />
Front<br />
Bearing<br />
Area<br />
(see following<br />
pages)<br />
2<br />
1<br />
5<br />
10<br />
3<br />
9<br />
Hydraulic Power Take-off Service Manual<br />
Clutch<br />
Area<br />
(see following<br />
pages)<br />
GP Control<br />
Valve Area<br />
(see following<br />
pages)<br />
135 136 6 56 4 37 46 42<br />
Pin<br />
Sheave Housing<br />
Front Bearing Area<br />
(see following pages)<br />
47<br />
Sheave Housing<br />
Output Bearing Area<br />
(see following pages)<br />
Note: Some parts not shown<br />
12<br />
55<br />
159
Assembly<br />
160<br />
<strong>Twin</strong> <strong>Disc</strong>, Incorporated<br />
Models <strong>HP</strong><strong>300</strong>S & <strong>HP</strong><strong>600</strong>S Sheave Housing Front Bearing Area<br />
Exploded View<br />
39<br />
42<br />
37<br />
48<br />
141<br />
40<br />
34<br />
41<br />
40<br />
42<br />
12<br />
140<br />
141<br />
33<br />
38<br />
Note: Typical unit illustrated.<br />
Approximate area shown.<br />
44<br />
35<br />
Hydraulic Power Take-off Service Manual<br />
36<br />
46<br />
45<br />
43
<strong>Twin</strong> <strong>Disc</strong>, Incorporated Assembly<br />
Models <strong>HP</strong><strong>300</strong>S & <strong>HP</strong><strong>600</strong>S Sheave Housing Output Bearing Area<br />
Exloded View<br />
12<br />
Hydraulic Power Take-off Service Manual<br />
54<br />
46<br />
51<br />
Note: Typical unit illustrated.<br />
Approximate area shown.<br />
52<br />
49<br />
50<br />
53<br />
161
Assembly<br />
Models <strong>HP</strong><strong>300</strong>I, <strong>HP</strong><strong>600</strong>I, Rear Bearing Area Exploded View<br />
162<br />
34<br />
37<br />
39<br />
12<br />
55<br />
38<br />
110<br />
<strong>Twin</strong> <strong>Disc</strong>, Incorporated<br />
Note: Typical unit illustrated.<br />
Approximate area shown.<br />
111<br />
132<br />
Hydraulic Power Take-off Service Manual<br />
47<br />
46<br />
45
<strong>Twin</strong> <strong>Disc</strong>, Incorporated Assembly<br />
Models <strong>HP</strong><strong>300</strong>I, <strong>HP</strong><strong>600</strong>I, <strong>HP</strong><strong>300</strong>S & <strong>HP</strong><strong>600</strong>S Clutch Area Exploded<br />
View<br />
22<br />
29<br />
9<br />
19<br />
Hydraulic Power Take-off Service Manual<br />
11<br />
21<br />
15<br />
30<br />
31<br />
16<br />
32<br />
18<br />
20<br />
19<br />
26<br />
17<br />
24<br />
23<br />
25<br />
Note: Typical unit illustrated.<br />
Approximate area shown.<br />
28<br />
27<br />
163
Assembly<br />
164<br />
<strong>Twin</strong> <strong>Disc</strong>, Incorporated<br />
Models <strong>HP</strong><strong>300</strong>I, <strong>HP</strong><strong>600</strong>I, <strong>HP</strong><strong>300</strong>S & <strong>HP</strong><strong>600</strong>S Front Bearing Area<br />
Exploded View<br />
Not shown<br />
(In Tower)<br />
108 Breather<br />
138 Plug, pipe<br />
139 Reducer, pipe<br />
6<br />
3<br />
85<br />
7<br />
8<br />
9<br />
Note: Typical unit illustrated.<br />
Approximate area shown.<br />
Hydraulic Power Take-off Service Manual<br />
11<br />
12
<strong>Twin</strong> <strong>Disc</strong>, Incorporated Assembly<br />
Models <strong>HP</strong><strong>300</strong>I, <strong>HP</strong><strong>600</strong>I, <strong>HP</strong><strong>300</strong>S & <strong>HP</strong><strong>600</strong>S Idler Gear Area<br />
Exploded View<br />
67<br />
68<br />
Hydraulic Power Take-off Service Manual<br />
64<br />
66<br />
65<br />
57<br />
62<br />
61<br />
63<br />
58<br />
Note: Typical unit illustrated.<br />
Approximate area shown.<br />
60<br />
59<br />
165
Assembly<br />
166<br />
<strong>Twin</strong> <strong>Disc</strong>, Incorporated<br />
Models <strong>HP</strong><strong>300</strong>I, <strong>HP</strong><strong>600</strong>I, <strong>HP</strong><strong>300</strong>S & <strong>HP</strong><strong>600</strong>S Tower #1 Area Exploded<br />
View<br />
71<br />
72<br />
75<br />
106 Elbow fitting<br />
not shown<br />
74<br />
73<br />
70<br />
69<br />
6<br />
84<br />
83<br />
76<br />
87<br />
77<br />
86<br />
6<br />
78<br />
Note: Typical unit illustrated.<br />
81<br />
80<br />
Hydraulic Power Take-off Service Manual<br />
94<br />
79<br />
82
<strong>Twin</strong> <strong>Disc</strong>, Incorporated Assembly<br />
Models <strong>HP</strong><strong>300</strong>I, <strong>HP</strong><strong>600</strong>I, <strong>HP</strong><strong>300</strong>S & <strong>HP</strong><strong>600</strong>S Tower #2 Area Exploded<br />
View<br />
102<br />
103<br />
75<br />
Hydraulic Power Take-off Service Manual<br />
74<br />
104<br />
101<br />
100<br />
107 Elbow fitting<br />
not shown<br />
6<br />
87<br />
77<br />
86<br />
97<br />
98<br />
96<br />
78<br />
80<br />
79<br />
81<br />
Note: Typical unit illustrated.<br />
Approximate area shown.<br />
109<br />
6<br />
91 Cover not shown.<br />
(NOt used if a pump<br />
is used in this<br />
location<br />
82<br />
167
Assembly<br />
168<br />
<strong>Twin</strong> <strong>Disc</strong>, Incorporated<br />
Models <strong>HP</strong><strong>300</strong>I, <strong>HP</strong><strong>600</strong>I, <strong>HP</strong><strong>300</strong>S & <strong>HP</strong><strong>600</strong>S GP Control Valve Area<br />
Illustration<br />
Approximate area shown.<br />
51<br />
Lock Plate<br />
51<br />
113 122 123 113<br />
51<br />
51<br />
51<br />
124<br />
127<br />
125<br />
112<br />
124<br />
126<br />
112<br />
116<br />
133<br />
131<br />
124<br />
119<br />
120<br />
125<br />
113<br />
121<br />
113<br />
126<br />
116<br />
112<br />
112<br />
Note: Typical unit illustrated.<br />
113<br />
128<br />
130<br />
128<br />
130<br />
117<br />
129<br />
134 114<br />
115<br />
134<br />
114<br />
115<br />
143<br />
129<br />
Hydraulic Power Take-off Service Manual
<strong>Twin</strong> <strong>Disc</strong>, Incorporated Assembly<br />
Models <strong>HP</strong><strong>300</strong>I, <strong>HP</strong><strong>600</strong>I, <strong>HP</strong><strong>300</strong>S & <strong>HP</strong><strong>600</strong>S GP Control Valve Area<br />
Exploded View - (Valve assembly 1020729 is illustrated)<br />
116<br />
128<br />
134<br />
118<br />
114<br />
127<br />
129<br />
115<br />
126<br />
133<br />
137<br />
Hydraulic Power Take-off Service Manual<br />
125<br />
113<br />
117<br />
122<br />
123<br />
112<br />
124<br />
130<br />
131<br />
Note: Typical unit illustrated.<br />
125<br />
169
Assembly<br />
170<br />
<strong>Twin</strong> <strong>Disc</strong>, Incorporated<br />
Models <strong>HP</strong><strong>300</strong>I, <strong>HP</strong><strong>600</strong>I, <strong>HP</strong><strong>300</strong>S & <strong>HP</strong><strong>600</strong>S GP Control Valve Area<br />
Exploded View - (Valve assembly 1021658 is illustrated)<br />
156<br />
154<br />
126<br />
155<br />
153<br />
152<br />
151<br />
113<br />
150<br />
116<br />
149<br />
148<br />
147<br />
134<br />
115<br />
122<br />
123<br />
Note: Typical unit illustrated.<br />
125<br />
118<br />
114<br />
125<br />
157 142<br />
158<br />
144<br />
145<br />
146<br />
143<br />
Hydraulic Power Take-off Service Manual
<strong>Twin</strong> <strong>Disc</strong>, Incorporated Assembly<br />
Models <strong>HP</strong><strong>300</strong>I, <strong>HP</strong><strong>600</strong>I, <strong>HP</strong><strong>300</strong>S & <strong>HP</strong><strong>600</strong>S Pipes and Fittings<br />
Illustrations<br />
Hydraulic Power Take-off Service Manual<br />
Note: Typical unit illustrated.<br />
171
Assembly<br />
172<br />
<strong>Twin</strong> <strong>Disc</strong>, Incorporated<br />
Models <strong>HP</strong><strong>300</strong>I, <strong>HP</strong><strong>600</strong>I, <strong>HP</strong><strong>300</strong>S & <strong>HP</strong><strong>600</strong>S Pipes and Fittings<br />
Illustrations<br />
Note: Typical units illustrated.<br />
Hydraulic Power Take-off Service Manual
<strong>Twin</strong> <strong>Disc</strong>, Incorporated<br />
Hydraulic Power Take-off Service Manual<br />
Troubleshooting<br />
Troubleshooting<br />
Troubleshooting of GP Control Valve with Electronic Interface<br />
The <strong>HP</strong>TO is one part of a complete power package. Problems in the input<br />
power system or the output power delivery components can cause problems to<br />
develop in the <strong>HP</strong>TO. It is therefore important that the entire power package<br />
be considered when problems are encountered.<br />
Electronic Interface LED Indicators<br />
The electronic interface control modules have one green and two red LED<br />
indicator lights. The green power light is illuminated whenever the input power<br />
is more than 9.0 volts.<br />
The following table lists the reasons for the various conditions where lights are<br />
illuminated. This should guide in troubleshooting problems. See the wiring<br />
schematics in the Installation Section.<br />
Troubleshooting Tables begin on the next page.<br />
Table 14. LED Light Status<br />
Light Status Profile Generator<br />
(Non trolling)<br />
Green light on Supply Voltage > 9.0 Volts<br />
Red light on Valve coil commanded on<br />
One red light flashing Open circuit in an energized<br />
valve coil circuit, or Valve coil<br />
leads shorted together, or Low<br />
coil current<br />
Both red lights flashing<br />
simultaneously<br />
Both red lights flashing<br />
alternately<br />
Not applicable<br />
Either or both speed signals<br />
missing<br />
173
Troubleshooting<br />
174<br />
Table 15. Troubleshooting Chart --- GP Valve Equipped <strong>HP</strong>TO<br />
Symptom Cause Remedy<br />
1. Low main oil pressure 1-1 Partially clogged oil<br />
strainer<br />
2. No oil pressure, or erratic<br />
low pressure at control<br />
valve.<br />
1-2 Contamination on Pilot<br />
Relief Val ve seat.<br />
1-3 Contamination in Main<br />
Valve Cartridge<br />
1-4 Broken piston rings on<br />
clutch shaft(s).<br />
1-5 Damaged or worn oil pump<br />
assembly.<br />
<strong>Twin</strong> <strong>Disc</strong>, Incorporated<br />
1-1 Remove and clean oil<br />
strainer.<br />
1-2 Disassemble the Pilot<br />
Relief Valve and clean.<br />
Service the transmission<br />
oil filter.<br />
1-3 Clean or replace the Main<br />
Val ve Cartridge, and<br />
<strong>service</strong> the transmission<br />
oil filter.<br />
1-4 Remove the collector and<br />
inspect piston rings.<br />
1-5 Replace damaged or worn<br />
oil pump assembly (pump<br />
is not <strong>service</strong>able).<br />
1-6 Engine idle speed too low. 1-6 Raise engine speed.<br />
2-1 Oil pump suction strainer<br />
plugged.<br />
2-1 Remove and clean<br />
strainer.<br />
2-2 Oil level low. 2-2 Check oil level and<br />
correct.<br />
2-3 Air leak on suction side of<br />
pump.<br />
2-3 Correct cause of air leak.<br />
2-4 Pump dri ve broken. 2-4 Disassemble and repair as<br />
required.<br />
2-5 Pilot Relief Valve or Main<br />
Regulating Val ve stuck in<br />
open position<br />
2-6 Remove, disassemble,<br />
clean and repair the Pilot<br />
Relief Valve. Remove,<br />
clean, or replace the Main<br />
Regulating val ve. This<br />
valve cannot be<br />
disassembled.<br />
2-6 Oil pump defective 2-7 Replace oil pump.<br />
2-7 Leaking heat exchanger<br />
has caused oil to be lost<br />
externally.<br />
2-7 Replace heat exchanger<br />
Hydraulic Power Take-off Service Manual
<strong>Twin</strong> <strong>Disc</strong>, Incorporated<br />
Hydraulic Power Take-off Service Manual<br />
Troubleshooting<br />
Table 15. Troubleshooting Chart (continued)--- GP Valve Equipped <strong>HP</strong>TO<br />
Symptom Cause Remedy<br />
1. Low main oil pressure 1-1<br />
2.<br />
No oil pressure, or<br />
erratic low pressure at<br />
control valve.<br />
1-2<br />
1-3<br />
1-4<br />
1-5<br />
1-6<br />
2-1<br />
Partially clogged oil<br />
strainer<br />
Contamination on Pilot<br />
Relief Val ve seat.<br />
Contamination in Main<br />
Valve Cartridge<br />
Broken piston rings on<br />
clutch shaft(s).<br />
Damaged or worn oil<br />
pump assembly.<br />
Engine idle speed too<br />
low.<br />
Oil pump suction strainer<br />
plugged.<br />
1-1<br />
1-2<br />
1-3<br />
1-4<br />
1-5<br />
Remove and clean oil<br />
strainer.<br />
Disassemble the Pilot<br />
Relief Valve and clean.<br />
Service the transmission<br />
oil filter.<br />
Clean or replace the<br />
Main Valve Cartridge,<br />
and <strong>service</strong> the<br />
transmission oil filter.<br />
Remove the collector<br />
and inspect piston rings.<br />
Replace damaged or<br />
worn oil pump assembly<br />
(pump is not<br />
<strong>service</strong>able).<br />
1-6 Raise engine speed.<br />
2-1<br />
2-2 Oil level low. 2-2<br />
2-3<br />
Air leak on suction side of<br />
pump.<br />
2-4 Pump dri ve broken. 2-4<br />
2-5<br />
Pilot Relief Valve or Main<br />
Regulating Val ve stuck in<br />
open position<br />
Remove and clean<br />
strainer.<br />
Check oil le vel and<br />
correct.<br />
2-3 Correct cause of air leak.<br />
2-6<br />
Disassemble and repair<br />
as required.<br />
Remove, disassemble,<br />
clean and repair the Pilot<br />
Relief Valve. Remove,<br />
clean, or replace the<br />
Main Regulating valve.<br />
This valve cannot be<br />
disassembled.<br />
2-6 Oil pump defective 2-7 Replace oil pump.<br />
2-7<br />
Leaking heat exchanger<br />
has caused oil to be lost<br />
over board.<br />
2-7 Replace heat exchanger<br />
175
Troubleshooting<br />
176<br />
Symptom Cause Remedy<br />
6. No neutral. 6-1 Clutch plates warped. 6-1<br />
7. Harsh engagement. 7-1<br />
7-2<br />
8. Low lube oil pressure. 8-1<br />
9.<br />
10.<br />
Faulty Proportional<br />
Valve.<br />
Profile Generator<br />
defective or out of<br />
adjustment.<br />
7-1<br />
7-2<br />
<strong>Twin</strong> <strong>Disc</strong>, Incorporated<br />
Table 15. Troubleshooting Chart (continued)--- GP Valve Equipped <strong>HP</strong>TO<br />
Oil spilling out of<br />
breather.<br />
Low Clutch Apply<br />
Pressure<br />
8-1<br />
8-3<br />
8-4<br />
Pump flow output too<br />
low.<br />
Pump suction strainer<br />
plugged.<br />
Air leak on suction side<br />
of pump.<br />
Lube relief valve<br />
malfunction.<br />
Remove clutch plates.<br />
Overhaul unit.<br />
Replace Proportional<br />
Valve.<br />
Replace Profile<br />
Generator. Adjust if<br />
proper equipment is<br />
available.<br />
8-1 Replace pump.<br />
8-2<br />
8-3<br />
8-4<br />
8-5 Broken piston rings. 8-5<br />
Remove, clean, inspect,<br />
and install the suction<br />
screen.<br />
Inspect and correct<br />
cause of suction leaks.<br />
Remove and clean or<br />
replace parts as<br />
necessary.<br />
Replace damaged<br />
piston rings.<br />
9-1 Oil level too high. 9-1 Adjust oil level.<br />
9-2 Wrong type of oil. 9-2 Draw and refill with<br />
recommended oil.<br />
10-1 Low Main Pressure<br />
10-2<br />
Defective Proportional<br />
Valve.<br />
10-1 See Paragraph 1.<br />
10-2<br />
Replace Proportional<br />
Valve<br />
Hydraulic Power Take-off Service Manual
<strong>Twin</strong> <strong>Disc</strong>, Incorporated Engineering Drawings<br />
The engineering drawings included are listed below.<br />
Hydraulic Power Take-off Service Manual<br />
Engineering Drawings<br />
Note: All part numbers listed in the following engineering<br />
drawings are for reference only. Please refer to your bill<br />
of material for part numbers specific to your model.<br />
� <strong>Twin</strong> <strong>Disc</strong> Hydraulic Power Take-off Cutaway<br />
� 1020668G <strong>HP</strong><strong>300</strong>I: Sheet 2 of 3<br />
� 1020668G <strong>HP</strong><strong>300</strong>I: Sheet 3 of 3<br />
� 1020668B <strong>HP</strong><strong>300</strong>S: Sheet 2 of 3<br />
� 1020668B <strong>HP</strong><strong>300</strong>S: Sheet 3 of 3<br />
� 1020668F <strong>HP</strong><strong>600</strong>I: Sheet 2 of 3<br />
� 1020668F <strong>HP</strong><strong>600</strong>I: Sheet 3 of 3<br />
� 1020668C <strong>HP</strong><strong>600</strong>S: Sheet 2 of 3<br />
� 1020668C <strong>HP</strong><strong>600</strong>S: Sheet 3 of 3<br />
� 1020696 Control Valve Assembly<br />
� 1021658 Control Valve Assembly<br />
� 1020686 <strong>HP</strong>TO Control Module<br />
� 1021292 Sheet 1 of 3 <strong>HP</strong>TO Plumbing<br />
� 1021292 Sheet 2 of 3 <strong>HP</strong>TO Plumbing<br />
� 1021292 Sheet 3 of 3 <strong>HP</strong>TO Plumbing<br />
� 1021295 Piping Diagram<br />
� X216923BU Gear Group (Sae C)<br />
� X216923BV Gear Group (Sae B)<br />
� X216923BX Gear Group (Sae B & C)<br />
Contact your<br />
Authorized <strong>Twin</strong> <strong>Disc</strong> Dealer<br />
for the latest BOM and<br />
engineering drawings.<br />
177
Engineering Drawings<br />
<strong>Twin</strong> <strong>Disc</strong> Hydraulic Power Take-Off Cut-away Illustration<br />
178<br />
<strong>Twin</strong> <strong>Disc</strong>, Incorporated<br />
Hydraulic Power Take-off Service Manual
SEE NOTE "B"<br />
SEE NOTE "C"<br />
PLUG, MA1038B<br />
MAIN PRESSURE CHECK<br />
M12x1.5 THD. CONFORMS<br />
TO ISO 6149<br />
VALVE, SEE CHART (TORQUE TO 36 N-m)<br />
(1021000A SHOWN)<br />
SCREW, MA960A (4)<br />
CAP, 1002144<br />
SEE NOTE "D"<br />
COVER, 1021661<br />
NUT, 1002145<br />
PORT "A"<br />
F<br />
CL<br />
LUBE (IP)<br />
SUMP<br />
SUMP<br />
BODY, 1020519<br />
PLUG, SEE CHART<br />
OPTIONAL INLET PORT<br />
M27x2.0 THD. CONFORMS<br />
TO ISO 6149<br />
SPOOL, 1021660<br />
CL<br />
BOTTOM VIEW<br />
SCALE = HALF<br />
SPRING(S)<br />
SEE CHART<br />
RING, A2916LV<br />
PISTON, 1020939A<br />
MAIN (CP)<br />
PORT "B"<br />
E<br />
SCREW, MA961X (6)<br />
PORT "B"<br />
WASHER, A2782AV<br />
B<br />
A2 ECN12561 7-28-04<br />
A B3 ECN12537 6-28-04<br />
REV SHEET ZONE CH. NO.<br />
DATE<br />
"O"RING, A2916JT (2)<br />
REV<br />
PORT "A"<br />
VALVE, 1020942<br />
BODY, 1021659<br />
SEE CHART<br />
STAMP VALVE ASSEMBLY<br />
IDENTIFIER HERE<br />
SHEET<br />
PLATE, 1018175<br />
UNLESS OTHERWISE SPECIFIED<br />
MACHINED DIMENSIONS<br />
X.<br />
±0.75<br />
X.X<br />
±0.25<br />
X.XX ±0.13<br />
ALL ANGULAR TOLERANCES ±1°<br />
GEOMETRIC TOLERANCING<br />
PER ASME Y14.5M 1994<br />
SCREW, MA1100B<br />
PROPORTIONAL VALVE,<br />
SEE CHART (2)<br />
SEE NOTE "A"<br />
PLUG, MA1038B (2)<br />
CLUTCH PRESSURE PORT<br />
M12x1.5 THD. CONFORMS<br />
TO ISO 6149<br />
GASKET, 1020531<br />
VALVE VALVE<br />
ASSEMBLY ASSEMBLY<br />
PART NO. IDENTIFIER<br />
1021658A<br />
1021658B<br />
1021658C<br />
1021658D<br />
1021658E<br />
1021658F<br />
1021658G<br />
1021658H<br />
1021658J<br />
FILTER, P10786<br />
GASKET, 1021663<br />
COVER, 1021662<br />
kg<br />
SCREW, MA960M (4)<br />
A<br />
BOM PRESSURE<br />
kPa<br />
(psi)<br />
(230-260)<br />
2205-2760<br />
(320-400)<br />
1795-2205<br />
(260-320)<br />
1585-1795<br />
(230-260)<br />
2205-2760<br />
(320-400)<br />
1585-1795<br />
(230-260)<br />
1585-1795<br />
(230-260)<br />
1585-1795<br />
(230-260)<br />
WEIGHT WR FIRST USE<br />
2<br />
ASSY.<br />
N m<br />
MODEL<br />
2<br />
1020391<br />
MG-5222DC<br />
NOTICE! THIS PRINT CONTAINS PROPIETARY INFORMATION AND IS NOT TO BE USED IN ANY<br />
MANNER DETRIMENTAL TO THE INTEREST OF<br />
TWIN DISC, INCORPORATE<br />
METRIC<br />
NOTES:<br />
A. PROPORTIONAL CONTROL VALVE OPERATION.<br />
1. WARNING DO NOT CONNECT VALVE COIL DIRECTLY<br />
TO BATTERY/POWER SUPPLY VOLTAGE.<br />
2. OPERATION TO BE PERFORMED WITH ONLY TWIN DISC<br />
CONTROL SYSTEMS OR MODULES.<br />
B. MANUAL DIRECTIONAL CONTROL VALVE OPERATION.<br />
1. WITH MANUAL DIRECTIONAL CONTROL VALVE IN<br />
CENTERED POSITION, PUSH TO ENGAGE PORT "A".<br />
2. WITH MANUAL DIRECTIONAL CONTROL VALVE IN<br />
CENTERED POSITION, PULL TO ENGAGE PORT "B".<br />
C. MANUAL DIRECTIONAL CONTROL VALVE MODE SWITCH.<br />
1. SWITCH IS NORMALLY CLOSED WHEN MANUAL DIRECTIONAL<br />
CONTROL VALVE IS IN THE CENTERED POSITION AND<br />
OPEN WHEN LEVER IS ACTUATED FROM CENTERED POSITION.<br />
2. CURRENT = 20 AMPS MAX.<br />
3. FOR WIRING SCHEMATIC, REFER TO CONTROL MODULE<br />
DRAWING.<br />
D. PRESSURE REGULATOR ADJUSTMENT.<br />
1. REMOVE 1002144 CAP AND LOOSEN 1002145 NUT.<br />
2. CLOCKWISE ROTATION OF 1020939A PISTON INCREASES<br />
PRESSURE. COUNTER CLOCKWISE DECREASES PRESSURE.<br />
3. LOCK PISTON IN PLACE USING JAM NUT AND REPLACE CAP.<br />
E. REFER TO MARINE TRANSMISSION ASSEMBLY DRAWING OR<br />
BILL OF MATERIAL FOR VALVE MOUNTING AND SCREWS.<br />
F. APPLY ANAEROBIC SEALANT MEETING M2828 REQUIREMENTS<br />
AROUND CORE PLUG, JUST BEFORE FINAL ASSEMBLY. REFER TO<br />
S774 FOR FURTHER INFORMATION.<br />
G. MODIFICATION KIT TO UPGRADE EXISTING 1020729/1020696<br />
SERIES VALVE ASSEMBLIES TO 1021658 SERIES VALVE ASSEMBLY.<br />
SPRING(S) VALVE SENSOR PLUG PLUG<br />
B 43111 1021000A<br />
C 43112<br />
201341ZC<br />
201341ZE 1021000A NONE M2051S MA1038E NONE 1020520<br />
D 43195<br />
201341ZC<br />
201341ZD<br />
1021000A 1016122A NONE MA1038E NONE 1020520<br />
E 43196<br />
201341ZC 1021000A1016122A<br />
NONE MA1038E NONE 1018528<br />
F 43197<br />
201341ZC<br />
201341ZE 1021000A1016122A<br />
NONE MA1038E NONE 1020520<br />
G 43198<br />
201341ZC 1020542 NONE M2051S MA1038E M1945E<br />
PORT "A"<br />
1018528<br />
H 43199<br />
201341ZC 1021000A NONE M2051S MA1185A NONE 1018528<br />
J 43200<br />
201341ZC 1020542 NONE M2051S MA1053Q NONE 1018528<br />
1585-1795<br />
A 43110 1795-2205<br />
(260-320)<br />
201341ZC<br />
201341ZD 1021000A NONE M2051S MA1038E NONE 1020520<br />
201341ZC NONE M2051S MA1038E NONE 1018528<br />
THIRD ANGLE<br />
PROJECTION<br />
MATERIAL HEAT TREAT<br />
ZONE CH. NO.<br />
DATE<br />
THIS NOTICE IS NOT INTENDED TO NULLIFY OR LIMIT RIGHTS GRANTED TO THE U.S.<br />
GOVERNMENT OR OTHERS BY CONTRACT.<br />
DWG SHT.<br />
WTW SIZE A1 1 of 1<br />
REV<br />
B<br />
D C B A<br />
SIMILAR TO<br />
NAME<br />
CORE<br />
PLUG PROPORTIONAL<br />
SEE NOTE VALVE<br />
"F"<br />
VALVE ASS'Y.<br />
DATE<br />
SCALE<br />
DRN.<br />
CHK.<br />
APPD.<br />
5-04-04<br />
FULL<br />
D. MEYERS<br />
ALC<br />
B<br />
B<br />
MODIFICATION<br />
KIT<br />
SEE NOTE "G"<br />
K1417<br />
K1418<br />
K1420<br />
K1417<br />
K1418<br />
K1420<br />
K1419<br />
K1418<br />
K1418<br />
TWIN DISC<br />
I N C O R P O R A T E D<br />
RACINE, WI 53403 - USA<br />
1021658<br />
5<br />
4<br />
3<br />
2<br />
1
OIL SPECIFICATIONS: Use only SAE-API <strong>service</strong> class CD or CC engine oil certified<br />
to meet Caterpillar TO-2 transmission oil specification and/or Allison type C-4<br />
transmission fluid. Oil viscosity is dependent on ambient temperature and resulting<br />
operating temperatures. See <strong>manual</strong> for recommendations. Multi-viscosity oils can be<br />
used, but require <strong>Twin</strong> <strong>Disc</strong> approval.<br />
SUMP: Customer supplied. Minimum size, 8 gallons. Use baffles to allow return oil to<br />
settle away from suction port. Recommended to be mounted below <strong>HP</strong>TO and allow for<br />
gravity drain from 1-1/2" drain ports. If the sump cannot be mounted below the <strong>HP</strong>TO, a<br />
scavenge pump that is 1.5 – 2 times the size of the charge pump must be used. Three<br />
drain ports are provided under the <strong>HP</strong>TO. Connecting all 3 ports may be required if<br />
drainage hoses are to long and tightly bent.<br />
Warning: Insufficient drainage will cause unit to overheat and oil will flow out from<br />
breather.<br />
FILTRATION: Customer supplied. The <strong>HP</strong>TO contains electronically controlled<br />
proportional pressure valves, thus filtration must meet the following criteria: Beta<br />
removal efficiency rating 2/20/75 for particle sizes 5micro/13micro/16micro. A typical<br />
filter element should say "5 micro nominal" or "16 micro absolute".<br />
COOLING REQUIREMENTS: Customer supplied, air to oil cooling is typical.<br />
-Minimum oil temperature at start-up: -40F.<br />
-Oil temperature at steady operating conditions: 100F-185F.<br />
- Recommended inlet temperature of H.E. to be 170F.<br />
- Recommended outlet temperature of H.E. to be 150F.<br />
-Oil flow to H.E. from <strong>HP</strong>TO: Pump specific (0.0085 GAL/REV theoretical for the<br />
standard <strong>Twin</strong> <strong>Disc</strong> pump)<br />
- The equivalent heat generation of the <strong>HP</strong>TO is 28000 BTU/hr continuous. Due to<br />
deterioration in cooling capacity in a dust-heavy environment; <strong>Twin</strong> <strong>Disc</strong> recommends<br />
that a larger heat exchanger be considered when feasible.<br />
-Peak oil pressure at H.E.: 265PSI.<br />
CHARGE PUMP SPECIFICATIONS: <strong>Twin</strong> <strong>Disc</strong> or customer supplied. 15 GPM<br />
maximum flow required. Oil flow of 8.5 GPM is required at 1000 rpm. Pump rotation is<br />
CW on output side, or CCW when mounted on engine side.<br />
MAINTENANCE REQUIREMENTS: All bearings within the main unit are oil<br />
lubricated. The output bearing of the straddle bearing housing unit is grease lubricated.<br />
Grease is to have operating temperature suitable up to 275F continuous use. NLGI grades<br />
0,1, or 2 are acceptable. Recommended greases would be Mobilgrease X<strong>HP</strong> 222,<br />
Mobilgrease CM-S, Mobilux EP-2 or equivalent. Add 1cc Every 10 hours.<br />
HOSE TYPE: Hoses must meet SAE517 specification for 100R17 or similar type for<br />
hydraulic applications.<br />
FITTINGS: Fittings selected must meet SAE J514, SAE J476, J518 standards.
#1021542 0804<br />
TWIN DISC, INCORPORATED RACINE, WISCONSIN 53403, U.S.A. 262-638-4000/262-638-4482 (FAX) WWW.TWINDISC.COM