DUO2 User Manual - Hyperion
DUO2 User Manual - Hyperion
DUO2 User Manual - Hyperion

Create successful ePaper yourself
Turn your PDF publications into a flip-book with our unique Google optimized e-Paper software.
Warnings:<br />
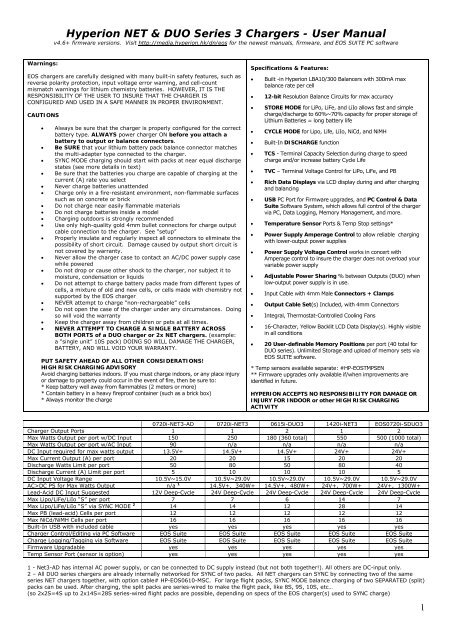
<strong>Hyperion</strong> NET & DUO Series 3 Chargers - <strong>User</strong> <strong>Manual</strong><br />
v4.6+ firmware versions. Visit http://media.hyperion.hk/dn/eos for the newest manuals, firmware, and EOS SUITE PC software<br />
EOS chargers are carefully designed with many built-in safety features, such as<br />
reverse polarity protection, input voltage error warning, and cell-count<br />
mismatch warnings for lithium chemistry batteries. HOWEVER, IT IS THE<br />
RESPONSIBILITY OF THE USER TO INSURE THAT THE CHARGER IS<br />
CONFIGURED AND USED IN A SAFE MANNER IN PROPER ENVIRONMENT.<br />
CAUTIONS<br />
� Always be sure that the charger is properly configured for the correct<br />
battery type. ALWAYS power charger ON before you attach a<br />
battery to output or balance connectors.<br />
� Be SURE that your lithium battery pack balance connector matches<br />
the multi-adapter type connected to the charger.<br />
� SYNC MODE charging should start with packs at near equal discharge<br />
states (see more details in text)<br />
� Be sure that the batteries you charge are capable of charging at the<br />
current (A) rate you select<br />
� Never charge batteries unattended<br />
� Charge only in a fire-resistant environment, non-flammable surfaces<br />
such as on concrete or brick<br />
� Do not charge near easily flammable materials<br />
� Do not charge batteries inside a model<br />
� Charging outdoors is strongly recommended<br />
� Use only high-quality gold 4mm bullet connectors for charge output<br />
cable connection to the charger. See “setup”<br />
� Properly insulate and regularly inspect all connectors to eliminate the<br />
possibility of short circuit. Damage caused by output short circuit is<br />
not covered by warranty.<br />
� Never allow the charger case to contact an AC/DC power supply case<br />
while powered<br />
� Do not drop or cause other shock to the charger, nor subject it to<br />
moisture, condensation or liquids<br />
� Do not attempt to charge battery packs made from different types of<br />
cells, a mixture of old and new cells, or cells made with chemistry not<br />
supported by the EOS charger<br />
� NEVER attempt to charge “non-rechargeable” cells<br />
� Do not open the case of the charger under any circumstances. Doing<br />
so will void the warranty<br />
� Keep the charger away from children or pets at all times.<br />
� NEVER ATTEMPT TO CHARGE A SINGLE BATTERY ACROSS<br />
BOTH PORTS of a DUO charger or 2x NET chargers. (example:<br />
a “single unit” 10S pack) DOING SO WILL DAMAGE THE CHARGER,<br />
BATTERY, AND WILL VOID YOUR WARRANTY.<br />
PUT SAFETY AHEAD OF ALL OTHER CONSIDERATIONS!<br />
HIGH RISK CHARGING ADVISORY<br />
Avoid charging batteries indoors. If you must charge indoors, or any place injury<br />
or damage to property could occur in the event of fire, then be sure to:<br />
* Keep battery well away from flammables (2 meters or more)<br />
* Contain battery in a heavy fireproof container (such as a brick box)<br />
* Always monitor the charge<br />
Specifications & Features:<br />
� Built -in <strong>Hyperion</strong> LBA10/300 Balancers with 300mA max<br />
balance rate per cell<br />
� 12-bit Resolution Balance Circuits for max accuracy<br />
� STORE MODE for LiPo, LiFe, and LiIo allows fast and simple<br />
charge/discharge to 60%~70% capacity for proper storage of<br />
Lithium Batteries = long battery life<br />
� CYCLE MODE for Lipo, Life, LiIo, NiCd, and NiMH<br />
� Built-In DISCHARGE function<br />
� TCS - Terminal Capacity Selection during charge to speed<br />
charge and/or increase battery Cycle Life<br />
� TVC – Terminal Voltage Control for LiPo, LiFe, and PB<br />
� Rich Data Displays via LCD display during and after charging<br />
and balancing<br />
� USB PC Port for Firmware upgrades, and PC Control & Data<br />
Suite Software System, which allows full control of the charger<br />
via PC, Data Logging, Memory Management, and more.<br />
� Temperature Sensor Ports & Temp Stop settings*<br />
� Power Supply Amperage Control to allow reliable charging<br />
with lower-output power supplies<br />
� Power Supply Voltage Control works in concert with<br />
Amperage control to insure the charger does not overload your<br />
variable power supply<br />
� Adjustable Power Sharing % between Outputs (DUO) when<br />
low-output power supply is in use.<br />
� Input Cable with 4mm Male Connectors + Clamps<br />
� Output Cable Set(s) Included, with 4mm Connectors<br />
� Integral, Thermostat-Controlled Cooling Fans<br />
� 16-Character, Yellow Backlit LCD Data Display(s). Highly visible<br />
in all conditions<br />
� 20 <strong>User</strong>-definable Memory Positions per port (40 total for<br />
DUO series). Unlimited Storage and upload of memory sets via<br />
EOS SUITE software.<br />
* Temp sensors available separate: #HP-EOSTMPSEN<br />
** Firmware upgrades only available if/when improvements are<br />
identified in future.<br />
HYPERION ACCEPTS NO RESPONSIBILITY FOR DAMAGE OR<br />
INJURY FOR INDOOR or other HIGH RISK CHARGING<br />
ACTIVITY<br />
0720i-NET3-AD 0720i-NET3 0615i-DUO3 1420i-NET3 EOS0720i-SDUO3<br />
Charger Output Ports 1 1 2 1 2<br />
Max Watts Output per port w/DC Input 150 250 180 (360 total) 550 500 (1000 total)<br />
Max Watts Output per port w/AC Input 90 n/a n/a n/a n/a<br />
DC Input required for max watts output 13.5V+ 14.5V+ 14.5V+ 24V+ 24V+<br />
Max Current Output (A) per port 20 20 15 20 20<br />
Discharge Watts Limit per port 50 80 50 80 40<br />
Discharge Current (A) Limit per port 5 10 10 10 5<br />
DC Input Voltage Range 10.5V~15.0V 10.5V~29.0V 10.5V~29.0V 10.5V~29.0V 10.5V~29.0V<br />
AC>DC PS for Max Watts Output n/a 1 14.5V+, 340W+ 14.5V+, 480W+ 24V+, 700W+ 24V+, 1300W+<br />
Lead-Acid DC Input Suggested 12V Deep-Cycle 24V Deep-Cycle 24V Deep-Cycle 24V Deep-Cycle 24V Deep-Cycle<br />
Max Lipo/LiFe/LiIo “S” per port 7 7 6 14 7<br />
Max Lipo/LiFe/LiIo “S” via SYNC MODE 2 14 14 12 28 14<br />
Max PB (lead-acid) Cells per port 12 12 12 12 12<br />
Max NiCd/NiMH Cells per port 16 16 16 16 16<br />
Built-In USB with included cable yes yes yes yes yes<br />
Charger Control/Editing via PC Software EOS Suite EOS Suite EOS Suite EOS Suite EOS Suite<br />
Charge Logging/Tagging via Software EOS Suite EOS Suite EOS Suite EOS Suite EOS Suite<br />
Firmware Upgradable yes yes yes yes yes<br />
Temp Sensor Port (sensor is option) yes yes yes yes yes<br />
1 - Net3-AD has internal AC power supply, or can be connected to DC supply instead (but not both together!). All others are DC-input only.<br />
2 – All DUO series chargers are already internally networked for SYNC of two packs. All NET chargers can SYNC by connecting two of the same<br />
series NET chargers together, with option cable# HP-EOS0610-MSC. For large flight packs, SYNC MODE balance charging of two SEPARATED (split)<br />
packs can be used. After charging, the split packs are series-wired to make the flight pack, like 8S, 9S, 10S, etc…<br />
(so 2x2S=4S up to 2x14S=28S series-wired flight packs are possible, depending on specs of the EOS charger(s) used to SYNC charge)<br />
1
GENERAL SETUP and NOTES<br />
The EOS NET/DUO come with male 4mm Bullet connectors (aka ‘banana plugs’) attached to the power INPUT cables.<br />
These cables are appropriate for attaching directly to most high-quality AC-DC power supply units, such as the BK Precision<br />
(USA) model 1692(15V, 40A, 600W). Also included are large Terminal Clips with matching 4mm female bullet connectors, for<br />
attaching directly to 12V~24V lead-acid batteries.<br />
Output side 4mm Male Connector + Cable assemblies (#HP-EOSOUTCORD) are also supplied. Carefully solder your<br />
preferred battery connector to the free ends, with correct Red (+) / Black (-) Polarity. If you make additional output cables,<br />
note that MINIMUM inner cable diameter should be 2.5mm (14ga) and MAXIMUM cable length is 30cm (12”).<br />
It is critically important that you use either a fully charged lead-acid automobile INPUT battery (or better, deep-cycle<br />
marine battery) - or a high quality AC-DC power supply. See specs table page #1 for recommended AC>DC power supplies.<br />
When charging high voltage batteries at high current the Power supply should meet or exceed our recommendations. Note that<br />
PS load control features DO allow you to use lower-rated power supplies reliably, but that total charger output wattage will be<br />
limited accordingly. (See details later in this manual).<br />
If you have any trouble charging after confirming that input and output cables are properly connected and of the proper<br />
materials, be sure to check the charger on an automotive battery. Many problems are associated with poor quality or<br />
inadequate switching AC-DC power supplies. Use PS Load control as needed to reduce load on your PS, or upgrade your PS.<br />
If, after carefully reading the following pages on usage, you have any difficulty using the charger please refer to the<br />
troubleshooting guide and warranty terms at the end of these instructions. It is best to carefully check your charger before<br />
making a return, as problems in setup, cabling, or power supply are much more common than defects in the charger. Chargers<br />
returned by the user and later found not defective will only be returned to the user at the user’s expense and may incur a service<br />
charge.<br />
ALWAYS power charger ON before you attach a battery to output or balance connectors!!<br />
Memory Positions for Charging, and Settings per Battery Type<br />
Twenty MEMORY positions on Each Channel allow you to set and store parameters for CHARGING your packs, such as BATTERY<br />
TYPE [NiMH, NiCd, LiPo, LiIon (LiIo), LiFePO4 (LiFe), Lead-Acid], battery CAPACITY, Charge RATE, Cutoff Voltage, Temperature,<br />
etc.<br />
BATTERY CHARGING - Let’s try it once to learn it….<br />
(Example: LiPo battery with balance connector. Follow the flow charts as you go…)<br />
MODE: Before Charging/Discharging is started: Scrolls between MENUS for MEMORY (Charging), USER<br />
SETUP, DATA VIEW, BALANCER.<br />
MODE also selects SOLO and SYNC modes for charging packs greater than 6S<br />
MODE: During Charging/Discharging: Scrolls between VIEW MODES: MEMORY, DATA VIEW, And DATA<br />
QUICK VIEW screens.<br />
UP/DOWN: Scroll through the settings within Menus, Data Views, and Selects values for Settings<br />
ENTER: Selects any Setting to CHANGE / Charge START / Charge STOP<br />
CH: (not pictured left) Selects which screen you are reading: Port #1 or Port #2.<br />
Attach the charger to an appropriate DC power supply (or wall power if NET ACDC). Connect the Output Cable 4mm bullet<br />
connectors to the Red (+) and Black (-) CH#1 output port on left side of the charger. Connect your Battery Main Connector to<br />
the Mating Connector you have previously soldered to the Output Cable set. Connect your Lithium Polymer battery Balance<br />
Connector to the EOS Balance Multi-Adapter. ALWAYS USE THE BALANCER(s) WHEN CHARGING LITHIUM BASED PACKS FOR<br />
SAFETY!!<br />
(See end of these instructions for more information and balance multi-adapters for various brand lithium packs).<br />
Note: Always connect the Output Cable set to charger first, then power CHARGER ON, then connect Battery MAIN Wires,<br />
then Battery BALANCE adapter. Never connect a pack to a charger which is powered OFF. After charging is finished,<br />
always disconnect the Battery main wire connectors from Output Cable set first; then disconnect Output Cable set from charger.<br />
After the Welcome screen, the charger will start and display the most recently used memory position.<br />
(see flowchart (2) MEMORY DISPLAY at this time)<br />
Press CH to select which charger or port screen you are reading, ‘1 or 2’ will be shown in the top, right-hand corner<br />
Pressing ENTER once will make the Memory Position start flashing. Flashing values can be changed with UP / DOWN keys.<br />
While Mem Position is flashing, Press DOWN to scroll through the ten available memory positions.<br />
Press ENTER again to confirm the memory position that you wish to use.<br />
From the memory screen, now press DOWN to get to BATT TYPE, press ENTER to start BATT TYPE flashing for selection.<br />
Press DOWN until you see your desired Battery Type (LiPo in this case). Press ENTER to confirm.<br />
Press DOWN again to select Pack Voltage which matches your battery<br />
Note: the Charger shows both pack voltage and the number of cells in Series (S) on this screen, matching the Voltage and<br />
Battery Type you have selected. If the “S” and the Voltage don’t match your battery, you have the Wrong Battery Type<br />
selected (like confusing LiIon 3.6v with LiPo 3.7v types). Use UP key to reach BATT TYPE again, and reset BATT TYPE properly.<br />
Press DOWN to get to BATT CAPACITY; press ENTER to make the mAh value flash and adjust with the UP or DOWN buttons<br />
until it matches your battery, by increments of 100mAh (to max of 50,000mAh). Press ENTER to confirm.<br />
If your battery is 730mAh, for example, you could set this to 700mAh. The common CHARGE RATE (set in next screen) for<br />
lithium is 1C of capacity (equal to 0.7A for a 700mAh setting).<br />
Press DOWN to get to CHG CURRENT. Max allowed charge rate for Lithium Polymer (LiPo 3.7v/cell) is 2C default, but selectable<br />
in USER SETUP, LIPO MAX C setting (1C~5C). CAUTION! For other cell types, there is no restriction, up to the max amps limit<br />
of the charger, so BE SURE you know what CHG CURRENT setting to use for your battery (see also below text on cell types).<br />
Press DOWN to TEMPERATURE CUT-OFF. Requires option part #HP-EOSTMPSEN, temp sensor. This is most often used by<br />
advanced users for NiMH charging. The Default setting is 50 degrees Celsius.<br />
2
Press DOWN to SAFETY TIMER - Adjustable between 20 and 300 minutes. An alarm will sound during charging after selected<br />
time interval during charging has elapsed. Set the time for about 30% longer than it should take your pack to charge.<br />
Keep in mind that a badly balanced pack may take longer than normal to charge, so don’t set this too tight. A Lipo pack at 1C<br />
rate might take as much as 120 minutes to charge, so timer of about 160~180 minutes may be appropriate. Note that while<br />
other safety checks based on capacity and voltage are also working for you, charging should never be left unattended in any<br />
case.<br />
Press DOWN to TCS CAPACITY – For LiPo and LiIon battery types Terminal Capacity Selection is available from 50% to 100% of<br />
pack capacity. During the charge, the charger will continually estimate capacity in the pack, and either terminate the charge or<br />
sound a signal tone (and continue charging) when your selected TCS percentage is reached, depending on the value for you set<br />
for TCS END ACTION. See end of manual for more details on TCS.<br />
Press DOWN to TCS END ACTION – Values are CONTINUE and STOP. CONTINUE is the default. In this case, when TCS% is<br />
reached for settings 50% to 95%, the charger will “beep” 10 times, but continue charging to 100% until stopped. If TCS<br />
ACTION is set to STOP, the charger will stop charging at that TCS setting and - if balancing is complete – then give COMPLETE<br />
(END) Buzzer according to you buzzer settings. (or continue till balanced, then give End buzzer).<br />
Press DOWN to TVC = YOUR RISK! NEVER change this from default 0mV setting, unless you have CAREFULLY read and<br />
understood the information on TVC function given on pages 5&6, AND FULLY ACCEPT ANY CONSEQUENCES AND ALL RISKS!<br />
Press DOWN to DSCH CURRENT – If you’ll be discharging, you’ll set the discharge current here. Note that depending on the voltage of the<br />
pack, the current you set may not be obtainable if the total Volts multiplied by Current (A) exceeds 50W.<br />
Press DOWN to DSCH VOLTAGE per cell – Lithium types should only be discharged for storage, so we recommend that you use STORE<br />
MODE for that. Otherwise, you need to be sure of the V/cell setting yourself, according to your battery type. Over-discharge can damage packs.<br />
Pressing DOWN for a last time returns you to the ‘Memory Select’ screen.<br />
At this point, see flowchart (7) LiIo / LiPo / LIFE BATTERY START. Holding the ENTER key pressed down for two seconds or<br />
more will start the CHARGE, STORE, DISCHARGE, or CYCLE process (select desired with UP/DOWN Keys) for LiPo, LiIon, and<br />
LIFE types, no matter where in the MEMORY (CHARGE) screens you may be. Additionally- if balancer circuit is connected – SYNC<br />
MODE is available via ENTER (short push) and UP/DOWN arrow keys.<br />
With “CHARGE START SOLO MODE” selected, hold down ENTER for 2 seconds. Hold down ENTER again, the charger will then<br />
read **BATTERY CHECK** and then ask you to confirm the number of cells in your battery pack. Press ENTER (short press) for<br />
a final time to start charging. (if balancer is connected, a 10-second countdown occurs, then auto start). If TVC Function is set<br />
to anything other than the default 0mV, the TVC setting will show on the screen for a few seconds before charging begins. IF<br />
the TVC setting is NOT as you wish (default STRONGLY SUGGESTED), STOP and reset TVC, then begin charge again!<br />
(see pages 5&6 for full details on TVC function)<br />
Note: If the Lithium-based pack is NOT connected to the balancer port, the Charger will read NO BALANCER.<br />
Holding down ENTER (2 seconds) at any time while charging a battery will then STOP charging (or discharging, etc…).<br />
MODE SELECTIONS<br />
Before Charging/Discharging/Store are in progress, Pressing the MODE button will scroll you through the MEMORY, DATA VIEW,<br />
BALANCER and USER SETUP screens, allowing you to change parameters as you like (see charts for each)<br />
During Charging/Discharging/Store , Pressing the MODE button will scroll you through the MEMORY, BALANCER and QUICK<br />
VIEW Data screens. (see chart (9) OPERATION and FINISH DISPLAY)<br />
* MEMORY – Short-press UP/DOWN buttons to scroll through the data presented. At the top memory screen (showing C: A),<br />
you can press ENTER and UP/DOWN to change charge current if desired. You can also LONG-press (2-seconds) UP button to<br />
see each screen presented in turn at two-second intervals.<br />
* BALANCER – UP/DOWN buttons to see detailed information on cell balancing, and individual cell voltages<br />
* QUICK VIEW – Shows the following useful info on a single screen:<br />
CAPACITY mAh/Ah (Charged in “C” or Discharged out “D”)<br />
INPUT VOLTAGE (Vi)<br />
PACK VOLTAGE (V)<br />
CHARGE CURRENT (A)<br />
CAPACITY (%) of the pack at current time.<br />
---- DATA VIEW<br />
Press the MODE button until you reach the DATA VIEW screen. (see chart (3) Data View Display)<br />
Use the UP or DOWN key to scroll through the various information presented:<br />
*INPUT – Current input voltage from the power supply<br />
*OUTPUT – The output voltage of charger while charging, or pack voltage of the battery while connected but not charging<br />
*BAT. RES – The internal resistance (IR) of the battery pack in mΩ. (Most accurate near charge END. Temp affects readings)<br />
*TEMP and PEAK TEMP – Current Temp, and Peak Temp recorded during the charge (requires optional temp sensor)<br />
*CHARGE TIME, CHARGE CURRENT<br />
*PEAK CHARGE VOLTAGE<br />
(see chart for other information screens available under Data View)<br />
3
---- BALANCER MODE (Lithium types only)<br />
Try it out with a LITHIUM battery pack which has the proper Balance Connector attached. Attach the charger to an appropriate<br />
DC power supply, and connect your battery pack’s main and balance connectors to charger as previously described.<br />
Press the MODE button until you reach the BALANCER Mode screen.<br />
*Press DOWN once to reach the SELECT VOLTAGE screen. This screen simply shows you a very accurate voltage for each cell in<br />
the pack, in turn. You will see [1CL] at upper right, and a voltage displayed below, to three decimal places; for example: 3.982.<br />
*Press ENTER to make the [1CL] flash, and UP to see the voltage for the second cell, third cell, etc…<br />
*When you have seen the voltage for the last cell in the pack, press DOWN to reach the next screen:<br />
AVG. V shows the average voltage per cell, across the whole pack.<br />
V. GAP shows the difference between the highest and lowest volt cells in the pack<br />
*Press the DOWN button to reach the next screen, which shows voltage for every cell in the pack to two decimal places (x.xxV).<br />
Press ENTER for two seconds. You will see BALANCE START / SOLO MODE - SYNC MODE<br />
--- If you are using a single port only. Use UP or DOWN to select SOLO MODE. Hold down the ENTER button, the<br />
charger will check the battery, and then ask you to confirm the number of cells in the pack. If correct, press ENTER once to start<br />
balance charging.<br />
--- If you are using DUO or 2x NET together, and want to balance two packs (of same type and capacity,) as a single unit –<br />
such as 4S VX4000 and 5S VX4000 to make a 9S series-connected flight pack –hold down the ENTER and DOWN key to change<br />
from SOLO MODE to SYNC MODE. Hold down the ENTER to start BATTERY CHECK. The number of cells in each pack will be<br />
shown one above the other. If both are correct, press ENTER to begin balancing.<br />
After Balancing has begun, you may return (using UP or DOWN keys) to the screen which shows all cell voltages together. Cells<br />
which are higher in voltage will show the decimal point alternating to a larger square shape, indicating that these cells are being<br />
discharged, while the lower voltage cells are not. Hold down the ENTER to stop balancing at any time.<br />
NOTE!! SYNC MODE Charging (selected in similar way to SYNC BALANCING above) is intended to be used only with two packs of<br />
the same brand, capacity, type, and lifecycle history! For example, two packs of CX5000 4S lithium polymer purchased at the<br />
same time and used together as a 8S flight pack in series when flying a particular model. At the start of SYNC MODE charging,<br />
both packs should be at roughly the same discharge state. Otherwise, you should SOLO MODE charge each pack separately, and<br />
when both are done use SYNC MODE balancing before connecting in series for flight.<br />
---- USER SETUP (these settings are “sticky” until you change them again)<br />
Press the MODE button until you reach the USER SETUP - TEMP MODE screen.<br />
* Press ENTER and use UP or DOWN keys to select temperature display in degrees Fahrenheit or Celsius<br />
Press DOWN to scroll through the following screens, and ENTER then UP or DOWN to change settings on each screen:<br />
* BUTTON SOUND screen - ON or OFF<br />
* FINISH SOUND TIME screen - OFF, ON (continuous), 1 Minute, 15 Seconds, 5 Seconds<br />
* FINISH SOUND MELODY screen – Choices 1 to 10 (Will also play each Melody)<br />
* LIPO MAX C screen – Choices of 1C to 5C in 1C steps, 2C Default. Allows limiting max LiPo charge C-rate as you desire.<br />
* POWER SUPPLY VOLTAGE screen – Set to limit max watts INPUT (primary for variable voltage PS units only)<br />
* POWER SUPPLY CURRENT screen – Set at the rated CURRENT (A) of your power source [set to 40A if car battery]<br />
* POWER SHARING screen - Set the shared power percentage for the two battery outputs (details below)<br />
Power Supply Voltage and Current together comprise PS Load Control. The EOS NET & DUO series are extremely powerful<br />
chargers, and can – particularly when charging high-voltage packs at high rate settings - pull more amperage than many power<br />
supplies can deliver. To avoid stressing your PS and having charges terminated prematurely, you can tell the charger the rating<br />
of your supply, to limit the load on the supply. If you find the PS is still overloaded, reduce the setting for POWER SUPPLY<br />
CURRENT until the problem goes away (or buy a stronger Power Supply unit!).<br />
* You have a fixed Voltage AC/DC PS with 20A rating: Set PS CURRENT to 20A (or less).<br />
* You have an AC/DC PS with variable voltage from 12V-18V, and 300W limit: Set your Supply to 18V, set PS VOLTAGE to 18V,<br />
set PS CURRENT to 300W/18= ~16A (or less).<br />
BATTERY CHARGING - EXTENDED DETAIL<br />
Consult the documentation or labels provided with your battery to determine the correct capacity setting. It is very important to<br />
get this right, as the charger uses the capacity setting to determine nominal charge rate (amperage), TCS percentage, and<br />
safety termination. Incorrect settings could damage the battery, and could even cause an accident.<br />
----- For Lithium types CAPACITY is selected in mAh. Selection is in increments of 100mAh. CURRENT is set in Ampere (at<br />
CHG CURRENT screen), so divide mAh by 1000 to get Amperage. For 700mAh, current is 0.7A for 1C, up to 1.4A for 2C etc. For<br />
an 1800mAh pack then, 1.8A for 1C, and 3.6A for 2C and so on.<br />
----- Lithium Polymer (3.7v) vs. Lithium Ion (3.6v) Please make absolutely sure that you properly identify the type of<br />
lithium battery you are charging, the capacity in mAh, and the number of cells wired in series and the pack voltage! Lithium Ion<br />
(3.6v nominal) should never exceed 1C charge rate. Never charge Li Ion 3.6V types by LIPO 3.7V charger mode!<br />
----- LiFePO4 Cells: (a123, etc) The LiFePO4 charge/discharge modes are intended for cells with 3.3V nominal produced by<br />
A123 Company, <strong>Hyperion</strong>, or other-brand LiFePO4 cells which are recognized to be of good quality from well-known makers. In<br />
MEMORY MODE, choose LIFE for BATT TYPE, for charging such cells. The LIFE charge mode MAY work with “no-name brand”<br />
LiFePO4 cells having 3.3V nominal voltage, but <strong>Hyperion</strong> has found some “knock off” cells in the market of very questionable<br />
quality. Customers who use LIFE mode (LiFePO4 mode) to charge such off-brand cells assume all risk.<br />
4
LiFePO4 (LIFE) CHG CURRENT (A) setting: The EOS NET/DUO does NOT limit max charge rate for LiFePO4 based on capacity.<br />
It is our position that ~4C rate is the target MAX for <strong>Hyperion</strong> or A123 LiFe, as of this writing. Consult battery maker<br />
documentation for other LiFePO4 types.<br />
NiCd and NiMH: Set BATT TYPE from MEMORY MODE screen as we did before in the LiPo example. Consult the battery<br />
manufacturer’s documentation to determine the proper settings for VOLTAGE, CAPACITY, and CHG CURRENT.<br />
In addition to the charge settings we have already seen in LiPo Mode, three additional settings exist for NiCd and NiMH battery<br />
types. These are essentially “expert” settings, and should be left at defaults unless you know why you want to change them:<br />
PEAK SENS (peak sensitivity – delta V) – default for NiCd is 7mV/C and NiMH is 5mV/C<br />
TRICKLE – sets a low current at which the charger will continue to charge the pack AFTER normal charge is ended<br />
PEAK DELAY – Short interval after peak is detected during which the charger will continue to charge before terminating<br />
STARTING CHARGE / SELECTING CHARGE TYPE: After setting MEMORY MODE charge parameters, holding down ENTER<br />
takes you to a Sub-Menu with three options for NiCd/NiMH charge type. Press ENTER once to start the current setting flashing,<br />
and use DOWN key to scroll through the three choices. Hold down the START button after your selection to start charging.<br />
AUTOMATIC – Essentially ignores your setting for CURRENT, but charges at rate determined by the internal resistance of the<br />
battery pack. Especially useful when you don’t know what settings you should make due to lack of documentation.<br />
LINEAR – Charges at whatever rate you have selected from start to finish (if the charger detects no problem with settings).<br />
NORMAL – Charges according to your RATE setting but uses an intelligent algorithm to alter current as needed during charge.<br />
Lead Acid Batteries: Set Pb for BATT TYPE, correct voltage at the BATT VOLTS screen and the Ah at the BATT CAPACITY<br />
screen, and amperage at the CHG CURRENT screen. Change CHARGE VOLTS if required for your battery type. Consult the<br />
battery manufacturer’s documentation to determine these settings. FLOAT VOLTAGE maintains the battery at the pre-set<br />
voltage after normal charge is finished. FLOAT VOLTAGE will be applied only until the SAFETY TIMER setting has elapsed. If you<br />
want to maintain your PB battery at FLOAT VOLTAGE setting indefinitely, turn SAFETY TIMER to OFF.<br />
TCS Feature (Terminal Capacity Selection % for Lithium battery types)<br />
TCS has two settings: TCS CAPACITY %, and TCS END ACTION.<br />
* The TCS CAPACITY Setting is selected from the MEMORY screen by pressing UP button four times (or DOWN seven times).<br />
TCS Capacity can be set from 50% to 100% in 5% increments (default is 100%, a full charge). The charger uses your setting<br />
for Battery Capacity in addition to sophisticated measurements and calculations to make a close estimate for the currently<br />
charged capacity in the pack during charging.<br />
* TCS END ACTION can be set to CONTINUE (default) and STOP. If CONTINUE, when TCS% is reached for settings 50% to<br />
95%, the charger will “beep” 10 times, but continue charging to 100% until stopped. If TCS ACTION is set to STOP, the charger<br />
will stop charging at that TCS setting and - if balancing is complete – then give COMPLETE (END) Buzzer according to your<br />
buzzer settings. (or continue till balanced, then give End buzzer)<br />
There are three good reasons why you might want to charge a Lithium Battery to something less than full capacity:<br />
* The first is for long-term storage. Lithium batteries are best stored after charging to 50%~60% of nominal capacity. However,<br />
rather than using TCS for this goal, it is easier and better to always use the STORE MODE function. STORE MODE automatically<br />
charges or discharges as needed to reach 60% TCS, then stops.<br />
* The second aim is to get more flight time in during a typical day at the field, by stopping the charge when the battery is 90%<br />
to 95% full, for example. Due to the CC/CV method by which LiPo are charged, charging the last few mAh back into the pack<br />
takes a LOT more time than the first few mAh did… So if you want to get in the air ASAP, and don’t mind a shorter flight then set<br />
TCS at 90%~95% could save you a good bit of charge time. In this case we suggest END ACTION setting of CONTINUE, that<br />
way the charger will sound 10 beeps when TCS is reached, so you can stop charging and fly. If you don’t catch the warning, the<br />
charger will continue to charge to full capacity, as a safety measure in case you have forgotten that TCS is set below 100%.<br />
* The third possibility is that evidence suggests that charging to 90%~95% can increase battery cycle life, compared to 100%<br />
charges. So in this case set TCS ACTION to STOP.<br />
TVC Function (Terminal Voltage Control per each memory slot, LIPO and LIFE)<br />
The TVC function allows adjustment of final CHARGE voltage for LIPO and LIFE battery types for each memory position:<br />
+0mV (default, therefore no change. Lipo=4.200V terminal, LIFE=3.600V terminal)<br />
+5mV to +80mV (5mV steps, so LIPO for example terminates at 4.205V~4.280V)<br />
-5mV to -20mV (5mV steps, so LIPO for example terminates at 4.195V~4.180V)<br />
The TVC Function is found in every memory slot for Lipo and Life, below TCS ACTION setting screen. Note that the TCV settings<br />
are RETAINED, like other Memory settings, when the charger is powered off. Be SURE that this setting is correct before using<br />
any LIPO or LIFE memory slot (Default TVC=0mV strongly recommended).<br />
Note: After confirming CELL COUNT and START for LIPO/LIFE charging, if TVC setting is not default, current TVC setting will be<br />
shown for a few seconds before the charger begins the charge. Be sure to note the displayed TVC setting at this time, and STOP<br />
the charge to reset TVC to default whenever so desired.<br />
Uses for TVC FUNCTION:<br />
-5mV to -20mV: Reducing Terminal Voltage should only be done in case MEASURED cell voltage at your battery pack (with<br />
quality digital voltmeter) shows Terminal voltage exceeding 4.2V for Lipo (or default 3.6V for LIFE/A123 types). This essentially<br />
acts as a calibration function, and should normally be unneeded when using EOS standard, supplied output leads and balance<br />
harnesses. However, if you have made your own longer harnesses, the additional length in leads creates the possibility of extra<br />
induced resistance, and therefore a reading at the charger lower than is actually found at the battery. This could cause an overvoltage<br />
charge. If you find terminal voltage over 4.2V/cell for any LIPO cell, reduce TVC setting on each memory position until<br />
your MEASURED max cell voltage (at battery) is at 4.2V or lower if LIPO, or 3.6V or lower if LIFE.<br />
+5mV to +80mV: Ability to set terminal voltage above defaults is only at the request of competition car, boat, and aircraft<br />
users, and only if the race sanctioning body allows terminal voltage for Lipo above 4.2V, or LIFE(A123) above 3.6V.<br />
No LIPO battery maker or seller recommends or allows Terminal Voltage to be set higher than 4.200V, to our knowledge.<br />
5
<strong>Hyperion</strong> does not recommend or allow G3 Lipo Terminal Voltage to be set higher than 4.200V. Therefore any + setting above<br />
0mV VOIDS your WARRANTY for your LIPO battery pack. Whenever ALL cells in a pack exhibit puffing, over-voltage charging (or<br />
severe over-discharge) is indicated and warranty will not be honored.<br />
WARNING! By setting the TVC to any POSITIVE SETTING above 0mV, you ACCEPT ALL RESPONSIBILITY for Damage to your<br />
battery, Fire, Injury, and any other Loss which may result. If you do not agree to accept all risk, DO NOT OPERATE YOUR<br />
CHARGER UNLESS ALL MEMORY POSITIONS ARE SET TO DEFAULT 0mV TVC position! Furthermore, it is your<br />
responsibility to insure that no other person uses your charger if TVC is set to greater than +0mV, and to reset ALL memory<br />
positions to TVC 0mV default before selling your charger or giving it to others.<br />
Positive settings (+5mV or higher) may be desired by racers looking for competitive advantage, and therefore +TVC has been<br />
demanded as a feature by racers. However, it is the official position of <strong>Hyperion</strong> that Competition Sanctioning Bodies are<br />
irresponsible in allowing over-voltage charging via their rulebooks, and therefore that both users and their sanctioning bodies are<br />
FULLY responsible for any Loss, Damage, or Injury that may occur due to over-voltage charging of batteries. Let’s say it again:<br />
If you want to use Positive TVC settings, you may make that choice. But ONLY if you personally deem it desirable, AND you are<br />
taking FULL RESPONSIBILITY for any and all results which may arise. We encourage you to petition your sanctioning body<br />
to stop allowing LIPO terminal voltages in excess of 4.200V, which are both potentially unsafe and without significant benefit, we<br />
believe.<br />
NOTE: PB (lead-acid) CHARGE also allows a TVC-like setting (CHARGE VOLTS). In general, PB should be charged at 14.4V<br />
setting. However, the Type of battery (wet vs gel vs agm, etc) and ambient temperature may dictate a lower or higher charger<br />
voltage. Consult your PB battery maker for advice, and use the CHARGE VOLTS setting at your own risk. If you have no<br />
information on TYPE of PB battery you are charging, use 14.0V CHARGE VOLTS setting.<br />
Lithium Care<br />
To maximize your investment in Lithium Battery packs, do the following:<br />
* ALWAYS Store your packs at 60%~70% capacity. After a day of flying, use STORE Mode to achieve this. It is especially<br />
harmful to store lithium packs fully charged, and should be avoided for more than a few hours at most.<br />
* NEVER discharge cells beyond 90% of capacity (plan for 80% max). NEVER fully discharge lithium packs.<br />
* STORE your packs in a cool, relatively dry location.<br />
See http://media.hyperion.hk/dn/g3lipo for full details on best care practices for your valuable Lipo batteries.<br />
LIPO MAX C – Under USER SETUP menu you will find a setting to allow setting of Maximum “C” charge rate for Lithium<br />
Polymer (3.7v/cell type) batteries, with options of 1C to 5C (2C is Default). Note that MAX C attainable will depend on the<br />
Amps Max and Watt Max rating of your charger, and pack capacity/voltage.<br />
NOTE: It is entirely YOUR responsibility to determine the SAFE Max C for your LiPo pack.<br />
HYPERION original LCL, LCX, LVX, LVZ types, 2C max charge rate.<br />
HYPERION GENERATION 3 25C/35C/45C packs, 6C max charge rate<br />
HYPERION GENERATION3 5C Rx packs, 4C max charge rate (20C LiFe Rx packs = 5C max charge)<br />
HYPERION SWIFT G3 CAR PACKS - 6C max charge rate<br />
(ALL <strong>Hyperion</strong> G3 LIPO packs ever produced support 6C rate, regardless of 2C or 5C charge cautions appearing on early packaging)<br />
If using other than <strong>Hyperion</strong> lithium packs, consult your battery’s documentation for allowed C rates, before exceeding 1C charge<br />
rate. If you don’t know the allowed max CHARGE rate for your pack, never exceed 1C rates.<br />
Net/Duo FAQ<br />
* The discharge function is supposed to be 10A Max (5A for NET3-AD), but when I discharged my pack I got less current. Why?<br />
Both charge and discharge functions are limited by both watts and amperage; whichever comes first.<br />
Charge: 180W and 15A maxes per port (DUO3)<br />
Discharge: 50W and 10A maxes per port (DUO 3)<br />
- If you are discharging a pack which starts at 10V, for example, the initial max current(A) would be: 50W/10V=5A<br />
(note that as the battery voltage drops during discharge, current will rise)<br />
- If charging a pack which starts at 10V, then max current would be: 180W/10V=18A. BUT current is limited to 15A,<br />
so the max you get will be 15A, since the current limit is reached before wattage limit…<br />
NOTE ALSO: Lithium batteries use CC/CV charge curves, so current will always fall as the battery becomes more charged.<br />
* Why does the charger not give the END buzzer (or FLAT CHECK error), even though the pack has been attached for a<br />
long time? (I have checked and buzzer is set ON)<br />
- LIPO/LIFE: Most likely, you have set a charge rate lower than 1C, and the charger cannot terminate CC/CV as required<br />
current at that point is too low. Assuming your battery is of decent quality and condition (if not, do NOT charge it!) there is NO<br />
reason to charge at rates below 1C. Charge again at 1C and observe results. Note also that END buzzer will NOT sound until the<br />
charger achieves target cell balance. For badly out-of-balance packs or large capacity packs, this could take up to an hour.<br />
- NiCd/NiMH: Same answer as Lipo/LifePO4 above (for a different reason). Try charging at a higher rate. We have found that<br />
many NiMH packs on the market today are poorly made, and do not signal delta-v (indicating end charge) properly when<br />
charged at low rates, and sometimes even at higher rates. Try setting delta-v in your charger menu to a lower value. Try<br />
charging at a higher rate (check battery for over-temp!). If nothing works, get a pack of cells from a known quality brand (Sanyo,<br />
GP, etc) and test your charger.<br />
* Why do I see “0” current flowing during charge at regular intervals? Is it a “Pulse” charger?<br />
No, the charger simply pauses charging at intervals in order to make extremely accurate readings of cell/pack condition.<br />
6
Troubleshooting<br />
(1) Ensure that the battery you are trying to charge and the settings on the charger match. Battery type (such as NiMH or LiPo),<br />
battery capacity, number of cells (charge voltage), and charge rate must all be correct.<br />
(2) Check that the input cable and output cables:<br />
*Have proper connectors and are in good condition *Are not frayed, worn, cut, or damaged<br />
*Are the proper gauge (output 2.5mm, 14ga) *Are proper length