Exterior Painting - Cloverdale Paint
Exterior Painting - Cloverdale Paint
Exterior Painting - Cloverdale Paint

You also want an ePaper? Increase the reach of your titles
YUMPU automatically turns print PDFs into web optimized ePapers that Google loves.
Volume 1<br />
DO IT YOURSELF SERIES<br />
EXTERIOR PAINTING<br />
A STEP-BY-STEP GUIDE<br />
UNLOCK YOUR CREATIVITY
DO IT YOURSELF SERIES<br />
STEP-BY-STEP GUIDES<br />
Volume 1 . . . . . . . . . . . . . . . . . . . . . .<br />
Volume 2 . . . . . . . . . . . . . . . . . . . . . .<br />
Volume 3 . . . . . . . . . . . . . . . . . . . . . . . .<br />
Volume 4 . . . . . . . . . . . . . . . . . . . . Decorative Finishes<br />
Volume 5 . . . . . . . . . . . . . . . .<br />
Volume 6 . . . . . . . . . .<br />
Volume 7 . . . . . . . . . . . . . . . . . . . . . . . .<br />
<strong>Exterior</strong> <strong><strong>Paint</strong>ing</strong><br />
Interior <strong><strong>Paint</strong>ing</strong><br />
Brush & Roller<br />
Interior Wood Finishing<br />
Solving <strong>Exterior</strong> <strong>Paint</strong> Problems<br />
Wallcoverings<br />
UNLOCK YOUR CREATIVITY<br />
For all of your home decorating and improvement needs,<br />
our trained and knowledgeable staff can help with your questions.
EXTERIOR PAINTING<br />
Checklist for<br />
exterior painting:<br />
Preparation:<br />
Putty knife & filler for<br />
hole and crack repairs<br />
Sandpaper & sanding<br />
blocks for siding<br />
preparation<br />
Extension pole for<br />
paint roller & pole<br />
sander<br />
Masking tape to make<br />
“cutting in” easier<br />
Drop cloths for<br />
protection and easier<br />
clean-up<br />
Cleaner (TSP) to clean<br />
walls, bleach to kill<br />
mildew and a bucket<br />
Sponges, painter hats,<br />
disposable paint suits,<br />
gloves<br />
Tips:<br />
If you’re not sure of<br />
the color, buy a small<br />
amount of paint and<br />
apply it to the<br />
intended surface.<br />
Volume 1<br />
A STEP-BY-STEP GUIDE<br />
Planning the Project<br />
<strong><strong>Paint</strong>ing</strong> your home is the fastest and most<br />
economical way to improve its appearance and keep<br />
it protected from the environment. A good paint job<br />
will last for many years, have a pleasing appearance<br />
and maintain the value of your home. You can add<br />
drama, style, and personality to a home faster with<br />
paint than most any other kind of home or landscape<br />
project.<br />
<strong><strong>Paint</strong>ing</strong> a house can be easily managed by breaking<br />
the project into a series of tasks: planning a color<br />
scheme, preparing the surface, choosing top quality<br />
paints & materials, painting, then finally cleaning up.<br />
Inspect all Surfaces<br />
Identify any problems requiring special attention:<br />
Loose or missing knots in siding, broken or<br />
deteriorated siding, chalking, mildew, areas of<br />
peeling, etc. Our staff are trained to help you solve<br />
these problems, just ask us for assistance.<br />
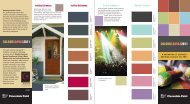
Select Colors & Finishes<br />
A well planned color scheme creates a pleasing<br />
overall impression and brings out the most attractive<br />
features of your home. Use color and finish to<br />
highlight features and hide unattractive parts<br />
of the house.<br />
Take some time and look at color schemes of other<br />
homes. This can be very helpful and serve as a<br />
source of inspiration for your color decisions.<br />
UNLOCK YOUR CREATIVITY<br />
For more information about our products, visit us on the web at<br />
www.cloverdalepaint.com
Volume 1<br />
EXTERIOR PAINTING<br />
Checklist for<br />
exterior painting:<br />
Application:<br />
Cloths/rags for<br />
clean-up<br />
Proper rollers & tray<br />
Angled brush & edger<br />
for “cutting in”<br />
Trim brush – usually<br />
2” wide (50mm)<br />
Brushes – synthetic for<br />
latex or alkyd, natural<br />
bristle for alkyd paints.<br />
A 2” (50mm) brush<br />
is usually the easiest<br />
and most efficient size<br />
for painting any areas<br />
that your roller cannot<br />
reach<br />
Pail hook – frees your<br />
hands when working<br />
on a ladder<br />
Tips:<br />
Be sure to work safely.<br />
Will you need ladders<br />
or scaffolding to reach<br />
all areas? Your local<br />
rental yard can help<br />
with these items.<br />
A STEP-BY-STEP GUIDE<br />
Calculate Your <strong>Paint</strong> Requirements<br />
Calculate the total surface area by multiplying the<br />
width by the height for each wall and add together<br />
for the total square feet (square metres).<br />
Adjust for large surfaces not to be painted.<br />
Example:<br />
The exterior front of the house to be painted, sided<br />
with new wood, is 50’ wide x 12’ high (15.24m x<br />
3.65m) = 600 sq.ft. (55.74 sq. metres) Divide the sq. ft<br />
(sq. metres) by the coverage factor below.<br />
Formula:<br />
total surface area<br />
coverage per can<br />
= # of gallon (3.70 litre) cans<br />
600 ÷ 250 (55.74 ÷ 23.225) = 2.4 or<br />
2-1/2 gallon (3.70 litre) cans.<br />
Here is a rough coverage guide, by surface type,<br />
for a one gallon (3.70 litre) can:<br />
150 sq. ft. (13.935 sq.m) coverage for stucco<br />
200 sq. ft. (18.58 sq.m) coverage for shingles<br />
250 sq. ft. (23.225 sq.m) coverage for new wood<br />
350 sq. ft. (32.515 sq.m) coverage for smooth siding<br />
One (1) coat of premium paint will cover most<br />
previously painted surfaces of similar color if the<br />
surface is in good condition.<br />
Two (2) coats may be required for major color<br />
changes, painting over damaged or old surfaces, or<br />
to maximize the time before painting again.<br />
UNLOCK YOUR CREATIVITY<br />
For all of your home decorating and improvement needs,<br />
our trained and knowledgeable staff can help with your questions.
EXTERIOR PAINTING<br />
Checklist for<br />
exterior painting:<br />
Clean-up:<br />
Solvent to clean tools<br />
used with alkyd (oil<br />
based) paints<br />
Garbage bags<br />
Pen and masking tape<br />
to mark paint cans<br />
with the color name<br />
and formula number<br />
for future touch ups.<br />
Gloss Selection Guide<br />
Gloss is the amount of<br />
“shine” the paint has<br />
when it dries, ranging<br />
from flat (no gloss) to<br />
high gloss.<br />
Volume 1<br />
A STEP-BY-STEP GUIDE<br />
Selecting & Buying <strong>Paint</strong> or Stain<br />
Choose the Gloss<br />
Refer to our Gloss Selection Guide for more<br />
information and actual examples of what different<br />
glosses look like. Gloss is the amount of “shine” the<br />
paint has when it dries, ranging from flat<br />
(no gloss) to high gloss.<br />
Flat to low gloss finishes are the most popular paints<br />
for siding and fences. Gloss paints are popular for<br />
doors, railings and trim and on areas exposed to high<br />
traffic or abrasion. Gloss finishes are tough and<br />
durable and are characterized by a sheen that results<br />
in a cool, crisp finish that reflects light.<br />
Product Use Flat Finish Low Gloss Semi or High Gloss Finish<br />
wood siding, shakes,<br />
shingles<br />
brick, masonry<br />
aluminum, vinyl, steel<br />
siding, shutters<br />
fences<br />
aluminum trim, gutters<br />
previously painted metal<br />
excellent excellent fair<br />
excellent excellent good<br />
very good excellent good<br />
very good very good good<br />
good very good excellent<br />
good excellent excellent<br />
Most surfaces can be painted with latex or alkyd<br />
based products. Our trained staff will help you make<br />
the right choice for your project.<br />
UNLOCK YOUR CREATIVITY<br />
For more information about our products, visit us on the web at<br />
www.cloverdalepaint.com
Tips:<br />
EXTERIOR PAINTING<br />
Primers seal the<br />
surface and help form<br />
a tight bond between<br />
the topcoat and<br />
underlying surface<br />
material. Primers<br />
should be applied to<br />
surfaces that have<br />
never been painted<br />
and areas that are<br />
bare or have been<br />
patched.<br />
Flat to low gloss<br />
finishes are the most<br />
popular paints for<br />
siding and fences. Gloss<br />
paints are popular for<br />
doors, railings and trim<br />
and on areas exposed<br />
to high traffic or<br />
abrasion. Gloss finishes<br />
are tough and durable<br />
and are characterized<br />
by a sheen that results<br />
in a cool, crisp finish<br />
that reflects light.<br />
Volume 1<br />
A STEP-BY-STEP GUIDE<br />
Choose the <strong>Paint</strong> Type<br />
<strong>Paint</strong>s are designed to be used on<br />
certain surfaces and to perform<br />
well under different conditions.<br />
Here is a summary of your options<br />
with performance characteristics.<br />
Latex – (water based) Easy to apply and clean-up,<br />
low odor, quick drying, durable, can be applied to<br />
partially moist surfaces, resists peeling, chalking,<br />
blistering and is flexible. Second coats can usually be<br />
applied within 2 - 4 hours of the first coat. Available<br />
in many glosses and has excellent color retention<br />
and UV protection. Ideal for siding, fences, stucco,<br />
masonry.<br />
Alkyd – (oil based) Excellent adhesion, smooth<br />
finishes, tough and durable. Alkyd paints are better<br />
over chalky surfaces or previous alkyd paints. They<br />
require mineral spirits for clean-up. Allow overnight<br />
drying between coats. Available in many glosses.<br />
Ideal for siding, trim, windows and doors.<br />
Enamel – (oil or water based) A glossy finish that<br />
is tough, durable, smooth and impact resistant.<br />
Enamels are available for a wide variety of surfaces<br />
including metal, pipes, etc.<br />
Wood Stains<br />
<strong>Paint</strong>s cover the surface but stains soak in and<br />
allow the natural texture of wood to show. Stains<br />
are popular for textured wood surfaces. Ideal for<br />
wood siding, shingles, shakes and fences.<br />
UNLOCK YOUR CREATIVITY<br />
For all of your home decorating and improvement needs,<br />
our trained and knowledgeable staff can help with your questions.
Tips:<br />
EXTERIOR PAINTING<br />
Buy your paint with<br />
the following<br />
considerations<br />
Get the best quality<br />
paint that you can<br />
afford.<br />
Premium grade<br />
products are easier to<br />
apply, have better<br />
color selection, cover<br />
more area than lower<br />
grade paints and have<br />
a longer life between<br />
paint jobs.<br />
Buy what you need<br />
and not more to<br />
minimize the amount<br />
of paint to be<br />
disposed of or stored.<br />
Volume 1<br />
A STEP-BY-STEP GUIDE<br />
Wood Stains<br />
Solid Color Stains – Penetrate and cover the natural<br />
grain of wood but allow the natural texture of the<br />
wood to show. Use on new wood or previously<br />
stained surfaces. Available in alkyd (oil) or 100%<br />
acrylic latex base.<br />
Semi Transparent Stains – Penetrate the surface<br />
of the wood to protect and color while letting the<br />
natural grain and texture show. Ideal for new wood<br />
or over previously semi transparent stained surfaces.<br />
Specialty <strong>Paint</strong>s – For decks, driveways, machinery,<br />
masonry, rusty surfaces. We carry an extensive<br />
selection of coatings for all architectural, industrial,<br />
maintenance and marine applications.<br />
Choose Primers<br />
Primers seal the surface and help form a tight<br />
bond between the topcoat and underlying surface<br />
material. Primers should be applied to surfaces<br />
that have never been painted and areas that are<br />
bare or have been patched.<br />
The two key factors in primer selection are adhesion<br />
to the surface and compatibility with the topcoat.<br />
The paint you choose will usually identify a<br />
recommended type of primer on the label.<br />
UNLOCK YOUR CREATIVITY<br />
For more information about our products, visit us on the web at<br />
www.cloverdalepaint.com
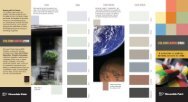
EXTERIOR PAINTING<br />
Finalize and select<br />
your colors<br />
We can offer you<br />
thousands of color<br />
alternatives! Refer to<br />
our In-Store Color<br />
Selector or purchase a<br />
decorating guidebook<br />
for a more detailed look<br />
at color.<br />
Color choice can<br />
dramatically change<br />
the look of your home.<br />
It can accentuate<br />
architectural features<br />
and can create<br />
harmony or drama.<br />
Tips:<br />
Custom color<br />
matching is available<br />
at all of our stores.<br />
Volume 1<br />
A STEP-BY-STEP GUIDE<br />
Buy your Tools and Materials<br />
Make sure you buy the best quality tools that you<br />
can afford. Top quality tools will save application<br />
time and achieve better results. Most jobs can be<br />
done with a few quality tools including 1 or 2<br />
premium brushes, a sturdy paint tray that can<br />
be attached to a ladder and<br />
1 or 2 good rollers.<br />
Brushes – Select a quality 2” - 2.5”<br />
(50 - 63mm) angled brush for<br />
cutting-in trim. Choose pure bristle<br />
natural hair brushes for alkyd or oil<br />
based paints and synthetic brushes<br />
for use with both water based and<br />
alkyd paints. Top quality brushes will<br />
hold more paint, have less dripping<br />
and spattering, apply paint more<br />
smoothly with minimal brush marks,<br />
give a long, even release of paint<br />
and provide better “cut-in” ability.<br />
Quality tools can be cleaned and<br />
saved for your next painting project.<br />
Rollers – Rollers are available in various nap sizes,<br />
fabrics, lengths and quality grades. Choose premium<br />
quality rollers to minimize fluff, spattering and<br />
unwanted marking.<br />
nap length<br />
5mm - 1/4”<br />
10mm - 3/8”<br />
15 - 30mm<br />
1/2” - 1-1/4”<br />
applications<br />
semi or high gloss paints on<br />
smooth surface walls<br />
flat or low gloss on<br />
smooth walls<br />
all paint types on rough or<br />
stippled surfaces such as stucco<br />
UNLOCK YOUR CREATIVITY<br />
For all of your home decorating and improvement needs,<br />
our trained and knowledgeable staff can help with your questions.
Tips:<br />
EXTERIOR PAINTING<br />
Use a 4’ extension<br />
handle for walls so<br />
that you don’t have to<br />
run up and down a<br />
ladder.<br />
Use a specialty masking<br />
tape on windows or in<br />
sunlight.<br />
It removes cleanly even<br />
after several days in<br />
direct sunlight. Regular<br />
masking tape can be<br />
very difficult to remove<br />
and will often pull off in<br />
pieces and leave<br />
adhesive behind on the<br />
surface. The specialty<br />
tape can be slightly<br />
more expensive to<br />
purchase but when you<br />
consider the extra time<br />
and inconvenience of<br />
scraping the pieces of<br />
regular masking tape<br />
and cleaning the<br />
adhesive residue it<br />
leaves behind, the<br />
specialty tape actually<br />
costs less. Often this<br />
specialty tape is a blue<br />
color.<br />
Volume 1<br />
A STEP-BY-STEP GUIDE<br />
Buy your Tools and Materials<br />
Spray Application – Sprayers can be bought or<br />
rented. Ask one of our professionals for advice before<br />
attempting this method of application.<br />
Special Tools – Surfaces with<br />
unusual angles and contours are<br />
sometimes difficult to paint. Special<br />
tools can make difficult areas easier<br />
to paint; pipe rollers & paint mitts<br />
for pipes and other contoured<br />
surfaces, various paint pads and<br />
trimmers, long handled rollers<br />
and brushes for hard to reach areas.<br />
Surface Preparation & Application<br />
Prepare to <strong>Paint</strong><br />
1. Gather materials and tools.<br />
2. Remove or cover window and<br />
door hardware. Note: Regular<br />
masking tape is very difficult to<br />
remove if left on outside for more<br />
than 24 hours. Use low tack<br />
masking tape or remove the<br />
regular masking tape as soon<br />
as possible.<br />
3. Cover shrubs and walkways.<br />
4. Play it safe! Wear a long sleeved shirt, painter hat,<br />
safety glasses, and a dust mask or gloves if needed.<br />
When using a ladder, be sure to have a level firm<br />
base.<br />
UNLOCK YOUR CREATIVITY<br />
For more information about our products, visit us on the web at<br />
www.cloverdalepaint.com
Tips:<br />
EXTERIOR PAINTING<br />
We will be happy to<br />
tint the primer to a<br />
similar tone as your<br />
topcoat to improve<br />
hiding and minimize<br />
the possibility of<br />
applying multiple<br />
coats.<br />
Prime the entire<br />
surface if you are<br />
painting a light color<br />
over a dark color.<br />
Our stores have<br />
knowledgeable staff<br />
to assist you with any<br />
preparation<br />
question. Just ask.<br />
Volume 1<br />
A STEP-BY-STEP GUIDE<br />
Prepare the Surface<br />
<strong>Paint</strong> can accentuate the surface condition, it is<br />
important that the surface be well prepared.<br />
1. Scrape or wire brush off any loose paint and rust.<br />
2. Remove oil, grease and dirt by hand or by<br />
pressure washing the surface. If mildew is present,<br />
wash with a solution consisting of 1 part bleach<br />
with 3 parts water. A car wash or turks head<br />
cleaning brush works great. Leave the bleach<br />
solution on the surface for at least 20 minutes to<br />
kill the mildew. Scrub solution vigorously on the<br />
surface and rinse thoroughly with water. Allow to<br />
dry. Use gloves and eye protection and follow the<br />
bleach manufacturer’s instructions. Don’t forget to<br />
cover your plants and shrubs.<br />
3. Make all needed repairs. Patch and<br />
fill all holes and cracks, replace<br />
loose or rotted wood.<br />
4. Caulk siding joints and around<br />
windows and doors. Make sure vents<br />
in soffits and eaves are clean.<br />
5. Sand all patches smooth.<br />
6. <strong>Exterior</strong> weathered surfaces that<br />
have been washed with TSP do not<br />
usually need sanding. Areas under the<br />
eaves and soffits not exposed to<br />
sunlight or shiny areas should be<br />
scuff sanded with 80 grit sandpaper<br />
to maximize adhesion.<br />
7. Spot prime all repaired or bare areas.<br />
UNLOCK YOUR CREATIVITY<br />
For all of your home decorating and improvement needs,<br />
our trained and knowledgeable staff can help with your questions.
Tips:<br />
EXTERIOR PAINTING<br />
Don’t forget to wear<br />
sunscreen.<br />
For the best results,<br />
apply paint above<br />
10°C (50°F). Do not<br />
apply in direct<br />
sunlight or on a hot<br />
surface.<br />
Stop painting at least<br />
2 hours before<br />
anticipated rain.<br />
Do not overspread the<br />
paint. If you are<br />
covering more than<br />
400 sq. ft. (37 sq.m)<br />
per gallon (3.70 litre)<br />
can on a smooth<br />
surface, your paint is<br />
too thin which will<br />
result in poor<br />
coverage.<br />
Volume 1<br />
A STEP-BY-STEP GUIDE<br />
Apply <strong>Paint</strong> & Stain<br />
Before You Start<br />
Safety comes first. Take a few minutes to ensure that<br />
your work environment is risk-free. Read and follow<br />
product labels, especially the caution and safety<br />
information.<br />
<strong>Paint</strong><br />
For a professional looking paint<br />
job, paint must be spread evenly<br />
onto the surfaces without running,<br />
dripping or lapping onto other<br />
areas. Keep these three steps in mind<br />
when painting… paint is first applied,<br />
then distributed, then finally smoothed.<br />
1. Stir the paint well before and<br />
occasionally during use. Use a lifting<br />
motion with the stir stick to ensure<br />
all solids on the bottom are<br />
well mixed.<br />
<strong>Exterior</strong> paint is best applied with a brush.<br />
This actually works the paint into the surface for<br />
better adhesion. Rollers or paint pads can also<br />
be used.<br />
2. Apply paint in the following order;<br />
a. Roof Trim.<br />
b. Walls.<br />
c. Doors.<br />
d. Windows.<br />
In general, work from the top down.<br />
UNLOCK YOUR CREATIVITY<br />
For more information about our products, visit us on the web at<br />
www.cloverdalepaint.com
Tips:<br />
EXTERIOR PAINTING<br />
Use an extension pole<br />
to speed up application.<br />
Want to take a break?<br />
Stop at visual break<br />
points to avoid uneven<br />
lap marks.<br />
Dip the brush loading<br />
one third of bristle<br />
length then tap the<br />
bristles against the<br />
side of the can – do<br />
not scrape brush on<br />
the can rim.<br />
Volume 1<br />
A STEP-BY-STEP GUIDE<br />
Brush Application Technique<br />
Pour mixed paint ½ of the depth of your brush’s<br />
bristles into a pail. Dip the brush loading one third of<br />
bristle length then tap the bristles against the side of<br />
the can – do not scrape brush on the can rim. Cut in<br />
edges using the narrow edge of the brush, pressing<br />
just enough to flex the bristles. Keep an eye on the<br />
edge to keep it straight.<br />
Roof Trim – Begin by cutting edges<br />
with a 2” (50mm) brush stroke. With<br />
your brush, start in the corner and<br />
paint across the width of the trim and<br />
slightly overlap brush strokes to prevent<br />
one lap from drying before the next lap.<br />
<strong>Paint</strong> in 3’ – 4’ (1 metre - 1-1/2 metre)<br />
sections.<br />
Roller Technique<br />
Roll the roller back and forth in lower<br />
portion of the paint tray until it is loaded. Then roll<br />
back and forth on the ridges of the upper section to<br />
remove excess paint. <strong>Paint</strong> a large “W” about three<br />
feet across, then work back-and-forth to distribute,<br />
then up & down to smooth. The final stroke is up,<br />
rolling in one direction only (called “backrolling”).<br />
Walls / Siding – Do one wall at a time starting in the<br />
top corner working down. Cut in next to all trim<br />
areas and in the corners. Overlap roller 2” to 3”<br />
(50mm - 75mm) to avoid missing spots. Keep roller<br />
strokes parallel and remember to back roll. For<br />
brushing, use a 3” (75mm) wall brush and work in<br />
areas of about 2’ (½ metre) square.<br />
UNLOCK YOUR CREATIVITY<br />
For all of your home decorating and improvement needs,<br />
our trained and knowledgeable staff can help with your questions.
Tips:<br />
EXTERIOR PAINTING<br />
When pausing for a<br />
snack or overnight,<br />
wrap your brush or<br />
roller sleeve in plastic<br />
film to seal out air and<br />
then store in a cool<br />
place. This will reduce<br />
the number of times<br />
you have to clean your<br />
tools.<br />
Clean brushes with a<br />
“brush comb” to align<br />
the bristles and<br />
remove traces of<br />
paint. Store brushes in<br />
their original covers,<br />
brown wrapping<br />
paper or plastic film.<br />
Clean any specks of<br />
paint off windows<br />
with a razor scraper.<br />
Place a thin film of<br />
solvent on top of<br />
alkyd paints to<br />
prevent skinning –<br />
do not shake.<br />
Volume 1<br />
A STEP-BY-STEP GUIDE<br />
Apply <strong>Paint</strong> & Stain<br />
Trim – Use a 2” – 2.5” (50mm - 63mm)<br />
angled brush.<br />
Doors – Start with the edges using<br />
a 2” – 3” (50mm - 75mm) brush then<br />
paint the rest of the door with a roller<br />
working from the top to the bottom. For paneled<br />
doors, start with the edge and mouldings then<br />
complete the flat areas. “Tip off” the door by gently<br />
running the brush from top to bottom. This will leave<br />
a smooth finish.<br />
Windows – Lower the outside sash completely.<br />
Use a 2” – 2.5” (50mm - 63mm) angled brush to paint<br />
side and top areas where the sashes slide, then paint<br />
the entire lower sash and crossbars.<br />
When paint is dry, push up the outside sash and<br />
window and paint them. Finish the side and bottom<br />
sliding areas. Open and close frequently until the<br />
paint is dry.<br />
Clean Up & Finish the Job<br />
1. Clean tools – Quality tools will<br />
last for years if properly cleaned<br />
and stored.<br />
Latex <strong>Paint</strong> – Clean brushes, roller and tray using<br />
soap and warm water before the paint dries.<br />
Alkyd <strong>Paint</strong> – Use the correct thinner<br />
then remove residue with warm<br />
soapy water.<br />
UNLOCK YOUR CREATIVITY<br />
For more information about our products, visit us on the web at<br />
www.cloverdalepaint.com
Tips:<br />
EXTERIOR PAINTING<br />
If you have a little<br />
paint left over, you<br />
can get rid of it by<br />
painting on another<br />
coat or paint onto<br />
scrap cardboard and<br />
throw out the dried<br />
cardboard instead of<br />
disposing the liquid<br />
paint. Let rags, paint<br />
cans, newspaper, etc.,<br />
dry before disposal.<br />
Volume 1<br />
A STEP-BY-STEP GUIDE<br />
Clean Up & Finish the Job<br />
2. Store paint and cleaners safely. Ensure that paints<br />
are airtight. Store paint in a cool, dry area – ideally<br />
a shed, closet or locking cabinet. Keep out of<br />
storage areas that freeze. Ensure that paint is<br />
stored away from radiators or any other source of<br />
combustion. Transfer partially empty cans to<br />
smaller containers where there’s less air to dry the<br />
paint out. Keep away from children & pets.<br />
Dispose of paint<br />
If you bought too much paint and don’t want to store<br />
it, offer it to a friend or community group. If you can’t<br />
give it away, check with your local municipality for<br />
disposal advice.<br />
3. Record paint name and number for future<br />
reference and correct matching. Label each can by<br />
area, i.e.: siding, fence, front door.<br />
4. Replace hardware.<br />
Enjoy your new, revitalized home!<br />
UNLOCK YOUR CREATIVITY<br />
For all of your home decorating and improvement needs,<br />
our trained and knowledgeable staff can help with your questions.
NOTES<br />
A STEP-BY-STEP GUIDE<br />
UNLOCK YOUR CREATIVITY<br />
For more information about our products, visit us on the web at<br />
www.cloverdalepaint.com
Your Local <strong>Cloverdale</strong> <strong>Paint</strong> Store<br />
www.cloverdalepaint.com<br />
Copyright © <strong>Cloverdale</strong> <strong>Paint</strong> Inc. 2005 86268