Catalyst Manual - Cal Stage
Catalyst Manual - Cal Stage
Catalyst Manual - Cal Stage

Create successful ePaper yourself
Turn your PDF publications into a flip-book with our unique Google optimized e-Paper software.
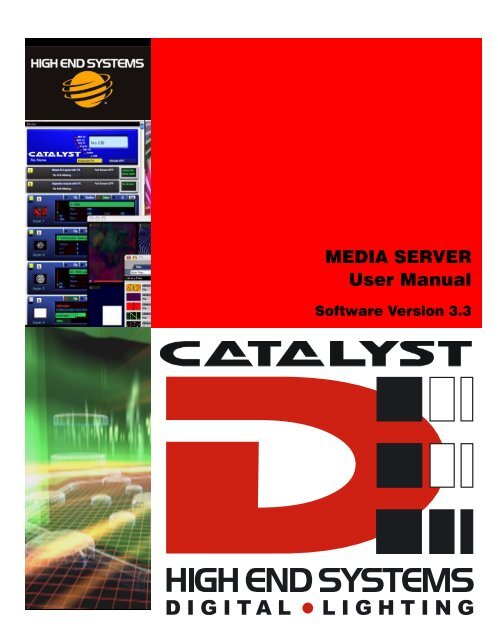
MEDIA SERVER<br />
User <strong>Manual</strong><br />
Software Version 3.3
Patents<br />
This product may use one or more of the following patents:<br />
US 4,392,187; US 4,602,321; US 4,688,161; US 4,701,833; US 4,709,311; US 4,779,176;<br />
US 4,800,474; US 4,962,687; US 4,972,306; US 4,980,806; US 5,010,459; US 5,031,078;<br />
US 5,073,847; US 5,078,039; US 5,186,536; US 5,209,560; US 5,278,742; US 5,282,121;<br />
US 5,307,295; US 5,329,431; US 5,331,822; US 5,367,444; US 5,402,326; US 5,430,629;<br />
US 5,432,691; US 5,454,477; US 5,455,748; US 5,506,762; US 5,515,254; US 5,537,303;<br />
US 5,545,951; US 5,580,164; US 5,590,954; US 5,590,955; US 5,640,061; US 5,647,662;<br />
US 5,665,305; US 5,691,886; US 5,728,994; US 5,758,955; US 5,758,956; US 5,769,527;<br />
US 5,774,273; US 5,798,619; US 5,806,951; US 5,823,661; US 5,825,548; US 5,828,485;<br />
US 5,829,868; US 5,857,768; US 5,882,107; US 5,934,794; US 5,940,204; US 5,945,786;<br />
US 5,953,152; US 5,980,066; US 6,048,080; US 6,327,103; US 6,048,081; US 6,057,958;<br />
US 6,054,816; US 6,126,288; US 6,142,652; US 6,172,822; US 6,188,933; US 6,208,087;<br />
US 6,219,093; US 6,220,730; US 6,241,366; US 6,255,787; US 6,256,136; US 6,278,542;<br />
US 6,288,828; US 6,327,103; US 6,421,165; US 6,430,934; US 6,466,357; US 6,502,961;<br />
US D347,113; US D350,408; US D359,574; US D360,404; US D365,165; US D366,712;<br />
US D370,080; US D372,550; US D377,338; US D381,740; US D409,771; US 6693392;<br />
US 6719433; EP 0662275; EP 0767398; DE 621495; DE 655144; DE 797503; EP 0475082;<br />
GB 2 043 769 B; GB 2 055 842 B; GB 2 283 808 B; GB 2 290 134 B; GB 2 291 814 B; GB 2<br />
292 530 B; GB 2 292 896 B; GB 2 294 909 B; GB 2 295 058 B; GB 2 303 203 B; GB 2 306 887<br />
B; GB 2 307 036 B; GB 2 316 477 B; MR0862-1996; M9,604,224.9
User <strong>Manual</strong><br />
Copyright ©2004 High End Systems, Inc. All rights reserved.<br />
Information and specifications in this document are subject to change without notice.<br />
High End Systems, Inc. assumes no responsibility or liability for any errors or<br />
inaccuracies that may appear in this manual.<br />
Trademarks used in this text: High End Systems, <strong>Catalyst</strong>, the <strong>Catalyst</strong> Logo, Wholehog<br />
III, and LithoPatterns are registered trademarks; and Talkback, the High End Systems<br />
globe logo, and the Hog logo are trademarks of High End Systems, Inc. or<br />
High End Systems Europe Ltd. Belden is a registered trademark of Belden, Inc. Apple,<br />
Final Cut Pro, Finder, FireWire, Mac, Mac OS, MacPaint, PowerMac, and QuickTime are<br />
trademarks of Apple Computer, Inc., registered in the United States and other countries.<br />
Adobe, Photoshop, and Premiere are registered trademarks of Adobe Systems, Inc.<br />
Extron is a registered trademark of Extron Electronics. Leitch is a registered trademark of<br />
Leitch Technology Corporation. Sony is a registered trademark of Sony. Radeon is a<br />
registered trademarks of ATI Corporation in the United States and /or other countries.<br />
Macromedia is a registered trademark and Flash is a trademark of Macromedia, Inc. ETL<br />
and C-ETL are registered trademarks of Intertek Testing Services. Omega Deck is a<br />
trademark of Fast Forward Video, Inc. Artnet is a trademark of Artistic Licence Ltd .<br />
Other trademarks and trade names may be used in this document to refer to either the<br />
entities claiming the marks and names or their products. High End Systems disclaims any<br />
proprietary interest in trademarks and trade names owned by others.<br />
<strong>Catalyst</strong> Media Server User <strong>Manual</strong><br />
Rev_111204 Printed in the USA<br />
Media Server<br />
<strong>Catalyst</strong>® V3 Media Server User <strong>Manual</strong> i<br />
®
1<br />
Contacting High End Systems ®<br />
US and the Americas<br />
Sales Department: High End Systems, Inc.<br />
2105 Gracy Farms Lane<br />
Austin, TX 78758 USA<br />
voice: 512.836.2242<br />
fax: 512.837.5290<br />
Customer Service: High End Systems, Inc.<br />
2105 Gracy Farms Lane<br />
Austin, TX 78758 USA<br />
voice: 800.890.8989<br />
24-hour fax: 512.834.9195<br />
24-hour voice mail: 512.837.3063 or 800.890.8989<br />
U.S. New York High End Systems, Inc. New York<br />
311 W. 43rd Street<br />
New York, NY 10036<br />
voice: 210.957.6840<br />
fax: 212.957.4466<br />
U.S. Los Angeles: High End Systems, Inc.<br />
8200 Haskell Avenue<br />
Van Nuys, CA 91406 US<br />
voice: 818.947.0550<br />
fax: 818.908.8975<br />
Europe Headquarters: High End Systems Europe LTD.<br />
53 Northfield Road<br />
London W13<br />
voice: +44 20.8579.5665<br />
fax: +44 20.8579.8469<br />
Asia: High End Systems Singapore Pte. Ltd.<br />
1 Tannery Road 06-05<br />
Cencon 1<br />
Singapore 1334<br />
voice: +65 6742 8266<br />
FAX: +65 6743 9322<br />
World Wide Web: http://www.highend.com<br />
ii <strong>Catalyst</strong>® V3 Media Server User <strong>Manual</strong>
Declaration of Conformity<br />
according to ISO/IEC Guide 22 and EN45104<br />
Manufacturer's name: High End Systems<br />
2105 Gracy Farms Lane<br />
Austin, TX, 78758 USA<br />
Distributor's name: High End Systems, Inc.<br />
Distributor's address: 2105 Gracy Farms Lane<br />
Austin, TX, 78758 USA<br />
Declares that the product:<br />
Product Name: <strong>Catalyst</strong><br />
Product Number: All<br />
Product Options: All<br />
Conforms to the following EEC directives:<br />
73/23/EEC, as amended by 93/68/EEC<br />
89/336/EEC, as amended by 92/31/EEC and 93/68/EEC<br />
Equipment referred to in this declaration of conformity was first manufactured in<br />
compliance with the following standards in 2002:<br />
<strong>Catalyst</strong> Interface Box<br />
EMC: EN55103-1:1996 (E2)<br />
EN55103-2:1996 (E2)<br />
Safety: EN60950:2000<br />
I, the undersigned, hereby declare that the equipment specified above conforms to the<br />
above Directives and Standards.<br />
Kenneth Hansen<br />
22 June 2003<br />
<strong>Catalyst</strong>® V3 Media Server User <strong>Manual</strong> iii
1<br />
Important Safety Information<br />
Instructions pertaining to continued protection against fire, electric shock, and injury to<br />
persons are found in Appendix D. Please read all instructions prior to assembling,<br />
mounting, and operating this equipment.<br />
Important: Informations De Sécurité. Les instructions se rapportant à la<br />
protection permanente contre les incendies, l’électrocution, excessif et aux blessures<br />
corporelles se trouvent dans l’Annexe D. Veuillez lire toutes les instructions avant<br />
d’assembler, de monter ou d’utiliser cet équipement.<br />
Wichtige Sicherheitshinweise. Sicherheitsanleitungen zum Schutz gegen Feuer,<br />
elektrischen Schlag, und Verletzung von Personen finden Sie in Anhang D. Vor der<br />
Montage, dem Zusammenbau und der Intbetriebnahme dieses Geräts alle Anleitungen<br />
sorgfältig durchlesen.<br />
Informazioni Importanti Di Sicurezza. Le istruzioni sulla protezione da incendi,<br />
folgorazione, e infortuni sono contenute nell’appendice D. Si prega di leggere tutte le<br />
istruzioni prima di assemblare, montare e azionare l’apparecchiatura.<br />
Informacion Importante De Seguridad. En el Apéndice D se encuentran<br />
instrucciones sobre protección continua contra incendios, descarga eléctrica, y lesiones<br />
personales. Lea, por favor, todas las instrucciones antes del ensamblaje, montaje y<br />
operación de este equipo.<br />
Warning Labels<br />
The following international caution and warning symbols appear throughout this manual<br />
to highlight messages.<br />
CAUTION!<br />
This symbol appears adjacent to Caution messages.<br />
Not heeding these messages could result in personal<br />
injury or damage to the equipment.<br />
WARNING!<br />
This symbol appears adjacent to high voltage warning<br />
messages. Not heeding these messages could result in<br />
serious personal injury.<br />
iv <strong>Catalyst</strong>® V3 Media Server User <strong>Manual</strong>
Introduction<br />
The High End Systems <strong>Catalyst</strong>® Media Server utilizes <strong>Catalyst</strong> software to allow<br />
simultaneous preview and play back of multiple still images or movie files. <strong>Catalyst</strong><br />
software add effects such as crossfading (dissolves), montages, masking, strobing, color<br />
changes, and 3D geometry—all rendered in real time. The resulting composite image can<br />
be triggered from a lighting console using DMX-512 protocol; or, in the case of userdefined<br />
Presets, with a computer keyboard, mouse or touchscreen.<br />
The Media Server plays many types of content—Quicktime video files, JPEG and GIF still<br />
images, and any other industry-standard format supported by Apple’s Quicktime player.<br />
The <strong>Catalyst</strong> system package includes a wide variety of still and movie files. In addition,<br />
custom content can be easily added to the system. Independent video signals can be sent<br />
to LED walls, DL1 digital lights, or digital media projectors, each controlled and operated<br />
independently.<br />
<strong>Catalyst</strong> Media Servers are available in a turnkey system with fully configured hardware<br />
and software. Information on configuring a hardware system to run <strong>Catalyst</strong> software only<br />
projects can be found in the Digital Lighting Support section of the High End Systems<br />
website.<br />
<strong>Catalyst</strong> Software Versions<br />
High End Systems currently offers three <strong>Catalyst</strong> Media Server software products.<br />
• <strong>Catalyst</strong> Pro offers eight layers with two video feeds from one server.<br />
• <strong>Catalyst</strong> DV is a single digital output solution with five cross-fadable layers.<br />
• <strong>Catalyst</strong> Xpress is a software only product with 2 movie layers, 1 mask layer and a<br />
single output.<br />
Choosing the right version of <strong>Catalyst</strong> software will depend on the number of layers,<br />
inputs and outputs you will need and your performance requirements.<br />
The following matrix compares each version’s feature set.<br />
Feature Pro * DV ** Xpress**<br />
Dual Output Yes No No<br />
Single Output Yes Yes Yes<br />
Total number of layers 8 5 3<br />
Movie Playback layers 4 4 2<br />
Video Inputs 2 2 1<br />
<strong>Catalyst</strong>® V3 Media Server User <strong>Manual</strong> v
Introduction<br />
MIDI Show Control Input Yes Yes Yes<br />
Serial Control Devices 4 3 0<br />
RS422 Control Devices 3 2 0<br />
MIDI Timecode Input Yes Yes No<br />
Presets Yes Yes Yes<br />
Movie Audio Support Yes Yes Yes<br />
Turnkey or Software Only Version Both Both Software only<br />
* The Pro version of <strong>Catalyst</strong> software can, in theory, play 8 movies back<br />
simultaneously if you have the appropriate hard drive array. Some hardware<br />
configurations can affect performance for multiple layer playback. For<br />
example, a <strong>Catalyst</strong> server running on a Dual 2.0 GHz G5 with all stock media<br />
served on an Atlas IV 10,000 RPM SCSI drive can generally playback a<br />
maximum of four simultaneous movies at PAL or NTSC resolutions and<br />
framerates, or fewer at higher resolutions. The additional layers can still be<br />
used effectively for masks, video input, images/gobos or for pre-loading<br />
movies.<br />
** <strong>Catalyst</strong> DV and Xpress have one output that can mix layers and one that<br />
can display only the separate layers with or without FX layout. DV and<br />
Xpress also contain a non-movie layer that can serve as a 'mask' layer,<br />
which can play still images, 'gobos', or movie frames only. Pro does not<br />
contain such a layer.<br />
Product specifications are subject to change without notice.<br />
This <strong>Manual</strong><br />
Feature Pro * DV ** Xpress**<br />
This <strong>Manual</strong> describes and illustrates all the features in <strong>Catalyst</strong> Pro Media Server<br />
turnkey system running <strong>Catalyst</strong> Version 3.3. If you are using another Software version,<br />
some of the features described in this manual may not be available. Support pages with<br />
manual downloads are available for previous versions at the High End Systems website:<br />
(http://www.highend.com/support/digital_lighting)<br />
vi <strong>Catalyst</strong>® V3 Media Server User <strong>Manual</strong>
Table of Contents<br />
Contacting High End Systems® ........................................................................................ii<br />
Important Safety Information .......................................................................................... iv<br />
Warning Labels .................................................................................................................iv<br />
Introduction .......................................................................................................v<br />
<strong>Catalyst</strong> Software Versions ............................................................................................... v<br />
This <strong>Manual</strong> ....................................................................................................................... vi<br />
Chapter 1: System Overview ...........................................................................1<br />
Selecting Media for Playback ............................................................................................ 2<br />
Working with Layers .......................................................................................................... 2<br />
Software Security ............................................................................................................... 2<br />
Chapter 2: QuickStart ......................................................................................3<br />
Media Server Setup ............................................................................................................ 3<br />
Unpacking the Roadcase ............................................................................................... 3<br />
Inspecting Your <strong>Catalyst</strong> Media Server ........................................................................ 3<br />
Setting up the Server Rack ............................................................................................ 4<br />
Hardware Connections ...................................................................................................... 5<br />
Connecting Preview Monitors and Outputs ................................................................. 5<br />
<strong>Catalyst</strong> Pro Dual Output Versions ........................................................................... 5<br />
<strong>Catalyst</strong> DV Single Output Versions ......................................................................... 6<br />
Connecting the Media Server to a DMX-512 Link ....................................................... 6<br />
<strong>Catalyst</strong> Software Application Setup ................................................................................ 7<br />
Configuring the <strong>Catalyst</strong> Software ................................................................................ 8<br />
Choose Output Options .............................................................................................. 8<br />
Set DMX Start Channels for Layers ......................................................................... 8<br />
Projecting Images Using Full Screen Mode ................................................................. 9<br />
System Shutdown .............................................................................................................. 9<br />
Chapter 3: Tutorials ........................................................................................11<br />
Lesson 1: Still Logo on Moving Background ................................................................. 11<br />
Set up Layer 1 ............................................................................................................... 11<br />
Add the Logo ................................................................................................................. 12<br />
Turn Layer 2 Background Transparent ...................................................................... 12<br />
Lesson 2: Crossfading Between Layers .......................................................................... 13<br />
Set Up First Cue ........................................................................................................... 13<br />
Setup the Second Cue and Playback .......................................................................... 14<br />
<strong>Catalyst</strong>® Media Server User <strong>Manual</strong> vii
Table of Contents<br />
Lesson 3: Image Color and Scale ................................................................................... 15<br />
Set up Layer 1 .............................................................................................................. 15<br />
Set Layer 1 Rotation, Position, and Scale .................................................................. 15<br />
Playback ....................................................................................................................... 16<br />
Lesson 4: Trails ................................................................................................................ 17<br />
Understanding Trails ................................................................................................... 17<br />
Applying Trails to Layer 1 ........................................................................................... 17<br />
Adding Trails to Layer 2 .............................................................................................. 18<br />
Lesson 5: Shutters ........................................................................................................... 19<br />
Understanding Shutters .............................................................................................. 19<br />
Set up Layer 1 .............................................................................................................. 19<br />
Add Shutters with Layer 2 ........................................................................................... 19<br />
Chapter 4: Windows Menus ..........................................................................21<br />
The <strong>Catalyst</strong> Interface ..................................................................................................... 21<br />
Selection Tools ................................................................................................................. 21<br />
<strong>Catalyst</strong> Control Window ................................................................................................ 22<br />
Components ................................................................................................................. 22<br />
CIB Panel ...................................................................................................................... 23<br />
Output Control(s) ......................................................................................................... 23<br />
Layer Panel ................................................................................................................... 24<br />
DMX In Panel ............................................................................................................... 25<br />
Video Input ................................................................................................................... 25<br />
Sound Input .................................................................................................................. 25<br />
Custom Serial Inputs ................................................................................................... 26<br />
Library Window ............................................................................................................... 27<br />
Files Tab ....................................................................................................................... 27<br />
Folders Tab ................................................................................................................... 28<br />
Color FX Tab ................................................................................................................ 30<br />
Geometry FX Tab ......................................................................................................... 30<br />
Presets Tab ....................................................................................................................... 31<br />
Output Windows .............................................................................................................. 32<br />
Chapter 5: Output Displays ...........................................................................33<br />
DV1 Video Distribution Amplifier .................................................................................. 33<br />
<strong>Catalyst</strong> Interface Box (CIB) ........................................................................................... 33<br />
Configuring Output Displays .......................................................................................... 34<br />
Output Configurations .................................................................................................... 36<br />
Single Output with Redundant Monitor ..................................................................... 36<br />
Dual Output Device With Preview Monitor ............................................................... 37<br />
Dual Outputs with Emulation Monitors ..................................................................... 38<br />
Dual Outputs with DL1 Dimming Control ................................................................. 39<br />
viii <strong>Catalyst</strong>® Media Server User <strong>Manual</strong>
Table of Contents<br />
Dual Outputs Widescreen Layers ................................................................................ 40<br />
Chapter 6: Media Playback ............................................................................41<br />
Libraries and Files ............................................................................................................41<br />
Preloaded Library Folders ........................................................................................... 41<br />
Referencing Content with the Use Layer ................................................................ 42<br />
In Frame and Out Frame ............................................................................................. 42<br />
Video Playback .................................................................................................................43<br />
Play Mode ..................................................................................................................... 43<br />
Playback Speed ................................................................................................................ 45<br />
Chapter 7: Movement and Size .....................................................................47<br />
X, Y, and Z Rotation ......................................................................................................... 47<br />
X Position ......................................................................................................................... 49<br />
Y Position .......................................................................................................................... 50<br />
Scale .................................................................................................................................. 51<br />
Image Movement Time .................................................................................................... 52<br />
Aspect Ratio ...................................................................................................................... 53<br />
Chapter 8: Intensity and Color ......................................................................55<br />
Intensity ............................................................................................................................ 55<br />
Red, Green, and Blue ....................................................................................................... 56<br />
Color Effects ..................................................................................................................... 57<br />
0 RGB Subtract ............................................................................................................. 57<br />
1 RGB Subtract High Contrast .................................................................................... 58<br />
2 RGB Subtract V High Contrast ................................................................................. 58<br />
3 Transparent Blacks ................................................................................................... 59<br />
4 Transparent Whites ................................................................................................... 60<br />
10 RGB Subtract Inverted Color .................................................................................. 61<br />
11 RGB Subtract High Contrast Inverted Color ......................................................... 61<br />
12 RGB Subtract Super High Contrast Inverted Color .............................................. 62<br />
13 Invert Whatever ....................................................................................................... 62<br />
14 RGB Subtract Inverted Color CMY ........................................................................ 63<br />
15 RGB Subtract High Contrast Inverted Color CMY ............................................... 63<br />
16 RGB Subtract Super High Contrast Inverted Color CMY .................................... 64<br />
20 Black and White ...................................................................................................... 64<br />
21 Black and White High Contrast .............................................................................. 65<br />
22 Black and White Super High Contrast ................................................................... 65<br />
23 Black and White Variable Super High Contrast ................................................... 66<br />
24 Invert Black and White ........................................................................................... 66<br />
30 Mask ......................................................................................................................... 67<br />
31 Invert Mask 1 ........................................................................................................... 67<br />
<strong>Catalyst</strong>® Media Server User <strong>Manual</strong> ix
Table of Contents<br />
32 Invert Mask 2 .......................................................................................................... 68<br />
35 Mask Fading ............................................................................................................ 68<br />
36 Invert Mask 1 Fading .............................................................................................. 68<br />
37 Invert Mask 2 Fading .............................................................................................. 68<br />
40 Alpha Invert as Red ................................................................................................ 69<br />
41 Alpha Invert as Green ............................................................................................. 69<br />
42 Alpha Invert as Blue ............................................................................................... 70<br />
43 Alpha Invert as Color .............................................................................................. 70<br />
44 Alpha as Red ........................................................................................................... 71<br />
45 Alpha as Green ........................................................................................................ 71<br />
46 Alpha as Blue .......................................................................................................... 72<br />
47 Alpha as Color ......................................................................................................... 72<br />
50 Lookup 1 Color Wheel ............................................................................................ 73<br />
51 Lookup 2 False Color .............................................................................................. 73<br />
52 Lookup 3 Black and White Solarize Highlights .................................................... 74<br />
60 Gamma Black and White ........................................................................................ 74<br />
61 Gamma Color .......................................................................................................... 75<br />
62 Gamma Color Separate Channels ......................................................................... 76<br />
63 Gain Color Separate Channels ............................................................................... 77<br />
65 Quantize Color Separate Channels ....................................................................... 78<br />
70 Convert to YUV ....................................................................................................... 79<br />
71 Saturation ................................................................................................................ 79<br />
72 Mega Saturation ...................................................................................................... 80<br />
73 Solarize .................................................................................................................... 80<br />
74 Solarize Invert ......................................................................................................... 81<br />
80 RGB Layer Blend 1 ................................................................................................. 81<br />
81 RGB Layer Blend 2 ................................................................................................. 82<br />
82 RGB Layer Blend 3 ................................................................................................. 82<br />
83 RGB Layer Blend 4 ................................................................................................. 83<br />
84 RGB Layer Blend 5 ................................................................................................. 83<br />
85 RGB Layer Blend 6 Add .......................................................................................... 84<br />
86 RGB Layer Blend 7 Subtract .................................................................................. 84<br />
89 RGB Layer Blend 10 Maximum ............................................................................. 85<br />
90 RGB Layer Blend 11 Add 2 ..................................................................................... 85<br />
100 Tint ......................................................................................................................... 86<br />
101 Tint Inverse ........................................................................................................... 86<br />
102 Fade to Hue ........................................................................................................... 87<br />
103 RGB > GBR ........................................................................................................... 87<br />
104 RGB > BGR ........................................................................................................... 88<br />
105 RGB > GRB ........................................................................................................... 88<br />
Chapter 9: Strobing and Trails ......................................................................89<br />
Strobing ............................................................................................................................ 89<br />
Trails ................................................................................................................................. 90<br />
x <strong>Catalyst</strong>® Media Server User <strong>Manual</strong>
Table of Contents<br />
Chapter 10: Visual Effects .............................................................................91<br />
0 Movie on Non-Infinite Plane ..................................................................................... 91<br />
1 Movie on Infinite Plane with Black Border ............................................................. 92<br />
2 Movie Unity Scaling .................................................................................................. 93<br />
4 Full Screen ................................................................................................................. 93<br />
5 Movie Keystone 1 ...................................................................................................... 94<br />
9 Setup Image Keystone 1 ........................................................................................... 95<br />
10 Movie on Sphere Filled ........................................................................................... 95<br />
11 Movie on Sphere Wireframe ................................................................................... 96<br />
12 Movie on Sphere Points .......................................................................................... 96<br />
13 Movie on Sphere Lit ................................................................................................ 97<br />
14 Movie on Disc Filled ................................................................................................ 97<br />
15 Movie on Disc Wireframe ....................................................................................... 98<br />
16 Movie on Disc Points ............................................................................................... 98<br />
17 Movie on Disc Silhouette ........................................................................................ 99<br />
20 Movie on Kaleidoscope ........................................................................................... 99<br />
21 Movie on Magic Lantern ....................................................................................... 100<br />
22 Movie Stretched ..................................................................................................... 101<br />
23 Movie Panorama Slices ......................................................................................... 102<br />
24 Movie on Magic Lantern 2 .................................................................................... 103<br />
30 Movie on Cube 4 Sides .......................................................................................... 104<br />
31 Movie on Cube 6 Sides .......................................................................................... 104<br />
32 Movie on Colored Cube 6 Sides ........................................................................... 105<br />
33 Movies First Four Layers on Cube ....................................................................... 105<br />
40 Movie on NxN Simultaneous ................................................................................ 106<br />
41 Movie on NxN Simultaneous Random Color ...................................................... 107<br />
42 Movie on NxN Consecutive .................................................................................. 107<br />
43 Movie on NxN Consecutive Random Color ......................................................... 107<br />
44 Movie on NxN Consecutive Random Frame ....................................................... 107<br />
45 Movie on Random Flicker ..................................................................................... 108<br />
46 Movie on Random Color Flicker .......................................................................... 108<br />
60 Rectangle Shuttered .............................................................................................. 109<br />
61 Rectangle Graduated Color Shuttered ................................................................. 110<br />
62 N Sided Shape Shuttered Black ........................................................................... 111<br />
70 Shutter Shuttered Black ........................................................................................ 112<br />
71 Shutter Shuttered Color ........................................................................................ 113<br />
72 Iris Shutter Black ................................................................................................... 114<br />
100 Movie on Teapot Filled ....................................................................................... 115<br />
120 Colored Sphere .................................................................................................... 115<br />
123 Spectrograph ....................................................................................................... 116<br />
Chapter 11: Keystone and Shutters ............................................................117<br />
Keystone Correction ...................................................................................................... 117<br />
Shutter Effects ................................................................................................................ 118<br />
Keystone Correction and Shutter Shape Preview ................................................ 118<br />
<strong>Catalyst</strong>® Media Server User <strong>Manual</strong> xi
Table of Contents<br />
Chapter 12: Art-Net Protocol ....................................................................119<br />
Setting Up the Server for Artnet .................................................................................. 119<br />
Assigning a DMX In Panel to Art-Net .......................................................................... 121<br />
Chapter 13: Audio ........................................................................................123<br />
Audio Input .................................................................................................................... 123<br />
Configuring the Audio Feed ...................................................................................... 123<br />
Activating the Audio Input ........................................................................................ 124<br />
Waveform Type Selection ......................................................................................... 124<br />
Audio Output .................................................................................................................. 125<br />
Audio Playback .......................................................................................................... 125<br />
Audio Device Set up for <strong>Catalyst</strong> Audio Output ...................................................... 125<br />
Setting Up DMX with Audio ..................................................................................... 126<br />
Playing Back Audio .................................................................................................... 126<br />
Creating Content with Audio Tracks ........................................................................ 126<br />
Chapter 14: Video Input ...............................................................................127<br />
Connecting the Video Feed ........................................................................................... 127<br />
Configuring the Video Input ......................................................................................... 127<br />
Chapter 15: Serial Control ...........................................................................129<br />
Connecting RS-232 Devices .......................................................................................... 129<br />
Assigning a DMX Channel ............................................................................................ 129<br />
Assigning the Interface and Data Format .................................................................... 130<br />
Setting the Serial Commands ....................................................................................... 131<br />
Custom String Command .......................................................................................... 132<br />
Sample Strings ........................................................................................................... 132<br />
Triggering Serial Devices from DMX .......................................................................... 133<br />
Chapter 16: MIDI Timecode .........................................................................135<br />
Connecting MIDI Timecode Devices ............................................................................ 135<br />
Assign the MIDI Device ................................................................................................ 135<br />
Synchronizing a Layer with MIDI Timecode ............................................................... 135<br />
Chapter 17: Sony 9-pin RS422 ....................................................................137<br />
Assigning the Interface and Data Format .................................................................... 138<br />
Assigning a DMX Value ................................................................................................ 140<br />
Triggering a Sony 9-pin Device from DMX ................................................................. 140<br />
Synchronizing to the Deck’s Timecode ....................................................................... 141<br />
Example 1 ................................................................................................................... 141<br />
Example 2 ................................................................................................................... 142<br />
xii <strong>Catalyst</strong>® Media Server User <strong>Manual</strong>
Table of Contents<br />
Chapter 18: Presets .....................................................................................143<br />
Creating a Preset ............................................................................................................ 144<br />
<strong>Catalyst</strong> Control Window ........................................................................................... 144<br />
Editing DMX Values in the Layer Panels ................................................................. 144<br />
File Tab Settings ..................................................................................................... 145<br />
Position Tab Settings ............................................................................................. 146<br />
Color Tab Settings .................................................................................................. 147<br />
FX Tab Settings ...................................................................................................... 148<br />
Setting DMX Values in the Library Preset Tab ........................................................ 148<br />
Naming the Preset ...................................................................................................... 149<br />
Editing a Preset .......................................................................................................... 149<br />
Storing a Preset .............................................................................................................. 150<br />
Preset Window Buttons .............................................................................................. 151<br />
Setting Crossfade Path and Fade Time ..................................................................... 152<br />
Triggering Presets .......................................................................................................... 153<br />
Triggering with a Keyboard, Mouse or Touchscreen .............................................. 153<br />
Triggering Presets with a Single DMX Channel ...................................................... 154<br />
Triggering Presets with Midi Show Control ............................................................. 154<br />
Chapter 19: Custom Content .......................................................................157<br />
Content Requirements ................................................................................................... 157<br />
Maximum Image Size ................................................................................................ 157<br />
Interlaced Images ....................................................................................................... 157<br />
Rendering Content ..................................................................................................... 158<br />
The Basics of Content Creation ............................................................................. 158<br />
Recommended CODECs ........................................................................................ 158<br />
Perceived Brightness .............................................................................................. 160<br />
Installing Libraries and Files ......................................................................................... 161<br />
Creating a New Library Folder .................................................................................. 161<br />
Adding New Files to a Library Folder ....................................................................... 162<br />
Chapter 20: Diagnostic Displays .................................................................163<br />
Hotkeys ........................................................................................................................... 163<br />
Displays ........................................................................................................................... 163<br />
<strong>Catalyst</strong> Version .......................................................................................................... 163<br />
This Computer ............................................................................................................ 164<br />
DMX Input Channels ................................................................................................. 165<br />
USB CIB DMX Input .................................................................................................. 165<br />
ArtNet DMX Input ...................................................................................................... 166<br />
Statistics ...................................................................................................................... 167<br />
Playbacks .................................................................................................................... 168<br />
Color FX Preview ....................................................................................................... 169<br />
Geometry FX Preview ................................................................................................ 170<br />
File Preview Library ................................................................................................... 171<br />
<strong>Catalyst</strong>® Media Server User <strong>Manual</strong> xiii
Table of Contents<br />
This Machine .............................................................................................................. 172<br />
Remote Machines ....................................................................................................... 173<br />
Chapter 21: Multiple Servers .......................................................................175<br />
Synchronizing Multiple Servers ................................................................................... 176<br />
Assigning Master Sync ID Numbers ........................................................................ 177<br />
Synchronizing Content .............................................................................................. 177<br />
Set Master Layer .................................................................................................... 177<br />
Set Slave Layer ....................................................................................................... 177<br />
Monitoring Remote Servers .......................................................................................... 178<br />
Broadcast Remote Preview ....................................................................................... 178<br />
Using the Remote Machines Diagnostic Display ..................................................... 179<br />
Accessing the Remote Machines Display Screen ................................................ 179<br />
Mimic Feature ........................................................................................................ 180<br />
Sending Remote Commands to Servers ...................................................................... 180<br />
Appendix A: Understanding DMX-512 .........................................................181<br />
Appendix B: DMX Protocol ..........................................................................181<br />
Appendix C: Copyrighted Materials FAQ ....................................................189<br />
Appendix D: Product and Safety Information ...............................................19<br />
Index ..............................................................................................................175<br />
xiv <strong>Catalyst</strong>® Media Server User <strong>Manual</strong>
Chapter 1:<br />
System Overview<br />
<strong>Catalyst</strong> Media Server Layers are designed to be controlled in a DMX-512 environment,<br />
The software’s user interface is used for configuration and diagnostic purposes and can<br />
also define presets for standalone operation. Media selections and manipulations can be<br />
accomplished by and recorded to a lighting controller. User-defined presets can be<br />
triggered with a computer keyboard, mouse or touchscreen.<br />
Figure 1: <strong>Catalyst</strong> Pro Software User Interface Display Screens<br />
<strong>Catalyst</strong>® V3 Media Server User <strong>Manual</strong> 1
System Overview<br />
Selecting Media for Playback<br />
Any content to be played back from the <strong>Catalyst</strong> Media Server is stored within computer<br />
folders accessible from the application. The folder names begin with a three-digit number<br />
from 000-253. This is known as the folder’s index number and corresponds directly to a<br />
DMX value for the Library parameter. For example, when the DMX value of the Library<br />
parameter is 11, the selected folder is the 011 Artbeats folder.<br />
Similarly, the files in each Library file folder have names beginning with a three-digit<br />
index number from 000 to 255. Each file’s index number corresponds directly to a DMX<br />
value for the File parameter DMX channel. Adjusting the DMX value of the File<br />
parameter on a lighting console selects a file from the active folder for playback.<br />
Working with Layers<br />
<strong>Catalyst</strong> layers have a fixed priority order of<br />
visibility, similar to sheets stacked back-to-front. A<br />
layer with higher priority is in front of those with<br />
lower priority. Layer 1 is at the back of the stack<br />
(lowest priority), and all other available layers are<br />
stacked in front of it in numerical order. Reducing a<br />
layer’s Intensity parameter DMX value reveals the<br />
layer behind it in the stack.<br />
Note: Different versions of <strong>Catalyst</strong> software<br />
support a different number of layers.<br />
Software Security<br />
High End Systems uses a USB dongle to prevent<br />
unauthorized copying of <strong>Catalyst</strong> software. Factory<br />
configured <strong>Catalyst</strong> Media Servers have a dongle<br />
internally installed. Software only versions of the<br />
application require a USB dongle plugged into one<br />
of the PowerMac USB ports.<br />
When the USB dongle is not detected by the<br />
<strong>Catalyst</strong> software, blue bars will appear at the top<br />
and bottom of both outputs.<br />
Reconnecting the USB dongle will remove the blue<br />
bars.<br />
2 <strong>Catalyst</strong>® V3 Media Server User <strong>Manual</strong>
Chapter 2:<br />
QuickStart<br />
This Chapter describes the steps to quickly setup and begin using a <strong>Catalyst</strong> Media Server<br />
system. These instructions also ship with your product as a Startup Sheet for the model<br />
you purchased. If you purchased a Software Only version of the product, setup<br />
instructions shipped with your product. For information on configuring hardware to run<br />
<strong>Catalyst</strong> Media Servers software, visit the High End System website support section<br />
[http://www.highend.com/support/digital_lighting/catalystsupportguide/].<br />
Media Server Setup<br />
Unpacking the Roadcase<br />
Unlatch and remove the top lid from the roadcase.Verify that the following contents are<br />
stored in the lid and remove any you need for your application:<br />
• LCD monitor<br />
• Keyboard<br />
• Mouse<br />
Top Lid<br />
• IEC TO 110v Adapter to attach an additional<br />
monitor or device like a firewire drive to the power<br />
conditioner in the server rack<br />
• IEC 220v power cord optional for 220v applications<br />
• USB Serial Adapters: One RS232 for serial devices<br />
and One RS422 for Deck Control<br />
Server Rack<br />
• A Mac G5 power cord and phone cable (only needed if<br />
you upgrade your G5 computer in the future)<br />
Base<br />
• Documentation for the G5, Power Conditioner, VDA, USB PCI CD, and a <strong>Catalyst</strong><br />
Software CD-ROM<br />
Inspecting Your <strong>Catalyst</strong> Media Server<br />
As you unpack the Media Server rack, verify that it is undamaged. If the product is<br />
damaged or parts are missing, notify both the shipping company and your sales agent<br />
immediately.<br />
Before returning merchandise, contact your High End Systems dealer/distributor for a<br />
Return Material Authorization (RMA) number. The factory cannot accept goods shipped<br />
without an RMA number. Return a damaged product for repair in its original roadcase. High<br />
End Systems assumes no responsibility for products damaged during transport.<br />
<strong>Catalyst</strong>® V3 Media Server User <strong>Manual</strong> 3
CHAPTER 2<br />
QuickStart<br />
See “Product and Safety Information” for more information on warranties provided by<br />
High End Systems for your product.<br />
Setting up the Server Rack<br />
1. Position the server rack upright on a platform constructed by latching the lid and the<br />
roadcase base together.<br />
2. The server rack contains a PowerMac ® G5, the <strong>Catalyst</strong> Interface Box (CIB) a power<br />
conditioner and a Digital Video Amplifier (VDA).<br />
• The <strong>Catalyst</strong> DV model utilizes an Extron ® VDA<br />
• The <strong>Catalyst</strong> Pro version contains a DV1 Dual VDA<br />
3. Set the LCD monitor on top of the server rack with the screen facing front and plug the<br />
monitor power cord from the rack into the back of the monitor.<br />
4. At the front of the server rack, pull the keyboard shelf out until it stops.<br />
5. Plug the keyboard into the white USB connector port attached to the keyboard shelf.<br />
6. Plug the mouse's USB plug into either of the two USB ports on the keyboard's back<br />
edge.<br />
CIB<br />
Power<br />
Cord<br />
DV1<br />
MacG5<br />
TIP: For better performance, use the optical mouse on a non-reflective<br />
surface instead of the keyboard tray.<br />
C<br />
CATALYST CATALYST CATALYST ATALYST ATALYST ATALYST ATALYST ATALYST<br />
Monitor Cable<br />
4 <strong>Catalyst</strong>® V3 Media Server User <strong>Manual</strong><br />
USB<br />
Start Button<br />
REAR FRONT<br />
<strong>Catalyst</strong> Pro Media Server Rack Setup
Hardware Connections<br />
CHAPTER 2<br />
QuickStart<br />
<strong>Catalyst</strong> Media Server models feature Dual or Single Output capability. Use the hardware<br />
setup for your model.<br />
Connecting Preview Monitors and Outputs<br />
<strong>Catalyst</strong> Pro Dual Output Versions<br />
1. Locate the DV1 (VDA) on the back of <strong>Catalyst</strong> Media Server rack.<br />
2. Plug the PowerMac LCD monitor data cable to the P1 monitor port on the DV1. If you<br />
are using two preview monitors, connect the second monitor to the P2 monitor port.<br />
3. Connect the device you want to designate as Output 1 to the RGBHV connectors on the<br />
DV1.<br />
4. Connect a second Output device to the RGBHV connectors on the CIB<br />
DV1<br />
G5 Output 1<br />
P1 and P2 Monitor Ports<br />
CIB<br />
Monitors<br />
DMX<br />
Console<br />
Output 2<br />
<strong>Catalyst</strong> Pro connected to two output devices and utilizing two monitors<br />
<strong>Catalyst</strong>® V3 Media Server User <strong>Manual</strong> 5
CHAPTER 2<br />
QuickStart<br />
<strong>Catalyst</strong> DV Single Output Versions<br />
1. Locate the Extron Video Distribution Amplifier (VDA) on the back of <strong>Catalyst</strong> Media<br />
Server rack.<br />
2. Plug the PowerMac LCD monitor data cable into the local monitor port on the VDA.<br />
3. Connect an Output device to the RGBHV connectors on the CIB.<br />
Monitor<br />
Media<br />
Server<br />
VDA<br />
CIB<br />
DMX Console<br />
Output 1<br />
<strong>Catalyst</strong> DV Connected to a DL1 digital light for output and utilizing an emulation monitor<br />
Connecting the Media Server to a DMX-512 Link<br />
1. Connect the male XLR connector of a DMX data cable to the lighting controller’s<br />
“DMX out” connector.<br />
2. Connect the data cable’s female XLR connector to the “DMX in” connector of the<br />
<strong>Catalyst</strong> Interface Box (CIB).<br />
6 <strong>Catalyst</strong>® V3 Media Server User <strong>Manual</strong>
<strong>Catalyst</strong> Software Application Setup<br />
At the front of the <strong>Catalyst</strong><br />
Media Server rack, press the<br />
PowerMac G5power button to<br />
turn on the computer. The<br />
desktop appears with icons for<br />
the Macintosh HD, the Content<br />
drive and the User <strong>Manual</strong> (in<br />
.pdf format).<br />
1. Move the mouse pointer to<br />
the bottom of the screen. A<br />
strip of icons forming the<br />
Dock will pop up that<br />
includes three <strong>Catalyst</strong><br />
icons. Each <strong>Catalyst</strong> icon is<br />
connected to a content<br />
format optimized for<br />
specific applications<br />
(Lighting, NTSC or PAL).<br />
2. Move the mouse over the<br />
version you want to select<br />
and click once to launch the<br />
application.<br />
The application ships from the<br />
factory set to open the <strong>Catalyst</strong><br />
windows upon launch. If the<br />
windows aren’t open on your<br />
desktop, you can access them<br />
via the Windows pull down<br />
menu at the top of the monitor<br />
display.<br />
BACK UP THE CONTENT DRIVE<br />
CHAPTER 2<br />
QuickStart<br />
Icons for <strong>Catalyst</strong> Software versions<br />
High End Systems recommends that you back up your content drive to a<br />
firewire drive or other media. The drive contains over35GB of content files. As<br />
an option, you can purchase Content backup on DVDs from High End Systems<br />
by contacting Customer Service at 800.890.8989.<br />
Dock<br />
<strong>Catalyst</strong>® V3 Media Server User <strong>Manual</strong> 7
CHAPTER 2<br />
QuickStart<br />
Configuring the <strong>Catalyst</strong> Software<br />
The following steps give you a basic default startup configuration for the <strong>Catalyst</strong> Pro 8layer<br />
software version. Your version may have fewer layers or fewer outputs, but the<br />
general steps are the same for all Media Server Software.<br />
Choose Output Options<br />
<strong>Catalyst</strong> Pro Media Servers can display independent views of the Layer content on each<br />
output. <strong>Catalyst</strong> DV and Xpress software versions have single output capability and the<br />
monitor emulates what is being projected from the output device.<br />
To configure Dual Outputs:<br />
1. Locate the Output 1 panel in<br />
the <strong>Catalyst</strong> Control Window.<br />
Click the top field in of the<br />
Output 1 panel as shown to<br />
pop up a menu.<br />
2. Highlight Mixed All Layers<br />
with FX and click to select.<br />
3. Locate the Output 2 panel in<br />
the <strong>Catalyst</strong> Control Window<br />
and select Separate Outputs<br />
with FX.<br />
Set DMX Start Channels for Layers<br />
To assign a DMX start channel to a Media Server layer:<br />
1. Scroll down the <strong>Catalyst</strong> Control Window until the first DMX In panel is visible.<br />
2. Turn on the DMX In panel by clicking the On button on the left side of the panel. The<br />
center circle and outside edge of the button turn yellow.<br />
3. Select a layer or serial device for that DMX In panel.<br />
8 <strong>Catalyst</strong>® V3 Media Server User <strong>Manual</strong>
4. Click in the number field to type in the start channel. Remember that each layer<br />
requires an uninterrupted range of 40 channels for independent DMX control.<br />
CHAPTER 2<br />
QuickStart<br />
5. Patch each layer to your lighting console using the DMX Start Channels assigned with<br />
the <strong>Catalyst</strong> DMX In panels.<br />
TIP: Each layer's DMX patch within the lighting console must match the<br />
corresponding layer's DMX Start Channel in the DMX In panel. For more<br />
information on setting DMX Start channels, see “Understanding DMX-<br />
512”.<br />
Now you are ready to use your lighting console to select and manipulate content on the<br />
computer's hard drive. Chapter 3: on page 11 contains tutorials that you will find helpful if<br />
you are new to <strong>Catalyst</strong> Media Servers.<br />
Projecting Images Using Full Screen Mode<br />
Selecting Full Screen Mode lets you view the output on the monitor as it is displayed<br />
through the output device you are using. With Full Screen mode off, your output device<br />
projects the desktop display.<br />
Press A on the keyboard to assign Output 1 to Full Screen mode.<br />
Press S on the keyboard to leave full screen mode.<br />
Once you select Full Screen mode, the output remains a black screen until the <strong>Catalyst</strong><br />
Media server receives DMX values from a lighting console.<br />
System Shutdown<br />
1. If you are in Full Screen mode, press S to disable.<br />
2. Close the <strong>Catalyst</strong> application by clicking on the File menu at the top<br />
of the desktop and selecting quit.<br />
3. Click on the menu option and choose Shut Down.<br />
<strong>Catalyst</strong>® V3 Media Server User <strong>Manual</strong> 9
CHAPTER 2<br />
QuickStart<br />
10 <strong>Catalyst</strong>® V3 Media Server User <strong>Manual</strong>
Chapter 3:<br />
Tutorials<br />
The following lessons provide a quick introduction to programming <strong>Catalyst</strong> with a<br />
lighting console. General knowledge of your lighting console is required to complete these<br />
tutorials. For information on programming without a console, see Chapter 18: “Presets”.<br />
Note: The sample content files in these tutorial lessons were selected from content<br />
shipping May 1, 2004.<br />
Lesson 1: Still Logo on Moving Background<br />
In this lesson you will set a movie playing on Layer 1; then, using Layer 2, superimpose a<br />
still image of the High End Systems logo over the movie playing onLayer 1.<br />
Set up Layer 1<br />
1. On your lighting console, select Layer 1. Set<br />
the Intensity parameter for Layer 1 to a DMX<br />
value of 255(100%).<br />
2. Set the Library parameter to a DMX value of<br />
11. This should select the preloaded <strong>Catalyst</strong><br />
Library folder 011 Artbeats.<br />
3. Set the File parameter to a DMX value of 3.<br />
This selects the movie file numbered 003 in<br />
Library folder 011. On the <strong>Catalyst</strong> Output 1<br />
display you should see the first frame of movie<br />
file 003WA 114, a pale blue image of rippling water.<br />
4. On your lighting console, set the Play Mode parameter to a DMX value of 2 or Play<br />
Loop Forward. The movie file will begin playing and the water will appear to be<br />
rippling.<br />
The Wholehog II uses eight character alpha-numeric labels to<br />
describe values of the Play Mode parameter. For this exercise,<br />
select plloopfw.<br />
The Wholehog III has a Mode menu with the Play Mode parameter<br />
options on the slotted toolbar. Select Play Loop Forward.<br />
<strong>Catalyst</strong>® V3 Media Server User <strong>Manual</strong> 11
CHAPTER 3<br />
Tutorials<br />
Add the Logo<br />
5. On the lighting console, select Layer 2. Set the<br />
Intensity parameter for Layer 2 to a DMX<br />
value of 255(100%). The <strong>Catalyst</strong> Output 1<br />
screen should change to solid white.<br />
6. Set the Library parameter to a DMX value of<br />
0. This should select the preloaded <strong>Catalyst</strong><br />
Library folder 000 (HES Lithos).<br />
7. Set the File parameter to a DMX value of 71<br />
(HES-logo-color). This selects the movie file<br />
numbered 71 in Library folder 0. You should<br />
see the High End Systems logo on the Output 1 window.<br />
Turn Layer 2 Background Transparent<br />
Now you’ll apply a color effect that turns the<br />
black background of the Layer 2 logo transparent,<br />
revealing the movie file playing on the underlying<br />
Layer 1.<br />
8. With Layer 2 still selected on your lighting<br />
console, set the Color Effects parameter to a<br />
DMX value of 3 (the color effect named<br />
Transparent Blacks). The black background<br />
of the High End Systems logo will become<br />
transparent and reveal the rippling water<br />
movie playing on Layer 1.<br />
9. Now change the Color Effects parameter to<br />
a DMX value of 4 (the color effect named<br />
Transparent Whites). The non-black<br />
portions of the High End Systems logo<br />
should become transparent and reveal the<br />
rippling water movie playing on Layer 1.<br />
12 <strong>Catalyst</strong>® V3 Media Server User <strong>Manual</strong>
Lesson 2: Crossfading Between Layers<br />
CHAPTER 3<br />
Tutorials<br />
Once you display content on different <strong>Catalyst</strong> layers, you can fade the layers in and out<br />
using the Intensity parameter. This creates a crossfading or dissolving effect between<br />
layers.<br />
In this lesson, you’ll play a movie on Layer 1 and record it in your lighting console as a cue<br />
or look. Then you’ll build and record another cue with a three-second crossfade to a<br />
colorful movie playing on Layer 2.<br />
Set Up First Cue<br />
1. Clear or remove any information from Lesson<br />
1 in your console’s programmer or editor.<br />
2. On your lighting console, select Layer 1. Set<br />
the Intensity parameter to a DMX value of<br />
255(100%).<br />
3. Setting DMX values in the Library and File<br />
parameters as in Lesson 1, select Library 12<br />
(Beacon DigiGobos), File 7 (loopedroseA).<br />
4. Set the Play Mode parameter to a DMX value<br />
of 2 (Play Loop Forward). The movie starts<br />
playing.<br />
5. On your lighting console, select Layer 2. Set<br />
the Intensity parameter to a DMX value of<br />
255(100%). The Output 1 screen changes to<br />
solid white.<br />
6. Using the preloaded <strong>Catalyst</strong> content, select<br />
Library 14 (Beacon DigiGobos), File 4<br />
(swirlstars2). Set the Play Mode parameter to<br />
a DMX value of 2 (Play Loop Forward). The<br />
animation will begin playing on Output 1.<br />
7. Still on Layer 2, change the Intensity parameter to a DMX value of 0 (0%). Layer 2<br />
will disappear, revealing the movie playing on Layer 1.<br />
8. Using your lighting console’s method of recording cues or looks, record the above<br />
DMX settings as Cue 1 on your lighting console.<br />
<strong>Catalyst</strong>® V3 Media Server User <strong>Manual</strong> 13
CHAPTER 3<br />
Tutorials<br />
Setup the Second Cue and Playback<br />
9. On your lighting console, select Layer 2. Change the Intensity parameter to a DMX<br />
value of 255 (100%).<br />
10. Use your lighting console’s cue timing options to assign a 3 second time value to the<br />
Intensity parameter.<br />
11. Record these DMX settings and timing information as Cue 2 on your lighting console.<br />
12. Clear your lighting console’s programmer or<br />
editor. The <strong>Catalyst</strong> Output 1 screen should<br />
change to all black.<br />
13. Using your lighting console, playback the Cue<br />
1 created above. The first movie plays on the<br />
Output 1 window of the <strong>Catalyst</strong> system.<br />
14. Using your lighting console, playback the Cue<br />
2 created above. Output 1 shows Layer 1<br />
crossfading to Layer 2 over a 3-second interval.<br />
15. When finished, follow your lighting console’s<br />
procedure to turn off or release any cues that<br />
are playing back.<br />
14 <strong>Catalyst</strong>® V3 Media Server User <strong>Manual</strong>
Lesson 3: Image Color and Scale<br />
In this lesson, you’ll use a Layer’s Position Controls<br />
to make an image appear to zoom away into the<br />
distance. In addition the Layer’s Color Controls are<br />
used to color the image.<br />
Set up Layer 1<br />
1. Clear or remove any information in your<br />
console’s programmer or editor.<br />
2. On your lighting console, select Layer 1. Set<br />
the Intensity parameter to a DMX value of<br />
255(100%).<br />
3. Select Library 0 (HES lithos) and File 5<br />
(comets). The image will be displayed on the<br />
Output 1 window.<br />
4. Change the Red parameter to a DMX value of<br />
255, and the Blue and Green parameters to a<br />
DMX value of 0. This changes the image to a<br />
red spiral galaxy<br />
5. Using your lighting console’s method of<br />
recording cues or looks, record the above DMX<br />
settings as Cue 1 on your lighting console.<br />
On a Wholehog console the Red, Green, and Blue parameters<br />
are labeled as Cyan, Magenta, and Yellow. The parameter values<br />
displayed are in terms of percentage where 0% equals a DMX<br />
value of 255 and 100% equals a DMX value of 0. On a Wholehog<br />
console, set the Cyan parameter to 0% and the Magenta and<br />
Yellow to 100% to create a red color.<br />
Set Layer 1 Rotation, Position, and Scale<br />
CHAPTER 3<br />
Tutorials<br />
6. Adjust the DMX value of the Z Rotation parameter so the Layer image starts spinning<br />
slowly—say 10 rotations per minute.<br />
7. Adjust the DMX value of the X Position parameter (not the X Rotation parameter) to<br />
move the image to the left edge of the Output 1 window, so it is barely visible.<br />
8. Adjust the DMX value of the Y Position parameter to move the image straight up to<br />
the top left corner of the Output 1 window, so only the corner is visible.<br />
<strong>Catalyst</strong>® V3 Media Server User <strong>Manual</strong> 15
CHAPTER 3<br />
Tutorials<br />
9. Adjust the DMX value of the Scale parameter to the midpoint of its 16-bit DMX value<br />
range. This shrinks the Layer’s image to a tiny point.<br />
10. Use your lighting console’s cue timing options to assign a 3-second time value to the<br />
Z-axis Rotation, Y position, and Scale parameters. Record the above DMX settings<br />
and timing information as Cue 2 on your lighting console.<br />
Playback<br />
11. Clear your lighting console’s programmer or editor. The <strong>Catalyst</strong> Output 1 window<br />
should change to all black.<br />
12. Using your lighting console, playback the Cue 1 created above. The red spiral galaxy<br />
appears on the Output 1 window of the <strong>Catalyst</strong> system.<br />
13. Using your lighting console, playback the Cue 2 created above. The red spiral galaxy<br />
will spin and shrink away on the Output 1 window.<br />
14. When finished, follow your lighting console’s procedure to turn off or release any<br />
cues that are playing back.<br />
16 <strong>Catalyst</strong>® V3 Media Server User <strong>Manual</strong><br />
On a Wholehog console, the 16-bit DMX values of the<br />
Scale parameter are displayed are in terms of<br />
percentage. 50% is equal to the midpoint of the 16-bit<br />
DMX range.
Lesson 4: Trails<br />
CHAPTER 3<br />
Tutorials<br />
The Trails parameter creates an afterimage that follows an image as it moves, then slowly<br />
fades away.<br />
Understanding Trails<br />
Unlike other <strong>Catalyst</strong> 3 effects, you can apply Trails only to Layer 1, the bottom Layer in<br />
the Layer stack. However, the Layer 1 Trails effect can also encompass content from<br />
higher layers, as long as Layer 1 is visible beneath them. For example assigning<br />
transparency to Layer 2 makes it subject to Layer 1’s Trails effect<br />
Trails parameter settings for layers other than Layer 1 are ignored and do<br />
not alter layers.<br />
Applying Trails to Layer 1<br />
15. Clear or remove any information in your<br />
console’s programmer or editor.<br />
16. On your lighting console, select Layer 1. Set<br />
the Intensity parameter to a DMX value of<br />
255(100%).<br />
17. Select Library 2 (HES Digital Aerials 2)and<br />
File 124 (threaded X). Set the Play Mode<br />
parameter to a DMX value of 0 (In Frame).<br />
Using the preloaded <strong>Catalyst</strong> content, you<br />
should now see an animation with two rotating<br />
squares playing in the Output 1 window.<br />
18. Assign the DMX value of the Color Effect<br />
parameter to 3 (transparent blacks).<br />
19. Adjust the DMX value of the Trails parameter<br />
to 255(100%). As the movie plays, each frame<br />
will leave an afterimage that slowly fades<br />
away.<br />
<strong>Catalyst</strong>® V3 Media Server User <strong>Manual</strong> 17
CHAPTER 3<br />
Tutorials<br />
Adding Trails to Layer 2<br />
20. On your lighting console, select Layer 2. Set<br />
the Intensity parameter to a DMX value of<br />
255(100%).<br />
21. Select Library 0 (HES lithos) and File 28<br />
(comet). Using the preloaded <strong>Catalyst</strong> content,<br />
you should now see a greyscale pinwheel<br />
image on Output 1.<br />
22. Adjust the DMX value of the Z Rotation<br />
parameter so the Layer 1 image starts<br />
spinning slowly— 20 rotations per minute, for<br />
example.<br />
23. Assign the DMX value of the Color Effects<br />
parameter to 3 (transparent blacks). You will<br />
now see the Trails effect from Layer 1 is<br />
applied to Layer 2.<br />
24. When finished, clear or remove any<br />
information from the above lesson in your<br />
lighting console’s programmer or editor.<br />
18 <strong>Catalyst</strong>® V3 Media Server User <strong>Manual</strong>
Lesson 5: Shutters<br />
CHAPTER 3<br />
Tutorials<br />
Any Layer can be used to shutter or crop content on underlying layers using the Shutter<br />
settings of the Visual Effects parameter.<br />
Understanding Shutters<br />
When a shutter Visual Effect is activated on a layer, that layer changes to a shutter only<br />
layer. Any assigned content for the layer will not be displayed. Instead, an adjustable<br />
transparent frame is displayed above underlying layers. A shutter Visual Effect will not<br />
function on Layer 1.<br />
Once a layer becomes a shutter only layer, the Keystone Correction parameters can be<br />
used to adjust the frame’s shape. In addition the X, Y, and Z Rotation, X and Y Position,<br />
and Scale parameters modify the appearance of the shutters.<br />
Set up Layer 1<br />
25. Clear or remove any information in your<br />
console’s programmer or editor.<br />
26. On your lighting console, select Layer 1. Set the<br />
Intensity parameter to a DMX value of<br />
255(100%).<br />
27. Adjust the Library and File parameters on your<br />
console to select Library 12 (Sean Bridwell<br />
Textures), File 8 (loopedsnakes1).<br />
28. Set the Play Mode parameter to a DMX value of<br />
3 (Play Loop Reverse).<br />
Add Shutters with Layer 2<br />
29. On your lighting console, select Layer 2. Set the<br />
Intensity parameter to a DMX value of<br />
255(100%).<br />
30. Set the Visual Effects parameter to a DMX<br />
value of 70 (Shutter -Black).<br />
31. Adjust the Scale parameter until the Output 1<br />
window displays a transparent square in a<br />
black background.<br />
<strong>Catalyst</strong>® V3 Media Server User <strong>Manual</strong> 19
CHAPTER 3<br />
Tutorials<br />
32. Adjust the eight Keystone Correction<br />
parameters to change the shape of the shutters.<br />
33. Adjust the Z Rotation parameter to rotate the<br />
shutters.<br />
34. When finished, clear or remove any<br />
information in your lighting console’s<br />
programmer or editor.<br />
20 <strong>Catalyst</strong>® V3 Media Server User <strong>Manual</strong>
Chapter 4:<br />
Windows Menus<br />
The <strong>Catalyst</strong> Interface<br />
The <strong>Catalyst</strong> Graphical User Interface is composed of the <strong>Catalyst</strong><br />
Control, Library, and Two Output windows (One Output window for<br />
the Xpress version).They are accessed through the Windows Menu at<br />
the top of the screen. The user interface provides configuration,<br />
command and preview functions.<br />
Selection Tools<br />
Three mechanisms are used to select and adjust interface settings:<br />
Menu A pop-up menu lets you scroll through the list to the desired file or setting. The<br />
library and file selection menus under the File tab, color effects under the Color tab, and<br />
FX effect under the FX tab all use menus.<br />
Slider Moving a slider left or right, or up or down, changes the parameters. Intensity<br />
adjustments on the Color tab, and all the adjustments on the Position tab, use sliders.<br />
Numerical Slider Where numerical values appear in a field, such as playback speed under<br />
the File tab, or the red, blue and green settings under the Color tab, click the field while<br />
holding down the mouse button. Moving the mouse up and down to raises or lowers value.<br />
The following sections outline each Window’s components and general functionality and<br />
references other sections of this manual with more detailed functional descriptions.<br />
<strong>Catalyst</strong>® V3 Media Server User <strong>Manual</strong> 21
CHAPTER 4<br />
Windows Menus<br />
<strong>Catalyst</strong> Control Window<br />
Components<br />
The <strong>Catalyst</strong> Control Window<br />
contains the following panels:<br />
CIB Paneldisplays status of the<br />
CIB connection and switches sync<br />
functions.<br />
Output Control panelssets the<br />
output display. <strong>Catalyst</strong> Pro and<br />
<strong>Catalyst</strong> DV have dual outputs,<br />
<strong>Catalyst</strong> Xpress has one output<br />
available.<br />
Layer Panels allow preview and<br />
control of DMX parameters for<br />
each available layer. <strong>Catalyst</strong> Pro<br />
provides eight layers; <strong>Catalyst</strong><br />
DV, five; and <strong>Catalyst</strong> Xpress,<br />
three.<br />
DMX Insets DMX start channel<br />
values for layers, as well as the<br />
following:<br />
Midi Show Control Input Triggeris used in conjunction with Presets<br />
Video Inputswitches a layer's content source from the Media Server hard drive to a video<br />
feed input. <strong>Catalyst</strong> Pro and DV software provides two video inputs. <strong>Catalyst</strong> Xpress has<br />
one video input.<br />
Sound Input activates audio input. All versions of <strong>Catalyst</strong> software provide this feature.<br />
Custom Serial inputs configures serial devices. Four serial inputs are available in<br />
<strong>Catalyst</strong> Pro software and three in the <strong>Catalyst</strong> DV version.<br />
Midi Time Code Input is available in <strong>Catalyst</strong> Pro and <strong>Catalyst</strong> DV versions<br />
22 <strong>Catalyst</strong>® V3 Media Server User <strong>Manual</strong>
CIB Panel<br />
CHAPTER 4<br />
Windows Menus<br />
Turnkey <strong>Catalyst</strong> systems utilize a <strong>Catalyst</strong> Interface Board (CIB) to connect to a DMX<br />
console. User configured systems utilizing <strong>Catalyst</strong> Software only versions may substitute<br />
an ArtNet box, see the High End Website for additional configuration information at<br />
http://www.highend.com/support/digital_lighting/catalystsupportguide/index.asp<br />
When a (CIB) is connected properly to the media server, the mini display window will say<br />
CIB OK. If the CIB is not hooked up, it will read No CIB CIBs are used with turnkey<br />
versions of <strong>Catalyst</strong>.<br />
The Name field is editable and is used to identify the local media server on network of<br />
multiple servers.<br />
The Remote Off/On field configures synchronization functionality. For more information<br />
on synchronizing output between servers, see Multiple Servers on page 175.<br />
Output Control(s)<br />
Figure 4-1 CIB Setting Pane<br />
Content can be viewed locally on a monitor before sending it to a <strong>Catalyst</strong> DL1 fixture or<br />
other video output device. The Output Control panes configures each layer or stacked<br />
layers with or without effects on either or both output screens at a selected screen<br />
resolution. For more detailed information, see Configuring Output Displays on page 34.<br />
The Output On/Off button turns Output Windows 1 and 2 On (yellow) and Off (white).<br />
Output Windows field provides a variety of Output display options on each output<br />
individually depending on available in your version of <strong>Catalyst</strong> Software.<br />
All layers with effects shows the composite of the individual layer effects. The most<br />
common output window setting is to show all four layers mixed with FX in Output<br />
Window 1, and Separate Outputs with FX on Output 2.<br />
The Anti-aliasing popup field provides options for smoothing the edges of the outputted<br />
image.<br />
Note: Anti-aliasing may slow the speed of FX for some images.<br />
<strong>Catalyst</strong>® V3 Media Server User <strong>Manual</strong> 23
CHAPTER 4<br />
Windows Menus<br />
Full Screen Display On/Off turns the full screen display mode on and off. The hot key to<br />
turn on full screen display for Output 1 is A, and the hot key to turn it off is S.<br />
The small monitor image displays the current resolution, screen refresh, and bit depth of<br />
the attached monitor is. If a second monitor is not hooked up it will say No Screen.<br />
On/Off button<br />
Layer Panel<br />
When using a DMX console to control a <strong>Catalyst</strong> Layer, all settings within the Layer panel<br />
will automatically adjust in real time to reflect the current DMX values sent from a<br />
lighting console.<br />
With the DMX In panels turned off, Preset programming allows the user to set values in<br />
each of this panel’s tabs, see Creating a Preset on page 144<br />
Active Button<br />
Solo Button<br />
Media Thumbnail<br />
Layer Name field<br />
The Solo function allows activates only the selected layer and all others are ignored. This<br />
test function can be used to isolate one Layer from the others. Clicking the Solo button<br />
will activate or de-activate the Solo function<br />
Output Windows Full Screen Display<br />
Aliasing<br />
The far left portion of the Layer Panel displays a thumbnail (if available) of the currently<br />
selected media for the layer.<br />
Each Layer can be named by clicking on the Layer Name field, typing in a name and<br />
pressing ENTER. This function is primarily for personal organization purposes.<br />
See the following for more information about parameters displayed in the layer panels:<br />
• File tab fields —Chapter 6: Media Playback on page 41.<br />
• Position tab fields — Chapter 7: Movement and Size on page 47.<br />
Display Config<br />
• Color tab fields — Chapter 8: Intensity and Color on page 55, and Chapter 9: Strobing<br />
and Trails on page 89.<br />
• FX tab fields — Chapter 10: Visual Effects on page 91, and Chapter 11: Keystone and<br />
Shutters on page 117.<br />
24 <strong>Catalyst</strong>® V3 Media Server User <strong>Manual</strong>
DMX In Panel<br />
CHAPTER 4<br />
Windows Menus<br />
Use the DMX In panels to patch layers as well as other inputs for DMX control. There are<br />
multiple DMX In panels in each <strong>Catalyst</strong> Software Version to allow setting DMX start<br />
channel values for one of the following Devices:<br />
• Layer image<br />
• Layer volume control<br />
• Preset Trigger<br />
• RS 422 devices<br />
• Serial Trigger<br />
• ArtNet protocol<br />
Yellow outline<br />
indicates DMX On<br />
Video Input<br />
Video feeds can be manipulated with the Layer’s parameters in the same manner as<br />
content played back from the hard drive. For more information, see Video Input on page<br />
127.<br />
On Button<br />
Video<br />
Input Field<br />
Sound Input<br />
Choose CIB DMX<br />
interface or ArtNet<br />
Type in Start<br />
Channel number<br />
Select Device<br />
<strong>Catalyst</strong> Pro, DV and Xpress versions can all convert audio to a visual waveform. The<br />
waveform can then be manipulated with the Layer’s parameters in the same manner as<br />
content played back from the hard drive.activates audio input. This panel activates the<br />
audio input. For more information on the audio feature, see Audio Input on page 123.<br />
Click on the round On/Off button to activate the Video Input panel<br />
<strong>Catalyst</strong>® V3 Media Server User <strong>Manual</strong> 25
CHAPTER 4<br />
Windows Menus<br />
Custom Serial Inputs<br />
The <strong>Catalyst</strong> Media Server can control peripheral devices such as video switchers or<br />
projector shutters through the PowerMac’s Universal Serial Bus (USB) ports. This feature<br />
lets non-DMX controlled devices coordinate automatically with events and images in your<br />
show. For more information, see Chapter 15: Serial Control on page 129.<br />
Midi Time Code Input <strong>Catalyst</strong> Media Servers can receive MIDI timecode and a Layer’s<br />
playback can synchronize to the timecode. This panel assigns the input. For more<br />
information, see Chapter 16: MIDI Timecode on page 135.<br />
Device field<br />
26 <strong>Catalyst</strong>® V3 Media Server User <strong>Manual</strong>
Library Window<br />
On the top of the PowerMac monitor, Click on Library within the<br />
Windows menu to open the Library window.<br />
The Library window of the <strong>Catalyst</strong> Media Server has the following<br />
functions.<br />
• Lists and describes content files and folders available to the server<br />
• Displays details about the Color and Visual Effects.<br />
• Configures Library folder assignments<br />
• Creates and edits Presets<br />
Files Tab<br />
CHAPTER 4<br />
Windows Menus<br />
Clicking on the Files tab on the top of the Library window displays the content currently<br />
available to the server.<br />
Thumbnail<br />
Folder Number<br />
File Number<br />
Assign Folder<br />
File Name<br />
File Statistics<br />
<strong>Catalyst</strong>® V3 Media Server User <strong>Manual</strong> 27
CHAPTER 4<br />
Windows Menus<br />
Folders Tab<br />
Clicking on the Folders tab on the top of the Library window displays the folders<br />
currently assigned as Library Folders. Additional folders from internal or external drives,<br />
as well as network sources, can be assigned to <strong>Catalyst</strong>. Any properly labeled folders and<br />
files in an assigned Library Folder become available content.<br />
Folder<br />
Assignment<br />
Number<br />
1. Click on a Folder assignment number to open the Choose a Folder window.<br />
2. Browse to the drive and folder containing the content files and click Open.<br />
28 <strong>Catalyst</strong>® V3 Media Server User <strong>Manual</strong>
CHAPTER 4<br />
Windows Menus<br />
The Folders tab of the Library Window now displays the newly assigned folder.<br />
3. Press the Scan Files... button to begin a scan of all available media files. The scanning<br />
window will open and display the scan progress.<br />
When the scan is complete the scanning window will close and the new media<br />
becomes available to the <strong>Catalyst</strong> Media Server.<br />
Note: Pressing Shift during a scan will perform a Quick Scan where no thumbnails<br />
will be created.<br />
<strong>Catalyst</strong>® V3 Media Server User <strong>Manual</strong> 29
CHAPTER 4<br />
Windows Menus<br />
Color FX Tab<br />
Clicking on the Color FX tab on the top of the Library window displays reference<br />
information for the Color Effects parameter.<br />
Colored fields indicate the functionality of other parameters associated with each effect.<br />
For more information, see Color Effects on page 57.<br />
Geometry FX Tab<br />
Clicking on the Geometry FX tab on the top of the Library window displays reference<br />
information for the Visual Effects parameter. Colored fields indicate the functionality of<br />
other parameters associated with each effect. For more information, see Chapter 10:<br />
Visual Effects on page 91.<br />
30 <strong>Catalyst</strong>® V3 Media Server User <strong>Manual</strong>
Presets Tab<br />
CHAPTER 4<br />
Windows Menus<br />
The preset tab contains fields that allow the programmer to name, edit and store preset<br />
created for programming without a DMX console. For detailed information, see Chapter<br />
18: Presets on page 143.<br />
<strong>Catalyst</strong>® V3 Media Server User <strong>Manual</strong> 31
CHAPTER 4<br />
Windows Menus<br />
Output Windows<br />
The output windows (Two for<br />
<strong>Catalyst</strong> Pro and DV versions, and<br />
one for <strong>Catalyst</strong> Xpress software<br />
version) allow the programmer to<br />
view the content according to the<br />
output selection criteria set in the<br />
<strong>Catalyst</strong> Control Window’s<br />
Output panel(s).<br />
Depending on the system<br />
configuration, these windows can<br />
display a preview of the content<br />
or emulate the actual output of<br />
the local server.<br />
For more information on<br />
configuring the output windows,<br />
see Chapter 5: Output Displays on<br />
page 33.<br />
These windows also display the<br />
diagnostic screens available in the<br />
<strong>Catalyst</strong> software interface. For<br />
detailed information, see Chapter<br />
20: Diagnostic Displays on page<br />
163.<br />
32 <strong>Catalyst</strong>® V3 Media Server User <strong>Manual</strong>
Chapter 5:<br />
Output Displays<br />
The <strong>Catalyst</strong> Media Server supports two output signals. Each signal is split, and can be<br />
displayed simulataneously on any output device (DL1 digital light, video projector, LED<br />
wall, etc.) and a monitor display.<br />
DV1 Video Distribution Amplifier<br />
The <strong>Catalyst</strong> Media Server uses the DV1 dual video distribution amplifier to split and<br />
amplify the PowerMac’s two video outputs for display on preview monitors as well as<br />
output devices. In addition, five BNC video connectors labeled R, G, B, H, and V (Red-<br />
Green-Blue-Horizontal sync-Vertical sync) are provided to send Output 1 to a device using<br />
high-quality 75-ohm video cable.<br />
RGBHV BNC connectors<br />
P1 and P2 Monitor Ports<br />
CAUTION!<br />
Using a video cable longer than 250 feet (80 meters) can<br />
degrade video performance.<br />
<strong>Catalyst</strong> Interface Box (CIB)<br />
The <strong>Catalyst</strong> Interface Box is an interface between the DMX console and the computer’s<br />
Universal Serial Bus (USB) port. In addition, five RGBHV connections are provided to<br />
send Output 2 to a device using high-quality 75-ohm video cable.<br />
RGBHV BNC connectors<br />
<strong>Catalyst</strong>® V3 Media Server User <strong>Manual</strong> 33
CHAPTER 5<br />
Output Displays<br />
Configuring Output Displays<br />
The <strong>Catalyst</strong> Control window contains the Output panels. Each panel can be activated<br />
with the On/Off button in the top right corner of the panel.<br />
On/Off button<br />
1. Click on the monitor icon to pop up a menu of resolution<br />
settings for the output. The display settings should match<br />
those configured on the display device. Consult the<br />
display device’s documentation for the recommended<br />
resolution and refresh rate settings.<br />
2. Click on the Full Screen button to pop up a menu containing output screen settings.<br />
Screen Setting Field<br />
Monitor icon<br />
Full Screen ON: The selected output fills the entire screen on the output display.<br />
Full Screen OFF. The selected output appears in a small window on the output display.<br />
Goto Full Screen At Startup. When the <strong>Catalyst</strong> application is started, the selected output<br />
will automatically enter Full Screen mode.<br />
Startup Screen. Select screen display size for startup.<br />
Note: High End Systems recommends using the “No Anti-Aliasing” option for all<br />
display configurations<br />
34 <strong>Catalyst</strong>® V3 Media Server User <strong>Manual</strong>
CHAPTER 5<br />
Output Displays<br />
3. Click on the Output Settings field of the Output panel to open a pop-up menu and<br />
select one of the options.<br />
All <strong>Catalyst</strong> Media Server software products contain the following Output Setting fields.<br />
• No Output<br />
Output Setting Fields<br />
• Separate outputs No FX displays all configured Layers simultaneously in a grid. Each<br />
Layer displays only its content playback, and ignores all other DMX parameters.<br />
• Separate outputs With FX displays all configured Layers simultaneously in a grid.<br />
Each Layer displays its content with all DMX parameter settings applied.<br />
• Mixed All Layers No FX displays all configured Layers stacked on top of each other.<br />
• Mixed 1 & 2 with FX displays configured Layers one and two stacked together.<br />
Depending on the number of layers for the <strong>Catalyst</strong> version, more layer combinations will<br />
be available settings.<br />
<strong>Catalyst</strong>® V3 Media Server User <strong>Manual</strong> 35
CHAPTER 5<br />
Output Displays<br />
Output Configurations<br />
Single Output with Redundant Monitor<br />
Monitor<br />
Media<br />
Server<br />
VDA<br />
CIB<br />
DMX Console<br />
Output 1<br />
<strong>Catalyst</strong> DV Single Output configuration<br />
With Single Output versions, the monitor can only display whatever signal is being sent to<br />
the output.<br />
36 <strong>Catalyst</strong>® V3 Media Server User <strong>Manual</strong>
Dual Output Device With Preview Monitor<br />
Media<br />
Server<br />
DV1<br />
Output 1<br />
Output 2<br />
Monitor<br />
Dual Output with Preview Monitor<br />
CHAPTER 5<br />
Output Displays<br />
In this example, Output 1 displays all layers combined, and Output 2 displays each layer<br />
individually for preview purposes.<br />
<strong>Catalyst</strong>® V3 Media Server User <strong>Manual</strong> 37<br />
CIB<br />
DMX Console
CHAPTER 5<br />
Output Displays<br />
Dual Outputs with Emulation Monitors<br />
Media<br />
Server<br />
DV1<br />
Output 1<br />
CIB<br />
P1 and P2<br />
Monitors<br />
Dual Output with Redundant Monitors<br />
Output 2<br />
DMX Console<br />
Output 1 and Output 2 each display individually assigned layers. Each monitor displays<br />
the same image as its respective output.<br />
38 <strong>Catalyst</strong>® V3 Media Server User <strong>Manual</strong>
Dual Outputs with DL1 Dimming Control<br />
Media<br />
Server<br />
DV1<br />
Output 1<br />
P1 and P2<br />
Monitors<br />
CIB<br />
Dual Output with DL1 output dimmer at 0<br />
Output 2<br />
DMX Console<br />
CHAPTER 5<br />
Output Displays<br />
Output 1 and Output 2 each display individually assigned layers. Each monitor displays<br />
the same image as its respective output. Using a DL1 digital lighting fixture or a projector<br />
with remote shuttering controls, the output displays can be hidden from view and the P1<br />
and P2 monitors behave as preview screens. Configure the Output panels the same as<br />
Dual Outputs with Redundant Monitors.<br />
<strong>Catalyst</strong>® V3 Media Server User <strong>Manual</strong> 39
CHAPTER 5<br />
Output Displays<br />
Dual Outputs Widescreen Layers<br />
Output 1 and Output 2 each display one half of the images from all assigned layers. Layer<br />
selections are automatically split and assigned to an output.<br />
DV1<br />
Media Output 1<br />
Server<br />
Configure the Output panels as follows:<br />
CIB<br />
P1 and P2<br />
Monitors<br />
Combined outputs<br />
Output 2<br />
DMX Console<br />
• Widescreen Layers Left for Output 1 displays the left half of assigned layers.<br />
• Widescreen Layers Right for Output 2 displays the right half of assigned layers.<br />
40 <strong>Catalyst</strong>® V3 Media Server User <strong>Manual</strong>
Chapter 6:<br />
Media Playback<br />
Libraries and Files<br />
Choosing content from a lighting console for a <strong>Catalyst</strong> Layer is a simple process of<br />
assigning DMX values for the Library and File parameters. These DMX values directly<br />
correspond to the desired Folder and File index numbers on the hard drive.<br />
Preloaded Library Folders<br />
The table below describes the preloaded content Library folders that ship with the<br />
<strong>Catalyst</strong> Media Server. (Note: Content included is subject to change.)<br />
Folder Name Content Description<br />
000 High End Lithos High End Systems Lithopattern® still images.<br />
001 Digital Aerials 1<br />
Digital still images and animations, designed specifically for aerial<br />
effects.<br />
002 Digital Aerials 2 Additional aerial still images and animations.<br />
003 HES-Oils<br />
004 HES-<br />
Digitally simulated psychedelic oil projections<br />
005 HES Lithos 2<br />
006 HES Reserved 4<br />
007 My Custom Content 1<br />
008 My Custom Content 2<br />
More still images from High End Systems Lithopattern library<br />
009 A Luna Blue Digital animations.<br />
010 Feedback Video Digital animations.<br />
011 Artbeats Video clips and digital animations.<br />
012 Sean Bridwell Textures Digital textures.<br />
013 Amorphous Digi-gobos Digital animations.<br />
014 Beacon DigiGobos Digital animations.<br />
015-InLight_C3 Digital animations<br />
016 Apollo Glass 1 Digital Images<br />
017 DHA TopMac Digital Images<br />
018 - 252 Available for additional content collections.<br />
253 Setup and Test Color bars and other diagnostic tests.<br />
254 Use Layer (DO NOT ALTER) References one layer’s content to other layer(s).<br />
255 Video Input (DO NOT ALTER) Reserved for Video input.<br />
<strong>Catalyst</strong>® V3 Media Server User <strong>Manual</strong> 41
CHAPTER 6<br />
Media Playback<br />
Referencing Content with the Use Layer<br />
By setting a layer’s Library parameter DMX value to 254, you can then use the File<br />
parameter’s DMX value to select another layer’s content to use in place of an actual file.<br />
The DMX value of the File parameter directly corresponds to the layer number (1-4 for<br />
example). This turns the first layer into a reference layer, an “alias” of the selected layer’s<br />
file—that is, a duplicate instance of the file playing on the selected layer. You can<br />
reposition and apply different effects to either instance, but playback controls work only<br />
on the reference layer, not the selected layer.<br />
For example, suppose you want layers 1 and 2 to<br />
contain the same image positioned differently on<br />
the screen. First, you would select the image and<br />
assign it to Layer 1 normally, then you would<br />
assign Layer 2 to reference Layer 1. Each layer<br />
shows the same image, but you can move each<br />
instance on the screen independently.<br />
Reference layers lighten system load, especially<br />
hard disk access. Though you manipulate the<br />
referenced file in different ways on different<br />
layers, the <strong>Catalyst</strong> system needs to read that file<br />
from the hard drive only once. If you were to assign the same movie file independently to<br />
each layer, the <strong>Catalyst</strong> system has to read the file multiple times.<br />
In Frame and Out Frame<br />
You can select a segment of a movie file for playback by assigning an In Frame as a start<br />
point and an Out Frame as an end point.<br />
The In Frame parameter corresponds to a 16-bit DMX value equal to a starting frame of<br />
the selected movie file. Similarly, The Out Frame parameter corresponds to a 16-bit DMX<br />
value equal to an ending frame of the selected movie file. Assigning the In Frame and Out<br />
Frame parameter DMX values to 0 will playback the entire movie file.<br />
Movie<br />
beginning<br />
frame<br />
In Frame<br />
parameter<br />
setting<br />
Movie segment<br />
Out Frame<br />
parameter<br />
setting<br />
Movie<br />
ending<br />
frame<br />
42 <strong>Catalyst</strong>® V3 Media Server User <strong>Manual</strong>
Video Playback<br />
Play Mode<br />
CHAPTER 6<br />
Media Playback<br />
The Play Mode parameter controls how movie files will playback. By assigning a<br />
corresponding DMX value to this parameter, you can play a movie file or segment in the<br />
following ways:<br />
DMX<br />
Value<br />
Play Mode Description<br />
0 In Frame Displays the frame selected by the In Frame parameter.<br />
1 Out Frame Displays the frame selected by the Out Frame parameter.<br />
2<br />
Play Loop Forward<br />
DMX value = 2<br />
3 Play Loop Reverse<br />
4 Play Once Forward<br />
5 Play Once Reverse<br />
Plays the movie in a continuous loop starting at the In frame and repeating<br />
when it reaches the Out frame.<br />
Plays the movie in a continuous loop starting at the Out frame and<br />
repeating when it reaches the In frame.<br />
Plays the movie once, starting at the In frame point and stopping when it<br />
reaches the Out frame.<br />
Plays the movie once, starting at the Out frame and stopping when it<br />
reaches the In frame.<br />
6 Stop Stops the movie playback, displaying a still image of the last frame played.<br />
7 Random Continuously displays random frames between the In frame and Out frame.<br />
8 PlaySine<br />
Plays the movie forward from the In frame to the Out Frame, then backward<br />
from the Out frame to the In frame.<br />
<strong>Catalyst</strong>® V3 Media Server User <strong>Manual</strong> 43
CHAPTER 6<br />
Media Playback<br />
DMX<br />
Value<br />
10<br />
11<br />
12<br />
13<br />
Play Loop Forward<br />
when Intensity >0<br />
Play Loop Reverse<br />
when Intensity >0<br />
Play Once Forward<br />
when Intensity >0<br />
Play Once Reverse<br />
when Intensity >0<br />
14 Random<br />
when Intensity >0<br />
15 PlaySine<br />
when Intensity >0<br />
40<br />
41<br />
42<br />
43<br />
44<br />
Play Loop Forward<br />
retrigger when<br />
Intensity >0<br />
Play Loop Reverse<br />
retrigger when<br />
Intensity >0<br />
Play Once Forward<br />
retrigger when<br />
Intensity >0<br />
Play Once Reverse<br />
retrigger when<br />
Intensity >0<br />
PlaySine retrigger<br />
when Intensity >0<br />
70 Play Audio<br />
Play Mode Description<br />
Plays the movie in a continuous loop starting at the In frame and repeating<br />
when it reaches the Out frame. Playback pauses whenever Intensity = 0<br />
and resumes when intensity is > 0 again.<br />
Plays the movie in a continuous loop starting at the Out frame and repeating<br />
when it reaches the In frame.Playback pauses whenever Intensity = 0<br />
and resumes when intensity is > 0 again.<br />
Plays the movie once, starting at the In frame point and stopping when it<br />
reaches the Out frame. Playback pauses whenever Intensity = 0 and<br />
resumes when intensity is > 0 again.<br />
Plays the movie once, starting at the Out frame and stopping when it<br />
reaches the In frame. Playback pauses whenever Intensity = 0 and<br />
resumes when intensity is > 0 again.<br />
Continuously displays random frames between the In frame and Out frame.<br />
Playback pauses when Intensity = 0 and resumes whenever intensity is > 0<br />
again.<br />
Plays the movie forward from the In frame to the Out Frame, then backward<br />
from the Out frame to the In frame. Playback pauses whenever Intensity =<br />
0 and resumes when intensity is > 0 again.<br />
Plays the movie in a continuous loop starting at the In frame and repeating<br />
when it reaches the Out frame. Playback pauses whenever Intensity = 0<br />
and starts playing from the InFrame when intensity is > 0 again.<br />
Plays the movie in a continuous loop starting at the Out frame and repeating<br />
when it reaches the In frame.Playback pauses whenever Intensity = 0<br />
and starts playing from the InFrame when intensity is > 0 again.<br />
Plays the movie once, starting at the In frame point and stopping when it<br />
reaches the Out frame. Playback pauses whenever Intensity = 0 and starts<br />
playing from the InFrame when intensity is > 0 again.<br />
Plays the movie once, starting at the Out frame and stopping when it<br />
reaches the In frame. Playback pauses whenever Intensity = 0 and starts<br />
playing from the InFrame when intensity is > 0 again.<br />
Plays the movie forward from the In frame to the Out Frame, then backward<br />
from the Out frame to the In frame. Playback pauses whenever Intensity = 0<br />
and starts playing from the InFrame when intensity is > 0 again.<br />
Plays the audio track, associated with the selected video file at CD quality.<br />
For more information, see Audio Output on page 125.<br />
71 Play Audio Loop Plays the audio track in a continuous loop<br />
Synchronize to<br />
80-99<br />
master<br />
Synchronizes this layer’s movie with another layer’s frame rate (from ID1-<br />
ID20).<br />
100<br />
Synchronize to<br />
MIDI Timecode<br />
Synchronizes this layer’s movie with MIDI timecode.<br />
101<br />
Synchronize to<br />
deck Timecode<br />
Synchronizes this layer’s movie with a remote deck’s timecode.<br />
103-<br />
105<br />
Synchronize to<br />
Sony<br />
Synchronizes this layer’s movie with a Sony 9-pin device.<br />
44 <strong>Catalyst</strong>® V3 Media Server User <strong>Manual</strong>
Playback Speed<br />
CHAPTER 6<br />
Media Playback<br />
The Playback Speed parameter controls the speed of the selected movie file’s Play Mode.<br />
A DMX value of zero plays back movie files at the original recorded speed. A value of 1<br />
pauses playback. DMX values from 2 to 255 represent increasing speed, from 1 percent to<br />
double the original recorded speed.<br />
<strong>Catalyst</strong>® V3 Media Server User <strong>Manual</strong> 45
CHAPTER 6<br />
Media Playback<br />
46 <strong>Catalyst</strong>® V3 Media Server User <strong>Manual</strong>
Chapter 7:<br />
Movement and Size<br />
X, Y, and Z Rotation<br />
The Rotation parameters provide image rotation with 16-bit<br />
precision in forward and reverse directions around the<br />
selected axis.<br />
X-axis rotation produces the effect of a top-to-bottom flip.<br />
Y-axis rotation produces a left-to-right flip. Z-axis rotation<br />
spins the image in a circle.<br />
X-Axis Rotation Y-Axis Rotation Z-Axis Rotation<br />
<strong>Catalyst</strong>® V3 Media Server User <strong>Manual</strong> 47
CHAPTER 7<br />
Movement and Size<br />
The layer’s image can be rotated on each axis by adjusting the DMX value of the<br />
appropriate X, Y, and Z Rotation parameters. The suggested default value for each<br />
channel is the midpoint of the parameter’s 16-bit DMX range, which is equal to no<br />
rotation. Increasing the DMX value from the midpoint indexes the image clockwise; as<br />
reducing the DMX value below the midpoint, indexes the image counterclockwise.<br />
X, Y, and Z Rotation parameter DMX values greater than the 720° limit in either direction,<br />
will start the image rotating continuously. Further adjustments to the DMX values will<br />
increase the speed of continuous rotation<br />
.<br />
48 <strong>Catalyst</strong>® V3 Media Server User <strong>Manual</strong>
X Position<br />
CHAPTER 7<br />
Movement and Size<br />
The X Position parameter adjusts the layer’s image horizontally along the X-axis. The<br />
midpoint of the 16-bit DMX value range centers the image on the X-axis.<br />
X Position parameter DMX values below the DMX midpoint move the image left, and<br />
values above the DMX midpoint move the image right.<br />
Image with an X Position value<br />
less than the DMX midpoint<br />
Image with an X Position value<br />
at the DMX midpoint<br />
Image with an X Position value<br />
greater than the DMX midpoint<br />
<strong>Catalyst</strong>® V3 Media Server User <strong>Manual</strong> 49
CHAPTER 7<br />
Movement and Size<br />
Y Position<br />
The Y Position parameter adjusts the layer’s image vertically along the Y-axis. The<br />
midpoint of the 16-bit DMX value range, centers the image on the Y-axis.<br />
Y Position parameter DMX values below the DMX midpoint move the image down, and<br />
values above the DMX midpoint move the image up.<br />
Image with a Y Position value<br />
less than the DMX midpoint<br />
Image with a Y Position value<br />
at the DMX midpoint<br />
Image with a Y Position value<br />
greater than the DMX midpoint<br />
50 <strong>Catalyst</strong>® V3 Media Server User <strong>Manual</strong>
Scale<br />
CHAPTER 7<br />
Movement and Size<br />
The Scale parameter<br />
adjusts the size of<br />
the layer’s image<br />
up to 8x its original<br />
size. When the<br />
midpoint of the<br />
16-bit DMX value<br />
range equals 0x, the<br />
image shrinks to invisibility). When the DMX value is increased from the midpoint, the<br />
image is enlarged. In addition, when the DMX value is reduced below the midpoint, an<br />
inverted image is enlarged.<br />
Image with the suggested<br />
default DMX value<br />
Image with a value<br />
greater than the DMX midpoint<br />
Image with a value<br />
less than the DMX midpoint<br />
Image with a value<br />
near the DMX midpoint<br />
<strong>Catalyst</strong>® V3 Media Server User <strong>Manual</strong> 51
CHAPTER 7<br />
Movement and Size<br />
Image Movement Time<br />
The Movement Speed parameter<br />
provides smoothing of movements<br />
created with the <strong>Catalyst</strong> application.<br />
Sometimes the transmission speed of<br />
DMX-512 can result in choppy image<br />
movements during slow Layer position<br />
movements.<br />
The Movement Speed parameter<br />
provides a variable smoothing of<br />
movements with DMX values from 0-<br />
255—the higher the DMX value, the<br />
slower the movement speed. Settings of<br />
the Movement Speed parameter affect<br />
changes to the X and Y Position, X, Y,<br />
and Z Rotation, and Scale parameters.<br />
The red arrow indicates movement with the<br />
X Position parameter.<br />
52 <strong>Catalyst</strong>® V3 Media Server User <strong>Manual</strong>
Aspect Ratio<br />
CHAPTER 7<br />
Movement and Size<br />
The Aspect Ratio parameter allows horizontal or vertical image compression from full<br />
image size to a thin line (1-4 pixels). The Aspect Ratio function compensates for dissimilar<br />
aspect ratios encountered in various video formats. For example, a movie created with a<br />
16:9 aspect ratio can be changed to a 4:3 aspect ratio. DMX values from 0 to 128 squeeze<br />
the image horizontally, and DMX values greater than 128 compress the image vertically.<br />
Image with a value<br />
less than the DMX midpoint<br />
Image with the midpoint DMX<br />
value default<br />
Image with a value<br />
greater than the DMX midpoint<br />
<strong>Catalyst</strong>® V3 Media Server User <strong>Manual</strong> 53
CHAPTER 7<br />
Movement and Size<br />
54 <strong>Catalyst</strong>® V3 Media Server User <strong>Manual</strong>
Chapter 8:<br />
Intensity and Color<br />
Intensity<br />
The Intensity parameter adjusts layer brightness levels from black (DMX = 0) to full<br />
intensity (DMX = 255). By crossfading the Intensity parameter of layers, a dissolve<br />
between layers can be created.<br />
Layer 1 with full Intensity Layer 2 with full Intensity<br />
Layer 1 with full Intensity<br />
and Layer 2 with Intensity set at the<br />
DMX midpoint value<br />
<strong>Catalyst</strong>® V3 Media Server User <strong>Manual</strong> 55
CHAPTER 8<br />
Intensity and Color<br />
Red, Green, and Blue<br />
The <strong>Catalyst</strong> Media Server uses an additive RGB color mixing system that modifies image<br />
color by filtering specific percentages of red, green, and blue. With the Red, Green, and<br />
Blue parameter DMX channels, a DMX value of 0 filters out all of a color, and a value of<br />
255 filters none of it. If each channel’s DMX value is set to 0, all color is filtered out and<br />
the result is black. With a DMX value of 255 in each channel, no color is filtered, which<br />
means the image has no color adjustment. Some settings of the Color Effects parameter<br />
change the functionality of the Red, Green, and Blue parameters.<br />
Red parameter = 255<br />
Green parameter = 255<br />
Blue parameter = 255<br />
Red parameter = 0<br />
Green parameter = 255<br />
Blue parameter = 255<br />
Red parameter = 255<br />
Green parameter = 0<br />
Blue parameter = 0<br />
Red parameter = 0<br />
Green parameter = 0<br />
Blue parameter =255<br />
56 <strong>Catalyst</strong>® V3 Media Server User <strong>Manual</strong>
Color Effects<br />
CHAPTER 8<br />
Intensity and Color<br />
The Color Effects parameter alters a layer’s content by applying variations to the image’s<br />
colors. In addition, some Color Effects change the behavior of the Red, Green, and Blue<br />
parameters. This chapter describes the Color Effects and their capabilities.<br />
0 RGB Subtract<br />
When the Color Effects parameter is assigned a DMX value of 0, the Layer’s image can be<br />
tinted. The Red, Green, and Blue parameters each remove existing color from the layer’s<br />
image.<br />
The Layer’s image without tinting The Layer’s image tinted with the<br />
Green, and Blue parameters.<br />
The Layer’s image tinted with the<br />
Blue parameter.<br />
The Layer’s image tinted with the<br />
Red parameter.<br />
<strong>Catalyst</strong>® V3 Media Server User <strong>Manual</strong> 57
CHAPTER 8<br />
Intensity and Color<br />
1 RGB Subtract High Contrast<br />
When the Color Effects parameter is assigned a DMX value of 1, the Layer’s image can be<br />
tinted. This is a higher contrast version of the RGB Subtract Color Effect. The Red, Green,<br />
and Blue parameters can remove existing color from the layer’s image.<br />
The Layer’s original image<br />
without a Color Effect.<br />
2 RGB Subtract V High Contrast<br />
When the Color Effects parameter is assigned a DMX value of 2, the Layer’s image can be<br />
tinted. This is a super high contrast version of the RGB Subtract Color Effect. The Red,<br />
Green, and Blue parameters can remove existing color from the layer’s image.<br />
The Layer’s original image<br />
without a Color Effect.<br />
The Layer’s image with the RGB<br />
Subtract High Contrast Effect.<br />
The Layer’s image with the RGB Subtract<br />
V High Contrast Effect.<br />
58 <strong>Catalyst</strong>® V3 Media Server User <strong>Manual</strong>
3 Transparent Blacks<br />
CHAPTER 8<br />
Intensity and Color<br />
When the Color Effects parameter is assigned a DMX value of 3, any black in a Layer’s<br />
image becomes transparent, revealing underlying Layers. The Red, Green, and Blue<br />
parameters can remove existing color from the layer’s image.<br />
Layer 1 Layer 2<br />
Transparent Blacks applied to<br />
Layer 2 reveals Layer 1 image.<br />
<strong>Catalyst</strong>® V3 Media Server User <strong>Manual</strong> 59
CHAPTER 8<br />
Intensity and Color<br />
4 Transparent Whites<br />
When the Color Effects parameter is assigned a DMX value of 4, any white in a Layer’s<br />
image becomes transparent, revealing underlying Layers. The Red, Green, and Blue<br />
parameters can remove existing color from the layer’s image.<br />
Layer 1 Layer 2<br />
Transparent Whites applied to<br />
Layer 2 reveals Layer 1 image.<br />
60 <strong>Catalyst</strong>® V3 Media Server User <strong>Manual</strong>
10 RGB Subtract Inverted Color<br />
CHAPTER 8<br />
Intensity and Color<br />
When the Color Effects parameter is assigned a DMX value of 10, the colors in a Layer’s<br />
image are inverted. The Red, Green, and Blue parameters can remove existing color from<br />
the layer’s image.<br />
The Layer’s original image<br />
without a Color Effect.<br />
11 RGB Subtract High Contrast Inverted Color<br />
When the Color Effects parameter is assigned a DMX value of 11, the colors in a Layer’s<br />
image are inverted. This is a higher contrast version of the RGB Subtract Inverted Color<br />
Effect. The Red, Green, and Blue parameters can remove existing color from the layer’s<br />
image.<br />
The Layer’s original image<br />
without a Color Effect.<br />
The Layer’s image with the RGB<br />
Subtract Inverted Color Effect.<br />
The Layer’s image with the RGB<br />
Subtract High Contrast Inverted Effect.<br />
<strong>Catalyst</strong>® V3 Media Server User <strong>Manual</strong> 61
CHAPTER 8<br />
Intensity and Color<br />
12 RGB Subtract Super High Contrast Inverted<br />
Color<br />
When the Color Effects parameter is assigned a DMX value of 12, the colors in a Layer’s<br />
image are inverted. This is a super higher contrast version of the RGB Subtract Inverted<br />
Color Effect. The Red, Green, and Blue parameters can remove existing color from the<br />
layer’s image.<br />
The Layer’s original image<br />
without a Color Effect.<br />
13 Invert Whatever<br />
When the Color Effects parameter is assigned a DMX value of 13, the colors in a Layer’s<br />
image are inverted. This Color Effect is a unique combination of transparency and color<br />
modification. The Red, Green, and Blue parameters can remove existing color from the<br />
layer’s image.<br />
The Layer’s original image<br />
without a Color Effect.<br />
The Layer’s image with the<br />
RGB Subtract Color Effect.<br />
The Layer’s image with the<br />
Invert Whatever Color Effect.<br />
62 <strong>Catalyst</strong>® V3 Media Server User <strong>Manual</strong>
14 RGB Subtract Inverted Color CMY<br />
CHAPTER 8<br />
Intensity and Color<br />
When the Color Effects parameter is assigned a DMX value of 10, the colors in a Layer’s<br />
image are inverted and converted to CMY. The Red, Green, and Blue parameters can<br />
remove existing color from the layer’s image.<br />
The Layer’s original image<br />
without a Color Effect.<br />
15 RGB Subtract High Contrast Inverted Color CMY<br />
When the Color Effects parameter is assigned a DMX value of 15, the colors in a Layer’s<br />
image are inverted and converted to CMY. This is a higher contrast version of the RGB<br />
Subtract Inverted Color CMY Effect. The Red, Green, and Blue parameters can remove<br />
existing color from the layer’s image.<br />
The Layer’s original image<br />
without a Color Effect.<br />
The Layer’s image with the RGB<br />
Subtract Inverted Color CMY Effect.<br />
The Layer’s image with the RGB<br />
Subtract High Contrast Inverted<br />
CMY Effect.<br />
<strong>Catalyst</strong>® V3 Media Server User <strong>Manual</strong> 63
CHAPTER 8<br />
Intensity and Color<br />
16 RGB Subtract Super High Contrast Inverted<br />
Color CMY<br />
When the Color Effects parameter is assigned a DMX value of 16, the colors in a Layer’s<br />
image are inverted and converted to CMY. This is the highest contrast version of the RGB<br />
Subtract Inverted Color CMY Effect. The Red, Green, and Blue parameters can remove<br />
existing color from the layer’s image.<br />
The Layer’s original image<br />
without a Color Effect.<br />
20 Black and White<br />
When the Color Effects parameter is assigned a DMX value of 20, the Layer’s image<br />
becomes black and white and can not be tinted. The Red, Green, and Blue parameters do<br />
not function with this Color Effect.<br />
The Layer’s original image<br />
without a Color Effect.<br />
The Layer’s image with the<br />
RGB Subtract Super High Contrast<br />
Inverted CMY Effect.<br />
The Layer’s image with the<br />
Black and White Effect.<br />
64 <strong>Catalyst</strong>® V3 Media Server User <strong>Manual</strong>
21 Black and White High Contrast<br />
CHAPTER 8<br />
Intensity and Color<br />
When the Color Effects parameter is assigned a DMX value of 21, the Layer’s image<br />
becomes black and white and can not be tinted. This high contrast version of the Black<br />
and White Color Effect is transparent, revealing underlying layers. The Red, Green, and<br />
Blue parameters do not function with this Color Effect.<br />
The Layer’s original image<br />
without a Color Effect.<br />
22 Black and White Super High Contrast<br />
When the Color Effects parameter is assigned a DMX value of 22, the Layer’s image<br />
becomes black and white and can not be tinted. This super high contrast version of the<br />
Black and White Color Effect is transparent, revealing underlying layers. The Red, Green,<br />
and Blue parameters do not function with this Color Effect.<br />
The Layer’s original image<br />
without a Color Effect.<br />
The Layer’s image with the Black and<br />
White High Contrast Effect.<br />
The Layer’s image with the Black and<br />
White Super High Contrast Effect.<br />
<strong>Catalyst</strong>® V3 Media Server User <strong>Manual</strong> 65
CHAPTER 8<br />
Intensity and Color<br />
23 Black and White Variable Super High Contrast<br />
When the Color Effects parameter is assigned a DMX value of 23, the Layer’s image<br />
becomes black and white and can not be tinted. This super high contrast version of the<br />
Black and White Color Effect is transparent, revealing underlying layers. The Red, Green,<br />
and Blue parameters each adjust the amount of the related color making up the final<br />
value of the black and white image.<br />
The Layer’s original image<br />
without a Color Effect.<br />
24 Invert Black and White<br />
When the Color Effects parameter is assigned a DMX value of 24, the Layer’s image<br />
becomes black and white and can not be tinted. This is an inverted version of the Black<br />
and White Color Effect. The Red, Green, and Blue parameters do not function with this<br />
Color Effect.<br />
The Layer’s original image<br />
without a Color Effect.<br />
The Layer’s image with the Black<br />
and White Variable Super<br />
High Contrast Effect.<br />
The Layer’s image with the Invert Black<br />
and White Effect.<br />
66 <strong>Catalyst</strong>® V3 Media Server User <strong>Manual</strong>
30 Mask<br />
CHAPTER 8<br />
Intensity and Color<br />
When the Color Effects parameter is assigned a DMX value of 30, the Layer’s image<br />
becomes black and white and can not be tinted. Any black in a Layer’s image becomes<br />
transparent, revealing underlying Layers. The Red parameter adjusts the Layer’s<br />
percentage of transparency to vary mask softness. The Green, and Blue parameters do<br />
not function with this Color Effect.<br />
The Layer’s original image<br />
without a Color Effect.<br />
31 Invert Mask 1<br />
When the Color Effects parameter is assigned a DMX value of 31, the Layer’s image<br />
becomes black and white and can not be tinted. Any black in a Layer’s image becomes<br />
transparent, revealing underlying Layers. White areas within the Layer’s image become<br />
black. The Red parameter adjusts the Layer’s percentage of transparency to vary mask<br />
softness. The Green, and Blue parameters do not function with this Color Effect.<br />
The Layer’s original image<br />
without a Color Effect.<br />
The Layer’s image with the<br />
Mask Effect.<br />
The Layer’s image with the<br />
Invert Mask 1 Effect.<br />
<strong>Catalyst</strong>® V3 Media Server User <strong>Manual</strong> 67
CHAPTER 8<br />
Intensity and Color<br />
32 Invert Mask 2<br />
When the Color Effects parameter is assigned a DMX value of 32, the Layer’s image<br />
becomes black and white and can not be tinted. Any white in a Layer’s image becomes<br />
transparent, revealing underlying Layers. The Red parameter adjusts the Layer’s<br />
percentage of transparency to vary mask softness. The Green, and Blue parameters do<br />
not function with this Color Effect.<br />
The Layer’s original image<br />
without a Color Effect.<br />
The Layer’s image with the<br />
Invert Mask 2 Effect.<br />
35 Mask Fading<br />
A DMX Color Effects parameter value of 35 operates the same as a DMX value of 30 with<br />
the addition of fading. The Layer’s image becomes black and white and can not be tinted.<br />
Any black in a Layer’s image becomes transparent, revealing underlying Layers. The Red<br />
parameter adjusts the mask percentage to vary mask softness. Green, and Blue parameters<br />
do not function with this Color Effect. The intensity channel adjusts mask fading.<br />
36 Invert Mask 1 Fading<br />
A DMX Color Effects parameter value of 36 operates the same as a DMX value of 31 with<br />
the addition of fading. The Layer’s image becomes black and white and can not be tinted.<br />
Any black in a Layer’s image becomes transparent, revealing underlying Layers. White<br />
areas within the Layer’s image become black. The Red parameter adjusts the mask<br />
percentage to vary mask softness. The Green, and Blue parameters do not function with<br />
this Color Effect. The intensity channel adjusts mask fading.<br />
37 Invert Mask 2 Fading<br />
A DMX Color Effects parameter value of 37 operates the same as a DMX value of 32 with<br />
the addition of fading. The Layer’s image becomes black and white and can not be tinted.<br />
Any white in a Layer’s image becomes transparent, revealing underlying Layers. The Red<br />
parameter adjusts the mask percent to vary the softness. The Green, and Blue parameters<br />
do not function with this Color Effect. The intensity channel adjusts mask fading.<br />
68 <strong>Catalyst</strong>® V3 Media Server User <strong>Manual</strong>
40 Alpha Invert as Red<br />
CHAPTER 8<br />
Intensity and Color<br />
When the Color Effects parameter is assigned a DMX value of 40, the portions of a<br />
Layer’s image without an alpha channel become red and can not be tinted. Any alpha<br />
channel portions of the image become transparent, revealing underlying Layers. The Red,<br />
Green, and Blue parameters do not function with this Color Effect.<br />
The Layer’s original image<br />
without a Color Effect.<br />
41 Alpha Invert as Green<br />
The Layer’s image with an<br />
Alpha Invert as Red Effect.<br />
Note: An alpha channel is embedded into content when the media file is created.<br />
When the Color Effects parameter is assigned a DMX value of 41, the portions of a<br />
Layer’s image without an alpha channel become green and can not be tinted. Any alpha<br />
channel portions of the image become transparent, revealing underlying Layers. The Red,<br />
Green, and Blue parameters do not function with this Color Effect.<br />
The Layer’s original image<br />
without a Color Effect.<br />
The Layer’s image with an<br />
Alpha Invert as Green Effect.<br />
Note: An alpha channel is embedded into content when the media file is created.<br />
<strong>Catalyst</strong>® V3 Media Server User <strong>Manual</strong> 69
CHAPTER 8<br />
Intensity and Color<br />
42 Alpha Invert as Blue<br />
When the Color Effects parameter is assigned a DMX value of 42, the portions of a<br />
Layer’s image without an alpha channel become blue and can not be tinted. Any alpha<br />
channel portions of the image become transparent, revealing underlying Layers. The Red,<br />
Green, and Blue parameters do not function with this Color Effect.<br />
The Layer’s original image<br />
without a Color Effect.<br />
43 Alpha Invert as Color<br />
The Layer’s image with an<br />
Alpha Invert as Blue Effect.<br />
Note: An alpha channel is embedded into content when the media file is created.<br />
When the Color Effects parameter is assigned a DMX value of 43, the portions of a<br />
Layer’s image without an alpha channel become white and can be tinted. Any alpha<br />
channel portions of the image become transparent, revealing underlying Layers. The Red,<br />
Green, and Blue parameters are used to select an alpha channel color.<br />
The Layer’s original image<br />
without a Color Effect.<br />
The Layer’s image with an<br />
Alpha Invert as Color Effect.<br />
Note: An alpha channel is embedded into content when the media file is created.<br />
70 <strong>Catalyst</strong>® V3 Media Server User <strong>Manual</strong>
44 Alpha as Red<br />
CHAPTER 8<br />
Intensity and Color<br />
When the Color Effects parameter is assigned a DMX value of 44, the portions of a<br />
Layer’s image with an alpha channel become red and can not be tinted. Non alpha<br />
channel portions of the image become transparent, revealing underlying Layers. The Red,<br />
Green, and Blue parameters do not function with this Color Effect.<br />
The Layer’s original image<br />
without a Color Effect.<br />
45 Alpha as Green<br />
The Layer’s image with<br />
Alpha as Red Effect.<br />
Note: An alpha channel is embedded into content when the media file is created.<br />
When the Color Effects parameter is assigned a DMX value of 45, the portions of a<br />
Layer’s image with an alpha channel become green and can not be tinted. Non alpha<br />
channel portions of the image become transparent, revealing underlying Layers. The Red,<br />
Green, and Blue parameters do not function with this Color Effect.<br />
The Layer’s original image<br />
without a Color Effect.<br />
The Layer’s image with<br />
Alpha as Green Effect.<br />
Note: An alpha channel is embedded into content when the media file is created.<br />
<strong>Catalyst</strong>® V3 Media Server User <strong>Manual</strong> 71
CHAPTER 8<br />
Intensity and Color<br />
46 Alpha as Blue<br />
When the Color Effects parameter is assigned a DMX value of 46, the portions of a<br />
Layer’s image with an alpha channel become blue and can not be tinted. Non alpha<br />
channel portions of the image become transparent, revealing underlying Layers. The Red,<br />
Green, and Blue parameters do not function with this Color Effect.<br />
The Layer’s original image<br />
without a Color Effect.<br />
47 Alpha as Color<br />
The Layer’s image with<br />
Alpha as Blue Effect.<br />
Note: An alpha channel is embedded into content when the media file is created.<br />
When the Color Effects parameter is assigned a DMX value of 47, the portions of a<br />
Layer’s image with an alpha channel become white and can be tinted. Non alpha channel<br />
portions of the image become transparent, revealing underlying Layers. The Red, Green,<br />
and Blue parameters are used to select an alpha channel color.<br />
The Layer’s original image<br />
without a Color Effect.<br />
The Layer’s tinted image<br />
with an Alpha as Color Effect.<br />
Note: An alpha channel is embedded into content when the media file is created.<br />
72 <strong>Catalyst</strong>® V3 Media Server User <strong>Manual</strong>
50 Lookup 1 Color Wheel<br />
CHAPTER 8<br />
Intensity and Color<br />
When the Color Effects parameter is assigned a DMX value of 50, a color-wheel based<br />
formula is applied to the Layer’s image colors. This effect does not allow tinting. The Red,<br />
Green, and Blue parameters do not function with this Color Effect.<br />
Original image. Image with the<br />
Invert Lookup 1 Color Effect.<br />
51 Lookup 2 False Color<br />
When the Color Effects parameter is assigned a DMX value of 51, the Layer’s image<br />
becomes mutated can not be tinted. The Red, Green, and Blue parameters do not function<br />
with this Color Effect.<br />
The Layer’s original image<br />
without a Color Effect.<br />
The Layer’s image with the<br />
Invert Lookup 2 Effect.<br />
<strong>Catalyst</strong>® V3 Media Server User <strong>Manual</strong> 73
CHAPTER 8<br />
Intensity and Color<br />
52 Lookup 3 Black and White Solarize Highlights<br />
When the Color Effects parameter is assigned a DMX value of 52, the Layer’s image<br />
becomes magenta and can not be tinted. The Red, Green, and Blue parameters do not<br />
function with this Color Effect.<br />
The Layer’s original image<br />
without a Color Effect.<br />
60 Gamma Black and White<br />
When the Color Effects parameter is assigned a DMX value of 60, the Layer’s image<br />
becomes black and white and can not be tinted. The Red parameter adjusts the contrast of<br />
the image. The Green, and Blue parameters do not function with this Color Effect.<br />
The Layer’s original image<br />
without a Color Effect.<br />
The Layer’s image with the<br />
Lookup 3 Effect.<br />
The Layer’s image with the<br />
Gamma Black and White Effect.<br />
74 <strong>Catalyst</strong>® V3 Media Server User <strong>Manual</strong>
61 Gamma Color<br />
CHAPTER 8<br />
Intensity and Color<br />
When the Color Effects parameter is assigned a DMX value of 61, the Layer’s image<br />
becomes red and can not be tinted. The Red parameter adjusts the overall gamma of the<br />
image. The Green, and Blue parameters do not function with this Color Effect.<br />
The Layer’s original image<br />
without a Color Effect.<br />
The Layer’s image with the<br />
Gamma Color adjustment.<br />
The Layer’s image with the<br />
Gamma Color Effect applied.<br />
<strong>Catalyst</strong>® V3 Media Server User <strong>Manual</strong> 75
CHAPTER 8<br />
Intensity and Color<br />
62 Gamma Color Separate Channels<br />
When the Color Effects parameter is assigned a DMX value of 62, the Layer’s image is<br />
displayed with high contrast. The Red, Green, and Blue parameters adjust the<br />
corresponding color gamma of the image.<br />
The Layer’s original image<br />
without a Color Effect.<br />
The Layer’s image with the<br />
Gamma Color Separate Effect.<br />
The Layer’s image with the Gamma Color<br />
Separate Effect Green channel adjustment.<br />
76 <strong>Catalyst</strong>® V3 Media Server User <strong>Manual</strong>
63 Gain Color Separate Channels<br />
CHAPTER 8<br />
Intensity and Color<br />
When the Color Effects parameter is assigned a DMX value of 62, the Layer’s image is<br />
displayed with high contrast. The Red, Green, and Blue parameters adjust the<br />
corresponding color gain of the image.<br />
The Layer’s original image<br />
without a Color Effect.<br />
The Layer’s image with the<br />
Gain Color Separate Channels Effect.<br />
The Layer’s image with the Gain Color Separate<br />
Channels Effect and Blue channel adjustment.<br />
<strong>Catalyst</strong>® V3 Media Server User <strong>Manual</strong> 77
CHAPTER 8<br />
Intensity and Color<br />
65 Quantize Color Separate Channels<br />
When the Color Effects parameter is assigned a DMX value of 65, the Layer’s image is<br />
displayed with a reduced set of representative colors. The Red, Green, and Blue<br />
parameters adjust the corresponding color in the image.<br />
The Layer’s original image<br />
without a Color Effect.<br />
The Layer’s image with the<br />
Quantize Color Separate Channels Effect.<br />
The Layer’s image with the Quantize Color Separate<br />
Channels Effect and Red channel adjustment.<br />
78 <strong>Catalyst</strong>® V3 Media Server User <strong>Manual</strong>
70 Convert to YUV<br />
CHAPTER 8<br />
Intensity and Color<br />
When the Color Effects parameter is assigned a DMX value of 70, the Layer’s image RGB<br />
color information is converted to a different color space. The Red parameter adjusts the<br />
illuminance of the image. The Green parameter adjusts the U component and the Blue<br />
parameter adjusts the V component.<br />
The Layer’s original image<br />
without a Color Effect.<br />
71 Saturation<br />
When the Color Effects parameter is assigned a DMX value of 71, the Layer’s image can<br />
not be tinted. The Red parameter reduces the color saturation of the image. When the Red<br />
parameter is set to 0, the image is black and white. The Green, and Blue parameters do<br />
not function with this Color Effect.<br />
The Layer’s original image<br />
without a Color Effect.<br />
The Layer’s image with the<br />
Convert to YUV Effect.<br />
The Layer’s image with a<br />
50% Saturation Effect.<br />
<strong>Catalyst</strong>® V3 Media Server User <strong>Manual</strong> 79
CHAPTER 8<br />
Intensity and Color<br />
72 Mega Saturation<br />
When the Color Effects parameter is assigned a DMX value of 72, the Layer’s image can<br />
not be tinted. The Red parameter adds and subtracts from the color saturation of the<br />
image. With no color saturation the image is black and white. The Green, and Blue<br />
parameters do not function with this Color Effect.<br />
73 Solarize<br />
The Layer’s original image<br />
without a Color Effect.<br />
When the Color Effects parameter is assigned a DMX value of 73, the Layer’s image<br />
becomes solarized and can not be tinted. The Red, Green, and Blue parameters do not<br />
function with this Color Effect.<br />
The Layer’s original image<br />
without a Color Effect.<br />
The Layer’s image with a Mega<br />
Saturation Effect.<br />
The Layer’s image with the<br />
Solarize Effect.<br />
80 <strong>Catalyst</strong>® V3 Media Server User <strong>Manual</strong>
74 Solarize Invert<br />
CHAPTER 8<br />
Intensity and Color<br />
When the Color Effects parameter is assigned a DMX value of 74, the Layer’s colors are<br />
inverted, the image becomes solarized, and it can not be tinted. The Red, Green, and Blue<br />
parameters do not function with this Color Effect.<br />
The Layer’s original image<br />
without a Color Effect.<br />
80 RGB Layer Blend 1<br />
When the Color Effects parameter is assigned a DMX value of 80, the white portions of<br />
the Layer’s image become transparent and the image can be tinted. The Red, Green, and<br />
Blue parameters each remove existing color from the layer’s image.<br />
The Layer’s original image<br />
without a Color Effect.<br />
The Layer’s image with the<br />
Solarize Invert Effect.<br />
The Layer’s image with the<br />
RGB Layer Blend 1 Effect.<br />
<strong>Catalyst</strong>® V3 Media Server User <strong>Manual</strong> 81
CHAPTER 8<br />
Intensity and Color<br />
81 RGB Layer Blend 2<br />
When the Color Effects parameter is assigned a DMX value of 81, the black portions of<br />
the Layer’s image become transparent and the image can be tinted. The Red, Green, and<br />
Blue parameters can remove existing color from the layer’s image.<br />
The Layer’s original image<br />
without a Color Effect.<br />
82 RGB Layer Blend 3<br />
When the Color Effects parameter is assigned a DMX value of 82, the white portions of<br />
the Layer’s image become semi-transparent and the image can be tinted. The Red, Green,<br />
and Blue parameters each remove existing color from the layer’s image.<br />
The Layer’s original image<br />
without a Color Effect.<br />
The Layer’s image with the<br />
RGB Layer Blend 2 Effect.<br />
The Layer’s image with the<br />
RGB Layer Blend 3 Effect.<br />
82 <strong>Catalyst</strong>® V3 Media Server User <strong>Manual</strong>
83 RGB Layer Blend 4<br />
CHAPTER 8<br />
Intensity and Color<br />
When the Color Effects parameter is assigned a DMX value of 83, portions of the Layer’s<br />
image become transparent and the image can be tinted. The Red, Green, and Blue<br />
parameters each remove existing color from the layer’s image.<br />
The Layer’s original image<br />
without a Color Effect.<br />
84 RGB Layer Blend 5<br />
When the Color Effects parameter is assigned a DMX value of 84, portions of the Layer’s<br />
image become semi-transparent and the image can be tinted. The Red, Green, and Blue<br />
parameters each remove existing color from the layer’s image.<br />
The Layer’s original image<br />
without a Color Effect.<br />
The Layer’s image with the<br />
RGB Layer Blend 4 Effect.<br />
The Layer’s image with the<br />
RGB Layer Blend 5 Effect.<br />
<strong>Catalyst</strong>® V3 Media Server User <strong>Manual</strong> 83
CHAPTER 8<br />
Intensity and Color<br />
85 RGB Layer Blend 6 Add<br />
When the Color Effects parameter is assigned a DMX value of 85, black portions of the<br />
Layer’s image become transparent and the image can be tinted. The Red, Green, and Blue<br />
parameters each remove existing color from the layer’s image.<br />
The Layer’s original image<br />
without a Color Effect.<br />
86 RGB Layer Blend 7 Subtract<br />
When the Color Effects parameter is assigned a DMX value of 86, white portions of the<br />
Layer’s image become semi-transparent and the image can be tinted. The Red, Green,<br />
and Blue parameters each remove existing color from the layer’s image.<br />
The Layer’s original image<br />
without a Color Effect.<br />
The Layer’s image with the<br />
RGB Layer Blend 6 Effect.<br />
The Layer’s image with the<br />
RGB Layer Blend 7 Effect.<br />
84 <strong>Catalyst</strong>® V3 Media Server User <strong>Manual</strong>
89 RGB Layer Blend 10 Maximum<br />
CHAPTER 8<br />
Intensity and Color<br />
When the Color Effects parameter is assigned a DMX value of 89, dark portions of the<br />
Layer’s image become transparent and the image can be tinted. The Red, Green, and Blue<br />
parameters each remove existing color from the layer’s image.<br />
The Layer’s original image<br />
without a Color Effect.<br />
90 RGB Layer Blend 11 Add 2<br />
When the Color Effects parameter is assigned a DMX value of 90, dark portions of the<br />
Layer’s image become semi-transparent and the image can be tinted. The Red, Green, and<br />
Blue parameters can remove existing color from the layer’s image.<br />
The Layer’s original image<br />
without a Color Effect.<br />
The Layer’s image with the<br />
RGB Layer Blend 10 Effect.<br />
The Layer’s image with the RGB Layer<br />
Blend 11 Effect.<br />
<strong>Catalyst</strong>® V3 Media Server User <strong>Manual</strong> 85
CHAPTER 8<br />
Intensity and Color<br />
100 Tint<br />
When the Color Effects parameter is assigned a DMX value of 100, the Layer’s image is<br />
converted to black and white and the image can be tinted. Black portions of the image<br />
become transparent. The Red, Green, and Blue parameters can remove existing color<br />
from the layer’s image.<br />
The Layer’s original image<br />
without a Color Effect.<br />
101 Tint Inverse<br />
When the Color Effects parameter is assigned a DMX value of 101, the Layer’s inverted<br />
image is converted to black and white and the image can be tinted. Black portions of the<br />
image become transparent. The Red, Green, and Blue parameters can remove existing<br />
color from the layer’s image.<br />
The Layer’s original image<br />
without a Color Effect.<br />
The Layer’s image with the<br />
Tint Effect.<br />
The Layer’s image with the<br />
Tint Invert Effect.<br />
86 <strong>Catalyst</strong>® V3 Media Server User <strong>Manual</strong>
102 Fade to Hue<br />
CHAPTER 8<br />
Intensity and Color<br />
When the Color Effects parameter is assigned a DMX value of 102, the Layer’s the image<br />
fades to a color rather than to black. The red control sets the fade percentage (100% =<br />
original image; 0% = only the color remains). The image will fade to the hue selected by<br />
the Green parameter, based on a spectrum wheel (red-violetindigo-blue-green-yelloworange-red).<br />
The Blue parameter does not function with this Color Effect.<br />
The Layer’s original image<br />
without a Color Effect.<br />
103 RGB > GBR<br />
When the Color Effects parameter is assigned a DMX value of 103, the colors of a Layer’s<br />
image are swapped and can be tinted. The Red, Green, and Blue parameters can remove<br />
existing color from the Layer’s image.<br />
The Layer’s original image<br />
without a Color Effect.<br />
The Layer’s image with the Fade to<br />
Hue Effect.<br />
The Layer’s image with the<br />
RGB > GBR Effect.<br />
<strong>Catalyst</strong>® V3 Media Server User <strong>Manual</strong> 87
CHAPTER 8<br />
Intensity and Color<br />
104 RGB > BGR<br />
When the Color Effects parameter is assigned a DMX value of 104, the colors of a Layer’s<br />
image are swapped and can be tinted. The Red, Green, and Blue parameters can remove<br />
existing color from the Layer’s image.<br />
The Layer’s original image<br />
without a Color Effect.<br />
105 RGB > GRB<br />
When the Color Effects parameter is assigned a DMX value of 105, the colors of a Layer’s<br />
image are swapped and can be tinted. The Red, Green, and Blue parameters can remove<br />
existing color from the Layer’s image.<br />
The Layer’s original image<br />
without a Color Effect.<br />
The Layer’s image with the<br />
RGB > BGR Effect.<br />
The Layer’s image with the<br />
RGB > GRB Effect.<br />
88 <strong>Catalyst</strong>® V3 Media Server User <strong>Manual</strong>
Chapter 9:<br />
Strobing and Trails<br />
Strobing<br />
The Strobing parameter creates flashing or pulsing of the layer’s image as though it were<br />
lit by a strobe light. Each strobing pattern is controlled by a range of 24 DMX values that<br />
govern strobing speed of that pattern. The strobe’s speed generally refers to the intervals<br />
when the image is turned on.<br />
The suggested default DMX value of the Strobing parameter is 0, which produces no<br />
strobe effect. Other DMX values for the parameter determine the strobing pattern. The<br />
available strobe patterns are:<br />
Strobe Pattern Description<br />
(DMX value = 0) Strobe Off<br />
OnOff<br />
(DMX values 1-24)<br />
Blinks the entire image repeatedly with equal on and off amounts of time. Value<br />
1 is the fastest setting (the image is turned on longest); 24 is the slowest<br />
setting.<br />
Pulse 1<br />
Pulse length is always 1 frame long. Time between pulses varies. Value 25 is<br />
(DMX values 25-49) the slowest setting; 49 is the fastest setting.<br />
Pulse 2<br />
Time between pulses is 25 frames. Pulse length varies. Value 50 is the longest<br />
(DMX values 50-74) setting; 74 is the shortest setting.<br />
Pulse Train<br />
Time between pulses is 25 frames.The number of pulses varies. Value 75 is<br />
(DMX values 75-99) the fastest setting with the most pulses; 99 has a single pulse.<br />
Random 1<br />
Equal on and off amounts of time. Pulse length varies randomly.<br />
(DMX values 100-124)<br />
Random 2<br />
Pulse length is always 1 frame. Time between pulses varies randomly.<br />
(DMX values 125-149)<br />
<strong>Catalyst</strong>® V3 Media Server User <strong>Manual</strong> 89
CHAPTER 9<br />
Strobing and Trails<br />
Trails<br />
The Trails parameter creates an afterimage that follows a moving image as it moves on<br />
layer 1. The DMX value of the Trails parameter varies the length, or duration, of the trails.<br />
The suggested default DMX value of 0, creates no trails. A value of 255 creates very long<br />
trails.<br />
The Trails effect is available only on Layer 1. However, trails are also applied to all content<br />
on other layers that become visible on Layer 1. For instance, if other layers are masked or<br />
turned partly transparent to reveal Layer 1 beneath, the Layer 1 Trails effect then applies<br />
to those layer’s visible content as well.<br />
The Trails effect requires transparency of the layer, either from the Color<br />
Effects parameter, or by reducing the Intensity parameter of the layer.<br />
Trails Off<br />
Small Trails Full Trails<br />
90 <strong>Catalyst</strong>® V3 Media Server User <strong>Manual</strong>
Chapter 10:<br />
Visual Effects<br />
The Visual Effects parameter applies various changes to a layer’s content. The Parameter<br />
1 (FX1) and Parameter 2 (FX2) parameters are linked to selected Visual Effects, and their<br />
function changes based on the Visual Effect. This chapter describes uses of the Visual<br />
Effects and their capabilities.<br />
0 Movie on Non-Infinite Plane<br />
When the Visual Effects parameter is assigned a DMX value of 0, the Layer’s content<br />
plays on a transparent plane. The Parameter 1 (FX1) and Parameter 2 (FX2) parameters<br />
do not function with this Visual Effect.<br />
Layer 1 with no Visual Effects Layer 2 with no Visual Effects<br />
Layer 2 with a Transparent plane<br />
scaled in over Layer 1<br />
<strong>Catalyst</strong>® V3 Media Server User <strong>Manual</strong> 91
CHAPTER 10<br />
Visual Effects<br />
1 Movie on Infinite Plane with Black Border<br />
When the Visual Effects parameter is assigned a DMX value of 1, the Layer’s content<br />
plays on a non-transparent black plane. The Parameter 1 (FX1) and Parameter 2 (FX2)<br />
parameters do not function with this Visual Effect.<br />
Layer 1 with no Visual Effects Layer 2 with no Visual Effects<br />
Layer 2 with a non-transparent plane<br />
scaled in over Layer 1<br />
92 <strong>Catalyst</strong>® V3 Media Server User <strong>Manual</strong>
2 Movie Unity Scaling<br />
CHAPTER 10<br />
Visual Effects<br />
When the Visual Effects parameter is assigned a DMX value of 2, the Layer’s content will<br />
be displayed pixel for pixel without any scaling. The Scale parameter is disabled with this<br />
selection. The Parameter 1 (FX1) and Parameter 2 (FX2) parameters do not function<br />
with this Visual Effect.<br />
Layer with the default Scale setting Layer with the<br />
Unity Scaling Visual Effect<br />
4 Full Screen<br />
When the Visual Effects parameter is assigned a DMX value of 4, the Layer’s content is<br />
matched to the output device aspect ratio. This allows scaling that fills the output display<br />
screen. The Parameter 1 (FX1) and Parameter 2 (FX2) parameters do not function with<br />
this Visual Effect<br />
Note: Applying this visual effect may distort the projected image.<br />
<strong>Catalyst</strong>® V3 Media Server User <strong>Manual</strong> 93
CHAPTER 10<br />
Visual Effects<br />
5 Movie Keystone 1<br />
When the Visual Effects parameter is assigned a DMX value of 5, the Layer’s content<br />
plays on an adjustable transparent plane. The Keystone Correction parameters adjust the<br />
shape of the Layer. The Parameter 1 (FX1) and Parameter 2 (FX2) parameters do not<br />
function with this Visual Effect.<br />
Layer 1 with no Visual Effects Layer 2 with no Visual Effects<br />
Layer 2 with Keystone adjustments<br />
over Layer 1.<br />
94 <strong>Catalyst</strong>® V3 Media Server User <strong>Manual</strong>
9 Setup Image Keystone 1<br />
CHAPTER 10<br />
Visual Effects<br />
When the Visual Effects parameter is assigned a DMX value of 6, the Layer’s output<br />
changes to a grid pattern. This grid pattern is useful for determining the results of<br />
Keystone adjustments. The Keystone Correction parameters adjust the shape of the<br />
Layer. The Parameter 1 (FX1) and Parameter 2 (FX2) parameters do not function with<br />
this Visual Effect<br />
A Layer with no Visual Effects<br />
10 Movie on Sphere Filled<br />
A Layer displaying a grid with<br />
Keystone adjustments<br />
When the Visual Effects parameter is assigned a DMX value of 10, the Layer’s content is<br />
wrapped around a solid sphere. The Parameter 1 (FX1) and Parameter 2 (FX2)<br />
parameters do not function with this Visual Effect.<br />
A Layer with its image wrapped<br />
around a solid sphere.<br />
<strong>Catalyst</strong>® V3 Media Server User <strong>Manual</strong> 95
CHAPTER 10<br />
Visual Effects<br />
11 Movie on Sphere Wireframe<br />
When the Visual Effects parameter is assigned a DMX value of 11, the Layer’s content is<br />
wrapped around a wireframe sphere. The Parameter 1 (FX1) and Parameter 2 (FX2)<br />
parameters do not function with this Visual Effect.<br />
A Layer with no Visual Effects<br />
12 Movie on Sphere Points<br />
A Layer with its layer wrapped<br />
around a wireframe sphere.<br />
When the Visual Effects parameter is assigned a DMX value of 12, the Layer’s content is<br />
wrapped around the points of a wireframe sphere. The Parameter 1 (FX1) and Parameter<br />
2 (FX2) parameters do not function with this Visual Effect.<br />
A Layer with its output wrapped<br />
around a points of a wireframe sphere.<br />
96 <strong>Catalyst</strong>® V3 Media Server User <strong>Manual</strong>
13 Movie on Sphere Lit<br />
CHAPTER 10<br />
Visual Effects<br />
When the Visual Effects parameter is assigned a DMX value of 13, the Layer’s content is<br />
wrapped around a solid sphere with an illumination effect. The Parameter 1 (FX1) and<br />
Parameter 2 (FX2) parameters do not function with this Visual Effect.<br />
A Layer with no Visual Effects<br />
14 Movie on Disc Filled<br />
A Layer with its image wrapped around<br />
a solid sphere with illumination.<br />
When the Visual Effects parameter is assigned a DMX value of 14, the Layer’s content is<br />
wrapped around a solid disc. The Parameter 1 (FX1) and Parameter 2 (FX2) parameters<br />
do not function with this Visual Effect.<br />
A Layer with its image wrapped<br />
around a solid disc<br />
<strong>Catalyst</strong>® V3 Media Server User <strong>Manual</strong> 97
CHAPTER 10<br />
Visual Effects<br />
15 Movie on Disc Wireframe<br />
When the Visual Effects parameter is assigned a DMX value of 15, the Layer’s content is<br />
wrapped around a wireframe disc. The Parameter 1 (FX1) and Parameter 2 (FX2)<br />
parameters do not function with this Visual Effect.<br />
A Layer with no Visual Effects<br />
16 Movie on Disc Points<br />
A Layer with its image wrapped around<br />
a wireframe disc.<br />
When the Visual Effects parameter is assigned a DMX value of 16, the Layer’s content is<br />
wrapped around the points of a wireframe disc. The Parameter 1 (FX1) and Parameter 2<br />
(FX2) parameters do not function with this Visual Effect.<br />
A Layer with its image wrapped around<br />
a points of a wireframe disc.<br />
98 <strong>Catalyst</strong>® V3 Media Server User <strong>Manual</strong>
17 Movie on Disc Silhouette<br />
CHAPTER 10<br />
Visual Effects<br />
When the Visual Effects parameter is assigned a DMX value of 17, the Layer’s content is<br />
wrapped around the edges of disc. The Parameter 1 (FX1) and Parameter 2 (FX2)<br />
parameters do not function with this Visual Effect.<br />
A Layer with no Visual Effects<br />
20 Movie on Kaleidoscope<br />
A Layer with its image wrapped around<br />
a the edges of disc<br />
When the Visual Effects parameter is assigned a DMX value of 20, the Layer’s content is<br />
repeated within a kaleidoscope tunnel. The Layer’s image can be rotated using the X<br />
Rotation parameter, and the entire kaleidoscope tunnel can be rotated with the Z<br />
Rotation parameter. The Parameter 1 (FX1) and Parameter 2 (FX2) parameters do not<br />
function with this Visual Effect.<br />
A Layer with its image repeated within<br />
a kaleidoscope tunnel<br />
<strong>Catalyst</strong>® V3 Media Server User <strong>Manual</strong> 99
CHAPTER 10<br />
Visual Effects<br />
21 Movie on Magic Lantern<br />
When the Visual Effects parameter is assigned a DMX value of 21, the Layer’s content is<br />
wrapped around hollow cylinder. The Parameter 1 (FX1) parameter adjusts the size of<br />
the cylinder and the Parameter 2 (FX2) parameter adjusts the number of times the<br />
content is repeated on the cylinder.<br />
A Layer with no Visual Effects<br />
The hollow cylinder with its size<br />
adjusted by Parameter 1 (FX1)<br />
A Layer with its image wrapped<br />
around hollow cylinder<br />
The hollow cylinder with its image<br />
repeated by Parameter 2 (FX2)<br />
100 <strong>Catalyst</strong>® V3 Media Server User <strong>Manual</strong>
22 Movie Stretched<br />
CHAPTER 10<br />
Visual Effects<br />
When the Visual Effects parameter is assigned a DMX value of 22, the Layer’s content is<br />
stretched into vertical slices. The Parameter 1 (FX1) parameter adjusts positioning of the<br />
stretch within the content, and the Parameter 2 (FX2) parameter adjusts the length of the<br />
stretched slices.<br />
A Layer with no Visual Effects<br />
The stretched image with its location<br />
adjusted by Parameter 1 (FX1)<br />
A Layer with its output stretched<br />
into vertical slices<br />
The image with the stretch length<br />
reduced by Parameter 2 (FX2)<br />
<strong>Catalyst</strong>® V3 Media Server User <strong>Manual</strong> 101
CHAPTER 10<br />
Visual Effects<br />
23 Movie Panorama Slices<br />
When the Visual Effects parameter is assigned a DMX value of 23, the Layer’s content is<br />
sliced into strips and placed side by side. The Parameter 1 (FX1) parameter adjusts the<br />
number of slices. The Parameter 2 (FX2) parameter does not function with this Visual<br />
Effect.<br />
The Layer’s original image. The Layer’s image sliced into<br />
strips placed side by side.<br />
102 <strong>Catalyst</strong>® V3 Media Server User <strong>Manual</strong>
24 Movie on Magic Lantern 2<br />
CHAPTER 10<br />
Visual Effects<br />
When the Visual Effects parameter is assigned a DMX value of 24, the Layer’s content is<br />
wrapped around solid cylinder. The Parameter 1 (FX1) parameter adjusts the size of the<br />
cylinder and the Parameter 2 (FX2) parameter adjusts the number of times the content is<br />
repeated on the cylinder.<br />
A Layer with no Visual Effects<br />
The solid cylinder with its size<br />
adjusted by Parameter 1 (FX1)<br />
A Layer with its output wrapped<br />
around a solid cylinder<br />
The solid cylinder with its image<br />
repeated by Parameter 2 (FX2)<br />
<strong>Catalyst</strong>® V3 Media Server User <strong>Manual</strong> 103
CHAPTER 10<br />
Visual Effects<br />
30 Movie on Cube 4 Sides<br />
When the Visual Effects parameter is assigned a DMX value of 30, the Layer’s content is<br />
wrapped around four sides of a cube. The Parameter 1 (FX1) and Parameter 2 (FX2)<br />
parameters do not function with this Visual Effect<br />
A Layer with no Visual Effects<br />
31 Movie on Cube 6 Sides<br />
The Layer’s image on four sides<br />
of a cube<br />
When the Visual Effects parameter is assigned a DMX value of 31, the Layer’s content is<br />
wrapped around six sides of a cube. The Parameter 1 (FX1) and Parameter 2 (FX2)<br />
parameters do not function with this Visual Effect<br />
The Layer’s image on six sides<br />
of a cube<br />
104 <strong>Catalyst</strong>® V3 Media Server User <strong>Manual</strong>
32 Movie on Colored Cube 6 Sides<br />
CHAPTER 10<br />
Visual Effects<br />
When the Visual Effects parameter is assigned a DMX value of 32, the Layer’s content is<br />
wrapped around six sides of a cube. Each side of the cube is tinted with a different color.<br />
The Parameter 1 (FX1) and Parameter 2 (FX2) parameters do not function with this<br />
Visual Effect<br />
The Layer’s image on six<br />
different colored sides<br />
33 Movies First Four Layers on Cube<br />
When the Visual Effects parameter is assigned a DMX value of 33, the content from each<br />
Layer of the <strong>Catalyst</strong> system is applied to one side of a cube. The Parameter 1 (FX1) and<br />
Parameter 2 (FX2) parameters do not function with this Visual Effect<br />
A cube with a different Layer’s<br />
content on each side.<br />
<strong>Catalyst</strong>® V3 Media Server User <strong>Manual</strong> 105
CHAPTER 10<br />
Visual Effects<br />
40 Movie on NxN Simultaneous<br />
When the Visual Effects parameter is assigned a DMX value of 40, the Layer’s content<br />
can be tiled in both the horizontal X-axis and the vertical Y-axis. The Parameter 1 (FX1)<br />
parameter adjusts the number of tiles on the horizontal X-axis. The Parameter 2 (FX2)<br />
parameter adjusts the number of tiles on the vertical Y-axis.<br />
A Layer’s content tiled on the<br />
horizontal X-axis<br />
A Layer’s content tiled on both<br />
the horizontal X-axis and<br />
the vertical Y-axis<br />
A Layer’s content tiled on the<br />
vertical Y-axis<br />
106 <strong>Catalyst</strong>® V3 Media Server User <strong>Manual</strong>
41 Movie on NxN Simultaneous Random Color<br />
CHAPTER 10<br />
Visual Effects<br />
When the Visual Effects parameter is assigned a DMX value of 41, the Layer’s content can<br />
be tiled in both the horizontal X-axis and the vertical Y-axis. Each tile of the image will<br />
randomly change color. The Parameter 1 (FX1) parameter adjusts the number of tiles on<br />
the horizontal X-axis. The Parameter 2 (FX2) parameter adjusts the number of tiles on<br />
the vertical Y-axis.<br />
A Layer’s content tiled on both the horizontal X-axis<br />
and the vertical Y-axis with randomly changing colors<br />
42 Movie on NxN Consecutive<br />
When the Visual Effects parameter is assigned a DMX value of 42, the Layer’s content can<br />
be tiled in both the horizontal X-axis and the vertical Y-axis. Each tile of the image will<br />
appear one at a time in a linear order. The Parameter 1 (FX1) parameter adjusts the<br />
number of tiles on the horizontal X-axis. The Parameter 2 (FX2) parameter adjusts the<br />
number of tiles on the vertical Y-axis.<br />
43 Movie on NxN Consecutive Random Color<br />
When the Visual Effects parameter is assigned a DMX value of 43, the Layer’s content can<br />
be tiled in both the horizontal X-axis and the vertical Y-axis. Each tile of the image will<br />
appear one at a time with a randomly changing color. The Parameter 1 (FX1) parameter<br />
adjusts the number of tiles on the horizontal X-axis. The Parameter 2 (FX2) parameter<br />
adjusts the number of tiles on the vertical Y-axis.<br />
44 Movie on NxN Consecutive Random Frame<br />
When the Visual Effects parameter is assigned a DMX value of 44, the Layer’s content can<br />
be tiled in both the horizontal X-axis and the vertical Y-axis. Each tile of the image will<br />
appear one at a time in a random order. The Parameter 1 (FX1) parameter adjusts the<br />
<strong>Catalyst</strong>® V3 Media Server User <strong>Manual</strong> 107
CHAPTER 10<br />
Visual Effects<br />
number of tiles on the horizontal X-axis. The Parameter 2 (FX2) parameter adjusts the<br />
number of tiles on the vertical Y-axis.<br />
45 Movie on Random Flicker<br />
When the Visual Effects parameter is assigned a DMX value of 45, the Layer’s content<br />
randomly turns on and off with a result similar to the Strobe parameter effect. The<br />
Parameter 1 (FX1) and Parameter 2 (FX2) parameters do not function with this Visual<br />
Effect.<br />
46 Movie on Random Color Flicker<br />
When the Visual Effects parameter is assigned a DMX value of 46, the Layer’s content<br />
randomly turns on and off. In addition, the image randomly changes colors. The Parameter<br />
1 (FX1) and Parameter 2 (FX2) parameters do not function with this Visual Effect.<br />
108 <strong>Catalyst</strong>® V3 Media Server User <strong>Manual</strong>
60 Rectangle Shuttered<br />
CHAPTER 10<br />
Visual Effects<br />
When the Visual Effects parameter is assigned a DMX value of 60, the Layer’s content is<br />
replaced with a non-transparent white rectangular image. This effect mimics a<br />
rectangular shuttered light. Keystone Correction parameters adjust the shutter sides and<br />
the color parameters let you mix the color. All the position, rotation and scale and strobe<br />
parameters adjustments can be used with this effect. The Parameter 1 (FX1) and<br />
Parameter 2 (FX2) parameters do not function with this Visual Effect.<br />
Layer 1 with no visual effect<br />
Shuttered effect with Keystone Correction,<br />
Scale, Rotation and Color parameter<br />
adjustments applied.<br />
Layer 1 with Rectangle Shuttered<br />
visual effect.<br />
<strong>Catalyst</strong>® V3 Media Server User <strong>Manual</strong> 109
CHAPTER 10<br />
Visual Effects<br />
61 Rectangle Graduated Color Shuttered<br />
When the Visual Effects parameter is assigned a DMX value of 61, the Layer’s content is<br />
replaced with a non-transparent white rectangular image. The Parameter 1 (FX1)<br />
parameter selects graduated color from the top of the rectangle. The Parameter 2 (FX2)<br />
parameter selects graduated color from the bottom of the rectangle. The Keystone<br />
Correction parameters adjust the shape of the image. All the position, rotation and scale<br />
and strobe parameters can be used with this effect.<br />
Effect with graduated color selected<br />
by Parameter 1 (FX1).<br />
Color mixed combination of Parameter 1<br />
and Parameter 2 adjustments.<br />
Effect with graduated color selected<br />
by Parameter 2 (FX2).<br />
Keystone Correction and Z Rotation<br />
parameter adjustments applied to the effect.<br />
110 <strong>Catalyst</strong>® V3 Media Server User <strong>Manual</strong>
62 N Sided Shape Shuttered Black<br />
CHAPTER 10<br />
Visual Effects<br />
When the Visual Effects parameter is assigned a DMX value of 62, the Layer’s content is<br />
replaced with a transparent polygon on a black plane. The Parameter 1 (FX1) parameter<br />
adjusts polygon’s number of sides. The Parameter 2 (FX2) parameter does not function<br />
with this Visual Effect. All the position, rotation and scale and strobe parameters can be<br />
used with this effect.<br />
Examples of various sized polygons<br />
<strong>Catalyst</strong>® V3 Media Server User <strong>Manual</strong> 111
CHAPTER 10<br />
Visual Effects<br />
70 Shutter Shuttered Black<br />
When the Visual Effects parameter is assigned a DMX value of 70, the Layer’s content is<br />
replaced with a transparent rectangular image on a black plane. The Keystone Correction<br />
parameters adjust the shape of the image. The Parameter 1 (FX1) and Parameter 2 (FX2)<br />
parameters do not function with this Visual Effect.<br />
Layer 1with no visual effect<br />
Layer 2 with Keystone Correction<br />
parameter adjustments over Layer 1<br />
Layer 2 with no visual effect<br />
112 <strong>Catalyst</strong>® V3 Media Server User <strong>Manual</strong>
71 Shutter Shuttered Color<br />
CHAPTER 10<br />
Visual Effects<br />
When the Visual Effects parameter is assigned a DMX value of 71, the Layer’s content is<br />
replaced with a transparent rectangular image on a white plane. The Keystone Correction<br />
parameters adjust the shape of the image. The Parameter 1 (FX1) and Parameter 2 (FX2)<br />
parameters do not function with this Visual Effect.<br />
Layer 1with no visual effect<br />
Layer 2 with Keystone Correction<br />
and Color parameter adjustments over Layer 1<br />
Layer 2 with no visual effect<br />
<strong>Catalyst</strong>® V3 Media Server User <strong>Manual</strong> 113
CHAPTER 10<br />
Visual Effects<br />
72 Iris Shutter Black<br />
When the Visual Effects parameter is assigned a DMX value of 72, the Layer’s content is<br />
replaced with a transparent circular image on a black plane. The Parameter 1 (FX1)<br />
parameter adjusts the softness of the circle’s edge. The Parameter 2 (FX2) parameter<br />
does not function with this Visual Effect.<br />
Layer 1with no visual effect<br />
Layer 2 with no Parameter 1 (FX1)<br />
parameter adjustments over Layer 1.<br />
Layer 2 with no visual effect<br />
Layer 2 with Parameter 1 (FX1)<br />
parameter adjustments over Layer 1.<br />
114 <strong>Catalyst</strong>® V3 Media Server User <strong>Manual</strong>
100 Movie on Teapot Filled<br />
CHAPTER 10<br />
Visual Effects<br />
When the Visual Effects parameter is assigned a DMX value of 100, the Layer’s content is<br />
wrapped around a solid teapot. The Parameter 1 (FX1) and Parameter 2 (FX2)<br />
parameters do not function with this Visual Effect<br />
Layer with no visual effect<br />
120 Colored Sphere<br />
A Layer with its image wrapped<br />
around a solid teapot.<br />
When the Visual Effects parameter is assigned a DMX value of 120, the Layer’s content is<br />
replaced by a colored sphere. All position parameters can be applied.<br />
Colored Sphere effect applied to layer<br />
Scale, x, y and z Rotation parameters<br />
applied to Colored Sphere effect.<br />
<strong>Catalyst</strong>® V3 Media Server User <strong>Manual</strong> 115
CHAPTER 10<br />
Visual Effects<br />
123 Spectrograph<br />
When the Visual Effects parameter is assigned a DMX value of 123, the Layer’s content is<br />
replaced with a waveform of the audio input. The Parameter 1 (FX1) selects different<br />
types of audio waveforms. The Parameter 2 (FX2) parameter does not function with this<br />
Visual Effect. Waveforms can also be modified by Color, position, scale and aspect ratio<br />
parameters.<br />
Several Variations of Waveforms are Available in the Spectrograph Parameter.<br />
116 <strong>Catalyst</strong>® V3 Media Server User <strong>Manual</strong>
Chapter 11:<br />
Keystone and Shutters<br />
Keystone Correction<br />
The shape of a projected image is affected by the angle of projection. A rectangular image<br />
may appear on a wall as a trapezoidal shape. Keystone correction compensates for this<br />
effect by allowing adjustments to the geometry of the layer’s image.<br />
The eight Keystone Correction parameters each adjust one corner of the layer’s image<br />
horizontally along the X-axis or vertically along the Y-axis.<br />
y1<br />
y2<br />
x1<br />
Layer Image<br />
x2 x3<br />
The suggested default DMX value for each parameter is 128, which equals no geometric<br />
correction. Values less than 128 move the selected corner left or up; values greater than<br />
128 move it right or down.<br />
To activate the affects of the Keystone Correction parameters, the Visual Effects<br />
parameter must be assigned to a DMX value of 5 (Keystone 1).<br />
Image with no Keystone correction Image with Keystone correction<br />
<strong>Catalyst</strong>® V3 Media Server User <strong>Manual</strong> 117<br />
x4<br />
y4<br />
y3
CHAPTER 11<br />
Keystone and Shutters<br />
Shutter Effects<br />
The eight Keystone Correction parameters also adjust the shape of shutter effects on a<br />
layer.<br />
To activate the shutter affects of the Keystone Correction parameters, the Visual Effects<br />
parameter must be assigned to a DMX value between 60 and 72. A DMX value of 70<br />
(Shuttered Black) is the most commonly used.<br />
When a shutter Visual Effect is activated on a layer, that layer changes to a shutter only<br />
layer. Any assigned content for the layer will not be displayed. Instead, an adjustable<br />
transparent frame is displayed above underlying layers. A shutter Visual Effect will not<br />
function on Layer 1.<br />
Once a layer becomes a shutter only layer, the Keystone Correction parameters can be<br />
used to adjust the frame’s shape. In addition the X, Y, and Z Rotation, X and Y Position,<br />
and Scale parameters modify the appearance of the shutters.<br />
Image on Layer 1 Shutters on Layer 2 overlaying Layer 1<br />
Keystone Correction and Shutter Shape Preview<br />
You can also preview shapes created by the Keystone Correction parameters in the<br />
<strong>Catalyst</strong> Control interface window on the PowerMac monitor. This field will display the<br />
Keystone correction shape or shutter shape regardless of the active Visual Effect.<br />
Keystone<br />
correction<br />
118 <strong>Catalyst</strong>® V3 Media Server User <strong>Manual</strong>
Chapter 12:<br />
Art-Net Protocol<br />
As an alternative to using standard DMX connections through the CIB, <strong>Catalyst</strong> Media<br />
Servers can receive DMX-512 over an Ethernet network using Art-Net protocol. Artnet is<br />
an open protocol developed by Artistic Licence to distribute DMX over Ethernet. <strong>Catalyst</strong><br />
software is compatible with Artnet, and a suitable Artnet DMX Input device can be used to<br />
send DMX into <strong>Catalyst</strong> from a lighting console. Such devices are available from the<br />
following manufacturers, amongst others:<br />
• Artistic Licence: Net-Lynx IP http://www.artisticlicence.com<br />
• ELC Lighting: Node 4 http://www.elclighting.com<br />
• ADB: Netport http://www.adb-ttv.be<br />
• LSC Lighting: DNAnet http://www.lsclighting.com.au<br />
• Enttec: DMX Gate Mk II http://www.enttec.com/products.php?display=ethernet<br />
Setting Up the Server for Artnet<br />
Connect your ArtNet device to your Media Server using a Cat 5 ethernet cable. You do not<br />
require a cross-over cable. You can also connect multiple <strong>Catalyst</strong> systems to an Artnet<br />
device using a hub/switcher. Be aware that Artnet is 10baseT, and may not work with some<br />
Gigabit hub/switchers.<br />
After connecting the ArtNet device,<br />
use the following steps to configure<br />
the server:<br />
1. Open System Preferences from<br />
the Apple Menu and choose<br />
Network.<br />
2. Create a new location and call<br />
it Artnet, and select Built-In<br />
Ethernet in the Show field.<br />
3. Click on the TCP/IP tab to<br />
configure the TCP/IP settings.<br />
It is important to set Configure<br />
IPv4 to <strong>Manual</strong>ly.<br />
<strong>Catalyst</strong>® V3 Media Server User <strong>Manual</strong> 119
CHAPTER 12<br />
Art-Net Protocol<br />
Note: Consult your manufacturers instruction manual for the correct IP<br />
settings, which may be different to the ones described.<br />
The default IP address setting<br />
is 2.0.0.x, where x is an integer<br />
value from 0 - 255. Some<br />
ArtNet boxes can use an<br />
alternative IP address, which is<br />
10.0.0.x. The Subnet Mask for<br />
Artnet is 255.0.0.y, where y is<br />
the position of the SubNet<br />
switch on your Artnet<br />
interface. Generally, this would<br />
be set to zero.<br />
Once you have entered your IP<br />
and Subnet settings, click the<br />
Apply Now button to apply the<br />
changes.<br />
Sometimes it may be necessary<br />
to configure the network speed.<br />
Artnet is a 10base T protocol,<br />
and Macintosh computers can<br />
support 10base T, 100base T<br />
and Gigabit Ethernet.<br />
4. Use the Apply Now button to<br />
apply the changes to your<br />
Ethernet settings.<br />
Artnet status can be monitored in<br />
the ArtNet Diagnostic screen.<br />
120 <strong>Catalyst</strong>® V3 Media Server User <strong>Manual</strong>
Assigning a DMX In Panel to Art-Net<br />
Assigning <strong>Catalyst</strong> DMX In panels to respond<br />
to Art-Net instead of standard DMX is a simple<br />
process.<br />
Next to the On/Off button in each DMX In<br />
panel is a field used to assign the DMX source.<br />
Click on the field to open a pop up window with<br />
available sources. You can then select CIB<br />
(when standard DMX is used) or one of ten Art-<br />
Net channels.<br />
The DMX panel will display its assigned DMX<br />
source:<br />
CHAPTER 12<br />
Art-Net Protocol<br />
The number after the ArtNet in DMX In corresponds to the Universe Number. The<br />
Universe Number corresponds to the Universe Number on your ArtNet device. If you set<br />
ArtNet 0, then your ArtNet device must also be set to Universe Number 0 also.<br />
<strong>Catalyst</strong>® V3 Media Server User <strong>Manual</strong> 121
CHAPTER 12<br />
Art-Net Protocol<br />
122 <strong>Catalyst</strong>® V3 Media Server User <strong>Manual</strong>
Chapter 13:<br />
Audio<br />
Audio Input<br />
Audio Inputs to the Media server can be displayed on any layer by choosing a Visual<br />
Effects parameter DMX value of 123. This effect changes the Layer’s output to a<br />
waveform display of the audio input. The waveform can be manipulated with the Layer’s<br />
parameters in the same manner as other content played back from the hard drive.<br />
The audio feed is input into the <strong>Catalyst</strong> Media Server via the PowerMac’s audio in<br />
connection.<br />
Configuring the Audio Feed<br />
1. On the back of the PowerMac computer, connect your audio feed to<br />
the PowerMac’s audio input port using a 3.5mm miniphone jack.<br />
2. Quit the application.<br />
3. Using the PowerMac<br />
Finder, locate the Audio<br />
MIDI Setup application<br />
in the<br />
Applications>Utilities<br />
folder. Click to open the<br />
file.<br />
4. Assign the Default<br />
Input to Built-In Audio.<br />
5. Assign the Source to<br />
Line In<br />
6. Close the Audio MIDI<br />
Setup window and<br />
launch the <strong>Catalyst</strong><br />
application.<br />
<strong>Catalyst</strong>® V3 Media Server User <strong>Manual</strong> 123
CHAPTER 13<br />
Audio<br />
Activating the Audio Input<br />
7. Use the Audio Input panel on the <strong>Catalyst</strong> Control window to activate Audio Input.<br />
Click on the round On/Off button to activate the Video Input panel<br />
When the Visual Effects parameter is<br />
assigned a DMX value of 123, the Layer’s<br />
content is replaced with a waveform of the<br />
audio input.<br />
The Parameter 1 (FX1) selects different types<br />
of audio waveforms. The Parameter 2 (FX2)<br />
parameter does not function with this Visual<br />
Effect.<br />
Waveform Type Selection<br />
The following chart lists the waveform types available by<br />
adjusting the Parameter 1 (FX1) parameter:<br />
Waveform Type<br />
DMX<br />
Value<br />
Mono Sound Waveform with Solid Outline<br />
0<br />
Mono Sound Envelope with Solid Outline 1<br />
Mono Sound Single Waveform with Solid Outline 2<br />
Mono Sound Single Waveform with Dashed Outline 3<br />
Stereo Sound Dual Envelope with Solid Outline 4<br />
Spectral Analysis by Frequency 5<br />
Phase Vector Scope drawn as Solid Lines 6<br />
Phase Vector Scope drawn as Solid Lines 7<br />
Phase Vector Scope drawn as Dots 8<br />
A Layer displaying an<br />
audio input waveform.<br />
124 <strong>Catalyst</strong>® V3 Media Server User <strong>Manual</strong>
Audio Output<br />
Audio Playback<br />
CHAPTER 13<br />
Audio<br />
In normal video only operation, <strong>Catalyst</strong> software will ignore audio tracks in a movie.<br />
<strong>Catalyst</strong> software uses video acceleration algorithms to get the best possible performance<br />
from the Macintosh computer. When using the audio playback feature, <strong>Catalyst</strong> software<br />
prioritises the playback of the audio in a movie, over the playback of video. This means<br />
that video performance may be affected by the playback of multiple audio and video<br />
layers.<br />
<strong>Catalyst</strong> uses Mac OS X's Core Audio API, which allows <strong>Catalyst</strong> to output through a wide<br />
variety of PCI, USB or Firewire audio devices.<br />
Each layer in <strong>Catalyst</strong> has it's own volume controland each volume control is a separately<br />
patchable DMX channel. For more information on Playback features, see Video Playback<br />
on page 43.<br />
Audio Device Set up for <strong>Catalyst</strong> Audio Output<br />
Setting up an audio<br />
device for <strong>Catalyst</strong> to<br />
output to is done within<br />
Mac OS X System<br />
Preferences.<br />
1. Open System<br />
Preferences from<br />
under the Apple<br />
Menu and click on<br />
the Sound icon.<br />
2. Click on the Output<br />
tab to set up the<br />
sound output device.<br />
The number<br />
of sound outputs<br />
available depends<br />
on which devices<br />
you have installed.<br />
A standard G5 Mac<br />
has Internal Audio<br />
and Digital Audio<br />
available. If you<br />
<strong>Catalyst</strong>® V3 Media Server User <strong>Manual</strong> 125
CHAPTER 13<br />
Audio<br />
have a video input card like a Blackmagic Decklink Extreme installed, you can use<br />
the card to output audio. You can also use other Core Audio compatible audio devices,<br />
including Firewire and USB devices.<br />
3. By clicking on the<br />
Input tab, you can<br />
also configure the<br />
Audio Input device<br />
for use with the<br />
Spectrograph visual<br />
effect.<br />
Setting Up DMX with Audio<br />
Each layer has a separate volume control which can be patched as a single DMX channel.<br />
To set up a DMX channel to control a layer volume control, go to the DMX In section of<br />
<strong>Catalyst</strong> Control window.<br />
Playing Back Audio<br />
To playback a movie with it's audio track, select the movie in the usual manner and set the<br />
play mode parameter to Play Audio to play the movie and audio track once, or Play Audio<br />
Loop to loop the movie and audio track. The audio play modes can be used with Inframe<br />
and Outframe parameters.<br />
Audio tracks can also be played back with Presets. Clicking on the Volume box with your<br />
mouse allows control of the volume.<br />
Creating Content with Audio Tracks<br />
Quicktime supports a number of large audio codecs. However, for the best audio quality it<br />
is advisable to use no compression and a sampling rate of 44.1Khz.<br />
Currently <strong>Catalyst</strong> does not support mp3 playback.<br />
126 <strong>Catalyst</strong>® V3 Media Server User <strong>Manual</strong>
Chapter 14:<br />
Video Input<br />
Choosing a Library parameter DMX value of 255 for any layer switches that layer's<br />
content source from the Media Server hard drive to a video feed input. The video feed can<br />
then be manipulated with the Layer’s parameters in the same manner as content played<br />
back from the hard drive.<br />
Connecting the Video Feed<br />
Video feeds are input into the <strong>Catalyst</strong> Media Server via the PowerMac’s FireWire<br />
connection or with an optional video input card. The <strong>Catalyst</strong> Media Server supports a<br />
wide variety of video input cards from most major manufacturers. To determine whether<br />
the <strong>Catalyst</strong> Media Server supports a particular card, contact High End Systems customer<br />
support.<br />
1. Shutdown the PowerMac computer.<br />
2. On the back of the computer, connect your video feed to a FireWire port or video<br />
input card.<br />
3. Reboot the computer and launch the <strong>Catalyst</strong> application.<br />
Configuring the Video Input<br />
Use the Video Input panel on the <strong>Catalyst</strong> Control window to configure Video Input.<br />
1. Click on the round On/Off button to activate the Video Input pane.l<br />
Outlines turn<br />
yellow when<br />
activated<br />
2. Click on the Video Input selection field to select a Video Input device. A popup menu<br />
will display any devices found by the <strong>Catalyst</strong> application.<br />
Video Input<br />
Field<br />
<strong>Catalyst</strong>® V3 Media Server User <strong>Manual</strong> 127
CHAPTER 14<br />
Video Input<br />
3. Click on the small monitor icon to toggle on and off a live preview of the Video Input.<br />
This preview is for test purposes only and should be switched off during normal<br />
<strong>Catalyst</strong> use.Click on the Settings... field to pop up a menu of display options for the<br />
Video Input.<br />
4. Choose the desired setting and click to select.<br />
Monitor Icon<br />
128 <strong>Catalyst</strong>® V3 Media Server User <strong>Manual</strong>
Chapter 15:<br />
Serial Control<br />
The <strong>Catalyst</strong> Media Server can control peripheral devices such as video switchers or<br />
projector shutters through the PowerMac’s Universal Serial Bus (USB) ports. Using the<br />
RS-232 serial communications protocol, the <strong>Catalyst</strong> Control window’s Custom Serial<br />
panel transmits RS-232 control commands to the peripherals as a response to changed<br />
DMX values. This feature lets non-DMX controlled devices coordinate automatically with<br />
events and images in your show.<br />
Each RS-232-enabled serial device is configured through one DMX In panel in the<br />
<strong>Catalyst</strong> Control window. The serial device then uses one DMX channel for control from a<br />
lighting console.<br />
Connecting RS-232 Devices<br />
Many aftermarket companies manufacture USB to Serial devices for use with the<br />
PowerMac computer. Typically these devices consist of a USB connector on one end and a<br />
DB9 on the other. Contact High End Systems technical support for recommended USB to<br />
serial devices.<br />
Connect the RS-232 device’s USB plug to the USB port on the PowerMac G5 computer.<br />
CAUTION!<br />
RS-232 signal strength can degrade sharply over cables longer<br />
than 45-50 feet (15 meters). Consult the manufacturer’s<br />
documentation to determine maximum practical cable length.<br />
Assigning a DMX Channel<br />
1. In an unused DMX In panel, click the left button to turn on the panel. The button’s<br />
center and edge turn from gray to yellow.<br />
2. Click the description of the layer, to the right of the channel number. On the pop-up<br />
menu, select Custom Serial Trigger 1 or 2. These triggers use the two Custom Serial<br />
<strong>Catalyst</strong>® V3 Media Server User <strong>Manual</strong> 129
CHAPTER 15<br />
Serial Control<br />
panels in the <strong>Catalyst</strong> Control window. Trigger 1 uses the top Custom Serial panel.<br />
Trigger 2 uses the bottom Custom Serial panel.<br />
3. Click the field showing the DMX start channel number. Type the value of the channel<br />
to assign to the serial device. Each serial device uses one DMX channel.<br />
Assigning the Interface and Data Format<br />
The RS-232 standard specifies several different data drivers for the PowerMac computer.<br />
The Media Server can send commands using any of these drivers. Check the USB to<br />
Serial device’s documentation to determine the driver used by your serial device, then set<br />
the interface using this procedure:<br />
1. In the <strong>Catalyst</strong> Control window’s Custom Serial panel, click the field labeled No<br />
Output to bring up a pop-up menu.<br />
2. When an RS-232 device is attached to one of the PowerMac USB ports, its driver<br />
appears in this pop-up menu. By default the menu also includes several PowerMac<br />
system options:<br />
OSX Midi. This choice is unavailable. You cannot send RS-232 serial control<br />
commands over MIDI.<br />
Apple IAC Device IAC Driver IAC Bus 1. The Inter-Application Communications<br />
driver lets multiple software applications communicate with one another.<br />
130 <strong>Catalyst</strong>® V3 Media Server User <strong>Manual</strong>
CHAPTER 15<br />
Serial Control<br />
OSX Serial Ports. •Any USB to Serial devices plugged into the computer will<br />
appear in this menu section.<br />
3. Select the RS-232 driver for the attached serial device. The No Output status changes<br />
to show the selected serial driver.<br />
Next, set the serial device’s baud rate (transmission speed) and data format (the method<br />
the device uses to encode its RS-232 messages). This information should be available in<br />
the serial device’s documentation; the data format is usually described in terms of data<br />
bits, stop bits, and parity.<br />
4. Click the same field you clicked in Step 1 to access the pop-up menu again.<br />
5. Select OSX Serial Ports.<br />
6. Select the baud rate and data format used by the attached serial device.<br />
Setting the Serial Commands<br />
Each DMX channel assigned to a serial device can trigger up to 10 strings, based on the<br />
DMX values the lighting console sends to the <strong>Catalyst</strong> Media Server. You can define each<br />
string sent to the peripheral device, or customize the sample inbuilt strings that are keyed<br />
to specific manufacturers’ equipment.<br />
1. In the Custom Serial panel, click one of the ten numbered buttons to create a serial<br />
command string that will be sent to the peripheral device. The Edit General Serial<br />
Preset dialog box appears.<br />
2. In the Name field, type a description of the string’s function or purpose.<br />
<strong>Catalyst</strong>® V3 Media Server User <strong>Manual</strong> 131
CHAPTER 15<br />
Serial Control<br />
3. For the command string itself, you will define your own string command as required<br />
by the triggered device. In addition, the <strong>Catalyst</strong> software includes several pre-defined<br />
strings as examples. If you choose a built-in string, you can use it as is, or customize it<br />
as needed.<br />
Custom String Command<br />
In the Serial String box type the string itself. A string can be text, a hexadecimal value, or<br />
a combination of both. Consult the serial controlled device’s manual for exact serial<br />
strings required.<br />
Text. • Enclose a text<br />
string in quotation<br />
marks.<br />
Hexadecimal. •Enclose<br />
a base-16 hex value in<br />
[brackets].<br />
Combination. •Chain<br />
together an indefinite<br />
numbers of text and<br />
hexadecimal strings in<br />
the Serial String box.<br />
Sample Strings<br />
The <strong>Catalyst</strong> application offers many sample string<br />
commands. Click the Inbuilt Strings field to open a<br />
pop-up menu. From the pop-up menu select a function.<br />
The selected string populates the Serial String box.<br />
Note: The Extron commands refer to video switching<br />
equipment made by Extron Electronics.<br />
The “Open shutter” and “Close shutter,” “Power<br />
on/off,” and “Picture mute on/off” commands<br />
work with NEC projectors.<br />
The “1 to 2” and “1 to 3” commands refer to the<br />
Leitch video switcher.<br />
The “midi notes” and “midi note 48 on off”<br />
commands are used for internal testing only<br />
and not available.<br />
132 <strong>Catalyst</strong>® V3 Media Server User <strong>Manual</strong>
CHAPTER 15<br />
Serial Control<br />
4. After defining the desired action, click Send Now to test this string on your serial<br />
device.<br />
5. Close the Edit General Serial Preset window by clicking the O.K. button.<br />
6. Repeat with the other Custom Serial panel buttons until you have entered all the<br />
command strings needed.<br />
Triggering Serial Devices from DMX<br />
When the Media Server receives a DMX channel<br />
value allocated to a particular button on the Custom<br />
Serial panel, the software transmits the associated<br />
string to the connected serial device. The Media<br />
Server sends the string once each time it receives the<br />
associated DMX value.<br />
Serial Button DMX values<br />
Serial<br />
Button<br />
DMX<br />
Value<br />
OFF 0<br />
1 6<br />
2 31<br />
3 56<br />
4 81<br />
5 106<br />
6 131<br />
7 156<br />
8 181<br />
9 206<br />
10 231<br />
<strong>Catalyst</strong>® V3 Media Server User <strong>Manual</strong> 133
CHAPTER 15<br />
Serial Control<br />
134 <strong>Catalyst</strong>® V3 Media Server User <strong>Manual</strong>
Chapter 16:<br />
MIDI Timecode<br />
<strong>Catalyst</strong> Media Servers can receive MIDI timecode and a Layer’s playback can<br />
synchronize to the timecode.<br />
Connecting MIDI Timecode Devices<br />
Many aftermarket companies manufacture USB to MIDI devices for use with the<br />
PowerMac computer. Typically these devices consist of a USB connector on one end and a<br />
number of MIDI connections on the other. Contact High End Systems technical support<br />
for recommended USB to MIDI devices.<br />
Connect the MIDI device’s USB plug to the USB port on the PowerMac computer.<br />
Assign the MIDI Device<br />
Click on the Device field of the Midi Time Code Input panel in the <strong>Catalyst</strong> Control<br />
window. Click on the installed MIDI device to select it.<br />
Device field<br />
Synchronizing a Layer with MIDI Timecode<br />
Assign the Play Mode parameter of a Layer to a DMX value of 100(Sync to MTC 0hr) to<br />
read the current frame from the MIDI device. The Layers content will playback according<br />
to the values of the MIDI timecode. Additional Play Mode values synchronize to different<br />
times. For example, a Play Mode parameter value of 101 synchronizes to MTC 1hr and a<br />
value of 102 to 2hr.<br />
<strong>Catalyst</strong>® V3 Media Server User <strong>Manual</strong> 135
CHAPTER 16<br />
MIDI Timecode<br />
136 <strong>Catalyst</strong>® V3 Media Server User <strong>Manual</strong>
Chapter 17:<br />
Sony 9-pin RS422<br />
Some versions of <strong>Catalyst</strong> software include the ability to control video equipment using<br />
the Sony 9-pin RS422 editing protocol. Devices using this protocol include Omega video<br />
decks, Doremi players, Sony broadcast products, as well as JVC and Panasonic products.<br />
Consult your playback device specifications for further information.<br />
When properly configured. the <strong>Catalyst</strong> Control window’s Sony 9-pin panel transmits<br />
RS422 control commands to the attached peripherals as a response to changed DMX<br />
values. This allows triggering of video playback decks and devices from you lighting<br />
controller.<br />
The Sony 9-pin panel.<br />
The Sony 9-pin RS422 protocol requires a serial output device for the PowerMac that is<br />
capable of transmitting RS422. Alternately an RS-232 to RS422 converter capable of operating<br />
at 38400 baud can be used. High End Systems recommends the SXPro Serial Card<br />
or the USB Twin Serial Adapter, both manufactured by Keyspan (www.keyspan.com).<br />
<strong>Catalyst</strong>® V3 Media Server User <strong>Manual</strong> 137
CHAPTER 17<br />
Sony 9-pin RS422<br />
Assigning the Interface and Data Format<br />
1. Click on the Device field to pop up a menu of serial devices:<br />
Device field<br />
2. Click on OSX Serial Setup... to open the Serial Port Setup window. Select the Sony<br />
9pin38400 baud preset and click OK to close the window:<br />
138 <strong>Catalyst</strong>® V3 Media Server User <strong>Manual</strong>
CHAPTER 17<br />
Sony 9-pin RS422<br />
3. Click on the Device field to pop up the menu of devices and click on the properly<br />
configured device:<br />
Click on the properly<br />
configured device.<br />
When properly configured and<br />
connected, the Sony 9-pin device<br />
panel displays green and blue<br />
transmit and receive lights.<br />
Transmit and Receive indicators<br />
<strong>Manual</strong> testing of the device is available by clicking on the playback buttons on the Sony<br />
9-pin device panel. Timecode from the playback device should also appear on the panel:<br />
Playback buttons Timecode display<br />
<strong>Catalyst</strong>® V3 Media Server User <strong>Manual</strong> 139
CHAPTER 17<br />
Sony 9-pin RS422<br />
Assigning a DMX Value<br />
1. In an unused DMX In panel, click the left button to turn on the panel. The button’s<br />
center and edge turn from gray to yellow<br />
2. Click the description of the layer, to the right of the channel number. On the pop-up<br />
menu, select Sony 9Pin RS422 1.<br />
3. Click the field showing the DMX start channel number. Type the value of the DMX<br />
start channel to assign to the Sony device. The Sony 9-pin device uses six DMX<br />
channels.<br />
Triggering a Sony 9-pin Device from DMX<br />
Using the six DMX channels assigned to the Sony<br />
device, first setup a command then trigger that<br />
command from your lighting console.<br />
The first channel of the device is the master enable<br />
channel used for triggering. The second channel is the<br />
command, and the remaining channels assign the deck<br />
position.<br />
The master enable channel only transmits commands<br />
when the channel is changed from 0 to 255.<br />
Command DMX Value<br />
no action 0-9<br />
Play 10-19<br />
Pause 20-29<br />
Stop 30-39<br />
Rewind 40-49<br />
Fast Forward 50-59<br />
Cue to time 60-69<br />
140 <strong>Catalyst</strong>® V3 Media Server User <strong>Manual</strong>
CHAPTER 17<br />
Sony 9-pin RS422<br />
The 3rd channel is timecode Hours. The 4th channel is timecode Minutes. The 5th channel<br />
is timecode Seconds. The 6th channel is timecode Frames.<br />
Each of the above timecode parameters uses the following DMX protocol:<br />
Time<br />
Value<br />
DMX<br />
Value<br />
0 0<br />
1 3<br />
2 7<br />
3 11<br />
4 15<br />
5 19<br />
6 23<br />
7 27<br />
8 31<br />
9 35<br />
10 39<br />
11 43<br />
12 47<br />
13 51<br />
14 55<br />
Synchronizing to the Deck’s Timecode<br />
<strong>Catalyst</strong> Media Server layers can be synchronized with timecode sent from Sony 9-pin<br />
devices.<br />
Assign the Play Mode parameter of a layer to a DMX value of 103(Sync to Sony 1) to read<br />
the current frame from the Sony 9-pin device. To assign a negative offset, use the In<br />
Frame parameter value and for a positive offset use the Out Frame parameter value.<br />
Syncing ignores the hours setting because a 16 bit DMX value is only able to represent 44<br />
minutes at 25 fps<br />
Example 1<br />
Time<br />
Value<br />
DMX<br />
Value<br />
15 59<br />
16 63<br />
17 67<br />
18 71<br />
19 75<br />
20 79<br />
21 83<br />
22 87<br />
23 91<br />
24 95<br />
25 99<br />
26 103<br />
27 107<br />
28 111<br />
29 115<br />
Time<br />
Value<br />
DMX<br />
Value<br />
30 119<br />
31 123<br />
32 127<br />
33 131<br />
34 135<br />
35 139<br />
36 143<br />
37 147<br />
38 151<br />
39 155<br />
40 159<br />
41 163<br />
42 167<br />
43 171<br />
44 175<br />
To assign the first frame of a <strong>Catalyst</strong> Layer’s movie to play at a time code of point 0hr 1<br />
min 30 sec 5 frames:<br />
1. <strong>Cal</strong>culate frame offset:<br />
(1min * 60 * 25) + (30secs * 25) + 5frames = 1500 + 750 + 5 = 2255<br />
2. Set the In Frame value to 2255 and Out Frame to 0.<br />
Time<br />
Value<br />
DMX<br />
Value<br />
45 179<br />
46 183<br />
47 187<br />
48 191<br />
49 195<br />
50 199<br />
51 203<br />
52 207<br />
53 211<br />
54 215<br />
55 219<br />
56 223<br />
57 227<br />
58 231<br />
59 235<br />
Time<br />
Value<br />
DMX<br />
Value<br />
60 240<br />
<strong>Catalyst</strong>® V3 Media Server User <strong>Manual</strong> 141
CHAPTER 17<br />
Sony 9-pin RS422<br />
When the Play Mode parameter is se t to Sync to Sony 1 and the deck is played, the<br />
Layer’s movie should play and stay in sync with the deck.<br />
When the video deck is played or stopped, the Layer’s movie will do the same.<br />
Example 2<br />
To sync to something with a timecode of 1hr 45 min 0 sec 0 fr:<br />
Use the Out Frame to set a positive offset. To calculate this value, round up to the nearest<br />
hour. With the above example, the time code is 15 minutes before timecode 2hr.<br />
So our positive offset is (15min * 60 * 25) = 22500<br />
Set the In Frame value to 0 and the Out Frame value to 22500.<br />
Note: The above examples are calculated with PAL settings of 25fps. When using<br />
NTSC 30fps change the frame rate value of the formula from 25 to 30.<br />
142 <strong>Catalyst</strong>® V3 Media Server User <strong>Manual</strong>
Chapter 18:<br />
Presets<br />
Presets are lighting console style cues set up within the <strong>Catalyst</strong> application. Presets are<br />
available in Pro, DV and Express versions and can control all layers and every parameter<br />
within <strong>Catalyst</strong>.<br />
The Presets programming screens are located in the Library window. Select Library from<br />
the Windows pull down Menu, and click on the Presets tab in the library window.<br />
Preset Number Preset Name Field<br />
Layers Available for Programming<br />
DMX values for parameters can be set in the layer panels of the <strong>Catalyst</strong> Control window,<br />
in the Presets window, or as a snapshot from DMX. Crossfading and timing are set in the<br />
Presets programming tab.<br />
The media server can be programmed with up to 200 Presets, triggered in one of three<br />
ways:<br />
• From a console as a single DMX channel<br />
• From the keyboard through Midi Show Control<br />
• From the GUI using a mouse or a suitable touchscreen.<br />
<strong>Catalyst</strong>® V3 Media Server User <strong>Manual</strong> 143
CHAPTER 18<br />
Presets<br />
Creating a Preset<br />
Note: Before programming Presets without a DMX desk, check that DMX is turned<br />
OFF in the <strong>Catalyst</strong> Control Window DMX In panel for every affected layer.<br />
A Yellow ring designates<br />
that DMX In is ON<br />
<strong>Catalyst</strong> Control Window<br />
Each layer has a panel in the <strong>Catalyst</strong> Control window with File, Position, Color and FX<br />
(Visual effects) tabs. Three mechanisms are used to select and adjust layer settings:<br />
Menu A pop-up menu lets you scroll through the list to the desired file or setting. The<br />
library and file selection menus under the File tab, color effects under the Color tab, and<br />
FX effect under the FX tab all use menus.<br />
Slider Moving a slider left or right, or up or down, changes the parameters. Intensity<br />
adjustments on the Color tab, and all the adjustments on the Position tab, use sliders.<br />
Numerical Slider Where numerical values appear on the screen, such as playback speed<br />
under the File tab, or the red, blue and green settings under the Color tab, click the field<br />
while holding down the mouse button. Then move the mouse up and down to raise or<br />
lower value. The strobe effect under the Color tab also uses this method to select a range<br />
of alphanumerical settings.<br />
Editing DMX Values in the Layer Panels<br />
The following sections describing the settings on each of the Layer Panel’s tabs used to<br />
set DMX values for a Preset. All DMX parameters can be set using the <strong>Catalyst</strong> Control<br />
Window interface. For general information regarding the File Layer components, see<br />
General Layer Panel Information on page 119.<br />
Note: These values cannot be entered from the keyboard.<br />
144 <strong>Catalyst</strong>® V3 Media Server User <strong>Manual</strong>
File Tab Settings<br />
CHAPTER 18<br />
Presets<br />
Library File Name<br />
File Info<br />
Playback<br />
mode<br />
Playback speed In frame Visual Segment<br />
Volume Control<br />
Size Reference<br />
File tab on Layer panel<br />
Library Select from the drop-down list of available library folders. Note the following<br />
special reserved libraries:<br />
• Library 254 (Use Layer) is reserved for layer functions. See Referencing Content<br />
with the Use Layer on page 42.<br />
• Library 255 (Video Input) is reserved for FireWire video input.<br />
Current frame<br />
Out frame<br />
Sync Options<br />
File Select a file from the drop-down list of files located in the currently selected Library<br />
folder. For more info, see Libraries and Files on page 41)<br />
Playback Mode Select a playback option from the pop-up list. Options are described in<br />
Video Playback on page 43.<br />
Playback Speed This field shows the movie’s currently selected playback speed,<br />
expressed as a percentage from 0 to 200% (where 100% is the movie’s original recording<br />
speed). If you move the value below 0%, the movie pauses. If you continue to move it<br />
lower, it will default back to 100%. Note that Pause only affects movie playback;<br />
it does not pause other moving effects, such as strobe or rotation. For more information,<br />
see Playback Speed on page 45.<br />
Video Segment The Current Frame will constantly display the frame that’s playing. Use the<br />
numerical sliders select the In Frame and Out Frame, except in Random and PlaySine<br />
modes. Red bars give a visual cue of the segment boundaries. For more info, see In Frame<br />
and Out Frame on page 42.<br />
Volume Control Audio volume can be set using this numerical slider from values of 0-255.<br />
<strong>Catalyst</strong>® V3 Media Server User <strong>Manual</strong> 145
CHAPTER 18<br />
Presets<br />
Position Tab Settings<br />
The Position tab displays image size and position, and provides previews of advanced<br />
positioning features like Smooth and Rotation. Numerical values to the right of the sliders<br />
display the precise coordinates of the image. For more detailed information about these<br />
parameters, see Movement and Size on page 47.<br />
Position<br />
Scale<br />
Rotation<br />
Position Tab<br />
x pos (X Position) Sliders moves the image right and left along the X axis.<br />
y pos (Y Position) Slider moves the image up and down along the Y axis.<br />
Smooth<br />
Scale Increases or decreases the size of the image. Moving the slider left shrinks the<br />
image, while moving the slider right expands it.<br />
Z Rot (Z Rotation) Rotates the image onscreen around the Z axis (like the hands on a<br />
clock). Moving the slider left rotates the image counterclockwise; moving it right rotates it<br />
clockwise. Moving the slider left past -720, or right past 720, sets the image rotating<br />
freely. The further you move the slider in either direction, the faster the image rotates.<br />
X Rot (X Rotation) Rotates the image around the horizontal (X) axis. If the image is a<br />
three-dimensional object, moving the slider to the left rotates the top of the image away<br />
from you, while moving the slider to the right rotates the image’s top toward you. Moving<br />
the slider left above -720, or right past 720, sets the image rotating freely. The further you<br />
move the slider in either direction, the faster the image rotates.<br />
Y Rot (Y Rotation) Rotates the image to the left or right around the vertical (Y) axis. If the<br />
image is a three-dimensional object, moving the slider to the left rotates the image left<br />
(that is, brings the right edge toward you); moving the slider to the right rotates the image<br />
right, bringing its left edge toward you. Moving the slider left past -720, or right past 720,<br />
sets the image free rotating around the Y axis. The further you move the slider in either<br />
direction, the more rapidly the image rotates.<br />
Smooth DMX communication of image position changes can develop latency under high<br />
loads, resulting in choppy images, especially for slower moves. Smooth lets you specify<br />
exact transition speeds, resulting in smoother images on the screen. The Smooth<br />
numerical slider allows you to set a smooth transition from 0-255—the higher the value,<br />
the slower the transition.<br />
146 <strong>Catalyst</strong>® V3 Media Server User <strong>Manual</strong>
Color Tab Settings<br />
CHAPTER 18<br />
Presets<br />
The Color Tab displays color settings for the selected image. For more information on<br />
these parameters, see Chapter 8: Intensity and Color on page 55 and Chapter 9: Strobing<br />
and Trails on page 89.<br />
Color Effects<br />
Color Setting<br />
Intensity<br />
Color Tab<br />
The following Color tab options are available:<br />
Color Effects This menu displays the name of the color effect currently applied to the<br />
image. For a full description of all color effects and their transparency settings, see.<br />
Intensity A slider field displays intensity from 255 (100%) to 0 (off). Intensity slider adjusts<br />
transparency settings.<br />
Red Slider that displays the intensity of the red channel, from 255 (100%) to 0 (off). To<br />
turn the image all red, set the Red channel to 255 and the Green and Blue fields to 0.<br />
Green Same as the Red slider, but for the green channel.<br />
Blue Same as the Red slider, but for the blue channel.<br />
Trails<br />
Strobe<br />
Trails This effect leaves trails (persistent afterimages with increasing duration) when the<br />
selected image moves. Values range from 0 (no trails) to 255 (very long trails). Note that<br />
this effect only shows up in the main preview window, not the individual layer preview<br />
windows, and may not be visible in certain circumstances, such as when the image is fullscreen.<br />
Trails can only be applied to Layer 1.<br />
Strobe An effect that causes the image to pulse on and off, as though lit from a strobe<br />
light. For a description of strobe options.<br />
<strong>Catalyst</strong>® V3 Media Server User <strong>Manual</strong> 147
CHAPTER 18<br />
Presets<br />
FX Tab Settings<br />
The FX tab lets you preview geometric (visual) effects applied to the image and adjust<br />
aspect ratio and keystone correction.<br />
Visual effect<br />
Aspect Ratio<br />
Parameter 1<br />
Parameter 2<br />
FX tab on Layer panel<br />
Visual Effects These selections are made from the pop-up menu. For a complete<br />
description of visual effects, see Visual Effects on page 4.<br />
FX Sliders These three numerical sliders vary in function with the effect selected.<br />
Keystone Correction Keystone correction adjusts the image to compensate for geometric<br />
or angular distortion in beam projections. The box displays the current shape of the<br />
image, and the eight sliders (two for each corner) let you preview keystone corrections.<br />
The inner box for each corner moves the shape of the image horizontally. Moving the<br />
mouse up stretches the corner to the left; moving the mouse down stretches the corner to<br />
the right. The outer box for each corner adjusts the image vertically. Moving the mouse up<br />
stretches the corner up; moving it down stretches it down.<br />
FX tab showing keystone slider<br />
The keystone sliders also set the shape of shutters used in shutter effects, described in<br />
Shutter Effects beginning on page 111.<br />
Setting DMX Values in the Library Preset Tab<br />
Shutter/<br />
Keystone<br />
Correction<br />
Keystone/<br />
Shutter<br />
slider<br />
To adjust the parameter value from within the LIbrary Window Preset window, click and<br />
hold on the value, moving the mouse either up or down to increase or decrease the value.<br />
Another option is to click and hold the mouse on the value and use the cursor keys to<br />
adjust the value.<br />
148 <strong>Catalyst</strong>® V3 Media Server User <strong>Manual</strong>
Naming the Preset<br />
To assign a preset name:<br />
1. Open the Library window and<br />
select the preset tab.<br />
2. Scroll through to pick the preset<br />
you wish to program.<br />
3. Click on no name next to the Preset<br />
number and type the name.<br />
4. Press Enter to store the Preset name.<br />
Editing a Preset<br />
1. Click on a layer to open the Edit Preset window.<br />
2. Click on the Layer<br />
Tabs to select the<br />
relevant layer.<br />
3. Click the Snapshot<br />
button to view the<br />
current DMX value<br />
information for that<br />
layer. If a value<br />
hasn’t been edited in<br />
the <strong>Catalyst</strong> Control<br />
Window, the Default<br />
DMX value for that<br />
parameter will be<br />
displayed.<br />
4. Use the scroll bar to<br />
scroll through the<br />
parameters of the<br />
layer.<br />
5. Click on the<br />
command to add or<br />
modify a value for an<br />
individual<br />
parameter.<br />
Selected<br />
Layer tab<br />
CHAPTER 18<br />
Presets<br />
<strong>Catalyst</strong>® V3 Media Server User <strong>Manual</strong> 149
CHAPTER 18<br />
Presets<br />
Storing a Preset<br />
After selecting and<br />
manipulating content on<br />
layers, use the Command<br />
Options to store the preset.<br />
Load and Run Preset ctrl<br />
+ This<br />
tells you how to trigger the<br />
preset from the Mac<br />
keyboard.<br />
Run Layer <br />
This runs the information<br />
recorded into the preset on a<br />
specific layer.<br />
Snapshot All Layers This will<br />
snapshot information for all<br />
the layers from the <strong>Catalyst</strong><br />
Application<br />
Active Snapshot All Layers<br />
<br />
Active Snapshot Layer<br />
<br />
Clear All Layers This clears<br />
all selections and programming<br />
from all available<br />
layers and returns the<br />
parameters back to their<br />
default values.<br />
Clear Layer selections clears programming<br />
specific This layer and a from<br />
and returns the parameters back to their default values.<br />
Clicking on the Layer Tabs select the relevant layer. After selecting the layer, click the<br />
Snapshot button to Snapshot information into the preset window.<br />
Use the scroll bar to scroll through the parameters of the layer.<br />
150 <strong>Catalyst</strong>® V3 Media Server User <strong>Manual</strong>
Preset Window Buttons<br />
The Preset Editor window also features buttons at the bottom of the window:<br />
Run This runs the currently selected layer.<br />
Snapshot This snapshots the currently selected layer.<br />
CHAPTER 18<br />
Presets<br />
Clear To Off This clears all programming from the currently selected layer and sets the<br />
parameters back to their default values.<br />
Active Snapshot <br />
Stop <br />
Cancel Cancels any programming changes<br />
OK Accepts programming changes.<br />
<strong>Catalyst</strong>® V3 Media Server User <strong>Manual</strong> 151
CHAPTER 18<br />
Presets<br />
Setting Crossfade Path and Fade Time<br />
After setting values for a layer’s<br />
parameters, crossfade path and fade<br />
time can be set for each relevant<br />
parameter. You can also adjust programming<br />
from this screen too. A<br />
crossfade path determines how a<br />
parameter fades from one value to<br />
another, and a fade time determines<br />
how quickly a parameter fades from<br />
one value to another. By default<br />
<strong>Catalyst</strong> will snap parameters, with a<br />
zero second fade time.<br />
To set a crossfade path, click on the<br />
pink path box in the value column<br />
for the parameter you wish to adjust.<br />
Snap Will snap the value - i.e. the value of the parameter will fade from one value to the<br />
desired value in zero seconds.<br />
Fade To This will allow a fade time to be used with this parameter.<br />
Click on the Time box to enter in a fade time. Hit enter when you have finished typing in<br />
the fade time.<br />
Snap Fade This snaps the parameter into a set value and then fades to another value.<br />
Sine This applies a sine wave between two set values<br />
Cosine This applies a cosine wave between a maximum and minimum value.<br />
Random This randomizes the parameter value between two points<br />
Flip This flips between two values.<br />
Flicker Applies a flicker to a parameter value<br />
152 <strong>Catalyst</strong>® V3 Media Server User <strong>Manual</strong>
Triggering Presets<br />
CHAPTER 18<br />
Presets<br />
Presents can be triggered from the keyboard, by using a mouse or touchscreen, using a<br />
single DMX channel or by using Midi Show Control.<br />
Triggering with a Keyboard, Mouse or Touchscreen<br />
Triggering Presets with a keyboard, mouse or a touchscreen requires the same approach.<br />
Go to full screen and hit the appropriate key to bring up the diagnostic screens – see<br />
‘Diagnostic Screens’ for more details. Page forwards through the diagnostic screens until<br />
you reach Presets Screen.<br />
This screen shows how the presets are mapped to the keyboard. Each preset can also be<br />
clicked on with the mouse, or if you have a suitable Mac compatible touchscreen, you can<br />
touch the relevant preset.<br />
Each preset shows which layers that effects:<br />
You can trigger presets from the keyboard by holding<br />
down Control and pressing the appropriate key. The<br />
first 40 presets are mapped to keys on the keyboard.<br />
See below for a keyboard map.<br />
<strong>Catalyst</strong>® V3 Media Server User <strong>Manual</strong> 153
CHAPTER 18<br />
Presets<br />
Preset Keyboard Mapping (UK and US Keyboards)<br />
Preset 1 1 Preset 11 Q Preset 21 A Preset 31 Z<br />
Preset 2 2 Preset 12 W Preset 22 S Preset 32 X<br />
Preset 3 3 Preset 13 E Preset 23 D Preset 33 C<br />
Preset 4 4 Preset 14 R Preset 24 F Preset 34 V<br />
Preset 5 5 Preset 15 T Preset 25 G Preset 35 B<br />
Preset 6 6 Preset 16 Y Preset 26 H Preset 36 N<br />
Preset 7 7 Preset 17 U Preset 27 J Preset 37 M<br />
Preset 8 8 Preset 18 I Preset 28 K Preset 38 ,<br />
Preset 9 9 Preset 19 O Preset 29 L Preset 39 .<br />
Preset 10 0 Preset 20 P Preset 30 ; Preset 40 /<br />
Triggering Presets with a Single DMX Channel<br />
Once you have set up your presets, you can trigger these with a single DMX channel from<br />
a lighting controller. DMX decimal values 1-4 are designated as idle. So the formula for<br />
determining a DMX value for a preset is the preset number + 4. For example, Preset 1 is<br />
mapped to DMX value 5 and preset 200 is mapped to DMX value 205.<br />
To trigger <strong>Catalyst</strong> with a single DMX channel, the DMX input section must be set to<br />
DMX Trigger, patched to an appropriate DMX address.<br />
Triggering Presets with Midi Show Control<br />
Midi Show Control (MSC) is a System Exclusive subset of the Midi Specification.<br />
A detailed description of Midi Show Control is beyond the scope of this manual. Detailed<br />
descriptions of the Midi Show Control protocol are available from the Midi<br />
Manufacturer’s Association (http://www.midi.org), or in John Huntington’s Control<br />
Systems for Live Entertainment, Focal Press, ISBN 0240803485, published 2000.<br />
154 <strong>Catalyst</strong>® V3 Media Server User <strong>Manual</strong>
CHAPTER 18<br />
Presets<br />
Different control platforms, particularly lighting desks, implement Midi Show Control in<br />
different ways. <strong>Catalyst</strong> allows any platform that supports Midi Show Control to trigger<br />
presets. Please see your control platform documentation to further details on how Midi<br />
Show Control has been implemented.<br />
Wholehog II OS (Echelon, Jands Hog, Hog 500, Hog 1000 and Wholehog II), and<br />
Wholehog III OS (iPC, Hog III PC, Wholehog III) send cue and cuelist information in Midi<br />
Show Control strings sent from these consoles.<br />
To set up <strong>Catalyst</strong> to use Midi Show Control, open the <strong>Catalyst</strong> Control window and scroll<br />
down to the Midi Show Control Section:<br />
Click on No Input to select a suitable Midi device. If a suitable device driver is installed on<br />
the system, <strong>Catalyst</strong> will be able to use it.<br />
Once you have selected a suitable device, you will need to set a Midi Show Control device<br />
ID. Click on the box next to ID to do this. You will need to send this ID in the MSC string<br />
to trigger presets. MSC controllers, and many lighting controllers allow you to set the<br />
device ID.<br />
Note: Make sure the device sending the MSC commands is sending the correct<br />
device ID.<br />
<strong>Catalyst</strong>® V3 Media Server User <strong>Manual</strong> 155
CHAPTER 18<br />
Presets<br />
156 <strong>Catalyst</strong>® V3 Media Server User <strong>Manual</strong>
Chapter 19:<br />
Custom Content<br />
The preloaded <strong>Catalyst</strong> Media Server content includes hundreds of still images and movie<br />
files. You can also easily install your own files.<br />
Content Requirements<br />
The Media Server software supports all file formats supported by Apple Quicktime—<br />
Quicktime itself, many other video codecs such as DV camcorder, and every major<br />
image file format. A complete list of supported formats is on Apple’s Web site at<br />
http://www.apple.com/quicktime/products/qt/specifications.html.<br />
Maximum Image Size<br />
Maximum image size for content files is 2048x2048 pixels. The Media Server will not load<br />
an image that measures more than 2048 pixels in either height or width.<br />
Interlaced Images<br />
For best display results, use only non-interlaced images with the <strong>Catalyst</strong> software.<br />
Interlaced images can show visible scan lines.<br />
Interlaced image<br />
De-interlaced image<br />
When preparing content for the <strong>Catalyst</strong> Media Server, render interlaced images and<br />
movies using de-interlacing.<br />
<strong>Catalyst</strong>® V3 Media Server User <strong>Manual</strong> 157
CHAPTER 19<br />
Custom Content<br />
Rendering Content<br />
The Basics of Content Creation<br />
1. Start with the highest quality source content possible. This gives you more options<br />
later, such as when you are color or gamma correcting the file, or scaling it for a<br />
different sized output, or other manipulation options.<br />
2. Master to high quality source rather that directly out of the compositing application,<br />
or a 3D program. Instead, render out to an uncompressed DM (Digital Master file).<br />
Or, if space is a concern, to a very high quality QuickTime PhotoJPEG file, with the<br />
quality at 95-98% (Control click 'n drag to get it that high on Mac, Alt click 'n drag on<br />
PC).<br />
3. Use Batch Capable Tools When Possible. Whenever you have a group of files to work<br />
with, use a tool capable of batch processing the results. Discreet's Cleaner or Apple's<br />
Compressor are good choices. For single files, QuickTime Player Pro works well. You<br />
just can't batch or save settings for future use.<br />
4. Know Where You're Going Beforehand. Know what you're planning on doing with the<br />
footage, and plan accordingly. If you know it's going to be a DV file, for instance,<br />
avoid strongly saturated colors. If you're destined for video output, avoid fine<br />
horizontal lines and broadcast illegal colors. If you're going to DVD, don't work with<br />
720x486 footage unless you know how you're going to crop it.<br />
Recommended CODECs<br />
DV & PhotoJPEG are recommended as the best codecs for developing <strong>Catalyst</strong> content.<br />
QuickTime DV codec plays back best under heavy load and is highly recommended if you<br />
want to play several movies concurrently. Apple has coded it to use dual processors at the<br />
same time for each movie, so it scales well.<br />
If you are NOT trying to play the maximum number of movies at the same time, try the<br />
PhotoJPEG codec at medium (50%) quality. These movies tend to look better than the DV<br />
files, but are more processor intensive than DV, and are NOT coded to use dual processors<br />
for each movie (the code isn't multi-threaded and multi-processor).<br />
If image quality is of paramount importance, try PhotoJPEG first and see if it will play<br />
back as many movies simultaneously as you need. If it works at medium (50%) quality, try<br />
bumping up the quality until you find the highest level that can be recompressed.<br />
TIP: Since the PhotoJPEG compressor cannot set a fixed data rate, each movie<br />
compressed with the PhotoJPEG codec will have a different file size. It can<br />
even have different data rates within the same movie. So test your files, let<br />
the entire movie play back in case one part has a higher data rate than<br />
another, and make no assumptions about what will work without testing it.<br />
158 <strong>Catalyst</strong>® V3 Media Server User <strong>Manual</strong>
CHAPTER 19<br />
Custom Content<br />
DV ALWAYS has the same data rate, and our tests indicate that one DV file plays back as<br />
well as any other, so it is much more predictable than PhotoJPEG.<br />
Other QuickTime codecs can be recommended in specific applications<br />
CODEC Recommended Use Pro Cons<br />
DV-PAL PAL TV bound<br />
footage or anything<br />
that requires a<br />
720x576, 25 fps<br />
movie.<br />
DV/DVCPRO<br />
-NTSC<br />
DVCPRO50-<br />
NTSC<br />
DVCPRO50-<br />
PAL<br />
Motion JPEG<br />
A and Motion<br />
JPEG B:<br />
NTSC TV bound<br />
footage or anything<br />
that requires a<br />
720x480, 29.97 fps<br />
movie<br />
Plays back very well,<br />
even multiple movies<br />
simultaneously.<br />
Same as DV-PAL Same as DV-PAL<br />
Better color sampling<br />
(4:2:2 rather than 4:1:1)<br />
Twice the data rate for<br />
better images<br />
Same as DVCPRO50-<br />
NTSC<br />
Playback is acceptable<br />
Only option other than<br />
DV that can handle<br />
fields (interlaced<br />
material) when properly<br />
configured.<br />
Can use arbitrary frame<br />
sizes and frame rates.<br />
Photo JPEG Single layer playback Adequate between 50<br />
and 80% quality<br />
Heavy compression, doesn't handle<br />
strongly saturated colors well<br />
Heavy color downsampling (strong<br />
reds look bad, for instance).<br />
It cannot be used with any other<br />
pixel size and frame rate.<br />
Worse playback than DV-NTSC and<br />
PhotoJPEG.<br />
It cannot be used with any other<br />
pixel size and frame rate.<br />
Same as DVCPRO50-NTSC<br />
<strong>Catalyst</strong>® V3 Media Server User <strong>Manual</strong> 159
CHAPTER 19<br />
Custom Content<br />
Perceived Brightness<br />
How an image is rendered can greatly influence the perceived brightness of a projected<br />
image. By rendering content for light output, the performance of the output device can be<br />
dramatically improved. Optimization for DL1 projection of the following content samples<br />
were accomplished by:<br />
1) Applying gain to the RGB values of the original content<br />
2) Applying an offset to the RGB values of the original content.<br />
160 <strong>Catalyst</strong>® V3 Media Server User <strong>Manual</strong>
Installing Libraries and Files<br />
CHAPTER 19<br />
Custom Content<br />
Content can be added to the <strong>Catalyst</strong> Media Server from internal and external hard drives,<br />
CD-Roms and DVD-roms, as well as over an Ethernet network. The process consists of<br />
placing properly named and formatted files within correctly named folders.<br />
Creating a New Library Folder<br />
1. Quit the <strong>Catalyst</strong> application by selecting File>Quit on the menu bar.<br />
2. Double-click the Macintosh HD icon on the desktop of the PowerMac<br />
G5. The Finder screen launches, displaying the directories and files on<br />
the root folder of the <strong>Catalyst</strong> Media Server.<br />
3. Browse to Applications><strong>Catalyst</strong> v3>Library Files. A new window opens showing<br />
the Library folders currently in the Library Files folder. Each folder with a name that<br />
starts with a three-digit number between 000 and 255, is a valid <strong>Catalyst</strong> Library<br />
folder accessible from DMX using the Library parameter.<br />
4. With the Library Files folder selected, click File>New<br />
Folder on the menu bar at the top of the screen.<br />
5. Type a name for a new Library folder. The folder name<br />
must begin with the number of a non-existent Library<br />
folder in the ### format (000-253).<br />
When naming folders ensure no existing folders share<br />
the same three digit number. In addition, folders 254 and<br />
255 are reserved and cannot be used for content.<br />
<strong>Catalyst</strong>® V3 Media Server User <strong>Manual</strong> 161
CHAPTER 19<br />
Custom Content<br />
Adding New Files to a Library Folder<br />
1. Double click on the newly created folder to open it.<br />
2. From the Finder menu at the top of the screen, select File > New Finder Window. A<br />
new Finder window is displayed.<br />
3. Browse to the drive and folder that holds your new file(s).<br />
4. Select the file(s) you wish to add to your newly created Library folder.<br />
5. Drag the new file(s) from the first folder into the desired Library folder.<br />
6. Confirm all files are named so that the name begins with the ### format (000-255).<br />
For example, “051SeascapeBlue.”<br />
When adding content to folders with existing content, ensure no image files<br />
share the same three digit number.<br />
7. Restart the <strong>Catalyst</strong> application by clicking the <strong>Catalyst</strong> icon in the Dock at the<br />
bottom of the monitor screen.<br />
8. When <strong>Catalyst</strong> starts, the new Folders and Files are accessible from DMX using the<br />
Library and File parameters.<br />
162 <strong>Catalyst</strong>® V3 Media Server User <strong>Manual</strong>
Chapter 20:<br />
Diagnostic Displays<br />
The <strong>Catalyst</strong> Media Server offers twelve diagnostic displays accessible from keyboard<br />
hotkeys.<br />
Hotkeys<br />
The following keyboard shortcuts provide quick access and manipulation of the diagnostic<br />
displays:<br />
Hotkey Output Action<br />
Q 1 Exits diagnostic display mode<br />
W 1 Enters diagnostic display mode<br />
E 1 Scrolls forward through diagnostic displays<br />
R 1 Scrolls backward through diagnostic displays<br />
A 1 Full screen on<br />
S 1 Full screen off<br />
Z 2 Exits diagnostic display mode<br />
X 2 Enters diagnostic display mode<br />
C 2 Scrolls forward through diagnostic displays<br />
V 2 Scrolls backward through diagnostic displays<br />
Displays<br />
<strong>Catalyst</strong> Version<br />
This screen displays the following information about the system:<br />
• Software version name<br />
• Build date<br />
• Operating system and processor information<br />
• Quicktime version<br />
• Video card manufacturer<br />
• Video card version<br />
• Uptime (elapsed since the program was launched)<br />
<strong>Catalyst</strong>® V3 Media Server User <strong>Manual</strong> 163
CHAPTER 20<br />
Diagnostic Displays<br />
This Computer<br />
This screen displays the<br />
assigned name of the <strong>Catalyst</strong><br />
Media Server, the Output on<br />
which the information is being<br />
displayed, and the resolution of<br />
that Output. It also shows the<br />
current gamma transfer<br />
function across both displays.<br />
Use this to verify that all<br />
displays are using the same<br />
output gamma when overlap is<br />
critical<br />
Selecting Preset lists a number<br />
of Color Profiles that can be<br />
used to adjust content<br />
brightness perception.<br />
164 <strong>Catalyst</strong>® V3 Media Server User <strong>Manual</strong>
DMX Input Channels<br />
CHAPTER 20<br />
Diagnostic Displays<br />
This screen displays DMX values for the parameters of each activated DMX In panel.<br />
USB CIB DMX Input<br />
This screen displays DMX values coming into the <strong>Catalyst</strong> Media Server from the <strong>Catalyst</strong><br />
Interface Box (CIB). Actively changing DMX values are highlighted in blue.<br />
<strong>Catalyst</strong>® V3 Media Server User <strong>Manual</strong> 165
CHAPTER 20<br />
Diagnostic Displays<br />
ArtNet DMX Input<br />
This screen displays DMX values coming into the <strong>Catalyst</strong> Media Server from an Art-Net<br />
Network. Actively changing DMX values are highlighted in blue. Use hotkeys T and Y<br />
(Output 1) or B and N (Output 2) to move forward and backward through the Art-Net<br />
Inputs.<br />
166 <strong>Catalyst</strong>® V3 Media Server User <strong>Manual</strong>
Statistics<br />
CHAPTER 20<br />
Diagnostic Displays<br />
This screen displays the amount of CPU time selected Media Server processes are using.<br />
Intended for internal diagnostics and technical support only.<br />
<strong>Catalyst</strong>® V3 Media Server User <strong>Manual</strong> 167
CHAPTER 20<br />
Diagnostic Displays<br />
Playbacks<br />
This screen displays playback parameter information and thumbnails for all enabled<br />
layers.<br />
Library<br />
DMX #<br />
Playback<br />
Option<br />
In and Out<br />
Frame<br />
Playback<br />
File Info<br />
File Name<br />
File DMX #<br />
Speed<br />
Frame Rate<br />
Playback Diagnostic Screen for <strong>Catalyst</strong> Pro 8-layer Version.<br />
168 <strong>Catalyst</strong>® V3 Media Server User <strong>Manual</strong>
Color FX Preview<br />
CHAPTER 20<br />
Diagnostic Displays<br />
This screen displays thumbnail previews of Layer 1 with each Color Effect applied to the<br />
current content for a designated layer along with all other selected parameter values.<br />
Numbered tabs move through layers. The > tabs move you through the range of<br />
color effects.<br />
The example below shows the color effects 0 - 23 applied to layer five content with its<br />
current adjustments to position, scale and visual effects.<br />
<strong>Catalyst</strong>® V3 Media Server User <strong>Manual</strong> 169
CHAPTER 20<br />
Diagnostic Displays<br />
Geometry FX Preview<br />
This screen displays thumbnail previews of Layer 1 with each Visual Effect applied to the<br />
current content for a designated layer with all it’s parameter adjustments. Numbered tabs<br />
move through layers. The > tabs move you through the range of visual effects.<br />
The example below shows the color effects 0 - 23 applied to layer five content with current<br />
adjustments for position, and scale.<br />
170 <strong>Catalyst</strong>® V3 Media Server User <strong>Manual</strong>
File Preview Library<br />
CHAPTER 20<br />
Diagnostic Displays<br />
This screen displays which Files in a Library Folder have content, indicated with a<br />
thumbnail preview or a green square. The > tabs move you through the<br />
available library folders.<br />
<strong>Catalyst</strong>® V3 Media Server User <strong>Manual</strong> 171
CHAPTER 20<br />
Diagnostic Displays<br />
This Machine<br />
This screen displays details of each layer’s parameters on this <strong>Catalyst</strong> Media Server.<br />
Thumbnail previews of this server’s individual layer outputs appear along the bottom.<br />
172 <strong>Catalyst</strong>® V3 Media Server User <strong>Manual</strong>
Remote Machines<br />
CHAPTER 20<br />
Diagnostic Displays<br />
This screen displays DMX values for <strong>Catalyst</strong> Media Servers connected through an<br />
Ethernet network. Remote servers are identified by the named entered in the CIB panel of<br />
the <strong>Catalyst</strong> Window, see CIB Panel on page 23.<br />
Mimic. In addition to monitoring layer information, the output window for this machine<br />
will display a broadcasting server’s multilayer content. This is useful when an operator<br />
cannot directly view a remote server’s output.<br />
A catalyst server can also mimic another server, for example, if content needs to be<br />
synchronized across more than one server.<br />
Remote Broadcasting needs to be set on a remote server to use the Mimic feature. For<br />
more detailed information on synchronizing, monitoring and sending values to remote<br />
servers, see “Chapter 21:”“Multiple Servers”.<br />
<strong>Catalyst</strong>® V3 Media Server User <strong>Manual</strong> 173
CHAPTER 20<br />
Diagnostic Displays<br />
174 <strong>Catalyst</strong>® V3 Media Server User <strong>Manual</strong>
Chapter 21:<br />
Multiple Servers<br />
<strong>Catalyst</strong> Media Servers can communicate with one another over an Ethernet network.<br />
This function allows the capabilities of synchronizing content across multiple servers,<br />
monitoring remote servers, and sending remote commands to multiple machines.<br />
To connect several servers, power off all servers and run Ethernet cable from each server<br />
to a shared Ethernet hub. To connect only two Media Servers, use a single Ethernet cable<br />
between the Ethernet ports of each system’s PowerMac; no crossover cable is needed.<br />
Ethernet Cable<br />
Media<br />
Server 1<br />
DV1<br />
CIB<br />
Output 1<br />
Media<br />
Server 2<br />
DV1<br />
Output 2<br />
Monitor<br />
Output 1<br />
DMX<br />
Console<br />
Output 2<br />
Monitor<br />
<strong>Catalyst</strong>® V3 Media Server User <strong>Manual</strong> 175<br />
CIB
CHAPTER 21<br />
Multiple Servers<br />
Synchronizing Multiple Servers<br />
Synchronized playback allows two or more Media Servers to play media with accurate<br />
frame-by-frame synchronization over an Ethernet network connection. This applies to<br />
either simultaneous playback of the same media file on multiple servers, or to playback of<br />
coordinated clips utilizing different media files.<br />
Synchronizing only affects server playback rates, not the Layer’s content. Each layer<br />
could be playing different movies; only their playback timing will be the same. To<br />
duplicate a movie on different layers, use the Play Mode parameter’s use layer setting.<br />
When synchronizing multiple servers, assign one layer of one server to provide the<br />
“master” timing for the other servers. This master layer has a unique Sync ID value, a<br />
number from 1 to 20. Other linked layers, on the same server or other servers, act as<br />
“slaves”, taking their playback timings, or frame rate, from the designated master layer.<br />
Synchronization occurs frame by frame, so each layer’s movie files may be different<br />
lengths, sizes, and formats. If the master layer is playing the 50th frame of a movie, the<br />
layers slaved to it will play the 50th frame of whatever movie file is selected on those<br />
systems. The master may be assigned to any of the Play Mode parameters (Play Loop<br />
Forward, Play Loop Reverse, etc.) available from DMX. When assigned to synchronize,<br />
the slave system’s layer matches the master system’s layer playback frame number by<br />
frame number.<br />
If the master layer plays a frame number that does not exist in the slaved layer’s movie,<br />
the slaved layer displays the last available frame of its movie. Therefore, if the master<br />
layer’s movie is longer than the slaved layer’s movie, the slaved layer will effectively<br />
freeze on its last frame until the master’s layer loops.<br />
Both movies<br />
beginning<br />
frame<br />
If the slaved layer’s movie is longer than the master layer’s total movie, the slaved layer<br />
will loop at the same frame as the master’s layer, and the slaved layer will never reach the<br />
end of its movie file.<br />
Both movies<br />
beginning<br />
frame<br />
Slave movie<br />
ending<br />
frame<br />
Master<br />
movie<br />
ending<br />
Master movie<br />
ending frame<br />
Slave movie<br />
frames not<br />
played<br />
176 <strong>Catalyst</strong>® V3 Media Server User <strong>Manual</strong>
Assigning Master Sync ID Numbers<br />
CHAPTER 21<br />
Multiple Servers<br />
The network can have up to 20 master layers at once, each with its own unique Sync ID<br />
number. Any layer can be synchronized to a master layer.<br />
All servers on the same network share the same set of 20 Sync ID values.<br />
Don’t assign the same ID value to two master layers, even if they’re on<br />
different servers.<br />
Using the <strong>Catalyst</strong> Control window on the PowerMac, you can assign unique Sync ID<br />
values to selected layers:<br />
1. On the appropriate Layer panel, click the File tab.<br />
2. At the layer panel’s lower right, click the SyncID field and a pop up menu will open.<br />
File tab<br />
3. On the pop-up menu, click the SyncID value you want to assign to that layer.<br />
Synchronizing Content<br />
After a layer has been assigned a unique Sync ID, any other layer can be synchronized to<br />
it using the Play Mode parameter. Synchronization can be switch on and off at any time<br />
using a lighting control and is selected in the same manner as any other DMX parameter<br />
function.<br />
Set Master Layer<br />
1. On your lighting console, select the layer to be used as the master layer (other layers<br />
will synchronize their frames with this layer).<br />
2. Using the DMX Library and File parameters, select a folder and movie file for<br />
playback.<br />
3. Assign the Play Mode parameter of this layer to a DMX value of 2 (Play Loop<br />
Forward)<br />
Set Slave Layer<br />
Sync ID<br />
4. On your lighting console, select a layer of another server to synchronize to the master<br />
layer.<br />
<strong>Catalyst</strong>® V3 Media Server User <strong>Manual</strong> 177
CHAPTER 21<br />
Multiple Servers<br />
5. Using the DMX Folder and File parameters, select a folder and movie file for<br />
playback. It does not have to be the same movie as on the master layer.<br />
6. With this slave layer, adjust the DMX value of the Play Mode parameter to a DMX<br />
value between 80 and 99. The exact value determines which SyncID is used for<br />
synchronization. For example, a DMX value of 80 synchronizes to SyncID number 1.<br />
The two layers on separate servers will now synchronize their frame-by-frame playback.<br />
You can disable synchronization at any time by changing the slave layer’s Play Mode<br />
parameter DMX value.<br />
Monitoring Remote Servers<br />
When multiple <strong>Catalyst</strong> Media Servers are connected with Ethernet connections, you can<br />
view information about any server on the network from any other server on the network.<br />
Broadcast Remote Preview<br />
The Wholehog II uses alpha-numeric labels to describe<br />
values of the Play Mode parameter. SyncID modes<br />
appear as SyncID#, where # equals the numeric value<br />
of the assigned SyncID.<br />
The Wholehog III has a toolbar menu with the Play<br />
Mode parameter SyncID numbers. Select the desired<br />
SyncID.<br />
1. To set up a server to broadcast remote preview information to other servers, locate<br />
the CIB Connection panel at the top of the <strong>Catalyst</strong> Control window on the<br />
PowerMac.<br />
Remote field<br />
2. Click on the Remote field in the bottom right corner of the CIB Connection panel to<br />
open a pop-up menu.<br />
3. In the pop-up menu, select “Broadcast to Remote Preview On”. The menu will close<br />
and the Remote Field will read “Remote ON”.<br />
4. Repeat this process for all servers on the network that you wish to remotely monitor.<br />
Each server on the network can be assigned a custom name to assist with personal<br />
organization.<br />
178 <strong>Catalyst</strong>® V3 Media Server User <strong>Manual</strong>
CHAPTER 21<br />
Multiple Servers<br />
5. Click on the Name field of the CIB Connection panel and type in a desired name for<br />
the server.<br />
Name field<br />
Using the Remote Machines Diagnostic Display<br />
Accessing the Remote Machines Display Screen<br />
1. Using the keyboard, press “W” (Output 1) or “X” (Output 2) to activate the Diagnostic<br />
Displays.<br />
2. Using the keyboard, press “E” (Output 1) or “C” (Output 2) to scroll through the<br />
Diagnostic Displays until the Remote Machines diagnostic display appears.<br />
3. Within the Remote Machines diagnostic display, all the <strong>Catalyst</strong> Media Servers on the<br />
network are displayed in a numbered list. Their name, IP address and other<br />
information is also displayed.<br />
4. To display parameter information for all layers of a particular <strong>Catalyst</strong> Media Server,<br />
click on the number to the left of the server name. The bottom portion of the<br />
information screen will display continually updated information about the parameters<br />
for each layer of the selected server.<br />
<strong>Catalyst</strong>® V3 Media Server User <strong>Manual</strong> 179
CHAPTER 21<br />
Multiple Servers<br />
5. Exit the Diagnostic Display by pressing “Q” (Output 1) or “Z” (Output 2).<br />
Mimic Feature<br />
When the Mimic Button is selected, this machine will display a remote server’s multilayer<br />
content. This is useful when an operator cannot directly view the output of a remote<br />
server.<br />
Note: The local machine can mimic a remote server’s content only if it has the<br />
same content loaded.<br />
A catalyst server can also mimic another server, for example, if content needs to be<br />
synchronized across more than one server.<br />
Sending Remote Commands to Servers<br />
In addition to synchronizing and monitoring other <strong>Catalyst</strong> Media Servers on an Ethernet<br />
network, you can send remote commands to networked servers.<br />
1. To set up a server to accept remote commands from another server, locate the CIB<br />
Connection panel at the top of the <strong>Catalyst</strong> Control window on the PowerMac.<br />
2. Click on the Remote field in the bottom right corner of the CIB Connection panel to<br />
open a pop-up menu.<br />
Remote setup<br />
for slave servers<br />
3. In the pop-up menu, select “Accept Remote Commands”. A check mark will be placed<br />
next to the option and the menu will close.<br />
4. Repeat this process for all servers on the network that you wish to accept remote<br />
commands.<br />
5. From any Media Server on the network, open the pop-up menu in the Remote field of<br />
the CIB Connection panel.<br />
180 <strong>Catalyst</strong>® V3 Media Server User <strong>Manual</strong>
CHAPTER 21<br />
Multiple Servers<br />
6. Click on any of the following commands to send it to all enabled machines on the<br />
network:<br />
Send Goto Fullscreens for All Connected. All Media Servers on the network that<br />
are set to Accept Remote Commands enter full screen mode on all outputs.<br />
Send Shutdown to All Connected. All Media Servers on the network that are set to<br />
Accept Remote Commands shut down.<br />
Send Restart to All Connected. All Media Servers on the network that are set to<br />
Accept Remote Commands reboot. Once the servers have rebooted, you must<br />
manually restart the <strong>Catalyst</strong> application on each server.<br />
Send Sleep to All Connected. All Media Servers on the network that are set to<br />
Accept Remote Commands enter sleep mode. You can wake sleeping Media<br />
Servers by sending them a Broadcast to Remote Preview On or Goto FullScreen<br />
command.<br />
<strong>Catalyst</strong>® V3 Media Server User <strong>Manual</strong> 181
CHAPTER 21<br />
Multiple Servers<br />
182 <strong>Catalyst</strong>® V3 Media Server User <strong>Manual</strong>
Appendix A<br />
Understanding DMX-512<br />
A lighting console typically utilizes a protocol called DMX-512 to communicate with<br />
automated lighting fixtures and conventional dimmers. This protocol consists of 512<br />
unique channels of control per output link (universe). Each channel is capable of<br />
producing 256 values ranging from 0 to 255. Typically a lighting fixture or device will use<br />
a channel for each parameter of the fixture and the associated values of that channel will<br />
control the various functions of that parameter. The lighting console is then programmed<br />
to transmit a corresponding DMX value for the desired function of each parameter. All<br />
DMX values are stored within in the lighting console, and typically are referred to as cues,<br />
scenes, or presets.<br />
<strong>Catalyst</strong> Media Server Layers operate in the same manner as lighting fixtures in regards<br />
to DMX control. Each parameter of a layer has one or two DMX channels assigned to it,<br />
which when adjusted from a lighting console provides various manipulations of that<br />
parameter. The total range of DMX channels used by a single <strong>Catalyst</strong> Layer is known as<br />
the DMX protocol and consists of 40 DMX channels.<br />
8-bit vs. 16-bit DMX<br />
Most parameters of an automated light use one channel of DMX providing 256 values of<br />
control (0-255). This is known as 8-bit DMX. Although several parameters of the <strong>Catalyst</strong><br />
Media Server use 8-bit DMX, most require a more accurate range of values than can be<br />
provided with a single DMX channel. By utilizing two DMX channels for a single<br />
parameter, 65535 values become available for controlling and adjusting parameter<br />
functions. This is known at 16-bit DMX. You can adjust 16-bit DMX values in both coarse<br />
and fine increments. The first channel of the pair provides coarse control changes of the<br />
DMX value in increments of 256. The second channel of the pair provides fine control and<br />
changes of the DMX value in increments of 1.<br />
Lighting Consoles<br />
Lighting consoles differ in many aspects and it is important to understand how your<br />
console operates with <strong>Catalyst</strong> Media Servers.<br />
Fixture Libraries. Many sophisticated lighting consoles utilize pre-made fixture<br />
libraries. A fixture library consists of profiles for various types of lighting fixtures<br />
and devices. Each profile corresponds to the fixture’s DMX protocol and allows<br />
for ease of programming. Depending upon the manufacturer of your lighting<br />
<strong>Catalyst</strong>® V3 Media Server User <strong>Manual</strong> 183
CHAPTER<br />
Understanding DMX-512<br />
console, some <strong>Catalyst</strong> parameters might have different labels for parameter<br />
names and functions than are listed within this manual. Consult your lighting<br />
console manual for further information.<br />
DMX Output Displays. Although all lighting consoles output the same 512<br />
channels of DMX per link, the on-screen labeling often differs. Parameter<br />
functions are displayed in either alpha-numeric descriptions (strobe 1),<br />
percentage (0-100%) or decimal (0-255 for 8-bit and 0-65535 for 16-bit). Consult<br />
your lighting console manual for further information.<br />
16-bit DMX. Individual access of the two DMX channels used with 16-bit<br />
parameters varies by lighting console. Consult your lighting console manual for<br />
further information.<br />
Default Values. While all <strong>Catalyst</strong> layer parameters have a range of possible DMX<br />
values starting at zero, not all functions should default to zero. Many lighting<br />
consoles define default DMX values for a fixture within the fixture’s library or<br />
with a default scene or cue. High End Systems has recommended a set of defaults<br />
to create consistent and predictable profiles across consoles.<br />
184 <strong>Catalyst</strong>® V3 Media Server User <strong>Manual</strong>
Appendix B:<br />
DMX Protocol<br />
Chap<br />
#<br />
1 Library<br />
2 File<br />
Function Description<br />
3 In Frame Coarse<br />
4 In Frame Fine<br />
Content Selection and Playback<br />
Value<br />
dec.<br />
Selects folder to access from hard drive 0-253<br />
Use Layer 254<br />
Video Input 255<br />
Selects image file from the selected folder<br />
Selects layer when Channel 1 value equals 254<br />
Selects video input when Channel 1 value equals 255<br />
Adjusts the In frame point<br />
5 Out Frame Coarse<br />
Adjusts the Out frame point<br />
6 Out Frame Fine<br />
7 Play Mode<br />
Default<br />
Value<br />
<strong>Catalyst</strong>® V3 Media Server User <strong>Manual</strong> 185<br />
0<br />
0-255 0<br />
0-<br />
65535<br />
0-<br />
65535<br />
Display the In frame 0<br />
Display the Out frame 1<br />
Play loop forward 2<br />
Play loop reverse 3<br />
Play once forward 4<br />
Play once reverse 5<br />
Stop 6<br />
Random 7<br />
PlaySine 8<br />
Play loop forward when intensity is greater than zero 10<br />
Play loop reverse when intensity is greater than zero 11<br />
Play once forward when intensity is greater than zero 12<br />
Play once reverse when intensity is greater than zero 13<br />
Random when intensity is greater than zero 14<br />
PlaySine when intensity is greater than zero 15<br />
Play Audio 70<br />
Play Audio Loop 71<br />
Synchronize to master unit (1-20) 80-99<br />
Synchronize to MIDI Timecode 100<br />
Synchronize to Deck Timecode 101<br />
Synchronize to Sony 1 103<br />
Synchronize to Sony 2 104<br />
Synchronize to Sony 3 105<br />
[Reserved] 106-255<br />
0<br />
0<br />
0
Appendix B<br />
DMX Protocol<br />
Chap<br />
#<br />
8 Playback Speed<br />
9<br />
10<br />
11<br />
12<br />
13<br />
14<br />
15<br />
Function Description<br />
X-axis Rotate<br />
(vertical flip)<br />
Coarse adjustment<br />
X-axis Rotate<br />
(vertical flip)<br />
Fine adjustment<br />
Y-axis Rotate<br />
(horizontal flip)<br />
Coarse adjustment<br />
Y-axis Rotate<br />
(horizontal flip)<br />
Fine adjustment<br />
Z-axis Rotate<br />
(circular rotation)<br />
Coarse adjustment<br />
Z-axis Rotate<br />
(circular rotation)<br />
Fine adjustment<br />
Scale<br />
Coarse adjustment<br />
Playback at 100% recorded speed 0<br />
Pause playback 1<br />
Playback at 0–200% recorded speed 2-255<br />
Position Control<br />
Continuous variable-speed counterclockwise image<br />
rotation around the X-axis (fast to slow)<br />
0-<br />
16382<br />
Continuous rotation stop 16383<br />
Rotates the image counterclockwise around the X-axis<br />
from 720° to 0°<br />
16384-<br />
32767<br />
0° rotation about the X-axis 32768<br />
Rotates the image clockwise around the X-axis 0° to<br />
720°<br />
32769-<br />
49152<br />
Continuous rotation stop 49153<br />
Continuous variable-speed clockwise image rotation<br />
around the X-axis (slow to fast)<br />
Continuous variable-speed counterclockwise image<br />
rotation around the Y-axis (fast to slow)<br />
49154-<br />
65535<br />
0-<br />
16382<br />
Continuous rotation stop 16383<br />
Rotates the image counterclockwise around the Y-axis<br />
from 720° to 0°<br />
16384-<br />
32767<br />
0° rotation about the Y-axis 32768<br />
Rotates the image clockwise around the Y-axis 0° to<br />
720°<br />
32769-<br />
49152<br />
Continuous rotation stop 49153<br />
Continuous variable-speed clockwise image rotation<br />
around the Y-axis (slow to fast)<br />
Continuous variable-speed counterclockwise image<br />
rotation around the z axis (fast to slow)<br />
49154-<br />
65535<br />
0-<br />
16382<br />
Continuous rotation stop 16383<br />
Rotates the image counterclockwise about the z axis<br />
from 720° to 0°<br />
16384-<br />
32767<br />
0° rotation about the z axis 32768<br />
Rotates the image clockwise around the z axis 0° to<br />
720°<br />
32769-<br />
49152<br />
Continuous rotation stop 49153<br />
Continuous variable-speed clockwise image rotation<br />
around the z axis (slow to fast)<br />
Value<br />
dec.<br />
49154-<br />
65535<br />
Default<br />
Value<br />
186 <strong>Catalyst</strong>® V3 Media Server User <strong>Manual</strong><br />
0<br />
32768<br />
32768<br />
32768<br />
32768<br />
Adjusts size of inverted image from 8x actual size to 0 0-32767<br />
Image scaled to 0 (vanishes)<br />
Resizes images from 0 to actual size<br />
32768<br />
32769-<br />
36863<br />
32768
Chap<br />
#<br />
16 Scale<br />
Fine adjustment<br />
17<br />
18<br />
19<br />
20<br />
X Position<br />
Coarse adjustment<br />
Actual size 36864<br />
Adjusts normal image size from 0 to 8x actual size<br />
Appendix B<br />
DMX Protocol<br />
32769-<br />
65535<br />
Moves image left from center of display 0-32767<br />
Centers image left-to-right in display 32768<br />
X Position<br />
Fine adjustment Moves image right from center of display<br />
Y Position<br />
Coarse adjustment<br />
Y Position<br />
Fine adjustment<br />
21 Aspect Ratio<br />
32769-<br />
65535<br />
Moves image down from center of display 0-32767<br />
Centers image up-and-down in display 32768<br />
Moves image up from center of display<br />
32769-<br />
65535<br />
Compresses image horizontally 0-128<br />
Compresses image vertically 129-255<br />
22 Movement Speed Image movement speed 0-255 0<br />
23 Intensity<br />
24 Red<br />
25 Green<br />
26 Blue<br />
Function Description<br />
Intensity and Color Control<br />
Black 0<br />
Adjusts intensity from black to full 1-254<br />
Full intensity 255<br />
Filters out all Red in image 0<br />
Adjusts less to full Red in image 1-254<br />
Red in image unaffected 255<br />
Filters out all Green in image 0<br />
Adjusts less to full Green in image 1-254<br />
Green in image unaffected 255<br />
Filters out all Blue in image 0<br />
Adjusts less to full Blue in image 1-254<br />
Blue in image unaffected 255<br />
Effects Control<br />
Value<br />
dec.<br />
27 Strobing No strobe 0 0<br />
Strobe pattern 1 1-24<br />
Strobe pattern 2 25-49<br />
Strobe pattern 3 50-74<br />
Strobe pattern 4 75-99<br />
Flicker/Black 100-124<br />
Random 125-149<br />
No strobe 150-255<br />
28 Trails Creates persistent afterimages with increasing duration 0-255 0<br />
Default<br />
Value<br />
32768<br />
32768<br />
<strong>Catalyst</strong>® V3 Media Server User <strong>Manual</strong> 187<br />
0<br />
0<br />
255<br />
255<br />
255
Appendix B<br />
DMX Protocol<br />
Chap<br />
#<br />
29 Color Effects<br />
Function Description<br />
RGB Subtract 0<br />
RGB Subtract High Contrast 1<br />
RGB Subtract Very High Contrast 2<br />
Transparent Blacks 3<br />
Transparent Whites 4<br />
RGB Subtract Inverted Color 10<br />
RGB Subtract High Contrast Inverted Color 11<br />
RGB Subtract Super High Contrast Inverted Color 12<br />
Invert Whatever 13<br />
RGB Subtract Inverted Color CMY 14<br />
RGB Subtract High Contrast Inverted Color CMY 15<br />
RGB Subtract Super High Contrast Inverted Color CMY 16<br />
Black White 20<br />
Black White High Contrast 21<br />
Black White Super High Contrast 22<br />
Black White Variable Super High Contrast 23<br />
Invert Black White 24<br />
Mask 30<br />
Inverse Mask 1 31<br />
Inverse Mask 2 32<br />
Mask Fading 35<br />
Invert Mask 1 Fading 36<br />
Invert Mask 2 Fading 37<br />
Alpha invert as Red 40<br />
Alpha invert as Green 41<br />
Alpha invert as Blue 42<br />
Alpha invert as Color 43<br />
Alpha as Red 44<br />
Alpha as Green 45<br />
Alpha as Blue 46<br />
Alpha as Color 47<br />
Lookup 2 False Color 51<br />
Lookup 3 BW Solarize Highlights 52<br />
Gamma BW (image is greyscale)<br />
Gamma Color 61<br />
Gamma Color Adjustment on Separate Channels 62<br />
Color Gain Adjustment on separate channels 63<br />
Quantize Color on Separate Channels<br />
Value<br />
dec.<br />
Convert to YUV 70<br />
Color Saturation (controlled by Red channel) 71<br />
188 <strong>Catalyst</strong>® V3 Media Server User <strong>Manual</strong><br />
60<br />
65<br />
Default<br />
Value<br />
0
Chap<br />
#<br />
29<br />
Function Description<br />
Color Effects<br />
(continued)<br />
Mega Saturation 72<br />
Solarize 73<br />
Solarize Invert 74<br />
RGB Layer Blend 1 80<br />
RGB Layer Blend 2 81<br />
RGB Layer Blend 3 82<br />
RGB Layer Blend 4 83<br />
RGB Layer Blend 5 84<br />
RGB Layer Blend 6 Add 85<br />
RGB Layer Blend 7 Subtract 86<br />
RGB Layer Blend 10 Maximum 89<br />
RGB Layer Blend 11 Add 2 90<br />
RGB Layer Blend 12 Inverse Add 2 91<br />
Tint 100<br />
Tint Inverse 101<br />
Fade to hue 102<br />
RGB > GBR 103<br />
RGB > BGR 104<br />
RGB > GRB 105<br />
Appendix B<br />
DMX Protocol<br />
Value<br />
dec.<br />
Default<br />
Value<br />
<strong>Catalyst</strong>® V3 Media Server User <strong>Manual</strong> 189<br />
0
Appendix B<br />
DMX Protocol<br />
Chap<br />
#<br />
30 Visual Effects<br />
Function Description<br />
Movie on Non-infinite Plane 0<br />
Movie on Infinite Plane Black 1<br />
Unity Scale 2<br />
Movie on Keystone 5<br />
Setup Keystone 9<br />
Movie on Sphere—Filled 10<br />
Movie on Sphere—Wireframe 11<br />
Movie on Sphere—Points 12<br />
Movie on Sphere—Lit 13<br />
Movie on Disc—Filled 14<br />
Movie on Disc—Wireframe 15<br />
Movie on Disc—Points 16<br />
Movie on Disc—Silhouette 17<br />
Movie on Kaleidoscope 20<br />
Movie on Magic Lantern<br />
Value<br />
dec.<br />
Movie Stretched 22<br />
Movie Panorama Slices 23<br />
Movie on Magic Lantern 2 24<br />
Movie on Cube—Four Sides 30<br />
Movie on Cube—Six Sides 31<br />
Movie on Colored Cube—Six Sides 32<br />
Movie on Cube—First Four Layers 33<br />
Movie on N x N Simultaneous Tiles 40<br />
Movie on N x N Simultaneous Tiles—Random Color 41<br />
Movie on N x N Consecutive Tiles 42<br />
Movie on N x N Consecutive Tiles—Random Color 43<br />
Movie on N x N Consecutive Tiles—Random Frame 44<br />
Movie on Random Flicker 45<br />
Movie on Random Color Flicker 46<br />
Rectangle Shuttered Crop Top Bottom 60<br />
Rectangle Gradient Color Shuttered 61<br />
N-Sided Shape Shuttered Color 62<br />
Shutter—Black 70<br />
Shutter—Color 71<br />
Iris Shuttered 72<br />
Movie on Teapot—Filled 100<br />
Colored Sphere 120<br />
Spectrograph 123<br />
31 Parameter 1 (FX1)<br />
0-255 0<br />
Functions depend on Visual Effect (Channel 30) setting<br />
32 Parameter 2 (FX2) 0-255 0<br />
190 <strong>Catalyst</strong>® V3 Media Server User <strong>Manual</strong><br />
21<br />
Default<br />
Value<br />
0
Chap<br />
#<br />
33 Keystone x1<br />
34 Keystone y1<br />
35 Keystone x2<br />
36 Keystone y2<br />
37 Keystone x3<br />
38 Keystone y3<br />
39 Keystone x4<br />
40 Keystone y4<br />
Function Description<br />
Keystone Correction<br />
Moves image’s upper left-hand corner left along X-axis<br />
Appendix B<br />
DMX Protocol<br />
Value<br />
dec.<br />
0-127<br />
No correction 128<br />
Moves upper left-hand corner right along X-axis 129-255<br />
Moves upper left-hand corner down along Y-axis 0-127<br />
No correction 128<br />
Moves upper left-hand corner up along Y-axis 129-255<br />
Moves lower right-hand corner left along X-axis 0-127<br />
No correction 128<br />
Moves lower right-hand corner right along X-axis 129-255<br />
Moves lower right-hand corner down along Y-axis 0-127<br />
No correction 128<br />
Moves lower right-hand corner up along Y-axis 129-255<br />
Moves lower right-hand corner left along X-axis 0-127<br />
No correction 128<br />
Moves lower left-hand corner right along X-axis 129-255<br />
Moves lower right-hand corner down along Y-axis 0-127<br />
No correction 128<br />
Moves lower right-hand corner up along Y-axis 129-255<br />
Moves lower left-hand corner left along X-axis 0-127<br />
No correction 128<br />
Moves lower left-hand corner right along X-axis 129-255<br />
Moves lower left-hand corner down along Y-axis 0-127<br />
No correction 128<br />
Moves lower left-hand corner up along Y-axis 129-255<br />
Default<br />
Value<br />
<strong>Catalyst</strong>® V3 Media Server User <strong>Manual</strong> 191<br />
128<br />
128<br />
128<br />
128<br />
128<br />
128<br />
128<br />
128
Appendix B<br />
DMX Protocol<br />
192 <strong>Catalyst</strong>® V3 Media Server User <strong>Manual</strong>
Appendix C:<br />
Copyrighted Materials FAQ<br />
The following FAQ, written by Suzy Vaughan Associates for High End Systems, can help<br />
you determine the correct use for materials that may be copyrighted.<br />
I want to use a film clip in a promotional piece advertising my services. What do I have to<br />
do to be able to do that?<br />
First of all, you need to obtain permission to use the clip from its owners. The clip is<br />
considered intellectual property, just as though it were your car or some software code<br />
developed by and belonging to Microsoft. This is because the U.S. Copyright Act gave<br />
creators of literary works [which include books, films, television programs, art works, still<br />
photos and musical compositions and recordings] the right to sell or license these works<br />
and to make money from them for the period of the copyright.<br />
But what about public domain material? I heard that lots of material is in the public domain<br />
and can be used for free.<br />
Once the copyright runs out, the creative work falls into the public domain and can be<br />
used freely by anyone without payment or licensing. If the work is not public domain, it is<br />
considered literary property. The Copyright Act provides substantial penalties for<br />
copyright infringement ranging from $10,000 for accidental infringement to $250,000 for<br />
willful infringement. However, contrary to popular belief, there really is not that much<br />
material in the public domain so this approach will limit you creatively.<br />
What if I want to use a clip in a public performance? It’s not being filmed or taped. Surely I<br />
don’t need permission for that?<br />
Public gatherings require clearance whenever copyrighted data is projected to audiences,<br />
or for any use other than just personal viewing. Concerts, tradeshows, industrial shows,<br />
parties and raves are all examples of public performance and permission must be<br />
obtained.<br />
Suppose I want to use a still photo or a magazine cover or a television clip? Do I have to<br />
obtain permission for them too?<br />
Yes, they are also copyrighted works, whose owners must grant a license for their usage.<br />
Do I need any other permissions to use this material?<br />
In many cases you do. You may need to obtain permission to use the appearance of actors<br />
who appear in the clip as well as pay the writers and directors of the film that your clip<br />
comes from.<br />
What about High End Systems material included with the <strong>Catalyst</strong>? Do I have to clear that?<br />
<strong>Catalyst</strong>® V3 Media Server User <strong>Manual</strong> 193
Appendix C<br />
Copyrighted Materials FAQ<br />
No. High End Systems has worked to provide clearance for the content that is provided<br />
with the <strong>Catalyst</strong> system. Any materials you received directly from High End Systems<br />
with the purchase of a new <strong>Catalyst</strong> system have already been properly licensed for your<br />
use in shows and presentations. That does not, however, license you to sell this content<br />
separately from the <strong>Catalyst</strong> system. Also, please be sure that any new content you obtain<br />
from outside sources is properly cleared for public presentation.<br />
This sounds really difficult, and I don’t know how to do it. How do I properly license copyrighted<br />
material?<br />
You need to consult with a Content Clearing House or with a properly licensed<br />
Intellectual Property Attorney. Content clearinghouses are typically less expensive to<br />
work with and have well established industry relations that can result in cost savings.<br />
High End Systems uses and highly recommends Suzy Vaughan Associates.<br />
How much does it typically cost to license copyrighted material?<br />
The answer depends entirely on what material you want to use and how you plan to use it.<br />
Prices can range from hundreds of dollars for photography content to thousands of<br />
dollars for a highly desirable film/video clip. Because price is content-sensitive, the best<br />
thing to do is to contact a clearinghouse to assist you.<br />
* Suzy Vaughan Associates has 20 years of experience in clearing clips, talent, and music<br />
for use in any number of venues. Their clients include Barbra Streisand, Michael Jackson,<br />
and The Emmys among other others. Contact Suzy Vaughan Associates’ at 818-988-<br />
5599, info@suzyvaughan.com, or www.suzyvaughan.com.<br />
194 <strong>Catalyst</strong>® V3 Media Server User <strong>Manual</strong>
Appendix D<br />
Product and Safety Information<br />
Product Information<br />
Computer Specifications<br />
The following specifications apply to currently shipping <strong>Catalyst</strong> Media Servers; earlier<br />
G4-based systems upgraded to the <strong>Catalyst</strong> Media Server will have different<br />
specifications.<br />
• Dual 2GHz PowerMac G5 (or higher)<br />
• ATI Radeon 9800 Pro (or higher)<br />
• Mac OS 10.3.3 (or higher)<br />
• Quicktime 6.5 (or higher)<br />
Note for upgrading customers: Though <strong>Catalyst</strong> software will run on a Dual 1.25 GHz<br />
PowerMac G4 or higher, it is not recommended due to performance problems. High End<br />
Systems recommends that all <strong>Catalyst</strong> users upgrade to a Dual 2GHz PowerMac G5 or<br />
higher.<br />
Electrical Specifications<br />
Auto Switching:<br />
• 100-125v AC<br />
• 200-240v AC<br />
Rated Power: 400W<br />
Warning!<br />
Class 1 equipment—this equipment must be grounded.<br />
Environmental Specifications<br />
Maximum ambient temperature (Ta): 35°C (95°F)<br />
<strong>Catalyst</strong>® V3 Media Server User <strong>Manual</strong> 195
Appendix D<br />
Product and Safety Information<br />
Installing Power Cord Caps<br />
The <strong>Catalyst</strong> Media Server control rack may ship without an attached power cord cap.<br />
Different locations (even within the same country) may require a different power cord cap<br />
to connect the fixture to a power outlet.<br />
Because of the variety of power cord caps used worldwide, High End Systems, Inc. cannot<br />
make specific recommendations for the power cord cap.<br />
Contact a local authority for the type of power cord cap needed. When installing the<br />
power cord cap, note that the cores in the mains lead are colored in accordance with the<br />
following code:<br />
• green and yellow = ground/earth<br />
• blue = neutral<br />
• brown = live<br />
Installing a Power Cord Cap – UK Only<br />
In the United Kingdom, the Colors of the cores in the mains lead of this equipment may<br />
not correspond with the Colored markings identifying the terminals in the fixture’s plug.<br />
Therefore, install a line cord cap in accordance with the following code:<br />
• The core Colored green and yellow must be connected to the plug terminal which is<br />
marked with the letter “E,” or by the earth symbol , or Colored green, or green and<br />
yellow.<br />
• The core Colored blue must be connected to the terminal which is marked with the<br />
letter “N”, or Colored black.<br />
• The core Colored brown must be connected to the terminal which is marked with the<br />
letter “L” or Colored red.<br />
Vatic Fitter Heads Information – Danmark<br />
Advarsel: Beskyttelse mod elektrisk chock.<br />
Vigtigt!<br />
Warning!<br />
Class 1 equipment—this equipment must be grounded.<br />
Warning!<br />
Class 1 equipment—this equipment must be earthed.<br />
Lederne med gul/groen isolation maa kun tilsluttes en klemme maerket<br />
eller<br />
196 <strong>Catalyst</strong>® V3 Media Server User <strong>Manual</strong>
<strong>Catalyst</strong> Accessories<br />
Appendix D<br />
Product and Safety Information<br />
The following table lists accessories available for the <strong>Catalyst</strong> Media Server from your<br />
High End dealer/distributor. For more information, contact your High End Systems<br />
dealer/distributor or see .<br />
Part Description Part Number<br />
<strong>Catalyst</strong> Interface Box 56040004<br />
Wholehog III lighting console 61020001<br />
Media Server control rack roadcase 56070001<br />
LCD Monitor 56070009<br />
Heavy duty 5-pin XLR cable(10’) 55050017<br />
Heavy duty 5-pin XLR cable (25’) 55050018<br />
Heavy duty 5-pin XLR cable (50’) 55050019<br />
Heavy duty 5-pin XLR cable (100’) 55050020<br />
Content Backup DVDs Vol 1 56040034<br />
Content Backup DVDs Vol 2 56040039<br />
Product Modification Warning<br />
High End Systems products are designed and manufactured to meet the requirements of<br />
United States and International safety regulations. Modifications to the product could<br />
affect safety and render the product non-compliant to relevant safety standards.<br />
Mise En Garde Contre La Modification Du Produit<br />
Les produits High End Systems sont conçus et fabriqués conformément aux exigences des<br />
règlements internationaux de sécurité. Toute modification du produit peut entraîner sa<br />
non conformité aux normes de sécurité en vigueur.<br />
Produktmodifikationswarnung<br />
Design und Herstellung von High End Systems entsprechen den Anforderungen der U.S.<br />
Amerikanischen und internationalen Sicherheitsvorschriften. Abänderungen dieses<br />
Produktes können dessen Sicherheit beeinträchtigen und unter Umständen gegen die<br />
diesbezüglichen Sicherheitsnormen verstoßen.<br />
Avvertenza Sulla Modifica Del Prodotto<br />
Prodotti di High End Systems sono stati progettati e fabbricati per soddisfare i requisiti<br />
delle normative di sicurezza statunitensi ed internazionali. Qualsiasi modifica al prodotto<br />
potrebbe pregiudicare la sicurezza e rendere il prodotto non conforme agli standard di<br />
sicurezza pertinenti.<br />
<strong>Catalyst</strong>® V3 Media Server User <strong>Manual</strong> 197
Appendix D<br />
Product and Safety Information<br />
Advertencia De Modificación Del Producto<br />
Los productos de High End Systems están diseñados y fabricados para cumplir los<br />
requisitos de las reglamentaciones de seguridad de los Estados Unidos e internacionales.<br />
Las modificaciones al producto podrían afectar la seguridad y dejar al producto fuera de<br />
conformidad con las normas de seguridad relevantes.<br />
FCC Information<br />
This equipment has been tested and found to comply with the limits for a Class A digital<br />
device, pursuant to part 15 of the FCC rules. These limits are designed to provide<br />
reasonable protection against harmful interference when the equipment is operated in a<br />
commercial environment. This equipment generates, uses, and can radiate radio<br />
frequency energy and, if not installed and used in accordance with the instruction<br />
manual, may cause harmful interference to radio communications. Operation of this<br />
equipment in a residential area is likely to cause harmful interference, in which case the<br />
user will be required to correct the interference at his own expense.<br />
198 <strong>Catalyst</strong>® V3 Media Server User <strong>Manual</strong>
Warranty Information<br />
Appendix D<br />
Product and Safety Information<br />
Limited Warranty. Unless otherwise stated, your product is covered by a one year<br />
parts,labor and technical support limited warranty. It is the owner’s responsibility to<br />
furnish receipts or invoices for verification of purchase, date, and dealer or distributor. If<br />
purchase date cannot be provided, date of manufacture will be used to determine<br />
warranty period.<br />
Returning an Item Under Warranty for Repair. It is necessary to obtain a Return<br />
Material Authorization (RMA) number from your dealer or point of purchase BEFORE<br />
any units are returned for repair. The manufacturer will make the final determination as<br />
to whether or not the unit is covered by warranty.<br />
Any Product unit or parts returned to High End Systems must be packaged in a suitable<br />
manner to ensure the protection of such Product unit or parts, and such package shall be<br />
clearly and prominently marked to indicate that the package contains returned Product<br />
units or parts and with an RMA number. Accompany all returned Product units or parts<br />
with a written explanation of the alleged problem or malfunction. Ship returned Product<br />
units or parts to: 2105 Gracy Farms Lane, Austin, TX, 78758, USA.<br />
Freight Damage Claims are invalid for fixtures shipped in non-factory boxes<br />
and packing materials.<br />
Freight. All shipping will be paid by the purchaser. Items under warranty shall<br />
have return shipping paid by the manufacturer only in the Continental United States.<br />
Under no circumstances will freight collect shipments be accepted. Prepaid shipping does<br />
not include rush expediting such as air freight. Air freight can be sent customer collect in<br />
the Continental United States.<br />
REPAIR OR REPLACEMENT AS PROVIDED FOR UNDER THIS WARRANTY IS THE<br />
EXCLUSIVE REMEDY OF THE CONSUMER. HIGH END SYSTEMS, INC. MAKES NO<br />
WARRANTIES, EXPRESS OR IMPLIED, WITH RESPECT TO ANY PRODUCT, AND<br />
HIGH END SPECIFICALLY DISCLAIMS ANY WARRANTY OF MERCHANTABILITY OR<br />
FITNESS FOR A PARTICULAR PURPOSE. HIGH END SHALL NOT BE LIABLE FOR<br />
ANY INDIRECT, INCIDENTAL OR CONSEQUENTIAL DAMAGE, INCLUDING LOST<br />
PROFITS, SUSTAINED OR INCURRED IN CONNECTION WITH ANY PRODUCT OR<br />
CAUSED BY PRODUCT DEFECTS OR THE PARTIAL OR TOTAL FAILURE OF ANY<br />
PRODUCT REGARDLESS OF THE FORM OF ACTION, WHETHER IN CONTRACT,<br />
TORT (INCLUDING NEGLIGENCE), STRICT LIABILITY OR OTHERWISE, AND<br />
WHETHER OR NOT SUCH DAMAGE WAS FORESEEN OR UNFORESEEN.<br />
Warranty is void if the product is misused, damaged, modified in any way, or for<br />
unauthorized repairs or parts. This warranty gives you specific legal rights, and you may<br />
also have other rights which vary from state to state.<br />
<strong>Catalyst</strong>® V3 Media Server User <strong>Manual</strong> 199
Appendix D<br />
Product and Safety Information<br />
Safety Information<br />
Warning: For Continued Protection Against Fire<br />
1. This equipment for connection to branch circuit having a maximum overload<br />
protection of 20 A.<br />
Warning: For Continued Protection Against Electric Shock<br />
1. If this equipment was received without a line cord plug, attach the appropriate line<br />
cord plug according to the following code:<br />
• brown–live<br />
• blue–neutral<br />
• green/yellow–earth<br />
2. As the Colors of the cores in the mains lead of this equipment may not correspond<br />
with the Colored markings identifying the terminals in your plug, proceed as follows:<br />
• the core which is Colored green and yellow must be connected to the terminal in<br />
the plug which is marked with the letter E or by the earth symbol , or Colored<br />
green or green and yellow.<br />
• the core which is Colored blue must be connected to the terminal which is<br />
marked with the letter N or Colored black.<br />
• the core which is Colored brown must be connected to the terminal which is<br />
marked with the letter L or Colored red.<br />
3. Class I equipment. This equipment must be earthed.<br />
4. Equipment suitable for dry locations only. Do not expose this equipment to rain or<br />
moisture.<br />
5. Refer servicing to qualified personnel; no user serviceable parts inside.<br />
200 <strong>Catalyst</strong>® V3 Media Server User <strong>Manual</strong>
Importantes Informations Sur La Sécurité<br />
Appendix D<br />
Product and Safety Information<br />
Mise En Garde: Pour Une Protection Permanente Contre Les Incendies<br />
1. Cet appareil de connection au circuit comporte une protection contre les surcharges<br />
de 20 A.<br />
Mise En Garde: Pour Une Protection Permanente Contre Les Chocs Électriques<br />
1. Si cet équipement est livré sans prise de cable, veuillez connecter la prise de cable<br />
correcte selon le code suivant:<br />
• marron—phase<br />
• bleu—neutre<br />
• vert/jaune—terre<br />
2. Débrancher le courant avant de changer les lampes ou d'effectuer des réparations.<br />
3. Cet équipement doit être uniquement utilisé dans des endroits secs. Ne pas l'exposer à<br />
la pluie ou l'humidité.<br />
4. À l'intérieur de l'équipement il n'y a pas de pièces remplaçables par l' utilisateur.<br />
Confiez l'entretien à un personnel qualifié.<br />
5. Equipement de Classe I. Cet équipement doit être mis à la terre.<br />
Wichtige Hinweise Für Ihre Sicherheit<br />
Warnung: Zum Schutz Vor Brandgefahr<br />
1. Dieses Gerät darf nur an eine Zweigleitung mit einem Überlastungsschutz von<br />
höchstens 20 A angeschlossen werden.<br />
Warnung: Zum Schutz Gegen Gefährliche Körperströme<br />
1. Wenn dieses Gerät ohne einen Netzkabelstecker erhalten wurde, ist der<br />
entsprechende Netzkabelstecker entsprechend dem folgenden Code anzubringen:<br />
• Braun—Unter Spannung stehend<br />
• Blau—Neutral<br />
• Grün/Gelb—Erde<br />
2. Vor dem Austauschen von Lampen oder vor Wartungsarbeiten stets den Netzstecker<br />
ziehen.<br />
3. Diese Geräte sind nur zum Einbau in trockenen Lagen bestimmt und müssen vor<br />
Regen und Feuchtigkeit geschützt werden.<br />
4. Servicearbeiten sollten nur von Fachpersonal ausgeführt werden. Das Gerät enthält<br />
keine wartungsbedürftigen Teile.<br />
5. Dieses Gerät gehört zur Klasse I. Dieses Gerät muß geerdet werden.<br />
<strong>Catalyst</strong>® V3 Media Server User <strong>Manual</strong> 201
Appendix D<br />
Product and Safety Information<br />
Información Importante De Seguridad<br />
Advertencia: Para Protección Continua Contra Incendios<br />
1. Este equipo debe conectarse a un circuito que tenga una protección máxima contra<br />
una sobrecargas de 20 A.<br />
Advertencia: Para La Protección Continua Contra Electrocuciones<br />
1. Si se recibió este equipo sin el conector de alimentacion, monte usted el conector<br />
correcto según ia clave siguente:<br />
• moreno—vivo<br />
• azul—neutral<br />
• verde/amarillo—tierra<br />
2. Desconecte el suministro de energía antes de cambiar lámparas o prestar servicio de<br />
reparación.<br />
3. Este equipo esta disenado para usarce en lugares secos no lo exponga a la lluvia o<br />
humedad.<br />
4. Derive el servicio de reparación de este equipo al personal calificado. El interior no<br />
contiene repuestos que puedan ser reparados por el usuario.<br />
5. Equipo de Clase I. Este equipo debe conectarse a tierra.<br />
Importanti Informazioni Di Sicurezza<br />
Avvertenza: Per Prevenire Incendi<br />
1. Questa apparecchiatura e' da collegarsi ad un circuito con una protezione da<br />
sovraccarico massima di 20 ampere.<br />
Avvertenza: Per Prevenire Le Scosse Elettriche<br />
1. Se questa apparecchiatura è stata consegnata senza una spina del cavo di<br />
alimentazione, collegare la spina appropriata del cavo di alimentazione in base ai<br />
seguenti codici:<br />
• marrone—fase<br />
• blu—neutro<br />
• verde/giallo—terra<br />
2. Disconnettere la corrente prima di cambiare la lampada o prima di eseguire qualsiasi<br />
riparazione.<br />
3. Questo apparecchio deve essere utilizzato in ambienti secchi. Non deve essere<br />
esposto a pioggia o montato in luoghi umidi.<br />
4. Per qualsiasi riparazione rivolgersi al personale specializzato. L' utente non deve<br />
riparare nessuna parte dentro l' unita'.<br />
5. Aparecchio di Classe I. Questa apparecchiatura deve essere messa a terra.<br />
202 <strong>Catalyst</strong>® V3 Media Server User <strong>Manual</strong>
Vigtig Sikkerhedsinformation<br />
Advarsel: Beskyttelse mod elektrisk chock.<br />
Appendix D<br />
Product and Safety Information<br />
VIGTIGT! LEDEREN MED GUL/GROEN ISOLATION MAA KUN TILSLUTTES KLEMME<br />
MAERKET ELLER .<br />
<strong>Catalyst</strong>® V3 Media Server User <strong>Manual</strong> 203
Appendix D<br />
Product and Safety Information<br />
204 <strong>Catalyst</strong>® V3 Media Server User <strong>Manual</strong>
Index<br />
Symbols<br />
16-bit DMX: 179, 180<br />
A<br />
Accessories: 193<br />
Alpha: 69<br />
Alpha channel: 69, 70, 71, 72<br />
anti-aliasing: 34<br />
Art-Net: 119, 139<br />
Aspect Ratio parameter: 53<br />
DMX protocol: 183<br />
Audio Input: 116, 121, 122<br />
Audio Input panel: 122<br />
B<br />
baud rate: 127<br />
Black and White: 64, 65, 66, 74, 79<br />
Blue: 143<br />
Blue parameter: 15, 56<br />
DMX protocol: 183<br />
BNC: 33<br />
Build Date: 159<br />
C<br />
<strong>Catalyst</strong> Interface Box: 33, 193<br />
<strong>Catalyst</strong> Interface Box (CIB)<br />
settings shown in Device Control: 23<br />
CD-Rom: 157<br />
CIB Connection panel: 174, 175, 176<br />
Color Effects parameter: 12, 18, 30, 57<br />
DMX protocol: 184<br />
Color FX Preview Screen: 164<br />
color mixing: 56<br />
Colour FX Tab: 30<br />
content: 25, 27, 28, 123, 153, 173<br />
contrast: 74<br />
Copyright: 189<br />
copyright: 190<br />
crossfade: 13, 55<br />
Cube: 104, 105<br />
cue: 13, 14, 15, 16, 179<br />
Custom Serial panel: 125, 126, 127, 129<br />
cylinder: 100, 103<br />
D<br />
default value: 180<br />
de-interlaced: 153<br />
desktop: 157<br />
Disc: 97, 98, 99<br />
dissolve: 55<br />
DL1 digital light: 39<br />
DL1digital light: 33<br />
DMX In pane: 125<br />
DMX In panel: 119, 125, 136<br />
DMX protocol: 179, 181<br />
DMX start channel: 126, 136<br />
dongle: 2<br />
DV1: 33<br />
DVD-rom: 157<br />
E<br />
Electrical Specifications: 191<br />
Environmental Specifications: 191<br />
Ethernet: 119, 157, 174<br />
Index<br />
F<br />
FCC Information: 194<br />
File: 2, 141<br />
file format: 153<br />
File parameter: 11, 12, 13, 17, 19, 41, 42, 158,<br />
173<br />
DMX protocol: 181<br />
<strong>Catalyst</strong>® V3 Media Server User <strong>Manual</strong> 175
Index<br />
File Preview Library Screen: 167<br />
File Tab: 24, 141, 173<br />
Files Tab: 27<br />
FireWire: 123<br />
library 255 reserved for input from: 141<br />
Fixture Library: 179<br />
Flicker: 108<br />
Folders Tab: 28, 29<br />
Full Screen: 34<br />
Full Screen Mode: 177<br />
FX Sliders: 144<br />
G<br />
Gamma: 74, 76, 77, 78<br />
Geometry FX Tab: 30<br />
Graduated Color: 110<br />
Green: 143<br />
Green parameter: 15, 56<br />
DMX protocol: 183<br />
H<br />
hard drives: 157<br />
HighEnd Lithopatterns: 41<br />
Hotkeys: 175<br />
hotkeys: 159, 162<br />
hue: 87<br />
I<br />
illuminance: 79<br />
image size: 153<br />
In Frame parameter: 42, 43<br />
DMX protocol: 181<br />
Intensity parameter: 11, 12, 13, 17, 18, 19, 55<br />
DMX protocol: 183<br />
Interlaced: 153<br />
Invert: 61, 62, 63, 66, 67, 68, 69, 81, 86<br />
invert: 51<br />
Iris: 114<br />
K<br />
Kaleidoscope: 99<br />
Keystone: 94, 95, 117<br />
controls: 144<br />
Keystone Correction parameters: 19, 20, 94,<br />
95, 109, 110, 112, 113, 117, 118<br />
DMX protocol: 187<br />
L<br />
Layer Panel: 23<br />
Layer panel: 24, 173<br />
Layer Priorities: 2<br />
LCD Monitor: 193<br />
Library Folder: 28, 157<br />
Library parameter: 2, 11, 12, 13, 17, 19, 41,<br />
123, 157, 173<br />
DMX protocol: 181<br />
Library window: 27<br />
lighting console: 11, 24, 125, 173, 179<br />
lighting controller: 6<br />
M<br />
Magic Lantern: 100, 103<br />
Mask: 67, 68<br />
master: 172, 173<br />
MIDI: 131<br />
Midi Time Code Input panel: 131<br />
MIDI Timecode: 131<br />
Mixed All Layers with FX: 35<br />
monitor icon: 34<br />
Movement Speed parameter: 52<br />
DMX protocol: 183<br />
Symbols<br />
NxN: 106, 107<br />
O<br />
Out Frame parameter: 42, 43<br />
DMX protocol: 181<br />
Output panel: 34, 35, 39, 40<br />
Output Settings: 35<br />
P<br />
P1 Monitor: 33, 39<br />
P2 Monitor: 33, 39<br />
Panorama: 102<br />
Parameter 1 (FX1) parameter: 91<br />
DMX protocol: 186<br />
176 <strong>Catalyst</strong>® V3 Media Server User <strong>Manual</strong>
Parameter 2 (FX2) parameter: 91<br />
DMX protocol: 186<br />
Play Mode parameter: 11, 13, 17, 19, 43, 131,<br />
172, 173<br />
DMX protocol: 181<br />
Playback Speed: 141<br />
Playback Speed parameter: 45<br />
DMX protocol: 182<br />
Playbacks Screen: 164<br />
polygon: 111<br />
Power<br />
rating: 191<br />
Power Cord Cap: 192<br />
PowerMac: 26, 27, 118, 121, 123, 125, 131,<br />
157, 173, 174, 176, 191<br />
specifications: 191<br />
Preview Monitor: 37<br />
Q<br />
Quicktime: 153, 191<br />
R<br />
Red parameter: 15, 56<br />
DMX protocol: 183<br />
reference layer: 41, 42<br />
Remote field: 174, 176<br />
resolution: 34<br />
RGB: 81, 82, 83, 84, 85, 87, 88<br />
RGBHV: 33<br />
roadcase: 193<br />
RS-232: 125, 126, 133<br />
RS422: 133<br />
S<br />
Saturation: 79<br />
Scale: 15<br />
Scale parameter: 16, 19, 49, 51, 52, 93, 118<br />
DMX protocol: 182<br />
Scan Files: 29<br />
Sean Bridwell Textures: 41<br />
segment: 42<br />
Separate outputs No FX: 35<br />
Separate outputs with FX: 35<br />
Serial: 125, 126, 127, 129, 133<br />
Settings: 124<br />
Shape: 111<br />
Shutdown: 177<br />
Shutter: 19, 109, 110, 111, 112, 113, 118<br />
Slaves: 172<br />
Solarize: 74, 80<br />
Solo: 24<br />
Sony 9-pin: 133<br />
Sony 9-pin panel: 133<br />
Spectrograph: 116<br />
Sphere: 95, 96, 97<br />
Stretch: 101<br />
Strobe: 89, 143<br />
Strobe parameter: 89, 108<br />
DMX protocol: 183<br />
Sync ID: 172, 173<br />
Synchronize: 172, 173<br />
Syncronize<br />
Timecode: 26, 131<br />
Index<br />
T<br />
Teapot: 115<br />
Temperature<br />
maximum: 191<br />
tile: 106, 107<br />
timecode: 131<br />
Tint: 86<br />
Trails: 17, 90, 143<br />
Trails parameter: 17, 90<br />
DMX protocol: 183<br />
transparent: 12, 59, 60, 62, 65, 67, 68, 69, 70,<br />
<strong>Catalyst</strong>® V3 Media Server User <strong>Manual</strong> 177
Index<br />
71, 72, 81, 82, 83, 84, 85, 86, 90, 91, 94, 114<br />
U<br />
Uptime: 159<br />
USB: 2, 26, 33, 125, 126, 131, 133<br />
Use Layer: 42<br />
use layer: 172<br />
V<br />
video feed: 22, 123<br />
Video Input: 123<br />
Video Input panel: 123<br />
video switcher: 26, 125, 128<br />
Visual Effects parameter: 19, 30, 91, 117, 118,<br />
121<br />
W<br />
Warranty: 195<br />
waveform: 116, 121, 122<br />
Wholehog: 11, 15, 16, 174, 193<br />
Widescreen: 40<br />
Wireframe: 96, 98<br />
X<br />
X Position parameter: 15, 49, 52, 118<br />
DMX protocol: 183<br />
X Rotation parameter: 47, 52, 99, 118<br />
DMX protocol: 182<br />
XLR cable: 6, 193<br />
Y<br />
Y Position parameter: 15, 50, 52, 118<br />
DMX protocol: 183<br />
Y Rotation parameter: 47, 52, 118<br />
DMX protocol: 182<br />
YUV: 79<br />
Z<br />
Z Rotation parameter: 15, 18, 20, 47, 52, 99,<br />
118<br />
DMX protocol: 182<br />
178 <strong>Catalyst</strong>® V3 Media Server User <strong>Manual</strong>