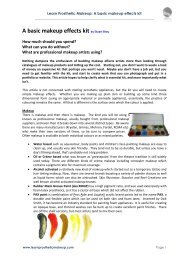
Painting Latex & Foam Latex by Stuart Bray - Learn Prosthetic Makeup
Painting Latex & Foam Latex by Stuart Bray - Learn Prosthetic Makeup
Painting Latex & Foam Latex by Stuart Bray - Learn Prosthetic Makeup

Create successful ePaper yourself
Turn your PDF publications into a flip-book with our unique Google optimized e-Paper software.
<strong>Learn</strong> <strong>Prosthetic</strong> <strong>Makeup</strong>: <strong>Painting</strong> <strong>Latex</strong> & <strong>Foam</strong> <strong>Latex</strong><br />
________________________________________________________________<br />
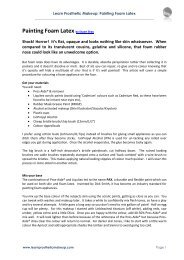
Mix your base<br />
The combination of Pros-Aide® and Liquitex led to the name PAX, a durable and flexible paint which can<br />
be used on both skin and foam latex. Invented <strong>by</strong> Dick Smith, it has become an industry standard for<br />
painting foam appliances.<br />
You mix up the base colour of the subjects skin using the acrylic paints, getting as close as you can. You<br />
can tweak with washes and makeup later. It takes a while to confidently mix flesh tones, so have a play<br />
and try several attempts. A little goes a long way so you don’t need to mix gallons of paint! Half an egg<br />
cup will be plenty. For this makeup I started with unbleached titanium (off white), adding reds, raw<br />
umber, yellow ochre and a little Olive. Once you are happy with the colour, add 40-50% Pros-Aide® and<br />
mix well. It will look lighter than before because of the whiteness of the Pros-Aide® but because Pros-<br />
Aide® dries clear the colour will return to normal. For darker skin tones, I like to start with a little warm<br />
colour like Apricot and add appropriate shades like Umber and Sienna to avoid going too cold.<br />
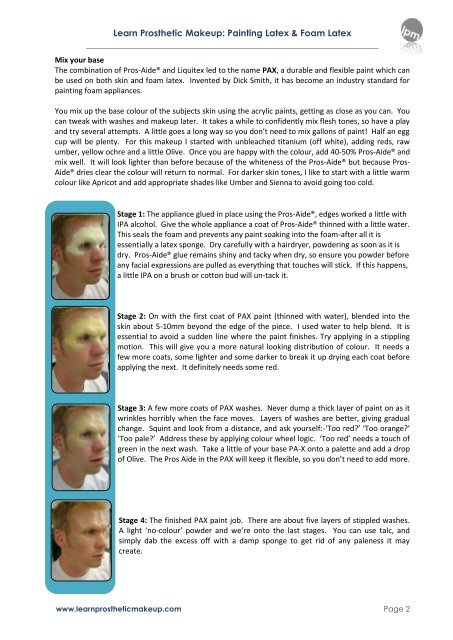
Stage 1: The appliance glued in place using the Pros-Aide®, edges worked a little with<br />
IPA alcohol. Give the whole appliance a coat of Pros-Aide® thinned with a little water.<br />
This seals the foam and prevents any paint soaking into the foam-after all it is<br />
essentially a latex sponge. Dry carefully with a hairdryer, powdering as soon as it is<br />
dry. Pros-Aide® glue remains shiny and tacky when dry, so ensure you powder before<br />
any facial expressions are pulled as everything that touches will stick. If this happens,<br />
a little IPA on a brush or cotton bud will un-tack it.<br />
Stage 2: On with the first coat of PAX paint (thinned with water), blended into the<br />
skin about 5-10mm beyond the edge of the piece. I used water to help blend. It is<br />
essential to avoid a sudden line where the paint finishes. Try applying in a stippling<br />
motion. This will give you a more natural looking distribution of colour. It needs a<br />
few more coats, some lighter and some darker to break it up drying each coat before<br />
applying the next. It definitely needs some red.<br />
Stage 3: A few more coats of PAX washes. Never dump a thick layer of paint on as it<br />
wrinkles horribly when the face moves. Layers of washes are better, giving gradual<br />
change. Squint and look from a distance, and ask yourself:-‘Too red?’ ‘Too orange?’<br />
‘Too pale?’ Address these <strong>by</strong> applying colour wheel logic. ‘Too red’ needs a touch of<br />
green in the next wash. Take a little of your base PA-X onto a palette and add a drop<br />
of Olive. The Pros Aide in the PAX will keep it flexible, so you don’t need to add more.<br />
Stage 4: The finished PAX paint job. There are about five layers of stippled washes.<br />
A light ‘no-colour’ powder and we’re onto the last stages. You can use talc, and<br />
simply dab the excess off with a damp sponge to get rid of any paleness it may<br />
create.<br />
www.learnprostheticmakeup.com Page 2