wireless adsl2+ modem router quick install guide - Amazon Web ...
wireless adsl2+ modem router quick install guide - Amazon Web ...
wireless adsl2+ modem router quick install guide - Amazon Web ...

You also want an ePaper? Increase the reach of your titles
YUMPU automatically turns print PDFs into web optimized ePapers that Google loves.
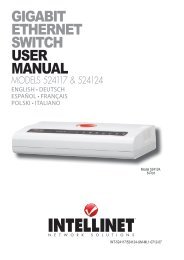
WIRELESS ADSL2+<br />
MODEM ROUTER<br />
QUICK INSTALL<br />
GUIDE<br />
MODELS<br />
524780, 524797,<br />
524872, 524896<br />
ENGLISH<br />
DEUTSCH<br />
FRANÇAIS<br />
ESPAÑOL<br />
POLSKI<br />
ITALIANO<br />
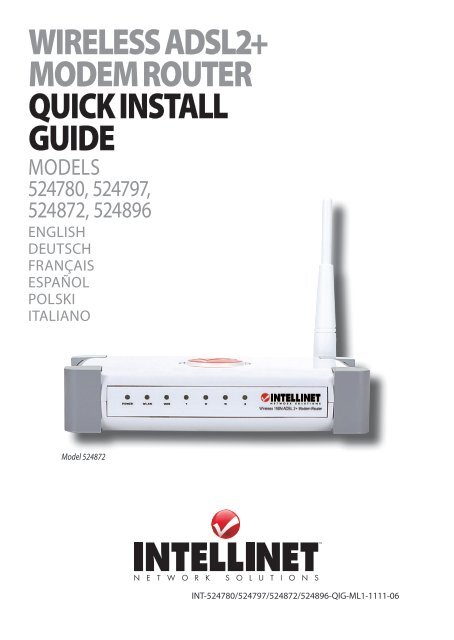
Model 524872<br />
INT-524780/524797/524872/524896-QIG-ML1-1111-06
Wireless ADSL2+ Modem Router • Quick Install Guide English<br />
Thank you for purchasing the INTELLINET NETWORK SOLUTIONS Wireless ADSL2+<br />
Modem Router.<br />
This <strong>guide</strong> presents the basic steps to set up and operate this device. For detailed<br />
instructions and specifications, refer to the user manual on the CD enclosed with this<br />
product or at www.intellinet-network.com.<br />
Package Contents<br />
• Wireless ADSL2+ Modem Router<br />
• Power adapter<br />
• Ethernet Cat5 RJ45 cable, 1.0 m (3 ft.)<br />
• RJ11 telephone cable, 1.8 m (5.9 ft.)<br />
• Setup CD with user manual and setup wizard<br />
• Quick <strong>install</strong>ation <strong>guide</strong><br />
HARDWARE SETUP / CONNECTIONS<br />
1. Connect the <strong>router</strong> to your ADSL cable using the supplied RJ11 cable.<br />
2. Connect the <strong>router</strong> to your PC, hub or switch by attaching the Ethernet cable to the<br />
LAN port of the <strong>router</strong>.<br />
3. Connect the power adapter to the power jack on the rear panel of the <strong>router</strong>.<br />
4. The ADSL LED will be on if the <strong>router</strong> is connected to the ADSL cable and receives<br />
the ADSL signals successfully. If the LED is blinking, contact your ISP (Internet<br />
service provider) to check the problem.<br />
NOTE: Use only the power adapter included with the <strong>router</strong>.<br />
SETUP WIZARD<br />
This <strong>router</strong> provides a Setup Wizard for configuring the ADSL settings. This wizard<br />
collects ADSL settings from some ISPs so that you can easily configure the <strong>router</strong>’s<br />
ADSL settings just by selecting the ISP vendor from the wizard. If you can’t find your<br />
ISP from the list in the wizard, manually set the ISP information. Both procedures are<br />
presented below.<br />
Getting Started<br />
Before starting, check the following items:<br />
• Make sure you’ve connected the ADSL cable to the <strong>router</strong> correctly. (The ADSL LED<br />
will be on.)<br />
• Un-<strong>install</strong> any dial-up programs <strong>install</strong>ed previously for the USB <strong>modem</strong> or other<br />
dial-up devices.<br />
• It’s recommended that you initially configure the <strong>router</strong> through the Ethernet cable<br />
before you set the <strong>wireless</strong> functions.<br />
2<br />
ENGLISH
This wizard can be run in Windows 98SE/Me/2000/XP/Vista/7. The following procedures<br />
are operated in Windows XP. (Procedures are similar for Windows 98SE/Me/2000/Vista/7.)<br />
1. Insert the enclosed setup CD into your CD-ROM drive. The Autorun.exe program<br />
should be executed automatically. If not, run Autorun.exe manually from the “Auto<br />
run” folder on the CD.<br />
2. When the initial screen displays, click “Setup Wizard.”<br />
3. The first Setup Wizard screen will display, indicating that the wizard is running and<br />
searching for the <strong>router</strong>.<br />
• If the <strong>router</strong> is found, the wizard will display the Please Select ISP screen (see the<br />
Setting the ISP sections).<br />
• If the <strong>router</strong> can’t be found, enter the IP address and the password of the <strong>router</strong><br />
(1234) on the Logon screen to search again. Click “Next” to continue.<br />
NOTE: The wizard will automatically select the country you’re in by checking the<br />
language of the operating system in your computer and then advance to the Please<br />
Select ISP screen.<br />
Setting the ISP Automatically<br />
If the wizard finds the ISP, follow the steps below and<br />
the wizard will configure the ISP settings automatically.<br />
1. Select the ISP displayed for your ADSL.<br />
2. When the next screen displays, enter the username<br />
and password that your ISP has provided, if needed. Click “Next.”<br />
ENGLISH<br />
3
3. Confirm the information that appears on the Settings Overview screen is correct,<br />
then click “Save” to save the settings and reboot the <strong>router</strong>. NOTE: Click “Back” to<br />
change settings on a previous screen.<br />
4. After saving and rebooting the <strong>router</strong>, the ISP settings are done. The wizard will<br />
then help to set your computer to obtain an IP address from the <strong>router</strong> automatically.<br />
A screen with a status bar will display to indicate the progress of the procedure.<br />
NOTE 1: To use the <strong>router</strong> to access the Internet, the IP address of each PC needs to<br />
be set in the same network segment as the <strong>router</strong>. The wizard will help to set the<br />
proper IP address for your computer.<br />
NOTE 2: By default, the <strong>router</strong>’s DHCP server is enabled. If it’s disabled before<br />
running the wizard, the wizard will enable the DHCP server automatically.<br />
5. The wizard will attempt to connect to the selected ISP. If the attempt fails, a screen<br />
prompt will indicate this is the case. Run the wizard to select the ISP again.<br />
6. If you do successfully connect to the ISP, you’ll see a confirmation screen. To<br />
configure additional <strong>Web</strong> management settings, click “Advanced Settings.” To close<br />
the wizard, click “Finish.”<br />
Setting the ISP Manually<br />
If the wizard is unable to find the ISP, follow the steps below to configure the ISP settings<br />
manually. First, however, check with your ISP as to what kind of service is provided,<br />
such as PPPoE, PPPoA or RFC1483/2684. Obtain the corresponding information as<br />
shown here and keep it for reference.<br />
PPPoE VPI/VCI, VC-based/LLC-based multiplexing, Username, Password<br />
(and Service Name)<br />
PPPoA VPI/VCI, VC-based/LLC-based multiplexing, Username, Password<br />
RFC1483 Bridged VPI/VCI, VC-based/LLC-based multiplexing to use Bridged Mode<br />
RFC1483 Routed VPI/VCI, VC-based/LLC-based multiplexing, IP Address, Subnet<br />
Mask, Gateway Address, and Domain Name System (DNS) IP<br />
Address (a fixed IP address)<br />
1. Without the correct ISP listed, select “Other.”<br />
4<br />
ENGLISH
2. Check with your ISP as to the connection type of the ADSL line. Select the<br />
Connection Type (below) and click “Next.”<br />
3. Input the VPI, VCI and encapsulation data supplied by your ISP. If the Connection<br />
Type is “Static IP Address,” input the IP address information supplied by your ISP.<br />
For details about each setting, refer to <strong>Web</strong> Management Configuration / General<br />
Setup in the user manual.<br />
4. Enter the username and password that your ISP provided, if needed. Click “Next.”<br />
5. Confirm the information that appears on the Settings Overview screen is correct,<br />
then click “Save” to save the settings and reboot the <strong>router</strong>. NOTE: Click “Back” to<br />
change settings on a previous screen.<br />
6. After saving and rebooting the <strong>router</strong>, the ISP settings are done. The wizard will<br />
then help to set your computer to obtain an IP address from the <strong>router</strong> automatically.<br />
A screen with a status bar will display to indicate the progress of the procedure.<br />
NOTE 1: To use the <strong>router</strong> to access the Internet, the IP address of each PC needs to<br />
be set in the same network segment as the <strong>router</strong>. The wizard will help to set the<br />
proper IP address for your computer.<br />
NOTE 2: By default, the <strong>router</strong>’s DHCP server is enabled. If it’s disabled before<br />
running the wizard, the wizard will enable the DHCP server automatically.<br />
7. The wizard will attempt to connect to the selected ISP. If the attempt fails, a screen<br />
prompt will indicate this is the case. Run the wizard to select the ISP again.<br />
8. If you do successfully connect to the ISP, you’ll see a confirmation screen. To<br />
configure additional <strong>Web</strong> management settings, click “Advanced Settings.” To close<br />
the wizard, click “Finish.”<br />
ENGLISH<br />
5
Wireless ADSL2+ Modem Router • Kurzanleitung Deutsch<br />
Vielen Dank für den Kauf des INTELLINET NETWORK SOLUTIONS Wireless ADSL2+<br />
Modem Router.<br />
Diese Kurzanleitung zeigt die grundlegenden Schritte zur Einrichtung und Inbetriebnahme<br />
dieses Gerätes. Für genauere Anweisungen nutzen Sie bitte das beiliegende Handbuch<br />
auf CD oder auf www.intellinet-network.com.<br />
Lieferumfang<br />
• Wireless ADSL2+ Modem Router<br />
• Netzteil<br />
• Ethernet Cat5 RJ45 Kabel, 1.0 m<br />
• RJ11-Telefonkabel, 1.8 m<br />
• Installations-CD mit Handbuch<br />
• Kurzanleitung<br />
HARDWAREINSTALLATION / ANSCHLUSS<br />
1. Verbinden Sie den Router mit Hilfe des beiliegenden Kabels mit Ihrem ADSL Anschluß.<br />
2. Verbinden Sie den LAN Port des Routers mit Hilfe des Ethernet Kabels mit Ihrem PC,<br />
Hub oder Switch.<br />
3. Verbinden Sie das Netzteil mit der Strombuchse auf der Rückseite des Routers.<br />
4. Die ADSL LED leuchtet, sobald der Router mit dem ADSL Anschluß verbunden ist<br />
und das ADSL Signal empfängt. Falls die LED blinkt, setzen Sie sich bitte mit Ihrem<br />
Internetanbieter in Verbindung, um das Problem zu lösen.<br />
HINWEIS: Benutzen Sie nur das mitgelieferte Netzteil.<br />
INSTALLATIONSASSISTENT<br />
Dieser Router ermöglicht die Konfiguration der ADSL Einstellungen mit Hilfe eines<br />
Installationsassistenten. Der Assistent bietet ADSL Voreinstellungen von einigen<br />
Internetanbietern; so können Sie den Router einfach einrichten, indem Sie den<br />
entsprechenden Anbieter in dem Assistenten auswählen. Falls Sie Ihren Anbieter nicht<br />
in der Liste finden, müssen Sie die Informationen manuell eingeben. Beide Verfahren<br />
werden weiter unten dargestellt.<br />
Installation<br />
Bevor Sie mit der Installation starten, überprüfen Sie bitte folgende Dinge:<br />
• Vergewissern Sie sich, dass der Router korrekt mit dem ADSL Anschluß verbunden<br />
ist. (Die ADSL LED muss leuchten.)<br />
• De<strong>install</strong>ieren Sie alle möglicherweise zuvor <strong>install</strong>ierten Wählprogramme.<br />
• Wir empfehlen die erste Konfiguration über das Ethernetkabel vorzunehmen, bevor<br />
Sie die Wireless-Funktionen einstellen.<br />
6<br />
DEUTSCH
Dieser Assistent läuft unter Windows 98SE/Me/2000/XP/Vista/7. Die folgenden Abläufe<br />
wurden unter Windows XP durchgeführt. (Die Abläufe unter Windows 98SE/Me/2000/<br />
Vista/7 ähnlich. )<br />
1. Legen Sie die Installations-CD in Ihr CD-ROM Laufwerk ein. Das Program Autorun.exe<br />
sollte automatisch starten. Falls nicht, starten Sie Autorun.exe manuell aus dem<br />
Ordner “Autorun” auf der CD.<br />
2. Wenn der Startbildschirm erscheint, drücken Sie auf “Setup Wizard.”<br />
3. Das erste Installationsfenster zeigt nun an, dass der Assistent läuft und nach dem<br />
Router sucht.<br />
• Wenn der Router gefunden wurde, werden Sie aufgefordert Ihren Internetanbieter<br />
(ISP) auszuwählen (siehe Einstellungen für ISP Auswahl).<br />
• Falls der Router nicht gefunden wird, geben Sie die IP Adresse und das Passwort<br />
des Routers (1234) im Anmeldefenster ein und suchen Sie erneut. Klicken Sie auf<br />
“Next”.<br />
HINWEIS: Der Assistent wird aufgrund der Sprache Ihres Betriebssystems das Land<br />
auswählen und dann zum Auswahlfenster des Internetanbieters weiterspringen.<br />
Automatische Einstellung des ISP<br />
Falls der Assistent Ihren Internetanbieter findet, folgen<br />
Sie den unten aufgeführten Schritte und der Assistent<br />
wird die Einstellungen für Ihren Internetanbieter<br />
automatisch festlegen.<br />
1. Wählen Sie Ihren Internetanbieter.<br />
2. Im folgenden Fenster geben Sie den Benutzernamen und das Passwort ein, das Sie<br />
von Ihrem Internetanbieter erhalten haben und klicken Sie auf “Next”.<br />
DEUTSCH<br />
7
3. Bestätigen Sie die in dem Fenster mit der Einstellungsübersicht angezeigten<br />
Informationen und klicken Sie dann auf “Save”, um diese Einstellungen zu speichern<br />
und den Router neu zu starten. HINWEIS: Klicken Sie auf “Back”, um Einstellungen in<br />
vorigen Fenstern zu ändern.<br />
4. Nach Speichern und Neustarten des Routers sind die ISP Einstellungen abgeschlossen.<br />
Der Assistent hilft Ihnen nun, Ihren Computer so einzurichten, dass dieser automatisch<br />
eine IP Adresse vom Router zugewiesen bekommt. Ein Statusbalken zeigt den<br />
Fortschritt des Vorgangs an.<br />
HINWEIS 1: Um mit dem Router auf das Internet zugreifen zu können, müssen die<br />
IP Adressen jedes PCs in dem gleichen Netzwerksegment liegen, wie der Router.<br />
Der Assistent hilft Ihnen, die richtige IP Adresse für Ihren Computer einzurichten.<br />
HINWEIS 2: Der DHCP Server des Routers ist standardmäßig eingeschaltet. Falls<br />
dieser vor dem Start des Assistenten ausgeschaltet wurde, wird der Assistent den<br />
DHCP Server automatisch einschalten.<br />
5. Der Assistent wird versuchen, sich mit dem ausgewählten Internetanbieter zu<br />
verbinden. Falls der Versuch fehlschlägt, erhalten Sie eine Fehlermeldung. Starten<br />
Sie den Assistenten neu und wählen Sie Ihren Internetanbieter.<br />
6. Sie erhalten eine Bestätigung, wenn Sie erfolgreich mit dem Internetanbieter<br />
verbunden sind. Um weitere <strong>Web</strong> Management Einstellungen vorzunehmen, klicken<br />
Sie auf “Advanced Settings.” Um den Assistenten zu schließen, klicken Sie auf “Finish.”<br />
Manuelle Einstellung des Internetanbieters<br />
Falls der Assistent nicht in der Lage ist den Internetanbieter zu finden, folgen Sie<br />
den unten aufgeführten Schritten, um den Internetanbieter manuell einzurichten.<br />
Zunächst benötigen Sie die Information von Ihrem Internetanbieter, welchen<br />
Dienst dieser anbietet, z.B. PPoE, PPoA oder RFC1483/2684. Bewahren Sie die<br />
erhaltenen Informationen gut auf.<br />
PPoE VPI/VCI, VC-based/LLC -based multiplexing, Benutzername,<br />
Passwort (und Dienst Name)<br />
PPoA VPI/VCI, VC-based/LLC -based multiplexing, Benutzername,<br />
Passwort<br />
RFC1483 Bridged VPI/VCI, VC-based/LLC -based multiplexing für Bridged Mode<br />
RFC1483 Routed VPI/VCI, VC-based/LLC -based multiplexing, IP Adresse, Subnet<br />
Mask, Gateway Adresse, und Domain Name System (DNS) IP<br />
Adresse (ein statische IP Adresse)<br />
1. Wird der korrekte Internetanbieter nicht aufgelistet,<br />
wählen Sie “Other.”<br />
8<br />
DEUTSCH
2. Überprüfen Sie den Verbindungstyp Ihrer ADSL Leitung und wählen Sie ihn aus.<br />
3. Geben Sie die von Ihrem Internetanbieter erhaltenen Werte für VPI, VCI und<br />
Datenkapselung ein. Falls der Verbindungstyp “Statische IP Adresse” ist, geben Sie<br />
die von Ihrem<br />
Internetprovider<br />
erhaltene IP Adresse<br />
ein. Für weitere Details<br />
lesen Sie bitte das<br />
Handbuch.<br />
4. Geben Sie Benutzername und Passwort ein, die sie von Ihrem Internetprovider<br />
erhalten haben. Klicken Sie auf “Next.”<br />
5. Bestätigen Sie die in dem Fenster mit der Einstellungsübersicht angezeigten<br />
Informationen und klicken Sie dann auf “Save”, um diese Einstellungen zu speichern<br />
und den Router neu zu starten. HINWEIS: Klicken Sie auf “Back”, um Einstellungen in<br />
vorigen Fenstern zu ändern.<br />
6. Nach Speichern und Neustarten des Routers sind die ISP Einstellungen abgeschlossen.<br />
Der Assistent hilft Ihnen nun, Ihren Computer so einzurichten, dass dieser automatisch<br />
eine IP Adresse vom Router zugewiesen bekommt. Ein Status balken zeigt den<br />
Fortschritt des Vorgangs an.<br />
HINWEIS 1: Um mit dem Router auf das Internet zugreifen zu können, müssen die IP<br />
A dressen jedes PCs in dem gleichen Netzwerksegment liegen, wie der Router. Der<br />
Assistent hilft Ihnen, die richtige IP Adresse für Ihren Computer einzurichten.<br />
HINWEIS 2: Der DHCP Server des Routers ist standardmäßig eingeschaltet. Falls dieser<br />
vor dem Start des Assistenten ausgeschaltet wurde, wird der Assistent den DHCP<br />
Server automatisch einschalten.<br />
7. Der Assistent wird versuchen, sich mit dem ausgewählten Internetanbieter zu<br />
verbinden. Falls der Versuch fehlschlägt, erhalten Sie eine Fehlermeldung. Starten<br />
Sie den Assistenten neu und wählen Sie Ihren Internetanbieter.<br />
8. Sie erhalten eine Bestätigung, wenn Sie erfolgreich mit dem Internetanbieter verbunden<br />
sind. Um weitere <strong>Web</strong> Management Einstellungen vorzunehmen, klicken Sie auf<br />
“Advanced Settings.” Um den Assistenten zu schließen, klicken Sie auf “Finish.”<br />
DEUTSCH<br />
9
Módem Ruteador Inalámbrico ADSL2+ • Guía de Instalación Rápida Español<br />
Gracias por comprar el Módem Ruteador Inalámbrico ADSL2+ de INTELLINET NETWORK<br />
SOLUTIONS .<br />
Esta guía presenta los pasos básicos para instalar y operar este dispositivo. Para obtener<br />
instrucciones detalladas y especificaciones, consulte el manual de usuario en el CD<br />
adjunto con este producto o visite www.intellinet-network.com.<br />
Contenido del Paquete<br />
• Módem Ruteador Inalámbrico ADSL2+<br />
• Adaptador de corriente<br />
• Cable RJ45 Ethernet Cat5, 1,0 m y cable telefono RJ11, 1,8 m<br />
• CD de instalación con manual de usuario y una asistente de configuración<br />
• Guia de Instalación rápida<br />
CONFIGURACION DE HARDWARE / CONEXIONES<br />
1. Conecte el <strong>router</strong> ADSL mediante el cable RJ11 incluido.<br />
2. Conecte el <strong>router</strong> a su PC, hub o switch conectando el cable e Ethernet al puerto<br />
LAN del <strong>router</strong>.<br />
3. Conecte el adaptador de corriente al jack de alimentaciónn en el panel posterior<br />
del <strong>router</strong>.<br />
4. El LED ADSL estará encedido si el <strong>router</strong> tiene conectado el cable de ADSL y recibe<br />
las señales con correctamente. Si el LED esta parpadeando, pongase en contacto<br />
con su ISP (Proveedor de servicios de Internet) para revisar el problema.<br />
NOTA: Utilice únicamente el adaptador de corriente incluido con el <strong>router</strong>.<br />
SETUP WIZARD<br />
Este <strong>router</strong> proporciona un asistente para establecer la configuración de ADSL. Este<br />
asistente recopila la configuración ADSL de algunos proveedores de Internet con sólo<br />
seleccionar el proveedor ISP. Si usted no puede encontrar su proveedor de Internet de<br />
la lista en el asistente, ingrese manualmente la información del ISP. Ambos procedimientos<br />
se presentan a continuación.<br />
Primeros pasos<br />
Antes de comenzar, compruebe los elementos siguientes:<br />
• Asegúrese de que ha conectado el cable al <strong>router</strong> ADSL correctamente. (El LED ADSL<br />
estará encendido.)<br />
• Desinstale cualquier programa dial-up instalados previamente para <strong>modem</strong> USB o<br />
de otro tipo dispositivo de acceso telefonico.<br />
• Se recomienda que de inicio se configure el <strong>router</strong> a través del cable Ethernet antes<br />
de establecer las funciones inalámbricas.<br />
10<br />
ESPAÑOL
Este asistente se puede ejecutar en Windows 98SE/Me/2000/XP/Vista/7. Los siguientes<br />
procedimientos son validos en Windows XP. (Los procedimientos son similares para<br />
Windows 98SE/Me/2000/Vista/7.)<br />
1. Inserte el CD de instalación incluido en su unidad de CD-ROM. El programa Autorun.exe<br />
se ejecutará automáticamente. Si no, ejecute Autorun.exe manualmente desde el<br />
menu “ejecutar “.<br />
2. Cuando aparezca la pantalla inicial, haga clic en “Setup Wizard.”<br />
3. La primera pantalla del asistente de instalación se mostrará, lo que indica que el<br />
asistente está en ejecución y buscando el <strong>router</strong>.<br />
• Si el <strong>router</strong> se encuentra, el asistente le mostrará la pantalla Seleccione ISP (ver el<br />
Configuración de las secciones ISP).<br />
• Si no localiza el <strong>router</strong>, escriba la dirección IP y la contraseña del <strong>router</strong> (1234) en<br />
la pantalla de inicio de sesión. Haga clic en “Next” para continuar.<br />
NOTA: El asistente selecciona automáticamente el país que está en el control de la el<br />
idioma del sistema operativo de su Pc y luego avance hasta la pantalla seleccione su ISP.<br />
Configuracion del ISP Automaticamente<br />
Si el asistente localiza el ISP, siga el asistente y el<br />
asistente configurará automáticamente el ISP.<br />
1. Seleccione el ISP para su ADSL.<br />
2. Cuando aparezca la pantalla siguiente, escriba el<br />
nombre de usuario y la contraseña que su ISP le ha proporcionado, si es necesario.<br />
Haga clic en “Siguiente”.<br />
ESPAÑOL<br />
11
3. Confirme la información que aparece en la pantalla Configuración general es correcta,<br />
a continuación, haga clic en “Guardar” para guardar la configuración y reiniciar el<br />
<strong>router</strong>. NOTA: Haga clic en “Volver” para cambiar la configuración en una pantalla<br />
anterior.<br />
4. Despues de guardar y reiniciar el <strong>router</strong>, la configuracion del ISP estara hecha. El<br />
asistente le ayudara a obtener un direccion ip del <strong>router</strong> para su PC de forma<br />
automatica. Una pantalla con una barra de estado le mostrara el progreso del<br />
procedimiento.<br />
NOTA 1: Para utilizar el <strong>router</strong> para acceder a Internet, la dirección IP de cada PC<br />
necesita establecer en el mismo segmento de red que el <strong>router</strong>. El asistente le<br />
ayudará a crear el dirección IP correcta para su equipo.<br />
NOTA 2: De forma predeterminada, el servidor DHCP del <strong>router</strong> está habilitado. Si es<br />
desactivado antes de ejecutar el asistente, el asistente habilitara el servidor DHCP.<br />
5. El asistente intentará conectar con el ISP seleccionado. Si el intento falla, una pantalla<br />
le indicara la falla. Ejecute el asistente para seleccionar el ISP de nuevo.<br />
6. Si usted se ha conectado al ISP correctamente, usted vera una pantalla de confirmación.<br />
Para configurar otros parametros de administracion web, haga clic en “Advanced<br />
Settings.” Para cerrar el asistente, haga clic en finalizar.<br />
Configuracion Manual del ISP<br />
Si el asistente no puede encontrar el ISP, siga estos pasos para configurar el ISP de modo<br />
manual. Sin embargo, consulte con su proveedor de Internet en cuanto a qué tipo de<br />
servicio se presta, como PPPoE, PPPoA o RFC1483/2684. Obtener la información<br />
correspondiente.<br />
PPPoE VPI/VCI, VC-based/LLC- Base multiplexacion, Usuario, contraseña<br />
(y Nombre del Servicio)<br />
PPPoA VPI/VCI, VC-based/LLC-Base multiplexacion, Usuario, contraseña<br />
RFC1483 Bridged VPI/VCI, VC-based/LLC-Base multiplexacion, uso modo Puente<br />
RFC1483 Routed VPI/VCI, VC-based/LLC-Base multiplexacion, direccion IP, Sub<br />
Mascara, Puerta de Enlace, y Sistema de nombres de Dominio<br />
(DNS) IP<br />
1. Si su ISP no esta en la lista, seleccione “Otro.”<br />
12<br />
ESPAÑOL
2. Verifique con su ISP para el tipo de conexión de la línea ADSL. Seleccione el Tipo de<br />
conexión (abajo) y haga clic en “Siguiente”.<br />
3. Introduzca el VPI, VCI y encapsulamiento de datos suministrados por su ISP. Si la<br />
conexión es tipo “Static IP Address”, introduzca la información de la dirección IP<br />
suministrada por su ISP. Para obtener más información acerca de cada ajuste, consulte<br />
<strong>Web</strong> Management Configuration / General Setup en el manual de usuario.<br />
4. Escriba el nombre de usuario y la contraseña que el ISP proporcionó, si es necesario.<br />
Haga clic en “Next”.<br />
5. Confirme la información que aparece en la pantalla Configuración general es correcta,<br />
a continuación, haga clic en “Save” para guardar la configuración y reiniciar el <strong>router</strong>.<br />
NOTA: Haga clic en “Back” para resgresar a la configuración de la pantalla anterior.<br />
6. Despues de guardar y reiniciar el <strong>router</strong>, la configuracion del ISP estara hecha. El<br />
asistente le ayudara a obtener un direccion IP del <strong>router</strong> para su PC de forma<br />
automatica. Una pantalla con una barra de estado le mostrara el progreso del<br />
procedimiento.<br />
NOTA 1: Para utilizar el <strong>router</strong> para acceder a Internet, la dirección IP de cada PC<br />
necesita establecer en el mismo segmento de red que el <strong>router</strong>. El asistente le<br />
ayudará a crear el dirección IP correcta para su equipo.<br />
NOTA 2: De forma predeterminada, el servidor DHCP del <strong>router</strong> está habilitado. Si es<br />
desactivado antes de ejecutar el asistente, el asistente habilitara el servidor DHCP.<br />
7. El asistente intentará conectar con el ISP seleccionado. Si el intento falla, una<br />
pantalla le indicara la falla. Ejecute el asistente para seleccionar el ISP de nuevo.<br />
8. Si usted se ha conectado al ISP correctamente, usted vera una pantalla de<br />
confirmación. Para configurar otros parametros de administracion web, haga clic en<br />
“Advanced Settings.” Para cerrar el asistente, haga clic en “Finalizar”.<br />
ESPAÑOL<br />
13
Modem routeur ADSL2+ sans fil • Guide d’<strong>install</strong>ation rapide Français<br />
Merci d’avoir achté le Modem routeur ADSL2+ sans fil INTELLINET NETWORK<br />
SOLUTIONS .<br />
Ce <strong>guide</strong> décrit les bases pour configurer et utiliser cet appareil. Pour des instructions<br />
et spécifications détailées, veuillez lire le manuel de l’utilisation sur le CD inclus ou sur<br />
www.intellinet-network.com.<br />
Contenu du pack<br />
• Modem routeur ADSL2+ sans fil<br />
• Adaptateur secteur<br />
• Câble Ethernet Cat5 RJ-45, 1 m<br />
• Câble téléphonique RJ-11, 1,8 m<br />
• CD d‘<strong>install</strong>ation contenant le manuel utilisateur et un assistant de configuration<br />
• Guide d‘<strong>install</strong>ation rapide<br />
INSTALLATION MATÉRIELLE / CONNEXIONS<br />
1. Connectez le routeur à votre câble ADSL via le le câble RJ11 inclu.<br />
2. Connectez le routeur à votre PC, Hub ou commutateur en branchant le câble<br />
Ethernet au port LAN du routeur.<br />
3. Connectez l’adaptateur secteur à la prise d’alimentation au panneau arrière du routeur.<br />
4. La DEL ADSL sur le <strong>router</strong> s’allume dès que le routeur est connecté au câble ADSL<br />
et reçoit les signaux ADSL. Si la DEL clignote, contactez votre FAI( fournisseur<br />
d‘accès à Internet) afin de résoudre le problème.<br />
NOTE: N’utilisez que l’adaptateur secteur fourni avec le routeur.<br />
ASSISTANT DE CONFIGURATION<br />
Ce routeur offre un assistant de configuration ADSL. Cet assistant identifie les<br />
configurations ADSL de plusieurs FAI afin que vous puissiez configurer le routeur<br />
facilement en sélectionnant le FAI de l’assistant. Si vous ne trouvez pas le FAI dans la<br />
liste, configurez les données de FAI manuellement. Toutes les deux procédures sont<br />
expliquées ci dessous.<br />
Préparations<br />
Avant de commencer, vérifiez les conditions suivantes:<br />
• Assurez-vous que vous avez connecté le câble ADSL au routeur proprement. (La DEL<br />
ADSL doit être allumée).<br />
• Dés<strong>install</strong>ez tous les programmes Accès par ligne commutée <strong>install</strong>és pour le <strong>modem</strong><br />
USB ou d’autres appareils Accès par ligne commutée.<br />
• Nous recommandons utiliser le câble Ethernet pour la première configuration avant<br />
que vous activez les fonctions sans fil.<br />
14<br />
FRANÇAIS
Cet assistant peut être exécuté sous Windows 98SE/Me/2000/XP/Vista/7. Les étapes<br />
suivantes s’appliquent sur Windows XP, mais sont similaires sur Windows 98SE/Me/2000/<br />
Vista/7).<br />
1. Insérez le CD d’<strong>install</strong>ation inclu dans votre lecteur CD-ROM. Le programme<br />
Autorun.exe est exécuté automatiquement. Si ce n’est pas le cas, démarrez<br />
Autorun.exe manuellement du dossier “Auto run” sur le CD.<br />
2. Sur l’écran initial, cliquez sur “Setup Wizard.”<br />
3. L’assistant commence la recherche du routeur.<br />
• Dès que le routeur est détecté, une liste pour la sélection de FAI s’affiche (cf. les<br />
sections suivantes).<br />
• Si le routeur ne peut pas être détecté, entrez l’adresse IP (192.168.2.1) et le mot de<br />
passe du routeur (1234). Cliquez sur “Next” afin de continuer.<br />
NOTE: L’assistant sélectionne votre pays automatiquement en identifiant la langue de<br />
votre système d’exploitation et puis continue avec la liste des FAI.<br />
FAI est identifié automatiquement<br />
Si l’assistant identifie votre FAI, suivez les étapes<br />
suivantes afin de le configurer automatiquement.<br />
1. Sélectionnez le FAI affiché pour votre ADSL.<br />
2. Puis entrez le nom d’utilisateur et mot de passe que<br />
votre FAI vous a donnés, si nécessaire. Cliquez sur “Next.”<br />
FRANÇAIS<br />
15
3. Confirmez si les informations dans l’aperçu sont correctes, puis cliquez sur “Save”<br />
afin d’enregistrer la configuration et redémarrez le routeur. NOTE: Cliquez sur “Back”<br />
afin de changer la configuration dans les étapes précédentes.<br />
4. Après avoir enregistré et redémarré le routeur, la configuration de FAI est finie.<br />
Votre ordinateur est maintenant attribué une adresse IP automatiquement. Une<br />
barre affiche le progrès de ce processus.<br />
NOTE 1: Afin d’utiliser le routeur pour l’accès Internet, l’adresse IP de chaque PC<br />
doit être configuré au même segment de réseau que le routeur. L’assistant vous<br />
aide configurer l’adresse IP pour votre ordinateur.<br />
NOTE 2: Par défaut, le serveur DHCP du routeur est activé. Si c’était désactivé avant<br />
démarrer l’assistant, le serveur DHCP est activé automatiquement.<br />
5. L’assistant essaie de connecter au FAI sélectionné. Si cela ne marche pas, c’est<br />
affiché par un message. Sélectionnez le FAI à nouveau.<br />
6. Dès que vous réussissez connecter au FAI, un écran de confirmation est affiché.<br />
Pour la configuration <strong>Web</strong> avancée, cliquez sur “Advanced Settings.” Afin de fermer<br />
l’assistant, cliquez sur “Finish.”<br />
Configurer le FAI manuellement<br />
Si l’assistant ne peut pas identifier le FAI, suivez les étapes ci-dessous pour la configuration<br />
de FAI manuelle. D’abord, informez-vous quel type de service vous utilisez, comme PP-<br />
PoE, PPPoA ou RFC1483/2684. Obtenez les informations comme affichées ci-dessous.<br />
PPPoE VPI/VCI, VC-based/LLC-based multiplexing, nom d’utilisateur, mot<br />
de passe (et nom de service)<br />
PPPoA VPI/VCI, VC-based/LLC-based multiplexing, nom d’utilisateur, mot<br />
de passe<br />
RFC1483 Bridged VPI/VCI, VC-based/LLC-based multiplexing pour le mode Bridged<br />
RFC1483 Routed VPI/VCI, VC-based/LLC-based multiplexing, adresse IP, masque de<br />
sous-réseau, passerelle et Domain Name System (DNS) adresse IP<br />
(adresse IP fixe).<br />
1. Si votre FAI n’est pas dans la liste, sélectionnez<br />
“Other.”<br />
16<br />
FRANÇAIS
2. Vous obtenez les informations sur le type de connexion de votre FAI. Sélectionnez<br />
ce type et cliquez sur “Next.”<br />
3. Entrez les données de VPI, VCI et encapsulation de votre FAI. Si le type de connexion<br />
est “Static IP Address,” entrez les informations d’adresse IP que vous avez obtenues<br />
de votre FAI. Pour plus de détails sur la configuration <strong>Web</strong>/ générale, veuillez lire le<br />
manuel de l’utilisateur.<br />
4. Entrez le nom d’utilisateur et mot de passe que votre FAI vous a donnés, si nécessaire.<br />
Cliquez sur “Next.”<br />
5. Confirmez si les informations dans l’aperçu sont correctes, puis cliquez sur “Save”<br />
afin d’enregistrer la configuration et redémarrez le routeur. NOTE: Cliquez sur “Back”<br />
afin de changer la configuration dans les étapes précédentes.<br />
6. Après avoir enregistré et redémarré le routeur, la configuration de FAI est finie. Votre<br />
ordinateur est maintenant attribué une adresse IP automatiquement. Une barre<br />
affiche le progrès de ce processus.<br />
NOTE 1: Afin d’utiliser le routeur pour l’accès Internet, l’adresse IP de chaque PC doit<br />
être configuré au même segment de réseau que le routeur. L’assistant vous aide<br />
configurer l’adresse IP pour votre ordinateur.<br />
NOTE 2: Par défaut, le serveur DHCP du routeur est activé. Si c’était désactivé avant<br />
démarrer l’assistant, le serveur DHCP est activé automatiquement.<br />
7. L’assistant essaie de connecter au FAI sélectionné. Si cela ne marche pas, c’est affiché<br />
par un message. Sélectionnez le FAI à nouveau.<br />
8. Dès que vous réussissez connecter au FAI, un écran de confirmation est affiché. Pour<br />
la configuration <strong>Web</strong> avancée, cliquez sur “Advanced Settings.” Afin de fermer<br />
l’assistant, cliquez sur “Finish.”<br />
FRANÇAIS<br />
17
Router bezprzewodowy ADSL 2+ • Instrukcja szybkiej instalacji Polski<br />
Dziękujemy za zakup Routera Bezprzewodowego ADSL 2+ INTELLINET NETWORK<br />
SOLUTIONS .<br />
Niniejsza instrukcja szybkiej instalacji przedstawia podstawowe kroki potrzebne do<br />
uruchomienia i obsługi urządzenia. Aby uzyskać szczegółowe informacje techniczne<br />
oraz podręcznik użytkownika, zapoznaj się z zawartością dołączonej płyty CD lub<br />
odwiedź stronę www.intellinet-network.com.<br />
Zawartość opakowania<br />
• Router bezprzewodowy ADSL2+<br />
• Adapter zasilania<br />
• Kabel Ethernet RJ45 Cat5, 1.0 m<br />
• Kabel telefoniczny RJ11, 1.8 m<br />
• Płyta instalacyjna z instrukcją<br />
• Instrukcja szybkiej instalacji<br />
PODŁĄCZENIE URZĄDZENIA<br />
1. Podłącz <strong>router</strong> do linii ADSL używając dołączonego telefonicznego kabla RJ11.<br />
2. Podłącz kablem Ethernet RJ45 jeden z portów LAN <strong>router</strong>a do komputera lub<br />
przełącznika.<br />
3. Podłącz zasilacz do <strong>router</strong>a.<br />
4. Dioda ADSL będzie świecić, jeśli <strong>router</strong> jest poprawnie podłączony do linii ADSL i<br />
odbiera sygnał. Jeśli dioda miga, skontaktuj się z dostawcą usług internetowych,<br />
aby uzyskać pomoc.<br />
UWAGA: Używaj tylko zasilacza dostarczonego wraz z urządzeniem.<br />
KONFIGURACJA<br />
Do <strong>router</strong>a dołączony jest kreator konfiguracji, dzięki któremu możliwa będzie szybka<br />
konfiguracja modułu ADSL. Kreator zawiera ustawienia niektórych dostawców usług<br />
internetowych, możliwa jest więc konfiguracja za pomocą wyboru nazwy dostawcy.<br />
Jeśli na liście nie ma Twojego dostawcy, ustawienia należy wprowadzić manualnie.<br />
Obydwie metody przedstawione są poniżej.<br />
Pierwsze kroki<br />
Zanim przystąpisz do konfiguracji, upewnij się że:<br />
• Router został prawidłowo podłączony do linii ADSL. (Dioda ADSL powinna świecić).<br />
• Odinstalowane zostało wszelkie oprogramowanie do obsługi <strong>modem</strong>u USB.<br />
• Zaleca się, aby konfiguracji dokonywać za pomocą połączenie kablowego, zanim<br />
ustawione zostaną parametry połączenie bezprzewodowego.<br />
18<br />
POLSKI
Kreator konfiguracji działa w systemach Windows 98SE/Me/2000/XP/Vista/7. Poniżej<br />
przedstawiona procedura oparta jest o Windows XP. (Procedura wygląda podobnie w<br />
systemach Windows 98SE/Me/2000/XP/Vista/7).<br />
1. Umieść dołączoną płytę CD w napędzie CD/DVD komputera. Automatycznie<br />
powinien zostać uruchomiony program Autorun. Jeśli tak się nie stanie, otwórz<br />
zawartość płyty i uruchom Autorun.exe.<br />
2. Po pojawieniu się ekranu z menu, wybierz opcję „Setup Wizard”.<br />
3. W pierwszym oknie kreatora konfiguracji wyświetlona zostanie informacja o<br />
poszukiwaniu <strong>router</strong>a.<br />
• Jeśli <strong>router</strong> zostanie odnaleziony, wyświetli się informacja Please Select ISP (zobacz<br />
sekcję ustawienia parametrów ISP).<br />
• Jeśli <strong>router</strong> nie zostanie odnaleziony, wprowadź adres IP oraz hasło <strong>router</strong>a (1234)<br />
w okno Logon, aby ponownie przeprowadzić wyszukiwanie. Wciśnij „Next”, aby<br />
kontynuować.<br />
UWAGA: Kreator konfiguracji automatycznie wybierze region, w którym się znajdujesz<br />
poprzez sprawdzenie języka systemu operacyjnego, a następnie przejdzie do opcji<br />
wyboru dostawcy usług internetowych.<br />
Automatyczne ustawienie parametrów ISP<br />
Jeśli kreator pokaże dostawcę usług internetowych, z<br />
którego korzystasz, postępuj zgodnie z poniższymi<br />
wskazówkami, kreator automatycznie ustawi<br />
odpowiednie parametry.<br />
1. Wybierz nazwę dostawcy, z którego usług korzystasz.<br />
2. W kolejnym oknie wprowadź nazwę użytkownika oraz hasło podane przez Twojego<br />
dostawcę usług internetowych. Wciśnij „Next”.<br />
POLSKI<br />
19
3. Sprawdź, czy wprowadzone informacje są prawidłowe, a następnie wciśnij „Save”,<br />
aby je zapisać i zrestartować <strong>router</strong>. UWAGA: Aby zmienić wcześniej wprowadzone<br />
parametry, wybierz opcję „Back”.<br />
4. Po zapamiętaniu ustawień i zrestartowaniu <strong>router</strong>a konfiguracja parametrów ISP<br />
jest zakończona. Następnie kreator konfiguracji będzie pomocny, aby ustawić<br />
komputer tak, aby automatycznie pobierał konfigurację IP z <strong>router</strong>a. Wyświetlone<br />
zostanie okno wskazujące postęp w procesie.<br />
UWAGA1: Aby uzyskać przez <strong>router</strong> komunikację z Internetem, adresy IP wszystkich<br />
komputerów muszą należeć do tej samej klasy adresowej, co adres <strong>router</strong>a. Kreator<br />
konfiguracji będzie pomocy przy ustawieniu odpowiedniego adresu IP komputera.<br />
UWAGA2: W ustawieniach domyślnych serwer DHCP <strong>router</strong>a jest włączony. Jeśli<br />
serwer został wyłączony przed skorzystaniem z kreatora konfiguracji, zostanie on<br />
automatycznie włączony przez kreatora.<br />
5. Kreator podejmie próbę połączenia się z wybranym ISP. Jeśli próba się nie powiedzie,<br />
zostanie wyświetlone okno oraz podana przyczyna. Należy uruchomić kreatora<br />
konfiguracji ponownie.<br />
6. Jeśli kreator uzyska połączenie z ISP, zostanie wyświetlona potwierdzająca informacja.<br />
Aby rozpocząć dodatkową konfiguracją poprzez przeglądarkę internetową, wybierz<br />
opcję „Advanced Settings”. Aby zamknąć kreatora, wybierz opcję „Finish”.<br />
Ręczne ustawienie parametrów ISP<br />
Jeśli kreator nie wykryje dostawcy, z którego usług korzystasz, postępuj zgodnie z<br />
poniższymi wskazówkami, aby dokonać ręcznej konfiguracji. Najpierw należy jednak<br />
skontaktować się z dostawcą usług internetowych w celu uzyskania informacji na temat<br />
rodzaju świadczonych usług, czy jest to PPPoE, PPPoA lub RFC1483/2684. Informacje<br />
podane przez ISP powinny być zgodne z jedną z informacji przedstawionych w<br />
poniższej tabeli.<br />
PPPoE VPI/VCI, VC-based/LLC-based multiplexing, Username, Password<br />
(and Service Name)<br />
PPPoA VPI/VCI, VC-based/LLC-based multiplexing, Username, Password<br />
RFC1483 Bridged VPI/VCI, VC-based/LLC-based multiplexing to use Bridged Mode<br />
RFC1483 Routed VPI/VCI, VC-based/LLC-based multiplexing, IP Address, Subnet<br />
Mask, Gateway Address, and Domain Name System (DNS) IP<br />
Address (a fixed IP address)<br />
1. Jeśli na liście nie ma Twojego dostawcy usług<br />
internetowych, wybierz opcję „Other”.<br />
20<br />
POLSKI
2. Po uzyskaniu informacji na temat typu linii ADSL, wybierz jedną z poniższych opcji<br />
i wciśnij „Next”.<br />
3. Wprowadź wartości VPI, VCI oraz rodzaj enkapsulacji dostarczone przez Twojego ISP.<br />
Jeśli typ połączenia to „Static IP Address”, wprowadź parametry IP dostarczone przez<br />
Twojego ISP. Aby uzyskać szczegółowe informacje na temat konfiguracji, zapoznaj<br />
się z instrukcją<br />
użytkownika, sekcja<br />
General Setup.<br />
4. W kolejnym oknie wprowadź nazwę użytkownika oraz hasło podane przez Twojego<br />
dostawcę usług internetowych. Wciśnij „Next”.<br />
5. Sprawdź, czy wprowadzone informacje są prawidłowe, a następnie wciśnij „Save”,<br />
aby je zapisać i zrestartować <strong>router</strong>. UWAGA: Aby zmienić wcześniej wprowadzone<br />
parametry, wybierz opcję „Back”.<br />
6. Po zapamiętaniu ustawień i zrestartowaniu <strong>router</strong>a, konfiguracja parametrów ISP jest<br />
zakończona. Następnie kreator konfiguracji będzie pomocny, aby ustawić komputer<br />
tak, aby automatycznie pobierał konfigurację IP z <strong>router</strong>a. Wyświetlone zostanie okno<br />
wskazujące postęp w procesie.<br />
UWAGA1: Aby uzyskać przez <strong>router</strong> komunikację z Internetem, adresy IP wszystkich<br />
komputerów muszą należeć do tej samej klasy adresowej, co adres <strong>router</strong>a. Kreator<br />
konfiguracji będzie pomocy przy ustawieniu odpowiedniego adresu IP komputera.<br />
UWAGA2: W ustawieniach domyślnych serwer DHCP <strong>router</strong>a jest włączony. Jeśli<br />
serwer został wyłączony przed skorzystaniem z kreatora konfiguracji, zostanie on<br />
automatycznie włączony przez kreatora.<br />
7. Kreator podejmie próbę połączenia się z wybranym ISP. Jeśli próba się nie powiedzie,<br />
zostanie wyświetlone okno oraz podana przyczyna. Należy uruchomić kreatora<br />
konfiguracji ponownie.<br />
8. Jeśli kreator uzyska połączenie z ISP zostanie wyświetlona potwierdzająca informacja.<br />
Aby rozpocząć dodatkową konfiguracją poprzez przeglądarkę internetową wybierz<br />
opcję „Advanced Settings”. Aby zamknąć kreatora wybierz opcję „Finish”.<br />
POLSKI<br />
21
Modem Router Wireless ADSL2+ • Guida rapida all’<strong>install</strong>azione Italiano<br />
Grazie per aver scelto il Modem Router Wireless ADSL2+ INTELLINET NETWORK<br />
SOLUTIONS .<br />
Questa guida fornisce le Informazioni principali per settare e far funzionare questa<br />
periferica. Per istruzioni e specifiche dettagliate far riferimento al manuale d’istruzione<br />
presente sul CD incluso al prodotto o visitate il sito www.intellinet-network.com.<br />
Contenuto della confezione<br />
• Wireless ADSL2+ Modem Router<br />
• Alimentatore<br />
• Cavo di rete Cat5 RJ45, 1.0 m; cavo telefonico RJ11, 1.8 m<br />
• CD per il settaggio con manuale utente e procedura guidata<br />
• Guida rapida all’<strong>install</strong>azione<br />
SETTAGGIO DELL’HARDWARE / CONNESSIONI<br />
1. Collegare il <strong>router</strong> al vostro cavo ADSL utilizzando il cavo RJ11 fornito.<br />
2. Collegare il <strong>router</strong> al vostro PC, hub o switch connettendo il cavo di rete alla porta<br />
LAN del <strong>router</strong>.<br />
3. Collegare l’alimentatore alla presa di alimentazione presente sul pannello posteriore<br />
del <strong>router</strong>.<br />
4. Il led ADSL si accenderà se il <strong>router</strong> è collegato al cavo ADSL e riceve I segnali ADSL<br />
con successo. Se il LED sta lampeggiando, contattate il vostro ISP (Internet service<br />
provider) per verificare il problema.<br />
NOTA: Utilizzare solamente l’alimentatore incluso nella confezione del <strong>router</strong>.<br />
SETTAGGIO GUIDATO<br />
Questo <strong>router</strong> fornisce una procedura guidata per configurare il settaggio ADSL. Questa<br />
procedura guidata contiene i settaggi indicati dal alcuni Internet Provider cosicché<br />
potete facilmente configurare il settaggio ADSL selezionando l’ISP direttamente dalla<br />
procedura guidata. Se non riuscite a trovare il vostro ISP nella lista della procedura<br />
guidata, settare manualmente l’informazione relativa all’ISP. Entrambe le procedure<br />
sono indicate sotto.<br />
Per iniziare<br />
Prima di iniziare, verificare i seguenti punti:<br />
• Assicurarsi di aver collegato il cavo ADSL al <strong>router</strong> correttamente. (Il led ADSL LED<br />
sarà accesa.)<br />
• Dis<strong>install</strong>are qualsiasi programma di connessione dial-up <strong>install</strong>ato precedentemente<br />
per il <strong>modem</strong> USB <strong>modem</strong> o altre periferiche dial-up.<br />
• Si raccomanda che inizialmente venga configurato il <strong>router</strong> attraverso il cavo di rete<br />
prima di settare le funzioni <strong>wireless</strong>.<br />
22<br />
ITALIANO
Questa guida può lavorare con Windows 98SE/Me/2000/XP/Vista/7. Le seguenti procedure<br />
sono funzionanti con Windows XP. ( Le procedure sono simili per Windows 98SE/Me/2000/<br />
Vista/7.)<br />
1. Inserire il CD incluso per il settaggio all’interno del lettore CD. Il programma di<br />
Autorun.exe dovrebbe svolgersi automaticamente. Se ciò non avvenisse, far partire<br />
manualmente il programma Autorun.exe dalla cartella “Auto run” presente nel CD.<br />
2. Quando compare la schermata iniziale, cliccare su “Setup Wizard” per la procedura<br />
guidata.<br />
3. La prima videata della procedura guidata apparirà sullo schermo, ad indicare che la<br />
procedura che si sta svolgendo serve per individuare il <strong>router</strong>.<br />
• Se il <strong>router</strong> viene trovato, verrà visualizzata sullo schermo la richiesta di selezionare<br />
l’ISP, Please Select ISP (vedere la sezione Settaggio dell’ ISP).<br />
• Se il <strong>router</strong> non può essere trovato, inserire l’indirizzo IP e la password del <strong>router</strong><br />
(1234) sulla schermata di connessione per effettuare una nuova ricerca. Cliccare<br />
“Next” per continuare.<br />
NOTA: La procedura guidata automaticamente seleziona il paese dove vi trovate<br />
verificando la lingua del sistema operativo presente nel computer e quindi si procedere<br />
con la schermata di selezione del ISP (PleaseSelect ISP)..<br />
Settaggio automatico dell’ ISP<br />
Se la procedura guidata trova l’ISP, seguire i passaggi<br />
sotto indicati e la procedura configurerà i settaggi<br />
dell’ ISP automaticamente.<br />
1. Selezionare il ISP mostrato per il vostro ADSL.<br />
2. Quando comparirà la videata successiva, inserire il nome utente e la password che il<br />
vostro ISP vi ha fornito, se necessario. Cliccare “Next.”<br />
ITALIANO<br />
23
3. Confermare che l’ informazione che appare sullo schermo Settings Overview sia<br />
corretta, quindi cliccare “Save” per salvare i settaggi e riavviare il <strong>router</strong>. NOTA: Cliccare<br />
“Back” per modificare i settaggi su una schermata precedente.<br />
4. Dopo aver salvato e riavviato il <strong>router</strong>, I settaggi dell’ ISP sono stati effettuati. La<br />
procedura guidata vi aiuterà quindi a settare il vostro computer per ottenere un<br />
indirizzo IP dal <strong>router</strong> automaticamente. Una schermata con una barra di stato<br />
apparirà sul monitor ad indicare il progresso della procedura.<br />
NOTA 1: Per usare il <strong>router</strong> per accedere ad Internet, è necessario che l’indirizzo IP di<br />
ciascun PC venga settato nello stesso segmento di rete come il <strong>router</strong>. La procedura<br />
guidata vi aiuterà a settare il corretto indirizzo IP del vostro computer.<br />
NOTA 2: Per impostazioni standard, il server DHCP del <strong>router</strong> è attivato. Se viene<br />
disabilitato prima di far partire la procedura guidata, quest’ultima attiverà<br />
automaticamente il server DHCP.<br />
5. La procedura guidata proverà a connettersi all’ISP selezionato. Se il tentativo fallisce,<br />
un messaggio prontamente indicherà il mancato collegamento. Far ripartire la<br />
procedura per selezionare l’ISP nuovamente.<br />
6. Se la connessione con l’ISP avviene con successo, vedrete un messaggio di conferma<br />
sullo schermo. Per configurare i settaggi supplementari di gestione <strong>Web</strong>, cliccare<br />
(settaggi avanzati) “Advanced Settings.” Per chiudere la procedura guidata, cliccare<br />
su (finito) “Finish.”<br />
Settaggio manuale dell’ISP<br />
Se la procedura guidata non è in grado di trovare l’ISP, seguire i passaggi sotto indicati<br />
per configurare il settaggio dell’ ISP manualmente. Prima di tutto, comunque, verificare<br />
con il vostro ISP quale tipo di servizio viene fornito come PPPoE, PPPoA o RFC1483/2684.<br />
Ottenere le corrispondenti informazioni come mostrato qui e tenerle per riferimento.<br />
PPPoE VPI/VCI, VC-based/LLC-based multiplexing, Username, Password<br />
(and Service Name)<br />
PPPoA VPI/VCI, VC-based/LLC-based multiplexing, Username, Password<br />
RFC1483 Bridged VPI/VCI, VC-based/LLC-based multiplexing to use Bridged Mode<br />
RFC1483 Routed VPI/VCI, VC-based/LLC-based multiplexing, IP Address, Subnet<br />
Mask, Gateway Address, and Domain Name System (DNS) IP<br />
Address (a fixed IP address)<br />
1. Se l’ISP corretto non compare nella lista, selezionare<br />
(altro) “Other.”<br />
24<br />
ITALIANO
2. Verificare con il vostro<br />
ISP il tipo di connessione<br />
della linea ADSL.<br />
Selezionare il tipo di<br />
connessione e cliccare<br />
(successivo) “Next.”<br />
3. Inserire il VPI, VCI e l’Encapsulation forniti dal vostro ISP. Se il tipo di connessione è<br />
(Indirizzo IP Statico) “Static IP Address,” inserire l’informazione con l’indirizzo IP fornito<br />
dal vostro ISP. Per i dettagli in merito a ciascun settaggio, fare riferimento a Gestione<br />
della Configurazione<br />
<strong>Web</strong>/ Settaggio<br />
Generale nel manuale<br />
d’istruzione.<br />
4. Inserire il nome utente e la password che l’ ISP vi ha fornito, se necessario. Cliccare<br />
(successivo) “Next.”<br />
5. Confermare che l’informazione che appare nella schermata generale relative ai<br />
settaggi (Settings Overview) sia corretta, quindi cliccare “Save” per salvare i settaggi<br />
e riavviare il <strong>router</strong>. NOTA: Cliccare “Back” per modificare I settaggi nella schermata<br />
precedente.<br />
6. Dopo aver effettuato il salvataggio e aver riavviato il <strong>router</strong>, i settaggi ISP sono stati<br />
effettuati. La procedura guidata vi aiuterà quindi a preparare il vostro computer per<br />
ottenere l’indirizzo IP automaticamente dal <strong>router</strong>. Una schermata con una barra di<br />
stato apparirà per indicare il progresso nella procedura.<br />
NOTA 1: Per usare il <strong>router</strong> per accedere a Internet,è necessario che l’indirizzo IP di<br />
ciascun PC venga settato nello stesso segmento di rete come il <strong>router</strong>. La procedura<br />
guidata vi aiuterà a settare l’indirizzo IP corretto per il vostro computer.<br />
NOTA 2: Per impostazioni standard, il server DHCP del <strong>router</strong> è attivato. Se viene<br />
disabilitato prima di far partire la procedura guidata, quest’ultima attiverà<br />
automaticamente il server DHCP.<br />
7. La procedura guidata proverà a connettersi all’ISP selezionato. Se il tentativo fallisce,<br />
un messaggio prontamente indicherà il mancato collegamento. Far ripartire la<br />
procedura per selezionare l’ISP nuovamente.<br />
8. Se la connessione con l’ISP avviene con successo, vedrete un messaggio di conferma<br />
sullo schermo. Per configurare i settaggi supplementari di gestione <strong>Web</strong>, cliccare<br />
(settaggi avanzati) “Advanced Settings.” Per chiudere la procedura guidata, cliccare<br />
su (finito) “Finish.”<br />
ITALIANO<br />
25
26<br />
WASTE ELECTRICAL & ELECTRONIC EQUIPMENT<br />
Disposal of Electric and Electronic Equipment<br />
(applicable in the European Union and other European countries with separate collection systems)<br />
ENGLISH<br />
This symbol on the product or its packaging indicates that this product shall not be treated as household waste.<br />
Instead, it should be taken to an applicable collection point for the recycling of electrical and<br />
electronic equipment. By ensuring this product is disposed of correctly, you will help prevent<br />
potential negative consequences to the environment and human health, which could otherwise<br />
be caused by inappropriate waste handling of this product. If your equipment contains easily<br />
removable batteries or accumulators, dispose of these separately according to your local<br />
requirements. The recycling of materials will help to conserve natural resources. For more<br />
detailed information about recycling of this product, contact your local city office, your household waste<br />
disposal service or the shop where you purchased this product. In countries outside of the EU: If you wish<br />
to discard this product, contact your local authorities and ask for the correct manner of disposal.<br />
DEUTSCH<br />
Dieses auf dem Produkt oder der Verpackung angebrachte Symbol zeigt an, dass dieses Produkt nicht mit<br />
dem Hausmüll entsorgt werden darf. In Übereinstimmung mit der Richtlinie 2002/96/EG des Europäischen<br />
Parlaments und des Rates über Elektro- und Elektronik-Altgeräte (WEEE) darf dieses Elektrogerät nicht<br />
im normalen Hausmüll oder dem Gelben Sack entsorgt werden. Wenn Sie dieses Produkt entsorgen<br />
möchten, bringen Sie es bitte zur Verkaufsstelle zurück oder zum Recycling-Sammelpunkt Ihrer Gemeinde.<br />
ESPAÑOL<br />
Este símbolo en el producto o su embalaje indica que el producto no debe tratarse como residuo doméstico.<br />
De conformidad con la Directiva 2002/96/CE de la UE sobre residuos de aparatos eléctricos y electrónicos<br />
(RAEE), este producto eléctrico no puede desecha se con el resto de residuos no clasificados. Deshágase<br />
de este producto devolviéndolo a su punto de venta o a un punto de recolección municipal para su<br />
reciclaje.<br />
FRANÇAIS<br />
Ce symbole sur Ie produit ou son emballage signifie que ce produit ne doit pas être traité comme un<br />
déchet ménager. Conformément à la Directive 2002/96/EC sur les déchets d’équipements électriques<br />
et électroniques (DEEE), ce produit électrique ne doit en aucun cas être mis au rebut sous forme de<br />
déchet municipal non trié. Veuillez vous débarrasser de ce produit en Ie renvoyant à son point<br />
de vente ou au point de ramassage local dans votre municipalité, à des fins de recyclage.<br />
ITALIANO<br />
Questo simbolo sui prodotto o sulla relativa confezione indica che il prodotto non va trattato come un rifiuto<br />
domestico. In ottemperanza alla Direttiva UE 2002/96/EC sui rifiuti di apparecchiature elettriche ed<br />
elettroniche (RAEE), questa prodotto elettrico non deve essere smaltito come rifiuto municipale misto. Si<br />
prega di smaltire il prodotto riportandolo al punto vendita o al punto di raccolta municipale locale per un<br />
opportuno riciclaggio.<br />
POLSKI<br />
Jeśli na produkcie lub jego opakowaniu umieszczono ten symbol, wówczas w czasie utylizacji nie wolno<br />
wyrzucać tego produktu wraz z odpadami komunalnymi. Zgodnie z Dyrektywą Nr 2002/96/WE w sprawie<br />
zużytego sprzętu elektrycznego i elektronicznego (WEEE), niniejszego produktu elektrycznego nie wolno<br />
usuwać jako nie posortowanego odpadu komunalnego. Prosimy o usuniecie niniejszego produktu<br />
poprzez jego zwrot do punktu zakupu lub oddanie do miejscowego komunalnego punktu zbiórki<br />
odpadów przeznaczonych do recyklingu.
WARRANTY INFORMATION<br />
ENGLISH: For warranty information, go to www.intellinet-network.com/warranty.<br />
DEUTSCH: Garantieinformationen finden Sie unter www.intellinet-network.com/warranty.<br />
ESPAÑOL: Si desea obtener información sobre la garantía, visite www.intellinet-network.com/warranty.<br />
FRANÇAIS: Pour consulter les informations sur la garantie, visitez www.intellinet-network.com/warranty.<br />
POLSKI: Informacje dotyczące gwarancji znajdują się na stronie www.intellinet-network.com/warranty.<br />
ITALIANO: Per informazioni sulla garanzia, accedere a www.intellinet-network.com/warranty.<br />
EN MÉXICO: Póliza de Garantía INTELLINET — Datos del importador y responsable ante el consumidor<br />
IC Intracom México, S.A. de C.V. • Av. Interceptor Poniente # 73, Col. Parque Industrial La Joya, Cuautitlán<br />
Izcalli, Estado de México, C.P. 54730, México. • Tel. (55)1500-4500<br />
La presente garantía cubre este producto por 3 años contra cualquier defecto de fabricación en sus<br />
materiales y mano de obra, bajo las siguientes condiciones:<br />
1. Todos los productos a que se refiere esta garantía, ampara su cambio físico, sin ningún cargo para<br />
el consumidor.<br />
2. El comercializador no tiene talleres de servicio, debido a que los productos que se garantizan no<br />
cuentan con reparaciones, ni refacciones, ya que su garantía es de cambio físico.<br />
3. La garantía cubre exclusivamente aquellas partes, equipos o sub-ensambles que hayan sido instaladas<br />
de fábrica y no incluye en ningún caso el equipo adicional o cualesquiera que hayan sido adicionados<br />
al mismo por el usuario o distribuidor.<br />
Para hacer efectiva esta garantía bastará con presentar el producto al distribuidor en el domicilio donde<br />
fue adquirido o en el domicilio de IC Intracom México, S.A. de C.V., junto con los accesorios contenidos<br />
en su empaque, acompañado de su póliza debidamente llenada y sellada por la casa vendedora<br />
(indispensable el sello y fecha de compra) donde lo adquirió, o bien, la factura o ticket de compra<br />
original donde se mencione claramente el modelo, número de serie (cuando aplique) y fecha de<br />
adquisición. Esta garantia no es válida en los siguientes casos: Si el producto se hubiese utilizado en<br />
condiciones distintas a las normales; si el producto no ha sido operado conforme a los instructivos de<br />
uso; o si el producto ha sido alterado o tratado de ser reparado por el consumidor o terceras personas.<br />
27
28<br />
REGULATORY STATEMENTS<br />
FCC Class B<br />
This equipment has been tested and found to comply with the limits for a Class B digital device,<br />
pursuant to Part 15 of Federal Communications Commission (FCC) Rules. These limits are designed<br />
to provide reasonable protection against harmful interference in a residential <strong>install</strong>ation. This<br />
equipment generates, uses and can radiate radio frequency energy, and if not <strong>install</strong>ed and used<br />
in accordance with the instructions may cause harmful interference to radio communications.<br />
However, there is no guarantee that interference will not occur in a particular <strong>install</strong>ation. If this<br />
equipment does cause harmful interference to radio or television reception, which can be determined<br />
by turning the equipment off and on, the user is encouraged to try to correct the interference by one or<br />
more of the following measures:<br />
• Reorient or relocate the receiving antenna.<br />
• Increase the separation between the equipment and the receiver.<br />
• Connect the equipment to an outlet on a circuit different from the receiver.<br />
• Consult the dealer or an experienced radio/TV technician for help.<br />
CE / R&TTE<br />
ENGLISH<br />
This device complies with the requirements of the R&TTE Directive 1999/5/EC.<br />
DEUTSCH<br />
Dieses Gerät enspricht der Direktive R&TTE Direktive 1999/5/EC.<br />
ESPAÑOL<br />
Este dispositivo cumple con los requerimientos de la Directiva R&TTE 1999/5/EC.<br />
FRANÇAIS<br />
Cet appareil satisfait aux exigences de la directive R&TTE 1999/5/CE.<br />
POLSKI<br />
Urządzenie spełnia wymagania dyrektywy R&TTE 1999/5/EC.<br />
ITALIANO<br />
Questo dispositivo è conforme alla Direttiva 1999/5/EC R&TTE.
INTELLINET NETWORK SOLUTIONS offers a complete line of active and passive networking products.<br />
Ask your local computer dealer for more information or visit www.intellinet-network.com.<br />
All trademarks and trade names are the property of their respective owners.<br />
INTELLINET NETWORK SOLUTIONS bietet ein vollständiges Sortiment aktiver und passiver<br />
Netzwerkkomponenten. Für weitere Informationen wenden Sie sich bitte an Ihren Händler oder<br />
nutzen Sie die <strong>Web</strong>seite www.intellinet-network.com.<br />
Alle Marken und Markennamen sind Eigentum Ihrer jeweiligen Inhaber.<br />
INTELLINET NETWORK SOLUTIONS ofrece una línea completa de productos de red activa y pasiva.<br />
Pregunte a su distribuidor para obtener mayor información o visite:<br />
www.intellinet-network.com.<br />
Todas las marcas y nombres comerciales son propiedad de sus respectivos dueños.<br />
INTELLINET NETWORK SOLUTIONS offre un assortiment complet de produits de réseau actifs et<br />
passifs. Pour plus d’informations veuillez contacter votre revendeur ou utiliser la page d’accueil<br />
www.intellinet-network.com.<br />
Toutes les marques et noms commerciaux sont la propriété de leurs propriétaires respectifs.<br />
INTELLINET NETWORK SOLUTIONS to kompletna linia aktywnych oraz pasywnych komponentów<br />
sieciowych. Poproś lokalnego dealera o więcej informacji lub odwiedź stronę<br />
www.intellinet-network.com.<br />
Wszystkie znaki towarowe i nazwy handlowe należą do ich właścicieli.<br />
INTELLINET NETWORK SOLUTIONS offre una linea completa di prodotti di rete attivi e passivi.<br />
Chiedi maggiori informazioni al tuo rivenditore di computer o visita il sito<br />
www.intellinet-network.com.<br />
Tutti i marchi registrati e le dominazioni commerciali sono di proprietà dei loro rispettivi proprietari.<br />
North & South America<br />
IC INTRACOM AMERICAS<br />
550 Commerce Blvd.<br />
Oldsmar, FL 34677<br />
USA<br />
Asia & Africa<br />
IC INTRACOM ASIA<br />
Far Eastern Technology Center<br />
7-F No. 125, Section 2, Da Tong Rd.<br />
Shijr, Taipei<br />
Taiwan, ROC<br />
Europe<br />
IC INTRACOM EUROPE<br />
Löhbacher Str. 7<br />
D-58553 Halver<br />
Germany<br />
29
Copyright © INTELLINET NETWORK SOLUTIONS