Cool & Warm Mist Ultrasonic Humidifier - QVC.com
Cool & Warm Mist Ultrasonic Humidifier - QVC.com
Cool & Warm Mist Ultrasonic Humidifier - QVC.com

Create successful ePaper yourself
Turn your PDF publications into a flip-book with our unique Google optimized e-Paper software.
Dirección postal:<br />
HoMedics Service Center<br />
Dept. 168, Suite 3<br />
43155 West Nine Mile Rd<br />
Novi, MI 48375<br />
correo electrónico:<br />
cservice@homedics.<strong>com</strong><br />
LIMITADA UNA GARANTÍA DE AÑO<br />
HoMedics vende sus productos con la intención de que no tengan defectos de fabricación ni de mano<br />
de obra por un plazo de un año a partir de la fecha de <strong>com</strong>pra original, con las siguientes excepciones.<br />
HoMedics garantiza que sus productos no tendrán defectos de material ni de mano de obra bajo<br />
condiciones de uso y servicio normales. Esta garantía se extiende únicamente a consumidores y no a<br />
distribuidores.<br />
Para obtener servicio para su producto HoMedics, envíe por correo el producto y su recibo de <strong>com</strong>pra<br />
fechado (<strong>com</strong>o <strong>com</strong>probante de <strong>com</strong>pra), con franqueo pago, a la siguiente dirección:<br />
HoMedics Service Center<br />
Dept. 168, Suite 3<br />
43155 West Nine Mile Rd<br />
Novi, MI 48375<br />
No se aceptarán pagos contra entrega.<br />
HoMedics no autoriza a nadie, incluyendo, pero sin limitarse a, distribuidores, posteriores consumidores<br />
<strong>com</strong>pradores del producto a un distribuidor, o <strong>com</strong>pradores remotos, a obligar a HoMedics de forma<br />
alguna más allá de las condiciones aquí establecidas. La garantía de este producto no cubre daños<br />
causados por uso inadecuado o abuso, accidente, conexión de accesorios no autorizados, alteración<br />
del producto, instalación inadecuada, reparaciones o modificaciones no autorizadas, uso inadecuado<br />
de la fuente de energía/electricidad, cortes de energía, caída del producto, funcionamiento incorrecto o<br />
daño de una pieza de funcionamiento debido al no cumplimiento del mantenimiento re<strong>com</strong>endado por<br />
el fabricante, daños durante el transporte, robo, descuido, vandalismo, condiciones climáticas, pérdida<br />
de uso en el período durante el cual el producto está en una instalación de reparación o a la espera de<br />
piezas o reparación, o cualquier otra condición, sin importar cual sea, que se encuentre fuera del control<br />
de HoMedics.<br />
Esta garantía es válida únicamente si el producto es <strong>com</strong>prado y operado en el país en el cual se <strong>com</strong>pró<br />
el producto. Un producto que requiera modificaciones o adaptación para habilitar su funcionamiento<br />
en cualquier país que no sea aquél para el que fue diseñado, fabricado, aprobado y/o autorizado, o la<br />
reparación de productos dañados por estas modificaciones no están cubiertos bajo esta garantía.<br />
LA GARANTÍA AQUÍ ESTABLECIDA SERÁ LA ÚNICA Y EXCLUSIVA GARANTÍA. NO HABRÁ NINGUNA<br />
OTRA GARANTÍA EXPRESA NI IMPLÍCITA, INCLUYENDO NINGUNA GARANTÍA DE COMERCIALIZACIÓN<br />
O APTITUD NI NINGUNA OTRA OBLIGACIÓN POR PARTE DE LA COMPAÑÍA CON RESPECTO A<br />
PRODUCTOS CUBIERTOS POR ESTA GARANTÍA. HOMEDICS NO TENDRÁ RESPONSABILIDAD<br />
ALGUNA POR NINGÚN DAÑO INCIDENTAL, CONSECUENTE NI ESPECIAL. BAJO NINGÚN CONCEPTO<br />
ESTA GARANTÍA REQUERIRÁ MÁS QUE LA REPARACIÓN O CAMBIO DE ALGUNA PIEZA O PIEZAS<br />
QUE SE HALLEN DEFECTUOSAS DENTRO DEL PERÍODO DE VIGENCIA DE ESTA GARANTÍA. NO SE<br />
EFECTUARÁN REEMBOLSOS. SI NO HAY PIEZAS DE REPUESTO DISPONIBLES PARA LOS MATERIALES<br />
DEFECTUOSOS, HOMEDICS SE RESERVA EL DERECHO DE REALIZAR SUSTITUCIONES EN VEZ DE<br />
REPARAR O CAMBIAR.<br />
Esta garantía no se extiende a la <strong>com</strong>pra de productos abiertos, usados, reparados, embalados otra vez<br />
y/o abiertos y vueltos a cerrar, incluyendo entre otras cosas la venta de dichos productos en sitios de<br />
remate por Internet y/o la venta de dichos productos por revendedores o mayoristas. Todas y cada una<br />
de las garantías cesarán y terminarán inmediatamente con respecto a cualquier producto o pieza del<br />
mismo que estén reparados, cambiados, alterados o modificados sin el consentimiento previo explícito<br />
y por escrito de HoMedics.<br />
Esta garantía le proporciona derechos legales específicos. Es posible que usted tenga derechos<br />
adicionales que pueden variar de un país a otro. Debido a las regulaciones de ciertos países, es posible<br />
que algunas de las limitaciones y exclusiones no se apliquen en su caso.<br />
Por más información con respecto a nuestra línea de productos en los EE.UU., visítenos en:<br />
www.homedics.<strong>com</strong><br />
© 2003-2010 HoMedics, Inc. y sus <strong>com</strong>pañías afiliadas, reservados todos los derechos. HoMedics® es una<br />
marca registrada de HoMedics, Inc. y sus <strong>com</strong>pañías afiliadas. Reservados todos los derechos.<br />
IB-HUMWM75A<br />
Register<br />
Please Take A Moment Now<br />
Your Product At:<br />
www.homedics.<strong>com</strong>/register<br />
Your valuable input regarding this<br />
product will help us create<br />
the products you will<br />
want in the future.<br />
El manual en español empieza<br />
a la página 16<br />
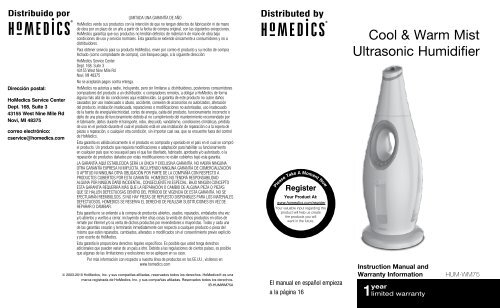
<strong>Cool</strong> & <strong>Warm</strong> <strong>Mist</strong><br />
<strong>Ultrasonic</strong> <strong>Humidifier</strong><br />
Instruction Manual and<br />
Warranty Information<br />
HUM-WM75
IMPORTANT SAFETY INSTRUCTIONS:<br />
WHEN USING ELECTRICAL PRODUCTS, ESPECIALLY WHEN CHILDREN ARE<br />
PRESENT, BASIC SAFETY PRECAUTIONS SHOULD ALWAYS BE FOLLOWED,<br />
INCLUDING THE FOLLOWING:<br />
READ ALL INSTRUCTIONS BEFORE USING<br />
DANGER – TO REDUCE THE RISK OF ELECTRIC SHOCK:<br />
• Always unplug the appliance from the electrical outlet immediately after using and<br />
before cleaning.<br />
• DO NOT reach for an appliance that has fallen into water. Unplug it immediately.<br />
• DO NOT use while bathing or in shower.<br />
• DO NOT place or store appliance where it can fall or be pulled into a tub or sink.<br />
• DO NOT place in or drop into water or other liquid.<br />
• NEVER use pins or other metallic fasteners with this appliance.<br />
• Keep dry – DO NOT operate in a wet or moist condition.<br />
• DO NOT use water above 86˚ Fahrenheit.<br />
WARNING - TO REDUCE THE RISK OF BURNS, FiRE, ELECTRIC<br />
SHOCK OR INJURY TO PERSONS:<br />
• An appliance should never be left unattended when plugged in. Unplug from outlet<br />
when not in use and before putting on or taking off parts or attachments.<br />
• Close supervision is necessary when this appliance is used by or near children,<br />
invalids or disabled persons.<br />
• Use this appliance only for its intended use as described in this manual.<br />
• NEVER operate this appliance if it has a damaged cord or plug, if it is not working<br />
properly, if it has been dropped or damaged, or dropped into water. Return it to<br />
HoMedics' Product Return Center for examination and repair.<br />
• Keep cord away from heated surfaces.<br />
• NEVER drop or insert any object into any opening.<br />
• DO NOT operate where aerosol (spray) products are being used or where oxygen is<br />
being administered.<br />
• Always place the humidifier on a firm, flat, level surface.<br />
• Please hold the water tank firmly with both hands when carrying a full tank of water.<br />
• NEVER use humidifier in an environment where explosive gases are present.<br />
• DO NOT place the humidifier near heat sources, such as a stove and do not<br />
expose the humidifier to direct sunlight.<br />
• DO NOT carry this appliance by the power cord or use cord as handle.<br />
• To disconnect, turn all controls to the "OFF" position, then remove plug from outlet.<br />
• This appliance is designed for personal, non-professional use only.<br />
• DO NOT use outdoors. For indoor use only.<br />
• DO NOT overfill with water.<br />
SAVE THESE INSTRUCTIONS<br />
CAUTION – PLEASE READ ALL INSTRUCTIONS CAREFULLY<br />
BEFORE OPERATION.<br />
• Never cover the appliance when it is in operation.<br />
• Always keep the cord away from high temperature and fire.<br />
• Perform regular maintenance of the <strong>Ultrasonic</strong> Nebulizer.<br />
• Avoid contact with detergent to your mouth and eyes. If contact occurs,<br />
use clean water to wash immediately. If serious, contact poison control<br />
or seek medical treatment.<br />
• Never use detergent to clean the <strong>Ultrasonic</strong> Nebulizer that is not re<strong>com</strong>mended<br />
by the manufacturer.<br />
• Never scrape the <strong>Ultrasonic</strong> Nebulizer with a hard object to clean.<br />
2 3
Operation and Maintenance<br />
• Do not repair or adjust the unit. Servicing must be performed by professional or<br />
qualified personnel.<br />
• Do not operate any appliance with an aging, knotted or damaged cord or plug, the<br />
replacement must be performed by the manufacturer, service center or qualified<br />
professional personnel.<br />
• Stop use if there is an unusual noise or smell. Servicing should be performed by<br />
qualified personnel only.<br />
• <strong>Humidifier</strong> should be unplugged when not in use for a long period of time.<br />
• Do not touch the water in the main unit or the parts in the water when the unit is on.<br />
• Never operate unit without water in the tank. Only use water in the tanks.<br />
• Never add any additive to the water that is not produced or under the supervision<br />
of the manufacturer.<br />
• Do not wash, adjust or move the humidifier without first unplugging the unit from its<br />
electrical outlet.<br />
• Keep the appliance out of reach from children. Do not allow children to use the<br />
appliance without supervision.<br />
Unique Features and Specifications<br />
<strong>Ultrasonic</strong> Technology<br />
This humidifier uses ultrasonic high frequency technology to convert the water into<br />
1-5 million super particles that are dispersed into the air evenly. These particles then<br />
<strong>com</strong>bine with the ions generated by the humidifier to moisten the air.<br />
Oscillating Head<br />
The humidifier features a motorized nozzle that automatically oscillates 120°. The<br />
oscillating head can also be stopped at any point in the oscillation cycle to target the<br />
mist in a specific direction.<br />
<strong>Warm</strong> or <strong>Cool</strong> <strong>Mist</strong> Option<br />
Choose either warm or cool mist for customized <strong>com</strong>fort.<br />
Auto Shut Off Protection<br />
When the tank is empty the unit will shut off automatically.<br />
Overheat Protection<br />
This humidifier is equipped with a non-resettable fuse in case of overheating. If<br />
the non-resettable fuse has been activated, operation cannot be resumed. The<br />
fuse will need to be replaced by an authorized service personnel.<br />
<strong>Ultrasonic</strong> Nebulizer<br />
The humidifier utilizes special spray techniques and the ultrasonic nebulizer is easy to<br />
clean for lifetime use.<br />
Voltage<br />
120V / 60Hz<br />
Watts<br />
105<br />
Tank Capacity<br />
1.4 gallon – 5.11 liter<br />
4 5
<strong>Cool</strong> & <strong>Warm</strong> <strong>Mist</strong> <strong>Ultrasonic</strong> <strong>Humidifier</strong><br />
Oscillating<br />
ON/OFF Button<br />
<strong>Warm</strong>/<strong>Cool</strong> <strong>Mist</strong> Button<br />
Oscillating Head &<br />
Nozzle<br />
<strong>Mist</strong> Decrease<br />
Button<br />
HEAT<br />
COOL<br />
<strong>Mist</strong> Increase<br />
Button<br />
<strong>Warm</strong>/<strong>Cool</strong> <strong>Mist</strong><br />
Indicator Light Ring<br />
Fig.2<br />
Power ON/OFF Button<br />
Power Knob<br />
Plug unit in to a 120 volt AC electrical outlet. Push the POWER ON/OFF ( )<br />
button to turn unit on.<br />
Control Panel<br />
HEAT<br />
COOL<br />
ATTENTION: When the water in the tank is almost empty, the power will shut off to<br />
indicate to the user to refill water.<br />
<strong>Mist</strong> Increase and Decrease<br />
There are 7 different levels of mist output from Lowest to Highest. To increase the<br />
mist output, press the MIST INCREASE ( ) button until the desired mist output is<br />
reached. When the maximum mist output has been reached, the indicator ring light<br />
will blink once and will blink each time the MIST INCREASE button is pressed.<br />
To decrease mist, press the MIST DECREASE ( ) button until the mist has<br />
decreased to the output level desired. When the minimum mist output level has<br />
been reached, the indicator ring light will blink once and will blink each time the MIST<br />
DECREASE button is pressed. (Fig.2)<br />
How To Use<br />
CAUTION: This appliance has a polarized plug (one blade wider than the<br />
other). To reduce the risk of shock, this plug is intended to fit only one<br />
way in a polarized outlet. If the plug does not fit fully in the outlet, reverse<br />
the plug. If it still does not fit, contact a qualified electrician.<br />
DO NOT attempt to defeat this safety feature. To do so could result in an<br />
electric shock hazard.<br />
Fig.1<br />
<strong>Warm</strong> and <strong>Cool</strong> <strong>Mist</strong> Control<br />
The humidifier is equipped with the option to select warm or cool mist. Each time<br />
the unit is turned on it will start producing cool mist. The <strong>Warm</strong>/<strong>Cool</strong> mist indicator<br />
ring will glow with a blue light. To select <strong>Warm</strong> <strong>Mist</strong>, press the WARM/COOL MIST<br />
button. When warm mist is selected, the mist indicator ring will change from blue<br />
to red and warm mist will start being produced. To return to cool mist, press the<br />
WARM/COOL MIST button again. The mist indicator ring will change from red to<br />
blue. (Fig.2)<br />
6 7
Oscillation<br />
When the humidifier is producing mist, press the OSCILLATION ON/OFF ( ) button<br />
to turn on the motorized oscillation feature. The nozzle at the top of the unit will<br />
oscillate in a 120° range from side to side. To target the nozzle and mist in a fixed<br />
direction, press the OSCILLATION ON/OFF ( ) button when the nozzle is at the<br />
desired position and the nozzle will stop and direct mist to the desired area only.<br />
(Fig.2)<br />
NOTE: The oscillation feature will not operate if the humidifying function is not<br />
operating. Oscillation feature will only work when mist is being produced.<br />
How To Fill<br />
CAUTION: Before filling unit with water, turn power off and unplug unit from outlet.<br />
Fig.3<br />
1. To release the tank from the unit, place your<br />
fingers with your palm facing upward into the<br />
recess in the tank handle. Press the tank release<br />
button with your thumb.<br />
2. Pull the water tank away from the humidifier base<br />
by the handle and remove the water tank from the<br />
base by lifting it up and away.<br />
Fig.6<br />
Fig.7<br />
Fig.8<br />
4. Fill the water tank with clean, cool (not cold) tap<br />
water. We re<strong>com</strong>mend using distilled water if you<br />
live in a hard water area.<br />
5. Replace the tank cap by turning clockwise<br />
until tight.<br />
6. Install the tank back on the base of the unit. Make<br />
sure the tank is firmly seated in the base.<br />
7. Press the tank handle into the base of the<br />
humidifier. You will know that the tank is locked into<br />
place when the locking mechanism clicks and the<br />
tank release button is in a raised position.<br />
Fig.4<br />
3. Turn the tank upside down – remove the tank cap<br />
by turning it counter-clockwise.<br />
Fig.9<br />
Fig.5<br />
8 9
About White Dust<br />
Use of high-mineral content hard water will cause a white mineral residue to<br />
accumulate on room surfaces near the humidifier. The mineral residue is <strong>com</strong>monly<br />
called "white dust". The higher the mineral content (the harder your water is), the<br />
greater the potential for white dust. The white dust is not caused by a defect in the<br />
humidifier, but is due only to minerals suspended in the water.<br />
Demineralization Cartridge<br />
The HoMedics demineralization cartridge will help reduce the potential for white<br />
dust, a deposit of minerals left behind from using hard water in your humidifier.<br />
The cartridge should be replaced every 30-40 fillings. The cartridge may need to<br />
be replaced more often when very hard water is used. When the cartridge needs<br />
to be changed, white dust will form around the humidifier. If white residue still<br />
forms around the humidifier after a new cartridge has been inserted, please make<br />
sure that the water you are using is untreated. If you live in a hard water area,<br />
we re<strong>com</strong>mend the use of distilled water for better results from the<br />
humidifier. Do not use with water softeners.<br />
Fig.10<br />
Cleaning and Care<br />
CAUTION: Before cleaning the unit, turn power off and unplug unit from the outlet.<br />
Installing Instructions<br />
1. Remove demineralization cartridge from packaging and let it soak in water<br />
for 10 minutes.<br />
2. To release the tank from the unit, place your fingers with your palm facing<br />
upward into the recess in the tank handle. Press the tank release button with<br />
your thumb. (Fig.3)<br />
3. Place 1 demineralization cartridge down onto post and into the<br />
Fig.15<br />
matching slot in the humidifier base. (Fig.11)<br />
4. Place the tank back on the base. (Fig.8)<br />
5. Press the tank handle into the base of the humidifier. You will know that the<br />
tank is locked into place when the locking mechanism clicks and the tank<br />
release button is in a raised position. (Fig.9)<br />
10 11<br />
Fig.11<br />
Fig.12<br />
Fig.13<br />
Fig.14<br />
Tank Cleaning<br />
Remove the tank from the base by placing<br />
your fingers with your palm facing upward<br />
into the recess in the tank handle. Press the<br />
tank release button with your thumb and lift<br />
the water tank out and away. (Fig.12)<br />
Unscrew the tank cap; wipe the tank with<br />
a soft cloth then wash it with clean<br />
water. (Fig.13)<br />
<strong>Ultrasonic</strong> Nebulizer Cleaning<br />
Pour a small amount of white vinegar on the<br />
surface of the <strong>Ultrasonic</strong> Nebulizer and soak<br />
for 5 minutes. Brush clean with soft bristle<br />
brush (not included). (Fig. 14)<br />
IMPORTANT: Make sure to wipe the<br />
black tubing on the nebulizer with the<br />
white vinegar and a soft cloth, then<br />
rinse. (Fig. 15)<br />
Surface Cleaning<br />
Clean the surface of the unit with a clean<br />
damp soft cloth.<br />
Re<strong>com</strong>mendation: Clean the tank and<br />
ultrasonic nebulizer once every two to three<br />
weeks, depending on your water conditions.<br />
Users in hard water areas may need to clean<br />
their humidifier tank and nebulizer more often.
Troubleshooting<br />
PROBLEM POSSIBLE CAUSE SOLUTION<br />
Power Light is off<br />
Peculiar Odor<br />
Excessive Noise<br />
White Dust Accumulation<br />
White Dust is forming<br />
on nearby furniture<br />
<strong>Mist</strong> is escaping from<br />
between the sides of the<br />
tank and the base.<br />
• Unit is not plugged in<br />
• No power at unit<br />
• If new unit<br />
• If unit is in use, the odor<br />
may be a dirty tank or old<br />
tank water<br />
• Unit is not level<br />
• Low water level<br />
• Hard water used<br />
• Demineralization Cartridge<br />
needs replacement<br />
• Hard water will deposit<br />
a certain amout of dust.<br />
Dust in the air settles<br />
because of the added<br />
humidity in the room<br />
• <strong>Ultrasonic</strong> Nebulizer cover<br />
is not securely closed<br />
(Figure 16).<br />
• Plug unit in<br />
• Press the POWER button<br />
to turn the power on<br />
• Check circuits, fuses, try a<br />
different outlet<br />
• Open the water tank cap<br />
and keep it in a shady and<br />
cool place for 12 hours<br />
• Empty the old water,<br />
clean the tank and fill<br />
with clean water<br />
• Place unit on a flat,<br />
even surface<br />
• Check the water level. Refill<br />
the tank if the water is low<br />
• Use distilled water and a<br />
Demineralization Cartridge<br />
• Replace Demineralization<br />
Cartridge<br />
• Use distilled water and a<br />
Demineralization Cartridge<br />
• Replace Demineralization<br />
Cartridge<br />
• Remove water tank and<br />
make sure <strong>Ultrasonic</strong><br />
Nebulizer is securely and<br />
tightly closed (Figure 17).<br />
Fig.16<br />
Fig.17<br />
12 13
Mail To:<br />
HoMedics Service Center<br />
Dept. 168, Suite 3<br />
43155 West Nine Mile Rd<br />
Novi, MI 48375<br />
e-mail:<br />
cservice@homedics.<strong>com</strong><br />
LIMITED ONE YEAR WARRANTY<br />
HoMedics sells its products with the intent that they are free of defects in manufacture and<br />
workmanship for a period of one year from the date of original purchase, except as noted below.<br />
HoMedics warrants that its products will be free of defects in material and workmanship under normal<br />
use and service. This warranty extends only to consumers and does not extend to Retailers.<br />
To obtain warranty service on your HoMedics product, mail the product and your dated sales receipt<br />
(as proof of purchase), postpaid, to the following address:<br />
HoMedics Service Center<br />
Dept. 168, Suite 3<br />
43155 West Nine Mile Rd<br />
Novi, MI 48375<br />
No COD’s will be accepted.<br />
HoMedics does not authorize anyone, including, but not limited to, Retailers, the subsequent<br />
consumer purchaser of the product from a Retailer or remote purchasers, to obligate HoMedics in<br />
any way beyond the terms set forth herein. This warranty does not cover damage caused by misuse<br />
or abuse; accident; the attachment of any unauthorized accessory; alteration to the product; improper<br />
installation; unauthorized repairs or modifications; improper use of electrical/power supply; loss<br />
of power; dropped product; malfunction or damage of an operating part from failure to provide<br />
manufacturer’s re<strong>com</strong>mended maintenance; transportation damage; theft; neglect; vandalism; or<br />
environmental conditions; loss of use during the period the product is at a repair facility or otherwise<br />
awaiting parts or repair; or any other conditions whatsoever that are beyond the control of HoMedics.<br />
This warranty is effective only if the product is purchased and operated in the country in which the<br />
product is purchased. A product that requires modifications or adoption to enable it to operate in any<br />
other country than the country for which it was designed, manufactured, approved and/or authorized,<br />
or repair of products damaged by these modifications is not covered under this warranty.<br />
THE WARRANTY PROVIDED HEREIN SHALL BE THE SOLE AND EXCLUSIVE WARRANTY. THERE<br />
SHALL BE NO OTHER WARRANTIES EXPRESS OR IMPLIED INCLUDING ANY IMPLIED WARRANTY<br />
OF MERCHANTABILITY OR FiTNESS OR ANY OTHER OBLIGATION ON THE PART OF THE COMPANY<br />
WITH RESPECT TO PRODUCTS COVERED BY THIS WARRANTY. HOMEDICS SHALL HAVE NO<br />
LIABILITY FOR ANY INCIDENTAL, CONSEQUENTIAL OR SPECIAL DAMAGES. IN NO EVENT SHALL<br />
THIS WARRANTY REQUIRE MORE THAN THE REPAIR OR REPLACEMENT OF ANY PART OR PARTS<br />
WHICH ARE FOUND TO BE DEFECTIVE WITHIN THE EFFECTIVE PERIOD OF THE WARRANTY.<br />
NO REFUNDS WILL BE GIVEN. IF REPLACEMENT PARTS FOR DEFECTIVE MATERIALS ARE NOT<br />
AVAILABLE, HOMEDICS RESERVES THE RIGHT TO MAKE PRODUCT SUBSTITUTIONS IN LIEU OF<br />
REPAIR OR REPLACEMENT.<br />
This warranty does not extend to the purchase of opened, used, repaired, repackaged and/or resealed<br />
products, including but not limited to sale of such products on Internet auction sites and/or sales of<br />
such products by surplus or bulk resellers. Any and all warranties or guarantees shall immediately<br />
cease and terminate as to any products or parts thereof which are repaired, replaced, altered, or<br />
modified, without the prior express and written consent of HoMedics.<br />
This warranty provides you with specific legal rights. You may have additional rights which may vary<br />
from country to country. Because of individual country regulations, some of the above limitations and<br />
exclusions may not apply to you.<br />
For more information regarding our product line in the USA, please visit: www.homedics.<strong>com</strong><br />
© 2003-2010 HoMedics, Inc. and its affiliated <strong>com</strong>panies, all rights reserved. HoMedics ® is a registered trademark<br />
of HoMedics, Inc. and its affiliated <strong>com</strong>panies. All rights reserved.<br />
IB-HUMWM75A<br />
Registre<br />
Tómese un momento ahora<br />
su producto en:<br />
www.homedics.<strong>com</strong>/register<br />
Su valioso aporte sobre este<br />
producto nos ayudará a<br />
crear los productos que<br />
desee en el futuro.<br />
Humidificador ultrasónico<br />
de niebla fría y caliente<br />
Manual de instrucciones<br />
e información de garantía<br />
HUM-WM75
IMPORTANTES INSTRUCCIONES DE SEGURIDAD:<br />
CUANDO UTILICE PRODUCTOS ELÉCTRICOS, ESPECIALMENTE CUANDO<br />
HAY NIÑOS PRESENTES, SIEMPRE SE DEBEN CUMPLIR CIERTAS<br />
PRECAUCIONES BÁSICAS DE SEGURIDAD, INCLUYENDO LO SIGUIENTE:<br />
LEA TODAS LAS INSTRUCCIONES ANTES DE USAR<br />
PELIGRO – PARA REDUCIR EL RIESGO DE CHOQUE ELÉCTRICO:<br />
• Siempre desenchufe el artefacto del tomacorriente, inmediatamente después de<br />
usarlo y antes de limpiarlo.<br />
• NO intente tomar un artefacto que haya caído al agua. Desenchúfelo de inmediato.<br />
• NO lo use mientras toma un baño o se ducha.<br />
• NO coloque ni guarde el artefacto en un lugar donde pueda caerse o ser tirado<br />
hacia una tina o pileta.<br />
• NO lo coloque ni lo deje caer en agua ni en ningún otro líquido.<br />
• NUNCA use alfileres ni otros sujetadores metálicos con este artefacto.<br />
• Manténgalo seco. NO lo haga funcionar si está mojado o húmedo.<br />
• NO use agua a una temperatura superior a los 86º Fahrenheit (30º C).<br />
ADVERTENCIA – PARA REDUCIR EL RIESGO DE QUEMADURAS,<br />
CHOQUE ELÉCTRICO, INCENDIO O LESIONES A LAS PERSONAS:<br />
• Un artefacto nunca debe ser dejado sin atención cuando está enchufado.<br />
Desenchúfelo del tomacorriente cuando no lo esté usando y antes de colocar o<br />
quitar piezas o accesorios.<br />
• Es necesaria una supervisión estricta cuando lo usan niños o personas inválidas o<br />
incapacitadas o cuando está próximo a ellos.<br />
• Utilice este artefacto sólo para el uso para el cual fue diseñado y <strong>com</strong>o se describe<br />
en este manual.<br />
• NUNCA haga funcionar este artefacto si tiene el cable o enchufe dañado, si no<br />
está funcionando adecuadamente, si se cayó o se dañó o si se dejó caer al agua.<br />
Envíelo al Centro de devoluciones de productos de HoMedic para que lo examinen<br />
y lo reparen.<br />
• Mantenga el cable alejado de superficies calientes.<br />
• NUNCA lo deje caer ni inserte ningún objeto en ninguna abertura.<br />
• NO lo haga funcionar donde se utilizan productos de rociado por aerosol ni donde<br />
se está administrando oxígeno.<br />
• Siempre coloque el humidificador en una superficie firme, plana y nivelada.<br />
• Sostenga el tanque de agua firmemente con ambas manos cuando cargue un<br />
tanque de agua lleno.<br />
• NUNCA use el humidificador en un ambiente en el que haya gases explosivos.<br />
• NO coloque el humidificador cerca de fuentes de calor, <strong>com</strong>o una estufa, y no<br />
exponga el humidificador a la luz solar directa.<br />
• NO lleve este artefacto tomado del cable de corriente, ni use el cable <strong>com</strong>o manija.<br />
• Para desconectar, coloque todos los controles en la posición “OFF” (apagado) y<br />
luego quite el enchufe del tomacorriente.<br />
• Este artefacto está diseñado únicamente para uso personal, no profesional.<br />
• NO lo use en exteriores. Sólo para uso en interiores.<br />
• NO llene en exceso con agua.<br />
GUARDE ESTAS INSTRUCCIONES<br />
PRECAUCIÓN – SÍRVASE LEER TODAS LAS INSTRUCCIONES CON<br />
ATENCIÓN ANTES DE PONER EN FUNCIONAMIENTO.<br />
• Nunca cubra el artefacto mientras esté en funcionamiento.<br />
• Siempre mantenga el cable alejado de llamas y temperaturas altas.<br />
• Realice un mantenimiento frecuente al nebulizador ultrasónico.<br />
• Evite el contacto del detergente con su boca y ojos. Si hay contacto, lave<br />
inmediatamente con agua limpia. Si fuera grave, póngase en contacto con el control<br />
de envenenamientos o procure tratamiento médico.<br />
• Nunca use un detergente que no esté re<strong>com</strong>endado por el fabricante para limpiar el<br />
nebulizador ultrasónico.<br />
• Nunca frote el nebulizador ultrasónico con un objeto duro para limpiarlo.<br />
16 17
Funcionamiento y mantenimiento<br />
• No repare ni ajuste la unidad. El servicio debe ser realizado por un profesional o por<br />
personal calificado.<br />
• No haga funcionar ningún artefacto con un cable o enchufe envejecido, anudado o<br />
dañado; el reemplazo debe realizarlo el fabricante, el centro de servicio o personal<br />
profesional calificado.<br />
• Deje de usarlo si hay ruido u olor inusuales. El servicio debe realizarlo únicamente<br />
personal calificado.<br />
• El humidificador debe estar desenchufado cuando no se utilice por un largo<br />
período de tiempo.<br />
• No toque el agua dentro de la unidad principal o las piezas dentro del agua cuando<br />
la unidad esté encendida.<br />
• Nunca haga funcionar la unidad sin agua dentro del tanque. Use solamente agua<br />
dentro de los tanques.<br />
• Nunca agregue ningún aditivo al agua que no sea producido o no esté bajo la<br />
supervisión del fabricante.<br />
• No lave, ajuste ni mueva el humidificador sin primero desenchufar la unidad de su<br />
tomacorriente.<br />
• Mantenga el artefacto fuera del alcance de los niños. No permita que los niños<br />
usen el artefacto sin supervisión.<br />
Características exclusivas y especificaciones<br />
Tecnología ultrasónica<br />
Este humidificador usa tecnología ultrasónica de alta frecuencia para convertir<br />
el agua en 1 a 5 millones de súper partículas que se dispersan en el aire de<br />
forma pareja. Estas partículas luego se <strong>com</strong>binan con los iones generados por el<br />
humidificador para humedecer el aire.<br />
Cabezal oscilante<br />
El humidificador cuenta con una boquilla motorizada que oscila 120º. La cabeza<br />
oscilante también puede detenerse en cualquier punto del ciclo de oscilación para<br />
apuntar la niebla hacia una dirección específica.<br />
Opción de niebla caliente o fría<br />
Elija la niebla caliente o fría para una <strong>com</strong>odidad personalizada.<br />
Protección de apagado automático<br />
Cuando el tanque esté vacío, la unidad se apagará automáticamente.<br />
Protección contra sobrecalentamiento<br />
Este humidificador está equipado con un fusible no borrable en caso de<br />
recalentamiento. Si el fusible no borrable se ha activado, la operación no se puede<br />
reanudar. El fusible deberá ser sustituido por un personal de servicio autorizado.<br />
Nebulizador ultrasónico<br />
El humidificador utiliza técnicas de rociado especiales y el nebulizador ultrasónico es<br />
fácil de limpiar para un uso de por vida.<br />
Voltaje<br />
120V / 60Hz<br />
Vatios<br />
105<br />
Capacidad de tanque<br />
1.4 gallon – 5.11 liter<br />
18 19
Humidificador ultrasónico de niebla fría y caliente<br />
Oscillating Head &<br />
Nozzle<br />
Botón ON/OFF<br />
(encendido/apagado)<br />
de la oscilación<br />
Botón de disminución<br />
de niebla<br />
HEAT<br />
COOL<br />
Botón de niebla<br />
caliente/fría<br />
Botón para el aumento<br />
de la niebla<br />
Control Panel<br />
Modo de uso<br />
PRECAUCIÓN: este artefacto tiene un enchufe polarizado (una paleta<br />
es más ancha que la otra). Para reducir el riesgo de descargas, este<br />
enchufe está diseñado para calzar de una sola forma en un tomacorriente<br />
polarizado. Si el enchufe no encaja <strong>com</strong>pletamente en el tomacorriente,<br />
invierta el enchufe. Si aún así no encaja, póngase en contacto con un<br />
electricista calificado.<br />
NO intente destruir esta característica de seguridad. Hacerlo podría tener<br />
HEAT<br />
COOL<br />
Fig.1<br />
Anillo de luz indicador<br />
de niebla caliente/fría<br />
Perilla de encendido<br />
Enchufe la unidad en un tomacorriente de 120 voltios de CA. Presione el botón<br />
“POWER” ( ) para encender la unidad.<br />
ATENCIÓN: Cuando el agua en el tanque es casi vacía, el poder apagará para<br />
indicar al usuario a rellenar agua.<br />
Aumento y disminución de niebla<br />
Hay 7 niveles de salida de niebla, desde “Lowest” (el más bajo) hasta “Highest” (el<br />
más alto). Para aumentar la salida de niebla, presione el botón MIST INCREASE<br />
( ) hasta que se alcance la salida de niebla deseada. Cuando se haya alcanzado<br />
un máximo de niebla, el anillo indicador parpadeará una vez y parpadeará cada<br />
vez que se presione el botón de aumento de niebla. Para disminuir la niebla,<br />
presione el botón MIST DECREASE ( ) hasta que la misma haya disminuido al<br />
nivel de salida deseado. Cuando se haya alcanzado el máximo de niebla, el anillo<br />
indicador parpadeará una vez y parpadeará cada vez que se presione el botón MIST<br />
DECREASE. (Fig.2)<br />
Control de niebla caliente y frío<br />
El humidificador está equipado con la opción para seleccionar niebla caliente o fría.<br />
Cada vez que se prenda la unidad, esta <strong>com</strong>enzará a producir niebla fría. El anillo<br />
indicador de niebla caliente/fría se encenderá con una luz azul. Para seleccionar<br />
niebla caliente, presione el botón WARM/COOL MIST (niebla caliente/fría). Cuando<br />
se selecciona niebla caliente, el anillo indicador de niebla cambiará de azul a rojo y<br />
se <strong>com</strong>enzará a producir niebla caliente. Para volver a la niebla fría, presione el botón<br />
WARM/COOL MIST (niebla caliente/fría). El anillo indicador cambiará de rojo a azul.<br />
<strong>com</strong>o resultado un peligro de choque eléctrico.<br />
(Fig.2)<br />
20 21<br />
Fig.2<br />
Botón ON/OFF<br />
(encendido/apagado)
Oscilación<br />
Cuando el humidificador está produciendo niebla, presione el botón OSCILLATION<br />
ON/OFF ( ) para encender la función de oscilación motorizada. La boquilla en<br />
la parte superior de la unidad oscilará en un rango de 120º de lado a lado. Para<br />
apuntar la boquilla y la niebla en una dirección fija, presione el botón OSCILLATION<br />
ON/OFF ( ) cuando la boquilla esté en la posición deseada y la misma se detendrá<br />
y dirigirá la niebla únicamente al área deseada. (Fig.2)<br />
NOTA: la función de oscilación no funcionará si la función de humidificación no<br />
está en funcionamiento. La función de oscilación sólo funcionará cuando se esté<br />
produciendo niebla..<br />
Cómo llenar<br />
PRECAUCIÓN: antes de llenar la unidad con agua, apague la corriente y<br />
desenchufe la unidad del tomacorriente.<br />
Fig.3<br />
1. Para quitar el tanque de la unidad, coloque sus<br />
dedos con la palma apuntando hacia arriba en la<br />
parte cóncava del mango del tanque. Presione el<br />
botón de liberación del tanque con su pulgar.<br />
2. Retire el tanque de agua de la base del<br />
humidificador jalando del mango y retire el tanque de<br />
agua de la base levantándolo.<br />
Fig.6<br />
Fig.7<br />
Fig.8<br />
4. Llene el tanque de agua con agua limpia y fresca<br />
(no fría) del grifo. Le re<strong>com</strong>endamos usar agua<br />
destilada si vive en un área con agua dura.<br />
5. Vuelva a colocar la tapa del tanque girándola hacia<br />
la derecha hasta que esté ajustada.<br />
6. Vuelva a instalar el tanque en la base de la unidad.<br />
Asegúrese de que el tanque esté asentado<br />
firmemente.<br />
7. Presione el mango del tanque contra la base del<br />
humidificador. Sabrá que el tanque está trabado<br />
en su lugar cuando el mecanismo de bloqueo y el<br />
botón de liberación del tanque esté en la posición<br />
elevada.<br />
Fig.9<br />
Fig.4<br />
3. Dé vuelta el tanque, quite la tapa del tanque<br />
girándola hacia la izquierda.<br />
Fig.5<br />
22 23
Sobre el polvo blanco<br />
El uso de agua dura con alto contenido de minerales hará que se acumule un<br />
residuo blanco de minerales en las superficies de la habitación cercanas al<br />
humidificador. El residuo mineral se llama <strong>com</strong>únmente “polvo blanco”. Cuanto<br />
más alto es el contenido mineral (más dura es su agua), más posibilidades de que<br />
se forme el polvo blanco. El polvo blanco no es provocado por un defecto en el<br />
humidificador, sino que se debe únicamente a los minerales suspendidos en el<br />
agua.<br />
Cartucho de desmineralización<br />
El cartucho de desmineralización HoMedics ayudará a reducir la probabilidad de<br />
que se forme polvo blanco, un depósito de minerales dejado por el agua dura de su<br />
humidificador. El cartucho debe reemplazarse cada 30 a 40 veces que se llena el<br />
humidificador. Es posible que el cartucho deba ser reemplazado con más frecuencia<br />
si se utilizan aguas muy duras. Cuando sea necesario cambiar el cartucho se<br />
formará polvo blanco alrededor del humidificador. Si aún se forma residuo blanco<br />
alrededor del humidificador después de haber introducido un nuevo cartucho,<br />
asegúrese de que el agua que está usando no sea tratada. Si vive en un área que<br />
tiene agua dura, le re<strong>com</strong>endamos el uso de agua destilada para obtener mejores<br />
resultados del humidificador. No lo utilice con ablandadores de agua.<br />
Fig.10<br />
Fig.11<br />
Installing Instructions<br />
1. Retire el cartucho de desmineralización del envase y remójelo en agua durante<br />
10 minutos.<br />
2. Para quitar el tanque de la unidad, coloque sus dedos con la palma apuntando<br />
hacia arriba en la parte cóncava del mango del tanque. Presione el botón de<br />
liberación del tanque con su pulgar. (Fig.3)<br />
3. Coloque un cartucho de desmineralización en el poste y dentro de la<br />
ranura para el mismo en la base del humidificador. (Fig.11)<br />
4. Vuelva a colocar el tanque sobre la base. (Fig.8)<br />
5. Presione el mango del tanque contra la base del humidificador. Sabrá que el<br />
tanque está trabado en su lugar cuando el mecanismo de bloqueo y el botón<br />
de liberación del tanque esté en la posición elevada. (Fig.9)<br />
Limpieza y cuidado<br />
PRECAUCIÓN: antes de limpiar la unidad, apague la corriente y desenchufe la<br />
unidad del tomacorriente.<br />
24 25<br />
Fig.12<br />
Fig.13<br />
Fig.14<br />
Fig.15<br />
Tank Cleaning<br />
Para quitar el tanque de la unidad, coloque sus dedos<br />
con la palma apuntando hacia arriba en la parte<br />
cóncava del mango del tanque. Presione el botón de<br />
liberación del tanque con su pulgar. Retire el tanque<br />
de agua de la base del humidificador jalando del<br />
mango y retire el tanque de agua de la base levantándolo.<br />
(Fig. 12)<br />
Desenrosque la tapa del tanque, limpie el tanque con<br />
un paño suave y luego lávelo con agua limpia.<br />
(Fig. 13)<br />
Limpieza del nebulizador ultrasónico<br />
Vierta una pequeña cantidad de vinagre blanco sobre<br />
la superficie del nebulizador ultrasónico y remoje<br />
durante 5 minutos. (Fig. 14) Cepíllelo con un cepillo de<br />
cerdas suaves (no incluido).<br />
IMPORTANTE: Asegúrese de limpiar el tubo<br />
negro del nebulizador con el vinagre blanco y<br />
un paño suave, luego enjuague. (Fig. 15)<br />
Limpieza de la superficie<br />
Limpie la superficie de la unidad con un paño suave,<br />
limpio y húmedo.<br />
Re<strong>com</strong>endación:<br />
Limpie el tanque y el nebulizador ultrasónico una vez<br />
cada dos o tres semanas, según las condiciones<br />
del agua. Es posible que los usuarios que viven en<br />
zonas de agua dura necesiten limpiar el tanque del<br />
humidificador y el nebulizador con más frecuencia.
Diagnóstico y resolución de problemas<br />
Problema Posible causa Solución<br />
La luz de encendido está<br />
apagada<br />
Olor extraño<br />
Ruido excesivo<br />
Acumulación de polvo<br />
blanco<br />
Se está formando polvo<br />
blanco en los muebles<br />
cercanos<br />
• La unidad no está<br />
enchufada<br />
• La unidad no recibe energía<br />
• Si la unidad es nueva<br />
• Si la unidad está en uso,<br />
el olor puede provenir de<br />
un tanque sucio o de agua<br />
vieja en el tanque<br />
• La unidad no está nivelada<br />
• Bajo nivel de agua<br />
• Se está usando agua dura<br />
• Se debe cambiar<br />
el cartucho de<br />
desmineralización<br />
• El agua dura depositará<br />
cierta cantidad de polvo. El<br />
polvo en el aire se asienta<br />
debido a la humedad<br />
agregada en la habitación<br />
• Enchufe la unidad<br />
• Presione el botón<br />
POWER (encendido) para<br />
encenderlo<br />
• Verifique los circuitos,<br />
fusibles, pruebe con otro<br />
tomacorrientes<br />
• Abra la tapa del tanque<br />
de agua y déjela en un<br />
lugar fresco y con sombra<br />
durante 12 horas<br />
• Vacíe el agua vieja, limpie el<br />
tanque y llénelo con agua<br />
limpia<br />
• Coloque la unidad en una<br />
superficie plana y nivelada<br />
• Verifique el nivel de agua<br />
Vuelva a llenar el tanque si<br />
el nivel de agua es bajo<br />
• Use agua destilada<br />
y un cartucho de<br />
desmineralización<br />
• Cambie el cartucho de<br />
desmineralización<br />
• Use agua destilada<br />
y un cartucho de<br />
desmineralización<br />
• Cambie el cartucho de<br />
desmineralización<br />
Fig.16<br />
Fig.17<br />
Se escapa vapor de<br />
entre los costados del<br />
tanque y la base.<br />
• La cubierta del nebulizador<br />
ultrasónico no está cerrada<br />
de forma segura<br />
(Figura 16).<br />
• Retire el tanque de agua<br />
y asegúrese de que el<br />
nebulizador ultrasónico esté<br />
cerrado de forma segura y<br />
firme (Figura 17).<br />
26 27