Horizontal Rotisserie - Household Appliance Inc.
Horizontal Rotisserie - Household Appliance Inc.
Horizontal Rotisserie - Household Appliance Inc.
Create successful ePaper yourself
Turn your PDF publications into a flip-book with our unique Google optimized e-Paper software.
2<br />
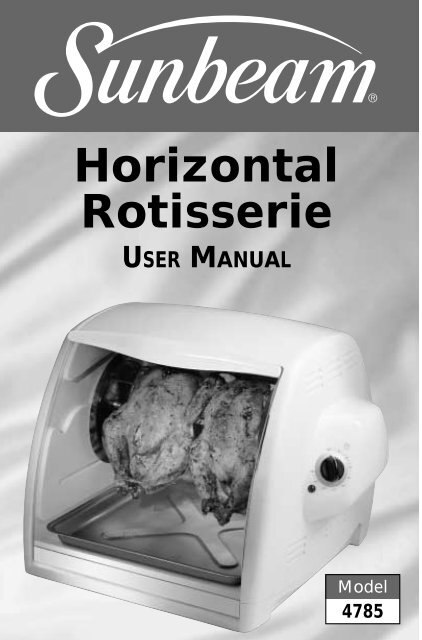
<strong>Horizontal</strong><br />
<strong>Rotisserie</strong><br />
USER MANUAL<br />
Model<br />
4785
CONGRATULATIONS!<br />
Enjoy rotisserie cooking at home in just a few, easy steps<br />
with your new SUNBEAM ®<br />
<strong>Horizontal</strong> <strong>Rotisserie</strong>.<br />
We've done everything we can to make rotisserie cooking<br />
a breeze. Our instruction manual is designed to give you<br />
helpful information on operating your new SUNBEAM ®<br />
<strong>Horizontal</strong> <strong>Rotisserie</strong>.<br />
Your SUNBEAM ®<br />
<strong>Horizontal</strong> <strong>Rotisserie</strong>:<br />
❑<br />
❑<br />
❑<br />
❑<br />
❑<br />
❑<br />
Seals in natural juices while unwanted fats<br />
drip away.<br />
Cooks chicken to be moist and flavorful inside,<br />
crispy and golden brown outside.<br />
Fits two chickens.<br />
Evenly browns and cooks a wide variety of foods<br />
to perfection.<br />
Provides an enclosed cooking environment<br />
with see-through door.<br />
Cleans up easily with dishwasher-safe<br />
components.<br />
3
TABLE OF CONTENTS<br />
Congratulations . . . . . . . . . . . . . . . . . . . Inside Cover<br />
Table of Contents . . . . . . . . . . . . . . . . . . . . . . . . . . 3<br />
Important Safeguards . . . . . . . . . . . . . . . . . . . . . . . 4<br />
Use of Extension Cords . . . . . . . . . . . . . . . . . . . . . . 5<br />
Using Your <strong>Rotisserie</strong> Safely . . . . . . . . . . . . . . . . . . 6<br />
Features of Your <strong>Rotisserie</strong> . . . . . . . . . . . . . . . . . . . 7<br />
Step-by-Step Instructions . . . . . . . . . . . . . . . . . . . . . 8<br />
Using Basket Accessory . . . . . . . . . . . . . . . . . . . . . .12<br />
Cleaning and Caring for Your <strong>Rotisserie</strong> . . . . . . . . .14<br />
Cooking Times . . . . . . . . . . . . . . . . . . . . . . . . . . . . .15<br />
<strong>Rotisserie</strong> Cooking Chart . . . . . . . . . . . . . . . . . . . . .16<br />
Carving Tips . . . . . . . . . . . . . . . . . . . . . . . . . . . . . . .17<br />
Warranty Information . . . . . . . . . . . . . . . . . . . . . . .19<br />
Product Information . . . . . . . . . . . . . . . . . . . . . . . .20<br />
4
IMPORTANT SAFEGUARDS<br />
When using electrical appliances, to reduce the risk of fire, electric shock,<br />
and/or injury to persons, basic safety precautions should always be<br />
followed, including the following:<br />
❑ READ ALL INSTRUCTIONS CAREFULLY.<br />
❑ Do not touch hot surfaces, use the handles or knobs. Always use oven<br />
mitts when handling hot materials. Allow metal parts to cool before<br />
cleaning. Allow the <strong>Rotisserie</strong> to cool thoroughly before inserting<br />
and removing parts.<br />
❑ When the unit is not in use, keep the <strong>Rotisserie</strong> unplugged.<br />
❑ To protect against electric shock, do not place cord, plug or appliance<br />
in water or other liquids.<br />
❑ Close supervision is always necessary when this or any appliance<br />
is used by or near children or incapacitated persons.<br />
❑ Do not allow anything to rest on the power cord. Do not plug in cord<br />
where people may walk or trip on it.<br />
❑ Do not operate this or any appliance with a damaged cord or plug<br />
or after the appliance malfunctions or has been damaged in any<br />
manner. Return appliance to an authorized service facility for<br />
examination, repair or adjustment.<br />
❑ Avoid contact with moving parts.<br />
❑ Do not use attachments that are not recommended by the<br />
manufacturer; they may cause fire, electric shock or injury.<br />
❑ Do not use outdoors or for commercial purposes.<br />
❑ Do not let the cord hang over the edge of a table or counter or touch<br />
hot surfaces. Do not place the appliance on an unsteady<br />
or cloth-covered surface.<br />
❑ Do not place the appliance near a hot gas or electric burner or<br />
in a heated oven.<br />
❑ To unplug, grip plug and pull from wall outlet.<br />
❑ Extreme caution must be used when moving an appliance containing<br />
hot oil or other hot liquids.<br />
❑ Do not use appliance for other than intended use.<br />
❑ Use extreme caution when removing drip pan or disposing of hot<br />
grease.<br />
❑ Do not operate without food inside.<br />
5
❑ Use of extension cords:<br />
A. A short power supply cord is provided to reduce the risk resulting<br />
from becoming entangled in or tripping over a longer cord.<br />
B. Longer extensions cords may be used if care is exercised<br />
in their use.<br />
C. If a longer detachable power-supply cord or extension cord<br />
is used:<br />
1. The marked electrical rating of the cord set or extension cord<br />
should be at least as great as the electrical rating of the<br />
appliance, and<br />
2. The cord should be arranged so that it will not drape over<br />
the countertop or tabletop where it can be pulled on by<br />
children or tripped over unintentionally.<br />
D. If the appliance is of the grounded type, the extension cord<br />
should be a grounding-type 3-wire cord.<br />
❑ Electrical Power: If electric circuit is overloaded with other appliances,<br />
your <strong>Rotisserie</strong> may not operate properly. The <strong>Rotisserie</strong> should be<br />
operated on a separate electrical circuit from other appliances.<br />
Read the following instructions<br />
before using this unit for the first time.<br />
THIS UNIT IS FOR HOUSEHOLD USE ONLY<br />
To reduce the risk of electrical shock, this appliance has a polarized plug<br />
(one blade is wider than the other). This plug fits a polarized outlet only<br />
one way; if the plug does not fit fully into the outlet, reverse the plug.<br />
If it still does not fit, contact a qualified electrician. Do not attempt<br />
to defeat this safety feature.<br />
NO USER SERVICEABLE PARTS<br />
IF UNIT MALFUNCTIONS RETURN TO SERVICE STATION<br />
6<br />
SAVE THESE INSTRUCTIONS
USING YOUR ROTISSERIE SAFELY<br />
BEFORE USE<br />
❑ Read all instructions carefully.<br />
❑ Make sure to remove all foreign matter from the drip tray.<br />
❑ Peel off static label from the door, if present.<br />
❑ Plug the <strong>Rotisserie</strong> into a properly wired outlet.<br />
WHERE TO USE<br />
❑ Use only on a stable, heat resistant surface.<br />
❑ Do not use the <strong>Rotisserie</strong> where it will be exposed to direct sunlight<br />
or other heat sources, such as a stove or oven.<br />
❑ Keep the <strong>Rotisserie</strong> out of the reach of children or incapacitated<br />
persons — it is hot!<br />
❑ Place the unit at least eight inches away from walls.<br />
❑ Do not use under a cabinet or in an enclosed area.<br />
WHILE IN USE<br />
❑ The <strong>Rotisserie</strong> is very hot during operation. Be careful to keep your<br />
hands and face away from the unit.<br />
❑ Do not operate the <strong>Rotisserie</strong> without reflector shield in place.<br />
❑ Do not open the door or remove the cooking basket during<br />
operation.<br />
❑ Do not cover the vents on the top of the <strong>Horizontal</strong> <strong>Rotisserie</strong>.<br />
AFTER USE<br />
❑ Use oven mitts or a pot holder when removing the basket and<br />
the drip pan after cooking.<br />
❑ Make sure to disconnect the power by unplugging the unit.<br />
Allow the <strong>Rotisserie</strong> to cool down before storing.<br />
❑ Read instructions before cleaning. DO NOT IMMERSE THE UNIT<br />
IN WATER. THIS WILL CAUSE ELECTRIC SHOCK AND/OR DAMAGE<br />
TO THE UNIT.<br />
7
Features of Your <strong>Rotisserie</strong><br />
A<br />
B<br />
C<br />
ADJUSTABLE FORKS<br />
D<br />
E<br />
DESCRIPTION OF PARTS<br />
A. <strong>Rotisserie</strong> Unit<br />
B. Drip Tray<br />
C. Food Basket and Cover<br />
D. Heat Reflector<br />
E. Spit Assembly<br />
8
STEP-BY-STEP INSTRUCTIONS<br />
1. Be sure unit is unplugged before starting. Clean all parts and<br />
accessories with warm, soapy water. Rinse well and dry thoroughly.<br />
2. <strong>Rotisserie</strong> should be placed at least 8 inches from walls and should<br />
not be positioned under cabinets.<br />
3. Slide the drip tray into machine at the base of unit.<br />
4. Position the heat reflector by sliding along the inside top towards<br />
the back and placing it behind the heating element. Reflector should<br />
fit neatly into grooves at the back of heating element leading into<br />
the drip tray.<br />
5. DO NOT EXCEED MAXIMUM LOAD WEIGHT OF 12 POUNDS.<br />
Trim any excess fat or loose hangings from meat or poultry before<br />
positioning in <strong>Rotisserie</strong>.<br />
6. Tie the wings and legs of poultry together with plain string or<br />
butcher’s twine to prevent loose pieces from rubbing the inside<br />
of the door, heat shield or heating element as the spit rotates<br />
inside the <strong>Rotisserie</strong>.<br />
9
7. Start with the end of a leg and loop a suitable length of the string<br />
(about 12 inches) or twine and tie-off. Bring the string to the next<br />
leg, pull tightly and wrap once or twice around the end and tie-off.<br />
Next, wrap approximately 36 inches (3 feet) of string or twine around<br />
the body of the bird making sure to secure the wings and legs close<br />
to the body by wrapping crossways so there is a big “X” of string or<br />
twine pulled tightly across the breast. Bring free end of string to the<br />
leg again and tie-off with a secure or double knot. Cut off the excess<br />
string or twine so it does not hang loose. The bird should now be a<br />
securely bound bundle with no loose parts hanging from its body.<br />
8. Open screws on adjustable fork then slide onto spit rod with<br />
pointed ends facing open end of spit rod.<br />
9. If cooking one chicken or turkey, insert spit rod through center<br />
of poultry, starting at the breast area. If cooking two small chickens<br />
or three cornish hens, insert spit rod through side of poultry,<br />
starting between the wing and thigh area.<br />
10. Push food onto spit rod and into fork as close to the fixed wheel<br />
as possible.<br />
11. Place second fork onto spit rod and slide into meat, adjust both forks<br />
making sure that meat or poultry is balanced on the spit. Make sure<br />
that forks are tightly fixed on spit by securing screws tightly by hand.<br />
12. Once your meat or poultry is securely fixed on spit rod, attach other<br />
wheel to end of spit rod.<br />
10
13. To place spit rod into machine, place right hand under meat, use your<br />
left hand to firmly hold detachable wheel, place loaded spit into unit<br />
by matching fixed wheel with gear to rotisserie gear located on the<br />
right side of the unit.<br />
14. If BBQ sauce is desired, it can be applied to the meat or poultry<br />
by gently brushing on with a basting brush after cooking process.<br />
15. Close the glass door. Make sure that the unit is at least 8 inches<br />
from the walls and is not placed under cabinets.<br />
16. Plug unit into outlet and turn unit on by setting timer to the desired<br />
cooking time.<br />
17. Allow the food to rotate one or more times to ensure that nothing<br />
hits the heating element, heat reflector or door. If necessary, turn<br />
timer off and adjust food.<br />
18. If the right side of the spit “jumps” on the gear and does not rotate<br />
properly, the poultry or meat must be set closer to the fixed wheel and<br />
balanced on the spit. Turn unit off, unplug the cord and reposition<br />
food so that it will be weighted evenly on the rotating spit.<br />
Plug cord into outlet and set timer to desired setting.<br />
19. A bell will sound at the end of the cooking cycle indicating that<br />
the machine is off and your food is ready. Unplug the electric cord.<br />
11
20. At the end of the cooking cycle allow the <strong>Rotisserie</strong> to cool down<br />
for a few minutes before removing the hot food. Be sure to wear<br />
protective gloves or oven mitt while handling hot food or a hot<br />
machine. Always assume that both the <strong>Rotisserie</strong> and food are hot<br />
after cooking.<br />
21. Once the unit is cooled down and while wearing protective gloves,<br />
remove drip tray. BE CAREFUL: Contents of drip tray are very hot.<br />
22. With your right hand (in glove or oven mitt) place a dish or platter<br />
below cooked meat, lift platter under meat until you gently lift the<br />
spit rod up and out of grooves and drive gear.<br />
23. Use your left hand (in glove or oven mitt) to stabilize the left<br />
removable wheel as you remove it from the unit.<br />
12
24. Place platter carefully on the counter.<br />
25. Carefully remove detachable wheel located on the left side.<br />
26. Loosen screw on adjustable fork and slide fork out of meat or poultry<br />
and off spit rod. BE CAREFUL : Food may be very hot and screws<br />
may be slippery due to meat’s juices.<br />
27. While holding the fixed wheel, use a fork or gloved hand<br />
to gently push meat or poultry off spit rod onto platter.<br />
28. Disassemble the remaining removable fork from the spit rod.<br />
Wash with warm, soapy water. Rinse all parts and accessories and<br />
dry thoroughly after every use. We suggest that the Heat Reflector<br />
be removed and cleaned only as needed. It is not necessary to clean<br />
after every use.<br />
*Be very careful when handling spit rod and adjustable forks. The ends<br />
are very sharp and can cause serious injury if not handled carefully.<br />
*As with any other high-temperature appliance, some discoloration will<br />
occur after usage and does not indicate any problem with the unit.<br />
USING BASKET ACCESSORY<br />
1. Make sure unit is unplugged before starting and is positioned<br />
at least 8 inches from walls and is not beneath cabinets.<br />
2. Be sure that the basket has been washed and dried before using.<br />
Use warm, soapy water to wash and clean basket. The basket<br />
should be cleaned after each use.<br />
3. Place drip tray into position at the bottom of unit.<br />
4. Release the basket lid by pulling the fastening pins out of<br />
the positioning holes located at both sides of the basket.<br />
13
5. Remove the lid from basket.<br />
6. Place food items into basket being sure that food fits neatly into<br />
basket and that food items cannot slip between basket’s grid.<br />
7. Affix lid by placing the back of the lid into the appropriate groove<br />
located at the back of the basket. The basket is designed so that the<br />
lid will only fit into the back at different levels for varied thicknesses<br />
of food. Press the front of the lid down onto food; be careful not<br />
to damage food within basket.<br />
8. Use one hand to hold lid firmly against food located within the basket,<br />
use other hand to fasten pins in positioning holes located on both<br />
sides of basket. Be sure that lid holds the food firmly in place.<br />
*Note there are various holes to choose from to hold food secure.<br />
9. Turn basket upside down assuring that no loose or small pieces of<br />
food will slip out of basket. It is important that food within basket<br />
cannot fit through grid.<br />
10. Place basket into machine with gears on the right side making sure<br />
that basket is correctly inserted into the unit.<br />
11. Close glass door and plug unit in.<br />
12. Turn on timer to desired cooking time and observe the basket rotate<br />
one or more times to be sure that food is secure and basket is<br />
rotating correctly and that nothing is hitting the door, heating<br />
element or heat shield.<br />
13. After timer has stopped and bell has rung, unplug electric cord<br />
and allow the basket and food several minutes to cool down<br />
before removing.<br />
14
14. While using protective gloves or oven mitts, open glass door and<br />
remove drip tray from unit. (Be very careful: contents of drip tray<br />
are extremely hot.)<br />
15. Position a plate or platter beneath the basket and carefully lift platter<br />
or plate until basket is free from gearing, then carefully remove<br />
platter with basket, securing basket with one hand.<br />
16. Place platter on clean counter, while using heat resistant gloves.<br />
Remove fastening pins at the side of basket. (Be very careful:<br />
food and basket may be extremely hot.) If necessary, use fork<br />
or tongs to assist in removing basket lid as it may be hot.<br />
17. Use a fork or tongs to remove food from basket.<br />
18. Enjoy !<br />
CLEANING AND CARING FOR ROTISSERIE<br />
➢<br />
➢<br />
➢<br />
➢<br />
➢<br />
Be sure to clean <strong>Rotisserie</strong> and accessories before first use.<br />
Make sure no packaging material is caught inside on the<br />
heating element.<br />
After using <strong>Rotisserie</strong>, always allow unit to cool completely<br />
before cleaning.<br />
Do not use any chemicals or solvents for cleaning unit or<br />
accessories. You may damage the unit or protective coating.<br />
Be sure to clean all accessories before using <strong>Rotisserie</strong>.<br />
15
➢<br />
➢<br />
➢<br />
➢<br />
➢<br />
➢<br />
➢<br />
➢<br />
Make sure unit is unplugged before cleaning unit and when loading<br />
and unloading food.<br />
Use warm, soapy water to clean the inside and outside of the unit<br />
and all accessories.<br />
If using a dishwasher to clean accessories, please place items on<br />
top shelf.<br />
You may soak accessories in hot, soapy water if food particles<br />
are hard to remove.<br />
DO NOT IMMERSE THE UNIT OR THE CORD IN WATER.<br />
You may notice some smoke or light odor coming from your unit<br />
when being used for the first time, this is due to the burning off<br />
of a protective coating on the heating element; this is normal.<br />
Some foods may splatter grease or juices while cooking causing<br />
some smoke during normal use. While this is normal, look through<br />
glass door to make sure that spit or food basket is rotating normally.<br />
Food should not touch element, heat reflector or glass door during<br />
operation.<br />
Be sure to keep the Heat Reflector clean and free of cooked-on<br />
foods. Wash thoroughly after cooking foods that splatter.<br />
16<br />
COOKING TIMES<br />
The cooking times provided by this chart are only a guideline to the<br />
APPROXIMATE MINIMUM COOKING TIMES, based on test averages.<br />
Cooking times do vary because of differences in meat, shape, size<br />
and the amount of fat and bone.<br />
When cooking with the SUNBEAM ® <strong>Rotisserie</strong>, use a meat thermometer – it<br />
takes the guesswork out of cooking. A meat thermometer measures the<br />
internal temperature of cooked meat and poultry to assure that a safe<br />
temperature has been reached. By using a meat thermometer, you can<br />
help prevent overcooking and cook foods at a safe temperature.<br />
Use a regular, oven-proof type thermometer which goes into the food at<br />
the beginning of the cooking time and can be easily read. Insert the<br />
point of the thermometer stem at least 2 inches into the thickest part of<br />
the meat, away from bone, fat and gristle. For poultry, insert the<br />
thermometer stem into the inner thigh area, near the breast but not<br />
touching the bone. THE MEAT THERMOMETER MUST NOT TOUCH THE<br />
HEATING ELEMENT WHEN THE BASKET OR SKEWER IS ROTATING.
SUNBEAM ®<br />
HORIZONTAL ROTISSERIE COOKING CHART<br />
TEMPERATURE<br />
APPROXIMATE<br />
FOOD WEIGHT MEAT THERMOMETER COOKING TIME<br />
POULTRY<br />
Chicken, whole 3-1/2 to 4-1/2 lbs. 180°F 20 min./lb.<br />
Chicken, pieces<br />
with bones 2 to 3-1/2 lbs. breast : 170°F; 20 min./lb.<br />
legs and thighs : 180°F<br />
20 min./lb.<br />
boneless 1 to 1-1/2 lbs. breast : 170°F; 30 min./lb.<br />
legs and thighs : 180°F<br />
30 min./lb.<br />
Cornish Hens 2 to 3 hens 180°F 20 min./lb.<br />
Turkey, unstuffed 12 lbs. or under 180°F 20 min./lb.<br />
Turkey Burgers 1 lb. 165°F 30 minutes total<br />
PORK<br />
Boneless Rolled Pork Roast 3-1/2 to 7 lbs. 160°F 25 min./lb.<br />
Pork Tenderloin about 1 lb. 160°F 30 to 40 min. total<br />
Pork Chops<br />
with bones 2 lbs. 160°F 15 min./lb.<br />
boneless 2 lbs. 160°F 15 min./lb.<br />
Spareribs 1-1/2 to 2 lbs. 160°F 30 min./lb.<br />
Boneless Ham Roast 160°F 20 min./lb.<br />
Uncooked Sausage 1 lb. 160°F 25 min./lb.<br />
Cooked Hot Dogs & Sausages 1 lb. 165°F 20 min./lb.<br />
BEEF<br />
Standing Rib Roast 6 to 8 lbs. rare : 145°F 20 min./lb.<br />
medium : 160°F<br />
25 min./lb.<br />
Boneless Rolled Beef Roast rare : 145°F 20 min./lb.<br />
medium : 160°F<br />
25 min./lb.<br />
Steaks 1-1/2 to 2 lb. 1-inch thick rare : 145°F 20 min./lb.<br />
medium : 160°F<br />
25 min./lb.<br />
Hamburgers 1-inch thick medium : 160°F 25 min./lb.<br />
LAMB<br />
Boneless Rolled Lamb Roast rare : 145°F 20 min./lb.<br />
medium : 160°F<br />
25 min./lb.<br />
Lamb Chops rare : 145°F 20 min./lb.<br />
medium : 160°F<br />
25 min./lb.<br />
SEAFOOD – SPRAY BASKET WITH NON-STICK COOKING SPRAY BEFORE PLACING FOOD<br />
Fish Steaks 2 lbs. : 1-inch thick 25 min. total<br />
Fish Filets 1 lb. 20 min. total<br />
OTHER<br />
Baked Potatoes cut in half, placed in basket 45 min. total<br />
Vegetables<br />
sliced 1/2-inch thick,<br />
brushed with oil,<br />
placed in basket<br />
25 min. total<br />
Cooking times given in the chart are based on foods that have already been thawed.<br />
* If timer needs to be set for less than 10 minutes, turn the knob beyond the 10-minute marking, then set.<br />
17
CARVING POULTRY<br />
CARVING TIPS<br />
On a carving board, arrange the chicken or other poultry on its back with<br />
the legs to the right. Remove string or twine used to bind legs and wings<br />
for cooking. Starting at the side facing the carver, cut the leg off body by<br />
grasping the leg with your left hand pulling gently while cutting through<br />
the meat and the joint at the thigh.<br />
Place the leg on the carving board and cut through the joint to sever the<br />
thigh bone from the drumstick. Slice the meat from the leg and thigh,<br />
carving parallel to the bone.<br />
Insert the meat fork into the breast meat to secure the body.<br />
Sever the wing from the body by carving through the joint.<br />
Start carving the breast just above the joint where the wing was<br />
removed. Cut thin slices of white meat, carving upward and cutting<br />
parallel to the breast bone.<br />
CARVING A WHOLE HAM, PORK ROAST OR ROAST LEG OF LAMB<br />
Place a whole ham, pork roast or leg of lamb on the carving board with<br />
the shank end to the right of the carver. For a ham, turn the scored fat<br />
side up. For the leg of lamb, place the roast so that the meaty section<br />
faces away from the carver.<br />
Insert a meat fork into the heavy part of the meat and cut several<br />
lengthwise slices from the less meaty side.<br />
Turn the ham, pork roast or leg of lamb so that it rests upright on the cut<br />
surface. Cut a wedge from the shank end by starting at the base of the<br />
bulge and slicing down to the leg bone. Then, make another cut at an<br />
angle to this, close to the shank end. Lift out the wedge.<br />
Starting at the shank end, cut thin uniform slices down to the leg bone.<br />
CARVING A RIB ROAST<br />
Arrange the roast on a platter or a cutting board with the largest end of<br />
the roast down, and the rib side to your left. The small end of the roast is<br />
nearest the carver. Insert a carving fork between the two top ribs.<br />
Slice across the roast from the fat edge of the rib bone. Free the slice<br />
from the bone using the tip of the knife.<br />
18
NOTES<br />
19
1-YEAR LIMITED WARRANTY<br />
Sunbeam Products, <strong>Inc</strong>. (“Sunbeam”) warrants that for a period of ONE year from<br />
the date of purchase, this product will be free from defects in material and<br />
workmanship. Sunbeam, at its option, will repair or replace this product or any<br />
component of the product found to be defective during this warranty period.<br />
Replacement will be made with a new or remanufactured product or component.<br />
If the product is no longer available, replacement may be made with a similar<br />
product of equal or greater value. This is your exclusive warranty.<br />
This warranty is valid for the original retail purchaser from the date of initial<br />
retail purchase and is not transferable. Keep the original sales receipt. Proof of<br />
purchase is required to obtain warranty performance. Sunbeam dealers, service<br />
centers or retail stores selling Sunbeam products do not have the right to alter,<br />
modify or any way change the terms and conditions of this warranty.<br />
This warranty does not cover normal wear of parts or damage resulting from any<br />
of the following: negligent use or misuse of the product, use on improper voltage<br />
or current, use contrary to the operating instructions, disassembly, repair or alteration<br />
by anyone other than Sunbeam or an Authorized Sunbeam Service Center.<br />
Further, the warranty does not cover Acts of God, such as fire, flood, hurricanes<br />
and tornadoes.<br />
Sunbeam shall not be liable for any incidental or consequential damages caused<br />
by the breach of any express or implied warranty. Except to the extent prohibited<br />
by applicable law, any implied warranty of merchantability or fitness for a<br />
particular purpose is limited in duration to the duration of the above warranty.<br />
Some states, provinces or jurisdictions do not allow the exclusion or limitation<br />
of incidental or consequential damages or limitations on how long an implied<br />
warranty lasts, so the above exclusion or limitations may not apply to you.<br />
This warranty gives you specific legal rights and you may have the rights<br />
that vary by state, province and/or jurisdiction.<br />
How to Obtain Warranty Service<br />
Please, DO NOT RETURN THIS PRODUCT TO THE PLACE OF PURCHASE. Take the<br />
product to an authorized Sunbeam service center. You can find the nearest<br />
Authorized Sunbeam Service Center by calling 1 800 458-8407, or by visiting<br />
our website at www.sunbeam.com. If an Authorized Sunbeam Service Center<br />
is not conveniently located, attach a tag to the product that includes your name,<br />
address, daytime telephone number and description of the problem. <strong>Inc</strong>lude a<br />
copy of the original sales receipt. Carefully package the tagged product with<br />
the sales receipt and send either by UPS or Parcel Post with shipping and<br />
insurance prepaid to the Authorized Sunbeam Service Center address.<br />
20
DO NOT SEND THIS PRODUCT TO THE PLACE OF PURCHASE<br />
For product questions:<br />
Sunbeam Consumer Service<br />
P.O. Box 948389<br />
Maitland, FL 32794-8389<br />
1.800.458.8407<br />
www.sunbeam.com<br />
DO NOT SEND PRODUCT TO THE ABOVE ADDRESS<br />
©2001 Sunbeam Products, <strong>Inc</strong>. All rights reserved.<br />
SUNBEAM ® is a registered trademark of Sunbeam Products, <strong>Inc</strong>.<br />
Distributed by Sunbeam Products, <strong>Inc</strong>.<br />
Boca Raton, FL 33431<br />
Printed in China P.N. 108315
22<br />
Asador<br />
<strong>Horizontal</strong><br />
MANUAL DE INSTRUCCIONES<br />
Modelo<br />
4785
FELICITACIONES!<br />
Disfrute de cocinar asando sus alimentos en casa,<br />
en unos sencillos y fáciles pasos con su nuevo Asador<br />
<strong>Horizontal</strong> SUNBEAM ® .<br />
Hemos hecho todo lo posible para hacer que la utilización<br />
de su Asador sea sencilla y rápida. Nuestro manual de<br />
instrucciones está diseñado para darle información útil<br />
y consejos.<br />
Su Asador <strong>Horizontal</strong> SUNBEAM ®<br />
hace lo siguiente:<br />
❑ Sella en el interior los jugos naturales mientras<br />
que escurre las grasas no deseadas.<br />
❑ Cocina el pollo haciéndolo jugoso y sabroso<br />
por dentro, crujiente y dorado por fuera.<br />
❑ En esta unidad cabrán dos pollos.<br />
❑ Dora uniformemente y cocina una amplia variedad<br />
de alimentos a la perfección.<br />
❑ Provee un ambiente incluido de cocinar que permite<br />
la visibilidad a través de la puerta deslizable.<br />
❑ Se limpia fácilmente, sus partes y accesorios pueden<br />
lavarse en lavadora de platos.<br />
23
ÍNDICE<br />
Felicitaciones . . . . . . . . . . . . . . . . . . Cubierta Interior<br />
Índice . . . . . . . . . . . . . . . . . . . . . . . . . . . . . . . . . . . . 3<br />
Precauciones Importantes . . . . . . . . . . . . . . . . . . . . 4<br />
Utilización de Cables de Extensión . . . . . . . . . . . . . 5<br />
Utilizando Su Asador con Seguridad . . . . . . . . . . . . 6<br />
Características de Su Asador . . . . . . . . . . . . . . . . . . 7<br />
Instrucciones Paso a Paso . . . . . . . . . . . . . . . . . . . . . 8<br />
Usando la Canasta . . . . . . . . . . . . . . . . . . . . . . . . . .12<br />
Limpieza y Cuidado del Asador . . . . . . . . . . . . . . . .14<br />
Tiempos de Cocción . . . . . . . . . . . . . . . . . . . . . . . . .15<br />
Cuadro de Cocción del Asador . . . . . . . . . . . . . . . .16<br />
Consejos para Rebanar y Cortar Carnes . . . . . . . . . .17<br />
Información de la Garantía . . . . . . . . . . . . . . . . . . .19<br />
Información Sobre los Productos . . . . . . . . . . . . . . .20<br />
24
PRECAUCIONES IMPORTANTES<br />
Cuando use aparatos eléctricos, para reducir el riesgo de incendio, electrocución<br />
y/o lesiones a personas algunas precauciones de seguridad básicas siempre deben<br />
de seguirse, incluyendo las siguientes:<br />
❑ LEA TODAS LAS INSTRUCCIONES CUIDADOSAMENTE.<br />
❑ No toque las superficies calientes. Use las manijas o las perillas. Siempre use<br />
guantes de cocina cuando maneje materiales calientes. Permita que las<br />
partes de metal se enfríen antes de limpiarlas. Permita que el Asador se<br />
enfríe completamente antes de insertar y remover piezas.<br />
❑ Cuando la unidad no se encuentre en uso, desconecte el Asador.<br />
❑ Para protegerse contra riesgo de descargas eléctricas, no sumerja el aparato,<br />
el cordón o la clavija en agua o en otros líquidos.<br />
❑ Supervisión cercana es necesaria cuando éste o cualquier otro aparato<br />
electrodoméstico sea usado por o cerca de niños o personas incapacitadas.<br />
❑ No permita que nada esté colocado sobre el cordón eléctrico. No conecte el<br />
cordón donde pueda ser pisado o donde alguien pueda tropezarse con él.<br />
❑ No opere ningún aparato electrodoméstico si el cordón o la clavija están<br />
dañados o después de que el aparato ha funcionado inadecuadamente, se<br />
ha caído o tenga algún daño cualquiera que éste sea. Regrese el aparato a<br />
una estación de servicio autorizada para su revisión, reparación o ajuste.<br />
❑ Evite el contacto con las partes en movimiento.<br />
❑ No use accesorios que no sean recomendados por el fabricante del aparato;<br />
ya que pueden causar incendios, descargas eléctricas o lesiones personales.<br />
❑ No se use en exteriores o para propósitos comerciales.<br />
❑ No permita que el cable eléctrico cuelgue del borde del mostrador o de<br />
la mesa ni toque superficies calientes. No coloque el electrodoméstico<br />
en una superficie inestable o cubierta por alguna tela o mantel.<br />
❑ No coloque el electrodoméstico sobre o cerca de la flama de una estufa<br />
de gas, eléctrica, dentro de un horno caliente.<br />
❑ Para desconectar, tome firmemente el enchufe y retírelo de la toma<br />
de corriente.<br />
❑ Debe tener extremo cuidado cuando mueva un aparato que contiene aceite<br />
caliente o cualquier otro líquido caliente.<br />
❑ No use el aparato para otra cosa que para lo que fue diseñado.<br />
❑ Tenga mucho cuidado cuando remueva la bandeja de goteo y deseche<br />
la grasa caliente.<br />
❑ No ponga en operación el aparato cuando está vacío.<br />
25
❑ Utilización de cables de extensión.<br />
A. El aparato está equipado con un cordón eléctrico corto como<br />
medida de seguridad para reducir el riesgo de tropezar, tirar<br />
o enredarse con un cordón más largo.<br />
B. Puede usar cables de extensión si se observan las precauciones<br />
adecuadas.<br />
C. Si se utilizan cables eléctricos más largos o cables de extensión:<br />
1. La capacidad nominal eléctrica del cable de extensión debe ser<br />
igual o mayor que el que se muestra en el electrodoméstico y<br />
2. Coloque el cable de extensión de manera que no cuelgue<br />
sobre el borde del mostrador o mesa donde pueda tirarlo<br />
un niño o pueda tropezar con él accidentalmente.<br />
D. Si el electrodoméstico tiene toma eléctrica de tierra, el cable de<br />
extensión deberá de ser del tipo de 3 alambres con toma eléctrica<br />
de tierra.<br />
❑ Corriente Eléctrica: Si el circuito eléctrico es sobrecargado con otros<br />
aparatos, su Asador <strong>Horizontal</strong> no operará adecuadamente.<br />
El Asador <strong>Horizontal</strong> debe de ser operado en un circuito eléctrico<br />
separado de otros aparatos.<br />
Lea las instrucciones siguientes antes de usar<br />
esta unidad para la primera vez.<br />
ESTA UNIDAD ES SÓLO PARA USO DOMÉSTICO<br />
Para reducir el riesgo de descargas eléctricas, este aparato cuenta con<br />
una clavija polarizada (una cuchilla es más ancha que otra). Como medida<br />
de seguridad, esta clavija entra sólo de una manera en un enchufe<br />
polarizado. Si la clavija no encaja en el enchufe simplemente colóquela<br />
al revés. Si aún así no encaja llame a un electricista calificado.<br />
De ninguna manera intente modificar esta medida de seguridad.<br />
EL USUARIO NO PUEDE DAR MANTENIMIENTO<br />
REGRESE EL APARATO A LA ESTACIÓN DE SERVICIO<br />
26<br />
CONSERVE ESTAS INSTRUCCIONES
UTILIZANDO SU ASADOR CON SEGURIDAD<br />
ANTES DE USAR<br />
❑ Lea todas las instrucciones cuidadosamente.<br />
❑ Asegúrese de remover cualquier material ajeno de la bandeja<br />
de goteo.<br />
❑ Despegue la etiqueta estática de la puerta si está presente.<br />
❑ Conecte el Asador en una toma de corriente adecuada.<br />
DONDE USAR<br />
❑ Use solamente en una superficie estable y resistente al calor.<br />
❑ No use el Asador donde esté expuesto a los rayos solares<br />
o alguna otra fuente de calor, como un horno o estufa.<br />
❑ Mantenga el Asador fuera del alcance de niños o personas<br />
incapacitadas ¡Está Caliente!<br />
❑ Coloque la unidad al menos 20 cm alejada de las paredes.<br />
❑ No se use bajo algún mueble de cocina o en una área cerrada.<br />
MIENTRAS SE USA<br />
❑ El Asador se pone muy caliente durante su operación. Tenga cuidado<br />
de mantener las manos y cara alejadas de la unidad.<br />
❑ No use el Asador sin el escudo reflector en su lugar.<br />
❑ No abra la puerta o remueva la canasta de cocción durante<br />
la operación.<br />
❑ No cubra las ventilas localizadas en la parte superior del Asador.<br />
DESPUÉS DE USAR<br />
❑ Use guantes o un utensilio de cocina cuando remueva la canasta<br />
y la bandeja de goteo después de cocinar.<br />
❑ Asegúrese de desconectar la unidad. Permita que el Asador se enfríe<br />
antes de almacenar.<br />
❑ Lea las instrucciones antes de limpiar. NO SUMERJA LA UNIDAD<br />
EN AGUA. ESTO CAUSARÁ DESCARGAS ELÉCTRICAS Y/O DAÑOS<br />
A LA UNIDAD<br />
27
Características de Su Asador<br />
A<br />
B<br />
C<br />
TRINCHES AJUSTABLES<br />
D<br />
E<br />
DESCRIPCIÓN DE LAS PARTES<br />
A. Asador<br />
B. Bandeja para Goteo<br />
C. Canasta para Alimentos y Tapa<br />
D. Reflector de Calor<br />
E. Ensamble de la Varilla<br />
28
INSTRUCCIONES PASO A PASO<br />
1. Asegúrese de que la unidad esté desconectada antes de iniciar.<br />
Lave todas las partes y accesorios del asador con agua tibia y<br />
jabonosa. Enjuáguelas y séquelas bien.<br />
2. El asador se debe colocar por lo menos de 8 pulgadas de las paredes<br />
y no se debe colocar bajo algún mueble de cocina.<br />
3. Deslice la bandeja de goteo dentro de la máquina en la base de la unidad.<br />
4. Coloque el reflector de calor deslizándolo a lo largo de la parte<br />
superior interna y hacia la parte trasera. Colóquelo detrás del<br />
elemento calefactor leading into the drip tray.<br />
5. NO EXCEDA EL PESO DE LA CARGA MÁXIMA DE 12 LIBRAS.<br />
Elimine cualquier exceso de grasa o trozos de carne que cuelguen<br />
de ésta o de las aves que vaya a cocinar, antes de colocarlas dentro<br />
del Asador.<br />
6. Utilizando hilo regular, cuerda de carnicero, o hasta hilo dental, ate<br />
las alas y las patas de las aves para evitar que las piezas sueltas rocen<br />
el interior de la puerta, el escudo calefactor o el elemento calefactor<br />
cuando la varilla gire dentro del Asador.<br />
29
7. Inicie esta operación enrollando el extremo de una pata del ave y átela.<br />
Lleve la cuerda a la otra pata, jale fuertemente y enrolle una vez o<br />
dos veces alrededor del extremo de la pata y átela. A continuación,<br />
enrolle aproximadamente 36 pulgadas (3 pies) de hilo o cuerda de<br />
carnicero alrededor del cuerpo del ave. En seguida, enrolle la cuerda<br />
o el hilo alrededor del cuerpo del ave, asegurándose de sujetar las<br />
alas y las patas cerca del cuerpo del animal, y cruce el hilo de manera<br />
que forme una “X” grande sobre la pechuga. Lleve el extremo libre<br />
de la cuerda o hilo nuevamente hacia la pata y átela de manera que<br />
el hilo no quede suelto. Ahora el ave ha quedado como un pequeño<br />
bulto atado correctamente sin ninguna parte suelta en la base de<br />
la unidad.<br />
8. Abra los tornillos sobre el trinche ajustable y después deslice sobre<br />
la varilla con los extremos en punta colocados el extremo abierto<br />
de la varilla.<br />
9. Si cocina un pollo o un pavo, inserte la varilla a través del centro del<br />
ave, iniciando en el área de la pechuga. Si cocina dos pollos pequeños<br />
o tres cordonices, inserte la varilla a los lados del pollo, iniciando por<br />
el área de las alas y los muslos.<br />
10. Presione los alimentos dentro de la varilla y del trinche.<br />
11. Coloque el segundo trinche en la varilla y deslícelo introduciéndolo<br />
en la carne, ajuste ambos trinches para asegurarse de que la carne o<br />
ave esté centrada a lo largo de la varilla. Verifique que los trinches<br />
estén fijos en la varilla, apretando manualmente los tornillos.<br />
12. Una vez que la carne o ave esté centrada y colocada firmemente en la<br />
varilla, ponga la otra rueda al extremo de la varilla.<br />
30
13. Para colocar la varilla dentro de la máquina, coloque la mano derecha<br />
debajo de la carne, use su mano izquierda para sostener firmemente<br />
la rueda removible, coloque la varilla cargada dentro de la unidad al<br />
emparejar la rueda fija con engrane, al engrane del Asador localizado<br />
en el lado derecho de la unidad.<br />
14. Si desea usar salsa BBQ o algún otro sazonador, puede aplicarlo<br />
antes del proceso de cocción a la carne o al ave, untándola ligeramente<br />
con una brocha o pincel.<br />
15. Cierre la puerta de vidrio. Verifique que la unidad esté colocada<br />
a por lo menos 8 pulgadas de las paredes y que no esté colocada<br />
debajo de los gabinetes.<br />
16. Enchufe la unidad a una toma de corriente eléctrica y enciéndala<br />
ajustando el cronómetro en el tiempo de cocción deseado.<br />
17. Permita que los alimentos giren una o más veces para revisar que<br />
no estén en contacto con el elemento calefactor, el reflector de<br />
calor o la puerta. Si es necesario, apague el cronómetro y ajuste<br />
nuevamente los alimentos.<br />
18. Si el lado derecho de la varilla "salta" sobre el engrane y no gira<br />
correctamente, la carne o el ave deben colocarse más cerca de la<br />
rueda fija y deben estar balanceados sobre la varilla. Apague la<br />
unidad, desconecte el cable y coloque nuevamente los alimentos para<br />
que el peso quede repartido de manera uniforme sobre la varilla<br />
giratoria. Conecte la unidad una toma de corriente eléctrica y<br />
encienda la unidad al fijar el reloj en el tiempo de cocción deseado.<br />
19. Escuchará una campana al final del ciclo de cocción, ésta indica<br />
que la máquina está apagada y que sus alimentos están listos.<br />
Desconecte el cordón eléctrico de la toma de corriente.<br />
31
20. Al final del ciclo de cocción, permita que la máquina se enfríe durante<br />
algunos minutos antes de remover los alimentos calientes. Asegúrese de<br />
tener puestos guantes protectores o un guante para hornear mientras<br />
maneja los alimentos o la máquina caliente. Siempre asuma que tanto<br />
el aparato como la comida están muy calientes después de cocinar.<br />
21. Una vez que la unidad se ha enfriado y mientras todavía tiene puestos<br />
los guantes protectores, remueva la bandeja de goteo. TENGA CUIDADO:<br />
Los contenidos en la bandeja de goteo están muy calientes.<br />
22. Con su mano izquierda (usando un guante protector) coloque un<br />
platón debajo de la carne que ha cocinado, levante el platón debajo<br />
de la carne hasta que lentamente saque la varilla fuera de las ranuras<br />
y del engrane.<br />
23. Use su mano derecha (siempre usando un guante protector)<br />
para estabilizar la rueda derecha removible a medida que usted<br />
la quita de la unidad.<br />
32
24. Coloque el platón cuidadosamente sobre la mesa o sobre el mostrador.<br />
25. Cuidadosamente, saque la rueda removible localizada en el lado derecho.<br />
26. Afloje el tornillo del trinche ajustable y deslice el trinche fuera de<br />
la carne o del ave y sáquelo de la varilla. TENGA MUCHO CUIDADO:<br />
Los alimentos pueden estar muy calientes y los tornillos pueden<br />
estar resbalosos debido a los jugos de la carne.<br />
27. Mientras sostiene la rueda fija, use un tenedor o su mano usando<br />
un guante, para empujar la carne o el ave fuera de la varilla<br />
y colocarla sobre el platón.<br />
28. Desarme el otro trinche removible de la varilla. Lávelos con agua tibia<br />
y jabonosa. Enjuague todas las partes y accesorios. Séquelos muy bien<br />
después de cada uso. Sugerimos que remueva la barra del reflector<br />
de calor y la limpie solamente cuando sea absolutamente necesario.<br />
No es necesario limpiarla después de cada uso.<br />
*Tenga muy cuidado al manejar la barra de la escupida y forkes ajustables.<br />
Los extremos son muy sostenidos y pueden causar lesión seria si no están<br />
manejados cuidadosamente.<br />
*Como con cualquier otro aparato de temperaturas elevadas, puede ocurrir<br />
alguna decoloración después del uso, pero esto no indica que exista<br />
ningún problema con el aparato.<br />
USANDO LA CANASTA<br />
1. Verifique que la unidad esté desconectada antes de iniciar, de que<br />
esté colocada a por lo menos 8 pulgadas de las paredes y que no se<br />
encuentre debajo de los gabinetes.<br />
2. Revise que la canasta haya sido lavada y secada antes de utilizar.<br />
Lávela con agua tibia y jabonosa. La canasta debe limpiarse después<br />
de cada uso.<br />
3. Coloque la bandeja de goteo en su lugar, en la parte inferior<br />
de la unidad.<br />
4. Libere la tapa de la canasta al jalar los seguros afuera de los orificios<br />
de colocación localizados en ambos lados de la canasta.<br />
33
5. Saque la tapa de la canasta.<br />
6. Coloque los alimentos dentro de la canasta verificando que los alimentos<br />
queden correctamente colocados y de que no se caerán por la rejilla<br />
de la canasta.<br />
7. Coloque la tapa al poner la parte posterior de la tapa dentro de la<br />
ranura superior localizada en el posterior de la canasta. La canasta<br />
está diseñada de manera que la tapa solamente pueda colocarse en<br />
el posterior a diferentes niveles para alimentos de varios gruesos.<br />
Presione la parte frontal de la tapa hacia abajo sobre los alimentos;<br />
tenga cuidado de no dañar los alimentos que se encuentran dentro<br />
de la canasta.<br />
8. Use una mano para sostener la tapa firmemente contra los alimentos<br />
localizados dentro de la canasta, use la otra mano para sujetar los<br />
seguros en los orificios de colocación localizados en ambos lados de<br />
la canasta. Revise que la tapa mantenga los alimentos firmemente<br />
en su lugar. *Note que hay varios orificios a elegir para colocar<br />
los alimentos.<br />
9. Voltee la canasta asegurándose de que ninguna pieza suelta<br />
o pequeña de alimento se salga de ésta. Es importante que<br />
los elementos dentro de la canasta no se salgan por la rejilla.<br />
10. Colóquela dentro del aparato con los engranes en el lado derecho<br />
asegurándose de que la canasta esté correctamente insertada<br />
dentro de la unidad.<br />
11. Cierre la puerta de vidrio y conecte la unidad a la toma de corriente.<br />
12. Encienda el reloj y seleccione el tiempo de cocción deseado. Observe<br />
cómo gira la canasta una o más veces para revisar que los alimentos<br />
están correctamente colocados dentro ésta y que gira libremente<br />
sin rozar la puerta, el elemento calefactor o el escudo de calor.<br />
13. Después de que el reloj se ha detenido y que escuche la señal de<br />
la campana, desconecte el cordón eléctrico y permita que la canasta<br />
y los alimentos se enfríen durante unos minutos antes de sacarlos.<br />
34
14. Mientras utiliza los guantes protectores, abra la puerta de vidrio<br />
y saque la bandeja para goteo de la unidad. (Tenga cuidado: los<br />
alimentos y la canasta pueden estar extremadamente calientes.)<br />
15. Coloque el platón debajo de la canasta y levante cuidadosamente<br />
el platón hasta que la canasta esté libre de los engranes, después<br />
remueva cuidadosamente el platón con la canasta, sosteniendo<br />
la canasta con una mano.<br />
16. Coloque el platón sobre una superficie limpia, mientras utiliza<br />
guantes resistentes al calor. Quite los seguros de la parte lateral<br />
de la canasta. (Tenga cuidado: los alimentos y la canasta pueden<br />
estar extremadamente calientes.) Si es necesario, utilice un tenedor<br />
o pinzas para ayudarse a remover la tapa de la canasta, ya que puede<br />
estar muy caliente.<br />
17. Utilice un trinche o pinzas para quitar los alimentos de la canasta.<br />
18. ¡Disfrutelos!<br />
➢<br />
➢<br />
➢<br />
➢<br />
➢<br />
➢<br />
➢<br />
LIMPIEZA Y CUIDADOS DEL ASADOR<br />
Asegúrese de limpiar el Asador y los Accesorios antes de usarlos.<br />
Verifique que no hay material de empaque atrapado dentro<br />
del elemento calefactor.<br />
Después de utilizar el Asador, siempre permita que la unidad<br />
se enfríe completamente antes de limpiarla.<br />
No utilice químicos o solventes para la limpieza de la unidad o<br />
de los accesorios. Ya que puede dañar el recubrimiento protector.<br />
Asegúrese de limpiar todos los accesorios antes de utilizar el Asador.<br />
Verifique que la unidad esté desconectada antes de limpiar<br />
la unidad y cuando introduzca y retire los alimentos.<br />
Utilice agua tibia y jabonosa para limpiar el interior y el exterior<br />
de la unidad y todos los accesorios.<br />
35
➢<br />
➢<br />
➢<br />
➢<br />
➢<br />
➢<br />
Si utiliza la lavadora de platos para lavar los accesorios,<br />
por favor colóquelos en la parrilla superior de la lavadora.<br />
En el caso que sea difícil remover alimentos pegados a los accesorios,<br />
usted puede remojarlos en agua caliente y jabonosa.<br />
NO SUMERJA LA UNIDAD O EL CABLE EN AGUA.<br />
Usted puede notar que un poco de humo o ligero olor sale de su unidad<br />
cuando está siendo utilizada por primera vez, esto se debe a que el<br />
recubrimiento protector en el elemento calefactor está siendo curado;<br />
esto es normal.<br />
Algunos alimentos pueden salpicar grasa o jugos mientras están<br />
siendo cocinados, causando que se produzca un poco de humo<br />
durante el uso regular. Esto es normal, pero observe el interior<br />
de la puerta de vidrio para asegurarse de que la vara o la canasta<br />
de alimentos estén girando correctamente. Los alimentos no deben<br />
entrar en contacto con el elemento calefactor, el reflector de calor<br />
o la puerta de vidrio durante la operación.<br />
Asegúrese de mantener el Reflector de Calor limpio y libre de<br />
residuos de alimentos. Lávelo completamente después de cocinar<br />
alimentos que salpiquen.<br />
TIEMPOS DE COCCIÓN<br />
Los tiempos de cocción que se indican en este cuadro son solamente una<br />
guía de los TIEMPOS MÍNIMOS APROXIMADOS DE COCCIÓN, basados en<br />
los promedios de prueba. Los tiempos de cocción pueden variar debido a<br />
las diferentes carnes, formas, tamaños y cantidad de grasa y hueso que<br />
ésta contenga.<br />
Cuando cocine con el Asador SUNBEAM ® , use un termómetro de alimentos<br />
– así evita el estar adivinando el nivel de cocción. Un termómetro para<br />
carnes mide la temperatura interna de la carne y aves que cocina,<br />
para asegurar que ha alcanzado una temperatura segura. Al usar un<br />
termómetro para carnes, puede ayudar a prevenir el cocinar demasiado<br />
las carnes y cocinar las carnes a una temperatura segura.<br />
Use un termómetro regular a prueba de horno que se introduce en los<br />
alimentos al inicio del tiempo de cocción y que puede leerse fácilmente.<br />
Inserte la punta del termómetro por lo menos 2 pulgadas dentro de la<br />
parte más gruesa de la carne, no lo inserte cerca del hueso o del cartílago.<br />
Para cocinar aves, inserte el termómetro en el interior del muslo del ave,<br />
cerca de la pechuga pero no debe tocar el hueso. EL TERMÓMETRO<br />
DE LA CARNE NO DEBE TOCAR EL ELEMENTO CALEFACTOR MIENTRAS<br />
LA CANASTA O LA VARILLA ESTÉN GIRANDO.<br />
36
CUADRO DE COCCIÓN DEL ASADOR HORIZONTAL SUNBEAM ®<br />
TEMPERATURA DEL TIEMPO<br />
TERMÓMETRO APROXIMADO<br />
ALIMENTOS PESO PARA CARNE DE COCCIÓN<br />
AVES<br />
Pollo, entero 3-1/2 a 4-1/2 lbs. 180°F 20 min./lb.<br />
Pollo, piezas<br />
con hueso 2 a 3-1/2 lbs. pechuga : 170°F; 20 min./lb.<br />
patas con muslo : 180°F 20 min./lb.<br />
sin hueso 1 a 1-1/2 lbs. pechuga : 170°F; 30 min./lb.<br />
patas con muslo : 180°F 30 min./lb.<br />
Codorniz 2 a 3 codornices 180°F 20 min./lb.<br />
Pavo sin rellenar 12 lbs. ó menos 180°F 20 min./lb.<br />
Hamburguesas de Pavo 1 lb. 165°F 30 minutos total<br />
PUERCO<br />
Rollo sin Hueso Asado de Puerco 3-1/2 a 7 lbs. 160°F 25 min./lb.<br />
Lomo de Puerco aproximadamente 1 lb. 160°F 30 a 40 min. total<br />
Chuletas de Puerco<br />
con hueso 2 lbs. 160°F 15 min./lb.<br />
sin hueso 2 lbs. 160°F 15 min./lb.<br />
Costillas 1-1/2 a 2 lbs. 160°F 30 min./lb.<br />
Jamón, sin Hueso 160°F 20 min./lb.<br />
Salchichón Crudo 1 lb. 160°F 25 min./lb.<br />
Salchichón y Salchichas Cocidas 1 lb. 165°F 20 min./lb.<br />
RES<br />
Costillas Asadas 6 a 8 libras. crudas : 145°F 20 min./lb.<br />
termino medio : 160°F 25 min./lb.<br />
Rollo de Costillas Asadas crudas : 145°F 20 min./lb.<br />
termino medio : 160°F 25 min./lb.<br />
Bistecs 1-1/2 a 2 lb. grosor de 1 pu. crudos : 145°F 20 min./lb.<br />
termino medio : 160°F 25 min./lb.<br />
Hamburguesas grosor de 1 pulgada. termino medio : 160°F 25 min./lb.<br />
CORDERO<br />
Rollo Asado de Cordero sin Hueso crudo : 145°F 20 min./lb.<br />
termino medio : 160°F 25 min./lb.<br />
Chuletas de Carnero crudo : 145°F 20 min./lb.<br />
termino medio : 160°F 25 min./lb<br />
MARISCOS – ROCÍE LA CANASTA CON ANTIADHERENTE ANTES DE COLOCAR LOS ALIMENTOS<br />
Filetes de Pescado 2 lbs. : grosor de 1 pulgada 25 min. total<br />
Filetes de Pescado 1 lb. 20 min. total<br />
OTROS<br />
Papas Horneadas cortadas a la mitad, 45 min. total<br />
colocadas dentro de la canasta<br />
Verduras Rebanadas grosor de 1/2 pulgada, 25 min. total<br />
unte aceite, coloque<br />
dentro de la canasta<br />
Los tiempos de cocción estipulados en esta tabla están basados en alimentos que han sido descongelados.<br />
*Si el cronómetro necesita ser programado por un tiempo menor a 10 minutos, gire la perilla más allá de<br />
la marca de los 10 minutos, y luego ponga en marcha.<br />
37
CONSEJOS PARA REBANAR Y CORTAR CARNES<br />
REBANANDO AVES<br />
Sobre una tabla para cortar, coloque el pollo u otra ave sobre su espalda con<br />
las patas hacia la derecha. Quite la cadena o la guita usada para atar<br />
las piernas y las alas para el cocinar. Empezando por el lado que quede<br />
enfrente del cuchillo, corte una pierna del cuerpo agarrando la pierna con su<br />
mano izquierda, jale gentilmente mientras corta completamente la carne y<br />
la articulación en el muslo.<br />
Coloque la pierna en la tabla para cortar y corte a través de la articulación para<br />
separar el hueso del muslo de la pierna. Rebane la carne de la pierna y muslo,<br />
corte paralelamente al hueso.<br />
Inserte el tenedor de carne en la pechuga para sostener el cuerpo fijamente.<br />
Separe el ala del cuerpo cortando en la articulación.<br />
Empiece rebanando la pechuga justo encima de la articulación de donde el ala<br />
fue removida. Corte en rebanadas delgadas la carne blanca, moviendo el<br />
cuchillo hacia arriba y en forma paralela al hueso de la pechuga.<br />
REBANANDO UN JAMÓN ENTERO, ASADO DE CARNE DE CERDO<br />
O ASADO DE PIERNA DE CORDERO<br />
Coloque el jamón entero, el asado de carne de cerdo o la pierna de cordero<br />
en una tabla para cortar, con la punta de la pierna hacia el lado derecho<br />
del cuchillo. Para el jamón, voltee el lado rayado hacia arriba. Para la pierna<br />
de cordero, colóquela de forma que la parte carnosa quede hacia el lado<br />
contrario del cuchillo.<br />
Introduzca el tenedor de carne en la parte con más carne y corte bastantes<br />
rebanadas longitudinalmente desde la parte con menos carne.<br />
Voltee el jamón, el asado de carne de cerdo y la pierna de cordero de forma<br />
que se sostenga sobre la parte anteriormente rebanada. Corte una rebanada<br />
de la punta de la pierna empezando por la base de la protuberancia y<br />
rebanando hacia abajo con dirección al hueso de la pierna. Después, haga<br />
otro corte con otro ángulo con respecto al anterior, cerca de la punta de la<br />
pierna. Levante la rebanada.<br />
Empezando por el final de la punta de la pierna, corte rebanadas delgadas<br />
y uniformes en rebanadas hacia abajo en dirección al hueso de la pierna.<br />
REBANANDO COSTILLAS<br />
Arregle el asado en un plato o en una tabla de cortar con la parte más grande<br />
hacia abajo y la parte de las costillas hacia su izquierda. La parte más pequeña<br />
del asado debe estar cerca del cuchillo. Inserte un tenedor entre las dos<br />
costillas superiores.<br />
Rebane alrededor del asado desde el borde más ancho de los hueso de<br />
costilla. Libere la rebanada del hueso usando la punta del cuchillo.<br />
38
NOTAS<br />
39
GARANTÍA LIMITADA DE 1 AÑO<br />
Sunbeam Products <strong>Inc</strong>. (“Sunbeam”) garantiza que, por un período de UN año<br />
a partir de la fecha de compra, este producto estará libre de defectos en el<br />
material y en su fabricación. Bajo la opinión de Sunbeam, reparará o repondrá<br />
este producto o cualquier componente del mismo si se encuentra defectuoso<br />
durante el periodo de garantía. La reposición se hará con un producto o<br />
un componente nuevo o refabricado. Si el producto ya no está disponible,<br />
la reposición se hará con un producto similar de igual o mayor valor.<br />
Esta es su garantía exclusiva.<br />
Esta garantía es válida para el comprador original a partir de la fecha de compra<br />
inicial y no es transferible. Guarde el recibo de compra original. La prueba de<br />
compra es requerida para obtener los servicios de garantía. Los vendedores de<br />
productos Sunbeam, los centros de servicio o tiendas que vendan productos<br />
Sunbeam no tienen el derecho de alterar, modificar o realizar ningún otro<br />
cambio a los términos y condiciones de esta garantía.<br />
Esta garantía no cubre el desgaste por uso normal o daños de partes como resultado<br />
de lo siguiente: uso negligente o mala utilización del producto, uso con una<br />
corriente eléctrica o un voltaje inadecuados, uso contrario a las instrucciones de<br />
operación, desensambles, reparaciones o alteraciones que no sean hechas por<br />
Sunbeam o por un Centro de Servicio Autorizado Sunbeam. Además, la garantía<br />
no cubre desastres naturales tales como incendios, inundaciones, huracanes<br />
y tornados.<br />
Sunbeam Products <strong>Inc</strong>. no se hace responsable por ningún daño emergente o<br />
incidental causado por el rompimiento de cualquier garantía expresa o implícita.<br />
Excepto al alcance prohibido por la ley aplicable, cualquier garantía implícita de<br />
comercialización o arreglo para un propósito particular, está limitada en duración<br />
de la garantía antes mencionada. Algunos estados, provincias o jurisdicciones<br />
no permiten la exclusión o limitación de daños emergentes o incidentales,<br />
o limitaciones en la duración de una garantía implícita, así que la exclusión o<br />
limitaciones pueden no ser aplicables para usted. Esta garantia le da a usted<br />
derechos legales específicos y puede tener otros derechos que varían por estado,<br />
provincia y/o jurisdicción.<br />
Cómo Obtener los Servicios de la Garantía<br />
Favor, NO REGRESE ESTE PRODUCTO AL LUGAR DE COMPRA. Lleve este producto<br />
a un Centro de Servicio Autorizado Sunbeam. Usted puede encontrar el Centro<br />
de Servicio Autorizado Sunbeam más cercano llamando al 1 800 458-8407, o visita<br />
el nuestro website a www.sunbeam.com. Si un centro de servicio no se encuentra<br />
convenientemente localizado cerca de usted, pegue una etiqueta al producto<br />
que incluya su nombre, dirección, teléfono donde se encuentra durante el día<br />
y descripción del problema. <strong>Inc</strong>luya una copia del recibo original de compra.<br />
Empaque cuidadosamente el producto etiquetado con el precio e incluya el recibo<br />
de compra. Envíelo ya sea por el servicio de paquetería UPS o por correo,<br />
con los gastos de envío y seguro prepagados, a la dirección del Centro<br />
de Servicio Autorizado Sunbeam.<br />
40
NO DEVUELVA ESTE PRODUCTO AL LUGAR DONDE LO COMPRÓ<br />
Para preguntas sobre los productos:<br />
Sunbeam Consumer Service<br />
P. O. Box 948389<br />
Maitland, FL 32794-8389<br />
1.800.458.8407<br />
www.sunbeam.com<br />
NO ENVÍE EL PRODUCTO A LA DIRECCIÓN ANTERIOR<br />
©2001 Sunbeam Products, <strong>Inc</strong>. Todos los derechos reservados.<br />
SUNBEAM ® es una marca registrada de Sunbeam Products, <strong>Inc</strong>.<br />
Distribuido por Sunbeam Products, <strong>Inc</strong>.<br />
Boca Raton, FL 33431<br />
Impreso en China P.N. 108315


