F210 Steam Iron Plancha de vapor - Applica Use and Care Manuals
F210 Steam Iron Plancha de vapor - Applica Use and Care Manuals
F210 Steam Iron Plancha de vapor - Applica Use and Care Manuals
Create successful ePaper yourself
Turn your PDF publications into a flip-book with our unique Google optimized e-Paper software.
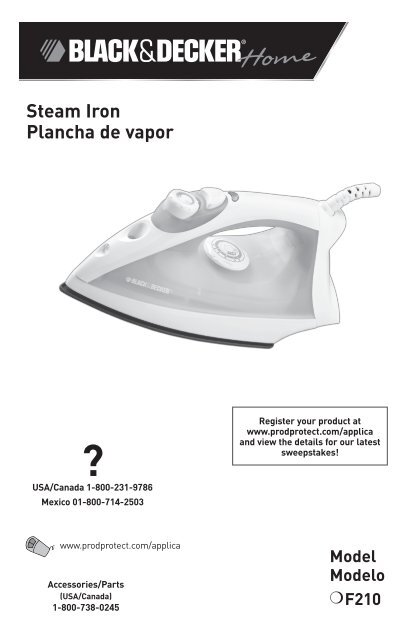
<strong>Steam</strong> <strong>Iron</strong><br />
<strong>Plancha</strong> <strong>de</strong> <strong>vapor</strong><br />
?<br />
USA/Canada 1-800-231-9786<br />
Mexico 01-800-714-2503<br />
Register your product at<br />
www.prodprotect.com/applica<br />
<strong>and</strong> view the <strong>de</strong>tails for our latest<br />
sweepstakes!<br />
www.prodprotect.com/applica<br />
Accessories/Parts<br />
(USA/Canada)<br />
1-800-738-0245<br />
Mo<strong>de</strong>l<br />
Mo<strong>de</strong>lo<br />
❍ <strong>F210</strong>
Please Read <strong>and</strong> Save this <strong>Use</strong> <strong>and</strong> <strong>Care</strong> Book<br />
IMPORTANT SAFEGUARDS<br />
When using your iron, basic safety precautions should always be followed,<br />
including the following:<br />
❍ READ ALL INSTRUCTIONS BEFORE USING.<br />
❍ <strong>Use</strong> iron only for its inten<strong>de</strong>d use.<br />
❍ To protect against a risk of electric shock, do not immerse the iron in<br />
water or other liquid.<br />
❍ The iron should always be turned OFF (refer to How to <strong>Use</strong> section)<br />
before plugging or unplugging from outlet. Never yank cord to<br />
disconnect from outlet; instead grasp plug <strong>and</strong> pull to disconnect.<br />
❍ Do not allow cord to touch hot surfaces. Let iron cool completely before<br />
putting away. Loop cord loosely around the iron when storing.<br />
❍ Always disconnect iron from electrical outlet when with water or<br />
emptying <strong>and</strong> when not in use.<br />
❍ Do not operate iron with a damaged cord or if the iron has been dropped<br />
or damaged. To avoid the risk of electric shock, do not disassemble<br />
the iron, take it to a qualified serviceman for examination <strong>and</strong> repair.<br />
Incorrect reassembly can cause a risk of electric shock when the iron<br />
is used.<br />
❍ Close supervision is necessary for any appliance being used by or near<br />
children. Do not leave iron unatten<strong>de</strong>d while connected or on an ironing<br />
board.<br />
❍ Burns can occur from touching hot metal parts, hot water or steam.<br />
<strong>Use</strong> caution when you turn a steam iron upsi<strong>de</strong> down or use the surge<br />
of steam — there may be hot water in the water tank. Avoid rapid<br />
movement of iron to minimize hot water spillage.<br />
SPECIAL INSTRUCTIONS<br />
❍ To avoid a circuit overload, do not operate another high-wattage<br />
appliance on the same circuit.<br />
❍ If an extension cord is absolutely necessary, a cord rated at 15-amperes<br />
<strong>and</strong> 120-volt, or a 7-ampere <strong>and</strong> 220-volt cord should be used. Cords<br />
rated for less amperage may overheat. <strong>Care</strong> should be taken to arrange<br />
the cord so that it cannot be pulled or tripped over.<br />
SAVE THESE INSTRUCTIONS.<br />
This product is for household use only.<br />
POLARIZED PLUG<br />
This appliance has a polarized plug (one bla<strong>de</strong> is wi<strong>de</strong>r than the other). To reduce<br />
the risk of electric shock, this plug is inten<strong>de</strong>d to fit into a polarized outlet only<br />
one way. If the plug does not fit fully into the outlet, reverse the plug. If it still<br />
does not fit, contact a qualified electrician. Do not attempt to modify the plug in<br />
any way.<br />
TAMPER-RESISTANT SCREW<br />
Warning: This appliance is equipped with a tamper-resistant screw to<br />
prevent removal of the outer cover. To reduce the risk of fire or electric<br />
shock, do not attempt to remove the outer cover. There are no userserviceable<br />
parts insi<strong>de</strong>. Repair should be done only by authorized service<br />
personnel.<br />
Note: If the power supply cord is damaged, it should be replaced by qualified<br />
personnel; in Latin America, by an authorized service center.<br />
ENGLISH
Product may vary slightly from what is illustrated.<br />
<br />
<br />
<br />
<br />
<br />
<br />
<br />
J<br />
J<br />
K<br />
<br />
<br />
<br />
<br />
g<br />
How to <strong>Use</strong><br />
This appliance is inten<strong>de</strong>d for household use only.<br />
GETTING STARTED<br />
• Remove any labels, stickers or tags attached to the body or soleplate of the<br />
iron.<br />
• Please go to www.prodprotect.com/applica to register your warranty.<br />
Note: <strong>Use</strong> ordinary tap water for ironing. Do not use water processed through<br />
a home softening system.<br />
Important: For optimum performance, let the iron st<strong>and</strong> for 90 seconds<br />
before beginning to iron.<br />
FILLING WATER TANK<br />
1. Tilt the iron <strong>and</strong> using a clean measuring cup, pour water<br />
into opening until the water reaches the MAX level mark on<br />
the water tank (A). Do not overfill. Refill as nee<strong>de</strong>d.<br />
2. Plug in the iron. Temperature ready light glows when iron<br />
has reached set temperature setting.<br />
Tip: If unsure of a garment’s fiber, test a small area (on an<br />
A<br />
insi<strong>de</strong> seam or hem) before ironing.<br />
ENGLISH<br />
K<br />
J<br />
STEAM IRONING<br />
1. Move the dry/steam selector to the <strong>de</strong>sired steam level (B).<br />
L<br />
1. Spray nozzle<br />
2. Water-fill opening<br />
3. Dry/steam selector<br />
4. Spray button<br />
5. Temperature ready light<br />
6. 360° pivoting cord<br />
7. Fabric gui<strong>de</strong><br />
8. Heel rest<br />
9. Water tank<br />
10. Fabric select dial<br />
11. Nonstick soleplate<br />
L<br />
K<br />
M<br />
M<br />
L<br />
O<br />
O<br />
M<br />
Symbols<br />
Dry<br />
<strong>Steam</strong><br />
Spray<br />
a<br />
B<br />
b 2. Turn the fabric select dial to appropriate setting (between<br />
4 <strong>and</strong> 6) for your fabric (C). See fabric gui<strong>de</strong> on the heel<br />
J<br />
rest <strong>and</strong> read garment’s label to help you <strong>de</strong>termine fabric<br />
type. The temperature ready light glows until it reaches the<br />
K<br />
appropriate temperature. It then cycles on <strong>and</strong> off during<br />
ironing.<br />
L<br />
C<br />
3. When finished ironing, turn the fabric select dial to lowest<br />
heat setting, move the selector M to <strong>and</strong> unplug the iron.<br />
a<br />
b<br />
St<strong>and</strong> the iron on its heel rest <strong>and</strong> allow it to cool off.<br />
O<br />
Important: Always st<strong>and</strong> the iron on its heel rest when powered on but not<br />
in use.<br />
O
K<br />
h<br />
DRY IRONING<br />
D<br />
E<br />
M<br />
1. Make sure dry/steam selector is set to<br />
O<br />
ironing (see EMPTYING THE WATER TANK).<br />
L<br />
(D).<br />
Note: It is recommen<strong>de</strong>d that you empty the water before dry<br />
2. Turn the fabric select dial to the appropriate setting for<br />
your fabric (E). See fabric gui<strong>de</strong> on the heel rest <strong>and</strong><br />
J<br />
read garment’s label to help you <strong>de</strong>termine fabric type.<br />
The temperature-ready light glows until it reaches the<br />
K<br />
appropriate temperature. It then cycles on <strong>and</strong> off during<br />
ironing.<br />
L<br />
3. When finished ironing, turn the fabric select dial to lowest<br />
heat setting, move the selector M to <strong>and</strong> unplug the iron.<br />
St<strong>and</strong> the iron on its heel rest <strong>and</strong> allow it to cool off.<br />
K<br />
O<br />
Important: Always st<strong>and</strong> the iron on its heel rest when powered on but not<br />
L<br />
in use.<br />
SPRAY<br />
M<br />
J<br />
J<br />
You can use spray at any setting. Check that the water tank is filled with water.<br />
O<br />
Press the button. If spray is weak, pump the button a few times.<br />
EMPTYING THE WATER TANK<br />
L<br />
Note: It is not necessary to empty the water after each use.<br />
K<br />
M<br />
1. Turn the fabric select dial to . Unplug the iron. St<strong>and</strong> the<br />
iron on its heel rest <strong>and</strong> allow it to cool off.<br />
O<br />
2. Empty the water by holding the iron over a sink with the tip<br />
pointing down. Water will empty out of water-fill opening (F).<br />
<strong>Care</strong> <strong>and</strong> Cleaning<br />
This product contains no user serviceable parts. Refer service to qualified<br />
service personnel.<br />
CLEANING OUTSIDE SURFACES<br />
1. Make sure iron is unplugged <strong>and</strong> has cooled completely. Wipe the soleplate<br />
<strong>and</strong> outer surfaces with a soft cloth dampened with water. Never use<br />
abrasives, heavy-duty cleansers, vinegar or scouring pads that may<br />
J<br />
scratch or discolor the iron.<br />
2. After cleaning, steam iron over K an old cloth to remove any residue from the<br />
steam vents.<br />
STORING YOUR IRON<br />
M<br />
1. Check that the selector is set to<br />
L<br />
2. Unplug the iron. St<strong>and</strong> the iron on its heel rest <strong>and</strong> allow it to cool off.<br />
O<br />
.<br />
3. Store vertically on its heel rest to prevent water leaking from the soleplate,<br />
or you can empty the water tank.<br />
ENGLISH<br />
F
NEED HELP?<br />
For service, repair or any questions regarding your appliance, call the<br />
appropriate 800 number on cover of this book. Please DO NOT return the<br />
product to the place of purchase. Also, please DO NOT mail product back to<br />
manufacturer, nor bring it to a service center. You may also want to consult the<br />
website listed on the cover of this manual.<br />
Two-Year Limited Warranty<br />
(Applies only in the United States <strong>and</strong> Canada)<br />
What does it cover?<br />
• Any <strong>de</strong>fect in material or workmanship provi<strong>de</strong>d; however, <strong>Applica</strong>’s liability<br />
will not exceed the purchase price of product.<br />
For how long?<br />
• Two years after date of purchase.<br />
What will we do to help you?<br />
• Provi<strong>de</strong> you with a reasonably similar replacement product that is either new<br />
or factory refurbished.<br />
How do you get service?<br />
• Save your receipt as proof of date of sale.<br />
• Visit the online service website at www.prodprotect.com/applica, or call tollfree<br />
1-800-231-9786, for general warranty service.<br />
• If you need parts or accessories, please call 1-800-738-0245.<br />
What does your warranty not cover?<br />
• Damage from commercial use<br />
• Damage from misuse, abuse or neglect<br />
• Products that have been modified in any way<br />
• Products used or serviced outsi<strong>de</strong> the country of purchase<br />
• Glass parts <strong>and</strong> other accessory items that are packed with the unit<br />
• Shipping <strong>and</strong> h<strong>and</strong>ling costs associated with the replacement of the unit<br />
• Consequential or inci<strong>de</strong>ntal damages (Please note, however, that some<br />
states do not allow the exclusion or limitation of consequential or inci<strong>de</strong>ntal<br />
damages, so this limitation may not apply to you.)<br />
How does state law relate to this warranty?<br />
• This warranty gives you specific legal rights. You may also have other rights<br />
that vary from state to state or province to province.<br />
is a registered tra<strong>de</strong>mark of The Black & Decker Corporation,<br />
Towson, Maryl<strong>and</strong>, USA<br />
ENGLISH<br />
Ma<strong>de</strong> in People’s Republic of China<br />
Printed in People’s Republic of China
Por favor lea este instructivo antes <strong>de</strong> usar el producto<br />
INSTRUCCIONES IMPORTANTES<br />
DE SEGURIDAD<br />
Cu<strong>and</strong>o se utilizan aparatos eléctricos, especialmente en la presencia<br />
<strong>de</strong> los niños, siempre se <strong>de</strong>be tomar ciertas medidas <strong>de</strong> seguridad,<br />
incluyendo las siguientes:<br />
❍ LEA TODAS LAS INSTRUCCIONES ANTES DE UTILIZAR EL PRODUCTO.<br />
❍ Utilice la plancha solamente con el fin previsto.<br />
❍ A fin <strong>de</strong> evitar el riesgo <strong>de</strong> un choque eléctrico, no sumerja la plancha<br />
en agua ni en ningún otro líquido.<br />
❍ Siempre ajuste la plancha a la posición <strong>de</strong> apagado (0) antes <strong>de</strong><br />
conectarla o <strong>de</strong>sconectarla <strong>de</strong>l tomacorriente. Nunca tire <strong>de</strong>l cable para<br />
<strong>de</strong>sconectar el aparato; sujete el enchufe y hale con cuidado.<br />
❍ No permita que el cable entre en contacto con las superficies calientes.<br />
Espere que la plancha se enfríe bien antes <strong>de</strong> guardarla. Enrolle el<br />
cable holgadamente alre<strong>de</strong>dor <strong>de</strong> la plancha.<br />
❍ Siempre <strong>de</strong>sconecte la plancha cu<strong>and</strong>o no esté en uso y cu<strong>and</strong>o llene<br />
o vacíe el tanque <strong>de</strong> agua.<br />
❍ No utilice la plancha si el cable o el enchufe presentan algún<br />
<strong>de</strong>sperfecto, si la ha <strong>de</strong>jado caer o dañado. Para evitar el riesgo <strong>de</strong><br />
un choque eléctrico, no <strong>de</strong>sarme la plancha. Acuda a una persona <strong>de</strong><br />
servicio calificada. El reensamblaje incorrecto <strong>de</strong> la plancha pue<strong>de</strong><br />
ocasionar el riesgo <strong>de</strong> un choque eléctrico.<br />
❍ Se requiere supervisar <strong>de</strong> cerca todo aparato eléctrico al ser utilizado<br />
por o en la presencia <strong>de</strong> los niños. Nunca <strong>de</strong>scui<strong>de</strong> la plancha mientras<br />
permanece enchufada ni sobre la tabla <strong>de</strong> planchar.<br />
❍ Pue<strong>de</strong>n ocurrir quemaduras si se tocan las partes metálicas, el agua<br />
caliente, o el <strong>vapor</strong>. Tome precaución al invertir una plancha <strong>de</strong> <strong>vapor</strong> ya<br />
que pue<strong>de</strong> haber agua caliente <strong>de</strong>ntro <strong>de</strong>l tanque. Evite los movimientos<br />
bruscos para no <strong>de</strong>rramar agua caliente.<br />
INSTRUCCIONES ESPECIALES<br />
❍ Para evitar una sobrecarga eléctrica, no utilice ningún otro aparato<br />
<strong>de</strong> alto consumo <strong>de</strong> corriente en el mismo circuito.<br />
❍ Para evitar sobrecargas, no opere ningún otro aparato <strong>de</strong> alto<br />
consumo <strong>de</strong> corriente en el mismo circuito. Si el uso <strong>de</strong> un cable <strong>de</strong><br />
extensión es absolutamente necesario, se <strong>de</strong>berá utilizar uno <strong>de</strong><br />
15 amperios y 120 voltios o uno <strong>de</strong> 7 amperios y 220 voltios. Los<br />
cables <strong>de</strong> menor amperaje se pue<strong>de</strong>n sobrecalentar. Se <strong>de</strong>be tener<br />
cuidado <strong>de</strong> acomodar el cable <strong>de</strong> manera que nadie lo hale ni se<br />
tropiece.<br />
CONSERVE ESTAS INSTRUCCIONES.<br />
Este aparato eléctrico es para uso doméstico<br />
únicamente.<br />
ENCHUFE POLARIZADO<br />
Este aparato cuenta con un enchufe polarizado (un contacto es más ancho que<br />
el otro). A fin <strong>de</strong> reducir el riesgo <strong>de</strong> un choque eléctrico, este enchufe encaja<br />
en un tomacorriente polarizada en un solo sentido. Si el enchufe no entra en el<br />
tomacorriente, inviértalo y si aun así no encaja, consulte con un electricista. Por<br />
favor no trate <strong>de</strong> alterar esta medida <strong>de</strong> seguridad.<br />
TORNILLO DE SEGURIDAD<br />
Advertencia: Este aparato cuenta con un tornillo <strong>de</strong> seguridad para evitar<br />
la remoción <strong>de</strong> la cubierta exterior <strong>de</strong>l mismo. A fin <strong>de</strong> reducir el riesgo <strong>de</strong><br />
incendio o <strong>de</strong> choque eléctrico, por favor no trate <strong>de</strong> remover la cubierta<br />
exterior. Este producto no contiene piezas reparables por el consumidor.<br />
Toda reparación se <strong>de</strong>be llevar a cabo únicamente por personal <strong>de</strong> servicio<br />
autorizado.<br />
Nota: Si el cordón <strong>de</strong> alimentación esta dañado, en América Latina <strong>de</strong>be<br />
sustituirse por personal calificado o por el centro <strong>de</strong> servicio autorizado.<br />
ESPAÑOL<br />
10 11
Este producto pue<strong>de</strong> variar ligeramente <strong>de</strong>l que aparece ilustrado.<br />
<br />
<br />
<br />
<br />
<br />
<br />
<br />
J<br />
J<br />
K<br />
K<br />
J<br />
L<br />
L<br />
<br />
<br />
<br />
<br />
Símbolos<br />
g<br />
Como usar<br />
Este aparato es para uso doméstico solamente.<br />
PASOS PRELIMINARES<br />
• Despegue toda calcomanía o etiqueta adherida al cuerpo o a la suela <strong>de</strong> la<br />
plancha.<br />
• Por favor, visite www.prodprotect.com/applica para registrar su garantía.<br />
Nota: Utilice agua <strong>de</strong> la llave para llenar el tanque <strong>de</strong> la plancha. No utilice<br />
agua procesada por un abl<strong>and</strong>ador <strong>de</strong> agua doméstico.<br />
Importante: Para óptimo rendimiento, se recomienda <strong>de</strong>jar reposar la<br />
plancha durante 90 segundos antes <strong>de</strong> comenzar a planchar.<br />
LLENADO DEL TANQUE DE AGUA<br />
1. Incline la plancha y con la ayuda <strong>de</strong> una taza <strong>de</strong> medir<br />
limpia, vierta agua a través <strong>de</strong>l orificio <strong>de</strong> llenado hasta<br />
alcanzar la marca <strong>de</strong>l nivel MAX <strong>de</strong>l tanque (A). No exceda<br />
el nivel <strong>de</strong> llenado. Llene <strong>de</strong> nuevo cu<strong>and</strong>o sea necesario.<br />
2. Enchufe la plancha. La luz indicadora <strong>de</strong> temperatura<br />
se ilumina cu<strong>and</strong>o la plancha alcanza la temperatura<br />
A<br />
seleccionada.<br />
Consejo: Si no conoce el tipo <strong>de</strong> tejido <strong>de</strong> la prenda, ensaye<br />
(sobre un ruedo o costura interior) antes <strong>de</strong> planchar.<br />
PLANCHADO A VAPOR<br />
1. Ajuste el selector <strong>de</strong> planchado seco/<strong>vapor</strong> al nivel <strong>de</strong><br />
<strong>vapor</strong> <strong>de</strong>seado (B).<br />
ESPAÑOL<br />
K<br />
M<br />
Seco<br />
1. Rociador<br />
2. Orificio <strong>de</strong> llenado <strong>de</strong> agua<br />
3. Selector <strong>de</strong> planchado seco/<strong>vapor</strong><br />
4. Botón <strong>de</strong> rociar<br />
5. Luz indicadora <strong>de</strong> temperatura<br />
6. Cable giratorio <strong>de</strong> 360°<br />
7. Guía <strong>de</strong> tejidos<br />
8. Talón <strong>de</strong> <strong>de</strong>scanso<br />
9. Tanque <strong>de</strong> agua<br />
10. Selector <strong>de</strong> tejidos<br />
11. Suela antiadherente<br />
M<br />
L<br />
O<br />
O<br />
M<br />
O<br />
Vapor<br />
Rocío<br />
a<br />
B<br />
b 2. Gire el selector <strong>de</strong> tejidos al ajuste apropiado (entre el<br />
4 y el 6), según el tejido <strong>de</strong> la prenda (C). Consulte la<br />
guía <strong>de</strong> tejidos en el talón <strong>de</strong> la plancha y lea la etiqueta<br />
<strong>de</strong> la prenda que <strong>de</strong>sea planchar para <strong>de</strong>terminar el tipo<br />
J<br />
<strong>de</strong> tejido. La luz indicadora <strong>de</strong> temperatura brilla hasta<br />
alcanzar la temperatura que uno ha programado. Esta<br />
K<br />
C<br />
luz se ilumina y se apaga a intervalos durante el ciclo <strong>de</strong>l<br />
planchado.<br />
L<br />
a<br />
b<br />
3. Al terminar <strong>de</strong> planchar, ajuste el selector <strong>de</strong> tejido al nivel más bajo,<br />
M<br />
pase el selector a la posición y <strong>de</strong>sconecte la plancha. Coloque la<br />
plancha sobre su talón y permita que se enfríe bien.<br />
O<br />
Importante: Siempre coloque la plancha sobre su talón cu<strong>and</strong>o esté<br />
encendida pero no en uso.<br />
12 13
K<br />
h<br />
L<br />
PLANCHADO EN SECO<br />
1. Asegúrese <strong>de</strong> ajustar el selector <strong>de</strong> planchado seco/<strong>vapor</strong> a<br />
M<br />
la posición (D).<br />
D<br />
E<br />
Nota: Se recomienda vaciar el agua (consulte la sección<br />
O<br />
VACIADO DEL TANQUE).<br />
2. Gire el selector <strong>de</strong> tejidos al ajuste apropiado según el tejido<br />
<strong>de</strong> la prenda (E). Consulte la guía <strong>de</strong> tejidos en el talón <strong>de</strong><br />
la plancha y lea la etiqueta <strong>de</strong> la prenda que <strong>de</strong>sea planchar<br />
para <strong>de</strong>terminar el tipo <strong>de</strong> tejido. La luz indicadora <strong>de</strong><br />
J<br />
temperatura brilla hasta alcanzar la temperatura que uno<br />
ha programado. Esta luz se ilumina y se apaga a intervalos<br />
K<br />
durante el ciclo <strong>de</strong>l planchado.<br />
L<br />
J<br />
3. Al terminar <strong>de</strong> planchar, ajuste el selector <strong>de</strong> tejido al nivel más bajo, pase el<br />
M<br />
selector a la posición y <strong>de</strong>sconecte la plancha. Coloque la plancha sobre<br />
su talón y permita que se enfríe bien. K<br />
O<br />
Importante: Siempre coloque la plancha sobre el talón <strong>de</strong> <strong>de</strong>scanso cu<strong>and</strong>o<br />
L<br />
esté encendida o no en uso.<br />
ROCIADOR<br />
M<br />
El rociador se pue<strong>de</strong> utilizar a cualquier ajuste. Asegúrese que el tanque se<br />
J<br />
O<br />
encuentre lleno <strong>de</strong> agua. Presione el botón . Si la emisión <strong>de</strong> rocío es débil,<br />
bombee el botón varias veces.<br />
K<br />
VACIADO DEL TANQUE<br />
L<br />
Nota: No es necesario vaciar el tanque <strong>de</strong>spués <strong>de</strong> cada uso.<br />
M<br />
1. Gire el selector <strong>de</strong> tejidos a la posición , y <strong>de</strong>sconecte la plancha. Coloque<br />
la plancha sobre su talón y permita que se enfríe bien.<br />
O<br />
2. Para vaciar el agua, sujete la plancha con la punta hacia<br />
abajo sobre un lava<strong>de</strong>ro. El agua sale a través <strong>de</strong>l orificio <strong>de</strong><br />
llenado (F).<br />
Cuidado y limpieza<br />
Este producto no contiene piezas reparables por el consumidor. Para<br />
servicio, acuda a personal <strong>de</strong> asistencia calificado.<br />
LIMPIEZA DE LAS SUPERFICIES EXTERIORES<br />
1. Asegúrese que la plancha se encuentre <strong>de</strong>sconectada y que se haya<br />
enfriado completamente. Limpie la suela y las <strong>de</strong>más superficies<br />
exteriores con un paño suave hume<strong>de</strong>cido con agua. Nunca utilice<br />
abrasivos, limpiadores fuertes, vinagre ni esponjas abrasivas que pudiesen<br />
rayar o <strong>de</strong>scolorar la plancha.<br />
J<br />
2. Después <strong>de</strong> limpiar la plancha, pase la planche a <strong>vapor</strong> sobre un paño<br />
viejo para K eliminar cualquier residuo acumulado.<br />
ALMACENAJE DE LA PLANCHA<br />
L<br />
1. Asegúrese que el selector <strong>de</strong> planchado seco/<strong>vapor</strong> se encuentre ajustado<br />
M<br />
a la posición .<br />
2. Desconecte la plancha. Coloque la plancha sobre su talón y permita que<br />
O<br />
se enfríe bien.<br />
3. Coloque la plancha verticalmente sobre el talón <strong>de</strong> <strong>de</strong>scanso para evitar<br />
que la suela gotee, o pue<strong>de</strong> vaciar el tanque <strong>de</strong> agua.<br />
ESPAÑOL<br />
F<br />
14 15
¿NECESITA AYUDA?<br />
Para servicio, reparaciones o preguntas relacionadas al producto, por favor<br />
llame al número <strong>de</strong>l centro <strong>de</strong> servicio en el país don<strong>de</strong> usted compró su<br />
producto. NO <strong>de</strong>vuelva el producto al fabricante. Llame o lleve el producto a un<br />
centro <strong>de</strong> servicio autorizado.<br />
DOS AÑOS DE GARANTÍA LIMITADA<br />
(No aplica en México, Estados Unidos o Canadá)<br />
¿Qué cubre la garantía?<br />
• La garantía cubre cualquier <strong>de</strong>fecto <strong>de</strong> materiales o <strong>de</strong> mano <strong>de</strong> obra. <strong>Applica</strong><br />
no se responsabiliza por ningún costo que exceda el valor <strong>de</strong> compra <strong>de</strong>l<br />
producto.<br />
¿Por cuánto tiempo es válida la garantía?<br />
• Por dos años a partir <strong>de</strong> la fecha original <strong>de</strong> compra.<br />
¿Cómo se pue<strong>de</strong> obtener servicio?<br />
• Conserve el recibo original <strong>de</strong> compra.<br />
• Por favor llame al número <strong>de</strong>l centro <strong>de</strong> servicio autorizado.<br />
Esta garantía no cubre:<br />
• Los productos que han sido utilizados en condiciones distintas a las normales<br />
• Los daños ocasionados por el mal uso, el abuso o negligencia.<br />
• Los productos que han sido alterados <strong>de</strong> alguna manera<br />
• Los daños ocasionados por el uso comercial <strong>de</strong>l producto<br />
• Los productos utilizados o reparados fuera <strong>de</strong>l país original <strong>de</strong> compra<br />
• Las piezas <strong>de</strong> vidrio y <strong>de</strong>más accesorios empacados con el aparato<br />
• Los gastos <strong>de</strong> tramitación y embarque asociados al reemplazo <strong>de</strong>l producto<br />
• Los daños y perjuicios indirectos o inci<strong>de</strong>ntales<br />
Póliza <strong>de</strong> Garantía<br />
(Válida sólo para México)<br />
Duración<br />
<strong>Applica</strong> Manufacturing, S. <strong>de</strong> R. L. <strong>de</strong> C.V. garantiza este producto por 2 años<br />
a partir <strong>de</strong> la fecha original <strong>de</strong> compra.<br />
¿Qué cubre esta garantía?<br />
Esta Garantía cubre cualquier <strong>de</strong>fecto que presenten las piezas, componentes<br />
y la mano <strong>de</strong> obra contenidas en este producto.<br />
Requisitos para hacer válida la garantía<br />
Para reclamar su Garantía <strong>de</strong>berá presentar al Centro <strong>de</strong> Servicio Autorizado<br />
la póliza sellada por el establecimiento en don<strong>de</strong> adquirió el producto. Si no la<br />
tiene, podrá presentar el comprobante <strong>de</strong> compra original.<br />
¿Don<strong>de</strong> hago válida la garantía?<br />
Llame sin costo al teléfono 01 800 714 2503, para ubicar el Centro <strong>de</strong> Servicio<br />
Autorizado más cercano a su domicilio en don<strong>de</strong> usted podrá encontrar<br />
partes, componentes, consumibles y accesorios.<br />
Procedimiento para hacer válida la garantía<br />
Acuda al Centro <strong>de</strong> Servicio Autorizado con el producto con la póliza <strong>de</strong><br />
Garantía sellada o el comprobante <strong>de</strong> compra original, ahí se reemplazará<br />
cualquier pieza o componente <strong>de</strong>fectuoso sin cargo alguno para el usuario<br />
final. Esta Garantía incluye los gastos <strong>de</strong> transportación que se <strong>de</strong>riven <strong>de</strong> su<br />
cumplimiento.<br />
Excepciones<br />
Esta Garantía no será válida cu<strong>and</strong>o el producto:<br />
A) Se hubiese utilizado en condiciones distintas a las normales.<br />
B) No hubiese sido operado <strong>de</strong> acuerdo con el instructivo <strong>de</strong> uso que le<br />
acompaña.<br />
C) Cu<strong>and</strong>o el producto hubiese sido alterado o reparado por personas no<br />
autorizadas por <strong>Applica</strong> Manufacturing, S. <strong>de</strong> R. L. <strong>de</strong> C.V.<br />
Nota: Usted podra encontrar partes, componentes, consumibles y accesorios<br />
en los centros <strong>de</strong> servicios autorizados. Esta garantía incluyen los gastos<br />
<strong>de</strong> transportación que se <strong>de</strong>riven <strong>de</strong> sus cumplimiento <strong>de</strong>ntro <strong>de</strong> sus red <strong>de</strong><br />
servicio.<br />
ESPAÑOL<br />
16 17
Por favor llame al número correspondiente que aparece en la lista a continuación<br />
para solicitar que se haga efectiva la garantía y don<strong>de</strong> Ud. pue<strong>de</strong> solicitar servicio,<br />
reparaciones o partes en el país don<strong>de</strong> el producto fué comprado. También pue<strong>de</strong><br />
consultarnos en el e-mail. “servicio@applicamail.com.mx<br />
Argentina<br />
Servicio Técnico Central<br />
Attendance<br />
Atención al Cliente<br />
Ave. Monroe 3351<br />
Buenos Aires, Argentina<br />
Tel.: 0810-999-8999<br />
Chile<br />
Servicio Máquinas y<br />
Herramientas Ltda.<br />
Av. Apoquindo No. 4867 -<br />
Las Con<strong>de</strong>s<br />
Santiago, Chile<br />
Tel.: (562) 263-2490<br />
Colombia<br />
PLINARES<br />
Avenida Quito # 88A-09<br />
Bogotá, Colombia<br />
Tel. sin costo<br />
01 800 7001870<br />
Costa Rica<br />
Aplicaciones<br />
Electromecanicas, S.A.<br />
Calle 26 Bis y Ave. 3<br />
San Jose, Costa Rica<br />
Tel.: (506) 257-5716<br />
223-0136<br />
Ecuador<br />
Servicio Master Ecuador<br />
Av. 6 <strong>de</strong> Diciembre 9276<br />
y Los Alamos<br />
Tel. ( 593 ) 2281-3882<br />
El Salvador<br />
Se<strong>de</strong>black<br />
Calle San Antonio Abad<br />
2936<br />
San Salvador, El Salvador<br />
Tel. (503) 2284-8374<br />
Guatemala<br />
MacPartes SA<br />
3ª Calle 414 Zona 9<br />
Frente a Tecun<br />
Tel. (502) 2331-5020<br />
2332-2101<br />
Honduras<br />
ServiTotal<br />
Contigua a Telecentro<br />
Tegucigalpa, Honduras,<br />
Tel. (504) 235-6271<br />
México<br />
Art. 123 No. 95<br />
Col. Centro, C.P. 06050<br />
Deleg. Cuauhtemoc<br />
Tel: 01 800 714-2503<br />
Nicaragua<br />
ServiTotal<br />
De semáforo <strong>de</strong> portezuelo<br />
500 metros al sur.<br />
Managua, Nicaragua,<br />
Tel. (505) 248-7001<br />
Panamá<br />
Servicios Técnicos CAPRI<br />
Tumbamuerto Boulevard<br />
El Dorado<br />
Panamá.<br />
Tel. (507) 2360 236<br />
(507) 2360 159<br />
Perú<br />
Servicio Técnico Central<br />
Fast Service<br />
Calle Jorge Muelle 121<br />
San Borja<br />
Lima Perú<br />
Tel.<br />
( 0511) 2257391-2230221<br />
Puerto Rico<br />
Buckeye Service<br />
Jesús P. Piñero #1013<br />
Puerto Nuevo, SJ PR<br />
00920<br />
Tel.: (787) 782-6175<br />
Republica Dominicana<br />
Plaza Lama, S.A.<br />
Av, Duarte #94<br />
Santo Domingo,<br />
República Dominicana<br />
Tel.: (809) 687-9171<br />
Trinidad <strong>and</strong> Tobago<br />
A.S. Bry<strong>de</strong>n & Sons<br />
(Trinidad) Limited<br />
33 In<strong>de</strong>pen<strong>de</strong>nce Square,<br />
Port of Spain<br />
Trinidad, W.I.<br />
Tel.: (868) 623-4696<br />
Venezuela<br />
Inversiones BDR CA<br />
Av. Casanova C.C.<br />
City Market<br />
Nivel Plaza Local 153,<br />
Diagonal Hotel Melia.<br />
Caracas<br />
Tel. (582) 324 0969<br />
Sello <strong>de</strong>l Distribuidor:<br />
Fecha <strong>de</strong> compra:<br />
APPLICA MANUFACTURING, S. DE R. L. DE C. V.<br />
Presi<strong>de</strong>nte Mazarik No111, 1er Piso<br />
Col. Chapultepec Morales, Mexico D.F<br />
Deleg. Miguel Hidalgo<br />
CP 11570<br />
MEXICO<br />
Teléfono: (55) 5263-9900<br />
18<br />
Del interior marque sin costo<br />
01 (800) 714 2503<br />
19<br />
Mo<strong>de</strong>lo:<br />
Código <strong>de</strong> fecha / Date Co<strong>de</strong><br />
Accesorios/Partes (EE.UU/Canadá)<br />
1-800-738-0245<br />
Comercializado por:<br />
<strong>Applica</strong> Manufacturing, S. <strong>de</strong> R. L. <strong>de</strong> C.V.<br />
Presi<strong>de</strong>nte Mazarik No111, 1er Piso<br />
Col. Chapultepec Morales, Mexico D.F<br />
Deleg. Miguel Hidalgo<br />
CP 11570<br />
MEXICO<br />
Servicio y Reparación<br />
Art. 123 No. 95<br />
Col. Centro, C.P. 06050<br />
Deleg. Cuauhtemoc<br />
Servicio al Consumidor,<br />
Venta <strong>de</strong> Refacciones y Accesorios<br />
01 800 714 2503<br />
es una marca registrada <strong>de</strong> The Black & Decker Corporation,<br />
Towson, Maryl<strong>and</strong>, E.U.<br />
Fabricado en la República Popular <strong>de</strong> China<br />
Impreso en la República Popular <strong>de</strong> China<br />
Importado por / Imported by:<br />
<strong>Applica</strong> Americas, Inc.<br />
Av. Juan B Justo 637 Piso 10<br />
(C1425FSA) Ciudad Autonoma <strong>de</strong> Buenos Aires<br />
Argentina<br />
C.U.I.T No. 30-69729892-0<br />
Importado por / Imported by:<br />
1 200 W 120 V<br />
60 Hz<br />
CAT. NO. EHB500<br />
TYPE 1 160 W 120 V<br />
AC ONLY 60Hz<br />
ESPAÑOL
Copyright © 2009 <strong>Applica</strong> Consumer Products, Inc.<br />
2009/4-7-56E/S<br />
20<br />
Printed on recycled paper.<br />
Impreso en papel reciclado.


