Cleaning Your Toaster Oven - GE :: Housewares
Cleaning Your Toaster Oven - GE :: Housewares
Cleaning Your Toaster Oven - GE :: Housewares

You also want an ePaper? Increase the reach of your titles
YUMPU automatically turns print PDFs into web optimized ePapers that Google loves.
840102700 ENv04 12/4/02 2:31 PM Page 1<br />
g<br />
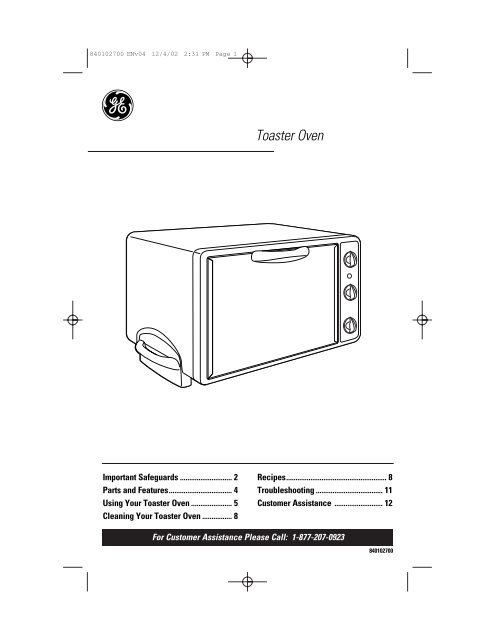
<strong>Toaster</strong> <strong>Oven</strong><br />
Important Safeguards ............................ 2<br />
Parts and Features.................................. 4<br />
Using <strong>Your</strong> <strong>Toaster</strong> <strong>Oven</strong> ...................... 5<br />
<strong>Cleaning</strong> <strong>Your</strong> <strong>Toaster</strong> <strong>Oven</strong> ................ 8<br />
Recipes...................................................... 8<br />
Troubleshooting .................................... 11<br />
Customer Assistance .......................... 12<br />
For Customer Assistance Please Call: 1-877-207-0923<br />
840102700
840102700 ENv04 12/4/02 2:31 PM Page 2<br />
IMPORTANT SAFEGUARDS<br />
When using electrical appliances, basic safety precautions should always be followed,<br />
including the following:<br />
1. Read all instructions.<br />
2. Do not touch hot surfaces. Use handles<br />
or knobs.<br />
3. To protect against electrical shock do not<br />
immerse cord, plug, or toaster oven in<br />
water or other liquid. See instructions for<br />
“<strong>Cleaning</strong>.”<br />
4. Close supervision is necessary when any<br />
appliance is used by or near children.<br />
5. Unplug from outlet when not in use and<br />
before cleaning. Allow to cool before<br />
cleaning appliance and putting on or<br />
taking off parts.<br />
6. Do not operate any appliance with a<br />
damaged cord or plug, or after the<br />
appliance malfunctions or is dropped<br />
or damaged in any manner. Call our<br />
toll-free customer assistance number for<br />
information on examination, repair or<br />
adjustment.<br />
7. The use of accessory attachments not<br />
recommended by the appliance<br />
manufacturer may cause injuries.<br />
8. Do not use outdoors.<br />
9. Do not let cord hang over edge of table<br />
or counter, or touch hot surfaces.<br />
10. Do not place on or near a hot gas or<br />
electric burner, or in a heated oven.<br />
11. Extreme caution must be used when<br />
moving an appliance containing hot oil<br />
or other hot liquids.<br />
12. To disconnect, turn all controls to Off,<br />
then remove plug from wall outlet.<br />
13. Use extreme caution when removing tray<br />
or disposing of hot grease.<br />
14. Do not clean with metal scouring pads.<br />
Pieces can break off the pad and touch<br />
electrical parts, creating a risk of electrical<br />
shock.<br />
15. Oversize foods or metal utensils must not<br />
be inserted in a toaster oven as they may<br />
create a fire or risk of electric shock.<br />
16. A fire may occur if the toaster oven is<br />
covered, touching or near flammable<br />
material, including curtains, draperies,<br />
walls, and the like, when in operation.<br />
Do not store any item on top of the<br />
appliance when in operation.<br />
17. Extreme caution should be exercised<br />
when using containers constructed of<br />
other than metal or glass.<br />
18. Do not store any materials, other than<br />
appliance manufacturer recommended<br />
accessories, in this oven when not in use.<br />
19. Do not place any of the following<br />
materials in the oven: paper, cardboard,<br />
plastic, and the like.<br />
20. Do not cover crumb tray or any part of<br />
the oven with metal foil. This will cause<br />
overheating of the oven.<br />
21. To turn off, turn oven control switch<br />
to OFF.<br />
22. Do not place eyes or face in close<br />
proximity with tempered safety glass<br />
door in the event that the safety<br />
glass breaks.<br />
23. Do not use appliance for other than<br />
intended use.<br />
24. Before using this appliance, move it 2 to<br />
4 inches away from wall or any object on<br />
the countertop. Remove any object that<br />
may have been placed on top of the<br />
appliance. Do not use on surfaces where<br />
heat may cause a problem.<br />
25. If plug gets hot, please call a qualified<br />
electrician.<br />
26. The oven door is not a shelf. Do not<br />
place heavy food items on the door.<br />
27. Use extreme caution when extending<br />
loaded rack or adding food to extended<br />
rack.<br />
28. To turn the oven Off, rotate the <strong>Oven</strong><br />
Control Switch to the “OFF” position.<br />
SAVE THESE INSTRUCTIONS!<br />
2
840102700 ENv04 12/4/02 2:31 PM Page 3<br />
Consumer Safety Information<br />
This appliance is intended for household<br />
use only.<br />
This appliance is equipped with a polarized<br />
plug. This type of plug has one blade wider<br />
than the other. The plug will fit into an<br />
electrical outlet only one way. This is a safety<br />
feature intended to help reduce the risk of<br />
electrical shock. If you are unable to insert<br />
the plug into the outlet, try reversing the<br />
plug. If the plug should still fail to fit, contact<br />
a qualified electrician to replace the obsolete<br />
outlet. Do not attempt to defeat the safety<br />
purpose of the polarized plug by modifying<br />
the plug in any way.<br />
The length of the cord used on this appliance<br />
was selected to reduce the hazards of<br />
becoming tangled in, or tripping over a<br />
longer cord. If a longer cord is necessary an<br />
approved extension cord may be used. The<br />
electrical rating of the extension cord must<br />
be equal to or greater than the rating of the<br />
toaster oven. Care must be taken to arrange<br />
the extension cord so that it will not drape<br />
over the countertop or tabletop where it can<br />
be pulled on by children or accidentally<br />
tripped over.<br />
This appliance is equipped with a fully<br />
tempered safety glass door. The tempered<br />
glass is four times stronger than ordinary<br />
glass and more resistant to breakage.<br />
Tempered glass can break, however it breaks<br />
into pieces with no sharp edges. Care must<br />
be taken to avoid scratching door surface or<br />
nicking edges. If the door has a scratch or<br />
nick, call our toll-free customer assistance<br />
number.<br />
Always unplug your toaster oven from the<br />
outlet when not in use.<br />
When heavy foods are on the oven rack, do<br />
not pull the oven rack out more than halfway.<br />
To baste or check for doneness, remove food<br />
from the oven and place on counter.<br />
The oven door is not a shelf. Do not place<br />
anything on the oven door.<br />
Do not place bake pan directly on heating<br />
elements.<br />
To avoid an electrical circuit overload,<br />
do not operate another high-wattage appliance<br />
on the same circuit with the toaster<br />
oven.<br />
Before First Use<br />
Remove broil grid, baking pan, and oven<br />
rack. Wash in hot, soapy water. Rinse<br />
and dry.<br />
Most heating appliances produce an odor<br />
and/or smoke when used for the first time.<br />
Plug toaster oven into outlet. Turn the<br />
Temperature Dial to 450°F. Set <strong>Oven</strong> Control<br />
Switch to BAKE. Heat at this temperature for<br />
10 minutes. The odor should not be present<br />
after this initial preheating.<br />
3
840102700 ENv04 12/4/02 2:31 PM Page 4<br />
Parts and Features<br />
1<br />
2<br />
3<br />
Temperature Dial – Select a baking<br />
temperature or set at 450ºF for<br />
toasting.<br />
Indicator Light – This is lit when<br />
<strong>Oven</strong> Control Switch is on BAKE,<br />
TOAST, or BROIL.<br />
Toast Shade Selector – Turn to<br />
desired toast shade.<br />
4<br />
5<br />
6<br />
<strong>Oven</strong> Control Switch – Use to turn<br />
the oven on or to a BAKE, BROIL<br />
or TOAST mode.<br />
Turn to OFF position:<br />
• To turn oven off.<br />
• To turn toaster off.<br />
• When not in use, unplug<br />
from outlet.<br />
Dual-Level Rack Grooves<br />
Slide-Out Crumb Tray – For easy<br />
cleaning.<br />
7<br />
8<br />
Broil Grid (see page 5)<br />
Bake Pan (see page 5)<br />
1<br />
2<br />
3<br />
4<br />
6<br />
5<br />
<strong>Oven</strong> Rack Positions<br />
The toaster oven comes with a dual-position oven rack. Flip the rack over to change<br />
the position. The oven rack may be used in the high or low position in either of the<br />
dual-level rack grooves.<br />
High Position<br />
Low Position<br />
4
840102700 ENv04 12/4/02 2:31 PM Page 5<br />
Broil Grid Positions<br />
The broil grid is a dual-position grid. It may be used in a low or high position.<br />
Always use the baking pan with the broil grid.<br />
High Position<br />
Low Position<br />
7<br />
Using <strong>Your</strong> <strong>Toaster</strong> <strong>Oven</strong><br />
To Toast (Do not leave toaster oven unattended during toasting.)<br />
1. Place oven rack in the high position<br />
in the top rack<br />
groove. Place bread<br />
centered on oven<br />
rack. Turn the<br />
Temperature Dial<br />
to 450ºF.<br />
2. Turn Toast Shade Selector to desired<br />
toast color (indicated<br />
by toast icon).<br />
NOTES:<br />
• Do not turn knob<br />
past the 5 minute<br />
mark when toasting.<br />
8<br />
• If you select a “light” toast setting, the<br />
end-of-cycle bell will not sound unless<br />
you turn the Toast Shade Selector<br />
past light toast icon and then back to<br />
your desired setting.<br />
3. Set <strong>Oven</strong> Control Switch to TOAST.<br />
The indicator light<br />
will come on. A bell<br />
will sound when the<br />
toasting cycle is<br />
completed.<br />
4. To stop the toasting cycle sooner,<br />
turn <strong>Oven</strong> Control Switch to OFF and<br />
Toast Shade Selector to 0.<br />
5. When finished, turn <strong>Oven</strong> Control<br />
Switch to OFF. Unplug from outlet.<br />
Toasting Tips!<br />
• To toast frozen pastry or waffles,<br />
place oven rack in high position.<br />
Select a light color and toast directly<br />
on oven rack. If pastry has a glaze or<br />
frosting, use baking pan to prevent<br />
dripping.<br />
• The number of slices of bread, the<br />
bread freshness, and the starting<br />
temperature of the oven will affect<br />
toast color. If the oven is already hot,<br />
select a lighter shade of toast than<br />
normal. Adjust the toast Shade<br />
Selector to achieve the desired color.<br />
• When toasting, condensation may<br />
form on oven door. A toaster is<br />
open and allows moisture to escape.<br />
A toaster oven is a closed space and<br />
so moisture is slow to escape. This is<br />
normal.<br />
• At the end of the toast cycle,<br />
remove toast immediately or the<br />
heat remaining in the toaster oven<br />
will continue to toast and dry out<br />
your toast.<br />
5
840102700 ENv04 12/4/02 2:31 PM Page 6<br />
To Bake<br />
1. Place oven rack in a low or high<br />
position depending on food to be<br />
cooked.<br />
2. Select temperature.<br />
3. Set <strong>Oven</strong> Control Switch to BAKE.<br />
The Indicator Light<br />
will come on.<br />
4. Let preheat for five minutes before<br />
beginning to bake.<br />
5. When finished, turn <strong>Oven</strong> Control<br />
Switch to OFF. Unplug from outlet.<br />
Baking Tips!<br />
• The toaster oven operates very<br />
much like a regular oven. When<br />
first using, check to determine if<br />
time or temperature should be<br />
adjusted.<br />
• To reduce the risk of fire, do not<br />
use oven cooking bags in the<br />
toaster oven.<br />
• Always allow at least one inch<br />
between the food and the heating<br />
element.<br />
• Bake potatoes at 425ºF for one hour,<br />
or until done.<br />
To Top-Brown (Do not leave toaster oven unattended during top-browning.)<br />
1. Place oven rack in the high position.<br />
Place dish to be browned in oven.<br />
2. Set Temperature Dial to 450ºF.<br />
5. To stop the top-brown cycle sooner,<br />
turn the <strong>Oven</strong> Control Switch<br />
to OFF and turn Toast Shade<br />
Selector to 0.<br />
6. When finished, turn the <strong>Oven</strong><br />
Control Switch to OFF. Unplug<br />
from outlet.<br />
3. Turn Toast Shade Selector to desired<br />
setting.<br />
4. Set <strong>Oven</strong> Control Switch to TOAST.<br />
The indicator light<br />
will come on. Watch<br />
food carefully to prevent<br />
over-browning.<br />
A bell will sound<br />
when the cycle is<br />
completed.<br />
6<br />
Top-Browning Tips!<br />
• If browning bread crumbs that top<br />
a casserole, set Toast Shade<br />
Selector at medium color.<br />
• To melt cheese, set Toast Shade<br />
Selector at light color.<br />
• Always allow at least one inch<br />
between the food and the heating<br />
element.
840102700 ENv04 12/4/02 2:31 PM Page 7<br />
To Broil<br />
1. Place oven rack in low or high<br />
position depending on food to<br />
be cooked.<br />
2. Set Temperature Dial to 450˚F.<br />
3. Set the <strong>Oven</strong> Control Switch to BROIL.<br />
The Indicator Light<br />
will come on.<br />
5. Halfway through cooking time, or<br />
when food has browned, turn food<br />
over to brown and cook other side.<br />
6. When finished, turn <strong>Oven</strong> Control<br />
Switch to OFF. Unplug from outlet.<br />
Broiling Tips!<br />
• For best results, do not preheat oven<br />
when broiling.<br />
• Use the broil grid in the high position<br />
for faster broiling times. Use the low<br />
position for foods needing longer<br />
broiling times, like chicken.<br />
• Always allow at least one inch<br />
between the food and the heating<br />
element.<br />
4. Set the broil grid in low or high position<br />
in baking pan. Place food on<br />
broil grid and place in oven.<br />
Broiling Chart<br />
Food<br />
Hamburgers<br />
Bacon<br />
Hot Dogs<br />
Sausage Links or Patties<br />
(pierce casings before cooking)<br />
Fish<br />
Amount<br />
4, 1-inch thick<br />
4 slices<br />
8<br />
8<br />
4 fillets<br />
Approximate Time<br />
20 minutes<br />
10 minutes<br />
15 minutes<br />
15 to 20 minutes<br />
15 minutes<br />
Pan Sizes!<br />
These pans should fit your toaster oven.<br />
To be sure, place the pan in the oven<br />
to check the fit before preparing the<br />
recipe.<br />
8- and 9-inch round or square<br />
baking pans<br />
6-cup muffin pan<br />
8x4-inch loaf pan<br />
9x5-inch loaf pan<br />
Most 1 to 1 1 ⁄2 quart casserole dishes<br />
7
840102700 ENv04 12/4/02 2:31 PM Page 8<br />
<strong>Cleaning</strong> <strong>Your</strong> <strong>Toaster</strong> <strong>Oven</strong><br />
<strong>Your</strong> toaster oven should be cleaned regularly for best performance and long life.<br />
Regular cleaning will also reduce the risk of fire hazard.<br />
1. Unplug oven and allow to cool.<br />
2. Wash oven rack, broil grid, and<br />
baking pan in hot, soapy water. Rinse<br />
and dry. These can be washed in the<br />
dishwasher, but may discolor.<br />
3. To clean the crumb tray, open oven<br />
door. Pull out crumb tray as shown.<br />
Wash in hot soapy water. Rinse and<br />
dry. Place crumb tray back in oven.<br />
Crumb<br />
Tray<br />
4. To clean the inside of the oven, wipe<br />
oven walls and glass door with a<br />
damp, soapy cloth. Repeat with a<br />
damp, clean cloth.<br />
5. To clean the outside of the oven,<br />
wipe with a damp cloth.<br />
NOTES:<br />
• Do not use abrasive cleanser. These<br />
may damage the nonstick coating.<br />
• For stubborn stains, use a plastic<br />
scouring pad.<br />
Do not clean with metal scouring pads.<br />
Pieces can break off pad and touch<br />
electrical parts, causing a risk of<br />
electric shock.<br />
Recipes<br />
Hot Mexican Bean Dip<br />
2 15-ounce cans black beans,<br />
well drained<br />
1 teaspoon hot pepper sauce<br />
1<br />
⁄2 cup sour cream<br />
1<br />
⁄2 cup salsa<br />
8 ounces Monterey Jack cheese, grated<br />
Mash black beans. Add hot pepper sauce, sour cream, salsa, and half of the<br />
cheese. Spoon into shallow 1 quart casserole dish. Sprinkle remaining cheese on<br />
top. Bake at 350°F about 15 minutes, or until bubbly. Serve with tortilla chips.<br />
Makes 8 appetizer servings.<br />
Mini Meat Loaves<br />
1 pound lean ground beef<br />
1 small onion, finely chopped<br />
3<br />
⁄4 cup fresh bread crumbs<br />
1 egg, beaten<br />
1 tablespoon grated Parmesan cheese<br />
1 tablespoon fresh parsley, finely<br />
chopped<br />
1<br />
⁄4 teaspoon each, salt and pepper<br />
Combine all ingredients and mix well. Divide the mixture between 6-cup muffin<br />
pan. Bake at 350°F for 30 minutes or until done. Makes 4 to 6 servings.<br />
8
840102700 ENv04 12/4/02 2:31 PM Page 9<br />
Tropical Chicken<br />
4 boneless, skinless chicken breasts<br />
8 ounce can crushed pineapple,<br />
not drained<br />
1<br />
⁄4 cup prepared mustard<br />
1<br />
⁄4 cup cider vinegar<br />
2 tablespoons soy sauce<br />
2 tablespoons brown sugar<br />
1<br />
⁄8 teaspoon ground ginger<br />
Rice (optional)<br />
Place chicken breasts in shallow casserole dish or 8-inch square baking pan.<br />
Combine remaining ingredients and pour over chicken. Bake at 350°F for 35 to 45<br />
minutes or until done. Serve over rice. Makes 4 servings.<br />
Honey Mustard Roast Chicken<br />
6 pound roasting chicken<br />
Salt and pepper<br />
Remove giblets from chicken cavity and use for gravy if desired. Rinse chicken in<br />
cold water. Pat dry. Sprinkle with salt and pepper. Place broiling grid in low position<br />
in baking pan. Place chicken on broiling grid. Cook at 350ºF for 2 hours or<br />
until done. Remove from oven. Combine honey and mustard and spoon or brush<br />
over chicken. Let chicken stand for 5 minutes before carving or cutting.<br />
Makes 6 to 8 servings.<br />
Baked Ziti<br />
1<br />
⁄2 pound lean ground beef<br />
2 tablespoons finely chopped onion<br />
1 1 ⁄2 cups spaghetti sauce<br />
1 1 ⁄2 cups uncooked ziti pasta<br />
In a skillet over medium-high heat, cook ground beef and onion until beef is done,<br />
about 8 minutes. Add spaghetti sauce and stir to mix. Set aside. Cook pasta according<br />
to package directions. Drain. In a greased 9x5-inch metal loaf pan layer the following:<br />
half of pasta, sour cream, half of meat sauce, remaining pasta, mozzarella, then<br />
remaining meat sauce. Sprinkle with Parmesan cheese. Bake at 350ºF for 30 minutes.<br />
Makes 2 to 3 servings.<br />
Crispy Catfish Fillets<br />
1<br />
⁄2 cup grated Parmesan cheese<br />
20 buttery crackers, like Ritz or<br />
Townhouse, crushed<br />
2 tablespoons honey<br />
1 tablespoon prepared mustard<br />
1<br />
⁄2 cup sour cream<br />
1<br />
⁄2 cup shredded mozzarella cheese,<br />
about 4 ounces<br />
1<br />
⁄4 cup grated Parmesan cheese<br />
1<br />
⁄3 cup fresh parsley sprigs, minced<br />
1<br />
⁄4 cup melted butter<br />
4 catfish fillets, about 8 ounces each<br />
Place cheese, crackers, and parsley in large shallow bowl. Mix. Dip fillets in butter<br />
then place in cracker mixture to coat. Lay fillets on aluminum foil-lined baking<br />
pan. Bake at 400˚F for 15-20 minutes. Makes 4 servings.<br />
9
840102700 ENv04 12/4/02 2:31 PM Page 10<br />
Parsley Potatoes<br />
5 red potatoes, about 1 1 ⁄2 pounds<br />
1 tablespoon vegetable oil<br />
1 tablespoon minced fresh parsley<br />
1<br />
⁄4 teaspoon salt<br />
1<br />
⁄4 teaspoon pepper<br />
Scrub potatoes and cut each into 6 wedges. Place in a bowl. Drizzle with oil. Sprinkle<br />
with parsley and seasonings. Stir to mix. Pour into baking pan. Bake at 400ºF for 35<br />
minutes or until fork tender. Makes 4 servings.<br />
Minute Muffins<br />
1 cup self-rising flour<br />
1<br />
⁄2 cup milk<br />
2 tablespoons mayonnaise or sour cream<br />
Stir together ingredients. Spoon into greased 6-cup muffin pan. Bake at 450°F for<br />
12 minutes or until done. Makes 6 muffins.<br />
Apple Kuchen<br />
8-ounce box yellow cake mix<br />
(makes 1 layer)<br />
3 tablespoons butter, melted<br />
1 large Golden Delicious apple<br />
1<br />
⁄2 teaspoon cinnamon<br />
1<br />
⁄4 cup sugar<br />
1<br />
⁄2 cup sour cream<br />
1 egg<br />
1<br />
⁄2 teaspoon vanilla<br />
In a small bowl combine cake mix and melted butter. Mix. Place mixture into<br />
greased 8-inch square baking pan. Press onto bottom and slightly up sides. Peel,<br />
core, and thinly slice the apple. Lay slices on crust. Combine cinnamon and sugar.<br />
Sprinkle half of sugar mixture over apples. Combine sour cream, egg, and vanilla.<br />
Pour over apples. Sprinkle remaining sugar mixture over sour cream. Bake at 350ºF<br />
for 40 minutes or until lightly browned and apples are tender. Makes 6 to 8 servings.<br />
Half-Pound Cake<br />
3-ounce package cream cheese<br />
6 tablespoons butter or margarine,<br />
room temperature<br />
1 cup sugar<br />
2 eggs<br />
1 teaspoon vanilla<br />
1 cup cake flour<br />
In a mixing bowl, cream together cream cheese, butter, and sugar. Beat in eggs and<br />
vanilla. Add flour and stir until mixed. Spoon into greased 8x4-inch loaf pan. Bake<br />
at 350ºF for 50 minutes or until tests done. Makes 6 servings.<br />
Warming & Reheating Tips!<br />
• Do not totally enclose foods in aluminum<br />
foil. Foil can insulate foods<br />
and slow down reheating.<br />
• To reheat rolls or biscuits, place on<br />
baking pan and heat at 300°F for 10<br />
minutes.<br />
• Reheat leftover roasts or casseroles at<br />
350°F for 20 to 30 minutes or until<br />
heated through.<br />
10
840102700 ENv04 12/4/02 2:31 PM Page 11<br />
Troubleshooting<br />
Question<br />
The toaster oven will not heat.<br />
The toaster oven will not toast.<br />
Moisture forms on the inside<br />
of the oven door when toasting.<br />
An odor and smoke comes<br />
from the toaster oven.<br />
The Indicator Light stays on.<br />
Some foods burn and some<br />
are not done.<br />
The oven gets hot on the outside.<br />
Answer<br />
Check to make sure the outlet is working<br />
and the oven is plugged in. Next turn<br />
the Temperature Dial to 350°F and then<br />
turn the <strong>Oven</strong> Control Switch to BAKE.<br />
The Indicator Light should now be lit.<br />
Check to make sure the outlet is working<br />
and the oven is plugged in.<br />
1. Set Temperature Dial to 450˚F.<br />
2. Select toast color.<br />
3. Turn <strong>Oven</strong> Control Switch to TOAST.<br />
The Indicator Light should now be lit.<br />
This is normal when toasting in a toaster<br />
oven. Moisture is slower to escape from<br />
the toaster oven than from a toaster.<br />
The amount of moisture will differ<br />
among fresh bread, bagels, and<br />
frozen pastry.<br />
Smoke and odor is normal during the<br />
first use of most heating appliances.<br />
This will not be present after the initial<br />
heating period.<br />
Turn <strong>Oven</strong> Control Switch to OFF. If<br />
light stays on, unplug unit and call our<br />
toll-free customer assistance number for<br />
information on examination, repair, or<br />
adjustment. Do not continue to use your<br />
toaster oven.<br />
Use the oven rack position to center<br />
food in the oven. Adjust the oven<br />
temperature or cooking time for best<br />
results with your recipes.<br />
Please be careful. The top and sides of<br />
oven get very hot, but this is normal.<br />
11
840102700 ENv04 12/4/02 2:31 PM Page 12<br />
Customer Assistance<br />
If you have a claim under this warranty, please call our Customer Assistance Number.<br />
For faster service please have model, series, and type numbers ready for operator to<br />
assist you. These numbers can be found on the bottom of your toaster oven.<br />
MODEL: ________________ TYPE: _________________ SERIES: __________________<br />
Customer Assistance Number 1-877-207-0923<br />
Keep this number for future reference!<br />
E-mail inquiries: www.gehousewares.com<br />
Two-Year Limited Warranty<br />
What does your warranty cover?<br />
• Any defect in material or workmanship.<br />
For how long after the original purchase?<br />
• Two years.<br />
What will we do?<br />
• Provide you with a new one.<br />
How do you make a warranty claim?<br />
• Save your receipt.<br />
• Properly pack your unit. We recommend<br />
using the original carton and packing<br />
materials.<br />
• Return the product to your nearest<br />
WAL ★ MART store or call Customer<br />
Assistance at 1-877-207-0923.<br />
What does your warranty not cover?<br />
• Glass parts, glass containers, cutter/strainer,<br />
blades and/or agitators.<br />
• Commercial use or any other use not<br />
found in printed directions.<br />
• Damage from misuse, abuse, or neglect.<br />
• Products purchased or serviced outside<br />
the USA.<br />
How does state law relate to this warranty?<br />
• This warranty gives you specific legal rights,<br />
and you may also have other rights which<br />
vary from state to state.<br />
• WAL ★ MART expressly disclaims all responsibility<br />
for consequential damages or<br />
incidental losses caused by use of this<br />
appliance. Some states do not allow this<br />
exclusion or limitation of incidental or<br />
consequential losses so the foregoing<br />
disclaimer may not apply to you.<br />
What if you purchased your product in the<br />
U.S., Canada or Mexico and encounter a<br />
problem while using it outside the country<br />
of purchase?<br />
• The warranty is valid only in the country of<br />
purchase and if you follow the warranty<br />
claim procedure as noted.<br />
g is a trademark of<br />
General Electric Company<br />
and is used under license by<br />
WAL ★ MART Stores, Inc.<br />
Bentonville, AR 72716<br />
840102700<br />
WAL ★ MART Stores, Inc.<br />
Bentonville, AR 72716<br />
12/02<br />
12
840102700 SPv04 12/4/02 2:32 PM Page 1<br />
g<br />
Horno Eléctrico<br />
Salvaguardias importantes.................... 2<br />
Piezas y características ..........................4<br />
El uso de su horno eléctrico .................. 5<br />
La limpieza de su horno eléctrico ........ 8<br />
Recetas ........................................................ 8<br />
Localización de fallas ............................ 11<br />
Asistencia al cliente .............................. 12<br />
Para comunicarse con Asistencia al Cliente, llame al 1-877-207-0923<br />
840102700
840102700 SPv04 12/4/02 2:32 PM Page 2<br />
SALVAGUARDIAS IMPORTANTES<br />
Cuando use aparatos eléctricos, es importante seguir todas las precauciones básicas de<br />
seguridad que incluyen lo siguiente:<br />
1. Lea todas las instrucciones.<br />
2. No toque superficies calientes. Use manijas<br />
o perillas.<br />
3. Para protegerse contra el riesgo de<br />
choque eléctrico, no sumerja el cable, el<br />
enchufe o el horno eléctrico en agua<br />
ni en ningún otro líquido. Consulte las<br />
instrucciones que aparecen en la sección<br />
de “Limpieza”.<br />
4. Es necesario que haya buena supervisión<br />
cuando los niños utilicen electrodomésticos<br />
o cuando éstos se estén utilizando cerca<br />
de niños.<br />
5. Desenchúfelo del tomacorriente cuando<br />
no lo esté usando y antes de la limpieza.<br />
Deje que se enfríe antes de limpiar el<br />
aparato o de colocar o sacar alguna pieza.<br />
6. No opere ningún aparato electrodoméstico<br />
si el cordón o el enchufe están averiados,<br />
después de un mal funcionamiento del<br />
aparato, o si éste se ha caído o averiado de<br />
alguna forma. Llame a nuestro número<br />
gratuito de servicio al cliente, para<br />
obtener información sobre el examen, la<br />
reparación o la regulación del aparato.<br />
7. El uso de accesorios no recomendados<br />
por el fabricante del aparato puede causar<br />
lesiones.<br />
8. No lo use al aire libre.<br />
9. No deje que el cable cuelgue sobre el<br />
borde de una mesa o de un mostrador,<br />
o que toque alguna superficie caliente.<br />
10. No coloque el aparato sobre o cerca de<br />
un quemador a gas o eléctrico caliente, ni<br />
dentro de un horno caliente.<br />
11. Es importante tener extremo cuidado cuando<br />
se mueva un electrodoméstico que contenga<br />
aceite caliente u otros líquidos calientes.<br />
12. Para desconectar, coloque todos los<br />
controles en la posición apagada (OFF),<br />
y luego saque el enchufe del tomacorriente.<br />
13. Tenga mucho cuidado cuando saque la<br />
bandeja o elimine la grasa caliente.<br />
14. No limpie con esponjillas metálicas.<br />
La esponjilla se puede desintegrar y los<br />
trozos pueden tocar las partes eléctricas,<br />
creando un riesgo de choque eléctrico.<br />
15. No introduzca alimentos ni utensilios<br />
metálicos de tamaño demasiado grande<br />
en el horno eléctrico ya que pueden crear<br />
un incendio o riesgo de choque eléctrico.<br />
16. Puede ocurrir un incendio si el horno<br />
eléctrico se cubre, toca o se encuentra<br />
cerca de materiales inflamables, incluyendo<br />
cortinas, colgaduras, paredes y superficies<br />
similares cuando esté funcionando. No<br />
ponga nada sobre el aparato cuando esté<br />
funcionando.<br />
17. Se debe tener mucho cuidado cuando<br />
se usen envases que no sean de metal<br />
o de vidrio.<br />
18. Cuando no esté en uso, no guarde<br />
ningún material en este horno que no<br />
sean los accesorios recomendados por su<br />
fabricante.<br />
19. No coloque ninguno de los siguientes<br />
materiales en el horno: papel, cartón,<br />
plástico y similares.<br />
20. No cubra la charola para migajas ni<br />
ninguna otra parte del horno con papel<br />
metálico. Eso puede hacer que el horno<br />
se recaliente.<br />
21. Para apagarlo, oprima el interruptor de<br />
control del horno a la posición apagada<br />
(OFF).<br />
22. No ponga los ojos o la cara cerca de la<br />
puerta de seguridad de vidrio templado,<br />
en caso de que el vidrio de seguridad<br />
se rompa.<br />
23. No use el aparato electrodoméstico para<br />
ningún otro fin que no sea el indicado.<br />
24. Antes de usar este aparato, muévalo entre<br />
2 y 4 pulgadas lejos de la pared o de<br />
cualquier objeto que se pueda haber colocado<br />
cerca o sobre el mismo. No lo use<br />
sobre superficies en donde el calor pueda<br />
ocasionar problemas.<br />
25. Si el enchufe se calienta, llame a un<br />
electricista competente.<br />
26. La puerta del horno no es un estante.<br />
No coloque alimentos pesados en la<br />
puerta.<br />
27. Tenga mucho cuidado al extender la<br />
rejilla o al agregar alimentos en la rejilla<br />
extendida.<br />
28. Para apagar el horno gire el interruptor<br />
de control del mismo a la posición de<br />
apagado (“OFF”).<br />
GUARDE ESTAS INSTRUCCIONES!<br />
2
840102700 SPv04 12/4/02 2:32 PM Page 3<br />
Información para la seguridad del consumidor<br />
Este aparato ha sido diseñado solamente<br />
para uso doméstico.<br />
Este aparato viene equipado con un enchufe<br />
polarizado. Este tipo de enchufe tiene una<br />
clavija más ancha que la otra. Este enchufe<br />
encajará en un tomacorriente de una sola<br />
manera. Esta es una propiedad de seguridad<br />
destinada a reducir el riesgo de choque<br />
eléctrico. Si no puede introducir el enchufe<br />
en el tomacorriente, trate de invertir el<br />
enchufe. Si aún no encaja, comuníquese<br />
con un electricista competente para cambiar<br />
el tomacorriente obsoleto. No trate de hacer<br />
caso omiso del propósito de seguridad<br />
del enchufe polarizado modificándolo de<br />
alguna manera.<br />
El largo del cable que se usa en este aparato<br />
fue seleccionado para reducir el peligro de<br />
que alguien se enganche o tropiece con un<br />
cordón más largo. Si se necesita un cordón<br />
más largo, se puede usar un cable de extensión<br />
aprobado. La clasificación nominal<br />
eléctrica del cable de extensión deberá ser<br />
igual o mayor que la clasificación nominal<br />
del horno eléctrico. Es importante tener<br />
cuidado de colocar el cable de extensión<br />
para que no se cuelgue sobre el mostrador<br />
o la mesera en donde niños puedan jalar<br />
el mismo o tropezarse accidentalmente.<br />
Este aparato viene equipado con una puerta<br />
de seguridad de vidrio totalmente templado.<br />
El vidrio templado es cuatro veces más fuerte<br />
que el vidrio común y más resistente a las<br />
roturas. El vidrio templado se puede romper,<br />
sin embargo se rompe en trozos sin bordes<br />
filosos. Es importante tener cuidado para<br />
evitar rayar la superficie de la puerta o hacer<br />
muescas en los bordes. Si la puerta está<br />
rayada o tiene muescas, llame al número de<br />
teléfono gratuito para servicio al cliente.<br />
Siempre desenchufe el horno tostador del<br />
tomacorriente cuando no lo esté usando.<br />
Cuando los alimentos pesados estén en la<br />
rejilla del horno, no jale hacia fuera más de la<br />
mitad de la rejilla. Para rociar los alimentos<br />
con el jugo de la cocción o para revisar el término<br />
de cocimiento, saque los alimentos del<br />
horno y coloquelos sobre el mostrador.<br />
La puerta del horno no es un estante. No<br />
coloque nada sobre la puerta del horno.<br />
No coloque la asadera para hornear<br />
directamente encima de los elementos de<br />
calefacción.<br />
Para evitar una sobrecarga en el circuito, no<br />
haga funcionar ningún otro aparato de alto<br />
vataje en el mismo circuito que el horno<br />
eléctrico.<br />
Antes del primer uso<br />
Retire la rejilla de la parrilla, la asadera para<br />
hornear y la rejilla del horno. Lávelas en<br />
agua caliente y jabonosa. Enjuague y seque.<br />
La mayoría de los aparatos de calentamiento<br />
producen un olor y/o humo cuando se usan<br />
por primera vez. Enchufe el horno eléctrico<br />
en el tomacorriente. Coloque el Control de<br />
Temperatura a 450°F. Coloque el Interruptor<br />
de Control del horno en la posición de<br />
HORNEAR (BAKE). Caliente a esta<br />
temperatura por 10 minutos. El olor deberá<br />
desaparecer después del precalentamiento<br />
inicial.<br />
3
840102700 SPv04 12/4/02 2:32 PM Page 4<br />
Piezas y características<br />
1<br />
2<br />
3<br />
Control de Temperatura – Seleccione<br />
una temperatura de horneado o<br />
fíjelo a 450°F para el tostado.<br />
Luz indicadora – Esta luz se ilumina<br />
cuando el Interruptor de Control<br />
del Horno está en la posición de<br />
HORNEAR (BAKE), TOSTAR<br />
(TOAST) o ASAR A LA<br />
PARRILLA (BROIL).<br />
Control de tostado – Hágalo girar al<br />
número deseado para seleccionar el<br />
grado de tostado.<br />
6 5<br />
Posiciones de la rejilla del horno<br />
El horno eléctrico viene con una rejilla de horno de dos posiciones. Invierta la rejilla<br />
para cambiar la posición. Se puede utilizar la rejilla del horno en la posición alta<br />
o baja en cualquiera de las guías de dos niveles de la rejilla.<br />
Posición alta<br />
Posición baja<br />
4<br />
5<br />
6<br />
7<br />
8<br />
Interruptor de control del horno –<br />
Úselo para encender el horno o<br />
para ponerlo en el modo de BAKE<br />
(Hornear), BROIL (Dorar) o<br />
TOAST (Tostar).<br />
Colóquelo en la posición apagada (OFF):<br />
• Para apagar el horno<br />
• Para apagar el tostador<br />
• Cuando no se esté usando,<br />
desenchúfelo del tomacorriente<br />
Dos niveles de guías para la rejilla<br />
Charola deslizable para migajas –<br />
Para una limpieza fácil.<br />
Rejilla para asar (vea debajo)<br />
Asadera para hornear (vea debajo)<br />
1<br />
2<br />
3<br />
4<br />
Posiciones de la rejilla para asar a la parrilla<br />
La rejilla para asar a la parrilla tiene dos posiciones. Se puede usar en la posición<br />
baja o alta. Siempre use la asadera para hornear con la rejilla para asar a la parrilla.<br />
Posición alta<br />
Posición baja<br />
7<br />
4<br />
8
840102700 SPv04 12/4/02 2:32 PM Page 5<br />
El uso de su horno eléctrico<br />
Para tostar (No deje el aparato sin supervisión cuando esté tostando.)<br />
1. Coloque la rejilla del horno en la<br />
posición alta en la<br />
guía superior de la<br />
rejilla. Coloque el<br />
pan en el centro de<br />
la rejilla del horno.<br />
Haga girar el<br />
Control de<br />
Temperatura a la posición de 450°F.<br />
2. Coloque el Control de Tostado en el<br />
color de tostado<br />
que desee (indicado<br />
por el icono de<br />
tostado).<br />
NOTAS:<br />
• No gire la perilla más allá de la marca<br />
de 5 minutos cuando esté tostando.<br />
• Si selecciona la graduación de tostado<br />
“claro,” el timbre de fin de ciclo<br />
no sonará a menos que haya colocado<br />
primero el Control de Tostado<br />
en una graduación que pase del<br />
icono de tostado claro y después lo<br />
haya bajado a la graduación menor<br />
que deseaba.<br />
¡Sugerencias para tostar!<br />
• Para tostar pasteles o wafles congelados,<br />
coloque la rejilla del horno en la<br />
posición alta. Seleccione un color<br />
claro y tueste directamente sobre la<br />
rejilla del horno. Si el pastel tiene<br />
fondant o glaseado, use la asadera<br />
para hornear para evitar que gotee.<br />
• El color del tostado se verá afectado<br />
por el número de rebanadas de pan,<br />
la frescura del pan y la temperatura<br />
del comienzo del horno. Si el horno<br />
ya está caliente, seleccione un color<br />
de tostado más claro que el normal.<br />
Ajuste el control de tostado para<br />
alcanzar el color deseado.<br />
3. Coloque el Interruptor de Control<br />
del Horno en la<br />
posición para tostar<br />
(TOAST). La luz<br />
indicadora se ilumi<br />
nará. Se oirá un<br />
timbre cuando el<br />
ciclo de tostado se<br />
haya completado.<br />
4. Para detener el ciclo de tostado con<br />
anticipación, haga girar el Interruptor<br />
de Control del Horno a la<br />
posición apagada (OFF) y el Control<br />
de Tostado a la posición 0.<br />
5. Cuando haya terminado, haga girar<br />
el Interruptor de Control del Horno<br />
a la posición apagada (OFF).<br />
Desenchúfelo del tomacorriente.<br />
• Cuando tueste, es posible que se<br />
forme condensación en la puerta del<br />
horno. Un tostador común es un<br />
aparato abierto y permite que se<br />
escape la humedad. Un horno<br />
eléctrico es un aparato cerrado y la<br />
humedad se escapa lentamente. Esto<br />
es normal.<br />
• Al final del ciclo, saque la tostada<br />
inmediatamente o el calor que<br />
permanece en el horno eléctrico<br />
continuará tostándola y la secará.<br />
5
840102700 SPv04 12/4/02 2:32 PM Page 6<br />
Para hornear<br />
1. Coloque la rejilla del horno en la<br />
posición baja o alta según la comida<br />
que esté cocinando.<br />
2. Seleccione la temperatura.<br />
3. Coloque el Interruptor de Control<br />
del Horno en la<br />
posición para hornear<br />
(BAKE). Se<br />
iluminará la Luz<br />
Indicadora.<br />
4. Deje que el horno se precaliente<br />
durante cinco minutos antes de<br />
comenzar a hornear.<br />
5. Cuando termine, gire el Interruptor<br />
de Control del Horno a la posición<br />
apagada (OFF). Desenchúfelo del<br />
tomacorriente.<br />
¡Sugerencias para hornear!<br />
• El horno eléctrico funciona en<br />
forma muy similar a un horno<br />
común. Cuando lo use por primera<br />
vez, verifique si es necesario regular<br />
la temperatura o el tiempo.<br />
• Para reducir el riesgo de incendio,<br />
no use bolsas para hornear en el<br />
horno eléctrico.<br />
• Siempre deje por lo menos una<br />
pulgada de distancia entre la comida<br />
y el elemento térmico.<br />
• Cueza las papas a 425°F por una hora<br />
o hasta que estén cocidas.<br />
Para dorar (No deje el horno eléctrico sin supervisión cuando esté dorando alimentos.)<br />
1. Coloque la rejilla del horno en la<br />
posición alta. Coloque lo que se va a<br />
dorar en el horno.<br />
2. Gradúe el Control de Temperatura a<br />
450°F.<br />
3. Haga girar el Control de Tostado a la<br />
graduación deseada.<br />
4. Coloque el Interruptor de Control<br />
del Horno en la<br />
posición de tostar<br />
(TOAST). La luz<br />
indicadora se<br />
iluminará. Vigile<br />
los alimentos con<br />
6<br />
atención para evitar que se quemen.<br />
Se escuchará un timbre cuando se<br />
haya completado el ciclo.<br />
5. Para detener el ciclo de dorado antes<br />
de lo programado, haga girar el<br />
Interruptor de Control del Horno a<br />
la posición apagada (OFF) y coloque<br />
el Control de Tostado en la graduación<br />
0.<br />
6. Cuando haya terminado, gire el<br />
Interruptor de Control del Horno a<br />
la posición apagada (OFF).<br />
Desenchúfelo del tomacorriente.<br />
¡Sugerencias para dorar!<br />
• Si está dorando las migas que<br />
cubren una cazuela, coloque el<br />
Control de Tostado en la graduación<br />
de color medio.<br />
• Para derretir queso, coloque el<br />
Control de Tostado en la graduación<br />
de color claro.<br />
• Siempre deje por lo menos una<br />
pulgada de distancia entre la comida<br />
y el elemento térmico.
840102700 SPv04 12/4/02 2:32 PM Page 7<br />
Para asar a la parrilla<br />
1. Coloque la rejilla del horno en la<br />
posición baja o alta según los<br />
alimentos que vaya a cocinar.<br />
2. Coloque el Control de Temperatura<br />
a 450°F.<br />
3. Coloque el Interruptor de Control<br />
del Horno en la<br />
posición de asar a<br />
la parrilla (BROIL).<br />
La luz indicadora se<br />
iluminará.<br />
4. Coloque la rejilla para asar a la parrilla<br />
en la posición baja o alta sobre la<br />
asadera para hornear. Ponga el alimento<br />
en la rejilla para asar a la<br />
parrilla y colóquela en el horno.<br />
5. Cuando haya llegado a la mitad del<br />
tiempo de cocción, o cuando el<br />
alimento se haya dorado lo suficiente,<br />
invierta el alimento para dorarlo<br />
y cocinarlo del otro lado.<br />
6. Cuando haya terminado, haga girar<br />
el Interruptor de Control del Horno<br />
a la posición apagada (OFF).<br />
Desenchufe del tomacorriente.<br />
¡Sugerencias para asar a la parrilla!<br />
• Para obtener mejores resultados no<br />
precaliente el horno cuando ase a<br />
la parrilla.<br />
• Use la rejilla para asar a la parrilla<br />
en la posición alta para acelerar el<br />
tiempo de asado. Use la posición<br />
baja para alimentos que requieran<br />
más tiempo de asado, como el pollo.<br />
• Siempre deje por lo menos una<br />
pulgada de distancia entre la comida<br />
y el elemento térmico.<br />
Tabla de tiempos para asar a la parrilla<br />
Alimento<br />
Hamburguesas<br />
Tocino<br />
Perros calientes/Hot dogs<br />
Salchichas o albóndigas<br />
(perforar la piel antes de cocinar)<br />
Pescado<br />
Cantidad<br />
4 de 1 pulgada de grueso<br />
4 tajadas<br />
8<br />
8<br />
4 filetes<br />
Tiempo aproximado<br />
20 minutos<br />
10 minutos<br />
15 minutos<br />
15 a 20 minutos<br />
15 minutos<br />
¡Tamaños de las asaderas!<br />
Las siguientes asaderas pueden adaptarse<br />
a su horno eléctrico. Para confirmarlo,<br />
coloque la asadera en el horno y verifique<br />
que encaje bien antes de preparar la<br />
receta.<br />
Asaderas y torteras redondas<br />
o cuadradas de 8 y 9 pulgadas<br />
Asadera para 6 muffins<br />
Molde de pan de 8 x 4 pulgadas<br />
Molde de pan de 9 x 5 pulgadas<br />
La mayoría de las fuentes o cazuelas<br />
para horno de 1 a 1 1 ⁄2 cuartos.<br />
7
840102700 SPv04 12/4/02 2:32 PM Page 8<br />
La limpieza de su horno eléctrico<br />
Se debe limpiar el horno eléctrico en forma periódica para obtener un mejor<br />
desempeño y una mayor duración. La limpieza periódica también reducirá el<br />
peligro de incendio.<br />
1. Desenchufe el horno y deje que<br />
se enfríe.<br />
2. Lave la rejilla del horno, la rejilla<br />
para asar a la parrilla y la asadera<br />
para hornear en agua caliente y<br />
jabonosa. Enjuague y seque. Estos<br />
accesorios se pueden lavar en el<br />
lavavajillas, pero es posible que se<br />
decoloren.<br />
3. Para limpiar la charola para migajas,<br />
abra la puerta del horno. Saque la<br />
charola para migajas de la manera<br />
8<br />
Recetas<br />
Charola para<br />
migajas<br />
Salsa mexicana caliente de frijoles<br />
2 latas de 15 onzas de frijoles<br />
negros, bien escurridos.<br />
1 cucharadita de salsa de chiles<br />
(ají picante)<br />
que se indica. Lávela con agua<br />
caliente jabonosa. Enjuáguela y<br />
séquela. Colóquela nuevamente<br />
en el horno.<br />
4. Para limpiar el interior del horno,<br />
lave las paredes y la puerta de vidrio<br />
del horno con un paño húmedo<br />
y jabonoso. Repita con un paño<br />
húmedo y limpio.<br />
5. Para limpiar el exterior del horno,<br />
utilice un paño húmedo.<br />
NOTAS:<br />
• No use productos de limpieza<br />
abrasivos ya que pueden dañar<br />
el revestimiento antiadherente.<br />
• Para manchas difíciles de limpiar,<br />
use una esponjilla.<br />
No limpie con esponjillas metálicas,<br />
ya que se pueden desintegrar y los trozos<br />
pueden tocar las partes eléctricas,<br />
creando un riesgo de choque eléctrico.<br />
1<br />
⁄2 taza de crema agria<br />
1<br />
⁄2 taza de salsa<br />
8 onzas de queso Monterrey Jack,<br />
rallado<br />
Muela los frijoles negros. Agregue la salsa de chile, la crema agria, la salsa y la mitad<br />
del queso. Vierta con una cuchara en una fuente llana de 1 cuarto. Espolvoree el<br />
resto del queso sobre la mezcla. Hornee a 350°F por unos 15 minutos o hasta que<br />
comience a burbujear. Sirva con chips de tortilla. Se obtienen 8 porciones de<br />
aperitivo.<br />
Panecillos de carne<br />
1 libra de carne molida magra<br />
1 cebolla pequeña, picada fina<br />
3<br />
⁄4 taza de pan rallado fresco<br />
1 huevo, batido<br />
1 cucharada de queso parmesano rallado<br />
1 cucharada de perejil fresco,<br />
picado fino<br />
1<br />
⁄4 cucharadita de sal y de pimienta.<br />
Combine todos los ingredientes y mézclelos bien. Divida la mezcla entre una<br />
asadera para 6 bollos. Hornee a 350°F por 30 minutos o hasta que estén hechos.<br />
Se obtienen entre 4 y 6 panecillos.
840102700 SPv04 12/4/02 2:32 PM Page 9<br />
Pollo a la Tropical<br />
4 pechugas de pollo deshuesadas<br />
1<br />
⁄4 taza de vinagre de sidra<br />
y sin pellejo<br />
2 cucharadas de salsa de soya<br />
1 lata de 8 onzas de piña picada, 2 cucharadas de azúcar morena<br />
no escurrida<br />
1<br />
⁄8 cucharadita de jengibre molido<br />
1<br />
⁄4 taza de mostaza preparada<br />
Arroz (opcional)<br />
Coloque las pechugas de pollo en una fuente llana o en una asadera cuadrada de<br />
8 pulgadas. Combine el resto de los ingredientes y viértalos sobre el pollo. Hornee<br />
a 350°F durante 35 a 45 minutos o hasta que esté bien cocido. Sirva sobre arroz.<br />
Se obtienen 4 porciones.<br />
Pollo asado a la mostaza con miel<br />
1 pollo para asar de 6 libras<br />
Sal y pimienta<br />
Saque las menudencias de la cavidad del pollo y úselas para hacer una salsa si así lo<br />
desea. Enjuague el pollo en agua fría. Séquelo. Espolvoree con sal y pimienta.<br />
Coloque la rejilla para asar a la parrilla en la posición baja dentro de la asadera del<br />
horno. Ponga el pollo sobre la rejilla para asar a la parrilla. Cocine a 350°F por<br />
2 horas o hasta que esté bien cocido. Sáquelo del horno. Combine la miel y la<br />
mostaza y vierta la mezcla con una cuchara o cepíllela sobre el pollo. Deje reposar<br />
el pollo por 5 minutos antes de cortarlo o trinchar. Se obtienen entre 6 y 8 porciones.<br />
Ziti al horno<br />
1<br />
⁄2 libra de carne picada magra<br />
2 cucharadas de cebolla picada fina<br />
1 1 ⁄2 tazas de salsa para pasta<br />
1 1 ⁄2 tazas de pasta ziti cruda<br />
2 cucharadas de miel<br />
1 cucharada de mostaza preparada<br />
1<br />
⁄2 taza de crema agria<br />
1<br />
⁄2 taza de queso mozzarella rallado,<br />
unas 4 onzas<br />
1<br />
⁄4 taza de queso parmesano rallado<br />
En una sartén sobre calor mediano alto, cocine la carne picada y la cebolla hasta<br />
que la carne esté cocida, unos 8 minutos. Agregue salsa para pasta y revuelva hasta<br />
mezclar. Póngalo a un lado. Cocine la pasta según las instrucciones del paquete.<br />
Drene. En un molde de pan engrasado de 9 x 5 pulgadas, coloque los siguientes<br />
ingredientes en capas: mitad de la pasta, crema agria, mitad de la salsa de carne,<br />
el resto de la pasta, mozzarella y luego el resto de la salsa de carne. Espolvoree con<br />
queso parmesano. Hornee a 350°F por 30 minutos. Se obtienen entre 2 y 3 porciones.<br />
Filetes de bagre crocantes<br />
1<br />
⁄2 taza de queso parmesano rallado<br />
20 galletas a la manteca, como Ritz<br />
o Townhouse, trituradas<br />
1<br />
⁄3 de taza de perejil fresco, picado<br />
1<br />
⁄4 de taza de mantequilla derretida<br />
4 filetes de bagre, de unas 8 onzas cada uno<br />
Coloque el queso, las galletas y el perejil en un tazón grande llano. Mezcle. Remoje<br />
los filetes en la mantequilla y luego cúbralos con la mezcla de las galletas. Coloque<br />
los filetes en una asadera revestida con papel de aluminio. Hornee a 400°F durante<br />
15 a 20 minutos. Se obtienen 4 porciones.<br />
9
840102700 SPv04 12/4/02 2:32 PM Page 10<br />
Papas al perejil<br />
5 papas coloradas, alrededor de 1 1 ⁄2 libras<br />
1 cucharada de aceite vegetal<br />
1 cucharada de perejil fresco picado<br />
Lave las papas y corte cada una en 6 trozos. Colóquelas en un tazón. Salpíquelas con<br />
aceite. Espolvoree el perejil y las especias. Agítelas hasta que queden bien mezcladas.<br />
Viértalas en una asadera. Hornee a 400°F por 35 minutos o hasta que estén blandas<br />
al pincharlas con un tenedor. Se obtienen 4 porciones.<br />
Muffins al minuto<br />
1 taza de harina leudante<br />
2 cucharadas de mayonesa o crema agria<br />
1<br />
⁄2 taza de leche<br />
Mezcle los ingredientes. Deje caer la mezcla con una cuchara en un molde para<br />
6 muffins engrasado. Hornee a 450°F durante 12 minutos o hasta que estén prontos.<br />
Se obtienen 6 muffins.<br />
Kuchen de manzana<br />
1 caja de mezcla para pastel amarillo<br />
de 8 onzas (hace una capa)<br />
3 cucharadas de mantequilla derretida<br />
1 manzana grande deliciosa dorada<br />
1<br />
⁄2 cucharadita de canela<br />
En un tazón pequeño, combine la mezcla del pastel y la mantequilla derretida.<br />
Mezcle. Coloque la mezcla en una tortera cuadrada engrasada de 8 pulgadas.<br />
Oprima la mezcla contra el fondo y ligeramente hacia arriba por los costados. Pele,<br />
quite el centro y corte la manzana en rodajas bien finas. Coloque las rodajas sobre<br />
la base del pastel. Combine la canela y el azúcar. Espolvoree la mitad de la mezcla<br />
de azúcar sobre las manzanas. Combine la crema agria, el huevo y la vainilla. Vierta<br />
sobre las manzanas. Espolvoree el resto de la mezcla de azúcar sobre la crema agria.<br />
Hornee a 350°F por 40 minutos o hasta que quede ligeramente dorada y las<br />
manzanas estén blandas. Se obtienen entre 6 y 8 porciones.<br />
Pastel inglés “medio pound”<br />
1 paquete de queso crema de 3 onzas<br />
6 cucharadas de mantequilla o<br />
margarina a temperatura ambiente<br />
1 taza de azúcar<br />
En un tazón para mezclar, bata el queso crema, la mantequilla y el azúcar hasta que<br />
queden cremosos. Agregue batiendo los huevos y la vainilla. Agregue la harina y<br />
revuelva hasta que se haya mezclado. Vierta con cuchara en un molde de pan<br />
engrasado de 8 x 4 pulgadas. Hornee a 350°F por 50 minutos o hasta que esté listo<br />
al tacto. Se obtienen 6 porciones.<br />
10<br />
¡Consejos para calentar y recalentar!<br />
• No tape los alimentos completamente<br />
con papel de aluminio. El papel de<br />
aluminio puede aislar los alimentos<br />
y hacer que se recalienten con<br />
menor rapidez.<br />
1<br />
⁄4 cucharadita de sal<br />
1<br />
⁄4 cucharadita de pimienta<br />
1<br />
⁄4 taza de azúcar<br />
1<br />
⁄2 taza de crema agria<br />
1 huevo<br />
1<br />
⁄2 cucharadita de vainilla<br />
2 huevos<br />
1 cucharadita de vainilla<br />
1 taza de harina para pasteles<br />
• Para recalentar bolillos o panecillos,<br />
colóquelos en la asadera y caliéntelos<br />
a 300°F por 10 minutos.<br />
• Recaliente los restos de carnes asadas<br />
o cazuelas a 350°F durante 20 a<br />
30 minutos o hasta que se hayan<br />
calentado completamente.
840102700 SPv04 12/4/02 2:32 PM Page 11<br />
Localización de fallas<br />
Pregunta<br />
El horno eléctrico no calienta.<br />
El horno eléctrico no tuesta.<br />
Se forma humedad en el<br />
interior de la puerta del<br />
horno cuando se tuesta.<br />
Olor y humo salen del<br />
horno eléctrico.<br />
La Luz Indicadora<br />
permanece iluminada.<br />
Ciertos alimentos se queman<br />
y otros no se cocinan.<br />
El exterior del horno<br />
se calienta.<br />
Respuesta<br />
Verifique que el tomacorriente esté<br />
funcionando y que el horno esté enchufado.<br />
Luego haga girar el Control de<br />
Temperatura a 350°F y haga girar el<br />
Interruptor de Control del Horno a la<br />
posición de horneado (BAKE). La Luz<br />
Indicadora deberá estar iluminada.<br />
Verifique que el tomacorriente esté<br />
funcionando y que el horno esté enchufado.<br />
1. Gradúe la temperatura a 450°F.<br />
2. Seleccione el grado de tostado.<br />
3. Haga girar el Interruptor de Control del<br />
Horno a la posición de tostar (TOAST).<br />
La Luz Indicadora deberá estar iluminada.<br />
Esto es normal cuando se tuesta en un<br />
horno eléctrico. La humedad se escapa<br />
más lentamente de un horno eléctrico que<br />
de un tostador común. La cantidad de<br />
humedad será diferente según sea pan<br />
fresco, bagels o pasteles congelados.<br />
El humo y el olor son normales durante el<br />
primer uso de la mayoría de aparatos de<br />
calentamiento. Esto desaparecerá después<br />
del período inicial de calentamiento.<br />
Haga girar el Interruptor de Control del<br />
Horno a la posición apagada (OFF).<br />
Si la luz permanece iluminada,<br />
desenchufe la unidad y llame a nuestro<br />
número gratuito para servicio al cliente<br />
para obtener información sobre el examen,<br />
las reparaciones o el ajuste del aparato. No<br />
continúe usando su horno eléctrico.<br />
Use la posición de la rejilla del horno para<br />
centrar los alimentos en el horno. Regule<br />
la temperatura del horno o el tiempo de<br />
cocción para obtener los mejores resultados<br />
con sus recetas.<br />
Es importante que tenga cuidado. La parte<br />
superior y los costados del horno se calientan<br />
mucho, pero esto es normal.<br />
11
840102700 SPv04 12/4/02 2:32 PM Page 12<br />
Asistencia al cliente<br />
Si desea hacer un reclamo bajo esta garantía, sírvase llamar a nuestro Número de<br />
Asistencia al Cliente. Para un servicio más rápido es importante que tenga los<br />
números de modelo, serie y tipo listos para que el operador lo pueda ayudar. Estos<br />
números se pueden encontrar en la parte inferior de su horno eléctrico.<br />
MODELO:________________ TIPO:_________________ SERIE: __________________<br />
Número de Asistencia al Cliente: 1-877-207-0923<br />
¡Guarde este número para referencia futura!<br />
Solicitud de información por e-mail: www.gehousewares.com<br />
Garantía Limitada de Dos Años<br />
¿Qué cubre su garantía?<br />
• Todo defecto de material o mano de obra.<br />
¿Por cuánto tiempo después de la<br />
compra inicial?<br />
• Dos años.<br />
¿Qué haremos?<br />
• Le suministraremos una unidad nueva.<br />
¿Cómo hacer un reclamo bajo garantía?<br />
• Guarde su recibo.<br />
• Empaque su unidad debidamente.<br />
Recomendamos usar la caja y los<br />
materiales de empaque originales.<br />
• Devuelva el producto a su tienda<br />
WAL ★ MART más cercana o llame al<br />
Número de Asistencia al Cliente al<br />
1-877-207-0923.<br />
¿Qué es lo que la garantía no cubre?<br />
• Partes de vidrio, envases de vidrio,<br />
cortador/colador, cuchillas y/o agitadores.<br />
• Uso comercial o cualquier otro uso que no se<br />
encuentre en las instrucciones impresas.<br />
• Daños debido al mal uso, abuso, o<br />
negligencia.<br />
• Productos comprados o reparados fuera<br />
de los Estados Unidos.<br />
¿Cuál es la relación entre las leyes estatales<br />
y esta garantía?<br />
• Esta garantía le otorga derechos legales<br />
específicos, y es posible que usted también<br />
tenga otros derechos que varían de un estado<br />
al otro.<br />
•WAL ★ MART expresamente niega toda<br />
responsabilidad por daños consecuentes o<br />
pérdidas incidentales causadas por el uso de<br />
este aparato. Ciertos estados no permiten esta<br />
exclusión o limitación de pérdidas incidentales<br />
o consecuentes de manera que es<br />
posible que el descargo de responsabilidad<br />
que antecede no corresponda en su caso.<br />
¿Qué sucede si usted adquirió su producto en<br />
los Estados Unidos, Canadá o México y encuentra<br />
un problema cuando lo está usando fuera<br />
del país de compra?<br />
• La garantía es válida solamente en el país de<br />
compra y si usted sigue el procedimiento de<br />
reclamo bajo garantía que se indica.<br />
g es una marca de comercio<br />
de General Electric Company<br />
usada bajo licencia por<br />
WAL ★ MART Stores, Inc.<br />
Bentonville, AR 72716<br />
840102700<br />
12<br />
WAL ★ MART Stores, Inc.<br />
Bentonville, AR 72716<br />
12/02