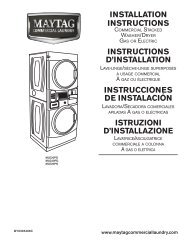
installation instructions commercial dryer instrucciones de ...
installation instructions commercial dryer instrucciones de ...
installation instructions commercial dryer instrucciones de ...

You also want an ePaper? Increase the reach of your titles
YUMPU automatically turns print PDFs into web optimized ePapers that Google loves.
DRYER SAFETY............................................................................ 3DRYER DISPOSAL........................................................................ 4INSTALLATION REQUIREMENTS............................................... 4Tools and Parts........................................................................... 4Location Requirements............................................................... 4Electrical Requirements – Gas Dryer......................................... 5Gas Supply Requirements ........................................................ 6Venting Requirements ............................................................... 7SECURITE DU SECHE-LINGE.................................................13ELIMINATION DU SECHE-LINGE............................................14EXIGENCES D’INSTALLATION................................................14Outillage et pièces.....................................................................14Exigences d’emplacement........................................................15Spécifications électriques – sèche-linge à gaz.........................16Spécifications <strong>de</strong> l’alimentation en gaz ....................................17Exigences concernant l’évacuation...........................................18SEGURIDAD DE LA SECADORA............................................ 24ELIMINACIÓN DE LA SECADORA.......................................... 25REQUISITOS DE INSTALACIÓN............................................. 25Piezas y herramientas........................................................... 25Requisitos <strong>de</strong> ubicación........................................................ 25Requisitos eléctricos – secadora a gas................................ 26Requisitos <strong>de</strong>l suministro <strong>de</strong> gas............................................ 27Requisitos <strong>de</strong> ventilación ..................................................... 28SICUREZZA DELL’ASCIUGATRICE......................................... 35L’ELIMINAZIONE DELL’ASCIUGATRICE................................ 36REQUISITI D’INSTALLAZIONE................................................. 36Attrezzi e componenti.............................................................. 36Requisiti di ubicazione............................................................. 36Requisiti elettrici – asciugatrice a gas..................................... 37Requisiti di alimentazione <strong>de</strong>l gas........................................... 38Requisiti di scarico............................................................... 39TABLE OF CONTENTSTABLE DES MATIÈRESÍNDICEINDICEINSTALLATION INSTRUCTIONS – GAS DRYER..................... 9Install Leveling Legs................................................................... 9Make Gas Connection................................................................ 9Connect Vent.............................................................................. 9Complete Installation ................................................................. 9ELECTRONIC CONTROL SETUP........................................... 10MAINTENANCE INSTRUCTIONS........................................... 10REVERSING THE DOOR SWING (OPTIONAL)....................... 10TECHNICAL SPECIFICATIONS – GAS DRYER..................... 11WARRANTY.............................................................................. 12INSTRUCTIONS D’INSTALLATION –SECHE-LINGE A GAZ.............................................................. 20Installation <strong>de</strong>s pieds <strong>de</strong> nivellement ..................................... 20Raccor<strong>de</strong>ment à la canalisation <strong>de</strong> gaz ................................ 20Raccor<strong>de</strong>ment du conduit d’évacuation .............................. 20Achever l’<strong>installation</strong> ............................................................... 20REGLAGE DE LA COMMANDE ELECTRONIQUE................ 21INSTRUCTIONS D’ENTRETIEN ............................................. 21INVERSION DU SENS D’OUVERTUREDE LA PORTE (FACULTATIF)................................................. 21FICHE TECHNIQUE – SECHE-LINGE A GAZ........................ 22GARANTIE................................................................................ 23INSTRUCCIONES DE INSTALACIÓN –SECADORA A GAS ................................................................. 30Instalación <strong>de</strong> las patas niveladoras..................................... 30Conexión <strong>de</strong>l suministro <strong>de</strong> gas............................................ 30Conexión <strong>de</strong>l ducto <strong>de</strong> escape............................................. 30Complete la instalación ........................................................ 31PREPARACIÓN DEL CONTROL ELECTRÓNICO.................. 31INSTRUCCIONES DE MANTENIMIENTO.............................. 31CÓMO INVERTIR EL SENTIDO DE ABERTURADE LA PUERTA (OPCIONAL).................................................. 32ESPECIFICACIONES TÉCNICAS – SECADORA A GAS....... 33GARANTÍA................................................................................ 34ISTRUZIONI D’INSTALLAZIONE – ASCIUGATRICEA GAS........................................................................................ 41Installazione <strong>de</strong>i piedini di regolazione..................................... 41Eseguire il collegamento gas.................................................... 41Connessione <strong>de</strong>llo scarico....................................................... 41Completamento <strong>de</strong>ll’installazione............................................ 41IMPOSTAZIONI COMANDI ELETTRONICI............................ 42ISTRUZIONI DI MANUTENZIONE.......................................... 42INVERTIRE LA ROTAZIONE DI APERTURA(OPZIONALE)........................................................................... 42DATI TECNICI – ASCIUGATRICE A GAS............................... 43GARANZIA................................................................................ 442
DRYER SAFETYYour safety and the safety of others are very important.We have provi<strong>de</strong>d many important safety messages in this manual and on your appliance. Always read and obey all safetymessages.This is the safety alert symbol.This symbol alerts you to potential hazards that can kill or hurt you and others.All safety messages will follow the safety alert symbol and either the word “DANGER” or “WARNING.”These words mean:DANGERYou can be killed or seriously injured if you don't immediatelyfollow <strong>instructions</strong>.WARNINGYou can be killed or seriously injured if you don't follow<strong>instructions</strong>.All safety messages will tell you what the potential hazard is, tell you how to reduce the chance of injury, and tell you what canhappen if the <strong>instructions</strong> are not followed.FOR YOUR SAFETY1. DO NOT USE OR STORE PETROL OR OTHER FLAMMABLE MATERIALS IN THIS APPLIANCE OR NEAR THIS APPLIANCE.2. DO NOT SPRAY AEROSOLS IN THE VICINITY OF THIS APPLIANCE WHILE IT IS IN OPERATION.3. DO NOT MODIFY THIS APPLIANCE.WARNING: For your safety, the information in this manual must be followed to minimizethe risk of fire or explosion, or to prevent property damage, personal injury, or <strong>de</strong>ath.– Do not store or use petrol or other flammablevapors and liquids in the vicinity of thisor any other appliance.– WHAT TO DO IF YOU SMELL GAS:• Do not try to light any appliance.• Do not touch any electrical switch; do not use any phone in your building.• Clear the room, building, or area of all occupants.• Immediately call your gas supplier from a neighbor's phone. Follow the gas supplier's<strong>instructions</strong>.• If you cannot reach your gas supplier, call the fire <strong>de</strong>partment.– Installation and service must be performed by a qualified installer, service agency, orthe gas supplier.IMPORTANT: When discarding or storing your old clothes <strong>dryer</strong>, remove the door.3
DRYER DISPOSALINSTALLATION REQUIREMENTSTools and PartsGather the required tools and parts before starting <strong>installation</strong>.Read and follow the <strong>instructions</strong> provi<strong>de</strong>d with any toolslisted here.Tools nee<strong>de</strong>dn 200 mm (8") or 250 mm(10") Pipe wrenchn 200 mm (8") or 250 mm(10") adjustable wrenchn Flat-bla<strong>de</strong> screwdrivern Phillips screwdrivern Adjustable wrench thatopens to 25 mm (1") orhex-head socket wrenchn LevelParts suppliedn 8 mm (5/16") socket wrenchn Utility knifennVent clampsPipe-joint compoundresistant to LP gasn Sealing compound gunand sealing compound (forinstalling new exhaust vent)nnPliersPutty knifeRemove parts bag from <strong>dryer</strong> drum. Check that all parts wereinclu<strong>de</strong>d.n Foot boot (4)n Dryer foot (4)If installing a gas <strong>dryer</strong>:Location RequirementsIMPORTANT: Observe all governing co<strong>de</strong>s and ordinances.n Check co<strong>de</strong> requirements: Some co<strong>de</strong>s limit or do not permit<strong>installation</strong> of clothes <strong>dryer</strong>s in garages or sleeping quarters.Contact your local building inspector.n Make sure that lower edges of the cabinet, plus the back andbottom si<strong>de</strong>s of the <strong>dryer</strong>, are free of obstructions to permita<strong>de</strong>quate clearance of air openings for combustion air.See “Recessed Area Installation Instructions” on the nextpage for minimum spacing requirements.n Do not install on carpet.NOTE: The <strong>dryer</strong> must not be installed in an area where it will beexposed to water and/or weather.4
Recessed Area Installation InstructionsProduct Dimensions (cont.)This <strong>dryer</strong> may be installed in a recessed area.This <strong>dryer</strong> must not be installed in a closet with a door.The <strong>installation</strong> spacing is in millimeters and is the minimumallowable. Additional spacing should be consi<strong>de</strong>red for easeof <strong>installation</strong>, servicing, and compliance with local co<strong>de</strong>s andordinances.The <strong>dryer</strong> must be exhausted outdoors.No other fuel-burning appliance may be installed in the samerecess as the <strong>dryer</strong>.Minimum Installation Clearances127 mm (5")737 mm (29")686 mm (27")Back Si<strong>de</strong>s Top FrontRecessed 51 mm 0 mm 305 mm —(2") (0") (12")51 mm (2")Door1940 mm(76 3 ⁄8")305 mm(12")0 mm(0")Recessedsi<strong>de</strong> view0 mm (0") 0 mm(0")Recessedfront viewAdditional clearances for wall, door, and floor moldings may berequired or if external exhaust elbow is used.603 mm(23 3 ⁄4")Si<strong>de</strong> Viewapprox. 25 mm(1")Electrical Requirements – Gas DryerProduct Dimensions1054 mm(41 1 /2")940 mm(37")Top <strong>dryer</strong>exhaustTop <strong>dryer</strong>gas line235 mm(9 1 ⁄4")NOTE: Gas lineslocated 32 mm(1 1 ⁄4") inwardfrom adjacentsi<strong>de</strong>.460 mm(18 1 ⁄8")140 mm(5 1 ⁄2")Bottom<strong>dryer</strong>gas lineGasElectricBack View1054 mm(41 1 ⁄2")Bottom<strong>dryer</strong>exhaust343 mm(13 1 ⁄2")83 mm(3 1 ⁄4")Important: Observe all governing co<strong>de</strong>s and ordinances.You will need an earthed electrical outlet located within 610 mm(2 feet) of either si<strong>de</strong> of the <strong>dryer</strong>.This <strong>dryer</strong> is supplied/fitted with an electricity supply cord andplug. It should be connected to electricity supply socket at thevoltage shown on the rating plate. The minimum supply fusecapacity should be 12A. The <strong>dryer</strong> must be positioned so that theplug is clearly visible and accessible. This plug also provi<strong>de</strong>s thefunction of an emergency stop control for the user. If the fittedplug is not used, the electrical connection must be carried outby a competent electrician in accordance with local or nationalco<strong>de</strong>s.If the supply cord is damaged, it must be replaced with aspecially terminated cord by an authorized service agent ora similarly competent person in or<strong>de</strong>r to avoid a hazard.Do not use an adapter.Do not use an extension cord.5
NOTE: In accordance with the European EMC Directive(2004/108/EC), the maximum electricity supply systemimpedance to which the gas <strong>dryer</strong> should be connectedis <strong>de</strong>clared to be 0.012 Ohm + j0.007 Ohm.NOTE: Electrical safety standards: The manufacturer haschosen compliance with IEC/EN.60335 standards as themost appropriate for this product.Using the universal cord inclu<strong>de</strong>d with this <strong>dryer</strong>:The gas <strong>dryer</strong> is equipped with a universal cord withinterchangeable plugs.1. To use the universal cord, select the plug end that fitsyour electrical outlet, and plug it into the adapter on thesupply cord.2. Secure the plug end in place on the cord by aligningthe 2 cover halves over the cord adapter and clippingthem together.Gas Supply RequirementsIf co<strong>de</strong>s permit and an additional earth bond wire is used, it isrecommen<strong>de</strong>d that a qualified electrician <strong>de</strong>termine that the earthbond path is a<strong>de</strong>quate.EARTHING INSTRUCTIONSIMPORTANT: Observe all governing co<strong>de</strong>s and ordinances.SAVE THESE INSTRUCTIONSGas SupplyBefore <strong>installation</strong>, check that the local gas distributionconditions, nature of gas and pressure, and the adjustment ofthe appliance are compatible. Burner information will be foundon the mo<strong>de</strong>l/serial rating plate in the door recess of the <strong>dryer</strong>.If this information does not agree with the type of gas available,see your <strong>de</strong>aler.Natural Gas:This <strong>dryer</strong> is factory adjusted for use with NATURAL GAS (G20),and no further adjustment should be required at <strong>installation</strong>.6
L.P. Gas:This <strong>dryer</strong> is also certified for use with L.P. (propane or butane)gases with appropriate conversion. No attempt shall be ma<strong>de</strong> toconvert the appliance from the gas specified on the mo<strong>de</strong>l/serialrating plate for use with a different gas without consulting theserving gas supplier.Conversion must be done by a competent service technician. Gasconversion kit, part number W10233219, is available for purchasefrom your <strong>de</strong>aler. Full <strong>instructions</strong> are supplied with the kit.Supply line requirements:Provi<strong>de</strong> a rigid gas supply line to the <strong>dryer</strong> location. It should beminimum 12.5 mm (1/2") ID. When acceptable to the gas supplierand local co<strong>de</strong>s, 10 mm (3/8") ID rigid supply line may be usedfor lengths un<strong>de</strong>r 6.1 m (20'). Pipe-joint compounds resistant tothe action of L.P. gas must be used.Gas connection to the <strong>dryer</strong> itself should be ma<strong>de</strong> by meansof a flexible gas hose suitable for the appliance and gas categoryin accordance with national <strong>installation</strong> regulations. If in doubt,contact the gas supplier. It should be minimum 10 mm (3/8") ID.A means of restraint should be used between the applianceand the wall to avoid straining of the rigid gas supply when theappliance is moved. An appropriate length of chain and a wallhook is recommen<strong>de</strong>d.The <strong>dryer</strong> gas inlet connection is a 3/8" NPT thread. An adapter issupplied for conversion to standard ISO.228-1 thread (3/8" BSP).Check for leaks by using an approved noncorrosive leak<strong>de</strong>tectionsolution. Bubbles will show a leak. Correct any leaksfound. A pressure measurement tapping is provi<strong>de</strong>d on thegas valve within the <strong>dryer</strong>, accessible after removal of the lowerfront panel.The <strong>dryer</strong> must be disconnected from the gas supply pipingsystem during any pressure testing of that system.Use a heavy metal vent.Venting RequirementsWARNINGFire HazardDo not use a plastic vent.Do not use a metal foil vent.Failure to follow these <strong>instructions</strong> can result in <strong>de</strong>athor fire.WARNING: To reduce the risk of fire, this <strong>dryer</strong> MUST BEEXHAUSTED OUTDOORS.n Following these venting requirements will minimise ductingair noise.n A<strong>de</strong>quate ventilation has to be provi<strong>de</strong>d to avoid the backflowof gases into the room from other fuel-burning appliances,including open fires (i.e. available airflow into the room shouldmatch airflow out from the room).n The <strong>de</strong>sign of the flue system should be such that anycon<strong>de</strong>nsate formed when operating the <strong>dryer</strong> from coldshall either be retained and subsequently re-evaporated ordischarged. Following these <strong>instructions</strong> should a<strong>de</strong>quatelymeet this requirement.n Dryer exhaust must not be connected into any gas vent,chimney, wall, ceiling, attic, crawlspace, or a concealed spaceof a building. Only rigid or flexible metal vent shall be used forexhausting.n Do not use an exhaust hood with a magnetic latch.n Do not install flexible metal vent in enclosed walls, ceilings,or floors.n Only a 102 mm (4") heavy metal exhaust vent and clampsmay be used.Heavy metalexhaust vent102 mm(4")n Use clamps to seal all joints. Vent must not be connected orsecured with screws or other fastening <strong>de</strong>vices which extendinto the interior of the vent and catch lint. Do not use ducttape.Improper venting can cause moisture and lint to collectindoors, which may result in:Moisture damage to woodwork, furniture, paint, wallpaper,carpets, etc.Housecleaning problems and health problems.IMPORTANT: Observe all governing co<strong>de</strong>s and ordinances.Use a heavy metal vent. Do not use plastic or metal foil vent.Rigid metal vent is recommen<strong>de</strong>d for best drying performanceand to avoid crushing and kinking.Flexible metal vent must be fully exten<strong>de</strong>d and supported whenthe <strong>dryer</strong> is in its final position. Remove excess flexible metal ventto avoid sagging and kinking that will result in reduced airflowand poor performance.The total length of flexible metal vent should not exceed 2.4 m(7 3 ⁄4 ft.).An exhaust hood should cap the vent to keep ro<strong>de</strong>nts andinsects from entering the building.Exhaust hood must be at least 305 mm (12") from the groundor any object that may be in the path of the exhaust (such asflowers, rocks, bushes, or snow).If using an existing vent system, clean lint from the entire lengthof the system and make sure exhaust hood is not plugged withlint. Replace any plastic or metal foil vent with rigid metal orflexible metal vent.Plan <strong>installation</strong> to use the fewest number of elbows and turns.AExhaust Air FlowA. GoodB. BetterB7
Allow as much room as possible when using elbows or makingturns. Bend vent gradually to avoid kinking.Vent outlet is located at the center of the bottom <strong>dryer</strong> back.The vent can be routed up, down, left, right, behind the <strong>dryer</strong>,or straight out the back of the <strong>dryer</strong>.Vent System LengthEach vent should enter the main vent at an angle pointing in thedirection of the airflow. Vents entering from the opposite si<strong>de</strong>should be staggered to reduce the exhausted air from interferingwith the other vents.The maximum angle of each vent entering the main vent shouldbe no more than 30°.A30˚ max.Maximum length of vent system <strong>de</strong>pends upon the type of ventused, number of elbows, and type of exhaust hood.Maximum Vent Length102 mm (4") Exhaust HoodsBox Louvered 64 mm (2 1 ⁄2") Angledair flowBA. Individual <strong>dryer</strong> ventB. Main ventRigid Metal VentNo. of 90° turns01234If <strong>dryer</strong> is installed in a confined area, such as a bedroom,bathroom, or closet, provision must be ma<strong>de</strong> for enough airfor combustion and ventilation. (Check governing co<strong>de</strong>s andordinances.) See “Recessed Area Installation Instructions”in the “Location requirements” section.A 102 mm (4") outlet hood is preferred. However, a 64 mm(2 1 ⁄2") outlet exhaust hood may be used. A 64 mm (2 1 ⁄2")outlet creates greater back pressure than other hood types.For permanent <strong>installation</strong>, a stationary vent system is required.Multiple Dryer VentingBox Hood and Louvered Style39.6 m (130 ft.)38.1 m (125 ft.)35.1 m (115 ft.)32.3 m (106 ft.)29.9 m (98 ft.)Angled Hood Style39.3 m (129 ft.)36.3 m (119 ft.)33.2 m (109 ft.)30.5 m (100 ft.)28 m (92 ft.)n A main vent can be used for venting a group of <strong>dryer</strong>s. Mainvent should be sized to remove 5663 l/min (200 CFM) of airper <strong>dryer</strong>. Large-capacity lint screens of proper <strong>de</strong>sign maybe used in the main vent if checked and cleaned frequently.The room where the <strong>dryer</strong>s are located should have make-upair equal to or greater than the airflow of all the <strong>dryer</strong>s in theroom.n A back-draft damper kit is nee<strong>de</strong>d and is available from a<strong>commercial</strong> laundry distributor; it should be installed in thevent of each <strong>dryer</strong> to keep exhausted air from returninginto the <strong>dryer</strong>s and to keep the exhaust in balance withinthe main vent. Unobstructed return air openings are required.Keep air openings free of dry cleaning fluid fumes. Fumes createacids which, when drawn through the <strong>dryer</strong> heating units, candamage <strong>dryer</strong>s and items being dried.A clean-out cover should be located on the main vent for periodiccleaning of the vent system.If an exhaust hood cannot be used:CDBA. Exhaust hood or elbowB. WallC. Main collector ventD. Horizontal ventE. 180° sweep elbowF. Vertical ventG. Roof12" min.(305 mm)The outsi<strong>de</strong> end of the main vent should have a sweep elbowdirected downward. If the main vent travels vertically through theroof, rather than through the wall, install a 180° sweep elbow onthe end of the vent at least 610 mm (2 ft.) above the highest partof the building. The opening in wall or roof shall have a diameter13 mm (1/2") larger than the vent diameter. The vent should becentered in the opening.Do not install screening or cap over the end of the vent.A610 mm (24")min.24"abovemin.(610 mm)highest point ofbuildingMin. 300 mm (12")clearance above anyaccumulation of snow, ice,or <strong>de</strong>bris such as leaves.FECG8
INSTALLATION INSTRUCTIONS – GAS DRYERInstall Leveling LegsNOTE: Sli<strong>de</strong> <strong>dryer</strong> onto cardboard or hardboard before movingto avoid damaging floor covering.1. Using two or more people, move <strong>dryer</strong> to <strong>de</strong>sired <strong>installation</strong>location.2. Take tape off front corners of <strong>dryer</strong>. Open <strong>dryer</strong> and removethe literature and parts packages. Wipe the interior of thedrum thoroughly with a damp cloth.3. Take two of the cardboard corners from the carton and placethem on the floor in back of the <strong>dryer</strong>. Firmly grasp the bodyof the <strong>dryer</strong> and gently lay it on its back on the cardboardcorners.4. With one of the legs in hand, check the ridges for a diamondmarking. That’s how far the leg is supposed to go into the hole.5. Start to screw the leveling legs into the holes by hand.(Use a small amount of liquid <strong>de</strong>tergent to lubricate the screwthreads so it is easier to turn the legs.) Use a 25 mm (1")wrench or socket wrench to finish turning the legs until youreach the diamond mark. Then fit a covered foot boot overeach foot.6. Now stand the <strong>dryer</strong> up.7. Remove cardboard or hardboard from un<strong>de</strong>r <strong>dryer</strong>. Adjustthe legs of the <strong>dryer</strong> up or down until the <strong>dryer</strong> is level.Make Gas Connection1. Remove red cap from gas pipe.2. Connect gas supply to <strong>dryer</strong>. If the flexible gas hose has 3/8"BSP thread, use the supplied conversion thread adapter. Usepipe-joint compound resistant to the action of L.P. gas for gasconnections.If necessary for service, open the toe panel. Use a putty knifeto press on the 2 toe panel locks located at the top of the toepanel. Pull downward on the toe panel to open. Toe panel ishinged at the bottom.3. Open the shut-off valve in the gas supply line.4. Test all connections by brushing on an approved noncorrosiveleak-<strong>de</strong>tection solution. Bubbles will show a leak. Correct anyleaks found.Connect Vent1. Using a 102 mm (4") clamp, connect vent to exhaust outletin <strong>dryer</strong>. If connecting to existing vent, make sure the vent isclean. The <strong>dryer</strong> vent must fit over the <strong>dryer</strong> exhaust outletand insi<strong>de</strong> the exhaust hood. Make sure the vent is securedto exhaust hood with a 102 mm (4") clamp.2. Move <strong>dryer</strong> into final position. Do not crush or kink vent.Make sure <strong>dryer</strong> is level.3. Check that there are no kinks in the flexible gas line.Complete Installation1. With <strong>dryer</strong> in final position, place level on top of the <strong>dryer</strong>, firstsi<strong>de</strong> to si<strong>de</strong>, then front to back. If the <strong>dryer</strong> is not level, adjustthe legs of the <strong>dryer</strong> up or down until the <strong>dryer</strong> is level.WARNINGElectric Shock HazardThis is a 3-wire <strong>dryer</strong> which must be earthed.Securely tighten all electrical connections.Failure to do so can result in <strong>de</strong>ath, fire, orelectric shock.2. Reconnect power to <strong>dryer</strong>.3. Check <strong>dryer</strong> operation. Select the full heat cycle (not the aircycle), start and allow the <strong>dryer</strong> to complete a full cycle tomake sure it is working properly. Dryer will stop when the timeis used up.NOTE: Dryer door must be closed for <strong>dryer</strong> to operate. Whendoor is open, the <strong>dryer</strong> stops. To restart <strong>dryer</strong>, close door andreselect your cycle.4. If the burner does not ignite and you can feel no heat insi<strong>de</strong> the<strong>dryer</strong>, shut off <strong>dryer</strong> for five minutes. Check that all gas supplyvalve controls are in “ON” position and that the electrical cordis plugged in. Repeat five-minute test.9
See the programming gui<strong>de</strong> for information on setup.ELECTRONIC CONTROL SETUPMaintenance <strong>instructions</strong>:n Clean lint screen after each cycle.n Removing accumulated lint (disconnect <strong>dryer</strong> from electricityand gas supply before starting this task):• From insi<strong>de</strong> the <strong>dryer</strong> cabinet:Lint should be removed every 2 years or more often,<strong>de</strong>pending on <strong>dryer</strong> usage. Cleaning should be doneby a qualified person.• From the exhaust vent:Lint should be removed every 2 years, or more often,<strong>de</strong>pending on <strong>dryer</strong> usage.MAINTENANCE INSTRUCTIONSIf <strong>dryer</strong> does not operate, check the following:n Electric supply is connected.n Circuit breaker is not tripped or fuse is not blown.n Door is closed.n Controls are set in a running or “ON” position.n Cycle has been selected.n Check that gas supply shut-off valves are set in open position.If you need assistance:Contact your authorized Maytag ® Commercial Laundry distributoror visit: www.MaytagCommercialLaundry.com. When you call,you will need the <strong>dryer</strong> mo<strong>de</strong>l number and serial number.Both numbers can be found on the serial-rating plate locatedon your <strong>dryer</strong>.REVERSING THE DOOR SWING (OPTIONAL)You can change your door swing from a right-si<strong>de</strong> opening toa left-si<strong>de</strong> opening, if <strong>de</strong>sired.C5. Reattach outer door panel toinner door panel so handleis on the si<strong>de</strong> where hingeswere just removed.B6. Attach door hinges to <strong>dryer</strong> door so that the larger hole isat the bottom of the hinge and the hinge pin is toward thedoor front.A1. Open <strong>dryer</strong> door. Remove bottom screws from cabinet si<strong>de</strong>of hinges (A). Loosen (do not remove) top screws from cabinetsi<strong>de</strong> of hinges.2. Lift door until top screws in cabinet are in large part of hingeslot. Pull door forward off screws. Remove top screws fromcabinet.3. Remove screws attaching hinges to door.4. Remove screws from all si<strong>de</strong>s of door (5 screws). Grasp si<strong>de</strong>sof outer door and gently lift to separate it from inner door (donot pry apart). Do not pull on door seal or plastic door catch.7. Remove the 4 screws that attach 2 plugs (B) on the handlesi<strong>de</strong>. Attach plugs to opposite si<strong>de</strong> using the same 4 screws.8. Insert screws into bottom holes on leftsi<strong>de</strong> of cabinet. Tighten screws halfway.Position door so large end of door hingeslot is over screws. Sli<strong>de</strong> door up soscrews are in bottom of slots. Tightenscrews. Insert and tighten top screwsin hinges.9. Close door and check that door strike aligns with doorcatch (C).10
TECHNICAL SPECIFICATIONS – GAS DRYER220-240V~50Hz 1ph 12A max. IP24 Clothes capacity: 9.0 kg max. each <strong>dryer</strong>. Sound pressure level,Lpa: 58 dBA (uncertainty, Kpa: +/–10 dBA) Total mass: 135 kg max.Factory set for NATURAL GAS: Injector size: 2.2 mm Heat input gross: 5.9 kWEuropean Country:European Gas Category:Gas Flow Rate:Supply Pressure (G20):Factory Adjusted Pressure:CH, CZ, CY, ES, GB, GR, HR,IE, IT, PT, SI, SK, TRII 2H3+0.562703 m 3 /hr20 mbarII 2H3B/P0.562703 m 3 /hr20 mbar7.4 mbar 7.4 mbarWith LP Gas Conversion Kit: Injector size: 1.25 mm Heat input gross: 6.4 kWEuropean Country:European Gas Category:Butane Supply Pressure (G30):Adjusted Pressure:Propane Supply Pressure (G31):Adjusted Pressure:CH, CZ, CY, ES, GB, GR, HR,IE, IT, PT, SI, SK, TRI 2E+II 2H3+ II 2H3B/P28-30 mbar30 mbarN/AN/A37 mbar 30 mbarN/A20 mbar25 mbarN/ACY, CZ, DK, EE, FI, GR, HU, IT,NO, RO, SE, SK, TRCY, CZ, DK, EE, FI, GR, HU, IT,NO, RO, SE, SK, TRWith France/Belgium NATURAL GAS conversion kit: Injector size: 1.65 mm Heat input gross: 5.9 kWEuropean Country:European Gas Category:Supply Pressure (G20):Supply Pressure (G25):Adjusted Pressure:FR, BENOTE: Conversion kit: From Natural Gas to LP Gas: Whirlpool Part No. W10233219.Conversion kit: From Natural Gas to Natural Gas - France/Belgium: Whirlpool Part No. W10181947.Manufacturer: Whirlpool Corporation, Benton Harbor, Michigan 49022, U.S.A.Manufacturing Site: Whirlpool Corporation, 1300 Marion-Agosta Rd., Marion, OH 43302, U.S.A.EU representatives: Maytag UK Ltd., 2 St. Annes Blvd., Redhill, RH1 1AX, UK& Bauknecht Hausgeräte GmbH, D-73614 Schorndorf, GermanyN/AEU - DECLARATION OF CONFORMITYCE - DECLARATION DE CONFORMITEWE (nous): BAUKNECHT HAUSGERÄTE GmbH, D-73614 Schorndorfrepresenting (représentant): WHIRLPOOL EUROPE S.r.l I-21025 COMERIO<strong>de</strong>clare un<strong>de</strong>r our sole responsibility that the productdéclarons sous notre propre responsabilité que le produit<strong>dryer</strong> Maytag MLG24PD(sèche-linge) :Maytag MLG24PNto which this <strong>de</strong>claration relates is in conformity with the following standard(s) or othernormative document(s)auquel se référe cette déclaration est conforme aux normes suivantes ou autres documents normatifsEN 60335-1:2002+A1+A2+A11+A12+A13EN 60335-2-11:2003+A1+A2EN 12752-1:1999EN 62233:2008EN ISO 10472-1:2008EN ISO 10472-4:2008EN 55014-1:2006EN 55014-2:1995+A1:2001EN 61000-3-12:2005EN 61000-3-11:2000following the provisions of Directive(s):suivant les prévisions <strong>de</strong>s Directives :2009/142/EC EUROPEAN GAS APPLIANCE DIRECTIVE2006/95/EC LOW VOLTAGE DIRECTIVE (CEE Directive Basse Tension)2004/108/EC ELECTROMAGNETIC COMPATIBILITY DIRECTIVE (CEE Directive CompatibilitéElectro-magnétique)2006/42/EC MACHINERY DIRECTIVESchorndorf, 29.04.2010Place and date:lieu et date :represented byRoberto MotturaDirector PDC, FCName and signature of authorised personNom et signature <strong>de</strong> la personne autorisée11
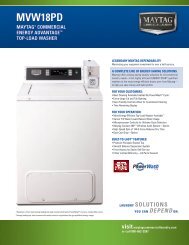
MAYTAG ® COMMERCIAL WASHER, DRYER, STACKED DRYER/DRYER, COMMERCIAL STACK LAUNDRY, AND MULTI-LOADCOIN OPERATED COMMERCIAL WASHERS AND DRYERSWARRANTYLIMITED WARRANTY ON PARTSFor the first five years from the date of purchase, when this <strong>commercial</strong> appliance is installed, maintained and operated according to the<strong>instructions</strong> attached to or furnished with the product, Maytag brand of Whirlpool Corporation (thereafter “Maytag”) will pay for factoryspecified parts or original equipment manufacturer parts to correct <strong>de</strong>fects in materials or workmanship. Proof of original purchase dateis required to obtain service un<strong>de</strong>r this warranty.ITEMS MAYTAG WILL NOT PAY FOR1. All other costs including labor, transportation, or custom duties.2. Service calls to correct the <strong>installation</strong> of your <strong>commercial</strong> appliance, to instruct you how to use your <strong>commercial</strong> appliance, toreplace or repair fuses, or to correct external wiring or plumbing.3. Repairs when your <strong>commercial</strong> appliance is used for other than normal, <strong>commercial</strong> use.4. Damage resulting from improper handling of product during <strong>de</strong>livery, theft, acci<strong>de</strong>nt, alteration, misuse, abuse, fire, flood, acts ofGod, improper <strong>installation</strong>, <strong>installation</strong> not in accordance with local electrical or plumbing co<strong>de</strong>s, or use of products not approvedby Maytag.5. Pickup and Delivery. This <strong>commercial</strong> appliance is <strong>de</strong>signed to be repaired on location.6. Repairs to parts or systems resulting from unauthorized modifications ma<strong>de</strong> to the <strong>commercial</strong> appliance.7. The removal and re<strong>installation</strong> of your <strong>commercial</strong> appliance if it is installed in an inaccessible location or is not installed inaccordance with published <strong>installation</strong> <strong>instructions</strong>.8. Chemical damage is exclu<strong>de</strong>d from all warranty coverage.9. Changes to the building, room, or location nee<strong>de</strong>d in or<strong>de</strong>r to make the <strong>commercial</strong> appliance operate correctly.10. Repairs ma<strong>de</strong> by a Non-Whirlpool authorized Service Technician.DISCLAIMER OF IMPLIED WARRANTIES; LIMITATIONS OF REMEDIESCUSTOMER'S SOLE AND EXCLUSIVE REMEDY UNDER THIS LIMITED WARRANTY SHALL BE PRODUCT REPAIR AS PROVIDEDHEREIN. IMPLIED WARRANTIES, INCLUDING WARRANTIES OF MERCHANTABILITY OR FITNESS FOR A PARTICULAR PURPOSE,ARE LIMITED TO ONE YEAR OR THE SHORTEST PERIOD ALLOWED BY LAW. WHIRLPOOL SHALL NOT BE LIABLE FORINCIDENTAL OR CONSEQUENTIAL DAMAGES. SOME STATES AND PROVINCES DO NOT ALLOW THE EXCLUSION OR LIMITATIONOF INCIDENTAL OR CONSEQUENTIAL DAMAGES, OR LIMITATIONS ON THE DURATION OF IMPLIED WARRANTIES OFMERCHANTABILITY OR FITNESS, SO THESE EXCLUSIONS OR LIMITATIONS MAY NOT APPLY TO YOU. THIS WARRANTY GIVESYOU SPECIFIC LEGAL RIGHTS AND YOU MAY ALSO HAVE OTHER RIGHTS, WHICH VARY FROM STATE TO STATE OR PROVINCETO PROVINCE.If you need service, please contact your authorized Maytag ® Commercial Laundry distributor. To locate your authorized Maytag ®Commercial Laundry distributor, or for web inquiries, visit www.MaytagCommercialLaundry.com.1/11For written correspon<strong>de</strong>nce:Maytag ® Commercial Laundry Service Department2000 M-63 NorthBenton Harbor, Michigan 49022 USA12
SECURITE DU SECHE-LINGEVotre sécurité et celle <strong>de</strong>s autres est très importante.Nous donnons <strong>de</strong> nombreux messages <strong>de</strong> sécurité importants dans ce manuel et sur votre appareil ménager. Assurez-vous <strong>de</strong>toujours lire tous les messages <strong>de</strong> sécurité et <strong>de</strong> vous y conformer.Voici le symbole d’alerte <strong>de</strong> sécurité.Ce symbole d’alerte <strong>de</strong> sécurité vous signale les dangers potentiels <strong>de</strong> décès et <strong>de</strong> blessures graves à vouset à d’autres.Tous les messages <strong>de</strong> sécurité suivront le symbole d’alerte <strong>de</strong> sécurité et le mot “DANGER” ou“AVERTISSEMENT”. Ces mots signifient :DANGERAVERTISSEMENTRisque possible <strong>de</strong> décès ou <strong>de</strong> blessure grave si vous nesuivez pas immédiatement les <strong>instructions</strong>.Risque possible <strong>de</strong> décès ou <strong>de</strong> blessure grave si vousne suivez pas les <strong>instructions</strong>.Tous les messages <strong>de</strong> sécurité vous diront quel est le danger potentiel et vous disent comment réduire le risque <strong>de</strong> blessure etce qui peut se produire en cas <strong>de</strong> non-respect <strong>de</strong>s <strong>instructions</strong>.POUR VOTRE SECURITE1. NE PAS UTILISER OU REMISER D’ESSENCE OU AUTRES MATÉRIAUX INFLAMMABLES DANS CET APPAREIL MÉNAGEROU À PROXIMITÉ DE CELUI-CI.2. NE PAS VAPORISER D’AÉROSOLS À PROXIMITÉ DE CET APPAREIL MÉNAGER LORSQU’IL EST EN FONCTIONNEMENT.3. NE PAS MODIFIER CET APPAREIL MÉNAGER.AVERTISSEMENT : Pour votre sécurité, les renseignements dans ce manuel doiventêtre observés pour réduire au minimum les risques d’incendie ou d’explosion ou pouréviter <strong>de</strong>s dommages au produit, <strong>de</strong>s blessures ou un décès.– Ne pas entreposer ou utiliser <strong>de</strong> l’essence ou d’autres vapeurs ou liqui<strong>de</strong>sinflammables àproximité <strong>de</strong> cet appareil ou <strong>de</strong> tout autre appareil électroménager.– QUE FAIRE DANS LE CAS D’UNE ODEUR DE GAZ :• Ne pas tenter d’allumer un appareil.• Ne pas toucher àun commutateur électrique; ne pas utiliser le téléphone se trouvantsur les lieux.• Évacuer tous les gens <strong>de</strong> la pièce, <strong>de</strong> l’édifice ou du quartier.• Appeler immédiatement le fournisseur <strong>de</strong> gaz d’un téléphone voisin. Suivre ses<strong>instructions</strong>.• À défaut <strong>de</strong> joindre votre fournisseur <strong>de</strong> gaz, appeler les pompiers.– L’<strong>installation</strong> et l’entretien doivent être effectués par un installateur qualifié, uneagence <strong>de</strong> service ou le fournisseur <strong>de</strong> gaz.IMPORTANT : Pour mettre l’ancien sèche-linge au rebut ou pour la remiser, enlever la porte.13
ÉLIMINATION DU SECHE-LINGEEXIGENCES D’INSTALLATIONOutillage et piècesRassembler les outils et pièces nécessaires avant <strong>de</strong> commencerl’<strong>installation</strong>. Lire et respecter les <strong>instructions</strong> d’<strong>installation</strong>fournies avec chacun <strong>de</strong>s outils <strong>de</strong> cette liste.Outillage nécessairen Clé à tube <strong>de</strong> 200 mm (8")ou 250 mm (10")n Clé à molette <strong>de</strong> 200 mm(8") ou 250 mm (10")n Tournevis à lame platen Tournevis Phillipsn Clé à molette avecouverture jusqu’à 25 mm(1") ou clé à douille à têtehexagonalen Niveaun Clé à douille <strong>de</strong> 8 mm(5/16")n Couteau utilitairen Bri<strong>de</strong>s <strong>de</strong> fixationn Composé d’étanchéité <strong>de</strong>sraccords filetés – résistantau propanen Pistolet à calfeutrage etcomposé <strong>de</strong> calfeutrage(pour l’<strong>installation</strong>d’un nouveau circuitd’évacuation)n Pincen Couteau à masticPièces fourniesRetirer le sac <strong>de</strong> pièces du tambour du sèche-linge. Vérifierla présence <strong>de</strong> toutes les pièces.n Patin (4)n Pied du sèche-linge (4)14
Exigences d’emplacementDimensions du produitBouche <strong>de</strong>déchargesupérieureCanalisation <strong>de</strong>gaz supérieure235 mm(9 1 ⁄4")Gaz343 mm(13 1 ⁄2")Pour l’<strong>installation</strong> d’un sèche-linge à gaz :IMPORTANT : Respecter les dispositions <strong>de</strong> tous les co<strong>de</strong>s etrèglements en vigueur.n Déterminer les exigences <strong>de</strong>s co<strong>de</strong>s : Certains co<strong>de</strong>s limitent ouprohibent l’<strong>installation</strong> d’un sèche-linge dans un garage ou unechambre à coucher. Consulter l’inspecteur local <strong>de</strong>s bâtiments.n Veiller à ce que les bords inférieurs <strong>de</strong> la caisse ainsi que l’arrière etles côtés inférieurs du sèche-linge soient exempts d’obstructions,afin <strong>de</strong> permettre le passage adéquat <strong>de</strong> l’air <strong>de</strong> combustion. Voir lasection “Instructions pour l’<strong>installation</strong> encastrée” pour l’espace <strong>de</strong>dégagement minimal.n Ne pas installer sur un tapis.NOTE : Le sèche-linge ne doit pas être installé en un endroit où il seraitexposé à <strong>de</strong> l’eau ou aux intempéries.Instructions pour l’<strong>installation</strong> encastrée1054 mm(41 1 /2")940 mm(37")460 mm(18 1 ⁄8")REMARQUE :Canalisations <strong>de</strong> gazsituées à 32 mm(1 1 ⁄4") vers l’intérieurà partir du côtéadjacent.140 mm(5 1 ⁄2")Canalisation<strong>de</strong> gazinférieureÉlectriqueVue arrière1054 mm(41 1 ⁄2")83 mm(3 1 ⁄4")Bouche<strong>de</strong>déchargeinférieureCe sèche-linge peut être installé dans un encastrement.Ce sèche-linge ne doit pas être installé dans un placard avec porte.Les distances <strong>de</strong> séparation sont exprimées en millimètres; il s’agit <strong>de</strong>sdistances minimales. Il est utile <strong>de</strong> prévoir <strong>de</strong>s distances <strong>de</strong> séparationsupérieures pour faciliter l’<strong>installation</strong> et les travaux d’entretien, ou si ceciest exigé par les co<strong>de</strong>s et règlements locaux.Le circuit d’évacuation du sèche-linge doit être relié à l’extérieur.Aucun autre appareil utilisant un combustible ne doit être installé dansle même encastrement.Distances <strong>de</strong> séparation minimales127 mm (5")737 mm (29")686 mm (27")Arrière Côtés Dessus AvantEncastré 51 mm 0 mm 305 mm —(2") (0") (12")51 mm (2")Portes1940 mm(76 3 ⁄8")305 mm(12")0 mm(0")Encastrement,vue latérale0 mm (0") 0 mmEncastrement, (0")vue avantOn doit prévoir un espacement additionnel pour tenir compteéventuellement <strong>de</strong>s moulures du mur, <strong>de</strong> la porte et du plancher,ou si le circuit d’évacuation comporte un cou<strong>de</strong>.603 mm(23 3 ⁄4")Vue latéraleapprox. 25 mm(1")15
Exigences concernant l’évacuationAVERTISSEMENTRisque d’incendieUtiliser un conduit d’évacuation en métal lourd.Ne pas utiliser un conduit d’évacuation en plastique.Ne pas utiliser un conduit d’évacuation en feuille<strong>de</strong> métal.Le non-respect <strong>de</strong> ces <strong>instructions</strong> peut causerun décès ou un incendie.AVERTISSEMENT : Pour réduire le risque d’incendie,ce sèche-linge DOIT ÉVACUER L’AIR À L’EXTÉRIEUR.n Si l’on suit ces spécifications d’évacuation, le bruit produitpar les conduits sera minimisé.n Une aération adéquate est nécessaire pour éviter le retour<strong>de</strong>s gaz dans la pièce en provenance d’appareils ménagersqui utilisent d’autres carburants comme combustible, ycompris les feux ouverts (autrement dit le débit d’air entrantdans la pièce doit être égal au débit qui en sort).n La conception du système d’évacuation doit permettreà toute con<strong>de</strong>nsation formée lors du fonctionnement <strong>de</strong>l’appareil d’être soit retenue puis évaporée, soit évacuée.Le respect <strong>de</strong> ces <strong>instructions</strong> permettra <strong>de</strong> répondreconvenablement à ce critère.n Le conduit d’évacuation du sèche-linge ne doit pas êtreraccordé à une évacuation <strong>de</strong> gaz, une cheminée, un mur,un plafond, un grenier, un vi<strong>de</strong> sanitaire ou un vi<strong>de</strong> <strong>de</strong>construction. Seul un conduit d’évacuation métallique rigi<strong>de</strong>ou souple doit être utilisé pour le système d’évacuation.n Ne pas utiliser un clapet d’évacuation à fermeturemagnétique.n Ne pas installer le conduit métallique flexible dans les cavitésfermées <strong>de</strong>s murs, plafonds ou planchers.n Utiliser uniquement un conduit d’évacuation en métal lourd<strong>de</strong> 102 mm (4") et <strong>de</strong>s bri<strong>de</strong>s <strong>de</strong> serrage.Conduitd’évacuation enmétal lourd102 mm(4")n Utiliser <strong>de</strong>s bri<strong>de</strong>s <strong>de</strong> fixation pour sceller tous les joints.L’évent ne doit pas être connecté ou fixé avec <strong>de</strong>s vis ouautres dispositifs d’accrochage qui se prolongent à l’intérieur<strong>de</strong> l’évent et peuvent retenir les peluches. Ne pas utiliser <strong>de</strong>ruban adhésif en toile.Une mauvaise évacuation <strong>de</strong> l'air peut causer <strong>de</strong>l'humidité et une accumulation <strong>de</strong> charpie à l'intérieur <strong>de</strong>la maison, ce qui peut provoquer :Dommages par l'humidité aux boiseries, meubles, peinture,papier-peint, tapis, etc.Problèmes <strong>de</strong> nettoyage dans la maison et problèmes<strong>de</strong> santé.IMPORTANT : Respecter les dispositions <strong>de</strong> tous les co<strong>de</strong>set règlements en vigueur.Utiliser un conduit d’évacuation en métal lourd. Ne pas utiliserun conduit <strong>de</strong> plastique ou en feuille métallique.On recomman<strong>de</strong> d’utiliser un conduit métallique rigi<strong>de</strong> pour unemeilleure performance <strong>de</strong> séchage et pour réduire les risquesd’écrasement et <strong>de</strong> déformation.Un conduit métallique flexible doit être totalement déployéet soutenu lorsque le sèche-linge est à sa position finale.Enlever tout excès <strong>de</strong> conduit flexible pour éviter toutaffaissement/déformation qui réduira le débit d’air etle ren<strong>de</strong>ment du sèche-linge.La longueur totale du conduit métallique flexible ne doit pasexcé<strong>de</strong>r 2,4 m (7 3 ⁄4 pi).Terminer le conduit d’évacuation par un clapet <strong>de</strong> décharge poureviter les rongeurs et insectes d’entrer dans le bâtiment.Le clapet <strong>de</strong> décharge doit être situé à au moins 305 mm (12")au-<strong>de</strong>ssus du sol ou <strong>de</strong> tout autre objet susceptible <strong>de</strong> se trouversur le trajet <strong>de</strong> l’air humi<strong>de</strong> rejeté (par exemple, fleurs, roches,arbustes ou neige).Lors <strong>de</strong> l’utilisation d’un circuit d’évacuation existant, nettoyer lespeluches sur toute la longueur du système et veiller à ce que labouche <strong>de</strong> décharge ne soit pas obstruée par une accumulation<strong>de</strong> peluches. Remplacer tout conduit <strong>de</strong> plastique ou <strong>de</strong> feuillemétallique mince par un conduit métallique flexible ou rigi<strong>de</strong>.Planifier l’<strong>installation</strong> pour introduire le nombre minimal <strong>de</strong> cou<strong>de</strong>set <strong>de</strong> changements <strong>de</strong> direction.ADébit d’évacuationA. Bon débit d’évacuationB. Meilleur débitd’évacuationSi <strong>de</strong>s cou<strong>de</strong>s sont utilisés ou <strong>de</strong>s changements <strong>de</strong> directioneffectués, prévoir autant d’espace que possible. Plier le conduitgraduellement pour éviter <strong>de</strong> le déformer.La bouche <strong>de</strong> sortie est située à l’arrière du sèche-linge,en bas/au centre.On peut acheminer le conduit d’évacuation par le haut, parle bas, par la gauche, par la droite, <strong>de</strong>rrière le sèche-linge ouen ligne droite <strong>de</strong>puis l’arrière du sèche-linge.B18
Longueur du circuit d’évacuationL’angle maximal entre le conduit connecté à un sèche-lingeet le conduit principal ne <strong>de</strong>vrait pas dépasser 30°.La longueur maximale du circuit d’évacuation dépend du type<strong>de</strong> conduit utilisé, du nombre <strong>de</strong> cou<strong>de</strong>s et du type <strong>de</strong> bouche<strong>de</strong> décharge.Longueur maximale du conduitClapet <strong>de</strong> décharge <strong>de</strong> 102 mm (4")Type boîte À persiennes Incliné <strong>de</strong> 64 mm (2 1 ⁄2")Adébit air flow d’airB30˚ max.Conduitmétallique rigi<strong>de</strong>Nombred’angles à 90°01234Clapets <strong>de</strong> type boîteet à persiennes39,6 m (130 pi.)38,1 m (125 pi.)35,1 m (115 pi.)32,3 m (106 pi.)29,9 m (98 pi.)Si le sèche-linge est installé dans un espace réduit tel qu’unechambre à coucher, une salle <strong>de</strong> bain ou un placard, on doitprévoir une arrivée d’air en quantité suffisante pour la combustionet la ventilation. (Consulter les co<strong>de</strong>s et règlements en vigueur.)Voir “Instructions pour l’<strong>installation</strong> encastrée” <strong>de</strong> la section“Exigences d’emplacement”.L’emploi d’une bouche <strong>de</strong> décharge <strong>de</strong> 102 mm (4") estpréférable. On peut cependant utiliser une bouche <strong>de</strong> 64 mm(2 1 ⁄2"). Une bouche <strong>de</strong> décharge <strong>de</strong> 64 mm (2 1 ⁄2") peut causer uneplus forte rétropression que les autres genres <strong>de</strong> bouches. Pourune <strong>installation</strong> permanente, un système d’évacuation fixe estrequis.Évacuation multiple du sèche-lingeClapet incliné39,3 m (129 pi.)36,3 m (119 pi.)33,2 m (109 pi.)30,5 m (100 pi.)28 m (92 pi.)n Un conduit d’évacuation principal peut être utilisé pour ungroupe <strong>de</strong>s sèche-linge. Le conduit d’évacuation principal<strong>de</strong>vrait être d’un diamètre suffisant pour évacuer 5663 l/min(200 pi 3 /min) d’air par sèche-linge. Des filtres à peluches<strong>de</strong> forte capacité et <strong>de</strong> conception adéquate peuvent êtreutilisés dans le conduit principal d’évacuation s’ils sontinspectés et nettoyés fréquemment. La pièce où se trouventles sèche-linge <strong>de</strong>vrait recevoir un apport d’air <strong>de</strong> débit égalou supérieur au débit total (pi 3 /min) <strong>de</strong> débit <strong>de</strong> tousles sèche-linge installés dans la pièce.n Un ensemble antirefoulement est nécessaire et est fournipar un distributeur <strong>de</strong> buan<strong>de</strong>rie <strong>commercial</strong> et <strong>de</strong>vrait êtreinstallé dans le conduit d’évacuation <strong>de</strong> chaque sèche-lingepour éviter l’air évacué <strong>de</strong> retourner dans les sèche-lingeet pour maintenir une pression équilibrée dans le conduitprincipal d’évacuation. Des orifices <strong>de</strong> passage d’air<strong>de</strong> retour non obstrués sont requis.Chaque conduit d’évacuation <strong>de</strong>vrait pénétrer dans le conduitprincipal à un angle pointant dans la direction du débit d’air.Les conduits raccordés au conduit principal <strong>de</strong> part et d’autre<strong>de</strong>vraient être disposés en quinconce pour que l’air évacuépar un sèche-linge ne puisse perturber l’évacuation d’un autresèche-linge.A. Conduit individuel d’évacuation du sèche-lingeB. Conduit principal d’évacuationFaire en sorte que les vapeurs générées par les liqui<strong>de</strong>s <strong>de</strong>nettoyage à sec ne puissent pas atteindre les orifices d’entréed’air; ces vapeurs créent <strong>de</strong>s composés aci<strong>de</strong>s qui, lorsqu’ilssont attirés vers les unités <strong>de</strong> chauffage <strong>de</strong>s sèche-linge, peuventendommager les sèche-linge et le linge en cours <strong>de</strong> séchage.Une bouche <strong>de</strong> nettoyage <strong>de</strong>vrait être installée dans le conduitprincipal d’évacuation pour les nettoyages périodiques dusystème d’évacuation.Si une bouche <strong>de</strong> décharge ne peut être utilisée :CDBA. Bouche <strong>de</strong> déchargeou cou<strong>de</strong> <strong>de</strong>déviationB. MurC. Cheminée principale<strong>de</strong> mise à l’air libreD. Conduit horizontalE. Cou<strong>de</strong> <strong>de</strong> déviationà 180°F. Conduit verticalG. Toit24" min.(610 mm)12" min.(305 mm)L’extrémité extérieure du conduit principal <strong>de</strong>vrait être munie d’uncou<strong>de</strong> <strong>de</strong> déviation dirigé vers le bas. Si le conduit principal suitune trajectoire verticale à travers le toit, plutôt qu’à travers le mur,installer un cou<strong>de</strong> <strong>de</strong> déviation <strong>de</strong> 180° à l’extrémité du conduit etdépassant d’au moins 610 mm (2 pi) au-<strong>de</strong>ssus <strong>de</strong> la partie laplus élevée du bâtiment. L’ouverture murale ou dans le toit doitavoir un diamètre supérieur <strong>de</strong> 13 mm (1/2") à celui du conduitd’évacuation. Le conduit d’évacuation <strong>de</strong>vrait être centrédans l’ouverture.Ne pas installer une grille ou un couvercle sur l’extrémité duconduit d’évacuation.A610 mm (2 pi)min. au-<strong>de</strong>ssusdu point leplus élevédu bâtiment300 mm (12") min.au-<strong>de</strong>ssus <strong>de</strong> touteaccumulation <strong>de</strong>neige, glace ou débriscomme <strong>de</strong>s feuilles.FECG19
INSTRUCTIONS D’INSTALLATION – SECHE-LINGE A GAZInstallation <strong>de</strong>s pieds <strong>de</strong> nivellement4. Vérifier tous les raccor<strong>de</strong>ments en les badigeonnant d’unesolution <strong>de</strong> détection <strong>de</strong>s fuites non corrosive approuvée.L’apparition <strong>de</strong> bulles indique une fuite. Réparer toute fuiteéventuelle.NOTE : Placer le sèche-linge sur une feuille <strong>de</strong> carton ou unpanneau <strong>de</strong> bois dur avant <strong>de</strong> la déplacer sur le plancher, afind’éviter d’endommager le revêtement du sol.1. À l’ai<strong>de</strong> <strong>de</strong> <strong>de</strong>ux personnes ou plus, déplacer le sèche-lingeà l’emplacement d’<strong>installation</strong> désiré.2. Enlever le ruban adhésif dans les angles avant du sèchelinge.Ouvrir le sèche-linge; enlever les brochures et sachets<strong>de</strong> pièces. Essuyer parfaitement la surface interne du tambouravec un chiffon humi<strong>de</strong>.3. Prendre <strong>de</strong>ux cornières <strong>de</strong> carton <strong>de</strong> l’emballage et les placersur le plancher à l’arrière du sèche-linge. Saisir fermementle sèche-linge et la placer doucement en appui sur la facearrière, sur les cornières <strong>de</strong> carton.4. Prendre l’un <strong>de</strong>s pieds et i<strong>de</strong>ntifier la marque en losange dansle filetage. Ce repère indique jusqu’où le pied doit être vissédans le trou.5. Commencer à visser à la main les pieds avant dans les trous.(Utiliser une petite quantité <strong>de</strong> détergent liqui<strong>de</strong> pour lubrifierla section filetée, pour qu’il soit plus facile <strong>de</strong> tourner lespieds). Utiliser une clé <strong>de</strong> 25 mm (1") ou une clé à douillepour visser les pieds jusqu’au repère. Placer ensuite un patin<strong>de</strong> protection sur chaque pied.6. Placer maintenant le sèche-linge verticalement.7. Retirer la feuille <strong>de</strong> carton ou le panneau <strong>de</strong> bois dur placésous le sèche-linge. Régler les pieds du sèche-linge versle haut ou vers le bas jusqu’à ce que le sèche-linge soitd’aplomb.Raccor<strong>de</strong>ment à la canalisation <strong>de</strong> gazRaccor<strong>de</strong>ment du conduit d’évacuation1. À l’ai<strong>de</strong> d’une bri<strong>de</strong> <strong>de</strong> fixation <strong>de</strong> 102 mm (4"), relier leconduit d’évacuation à la bouche d’évacuation du sèchelinge.Si on utilise le conduit d’évacuation existant, s’assurerqu’il est propre. Le conduit d’évacuation du sèche-linge doitêtre fixé sur la bouche d’évacuation du sèche-linge et dans leclapet d’évacuation. S’assurer que le conduit d’évacuation estfixé au clapet d’évacuation à l’ai<strong>de</strong> d’une bri<strong>de</strong> <strong>de</strong> fixation <strong>de</strong>102 mm (4").2. Placer le sèche-linge à l’emplacement final désiré. Ne pasécraser ni <strong>de</strong>former le conduit d’évacuation. Vérifier que lesèche-linge est <strong>de</strong> niveau.3. Vérifier que la canalisation souple <strong>de</strong> gaz n’est pas déformée.Achever l’<strong>installation</strong>1. Une fois le sèche-linge à son emplacement final, placerun niveau sur le sommet du sèche-linge, transversalement,puis dans le sens avant arrière. Si le sèche-linge n’est pasd’aplomb, ajuster les pieds pour modifier la hauteur et établirun bon aplomb du sèche-linge.Cet appareil est un sèche-linge à 3 conducteursqui doit être relié à la terre.1. Retirer le capuchon rouge <strong>de</strong> la canalisation <strong>de</strong> gaz.2. Raccor<strong>de</strong>r la canalisation <strong>de</strong> gaz au sèche-linge. Le raccorddu conduit d’alimentation en gaz du sèche-linge est unfiletage conique NPT <strong>de</strong> 3/8". Un adaptateur est fourni pourla conversion à un filetage standard (3/8" BSP) selon la normeISO.228-1. Utiliser un composé d’étanchéité compatible avecle gaz propane.Si cela est nécessaire à l’entretien, ouvrir le panneau <strong>de</strong>plinthe. Utiliser un couteau à mastic pour appuyer sur les 2verroux du panneau <strong>de</strong> plinthe situé sur la partie supérieuredu panneau <strong>de</strong> plinthe. Tirer le panneau <strong>de</strong> plinthe vers lebas pour l’ouvrir. Le panneau <strong>de</strong> plinthe est fixé à la partieinférieure.3. Ouvrir le robinet d’arrêt <strong>de</strong> la canalisation d’arrivée <strong>de</strong> gaz.2. Brancher le sèche-linge ou reconnecter la source <strong>de</strong> courantélectrique.3. Contrôler le bon fonctionnement du sèche-linge. Sélectionnerun programme complet avec chaleur (pas un programmeà l’air), le mettre en marche et laisser le sèche-linge terminerle programme complet pour s’assurer qu’il fonctionnecorrectement. Il s’arrête lorsque la durée est écoulée.REMARQUE : La porte du sèche-linge doit être ferméepour que l’appareil fonctionne. Lorsque la porte est ouverte,le sèche-linge s’arrête. Pour remettre le sèche-linge enmarche, fermer la porte et resélectionner un programme.4. Si on ne perçoit aucune chaleur à l’intérieur du sèche-lingeet si le brûleur ne s’allume pas, arrêter la sécheuse pendantcinq minutes. Vérifier que tous les robinets <strong>de</strong> la canalisationd’alimentation sont ouverts et que le cordon d’alimentationélectrique est branché. Répéter le test <strong>de</strong> cinq minutes <strong>de</strong>fonctionnement.20
REGLAGE DE LA COMMANDE ELECTRONIQUEVoir le gui<strong>de</strong> <strong>de</strong> programmation pour <strong>de</strong>s renseignementssur la mise en marche.Instructions d’entretien :n Nettoyer le filtre à peluches après chaque utilisation.n Comment enlever les peluches accumulées (déconnecterle sèche-linge <strong>de</strong> l’alimentation électrique et <strong>de</strong> l’alimentationen gaz avant d’effectuer cette opération) :• De l’intérieur du sèche-linge :Il faut retirer les peluches tous les 2 ans ou plus souvent,selon l’utilisation du sèche-linge. Le nettoyage doit êtreeffectué par une personne qualifiée.• Du conduit d’évacuation :Il faut retirer les peluches tous les 2 ans ou plus souvent,selon l’utilisation du sèche-linge.Le sens d’ouverture <strong>de</strong> la porte peut être changé du côté droitau côté gauche, si désiré.INSTRUCTIONS D’ENTRETIENSi le sèche-linge ne fonctionne pas, vérifier ce qui suit :n Le circuit d’alimentation électrique est bien connecté.n Les disjoncteurs ne sont pas ouverts et les fusibles sontintacts.n La porte est fermée.n Les boutons <strong>de</strong> comman<strong>de</strong> sélectionnent une configuration <strong>de</strong>fonctionnement ou sont placées sur “ON”.n Un programme a été sélectionné.n Vérifier que les robinets <strong>de</strong> la canalisation <strong>de</strong> gaz sont ouverts.Si vous avez besoin d’assistance :Veuillez communiquer avec votre distributeur d’ensemble<strong>de</strong> buan<strong>de</strong>rie commercal Maytag ® autorisé ou visitez le siteWeb www.MaytagCommercialLaundry.com. Lors <strong>de</strong> l’appel,vous aurez besoin <strong>de</strong>s numéros <strong>de</strong> modèle et <strong>de</strong> série dusèche-linge. Les <strong>de</strong>ux numéros sont indiqués sur la plaquesignalétique du sèche-linge.INVERSION DU SENS D’OUVERTURE DE LA PORTE(FACULTATIF)C5. Fixer à nouveau le panneau <strong>de</strong>porte à la porte interne <strong>de</strong> façonà ce que la poignée se trouvedu côté où les vis viennentd’être retirées.B6. Fixer les charnières <strong>de</strong> porte à la porte du sèche-linge <strong>de</strong> façonà ce que le trou le plus gros se trouve au fond <strong>de</strong> la charnièreet que l’axe <strong>de</strong> la charnière soit orienté vers l’avant <strong>de</strong> la porte.A1. Ouvrir la porte du sèche-linge. Oter les vis inférieures du côtécharnière <strong>de</strong> la caisse (A). Desserrer (ne pas retirer) les vissupérieures du côté charnière <strong>de</strong> la caisse.2. Soulever la porte jusqu’à ce que les vis supérieures <strong>de</strong> lacaisse se trouvent dans la partie large <strong>de</strong> l’encoche <strong>de</strong> lacharnière. Tirer la porte vers l’avant pour la dégager <strong>de</strong>s vis.Retirer les vis supérieures <strong>de</strong> la caisse.3. Retirer les vis fixant les charnières à la porte.4. Retirer les vis <strong>de</strong> chaque côté <strong>de</strong> la porte (5 vis). Saisir lescôtés <strong>de</strong> la porte externe et la soulever doucement pour laséparer <strong>de</strong> la porte interne (ne pas les séparer en forçant).Ne pas tirer sur le joint ou le loquet en plastique <strong>de</strong> la porte.7. Oter les 4 vis fixant les 2 bouchons d’obturation (B) du côté<strong>de</strong> la poignée. Fixer les bouchons d’obturation au côté opposéà l’ai<strong>de</strong> <strong>de</strong>s mêmes 4 vis.8. Insérer les vis dans les trous inférieurs ducôté gauche <strong>de</strong> la caisse. Serrer les visà moitié. Positionner la porte <strong>de</strong> façon àce que le côté large <strong>de</strong> l’encoche <strong>de</strong> lacharnière <strong>de</strong> porte se trouve au-<strong>de</strong>ssus<strong>de</strong>s vis. Faire glisser la porte vers le haut<strong>de</strong> façon à ce que les vis se trouventau fond <strong>de</strong>s encoches. Resserrer les vis. Insérer les vissupérieures dans les charnières et les serrer.9. Fermer la porte et vérifier que la gâche <strong>de</strong> la porte est alignéeavec le loquet (C).21
FICHE TECHNIQUE – SECHE-LINGE A GAZ220-240 v ~ 50 Hz, 1 ph, 12 A max. IP24 Capacité max. : 9,0 kg max. chaque sèche-linge. Niveau <strong>de</strong>pression acoustique, LpA : 58 dBA (incertitu<strong>de</strong>, KpA : +/– 10 dBA) Poids total : 135 kg max.Réglé à l’usine pour le GAZ NATUREL. Taille <strong>de</strong> l’injecteur : 2,2 mmCapacité calorique brute : 5,9 kWPays européen :Catégorie européenne <strong>de</strong> gaz :Pression ajustée :Pression <strong>de</strong> l’alimentation (G20)Pression réglée à l’usine :Pays européen :CH, CZ, CY, ES, GB, GR, HR,IE, IT, PT, SI, SK, TRII 2H3+0,562703 m 3 /h20 mbarAvec trousse <strong>de</strong> conversion au GPL : Taille <strong>de</strong> l’injecteur : 1,25 mmCapacité calorique brute : 6,4 kWCY, CZ, DK, EE, FI, GR, HU,IT, NO, RO, SE, SK, TRII 2H3B/P0,562703 m 3 /h20 mbar7,4 mbar 7,4 mbarCH, CZ, CY, ES, GB, GR, HR,IE, IT, PT, SI, SK, TRCY, CZ, DK, EE, FI, GR, HU,IT, NO, RO, SE, SK, TRCatégorie européenne <strong>de</strong> gaz :Pression d’alimentation en butane (G30) :Pression ajustée :II 2H3+28-30 mbarS/OII 2H3B/P30 mbarS/OPression d’alimentation en propane (G31) :Pression ajustée :37 mbarS/O30 mbarS/OAvec l’ensemble <strong>de</strong> conversion au GAZ NATUREL pour la France/Belgique : Taille <strong>de</strong> l’injecteur : 1,65 mmProduction <strong>de</strong> chaleur brute : 5,9 kWPays européen :FR, BECatégorie européenne <strong>de</strong> gaz :Pression d’alimentation (G20) :20 mbarPression d’alimentation (G25) :25 mbarPression ajustée :S/OREMARQUE : Trousse <strong>de</strong> conversion : du gaz naturel au GPL : Pièce Whirlpool N° W10233219.Ensemble <strong>de</strong> conversion du gaz naturel au gaz naturel - France/Belgique :Pièce Whirlpool N° : W10181947Fabricant : Whirlpool Corporation, Benton Harbor, Michigan 49022, U.S.A.Site industriel <strong>de</strong> fabrication : Whirlpool Corporation, 1300 Marion-Agosta Rd., Marion, OH 43302, ETATS-UNISReprésentant <strong>de</strong> l’UE : Maytag UK Ltd., 2 St. Annes Blvd., Redhill, RH1 1AX, UKet Bauknecht Hausgeräte GmbH, D-73614 Schorndorf22
GARANTIE DE LAVE-LINGE, SÈCHE-LINGE, LAVE-LINGE ETSÈCHE-LINGE SUPERPOSÉS À USAGE COMMERCIAL,ENSEMBLE DE BUANDERIE SUPERPOSÉ À USAGECOMMERCIAL, ET LAVE-LINGE ET SÈCHE-LINGE À CHARGEMULTIPLE ET À USAGE COMMERCIAL PAYANTS MAYTAG ®GARANTIE LIMITÉE SUR LES PIÈCESPendant les cinq premières années à compter <strong>de</strong> la date d’achat, lorsque cet appareil ménager à usage <strong>commercial</strong> est installé,entretenu et utilisé conformément aux <strong>instructions</strong> jointes ou fournies avec le produit, la marque Maytag <strong>de</strong> Whirlpool Corporation(ci-après désignée “Maytag”) paiera pour les pièces spécifiées par l’usine ou pour les pièces originales du fabricant <strong>de</strong> l’équipementpour corriger tout vice <strong>de</strong> matériau ou <strong>de</strong> fabrication. Une preuve <strong>de</strong> la date d’achat d’origine est exigée pour obtenir un service dansle cadre <strong>de</strong> la présente garantie.MAYTAG NE PRENDRA PAS EN CHARGE :1. Tout autre coût y compris la main-d’œuvre, le transport ou les droits <strong>de</strong> douane.2. Les visites <strong>de</strong> service pour rectifier l’<strong>installation</strong> <strong>de</strong> l’appareil ménager à usage <strong>commercial</strong>, montrer à l’utilisateur comment utiliserl’appareil ménager à usage <strong>commercial</strong>, remplacer ou réparer <strong>de</strong>s fusibles ou rectifier le câblage ou la plomberie du domicile.3. Les réparations lorsque l’appareil ménager à usage <strong>commercial</strong> est utilisé à <strong>de</strong>s fins autres qu’un usage <strong>commercial</strong> normal.4. Les dommages imputables à : mauvaise manipulation du produit lors <strong>de</strong> la livraison, vol, acci<strong>de</strong>nt, modification, usage impropreou abusif, incendie, inondation, actes <strong>de</strong> Dieu, <strong>installation</strong> fautive ou <strong>installation</strong> non conforme aux co<strong>de</strong>s locaux d’électricité ou<strong>de</strong> plomberie, ou l’utilisation <strong>de</strong> produits non approuvés par Maytag.5. Le ramassage et la livraison. Cet appareil ménager à usage <strong>commercial</strong> est conçu pour être réparé sur site.6. Les réparations aux pièces ou systèmes résultant d’une modification non autorisée faite à l’appareil ménager à usage<strong>commercial</strong>.7. L’enlèvement et la ré<strong>installation</strong> <strong>de</strong> l’appareil ménager à usage <strong>commercial</strong> si celui-ci est installé dans un endroit inaccessible oun’est pas installé conformément aux <strong>instructions</strong> d’<strong>installation</strong> fournies.8. Aucun dommage dû à <strong>de</strong>s produits chimiques n’est couvert par la garantie.9. Des modifications apportées à l’immeuble, à la pièce ou aux lieux afin <strong>de</strong> permettre à l’appareil ménager à usage <strong>commercial</strong><strong>de</strong> fonctionner correctement.10. Réparations effectuées par un technicien <strong>de</strong> réparation non agréé par Whirlpool.CLAUSE D’EXONÉRATION DE RESPONSABILITÉ AU TITRE DES GARANTIES IMPLICITES; LIMITATION DES RECOURSLE SEUL ET EXCLUSIF RECOURS DU CLIENT DANS LE CADRE DE LA PRÉSENTE GARANTIE LIMITÉE CONSISTE EN LARÉPARATION PRÉVUE CI-DESSUS. LES GARANTIES IMPLICITES, Y COMPRIS LES GARANTIES APPLICABLES DE QUALITÉMARCHANDE OU D’APTITUDE À UN USAGE PARTICULIER, SONT LIMITÉES À UN AN OU À LA PLUS COURTE PÉRIODEAUTORISÉE PAR LA LOI. WHIRLPOOL N’ASSUME AUCUNE RESPONSABILITÉ POUR LES DOMMAGES FORTUITS OUINDIRECTS. CERTAINES JURIDICTIONS NE PERMETTENT PAS L’EXCLUSION OU LA LIMITATION DES DOMMAGES FORTUITSOU INDIRECTS, OU LES LIMITATIONS DE LA DURÉE DES GARANTIES IMPLICITES DE QUALITÉ MARCHANDE OU D’APTITUDE ÀUN USAGE PARTICULIER, DE SORTE QUE CES EXCLUSIONS OU LIMITATIONS PEUVENT NE PAS S’APPLIQUER DANS VOTRECAS. CETTE GARANTIE VOUS CONFÈRE DES DROITS JURIDIQUES SPÉCIFIQUES ET VOUS POUVEZ ÉGALEMENT JOUIRD’AUTRES DROITS QUI PEUVENT VARIER D’UNE JURIDICTION À UNE AUTRE.Si vous avez besoin <strong>de</strong> service, veuillez contacter votre distributeur autorisé <strong>de</strong> buan<strong>de</strong>rie à usage <strong>commercial</strong> Maytag ® . Pourlocaliser votre distributeur autorisé <strong>de</strong> buan<strong>de</strong>rie à usage <strong>commercial</strong> Maytag ® ou pour toute question via internet, consulter :www.MaytagCommercialLaundry.com.Pour toute correspondance écrite :Maytag ® Commercial Laundry Service Department2000 M-63 NorthBenton Harbor, Michigan 49022 USA1/1123
SEGURIDAD DE LA SECADORAPARA SU SEGURIDAD1. NO ALMACENE NI USE GASOLINA NI OTROS VAPORES INFLAMABLES CERCA DE ÉSTE O CUALQUIER OTROELECTRODOMÉSTICO.2. NO ROCÍE CON AEROSOLES EN LA PROXIMIDAD DE ESTE APARATO MIENTRAS ESTÉ EN FUNCIONAMIENTO.3. NO MODIFIQUE ESTE APARATO.IMPORTANTE: Cuando <strong>de</strong>scarte o guar<strong>de</strong> su vieja secadora, quítele la puerta.24
ELIMINACIÓN DE LA SECADORAREQUISITOS DE INSTALACIÓNPiezas y herramientasReúna las herramientas y piezas necesarias antes <strong>de</strong> comenzarla instalación. Lea y siga las <strong>instrucciones</strong> provistas concualquiera <strong>de</strong> las herramientas enlistadas aquí.Herramientas necesariasn Llave para tubos<strong>de</strong> 200 mm (8")ó 250 mm (10")n Llave ajustable <strong>de</strong> 200 mm(8") ó 250 mm (10")nDestornillador <strong>de</strong>hoja planan Destornillador Phillipsn Llave ajustable que se abraa 25 mm (1") o llave <strong>de</strong>cubo <strong>de</strong> cabeza hexagonaln NivelPiezas suministradasn Llave <strong>de</strong> cubo<strong>de</strong> 8 mm (5/16")n Cuchillo para uso generaln Abraza<strong>de</strong>ras para ducton Pegamento para tuberíasresistente a gas LPn Pistola y masilla paracalafateo (para instalar elnuevo ducto <strong>de</strong> escape)n Pinzasn Cuchillo para masillaRetire la bolsa <strong>de</strong> piezas <strong>de</strong>l tambor <strong>de</strong> la secadora. Verifique queestén todas las piezas.n Cubiertas protectoras parapatas (4)n Patas <strong>de</strong> la secadora (4)Requisitos <strong>de</strong> ubicaciónSi va a instalar una secadora a gas:IMPORTANTE: Observe todos los códigos y reglamentosaplicables.n Verifique los requisitos <strong>de</strong>l código: Algunos códigos limitan,o no permiten, la instalación <strong>de</strong> secadoras <strong>de</strong> ropa en garajeso en dormitorios. Póngase en contacto con el inspector <strong>de</strong>construcciones <strong>de</strong> su localidad.n Asegúrese <strong>de</strong> que los bor<strong>de</strong>s inferiores <strong>de</strong>l<strong>de</strong> la carcasa, laparte posterior y los lados <strong>de</strong> la parte posterior e inferior <strong>de</strong>la secadora, estén libres <strong>de</strong> obstrucciones, para permitir elespacio a<strong>de</strong>cuado <strong>de</strong> aberturas para la combustión <strong>de</strong> aire.Vea “Instrucciones para la instalación en un área empotrada”más abajo para requisitos mínimos <strong>de</strong> instalación.n No la instale sobre alfombra.NOTA: No <strong>de</strong>be instalarse la secadora en un área en don<strong>de</strong>pueda estar expuesta al agua y/o a la intemperie.25
Instrucciones para la instalación enun área empotradaEsta secadora podrá instalarse en un área empotrada.Esta secadora no se <strong>de</strong>be instalar en un clóset con puerta.El espacio <strong>de</strong> instalación es en milímetros (pulgadas) y es elmínimo permitido. Debe consi<strong>de</strong>rarse espacio adicional parafacilitar la instalación, el servicio técnico y el cumplimiento <strong>de</strong>los códigos y or<strong>de</strong>nanzas locales.La secadora <strong>de</strong>berá ventilarse al exterior.No se pue<strong>de</strong> instalar otro electrodoméstico que usa combustibleen el mismo clóset en que se encuentra la secadora.Espacios mínimos para la instalaciónParte posterior Lados Parte superior Parte frontalLugar 51 mm 0 mm 305 mm —empotrado (2 pulg) (0 pulg) (12 pulg)51 mm (2")Dimensiones <strong>de</strong>l producto (cont.)737 mm (29")127 mm (5") 686 mm (27")Puerta1940 mm(76 3 ⁄8")305 mm(12")0 mm(0")Vista lateral enlugar empotrado0 mm (0") 0 mm (0")Vista frontal enlugar empotradoSe podrían necesitar espacios libres adicionales para las molduras <strong>de</strong> lapared, <strong>de</strong> la puerta y <strong>de</strong>l piso, o si se usa un codo externo <strong>de</strong> ventilación.603 mm(23 3 ⁄4")Vista lateralapprox. 25 mm(1")Requisitos eléctricos – Secadora a gasDimensiones <strong>de</strong>l productoSalida <strong>de</strong> aire<strong>de</strong> la secadorasuperiorLínea <strong>de</strong> gas <strong>de</strong> lasecadora superior1054 mm(41 1 /2")940 mm(37")NOTA: Las líneas<strong>de</strong> gas estánubicadas a 32mm (1 1 /4") hacia<strong>de</strong>ntro <strong>de</strong>l ladoadyacente.26235 mm(9 1 ⁄4")460 mm(18 1 ⁄8")140 mm(5 1 ⁄2")Línea <strong>de</strong>gas <strong>de</strong> lasecadorainferiorGasEléctricoVistaposterior1054 mm(41 1 ⁄2")Salida <strong>de</strong>aire <strong>de</strong> lasecadorainferior343 mm(13 1 ⁄2")83 mm(3 1 ⁄4")IMPORTANTE: Observe todos los códigos y reglamentosaplicables.Necesitará un contacto con conexión a tierra ubicado a no más<strong>de</strong> 610 mm (2 pies) <strong>de</strong> cualquiera <strong>de</strong> los lados <strong>de</strong> la secadora.Esta secadora está provista <strong>de</strong> un cable <strong>de</strong> suministroeléctrico y un enchufe. Deberá ser conectada al receptáculo <strong>de</strong>suministro eléctrico con el voltaje que se muestra en la placa<strong>de</strong> clasificación. La capacidad mínima <strong>de</strong>l fusible <strong>de</strong> suministro<strong>de</strong>berá ser <strong>de</strong> 12A. La secadora <strong>de</strong>berá colocarse <strong>de</strong> maneraque el enchufe esté claramente visible y accesible. Esteinterruptor <strong>de</strong> <strong>de</strong>sconexión también tiene la función <strong>de</strong> control<strong>de</strong> parada <strong>de</strong> emergencia para el usuario. Si no se usa el enchufeprovisto, la conexión eléctrica <strong>de</strong>berá llevarse a cabo por parte<strong>de</strong> un electricista capacitado, según los códigos locales onacionales.Si se ha dañado el cable <strong>de</strong> suministro, <strong>de</strong>berá reemplazarsecon un cable especialmente terminado, por parte <strong>de</strong> un agente<strong>de</strong> servicio autorizado u otra persona similarmente calificada,para evitar un peligro.No use un adaptador.No use un cable eléctrico <strong>de</strong> extensión.
NOTA: De acuerdo a la Directiva EMC Europea (2004/108/EC),la impedancia máxima <strong>de</strong>l sistema <strong>de</strong> suministro <strong>de</strong> electricidadmáxima a la cual la secadora eléctrica <strong>de</strong>be estar conectadaes 0,012 Ohm + j0,007 Ohm.NOTA: Estándares <strong>de</strong> seguridad sobre electricidad: El fabricanteha elegido cumplir con los estándares IEC/EN.60335 por ser losmás apropiados para esta secadora.ADVERTENCIACómo utilizar el cable universal provisto conesta secadora:Esta secadora a gas está equipada con un cable universalque tiene clavijas intercambiables.1. Para utilizar el cable universal, elija la punta <strong>de</strong> la clavijaque encaje en su tomacorriente, y conéctelo al adaptadoren el cable <strong>de</strong> suministro.2. Asegure la punta <strong>de</strong> la clavija en el cable alineandolas 2 mita<strong>de</strong>s <strong>de</strong> la cubierta sobre el adaptador <strong>de</strong>l cable,y sujetándolas.Peligro <strong>de</strong> <strong>de</strong>scarga eléctricaSe requiere una conexión eléctrica a tierra paraesta secadora.No haga la conexión a tierra sobre una tubería <strong>de</strong> gas.No cambie el enchufe <strong>de</strong>l cable <strong>de</strong> suministro <strong>de</strong>energía. Si no encaja en el contacto, consulte aun electricista competente para instalar uncontacto a<strong>de</strong>cuado.No use un cable eléctrico <strong>de</strong> extensión conesta secadora.No seguir estas <strong>instrucciones</strong> pue<strong>de</strong> ocasionarla muerte, incendio o lesiones graves.Requisitos <strong>de</strong>l suministro <strong>de</strong> gasADVERTENCIASi los códigos lo permiten y se emplea una ligadura <strong>de</strong> conexióna tierra adicional, es recomendable que un electricista calificado<strong>de</strong>termine si la trayectoria <strong>de</strong> conexión a tierra <strong>de</strong> la ligadura esa<strong>de</strong>cuada.INSTRUCCIONES PARA LA CONEXIÓN A TIERRAPara la conexión <strong>de</strong> una secadora mediante cableeléctrico conectado a tierra:Esta secadora <strong>de</strong>be estar conectada a tierra. En el caso<strong>de</strong> funcionamiento <strong>de</strong>fectuoso o avería, la conexión a tierrareducirá el riesgo <strong>de</strong> <strong>de</strong>scarga eléctrica al proporcionaruna vía <strong>de</strong> menor resistencia para la corriente eléctrica.Esta secadora usa un cable que cuenta con un conductorpara la conexión a tierra <strong>de</strong>l equipo y un enchufe <strong>de</strong>conexión a tierra. El enchufe <strong>de</strong>be conectarse en un contactoapropiado, que esté <strong>de</strong>bidamente instalado y conectado atierra <strong>de</strong> acuerdo con todos los códigos y or<strong>de</strong>nanzas locales.ADVERTENCIA:La conexión in<strong>de</strong>bida <strong>de</strong>l conductor parala conexión a tierra <strong>de</strong>l equipo pue<strong>de</strong> ocasionar un riesgo <strong>de</strong><strong>de</strong>scarga eléctrica. Si no está seguro <strong>de</strong> que la conexión atierra <strong>de</strong> la secadora es la a<strong>de</strong>cuada, verifíquela con unelectricista o representante o personal <strong>de</strong> servicio competente.No modifique el enchufe provisto con la secadora: Si noencaja en el contacto, consulte con un electricistacompetente para instalar un contacto a<strong>de</strong>cuado.GUARDE ESTAS INSTRUCCIONESPeligro <strong>de</strong> explosiónConecte esta secadora a un suministro regulado<strong>de</strong> gas. La presión <strong>de</strong> suministro <strong>de</strong>be estar <strong>de</strong> acuerdocon las Especificaciones técnicas (vea la última página).Instale una válvula <strong>de</strong> cierre.Apriete firmemente todas las conexiones <strong>de</strong> gas.Si se conecta a LP, haga que una persona calificadase asegure <strong>de</strong> que la presión <strong>de</strong> gas es la correcta.No seguir esta instrucción pue<strong>de</strong> ocasionar la muerte,explosión o incendio.IMPORTANTE: Observe todos los códigos y reglamentosaplicables.Suministro <strong>de</strong> gasAntes <strong>de</strong> realizar la instalación, verifique que las condicioneslocales <strong>de</strong> distribución <strong>de</strong> gas, la naturaleza <strong>de</strong>l mismo y supresión, y el ajuste <strong>de</strong>l electrodoméstico sean compatibles.La información sobre el quemador está ubicada en la placacon el número <strong>de</strong> mo<strong>de</strong>lo/serie, que está en el hueco <strong>de</strong> lapuerta <strong>de</strong> la secadora. Si esta información no está <strong>de</strong> acuerdocon el tipo <strong>de</strong> gas disponible, vea a su distribuidor.Gas natural:Esta secadora ha sido ajustada en fábrica para ser usada conGAS NATURAL (G20) y no <strong>de</strong>bería necesitarse otro ajustedurante su instalación.27
Gas L.P.:Esta secadora también está certificada para ser usada congas L.P. (propano o butano) con la conversión a<strong>de</strong>cuada. Nose <strong>de</strong>berá intentar convertir el aparato <strong>de</strong>l gas especificado enla placa indicadora <strong>de</strong>l mo<strong>de</strong>lo/<strong>de</strong> la serie para utilizar un gasdistinto sin consultar con el proveedor <strong>de</strong> gas.La conversión <strong>de</strong>berá llevarla a cabo un técnico <strong>de</strong> serviciocalificado. El juego <strong>de</strong> conversión <strong>de</strong> gas, pieza númeroW10233219, está disponible con su distribuidor. El juegoincluye las <strong>instrucciones</strong> completas.Requisitos <strong>de</strong> la línea <strong>de</strong> suministro:Provea una línea <strong>de</strong> suministro <strong>de</strong> gas <strong>de</strong> tubería rígidahacia la ubicación <strong>de</strong> la secadora. Debería tener un mínimo <strong>de</strong>12,5 mm (1/2") <strong>de</strong> diámetro interno. Cuando sea aceptable parael proveedor <strong>de</strong> gas y los códigos locales, se podrá usar una línea<strong>de</strong> suministro rígida <strong>de</strong> 10 mm (3/8") <strong>de</strong> diámetro interno paralongitu<strong>de</strong>s menores <strong>de</strong> 6,1 m (20'). Deben usarse compuestospara uniones <strong>de</strong> tubería que sean resistentes a la acción <strong>de</strong>lgas LP.La conexión <strong>de</strong> gas a la secadora <strong>de</strong>be hacerse con unamanguera para gas flexible a<strong>de</strong>cuada para el electrodomésticoy la categoría <strong>de</strong> gas <strong>de</strong> acuerdo con las reglamentacionesnacionales <strong>de</strong> instalación. En caso <strong>de</strong> dudas, consulte conel proveedor <strong>de</strong> gas. Debe ser <strong>de</strong> un mínimo <strong>de</strong> 10 mm (3/8")<strong>de</strong> diámetro interno.Se <strong>de</strong>be utilizar un medio <strong>de</strong> sujeción entre el electrodomésticoy la pared, para prevenir que se ejerza tensión en el suministro <strong>de</strong>gas rígido cuando se mueva el electrodoméstico. Se recomiendauna ca<strong>de</strong>na <strong>de</strong> longitud a<strong>de</strong>cuada y un gancho <strong>de</strong> pared.La conexión <strong>de</strong> entrada <strong>de</strong> gas a la secadora es una rosca <strong>de</strong>NPT 3/8". Se proporciona un adaptador para convertirla a unarosca según la norma ISO.228-1 (3/8" BSP).Verifique si hay fugas utilizando una solución para <strong>de</strong>tección <strong>de</strong>fugas que no sea corrosiva. Se observarán burbujas si hay fugas.Tape cualquier fuga que encuentre. Se ha provisto una conexiónpara medir la presión en la válvula <strong>de</strong> gas, la cual está ubicada<strong>de</strong>ntro <strong>de</strong> la secadora, accesible <strong>de</strong>spués <strong>de</strong> haber retirado elpanel frontal inferior.Durante cualquier prueba <strong>de</strong> presión <strong>de</strong>l sistema, la secadora<strong>de</strong>be ser <strong>de</strong>sconectada <strong>de</strong>l sistema <strong>de</strong> tubería <strong>de</strong>l suministro<strong>de</strong> gas.n El diseño <strong>de</strong>l sistema <strong>de</strong> tubería <strong>de</strong>berá ser tal que lacon<strong>de</strong>nsación que se forme cuando el aparato esté enfuncionamiento, que<strong>de</strong> retenida y se evapore posteriormenteo se <strong>de</strong>seche. Al seguir estas <strong>instrucciones</strong>, este requisitose cumplirá a<strong>de</strong>cuadamente.n El conducto <strong>de</strong> escape <strong>de</strong> la secadora no <strong>de</strong>be conectarseen ningún conducto <strong>de</strong> escape <strong>de</strong> gas, chimenea, pared,techo, <strong>de</strong>sván, espacio angosto o el espacio oculto <strong>de</strong> unedificio. Deberá usarse solamente un conducto <strong>de</strong> metalrígido o flexible para el escape.n No use un conducto <strong>de</strong> escape <strong>de</strong> plástico con pestillomagnético.n No instale el ducto <strong>de</strong> escape <strong>de</strong> metal flexible en pare<strong>de</strong>s,techos o pisos encerrados.n Sólo pue<strong>de</strong> usarse un conducto <strong>de</strong> escape <strong>de</strong> metal pesado<strong>de</strong> 102 mm (4") y abraza<strong>de</strong>ras.Conducto <strong>de</strong>escape <strong>de</strong>metal pesado102 mm(4")n Utilice abraza<strong>de</strong>ras para sellar todas las juntas. No <strong>de</strong>beconectarse ni asegurarse el ducto <strong>de</strong> escape con tornillosni con ningún otro dispositivo que se extienda hacia el interior<strong>de</strong> dicho conducto y atrape pelusa. No utilice cinta paraductos.Requisitos <strong>de</strong> ventilaciónADVERTENCIA: Para reducir el riesgo <strong>de</strong> incendio,esta secadora DEBE VENTILARSE HACIA EL EXTERIOR.n Cumplir con estos requisitos <strong>de</strong> ventilación minimizará elruido proveniente <strong>de</strong>l aire en los ductos.n Deberá proveerse una ventilación a<strong>de</strong>cuada para evitarel contraflujo <strong>de</strong> gases <strong>de</strong> aparatos que consuman otroscombustibles, incluidos fuegos abiertos, en la habitación (porejemplo, el flujo <strong>de</strong> aire disponible que entre en la habitación<strong>de</strong>berá coincidir con el flujo <strong>de</strong> aire que sale <strong>de</strong> la misma).28IMPORTANTE: Observe todos los códigos y reglamentosaplicables.Use un conducto <strong>de</strong> escape <strong>de</strong> metal pesado. No use conducto<strong>de</strong> escape <strong>de</strong> plástico o <strong>de</strong> hoja <strong>de</strong> metal.Se recomienda un conducto <strong>de</strong> escape <strong>de</strong> metal rígido paraun mejor <strong>de</strong>sempeño en el secado y para evitar que se aplasteo se tuerza.El ducto <strong>de</strong> escape <strong>de</strong> metal flexible <strong>de</strong>be exten<strong>de</strong>rse ysostenerse por completo cuando la secadora está en suubicación final. Quite el exceso <strong>de</strong>l ducto <strong>de</strong> metal flexiblepara evitar que se doble y se tuerza, lo cual dará lugar a unareducción <strong>de</strong>l flujo <strong>de</strong> aire y a un rendimiento insuficiente.El largo total <strong>de</strong>l conducto <strong>de</strong> escape <strong>de</strong> metal flexible no <strong>de</strong>beexce<strong>de</strong>r 2,4 m (7 3 ⁄4 pies).Una capota <strong>de</strong> ventilación <strong>de</strong>be tapar el ducto <strong>de</strong> escapepara evitar el ingreso <strong>de</strong> roedores e insectos al edificio.La capota <strong>de</strong> ventilación <strong>de</strong>be estar al menos a 305 mm (12")<strong>de</strong>l piso o <strong>de</strong> cualquier objeto que pueda encontrarse en el paso<strong>de</strong>l escape (tales como flores, piedras, arbustos o nieve).Si se usa un sistema <strong>de</strong> ventilación existente, limpie la pelusaque está en toda la longitud <strong>de</strong>l sistema y asegúrese <strong>de</strong> que lacapota <strong>de</strong> ventilación no esté obstruida con pelusa. Reemplacecualquier ducto <strong>de</strong> escape <strong>de</strong> plástico o <strong>de</strong> hoja <strong>de</strong> metal poruno <strong>de</strong> metal rígido o flexible.
Planifique la instalación a fin <strong>de</strong> usar el menor número posible<strong>de</strong> codos y vueltas.Flujo <strong>de</strong> aire <strong>de</strong> escapeA. BuenoB. MejorACuando use codos o haga vueltas, <strong>de</strong>je todo el espacio que seaposible. Doble el ducto gradualmente para evitar torceduras.La salida <strong>de</strong> ventilación está ubicada en el centro <strong>de</strong> la parteposterior <strong>de</strong> la secadora inferior.El ducto <strong>de</strong> escape pue<strong>de</strong> ser dirigido hacia arriba, hacia abajo,a la izquierda, <strong>de</strong>recha, <strong>de</strong>trás <strong>de</strong> la secadora o directamentehacia atrás por la parte posterior <strong>de</strong> la misma.Bn Un juego <strong>de</strong> compuerta <strong>de</strong> contratiro es necesario yestá disponible <strong>de</strong> un distribuidor <strong>de</strong> ductos <strong>de</strong> lavan<strong>de</strong>ríacomercial y <strong>de</strong>be instalarse en cada ducto <strong>de</strong> escape<strong>de</strong> las secadoras para evitar que el aire <strong>de</strong> escape regresea las secadoras y para mantener el escape en balance conla ventilación principal. Se requieren aberturas <strong>de</strong> vuelta<strong>de</strong> aire sin obstrucción.Cada ducto <strong>de</strong> escape <strong>de</strong>be entrar en la ventilación principal aun ángulo que apunte en la dirección <strong>de</strong>l flujo <strong>de</strong> aire. Los ductos<strong>de</strong> escape que entren por el lado opuesto <strong>de</strong>ben alternarse paralograr que el aire <strong>de</strong> escape reduzca su interferencia con otrosductos <strong>de</strong> escape.El ángulo máximo <strong>de</strong> cada ducto que entra en el ducto principal<strong>de</strong>berá ser no más <strong>de</strong> 30°.A30˚ max.flujo air flow <strong>de</strong> aireBLargo <strong>de</strong>l sistema <strong>de</strong> ventilaciónLa longitud máxima <strong>de</strong>l sistema <strong>de</strong> ventilación <strong>de</strong>pen<strong>de</strong> <strong>de</strong>l tipo<strong>de</strong> ducto que se use, el número <strong>de</strong> codos y el tipo <strong>de</strong> capota<strong>de</strong> ventilación.Longitud máxima <strong>de</strong>l conducto <strong>de</strong> escapeConducto<strong>de</strong> escape <strong>de</strong>metal rígidoN° <strong>de</strong> vueltas<strong>de</strong> 90°01234Capotas <strong>de</strong> ventilación <strong>de</strong> 102 mm (4")CajaPersianaCapota <strong>de</strong> ventilación tipocaja y tipo persiana39,6 m (130 pies)38,1 m (125 pies)35,1 m (115 pies)32,3 m (106 pies)29,9 m (98 pies)Angular <strong>de</strong>64 mm (2 1 ⁄2")Capota <strong>de</strong>ventilación angular39,3 m (129 pies)36,3 m (119 pies)33,2 m (109 pies)30,5 m (100 pies)28 m (92 pies)A. Conducto <strong>de</strong> escape individual <strong>de</strong> la secadoraB. Conducto principalMantenga las aberturas <strong>de</strong> aire libres <strong>de</strong> los gases <strong>de</strong> los líquidos<strong>de</strong> limpieza en seco. Los gases producen ácidos, los cualespue<strong>de</strong>n dañar las secadoras y los artículos que se estén secandocuando pasan a través <strong>de</strong> las unida<strong>de</strong>s <strong>de</strong> calentamiento <strong>de</strong> lassecadoras.Debe ubicarse una cubierta <strong>de</strong> limpieza en el ducto principal parauna limpieza periódica <strong>de</strong>l sistema <strong>de</strong> ventilación.Si no pue<strong>de</strong> usarse una capota <strong>de</strong> ventilación:CDBA12" min.(305 mm)Espacio mínimo <strong>de</strong> 300 mm(12") por encima <strong>de</strong> cualquieracumulación <strong>de</strong> nieve, hielo o<strong>de</strong>sechos tales como hojas.Si la secadora está instalada en un área cerrada tal comoun dormitorio, baño o armario, <strong>de</strong>berán tomarse las provisionesnecesarias para que haya aire suficiente para la combustióny la ventilación. (Verifique los códigos y reglamentos aplicables.)Vea “Instrucciones para la instalación en un área empotrada”en la sección “Requisitos <strong>de</strong> ubicación”.Se prefiere una capota <strong>de</strong> salida <strong>de</strong> 102 mm (4"). Aún así, podráusarse una salida <strong>de</strong> escape <strong>de</strong> 64 mm (2½"). Una salida <strong>de</strong>64 mm (2½") ocasiona mayor contrapresión que los otros tipos<strong>de</strong> capotas. Para una instalación permanente, se necesita unsistema fijo <strong>de</strong> ventilación.A. Capota <strong>de</strong> ventilacióno codoB. ParedC. Conducto colectorprincipalD. Conducto horizontalE. Codo curvado a 180°F. Conducto verticalG. Techo610 mm (24")mín. sobreel punto24" min.(610 mm)más alto<strong>de</strong>l edificioFECGVentilación para múltiples secadorasn Pue<strong>de</strong> usarse un ducto principal para ventilar un grupo<strong>de</strong> secadoras. La ventilación principal <strong>de</strong>be ser <strong>de</strong>l tamañocomo para eliminar 5663 l/min (200 pies cúbicos por minuto)<strong>de</strong> aire por secadora. Pue<strong>de</strong>n usarse filtros <strong>de</strong> pelusa <strong>de</strong>gran capacidad con diseño apropiado en la ventilaciónprincipal si se revisan y se limpian frecuentemente. Lahabitación en don<strong>de</strong> estén ubicadas las secadoras <strong>de</strong>berátener aire suficiente o mayor <strong>de</strong> todas las secadoras enla habitación.El extremo exterior <strong>de</strong> la ventilación principal <strong>de</strong>be tener uncodo curvado dirigido hacia abajo. Si el ducto principal viajaverticalmente a través <strong>de</strong>l techo, en lugar <strong>de</strong> la pared, instaleun codo curvado a 180° en el extremo <strong>de</strong>l ducto <strong>de</strong> escape, porlo menos a 610 mm (2 pies) sobre la parte más alta <strong>de</strong>l edificio.La abertura <strong>de</strong> la pared o <strong>de</strong>l techo <strong>de</strong>be tener un diámetro <strong>de</strong>13 mm (1/2") más gran<strong>de</strong> que el diámetro <strong>de</strong>l ducto. El ducto<strong>de</strong>be estar centrado en la abertura.No instale una malla metálica ni una tapa sobre el extremo<strong>de</strong>l ducto.29
INSTRUCCIONES DE INSTALACIÓN – SECADORA A GASInstalación <strong>de</strong> las patas niveladorasConexión <strong>de</strong>l suministro <strong>de</strong> gasNOTA: Deslice la secadora sobre un pedazo <strong>de</strong> cartón oma<strong>de</strong>ra dura antes <strong>de</strong> moverla por el piso, para no dañar elrevestimiento <strong>de</strong> éste.1. Con la ayuda <strong>de</strong> dos o más personas, mueva la secadoraal lugar <strong>de</strong>seado para su instalación.2. Remueva la cinta <strong>de</strong> las esquinas frontales <strong>de</strong> la secadora.Abra la secadora y saque los paquetes que contienen la bolsacon el material impreso y las piezas. Limpie el interior <strong>de</strong>ltambor minuciosamente con un paño húmedo.3. Tome dos <strong>de</strong> los esquinales <strong>de</strong> cartón <strong>de</strong> la caja y colóquelossobre el piso, en la parte posterior <strong>de</strong> la secadora. Sujete confirmeza el cuerpo <strong>de</strong> la secadora y colóquela cuidadosamentesobre su parte posterior, encima <strong>de</strong> los esquinales <strong>de</strong> cartón.4. Con una <strong>de</strong> las patas a mano, fíjese en las ranuras paraencontrar la marca en forma <strong>de</strong> diamante. Hasta ahí esdon<strong>de</strong> la pata <strong>de</strong>be introducirse en el orificio.5. Comience a atornillar las patas niveladoras en los orificioscon la mano. (Use una pequeña cantidad <strong>de</strong> <strong>de</strong>tergente líquidopara lubricar las roscas <strong>de</strong>l tornillo, y hacer <strong>de</strong> esa manera másfácil el girar las patas.) Use una llave <strong>de</strong> tuercas <strong>de</strong> 25 mm(1") o una llave <strong>de</strong> cubo para terminar <strong>de</strong> girar las patas, hastallegar a la marca con forma <strong>de</strong> diamante. Luego haga encajaruna cubierta sobre cada pata.6. Ahora ponga la secadora <strong>de</strong> pie.7. Quite el cartón o ma<strong>de</strong>ra que se encuentra <strong>de</strong>bajo <strong>de</strong> lasecadora. Regule las patas <strong>de</strong> la secadora hacia arriba o haciaabajo hasta que la misma que<strong>de</strong> nivelada.1. Quite la tapa roja <strong>de</strong>l tubo <strong>de</strong> gas.2. Conecte el suministro <strong>de</strong> gas a la secadora. Si la manguera<strong>de</strong> gas flexible tiene una rosca BSP <strong>de</strong> 3/8", use el adaptador<strong>de</strong> conversión <strong>de</strong> rosca provisto. Use un compuesto para juntas<strong>de</strong> tubería resistente a la acción <strong>de</strong> gas L.P. para conexiones<strong>de</strong> gas. Si es necesario para darle servicio, abra el panel <strong>de</strong> pie.Use un cuchillo para masilla para presionar los 2 seguros<strong>de</strong>l panel, ubicados en la parte superior <strong>de</strong>l panel <strong>de</strong> pie.Tire <strong>de</strong>l panel <strong>de</strong> pie hacia abajo para abrir. El panel <strong>de</strong> pietiene bisagras en la parte inferior.3. Abra la válvula <strong>de</strong> cierre en la línea <strong>de</strong> suministro <strong>de</strong> gas.4. Pruebe todas las conexiones aplicando con un cepillo unasolución aprobada para <strong>de</strong>tección <strong>de</strong> fugas que no seacorrosiva. Se observarán burbujas si hay fugas. Tape cualquiersfugas que encuentre.Conexión <strong>de</strong>l ducto <strong>de</strong> escape1. Usando una abraza<strong>de</strong>ra <strong>de</strong> 102 mm (4"), conecte el ducto<strong>de</strong> escape a la salida <strong>de</strong> aire en la secadora. Si se conectaa un ducto <strong>de</strong> escape existente, asegúrese <strong>de</strong> que el mismoesté limpio. El ducto <strong>de</strong> escape <strong>de</strong> la secadora <strong>de</strong>be encajarsobre la salida <strong>de</strong> aire <strong>de</strong> la secadora y <strong>de</strong>ntro <strong>de</strong> la capota<strong>de</strong> ventilación. Cerciórese <strong>de</strong> que el ducto <strong>de</strong> escape estéasegurado a la capota <strong>de</strong> ventilación con una abraza<strong>de</strong>ra<strong>de</strong> 102 mm (4").2. Mueva la secadora a su posición final. No aplaste ni retuerzael ducto <strong>de</strong> escape. Asegúrese <strong>de</strong> que la secadora esténivelada.3. Asegúrese <strong>de</strong> que no haya torceduras en la línea <strong>de</strong> gasflexible.30
Complete la instalación1. Con la secadora en su posición final, coloque un nivel sobrela secadora, primero <strong>de</strong> lado a lado; luego <strong>de</strong> a<strong>de</strong>lante haciaatrás. Si la secadora no está nivelada, ajuste las patas <strong>de</strong> lasecadora hacia arriba o hacia abajo hasta que esté nivelada.NOTA: La puerta <strong>de</strong> la secadora se <strong>de</strong>be cerrar para quela funcione. Cuando se abre la puerta, la secadora se<strong>de</strong>tiene. Para reiniciar la secadora, cierre la puerta y vuelvaa seleccionar el ciclo.4. Si el quemador no se encien<strong>de</strong> y no siente calor <strong>de</strong>ntro<strong>de</strong> la secadora, apáguela por 5 minutos. Revise que todoslos controles <strong>de</strong> la válvula <strong>de</strong> suministro <strong>de</strong> gas estén en laposición <strong>de</strong> “Encendido” (ON), y que el cable eléctrico estéenchufado. Repita la prueba <strong>de</strong> 5 minutos.Ésta es una secadora <strong>de</strong> 3 hilos y <strong>de</strong>be estarconectada a tierra.2. Reconecte el suministro <strong>de</strong> energía a la secadora.3. Revise el funcionamiento <strong>de</strong> la secadora. Seleccione el ciclo<strong>de</strong> calor máximo (no el ciclo <strong>de</strong> aire), ponga la secadoraen marcha y <strong>de</strong>je que funcione por un ciclo completo paraasegurarse <strong>de</strong> que esté funcionando a<strong>de</strong>cuadamente. Lasecadora se <strong>de</strong>tendrá cuando se haya terminado el tiempo.PREPARACIÓN DEL CONTROL ELECTRÓNICOVea la guía <strong>de</strong> programación para obtener información sobre la preparación.INSTRUCCIONES DE MANTENIMIENTOInstrucciones <strong>de</strong> mantenimiento:n Limpie el filtro <strong>de</strong> pelusa <strong>de</strong>spués <strong>de</strong> cada ciclo.n Eliminación <strong>de</strong> pelusa acumulada (<strong>de</strong>sconecte la secadora<strong>de</strong>l suministro eléctrico y <strong>de</strong>l gas antes <strong>de</strong> comenzar estatarea):• En el interior <strong>de</strong> la carcasa <strong>de</strong> la secadora:Según el uso <strong>de</strong> la secadora, se <strong>de</strong>be quitar la pelusa cada2 años, o con más frecuencia. La limpieza <strong>de</strong>berá efectuarlauna persona calificada.• En el conducto <strong>de</strong> escape:Según el uso <strong>de</strong> la secadora, se <strong>de</strong>be quitar la pelusa cada2 años, o con más frecuencia.Si la secadora no funciona, revise lo siguiente:n Que el suministro eléctrico esté conectado.n Que el cortacircuitos no se disparó o el fusibleno está quemado.n Que la puerta esté cerrada.n Que los controles estén fijados en una posición<strong>de</strong> funcionamiento o Encendido (ON).n Que se haya seleccionado el ciclo.n Revise que las válvulas <strong>de</strong> cierre <strong>de</strong>l suministro <strong>de</strong> gas esténen la posición abierta.Si necesita ayuda:Póngase en contacto con su distribuidor autorizado<strong>de</strong> secadoras comerciales <strong>de</strong> Maytag ® , o visite:www.MaytagCommercialLaundry.com. Cuando llame,usted necesitará tener a mano el número <strong>de</strong>l mo<strong>de</strong>lo y <strong>de</strong> serie<strong>de</strong> la secadora. Ambos números se encuentran en la placa<strong>de</strong> clasificación <strong>de</strong> serie que está ubicada en la secadora.31
CÓMO INVERTIR EL SENTIDO DE ABERTURADE LA PUERTA (OPCIONAL)Usted pue<strong>de</strong> invertir el cierre <strong>de</strong> la puerta <strong>de</strong> la abertura a la<strong>de</strong>recha a la abertura a la izquierda, si lo <strong>de</strong>sea.C5. Vuelva a sujetar el panel exterioral panel interior <strong>de</strong> la puerta, <strong>de</strong>modo que la manija que<strong>de</strong> enel lado en don<strong>de</strong> recién se hanquitado las bisagras.BA6. Sujete las bisagras <strong>de</strong> la puerta a la misma, <strong>de</strong> modo queel orificio más gran<strong>de</strong> esté en la parte inferior <strong>de</strong> la bisagra,y que el pasador <strong>de</strong> la bisagra esté orientado hacia el frente<strong>de</strong> la puerta.1. Abra la puerta <strong>de</strong> la secadora. Quite los tornillos inferiores <strong>de</strong>llado <strong>de</strong> la carcasa que tiene bisagras (A). Afloje (no quite) lostornillos superiores <strong>de</strong>l lado <strong>de</strong> la carcasa que tiene bisagras.2. Levante la puerta hasta que los tornillos superiores <strong>de</strong> lacarcasa estén en la parte gran<strong>de</strong> <strong>de</strong> la ranura <strong>de</strong> la bisagra.Jale la puerta hacia a<strong>de</strong>lante para sacarla <strong>de</strong> los tornillos.Quite los tornillos superiores <strong>de</strong> la carcasa.3. Quite los tornillos que sujetan las bisagras a la puerta.4. Quite los tornillos <strong>de</strong> todos los lados <strong>de</strong> la puerta (5 tornillos).Sujete los lados <strong>de</strong> la puerta exterior y levántela con cuidadopara separarla <strong>de</strong> la puerta interior (no las apalanque). No jaleel sello <strong>de</strong> la puerta ni el seguro <strong>de</strong> plástico <strong>de</strong> la puerta.7. Quite los 4 tornillos que sujetan 2 tapones (B) en el lado <strong>de</strong>la manija. Sujete los tapones al lado opuesto con los mismos4 tornillos.8. Inserte los tornillos en los orificiosinferiores, en el lado izquierdo <strong>de</strong> lacarcasa. Apriete los tornillos hasta lamitad. Coloque la puerta <strong>de</strong> modo queel extremo gran<strong>de</strong> <strong>de</strong> la ranura <strong>de</strong> labisagra <strong>de</strong> la puerta esté sobre lostornillos. Deslice la puerta hacia arriba,<strong>de</strong> modo que los tornillos que<strong>de</strong>n en la parte inferior <strong>de</strong> lasranuras. Apriete los tornillos. Inserte y apriete los tornillossuperiores en las bisagras.9. Cierre la puerta y verifique que el tope <strong>de</strong> la misma estéalineado con el seguro <strong>de</strong> la puerta (C).32
ESPECIFICACIONES TÉCNICAS – SECADORA A GAS220-240V~50Hz 1ph 12A máx. IP24 Capacidad <strong>de</strong> ropa: 9,0 kg. máx. cada secadora. Nivel <strong>de</strong> presión sonora,NPS: 58 dBA (rango <strong>de</strong> variación, kPa: +/–10 dBA) Peso total: 135 kg. máx.Ajustado en fábrica para GAS NATURAL: Tamaño <strong>de</strong>l inyector: 2,2 mmCapacidad calorífica bruta: 5,9 KwPaís europeo:CH, CZ, CY, ES, GB, GR, HR,IE, IT, PT, SI, SK, TRCY, CZ, DK, EE, FI, GR, HU, IT,NO, RO, SE, SK, TRCategoría europea <strong>de</strong> gas:II 2H3+II 2H3B/PTasa <strong>de</strong> flujo <strong>de</strong> gas:Presión <strong>de</strong> suministro (G20):Presión ajustada en fábrica:0,562703 m 3 /hr20 mbar7.4 mbar0,562703 m 3 /hr20 mbar7.4 mbarCon juego <strong>de</strong> conversión LPG: Tamaño <strong>de</strong>l inyector: 1,25 mmCapacidad calorífica bruta: 6,4 kWPaís europeo:CH, CZ, CY, ES, GB, GR, HR, CY, CZ, DK, EE, FI, GR, HU, IT,IE, IT, PT, SI, SK, TRNO, RO, SE, SK, TRCategoría europea <strong>de</strong> gas:II 2H3+II 2H3B/PPresión <strong>de</strong> suministro <strong>de</strong> gas butano (G30):Presión ajustada:Presión <strong>de</strong> suministro <strong>de</strong> gas propano (G31):Pression ajustée :28-30 mbarN/A37 mbarN/A30 mbarN/A30 mbarN/ANOTA: Juego <strong>de</strong> conversión: De gas natural a gas LP: Pieza número W10233219 <strong>de</strong> Whirlpool.Fabricante: Whirlpool Corporation, Benton Harbor, Michigan 49022, U.S.A.Sitio <strong>de</strong> fabricación: Whirlpool Corporation, 1300 Marion-Agosta Rd., Marion, OH 43302, U.S.A.Representante <strong>de</strong> UE: Maytag UK Ltd., 2 St. Annes Blvd., Redhill, RH1 1AX, UKy Bauknecht Hausgeräte GmbH, D-73614 Schorndorf33
GARANTÍA DE MAYTAG ® PARA LAVADORA COMERCIAL,SECADORA, SECADORA/SECADORA APILADAS, APARATOSDE LAVANDERÍA COMERCIAL APILADOS, LAVADORASY SECADORAS COMERCIALES DE CARGAS MÚLTIPLES YOPERADAS POR MONEDASGARANTÍA LIMITADA EN LAS PIEZASDurante los cinco primeros años a partir <strong>de</strong> la fecha <strong>de</strong> compra, siempre y cuando este aparato comercial haya sido instalado,mantenido y operado según las <strong>instrucciones</strong> adjuntas o provistas con el proconducconto, la marca Maytag <strong>de</strong> WhirlpoolCorporation (en lo sucesivo <strong>de</strong>nominada “Maytag”) se hará cargo <strong>de</strong> las piezas especificadas <strong>de</strong> fábrica o <strong>de</strong> las piezas originales<strong>de</strong>l equipo <strong>de</strong>l fabricante, para corregir <strong>de</strong>fectos en los materiales o la mano <strong>de</strong> obra. Se requiere una prueba <strong>de</strong> la fecha <strong>de</strong> compraoriginal para obtener servicio bajo esta garantía.MAYTAG NO PAGARÁ POR LOS SIGUIENTES ARTÍCULOS:1. Todos los otros costos incluyendo mano <strong>de</strong> obra, transporte o <strong>de</strong>rechos <strong>de</strong> aduana.2. Visitas <strong>de</strong> servicio técnico para corregir la instalación <strong>de</strong> su aparato comercial, para enseñarle a usar su aparato comercial,para cambiar o reparar fusibles o para corregir el cableado externo o la tubería.3. Reparaciones cuando su electrodoméstico comercial se use <strong>de</strong> un modo diferente al <strong>de</strong> un comercio normal.4. Daños causados por el manejo inapropiado <strong>de</strong>l proconducto durante la entrega, robo, acci<strong>de</strong>nte, alteración, uso in<strong>de</strong>bido,abuso, incendio, inundación, actos fortuitos, instalación incorrecta, instalación que no esté <strong>de</strong> acuerdo con los códigos eléctricoso <strong>de</strong> plomería locales, o el empleo <strong>de</strong> proconductos no aprobados por Maytag.5. Recogida y entrega. Este aparato comercial ha sido diseñado para ser reparado en su lugar.6. Reparaciones <strong>de</strong> piezas o sistemas como resultado <strong>de</strong> modificaciones no autorizadas que se hayan efectuadoen el aparato comercial.7. La remoción y reinstalación <strong>de</strong> su aparato comercial, si estuviera instalado en un lugar inaccesible o si no estuviera instalado<strong>de</strong> conformidad con las <strong>instrucciones</strong> <strong>de</strong> instalación publicadas.8. Los daños ocasionados por proconductos químicos están excluidos <strong>de</strong> toda cobertura <strong>de</strong> la garantía.9. Cambios necesarios en el edificio, habitación o lugar para hacer que el aparato comercial funcione correctamente.10. Las reparaciones realizadas por un técnico <strong>de</strong> servicio que no sea autorizado por Whirlpool.EXCLUSIÓN DE GARANTÍAS IMPLÍCITAS; LIMITACIONES DE RECURSOSEL ÚNICO Y EXCLUSIVO RECURSO DEL CLIENTE SEGÚN LOS TÉRMINOS DE ESTA GARANTÍA LIMITADA SERÁ EL DE REPARAREL PROCONDUCTO SEGÚN SE ESTIPULA EN LA PRESENTE. LAS GARANTÍAS IMPLÍCITAS, INCLUYENDO LAS GARANTÍASDE COMERCIABILIDAD O DE IDONEIDAD PARA UN PROPÓSITO PARTICULAR, SERÁN LIMITADAS A UN A—O O AL PERÍODOMÁS CORTO PERMITIDO POR LEY. WHIRLPOOL NO SE RESPONSABILIZARÁ POR DA—OS INCIDENTALES O CONSECUENTES.ALGUNOS ESTADOS Y PROVINCIAS NO PERMITEN LA EXCLUSIÓN O LIMITACIÓN POR DA—OS INCIDENTALES OCONSECUENTES, O LIMITACIONES ACERCA DE CUÁNTO DEBE DURAR UNA GARANTÍA IMPLÍCITA DE COMERCIABILIDADO IDONEIDAD, DE MODO QUE LAS LIMITACIONES O EXCLUSIONES ARRIBA MENCIONADAS PUEDEN NO APLICARSE ENSU CASO. ESTA GARANTÍA LE OTORGA DERECHOS LEGALES ESPECÍFICOS Y ES POSIBLE QUE USTED TENGA TAMBIÉNOTROS DERECHOS QUE PUEDEN VARIAR DE UN ESTADO A OTRO O DE UNA PROVINCIA A OTRA.Si usted necesita servicio técnico, póngase en contacto con su distribuidor autorizado <strong>de</strong> aparatos <strong>de</strong> lavan<strong>de</strong>ría comercial <strong>de</strong>Maytag ® . Para ubicar a su distribuidor autorizado <strong>de</strong> aparatos <strong>de</strong> lavan<strong>de</strong>ría comercial <strong>de</strong> Maytag ® , o para solicitar información porinternet, visite www.MaytagCommercialLaundry.com.Para enviar correspon<strong>de</strong>ncia por escrito:Maytag ® Commercial Laundry Service Department2000 M-63 NorthBenton Harbor, Michigan 49022 USA1/1134
SICUREZZA DELL’ASCIUGATRICELa sicurezza <strong>de</strong>ll’utente e <strong>de</strong>gli altri è fondamentale.Il presente manuale e l’elettrodomestico stesso contengono numerosi importanti messaggi sulla sicurezza.Leggere e seguire sempre tutti i messaggi di sicurezza.Questo è il simbolo che indica un pericolo.Questo simbolo avverte l’utente <strong>de</strong>i possibili pericoli mortali per sé e per gli altri.Tutti i messaggi di sicurezza sono contrassegnati dal simbolo di allarme sicurezza e dalle parole“PERICOLO” o “AVVERTENZA”. Significato:PERICOLOAVVERTENZAPericolo di morte o di lesioni gravi in caso di mancataosservanza immediata <strong>de</strong>lle istruzioni.Pericolo di morte o di lesioni gravi in caso di mancataosservanza <strong>de</strong>lle istruzioni.Tutti i messaggi di sicurezza informano l’utente sulla tipologia <strong>de</strong>l pericolo, su come ridurre il rischio di lesioni e su cosa puòsucce<strong>de</strong>re in caso di mancata osservanza <strong>de</strong>lle istruzioni.PER LA TUA SICUREZZA1. NON UTILIZZARE O CONSERVARE BENZINA O ALTRI MATERIALI INFIAMMABILI NELL’APPARECCHIATURA O NELLESUE VICINANZE.2. NON SPRUZZARE L’AEROSOL NELLE VICINANZE DELL’APPARECCHIATURA QUANDO È IN FUNZIONE.3. NON MODIFICARE L’APPARECCHIATURA.AVVERTENZA: Per la vostra sicurezza, attenersi sempre alle informazioni contenute inquesto manuale per ridurre i rischi di incendio o di esplosione e per prevenire danni allecose, lesioni fisiche e rischio di morte– Non lasciare o utilizzare benzina o altri gas o liquidi infiammabili nelle vicinanze a questoo di altri elettrodomestici.– COSA FARE SE SI SENTE ODORE DI GAS:• Non accen<strong>de</strong>re nessun apparecchio.• Non toccare alcun interruttore, non utilizzare il telefono nella propria abitazione.• Evacuare la stanza, l’abitazione o l’area.• Chiamare immediatamente il fornitore di gas dal telefono di un vicino. Seguirele istruzioni <strong>de</strong>l fornitore di gas.• In caso non fosse possibile contattare il fornitore di gas, chiamare i vigili <strong>de</strong>l fuoco.– L’installazione e la manutenzione <strong>de</strong>vono essere eseguite solo da un installatorequalificato, servizio di assistenza o dal fornitore <strong>de</strong>l gas.IMPORTANTE: Nell’eliminare o memorizzando la vostra vecchia asciugatrice di vestiti, rimuova la porta.35
L’ELIMINAZIONE DELL’ASCIUGATRICEREQUISITI D’INSTALLAZIONEAttrezzi e componentiRiunire gli attrezzi e i pezzi necessari prima di iniziarel’installazione. Consultare ed attenersi alle istruzioni fornitecon qualsiasi attrezzo elencato di seguito.Attrezzi necessarin Chiave stringitubo da 200 mm(8") o 250 mm (10")n Chiave inglese da 200 mm(8") o 250 mm (10")n Cacciavite a testa piattan Cacciavite Phillipsn Chiave regolabile con aperturaa 25 mm (1") o chiave bussolaesagonalen Livellon Chiave bussola da 8 mm(5/16")Componenti in dotazionen Coltello multiuson Morsetti per lo scaricon A<strong>de</strong>sivo per tubatureresistente all’azione <strong>de</strong>l gasdi petrolio liquefatton Pistola per presellatura epresello (per l’installazione<strong>de</strong>l nuovo scarico)n Pinzan Spatola per stuccoRimuovere il sacchetto <strong>de</strong>i componenti dall’asciugatrice.Controllare che vi siano inclusi tutti i pezzi necessari.n Protezione pie<strong>de</strong> (4)n Pie<strong>de</strong> asciugatrice (4)Requisiti di ubicazioneAVVERTENZARischio di esplosioneTenere materiali e vapori infiammabili, quali benzina,lontani dall’asciugatrice.Non installare in un garage.La mancata osservanza di queste precauzioni puòprovocare la morte, esplosioni o incendi.Se si installa un’asciugatrice a gas:IMPORTANTE: rispettare le normative i regolamenti.n Controllare i requisiti normativi: alcune normative limitano oproibiscono l’installazione di asciugatrici in garage, armadi oluoghi dove si dorme. Contattare l’ispettore edilizio locale.n Assicurarsi che i bordi inferiori <strong>de</strong>ll’armadio e le paretiposteriore e inferiore <strong>de</strong>ll’asciugatrice siano liberi da ostacoliper consentire per il passaggio <strong>de</strong>ll’aria di combustione.Vedi sotto “Istruzioni di installazione incassata” per i requisitiminimi di spazio.n Non installare su tappeti.NOTA: non installare l’asciugatrice in una zona esposta ad acquae/o intemperie.36
Istruzioni di installazione incassataDimensioni per l’asciugatrice (cont.)È possibile installare l’asciugatrice incassata.L’asciugatrice non <strong>de</strong>ve essere installata in uno spazio ristrettochiuso con una porta.Lo spazio di installazione è in millimetri e rappresenta il minimonecessario. E’ opportuno calcolare spazio ulteriore per agevolarele operazioni di installazione e assistenza, in conformità conle normative locali.L’asciugatrice <strong>de</strong>ve scaricare all’esterno.Non installare altre apparecchiature a combustione nello stessospazio per l’incasso <strong>de</strong>ll’asciugatrice.Spazi minimi per l’installazione127 mm (5")737 mm (29")686 mm (27")Dietro Lati Sopra FrontaleSpazio 51 mm 0 mm 305 mm —per (2") (0") (12")l’incasso51 mm (2")Porta1940 mm(76 3 ⁄8")305 mm(12")0 mm(0")Vista lateralespazio incasso0 mm (0") 0 mm (0")Vista frontalespazio incassoPuò essere necessario spazio ulteriore per pareti divisorie, sportellie porte, oppure nel caso in cui venga utilizzato un gomito di scaricoesterno.603 mm(23 3 ⁄4")Vistalateraleapprox. 25 mm(1")Requisiti elettrici – asciugatrice a gasDimensioni per l’asciugatriceScarico asciugatriceparte superiore1054 mm(41 1 /2")940 mm(37")Gas235 mm(9 1 ⁄4")460 mm(18 1 ⁄8")140 mm(5 1 ⁄2")GasElettrico1054 mm(41 1 ⁄2")343 mm(13 1 ⁄2")IMPORTANTE: rispettare le normative e i regolamenti.È necessario avere a disposizione una presa elettrica collegataa terra ubicata entro 610 mm su uno <strong>de</strong>i due lati <strong>de</strong>ll’asciugatrice.Questa asciugatrice è fornita/dotata di un cavo e di una spinadi alimentazione di corrente elettrica. Deve essere collegata allapresa <strong>de</strong>lla corrente elettrica al voltaggio indicato sulla targa<strong>de</strong>i dati tecnici. La capacità minima di alimentazione <strong>de</strong>l fusibileè di 12A. L’asciugatrice <strong>de</strong>ve essere posta in posizione taleda ren<strong>de</strong>re la spina chiaramente visibile e accessibile. Questointerruttore di disconnessione funziona anche da comando diarresto di emergenza per l’utente. Se la spina in dotazione nonè utilizzata, il collegamento elettrico <strong>de</strong>ve essere effettuato da untecnico qualificato in conformità alle disposizioni nazionali e locali.NOTA: lacondotta<strong>de</strong>l gas vaposizionata a32 mm. (1 1 /4")dal lato vicino.GasVistaposteriore83 mm(3 1 ⁄4")ScaricoasciugatriceparteinferioreSe il cavo <strong>de</strong>ll’alimentazione è danneggiato, <strong>de</strong>ve esseresostituito con un cavo specifico da un tecnico autorizzato <strong>de</strong>lservizio di assistenza o da personale qualificato per evitarequalsiasi rischio.Non utilizzare adattatori.Non utilizzare prolunghe.37
NOTA: in rispetto <strong>de</strong>lla Direttiva europea EMC (2004/108/CE),l’impe<strong>de</strong>nza massima <strong>de</strong>l sistema di alimentazione elettrica acui connettere l’asciugatrice è dichiarata pari a 0,012 Ohm +j0,007 Ohm.NOTA: Standard di sicurezza elettrica: il produttore ha scelto laconformità con gli standard IEC/EN.60335 come i più a<strong>de</strong>guatiper questa asciugatrice.AVVERTENZASe si utilizza il cavo universale incluso conl’asciugatrice:L’asciugatrice a gas è dotata di un cavo universale munitodi spine intercambiabili.1. Per usare il cavo universale, scegliere l’uscita <strong>de</strong>lla spinaadatta alla presa <strong>de</strong>lla corrente e inserirla nell’adattatore sulcavo <strong>de</strong>ll’alimentazione.2. Fissare l’estremità <strong>de</strong>lla spina in posizione sul cavoallineando le due metà <strong>de</strong>lla copertura sull’adattatore<strong>de</strong>l cavo e unendole.Pericolo di scossa elettricaL’asciugatrice <strong>de</strong>ve essere dotata di messa a terra.Non mettere a terra verso un tubo di gas.Non sostituire la spina elettrica. Se la spina noncombacia con la presa elettrica, far installare una presaadatta da un elettricista qualificato.Non usare una prolunga con questa asciugatrice.La mancata osservanza di queste istruzioni puòcausare morte, incendi o gravi lesioni.Qualora le normative lo consentano, si utilizza un cavo di messaa terra aggiuntivo, facendo <strong>de</strong>terminare a un elettricista espertoil percorso a<strong>de</strong>guato.Requisiti di alimentazione <strong>de</strong>l gasAVVERTENZAISTRUZIONI PER LA MESSA A TERRAPer asciugatrice collegata con cavo di messa a terra:L’asciugatrice <strong>de</strong>ve essere messa a terra. In caso di anomalienel funzionamento o di guasto, la messa a terra riduce ilrischio di shock elettrico fornendo un percorso di resistenzaminore per la corrente elettrica. L’asciugatrice è dotata diun cavo provvisto di conduttore di messa a terra<strong>de</strong>ll’apparecchio e di una spina di messa a terra. La spina<strong>de</strong>ve essere collegata a terra in una presa a<strong>de</strong>guata,correttamente installata e collegata a terra conformementea tutti i codici e le disposizioni locali.AVVERTENZA: Il collegamento improprio <strong>de</strong>l conduttoredi messa a terra <strong>de</strong>ll’apparecchiatura può provocare il rischiodi shock elettrico.Per verificare che l’asciugatrice sia stata correttamentemessa a terra, consultare un tecnico qualificato,rappresentante o personale tecnico <strong>de</strong>l servizio di assistenza.Non modificare la spina fornita con l’asciugatrice. Se nonentra nella presa, fare installare una presa a<strong>de</strong>guata daun tecnico qualificato.38CONSERVARE LE PRESENTI ISTRUZIONIRischio di esplosioneCollegare l’asciugatrice a un’alimentazione <strong>de</strong>l gasregolata. La pressione di alimentazione <strong>de</strong>ve essereconforme ai Dati Tecnici (vedi ultima pagina).Installare una valvola di arresto.Bloccare saldamente tutti i collegamenti <strong>de</strong>l gas.Se collegato a gas di petrolio liquefatto, è necessarioche un tecnico qualificato verifichi che la pressione<strong>de</strong>l gas sia corretta.La mancata osservanza di tale procedura potrebbecausare morte, esplosioni o incendi.IMPORTANTE: rispettare le normative e i regolamenti.Alimentazione <strong>de</strong>l gas:Prima <strong>de</strong>ll’installazione, controllare che le condizioni <strong>de</strong>lladistribuzione locale di gas, il tipo di gas e di pressione ela regolazione <strong>de</strong>ll’elettrodomestico siano compatibili. Leinformazioni relative al bruciatore si trovano sulla targa <strong>de</strong>idati tecnici <strong>de</strong>l mo<strong>de</strong>llo/di serie nell’incassatura <strong>de</strong>llo sportello<strong>de</strong>ll’asciugatrice. Se tali informazioni non corrispondono al tipodi gas disponibile, consultare il proprio rivenditore.Gas naturale:L’asciugatrice è stata fabbricata per essere utilizzata con GASNATURALE (G20), non è necessario alcun adattamento ulterioreal momento <strong>de</strong>ll’installazione.
Gas di petrolio liquefatto:L’asciugatrice è certificata anche per l’uso con gas di petrolioliquefatto (propano o butano) opportunamente convertiti. Nontentare assolutamente di convertire l’elettrodomestico per un usodiverso da quello con il gas specificato sulla targa <strong>de</strong>i dati tecnici<strong>de</strong>l mo<strong>de</strong>llo/di serie senza aver prima consultato il fornitore di gas.La conversione <strong>de</strong>ve essere effettuata da un tecnico qualificato.Il kit di conversione <strong>de</strong>l gas, pezzo numero W10233219, puòessere acquistato presso il proprio rivenditore. Le istruzionicomplete sono fornite insieme al kit.Requisiti <strong>de</strong>l cavo di alimentazione:Dotare la postazione <strong>de</strong>ll’asciugatrice di un cavo rigido dialimentazione <strong>de</strong>l gas. Esso <strong>de</strong>ve misurare almeno 12,5 mm(1/2") ID. Se consentito dal fornitore di gas e dalle normativelocali, è possibile utilizzare un filo di alimentazione rigido di10 mm (3/8") ID per lunghezze inferiori a 6,1 m (20'). È necessarioutilizzare un a<strong>de</strong>sivo per tubature resistente all’azione <strong>de</strong>l gasdi petrolio liquefatto.Il collegamento <strong>de</strong>l gas all’asciugatrice <strong>de</strong>ve essere realizzato conun tubo flessibile per gas adatto all’elettrodomestico e al tipo digas conformemente alle disposizioni nazionali di installazione. Incaso di perplessità, contattare il fornitore di gas. Esso dovrebbemisurare minimo 10 mm (3/8") ID.Tra la parete e l’elettrodomestico <strong>de</strong>ve essere applicata unaprotezione per evitare che il filo rigido di alimentazione <strong>de</strong>l gas si<strong>de</strong>formi quando si muove l’elettrodomestico. Si raccomanda l’usodi una catena di lunghezza a<strong>de</strong>guata e di un gancio da parete.Il collegamento di immissione <strong>de</strong>l gas nell’asciugatrice è un cavoNPT di 3/8". Viene fornito un adattatore per la conversione a cavostandard ISO.228-1 (3/8" BSP).Controllare se sono presenti perdite utilizzando una soluzionedi rilevamento <strong>de</strong>lle perdite non corrosiva. Le bolle indicano lapresenza di una perdita. Riparare immediatamente eventualiperdite. La valvola <strong>de</strong>l gas all’interno <strong>de</strong>ll’asciugatrice è dotatadi una filettatura per misurare la pressione, a cui si può acce<strong>de</strong>rerimuovendo il pannello anteriore inferiore.L’asciugatrice <strong>de</strong>ve essere scollegata dal sistema di condottaper l’alimentazione <strong>de</strong>l gas durante il controllo <strong>de</strong>lla pressione<strong>de</strong>l sistema.Requisiti di scaricon Seguendo i presenti requisiti di scarico si riduce al minimola rumorosità <strong>de</strong>ll’aria <strong>de</strong>l condotto.n Predisporre un’a<strong>de</strong>guata aereazione per evitare il riflusso digas all’interno <strong>de</strong>lla stanza, <strong>de</strong>rivante da apparecchiature acombustione, inclusi focolari aperti (ovvero il flusso di ariadisponibile all’interno <strong>de</strong>lla stanza <strong>de</strong>ve essere pari a quelloesterno).n Il sistema di condotta <strong>de</strong>ve essere realizzato in modo tale daimpedire che qualsiasi con<strong>de</strong>nsa che si è formata utilizzandol’asciugatrice a freddo, possa essere trattenuta, evaporandodi nuovo successivamente, o scaricata. Attenersi a questeistruzioni dovrebbe consentire di soddisfare tale requisito.n Lo scarico <strong>de</strong>ll’asciugatrice non <strong>de</strong>v’essere connesso anessuno scarico di gas, fumaiolo, parete, soffitto, attico,passi d’uomo o spazio <strong>de</strong>limitato di edificio. Utilizzareesclusivamente scarichi metallici rigidi o flessibili perl’impianto di scarico.n Non utilizzare cappe con blocco magnetico.n Non installare uno scarico in metallo flessibile in pareti,soffitti o pavimenti chiusi.n È possibile utilizzare scarichi in metallo massiccio dal 102 mm(4") con morsetti a<strong>de</strong>guati.Scarico inmetallomassiccio102 mm(4")n Utilizzare i morsetti per sigillare tutti i raccordi. Non connettereo fissare lo scarico con viti o altri dispositivi di fissaggio chesi estendano all’interno <strong>de</strong>llo stesso ed attragano garza.Non utilizzare nastro isolante.Una ventilazione impropria può causare l’accumulazionedi umidità e pelucchi nella stanza, provocando:Danni di umidità al legno, ai mobili, alla vernice, alla cartada parati, ai tappeti, ecc.Problemi nel pulire la casa e problemi di salute.AVVERTENZA: per ridurre il rischio di incendio,LO SCARICO DELL’ASCIUGATRICE DEVE SCARICAREALL’ESTERNO.IMPORTANTE: rispettare le normative e le ordinanze governative.Utilizzare uno scarico in metallo pesante. Non utilizzare unoscarico in plastica o lamina metallica.Consigliato uno scarico in metallo rigido per le migliori prestazionidi asciugatura e per evitare schiacciamenti e torsioni.Sten<strong>de</strong>re completamente lo scarico in metallo flessibile esostenerlo quando l’asciugatrice si trova alla sua estremità.Eliminare lo scarico in metallo flessibile in eccesso per evitarecedimenti e attorcigliamenti che ridurrà il flusso <strong>de</strong>ll’aria e ren<strong>de</strong>rescarse le prestazioni.La lunghezza totale <strong>de</strong>llo scarico in metallo flessibile non <strong>de</strong>vesuperare i 2,4 m (7 3 /4').Coprire lo scarico con una cappa per evitare l’ingresso di roditorie insetti al edificio.La cappa di scarico <strong>de</strong>ve trovarsi ad almeno 305 mm (12") daterra o dagli altri oggetti presenti nel raggio di azione <strong>de</strong>llo scarico(quali fiori, pietre, cespugli o neve).39
Se si utilizza un impianto di scarico esistente, pulire tutto ilsistema, accertandosi che la cappa non sia intasata con garza.Sostituire gli eventuali scarichi in plastica o lamina metallica conscarichi in metallo rigido o flessibile.Piano di installazione per utilizzare il numero minimo di gomitie curve.Flusso d’aria di scaricoA. BuonoB. MiglioreQuando si utilizzano gomiti o curve preve<strong>de</strong>re il maggiorespazio possibile. Piegare lo scarico gradualmente per evitareattorcigliamenti.L’uscita di scarico si trova al centro <strong>de</strong>lla parte posteriore<strong>de</strong>ll’asciugatrice.È possibile instradare lo scarico verso l’alto, il basso, a <strong>de</strong>stra o asinistra, dietro l’asciugatrice o direttamente al di fuori <strong>de</strong>lla parteposteriore.Lunghezza <strong>de</strong>ll’impianto di scaricoLa lunghezza massima <strong>de</strong>ll’impianto di scarico dipen<strong>de</strong> dal tipodi scarico utilizzato, dal numero di gomiti e dal tipo di cappa.Lunghezza massima <strong>de</strong>llo scaricoScarico inmetallo rigidoN. di curve da 90°01234Se l’asciugatrice viene installata in un’area ristretta, quale unacamera da letto, un bagno o un armadio, fornire aria a sufficienzaper la combustione e la ventilazione (rispettare le normative ele ordinanze governative). Consultare “Istruzioni di installazioneincassata”, nella sezione “Requisiti di ubicazione”.È preferibile una cappa con uscita da 102 mm (4") Tuttavia, èpossibile utilizzare una cappa di scarico con uscita da 64 mm(2 1 /2"). Una cappa di scarico con uscita da 64 mm (2 1 /2") generauna pressione maggiore rispetto agli altri tipi di cappa. Perinstallazioni permanenti, è necessario un impianto di scaricofisso.Scarico di asciugatrici multipleAQuadratan Per lo scarico di un gruppo di asciugatrici è possibileutilizzare uno scarico principale. Lo scarico principale<strong>de</strong>ve avere dimensioni tali da rimuovere 5663 l/min(200 CFM) d’aria per asciugatrice. Nello scarico principale40BCappe di scarico 102 mm (4")PersianaCappa quadrata e a persiana Cappa angolata39,6 m (130 piedi)38,1 m (125 piedi)35,1 m (115 piedi)32,3 m (106 piedi)29,9 m (98 piedi)Angolata,64 mm (2 1 ⁄2")39,3 m (129 piedi)36,3 m (119 piedi)33,2 m (109 piedi)30,5 m (100 piedi)28 m (92 piedi)sono utilizzabili filtri in garza di gran<strong>de</strong> capacità progettatiappositamente. La stanza in cui vengono sistemate leasciugatrici <strong>de</strong>ve preve<strong>de</strong>re un rinnovo d’aria uguale omaggiore al flusso d’aria di tutte le asciugatrici presenti.n É necessario il kit di attenuazione <strong>de</strong>l ritorno d’aria disponibilepresso i rivenditori di lavatrici e va installato nello scarico diciascuna asciugatrice per evitare il ritorno <strong>de</strong>ll’aria e permantenere lo scarico in equilibrio all’interno <strong>de</strong>llo scaricoprincipale. Sono richieste <strong>de</strong>lle aperture di ritorno d’aria nonostruite.Ciascuno scarico <strong>de</strong>ve entrare nello scarico principale con unangolo che punta nella direzione <strong>de</strong>l flusso d’aria. Sfalsare gliscarichi che entrano dal alto opposto per ridurre l’interferenza<strong>de</strong>ll’aria di scarico con gli altri scarichi.L’angolo massimo di ciascuno scarico che entra in quelloprincipale non <strong>de</strong>ve superare i 30°.Aair flusso flowd’aria30˚ max.A. Scarico asciugatrice singolaB. Scarico principaleTenere le aperture <strong>de</strong>ll’aria libere da fumi <strong>de</strong>i fluidi <strong>de</strong>lla puliziaa secco. I fumi generano acidi, che quando passano attraversole unità di riscaldamento <strong>de</strong>ll’asciugatrice, possono danneggiareasciugatrici e carichi in fase di asciugatura.Posizionare un coperchio a sifone sullo scarico principaleper la pulizia periodica <strong>de</strong>ll’impianto di scarico.Se è impossibile utilizzare una cappa di scarico:CDBA. Cappa di scaricoo gomitoB. PareteC. Scarico <strong>de</strong>l collettoreprincipaleD. Scarico orizzontaleE. Gomito da 180°F. Scarico verticaleG. Tetto24" min.(610 mm)12" min.(305 mm)L’estremità esterna <strong>de</strong>llo scarico principale <strong>de</strong>ve essere dotato diun gomito diretto verso il basso. Se lo scarico principale si spostaverticalmente sul tetto, piuttosto che sulla parete, installare ungomito da 180° sull’estremità <strong>de</strong>llo scarico almeno 610 mm(2 piedi) oltre il punto più alto <strong>de</strong>ll’edificio. L’apertura sulla pareteo sul tetto <strong>de</strong>vono avere un diametro da 13 mm (1⁄2") maggioredi quello <strong>de</strong>llo scarico. Centrare lo scarico nell’apertura.Non installare filtri o tappe oltre l’estremità <strong>de</strong>llo scarico.BA610 mm(24") min.oltre il puntopiù alto<strong>de</strong>ll’edificioMin. 300 mm (12") dispazio contro l’accumulodi neve, ghiaccio, <strong>de</strong>trititipo foglie.FECG
ISTRUZIONI D’INSTALLAZIONE – ASCIUGATRICE A GASInstallazione <strong>de</strong>i piedini di regolazione3. Aprire la valvola di arresto nella condotta di alimentazione<strong>de</strong>l gas.4. Controllare tutti i collegamenti applicando una soluzionedi rilevamento <strong>de</strong>lle perdite non corrosiva. Le bolle indicanola presenza di una perdita. Riparare immediatamente eventualiperdite.NOTA: far scivolare l’asciugatrice su cartone o pannelli primadi spostarla per evitare di danneggiare il pavimento.1. Per spostare l’asciugatrice alla posizione di installazioneoccorrono due o più persone.2. Rimuovere il nastro dagli angoli anteriori <strong>de</strong>ll’asciugatrice.Aprire l’asciugatrice e rimuovere le confezioni contenenti ladocumentazione e i componenti. Pulire a fondo la parte interna<strong>de</strong>l tamburo con un panno umido.3. Pren<strong>de</strong>re due angoli di cartone <strong>de</strong>lla confezione e posizionarlisul pavimento nella parte posteriore <strong>de</strong>ll’asciugatrice. Afferraresaldamente il corpo l’asciugatrice e appoggiare <strong>de</strong>licatamentela parte posteriore sugli angoli di cartone.4. Pren<strong>de</strong>ndo uno <strong>de</strong>i piedini in mano, individuare la forma didiamante nella filettatura. Questo indica il punto fino al qualeil pie<strong>de</strong> <strong>de</strong>ve essere avvitato nel foro.5. Cominciare ad avvitare a mano i piedi di regolazione neifori (utilizzare una piccola quantità di liquido <strong>de</strong>tergente perlubrificare le filettature, per ren<strong>de</strong>re più semplice il movimentodi rotazione). Utilizzare una chiave o una chiave a tubo da25 mm (1") per completare l’avvitamento <strong>de</strong>i piedi fino araggiungere il segno a forma di diamante. Posizionare unaprotezione sotto ciascun pie<strong>de</strong>.6. Sollevare l’asciugatrice.7. Rimuovere il cartone o il pannello rigido. Regolare i piedi<strong>de</strong>ll’asciugatrice verso l’alto o verso il basso fino a quandol’asciugatrice non è a livello.Eseguire il collegamento gasConnessione <strong>de</strong>llo scarico1. Utilizzando un morsetto da 102 mm (4"), connetterelo scarico all’uscita di scarico <strong>de</strong>ll’asciugatrice. Se si collegaa uno scarico esistente, verificare che lo scarico sia pulito.Il condotto <strong>de</strong>llo scarico <strong>de</strong>ll’asciugatrice <strong>de</strong>ve essere fissatosulla cappa <strong>de</strong>llo scarico. Verificare che lo scarico sia fissatoalla cappa tramite un morsetto da 102 mm (4").2. Spostare l’asciugatrice nella posizione finale. Non piegare oattorcigliare lo scarico. Verificare che lo scarico sia a livello.3. Controllare per assicurarsi che il tubo flessibile <strong>de</strong>l gas non siaattorcigliato.Completamento <strong>de</strong>ll’installazione1. Quando l’asciugatrice si trova nella posizione finale, posizionareun livello sulla parte superiore prima da <strong>de</strong>stra a sinistra e poidalla parte anteriore a quella posteriore. Se l’asciugatrice non èa livello, regolare i piedini verso l’alto o verso il basso.Si tratta di un’asciugatrice a tre fili di cui <strong>de</strong>ve essereeffettuata la messa a terra.1. Rimuovere il tappo rosso dal tubo <strong>de</strong>l gas.2. Collegare la condotta <strong>de</strong>l gas all’asciugatrice. Se il tubo flessibile<strong>de</strong>l gas è dotato di attacco 3/8" BSP, utilizzare l’adattatore diconversione <strong>de</strong>lla filettatura fornito in dotazione. È necessarioutilizzare a<strong>de</strong>sivo per tubature resistente all’azione <strong>de</strong>l gas dipetrolio liquefatto per i collegamenti <strong>de</strong>l gas.Se indispensabile, aprire il pannello in basso. Servirsi diun coltello per premere sulle due chiusure <strong>de</strong>l pannelloposizionate nella parte superiore <strong>de</strong>l pannello. Tirare verso ilbasso sul pannello per aprire. Il pannello è fissato ai cardininella parte inferiore.2. Allacciare a una presa collegata a terra.3. Controllare il buon funzionamento <strong>de</strong>ll’apparecchio. Selezionareil programma completo (non il ciclo con l’aria), mettere in motoe far eseguire il ciclo completo per assicurarsi <strong>de</strong>l correttofunzionamento. L’asciugatrice si arresterà al termine <strong>de</strong>l ciclo.NOTA: Lo sportello <strong>de</strong>ll’asciugatrice <strong>de</strong>ve essere chiusoaffinché funzioni. Quando lo sportello è aperto l’apparecchiosi blocca. Per rimettere in moto l’asciugatrice chiu<strong>de</strong>re losportello e riselezionare il ciclo scelto.4. Se il bruciatore non si accen<strong>de</strong> e non si sente il calorenell’asciugatrice, arrestare l’asciugatrice per cinque minuti.Verificare che tutti i controlli <strong>de</strong>lle valvole di alimentazione <strong>de</strong>lgas si trovino in posizione di “APERTO” e che nessun cavoelettrico sia collegato alla corrente. Ripetere l’operazione diprova di cinque minuti.41
IMPOSTAZIONI COMANDI ELETTRONICIVe<strong>de</strong>re la guida di programmazione per informazioni sull’impostazione.ISTRUZIONI DI MANUTENZIONEIstruzioni di manutenzione:n Pulire il filtro dopo ogni ciclo.n Rimozione <strong>de</strong>lla filaccia accumulata (scollegare l’asciugatricedall’alimentazione elettrica e <strong>de</strong>l gas prima di iniziare questaattività):• Dalla parte interna <strong>de</strong>ll’asciugatrice:Rimuovere la filaccia ogni 2 anni o più spesso, in baseall’utilizzo <strong>de</strong>ll’asciugatrice. La pulizia <strong>de</strong>ve essere eseguitada personale qualificato.• Dallo scarico:Rimuovere la filaccia ogni 2 anni o più spesso, in baseall’utilizzo <strong>de</strong>ll’asciugatrice.Se l’asciugatrice non funziona controllare che:n L’alimentazione elettrica sia connessa.n L’interruttore di circuito non sia scattato o il fusibile non siabruciato.n Lo sportello sia chiuso.n I comandi siano in posizione “ON” o siano attivati.n Il ciclo sia stato selezionato.n Controllare che le valvole di arresto <strong>de</strong>ll’alimentazione <strong>de</strong>l gassi trovino in posizione di apertura.Per l’assistenza:Contattare il rivenditore autorizzato di asciugatriciCommerciali Maytag ® , oppure visitare il sito www.MaytagCommercialLaundry.com. Al momento <strong>de</strong>lla chiamata,tenere a portata di mano il numero <strong>de</strong>l mo<strong>de</strong>llo e il numerodi serie <strong>de</strong>ll’asciugatrice riportati sulla targhetta situatasull’asciugatrice.INVERTIRE LA ROTAZIONE DI APERTURA (OPZIONALE)La rotazione <strong>de</strong>llo sportello in apertura può essere verso <strong>de</strong>stra overso sinistra, a piacere.C5. Rinfilare il pannello esterno <strong>de</strong>llosportello al pannello interno inmodo che la maniglia sia sul latodal quale sono appena staterimosse le cerniere.BA6. Fissare le cerniere <strong>de</strong>llo sportello allo sportello in modo cheil foro più gran<strong>de</strong> <strong>de</strong>lla cerniera sia in basso e l’asse <strong>de</strong>llacerniera sia orientato verso l’avanti <strong>de</strong>llo sportello.1. Aprire lo sportello <strong>de</strong>ll’asciugatrice. Rimuovere le viti inferioridalle cerniere laterali (A). Allentare (senza rimuovere) le vitisuperiori dalle cerniere laterali.2. Sollevare lo sportello finché le viti superiori si trovino nella partepiù larga nella scanalatura <strong>de</strong>lle cerniere. Tirare lo sportello inavanti e staccarlo dalle viti. Posare lo sportello (lato manigliaverso l’alto) sulla parte superiore <strong>de</strong>ll’asciugatrice.3. Rimuovere le viti che fissano le cerniere allo sportello.4. Rimuovere le viti da tutti i lati <strong>de</strong>llo sportello (5 viti). Afferrarei lati <strong>de</strong>llo sportello esterno e sollevarlo con accortenza persepararlo da quello interno (non forzare). Evitare di forzarela guarnizione <strong>de</strong>llo sportello o i ganci in plastica.427. Rimuovere le 4 viti che fissano i 2 cappucci (B) dal lato <strong>de</strong>llamaniglia. Fissare i cappucci dal lato opposto usando le stesse4 viti.8. Inserire le viti nei fori inferiori sul latosinistro <strong>de</strong>lla carcassa. Serrare le viti ametà. Posizionare lo sportello in modo chel’estremità più larga <strong>de</strong>lla scanalatura <strong>de</strong>llacerniera <strong>de</strong>llo sportello si trovi al di sopra<strong>de</strong>lle viti. Far scivolare lo sportello versol’alto in modo che le viti si trovino in fondoalle scanalature. Serrare le viti. Inserire e serrare le viti superiorinelle cerniere.9. Chiu<strong>de</strong>re lo sportello e verificare che il battente sia allineatocon il gancio <strong>de</strong>llo sportello (C).
DATI TECNICI – ASCIUGATRICE A GASAlimentazione monofase 220-240V~50Hz 12A max. IP24 Carico massimo: 9,0 kg max. ogni asciugatrice.Livello <strong>de</strong>lla pressione sonora, Lpa: 58 dBA (incertezza, Kpa: +/–10 dBA) Massa totale: 135 kg max.Fabbricata per GAS NATURALE: Dimensioni iniettore: 2,2 mmAssorbimento massimo: 5,9 KWPaesi Europei:Tipologia europea di gas:Portata gas:Pressione di alimentazione (G20):Pressione regolata di fabbricazione:Paesi Europei:Tipologia europea di gas:Pressione di alimentazione butano (G30):Pressione regolata:Pressione di alimentazione propano (G31):Pressione regolata:CH, CZ, CY, ES, GB, GR, HR,IE, IT, PT, SI, SK, TRII 2H3+0,562703 m 3 /hr20 mbar 20 mbar7,4 mbar 7,4 mbarCon kit di conversione Gas di petrolio liquefatto: Dimensioni iniettore: 1,25 mmAssorbimento massimo: 6,4 KWCH, CZ, CY, ES, GB, GR, HR,IE, IT, PT, SI, SK, TRII 2H3+28-30 mbar30 mbar37 mbar 30 mbarNOTA: Kit di conversione: Da gas naturale a gas di petrolio liquefatto: Pezzo Whirlpool n. W10233219.Produttore: Whirlpool Corporation, Benton Harbor, Michigan 49022, U.S.A.Sito produttivo: Whirlpool Corporation, 1300 Marion-Agosta Rd., Marion, OH 43302, U.S.A.Rappresentante EU: Maytag UK Ltd., 2 St. Annes Blvd., Redhill, RH1 1AX, UKe Bauknecht Hausgeräte GmbH, D-73614 SchorndorfN/AN/ACY, CZ, DK, EE, FI, GR, HU, IT,NO, RO, SE, SK, TRII 2H3B/P0,562703 m 3 /hrCY, CZ, DK, EE, FI, GR, HU, IT,NO, RO, SE, SK, TRII 2H3B/PN/AN/A43
GARANZIA LAVATRICI, ASCIUGATRICI, ASCIUGATRICIIMPILATE COMMERCIALI, LAVATRICI COMMERCIALIIMPILATE, LAVATRICI E ASCIUGATRICI COMMERCIALIA GETTONI MULTI CARICO MAYTAG ®GARANZIA LIMITATA SUI PEZZIPer i primi cinque anni dalla data di acquisto, ove l’installazione, la manutenzione e il funzionamento siano avvenuti in conformitàcon le istruzioni allegate o fornite con il prodotto, Maytag marchio di Whirlpool Corporation (da questo momento “Maytag”) saràresponsabile <strong>de</strong>l rimborso <strong>de</strong>lle parti indicate dalla fabbrica o <strong>de</strong>lle parti <strong>de</strong>lle apparecchiature originali indicate dal produttore incaso di difetti nei materiali o di fabbricazione. È necessaria una prova <strong>de</strong>lla data di acquisto per ottenere l’assistenza copertadalla presente garanzia.VOCI NON A CARICO DI MAYTAG:1. Tutti gli altri costi inclusi, manodopera, trasporto o dazi doganali.2. L’assistenza in caso di errata installazione <strong>de</strong>ll’apparecchiatura <strong>commercial</strong>e, per ricevere istruzioni sull’uso <strong>de</strong>l dispositivo,per la sostituzione o riparazione di fusibili oppure per correggere il cablaggio o l’impianto idraulico esterni.3. Riparazioni in caso di utilizzo <strong>de</strong>ll’apparecchiatura al di fuori <strong>de</strong>l proprio regolare uso <strong>commercial</strong>e.4. Danni provocati dall’errata manipolazione <strong>de</strong>l prodotto durante la consegna, furto, inci<strong>de</strong>nti, alterazioni, cattivo utilizzo, abusi,incendio, inondazione, cause di forza maggiore, errata installazione, installazione non in conformità con le norme sugli impiantielettrici e idraulici locali, uso di prodotti non approvati da Maytag.5. Ritiro e consegna. Questo dispositivo <strong>commercial</strong>e è progettato per essere riparato in situ.6. Riparazioni di parti o sistemi provocate da modifiche non autorizzate apportate al dispositivo <strong>commercial</strong>e.7. La rimozione e reinstallazione <strong>de</strong>l dispositivo <strong>commercial</strong>e se installato in un’area di difficile accesso o non in conformitàcon le istruzioni di installazione pubblicate.8. I danni chimici sono esclusi dalla copertura <strong>de</strong>lla garanzia.9. Le modifiche all’edificio, alla stanza o all’area necessarie al corretto funzionamento <strong>de</strong>l dispositivo <strong>commercial</strong>e.10. Riparazioni effettuate non da personale di assistenza autorizzato <strong>de</strong>lla Whirlpool.LIMITAZIONE DELLE GARANZIE IMPLICITE; LIMITAZIONE DEI RIMEDIUNICO E SOLO RIMEDIO DA PARTE DEL CLIENTE SOTTO LA PRESENTE GARANZIA È LA RIPARAZIONE DEL PRODOTTOCOME SPECIFICATO DALLA PRESENTE GARANZIA. LE GARANZIE IMPLICITE, INCLUSE LE GARANZIE DI COMMERCIABILITÀO IDONEITÀ PER UNO SCOPO PARTICOLARE, SONO LIMITATE A UN ANNO O AL PERIODO MINIMO CONSENTITO DALLALEGGE. WHIRPOOL NON È RESPONSABILE DI INCIDENTI O DANNI DA ESSI DERIVANTI. ALCUNI STATI E PROVINCE NONRICONOSCONO L’ESCLUSIONE DI DANNI INCIDENTALI O CONSEQUENZIALI O LE LIMITAZIONI SULLA DURATA DELLEGARANZIE IMPLICITE DI COMMERCIABILITÀ O IDONEITÀ; PERTANTO QUESTA LIMITAZIONE ED ESCLUSIONE POTREBBENON ESSERE APPLICABILE. LA PRESENTE GARANZIA FORNISCE DIRITTI LEGALI SPECIFICI OLTRE A QUELLI EVENTUALI CHESPETTANO IN BASE ALLO STATO O ALLA PROVINCIA A CUI SI APPARTIENE.Per assistenza, contattare il distributore autorizzato di lavatrici <strong>commercial</strong>i Maytag ® . Per localizzare il rivenditore Maytag ® locale oper richieste via Web, visitare www.MaytagCommercialLaundry.com.Per inviare richieste per iscritto scrivere a:Maytag ® Commercial Laundry Service Department2000 M-63 NorthBenton Harbor, Michigan 49022 USA1/11W10184555D®/TM © 2012 Maytag. All rights reserved.®/TM © 2012 Maytag. Tous droits réservés.®/TM © 2012 Maytag. Todos los <strong>de</strong>rechos reservados.®/TM © 2012 Maytag. Tutti i diritti riservati.05/2012Printed in U.S.A.Imprimé aux É.-U.Impreso en EE.UU.Stampato negli S.U.A.