18149 ISTR.MONT.ARA' EUR-USA.indd - Flos
18149 ISTR.MONT.ARA' EUR-USA.indd - Flos
18149 ISTR.MONT.ARA' EUR-USA.indd - Flos
- No tags were found...

Create successful ePaper yourself
Turn your PDF publications into a flip-book with our unique Google optimized e-Paper software.
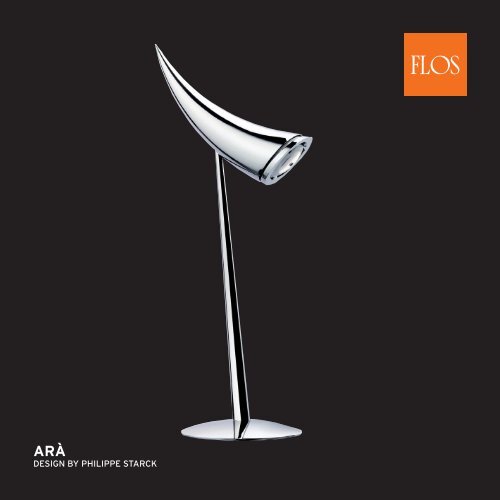
ARÀdesign by Philippe Starck
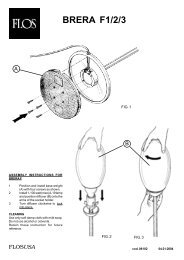
<strong>ISTR</strong>UZIONI DI INSTALLAZIONE ED IMPIEGOATTENZIONE!La sicurezza dell’apparecchio é garantita solo rispettandoqueste istruzioni sia in fase di installazione che di impiego;é pertanto necessario conservarle.AVVERTENZE:- All’atto dell’installazione ed ogni volta che si intervienesull’apparecchio, assicurarsi che sia stata tolta la tensionedi alimentazione.- L’apparecchio non può essere in alcun modo modificatoo manomesso, ogni modifica ne può compromettere lasicurezza rendendo lo stesso pericoloso. FLOS declinaogni responsabilità per i prodotti modificati.- Se il cavo flessibile si danneggia, deve essere sostituitoda FLOS o da personale qualificato al fine di evitarepericoli.- Il simbolo riportato sull’apparecchio indica che ilprodotto deve essere smaltito in modo differenziato dairifiuti urbani.DATI TECNICILampada alogena dicroica (Ø mm 35) 35W 12V attaccoGU4, tipo HR.<strong>ISTR</strong>UZIONI PER LA PULIZIA DELL’APPARECCHIO- Per la pulizia dell’apparecchio utilizzare esclusivamenteun panno morbido eventualmente inumidito con acqua esapone.- Attenzione: non utilizzare alcool o solventi. INSTRUCTION FOR CORRECT INSTALLATION AND USEWARNING!The safety of this fitting can only be guaranteed if theseinstructions are observed, during both installation anduse. Please retain these instructions safety.REMARKS:- When installing and whenever acting on the appliance,ensure that the power supply has been switched off.- The appliance may in no way be modified or tamperedwith, any modification may compromise safety causingthe appliance to become dangerous. FLOS declines allresponsibility for products that are modified.- Should the external trailing cable get damaged,it mustbe replaced by FLOS or by qualified personnel in order toavoid any danger.- The symbol shown on the device indicates that theproduct must be thrown out in a different manner thanwith the urban trashes.TECHNICAL DATADichroic halogen light bulb (Ø mm 35) 35W 12V attachmentGU4, type HR.CLEANING INSTRUCTIONS- Use only a soft cloth to clean the appliance, dampenedwith water and soap or mild cleanser if needed forresistant dirt- Warning: do not use alcohol or other solvents.
INSTRUCCIONES DE INSTALACIÓN Y DE USO¡ATENCIÓN!La seguridad del aparato sólo puede garantizarse con lacondición de que se respeten las siguientes instrucciones,tanto en la fase de instalación como de uso, por lo cual serecomienda conservarlas.ADVERTENCIA:- Para efectuar la instalación, y toda vez que se efectúealguna operación en el aparato, asegurarse de habercortado la corriente eléctrica.- El aparato no puede ser en ningùn caso modificado oforzado, cualquier modificaciòn puede comprometer laseguridad haciéndolo peligroso. FLOS declina cualquierresponsabilidad por los productos modificados.- Si el cable externo se estropea, debe ser sustituidopor FLOS o por personal cualificado con el fin de evitarsituaciones peligrosas.- El símbolo marcado en el aparato indica que elproducto debe ser eliminado en modo diferenciado delresto de los desechos urbanos.DATOS TECNICOSLámpara de incandescencia alógena dicroica (Ø mm 35)35W 12V casquillo GU4, tipo HR.INSTRUCCIONES PARA LIMPIAR EL APARATO- Para la limpieza del aparato, utilizar exclusivamente unpaño suave. En caso de suciedad más resistente, humedecerel paño con agua y jabón o un detergente neutro.- Advertencia: no emplear alcohol ni disolventes. <strong>ISTR</strong>UÇÕES INSTALAÇÃO E USOATENÇÃO!A segurança do aparelho é garantida somente serespeitarmos as instruções tanto na fase de instalaçãocomo na de uso; portanto é necessário conservar taisinstruções.ADVERTÊNCIA:- Para efectuar la instalación, y toda vez que se efectúealguna operación en el aparato, asegurarse de habercortado la corriente eléctrica.- De forma alguma o aparelho deve ser modificado oualterado, toda e qualquer modificação pode comprometer asegurança tornando o aparelho perigoso. FLOS declina todae qualquer responsabilidade pelos produtos modificados.- Se o cabo flexível está danificado, deve ser substituídopela FLOS ou por pessoal qualificado para evitar qualquerperigo.- O símbolo indicado no aparelho indica que o produtodeve ser eliminado de forma diferenciada em relação aolixo urbano.DADOS TÉCNICOSLampadinha incandescente alógena dicróico (Ø mm 35)35W 12V ligação GU4 tipo HR.INSTRUÇÕES PARA A LIMPEZA DO APARELHO- Para limpeza do aparelho utilizar exclusivamente umtecido macio eventualmente úmido com água e sabão oudetergente neutro para a sujeira mais difícil.- Atenção: não utilizar álcool ou solventes.
Fig. 1 Fig. 2BAA<strong>USA</strong>/120V<strong>USA</strong>/120VBFig.1 Eseguendo i movimenti descritti in figura, togliere l’attacco a parete (A) dal trasformatore (B). Senzal’attacco a parete (A) il trasformatore (B) potrà essere posizionato in terra. Fig.2 TRASFORMATORE FISSATO APARETE O SCRIVANIA Fissare l’attacco a parete (A) con tasselli ad espansione se a muro, o con viti autofilettantise fissato su mobile. NOTA: Scegliere i tasselli ad espansione idonei per la superficie destinata al montaggio.Inserire a scatto il trasformatore (B) sull’attacco (A). Inserire la spina nel trasformatore.Fig.1 Following the movements shown in the diagram, remove the wall attachment (A) from the transformer(B). Without the wall attachment (A), the transformer (B) can be positioned on the ground. Fig.2 FIXING THETRANSFORMER TO THE WALL OR TO THE DESK If the wall attachment (A) is to be fixed to the wall, secure it withscrew anchors, if it is be fixed to the desk or table top, secure it with self-tapping screw. NOTE: Choose screwanchors that are suitable for the surface which shall be assembled upon. Snap the transformer (B) into place inthe attachment (A). Push the plug into the transformer.Abb.1 Durch die auf Abbildung N°1 dargestellten Handgriffe wird die Wandfassung (A) vom Transformator(B) entfernt. Ohne die Wandfassung (A) kann der Transformator (B) am Boden aufgestellt werden.Abb.2 TRANSFORMATOR ZUR BEFESTIGUNG AN DER WAND ODER AM SCHREIBTISCH Die Wandfassung (A) wirdmit Spreizdubeln an der Mauer oder mit selbstschneidenden Schrauben an einem Mobek befesting.
HINWEIS: für die für die Montage vorgesehene Fläche passende Spreizdübel auswählen. Den Transformator (B)auf die Fassung (A) stecken bis er einschnappt. Den Stecker in den Transformator einfugen.Fig.1 En exécutant les mouvements indiqués dans la figure, enveler la fixation murale (A) du transformateur(B). Sans la fixation murale (A), le transformateur (B) pourra être positionné par terre. Fig.2 TRASFORMAT<strong>EUR</strong>FIXE AU MUR OU BUREAU Monter la fixation murale (A) au money de vis tamponéès s’il s’agit effectivement demur, ou au money de vis-tarauds si on doit fixer à un meuble. NOTE: Choisir les vis tamponnées appropriées àla surface destinée au montage. Enclinqueter le transformateur (B) sur la fixation (A). Enfoncer la fiche dans letransformateur.Fig.1 Actuando asì como descrito en la figura, sacar el enganche a pared (A) del transformador (B). Una vezsacado el enganche a pared (A) el transformador puede posicionares a tierra. Fig.2 TRANSFORMADOR FIJADOSOBRE PARED O ESCRITORIO Fijar el enganche a pared (A) con cuñas de expansión si a pared o con tornillosautofilenteantes si sobre mueble. NOTA: Elegir los tacos de expansión idóneos para la superficie destinadaal montaje. Inserción con disparo del transformador (B) en el enganche (A). Conectar el enchufe en eltransformador.Fig.1 Realizar os movimentos descritos na figura, retirar o suporte de parede (A) do transformador (B) sem osuporte de parede (A) o transformador (B) poderá ser colocado no chão. Fig.2 TRANSFORMADOR FIXADO ÁPAREDE OU ESCRIVANINHA Fixar o suporte a parede (A) com buchas de expansão se for fixado na parede oucom parafusos auto-roscante ou com se fixado em móveis. OBSERVAR BEM: Escolher as buchas de expansãocorrectas de acordo com a superfície destinada à montagem.Рис.1 Выполняя движения, описанные на рисунке, снять настенное крепление (A) странсформатора (B). Без настенного крепления (A) трансформатор (B) может бытьпозиционирован на земле. Рис.2 ТРАНСФОРМАТОР, ПРИКРЕПЛЁННЫЙ К СТЕНЕ ИЛИК СТОЛУ Закрепить настенное крепление (A) посредством расширительных вставок, вслучае настенной установки, или посредством самонарезающих винтов, в случае установкина мебели. ПРИМЕЧАНИЕ: Выбирать расширительные вставки, соответствующиеповерхности, предназначенной для монтажа.
BFig. 3A
Fig.3 Per la sostituzione della lampada, estrarre a scatto il vetro di protezione (A) dalle molle (B). Sostituire lalampada non toccandola con le mani nude. Inserire il vetro di protezione (A) nelle molle (B).Fig.3 For replacement of the bulb, release the guard-glass (A) from the two springs (B). Do not touch the bulbbare-hand when you replace it. Reset the guard-glass (A) into the springs (B).Abb.3 Um die Glühbirne auszutauschen, die Glasschale (A) aus den Federn (B) herausnehmen. Die Glühbirne miteiner neuen ersetzen, ohne sie mit den bloßsen Fingern Anzufassen. Die Glasschale (A) wieder in die Federn (B)einschnappen.Fig.3 Pour remplacer l’ampoule déscenclencer le verre de protection (A) des ressort (B). Remplacer l’ampoulesans la toucher à mains nues. Remettre le verre de protection (A) dans les ressort (B).Fig.3 Para la sostitución de la bombilla, extraer a disparo el vidrio protección (A) de los resortes (B). Sustituir labombilla sin tocarla con las manos nudas. Colocar el vidrio de protección (A) en los resortes (B).Fig.3 Para a substituição da lâmpada, extrair puxando o vidro de protecção (A) das molas (B). Substituir alâmpada tomando cuidado para não toca-la com as mãos sem protecção. Colocar o vidro de protecção (A) nasmolas (D).Рис.3 Для замены лампочки извлечь расцеплением защитное стекло (A) из пружин (B).Заменить лампочку, не дотрагиваясь до неё голыми руками. Установить защитное стекло(A) в пружины (B).
Fig. 4ONOFFFig.4 Per accendere, spegnere ed orientare il fascio luminoso fare riferimento alla figura 4.Fig.4 Refer to explanatory drawings in fig. 4 to swich on/off and to adjust the beamof light.Abb.4 Um die Lichtstrahl ein-und auszuschalten und ihn auszurichten die Angaben in Abb. 4 genau befolgen.Fig.4 Pour allumer, éteindre et orienter le faisceaux lumineaux, suivre attentivement les dessins de la figure 4.Fig.4 Para encender, apagar y dirigir el haz luminoso atenerse atentamente a la figura 4.Fig.4 Para ligar, desligar ou virar a faixa luminosa seguir atentamente a figura 4.Рис.4 Для включения, выключения и ориентировки светового пучка тщательно следоватьуказаниям, приведённым на рисунке 4.
<strong>18149</strong> - 03/03/2010
www.flos.com