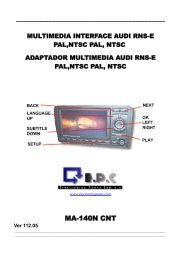
MULTIMEDIA INTERFACE VW RNS2 - epc.net.pl
MULTIMEDIA INTERFACE VW RNS2 - epc.net.pl
MULTIMEDIA INTERFACE VW RNS2 - epc.net.pl

You also want an ePaper? Increase the reach of your titles
YUMPU automatically turns print PDFs into web optimized ePapers that Google loves.
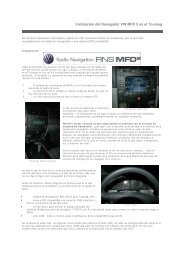
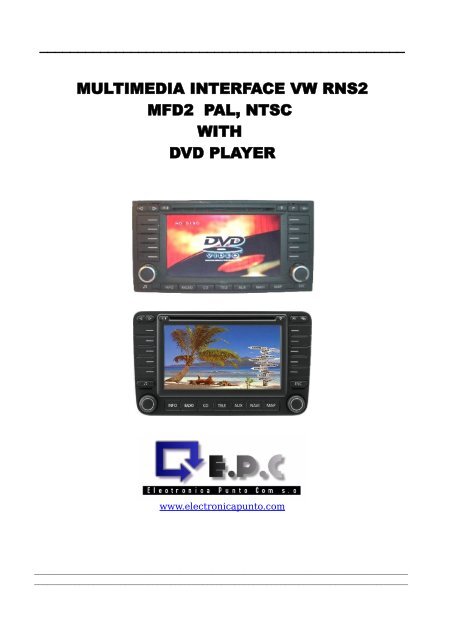
________________________________________________<strong>MULTIMEDIA</strong> <strong>INTERFACE</strong> <strong>VW</strong> <strong>RNS2</strong>MFD2 PAL, NTSCWITHDVD PLAYERwww.electronicapunto.com____________________________________________________________________________________________________________________________________________________________________
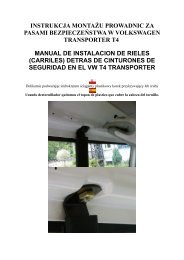
____________________________________________________________________________________________________________________________________________________________________1.PLGBESInstrukcja montażuInstallation/ connection:Manual de instalacion:1.PL Zdemontuj i odłącz nawigację .GB Remove and disconnect the navigation system.ES Demonta y desconecta el navegador2.PLGBESPodłacz 18-sto pinowy wtyk do nawigacji jak na zdjęciu poniżej.Connect the 18-pin connector into navigation system according to picture below..Conecta el cable con conector redondo de 18 pins al navegador (Ver foto de abajo)3.PLPodłącz przewody:Czerwony – stały +12V.Czarny – masaNiebieski – włącznik obrazu. Podanie +12V spowoduje przełączenie navigacji na obraz zAUX. Opcja dostępna tylko w nawigacjach DX.nwejściaGBESConnect cables:Red – to +12V battery.Black – chassis ground negativeBlue – If you connect this line to +12V then the navigation unit will be switched over the AUX-INPUT(only picture). This makes possible to use the drive backward camera during the forward motion (Nopermited in German law) This options es only possible in relation with a DX-navigation unit.Conecta los cables:Rojo - +12VNegro – negativo (masa)Azul – Si conectas este cable a +12V el navegador entrara en modo VIDEO en movimiento. Paracambiar de modo video a modo de navegador pon un interuptor en cable azul.__________________________________________________________________________________2
__________________________________________________________________________________4.PLGBES.Podłącz zasilanie nawigacji i włącz ją. W menu AUX wybierz opcję TV.Zamontuj nawigację. Na ekranie będzie widoczny obraz z tunera.Connect navigation power and turn it on. Chose TV in AUX menu.Build the navi. It will be seen picture from tuner on the navi screen. .Conecta alimentacion y pon a funcionar el navegador. En el menu AUX elige opcion TV. Instala elnavegador. En la pantalla del navegador va estar visible la imagen de sintonizadorPL UWAGA!!1. Przy podłaczaniu adaptera wymagana jest minimalna znajomość podstawelektroniki2. Za uszkodzenia spowodowane złą instalacją lub błędami w połaczeniachelektrycznych lub szkody spowodowane z obu tych powodów producent nie ponosiodpowiedzialnościGB ATTENTION!!1. Connect this interface only if you possess concerning knowledge about electronics.2. For damages caused by wrong mounting /installation or mistakes of electrical connection and damagescaused by both reasons we are not aliable.ES ATENCION !! OJO !! CUIDADO !!1. La conexion de interface exige conocimientos basicos de electronica.El fabricante no se responsabiliza de los daños producidos por la incorecta instalacion de interface. Si noeres persona mañosa ACUDE A UN TALLER DE CAR AUDIO.www.electronicapunto.comTelefono de atencion de cliente:España . 91-1516719Polonia. 0048 - 5449167(Ten en cuenta que no siempre tenemos a nuestro interprete disponible con lo cual sitienes alguna duda escribenos un correo electronico al electronicapuntocom@yahoo.es)3