NETCAM HD - Belkin
NETCAM HD - Belkin
NETCAM HD - Belkin

You also want an ePaper? Increase the reach of your titles
YUMPU automatically turns print PDFs into web optimized ePapers that Google loves.
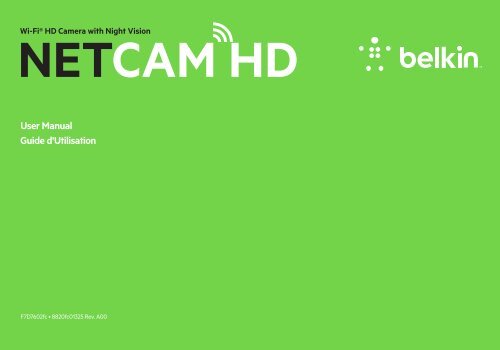
Wi-Fi® <strong>HD</strong> Camera with Night Vision<br />
<strong>NETCAM</strong> <strong>HD</strong><br />
User Manual<br />
Guide d'Utilisation<br />
F7D7602fc • 8820fc01325 Rev. A00
TABLE OF CONTENTS<br />
Getting Started . . . . . . . . . . . . . . . . . . . . . . . . . . . . . . . . . . . . . . . . . . . . . . . . . . 1<br />
What’s in the Box. .....................................................1<br />
Initial Setup ...........................................................1<br />
Set Up Your Camera Wirelessly Through Your Mobile Devices ......... 2<br />
Getting to Know Your Wi-Fi Camera . . . . . . . . . . . . . . . . . . . . . . . . . . . . .19<br />
Front Panel. ..........................................................19<br />
Back Panel ..........................................................20<br />
Technical Details . . . . . . . . . . . . . . . . . . . . . . . . . . . . . . . . . . . . . . . . . . . . . . . . 21<br />
Software Features and Specifications .................................21<br />
Hardware Features and Specifications ...............................25<br />
System Requirements ...............................................27<br />
Resetting the Camera ...............................................27<br />
Troubleshooting, Support, and Warranty . . . . . . . . . . . . . . . . . . . . . . . .28<br />
Troubleshooting.....................................................28<br />
Technical Support ...................................................29<br />
<strong>Belkin</strong> International, Inc., Limited 2-Year Product Warranty ...........30<br />
Regulatory Information . . . . . . . . . . . . . . . . . . . . . . . . . . . . . . . . . . . . . . . . .33<br />
FCC Statement ......................................................33<br />
IC Statement ......................................................34
GETTING STARTED<br />
Congratulations on buying a <strong>Belkin</strong> NetCam <strong>HD</strong> .<br />
This device will enable you to easily check in on<br />
your home and your loved ones when you are away .<br />
What’s in the Box<br />
NetCam <strong>HD</strong><br />
Power Supply<br />
Quick Installation Guide<br />
Mounting Kit<br />
1<br />
Initial Setup<br />
To get started, you will need:<br />
• Your wireless router, its network name (SSID),<br />
and password.<br />
• An Android device (Version 2.2 or later) or an iPhone,<br />
iPad, or iPod touch (iOS Version 4.1 or later).
GETTING STARTED<br />
Set Up Your Camera Wirelessly Through Your<br />
Mobile Devices<br />
1. Plug the NetCam into a power outlet<br />
2<br />
2. Switch the NetCam to Setup Mode by flipping up the switch on the<br />
back of the camera<br />
Please make sure the switch is<br />
in setup mode and the Wi-Fi light is blinking.
GETTING STARTED<br />
3. Download the NetCam App from the App Store or Google Play<br />
3<br />
4. Set Up on iPhone, iPad, or iPod touch<br />
4.1 Connect your mobile device to NetCam Wi-Fi signal<br />
Go to “Settings > Wi-Fi” on your iPhone/iPad/iPod touch<br />
and connect to the camera’s Wi-Fi signal.
GETTING STARTED<br />
4.2 Launch the NetCam App<br />
Once your device establishes a connection with the camera,<br />
launch the NetCam App. You should see a pop-up message<br />
like the one below. Click “Yes” to set up your camera.<br />
4<br />
4.3 Camera Setup<br />
Click “Continue” to begin setup.
GETTING STARTED<br />
4.4 Camera Preview<br />
The camera will show you a preview after successfully connecting to<br />
your device.<br />
Click “Connect Camera to Internet.”<br />
5<br />
4.5 Connect to Internet<br />
Choose your Wi-Fi network to connect to the Internet.
GETTING STARTED<br />
4.6 Connect to Internet<br />
Enter your Wi-Fi password if you have a security-enabled network.<br />
6<br />
Please wait for the camera to establish connection with<br />
the Internet.
GETTING STARTED<br />
4.7 Create an Account<br />
If this is your first time setting up your camera, you will need to create<br />
an account.<br />
7<br />
4.8 Use Existing Account<br />
If you have an existing account, select “Use Existing”<br />
and then enter your account information. Click “Sign in.”
GETTING STARTED<br />
4.9 Set Up Camera Info<br />
Create the camera name and its description.<br />
8<br />
Click “Continue.” It will take a few seconds to register the<br />
camera with the server.
GETTING STARTED<br />
4.10 Setup Complete<br />
Please flip the setup switch down on the back of the NetCam. Click<br />
“Finish” to complete the setup.<br />
9<br />
Congratulations!
GETTING STARTED<br />
5. Set Up on Android Devices<br />
5.1 Connect your device to NetCam Wi-Fi signal<br />
Go to “Settings > Wireless” and “Network > Wi-Fi settings” and<br />
connect to the camera Wi-Fi signal.<br />
10<br />
5.2 Launch NetCam App<br />
Once your device establishes a connection with the camera, launch the<br />
NetCam App. You should see a pop-up message like the one below.<br />
Click “Yes” to set up your camera.
GETTING STARTED<br />
5.3 Camera Setup<br />
Click “Continue” to begin setup.<br />
11<br />
5.4 Camera Preview<br />
The camera will show you a preview after successfully connecting to<br />
your device. Click “Connect camera to Internet.”
GETTING STARTED<br />
5.5 Connect to the Internet<br />
Choose your Wi-Fi network to connect to the Internet.<br />
12<br />
5.6 Connect to Internet<br />
Enter your Wi-Fi password if you have a security-enabled network.
GETTING STARTED<br />
Please wait for the camera to establish an Internet connection. 5.7 Create an Account<br />
13<br />
If this is your first time setting up your camera, you will need to create<br />
an account.
GETTING STARTED<br />
5.8 Use Existing Accounts<br />
If you have an existing account, select “Use Existing” and then enter<br />
your account information. Click “Sign in.”<br />
14<br />
5.9 Set Up Camera Info<br />
Create the camera name and its description.
GETTING STARTED<br />
Click “Continue.” It will take a few seconds to register the camera<br />
with the server.<br />
15<br />
5.10 Setup Complete<br />
Please flip the setup switch down on the back of the NetCam.<br />
Click “Finish” to complete the setup.
GETTING STARTED<br />
Congratulations!<br />
16
GETTING STARTED<br />
6. Mounting Your Camera (optional)<br />
Unscrew camera post from the base and remove weight.<br />
17<br />
Attach screws to wall and hang plate onto screws.<br />
1/8 in or 5.5mm<br />
2.5mm
GETTING STARTED<br />
Align base with plate and screw on camera post.<br />
18
GETTING TO KNOW YOUR Wi-Fi CAMERA<br />
Front Panel<br />
A: Brightness sensor<br />
B: Camera sensor<br />
C: IR LED<br />
D: Microphone<br />
19
GETTING TO KNOW YOUR Wi-Fi CAMERA<br />
Back Panel<br />
LED Indicators<br />
A: Setup<br />
Green: Setup up mode on<br />
Amber: Setup mode initializing<br />
Light Off: Setup mode off<br />
20<br />
B: Network<br />
Green: Connected to server<br />
Orange: Connected to local area network only<br />
Flashing Amber: Not connected to any network<br />
Flashing Green: Connected to network, ready to set up<br />
C: Power<br />
Green: Power On<br />
D: Camera Stand<br />
You can adjust the NetCam’s position by adjusting the stand.<br />
E: Reset button<br />
Reset System: Press and hold for 1 second to reset the system.<br />
Factory Default: Press and hold for 20 seconds to restore factory<br />
default settings.<br />
F: Setup switch<br />
Flip up to switch to setup mode.<br />
Flip down to switch to camera mode.
TECHNICAL DETAILS<br />
Software Features and Specifications<br />
App on iOS or Android<br />
• Camera setup<br />
• Live camera viewing<br />
• Save snapshot and video from the live stream<br />
• Live one-way audio<br />
• Camera settings<br />
• Enable/disable email alert<br />
• Camera sharing<br />
• Set camera status (online, offline, private)<br />
• Auto adjust<br />
• Video stream (Frame rate, video resolution, quality)<br />
• General settings<br />
• Reset password<br />
• Sign in automatically<br />
• Invite friends to view your camera<br />
Web App<br />
• Live camera viewing<br />
• Live audio on selected PC web browsers (Internet Explorer®,<br />
Firefox®, and Google Chrome)<br />
• Camera settings<br />
• Camera firmware upgrade<br />
• Delete camera<br />
21<br />
• Invite friends to view your camera<br />
• Enable/disable email alert<br />
• User account management<br />
• Create new user account<br />
• Reset password
TECHNICAL DETAILS<br />
Main Window<br />
Camera<br />
Status<br />
Configure<br />
Camera<br />
22<br />
Camera Configuration<br />
• Name: Name of your camera<br />
• Share/unshare: Make your camera public to your friends or not.<br />
• Status: Change camera status to be online, offline, or private.<br />
• Rotation: Select Normal or Flipped Vertically on the videos.<br />
• IR: Select “Auto,” “On,” or “Off” of IR LEDs.<br />
• Auto Adjust<br />
• Frame Rate: Up to 25fps<br />
• Quality: 1-5 (Best = 5)<br />
• Video Size: 1280x720, 640x360, 320x180<br />
• Microphone > Enable/Disable Microphone<br />
• Email alert > Enable/Disable email alert
TECHNICAL DETAILS<br />
23<br />
Camera Viewer<br />
Take a<br />
Snapshot<br />
Record<br />
Video<br />
Enable<br />
Microphone
TECHNICAL DETAILS<br />
Protection<br />
To protect your security against a hacker,<br />
a pop-up message will alert you if someone else is<br />
logged into your account at the same time as you.<br />
24<br />
Web Browser<br />
Access this link via Internet Explorer, Netscape, Firefox,<br />
or Google Chrome: http://www.belkin.com/netcam<br />
Then you can view the camera via your PC.
TECHNICAL DETAILS<br />
Hardware Features and Specifications<br />
Camera<br />
Image Sensor 2MP 1/3.2 inch CMOS sensor<br />
Lens Focal length: 3.0mm, F2.0<br />
View Angle Horizontal: 78°<br />
Vertical: 45°<br />
Diagonal: 90°<br />
IR LEDs 8 IR LEDs, 850nm<br />
8-meter illumination distance<br />
IR Mode Always on<br />
Always off<br />
Auto mode<br />
● IR turns on when luminance<br />
decreases to about 3 lux<br />
● IR turns off when luminance<br />
increases to about 8 lux<br />
Ambient Light Sensor RoHS-compliant 560nm luminance<br />
detector<br />
Video<br />
Codecs H.264<br />
Resolution 1280x720, 640x360, 320x180<br />
Frame Rate Up to 25frames<br />
25<br />
Still Image Capture 720P still capture<br />
Video Features Adjust image size and quality<br />
Audio<br />
Audio In Built-in microphone, -38 dB ± 2 dB<br />
Audio Compression G.711, PCM<br />
Networking<br />
Network Interface 802.11b/g/n WLAN<br />
Wireless Connectivity 802.11b/g/n Wireless with<br />
WEP/WPA/WPA2 security<br />
Radio Specifications RF band: ISM Band 2.4GHz<br />
Channels: Varies by country<br />
RF Power Output<br />
● 802.11n: 14 ± 1 dBm Average<br />
● 802.11g: 14 ± 1 dBm Average<br />
● 802.11b: 16 ± 1 dBm Average<br />
Antenna Type: Chip antenna, SMD<br />
Gain: 1.5 dBm peak<br />
Efficiency: above 80%
TECHNICAL DETAILS<br />
General<br />
System Processor: RT5350<br />
Speed: 360MHz<br />
DRAM: 64MB<br />
Flash: 16MB<br />
Button Reset Button<br />
● Reset system: Press less than 1<br />
second to reset the system<br />
● Factory default: Press and hold 20<br />
seconds to restore the factory<br />
default settings<br />
Switch Setup mode switch: Turn<br />
setup mode on and off<br />
LEDs Setup Mode LED<br />
● Solid Green: Setup Mode on<br />
● Amber: In progress to switch to<br />
Setup Mode<br />
● No light: Setup Mode off<br />
Network LED<br />
● Solid Amber: Local network ok<br />
● Solid Green: Connection to<br />
Internet ok<br />
● Flashing Amber: No network yet<br />
● Flashing Green: Global Internet ok<br />
System LED<br />
● Solid Green: System on<br />
26<br />
Power External AC-to-DC switching<br />
power adapter<br />
Input: 100-249V AC, 50/60Hz,<br />
Output: 5V DC, 1A
TECHNICAL DETAILS<br />
System Requirements<br />
iPhone, iPad, or iPod touch with iOS 4.1 or above<br />
or<br />
Android devices Version 2.2 or above<br />
PC OS: Windows® XP, Windows Vista®, or Windows<br />
7, or Mac OS® X v10.6.8 Snow Leopard<br />
PC browsers: Internet Explorer 8, Google<br />
Chrome 16, Firefox 11.1, Safari® 5.1<br />
Using the latest Adobe Flash Player<br />
27<br />
Resetting the Camera<br />
The “Reset” button is used in rare cases. In the unlikely event<br />
that your camera functions improperly, please use a pin to<br />
reset the camera. The Reset button is where the arrow below<br />
points. Reset the camera when the switch is in “OFF” mode.<br />
After the reset, the camera will resume to the default setting.<br />
● Reset system: Press and hold for 1 second to reset the<br />
system<br />
● Reset to factory default: Press and hold for 20 seconds to<br />
restore the factory default settings
TROUBLESHOOTING, SUPPORT, AND WARRANTY<br />
If I buy more cameras, could I use the same username to<br />
connect them?<br />
Unlimited cameras can be added under your own account, but<br />
each one should have a different camera name. The figure below<br />
shows that you can have different cameras under your account.<br />
28<br />
How can I share my cameras with my friends?<br />
Log in to your account. Under the camera configuration,<br />
find the “Sharing” icon. Type in your friends’ email<br />
addresses to invite them to see your camera.
TROUBLESHOOTING, SUPPORT, AND WARRANTY<br />
How can I upgrade the firmware?<br />
Access your NetCam’s account from a web browser. Under the camera<br />
configuration, a screen will pop up like the one below. Click “Update<br />
Now.” It will take about 5~10 minutes to upgrade the new firmware.<br />
29<br />
Can I change my username?<br />
Your username is what identifies your account information,<br />
and once set, it cannot be changed. If you later do not like your<br />
username, the only recourse is to create a new account. Please<br />
note that any subscription services registered in the old account<br />
(if applicable) cannot be transferred to the new account.<br />
Forgot or lost your password?<br />
The NetCam App login screen has a link labeled “Forgot your<br />
password?” that takes you to the account sign-in webpage. Type<br />
in your username and email address, and then click the Reset<br />
button to begin the process of setting up a new password.<br />
Technical Support<br />
US<br />
http://www .belkin .com/support
TROUBLESHOOTING, SUPPORT, AND WARRANTY<br />
<strong>Belkin</strong> International, Inc ., Limited 2-Year Product Warranty<br />
What this warranty covers .<br />
<strong>Belkin</strong> International, Inc. (“<strong>Belkin</strong>”) warrants to the original<br />
purchaser of this <strong>Belkin</strong> product that the product shall be free<br />
of defects in design, assembly, material, or workmanship.<br />
What the period of coverage is .<br />
<strong>Belkin</strong> warrants the <strong>Belkin</strong> product for two years.<br />
What will we do to correct problems?<br />
Product Warranty.<br />
<strong>Belkin</strong> will repair or replace, at its option, any defective product free of<br />
charge (except for shipping charges for the product). <strong>Belkin</strong> reserves the<br />
right to discontinue any of its products without notice, and disclaims any<br />
limited warranty to repair or replace any such discontinued products.<br />
In the event that <strong>Belkin</strong> is unable to repair or replace the product (for<br />
example, because it has been discontinued), <strong>Belkin</strong> will offer either a<br />
refund or a credit toward the purchase of another product from <strong>Belkin</strong>.<br />
com in an amount equal to the purchase price of the product as evidenced<br />
on the original purchase receipt as discounted by its natural use.<br />
30<br />
What is not covered by this warranty?<br />
All above warranties are null and void if the <strong>Belkin</strong> product is not<br />
provided to <strong>Belkin</strong> for inspection upon <strong>Belkin</strong>’s request at the sole<br />
expense of the purchaser, or if <strong>Belkin</strong> determines that the <strong>Belkin</strong><br />
product has been improperly installed, altered in any way, or tampered<br />
with. The <strong>Belkin</strong> Product Warranty does not protect against acts<br />
of God such as flood, lightning, earthquake, war, vandalism, theft,<br />
normal-use wear and tear, erosion, depletion, obsolescence, abuse,<br />
damage due to low voltage disturbances (i.e. brownouts or sags), nonauthorized<br />
program, or system equipment modification or alteration.
TROUBLESHOOTING, SUPPORT, AND WARRANTY<br />
How to get service .<br />
To get service for your <strong>Belkin</strong> product you must take the following steps:<br />
1 . Contact <strong>Belkin</strong> International, Inc., at 12045 E. Waterfront Drive,<br />
Playa Vista, CA 90094, Attn: Customer Service, within 15 days of the<br />
Occurrence. Be prepared to provide the following information:<br />
a. The part number of the <strong>Belkin</strong> product<br />
b. Where you purchased the product.<br />
c. When you purchased the product.<br />
d. Copy of original receipt<br />
31<br />
2 . Your <strong>Belkin</strong> Customer Service Representative will then<br />
instruct you on how to forward your receipt and <strong>Belkin</strong><br />
product and how to proceed with your claim.<br />
<strong>Belkin</strong> reserves the right to review the damaged <strong>Belkin</strong> product. All<br />
costs of shipping the <strong>Belkin</strong> product to <strong>Belkin</strong> for inspection shall be<br />
borne solely by the purchaser. If <strong>Belkin</strong> determines, in its sole discretion,<br />
that it is impractical to ship the damaged equipment to <strong>Belkin</strong>, <strong>Belkin</strong><br />
may designate, in its sole discretion, an equipment repair facility to<br />
inspect and estimate the cost to repair such equipment. The cost, if<br />
any, of shipping the equipment to and from such repair facility and<br />
of such estimate shall be borne solely by the purchaser. Damaged<br />
equipment must remain available for inspection until the claim is finalized.<br />
Whenever claims are settled, <strong>Belkin</strong> reserves the right to be subrogated<br />
under any existing insurance policies the purchaser may have.
TROUBLESHOOTING, SUPPORT, AND WARRANTY<br />
How state law relates to the warranty .<br />
THIS WARRANTY CONTAINS THE SOLE WARRANTY OF BELKIN.<br />
THERE ARE NO OTHER WARRANTIES, EXPRESSED OR, EXCEPT AS<br />
REQUIRED BY LAW, IMPLIED, INCLUDING THE IMPLIED WARRANTY<br />
OR CONDITION OF QUALITY, MERCHANTABILITY OR FITNESS FOR A<br />
PARTICULAR PURPOSE, AND SUCH IMPLIED WARRANTIES, IF ANY,<br />
ARE LIMITED IN DURATION TO THE TERM OF THIS WARRANTY.<br />
Some states do not allow limitations on how long an implied<br />
warranty lasts, so the above limitations may not apply to you.<br />
IN NO EVENT SHALL BELKIN BE LIABLE FOR INCIDENTAL, SPECIAL,<br />
DIRECT, INDIRECT, CONSEQUENTIAL OR MULTIPLE DAMAGES<br />
SUCH AS, BUT NOT LIMITED TO, LOST BUSINESS OR PROFITS<br />
ARISING OUT OF THE SALE OR USE OF ANY BELKIN PRODUCT,<br />
EVEN IF ADVISED OF THE POSSIBILITY OF SUCH DAMAGES.<br />
This warranty gives you specific legal rights, and you may also have<br />
other rights, which may vary from state to state. Some states do<br />
not allow the exclusion or limitation of incidental, consequential, or<br />
other damages, so the above limitations may not apply to you.<br />
32
REGULATORY INFORMATION<br />
DECLARATION OF CONFORMITY WITH FCC RULES<br />
FOR ELECTROMAGNETIC COMPATIBILITY<br />
We, <strong>Belkin</strong> International, Inc., of 12045 E. Waterfront Drive, Playa<br />
Vista, CA 90094, declare under our sole responsibility that the device,<br />
F7D7602v1, complies with Part 15 of the FCC Rules. Operation is<br />
subject to the following two conditions: (1) this device may not cause<br />
harmful interference, and (2) this device must accept any interference<br />
received, including interference that may cause undesired operation.<br />
Caution: Exposure to Radio Frequency Radiation .<br />
The radiated output power of this device is far below the FCC radio<br />
frequency exposure limits. Nevertheless, the device shall be used in<br />
such a manner that the potential for human contact during normal<br />
operation is minimized. When connecting an external antenna to the<br />
device, the antenna shall be placed in such a manner to minimize the<br />
potential for human contact during normal operation. In order to<br />
avoid the possibility of exceeding the FCC radio frequency exposure<br />
limits, human proximity to the antenna shall not be less<br />
than 20cm (8 inches) during normal operation.<br />
Federal Communication Commission Interference Statement<br />
This equipment has been tested and found to comply with the limits<br />
for a Class B digital device, pursuant to Part 15 of the FCC Rules. These<br />
limits are designed to provide reasonable protection against harmful<br />
interference in a residential installation. This equipment generates, uses<br />
33<br />
and can radiate radio frequency energy and, if not installed and used<br />
in accordance with the instructions, may cause harmful interference to<br />
radio communications. However, there is no guarantee that interference<br />
will not occur in a particular installation. If this equipment does cause<br />
harmful interference to radio or television reception, which can be<br />
determined by turning the equipment off and on, the user is encouraged<br />
to try to correct the interference by one of the following measures:<br />
• Reorient or relocate the receiving antenna.<br />
• Increase the separation between the equipment and receiver.<br />
• Connect the equipment into an outlet on a circuit different<br />
from that to which the receiver is connected.<br />
• Consult the dealer or an experienced radio/TV technician for help.<br />
FCC Caution: Any changes or modifications not expressly approved<br />
by the party responsible for compliance could void the user’s authority<br />
to operate this equipment<br />
This device and its antenna(s) must not be co-located or operating in<br />
conjunction with any other antenna or transmitter.<br />
This device is going to be operated in 5.15~5.25GHz frequency range,<br />
it is restricted for indoor environment only.
REGULATORY INFORMATION<br />
IMPORTANT NOTE:<br />
FCC Radiation Exposure Statement:<br />
This equipment complies with FCC radiation exposure limits set forth<br />
for an uncontrolled environment. This equipment should be installed<br />
and operated with a minimum distance of 23cm between the radiator<br />
and your body.<br />
IC Statement:<br />
This Class B digital apparatus complies with Canadian ICES-003.<br />
Cet appareil numerique de la classe B conforme a la norme<br />
NMB-003 du Canada.<br />
Industry Canada Statement:<br />
This device complies with RSS-210 of the Industry Canada Rules.<br />
Operation is subject to the following two conditions: (1) This device may<br />
not cause interference, and (2) This device must accept any interference,<br />
including interference that may cause undesired operation of the device.<br />
Ce dispositif est conforme a la norme CNR- standards d’Industrie Canada<br />
applicable aux appareils radio exempts de licence. Son fonctionnement<br />
est sujet aux deux conditions suivantes: (1) le dispositif ne doit pas<br />
produire de brouillage prejudiciable, et (2) ce dispositif doit accepter<br />
tout brouillage recu, y compris un brouillage susceptible de provoquer un<br />
fonctionnement indesirable.<br />
34<br />
IMPORTANT NOTE:<br />
Radiation Exposure Statement:<br />
This equipment complies with IC radiation exposure limits set forth for<br />
an uncontrolled environment. This equipment should be installed and<br />
operated with a minimum distance of 20cm between the radiator and<br />
your body.<br />
Déclaration d’exposition aux radiations: Cet équipement est conforme aux<br />
limites d’exposition aux rayonnements IC établies pour un environnement<br />
non contrôlé. Cet équipement doit être installé et utilisé avec un minimum<br />
de 20 cm de distance entre la source de rayonnement et votre corps.<br />
This radio transmitter (IC: 3623A-F7D7602V1/ Model: F7D7602V1) has<br />
been approved by Industry Canada to operate with the antenna types<br />
listed below with the maximum permissible gain and required antenna<br />
impedance for each antenna type indicated. Antenna types not included<br />
in this list, having a gain greater than the maximum gain indicated for that<br />
type, are strictly prohibited for use with this device.
REGULATORY INFORMATION<br />
Avertissement:<br />
Ce dispositif a été conçu pour fonctionner avec une antenne ayant un<br />
gain maximal de PCB dipole antenne avec dB [3.1]. Une antenne à gain<br />
plus élevé est strictement interdite par les règlements d’Industrie Canada.<br />
L’impédance d’antenne requise est de 50 ohms.<br />
Conformément à la réglementation d’Industrie Canada, le présent<br />
émetteur radio peutfonctionner avec une antenne d’un type et d’un gain<br />
maximal (ou inférieur) approuvé pourl’émetteur par Industrie Canada.<br />
Dans le but de réduire les risques de brouillage radioélectriqueà<br />
l’intention des autres utilisateurs, il faut choisir le type d’antenne et<br />
son gain de sorte que lapuissance isotrope rayonnée équivalente (p.i.r.e.)<br />
ne dépasse pas l’intensité nécessaire àl’établissement d’une<br />
communication satisfaisante.<br />
Le présent émetteur radio (IC: 3623A-F7D7602V1/ Model: F7D7602V1)<br />
a été approuvé par Industrie Canada pour fonctionner avec les types<br />
d’antenne énumérés ci-dessous et ayant un gain admissible maximal et<br />
l’impédance requise pour chaque type d’antenne. Les types d’antenne<br />
non inclus dans cette liste, ou dont le gain est supérieur au gain maximal<br />
indiqué, sont strictement interdits pour l’exploitation de l’émetteur.<br />
35
© 2013 <strong>Belkin</strong> International, Inc. All rights reserved. All trade names are registered trademarks of respective manufacturers<br />
listed. Windows, Windows Vista, and Internet Explorer are either registered trademarks or trademarks of Microsoft<br />
Corporation in the United States and/or other countries. iPad, iPhone, iPod touch, Mac OS, and Safari are trademarks of<br />
Apple Inc., registered in the U.S. and other countries. App Store is a service mark of Apple Inc. Wi-Fi is a registered trademark<br />
of the Wi-Fi Alliance. Android, Google Chrome, and Google Play are trademarks of Google Inc.
TABLE OF CONTENTS<br />
Mise en route . . . . . . . . . . . . . . . . . . . . . . . . . . . . . . . . . . . . . . . . . . . . 1<br />
Contenu de la boîte ........................................... 1<br />
Configuration initiale .......................................... 1<br />
Configurez votre caméra sans fil au moyen de vos appareils mobiles . 2<br />
Connaître votre caméra Wi-Fi . . . . . . . . . . . . . . . . . . . . . . . . . . . . . 19<br />
Face avant ................................................. 19<br />
Face arrière ................................................20<br />
Détails techniques . . . . . . . . . . . . . . . . . . . . . . . . . . . . . . . . . . . . . . . 21<br />
Fonctions logicielles et spécifications........................... 21<br />
Fonctions matérielles et spécifications..........................25<br />
Configuration requise ........................................27<br />
Réinitialisation de la caméra ..................................27<br />
Dépannage, soutien et garantie . . . . . . . . . . . . . . . . . . . . . . . . . . . .28<br />
Dépannage .................................................28<br />
Soutien technique ...........................................29<br />
Garantie limitée de 2 ans de <strong>Belkin</strong> International, Inc. sur le produit . 30<br />
Information réglementaire . . . . . . . . . . . . . . . . . . . . . . . . . . . . . . . .33<br />
Déclaration FCC .....................................................33<br />
Énoncé d’Industrie Canada ..........................................34
GETTING STARTED<br />
Félicitations pour votre choix d’une NetCam <strong>Belkin</strong> .<br />
Cet appareil vous permettra de jeter facilement<br />
un coup d’œil sur votre domicile et vos êtres chers<br />
pendant votre absence .<br />
Contenu de la boîte<br />
NetCam <strong>HD</strong><br />
Bloc d’alimentation<br />
Guide d’installation rapide<br />
Trousse de montage<br />
1<br />
Configuration initiale<br />
Pour commencer, vous aurez besoin de ce qui suit :<br />
• Votre routeur sans fil, son nom de réseau<br />
(SSID) et son mot de passe.<br />
• Un appareil Android (version 2.2 ou plus récente) ou un<br />
iPhone, iPad ou iPod touch (iOS version 4.1 ou plus récente)
MISE EN ROUTE<br />
Configurez votre caméra sans fil au<br />
moyen de vos appareils mobiles<br />
1. Branchez la NetCam sur une prise de courant<br />
2<br />
2. Réglez la NetCam en mode Configuration en poussant vers le haut le<br />
commutateur situé à l’arrière de la caméra<br />
Veuillez vous assurer que le commutateur est en<br />
mode Configuration et que le voyant Wi-Fi clignote.
MISE EN ROUTE<br />
3. Téléchargez l’application NetCam depuis le site App Store<br />
ou Google Play<br />
3<br />
4. Configuration sur un iPhone, iPad ou iPod touch<br />
4.1 Sélectionnez le signal Wi-Fi NetCam pour votre appareil mobile<br />
Sélectionnez « Réglages > Wi-Fi » sur votre iPhone/iPad/iPod touch,<br />
puis sélectionnez le signal Wi-Fi de la caméra.
MISE EN ROUTE<br />
4.2 Lancez l’application NetCam<br />
Une fois la connexion établie avec la caméra, lancez l’application<br />
NetCam. Un message semblable à celui-ci devrait s’afficher.<br />
Cliquez sur « Oui » pour configurer votre caméra.<br />
4<br />
4.3 Configuration de la caméra<br />
Cliquez sur « Continuer » pour commencer la configuration.
MISE EN ROUTE<br />
4.4 Prévisualisation<br />
La caméra vous donnera un aperçu d’image<br />
une fois connecté à votre appareil.<br />
Cliquez sur « Connecter la caméra à Internet ».<br />
5<br />
4.5 Connexion à Internet<br />
Sélectionnez votre réseau Wi-Fi pour vous connecter à Internet.
MISE EN ROUTE<br />
4.6 Connexion à Internet<br />
Entrez votre mot de passe Wi-Fi si vous avez un réseau sécurisé.<br />
6<br />
Attendez que la caméra établisse la connexion à Internet.
MISE EN ROUTE<br />
4.7 Création d’un compte<br />
Si vous configurez votre caméra pour la première fois, vous devez<br />
créer un compte.<br />
7<br />
4.8 Utilisation d’un compte existant<br />
Si vous avez déjà un compte, sélectionnez « Utiliser<br />
existant » et entrez les détails de votre compte. Cliquez<br />
sur « Se connecter ».
MISE EN ROUTE<br />
4.9 Définition des informations de la caméra<br />
Attribuez un nom à la caméra et donnez une description.<br />
8<br />
Cliquez sur « Continuer ». Il faudra quelques secondes pour enregistrer<br />
la caméra sur le serveur.
MISE EN ROUTE<br />
4.10 Configuration terminée<br />
Poussez le commutateur à l’arrière de la NetCam vers le bas.<br />
Cliquez sur « Terminer » pour compléter l’installation.<br />
9<br />
Félicitations!
MISE EN ROUTE<br />
5. Configuration sur des appareils Android<br />
5.1 Sélectionnez le signal Wi-Fi NetCam pour votre appareil<br />
Sélectionnez « Réglages > Sans fil » et « Réseau > Réglages Wi-Fi »,<br />
puis sélectionnez le signal Wi-Fi de la caméra.<br />
10<br />
5.2 Lancez l’application NetCam<br />
Une fois la connexion établie avec la caméra, lancez l’application<br />
NetCam. Un message semblable à celui-ci devrait s’afficher.<br />
Cliquez sur « Oui » pour configurer votre caméra.
MISE EN ROUTE<br />
5.3 Configuration de la caméra<br />
Cliquez sur « Continuer » pour commencer la configuration.<br />
11<br />
5.4 Prévisualisation<br />
La caméra vous donnera un aperçu d’image une fois connecté à<br />
votre appareil. Cliquez sur « Connecter la caméra à Internet ».
MISE EN ROUTE<br />
5.5 Connexion à Internet<br />
Sélectionnez votre réseau Wi-Fi pour vous connecter à Internet.<br />
12<br />
5.6 Connexion à Internet<br />
Entrez votre mot de passe Wi-Fi si vous avez un réseau sécurisé.
MISE EN ROUTE<br />
Attendez que la caméra établisse une connexion Internet. 5.7 Création d’un compte<br />
13<br />
Si vous configurez votre caméra pour la première fois, vous devez<br />
créer un compte.
MISE EN ROUTE<br />
5.8 Utilisation d’un compte existant<br />
Si vous avez déjà un compte, sélectionnez « Utiliser existant » et entrez<br />
les détails de votre compte. Cliquez sur « Se connecter ».<br />
14<br />
5.9 Définition des informations de la caméra<br />
Attribuez un nom à la caméra et donnez une description.
MISE EN ROUTE<br />
Cliquez sur « Continuer ». Il faudra quelques secondes pour<br />
enregistrer la caméra sur le serveur.<br />
15<br />
5.10 Configuration terminée<br />
Poussez le commutateur à l’arrière de la NetCam vers le bas. Cliquez<br />
sur « Terminer » pour compléter l’installation.
MISE EN ROUTE<br />
Félicitations!<br />
16
MISE EN ROUTE<br />
6. Montage de votre caméra (facultatif)<br />
Dévissez le pied de la caméra de la base et retirez le poids.<br />
17<br />
Fixez les vis au mur et accrochez la plaque sur les vis.<br />
1/8 in or 5.5mm<br />
2.5mm
MISE EN ROUTE<br />
Alignez la base avec la plaque et vissez-la sur le pied de la caméra.<br />
18
CONNAÎTRE VOTRE CAMÉRA WI-FI<br />
Face avant<br />
A : Détecteur de luminosité<br />
B : Capteur de la caméra<br />
C : Voyant infrarouge<br />
D : Microphone<br />
19
CONNAÎTRE VOTRE CAMÉRA WI-FI<br />
Face arrière<br />
Témoins lumineux<br />
A: Configuration<br />
Vert : Mode Configuration activé<br />
Ambre : Mode Configuration en phase d’initialisation<br />
Voyant éteint : Mode Configuration désactivé<br />
20<br />
B: Réseau<br />
Vert : Connecté au serveur<br />
Orange : Connecté au réseau local seulement<br />
Ambre clignotant : Connecté à aucun réseau<br />
Vert clignotant : Connecté au réseau, prêt pour la<br />
configuration<br />
C: Alimentation<br />
Vert : Sous tension<br />
D : Pied de la caméra<br />
Vous pouvez régler la position de la NetCam en ajustant le pied.<br />
E : Bouton de réinitialisation<br />
Réinitialisation du système : Appuyez sur le bouton et maintenez-le<br />
enfoncé pendant 1 seconde pour réinitialiser le système.<br />
Paramètres du fabricant : Appuyez sur le bouton et maintenez-le<br />
enfoncé pendant 20 secondes pour rétablir les paramètres par défaut<br />
définis en usine.<br />
F: Commutateur de configuration<br />
Poussez le commutateur vers le haut pour passer en mode<br />
Configuration.<br />
Poussez le commutateur vers le bas pour passer en mode Caméra.
TECHNICAL DETAILS<br />
Technical Features<br />
Fonctions logicielles et spécifications<br />
Application sur iOS ou Android<br />
• Configuration de la caméra<br />
• Visionnement en direct de la caméra<br />
• Sauvegarde de capture d’écran et de<br />
vidéo à partir du flux en direct<br />
• Communication audio unidirectionnelle en direct<br />
• Réglages de la caméra<br />
o Activer/désactiver les alertes par courriel<br />
o Partage de caméra<br />
o Définir l’état de la caméra (en ligne, hors ligne, privé)<br />
o Réglage automatique<br />
• Flux vidéo (fréquence d’images, résolution vidéo, qualité)<br />
• Réglages généraux<br />
o Réinitialisation du mot de passe<br />
o Se connecter automatiquement<br />
• Inviter des amis à visionner votre caméra<br />
Application Web<br />
• Visionnement en direct de la caméra<br />
• Audio en direct sur certains navigateurs Web pour PC<br />
(Internet Explorer®, Firefox® et Google Chrome)<br />
• Réglages de la caméra<br />
• Mise à niveau du micrologiciel de la caméra<br />
21<br />
• Supprimer la caméra<br />
• Inviter des amis à visionner votre caméra<br />
• Activer/désactiver les alertes par courriel<br />
• Gestion de compte d’utilisateur<br />
• Créer un nouveau compte d’utilisateur<br />
• Réinitialisation du mot de passe
DÉTAILS TECHNIQUES<br />
Fenêtre principale<br />
État de la<br />
caméra<br />
Configurer<br />
la caméra<br />
22<br />
Configuration de la caméra<br />
• Nom : Nom de votre caméra<br />
• Partager/arrêter le partage : Rendre votre<br />
caméra accessible à vos amis ou non.<br />
• État : Changer l’état de la caméra à En ligne, Hors ligne ou Privé.<br />
• Rotation : Sélectionner Normal ou Renverser<br />
verticalement sur les vidéos.<br />
• Infrarouge : Sélectionner « Auto », « On » ou<br />
« Off » sur les voyants infrarouges.<br />
• Réglage automatique<br />
o Fréquence d’images : Jusqu’à 25 images par seconde<br />
o Qualité : 1-5 (Meilleure = 5)<br />
o Taille de la vidéo : 1280x720, 640x360, 320x180<br />
• Microphone : Activer/Désactiver microphone<br />
• Alertes par courriel > Activer/Désactiver alertes par courriel
DÉTAILS TECHNIQUES<br />
23<br />
Visionneuse de caméra<br />
Capture<br />
instantanée<br />
Enregistrer<br />
vidéo<br />
Activer<br />
microphone
DÉTAILS TECHNIQUES<br />
Protection<br />
Pour vous protéger contre les pirates, un message<br />
contextuel vous avertit si quelqu’un d’autre est connecté<br />
à votre compte en même temps que vous.<br />
24<br />
Navigateur Web<br />
ACliquez sur le lien suivant dans Internet Explorer, Netscape,<br />
Firefox ou Google Chrome : http://www.belkin.com/netcam/<br />
Vous pourrez alors visionner la caméra à partir de votre ordinateur.
DÉTAILS TECHNIQUES<br />
Fonctions matérielles et spécifications<br />
Appareil photo<br />
Capteur d’image Capteur CMOS 2MP 1/3,2 po<br />
Lentille Longueur focale : 3,0mm, F2,0<br />
Angle de visionnement Horizontal : 78°<br />
Vertical : 45°<br />
Diagonal : 90°<br />
Voyants infrarouges (IR) 8 voyants IR, 850 nmDistance<br />
d’éclairage 8 mètres<br />
Mode infrarouge (IR) Toujours activé<br />
Toujours désactivé<br />
Mode automatique<br />
● La fonction IR s’active<br />
lorsque la luminance baisse<br />
jusqu’à 3 lux environ<br />
● La fonction IR se désactive<br />
lorsque la luminance augmente<br />
jusqu’à 8 lux environ<br />
Capteur de luminosité<br />
ambiante<br />
Vidéo<br />
Codecs H.264<br />
Détecteur de luminance 560 nm,<br />
conforme à la norme RoHS<br />
Résolution 1280x720, 640x360, 320x180<br />
Fréquence d’images Jusqu’à 25 images par seconde<br />
25<br />
Capture d’images fixes Capture d’images 720P<br />
Fonctions vidéo Régler la taille et qualité d’image<br />
Audio<br />
Entrée audio Microphone intégré , -38 dB ± 2 dB<br />
Compression audio G.711, PCM<br />
Réseautage<br />
Interface Réseau 802.11b/g/n WLAN<br />
Connectivité sans fil 802.11b/g/n sans fil avec<br />
sécurité WEP/WPA/WPA2<br />
Spécifications radio Bande RF : Bande ISM 2,4 GHz<br />
Canaux : Varient selon le pays<br />
Sortie puissance radioélectrique<br />
●802.11n : 14 ± 1 dBm en moyenne<br />
●802.11g : 14 ± 1 dBm en moyenne<br />
●802.11g : 16 ± 1 dBm en moyenne<br />
Antenne Type : Microcircuit, SMDGain : Crête<br />
1,5 dBmEfficacité : au-delà de 80%
DÉTAILS TECHNIQUES<br />
Généralités<br />
Système Processeur : RT5350<br />
Vitesse : 360MHz<br />
SDRAM : 64 MoFlash : 16 Mo<br />
Bouton Bouton de réinitialisation<br />
● Réinitialiser le système :<br />
Presser moins d’une seconde<br />
pour réinitialiser le système<br />
● Paramètres par défaut :<br />
Appuyer et maintenir enfoncé<br />
pendant 20 secondes pour<br />
rétablir les paramètres par<br />
défaut définis en usine<br />
Commutateur Commutateur de mode<br />
Configuration : Activer/désactiver<br />
le mode Configuration<br />
Voyants Voyant du mode Configuration<br />
● Vert fixe : Mode<br />
Configuration activé<br />
● Orange : Passage au mode<br />
Configuration en cours<br />
● Éteint : Mode Configuration<br />
désactivéVoyant Réseau<br />
● Orange fixe : Réseau local OK<br />
● Vert fixe : Connexion à Internet OK<br />
● Orange clignotant : Pas encore<br />
de connexion réseau<br />
● Vert clignotant : Internet<br />
OKVoyant Système<br />
● Vert fixe : Système activé<br />
26<br />
Alimentation Adaptateur d’alimentation externe<br />
c.a. à c.cEntrée : 100-249 V c.a.,<br />
50/60 Hz, Sortie : 5 V c.c., 1A
DÉTAILS TECHNIQUES<br />
Configuration requise<br />
iPhone, iPad ou iPod touch avec système iOS 4.1 ou plus récent<br />
ou<br />
Appareils Android, version 2.2 ou plus récente<br />
Système d’exploitation du PC : Windows® XP, Windows Vista®<br />
ou Windows 7, ou Mac OS® X v10.6.8 Snow Leopard<br />
Navigateurs pour PC : Internet Explorer 8, Google<br />
Chrome 16, Firefox 11.1, Safari® 5.1<br />
Version la plus récente d’Adobe Flash Player<br />
27<br />
Réinitialisation de la caméra<br />
Le bouton de réinitialisation s’utilise rarement. Dans<br />
le cas peu probable où votre caméra ne fonctionnerait<br />
pas correctement, veuillez utiliser un trombone pour la<br />
réinitialiser. Le bouton de réinitialisation se trouve à l’endroit<br />
indiqué par la flèche ci-dessous. Réinitialisez la caméra<br />
lorsque le commutateur est en mode Désactivé (OFF). Une<br />
fois réinitialisée, la caméra reprendra ses réglages par défaut.<br />
● Réinitialiser le système : Presser et maintenir enfoncé pendant une<br />
seconde pour réinitialiser le système<br />
● Rétablissement des paramètres par défaut : Presser et maintenir<br />
enfoncé pendant 20 secondes pour rétablir les paramètres par<br />
défaut définis en usine
DÉPANNAGE, SOUTIEN ET GARANTIE<br />
Si j’achetais d’autres caméras, pourrais-je utiliser le<br />
même nom d’utilisateur pour les connecter?<br />
Vous pouvez ajouter un nombre illimité de caméras sous votre propre<br />
compte, mais chacune doit avoir un nom différent. La figure ci-dessous<br />
indique que vous avez différentes caméras sous votre compte.<br />
Comment puis-je partager mes caméras avec mes amis?<br />
28<br />
Comment puis-je partager mes caméras avec mes amis?<br />
Ouvrez une session en utilisant votre compte. À l’écran de configuration<br />
de la caméra, repérez l’icône « Partage ». Tapez les adresses<br />
courriel de vos amis pour les inviter à visionner votre caméra.
DÉPANNAGE, SOUTIEN ET GARANTIE<br />
Comment puis-je mettre à niveau le micrologiciel?<br />
Accédez à votre compte NetCam à partir d’un navigateur Web. À<br />
l’écran de configuration de la caméra, une fenêtre contextuelle comme<br />
celle-ci s’ouvrira. Cliquez sur « Mettre à niveau maintenant ». Il faudra<br />
environ de 5 à 10 minutes pour mettre à niveau le micrologiciel.<br />
29<br />
Puis-je changer mon nom d’utilisateur?<br />
Comme votre nom d’utilisateur est ce qui identifie votre compte, une fois<br />
créé, il ne peut pas être changé. Si, par la suite, vous n’aimez pas votre<br />
nom d’utilisateur, votre seul recours sera de créer un nouveau compte.<br />
Veuillez noter que tout service auquel vous être abonné avec votre ancien<br />
compte (s’il y a lieu) ne peut pas être transféré au nouveau compte.<br />
Vous avez oublié ou perdu votre mot de passe?<br />
L’écran d’ouverture de session de l’application NetCam contient un<br />
lien intitulé « Vous avez oublié votre mot de passe? » qui vous amène<br />
à page Web de connexion. Tapez votre nom d’utilisateur et votre<br />
adresse courriel, puis cliquez sur le bouton de réinitialisation pour<br />
commencer le processus d’établissement d’un nouveau mot de passe.<br />
Soutien technique<br />
États-Unis<br />
http://www .belkin .com/support
DÉPANNAGE, SOUTIEN ET GARANTIE<br />
Garantie limitée de 2 ans de <strong>Belkin</strong> International,<br />
Inc . sur le produitWhat this warranty covers .<br />
Portée de la garantie<br />
<strong>Belkin</strong> International, Inc. (« <strong>Belkin</strong> ») garantit à l’acheteur<br />
initial que ce produit <strong>Belkin</strong> sera exempt de tout défaut de<br />
conception, d’assemblage, de matériau et de fabrication.<br />
Durée de la garantie<br />
<strong>Belkin</strong> garantit ce produit pendant une période de deux ans.<br />
Que ferons-nous en cas de problème?<br />
Garantie sur le produit<br />
<strong>Belkin</strong> réparera ou remplacera, à son gré et sans frais, tout produit<br />
défectueux (les frais d’expédition ne sont cependant pas compris).<br />
<strong>Belkin</strong> se réserve le droit d’abandonner la fabrication de ses produits<br />
sans préavis et rejette toute garantie limitée concernant la réparation<br />
ou le remplacement de tels produits. Advenant que <strong>Belkin</strong> soit incapable<br />
de réparer ou de remplacer le produit (parce qu’il en a abandonné la<br />
fabrication, par exemple), <strong>Belkin</strong> offrira soit un remboursement, soit<br />
un crédit applicable à l’achat d’un autre produit sur le site <strong>Belkin</strong>.<br />
com d’un montant égal au prix d’achat du produit, attesté par le<br />
reçu d’achat initial et actualisé en fonction de l’usure normale.<br />
30<br />
Qu’est-ce que la présente garantie ne couvre pas?<br />
Toutes les garanties ci-dessus sont nulles et non avenues si le produit<br />
<strong>Belkin</strong> n’est pas expédié à <strong>Belkin</strong> pour inspection, à sa demande<br />
mais aux frais de l’acheteur, ou si <strong>Belkin</strong> s’aperçoit que le produit<br />
a été mal installé, modifié ou altéré de quelque façon. La garantie<br />
<strong>Belkin</strong> sur le produit ne s’applique pas aux cas de force majeure tels<br />
que tremblement de terre, inondation, foudre, guerre, vandalisme,<br />
vol, usure normale, érosion, épuisement, obsolescence, abus,<br />
dommages causés par des perturbations de tension, programme<br />
non autorisé ou modification de système ou d’équipement.
DÉPANNAGE, SOUTIEN ET GARANTIE<br />
Pour obtenir de l’assistance<br />
Marche à suivre pour obtenir de l’assistance<br />
concernant votre produit <strong>Belkin</strong> :<br />
1 . Communiquez avec <strong>Belkin</strong> International, Inc., au 12045 E.<br />
Waterfront Drive, Playa Vista, CA 90094, à l’attention du<br />
Service Client, dans les 15 jours qui suivent la survenue du<br />
problème. Soyez prêt à fournir les renseignements suivants :<br />
a. Numéro de produit <strong>Belkin</strong>.<br />
b. Endroit où vous avez acheté le produit.<br />
c. Date d’achat du produit.<br />
d. Copie du reçu d’origine.<br />
31<br />
2 . Le représentant du Service à la clientèle <strong>Belkin</strong> vous indiquera<br />
alors la marche à suivre pour retourner le produit <strong>Belkin</strong>,<br />
avec le reçu, et comment faire votre réclamation.<br />
<strong>Belkin</strong> se réserve le droit d’examiner le produit endommagé. Tous les coûts<br />
d’expédition du produit <strong>Belkin</strong> aux fins d’inspection seront entièrement<br />
assumés par l’acheteur. Si <strong>Belkin</strong> détermine, à son entière discrétion,<br />
qu’il est peu pratique de lui expédier l’équipement endommagé, <strong>Belkin</strong><br />
peut désigner, à son entière discrétion, un atelier de réparation pour<br />
inspecter l’équipement et évaluer les coûts de réparation. Les coûts,<br />
le cas échéant, relatifs à l’expédition de l’équipement jusqu’à l’atelier<br />
de réparation et au retour, ainsi qu’à l’estimation, seront entièrement<br />
assumés par l’acheteur. L’équipement endommagé doit être disponible aux<br />
fins d’inspection jusqu’à ce que la demande de réclamation soit réglée.<br />
Lorsqu’un règlement intervient, <strong>Belkin</strong> se réserve le droit d’être subrogé<br />
en vertu de quelque police d’assurance que l’acheteur pourrait avoir.
DÉPANNAGE, SOUTIEN ET GARANTIE<br />
Rapport entre la loi des États et la présente garantie<br />
CETTE GARANTIE CONTIENT LA GARANTIE EXCLUSIVE DE BELKIN.<br />
IL N’Y A PAS D’AUTRE GARANTIE EXPRESSE OU, SAUF DANS LES<br />
CAS EXIGÉS PAR LA LOI, IMPLICITE, Y COMPRIS DE GARANTIE<br />
IMPLICITE OU CONDITION DE QUALITÉ OU DE CONFORMITÉ À UN<br />
USAGE PARTICULIER. DE TELLES GARANTIES IMPLICITES, S’IL EN<br />
EST, SONT LIMITÉES À LA DURÉE DE LA PRÉSENTE GARANTIE.<br />
Certains états n’autorisent pas de limite quant à la durée<br />
d’une garantie implicite; il se pourrait donc que les limites<br />
indiquées ci-dessus ne s’appliquent pas dans votre cas.<br />
EN AUCUN CAS BELKIN NE SERA RESPONSABLE DE QUELQUES<br />
DOMMAGES-INTÉRÊTS POUR CAUSE DIRECTE, INDIRECTE, SPÉCIALE,<br />
FORTUITE OU MULTIPLE, NOTAMMENT MAIS NON EXCLUSIVEMENT,<br />
PERTE D’OCCASIONS D’AFFAIRES OU DE PROFITS DÉCOULANT DE<br />
LA VENTE OU DE L’UTILISATION DE TOUT PRODUIT BELKIN, MÊME<br />
SI ELLE ÉTAIT INFORMÉE DE LA POSSIBILITÉ DE TELS DOMMAGES.<br />
Cette garantie vous confère des droits légaux spécifiques, et vous pouvez<br />
aussi avoir d’autres droits pouvant varier d’un état à l’autre. Certains<br />
états ne permettent pas l’exclusion ou la limitation des dommagesintérêts<br />
pour une cause indirecte, fortuite ou autre; il se pourrait donc<br />
que les limites indiquées ci-dessus ne s’appliquent pas dans votre cas.<br />
32
INFORMATION RÉGLEMENTAIRE<br />
DÉCLARATION DE CONFORMITÉ À LA RÈGLEMENTATION FCC<br />
EN MATIÈRE DE COMPATIBILITÉ ÉLECTROMAGNÉTIQUE<br />
Nous, <strong>Belkin</strong> International, Inc., sis au 12045 E. Waterfront Drive, Playa<br />
Vista, CA 90094, déclarons sous notre seule responsabilité que l’appareil<br />
F7D7602v1, est conforme aux normes énoncées à l’alinéa 15 de la<br />
réglementation FCC. Le fonctionnement est assujetti aux deux conditions<br />
suivantes : (1) cet appareil ne peut pas provoquer d’interférence nuisible,<br />
et (2) cet appareil doit accepter toute interférence reçue, y compris<br />
des interférences pouvant entraîner un fonctionnement non désiré.<br />
Attention : Exposition à des rayonnements<br />
à fréquence radioélectrique .<br />
La puissance des rayonnements émis par cet appareil est bien inférieure<br />
aux limites fixées par la FCC en matière d’exposition aux rayonnements<br />
à fréquence radioélectrique. Néanmoins, cet appareil doit être utilisé<br />
de façon à minimiser, en fonctionnement normal, les risques de contact<br />
avec des personnes. Si une antenne externe est connectée à l’appareil,<br />
celle-ci doit être placée de telle sorte que, en fonctionnement normal, les<br />
risques de contact avec des personnes soient minimes. Pour être sûr de<br />
ne pas dépasser les limites fixées par la FCC en matière d’exposition aux<br />
rayonnements à fréquence radioélectrique, les personnes doivent se tenir à<br />
au moins 20 cm (8 pouces) de l’antenne pendant le fonctionnement normal.<br />
Attestation de la Federal Communication<br />
Commission (FCC) relative aux interférences<br />
33<br />
Cet appareil a été testé et jugé conforme aux limites imposées pour les<br />
unités numériques de classe B, en vertu de l’alinéa 15 de la réglementation<br />
FCC. Ces limites visent à assurer une protection raisonnable contre<br />
les interférences en milieu résidentiel. Cet appareil génère, utilise et<br />
peut émettre de l’énergie radioélectrique et, s’il n’est pas installé et<br />
utilisé selon les directives, peut causer des interférences nuisibles<br />
aux communications radio. Cependant, il n’existe aucune garantie<br />
que des interférences ne se produiront pas dans une installation<br />
particulière. Si cet équipement cause des interférences nuisibles sur le<br />
plan de la réception radio ou télévision, pouvant être déterminées en<br />
mettant l’appareil sous et hors tension, l’utilisateur est invité à tester<br />
et à corriger l’interférence en prenant une des mesures suivantes :<br />
• Réorienter ou changer la position de l’antenne réceptrice.<br />
• Augmenter la distance entre l’équipement et le récepteur.<br />
• Brancher l’équipement sur une prise de courant appartenant à un<br />
circuit différent de celui sur lequel le récepteur est branché.<br />
• Demander l’assistance du fournisseur ou d’un<br />
technicien de télé ou de radio expérimenté.<br />
Mise en garde de la FCC : Toute modification qui n’a pas été expressément<br />
approuvée par la partie responsable des questions de conformité pourrait<br />
annuler le droit de l’utilisateur de se servir de cet équipement.<br />
Cet émetteur et ses antennes ne doivent pas être installés ou utilisés de<br />
pair avec tout autre émetteur ou antenne.<br />
Cet appareil fonctionnera dans la gamme de fréquences de 5,15~5,25 GHz,<br />
limité à un environnement intérieur seulement.
INFORMATION RÉGLEMENTAIRE<br />
NOTE IMPORTANTE :<br />
Attestation de la FCC relative à l’exposition aux rayonnements :<br />
Cet équipement respecte les limites imposées par la FCC en matière<br />
d’exposition aux rayonnements dans un environnement non contrôlé. Il<br />
doit être installé et utilisé en laissant une distance minimale de 23cm entre<br />
le radiateur et vous.<br />
Énoncé d’Industrie Canada :<br />
Ce périphérique numérique de classe B est conforme à la norme<br />
canadienne NMB-003.<br />
Cet appareil numerique de la classe B conforme a la norme<br />
NMB-003 du Canada.<br />
Énoncé d’Industrie Canada :<br />
Cet appareil est conforme aux normes RSS-210 d’Industrie Canada.<br />
Le fonctionnement est assujetti aux deux conditions suivantes : (1)<br />
Cet appareil ne peut pas provoquer d’interférence et (2) cet appareil<br />
doit accepter toute interférence, y compris celle pouvant entraîner un<br />
fonctionnement non désiré.<br />
Ce dispositif est conforme a la norme CNR- standards d’Industrie Canada<br />
applicable aux appareils radio exempts de licence. Son fonctionnement<br />
est sujet aux deux conditions suivantes: (1) le dispositif ne doit pas<br />
produire de brouillage prejudiciable, et (2) ce dispositif doit accepter<br />
tout brouillage recu, y compris un brouillage susceptible de provoquer un<br />
34<br />
fonctionnement indesirable.<br />
NOTE IMPORTANTE :<br />
Énoncé concernant l’exposition aux rayonnements :<br />
Cet équipement respecte les limites imposées par Industrie Canada en<br />
matière d’exposition aux rayonnements dans un environnement non<br />
contrôlé. Il doit être installé et utilisé en laissant une distance minimale de<br />
20 cm entre le radiateur et vous.<br />
Déclaration d’exposition aux radiations: Cet équipement est conforme aux<br />
limites d’exposition aux rayonnements IC établies pour un environnement<br />
non contrôlé. Cet équipement doit être installé et utilisé avec un minimum<br />
de 20 cm de distance entre la source de rayonnement et votre corps.<br />
Cet émetteur radio (IC : 3623A-F7D7602V1/ Modèle : F7D7602V1) a été<br />
approuvé par Industrie Canada pour fonctionner avec les types d’antenne<br />
énumérés ci-dessous avec le gain maximal admissible et l’impédance<br />
requise pour chaque type d’antenne indiqué. Les types d’antenne qui ne<br />
figurent pas dans cette liste, ayant un gain supérieur au gain maximum<br />
indiqué pour ce type, sont strictement interdits d’utilisation avec cet<br />
appareil.
INFORMATION RÉGLEMENTAIRE<br />
Avertissement:<br />
Ce dispositif a été conçu pour fonctionner avec une antenne ayant un<br />
gain maximal de PCB dipole antenne avec dB [3.1]. Une antenne à gain<br />
plus élevé est strictement interdite par les règlements d’Industrie Canada.<br />
L’impédance d’antenne requise est de 50 ohms.<br />
Conformément à la réglementation d’Industrie Canada, le présent<br />
émetteur radio peutfonctionner avec une antenne d’un type et d’un gain<br />
maximal (ou inférieur) approuvé pourl’émetteur par Industrie Canada.<br />
Dans le but de réduire les risques de brouillage radioélectriqueà<br />
l’intention des autres utilisateurs, il faut choisir le type d’antenne et<br />
son gain de sorte que lapuissance isotrope rayonnée équivalente (p.i.r.e.)<br />
ne dépasse pas l’intensité nécessaire àl’établissement d’une<br />
communication satisfaisante.<br />
Le présent émetteur radio (IC: 3623A-F7D7602V1/ Model: F7D7602V1)<br />
a été approuvé par Industrie Canada pour fonctionner avec les types<br />
d’antenne énumérés ci-dessous et ayant un gain admissible maximal et<br />
l’impédance requise pour chaque type d’antenne. Les types d’antenne<br />
non inclus dans cette liste, ou dont le gain est supérieur au gain maximal<br />
indiqué, sont strictement interdits pour l’exploitation de l’émetteur.<br />
35
© 2013 <strong>Belkin</strong> International, Inc. Tous droits réservés. Toutes les marques de commerce sont des marques déposées de leurs<br />
fabricants respectifs. Windows, Windows Vista et Internet Explorer sont soit des marques de commerce, soit des marques<br />
déposées de Microsoft Corporation aux États-Unis et/ou dans d’autres pays. iPad, iPhone, iPod touch, Mac OS et Safari sont<br />
des marques de commerce d’Apple Inc. enregistrées aux États-Unis et dans d’autres pays. App Store est une marque de<br />
service d’Apple Inc. Wi-Fi est une marque de commerce déposée de Wi-Fi Alliance. Android, Google Chrome et Google Play<br />
sont des marques de commerce de Google Inc.