Programming a user code - Sentry® Safe
Programming a user code - Sentry® Safe
Programming a user code - Sentry® Safe

You also want an ePaper? Increase the reach of your titles
YUMPU automatically turns print PDFs into web optimized ePapers that Google loves.
Thank you for purchasing this<br />
Sentry<strong>Safe</strong> or ProStaff by Sentry<strong>Safe</strong><br />
gun safe product.<br />
Please read this manual before using this product.<br />
We are pleased that you have chosen one of our gun safes to protect your firearms. You can be<br />
assured that your safe meets the California Department of Justice standards for firearm safety.<br />
This manual will provide you with the information you need to:<br />
• unpack and set up your safe<br />
• open the safe<br />
• operate the lock<br />
• take full advantage of your safe’s special features.<br />
Remember to keep your combination a secret. Writing down a combination and putting it in a desk<br />
drawer is like leaving your door key under the mat – it invites entry.<br />
Please retain this manual for your records. If you have any questions about your gun safe, please<br />
visit our website at www.sentrysafe.com or call Sentry Customer Service at 1-800-828-1438 or<br />
1-585-381-4900. Customer Service representatives are ready to assist you, 8 a.m. to 8 p.m., E.S.T.,<br />
Monday - Friday.<br />
Tools/equipment required<br />
• Adjustable wrench, pliers, or 17 mm (11/16”) socket wrench<br />
• Hammer<br />
Instructions<br />
1. Using a wrench or pliers, remove the nuts located under the X-cut in the carpet in the bottom of<br />
the unit. (Fig. B)<br />
NOTE: If the bolts turn when you begin to remove the nuts, reach between the<br />
slats of the pallet and hold the bolts, by hand and/or with pliers, as you<br />
turn the nuts.<br />
2. Once the nuts are removed, use a hammer to tap the bolts through the bottom of the safe.<br />
3. Close door and put handle in locked position.<br />
4. With your helper, slide safe to one edge of pallet. Tip the safe so that the edge moves to the<br />
floor. (Fig. C)<br />
5. Remove the pallet and stand the safe upright on the floor.<br />
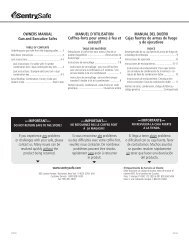
Table of Contents<br />
Unbolting your gun safe from the shipping pallet . . . . . . . . . . . . . . . . . . . . . . . . . . . . . . . . . . . . . . . . . . . . . .2<br />
Bolt-down instructions . . . . . . . . . . . . . . . . . . . . . . . . . . . . . . . . . . . . . . . . . . . . . . . . . . . . . . . . . . . . . . . . . . . . .2<br />
Lock instructions . . . . . . . . . . . . . . . . . . . . . . . . . . . . . . . . . . . . . . . . . . . . . . . . . . . . . . . . . . . . . . . . . . . . . . . .3-5<br />
Lock instructions: For safes with 3-number combination lock . . . . . . . . . . . . . . . . . . . . . . . . . . . . . . . .3<br />
Lock instructions: For safes with UL Group 2 combination lock . . . . . . . . . . . . . . . . . . . . . . . . . . . . . .3<br />
Lock instructions: Standard electronic lock . . . . . . . . . . . . . . . . . . . . . . . . . . . . . . . . . . . . . . . . . . . . . .3-4<br />
Lock instructions: UL Type 1 electronic lock . . . . . . . . . . . . . . . . . . . . . . . . . . . . . . . . . . . . . . . . . . . . . .4-5<br />
Sentry<strong>Safe</strong> or ProStaff Fire-<strong>Safe</strong> gun safes . . . . . . . . . . . . . . . . . . . . . . . . . . . . . . . . . . . . . . . . . . . . . . . . . . . .5<br />
1-Year Limited Warranty . . . . . . . . . . . . . . . . . . . . . . . . . . . . . . . . . . . . . . . . . . . . . . . . . . . . . . . . . . . . . . . . . . . .6<br />
French . . . . . . . . . . . . . . . . . . . . . . . . . . . . . . . . . . . . . . . . . . . . . . . . . . . . . . . . . . . . . . . . . . . . . . . . . . . . . . . . .7-12<br />
Spanish . . . . . . . . . . . . . . . . . . . . . . . . . . . . . . . . . . . . . . . . . . . . . . . . . . . . . . . . . . . . . . . . . . . . . . . . . . . . . . .13-18<br />
Serial Number, Combination, Factory Code and Generic Code . . . . . . . . . . . . . . . . . . . . . . . . .Back Cover<br />
Unbolting your gun safe from the shipping pallet<br />
WARNING!<br />
This is a two-person operation and should not<br />
be attempted without help. Before attempting<br />
to unbolt your new safe, be certain someone is<br />
with you to help steady the safe while you<br />
work. Ensure the safe is standing upright on a<br />
flat, level surface. (Fig. A)<br />
NOTA: Sentry Group is not responsible for any<br />
costs incurred for unit to be removed<br />
from pallet and installed in place.<br />
A<br />
B<br />
Bolt-down instructions<br />
To help provide maximum security, Sentry strongly recommends this safe be bolted down.<br />
(Hardware supplied)<br />
1. Select a suitable and convenient location for your safe. Set the safe in place and use the holes<br />
provided in the bottom or back of the safe to mark the location of the holes to be drilled in the<br />
floor or wall. It is not recommended to attempt to bolt to both floor and wall. If bolting to a<br />
wall, please ensure that the safe is resting firmly on the floor.<br />
Note: Fire-<strong>Safe</strong> models cannot be bolted to the wall.<br />
2. Move the safe away and drill holes of the appropriate diameter and depth for the type of<br />
hardware and the mounting surface being used (2 each – bolts, washers and masonry anchors).<br />
3. Place the safe back over the holes and install the fasteners as required. If a water resistant unit<br />
was purchased, rubberized washers are provided. Assure that the area around the safe hole<br />
opening is clean using a damp cloth. Place the rubber side of the washer facing down against the<br />
safe floor and install the fastener.<br />
Water-resistant models must be bolted down. The supplied hardware<br />
MUST BE USED to bolt the safe to the floor to ensure the watertight seal,<br />
or the water-resistant claim is invalid. See “Water-resistance protection”<br />
on page 6.<br />
NOTE: Sentry Group is not responsible for any costs incurred if unit is to be replaced.<br />
Lock instructions<br />
The combination for this safe has been randomly selected and appears on the back cover of this<br />
manual. It is important that you keep this Owner’s Manual in a secure place other than IN your<br />
safe; it is your reference for both the safe’s combination and Serial Number. Compare the Serial<br />
Number on the back cover with the number found on the lower right side of the safe. If the<br />
numbers do not match, do not attempt to operate the combination and call Sentry<br />
Customer Service at 1-800-828-1438 or 1-585-381-4900, 8:00 a.m.– 8:00p.m. E.S.T.,<br />
M-F.<br />
C<br />
2