Becker Centronic VarioControl VC320 Anleitung - auf enobi.de
Becker Centronic VarioControl VC320 Anleitung - auf enobi.de
Becker Centronic VarioControl VC320 Anleitung - auf enobi.de

Create successful ePaper yourself
Turn your PDF publications into a flip-book with our unique Google optimized e-Paper software.
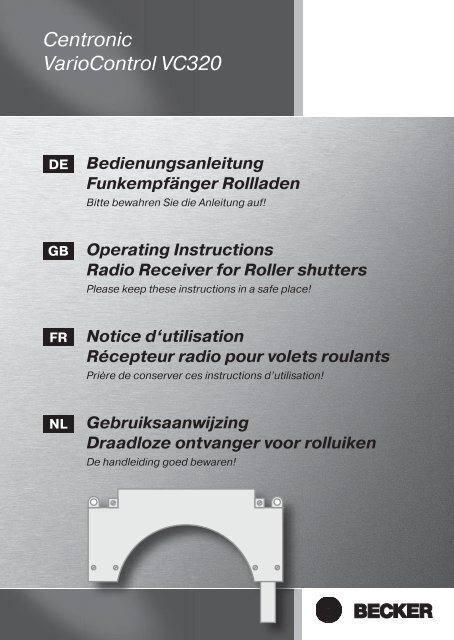
<strong>Centronic</strong><strong>VarioControl</strong> <strong>VC320</strong>DEBedienungsanleitungFunkempfänger Rollla<strong>de</strong>nBitte bewahren Sie die <strong>Anleitung</strong> <strong>auf</strong>!GBOperating InstructionsRadio Receiver for Roller shuttersPlease keep these instructions in a safe place!FRNotice d‘utilisationRécepteur radio pour volets roulantsPrière <strong>de</strong> conserver ces instructions d’utilisation!NLGebruiksaanwijzingDraadloze ontvanger voor rolluikenDe handleiding goed bewaren!
SommairePrestation <strong>de</strong> Garantie ............................................................................ 32Consignes <strong>de</strong> sécurité ............................................................................ 33Généralités ............................................................................................ 33Utilisation conforme aux prescriptions .................................................... 34Branchement ......................................................................................... 35Montage ................................................................................................ 38Caractéristiques techniques ................................................................... 44Que faire si… ? ....................................................................................... 45InhoudsopgaveGarantieverlening .................................................................................. 46Veiligheidsinstructies ............................................................................. 47Algemeen ............................................................................................. 47Reglementaire toepassing ...................................................................... 48Aansluiting ............................................................................................. 49Montage ................................................................................................ 52Technische gegevens ............................................................................. 58Wat te doen, als ...? ................................................................................. 59DEGBFRNL3
BedienungsanleitungInhaltsverzeichnisGewährleistung ........................................................................................ 4Sicherheitshinweise ................................................................................. 5Allgemeines ............................................................................................. 5Bestimmungsgemäße Verwendung .......................................................... 6Anschluss ................................................................................................ 7Montage ................................................................................................ 10Technische Daten .................................................................................. 16Was tun, wenn...? ................................................................................... 17Gewährleistung<strong>Becker</strong>Antriebe GmbH ist von <strong>de</strong>r gesetzlichen und vertraglichen Gewährleistungfür Sachmängel und Produkthaftung befreit, wenn ohne unsere vorherigeZustimmung eigene bauliche Verän<strong>de</strong>rungen und/o<strong>de</strong>r unsachgemäße Installationengegen unsere vorgegebenen Montagerichtlinien vorgenommen, ausgeführto<strong>de</strong>r veranlasst wer<strong>de</strong>n.Der Weiterverarbeiter hat dar<strong>auf</strong> zu achten, dass alle für die Herstellung undKun<strong>de</strong>nberatung erfor<strong>de</strong>rlichen gesetzlichen und behördlichen Vorschriften,insbeson<strong>de</strong>re die EMVVorschriften, eingehalten wer<strong>de</strong>n.Das vorliegen<strong>de</strong> Produkt unterliegt technischen Weiterentwicklungen und Verbesserungen,informieren Sie sich in <strong>de</strong>n aktuellen Verk<strong>auf</strong>sunterlagen über diegenauen Produktspezifikationen.4
SicherheitshinweiseVorsicht• Verletzungsgefahr durch Stromschlag.• Anschlüsse an 230 V Netz müssen durch eine Elektrofachkraft erfolgen.• Schalten Sie vor <strong>de</strong>r Montage die Anschlussleitung spannungsfrei.• Die Vorschriften <strong>de</strong>r örtlichen Energieversorgungsunternehmen sowiedie Bestimmungen für nasse und feuchte Räume nach VDE 100,sind beim Anschluss einzuhalten.• Nur in trockenen Räumen verwen<strong>de</strong>n.• Verwen<strong>de</strong>n Sie nur unverän<strong>de</strong>rte <strong>Becker</strong> Originalteile.• Halten Sie Personen aus <strong>de</strong>m Fahrbereich <strong>de</strong>r Anlagen fern.• Halten Sie Kin<strong>de</strong>r von Steuerungen fern.• Beachten Sie Ihre lan<strong>de</strong>sspezifischen Bestimmungen.• Wird die Anlage durch ein o<strong>de</strong>r mehrere Geräte gesteuert, muss <strong>de</strong>rFahrbereich <strong>de</strong>r Anlage während <strong>de</strong>s Betriebes einsehbar sein.DEGBFRNLAllgemeinesDer vom Werk ausgelieferte <strong>VC320</strong> wan<strong>de</strong>lt Funksignale in Steuersignale um.Ein bedrahteter Antrieb kann mit <strong>de</strong>m <strong>VC320</strong>, per Funk gesteuert wer<strong>de</strong>n. Der<strong>VC320</strong> kann mit allen Sen<strong>de</strong>rn <strong>de</strong>s <strong>Centronic</strong> Steuerungsprogramms angesteuertwer<strong>de</strong>n.5
BedienungsanleitungBestimmungsgemäße VerwendungDer <strong>VC320</strong> darf nur für die Ansteuerung von Rollla<strong>de</strong>nanlagen verwen<strong>de</strong>t wer<strong>de</strong>n.• Bitte beachten Sie, dass Funkanlagen nicht in Bereichen mit erhöhtem Störungsrisikobetrieben wer<strong>de</strong>n dürfen (z.B. Krankenhäuser, Flughäfen).• Die Fernsteuerung ist nur für Geräte und Anlagen zulässig, bei <strong>de</strong>nen eineFunktionsstörung im Handsen<strong>de</strong>r o<strong>de</strong>r Empfänger keine Gefahr für Personen,Tiere o<strong>de</strong>r Sachen ergibt o<strong>de</strong>r dieses Risiko durch an<strong>de</strong>re Sicherheitseinrichtungenabge<strong>de</strong>ckt ist.• Der Betreiber genießt keinerlei Schutz vor Störungen durch an<strong>de</strong>re Fernmel<strong>de</strong>anlagenund En<strong>de</strong>inrichtungen (z.B. auch durch Funkanlagen, die ordnungsgemäßim gleichen Frequenzbereich betrieben wer<strong>de</strong>n).• Funkempfänger nur mit vom Hersteller zugelassenen Geräten und Anlagenverbin<strong>de</strong>n.HinweisAchten Sie dar<strong>auf</strong>, dass die Steuerung nicht im Bereich metallischerFlächen o<strong>de</strong>r magnetischer Fel<strong>de</strong>r installiert und betrieben wird.Funkanlagen, die <strong>auf</strong> <strong>de</strong>r gleichen Frequenz sen<strong>de</strong>n, können zur Störung<strong>de</strong>s Empfangs führen.Es ist zu beachten, dass die Reichweite <strong>de</strong>s Funksignals durch <strong>de</strong>n Gesetzgeberund die baulichen Maßnahmen begrenzt ist.6
AnschlussVorsichtVerletzungsgefahr durch Stromschlag.Anschluss nur durch eine Elektrofachkraft!Achten Sie bei <strong>de</strong>r Montage <strong>de</strong>s Rollla<strong>de</strong>ns immer dar<strong>auf</strong>, dass die Leitungennicht bei Betrieb <strong>de</strong>r Anlage beschädigt wer<strong>de</strong>n können. DeckenSie scharfe Kanten, über die das Kabel geführt wird, mit entsprechen<strong>de</strong>mSchutzband ab. Bei eventuellen Beschädigungen <strong>de</strong>r Leitungendarf ein Austausch dieser nur durch <strong>de</strong>n Hersteller erfolgen.Wird mehr als ein Antrieb über <strong>de</strong>r <strong>VC320</strong> angesteuert, müssen dieAntriebe durch Relaissteuerungen entkoppelt wer<strong>de</strong>n. Diese Entkopplungentfällt bei <strong>Becker</strong>Antrieben mit elektronischer Endabschaltung.Beachten Sie <strong>de</strong>n Schaltstrom <strong>de</strong>s Gerätes.DEGBFRNL7
BedienungsanleitungSchließen Sie <strong>de</strong>n <strong>VC320</strong> wie folgt an:PENLNetz230V / 50 Hz8
Schließen Sie <strong>de</strong>n Rohrantrieb wie folgt an:RohrantriebDichtungsringDEGBFRNLLernen Sie einen Sen<strong>de</strong>r in <strong>de</strong>n Empfänger ein (siehe Kapitel „Einlernen <strong>de</strong>sFunks“)HinweisAchten Sie <strong>auf</strong> optimalen Funkempfang.Überprüfen Sie die Drehrichtung <strong>de</strong>s Rohrantriebes. Sollte die Drehrichtungnicht stimmen, tauschen Sie die Anschlussdrähte ▲ und ▼ <strong>de</strong>sRohrantriebes.9
Bedienungsanleitung2) ZwischenpositionHinweisDie Zwischenposition ist eine frei wählbare Position <strong>de</strong>s Rollla<strong>de</strong>ns,zwischen <strong>de</strong>r oberen und unteren Endlage. Vor <strong>de</strong>m Einstellen <strong>de</strong>r Zwischenpositionmüssen bei<strong>de</strong> Endlagen eingestellt sein.Die Zwischenposition wird aus <strong>de</strong>r oberen Endlage angefahren.2a) Einstellen <strong>de</strong>r Zwischenposition1. Fahren Sie <strong>de</strong>n Behang aus <strong>de</strong>r oberen Endlage in die gewünschte Zwischenposition.2. Drücken Sie nun zuerst die STOPPTaste und innerhalb 3 Sekun<strong>de</strong>n zusätzlichdie ABTaste und halten Sie die bei<strong>de</strong>n Tasten gedrückt.Die Quittierung erfolgt durch ein „Nicken“ <strong>de</strong>s Behanges.Die Zwischenposition wur<strong>de</strong> gespeichert.2b) Anfahren <strong>de</strong>r Zwischenposition1. Drücken Sie 2 mal die ABTaste innerhalb einer Sekun<strong>de</strong>.Der Behang fährt in die Zwischenposition.2c) Löschen <strong>de</strong>r Zwischenposition1. Fahren Sie <strong>de</strong>n Behang in die Zwischenposition.2. Drücken Sie nun zuerst die STOPPTaste und innerhalb 3 Sekun<strong>de</strong>n zusätzlichdie ABTaste und halten Sie die bei<strong>de</strong>n Tasten gedrückt.Die Quittierung erfolgt durch ein „Nicken“ <strong>de</strong>s Behanges.Die Zwischenposition wur<strong>de</strong> gelöscht.12
3) LüftungspositionHinweisMit dieser Funktion können Sie <strong>de</strong>n Rollla<strong>de</strong>n aus <strong>de</strong>r unteren Endlagesoweit wie<strong>de</strong>r Auffahren, dass die Lüftungsschlitze geöffnet wer<strong>de</strong>n.Vor <strong>de</strong>m Einstellen <strong>de</strong>r Lüftungsposition müssen bei<strong>de</strong> Endlagen eingestelltsein.Die Lüftungsposition wird aus <strong>de</strong>r unteren Endlage angefahren.3a) Einstellen <strong>de</strong>r Lüftungsposition1. Fahren Sie <strong>de</strong>n Behang aus <strong>de</strong>r unteren Endlage in die gewünschte Lüftungsposition.2. Drücken Sie nun zuerst die STOPPTaste und innerhalb 3 Sekun<strong>de</strong>n zusätzlichdie AUFTaste und halten Sie die bei<strong>de</strong>n Tasten gedrückt.Die Quittierung erfolgt durch ein „Nicken“ <strong>de</strong>s Behanges.Die Lüftungsposition wur<strong>de</strong> gespeichert.3b) Anfahren <strong>de</strong>r Lüftungsposition1. Drücken Sie 2 mal die AUFTaste innerhalb einer Sekun<strong>de</strong>.Der Behang fährt in die Lüftungsposition.3c) Löschen <strong>de</strong>r Lüftungsposition1. Fahren Sie <strong>de</strong>n Behang in die Lüftungsposition.2. Drücken Sie nun zuerst die STOPPTaste und innerhalb 3 Sekun<strong>de</strong>n zusätzlichdie AUFTaste und halten Sie die bei<strong>de</strong>n Tasten gedrückt.Die Quittierung erfolgt durch ein „Nicken“ <strong>de</strong>s Behanges.Die Lüftungsposition wur<strong>de</strong> gelöscht.DEGBFRNL13
Bedienungsanleitung4) Sen<strong>de</strong>r löschen4a) Sen<strong>de</strong>r einzeln löschenHinweisDer unter 1a) eingelernte Mastersen<strong>de</strong>r kann nicht gelöscht wer<strong>de</strong>n.Er kann nur überschrieben wer<strong>de</strong>n (siehe Punkt 5).1. Drücken Sie die Lerntaste am Mastersen<strong>de</strong>r für 3 Sekun<strong>de</strong>n.Die Quittierung erfolgt durch ein „Nicken“ <strong>de</strong>s Behanges.2. Jetzt drücken Sie die Lerntaste <strong>de</strong>s zu löschen<strong>de</strong>n Sen<strong>de</strong>rs für 3 Sekun<strong>de</strong>nDie Quittierung erfolgt durch ein „Nicken“ <strong>de</strong>s Behanges.3. Anschließend drücken Sie noch einmal die Lerntaste <strong>de</strong>s zu löschen<strong>de</strong>n Sen<strong>de</strong>rsfür 10 Sekun<strong>de</strong>nDie Quittierung erfolgt durch ein „Nicken“ <strong>de</strong>s Behanges.Der Sen<strong>de</strong>r wur<strong>de</strong> aus <strong>de</strong>m <strong>VC320</strong> gelöscht.4b) Alle Sen<strong>de</strong>r löschen (außer Mastersen<strong>de</strong>r)1. Drücken Sie die Lerntaste am Mastersen<strong>de</strong>r für 3 Sekun<strong>de</strong>n.Die Quittierung erfolgt durch ein „Nicken“ <strong>de</strong>s Behanges.2. Drücken Sie noch einmal die Lerntaste am Mastersen<strong>de</strong>r für 3 Sekun<strong>de</strong>n.Die Quittierung erfolgt durch ein „Nicken“ <strong>de</strong>s Behanges.3. Drücken Sie noch einmal die Lerntaste am Mastersen<strong>de</strong>r für 10 Sekun<strong>de</strong>n.Die Quittierung erfolgt durch ein „Nicken“ <strong>de</strong>s Behanges.Alle Sen<strong>de</strong>r (außer Mastersen<strong>de</strong>r) wur<strong>de</strong>n aus <strong>de</strong>m Empfänger gelöscht14
5) Master überschreiben1. Schalten Sie die Spannungsversorgung <strong>de</strong>s <strong>VC320</strong> aus und nach 10 Sekun<strong>de</strong>nwie<strong>de</strong>r ein.Der <strong>VC320</strong> geht für 3 Minuten in Lernbereitschaft.HinweisDamit <strong>de</strong>r neue Mastersen<strong>de</strong>r nur in <strong>de</strong>n gewünschten <strong>VC320</strong> eingelerntwird, müssen Sie alle an<strong>de</strong>ren Empfänger, die mit an <strong>de</strong>r gleichenSpannungsversorgung angeschlossen sind, aus <strong>de</strong>r Lernbereitschaftbringen.Nach Wie<strong>de</strong>reinschalten <strong>de</strong>r Spannung führen Sie dazu mit <strong>de</strong>m Sen<strong>de</strong>rdieser Empfänger einen Fahr o<strong>de</strong>r StoppBefehl aus.2. Jetzt drücken Sie die Lerntaste <strong>de</strong>s neuen Mastersen<strong>de</strong>rs für 10 Sekun<strong>de</strong>n.Die Quittierung erfolgt durch ein „Nicken“ <strong>de</strong>s Behanges.Der neue Mastersen<strong>de</strong>r wur<strong>de</strong> eingelernt und <strong>de</strong>r alte Mastersen<strong>de</strong>r wur<strong>de</strong> gelöscht.6) Programmieren <strong>de</strong>r FahrzeitenHinweisDiese Funktion ist nur mit <strong>de</strong>n Sen<strong>de</strong>rn MemoControl MC441 und MC411<strong>de</strong>s <strong>Becker</strong>SteuerungsProgrammes <strong>Centronic</strong> möglich.Der <strong>VC320</strong> kann die Schaltzeit für eine AUF und ABBewegung speichern.In <strong>de</strong>r Schiebeschalterstellung „“ wird diese Rollla<strong>de</strong>nbewegung alle 24 Stun<strong>de</strong>nwie<strong>de</strong>rholt.Die Stellung <strong>de</strong>s /Schiebeschalters ist beim Lernen <strong>de</strong>r Schaltzeit unerheblich.Zuvor gespeicherte Schaltzeiten wer<strong>de</strong>n ggf. überschrieben.1. Ggf. <strong>de</strong>n Rollla<strong>de</strong>n in die entgegengesetzte Endlage steuern.2. Warten bis zur gewünschten Zeit, zu <strong>de</strong>r <strong>de</strong>r automatische Fahrbefehl ausgeführtwer<strong>de</strong>n soll.3. Zum gewünschten Zeitpunkt die entsprechen<strong>de</strong> Richtungstaste betätigenund gedrückt halten bis <strong>de</strong>r Rollla<strong>de</strong>nantrieb nach ca. 6 Sekun<strong>de</strong>n kurzstoppt und anschließend bis zur Endlage weiterläuft.4. Richtungstaste loslassen.Der <strong>VC320</strong> hat <strong>de</strong>n aktuellen Zeitpunkt für diese Bewegungsrichtung gespeichert.DEGBFRNL15
Bedienungsanleitung7) Löschen <strong>de</strong>r FahrzeitenHinweisBeim Löschvorgang wer<strong>de</strong>n immer bei<strong>de</strong> Fahrzeiten gelöscht.Um die AUF und ABFahrzeit zu löschen, drücken Sie die STOPPTaste für 10Sekun<strong>de</strong>n.Die Quittierung erfolgt durch ein „Nicken“ <strong>de</strong>s Behanges.Die Fahrzeiten sind gelöscht.Technische DatenNennspannung230240 V AC / 50 HzSchaltstrom 5 A /230240 V AC bei cos ϕ =1Schutzart IP 42Schutzklasse(nur nach bestimmungsgemäßer Montage) IIZulässige Umgebungstemperatur 25 °C bis +55 °CFunkfrequenz868,3 MHzMontageartIm Rollla<strong>de</strong>nkasten16
Was tun, wenn...?Störung Ursache BeseitigungAntrieb läuft nicht. Falscher Anschluss. Anschluss prüfen.Antrieb läuft in diefalsche RichtungDer <strong>VC320</strong> führtmanuelle Fahrbefehlenicht aus.Der <strong>VC320</strong> führtautomatische Fahrbefehlenicht aus.<strong>VC320</strong> nimmt keineSchaltzeiten an.Rohrantrieb fährtnicht zu <strong>de</strong>r eingestelltenSchaltzeit.Eingestellte Schaltzeitenän<strong>de</strong>rn sich.Falscher AnschlußSen<strong>de</strong>r ist nicht im <strong>VC320</strong>eingelernt.1. Sen<strong>de</strong>r ist nicht im<strong>VC320</strong> eingelernt.2. Schiebeschalter <strong>de</strong>sSen<strong>de</strong>rs steht <strong>auf</strong> .Eingelernter Sen<strong>de</strong>r hatkeinen / Schiebeschalter.1. / Schiebeschalterin Position .2. Mehrere Schiebeschalter-Sen<strong>de</strong>rsind in <strong>de</strong>nRohrantrieb eingelernt.Ein / Schiebeschaltersteht <strong>auf</strong> .Häufige 230VAC-Netzunterbrechungen.Schwankungenin <strong>de</strong>r50 Hz-Netzfrequenz.Drähte ▲ und tauschen.Sen<strong>de</strong>r einlernen.1. Sen<strong>de</strong>r einlernen.2. Stellen Sie <strong>de</strong>n Schiebeschalter<strong>de</strong>s Sen<strong>de</strong>rs<strong>auf</strong> .Sen<strong>de</strong>r mit /-Schiebeschalterverwen<strong>de</strong>n.1. / Schiebeschalterin Position schieben.2. An einem Sen<strong>de</strong>r <strong>de</strong>nSchiebeschalter von <strong>auf</strong> stellen. Steht <strong>de</strong>rSchiebeschalter schon<strong>auf</strong> , so muss <strong>auf</strong> und wie<strong>de</strong>r zurück <strong>auf</strong> gestellt wer<strong>de</strong>n.DEGBFRNL17
Operating InstructionsContentsWarranty ................................................................................................ 18Safety instructions ................................................................................. 19General information ............................................................................... 19Designated use ...................................................................................... 20Installation ............................................................................................. 21Assembly ............................................................................................... 24Technical data ........................................................................................ 30What to do if...? ....................................................................................... 31Warranty<strong>Becker</strong>Antriebe GmbH will be released from all warranty and product liabilityobligations if the customer modifies the equipment without prior approval from<strong>Becker</strong>Antriebe GmbH or if the equipment is installed incorrectly and/or contraryto the specified installation instructions, by the customer or a third party.Any further processing must comply with all current statutory and official regulationsgoverning manufacture and advice to customers, especially the EMCregulations.This product is subject to technical <strong>de</strong>velopments and improvements. Pleaserefer to the current sales brochure for the precise product specifications.18
Safety instructionsWarning!• Risk of injury by electric shock.• All electrical installations to a 230 V power network must be performedby an authorised electrician.• Before assembly, disconnect the power lead from the supply.• When installing the system, the provisions set down by local publicutilities and the stipulations for wet and damp rooms in accordancewith VDE 100 must be observed.• For use in dry rooms only.• Use unmodified <strong>Becker</strong> original parts only.• Keep persons away from the systems gui<strong>de</strong> track.• Keep children away from controls.• Always comply with relevant national stipulations.• If the system is controlled by one or more <strong>de</strong>vices, the system gui<strong>de</strong>track must be visible during operation.DEGBFRNLGeneral informationThe <strong>VC320</strong>, as supplied ex works, converts radio signals into control signals andcan be used to control a mainsconnected drive. The <strong>VC320</strong> can be operatedwith any transmitter from the <strong>Centronic</strong> range.19
Operating InstructionsThe <strong>VC320</strong> may be used to operate roller shutters only.• Please note that radiocontrolled systems may not be used in areas with ahigh risk of interference (e.g. hospitals, airports).• The remote control is inten<strong>de</strong>d solely for use with equipment and systems inwhich malfunctions in the handheld transmitter or receiver would not poseany risk to persons, animals or property or which contain safety <strong>de</strong>vices toeliminate such risks.• The operator is not protected from interference from other telecommunicationssystems and terminal equipment (e.g. even from radiocontrolled systemswhich are properly operated in the same frequency range).• Radio receivers may only be used in combination with equipment and systemsstipulated in manufacturers’ specifications.NoteDesignated useEnsure that the system is not installed and operated close to metal surfacesor magnetic fields.Radio base systems transmitting in the same frequency range maycause reception interference.Please not that the operating range of the radio signal is limited by legislationas well as by product <strong>de</strong>sign.20
InstallationCautionRisk of injury by electric shock!All electrical installations must be performed by an authorised electrician!When installing the roller shutter, always ensure that there is no risk ofthe wiring being damaged when the system is in operation. Any sharpedges which the cable comes into contact with must be covered withsuitable protective band. Damaged wiring may be replaced by the manufactureronly.If the <strong>VC320</strong> is used to operate more than one drive, the drives must be<strong>de</strong>coupled by relay controls. This does not apply to <strong>Becker</strong> drives withelectronic limit switches.The switched current of the <strong>de</strong>vice must be observed at all times.DEGBFRNL21
Operating InstructionsConnect the <strong>VC320</strong> as shown below:PENLMains230V / 50 Hz22
Connect the tubular drive as shown below:Tubular driveSealing washerDEGBFRNLProgramme one transmitter in the receiver (See section on “Programming radiochannels”)NoteEnsure that optimum radio reception is achieved.Check the rotation direction of the tubular drive. If the rotation directionis incorrect, the connecting wires ▲ and ▼ of the tubular drive must bechanged round.23
Operating InstructionsAssemblyMounting bracketDepth: 20 mmThere are 2 possible ways to install the <strong>de</strong>vice:a) The <strong>VC320</strong> can be mounted using the mounting brackets shown. To do so,two screws (Ø 3 mm) are required.b) The <strong>VC320</strong> can be mounted using the adhesive pads provi<strong>de</strong>d.NoteAlways ensure that the contact spot for the adhesive pads is dry, cleanand nongreasy.24
1) Programming radio channels1. Connect the <strong>VC320</strong> to the power supply.2. Now switch on the power supply.3. The <strong>VC320</strong> goes into programming mo<strong>de</strong> for 3 minutes.1a) Programming master transmitterWhen the receiver is in programming mo<strong>de</strong>, press the programming button onthe transmitter and hold for 3 seconds.The shutter will make a slight movement to confirm programming, i.e. the shuttercurtain will move a few centimetres.This confirmation is referred to as “nodding” in the rest of the operating instructions.When the shutter “nods”, this signifies that the programming process has beensuccessfully completed.NoteIf a transmitter has already been programmed in the receiver, press theprogramming button and hold for 10 seconds.1b) Programming additional transmittersNoteIn addition to the master transmitter, up to 15 further transmitters canbe programmed in the <strong>VC320</strong>.1. Press the programming button of the master transmitter programmed in point1a) for 3 seconds.The shutter will “nod” to confirm.2. Now press the programming button of a new transmitter which has not yetbeen programmed in the <strong>VC320</strong> and hold for 3 seconds. Doing so activatesthe programming mo<strong>de</strong> of the <strong>VC320</strong> for a new transmitter for 3 minutes.The shutter will “nod” to confirm.3. Now press the programming button of the new transmitter which you wish toprogramme for a further 3 seconds.The shutter will “nod” to confirm.The new transmitter has been successfully programmed in the receiver.DEGBFRNL25
Operating Instructions2) Intermediate positionNoteThe intermediate position can be set at any given position and lies betweenthe upper and lower final positions of the shutter. The intermediateposition can only be set after the two final positions have been set.The shutter is adjusted into the intermediate position from the upperfinal position.2a) Setting the intermediate position1. Adjust the shutter from the upper final position into the <strong>de</strong>sired intermediateposition.2. Now press and hold the STOP button. Within 3 seconds also press the DOWNbutton and keep both buttons pressed.The shutter will “nod” to confirm.The intermediate position has been stored.2b) Adjusting the shutter into the intermediate position1. Press the DOWN button twice within one second.The shutter will move into the intermediate position.2c) Deleting the intermediate position1. Adjust the shutter into the intermediate position.2. Now press and hold the STOP button. Within 3 seconds also press the DOWNbutton and keep both buttons pressed.The shutter will “nod” to confirm.The intermediate position has been <strong>de</strong>leted.26
3) Ventilation positionNoteThis function is used to move your roller shutters from the lower finalposition upwards in or<strong>de</strong>r to open the ventilation slats. The ventilationposition can only be set after the two final positions have been set.The shutter is adjusted into the ventilation position from the lower final position.3a) Setting the ventilation position1. Adjust the shutter into the <strong>de</strong>sired ventilation position from the lower final position.2. Now press and hold the STOP button. Within 3 seconds also press the UPbutton and keep both buttons pressed.The shutter will “nod” to confirm.The ventilation position has been stored.3b) Adjusting the shutter into the ventilation position1. Press the UP button twice within one second.The shutter will move into the ventilation position.3c) Deleting the ventilation position1. Adjust the shutter into the ventilation position.2. Now press and hold the STOP button. Within 3 seconds also press the UPbutton and keep both buttons pressed.The shutter will “nod” to confirm.The ventilation position has been <strong>de</strong>leted.DEGBFRNL27
Operating Instructions4) Deleting transmitters4a) Deleting transmitters individuallyNoteThe master transmitter which was programmed in point 1a) cannot be<strong>de</strong>leted. It can only be overwritten (see Point 5).1. Press the programming button on the master transmitter for 3 seconds.The shutter will “nod” to confirm.2. Now press the programming button of the transmitter to be <strong>de</strong>leted for 3 seconds.The shutter will “nod” to confirm.3. Then press the programming button of the transmitter to be <strong>de</strong>leted for afurther 10 seconds.The shutter will “nod” to confirm.The transmitter has been <strong>de</strong>leted from the <strong>VC320</strong>.4b) Deleting all transmitters (except master transmitter)1. Press the programming button on the master transmitter for 3 seconds.The shutter will “nod” to confirm.2. Press the programming button on the master transmitter for a further 3 seconds.The shutter will “nod” to confirm.3. Press the programming button on the master transmitter for a further 10 seconds.The shutter will “nod” to confirm.All transmitters (except master transmitter) have been <strong>de</strong>leted from the receiver.28
5) Overwriting the master transmitter1. Turn off the power supply to the <strong>VC320</strong> and switch back on after 5 seconds.The <strong>VC320</strong> goes into programming mo<strong>de</strong> for 3 minutes.NoteTo ensure that the new master transmitter is programmed in the <strong>de</strong>sired<strong>VC320</strong> only, all other receivers which are connected to the same powersupply must be <strong>de</strong>activated from the programming mo<strong>de</strong>.To do so, after switching back on the power supply, execute a control orstop command using the transmitter for the given receivers.2. Now press the programming button of the new master transmitter for 10 seconds.The shutter will “nod” to confirm.The new master transmitter has been programmed and the old master transmitter<strong>de</strong>leted.146) Programming switching timesNoteThis function is only available with the transmitters MemoControlMC441 and MC411, which can be found in the <strong>Centronic</strong> range from<strong>Becker</strong>.The <strong>VC320</strong> can store switching times for one UP and DOWN command.If the sliding switch is set to auto ““, this command is repeated every 24hours.The / position for the sliding switch is unimportant when programming theswitching time. All previously stored switching times are overwritten accordingly.1. If necessary, adjust your roller shutter into the final position opposite to the<strong>de</strong>sired running direction.2. Wait until the time at which the automatic control command is to be executed.3. At the <strong>de</strong>sired time, press the <strong>de</strong>sired direction key and hold down until theroller shutter drive stops briefly after approximately 6 seconds and thenmoves into the final position.4. Release the direction key.The <strong>VC320</strong> will automatically store the current time for this control command.DEGBFRNL29
Operating Instructions7) Deleting switching timesNoteBoth switching times are always <strong>de</strong>leted in this process.In or<strong>de</strong>r to <strong>de</strong>lete the UP and DOWN switching times, press the STOP buttonfor 10 seconds.The shutter will “nod” to confirm.The switching times have been <strong>de</strong>leted.Technical dataNominal voltage230240 V AC / 50 HzSwitched current 5 A /230240 V AC for cos ϕ =1System of protection IP 42Protection rating(provi<strong>de</strong>d the <strong>de</strong>vice has been properlyinstalled in accordance with the specifications) IIPermissible ambient temperature Between 25 °C and +55 °COperating frequency868.3 MHzType of installationIn roller shutter box30
What to do if...?Malfunction Cause SolutionDrive is not running. Faulty connection. Check connection.Drive is running inthe wrong direction.The <strong>VC320</strong> doesnot execute manualcontrol commands.The <strong>VC320</strong> does notexecute automaticcontrol commands.<strong>VC320</strong> will not acceptswitching times.Tubular drive doesnot run at the pre-setswitching time.Programmed switchingtimes change.Faulty connection.Transmitter is not programmedin the <strong>VC320</strong>.1. Transmitter is not programmedin the <strong>VC320</strong>.2. Sliding switch of thetransmitter is set tomanual .Programmed transmitterhas no manual/auto /sliding switch.1. Manual/auto /sliding switch is set tomanual .2. Several sliding switchtransmitters are programmedin the tubulardrive. One manual/auto/ sliding switch is setto manual .Frequent power interruptionsin 230 VACpower supply. Variationsin the 50 Hz power-linefrequency.Change round ▲ and wires.Programme transmitter.1. Programme transmitter.2. Set the sliding switchof the transmitter toauto U.Use transmitter withmanual/auto / slidingswitch.1. Set manual/auto /sliding switch to auto .2. Adjust the slidingswitch on one of thetransmitters from manual to auto . If the slidingswitch is already set toauto , adjust the switchto manual briefly andback to auto .DEGBFRNL31
Notice d‘utilisationSommairePrestation <strong>de</strong> Garantie ............................................................................ 32Consignes <strong>de</strong> sécurité ............................................................................ 33Généralités ............................................................................................ 33Utilisation conforme aux prescriptions .................................................... 34Branchement ......................................................................................... 35Montage ................................................................................................ 38Caractéristiques techniques ................................................................... 44Que faire si… ? ....................................................................................... 45Prestation <strong>de</strong> Garantie<strong>Becker</strong>Antriebe GmbH est dégagé <strong>de</strong> la garantie et <strong>de</strong> la responsabilité du faitdu produit si, sans notre autorisation préalable, <strong>de</strong>s modifications <strong>de</strong> constructionsont effectuées et/ou <strong>de</strong>s installations inadéquates sont exécutées ou engagées,à l‘encontre <strong>de</strong> nos directives <strong>de</strong> montage prescrites.L‘utilisateur / l‘électricien doit veiller à ce que toutes les consignes et prescriptionsen vigueur, particulièrement celles en matière <strong>de</strong> compatibilité électromagnétique,soient respectées.Le présent produit est soumis à <strong>de</strong>s développements et perfectionnementstechniques, informezvous dans les documents <strong>de</strong> vente actuels au sujet <strong>de</strong>sspécifications <strong>de</strong> produit précises.32
Pru<strong>de</strong>nce !Consignes <strong>de</strong> sécurité• Risque <strong>de</strong> blessure pouvant être provoqué par <strong>de</strong>s décharges électriques.• Les branchements au réseau 230 V doivent obligatoirement être effectuéspar un électricien autorisé.• Coupez l’alimentation du câble <strong>de</strong> branchement avant <strong>de</strong> procé<strong>de</strong>rau montage.• Observez lors du branchement les prescriptions <strong>de</strong>s entreprisesd’approvisionnement en énergie locales ainsi que les directives pourlocaux humi<strong>de</strong>s et immergés selon VDE 100.• A utiliser uniquement dans <strong>de</strong>s locaux secs.• Utilisez uniquement <strong>de</strong>s pièces originales <strong>de</strong> <strong>Becker</strong> n’ayant subiaucune modification.• Veillez à ce que personne ne se tienne dans la zone <strong>de</strong> déploiement<strong>de</strong>s installations• Tenez les enfants à l’écart <strong>de</strong>s comman<strong>de</strong>s.• Observez les directives spécifiques <strong>de</strong> votre pays.• Lorsque l’installation est pilotée par un ou plusieurs appareils, lazone <strong>de</strong> déploiement <strong>de</strong> l’installation doit être visible pendant l’utilisation.GénéralitésLe <strong>VC320</strong> livré par l’usine transforme les signaux radio en signaux <strong>de</strong> comman<strong>de</strong>.Un moteur filaire peut être commandé par radio avec le <strong>VC320</strong>. Le <strong>VC320</strong>peut être piloté avec tous les émetteurs du programme <strong>de</strong> comman<strong>de</strong>s <strong>Centronic</strong>.DEGBFRNL33
Notice d‘utilisationUtilisation conforme aux prescriptionsLe <strong>VC320</strong> doit être utilisé exclusivement pour la comman<strong>de</strong> d’installations <strong>de</strong>volets roulants.• Sachez qu’il est interdit d’utiliser les installations radio dans les zones où lerisque <strong>de</strong> perturbations est élevé (p. ex. hôpitaux, aéroports).• La comman<strong>de</strong> à distance n’est autorisée que pour les appareils et installationspour lesquels une perturbation fonctionnelle dans la télécomman<strong>de</strong> oudans le récepteur ne constitue aucun danger pour les personnes, les animauxou les choses ou pour lesquels ce risque est éliminé grâce à d’autresdispositifs <strong>de</strong> sécurité.• L’exploitant n’est en aucun cas protégé contre les perturbations provoquéespar d’autres installations <strong>de</strong> télécommunication et <strong>de</strong> dispositifs terminaux(par ex. par <strong>de</strong>s installations radio qui sont utilisées <strong>de</strong> manière conformedans la même plage <strong>de</strong> fréquence).• Combinez les récepteurs radio uniquement avec <strong>de</strong>s appareils et <strong>de</strong>s installationsautorisés par le fabricant.RemarqueVeillez à ce que la comman<strong>de</strong> ne soit pas installée et utilisée dans unezone métallique ou <strong>de</strong> champs magnétiques.Les installations radio qui émettent sur la même fréquence peuventcauser une perturbation <strong>de</strong> la réception.Sachez que la portée du signal radio est limitée par la législation et parles mesures relatives à la construction34
BranchementPru<strong>de</strong>nceRisque <strong>de</strong> blessure pouvant être provoqué par <strong>de</strong>s décharges électriques.Le branchement doit obligatoirement être effectué par un électricienautorisé !Lors du montage du volet roulant, veillez toujours à ce que les câblesne soient pas endommagés lors du fonctionnement <strong>de</strong> l’installation.Recouvrez les bords tranchants sur lesquels le câble est posé avec uneban<strong>de</strong> <strong>de</strong> protection appropriée.En cas d’un éventuel endommagement <strong>de</strong>s câbles, leur remplacementne peut être effectué que par le fabricant.Si la <strong>VC320</strong> assure la comman<strong>de</strong> <strong>de</strong> plus d’un moteur, les moteurs doiventêtre découplés par <strong>de</strong>s relais. Ce découplement n’est pas nécessairepour les moteurs <strong>Becker</strong> avec fin <strong>de</strong> course électronique.Vérifiez le courant <strong>de</strong> commutation <strong>de</strong> l’appareil.DEGBFRNL35
Notice d‘utilisationBranchez le <strong>VC320</strong> <strong>de</strong> la manière suivante :PENLRéseau230V / 50 Hz36
Branchez le moteur tubulaire <strong>de</strong> la manière suivante :moteur tubulairebague <strong>de</strong> jointDEGBFRNLProgrammez un émetteur dans le récepteur (cf. chapitre « Programmation <strong>de</strong>la radio »)RemarqueVeillez à une réception optimale <strong>de</strong> la radio.Vérifiez le sens <strong>de</strong> rotation du moteur tubulaire. Si le sens <strong>de</strong> rotationest incorrect, échangez les fils <strong>de</strong> branchement ▲ et ▼ du moteur tubulaire.37
Notice d‘utilisationMontagelanguette <strong>de</strong> fixationProfon<strong>de</strong>ur : 20 mmIl existe 2 possibilités <strong>de</strong> montage :a) Vous pouvez visser le <strong>VC320</strong> avec <strong>de</strong>ux vis Ø 3mm dans les languettes <strong>de</strong>fixation.b) Vous avez la possibilité <strong>de</strong> fixer le <strong>VC320</strong> en le collant à l’ai<strong>de</strong> <strong>de</strong>s autocollantsfournis.RemarqueVeillez à ce que la surface à coller soit sèche, propre et sans traces <strong>de</strong>graisse.38
1) Programmation <strong>de</strong> la radio1. Branchez le <strong>VC320</strong> au réseau.2. Mettez maintenant sous tension.3. Le <strong>VC320</strong> passe en mo<strong>de</strong> <strong>de</strong> programmation et y reste 3 minutes.1a) Programmation <strong>de</strong> l’émetteur maîtreAppuyez pendant 3 secon<strong>de</strong>s sur la touche <strong>de</strong> programmation <strong>de</strong> l’émetteur aucours du mo<strong>de</strong> <strong>de</strong> programmation.Le tablier acquitte le processus <strong>de</strong> programmation avec un mouvement,c’estàdire que le tablier se déplace <strong>de</strong> quelques centimètres.Cet acquittement sera nommé à la suite « réaction ».Le processus <strong>de</strong> programmation est ainsi terminé.RemarqueSi un émetteur est déjà programmé dans le récepteur, appuyez pendant10 secon<strong>de</strong>s sur la touche <strong>de</strong> programmation.1b) Programmation d’autres émetteursRemarqueOutre l’émetteur maître, il est également possible <strong>de</strong> programmer aumaximum 15 émetteurs dans le <strong>VC320</strong>.1. Appuyez pendant 3 secon<strong>de</strong>s sur la touche <strong>de</strong> programmation <strong>de</strong> l’émetteurmaître programmé au point 1a).L’acquittement se manifeste par une « réaction » du tablier.2. Appuyez maintenant pendant 3 secon<strong>de</strong>s sur la touche <strong>de</strong> programmationd’un nouvel émetteur que le <strong>VC320</strong> ne connaît pas encore. Vous activez ainsipendant 3 minutes le mo<strong>de</strong> <strong>de</strong> programmation du <strong>VC320</strong> pour un nouvelémetteur.L’acquittement se manifeste par une « réaction » du tablier.3. Appuyez maintenant pendant 3 secon<strong>de</strong>s une nouvelle fois sur la touche <strong>de</strong>programmation d’un nouvel émetteur que vous souhaitez programmer.L’acquittement se manifeste par une « réaction » du tablier.Le nouvel émetteur est maintenant programmé.DEGBFRNL39
Notice d‘utilisation2) Position intermédiaireRemarqueLa position intermédiaire est une position <strong>de</strong> la protection solaire quipeut être librement sélectionnée entre la position finale supérieure etla position finale inférieure. Les <strong>de</strong>ux positions finales doivent avoir étéprogrammées avant la programmation <strong>de</strong> la position intermédiaire.Cette position est atteinte à partir <strong>de</strong> la position finale supérieure.2a) Programmation <strong>de</strong> la position intermédiaire1. Déplacez le tablier <strong>de</strong> la position finale supérieure vers la position intermédiairesouhaitée.2. Appuyez tout d’abord sur la touche STOP et à la fois sur la touche DESCENTEen l’espace <strong>de</strong> 3 secon<strong>de</strong>s et maintenez les <strong>de</strong>ux touches enfoncées.L’acquittement se manifeste par une « réaction » du tablier.La position intermédiaire a été mémorisée.2b) Amener le volet roulant en position intermédiaire1. Appuyez <strong>de</strong>ux fois sur la touche DESCENTE en l’espace d’une secon<strong>de</strong>.Le tablier se déplace vers la position intermédiaire.2c) Effacer la position intermédiaire1. Amenez le volet roulant en position intermédiaire.2. Appuyez tout d’abord sur la touche STOP et à la fois sur la touche DESCENTEen l’espace <strong>de</strong> 3 secon<strong>de</strong>s et maintenez les <strong>de</strong>ux touches enfoncées.L’acquittement se manifeste par une « réaction » du tablier.La position intermédiaire a été effacée.40
3) Position d’aérationRemarqueCette fonction vous permet <strong>de</strong> remonter le volet roulant à partir <strong>de</strong>la position finale inférieure <strong>de</strong> manière à ce que les fentes d’aérationpuissent s’ouvrir. Les <strong>de</strong>ux positions finales doivent avoir été programméesavant la programmation <strong>de</strong> la position d’aération.La position d’aération est atteinte à partir <strong>de</strong> la position finale inférieure.3a) Programmation <strong>de</strong> la position d’aération1. Déplacez le tablier <strong>de</strong> la position finale inférieure vers la position d’aérationsouhaitée.2. Appuyez tout d’abord sur la touche STOP et à la fois sur la touche MONTEEen l’espace <strong>de</strong> 3 secon<strong>de</strong>s et maintenez les <strong>de</strong>ux touches enfoncées.L’acquittement se manifeste par une « réaction » du tablier.La position d’aération a été mémorisée.3b) Amener le volet roulant en position d’aération1. Appuyez <strong>de</strong>ux fois sur la touche MONTEE en l’espace d’une secon<strong>de</strong>.Le tablier se déplace vers la position d’aération.3c) Effacer la position d’aération1. Amenez le volet roulant en position d’aération.2. Appuyez tout d’abord sur la touche STOP et à la fois sur la touche MONTEEen l’espace <strong>de</strong> 3 secon<strong>de</strong>s et maintenez les <strong>de</strong>ux touches enfoncées.L’acquittement se manifeste par une « réaction » du tablier.La position d’aération a été effacée.DEGBFRNL41
Notice d‘utilisation4) Effacement <strong>de</strong>s émetteurs4a) Effacer les émetteurs un à unRemarqueL’émetteur maître programmé au point 1a) ne peut pas être effacé. Ilpeut seulement être remplacé (cf. point 5).1. Appuyez pendant 3 secon<strong>de</strong>s sur la touche <strong>de</strong> programmation <strong>de</strong> l’émetteurmaître.L’acquittement se manifeste par une « réaction » du tablier.2. Appuyez maintenant pendant 3 secon<strong>de</strong>s sur la touche <strong>de</strong> l’émetteur quevous souhaitez effacer.L’acquittement se manifeste par une « réaction » du tablier.3. Appuyez ensuite une nouvelle fois pendant 10 secon<strong>de</strong>s sur la touche <strong>de</strong>l’émetteur que vous souhaitez effacer.L’acquittement se manifeste par une « réaction » du tablier.L’émetteur a été effacé du <strong>VC320</strong>.4b) Effacer tous les émetteurs (à l’exception <strong>de</strong> l’émetteur maître)1. Appuyez pendant 3 secon<strong>de</strong>s sur la touche <strong>de</strong> programmation <strong>de</strong> l’émetteurmaître.L’acquittement se manifeste par une « réaction » du tablier.2. Appuyez une nouvelle fois pendant 3 secon<strong>de</strong>s sur la touche <strong>de</strong> programmation<strong>de</strong> l’émetteur maître.L’acquittement se manifeste par une « réaction » du tablier.3. Appuyez une nouvelle fois pendant 10 secon<strong>de</strong>s sur la touche <strong>de</strong> programmation<strong>de</strong> l’émetteur maître.L’acquittement se manifeste par une « réaction » du tablier.Tous les émetteurs (à l’exception <strong>de</strong> l’émetteur maître) ont été effacés du récepteur.42
5) Reprogrammation <strong>de</strong> l’émetteur maître1. Coupez le courant du <strong>VC320</strong> et remettezle sous tension après 5 secon<strong>de</strong>s.Le <strong>VC320</strong> passe en mo<strong>de</strong> <strong>de</strong> programmation et y reste 3 minutes.RemarquePour que le nouvel émetteur maître soit programmé dans le <strong>VC320</strong> souhaité,tous les autres récepteurs qui sont branchés sur le même réseaune doivent plus se trouver en mo<strong>de</strong> <strong>de</strong> programmation.Après remise sous tension, exécutez pour cela un ordre <strong>de</strong> déplacementou d’arrêt à l’ai<strong>de</strong> <strong>de</strong> l’émetteur <strong>de</strong> ces récepteurs.2. Appuyez pendant 10 secon<strong>de</strong>s sur la touche <strong>de</strong> programmation du nouvelémetteur maître.L’acquittement se manifeste par une « réaction » du tablier.Le nouvel émetteur maître a été programmé et l’ancien émetteur maître a étéeffacé.6) Programmation <strong>de</strong>s horairesRemarqueCette fonction n’est possible qu’avec les émetteurs MemoControlMC441 et MC411 du programme <strong>de</strong> comman<strong>de</strong>s <strong>Centronic</strong> <strong>de</strong> <strong>Becker</strong>.Le <strong>VC320</strong> peut mémoriser les horaires pour le déplacement <strong>de</strong> MONTEE et <strong>de</strong>DESCENTE.Lorsque le curseur est en position « », ce déplacement du volet roulant sereproduit toutes les 24 heures.La position du curseur / ne joue aucun rôle pour la programmation <strong>de</strong>s horaires.Le cas échéant, les horaires mémorisés auparavant sont remplacés.1. Si nécessaire, amener le volet roulant dans la position finale opposée.2. Atten<strong>de</strong>z l’horaire souhaité auquel l’ordre <strong>de</strong> marche automatique doit êtreeffectué.3. Actionnez au moment souhaité la touche <strong>de</strong> direction correspondante etmaintenezla enfoncée jusqu’à ce que le moteur du volet roulant s’arrêtebrièvement au bout <strong>de</strong> 6 secon<strong>de</strong>s environ et continue ensuite <strong>de</strong> se déplacerjusqu’à la position finale.4. Lâchez la touche <strong>de</strong> direction.Le <strong>VC320</strong> a mémorisé l’horaire actuel pour le sens <strong>de</strong> ce déplacement.DEGBFRNL43
Notice d‘utilisation7) Effacement <strong>de</strong>s horairesRemarqueLors du processus d’effacement, les <strong>de</strong>ux horaires sont toujours effacés.Pour effacer l’horaire <strong>de</strong> MONTEE et <strong>de</strong> DESCENTE, appuyez pendant 10 secon<strong>de</strong>ssur la touche STOP.L’acquittement se manifeste par une « réaction » du tablier.Les horaires ont été effacés.Caractéristiques techniquesTension nominale230240 V AC / 50 HzCourant <strong>de</strong> commutation 5 A /230240 V AC pour cos ϕ =1Indice <strong>de</strong> protection IP 42Classe <strong>de</strong> protection (uniquementaprès un montage conformeaux prescriptions)IITempérature ambiante admissible 25 °C à +55 °CFréquence radio868,3 MHzType <strong>de</strong> montagedans le coffre du volet roulant44
Que faire si… ?Anomalie Cause Mesure à prendreLe moteur ne fonctionnepas.Le moteur fonctionnedans la mauvaisedirection.Le <strong>VC320</strong> n’exécutepas les ordres <strong>de</strong>marche manuels.Le <strong>VC320</strong> n’exécutepas les ordres <strong>de</strong>marche automatiques.Le <strong>VC320</strong> n’accepteaucun horaire.Le moteur tubulairene se déclenchepas aux horairesprogrammés.Les horaires programméschangent.Mauvais branchement.Vérifier le branchementMauvais branchement. Echanger les fils ▲ et .L’émetteur n’est pas programmédans le <strong>VC320</strong>.1. L’émetteur n’est pasprogrammé dans le<strong>VC320</strong>.2. Le curseur / <strong>de</strong>l’émetteur se trouvesur .L’émetteur programméne possè<strong>de</strong> pas <strong>de</strong> curseur/.1. Curseur / en position.2. Plusieurs émetteurs àcurseur sont programmésdans le moteur tubulaire.Un curseur / se trouvesur .Coupures <strong>de</strong> courant230 V fréquentes. Variationsdans la fréquence <strong>de</strong>réseau 50 Hz.Programmer l’émetteur.1. Programmerl’émetteur.2. Placer le curseur /<strong>de</strong> l’émetteur sur .Utiliser un émetteur avecun curseur /.1. Placer le curseur /<strong>de</strong> l’émetteur en position.2. Faire passer le curseurd’un émetteur <strong>de</strong> à .Si le curseur se trouvedéjà sur , le replacerd’abord sur et ensuite<strong>de</strong> nouveau sur .DEGBFRNL45
GebruiksaanwijzingInhoudsopgaveGarantieverlening .................................................................................. 46Veiligheidsinstructies ............................................................................. 47Algemeen ............................................................................................. 47Reglementaire toepassing ...................................................................... 48Aansluiting ............................................................................................. 49Montage ................................................................................................ 52Technische gegevens ............................................................................. 58Wat te doen, als ...? ................................................................................. 59Garantieverlening<strong>Becker</strong>Antriebe GmbH is van <strong>de</strong> garantieverlening en <strong>de</strong> productaansprakelijkheidbevrijd, wanneer zon<strong>de</strong>r onze voorafgaan<strong>de</strong> toestemming eigenbouwkundige constructie wijzigingen zijn aangebracht en/of onvakkundigeinstallaties wor<strong>de</strong>n doorgevoerd of in opdracht wor<strong>de</strong>n gegeven, die in strijd zijnmet onze voorgeschreven montagerichtlijnen.De ver<strong>de</strong>re verwerker dient erop toe te zien dat alle voor het tot stand brengenvan en het adviseren van <strong>de</strong> consument vereiste wettelijke en officiele voorschriftenin acht wor<strong>de</strong>n genomen.Dit product is on<strong>de</strong>rhevig aan technische ontwikkelingen en verbeteringen.Voor <strong>de</strong> na<strong>de</strong>re productspecificaties verwijzen wij naar <strong>de</strong> actuele verkoopdocumentatie.46
Voorzichtig!Veiligheidsinstructies• Gevaar voor verwonding door elektrische schok.• Aansluitingen op het 230 V elektriciteitsnet moeten door een geautoriseerdvakman wor<strong>de</strong>n uitgevoerd.• Haal voor <strong>de</strong> montage <strong>de</strong> spanning van <strong>de</strong> aansluitkabel.• Bij het aansluiten dienen <strong>de</strong> voorschriften van het plaatselijke energiebedrijfalsme<strong>de</strong> <strong>de</strong> bepalingen voor natte en vochtige ruimten volgensVDE 100 te wor<strong>de</strong>n aangehou<strong>de</strong>n.• Uitsluitend in droge ruimte gebruiken.• Gebruik uitsluitend niet veran<strong>de</strong>r<strong>de</strong> originele on<strong>de</strong>r<strong>de</strong>len van <strong>Becker</strong>.• Houd personen buiten het werkgebied van <strong>de</strong> installatie.• Houd kin<strong>de</strong>ren op afstand van besturingsapparaten.• Neem <strong>de</strong> bepalingen in acht die specifiek voor uw land van toepassingzijn.• Wanneer <strong>de</strong> installatie door één of meer<strong>de</strong>re apparaten wordt gestuurd,dan moet het bewegingsgebied van <strong>de</strong> installatie geduren<strong>de</strong><strong>de</strong> bediening zichtbaar zijn.DEGBFRNLAlgemeenDe door <strong>de</strong> fabriek afgelever<strong>de</strong> <strong>VC320</strong> zet radiosignalen om in stuursignalen.Een bekabel<strong>de</strong> aandrijving kan met <strong>de</strong> <strong>VC320</strong> draadloos gestuurd wor<strong>de</strong>n. De<strong>VC320</strong> kan met alle zen<strong>de</strong>rs van het <strong>Centronic</strong> besturingsprogramma wor<strong>de</strong>naangestuurd.47
GebruiksaanwijzingDe <strong>VC320</strong> mag uitsluitend voor het aansturen van rolluikinstallaties wor<strong>de</strong>n gebruikt.• Let erop dat draadloze installaties niet in gebie<strong>de</strong>n met een verhoogd risicogebruikt mogen wor<strong>de</strong>n (bijv. ziekenhuizen, luchthavens).• De afstandsbediening is uitsluitend toegestaan voor apparaten en installatieswaarbij een functionele storing in <strong>de</strong> handzen<strong>de</strong>r of ontvanger geen gevaarvoor personen, dieren en goe<strong>de</strong>ren oplevert of waar dit risico door an<strong>de</strong>reveiligheidsvoorzieningen is afge<strong>de</strong>kt.• De exploitant geniet generlei bescherming tegen storingen bijv. door radiozendinstallatiesen eindinstallaties (zoals draadloze installaties die volgens<strong>de</strong> regels in hetzelf<strong>de</strong> frequentiebereik wor<strong>de</strong>n gebruikt.)• Verbind draadloze ontvangers uitsluitend met door <strong>de</strong> fabrikant goedgekeur<strong>de</strong>apparatuur.AanwijzingReglementaire toepassingLet erop dat <strong>de</strong> besturing niet in het gebied van metalen oppervlakkenof magnetische vel<strong>de</strong>n wordt geïnstalleerd of geëxploiteerd.Draadloze installaties die op <strong>de</strong>zelf<strong>de</strong> frequentie zen<strong>de</strong>n, kunnen aanleidinggeven tot storingen in <strong>de</strong> ontvangst.Houd er rekening mee dat <strong>de</strong> reikwijdte van het radiosignaal door <strong>de</strong>wetgever en door bouwkundige maatregelen is beperkt.48
AansluitingVoorzichtigGevaar voor verwonding door elektrische schok.Aansluiting uitsluitend door een geautoriseer<strong>de</strong> vakman!Let er bij <strong>de</strong> montage van het rolluik altijd op dat <strong>de</strong> kabels bij gebruikvan <strong>de</strong> installatie niet beschadigd kunnen wor<strong>de</strong>n! Dek scherpe kanten,waarover <strong>de</strong> kabels geleid wor<strong>de</strong>n af met geschikt af<strong>de</strong>kband. Bijeventuele beschadiging van <strong>de</strong> kabels mogen <strong>de</strong>ze uitsluitend door <strong>de</strong>fabrikant wor<strong>de</strong>n vervangen.Wanneer meer dan één buismotor via <strong>de</strong> <strong>VC320</strong> wordt aangestuurd,zorg dan voor een scheiding met <strong>de</strong>ze buismotor d.m.v. relais. Dezescheiding vervalt bij <strong>Becker</strong>motoren met elektronische eindschakelaar.Let op <strong>de</strong> schakelstroom van het apparaat.DEGBFRNL49
GebruiksaanwijzingSluit <strong>de</strong> <strong>VC320</strong> als volgt aan:PENLNet230V / 50 Hz50
Sluit <strong>de</strong> buismotor als volgt aan:BuismotorAfdichtingringDEGBFRNLProgrammeer een zen<strong>de</strong>r in <strong>de</strong> ontvanger (zie hoofdstuk „Programmeren van<strong>de</strong> zen<strong>de</strong>r“).AanwijzingLet op een optimale radioontvangst.Controleer <strong>de</strong> draairichting van <strong>de</strong> buismotor. Wanneer <strong>de</strong> draairichtingniet klopt, verwissel dan <strong>de</strong> aansluitdra<strong>de</strong>n ▲ en ▼ van <strong>de</strong> buismotor.51
GebruiksaanwijzingMontageBevestigingsoogDiepte: 20 mmDe <strong>VC320</strong> kan op twee manieren wor<strong>de</strong>n gemonteerd:a) De <strong>VC320</strong> met twee schroeven Ø 3 mm door <strong>de</strong> bevestigingsogen vastschroeven.b) De <strong>VC320</strong> vastplakken met <strong>de</strong> meegelever<strong>de</strong> lijmkussentjes.AanwijzingZorg ervoor dat <strong>de</strong> plaats waar <strong>de</strong> lijmkussentjes wor<strong>de</strong>n aangebrachtschoon, droog en vetvrij is.52
1) Programmeren van <strong>de</strong> zen<strong>de</strong>r1. Sluit <strong>de</strong> <strong>VC320</strong> aan op <strong>de</strong> netvoeding.2. Schakel nu <strong>de</strong> spanning in.3. De <strong>VC320</strong> gaat geduren<strong>de</strong> 3 minuten in <strong>de</strong> programmeerstand.1a) Masterzen<strong>de</strong>r programmerenDruk <strong>de</strong> programmeertoets tij<strong>de</strong>ns <strong>de</strong> programmeerstand geduren<strong>de</strong> 3 secon<strong>de</strong>nin.Het rolluikpantser bevestigt het programmeren met een beweging, d.w.z. dathet rolluikpantser zich enkele centimeters beweegt.Deze bevestiging wordt hierna <strong>de</strong> „knikbeweging“ genoemd.Daarmee is het programmeren beëindigd.AanwijzingWanneer in <strong>de</strong> ontvanger al een zen<strong>de</strong>r is geprogrammeerd, druk dangeduren<strong>de</strong> 10 secon<strong>de</strong>n op <strong>de</strong> programmeertoets.1b) Het programmeren van an<strong>de</strong>re zen<strong>de</strong>rsAanwijzingEr kunnen behalve <strong>de</strong> masterzen<strong>de</strong>r nog max. 15 an<strong>de</strong>re zen<strong>de</strong>rs in<strong>VC320</strong> wor<strong>de</strong>n geprogrammeerd.1. Druk op <strong>de</strong> programmeertoets van <strong>de</strong> on<strong>de</strong>r 1a) geprogrammeer<strong>de</strong> masterzen<strong>de</strong>rgeduren<strong>de</strong> 3 secon<strong>de</strong>n.De bevestiging volgt door een „knikbeweging“ van het rolluikpantser.2. Druk nu geduren<strong>de</strong> 3 secon<strong>de</strong>n op <strong>de</strong> programmeertoets van een nieuwezen<strong>de</strong>r die nog niet bekend is bij <strong>de</strong> <strong>VC320</strong>. Hierdoor wordt <strong>de</strong> programmeerstandvan <strong>de</strong> <strong>VC320</strong> voor een nieuwe zen<strong>de</strong>r geduren<strong>de</strong> 3 minuten geactiveerd.De bevestiging volgt door een „knikbeweging“ van het rolluikpantser.3. Druk <strong>de</strong> programmeertoets van <strong>de</strong> nieuw te programmeren zen<strong>de</strong>r nogmaalsgeduren<strong>de</strong> 3 secon<strong>de</strong>n in.De bevestiging volgt door een „knikbeweging“ van het rolluikpantser.De nieuwe zen<strong>de</strong>r is nu geprogrammeerd.DEGBFRNL53
Gebruiksaanwijzing2) TussenpositieAanwijzingDe tussenpositie is een vrij te kiezen positie van het rolluik, tussen <strong>de</strong>bovenste en on<strong>de</strong>rste eindpositie. Vóór het instellen van <strong>de</strong> tussenpositiemoeten bei<strong>de</strong> eindposities zijn ingesteld.De tussenpositie wordt bereikt vanuit <strong>de</strong> bovenste eindpositie.2a) Instellen van tussenpositie1. Zet het rolluikpantser vanuit <strong>de</strong> bovenste eindpositie in <strong>de</strong> gewenste tussenpositie.2. Druk nu eerst <strong>de</strong> STOPtoets in en binnen 3 secon<strong>de</strong>n <strong>de</strong> NEERtoets en houdbei<strong>de</strong> toetsen ingedrukt.De bevestiging volgt door een „knikbeweging“ van het rolluikpantser.De tussenpositie werd opgeslagen.2b) Bedienen in <strong>de</strong> richting van tussenpositie1. Druk binnen één secon<strong>de</strong> 2 maal op <strong>de</strong> NEERtoets.Het rolluikpantser loopt naar <strong>de</strong> tussenpositie.2c) Wissen van <strong>de</strong> tussenpositie1. Laat het rolluikpantser in <strong>de</strong> tussenpositie lopen.2. Druk nu eerst <strong>de</strong> STOPtoets in en binnen 3 secon<strong>de</strong>n <strong>de</strong> NEERtoets enhoud bei<strong>de</strong> toetsen ingedrukt.De bevestiging volgt door een „knikbeweging“ van het rolluikpantser.De tussenpositie werd gewist.54
3) VentilatiepositieAanwijzingMet <strong>de</strong>ze functie is het mogelijk het rolluik uit <strong>de</strong> on<strong>de</strong>rste eindpositiezover weer omhoog te laten lopen, dat <strong>de</strong> ventilatiegleuven wor<strong>de</strong>n geopend.Vóór het instellen van <strong>de</strong> ventilatiepositie moeten bei<strong>de</strong> eindpositieszijn ingesteld.De ventilatiepositie wordt bereikt vanuit <strong>de</strong> on<strong>de</strong>rste eindpositie.3a) Instellen van ventilatiepositie1. Zet het rolluikpantser vanuit <strong>de</strong> on<strong>de</strong>rste eindpositie in <strong>de</strong> gewenste ventilatiepositie.2. Druk nu eerst <strong>de</strong> STOPtoets in en binnen 3 secon<strong>de</strong>n <strong>de</strong> OPtoets en houdbei<strong>de</strong> toetsen ingedrukt.De bevestiging volgt door een „knikbeweging“ van het rolluikpantser.De tussenpositie werd opgeslagen.3b) Bedienen in <strong>de</strong> richting van <strong>de</strong> ventilatiepositie1. Druk binnen één secon<strong>de</strong> 2 maal op <strong>de</strong> OPtoets.Het rolluikpantser loopt naar <strong>de</strong> ventilatiepositie.3c) Wissen van <strong>de</strong> ventilatiepositie1. Laat het rolluikpantser in <strong>de</strong> ventilatiepositie lopen.2. Druk nu eerst <strong>de</strong> STOPtoets in en binnen 3 secon<strong>de</strong>n <strong>de</strong> OPtoets en houdbei<strong>de</strong> toetsen ingedrukt.De bevestiging volgt door een „knikbeweging“ van het rolluikpantser.De ventilatiepositie werd gewist.DEGBFRNL55
Gebruiksaanwijzing4) Zen<strong>de</strong>rs wissen4a) Zen<strong>de</strong>rs afzon<strong>de</strong>rlijk wissenAanwijzingDe on<strong>de</strong>r 1a geprogrammeer<strong>de</strong> masterzen<strong>de</strong>r kan niet wor<strong>de</strong>n gewist.Deze kan alleen wor<strong>de</strong>n overschreven (zie punt 5).1. Druk <strong>de</strong> programmeertoets van <strong>de</strong> masterzen<strong>de</strong>r in geduren<strong>de</strong> 3 secon<strong>de</strong>n.De bevestiging volgt door een „knikbeweging“ van het rolluikpantser.2. Druk nu geduren<strong>de</strong> 3 secon<strong>de</strong>n <strong>de</strong> programmeertoets in van <strong>de</strong> zen<strong>de</strong>r diemoet wor<strong>de</strong>n gewist.De bevestiging volgt door een „knikbeweging“ van het rolluikpantser.3. Druk aansluitend nogmaals geduren<strong>de</strong> 10 secon<strong>de</strong>n op <strong>de</strong> programmeertoetsvan <strong>de</strong> zen<strong>de</strong>r die moet wor<strong>de</strong>n gewist.De bevestiging volgt door een „knikbeweging“ van het rolluikpantser.De zen<strong>de</strong>r werd uit <strong>de</strong> <strong>VC320</strong> gewist.4 b) Alle zen<strong>de</strong>rs wissen (behalve masterzen<strong>de</strong>r)1. Druk <strong>de</strong> programmeertoets van <strong>de</strong> masterzen<strong>de</strong>r in geduren<strong>de</strong> 3 secon<strong>de</strong>n.De bevestiging volgt door een „knikbeweging“ van het rolluikpantser.2. Druk nogmaals <strong>de</strong> programmeertoets van <strong>de</strong> masterzen<strong>de</strong>r geduren<strong>de</strong> 3 secon<strong>de</strong>nin.De bevestiging volgt door een „knikbeweging“ van het rolluikpantser.3. Druk nogmaals <strong>de</strong> programmeertoets van <strong>de</strong> masterzen<strong>de</strong>r geduren<strong>de</strong> 10secon<strong>de</strong>n in.De bevestiging volgt door een „knikbeweging“ van het rolluikpantser.Alle zen<strong>de</strong>rs (behalve <strong>de</strong> masterzen<strong>de</strong>r) wer<strong>de</strong>n uit <strong>de</strong> ontvanger gewist.56
5) Master overschrijven1. Schakel <strong>de</strong> spanning van <strong>de</strong> <strong>VC320</strong> uit en na 5 secon<strong>de</strong>n weer in.De <strong>VC320</strong> gaat geduren<strong>de</strong> 3 minuten in <strong>de</strong> programmeerstand.AanwijzingOm ervoor te zorgen dat <strong>de</strong> nieuwe masterzen<strong>de</strong>r alleen in <strong>de</strong> gewenste<strong>VC320</strong> wordt geprogrammeerd, moeten alle an<strong>de</strong>re ontvangers dieop het zelf<strong>de</strong> voedingspunt zijn aangesloten uit <strong>de</strong> programmeerstandwor<strong>de</strong>n gehaald.Voer daartoe, na het opnieuw inschakelen van <strong>de</strong> spanning, met <strong>de</strong>zen<strong>de</strong>r van <strong>de</strong>ze ontvanger een loop en stopcommando uit.2. Druk nu <strong>de</strong> programmeertoets van <strong>de</strong> masterzen<strong>de</strong>r geduren<strong>de</strong> 10 secon<strong>de</strong>nin.De bevestiging volgt door een „knikbeweging“ van het rolluikpantser.De nieuwe masterzen<strong>de</strong>r werd geprogrammeerd en <strong>de</strong> ou<strong>de</strong> masterzen<strong>de</strong>rwerd gewist.6) Programmeren van <strong>de</strong> schakeltij<strong>de</strong>nAanwijzingDeze functie is uitsluitend met <strong>de</strong> zen<strong>de</strong>rs MemoControl MC441 enMC411 van het <strong>Becker</strong>besturingsprogramma <strong>Centronic</strong> mogelijk.De <strong>VC320</strong> kan <strong>de</strong> schakeltijd voor een OP en NEERbeweging opslaan.In <strong>de</strong> schuifschakelaarstand „“ wordt <strong>de</strong>ze rolluikbeweging om <strong>de</strong> 24 uur herhaald.De positie van <strong>de</strong> /schuifschakelaar is bij het programmeren van <strong>de</strong> schakeltijdonbelangrijk. Eer<strong>de</strong>r opgeslagen schakeltij<strong>de</strong>n wor<strong>de</strong>n evt. overschreven.1. Stuur het rolluik eventueel in <strong>de</strong> tegenovergestel<strong>de</strong> eindpositie.2. Wacht tot <strong>de</strong> gewenste tijd waarop het automatische commando dient te wor<strong>de</strong>nuitgevoerd.3. Op het gewenste tijdstip <strong>de</strong> betreffen<strong>de</strong> richtingtoets bedienen en ingedrukthou<strong>de</strong>n tot <strong>de</strong> rolluikmotor na ca. 6 secon<strong>de</strong>n kort stopt en vervolgens tot aan<strong>de</strong> eindpositie doorloopt.4. Laat <strong>de</strong> richtingtoets los.De <strong>VC320</strong> heeft het actuele tijdstip voor <strong>de</strong>ze bewegingsrichting opgeslagen.DEGBFRNL57
Gebruiksaanwijzing7) Wissen van <strong>de</strong> schakeltij<strong>de</strong>nAanwijzingBij het wissen wor<strong>de</strong>n altijd bei<strong>de</strong> schakeltij<strong>de</strong>n gewist.Om <strong>de</strong> OP en NEERschakeltijd te wissen, <strong>de</strong> STOPtoets geduren<strong>de</strong> 10 secon<strong>de</strong>nindrukken. De bevestiging volgt door een „knikbeweging“ van het rolluikpantser.De looptij<strong>de</strong>n zijn gewist.Technische gegevensNominale spanning230240 V AC / 50 HzSchakelstroom 5 A /230240 V AC bij cos ϕ =1Aard van <strong>de</strong> beveiliging IP 42Veiligheidsklasse (alleen na montagevolgens voorschriften)IIToegelaten omgevingstemperatuur 25 °C bis +55 °CRadiofrequentie868,3 MHzMontagesoortIn rolluikkast58
Wat te doen, als ...?Storing Oorzaak VerhelpenBuismotor loopt niet. Verkeer<strong>de</strong> aansluiting. Aansluiting controleren.Buismotor loopt in <strong>de</strong>verkeer<strong>de</strong> richting.De <strong>VC320</strong> voert<strong>de</strong> handmatigecommando‘s niet uit.De <strong>VC320</strong> voertautomatischecommando’s niet uit.De <strong>VC320</strong> accepteertgeen schakeltij<strong>de</strong>n.Buismotor loopt nietop <strong>de</strong> ingestel<strong>de</strong>schakeltijd.Ingestel<strong>de</strong> schakeltij<strong>de</strong>nwijzigen zich.Verkeer<strong>de</strong> aansluiting.De zen<strong>de</strong>r is niet in <strong>de</strong><strong>VC320</strong> geprogrammeerd.1. Zen<strong>de</strong>r is niet in <strong>de</strong><strong>VC320</strong> geprogrammeerd.2. Schuifschakelaar van<strong>de</strong> zen<strong>de</strong>r staat op .De geprogrammeer<strong>de</strong>zen<strong>de</strong>r heeft geen /schuifschakelaar.1. / schuifschakelaarin positie .2. Meer<strong>de</strong>re schuifschakelaarzen<strong>de</strong>rszijn in <strong>de</strong>buismotor geprogrammeerd.Een / schuifschakelaarstaat op .Frequente 230 V ACon<strong>de</strong>rbrekingenvan <strong>de</strong>voeding. Schommelingenin <strong>de</strong> 50 Hz netfrequentie.Bedrading ▲ en aanvoeding omwisselen.Zen<strong>de</strong>r programmeren.1. Zen<strong>de</strong>r programmeren.2. Zet <strong>de</strong> schuifschakelaarvan <strong>de</strong> zen<strong>de</strong>rop .Gebruik een zen<strong>de</strong>r met/ schuifschakelaar.1. / schuifschakelaarin positie schuiven.2. De schuifschakelaarvan een zen<strong>de</strong>r van op zetten. Staat <strong>de</strong>schuifschakelaar al op ,dan moet <strong>de</strong>ze op enweer terug op wor<strong>de</strong>ngezet.DEGBFRNL59
<strong>Becker</strong>-Antriebe GmbH35764 Sinn/Germany4034 630 031 0c 01/05 DE/GB/FR/NL