

Sony CDX-GT450U - CDX-GT450U Consignes d’utilisation Allemand
Sony CDX-GT450U - CDX-GT450U Consignes d’utilisation Allemand
Sony CDX-GT450U - CDX-GT450U Consignes d’utilisation Allemand

You also want an ePaper? Increase the reach of your titles
YUMPU automatically turns print PDFs into web optimized ePapers that Google loves.
14<br />
To cancel Jump mode<br />
Press (BACK) or (SEEK) –.<br />
Note<br />
If no operation is performed for 7 seconds, the Jump<br />
mode is canceled.<br />
Searching a track by listening<br />
to track passages — ZAPPIN<br />
While playing back short track passages in a CD<br />
or USB device in sequence, you can search for a<br />
track you want to listen to.<br />
ZAPPIN mode is suitable for searching for a<br />
track in shuffle or shuffle repeat mode.<br />
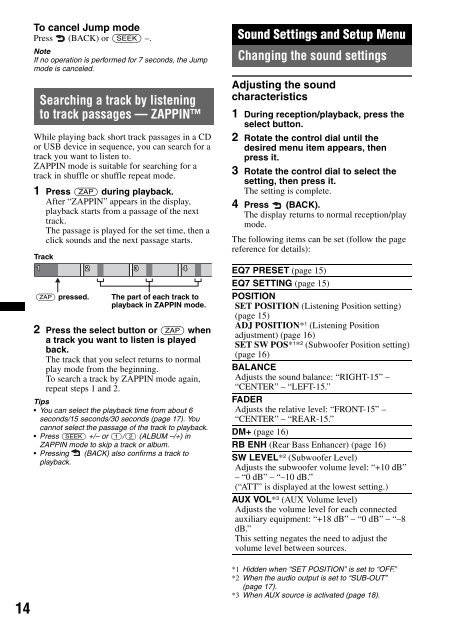
1 Press (ZAP) during playback.<br />
After “ZAPPIN” appears in the display,<br />
playback starts from a passage of the next<br />
track.<br />
The passage is played for the set time, then a<br />
click sounds and the next passage starts.<br />
Track<br />
(ZAP) pressed.<br />
The part of each track to<br />
playback in ZAPPIN mode.<br />
2 Press the select button or (ZAP) when<br />
a track you want to listen is played<br />
back.<br />
The track that you select returns to normal<br />
play mode from the beginning.<br />
To search a track by ZAPPIN mode again,<br />
repeat steps 1 and 2.<br />
Tips<br />
• You can select the playback time from about 6<br />
seconds/15 seconds/30 seconds (page 17). You<br />
cannot select the passage of the track to playback.<br />
• Press (SEEK) +/– or (1)/(2) (ALBUM –/+) in<br />
ZAPPIN mode to skip a track or album.<br />
• Pressing (BACK) also confirms a track to<br />
playback.<br />
Sound Settings and Setup Menu<br />
Changing the sound settings<br />
Adjusting the sound<br />
characteristics<br />
1 During reception/playback, press the<br />
select button.<br />
2 Rotate the control dial until the<br />
desired menu item appears, then<br />
press it.<br />
3 Rotate the control dial to select the<br />
setting, then press it.<br />
The setting is complete.<br />
4 Press (BACK).<br />
The display returns to normal reception/play<br />
mode.<br />
The following items can be set (follow the page<br />
reference for details):<br />
EQ7 PRESET (page 15)<br />
EQ7 SETTING (page 15)<br />
POSITION<br />
SET POSITION (Listening Position setting)<br />
(page 15)<br />
ADJ POSITION* 1 (Listening Position<br />
adjustment) (page 16)<br />
SET SW POS* 1 * 2 (Subwoofer Position setting)<br />
(page 16)<br />
BALANCE<br />
Adjusts the sound balance: “RIGHT-15” –<br />
“CENTER” – “LEFT-15.”<br />
FADER<br />
Adjusts the relative level: “FRONT-15” –<br />
“CENTER” – “REAR-15.”<br />
DM+ (page 16)<br />
RB ENH (Rear Bass Enhancer) (page 16)<br />
SW LEVEL* 2 (Subwoofer Level)<br />
Adjusts the subwoofer volume level: “+10 dB”<br />
– “0 dB” – “–10 dB.”<br />
(“ATT” is displayed at the lowest setting.)<br />
AUX VOL* 3 (AUX Volume level)<br />
Adjusts the volume level for each connected<br />
auxiliary equipment: “+18 dB” – “0 dB” – “–8<br />
dB.”<br />
This setting negates the need to adjust the<br />
volume level between sources.<br />
*1 Hidden when “SET POSITION” is set to “OFF.”<br />
*2 When the audio output is set to “SUB-OUT”<br />
(page 17).<br />
*3 When AUX source is activated (page 18).


