
You also want an ePaper? Increase the reach of your titles
YUMPU automatically turns print PDFs into web optimized ePapers that Google loves.
VERMEIREN<br />
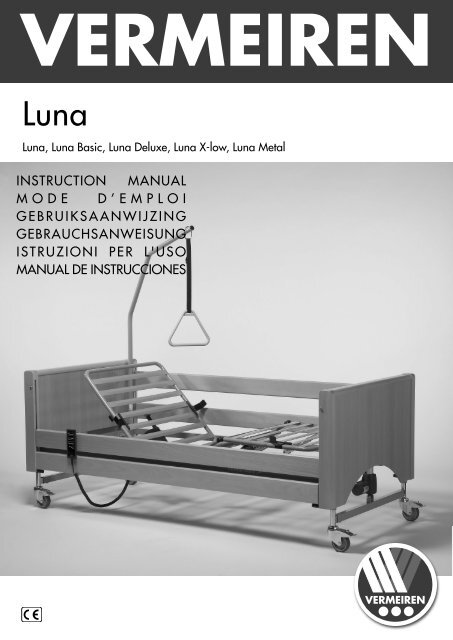
<strong>Luna</strong><br />
<strong>Luna</strong>, <strong>Luna</strong> Basic, <strong>Luna</strong> Deluxe, <strong>Luna</strong> X-low, <strong>Luna</strong> Metal<br />
INSTRUCTION MANUAL<br />
M O D E D ’ E M P L O I<br />
G E B R U I K S A A N W I J Z I N G<br />
GEBRAUCHSANWEISUNG<br />
I S T R U Z I O N I P E R L ' U S O<br />
MANUAL DE INSTRUCCIONES
Instructions to the specialist dealer<br />
This instruction manual is part and parcel of the product and must accompany every product sold.<br />
Version: A, November 2010<br />
All rights reserved, including translation.<br />
No part of this manual may be reproduced in any form what so ever (print, photocopy, microfilm or any other process) without<br />
written permission of the publisher, or processed, duplicated or distributed by using electronic systems.<br />
© N.V. <strong>Vermeiren</strong> N.V. 2010<br />
Instructions pour les distributeurs<br />
Ce manuel d'instructions fait partie du produit et doit accompagner chaque produit vendu.<br />
Version : A, Novembre 2010<br />
Tous droits réservés, y compris la traduction.<br />
Aucune partie de ce manuel ne peut être reproduite, sous quelque forme que ce soit (imprimée, photocopie, microfilm ou tout<br />
autre procédé) sans l'autorisation écrite du publicateur, ni traitée, dupliquée ou distribuée à l'aide de systèmes électroniques.<br />
© N.V. <strong>Vermeiren</strong> N.V. 2010<br />
Instructies voor de vakhandelaar<br />
Deze handleiding is deel van het product en dient bij iedere product te worden geleverd.<br />
Versie: A, november 2010<br />
Alle rechten, inclusief vertaling, voorbehouden.<br />
Niets uit deze handleiding mag geheel of gedeeltelijk in enige vorm (druk, fotokopie, microfilm of ieder ander procedé) zonder<br />
de schriftelijke toelating van de uitgever worden gereproduceerd of met behulp van elektronische systemen worden verwerkt,<br />
gekopieerd of verspreid.<br />
© N.V. <strong>Vermeiren</strong> N.V. 2010<br />
Hinweise für den Fachhändler<br />
Diese Gebrauchsanweisung ist Bestandteil des Produkts und ist bei jeder Produkts auszuhändigen.<br />
Version: A, November 2010<br />
Alle Rechte, auch an der Übersetzung, vorbehalten.<br />
Kein Teil der Gebrauchsanweisung darf in irgendeiner Form (Druck, Fotokopie, Mikrofilm oder einem anderen Verfahren) ohne<br />
schriftliche Genehmigung des Herausgebers reproduziert oder unter Verwendung elektronischer Systeme verarbeitet,<br />
vervielfältigt oder verbreitet werden.<br />
© N.V. <strong>Vermeiren</strong> N.V. 2010<br />
Istruzioni per il rivenditore<br />
Il presente Manuale di istruzioni è parte integrante del prodotto e deve essere fornito assieme alla prodotto.<br />
Versione: A, Novembre 2010<br />
Tutti i diritti riservati (anche sulla traduzione).<br />
Il presente manuale non può essere riprodotto, neppure parzialmente, con alcun mezzo (stampa, fotocopia, microfilm o altro<br />
procedimento) senza l’autorizzazione scritta della casa produttrice, né elaborato, duplicato o distribuito con l’ausilio di sistemi<br />
elettronici.<br />
© N.V. <strong>Vermeiren</strong> N.V. 2010<br />
Instrucciones destinadas a los distribuidores especializados<br />
El presente manual de instrucciones es parte integrante del producto y se debe adjuntar a todas las producto que se vendan.<br />
Versión: A, noviembre 2010<br />
Todos los derechos reservados, incluidos los de la traducción.<br />
Se prohíbe la reproducción total o parcial del presente manual de cualquier forma (impresión, fotocopia, microfilm o cualquier<br />
otro procedimiento), así como la edición, copia o distribución empleando sistemas electrónicos, sin el permiso escrito del<br />
editor.<br />
© N.V. <strong>Vermeiren</strong> N.V. 2010<br />
Instrukcje dla wyspecjalizowanego sprzedawcy<br />
Niniejsza instrukcja obsługi jest nieodłączną częścią produktu i musi być dołączona do każdego sprzedawanego produktu.<br />
Wersja: A, Listopada 2010<br />
Wszelkie prawa zastrzeżone, łącznie z tłumaczeniem.<br />
Żadna część niniejszej instrukcji nie może być powielana w jakiejkolwiek formie (drukowanej, fotokopii, mikrofilmu ani innej) bez<br />
pisemnej zgody wydawcy, nie może być również przetwarzana, kopiowana ani rozprowadzana za pomocą systemów<br />
elektronicznych.<br />
© N.V. <strong>Vermeiren</strong> N.V. 2010
Contents<br />
Page 1<br />
<strong>Luna</strong><br />
2010-11<br />
Preface .................................................................................................. 2<br />
1 Productdescription ................................................................... 3<br />
1.1 Intended Use ................................................................................................................ 3<br />
1.2 Technical specifications .............................................................................................. 4<br />
1.3 Components ................................................................................................................. 5<br />
1.4 Explanation of symbols ............................................................................................... 5<br />
1.5 Accessories .................................................................................................................. 6<br />
1.6 For your safety ............................................................................................................ 6<br />
2 Use .............................................................................................. 7<br />
2.1 Disabling box (IF INSTALLED ON THE BED) ........................................................ 7<br />
2.2 Manual control without lock function ......................................................................... 8<br />
2.3 Manual control with lock function .............................................................................. 9<br />
2.4 Operating the steering casters ..................................................................................... 9<br />
2.5 Strain relief ................................................................................................................ 10<br />
2.6 Power cable ............................................................................................................... 10<br />
2.7 Emergency lowering of the headrest ......................................................................... 11<br />
2.8 Side railings ............................................................................................................... 11<br />
2.9 Lifting pole ................................................................................................................ 12<br />
2.10 Stop notch (when available) ...................................................................................... 12<br />
2.11 Transfer in and out the <strong>bed</strong> ........................................................................................ 13<br />
2.12 Transport ................................................................................................................... 13<br />
2.13 Cable placement ........................................................................................................ 13<br />
3 Installation and adjustment ................................................... 14<br />
3.1 Tools .......................................................................................................................... 14<br />
3.2 Manner of delivery .................................................................................................... 14<br />
3.3 Assembly ................................................................................................................... 14<br />
4 Maintenance ............................................................................ 18<br />
4.1 Regular Maintenance................................................................................................. 18<br />
4.2 Shipping and storage ................................................................................................. 19<br />
4.3 Care ........................................................................................................................... 19<br />
4.4 Inspection .................................................................................................................. 20<br />
4.5 Disinfection ............................................................................................................... 24<br />
5 Guarantee ................................................................................ 27<br />
6 Disposal .................................................................................... 27<br />
7 Declaration of conformity ...................................................... 27<br />
8 Maintenance plan ................................................................... 28<br />
9 Disinfection book .................................................................... 28<br />
EN
EN<br />
Preface<br />
Page 2<br />
<strong>Luna</strong><br />
2010-11<br />
First of all we want to thank you for putting your trust in us by selecting one of our products.<br />
The <strong>Vermeiren</strong> <strong>bed</strong>s are the result of many years of research and experience. During the<br />
development, special attention was given to the ease of use and the serviceability of the<br />
<strong>bed</strong>.<br />
The expected lifetime for your <strong>bed</strong> is strongly influenced by the care and maintenance of the<br />
<strong>bed</strong>.<br />
This manual will help you get acquainted with the operation of your <strong>bed</strong>.<br />
Following the user instructions and the maintenance instructions are an essential part of the<br />
warranty.<br />
This manual reflects the latest product developments. <strong>Vermeiren</strong> has the right to introduce<br />
changes without the obligation to adapt or replace previously delivered models.<br />
For any further questions, please consult your specialist dealer.
1 Productdescription<br />
1.1 Intended Use<br />
Page 3<br />
<strong>Luna</strong><br />
2010-11<br />
With the LUNA model, you have acquired a nursing <strong>bed</strong> that was developed entirely for your<br />
comfort. This nursing <strong>bed</strong> offers various individual adjustment possibilities which are<br />
explained below.<br />
The nursing <strong>bed</strong> is designed for a single adult patient (from 12 years, up to 140 kg (308.6lb.)<br />
max.<br />
The <strong>bed</strong> shall be used with a suitable mattress (min. RG 35, 120 mm (4.7 in) thick , max. 20<br />
kg (44 lb.))<br />
The LUNA nursing <strong>bed</strong> is designed for dry indoors use on level, solid floors.<br />
The different types of fittings and accessories, and the modular construction allow full use by<br />
persons disabled by:<br />
paralysis<br />
loss of limbs (leg amputation)<br />
limb defects or deformations<br />
stiff or damaged joints<br />
heart insuffiencies and poor blood circulation<br />
balance disturbances<br />
cachexia (decrease in muscle)<br />
and also for aged persons.<br />
When providing for individual requirements:<br />
body size and weight (max. 140kg (308.6 lb.))<br />
physical and psychological condition<br />
residential circumstances<br />
environment<br />
should be taken into consideration.<br />
The <strong>bed</strong> shall be used as application environment 4: "care provided in a domestic area<br />
where ME equipment is used to alleviate or compensate for an injury, disability or disease".<br />
Your <strong>bed</strong> should only be used on surfaces where all four wheels are touching the ground.<br />
The <strong>bed</strong> should not be used as a ladder, nor is it a transport for heavy or hot objects.<br />
When used on mats, carpeted floors or loose floor coverings, the floor covering can get<br />
damaged and it is difficult to push over such surfaces (without patient).<br />
Use only <strong>Vermeiren</strong> approved accessories.<br />
The manufacturer is not liable for damage caused by the lack of or improper service or as a<br />
result of not following instructions from this manual.<br />
Compliance with the user and maintenance instructions are an essential part of the<br />
guarantee conditions.<br />
EN
EN<br />
1.2 Technical specifications<br />
Technical terms below are valid for the <strong>bed</strong> in standard settings.<br />
If other accessories are used, the tabulated values will change.<br />
Make <strong>Vermeiren</strong><br />
Address <strong>Vermeiren</strong>plein 1/15, B-2920 Kalmthout<br />
Type <strong>bed</strong><br />
Model <strong>Luna</strong><br />
Maximum occupant mass 140 kg (308.6 lb.)<br />
Description Min. Max.<br />
Page 4<br />
<strong>Luna</strong><br />
2010-11<br />
Length 2150 mm (84.6 in) (<strong>Luna</strong> models) 2240 mm (88.2 in) (<strong>Luna</strong> X-low)<br />
Width 1030 mm (40.6 in.)<br />
Height adjustment of the <strong>bed</strong><br />
surface<br />
400 mm (15.7 in) (without mattress)<br />
200 mm (7.9 in) (<strong>Luna</strong> X-low)<br />
Folded length 445 mm (17.52 in.)<br />
Folded width 935 mm (36.81 in.)<br />
Folded height 1045 mm (41.14 in.)<br />
Total mass 95 kg (209.4 lb.)<br />
Adjustment of the back section 83°<br />
Max. thigh angle 31.7°<br />
Max. angle for lower leg -14,8°<br />
Max. safe load 175 kg (385.8 lb.)<br />
Lifting pole Nominal load 80 kg (176.4 lb.)<br />
805 mm (31.7 in) (without mattress)<br />
600 mm (23.6 in) (<strong>Luna</strong> X-low)<br />
Mattress Min. RG 35, thickness 120 mm, 2000 x 900 mm, max. 20 kg<br />
(thickness 4.7 in, 78.7 x 35.4 in, max. 44 lb.)<br />
Under clearance for patient lift 150 mm (5.9 in) (except for <strong>Luna</strong> X-low)<br />
Steering casters (4 pieces) Ø 125 mm (4.9 in), can be locked<br />
Front part of motor LA273100-A01405040, Linak<br />
Back section motor LA270022-00, Linak<br />
Leg section motor LA270022-00, Linak<br />
Manual operation HBW074-072, Linak<br />
Disabling box ACL 403500, Linak<br />
Transformer CB6404+10019, Linak<br />
Nominal voltage, transformer U input: 230 V , ± 10%, 50 Hz, current: max. 1.5 A, output voltage: 24V ---,<br />
max. 70 VA<br />
Period switched on 10%, max. 6 min/hour<br />
Noise level < 65 dB(A)<br />
Class / Kind of protection Protection class II, application part Type B / IP54 (spray protection)<br />
Storage and use temperature + 5 °C (+41 °F) + 41 °C (+106 °F)<br />
Storage and use humidity 30% 70%<br />
We reserve the right to introduce technical changes. Measurement tolerance ± 15 mm / 1,5 kg / ° (0.59 in. / 3,3 lb. / 1,5°)<br />
Table 1: Technical specifications
The <strong>bed</strong> complies to the requirements set up in:<br />
EN 1970: Adjustable <strong>bed</strong>s for disabled persons: Requirements and test methods<br />
EN 1970+ A1: Adjustable <strong>bed</strong>s for disabled persons: Requirements and test methods<br />
EN 60601-2-38/A1: Medical electrical equipment - Part 2-38: Particular requirements for the<br />
safety of electrically operated hospital <strong>bed</strong>s<br />
1.3 Components<br />
1.4 Explanation of symbols<br />
Maximum mass<br />
CE conformity<br />
L Safety instructions<br />
�<br />
��<br />
��<br />
�<br />
Observe the instructions for use<br />
The correct procedure or method of use<br />
Incorrect procedure or method of use<br />
Protection class II<br />
Type B application<br />
Page 5<br />
<strong>Luna</strong><br />
2010-11<br />
1 = Lifting pole<br />
2 = Triangle<br />
3 = Mattress retainer<br />
4 = Side rail<br />
5 = Upper leg section<br />
6 = Lower leg section<br />
7 = Foot board<br />
8 = Under carriage<br />
frame<br />
9 = Caster<br />
10 = Wheel lock<br />
11 = Motor<br />
12 = Head board<br />
13 = Third <strong>bed</strong>side<br />
wood<br />
14 = Manual control<br />
15 = Side structure<br />
16 = Back section<br />
17 = Seat section<br />
18 = Assembly button<br />
EN
EN<br />
Page 6<br />
<strong>Luna</strong><br />
2010-11<br />
1.5 Accessories<br />
L WARNING: Precautions shall be taken if accessories not listed below are used.<br />
Disabling box + manual control without lock function<br />
Third <strong>bed</strong>side wood<br />
1.6 For your safety<br />
l Carefully read the instruction manual before using the nursing <strong>bed</strong>.<br />
l Place and use your nursing <strong>bed</strong> only on straight and level surfaces and ensure that<br />
all four steering castors stand securely on the floor.<br />
l When the <strong>bed</strong> is placed in position, make sure that no obstacles are present inside<br />
the entire adjustment range.<br />
L If the patient is not supervised, the <strong>bed</strong> must be adjusted beforehand to the lowest<br />
position to reduce the danger of injury by falling when getting into, getting out of, or<br />
lying on the <strong>bed</strong>.<br />
L If the patient is not under supervision, the side railings on both sides should be raised<br />
to the highest position. The railings may only be lowered on one or both sides when a<br />
supervisor is present.<br />
L Watch your hands when assembling, disassembling or using the <strong>bed</strong> -- danger of<br />
squashing !<br />
L When transporting the <strong>bed</strong>, grasp it only by solid frame parts and wooden parts.<br />
L All four steering castors must always be locked before using the nursing <strong>bed</strong>.<br />
L Medical-electrical treatments are forbidden inside the nursing <strong>bed</strong> !<br />
L Do not lean against or on the side railings -- danger of accidents !<br />
L Avoid leaning out sideways with the upper body -- danger of accidents !<br />
L Do not rest your legs on other objects -- danger of accidents !<br />
L When adjusting hinges, joints or other clamps, make sure that no body parts or<br />
objects are present -- danger of squashing !<br />
L Do not place your hands between the frame and the mattress when adjusting leg or<br />
back rests -- danger of squashing !<br />
L Use only power sockets conforming to VDE (220 V / 230 V, 50 Hz) for plugging in.<br />
L Plugs must only be pulled out by grasping the plug itself; never pull on the lead.<br />
L Lock manual operation with the disabling box each time after use.<br />
L The nursing <strong>bed</strong> must only be used in dry rooms.<br />
L Only use mattresses which comply with the prescriptions of the <strong>bed</strong> manufacturer.<br />
L If the overhead boom is distorted, it should be replaced.<br />
L The side railings must be fitted even if the relevant side is situated against the wall.<br />
L Do not undertake repairs on your own -- danger of accidents !<br />
L Do not open any housings of the driving system -- danger of accidents !<br />
L A patient may only be conveyed in the nursing <strong>bed</strong> when lying in the lowest horizontal<br />
position.<br />
L Make sure that all power leads are laid without kinks, shearing or other mechanical<br />
damages.<br />
L All cables should be laid without making contact with the floor and with no kinks.
Page 7<br />
<strong>Luna</strong><br />
2010-11<br />
L No additional mechanical or electric appliances may be used or fitted.<br />
L Servicing, inspection, repairs and disinfection should only be undertaken by<br />
authorized, trained persons.<br />
L Use only genuine replacement parts of the manufacturer for your nursing <strong>bed</strong>.<br />
L Do not exceed the maximum load of 140 kg (308.6 lb.) as stated by the<br />
manufacturer.<br />
L The use of open flames like candles or glowing objects like cigarettes is forbidden<br />
inside the nursing <strong>bed</strong>.<br />
L Replace the side railings if they are bent or broken, otherwise there is a risk of the<br />
patient falling out of the <strong>bed</strong>.<br />
L Use of your <strong>bed</strong> could influence other electrical devices (noises). Avoid using such<br />
devices at the same time.<br />
L Obey all safety and operational instructions.<br />
L Electrically operated <strong>bed</strong> is placed with a distance to the power supply plug.<br />
L The medical <strong>bed</strong> shall only be used with a hoist that can positioned under the limited<br />
space of the medical <strong>bed</strong>.<br />
2 Use<br />
This chapter describes the everyday use. These instructions are for the user and the<br />
specialist dealer.<br />
The <strong>bed</strong> is delivered fully assembled by your specialist dealer. The instructions intended for<br />
the specialist dealer on how to set up the <strong>bed</strong> are given in § 3.<br />
L WARNING: Avoid squeezing from routing cables of other equipment between<br />
parts of the medical <strong>bed</strong>.<br />
L WARNING: The medical <strong>bed</strong> shall only be used with a hoist that can positioned<br />
under the limited space of the <strong>bed</strong>.<br />
2.1 Disabling box (IF INSTALLED ON THE BED)<br />
L CAUTION: Risk of injury - Protect electric cables from crushing.<br />
This paragraph shall be used if the disabling box is installed on the <strong>bed</strong> and in<br />
combination with the manual control without lock function.<br />
A disabling box is situated between the transformer and the manual control to prevent<br />
involuntary electric operation of the nursing <strong>bed</strong> (mounted on the cross bar of the <strong>bed</strong><br />
undercarriage). It has rotating switches that activate or prevent manual operation.<br />
1<br />
3<br />
�<br />
�<br />
4<br />
2<br />
1 = Disabling box<br />
2 = Transformer connection<br />
3 = Manual control connection<br />
4 = Disabling control<br />
�= Locked<br />
�= Unlocked<br />
EN
EN<br />
2.2 Manual control without lock function<br />
L CAUTION: Risk of injury - Adjustments made by the patient must be allowed<br />
under supervision only.<br />
Page 8<br />
<strong>Luna</strong><br />
2010-11<br />
This manual control shall be used in combination with the disabling box.<br />
The height of the <strong>bed</strong> surface, the angle of the backrest and the knee-bend angle can be<br />
adjusted with the manual control. After use the manual control needs to be hung on the side<br />
rail and secured by means of the disabling box.<br />
Following adjustments can be used:<br />
Back section down and up function<br />
Mattress support platform down and up<br />
Leg down and up function<br />
Anti trendelenburg<br />
When connecting the manual control to the disabling box please make sure that the<br />
connection plug in the disabling box is especially secure. Proceed as follows:<br />
1. Remove the safety ring from the connection.<br />
2. Insert the connection plug for the manual control in<br />
the disabling box.<br />
3. Place the safety ring in the disabling box<br />
connection so the cable cannot be removed<br />
involuntarily.<br />
The connection cable can only be removed from the disabling box after the safety ring has<br />
been removed.
2.3 Manual control with lock function<br />
The disabling box can be replaced with a manual control with locking function.<br />
Unlocked<br />
The manual control has a lock function.<br />
It allows for one of more functions to be disabled or<br />
released.<br />
Page 9<br />
<strong>Luna</strong><br />
2010-11<br />
Precautionary measures:<br />
• To switch from lock and release positions, a small<br />
button between both manual control buttons needs to<br />
be turned with help of a key.<br />
The key shall only be available to nursing personnel.<br />
Locked<br />
2.4 Operating the steering casters<br />
L WARNING: Good operation of the steering casters is influenced by wear and<br />
contamination of the tires (water, oil, …) – Check the condition of the tires<br />
before each use.<br />
L WARNING: The steering casters can wear – Check the operation of the steering<br />
casters before each use.<br />
L WARNING: Danger of accidents - All steering casters should always be braked. If<br />
only one caster is braked, the free running wheels rotate around the locked one.<br />
All steering wheels can be locked to prevent involuntary rolling.<br />
Securing (A)<br />
Push the surface of the tilting lever downwards by foot until it brakes the wheel.<br />
Releasing (B)<br />
Push the surface of the tilting lever forwards by foot until the wheel is released.<br />
A<br />
B<br />
EN
EN<br />
2.5 Strain relief<br />
L WARNING: Do not remove the relief unit.<br />
L WARNING: Nothing must be fitted to or hung on the relief unit.<br />
Page 10<br />
<strong>Luna</strong><br />
2010-11<br />
Below the spar of the head slatted frame there is a socket for the tightening of the relief unit.<br />
Insert the relief unit of the power cable (4) into the suspension (3).<br />
Pull the desired length of the power cable (1) in such a way that the power cable (2)<br />
can be laid under the slatted frame without sagging. Be careful to avoid that the cable<br />
(2) come under the traction in any adjustment position.<br />
Fasten the power cable by properly tightening the relief unit of the power cable (4).<br />
Fasten the position of the relief unit by properly tightening the fixing screws (5).<br />
1<br />
2.6 Power cable<br />
L WARNING: Nothing but the power cable should be suspended here.<br />
L WARNING: The power cable can be damaged - The power cable must be<br />
carefully positioned without kinks, pulling, shearing or other mechanical<br />
damages and without making contact with the floor.<br />
4<br />
To ensure that your power cable stays properly functional and in a technically secure<br />
condition even after protracted use, and in the case that you do not operate your <strong>bed</strong><br />
electrically, we have at the spar of the slatted frame (below the relief unit) provided a device<br />
where you might safely leave the rolled-up cable beneath the nursing <strong>bed</strong>.<br />
3<br />
5<br />
2<br />
1 = Power cables<br />
(power<br />
connection)<br />
2 = Power cables<br />
(connection of<br />
transformer)<br />
3 = Suspension<br />
Ease of pulling<br />
4 = Ease of pulling<br />
Power cables<br />
5 = Fixing screws<br />
Ease of pulling<br />
Fig. 8a
2.7 Emergency lowering of the headrest<br />
L WARNING: Risk of squashing - Check that there are no objects or body parts<br />
between the headrest and the frame.<br />
Page 11<br />
<strong>Luna</strong><br />
2010-11<br />
The headrest can be lowered manually (emergency lowering in the case of motor failure).<br />
Emergency lowering is only permitted if at least two persons are available.<br />
Procedure: 1. Turn the securing loop of the upper motor over.<br />
2. One person holds on to the side of the headrest while another person<br />
pulls the securing bolts out and removes the motor from its<br />
suspension.<br />
3. Then the headrest can be lowered.<br />
2.8 Side railings<br />
The side railings can be lowered on one side.<br />
1<br />
Lowering<br />
L WARNING: Risk of squashing - Secure the side railings against falling<br />
involuntarily.<br />
L WARNING: Risk of squashing - No objects or body parts may extend<br />
above the lying surface!<br />
L WARNING: Risk of injury - Do not lower the side railings on one side if<br />
the patient is not supervised.<br />
Raise the upper side slat gently, press the arresting knob on the side of the headrest<br />
or foot-end and lower the side railing slowly. (Always take hold of the upper wooden<br />
slat only !)<br />
For the <strong>Luna</strong> Basic <strong>bed</strong>, the knob is located on the outside of the head- and foot<br />
part.<br />
1<br />
2<br />
4<br />
3<br />
2<br />
1 = Securing loop<br />
2 = Motor attachment<br />
3 = Headrest frames<br />
4 = Headrest motor<br />
1 = Upper side railing<br />
2 = Arresting knob<br />
EN
EN<br />
Page 12<br />
<strong>Luna</strong><br />
2010-11<br />
If raising the side railings or covering these are required for additional security of the patient<br />
(e.g. very skinny patient), it should be noted that no functions of the <strong>bed</strong> should be impaired,<br />
nor the CE-conformable implementation as when first delivered.<br />
2.9 Lifting pole<br />
�<br />
��<br />
�<br />
�<br />
The overhead boom can be mounted on either side of the headrest (use only for LUNA!).<br />
1 = Lifting pole<br />
2 = Boom socket<br />
3 = Locking bolts<br />
4 = Insert nut<br />
5 = Upper frame boom<br />
6 = Socket holes<br />
7 = Strap<br />
8 = Triangle<br />
��<br />
Insert the boom (1) as far as it will go into the relevant socket (2).<br />
Let the arresting bolts (3) slide into the groove (4).<br />
Pull the metal loop over the end of the upper frame (5) until the bolts engage one of<br />
the three socket holes (6).<br />
Also pull strap (7) into the metal loop and through the triangle (8); then fix its length.<br />
Secure the strap.<br />
2.10 Stop notch (when available)<br />
L CAUTION: Risk of injury - No people or objects allowed close to where adjusting<br />
is being done.<br />
To adjust the lying surface of the lower leg, grip the foot-end toggle strap in the middle of the<br />
frame. Pull the lying surface of the lower leg to the desired height. The stop notch locks in<br />
distances of approx. 2cm. To lower the lying surface of the lower leg, use the foot-end toggle<br />
strap and pull it to the upper position. The stop notch will now stop locking and you can<br />
slowly completely let down the lying surface of the lower leg until it reaches the <strong>bed</strong> frame.<br />
Perform adjustments only by means of the foot-end toggle strap to avoid tilting or damage to<br />
the frame adjustors.
<strong>Luna</strong><br />
2010-11<br />
2.11 Transfer in and out the <strong>bed</strong><br />
L CAUTION: In case you can't perform the transfer in a safe manner, ask someone<br />
to assist you.<br />
1. Position you as close as possible to the <strong>bed</strong>.<br />
2. Check the brakes from the <strong>bed</strong> are in the on position.<br />
3. Remove or fold down the side railings of the <strong>bed</strong>.<br />
4. Transfer to/from the <strong>bed</strong>.<br />
2.12 Transport<br />
L WARNING: Risk of injury – See that the <strong>bed</strong> is attached properly. So you can<br />
avoid injury from the passengers during collision or sudden braking.<br />
L WARNING: Risk of injury – Use for attaching the <strong>bed</strong> and passenger NEVER the<br />
same seatbelt.<br />
L WARNING: Risk of injury – Patients may only be transported when recumbent in<br />
the lowest horizontal position.<br />
To avoid damage when transported, the overhead boom should be detached. the power<br />
cable and check that no cables hang near the floor.<br />
2.13 Cable placement<br />
Page 13<br />
1 = Head slatted frame<br />
2 = Feet slatted frame<br />
3 = Boom sockets<br />
4 = Relief device<br />
5 = Power cable<br />
6 = Transformer / control<br />
box<br />
7 = Disabling box<br />
8 = Motor of headrest<br />
surface<br />
9 = Knee-bending angle<br />
motor<br />
10 = Motor of head part<br />
11 = Motor of foot part<br />
12 = Manual operation<br />
All cables inside the <strong>bed</strong><br />
frame, have been fitted in<br />
such a way that prevents<br />
contact with the floor as<br />
well as squashing or<br />
pinching.<br />
EN
EN<br />
3 Installation and adjustment<br />
Page 14<br />
<strong>Luna</strong><br />
2010-11<br />
The instructions in this chapter are for the specialist dealer.<br />
The <strong>Vermeiren</strong> <strong>Luna</strong> has been designed to be adjust with a minimum of replacements parts.<br />
There is no need for extra stock of spare parts.<br />
To find a service facility or specialist dealer near you, contact the nearest <strong>Vermeiren</strong> facility.<br />
A list of <strong>Vermeiren</strong> facilities can be found on the last page.<br />
L WARNING: Risk of unsafe settings - Use only the settings descri<strong>bed</strong> in this<br />
manual.<br />
3.1 Tools<br />
To set up the <strong>bed</strong> the following tools are needed.<br />
Allen key<br />
Screwdriver<br />
3.2 Manner of delivery<br />
The <strong>Vermeiren</strong> <strong>Luna</strong> shall be delivered with:<br />
2 front parts incl. engine + wooden lagging Approx. 17 kg (37.5 lb.) / unit<br />
Slatted frame, foot-end incl. motor Approx. 20 kg (44 lb.)<br />
Slatted frame, headrest incl. transformer and motor Approx. 20 kg (44 lb.)<br />
Side railings (2 x 2 wooden slats) Approx. 3 kg (6.6 lb.)/ unit<br />
Overhead boom + triangular grip Approx. 10 kg (22 lb.)<br />
Manual operation Approx. 10 kg (22 lb.)<br />
Disabling box<br />
Allen key (for assembly)<br />
Instruction Manual<br />
The nursing <strong>bed</strong> may only be used with the parts listed here. If parts are omitted or if foreign<br />
furnishings, components or electrical systems are included, then this <strong>bed</strong> is not regarded as<br />
a nursing <strong>bed</strong> supplied by the manufacturer, and you use it at your own risk. Then the CE<br />
conformity and the warranty of the manufacturer do not apply.<br />
Contents above might be different depending on your type: <strong>Luna</strong>, <strong>Luna</strong> Basic, <strong>Luna</strong> Deluxe,<br />
<strong>Luna</strong> X-low. Depending on your type of <strong>Luna</strong> <strong>bed</strong>, certain images might appear different in<br />
the manual.<br />
3.3 Assembly<br />
L CAUTION: Chance of pinching - Do not place fingers between the components of<br />
the <strong>bed</strong>.<br />
L CAUTION: Risk of clamping - Keep fingers away from moving parts of the <strong>bed</strong>.<br />
Assembly shown below applicable for types: <strong>Luna</strong>, <strong>Luna</strong> Basic, <strong>Luna</strong> Deluxe, <strong>Luna</strong> X-low.<br />
Depending on your type of <strong>Luna</strong> <strong>bed</strong>, certain images might appear different.<br />
You should obey the assembly instructions of your nursing <strong>bed</strong> as explained below.
3.3.1 Front parts<br />
2<br />
Page 15<br />
<strong>Luna</strong><br />
2010-11<br />
Place the slatted frame ends into front parts’ sockets (fixing screws must be loosened<br />
beforehand; don’t tilt!).<br />
N.B: The slatted frame headrest comes fitted with sockets for the boom as well as a power<br />
cable suspension.<br />
Fasten with the securing screws by tightening them far enough to go through the<br />
fixing holes of the front parts’ sockets and thus locking it in place (tighten very<br />
properly!).<br />
Protect the electric lead to the motor against damage by squashing.<br />
3.3.2 Slatted Frame<br />
3<br />
1<br />
1 1<br />
Erect both slatted frames and insert them into each other flush.<br />
Then properly retighten the fixing screws of the slatted frame connection.<br />
Protect the electric lead to the motor against damage by squashing.<br />
2<br />
3<br />
1 = Slatted frame ends<br />
2 = Front parts’ sockets<br />
3 = Fixing screws<br />
1 = Slatted<br />
frames<br />
2 = Fixing<br />
screws<br />
EN
EN<br />
3.3.3 Wooden side railings<br />
Page 16<br />
<strong>Luna</strong><br />
2010-11<br />
Assembly shown below applicable for types: <strong>Luna</strong>, <strong>Luna</strong> Basic, <strong>Luna</strong> Deluxe, <strong>Luna</strong> X-low.<br />
Depending on your type of <strong>Luna</strong> <strong>bed</strong>, certain images might appear different.<br />
A. Insert the short bolt rails (1) on the right and left in the upper wood slat. Insert the<br />
long bolt rails (2) right and left in the lower wood slat.<br />
Insert the long bolt rails (2) in the wood slat in the sliding rail for the head and<br />
foot section one by one and secure them by inserting the rails until the upper end is<br />
inserted and clicks. On one side release this rail again until the tip by pressing the<br />
position locking button (5) and pulling the upper wooden slat gently upwards.<br />
Let the bolt rails (2) fall from the sliding rail once more until the tip of the rail is just<br />
barely in the guide. The short bolt rail (1) will now be inserted together with the<br />
wooden slat between the walls of the long bolt rails and the entire bolt rail system (1)<br />
+ (2) will placed in the relevant sliding rail (4) by pulling upwards when grasping<br />
only the upper wooden slat and then locking the structure in position.<br />
B. Insert the locknuts (6) and tighten them manually.<br />
1 = Short bolt rails<br />
2 = Long bolt rails<br />
3 = Wood slats (2 pieces each side)<br />
4 = Sliding rail<br />
5 = Position locking button<br />
6 = Locknut
<strong>Luna</strong><br />
2010-11<br />
3.3.4 Transformer connections<br />
L CAUTION: Risk of injury - Do not touch the plug with wet hands.<br />
L CAUTION: Risk of injury - Do not place any objects on the connection and the<br />
lead, and protect these against mechanical loads.<br />
1. A 220 V / 230 V, 50 Hz power socket conforming to the VDE specifications is required<br />
2. The diagram for the transformer connections is given in the figure below:<br />
Take hold of the plug only to remove it from the power socket.<br />
The power lead must be laid without any loops or kinks and should not pass around sharp<br />
edges.<br />
The power cable leading to the manual switch must be protected against squashing.<br />
6<br />
1 2 3 4<br />
1 2 3 4 5<br />
Page 17<br />
1 = Connection of headrest motor<br />
2 = Connection of knee-bending angle motor<br />
3 = Connection of head-end motor<br />
4 = Connection of feet-end motor<br />
5 = Connection of disabling box<br />
6 = Transformer / control box<br />
The cables of the motors and connections of the<br />
transformers bear the same numbers.<br />
EN
EN<br />
4 Maintenance<br />
Lifetime of the <strong>bed</strong> is influenced by its use, storage, regular maintenance, servicing and<br />
cleaning.<br />
4.1 Regular Maintenance<br />
Page 18<br />
<strong>Luna</strong><br />
2010-11<br />
The maintenance activities to ensure a good condition for your <strong>Vermeiren</strong> <strong>bed</strong> are descri<strong>bed</strong><br />
below:<br />
Before every use<br />
� Check the tyres and make them clean. If necessary change the tire.<br />
� Check the brakes and adjusted if necessary.<br />
� Check the <strong>bed</strong> (cleanliness, cracks, damage on structural parts ... .) and make<br />
it clean. If necessary change the coating.<br />
� Check the cables for visible signs of damage and whether all plugs are<br />
properly inserted as indicated in the instruction manual. In the case of<br />
damage immediately unplug the power lead.<br />
� Check the functioning of the mechanically adjustable elements (side railings,<br />
overhead boom, foot-end).<br />
� Check that the manual controls function properly. If a function is faulty, kindly<br />
disconnect the power plug.<br />
Every 8 weeks: inspection or adjusting from<br />
� Operation of the sliding rail of the side railings (headrest and foot-end)<br />
� Placement of the slats in the slatted frame (if available)<br />
� The condition of the wooden parts<br />
� Overhead boom (fit / deformation)<br />
� Lubricating from moving parts<br />
Every 6 months or for every new user<br />
� General review<br />
� Disinfection<br />
� Cleanness<br />
� Airing of the mattress used<br />
For your convenience, on the back of this manual is a maintenance plan.<br />
Repairing and assembling of spare parts for your <strong>bed</strong> may only be performed by the<br />
specialist dealer.<br />
Only authorized <strong>Vermeiren</strong> spare parts may be installed.
4.2 Shipping and storage<br />
The shipping and storage of the <strong>bed</strong> shall be according following instructions:<br />
4.3 Care<br />
Store in a dry place (between +5 °C and +41 °C).<br />
The relative humidity of the air should be between 30% and 70%.<br />
Provide sufficient covering or packaging to protect the <strong>bed</strong> from rust and foreign<br />
bodies. (e.g. salt water, sea air, sand, dust).<br />
Store all removed parts together in one place (or mark them if necessary) to avoid<br />
mixing up with other products when re-assembling.<br />
Page 19<br />
<strong>Luna</strong><br />
2010-11<br />
Components must be stored without being subjected to strains (Don't put too heavy<br />
parts on the <strong>bed</strong>, not clamping between something, ...).<br />
Carefully roll up the power lead with no kinks and place it in the receptacle provided.<br />
Check internal cables for squashing and the prevention of kinks.<br />
4.3.1 Metal frames, wooden parts<br />
The cleaning of the metal frames and the wooden parts shall be according:<br />
� Clean metal frames and the wooden parts with a cloth moistened with hot<br />
water. Be aware that you don't soak the metal frames and the wooden parts.<br />
� Use a mild commercial detergent for removing stubborn dirt.<br />
� Stains can be removed by using a sponge or a soft brush.<br />
� Do not use strong cleaning liquids like solvents, nor use hard brushes.<br />
� Never clean with steam and/or pressure washers.<br />
4.3.2 Plastic parts<br />
Clean plastic parts of your <strong>bed</strong> with commercial plastic cleaners. Only use a soft brush or<br />
soft sponge.<br />
The motors and the manual unit should only be cleaned with a slightly damp cloth.<br />
4.3.3 Coating<br />
The high quality of the surface layer guarantees optimal protection against corrosion. If the<br />
outer coat is damaged by scratching or in some other way, get your specialist dealer to<br />
repair the affected surface.<br />
When cleaning, only use warm water and normal household detergents and soft brushes<br />
and cloths. Ensure that no wetness gets into the tubes.<br />
Initially the zinc parts only require rubbing with a dry cloth. Stubborn dirt can best be<br />
removed by using a suitable commercial zinc polish.<br />
EN
EN<br />
4.4 Inspection<br />
Page 20<br />
<strong>Luna</strong><br />
2010-11<br />
In principle we recommend one inspection every year, and a minimum of one before usage<br />
is resumed. All of the following checks must be performed and documented by authorized<br />
persons:<br />
Check the frame parts for plastic deformation, cracks and impaired functioning (lying<br />
surface, undercarriage, backrest, foot-end, erection boom, receptacle for the boom,<br />
wheels).<br />
Visually check for damage to the paintwork (danger of corrosion)<br />
Check the operation of the braking wheels (free running, safety, locking etc.)<br />
Check the solidity and seating of all screws.<br />
Verify the amount of grease on the metal joints of movable parts.<br />
Visually check all housings for damage, screws must be securely fixed, seals and<br />
gaskets should not exhibit visible damage.<br />
Visually check all plastic parts for cracks and brittle spots<br />
Visual inspection of the power connection (EPR or similar)<br />
Condition of the power lead (especially: squashing, abrasion, cuts, visible insulation<br />
or inner conductors, visible metallic veins, kinks, bulges, color changes of the outer<br />
covering, brittle places)<br />
Check the internal cabling of the power supply (especially: crushing, abrasion, cuts,<br />
visible insulation of the inner conductor, visible metallic veins, kinks, lumpiness, color<br />
changes of the outer sleeve, brittle spots)<br />
Humidity protection of the electric system, at least IPX4 (see Type label).<br />
Device for suspending the power cable during transportation.<br />
The power cable and other electric leads must be laid down securely in such a way<br />
that shearing, squashing, and other mechanical stresses are improbable.<br />
Measure the resistance of the protective braid (Ohm) according to VDE 0751-1.<br />
Measure the residual diversion current (A) according to VDE 0751-1<br />
Measure the insulation resistance (MOhm) according to VDE 0751-1<br />
Check the functioning of the side railings (locking, distances according to EN 1970:<br />
2000, also when loaded, deformation and wear through loading)<br />
Check the operation of the drives (over the full adjustment range of the motors �<br />
noises, speed, free running, etc., final switching (e.g. current limiting, main switch), if<br />
necessary: Measure the performance, first with no load, and then with the nominal<br />
load ("SWL") to investigate the wear and tear of the motors by comparing the values<br />
of the electric current with the values when the <strong>bed</strong> was delivered.<br />
Check the condition of the mattress (not when use of the <strong>bed</strong> is resumed)<br />
Completeness of the delivery condition, instruction manual available?<br />
Electrical measurements may only be carried out by persons at least trained on the nursing<br />
<strong>bed</strong> and instructed by an electrician about the instruments and procedures to be used. Only<br />
an electrician can release the nursing <strong>bed</strong> for use after making the measurements and<br />
performing the servicing.<br />
The service must only be signed off in the maintenance plan if a minimum of all the abovementioned<br />
aspects have been checked.
Requirement: Remark:<br />
1.) Check:<br />
NA Yes No Remark<br />
1.1) Power lead<br />
EPR cable or comparable quality<br />
1.2) Condition of the power lead<br />
In particular look for:<br />
crushing, abrasion, cuts, visible insulation<br />
of the inner conductor, visible metallic veins, kinks,<br />
bulges, color changes to outer cover,<br />
brittle spots<br />
1.3) Condition of internal cables<br />
In particular look for:<br />
crushing, abrasion, cuts, visible insulation of the inner<br />
conductor, visible metallic veins, kinks, lumpiness, color<br />
changes of the outer sleeve, brittle spots)<br />
1.4) Sufficient ease of pulling and anti-kink of the<br />
power cable<br />
1.5) Sufficient ease of pulling and anti-kink of the<br />
internal cables<br />
1.6) The power cable and other electric leads must<br />
be laid down securely in such a way that<br />
shearing, squashing, and other mechanical<br />
stresses are improbable.<br />
1.7) Humidity protection IP X4<br />
1.8) Device for suspending the power cable during<br />
transportation<br />
1.9) Check the frame parts for plastic deformation<br />
and/or wear and tear.<br />
- bottom of <strong>bed</strong><br />
- <strong>bed</strong> lift<br />
- backrest, seat area, feet area<br />
- boom<br />
- boom socket<br />
- rollers<br />
1.10) Housing<br />
Visually check all housings for damage, screws must<br />
be securely fixed, seals and gaskets should not exhibit<br />
visible damage.<br />
Page 21<br />
NA Yes No Remark<br />
NA Yes No Remark<br />
NA Yes No Remark<br />
NA Yes No Remark<br />
NA Yes No Remark<br />
NA Yes No Remark<br />
NA Yes No Remark<br />
NA Yes No Remark<br />
NA Yes No Remark<br />
NA Yes No Remark<br />
<strong>Luna</strong><br />
2010-11<br />
EN
EN<br />
Table (A) on Picture (B)<br />
Symbol Size Requirement in mm<br />
A The smallest distance between the<br />
elements within the circumference<br />
of the side railings in an<br />
erect/inserted position, or the area<br />
included by the side railings and<br />
fixed parts of the <strong>bed</strong>.<br />
A 120<br />
B Thickness of the mattress in<br />
As indicated by<br />
accordance with regulatory use manufacturer<br />
C Height of the top sides of the side<br />
railings over the mattress (see ‘B’)<br />
without compression.<br />
C 220<br />
D Distance between the headrest or<br />
D 60<br />
food part and the side railings.<br />
or<br />
D 235<br />
E Distance between side railings<br />
E 60<br />
taken apart with the lying surface in<br />
or<br />
flat position.<br />
E 235<br />
F Smallest distance of all accessible If D 235 then F<br />
openings between the side railing<br />
60<br />
and the lying surface.<br />
If D 60 then<br />
F 120<br />
G Overall length of the side railings or<br />
sum total of the lengths of the side G 1/2 of the length<br />
railings taken apart on one side of<br />
the <strong>bed</strong>.<br />
of the lying surface<br />
H Distance between headrest and<br />
foot-end without extension of these<br />
parts.<br />
No requirements<br />
With <strong>bed</strong>s of which the side railings exceed the indicated<br />
measure by less than 10%, such side railings must not be<br />
used with small or underweight patients, or else additional<br />
measures must be taken to avoid such patients from getting<br />
clamped or sliding through.<br />
Side railings that exceed the indicated values by 10% or<br />
more, may until such time as the shortages have been<br />
solved, not be used anymore and must be exchanged or<br />
upgraded.<br />
In addition to the following points, the full functionality (i.e.<br />
locking, fixing elements) of the side railings must be checked.<br />
Any defects must be eliminated. Observing the sizes of the<br />
side railing components in accordance with the following<br />
sketch.<br />
Page 22<br />
Actual size: mm<br />
Actual size: mm<br />
Actual size: mm<br />
Actual size: mm<br />
Actual size: mm<br />
Actual size: mm<br />
Actual size: mm<br />
Actual size: mm<br />
NA Yes No Remark<br />
NA Yes No Remark<br />
NA Yes No Remark<br />
NA Yes No Remark<br />
<strong>Luna</strong><br />
2010-11
Picture (B) on Table (A)<br />
D D<br />
G<br />
C<br />
B<br />
2.) Checking sizes<br />
A<br />
H<br />
A F<br />
2.1) Resistance of the protective braid<br />
Actual size: Ohm<br />
2.2) Residual diversion current<br />
Actual size: A<br />
2.3) Insulation resistance<br />
Actual size: MOhm<br />
3.) Functional check<br />
3.1) Functional check of the side railings:<br />
- locking, e.g. play in the locking device<br />
- distances, including under load<br />
- deformation<br />
- wear and tear owing to load<br />
3.2) Functional check of the brakes:<br />
- safety<br />
- braking<br />
- neutral<br />
3.3) Functional check of the drives:<br />
- over the full adjustment range of the motors<br />
(noises, speed, neutral, etc.)<br />
- final switching (e.g. current limiting, main switch)<br />
- if necessary, measure the motor performance first<br />
without load and then with the nominal load (SWL) to<br />
check for wear and tear of the motors<br />
Compare with the values given at the time of<br />
delivery. The manufacturer will provide you with the<br />
limits.<br />
Other:<br />
Page 23<br />
NA Yes No Remark<br />
NA Yes No Remark<br />
NA Yes No Remark<br />
NA Yes No Remark<br />
NA Yes No Remark<br />
NA Yes No Remark<br />
NA Yes No Remark<br />
NA Yes No Remark<br />
<strong>Luna</strong><br />
2010-11<br />
Remark: If the braces of the side<br />
railing are outside (indicated in<br />
dark gray), side railings distance<br />
A becomes compulsory for the<br />
lying surface.<br />
EN
EN<br />
Page 24<br />
<strong>Luna</strong><br />
2010-11<br />
4.5 Disinfection<br />
L WARNING: Dangerous Products - The use of disinfectants is restricted to<br />
authorized personnel.<br />
L WARNING: Dangerous Products, change on irritate your skin - You should wear<br />
suitable protective clothing because the disinfectants could irritate your skin. For<br />
this purpose you should also take note of the product information of the solutions<br />
concerned.<br />
All parts of the <strong>bed</strong> can be treated by scrubbing with a disinfectant.<br />
All steps taken to disinfect rehabilitation equipment, their components or other accessory<br />
parts are to be recorded in a disinfection report containing a minimum of the following<br />
information (with product documentation appended):<br />
Date of the<br />
disinfection<br />
Reason Specification Substance and<br />
concentration<br />
Table 2: Example of a disinfection book<br />
Abbreviations used in column 2 (reason):<br />
V = Suspected infection IF = Infection case W = Repetition I = Inspection<br />
For a blank sheet of a disinfection book see § 9.<br />
Signature
The recommended disinfectants for scrubbing (based on the list provided by the Robert<br />
Koch Institute, RKI) are standing in the table below. The current state of the disinfectants<br />
included in the RKI list can be obtained from the Robert Koch Institute (RKI) (homepage:<br />
www.rki.de).<br />
Active substance Product name Laundry<br />
Phenol or phenol<br />
derivative<br />
Chlorine, organic<br />
or inorganic<br />
substances with<br />
active chlorine<br />
disinfection<br />
Diluted solution<br />
Time to take effect<br />
Surface<br />
disinfection<br />
(scrubbing-<br />
/wiping<br />
disinfection)<br />
Diluted solution<br />
Time to take effect<br />
Disinfection of excretions<br />
1 part sputum or stools + 2 parts<br />
diluted solution or 1 part urine + 1 part<br />
diluted solution<br />
Diluted solution<br />
Page 25<br />
Sputum Stools Urine<br />
% Hr. % Hr. % Hr. % Hr. % Hr.<br />
Time to take effect<br />
Diluted solution<br />
Time to take effect<br />
Diluted solution<br />
Time to take effect<br />
Area of<br />
effectiveness<br />
<strong>Luna</strong><br />
2010-11<br />
Manufacturer or<br />
Supplier<br />
Amocid 1 12 5 6 5 4 5 6 5 2 A Lysoform<br />
Gevisol 0,5 12 5 4 5 4 5 6 5 2 A Schülke & Mayr<br />
Helipur 6 4 6 4 6 6 6 2 A B. Braun<br />
m-cresylic soap<br />
solution (DAB<br />
6)<br />
1 12 5 4 A<br />
Phenol 1 12 3 2 A<br />
Chloramin-T<br />
DAB 9<br />
1,5 12 2,5 2 5 4 A 1 B<br />
Clorina 1, 5 12 2,5 2 5 4 A 1 B Lysoform<br />
Trichlorol 2 12 3 2 6 4 A 1 B Lysoform<br />
Per combinations Apesin AP100 2 4 4 AB Tana<br />
PROFESSIONAL<br />
Formaldehyde<br />
and/or other<br />
aldehydes or<br />
derivatives<br />
Dismozon pur 2 4 1 AB Bode Chemie<br />
Perform 2 3 4 AB Schülke & Mayr<br />
Wofesteril 2 2 4 AB Kesla Pharma<br />
Aldasan 2000 4 4 AB Lysoform<br />
Antifect FD 10 3 4 AB Schülke & Mayr<br />
Antiseptica<br />
surface<br />
disinfection 7<br />
3 6 AB Antiseptica<br />
Apesin AP30 5 4 A Tana<br />
PROFESSIONAL<br />
Bacillocid<br />
special<br />
6 4 AB Bode Chemie<br />
Buraton 10F 3 4 AB Schülke & Mayr<br />
Desomed A<br />
2000<br />
Hospital<br />
disinfectant<br />
cleaner<br />
Desomed<br />
Perfekt<br />
Formaldehydesolution<br />
(DAB<br />
10), (formaline)<br />
3 6 AB Desomed<br />
8 6 AB Dreiturm<br />
7 4 AB* Desomed<br />
1,5 12 3 4 AB<br />
Incidin Perfekt 1 12 3 4 AB Ecolab<br />
Incidin Plus 8 6 A Ecolab<br />
Kohrsolin 2 12 3 4 AB Bode Chemie<br />
Formaldehyde Lysoform 4 12 5 6 AB Lysoform<br />
EN
EN<br />
Active substance Product name Laundry<br />
and/or other<br />
aldehydes or<br />
derivatives<br />
Amphoteric<br />
surfactants<br />
(amfotensiden)<br />
disinfection<br />
Diluted solution<br />
Time to take effect<br />
Surface<br />
disinfection<br />
(scrubbing-<br />
/wiping<br />
disinfection)<br />
Diluted solution<br />
Time to take effect<br />
Disinfection of excretions<br />
1 part sputum or stools + 2 parts<br />
diluted solution or 1 part urine + 1 part<br />
diluted solution<br />
Diluted solution<br />
Page 26<br />
Sputum Stools Urine<br />
% Hr. % Hr. % Hr. % Hr. % Hr.<br />
Time to take effect<br />
Diluted solution<br />
Time to take effect<br />
Diluted solution<br />
Time to take effect<br />
Area of<br />
effectiveness<br />
<strong>Luna</strong><br />
2010-11<br />
Manufacturer or<br />
Supplier<br />
Lysoformin 3 12 5 6 AB Lysoform<br />
Lysoformin<br />
2000<br />
4 6 AB Lysoform<br />
Melsept 2 12 4 6 AB B. Braun<br />
Melsitt 4 12 10 4 AB B. Braun<br />
Minutil 2 12 6 4 AB Ecolab<br />
Multidor 3 6 AB Ecolab<br />
Nûscosept 5 4<br />
AB<br />
Dr. Nüsken<br />
Chemie<br />
Optisept 7 4 AB* Dr. Schumacher<br />
Pursept-FD 7 4 AB* Merz<br />
Ultrasol F 3 12 5 4 AB Fresenius Kabi<br />
Tensodur 103 2 12<br />
Lye Lime-milk 3 20 6 A 3 B<br />
1 Not effective against myco-bacteria when service disinfecting, especially in the presence of blood.<br />
2 Not suitable for disinfecting blood-contaminated or porous surfaces (e.g. raw wood).<br />
3 Useless for tuberculosis; preparation of Lime-milk: 1 part dissolved lime (calcium hydroxide) + 3 parts water.<br />
* Checked for effectiveness on viruses in accordance with checking methods of the RKI (Federal Health Reporting 38 (1995) 242).<br />
A: Suitable for killing vegetative bacterial germs including myco-bacteria as well as fungi, including fungal spores.<br />
B: Suitable for deactivating viruses.<br />
Table 3: Disinfectants<br />
A<br />
MFH Marienfelde<br />
Kindly consult your specialist dealer if you have queries on matters related to disinfection; he<br />
will gladly assist you.
5 Guarantee<br />
Excerpt from the "General Business Conditions":<br />
(...)<br />
5. The guarantee period for warranty claims is 24 months.<br />
Page 27<br />
<strong>Luna</strong><br />
2010-11<br />
The guarantee excludes damage arising from structural changes to our products, insufficient<br />
maintenance, defective or improper handling or storage or the use of non-original parts.<br />
Likewise, the guarantee excludes parts or working parts subject to natural wear and tear.<br />
(...)<br />
6 Disposal<br />
When disposing of the <strong>bed</strong>, contact your local disposal centre or return the product to your<br />
specialist dealer who, after submitting it to a hygienic procedure, will be able to send it back<br />
to the manufacturer who will dispose of and recycle it correctly, separating it into its<br />
component materials.<br />
Packaging materials can be taken to disposal or recycling centers or to your specialist<br />
dealer.<br />
7 Declaration of conformity<br />
EN
EN<br />
8 Maintenance plan<br />
Page 28<br />
<strong>Luna</strong><br />
2010-11<br />
Date Maintenance Remarks Paraph<br />
1/1/2010 Greasing and general servicing non<br />
9 Disinfection book<br />
Date of the<br />
disinfection<br />
Reason Specification Substance and<br />
concentration<br />
Abbreviations used in column 2 (reason):<br />
V = Suspected infection IF = Infection case W = Repetition I = Inspection<br />
Signature
Contents<br />
Page 1<br />
<strong>Luna</strong><br />
2010-11<br />
Préface .................................................................................................. 2<br />
1 Description du produit ............................................................. 3<br />
1.1 Utilisation prévue ........................................................................................................ 3<br />
1.2 Caractéristiques techniques ......................................................................................... 4<br />
1.3 Composants ................................................................................................................. 5<br />
1.4 Explication des symboles ............................................................................................ 5<br />
1.5 Accessoires .................................................................................................................. 6<br />
1.6 Pour votre sécurité ....................................................................................................... 6<br />
2 Utilisation ................................................................................... 7<br />
2.1 Boîtier de blocage (EN OPTION) ............................................................................... 7<br />
2.2 Commande manuelle sans fonction de blocage .......................................................... 8<br />
2.3 Commande manuelle avec fonction de blocage .......................................................... 9<br />
2.4 Actionnement des freins .............................................................................................. 9<br />
2.5 Soulagement de traction ............................................................................................ 10<br />
2.6 Cäble secteur ............................................................................................................. 10<br />
2.7 Descente d'urgence du dossier ................................................................................... 11<br />
2.8 Barreaux latéraux ...................................................................................................... 11<br />
2.9 Potence de levage ...................................................................................................... 12<br />
2.10 Rastomat (le cas échéant) .......................................................................................... 12<br />
2.11 Transfert dans et hors du lit ....................................................................................... 13<br />
2.12 Transport ................................................................................................................... 13<br />
2.13 Cäblage ...................................................................................................................... 13<br />
3 Installation et réglage ............................................................. 14<br />
3.1 Outils ......................................................................................................................... 14<br />
3.2 Mode de livraison ...................................................................................................... 14<br />
3.3 Assemblage ............................................................................................................... 14<br />
4 Maintenance ............................................................................ 18<br />
4.1 Maintenance régulière ............................................................................................... 18<br />
4.2 Expedition et stockage .............................................................................................. 19<br />
4.3 Entretien .................................................................................................................... 19<br />
4.4 Inspection .................................................................................................................. 20<br />
4.5 Désinfection .............................................................................................................. 24<br />
5 Garantie ................................................................................... 27<br />
6 Mise au rebut ........................................................................... 27<br />
7 Déclaration de conformité ..................................................... 27<br />
8 Plan de maintenance ............................................................... 28<br />
9 Journal de désinfection .......................................................... 28<br />
FR
FR <strong>Luna</strong><br />
2010-11<br />
Préface<br />
Nous tenons tout d'abord à vous remercier de nous avoir fait confiance en choisissant l'un<br />
de nos lit.<br />
Les lits <strong>Vermeiren</strong> sont le résultat de nombreuses années de recherche et d'expérience. Au<br />
cours du développement, une attention spéciale a été portée sur la facilité d'utilisation et les<br />
possibilités d'entretien du lit.<br />
La longévité de votre lit sera largement fonction des soins et de l'entretien dont celui-ci fera<br />
l'objet.<br />
Ce manuel vous aidera à connaître le fonctionnement de votre lit.<br />
Le respect des instructions d'utilisation et des instructions de maintenance est une condition<br />
essentielle de la garantie.<br />
Ce manuel reflète les derniers développements du produit. <strong>Vermeiren</strong> est autorisé à<br />
apporter des modifications sans devoir pour autant adapter ou remplacer les modèles<br />
fournis précédemment.<br />
Pour toute question, consultez votre distributeur.<br />
Page 2
1 Description du produit<br />
1.1 Utilisation prévue<br />
Page 3<br />
<strong>Luna</strong><br />
2010-11<br />
Avec le modèle LUNA, vous avez fait l’acquisition d’un lit de soin entièrement conçu pour<br />
votre confort. Ce lit vous offre différentes possibilités de réglage individuel expliquées ciaprès.<br />
Lisez donc attentivement le mode d’emploi pour vous familiariser avec votre lit de<br />
soin.<br />
Le lit médicalisé est destiné à un seul patient (d'au moins 12 ans,140 kg au plus).<br />
Il sera utilisé avec un matelas adapté (min. RG 35, épaisseur 120 mm, 20 kg max.)<br />
Le lit de soin LUNA est conçu pour être utilisé sur des sols plats et durs dans des locaux<br />
intérieurs secs.<br />
Les différents types d'équipements et d'accessoires et la construction modulaire permettent<br />
une utilisation complète par des personnes souffrant des handicaps suivants :<br />
paralysie,<br />
perte des membres (amputation de jambe),<br />
déficiences ou déformations des membres,<br />
articulations raides ou abîmées,<br />
insuffisances cardiaques et mauvaise circulation sanguine,<br />
troubles de l'équilibre,<br />
cachexie (perte musculaire),<br />
ainsi que par des personnes âgées.<br />
En cas de fourniture pour des besoins individuels :<br />
la taille et le poids (maximum 140 kg),<br />
l'état physique et psychologique,<br />
la nature de la résidence,<br />
l'environnement<br />
doivent être pris en considération.<br />
Il sera utilisé en environnement d'application de type 4 : "soins à domicile avec équipements<br />
médicaux destinés à atténuer l'incidence de blessures, d'un handicap ou d'une maladie".<br />
Il doit être utilisé sur un sol plan permettant aux quatre roues d'être en contact avec le sol.<br />
Le lit ne doit pas être utilisé comme échelle, ni pour le transport d'objets lourds ou chauds.<br />
Tapis, moquettes et revêtements flottants sont susceptibles d'être endommagés par les<br />
roulettes et ne permettent pas de faire rouler facilement le lit (sans le patient).<br />
Utilisez uniquement des accessoires approuvés par <strong>Vermeiren</strong>.<br />
Le fabricant n'est pas responsable des dommages causés par l'absence ou l'inadéquation<br />
de l'entretien, ou par le non-respect des instructions de ce manuel.<br />
Le respect des instructions d'utilisation et de maintenance est une condition essentielle de la<br />
garantie.<br />
FR
FR <strong>Luna</strong><br />
2010-11<br />
1.2 Caractéristiques techniques<br />
Les indications techniques ci-dessous sont valides pour le lit avec ses réglages standard.<br />
En cas d'utilisation d'autres accessoires, les valeurs indiquées sont modifiées.<br />
Marque <strong>Vermeiren</strong><br />
Adresse <strong>Vermeiren</strong>plein 1/15, B-2920 Kalmthout<br />
Type Lit<br />
Modèle <strong>Luna</strong><br />
Masse maximale de<br />
l'occupant<br />
140 kg<br />
Description Minimum Maximum<br />
Longueur 2150 mm (modèles <strong>Luna</strong>) 2240 mm (<strong>Luna</strong> X-low)<br />
Largeur 1030 mm<br />
Surface de couchage réglable<br />
en hauteur<br />
400 mm (sans matelas)<br />
200 mm (<strong>Luna</strong> X-low)<br />
Longueur plié 445 mm<br />
Largeur plié 935 mm<br />
Hauteur plié 1045 mm<br />
Masse totale 95 kg<br />
Réglage du dossier 83°<br />
Angle max. de la cuisse 31.7°<br />
Angle max. de la jambe -14,8°<br />
Charge utile sûre max. 175 kg<br />
Potence de levage Charge nominale 80 kg<br />
Page 4<br />
805 mm (sans matelas)<br />
600 mm (<strong>Luna</strong> X-low)<br />
Matelas Min. RG 35, 120 mm d'épaisseur, 2000 x 900 mm, max. 20 kg<br />
Hauteur de passage pour le<br />
soulève-malade<br />
150 mm (exception <strong>Luna</strong> X-low)<br />
Roulettes directrices (4 x) Ø 125 mm, blocables<br />
Moteur des parties avant LA273100-A01405040, Linak<br />
Moteur du dossier LA270022-00, Linak<br />
Moteur de la zone jambes LA270022-00, Linak<br />
Commande manuelle HBW074-072, Linak<br />
Boîtier de blocage ACL 403500, Linak<br />
Transfo CB6404+10019, Linak<br />
Tension nominale du transfo U in: 230 V , ± 10%, 50 Hz, I in: max. 1.5 A, U out: 24V ---, max. 70 VA<br />
Facteur de service 10%, max. 6 min/heure<br />
Niveau sonore < 65 dB(A)<br />
Classe de protection / degré de<br />
protection<br />
Température de stockage et<br />
d'utilisation<br />
Humidité de stockage et<br />
d'utilisation<br />
Classe de protection II, pièce d’application type B / IP54<br />
(protégé contre les projections d’eau)<br />
+ 5 °C + 41 °C<br />
30% 70%<br />
Nous nous réservons le droit d’apporter des modifications techniques. Tolérance de mesure ± 15 mm / 1,5 kg / °<br />
Tableau 1 : Caractéristiques techniques
Le lit est conforme aux normes suivantes :<br />
Page 5<br />
<strong>Luna</strong><br />
2010-11<br />
EN 1970 : lits réglables pour personnes handicapées, exigences et méthodes de test<br />
EN 1970+ A1: lits réglables pour personnes handicapées : exigences et méthodes de test<br />
EN 60601-2-38/A1: Equipements médicaux électriques - Partie 2-38 : exigences particulières<br />
en matière de sécurité des lits hospitaliers à commande électrique<br />
1.3 Composants<br />
1.4 Explication des symboles<br />
Poids maximum<br />
CE conformité<br />
L Directives en matière de sécurité<br />
�<br />
��<br />
��<br />
�<br />
Lire le mode d'emploi<br />
Procédure / utilisation correctes<br />
Procédure / utilisation incorrectes<br />
Classe de protection II<br />
Pièce d'utilisation type B<br />
1 = potence de levage<br />
2 = triangle<br />
3 = retenue du matelas<br />
4 = barreau latéral<br />
5 = Zone cuisses<br />
6 = Zone jambes<br />
7 = pied<br />
8 = cadre du chariot<br />
lévateur<br />
9 = roulette<br />
10 = blocage de roulette<br />
11 = moteur<br />
12 = appuie-tête<br />
13 = bois poste soignant<br />
14 = commande manuelle<br />
15 = structure latérale<br />
16 = zone dossier<br />
17 = zone assise<br />
18 = bouton de montage<br />
FR
FR <strong>Luna</strong><br />
2010-11<br />
1.5 Accessoires<br />
L AVERTISSEMENT: des précautions devront être prises en cas d'uilisation<br />
d'accessoires non répertoriés ci-dessous.<br />
Boîte de blocage + commande manuelle sans fonction de verrouillage<br />
Bois poste soignant<br />
1.6 Pour votre sécurité<br />
l Avant d’utiliser ce lit de soin, lisez attentivement le mode d’emploi.<br />
l Positionnez et utilisez votre lit de soin uniquement sur des surfaces droites et planes<br />
pour que les quatre roulettes directrices reposent solidement sur le sol.<br />
l À l’endroit où vous installez le lit, vérifiez bien qu’il n’y a aucun obstacle dans<br />
l’ensemble de la zone de réglage.<br />
L SI le patient reste sans surveillance, il faut d’abord abaisser le lit dans la position la<br />
plus basse pour réduire le risque de blessure en cas de chute si le patient se met<br />
dans le lit, quitte le lit ou se couche dans le lit.<br />
L Si le patient reste sans surveillance, il faut relever les barreaux latéraux de chaque<br />
côté. L’abaissement d’un seul côté ou des deux côtés n’est autorisé qu’en présence<br />
d’un(e) surveillant(e).<br />
L Faites attention à vos mains lors du montage/démontage et lorsque vous utilisez le lit<br />
- risque d’écrasement !<br />
L Pour transporter le lit, saisissez-le uniquement par des éléments fixes du cadre ou<br />
par des éléments fixes en bois.<br />
L Il faut toujours bloquer les quatre roulettes directrices avant d’utiliser le lit.<br />
L Il est interdit d’utiliser des appareils médicaux électriques à l’intérieur du lit de soin !<br />
L Ne vous appuyez pas contre ou sur les barreaux latéraux - Risque d’accident !<br />
L Éviter de pencher le buste à l’extérieur sur le côté - Risque d’accident !<br />
L Ne pas soulager les jambes en les posant sur d’autres objets - Risque d’accident !<br />
L Ne pas laisser des parties du corps ou des objets entre les charnières, les<br />
articulations ou d’autres éléments de serrage pendant un réglage - Risque<br />
d’écrasement !<br />
L Lors du réglage pour les jambes ou le dos, ne pas glisser les mains entre le cadre et<br />
le matelas - Risque d’écrasement !<br />
L Utilisez la fiche secteur uniquement dans une prise de courant conforme à VDE<br />
(220V/230V, 50 Hz).<br />
L Débranchez les connexions électriques en tirant sur la fiche et non sur le fil.<br />
L Après chaque utilisation, verrouillez la commande manuelle à l’aide du boîtier de<br />
blocage.<br />
L Utilisez votre lit de soin uniquement dans des locaux secs.<br />
L Utilisez uniquement un matelas qui répond aux spécifications du fabricant du lit.<br />
L Si la potence est déformée, il faut la remplacer.<br />
L Les barreaux latéraux doivent rester montés même du côté tourné vers le mur.<br />
L N’effectuez aucune réparation vous-même - Risque d’accident !<br />
L N’ouvrez aucun carter du système d’entraînement - Risque d’accident !<br />
L Le transport du patient avec le lit de soin n’est autorisé que dans la position couchée<br />
horizontale la plus basse.<br />
L Veillez à ce que les circuits d'alimentation ne présentent aucun nœud ouvert, signe<br />
de cisaillement, ni aucun autre dommage mécanique<br />
L Il faut poser les câbles de manière à ce qu’il n’y ait aucun contact avec le sol et à ce<br />
que ceux-ci ne soient pas écrasés.<br />
Page 6
<strong>Luna</strong><br />
2010-11<br />
L Il est interdit d’utiliser ou d’installer des appareils mécaniques ou électriques<br />
supplémentaires.<br />
L L’entretien, l’inspection, la remise en état et la désinfection ne peuvent être exécutés<br />
que par des personnes autorisées et formées.<br />
L Utilisez uniquement des pièces d’origine du fabricant pour votre lit de soin.<br />
L Ne chargez pas votre lit de soin au-delà de la valeur spécifiée par le fabricant (max.<br />
140 kg).<br />
L Dans le lit de soin, les flammes ouvertes ou les corps incandescents sont interdits<br />
(bougies, cigarettes, etc.)<br />
L Remplacez vos barreaux latéraux s’ils sont déformés ou ouverts pour éviter les<br />
chutes en bas du lit.<br />
L l’utilisation de votre lit peut influencer d’autres appareils électriques (parasites).<br />
Evitez de les employer en même temps.<br />
L Respectez les consignes de sécurité et le mode d’emploi.<br />
L Le lit électrique doit être placé à distance de la prise d'alimentation secteur.<br />
L Il doit être exclusivement utilisé avec un lève-personne pouvant être positionné sous<br />
le lit médicalisé.<br />
2 Utilisation<br />
Ce chapitre décrit l'utilisation quotidienne. Ces instructions sont destinées à l'utilisateur<br />
et au distributeur.<br />
Le lit est livré entièrement assemblé par votre distributeur. Les instructions destinées au<br />
distributeur pour le réglage du lit sont indiquées au § 3.<br />
L AVERTISSEMENT: Veillez à ce qu'aucune partie du lit ne pince les câbles<br />
d'autres équipements.<br />
L AVERTISSEMENT: Le lit médicalisé doit être exclusivement utilisé avec un lèvepersonnes<br />
pouvant être positionné sous le lit.<br />
2.1 Boîtier de blocage (EN OPTION)<br />
L ATTENTION : Risque de blessures - Veillez à ce qu'aucun câble électrique ne<br />
soit écrasé.<br />
Ce paragraphe s'applique lorsqu'un boîtier de blocage est monté sur le lit pour être<br />
utilisé avec la commande manuelle sans fonction de verrouillage.<br />
Ce boîtier est situé entre le transformateur et la commande manuelle afin d'éviter tout<br />
actionnement électrique involontaire du lit (boîtier monté sur la barre transversale du chariot<br />
élévateur du lit). Il est muni d'interrupteurs rotatifs autorisant ou interdisant tour à tour le<br />
fonctionnement manuel du lit.<br />
1<br />
3<br />
�<br />
�<br />
4<br />
2<br />
Page 7<br />
1 = Boîtier de blocage<br />
2 = Raccordement du transformateur<br />
3 = Raccordement de la commande<br />
manuelle<br />
4 = Interrupteur de blocage<br />
�= Verrouillé<br />
�= Déverrouillé<br />
FR
FR <strong>Luna</strong><br />
2010-11<br />
2.2 Commande manuelle sans fonction de blocage<br />
L ATTENTION : Risque de blessures - Les réglages du patient doivent être<br />
effectués sous surveillance.<br />
Cette commande manuelle doit être utilisée en complément du boîtier de blocage.<br />
La commande manuelle permet de régler la hauteur du lit ainsi que les angles d'inclinaison<br />
du dossier et de pliure au niveau des genoux. Après utilisation, la commande manuelle doit<br />
être raccrochée au barreau latéral et sécurisée par le boîtier de blocage.<br />
Les réglages possibles sont les suivants :<br />
Inclinaison du dossier<br />
Montée et descente du sommier<br />
Montée et descente de la zone jambes<br />
Position anti-Trendelenburg<br />
Lors du raccordement de la commande actuelle au boîtier de blocage, veillez à ce que<br />
le raccordement au boîtier soit parfait. Pour cela :<br />
1. Retirez la bague de sécurité.<br />
2. Branchez la prise de connexion de la commande<br />
manuelle sur le boîtier de blocage.<br />
3. Posez la bague de sécurité sur le raccordement du<br />
boîtier de blocage afin d'éviter tout retrait<br />
involontaire du cordon.<br />
Le cordon de connexion ne peut être ainsi retiré du boîtier de blocage sans retrait préalable<br />
de la bague de sécurité.<br />
Page 8
2.3 Commande manuelle avec fonction de blocage<br />
Le boîtier de blocage peut être remplacé par une commande manuelle avec fonction de<br />
verrouillage.<br />
Déverrouillé<br />
La commande manuelle possède une fonction de<br />
verrouillage.<br />
Elle permet de désactiver ou de réactiver une ou<br />
plusieurs fonctions.<br />
Page 9<br />
<strong>Luna</strong><br />
2010-11<br />
Mesures de précaution :<br />
• Le passage entre les positions de verrouillage et de<br />
déverrouillage s'effectue au moyen de la clé du petit<br />
bouton situé entre les deux boutons de commande<br />
manuelle.<br />
Verrouillé<br />
2.4 Actionnement des freins<br />
L AVERTISSEMENT: Le fonctionnement des roulettes directrices est fonction de<br />
leur usure et de l'éventuelle contamination des pneus (eau, huile…) – Vérifiez<br />
l'état des pneus avant chaque utilisation.<br />
L AVERTISSEMENT: Les roulettes directrices sont sujettes à l'usure – Vérifiez leur<br />
état avant chaque utilisation.<br />
L AVERTISSEMENT: Risque d'accident - Bloquez toujours les roulettes<br />
directrices. Si vous ne bloquez qu'un roulette directrice, les roulettes libres<br />
tournent autour de la roulette débloquée.<br />
Les quatre roulettes directrices peuvent être bloquées pour empêcher tout roulement<br />
involontaire.<br />
Blocage (A)<br />
Fläche des Kipphebels mit dem Fuß bis zum Anschlag nach unten treten.<br />
Déblocage (B)<br />
Fläche des Kipphebels mit dem Fuß bis zum Anschlag nach vorne treten.<br />
A<br />
B<br />
FR
FR <strong>Luna</strong><br />
2010-11<br />
2.5 Soulagement de traction<br />
L AVERTISSEMENT: Ne retirez pas le dispositif de passage de câbles.<br />
L AVERTISSEMENT: Ne placer ou n'accrocher aucun objet sur le soulagement de<br />
traction.<br />
Le support de fixation du soulagement de traction se trouve sous la barre transversale du<br />
sommier à latte à la tête du lit.<br />
Introduisez le soulagement de traction du câble secteur (4) dans le support prévu à<br />
cet effet (3).<br />
Tirez le câble secteur (1) à la longueur désirée de telle manière à ce que le câble<br />
secteur (2) puisse être installé en dessous du sommier à latte en empêchant ainsi le<br />
câble de pendre. Veillez à ce que le câble (2) reste détendu dans toutes les positions<br />
de réglage.<br />
Vérifiez le câble secteur lorsque vous vissez à la main le dispositif de soulagement<br />
de traction du câble (4).<br />
Vérifiez la position du câble secteur lorsque vous vissez à la main le dispositif de<br />
soulagement de traction du câble (5).<br />
1<br />
4<br />
2.6 Cäble secteur<br />
L AVERTISSEMENT: Ne suspendre aucun autre objet en dehors du câble secteur.<br />
L AVERTISSEMENT: Le cordon d'alimentation peut-être endommagé - Le cordon<br />
d'alimentation doit être soigneusement positionné de manière à éviter les risques<br />
de nœuds, de traction, de cisaillement ou tout autre risque mécanique en veillant<br />
à ce qu'il ne soit pas en contact avec le sol.<br />
Pour que votre câble secteur reste en bon état sur le plan du fonctionnement et de la<br />
sécurité, nous avons prévu sur la barre transversale du sommier à lattes (à côté du<br />
soulagement de traction) une suspension sur laquelle vous pouvez laisser votre câble<br />
enroulé sur le lit de soin pour le cas où vous n’utiliseriez pas votre lit avec la commande<br />
électrique.<br />
Page 10<br />
3<br />
5<br />
2<br />
1 = Câble secteur<br />
(raccordement au<br />
secteur)<br />
2 = Câble secteur<br />
(raccordement<br />
côté transfo)<br />
3 = Support<br />
soulagement de<br />
traction<br />
4 = Soulagement de<br />
traction<br />
Câble secteur<br />
5 = Molette du<br />
soulagement de<br />
traction
<strong>Luna</strong><br />
2010-11<br />
2.7 Descente d'urgence du dossier<br />
L AVERTISSEMENT: Risque d'écrasement des mains ou d'objetsentre l'appui-tête<br />
et le cadre.<br />
Le dossier peut être descendu manuellement (descente d’urgence en cas de panne du<br />
moteur).<br />
Descente d'urgence autorisée avec au moins deux personnes.<br />
Manipulation : 1. Rabattre la languette de sécurité de la fixation supérieure du moteur.<br />
2. Une personne saisit le cadre du dossier sur le côté, pendant qu’une<br />
seconde personne enlève le boulon de blocage et enlève le moteur de<br />
la suspension.<br />
3. Descendre le dossier.<br />
2.8 Barreaux latéraux<br />
Les barreaux latéraux peuvent descendre d’un côté.<br />
1<br />
Descendre<br />
L AVERTISSEMENT: Risque d'écrasement - fixez correctement les<br />
barreaux latéraux afin d'éviter leur chute involontaire.<br />
L AVERTISSEMENT: Risque d'écrasement - aucun objet ni parties du<br />
corps ne doit dépasser au-dessus de la surface de couchage !<br />
L AVERTISSEMENT: Risque de blessures - N'abaissez pas les barreaux<br />
latéraux d'un côté si le patient doit demeurer sans surveillance.<br />
Lever légèrement le barreaux latéral supérieur, enfoncer le bouton de blocage sur la<br />
tête/le<br />
pied latéral et abaisser lentement les barreaux latéraux (saisissez uniquement le<br />
barreau en bois du dessus !).<br />
Pour la <strong>Luna</strong> Basic, le bouton est situé l’extérieur des panneaux.<br />
2<br />
1<br />
4<br />
3<br />
2<br />
Page 11<br />
1 = Languette de sécurité<br />
2 = Fixation du moteur<br />
3 = Cadre du dossier<br />
4 = Moteur du cadre du<br />
dossier<br />
1 = Barreau latéral<br />
supérieur<br />
2 = Bouton<br />
FR
FR <strong>Luna</strong><br />
2010-11<br />
Si des rehausses ou des recouvrements de barreaux latéraux sont nécessaires pour<br />
accroître la sécurité du patient (patient fortement amaigri par exemple), il faut veiller à ne<br />
pas compromettre, après installation de ces dispositifs, les fonctions du lit et la conformité<br />
CE d’origine.<br />
�<br />
��<br />
�<br />
2.9 Potence de levage<br />
�<br />
La potence peut être montée des deux côtés du cadre côté tête (à utiliser uniquement avec<br />
le modèle LUNA !).<br />
Introduire la potence (1) à fond dans le logement souhaité (2).<br />
Glisser le boulon de blocage (3) dans la rainure de positionnement (4).<br />
Tirer la boucle métallique (5) au-dessus de l’extrémité supérieure du cadre jusqu’à ce<br />
que le boulon descende dans l’un des trois trous (6).<br />
Tirer la sangle (7) dans la boucle métallique, la passer dans le triangle (8) et régler la<br />
longueur. Bloquer la sangle.<br />
2.10 Rastomat (le cas échéant)<br />
L ATTENTION : Risque de blessures - Pendant le réglage, veillez à ce qu'aucun<br />
objet ni personne ne demeure à proximité.<br />
Pour régler la surface d’appui des jambes, saisissez la sangle aménagée au pied du lit au<br />
centre du châssis. Réglez le repose-jambes à la hauteur souhaitée. L’intervalle de réglage<br />
du Rastomat est d’environ 2 cm. Pour dégager le repose-jambes, tirez-le en position<br />
supérieure au moyen de la sangle aménagée au pied du lit. Le Rastomat bloque tous les<br />
arrêts et vous pouvez alors relâcher lentement le repose-jambes complètement jusqu’à ce<br />
qu’il repose sur le cadre du lit.<br />
Effectuez cette opération à l’aide de la sangle uniquement aménagée au pied du lit pour<br />
éviter de forcer la crémaillère et de l’endommager.<br />
Page 12<br />
1 = Potence<br />
2 = Logement de la potence<br />
3 = Boulon de blocage<br />
4 = Rainure de positionnement<br />
5 = Extrémité de la potence<br />
6 = Trous<br />
7 = Sangle<br />
8 = Triangle<br />
��
2.11 Transfert dans et hors du lit<br />
L ATTENTION : Si vous ne pouvez pas réaliser le transfert en toute sécurité,<br />
demandez à quelqu'un de vous aider.<br />
1. Placez-vous aussi près que possible du lit.<br />
2. Vérifiez que les freins du lit sont enclenchés.<br />
3. Retirez ou descendez les barreaux latéraux du lit.<br />
4. Procédez au transfert vers/depuis le lit.<br />
Page 13<br />
<strong>Luna</strong><br />
2010-11<br />
2.12 Transport<br />
L AVERTISSEMENT: Risque de blessure – Vérifiez que le lit est bien fixé. Vous<br />
éviterez ainsi des blessures des passagers en cas de collision ou de<br />
freinage brutal.<br />
L AVERTISSEMENT : risque de blessure - N'utilisez JAMAIS la même ceinture<br />
pour attacher le passager et le lit.<br />
L AVERTISSEMENT : risque de blessure. – Le transport de patient n'est autorisé<br />
que dans la position couchée horizontale la plus basse!<br />
Pour éviter des dégâts pendant le transport, n’oubliez pas de démonter la potence.<br />
Débranchez le câble secteur et vérifiez qu’aucun câble pendant ne se trouve à proximité du<br />
sol.<br />
2.13 Cäblage<br />
1 = sommier têtière<br />
2 = sommier repose-<br />
jambes<br />
3 = supports potence<br />
4 = soulagement de<br />
traction<br />
5 = câble secteur<br />
6 = transfo / boîtier de<br />
contrôle<br />
7 = boîtier de blocage<br />
8 = moteur têtière<br />
9 = moteur pliure du<br />
genou<br />
10 = moteur têtière<br />
11 = moteur repose-<br />
jambes<br />
12 = commande manuelle<br />
Tous les câbles à<br />
l’intérieur du cadre du lit<br />
doivent être posés de<br />
telle façon à éviter tout<br />
contact avec le sol et tout<br />
risque d’écrasement ou<br />
de cisaillement.<br />
FR
FR <strong>Luna</strong><br />
2010-11<br />
3 Installation et réglage<br />
Les instructions de ce chapitre sont destinées au distributeur.<br />
Le <strong>Vermeiren</strong> <strong>Luna</strong> a été conçu pour un réglage avec un minimum de pièces de rechange. Il<br />
n'est pas nécessaire de stocker des pièces de rechange.<br />
Pour trouver un service d'entretien ou un revendeur spécialisé près de chez vous, contactez<br />
l'établissement <strong>Vermeiren</strong> le plus proche. Vous trouverez une liste des établissements sur la<br />
dernière page.<br />
L AVERTISSEMENT: Risque de limitations dangereuses - N'utiliser que les<br />
limitations décrites dans ce manuel.<br />
3.1 Outils<br />
Le montage du lit nécessite les outils suivants.<br />
Clé Allen<br />
Tournevis<br />
3.2 Mode de livraison<br />
Le <strong>Vermeiren</strong> <strong>Luna</strong> doit être livré avec:<br />
2 pièces (tête et pied du lit) moteur compris + habillage en bois env. 17 kg / pièce<br />
Sommier à lattes, tête moteur compris env. 20 kg<br />
Sommier à lattes, tête transfo et moteur compris env. 20 kg<br />
Barreaux latéraux (2 x 2 lattes en bois) env. 3 kg / pièce<br />
Potence + poignée en triangle env. 10 kg<br />
Commande manuelle env. 10 kg<br />
Boîtier de blocage<br />
Clé pour vis à six pans creux (structure)<br />
Mode d’emploi<br />
Le lit de soin ne peut être utilisé qu’avec les éléments repris ici. Si vous omettez des<br />
éléments ou si vous combinez des équipements, des composants et des systèmes<br />
électriques d’une autre marque, ce lit n’est plus considéré comme un lit de soin livré par le<br />
fabricant et son utilisation se fait à vos risques et périls. La conformité CE et la<br />
responsabilité du fabricant sont annulées.<br />
�<br />
Contenu ci-dessus peut être différent en fonction de votre modèle: <strong>Luna</strong>, <strong>Luna</strong> Basic, <strong>Luna</strong><br />
Deluxe, <strong>Luna</strong> X-low. Certaines images peuvent varier d'un modèle <strong>Luna</strong> à l'autre dans le<br />
manuel<br />
3.3 Assemblage<br />
L ATTENTION : Risque de pincement entre des éléments du lit.<br />
L ATTENTION : Risque d'écrasement - Tenez vos doigts à l'écart des pièces<br />
mobiles du lit.<br />
Assemblée montré ci-dessous applicables pour les types: <strong>Luna</strong>, <strong>Luna</strong> Basic, <strong>Luna</strong> Deluxe,<br />
<strong>Luna</strong> X-low. En fonction de votre type de lit, certaines images peuvent paraître différents.<br />
Suivez les instructions ci-dessous qui vous expliquent l’assemblage de votre lit de soin.<br />
Page 14
3.3.1 Tête et pied de lit<br />
2<br />
3<br />
Page 15<br />
<strong>Luna</strong><br />
2010-11<br />
Introduisez les extrémités du sommier à lattes dans les pièces d’appui de la tête et<br />
du pied du pied (les vis de fixation doivent être d’abord dévissées, faire en sorte de<br />
ne pas coincer la vis !).<br />
ATTENTION: Le sommier est muni de supports pour la potence ainsi que d’attaches<br />
servant à suspendre le câble du secteur.<br />
Bloquez le tout au moyen des vis de fixation en les vissant de telle façon à ce<br />
qu'elles s’engagent dans le pas de vis aménagé dans les supports d’appui de la tête<br />
et du pied du lit pour former un ensemble rigide (bloquez à la main !).<br />
Protéger le câble d'alimentation du moteur contre l'écrasement.<br />
3.3.2 Sommier a lattes<br />
1<br />
1 1<br />
Redressez les deux sommiers à lattes et les glisser l’un dans l’autre jusqu’à butée.<br />
Bloquez ensuite à la main les vis de fixation de liaison.<br />
Protéger le câble d'alimentation du moteur contre l'écrasement.<br />
2<br />
3<br />
1 = Extrémités du<br />
sommier à lattes<br />
2 = Pièces d'appui de la<br />
tête de lit<br />
3 = Vis de fixation<br />
1 = Sommier à<br />
lattes<br />
2 = Vis de fixation<br />
FR
FR <strong>Luna</strong><br />
2010-11<br />
3.3.3 Barreaux latéraux en bois<br />
Le montage ci-dessous s'applique aux modèles suivants : <strong>Luna</strong>, <strong>Luna</strong> Basic, <strong>Luna</strong> Deluxe,<br />
<strong>Luna</strong> X-bas.<br />
Certaines images peuvent varier d'un modèle <strong>Luna</strong> à l'autre.<br />
A. Introduisez les rails à broche courte (1) à droite et à gauche du barreau en bois<br />
supérieur. Introduisez les rails à broche longue (2) à droite et à gauche du barreau<br />
en bois inférieur.<br />
Introduisez un à un les rails à broche longue (2) du barreau en bois dans la glissière<br />
à la tête puis au pied du lit, et fixez-les de telle manière que l'extrémité des rails<br />
soit parfaitement introduite et enclenchée. Dégagez de nouveau ce rail d’un côté en<br />
appuyant sur le bouton de verrouillage de position (5) et en tirant délicatement vers<br />
le haut le barreau en bois.<br />
Laissez de nouveau les rails à broche (2) descendre de la glissière jusqu'à ce que<br />
l'extrémité repose à peine sur le guide. Le rail à broche courte (1) est maintenant<br />
introduit avec le barreau en bois entre les parois des rails à broche longue et tout le<br />
dispositif de rail à broche (1) + (2) sera placé dans la glissière correspondante (4) en<br />
étant tiré vers le haut lorsque vous saisirez le barreau en bois et bloquerez la<br />
structure dans cette position.<br />
B. Introduisez les contre-écrous (6) et serrez-les manuellement.<br />
Page 16<br />
1 = rails à broche courte<br />
2 = rails à broche longue<br />
3 = barreaux en bois (2 éléments<br />
de part et d'autre)<br />
4 = glissière<br />
5 = bouton de blocage de position<br />
6 = contre-écrou
<strong>Luna</strong><br />
2010-11<br />
3.3.4 Branchements<br />
L ATTENTION : risque de blessure. - Ne pas toucher la fiche si vous aves les<br />
mains humides.<br />
L ATTENTION: risque de blessure - Ne placer aucun objet sur la connexion et le<br />
câble d'alimentation et protéger ces éléments contre les sollicitations<br />
mécaniques.<br />
1. Comme source de courant, il faut utiliser une prise de courant 220V/230V, 50Hz<br />
installée conformément aux prescriptions VDE.<br />
2. La figure ci-dessous présente les connexions du transformateur:<br />
Saisir le câble uniquement par la fiche et le débrancher de la prise de courant.<br />
Poser le câble secteur sans boucles, sans le plier et sans le placer sur des arêtes vives.<br />
Protéger le câble secteur et le câble d'alimentation vers l'interrupteur manuel contre<br />
l'écrasement.<br />
6<br />
1 2 3 4<br />
1 2 3 4 5<br />
Page 17<br />
1 = Borne moteur têtière<br />
2 = Borne moteur pliure du genou<br />
3 = Borne moteur dossier<br />
4 = Borne moteur repose-jambes<br />
5 = Borne boîtier de blocage<br />
6 = Transfo / boîtier de contrôle<br />
Les câbles de raccordement des moteurs et les bornes<br />
du transfo ont la même numérotation.<br />
FR
FR <strong>Luna</strong><br />
2010-11<br />
4 Maintenance<br />
La durée de vie du lit est influencée par son utilisation, de son stockage, de sa maintenance<br />
régulière, de l'entretien et du nettoyage.<br />
4.1 Maintenance régulière<br />
Les activités de maintenance requises pour garantir le bon état de votre lit <strong>Vermeiren</strong> sont<br />
décrites ci-dessous :<br />
� Avant chaque utilisation<br />
� Contrôlez et nettoyez les pneus. Remplacez les pneus si nécessaire.<br />
� Contrôlez les freins et réglez-les si nécessaire.<br />
� Contrôlez le lit (propreté, fissures, dommages sur les pièces de structure,<br />
etc.) et nettoyez-le. Remplacez le revêtement si nécessaire.<br />
� Vérifiez que les câbles ne présentent pas de dégâts visibles et que les<br />
connexions ont été effectuées comme indiqué dans le mode d’emploi. S’il y a<br />
des dégâts, il faut retirer immédiatement la fiche. Avertissez votre atelier<br />
spécialisé agréé pour la remise en état.<br />
� Vérifiez que les éléments mécaniques de réglage (barreaux latéraux,<br />
potence, repose-pied) fonctionnent correctement. Si vous constatez des<br />
dysfonctionnements, informez immédiatement votre revendeur.<br />
� Vérifiez le bon fonctionnement des commandes manuelles ; en cas de<br />
dysfonctionnement, veuillez déconnecter le cordon d'alimentation.<br />
� Toutes les 8 semaines : inspection ou rectification<br />
� Fonctionnement de la glissière des barreaux latéraux (tête et pied)<br />
� Logements des lattes dans le sommier à lattes<br />
� État des éléments en bois<br />
� Potence (ajustement / déformation)<br />
� Lubrification des pièces mobiles<br />
Tout les 6 mois ou pour tout nouvel utilisateur<br />
� Révision générale<br />
� Désinfection<br />
� Propreté<br />
� Pénétration de l'humidité dans le matelas utilisé<br />
Vous trouverez un plan de maintenance au verso de ce manuel.<br />
Seul le distributeur peut se charger de la réparation et de l'assemblage des pièces<br />
détachées de votre lit.<br />
N'installez que des pièces de rechange autorisées par <strong>Vermeiren</strong>.<br />
Page 18
4.2 Expedition et stockage<br />
Respectez les instructions suivantes pour le expedition or le stockage du lit:<br />
Le stocker uniquement dans des locaux secs (+5°C à +41°C).<br />
À une humidité relative de 30 % à 70 %.<br />
Page 19<br />
<strong>Luna</strong><br />
2010-11<br />
Utilisez suffisamment de protections ou emballages pour mettre le lit à l'abri de la<br />
rouille et des corps étrangers. (Par exemple eau salée, air salin, sable, poussière).<br />
Stockez toutes les pièces retirées ensemble, au même endroit (ou repérez-les si<br />
nécessaire) pour éviter de les mélanger avec d'autres produits lors du remontage.<br />
Les composants doivent être stockés sans subir de contrainte (ne placez pas de<br />
pièces trop lourdes sur le lit, ne le coincez pas entre d'autres objets, etc.).<br />
Enrouler le câble secteur, sans le plier, dans le support prévu à cet effet.<br />
Vérifier que les câblages internes ne sont pas écrasés ou pliés.<br />
4.3 Entretien<br />
4.3.1 Structure métallique, éléments en bois<br />
Le nettoyage des pièces en métal et en bois doit s'effectuer comme suit :<br />
� Avec un chiffon mouillé à l'eau chaude, sans humidification excessive des<br />
pièces en métal et en bois.<br />
� Utilisez un détergent doux vendu dans le commerce pour enlever les taches<br />
rebelles.<br />
� Vous pouvez utiliser une éponge ou une brosse douce pour éliminer les<br />
taches.<br />
� N'utilisez pas de produits de nettoyage agressifs tels que des solvants ni de<br />
brosses à poils durs.<br />
� N'utilisez jamais de vapeur ni de nettoyeur haute pression pour le nettoyage.<br />
4.3.2 Pièces en plastique<br />
Nettoyez les éléments en plastique de votre lit avec un produit de nettoyage conçu à cet<br />
effet. Utilisez exclusivement une éponge ou brosse douce.<br />
Les moteurs et l'unité manuelle seront exclusivement nettoyés à l'aide d'un chiffon<br />
légèrement humidifié.<br />
4.3.3 Enduit<br />
La grande qualité de la couche de surface garantit une protection optimale contre la<br />
corrosion. Si la couche externe est endommagée par une rayure ou autre, faites réparer la<br />
surface concernée par votre distributeur.<br />
Pour le nettoyage, utilisez exclusivement de l'eau chaude et des détergents domestiques<br />
normaux avec des brosses ou tissus doux. Veillez à ne pas faire entrer d'humidité dans les<br />
tubes.<br />
À l'origine, les pièces en zinc n'ont besoin que d'être frottées avec un tissu sec. Vous pouvez<br />
éliminer les taches rebelles avec un polish pour zinc du commerce.<br />
FR
FR <strong>Luna</strong><br />
2010-11<br />
4.4 Inspection<br />
Nous recommandons en principe une inspection annuelle, ainsi qu'une autre avant toute<br />
remise en service. Les vérifications suivantes doivent être réalisées et documentées par des<br />
personnes autorisées :<br />
contrôle des éléments de cadre pour vérifier l’absence de déformation des pièces en<br />
plastique, de craquelures ou de dysfonctionnements (surface de couchage, chariot<br />
élévateur, dossier, pied, potence, support de potence, roulettes).<br />
contrôle visuel des peintures (risque de corrosion)<br />
vérification du fonctionnement des roulettes de freinage (roue libre, sécurité, blocage,<br />
etc.)<br />
contrôle de la solidité et du serrage de toutes les vis<br />
vérification de la lubrification des joints métalliques des pièces mobiles<br />
contrôle visuel de tous les boîtiers pour vérifier qu’ils ne sont pas abîmés ; les vis doivent<br />
être bien serrées, les joints ne doivent pas présenter de dégâts externes visibles<br />
vérification de l'absence de zones fissurées et fragilisées au niveau des pièces en<br />
plastique<br />
contrôle visuel du câble secteur (EPR ou comparable)<br />
état du câble secteur (en particulier : écrasements, usure, coupures, isolations ou<br />
conducteurs internes visibles, conducteurs métalliques visibles, plis, noeuds,<br />
débosselages, décoloration de l’enveloppe extérieure, zones cassantes)<br />
contrôle du câblage interne de la ligne d’alimentation secteur (en particulier :<br />
écrasements, usure, coupures, isolations ou conducteurs internes visibles, conducteurs<br />
métalliques visibles, plis, noeuds, débosselages, décoloration de l’enveloppe extérieure,<br />
zones cassantes)<br />
vérification de la protection du système électrique contre l’humidité - minimum IPX4 (voir<br />
plaque signalétique)<br />
vérification du dispositif de suspension du câble secteur lors du transport<br />
le cordon d'alimentation ainsi que tout autre câble électrique doit être disposé de manière<br />
à éviter les risques de cisaillement, d’écrasement et autres sollicitations mécaniques<br />
mesure de la résistance du conducteur de protection (Ohm) suivant VDE 0751-1<br />
mesure du courant de fuite résiduel (A) suivant VDE 0751-1<br />
mesure de la résistance d’isolement (MOhm) suivant VDE 0751-1<br />
contrôle du fonctionnement des barreaux latéraux (verrouillage, distances suivant EN<br />
1970 : 2000, également en cas de sollicitation, déformation, usure par sollicitation)<br />
contrôle du fonctionnement des entraînements (parcours de la plage de réglage complète<br />
des bruits des moteurs, vitesse, marche silencieuse, etc., déclenchement en fin de<br />
course (ex. : limitation du courant, contacteur de fin de course), et si nécessaire : mesure<br />
des performances, d'abord sans charge puis avec la charge nominale ("SWL"), afin de<br />
détecter tout signe d'usure du moteur en comparant les valeurs de courant électrique<br />
obtenues avec les valeurs de référence lors de la livraison.<br />
vérification de l’état du matelas (pas en cas de réutilisation du lit)<br />
Présence de l'ensemble des pièces et du manuel d'instructions ?<br />
Les mesures de contrôle ne peuvent être effectuées que par des personnes qui ont au<br />
moins suivi une formation sur le lit de soin et auxquelles des électriciens qualifiés ont<br />
dispensé une formation sur les outils et procédures de contrôle à mettre en œuvre.<br />
L’autorisation d’utiliser le lit de soin après des mesures de contrôle réussies ou après des<br />
opérations d’entretien ne peut être délivrée que par un électricien qualifié.<br />
L'entretien ne doit être validé dans le plan de maintenance que si au minimum tous les<br />
éléments indiqués ci-dessus ont été contrôlés.<br />
Page 20
Page 21<br />
<strong>Luna</strong><br />
2010-11<br />
Exigence : Remarques<br />
1.) Contrôle visuel :<br />
n.a. Oui Non Remarque<br />
1.1) Raccordement au secteur<br />
Câble EPR ou de qualité équivalente<br />
1.2) Etat du câble secteur<br />
Points particuliers à contrôler :<br />
écrasements, usure, coupures, isolations ou<br />
conducteurs internes visibles<br />
conducteurs métalliques visibles, plis,<br />
débosselages, décoloration de l’enveloppe<br />
extérieure,<br />
zones cassantes<br />
1.3) Etat des lignes internes<br />
Points particuliers à contrôler :<br />
écrasements, usure, coupures, isolations ou<br />
conducteurs internes visibles, conducteurs<br />
métalliques visibles, plis, débosselages,<br />
décoloration de l’enveloppe extérieure, zones<br />
cassantes)<br />
1.4) Soulagement de traction et protection<br />
contre l’écrasement suffisants du câble<br />
secteur<br />
1,5) Soulagement de traction et protection<br />
contre l’écrasement suffisants des lignes<br />
internes<br />
Le câble secteur et les diverses lignes<br />
électriques sont bien fixés, ce qui rend<br />
improbables le cisaillement, l’écrasement et<br />
autres sollicitations mécaniques.<br />
1.7) Protection contre l’humidité IP X4<br />
Dispositif pour suspendre le câble secteur lors<br />
du transport<br />
1.9) Contrôle visuel des éléments de cadre pour<br />
vérifier l’absence de déformation plastique<br />
et/ou d’usure :<br />
- Fond du lit<br />
- Soulève-lit<br />
- Surface de couchage, appui pour le siège, appui<br />
pour les pieds<br />
- Potence<br />
- Support de potence<br />
- Roulettes<br />
1.10) Boîtiers<br />
Contrôle visuel de tous les boîtiers pour vérifier<br />
qu’ils ne sont pas abîmés ; les vis doivent être<br />
bien serrées, les joints ne doivent pas présenter<br />
de dégâts externes. visibles<br />
n.a. Oui Non Remarque<br />
n.a. Oui Non Remarque<br />
n.a. Oui Non Remarque<br />
n.a. Oui Non Remarque<br />
n.a. Oui Non Remarque<br />
n.a. Oui Non Remarque<br />
n.a. Ja Nein Bemerkung<br />
n.a. Oui Non Remarque<br />
n.a. Oui Non Remarque<br />
n.a. Oui Non Remarque<br />
FR
FR <strong>Luna</strong><br />
2010-11<br />
Tableau (A) se rapportant à la figure (B)<br />
Pour les lits dont les dimensions des barrières latérales<br />
sont supérieures de 10 % aux dimensions indiquées, il<br />
y a lieu de ne pas utiliser ces barrières avec des<br />
patients d’une taille plus petite ou d’un poids inférieur et<br />
de prendre les mesures supplémentaires nécessaires<br />
pour éviter que le patient ne soit pris au piège dans les<br />
barreaux ou ne passe à travers les barreaux.<br />
Les barrières latérales dont les dimensions sont égales<br />
ou supérieures de 10 % aux valeurs indiquées ne<br />
peuvent plus être utilisés aussi longtemps que celles-ci<br />
n’auront pas été aménagés de telle façon à se<br />
conformer aux exigences ; remplacez les si nécessaire.<br />
Outre la vérification effectuée selon les points suivants,<br />
il y a lieu de contrôler la fonctionnalité (bon<br />
fonctionnement des crémaillères, éléments de fixation)<br />
des barrières latérales. Les défectuosités constatées<br />
doivent être réparées. Respect des dimensions des<br />
composants des barrières latérales suivant croquis ciaprès.<br />
Page 22<br />
Mesure effective : mm<br />
Mesure effective : mm<br />
Mesure effective : mm<br />
Mesure effective : mm<br />
Mesure effective : mm<br />
Mesure effective : mm<br />
Mesure effective : mm<br />
Mesure effective : mm<br />
n.a. Oui Non Remarque<br />
n.a. Ja Non Remarque<br />
n.a. Oui Non Remarque<br />
n.a. Oui Non Remarque
Figure (A) se rapportant au tableau (B)<br />
D D<br />
G<br />
C<br />
B<br />
2.) Contrôle des mesures<br />
A<br />
H<br />
A F<br />
2.1) Résistance du conducteur de protection<br />
Valeur effective : Ohm<br />
2.2) Courant de fuite<br />
Valeur effective : A<br />
2.3) Résistance d’isolement<br />
Valeur effective : MOhm<br />
3.) Contrôles du fonctionnement<br />
3.1) Contrôle du fonctionnement des barreaux<br />
latéraux :<br />
- Verrouillage, par exemple jeu dans le verrouillage<br />
- Distances, également en charge<br />
- Déformation<br />
- Usure par sollicitation<br />
3,2) Contrôle du fonctionnement des freins :<br />
- Sécurité<br />
- Arrêt<br />
- Roue libre<br />
3,3) Contrôle du fonctionnement des moteurs :<br />
- Parcours de la plage de réglage complète des moteurs<br />
(bruits, vitesse, marche silencieuse, etc.)<br />
- Déclenchement en fin de course (par exemple limitation<br />
du courant, contacteur de fin de course)<br />
- si nécessaire, mesurer la puissance absorbée d’abord<br />
sans charge, ensuite à la charge nominale (SWL), pour<br />
pouvoir calculer l’usure éventuelle des moteurs via la<br />
consommation de courant et la. comparer aux valeurs<br />
qui existaient à la livraison. Le fabricant peut fixer des<br />
valeurs limites.<br />
Divers :<br />
Page 23<br />
<strong>Luna</strong><br />
2010-11<br />
Remarque : lorsque les<br />
montants de la barrière<br />
latérale sont externes<br />
(indiqué en gris foncé), la<br />
distance A sous les<br />
barreaux par rapport au<br />
sommier est une<br />
imposition.<br />
n.a. Oui Non Remarque<br />
n.a. Oui Non Remarque<br />
n.a. Oui Non Remarque<br />
n.a. Oui Non Remarque<br />
n.a. Oui Non Remarque<br />
n.a. Oui Non Remarque<br />
n.a. Oui Non Remarque<br />
n.a. Oui Non Remarque<br />
FR
FR <strong>Luna</strong><br />
2010-11<br />
4.5 Désinfection<br />
L AVERTISSEMENT : produits dangereux, l'utilisation de désinfectants est<br />
réservée au personnel autorisé.<br />
L AVERTISSEMENT : produits dangereux, irritants pour la peau. Vous devez porter<br />
des vêtements de protection adaptés car les désinfectants peuvent irriter votre<br />
peau. Vous devez pour cela également tenir compte des informations relatives<br />
aux produits utilisés.<br />
Toutes les pièces du lit peuvent être traitées par récurage avec un désinfectant.<br />
Toutes les mesures prises pour désinfecter des équipements réutilisés, leurs composants ou<br />
accessoires doivent être notées dans un rapport de désinfection contenant au minimum les<br />
informations suivantes (avec documentation des produits jointe) :<br />
Date de<br />
désinfection<br />
Motif Spécification Substance et<br />
concentration<br />
Tableau 2: Exemple de journal de désinfection<br />
Abréviations utilisées dans la colonne 2 (motif) :<br />
V = Infection suspectée IF = Cas d'infection W = Répétition I = Inspection<br />
Pour une feuille vierge d'un journal de désinfection, voir § 9.<br />
Page 24<br />
Signature
<strong>Luna</strong><br />
2010-11<br />
Les désinfectants recommandés pour le récurage (d'après la liste fournie par le Robert Koch<br />
Institute, RKI) sont présentés dans le tableau ci-dessous. L'état actuel des désinfectants<br />
présents dans la liste RKI est disponible auprès du Robert Koch Institute (RKI) (page<br />
d'accueil : www.rki.de).<br />
Substance<br />
active<br />
Phénol ou dérivé<br />
de phénol<br />
Chlore,<br />
substances<br />
organiques ou<br />
anorganiques<br />
avec chlore actif<br />
Par<br />
combinaisons<br />
Formaldéhyde<br />
et/ou autres<br />
aldéhydes ou<br />
dérivés<br />
Nom du produit Désinfectant<br />
de<br />
blanchisserie<br />
Solution diluée<br />
Durée pour faire effet<br />
Désinfection<br />
de surface<br />
(récurage/<br />
essuyage)<br />
Solution diluée<br />
Durée pour faire effet<br />
Page 25<br />
Désinfection des excrétions<br />
1 volume crachat ou de selles + 2<br />
volumes de solution diluée ou 1<br />
volume d'urine + 1 volume de solution<br />
diluée<br />
Crachat Selles Urine<br />
Solution diluée<br />
% h % h % h % h % h<br />
Durée pour faire effet<br />
Solution diluée<br />
Durée pour faire effet<br />
Solution diluée<br />
Durée pour faire effet<br />
Zone<br />
d'efficacité<br />
Fabricant ou<br />
fournisseur<br />
Amocid 1 12 5 6 5 4 5 6 5 2 A Lysoform<br />
Gevisol 0,5 12 5 4 5 4 5 6 5 2 A Schülke & Mayr<br />
Helipur 6 4 6 4 6 6 6 2 A B. Braun<br />
Solution<br />
savonneuse mcresylic<br />
(DAB 6)<br />
1 12 5 4 A<br />
Phénol 1 12 3 2 A<br />
Chloramine-T<br />
DAB 9<br />
1,5 12 2,5 2 5 4 A 1 B<br />
Clorina 1,5 12 2,5 2 5 4 A 1 B Lysoform<br />
Trichlorol 2 12 3 2 6 4 A 1 B Lysoform<br />
Apesin AP100 2 4 4 AB Tana<br />
PROFESSIONAL<br />
Dismozon pur 2 4 1 AB Bode Chemie<br />
Perform 2 3 4 AB Schülke & Mayr<br />
Wofesteril 2 2 4 AB Kesla Pharma<br />
Aldasan 2000 4 4 AB Lysoform<br />
Antifect FD 10 3 4 AB Schülke & Mayr<br />
Antiseptica<br />
désinfection de<br />
surface 7<br />
3 6 AB Antiseptica<br />
Apesin AP30 5 4 A Tana<br />
PROFESSIONAL<br />
Bacillocid special 6 4 AB Bode Chemie<br />
Buraton 10F 3 4 AB Schülke & Mayr<br />
Desomed A 2000 3 6 AB Desomed<br />
Nettoyant<br />
désinfectant pour<br />
hôpitaux<br />
8 6 AB Dreiturm<br />
Desomed Perfekt 7 4 AB* Desomed<br />
Solution<br />
formaldéhyde<br />
(DAB 10),<br />
(formaline)<br />
1,5 12 3 4 AB<br />
Incidin Perfekt 1 12 3 4 AB Ecolab<br />
Incidin Plus 8 6 A Ecolab<br />
Kohrsolin 2 12 3 4 AB Bode Chemie<br />
FR
FR <strong>Luna</strong><br />
2010-11<br />
Substance<br />
active<br />
Formaldéhyde<br />
et/ou autres<br />
aldéhydes ou<br />
dérivés<br />
Surfactants<br />
amphotères<br />
(amfotensiden)<br />
Nom du produit Désinfectant<br />
de<br />
blanchisserie<br />
Solution diluée<br />
Durée pour faire effet<br />
Désinfection<br />
de surface<br />
(récurage/<br />
essuyage)<br />
Solution diluée<br />
Durée pour faire effet<br />
Page 26<br />
Désinfection des excrétions<br />
1 volume crachat ou de selles + 2<br />
volumes de solution diluée ou 1<br />
volume d'urine + 1 volume de solution<br />
diluée<br />
Crachat Selles Urine<br />
Solution diluée<br />
% h % h % h % h % h<br />
Durée pour faire effet<br />
Solution diluée<br />
Durée pour faire effet<br />
Solution diluée<br />
Durée pour faire effet<br />
Zone<br />
d'efficacité<br />
Fabricant ou<br />
fournisseur<br />
Lysoform 4 12 5 6 AB Lysoform<br />
Lysoformin 3 12 5 6 AB Lysoform<br />
Lysoformin 2000 4 6 AB Lysoform<br />
Melsept 2 12 4 6 AB B. Braun<br />
Melsitt 4 12 10 4 AB B. Braun<br />
Minutil 2 12 6 4 AB Ecolab<br />
Multidor 3 6 AB Ecolab<br />
Nûscosept 5 4 AB Dr. Nüsken<br />
Chemie<br />
Optisept 7 4 AB* Dr. Schumacher<br />
Pursept-FD 7 4 AB* Merz<br />
Ultrasol F 3 12 5 4 AB Fresenius Kabi<br />
Tensodur 103 2 12 A MFH Marienfelde<br />
Lye Lait de chaux 3 20 6 A 3 B<br />
1 Pas efficace contre les myco-bactéries lors de la désinfection d'entretien, principalement en présence de sang.<br />
2 Ne convient pas pour désinfecter des surfaces poreuses ou contaminées de sang (par exemple bois brut).<br />
3 Pas efficace pour la tuberculose ; préparation de lait de chaux : 1 volume de chaux dissoute (hydroxyde de calcium) + 3 volumes d'eau.<br />
* Efficacité contrôlée sur les virus conformément aux méthodes de contrôle de RKI (Federal Health Reporting 38 (1995) 242).<br />
A : convient pour tuer les germes bactériens végétatifs, y compris les myco-bactéries et champignons, y compris les spores fongiques.<br />
B : convient pour désactiver les virus.<br />
Tableau 3 : Désinfectants<br />
Consultez votre distributeur pour toute question relative à la désinfection ; il sera heureux de<br />
vous aider.
5 Garantie<br />
Extrait des Conditions générales de vente :<br />
(...)<br />
5. La durée de garantie est de 24 mois.<br />
Page 27<br />
<strong>Luna</strong><br />
2010-11<br />
La garantie exclut les dommages liés à des modifications structurelles apportées à nos<br />
produits, à une maintenance insuffisante, à une manipulation ou un stockage déficients ou<br />
inappropriés ou à l'utilisation de pièces autres que les pièces d'origine. Par ailleurs, la<br />
garantie exclut les pièces ou pièces de travail soumises à une usure naturelle.<br />
(...)<br />
6 Mise au rebut<br />
Lors de la mise au rebut du lit, contactez votre centre de collecte local ou retournez le<br />
produit à votre distributeur qui, après l'avoir soumis à une procédure d'hygiène, sera en<br />
mesure de le renvoyer au fabricant, qui se chargera de sa mise au rebut et de son recyclage<br />
corrects, en le séparant en différents matériaux entrant dans sa composition.<br />
Les emballages peuvent être déposés dans des centres de collecte ou de recyclage ou<br />
après de votre distributeur.<br />
7 Déclaration de conformité<br />
FR
FR <strong>Luna</strong><br />
2010-11<br />
8 Plan de maintenance<br />
Date Maintenance Remarques Signature<br />
1/1/2010 Lubrification et entretien général non<br />
9 Journal de désinfection<br />
Date de<br />
désinfection<br />
Motif Spécification Substance et<br />
concentration<br />
Abréviations utilisées dans la colonne 2 (motif) :<br />
V = Infection suspectée IF = Cas d'infection W = Répétition I = Inspection<br />
Page 28<br />
Signature
Contents<br />
Pagina 1<br />
<strong>Luna</strong><br />
2010-11<br />
Voorwoord ............................................................................................ 2<br />
1 Productomschrijving ................................................................ 3<br />
1.1 Toepassingsgebied ....................................................................................................... 3<br />
1.2 Technische specificaties .............................................................................................. 4<br />
1.3 Componenten .............................................................................................................. 5<br />
1.4 Gebruikte symbolen .................................................................................................... 5<br />
1.5 Accessoires .................................................................................................................. 6<br />
1.6 Voor uw veiligheid ...................................................................................................... 6<br />
2 Gebruik ...................................................................................... 7<br />
2.1 Uitschakelingskast (INDIEN ONDER HET BED GEÏNSTALLEERD) ................... 7<br />
2.2 Handmatige <strong>bed</strong>iening zonder vergrendelingsfunctie ................................................. 8<br />
2.3 Handmatige <strong>bed</strong>iening met vergrendelingsfunctie ...................................................... 9<br />
2.4 Bedienen van de rem ................................................................................................... 9<br />
2.5 Trekontlasting ............................................................................................................ 10<br />
2.6 Stroomkabel .............................................................................................................. 10<br />
2.7 Noodaflaat hoofdeinde .............................................................................................. 11<br />
2.8 Onrusthek .................................................................................................................. 11<br />
2.9 Oprichter.................................................................................................................... 12<br />
2.10 Rastomat (indien aanwezig) ...................................................................................... 12<br />
2.11 In en uit het <strong>bed</strong> tillen ................................................................................................ 13<br />
2.12 Transport ................................................................................................................... 13<br />
2.13 Bekabeling ................................................................................................................. 13<br />
3 Montage en afstellen ............................................................... 14<br />
3.1 Gereedschap .............................................................................................................. 14<br />
3.2 Leveringsomvang ...................................................................................................... 14<br />
3.3 Montage ..................................................................................................................... 14<br />
4 Onderhoud ............................................................................... 18<br />
4.1 Periodiek Onderhoud................................................................................................. 18<br />
4.2 Verpakking en opslag ................................................................................................ 19<br />
4.3 Verzorging ................................................................................................................. 19<br />
4.4 Inspectie .................................................................................................................... 20<br />
4.5 Desinfecteren ............................................................................................................. 24<br />
5 Garantie ................................................................................... 27<br />
6 Afvalverwerking ..................................................................... 27<br />
7 Declaration of conformity ...................................................... 27<br />
8 Onderhoudsplan ..................................................................... 28<br />
9 Desinfectiejournaal ................................................................. 28<br />
NL
NL<br />
Voorwoord<br />
Pagina 2<br />
<strong>Luna</strong><br />
2010-11<br />
We willen U danken voor het vertrouwen dat U in onze producten stelt.<br />
De <strong>Vermeiren</strong> <strong>bed</strong>den zijn het resultaat van jarenlange studies en ervaringen. Bij de<br />
ontwikkeling werd veel aandacht besteed aan een eenvoudige <strong>bed</strong>iening en een gemakkelijk<br />
onderhoud.<br />
De verwachte levensduur van uw <strong>bed</strong> wordt sterk beïnvloed door de verzorging en het<br />
onderhoud van het <strong>bed</strong>.<br />
Deze handleiding maakt U vertrouwd met de <strong>bed</strong>iening van Uw <strong>bed</strong>.<br />
In dit document vindt U ook enkele onderhoudsadviezen zodat Uw <strong>bed</strong> lang meegaat.<br />
Het naleven van de gebruiks- en onderhoudsinstructies vormen een essentieel onderdeel<br />
van de garantiebepalingen.<br />
Deze handleiding houdt rekening met de recentste productontwikkelingen. De Firma<br />
<strong>Vermeiren</strong> behoudt zich echter het recht voor om wijzigingen door te voeren zonder verplicht<br />
te zijn voordien geleverde modellen aan te passen of te vervangen.<br />
Als U nog vragen hebt, neemt U best contact op met Uw vakhandelaar.
1 Productomschrijving<br />
1.1 Toepassingsgebied<br />
Pagina 3<br />
<strong>Luna</strong><br />
2010-11<br />
Met het model LUNA beschikt u over een ziekenhuis<strong>bed</strong> dat volledig is ontworpen voor uw<br />
comfort. Het ziekenhuis<strong>bed</strong> biedt verschillende aanpassingsmogelijkheden die verder in dit<br />
document worden behandeld. Lees de handleiding zorgvuldig opdat u vertrouwd geraakt<br />
met de <strong>bed</strong>iening van uw <strong>bed</strong>.<br />
Het verpleeg<strong>bed</strong> is ontworpen voor één volwassen patiënt (vanaf 12 jaar, tot maximaal 140<br />
kg.)<br />
Het <strong>bed</strong> moet worden gebruikt in combinatie met een geschikt matras (min. RG 35, 120 mm<br />
dik, maximaal 20 kg.)<br />
Het ziekenhuis<strong>bed</strong> LUNA is ontworpen voor gebruik in een droge ruimte en op een vlakke en<br />
vaste ondergrond.<br />
Het <strong>bed</strong> biedt door zijn modulaire opbouw verschillende aanpassingsmogelijkheden voor<br />
mensen die moeilijk kunnen lopen door:<br />
verlamming<br />
verlies van ledematen (beenamputatie)<br />
defect of aandoeningen van ledematen<br />
contracturen en gewrichtsaandoeningen<br />
hart- en bloedsomloopinsufficiëntie<br />
evenwichtsstoornissen<br />
cachexie (afname van het spierweefsel)<br />
geriatrische patiënten<br />
Hou bij de individuele verzorging rekening met:<br />
grootte en lichaamsgewicht (max. 140 kg)<br />
fysieke en psychische gesteldheid<br />
woonomgeving<br />
milieu<br />
Het <strong>bed</strong> moet worden gebruikt als toepassingsomgeving 4: "verpleging die wordt geboden in<br />
een huiselijke omgeving waarbij ME-apparatuur wordt gebruikt om letsel, invaliditeit of ziekte<br />
te verlichten".<br />
Uw <strong>bed</strong> mag alleen worden gebruikt op een ondergrond waarbij alle vier de wielen op de<br />
grond staan.<br />
Het <strong>bed</strong> dient niet als klimtoestel of om hete of zware voorwerpen te transporteren.<br />
Als het <strong>bed</strong> wordt gebruikt op matten, vloer<strong>bed</strong>ekking of losse vloerkleden, kan de<br />
vloer<strong>bed</strong>ekking beschadigd raken en wordt het lastig om het <strong>bed</strong> (zonder patiënt) over<br />
dergelijke ondergrond voort te duwen.<br />
Gebruik enkel door <strong>Vermeiren</strong> goedgekeurde accessoires.<br />
<strong>Vermeiren</strong> is niet aansprakelijk voor schade door gebrekkig of onvoldoende onderhoud of als<br />
gevolg van het niet naleven van instructies van deze handleiding.<br />
Het naleven van de gebruiks- en onderhoudsinstructies vormen een essentieel onderdeel<br />
van de garantiebepalingen.<br />
NL
NL<br />
1.2 Technische specificaties<br />
Pagina 4<br />
<strong>Luna</strong><br />
2010-11<br />
Onderstaande technische gegevens zijn geldig voor de <strong>bed</strong> in standaard afstelling. Wanneer<br />
er andere accessoires worden gebruikt, worden de opgegeven waarden gewijzigd.<br />
Merk <strong>Vermeiren</strong><br />
Adres <strong>Vermeiren</strong>plein 1/15, B-2920 Kalmthout<br />
Type Bed<br />
Model <strong>Luna</strong><br />
Maximale massa gebruiker 140 kg<br />
Omschrijving Min. Max.<br />
Lengte 2150 mm (<strong>Luna</strong> modellen) 2240 mm (<strong>Luna</strong> X-low)<br />
Breedte 1030 mm<br />
Hoogteverstelling ligvlak 400 mm (zonder matras)<br />
200 mm (<strong>Luna</strong> X-low)<br />
Lengte dichtgevouwen 445 mm<br />
Breedte dichtgevouwen 935 mm<br />
Hoogte dichtgevouwen 1045 mm<br />
Totaal gewicht 95 kg<br />
Verstellen van het achterste<br />
gedeelte<br />
Max. hoek bovenbeen 31.7°<br />
Max. hoek onderbeen -14,8°<br />
Max. veilige werklast 175 kg<br />
Oprichter Nominale last 80 kg<br />
83°<br />
805 mm (zonder matras)<br />
600 mm (<strong>Luna</strong> X-low)<br />
Matras Min. RG 35,120 mm dik, 2000 x 900 mm, max. 20 kg<br />
Vrije hoogte voor patiëntenlift 150 mm (met uitzondering van <strong>Luna</strong> X-low)<br />
Wielen (4 stuks) Ø 125 mm, vergrendelbaar<br />
Motor hoofd-/voeteinde LA273100-A01405040, Linak<br />
Motor achterste gedeelte LA270022-00, Linak<br />
Motor beengedeelte LA270022-00, Linak<br />
Hand<strong>bed</strong>iening HBW074-072, Linak<br />
Veiligheidsbox ACL 403500, Linak<br />
Transfo CB6404+10019, Linak<br />
Nominale spanning transfo U in: 230 V , ± 10%, 50 Hz, I in: max. 1.5 A, U uit: 24V ---, max. 70 VA<br />
Inschakeltijd 10%, max. 6 min/u<br />
Geluidsniveau < 65 dB(A)<br />
Beschermklasse /<br />
beschermingsgraad<br />
Beschermklasse II, toepassingsdeel type B / IP54 (spatwaterdicht)<br />
Opslag en gebruikstemperatuur + 5 °C + 41 °C<br />
Opslag en<br />
gebruiksluchtvochtigheid<br />
30% 70%<br />
Technische wijzigingen voorbehouden. Meettolerantie ± 15 mm / 1,5 kg / °<br />
Tabel 1: Technische Specificaties
Het <strong>bed</strong> voldoet aan de vereisten die zijn vastgelegd in:<br />
Pagina 5<br />
<strong>Luna</strong><br />
2010-11<br />
EN 1970: verstelbare <strong>bed</strong>den voor invalide personen: vereisten en testmethoden<br />
EN 1970+ A1: verstelbare <strong>bed</strong>den voor invalide personen: vereisten en testmethoden<br />
EN 60601-2-38/A1: medisch elektrische apparatuur - artikel 2-38: specifieke vereisten voor de<br />
veiligheid van elektrisch bestuurbare ziekenhuis<strong>bed</strong>den<br />
1.3 Componenten<br />
1.4 Gebruikte symbolen<br />
Maximum gewicht<br />
CE conformiteit<br />
L Veiligheidsinstructies<br />
�<br />
��<br />
��<br />
�<br />
Handleiding lezen<br />
Correcte werkwijze/toepassing<br />
Verkeerde werkwijze/toepassing<br />
Beschermklasse II<br />
Toepassingsdeel type B<br />
1 = oprichter<br />
2 = triangel<br />
3 = matrasklem<br />
4 = zijrail<br />
5 = bovenste<br />
beengedeelte<br />
6 = onderste<br />
beengedeelte<br />
7 = voeteneinde<br />
8 = frame onderstel<br />
9 = zwenkwiel<br />
10 = wielvergrendeling<br />
11 = motor<br />
12 = hoofdeinde<br />
13 = derde <strong>bed</strong>-zijde<br />
(hout)<br />
14 = handmatige<br />
<strong>bed</strong>iening<br />
15 = zijstel<br />
16 = achtergedeelte<br />
17 = zitgedeelte<br />
18 = montageknop<br />
NL
NL<br />
Pagina 6<br />
<strong>Luna</strong><br />
2010-11<br />
1.5 Accessoires<br />
L WAARSCHUWING: er moeten voorzorgsmaatregelen worden genomen als er<br />
accessoires worden gebruikt die niet hieronder staan vermeld.<br />
Uitschakelingskast + handmatige <strong>bed</strong>iening zonder vergrendelingsfunctie<br />
Derde <strong>bed</strong>zijde (hout)<br />
1.6 Voor uw veiligheid<br />
l Voor u het ziekenhuis<strong>bed</strong> gebruikt, moet u de handleiding aandachtig lezen.<br />
l Plaats en gebruik het ziekenhuis<strong>bed</strong> alleen op een horizontale en vlakke ondergrond<br />
zodat de vier wielen stevig op de grond staan.<br />
l Bij het installeren van het <strong>bed</strong> moet u controleren of het volledige verstelbereik vrij is<br />
van hindernissen.<br />
L Wanneer de patiënt zonder toezicht is, moet het <strong>bed</strong> eerst op de laagste stand<br />
worden gezet om letsels door vallen te vermijden bij het instappen, uitstappen of<br />
neerliggen in het <strong>bed</strong>.<br />
L Wanneer de patiënt zonder toezicht is, moet het onrusthek aan weerszijden in de<br />
bovenste stand worden gezet. Het neerlaten aan 1 of 2 zijden mag alleen gebeuren<br />
wanneer iemand toezicht houdt.<br />
L Let bij het monteren/demonteren en gebruiken van het <strong>bed</strong> op uw handen – Gevaar<br />
voor knellen!<br />
L Voor het transporteren mag u het <strong>bed</strong> alleen aan de vaste frameonderdelen of<br />
houten onderdelen vastnemen.<br />
L Alle vier de wielen moeten voor ieder gebruik worden geblokkeerd.<br />
L Medisch-elektrische toepassingen in het ziekenhuis<strong>bed</strong> zijn niet toegestaan!<br />
L De patiënt mag niet met het bovenlichaam uit het <strong>bed</strong> leunen – Gevaar!<br />
L De patiënt mag niet met het bovenlichaam uit het <strong>bed</strong> leunen – Gevaar!<br />
L De benen niet ontlasten door deze op andere voorwerpen te leggen – Gevaar!<br />
L Bij het verstellen van het been- of rugdeel de handen niet tussen het frame en de<br />
matras schuiven – Gevaar voor knellen!<br />
L Bij het verstellen van het been- of rugdeel de handen niet tussen het frame en de<br />
matras schuiven – Gevaar voor knellen!<br />
L Gebruik de stekker alleen met een stopcontact conform VDE (220V/230V, 50 Hz).<br />
L Trek een kabel altijd uit aan de stekker, trek nooit aan de kabel zelf.<br />
L Blokkeer de hand<strong>bed</strong>iening na ieder gebruik altijd met de veiligheidsbox.<br />
L Gebruik uw ziekenhuis<strong>bed</strong> uitsluitend in droge ruimten.<br />
L Gebruik alleen een matras die voldoet aan de voorschriften van de <strong>bed</strong>denfabrikant.<br />
L Wanneer de oprichter vervormd is, moet deze worden vervangen.<br />
L De onrusthekken moeten altijd zijn gemonteerd, ook wanneer de betreffende zijde<br />
van het <strong>bed</strong> tegen een muur staat.<br />
L Probeer nooit zelf reparaties uit te voeren – Gevaar!<br />
L Open nooit de behuizing van het aandrijfsysteem – Gevaar!<br />
L Voor het transporteren van patiënten in het ziekenhuis<strong>bed</strong> moeten de patiënten in<br />
onderste en horizontale positie liggen.<br />
L Zorg ervoor dat alle stroomkabels worden geplaatst zonder knikken, schuren of<br />
andere mechanische beschadigingen.<br />
L Alle kabels moeten zo worden gelegd dat ze de grond niet raken en dat de kabels<br />
niet worden gekneld.<br />
L Het is verboden extra mechanische of elektrische apparaten te gebruiken of aan te<br />
brengen.
<strong>Luna</strong><br />
2010-11<br />
L Het onderhouden, inspecteren, repareren en desinfecteren mag alleen door bevoegd<br />
en geschoold personeel worden uitgevoerd.<br />
L Gebruik voor uw ziekenhuis<strong>bed</strong> uitsluitend originele wisselstukken van de fabrikant.<br />
L Let erop dat het ziekenhuis<strong>bed</strong> niet te zwaar wordt belast (max. 140 kg).<br />
L In het <strong>bed</strong> is het gebruik van open vlammen of gloeiende voorwerpen (kaarsen,<br />
sigaretten, enz.) verboden.<br />
L Vervang de onrusthekken wanneer deze verbogen of gebroken zijn. Anders kan de<br />
patiënt uit het <strong>bed</strong> vallen.<br />
L Het gebruik van uw <strong>bed</strong> kan andere elektrische apparaten beïnvloeden (storingen).<br />
Gebruik het <strong>bed</strong> niet tegelijk met andere apparaten.<br />
L Respecteer alle veiligheids- en gebruiksinstructies.<br />
L Elektrisch bestuurd <strong>bed</strong> wordt op een afstand van het stroomvoorzieningscontact<br />
geplaatst.<br />
L Het medisch <strong>bed</strong> mag alleen in combinatie met een takel worden gebruikt die onder<br />
de beperkte ruimte van het medisch <strong>bed</strong> kan worden geplaatst.<br />
2 Gebruik<br />
Dit hoofdstuk beschrijft het normaal gebruik. Deze instructies zijn van toepassing voor de<br />
gebruiker en de vakhandelaar.<br />
Het <strong>bed</strong> wordt gemonteerd en afgesteld door Uw vakhandelaar. De instructies voor de<br />
montage en afstelling van de <strong>bed</strong> staat in § 3.<br />
L WAARSCHUWING: Vermijd het bekneld raken van routingskabels van andere<br />
apparatuur tussen onderdelen van het medisch <strong>bed</strong>.<br />
L WAARSCHUWING: Het medisch <strong>bed</strong> mag alleen worden gebruikt in combinatie<br />
met een takel die onder de beperkte ruimte van het <strong>bed</strong> kan worden geplaatst.<br />
2.1 Uitschakelingskast (INDIEN ONDER HET BED<br />
GEÏNSTALLEERD)<br />
L VOORZICHTIG: risico op letsel - voorkom dat elektrische kabels worden<br />
platgedrukt.<br />
Deze paragraaf is van toepassing als de uitschakelingskast onder het <strong>bed</strong> is<br />
geïnstalleerd en in combinatie met de handmatige <strong>bed</strong>iening zonder<br />
vergrendelingsfunctie.<br />
Tussen de transformator en de handmatige <strong>bed</strong>iening is een uitschakelingskast geplaatst<br />
om on<strong>bed</strong>oelde elektrische <strong>bed</strong>iening van het verpleeg<strong>bed</strong> te voorkomen (op de dwarsbalk<br />
van het <strong>bed</strong>onderstel gemonteerd). De kast heeft draaiknoppen die handmatige <strong>bed</strong>iening<br />
kunnen activeren of voorkomen.<br />
1<br />
3<br />
�<br />
�<br />
4<br />
2<br />
Pagina 7<br />
1 = Uitschakelingskast<br />
2 = Aansluiting transformator<br />
3 = aansluiting handmatige<br />
<strong>bed</strong>iening<br />
4 = uitschakelingsknop<br />
�= Vergrendeld<br />
�= Niet-vergrendeld<br />
NL
NL<br />
Pagina 8<br />
<strong>Luna</strong><br />
2010-11<br />
2.2 Handmatige <strong>bed</strong>iening zonder vergrendelingsfunctie<br />
L VOORZICHTIG: risico op letsel- de patiënt mag alleen onder toezicht het <strong>bed</strong><br />
verstellen.<br />
Deze handmatige <strong>bed</strong>iening mag alleen in combinatie met de uitschakelingskast<br />
worden gebruikt.<br />
De hoogte van het <strong>bed</strong>oppervlak, de hoek van de rugsteun en die van de knieholtesteun<br />
kunnen met de handmatige <strong>bed</strong>iening worden versteld. Na het gebruik van de handmatige<br />
<strong>bed</strong>iening moet deze aan de zijrail van het <strong>bed</strong> worden gehangen en via de<br />
uitschakelingskast worden bevestigd.<br />
De volgende verstellingen kunnen worden gedaan:<br />
Verstelfunctie achtergedeelte<br />
Verstelling matrassteunplatform<br />
Verstelfunctie beengedeelte<br />
Anti-trendelenburg<br />
Zorg er bij het aansluiten van de handmatige <strong>bed</strong>iening op de uitschakelingskast voor dat de<br />
stekker stevig in de uitschakelingskast zit. Ga als volgt te werk:<br />
1. Verwijder de veiligheidsring van de aansluiting.<br />
2. Plaats de stekker voor de handmatige <strong>bed</strong>iening in<br />
de uitschakelingskast.<br />
3. Plaats de veiligheidsring in de aansluiting van de<br />
uitschakelingskast zodat de kabel niet on<strong>bed</strong>oeld<br />
kan worden verwijderd.<br />
De aansluitingskabel kan alleen uit de uitschakelingskast worden verwijderd nadat de<br />
veiligheidsring is verwijderd.
2.3 Handmatige <strong>bed</strong>iening met vergrendelingsfunctie<br />
De uitschakelingskast kan worden vervangen door een handmatige <strong>bed</strong>iening met<br />
vergrendelingsfunctie.<br />
Niet-vergrendeld<br />
De handmatige <strong>bed</strong>iening heeft een<br />
vergrendelingsfunctie.<br />
Hiermee kunnen een of meer functies worden<br />
uitgeschakeld of vrijgegeven.<br />
Pagina 9<br />
<strong>Luna</strong><br />
2010-11<br />
Voorzorgsmaatregelen:<br />
• Als u wilt schakelen tussen vergrendeling en vrijgave<br />
moet u een kleine knop tussen beide handmatige<br />
<strong>bed</strong>ieningsknoppen met behulp van een sleutel<br />
omdraaien.<br />
Vergrendeld<br />
2.4 Bedienen van de rem<br />
L WAARSCHUWING: Een goede werking van de stuurzwenkwielen wordt<br />
beïnvloed door slijtage en vervuiling van de banden (water, olie,...) – controleer<br />
voor elk gebruik de conditie van de banden.<br />
L WAARSCHUWING: De stuurzwenkwielen kunnen slijten – controleer voor elk<br />
gebruik de werking van de stuurzwenkwielen.<br />
L WAARSCHUWING: Gevaar voor accidenten - Zet altijd alle wielen vast. Wanneer<br />
slechts een wiel wordt geblokkeerd, rollen de vrije wielen rond het geblokkeerde<br />
wiel.<br />
Om ongewenste verplaatsingen te vermijden kunnen alle wielen worden geblokkeerd.<br />
Blokkeren (A)<br />
Vlak van de hendel met de voet tot tegen de aanslag indrukken.<br />
Loszetten (B)<br />
Vlak van de hendel met de voet tot tegen de aanslag naar voor duwen.<br />
A<br />
B<br />
NL
NL<br />
2.5 Trekontlasting<br />
L WAARSCHUWING: Verwijder de ontlastingseenheid niet.<br />
L WAARSCHUWING: Geen voorwerpen op de trekontlasting aanbrengen of<br />
hangen.<br />
Pagina 10<br />
<strong>Luna</strong><br />
2010-11<br />
Onder de dwarsbalk van het lattenrooster aan het hoofdeinde bevindt zich de houder voor<br />
de trekontlasting.<br />
Schuif de trekontlasting van de stroomkabel (4) in de voorziene ophanging (3).<br />
Trek de stroomkabel (1) in de gewenste stand zodat de stroomkabel (2) zonder door<br />
te hangen onder het lattenrooster kan worden gelegd. Let erop dat de kabel (2) in<br />
een verstelpositie te strak wordt getrokken.<br />
Bevestig de stroomkabel door de trekontlasting van de stroomkabel (4) handvast te<br />
draaien.<br />
Bevestig de positie van de stroomkabel door de schroefverbinding (5) handvast te<br />
draaien.<br />
1<br />
4<br />
2.6 Stroomkabel<br />
L WAARSCHUWING: Geen andere voorwerpen dan het netsnoer ophangen.<br />
L WAARSCHUWING: De stroomkabel kan worden beschadigd - de stroomkabel<br />
moet voorzichtig worden geplaatst zonder knikken, druk, schuren of andere<br />
mechanische beschadigingen en zonder contact te maken met de vloer.<br />
Opdat het stroomkabel ook na lang gebruik correct en veilig kan functioneren, hebben we op<br />
de dwarsbalk van het lattenrooster (naast de trekontlasting) een houder voorzien waar u het<br />
snoer kunt oprollen wanneer u het <strong>bed</strong> niet elektrisch gebruikt.<br />
3<br />
5<br />
2<br />
1 = Kabel<br />
(netaansluiting)<br />
2 = Kabel (aansluiting<br />
transfo)<br />
3 = Ophanging<br />
trekontlasting<br />
4 = Trekontlasting<br />
kabel<br />
5 = Schroefverbinding<br />
trekontlasting<br />
Fig. 8a
<strong>Luna</strong><br />
2010-11<br />
2.7 Noodaflaat hoofdeinde<br />
L WAARSCHUWING: risico op platdrukken - zorg ervoor dat er zich geen objecten<br />
of lichaamsdelen tussen de hoofdsteun en het frame bevinden.<br />
Het hoofdeinde kan met de hand worden neergelaten (noodaflaat wanneer de motor defect<br />
is)<br />
Deze functie moet met minstens twee personen worden <strong>bed</strong>iend.<br />
Procedure: 1. Veiligheidslus van de bovenste motorbevestiging omleggen.<br />
2. Een persoon neemt het frame van het hoofdeinde vast terwijl de<br />
tweede persoon de veiligheidsbout uittrekt en de motor uit de<br />
ophanging haalt.<br />
3. Het hoofdeinde laten zakken.<br />
2.8 Onrusthek<br />
1<br />
De onrusthekken kunnen aan een kant worden neergelaten<br />
Neerlaten<br />
L WAARSCHUWING: risico op platdrukken - bevestig de zijrailings zodat<br />
de patiënt niet on<strong>bed</strong>oeld uit <strong>bed</strong> kan vallen.<br />
L WAARSCHUWING: risico op platdrukken - Er mogen geen objecten of<br />
lichaamsdelen boven het ligoppervlak uitsteken!<br />
L WAARSCHUWING: risico op letsel - breng de zijrailings niet omlaag<br />
aan één kant als er geen toezicht is op de patiënt.<br />
Bovenste onrusthek lichtjes optillen, blokkeerknop opzij van het hoof-/voeteneinde<br />
indrukken en het onrusthek langzaam neerlaten. (houd altijd alleen de bovenste<br />
houten lat vast!)<br />
Bij het <strong>Luna</strong> Basic <strong>bed</strong> bevindt de blokkeerknop zich aan de buitenzijde van de<br />
houten panelen.<br />
2<br />
1<br />
4<br />
3<br />
2<br />
Pagina 11<br />
1 = Veiligheidslus<br />
2 = Motorbevestiging<br />
3 = Hoofdeinde<br />
4 = Motor hoofdeinde<br />
1 = Bovenste onrusthek<br />
2 = Blokkeer knop<br />
NL
NL<br />
Pagina 12<br />
<strong>Luna</strong><br />
2010-11<br />
Wanneer de onrusthekken moeten worden verhoofd of afgedekt als extra veiligheid van de<br />
patiënt (bijv. sterk vermagerde patiënten), moet u erop letten dat na het monteren alle<br />
functies van het <strong>bed</strong> en de CE-conforme installatie bij levering niet worden beïnvloed.<br />
2.9 Oprichter<br />
�<br />
��<br />
�<br />
�<br />
De oprichter kan aan weerszijden van het hoofdeinde worden gemonteerd (alleen gebruiken<br />
voor LUNA!).<br />
1 = Oprichter<br />
2 = Opnamebus oprichter<br />
3 = Blokkeerbout<br />
4 = Groef<br />
5 = Frame oprichter<br />
6 = Boorgaten<br />
7 = Gordel<br />
8 = Triangel<br />
��<br />
Oprichter (1) tot de aanslag in de betreffende opnamebus (2) plaatsen.<br />
Blokkeerbout (3) in de groef (4) laten glijden.<br />
Metalen lus over de bovenzijde van het frame (5) trekken tot de bout in een van de<br />
drie boorgaten (6) klikt.<br />
Gordel (7) in de metalen lus trekken en door de triangel (8) schuiven en op de<br />
gewenste lengte brengen. Gordel vastmaken.<br />
2.10 Rastomat (indien aanwezig)<br />
L VOORZICHTIG: risico op letsel - Er zijn geen mensen of objecten toegestaan in<br />
de buurt van de plek waar het verstellen plaatsvindt.<br />
Voor het verstellen van het onderbeenvlak neemt u de handgrepen aan het voeteinde in het<br />
midden van het frame vast. Trek het onderbeenvlak in de gewenste stand. De Rastomat<br />
arrêteert iedere 2 cm. Voor het neerlaten van het onderbeenvlak trekt u de handgrepen aan<br />
het voeteinde in de bovenste stand. De Rastomat deblokkeert. U kunt het onderbeenvlak<br />
langzaam neerlaten tot op het <strong>bed</strong>frame.<br />
Voer deze verstelling alleen uit met de handgrepen aan het voeteinde. Anders kan het <strong>bed</strong><br />
kantelen en kan de verstelling worden beschadigd.
2.11 In en uit het <strong>bed</strong> tillen<br />
L VOORZICHTIG: In het geval dat u de patiënt niet op een veilige manier kunt<br />
verplaatsen, vraag dan iemand om u te helpen.<br />
1. Ga zo dicht mogelijk bij het <strong>bed</strong> staan.<br />
2. Controleer of de remmen van het <strong>bed</strong> zijn ingeschakeld.<br />
3. Verwijder of klap de zijrailings van het <strong>bed</strong> in.<br />
4. Til de patiënt in/uit <strong>bed</strong>.<br />
Pagina 13<br />
<strong>Luna</strong><br />
2010-11<br />
2.12 Transport<br />
L WAARSCHUWING: Gevaar voor letsel – Zorg er voor dat de <strong>bed</strong> voldoende<br />
vastgemaakt is om verwonding van de inzittenden tijdens aanrijding of plots<br />
remmen te voorkomen.<br />
L WAARSCHUWING: Gevaar voor letsel – Gebruik voor het vastmaken van de<br />
<strong>bed</strong> en de passagiers NOOIT dezelfde gordel.<br />
L WAARSCHUWING: Gevaar voor letsel – Een patiënt mag alleen worden vervoerd<br />
wanneer het ligvlak helemaal omlaag en horizontaal is!<br />
Om transportschade te vermijden moet u erop letten dat de oprichter wordt gedemonteerd.<br />
Maak het stroomsnoer los en let erop dat geen loshangende kabels op de grond liggen.<br />
2.13 Bekabeling<br />
1 = Lattenrooster hoofdeinde<br />
2 = Lattenrooster voeteinde<br />
3 = Bevestigingen oprichter<br />
4 = Trekontlasting<br />
5 = Stroomkabel<br />
6 = Transfo / controlebox<br />
7 = Veiligheidsbox<br />
8 = Motor ligvlak hoofd<br />
9 = Motor knieholte<br />
10 = Motor hoofdeinde<br />
11 = Motor voeteinde<br />
12 = Hand<strong>bed</strong>iening<br />
Alle kabels binnenin het<br />
<strong>bed</strong>frame zijn zodanig<br />
gemonteerd om contact met<br />
de grond te vermijden evenals<br />
vervormingen of knellingen.<br />
NL
NL<br />
3 Montage en afstellen<br />
Pagina 14<br />
<strong>Luna</strong><br />
2010-11<br />
De in dit hoofdstuk beschreven instructies zijn bestemd voor de vakhandelaar.<br />
De <strong>Vermeiren</strong> <strong>Luna</strong> is speciaal ontworpen om te worden afgesteld met een minimum aan te<br />
vervangen onderdelen. Zo is er geen extra voorraad nodig van vervangonderdelen.<br />
Om een servicepunt of vakhandelaar in uw buurt te vinden, neemt u contact op met de<br />
dichtsbijzijnde <strong>Vermeiren</strong> faciliteit. Een lijst van de <strong>Vermeiren</strong> faciliteiten zijn terug te vinden<br />
op de laatste bladzijde.<br />
L WAARSCHUWING: Risico bij onveilige beperkingen - Gebruik enkel de<br />
beperkingen beschreven in deze handleiding.<br />
3.1 Gereedschap<br />
Voor het opzetten van het <strong>bed</strong> zijn de volgende gereedschappen nodig.<br />
Inbussleutel<br />
Schroevendraaier<br />
3.2 Leveringsomvang<br />
De vermeiren <strong>Luna</strong> wordt als volgt geleverd:<br />
2 hoofd/voeteinden met motor + houtafwerking ca. 17 kg / stuk<br />
Lattenrooster, voeteneinde incl. motor ca. 20 kg<br />
Lattenrooster, hoofdeinde incl. Transfo en motor ca. 20 kg<br />
Onrusthek (2 x 2 houten latten) ca. 3 kg / stuk<br />
Bedgalg + triangel ca. 10 kg<br />
Hand<strong>bed</strong>iening ca. 10 kg<br />
Veiligheidsbox<br />
Inbussleutel (montage)<br />
Handleiding<br />
Het ziekenhuis<strong>bed</strong> mag uitsluitend met de hier vermelde componenten worden gebruikt.<br />
Wanneer componenten worden weggelaten of vreemde uitrustingen, componenten of<br />
elektrische systemen gecombineerd, geldt dit <strong>bed</strong> niet meer als een door de fabrikant<br />
geleverd ziekenhuis<strong>bed</strong>. Het <strong>bed</strong> wordt dan op eigen risico gebruikt. De CE-conformiteit en<br />
de aansprakelijkheid van de fabrikant gelden dan niet.<br />
Bovenvermelde beschrijving kan verschillen naargelang uw <strong>Luna</strong> <strong>bed</strong>-type (<strong>Luna</strong>, <strong>Luna</strong><br />
Basic, <strong>Luna</strong> Deluxe, <strong>Luna</strong> X-low, <strong>Luna</strong> metal). Afhankelijk van uw type <strong>Luna</strong> <strong>bed</strong> kunnen<br />
bepaalde afbeeldingen in deze handleiding afwijken.<br />
3.3 Montage<br />
L VOORZICHTIG: kans op beknelling - plaats geen vingers tussen de onderdelen<br />
van het <strong>bed</strong>.<br />
L VOORZICHTIG: risico op klemmen - houd uw vingers uit de buurt van de<br />
bewegende onderdelen van het <strong>bed</strong>.<br />
Montage hier beschreven is van toepassing voor de types: <strong>Luna</strong>, <strong>Luna</strong> Basic, <strong>Luna</strong> Deluxe &<br />
<strong>Luna</strong> X-Low. Afhankelijk van uw type <strong>Luna</strong> <strong>bed</strong> kunnen bepaalde afbeeldingen in deze<br />
handleiding afwijken.<br />
Lees de volgende instructies.
3.3.1 Hoofd- / voeteinde<br />
2<br />
Schuif het uiteinde van het lattenrooster in de houders (de blokkeerschroeven<br />
moeten eerst zijn losgedraaid. Let erop dat deze niet zijn gekanteld!).<br />
OPGELET: Het lattenrooster voor het hoofdeinde is voorzien van bevestigingspunten<br />
voor de oprichter en de stroomkabel.<br />
Zet alles vast met de blokkeerschroeven. Draai deze vast tot ze volledig door de<br />
opening in de houders zitten en een klemkracht genereren (handvast draaien!).<br />
Ervoor zorgen dat de motorleidingen niet gekneld zijn.<br />
3.3.2 Lattenrooster<br />
3<br />
1<br />
1 1<br />
Zet beide lattenroosters recht en schuif deze goed in elkaar.<br />
Draai de blokkeerschroeven van de lattenroosterverbinding handvast.<br />
Ervoor zorgen dat de motorleidingen niet gekneld zijn.<br />
2<br />
Pagina 15<br />
3<br />
1 = Lattenrooster<br />
2 = Houders<br />
3 = Blokkeerschroeven<br />
1 = Lattenrooster<br />
2 = Blokkeer-<br />
schroeven<br />
<strong>Luna</strong><br />
2010-11<br />
NL
NL<br />
3.3.3 Houten zijrailings<br />
Pagina 16<br />
<strong>Luna</strong><br />
2010-11<br />
De hieronder getoonde montage is van toepassing op de typen: <strong>Luna</strong>, <strong>Luna</strong> Basic, <strong>Luna</strong><br />
Deluxe, <strong>Luna</strong> X-low.<br />
Afhankelijk van uw type <strong>Luna</strong>-<strong>bed</strong> kunnen bepaalde afbeeldingen anders worden<br />
weergegeven.<br />
1 = korte-boutrails<br />
2 = lange-boutrails<br />
3 = houten latten (2 stuks aan elke<br />
kant)<br />
4 = geleiderail<br />
5 = vergrendelingsknop<br />
6 = vergrendelingsmoer<br />
A. Plaats de korte-boutrails (1) rechts en links in de bovenste houten lat. Plaats de<br />
lange-boutrails (2) rechts en links in de onderste houten lat.<br />
Plaats de lange-boutrails (2) in de houten lat één voor één in de geleiderail voor het<br />
hoofd- en voetgedeelte en bevestig ze door de rails helemaal naar binnen te<br />
schuiven totdat het bovenste uiteinde naar binnen is geschoven en op zijn plek<br />
vastklikt. Maak deze rail aan één kant tot aan de punt weer los door op de<br />
vergrendelingsknop (5) te drukken en de bovenste houten lat voorzichtig omhoog te<br />
trekken.<br />
Laat de boutrails (2) nog eenmaal van de geleiderail vallen totdat de punt van de rail<br />
nagenoeg in de geleider zit. De korte-boutrail (1) wordt nu samen met de houten lat<br />
tussen de muren van de lange-boutrails geschoven en het gehele bout railsysteem<br />
(1) + (2) wordt in de betreffende geleiderail (4) geplaatst door alleen de bovenste<br />
houten lat omhoog te trekken en vervolgens de stellage in positie te vergrendelen.<br />
B: Plaats de vergrendelingsmoeren (6) en draai ze handmatig vast.
<strong>Luna</strong><br />
2010-11<br />
3.3.4 Aansluitingen<br />
L VOORZICHTIG: Kans op letsel - De stekker nooit met natte handen vastnemen.<br />
L VOORZICHTIG: Kans op letsel - Geen voorwerpen op de aansluiting en<br />
toevoerleiding plaatsen en deze beschermen tegen mechanische belasting.<br />
1. Als stroombron moet een VDE-conform stopcontact van 220V/230V, 50Hz worden<br />
gebruikt.<br />
2. Het diagram voor de aansluitingen van de transformator wordt in onderstaande figuur<br />
getoond:<br />
Stoomsnoer altijd aan de stekker uit het stopcontact trekken.<br />
Netsnoer zonder lussen aanbrengen, niet plooien en niet langs scherpe randen leggen.<br />
Stroomsnoer en toervoerleiding naar de handschakelaar beveiligen tegen knellen.<br />
6<br />
1 2 3 4<br />
1 2 3 4 5<br />
Pagina 17<br />
1 = Aansluiting motor hoofddeel<br />
2 = Aansluiting motor knieholte<br />
3 = Aansluiting motor hoofdeinde<br />
4 = Aansluiting motor voeteinde<br />
5 = Aansluiting veiligheidsbox<br />
6 = Transfo / controlebox<br />
De aansluitkabels van de motoren en de aansluitingen<br />
van de transfo dragen hetzelfde nummer.<br />
NL
NL<br />
4 Onderhoud<br />
Pagina 18<br />
<strong>Luna</strong><br />
2010-11<br />
De verwachte levensduur van het <strong>bed</strong> wordt beïnvloed door het gebruik, opslag, regelmatig<br />
onderhoud en schoonmaak.<br />
4.1 Periodiek Onderhoud<br />
Om Uw <strong>Vermeiren</strong> <strong>bed</strong> in goede conditie te houden dient U regelmatig het volgende<br />
onderhoud te plegen:<br />
Voor ieder gebruik<br />
� Controleer de staat van de banden en maak schoon of vervang indien nodig.<br />
� Controleer de staat van de remmen en stel ze opnieuw af indien nodig.<br />
� Controleer de staat van het <strong>bed</strong> (netheid, scheuren, schade aan dragende<br />
onderdelen, ...) en maak schoon of vervang indien nodig.<br />
� Controleer alle kabels op zichtbare schade en ga na of alle verbindingen<br />
conform de handleiding zijn. Bij beschadigingen dient de stekker direct uit het<br />
stopcontact te worden getrokken. Informeer een erkende reparatiewerkplaats<br />
om het probleem op te lossen.<br />
� Controleer de werking van de mechanische slijtagedelen (onrusthek,<br />
oprichter, voetrooster). Wanneer deze niet meer goed functioneren, dient u<br />
direct contact op te nemen met de vakhandelaar.<br />
� Controleer of de handmatige <strong>bed</strong>iening goed werkt. Als een functie defect is,<br />
haalt u voorzichtig de stekker uit het stopcontact.<br />
� Om de 8 weken: inspectie of bijstellen van<br />
� Functie van de rail van het onrusthek (hoofd- en voeteneinde)<br />
� Bevestiging van de latten in het lattenrooster (indien aanwezig)<br />
� Staat van de houten elementen<br />
� Oprichter (passing / vervorming)<br />
� Smering van bewegende onderdelen<br />
Elke 6 maanden of voor elke nieuwe gebruiker<br />
� Algemeen nazicht<br />
� Desinfectie<br />
� Netheid<br />
� Vochtigheid van de gebruikte matras<br />
Voor Uw gemak is achteraan deze handleiding een onderhoudsplan voorzien.<br />
Reparaties en het monteren van wisselstukken voor Uw <strong>bed</strong> mogen enkel door de<br />
vakhandelaar uitgevoerd worden.<br />
Enkel door <strong>Vermeiren</strong> toegelaten wisselstukken mogen gemonteerd worden.
4.2 Verpakking en opslag<br />
Om het <strong>bed</strong> te verpakken of te bewaren dienen volgende instructies gevolgd te worden:<br />
Alleen in droge ruimte opslagen (tussen +5°C en +41°C).<br />
De relatieve luchtvochtigheid van 30% tot 70%.<br />
Pagina 19<br />
<strong>Luna</strong><br />
2010-11<br />
Beschermen door voldoende afdekking of verpakking tegen roest en binnendringen<br />
van vreemde voorwerpen (bijv. zout water, zeelucht, zand, stof).<br />
Alle gedemonteerde onderdelen duidelijk opslaan (eventueel labelen), opdat bij het<br />
monteren achteraf geen verwarring met andere producten mogelijk is.<br />
Alle componenten moeten onbelast worden opgeslagen (geen te zware voorwerpen<br />
op de <strong>bed</strong>onderdelen leggen, nergens tussen klemmen, ...).<br />
Stroomsnoer zonder plooien oprollen in de daartoe voorziene houder.<br />
Interne kabels controleren op knellen en plooien.<br />
4.3 Verzorging<br />
4.3.1 Metalen frames, houten onderdelen<br />
Het reinigen van de metalen frames en de houten onderdelen moet als volgt gebeuren:<br />
� Maak de metalen frames en de houten onderdelen schoon met een vochtige<br />
warme doek. Zorg ervoor dat u de metalen frames en houten onderdelen niet<br />
te nat maakt.<br />
� Bij hardnekkige vlekken kunt u de bekleding afwassen met een gangbaar<br />
fijnwasmiddel.<br />
� Vlekken kunt u verwijderen met een sponsje of een zachte borstel.<br />
� Gebruik geen aggresieve reinigingsmiddelen, zoals oplosmiddelen of harde<br />
borstels.<br />
� Reinigen met stoom- en/of hogedrukreinigers is niet toegestaan.<br />
4.3.2 Kunststof onderdelen<br />
Behandel kunststof onderdelen van het <strong>bed</strong> met een gangbaar reinigingsmiddel voor<br />
kunststof. Gebruik alleen een zachte borstel of zachte spons.<br />
De motoren en de handmatige eenheid mogen alleen met een licht vochtige doek worden<br />
schoongemaakt.<br />
4.3.3 Coatings<br />
Door de hoogwaardige oppervlaktebehandeling is een optimale corrosiebescherming<br />
gegarandeerd. Wanneer de coating door krassen e.d. is beschadigd, laat u deze door uw<br />
vakhandelaar repareren.<br />
Voor het schoonmaken gebruikt u alleen warm water en algemeen verkrijgbare<br />
huishoudelijke reinigingsmiddelen, evenals zachte borstels en doeken. Let op dat er geen<br />
vochtigheid in de buizen komt.<br />
Voor de verzinkte onderdelen volstaat meestal schoonwrijven met een droge doek. Moeilijk<br />
te verwijderen vuil kunt u best verwijderen met een speciaal reinigingsmiddel voor zink.<br />
NL
NL<br />
4.4 Inspectie<br />
Pagina 20<br />
<strong>Luna</strong><br />
2010-11<br />
In principe raden we één inspectie per jaar aan, en een minimum van één inspectie voordat<br />
het gebruik wordt hervat. Alle volgende controles moeten worden uitgevoerd en<br />
gedocumenteerd door daartoe bevoegde personen:<br />
Controleer de onderdelen van het frame op vervorming van de kunststof, scheuren en<br />
slechte functionering (ligoppervlak, onderstel, armsteun, voeteneinde, montagegiek,<br />
reservoir voor de giek, wielen).<br />
Visuele controle op beschadiging van de verf (gevaar op corrosie).<br />
Controleer de werking van de remwielen (soepelheid, veiligheid, vergrendeling, etc.)<br />
Controleer of alle schroeven stevig vastzitten en op de goede plek.<br />
Controleer de hoeveelheid smering op de metalen verbindingsstukken van de<br />
beweegbare onderdelen.<br />
Controleer visueel alle behuizingen op schade, schroeven moeten vastzitten, dichtingen<br />
en pakkingen mogen geen zichtbare schade vertonen.<br />
Controleer visueel alle onderdelen op krassen en broze plekken<br />
Visuele inspectie van de bovenste aansluiting (EPR of gelijkwaardig)<br />
Toestand van de voedingskabel (met name: platdrukken, afslijting, sneden, zichtbare<br />
isolatie van de binnenleidingen, zichtbare metaaldraden, knikken, deuken,<br />
kleurveranderingen van de buitenste laag, breekbare punten)<br />
Controleer de binnenste bekabeling van de stroomvoorziening (met name: knellen,<br />
afslijting, sneden, zichtbare isolatie van de binnenleidingen, zichtbare metaaldraden,<br />
knikken, zwellingen, deuken, kleurveranderingen van de buitenste laag, breekbare<br />
punten)<br />
Bescherming tegen vochtigheid van het elektrische systeem, ten minste IPX4 (zie Typelabel).<br />
Apparaat voor het ophangen van de stroomkabel tijdens transport.<br />
De stroomkabel en andere elektrische leidingen moeten goed worden neergelegd zodat<br />
schuren, platdrukken en andere mechanische beschadigingen niet waarschijnlijk zijn.<br />
Meet de weerstand van de beschermtres (Ohm) volgens VDE 0751-1.<br />
Meet de reststroom (A) volgens VDE 0751-1.<br />
Meet de isolatieweerstand (MOhm) volgens VDE 0751-1.<br />
Controleer de werking van de zijrailings (vergrendeling, afstanden volgens EN 1970:<br />
2000, ook bij belasting, vervorming en slijtage door belasting)<br />
Controleer de werking van de aandrijvingen (over het volledige afstelbereik van de<br />
motoren � vreemde geluiden, snelheid, soepelheid, etc., eindschakeling (bijv.<br />
stroombegrenzing, hoofdschakelaar). Indien nodig: meet het vermogen, eerst zonder<br />
last, daarna met de nominale last (“SWL”) om zo eventuele slijtage van de motoren te<br />
kunnen onderzoeken door de waarden van de elektrische stroom te vergelijken met de<br />
waarden bij levering.<br />
Controleer de toestand van het matras (niet wanneer gebruik van het <strong>bed</strong> wordt hervat)<br />
Is de takel nog volledig in de staat van levering, is de handleiding nog beschikbaar?<br />
Meetcontroles mogen uitsluitend worden uitgevoerd door personen die minstens voor het<br />
ziekenhuis<strong>bed</strong> zijn opgeleid en die minstens door een geschoold elektricien zijn onderwezen<br />
over de te gebruiken controlemiddelen en controleprocedures. Alleen een geschoold<br />
elektricien mag het ziekenhuis<strong>bed</strong> na de meetcontroles of het onderhoud vrijgeven voor<br />
gebruik.<br />
Laat het onderhoud alleen in het onderhoudsplan opnemen wanneer minstens de hiervoor<br />
vermelde profielen zijn gecontroleerd.
Pagina 21<br />
<strong>Luna</strong><br />
2010-11<br />
Eisen: Opmerking:<br />
1.) Visuele controle:<br />
n.a. Ja Nee Opmerking<br />
1.1) Stroomleiding<br />
EPR-kabel of vergelijkbare kwaliteit<br />
1.2) Toestand van het stroomsnoer<br />
vooral: knellen, afslijting, sneden, zichtbare<br />
isolatie van de binnenleidingen, zichtbare<br />
metaaldraden, knikpunten, uitbolling,<br />
kleurveranderingen van de buitenste laag, brosse<br />
punten<br />
1,3) Toestand van de interne leidingen<br />
vooral: knellen, afslijting, sneden, zichtbare isolatie van<br />
de binnenleidingen, zichtbare metaaldraden,<br />
knikpunten, uitbolling, kleurveranderingen van de<br />
buitenste laag, brosse punten<br />
1.4) Voldoende trekontlasting en<br />
knikbescherming van het stroomsnoer<br />
1,5) Voldoende trekontlasting en<br />
knikbescherming van de interne leidingen<br />
1.6) Stroomsnoer en andere elektrische<br />
leidingen veilig gelegd, zodat schuren,<br />
knellen en andere mechanische belastingen<br />
onwaarschijnlijk zijn<br />
1.7) Vochtbescherming IP X4<br />
1.8) Inrichting voor het ophangen van het<br />
stroomsnoer tijdens het transport<br />
1.9) Visuele controle van het frame op<br />
plastische vervorming en/of slijtage:<br />
- <strong>bed</strong>bodem<br />
- <strong>bed</strong>lift<br />
- rugleuning, zitting, voeteinde<br />
- oprichter<br />
- oprichterbevestiging<br />
- wielen<br />
1.10) Behuizing<br />
Visuele controle van alle behuizingen op schade.<br />
Schroeven moeten vast zitten, dichtingen mogen<br />
geen zichtbare schade vertonen.<br />
n.a. Ja Nee Opmerking<br />
n.a. Ja Nee Opmerking<br />
n.a. Ja Nee Opmerking<br />
n.a. Ja Nee Opmerking<br />
n.a. Ja Nee Opmerking<br />
n.a. Ja Nee Opmerking<br />
n.a. Ja Nee Opmerking<br />
n.a. Ja Nee Opmerking<br />
n.a. Ja Nee Opmerking<br />
n.a. Ja Nee Opmerking<br />
NL
NL<br />
Tabel (A) bij afbeelding (B)<br />
Aanduiding Maten Vereiste in mm<br />
A De kleinste af stand tussen<br />
elementen binnen de omtrek v an<br />
het onrusthek in<br />
opgerichte/v astgeklikte stand of de<br />
zone die gev ormd wordt door het<br />
onrusthek en de vaste delen v an het<br />
<strong>bed</strong>.<br />
A 120<br />
B Dikte v an de matras bij reglementair Vermeld door de<br />
gebruik<br />
producent<br />
C Hoogte v an de bov enste rand v an<br />
het onrusthek boven de matras (zie<br />
ŌBÕ) zonder compressie.<br />
C 220<br />
D Af stand tussen hoof d- of v oeteinde D 60<br />
en het onrusthek.<br />
of<br />
D 235<br />
E Af stand tussen gedeelde<br />
E 60<br />
onrusthekken en het ligv lak in<br />
of<br />
v lakke toestand.<br />
E 235<br />
F Kleinste af meting v an alle<br />
Als D 235 dan F<br />
toegankelijke openingen tussen het<br />
60<br />
onrusthek en het ligv lak<br />
Als D 60 dan<br />
F 120<br />
G Totale lengte v an het onrusthek of<br />
som v an de lengten v an de<br />
G 1/2 v an de<br />
gedeelde onrusthekken aan een lengte v an het<br />
zijde v an het <strong>bed</strong><br />
ligv lak<br />
H Af stand tussen hoof d- en v oeteinde<br />
zonder uitbreiding v an deze delen<br />
Geen v ereisten<br />
Bij <strong>bed</strong>den waarvan de onrusthekken de aangegeven<br />
maten met minder dan 10% overschrijden, mogen deze<br />
onrusthekken niet worden gebruikt bij kleine of erg<br />
lichte patiënten en moet door extra maatregelen worden<br />
gezorgd dat de patiënt niet gekneld kan raken of kan<br />
wegglijden.<br />
Onrusthekken die 10% of meer afwijken van de<br />
vermelde maten, mogen niet meer worden gebruikt tot<br />
het defect os opgelost en dienen te worden vervangen<br />
of toegerust.<br />
Naast de controle aan de hand van de volgende punten<br />
dient de correcte functie (arrêtering,<br />
bevestigingselementen) van de onrusthekken te worden<br />
gecontroleerd. Vastgestelde defecten moeten worden<br />
opgelost. De afmetingen van de componenten<br />
respecteren conform onderstaande schets.<br />
Pagina 22<br />
Werkelijke maat: mm<br />
Werkelijke maat: mm<br />
Werkelijke maat: mm<br />
Werkelijke maat: mm<br />
Werkelijke maat: mm<br />
Werkelijke maat: mm<br />
Werkelijke maat: mm<br />
Werkelijke maat: mm<br />
<strong>Luna</strong><br />
2010-11<br />
n.a. Ja Nee Opmerking<br />
n.a. Ja Nee Opmerking<br />
n.a. Ja Nee Opmerking<br />
n.a. Ja Nee Opmerking
Afbeelding (B) bij tabel (A)<br />
D D<br />
G<br />
C<br />
B<br />
2.) Meetcontroles<br />
2.1) Aardleidingsweerstand<br />
Reële waarde: Ohm<br />
2.2) Doorlekstroom<br />
Reële waarde: A<br />
2.3) Isolatieweerstand<br />
Reële waarde: MOhm<br />
3.) Functiecontroles<br />
A<br />
H<br />
A F<br />
3.1) Functiecontrole van de onrusthekken:<br />
- vergrendeling of speling in de vergrendeling<br />
- afstanden, ook bij belasting<br />
- vervorming<br />
- slijtage door belasting<br />
3.2) Functiecontrole van de remmen:<br />
- veiligheid<br />
- arrêtering<br />
- vrijloop<br />
3.3) Functiecontrole van de aandrijvingen:<br />
- verplaatsing over het volledige instelbereik van de<br />
motoren (geluid, snelheid, soepelheid, enz.),<br />
eindafsluiting (b.v. stroombegrenzing,<br />
eindschakelaar)<br />
Meten van het opgenomen vermogen, eerst zonder<br />
last, daarna met de nominale last (SWL), om zo<br />
eventuele slijtage van de motoren te kunnen meten<br />
via de opgenomen stroom en de waarden te kunnen<br />
vergelijken met de waarden bij levering. De<br />
producent kan grenswaarden vastleggen.<br />
Andere:<br />
Pagina 23<br />
<strong>Luna</strong><br />
2010-11<br />
Opmerking: als de<br />
balken van de<br />
onrusthekken aan de<br />
buitenkant zitten<br />
(donkergrijs gemarkeerd)<br />
geldt onder de<br />
onrusthekken afstand A<br />
tot het ligvlak.<br />
n.a. Ja Nee Opmerking<br />
n.a. Ja Nee Opmerking<br />
n.a. Ja Nee Opmerking<br />
n.a. Ja Nee Opmerking<br />
n.a. Ja Nee Opmerking<br />
n.a. Ja Nee Opmerking<br />
n.a. Ja Nee Opmerking<br />
n.a. Ja Nee Opmerking<br />
NL
NL<br />
Pagina 24<br />
<strong>Luna</strong><br />
2010-11<br />
4.5 Desinfecteren<br />
L WAARSCHUWING: Gevaarlijke produkten - Het gebruik van<br />
desinfecteermiddelen is voorbehouden aan bevoegd vakpersoneel.<br />
L WAARSCHUWING: Gevaarlijke produkten, kans op huidirretaties - Draag<br />
gepaste beschermkledij. Het desinfecteermiddel kan bij contact met de huid<br />
irritaties veroorzaken. Volg ook de aanwijzingen op de betreffende oplossingen.<br />
Alle delen van het <strong>bed</strong> kunnen worden behandeld met een schuurdesinfectie.<br />
Alle maatregelen ter desinfectie van revalidatiemiddelen, hun componenten of andere<br />
accessoires worden bijgehouden in een desinfectiejournaal. Dit journaal bevat minstens de<br />
volgende gegevens en wordt bij de betreffende productdocumentatie bewaard:<br />
Datum van<br />
desinfectie<br />
Reden Specificatie Middel en<br />
concentratie<br />
Tabel 2: Voorbeeld desinfectiejournaal<br />
Afkortingen voor de gegevens in kolom 2 (reden):<br />
V = Vermoeden van infectie IF = Infectie W = Nieuw gebruik I = Inspectie<br />
Voor een blanco invulblad van een desinfectiejournaal zie § 9.<br />
Handtekening
Pagina 25<br />
<strong>Luna</strong><br />
2010-11<br />
De geadviseerde desinfecteermiddelen voor de schuurdesinfectie (conform RKI-lijst) staan<br />
in onderstaande tabel. De actuele stand van de in de RKI-lijst opgenomen<br />
desinfecteermiddelen kan worden opgevraagd bij het Robert-Koch-Institut (RKI)<br />
(internetpagina: www.rki.de).<br />
Werkzame stof Productnaam Wasdesinfectie<br />
Fenol of<br />
fenolderivaat<br />
Gebruiksverdunning<br />
Inwerktijd<br />
Oppervlaktedesinfectie<br />
(schuur-<br />
/wisdesinfectie)<br />
Gebruiksverdunning<br />
Inwerktijd<br />
Desinfectie van afscheidingen<br />
1 deel braaksel of stoelgang + 2 delen<br />
gebr.-verd. of 1 deel urine + 1 deel gebr.verd.<br />
Braaksel Stoelgang Urine<br />
Gebruiksverdunning<br />
% uur % uur % uur % uur % uur<br />
Inwerktijd<br />
Gebruiksverdunning<br />
Inwerktijd<br />
Gebruiksverdunning<br />
Inwerktijd<br />
Werkingsbereik<br />
Fabrikant of<br />
leverancier<br />
Amocid 1 12 5 6 5 4 5 6 5 2 A Lysoform<br />
Gevisol 0,5 12 5 4 5 4 5 6 5 2 A Schülke & Mayr<br />
Helipur 6 4 6 4 6 6 6 2 A B. Braun<br />
m-Kresolzeep-<br />
oplossing (DAB<br />
6)<br />
1 12 5 4 A<br />
Phenol 1 12 3 2 A<br />
Chloor, organ. of Chloramin-T 1,5 12 2,5 2 5 4 A<br />
anorgan. substanties DAB 9<br />
met actieve chloor<br />
1 B<br />
Clorina 1, 5 12 2,5 2 5 4 A 1 B Lysoform<br />
Trichlorol 2 12 3 2 6 4 A 1 B Lysoform<br />
Per-verbindingen Apesin AP100 2 4 4 AB Tana<br />
PROFESSIONAL<br />
Formaldehyde<br />
en/of andere<br />
aldehyden of<br />
derivaten<br />
Dismozon pur 2 4 1 AB Bode Chemie<br />
Perform 2 3 4 AB Schülke & Mayr<br />
Wofesteril 2 2 4 AB Kesla Pharma<br />
Aldasan 2000 4 4 AB Lysoform<br />
Antifect FD 10 3 4 AB Schülke & Mayr<br />
Antiseptica<br />
oppervlakte<br />
desinfectie 7<br />
3 6 AB Antiseptica<br />
Apesin AP30 5 4 A Tana<br />
PROFESSIONAL<br />
Bacillocid<br />
special<br />
6 4 AB Bode Chemie<br />
Buraton 10F 3 4 AB Schülke & Mayr<br />
Desomed<br />
A2000<br />
Ontsmettingsreiniger<br />
Ziekenhuis<br />
Desomed<br />
Perfekt<br />
Formaldehydeoplossing<br />
(DAB<br />
10), (formaline)<br />
3 6 AB Desomed<br />
8 6 AB Dreiturm<br />
7 4 AB* Desomed<br />
1,5 12 3 4 AB<br />
Incidin Perfekt 1 12 3 4 AB Ecolab<br />
Incidin Plus 8 6 A Ecolab<br />
Kohrsolin 2 12 3 4 AB Bode Chemie<br />
NL
NL<br />
Werkzame stof Productnaam Wasdesinfectie<br />
Formaldehyde<br />
en/of andere<br />
aldehyden of<br />
derivaten<br />
Amfotere<br />
oppervlakteactieve<br />
stoffen<br />
(amfotensiden)<br />
Gebruiksverdunning<br />
Inwerktijd<br />
Oppervlaktedesinfectie<br />
(schuur-<br />
/wisdesinfectie)<br />
Gebruiksverdunning<br />
Inwerktijd<br />
Desinfectie van afscheidingen<br />
1 deel braaksel of stoelgang + 2 delen<br />
gebr.-verd. of 1 deel urine + 1 deel gebr.verd.<br />
Braaksel Stoelgang Urine<br />
Gebruiksverdunning<br />
% uur % uur % uur % uur % uur<br />
Inwerktijd<br />
Pagina 26<br />
Gebruiksverdunning<br />
Inwerktijd<br />
Gebruiksverdunning<br />
Inwerktijd<br />
Werkingsbereik<br />
Fabrikant of<br />
leverancier<br />
Lysoform 4 12 5 6 AB Lysoform<br />
Lysoformin 3 12 5 6 AB Lysoform<br />
Lysoformin<br />
2000<br />
4 6 AB Lysoform<br />
Melsept 2 12 4 6 AB B. Braun<br />
Melsitt 4 12 10 4 AB B. Braun<br />
Minutil 2 12 6 4 AB Ecolab<br />
Multidor 3 6 AB Ecolab<br />
<strong>Luna</strong><br />
2010-11<br />
Nûscosept 5 4 AB Dr. Nüsken Chemie<br />
Optisept 7 4 AB* Dr. Schumacher<br />
Pursept-FD 7 4 AB* Merz<br />
Ultrasol F 3 12 5 4 AB Fresenius Kabi<br />
Tensodur 103 2 12<br />
Loog Kalkmelk 3 20 6 A 3 B<br />
1 Onvoldoende werkzaam tegen mycobacteriën, in het bijzonder in aanwezigheid van bloed bij de oppervlaktedesinfectie.<br />
A<br />
MFH Marienfelde<br />
2 Niet geschikt voor het desinfecteren van merkbare met bloed besmette vlakken of van poreuze oppervlakken (bijv. onbehandeld hout).<br />
3 Onbruikbaar bij tuberculose; bereiding van de kalkmelk: 1 deel opgeloste kalk (calciumhydroxide) + 3 delen water.<br />
* Effectiviteit tegen virussen gecontroleerd volgens de proefmethode van het RKI [Bundesgesundheitsblatt 38 (1995) 242].<br />
A: Geschikt voor het vernietigen van vegetatieve bacteriële kiemen, inclusief mycobacteriën en van schimmels, inclusief schimmelsporen.<br />
B: Geschikt voor het inactiveren van virussen.<br />
Tabel 3: Desinfecteermiddelen<br />
Voor meer informatie over desinfecteren kunt u contact opnemen met de vakhandelaar. Hij<br />
helpt u graag verder.
5 Garantie<br />
Uittreksel uit de algemene verkoopsvoorwaarden:<br />
(...)<br />
5. De verjaringstermijn voor garantie aanspraken <strong>bed</strong>raagt 24 maanden.<br />
Pagina 27<br />
<strong>Luna</strong><br />
2010-11<br />
Wij zijn niet aansprakelijk voor schade die ontstaat door constructieve wijzigingen aan onze<br />
producten, gebrekkig onderhoud, gebrekkige of onoordeelkundige behandeling of bewaring<br />
of gebruik van niet-originele wisselstukken. De garantie op slijtagedelen of onderdelen die<br />
onderhevig zijn aan een natuurlijk slijtage, is eveneens uitgesloten.<br />
(...)<br />
6 Afvalverwerking<br />
Als U het <strong>bed</strong> wilt wegdoen, stelt U zich in verbinding met de plaatselijke verantwoordelijken<br />
of bezorgt U het product terug bij de vakhandel. Deze kan, na hygiënische reiniging, het <strong>bed</strong><br />
aan de fabrikant terugsturen. De fabrikant kan voor vakkundige verwerking en hergebruik<br />
(gescheiden naar grondstof) zorg dragen.<br />
Verpakkingsmateriaal kan bij de betreffende verwerkingsplaatsen en hergebruikinstellingen<br />
of bij Uw vakhandelaar afgegeven worden.<br />
7 Declaration of conformity<br />
NL
NL<br />
8 Onderhoudsplan<br />
Pagina 28<br />
<strong>Luna</strong><br />
2010-11<br />
Datum Onderhoud Opmerkingen Paraaf<br />
1/1/2010 Smering & algemeen nazicht geen<br />
9 Desinfectiejournaal<br />
Datum van<br />
desinfectie<br />
Reden Specificatie Middel en<br />
concentratie<br />
Afkortingen voor de gegevens in kolom 2 (reden):<br />
V = Vermoeden van infectie IF = Infectie W = Nieuw gebruik I = Inspectie<br />
Handtekening
Contents<br />
Seite 1<br />
<strong>Luna</strong><br />
2010-11<br />
Preface .................................................................................................. 2<br />
1 Produktbeschreibung ............................................................... 3<br />
1.1 Verwendungszweck ..................................................................................................... 3<br />
1.2 Technische Daten ........................................................................................................ 4<br />
1.3 Komponenten .............................................................................................................. 5<br />
1.4 Zeichenerklärung ......................................................................................................... 5<br />
1.5 Zubehör ....................................................................................................................... 6<br />
1.6 Für ihre Sicherheit ....................................................................................................... 6<br />
2 Verwendung ............................................................................... 7<br />
2.1 Sperrbox (SOFERN AM BETT INSTALLIERT) ....................................................... 7<br />
2.2 Hand<strong>bed</strong>ienung ohne Sperrfunktion............................................................................ 8<br />
2.3 Hand<strong>bed</strong>ienung mit Sperrfunktion .............................................................................. 9<br />
2.4 Betätigen der Bremsen ................................................................................................ 9<br />
2.5 Zugentlastung ............................................................................................................ 10<br />
2.6 Netzkabel ................................................................................................................... 10<br />
2.7 Notablass Kopfliegeteil ............................................................................................. 11<br />
2.8 Seitengitter ................................................................................................................ 11<br />
2.9 Aufrichter .................................................................................................................. 12<br />
2.10 Rastomat (wenn vorhanden)...................................................................................... 12<br />
2.11 Transport in bzw. aus dem Bett ................................................................................. 13<br />
2.12 Transport ................................................................................................................... 13<br />
2.13 Kabelverlegung ......................................................................................................... 13<br />
3 Zusammenbau und Einstellung ............................................ 14<br />
3.1 Werkzeug ................................................................................................................... 14<br />
3.2 Lieferumfang ............................................................................................................. 14<br />
3.3 Aufbau ....................................................................................................................... 14<br />
4 Wartung ................................................................................... 18<br />
4.1 Regelmäßige Wartung ............................................................................................... 18<br />
4.2 Verpackung und Lagerung ........................................................................................ 19<br />
4.3 Pflege ......................................................................................................................... 19<br />
4.4 Inspektion .................................................................................................................. 20<br />
4.5 Desinfektion .............................................................................................................. 24<br />
5 Garantie ................................................................................... 27<br />
6 Entsorgung .............................................................................. 27<br />
7 Übereinstimmungserklärung ................................................. 27<br />
8 Wartungsplan .......................................................................... 28<br />
9 Desinfektionbuch .................................................................... 28<br />
DE
DE<br />
Preface<br />
Seite 2<br />
<strong>Luna</strong><br />
2010-11<br />
Zuerst möchten wir uns für das Vertrauen <strong>bed</strong>anken, das Sie in uns gesetzt haben, indem<br />
Sie sich für einen unserer Pflegebett entschieden haben.<br />
Die <strong>Vermeiren</strong>-Pflegebett sind das Ergebnis langjähriger Forschung und Erfahrung. In der<br />
Entwicklungsphase wurde besonderer Wert auf Bedienerfreundlichkeit und leichte Wartung<br />
des Plegebett gelegt.<br />
Die zu erwartende Lebensdauer Ihres Bettes hängt im Wesentlichen von der Wartung und<br />
Pflege ab, die für das Bett aufgewendet wird.<br />
Diese Bedienungsanleitung soll Ihnen helfen, sich mit der Benutzung Ihres Pflegebett<br />
vertraut zu machen.<br />
Das Befolgen der Bedienungsanleitung und der Wartungshinweise bildet einen wesentlichen<br />
Teil der Garantie<strong>bed</strong>ingungen.<br />
Diese Bedienungsanleitung spiegelt die neuesten Produktentwicklungen wider. Das<br />
Unternehmen <strong>Vermeiren</strong> behält sich jedoch das Recht vor, Änderungen vorzunehmen.<br />
Dabei besteht jedoch keine Verpflichtung, die früher ausgelieferten Modelle anzupassen<br />
oder zu ersetzen.<br />
Sollten Sie weitere Fragen haben, so wenden Sie sich bitte an Ihren Fachhändler.
1 Produktbeschreibung<br />
1.1 Verwendungszweck<br />
Seite 3<br />
<strong>Luna</strong><br />
2010-11<br />
Mit dem Modell LUNA haben Sie ein Pflegebett erworben, das ganz für Ihren Komfort<br />
entwickelt wurde. Das Pflegebett bietet Ihnen verschiedene individuelle<br />
Verstellmöglichkeiten, die nachfolgend erläutert sind. Lesen Sie daher bitte, um sich mit<br />
Ihrem Bett vertraut zu machen, die Gebrauchsanweisung sorgfältig durch.<br />
Das Pflegebett wurde für einen erwachsenen Patienten (ab 12 Jahre, bis zu 140 kg)<br />
konzipiert.<br />
Das Bett muss mit einer geeigneten Matratze (min. RG 35, 120 mm Dicke, max. 20 kg)<br />
verwendet werden.<br />
Das Pflegebett LUNA ist für den Gebrauch auf ebenen, festen Böden im trockenen<br />
Innenbereich konzipiert.<br />
Die Vielfalt an Ausstattungs- und Zubehörvarianten sowie die modulare Bauweise erlauben<br />
den Transport eines Menschen bei Gehbehinderung/Gehunfähigkeit aufgrund von:<br />
Lähmungen<br />
Gliedmaßenverlust (Beinamputation)<br />
Gliedmaßendefekt oder -deformation<br />
Gelenkkontrakturen oder -schäden<br />
Herzkrankheiten oder schwachem Blutkreislauf<br />
Gleichgewichtsstörungen<br />
Kachexie (Muskelschwund)<br />
und für ältere Menschen.<br />
Bei der individuellen Versorgung sind außerdem:<br />
Körpergröße und -gewicht (max. 140 kg)<br />
körperlicher und geistiger Zustand<br />
Wohnverhältnisse<br />
Umgebung<br />
zu beachten.<br />
Das Bett wurde für die Anwendungsumgebung 4: „Pflege im häuslichen Bereich, bei der ME-<br />
Ausrüstungen verwendet werden, um eine Verletzung, Behinderung oder Krankheit zu<br />
lindern oder zu kompensieren“ konzipiert.<br />
Das Bett darf nur auf Flächen verwendet werden, auf denen alle vier Räder den Boden<br />
berühren.<br />
Der Pflegebett darf nicht als Leiter oder als Transportmittel für schwere oder heiße Objekte<br />
verwendet werden.<br />
Bei Verwendung des Bettes auf Teppichen, Teppichböden oder lose verlegten<br />
Bodenbelägen besteht die Gefahr deren Beschädigung. Außerdem lässt sich das Pflegebett<br />
schwerer schieben (ohne Patient !).<br />
Verwenden Sie ausschließlich von <strong>Vermeiren</strong> genehmigtes Zubehör.<br />
Für Schäden durch nicht oder mangelhaft durchgeführte Wartung oder durch<br />
Nichtbeachtung der folgenden Anweisungen übernimmt der Hersteller keine Haftung.<br />
Das Befolgen der Bedienungsanleitung und der Wartungshinweise bildet einen wesentlichen<br />
Teil der Garantie<strong>bed</strong>ingungen.<br />
DE
DE<br />
1.2 Technische Daten<br />
Die im Folgenden aufgeführten technischen Daten gelten für einen Pflegebett in der<br />
Standardkonfiguration.<br />
Wurden anderes Zubehör montiert, ändern sich die in der Tabelle aufgeführten Werte.<br />
Hersteller <strong>Vermeiren</strong><br />
Adresse <strong>Vermeiren</strong>plein 1/15, B-2920 Kalmthout<br />
Typ Pflegebett<br />
Modell <strong>Luna</strong><br />
Max. zulässiges Gewicht des<br />
Fahrers<br />
140 kg<br />
Beschreibung Min. Max.<br />
Länge 2150 mm (<strong>Luna</strong> Modelle) 2240 mm (<strong>Luna</strong> X-low)<br />
Breite 1030 mm<br />
Liegefläche höhenverstellbar 400 mm (ohne Matratze)<br />
200 mm (<strong>Luna</strong> X-low)<br />
Länge zusammengeklappt 445 mm<br />
Breite zusammengeklappt 935 mm<br />
Höhe zusammengeklappt 1045 mm<br />
Gesamtgewicht 95 kg<br />
Verstellung des Rückenbereichs 83°<br />
max. Winkel Oberschenkel 31.7°<br />
max. Winkel Unterschenkel -14,8°<br />
max. sichere Arbeitslast 175 kg<br />
Aufrichter Nennlast 80 kg<br />
Seite 4<br />
805 mm (ohne Matratze)<br />
600 mm (<strong>Luna</strong> X-low)<br />
Matratze Min. RG 35, 120 mm Dicke, 2000 x 900 mm, max. 20 kg<br />
Unterfahrbarkeit für<br />
Patientenlifter<br />
150 mm (keineUnterfahrbarkeit möglich bei Modell <strong>Luna</strong> X-low)<br />
Lenkrollen (4 Stück) Ø 125 mm, feststellbar<br />
Motor Stirnteile LA273100-A01405040, Linak<br />
Motor des Rückenbereichs LA270022-00, Linak<br />
Motor des Beinbereichs LA270022-00, Linak<br />
Hand<strong>bed</strong>ienung HBW074-072, Linak<br />
Sperrbox ACL 403500, Linak<br />
Trafo CB6404+10019, Linak<br />
Nennspannung Trafo U in: 230 V , ± 10%, 50 Hz, I in: max. 1.5 A, U out: 24V ---, max. 70 VA<br />
Einschaltdauer 10%, max. 6 min/Std.<br />
Schallleistungspegel < 65 dB(A)<br />
<strong>Luna</strong><br />
2010-11<br />
Schutzklasse / Schutzart Schutzklasse II, Anwendungsteil Typ B / IP54 (spritzwassergeschützt)<br />
Temperaturbereich für Lagerung<br />
und Nutzung<br />
Luftfeuchtigkeitsbereich für<br />
Lagerung und Nutzung<br />
+ 5 °C + 41 °C<br />
30% 70%<br />
Technische Änderungen vorbehalten. Messtoleranzen ± 15 mm / 1,5 kg / °<br />
Tabelle 1: Technische Daten
Das Pflegebett entspricht den Anforderungen der folgenden Normen:<br />
Seite 5<br />
<strong>Luna</strong><br />
2010-11<br />
EN 1970: Verstellbare Betten für körperbehinderte Personen: Anforderungen und<br />
Testmethoden<br />
EN 1970+ A1: Verstellbare Betten für körperbehinderte Personen: Anforderungen und<br />
Testmethoden<br />
EN 60601-2-38/A1: Elektrische medizinische Ausrüstung - Teil 2-38: Besondere Anforderungen<br />
für die Sicherheit von elektrisch verstellbaren Krankenhausbetten<br />
1.3 Komponenten<br />
1.4 Zeichenerklärung<br />
Max. Gewicht<br />
CE Konformität<br />
L Sicherheitshinweise<br />
�<br />
��<br />
��<br />
�<br />
Gebrauchsanweisung beachten<br />
Richtige Verfahrens- / Anwendungsweise<br />
Falsche Verfahrens- / Anwendungsweise<br />
Schutzklasse II<br />
Anwendungsteil Typ B<br />
1 = Aufrichter<br />
2 = Triangle<br />
3 = Matratzenhalter<br />
4 = Seitengitter<br />
5 = Oberer<br />
Beinbereich<br />
6 = Unterer Beinbereich<br />
7 = Fußteil<br />
8 = Unterwagen-rahmen<br />
9 = Laufrolle<br />
10 = Radsicherung<br />
11 = Motor<br />
12 = Kopfteil<br />
13 = Drittes Seitenteil<br />
(Holz)<br />
14 = Hand<strong>bed</strong>ienung<br />
15 = Seitengitter<br />
16 = Rückenbereich<br />
17 = Sitzbereich<br />
18 = Montagetaste<br />
DE
DE<br />
Seite 6<br />
<strong>Luna</strong><br />
2010-11<br />
1.5 Zubehör<br />
L WARNUNG: Bei Verwendung der im Folgenden nicht aufgeführten Zubehörteile<br />
müssen zusätzliche Vorsichtsmaßnahmen getroffen werden.<br />
Sperrbox + Hand<strong>bed</strong>ienung ohne Sperrfunktion<br />
Drittes Seitenteil (Holz)<br />
1.6 Für ihre Sicherheit<br />
l Lesen Sie vor dem Gebrauch dieses Pflegebettes die Gebrauchsanweisung<br />
sorgfältig durch.<br />
l Positionieren und benutzen Sie Ihr Pflegebett nur auf geraden und ebenen Flächen,<br />
so dass alle vier Lenkrollen sicher auf dem Boden stehen.<br />
l Achten Sie beim Standort des Bettes darauf, dass im kompletten Verstellbereich<br />
keine Hindernisse vorhanden sind.<br />
L Ist der Patient unbeaufsichtigt, ist das Bett zuvor in die niedrigste Position zu<br />
verfahren, um das Risiko von Verletzungen durch Fallen beim Einsteigen in,<br />
Aussteigen aus dem Bett oder das Liegen im Bett zu verringern.<br />
L Ist der Patient unbeaufsichtigt, sind die Seitengitter beider Seiten in die obere<br />
Position zu bringen. Das ein- oder beidseitige Absenken ist nur im Beisein einer<br />
Aufsichtsperson zulässig.<br />
L Achten Sie bei der Montage/Demontage und Benutzung auf Ihre Hände –<br />
Quetschgefahr !<br />
L Fassen Sie zum Transport des Bettes nur an feste Rahmen-/ und Holzteile.<br />
L Alle vier Lenkrollen sind immer vor der Benutzung des Pflegebettes festzustellen.<br />
L Medizinisch-elektrische Anwendungen innerhalb des Pflegebettes sind untersagt !<br />
L Lehnen Sie sich nicht an oder auf die Seitengitter – Unfallgefahr !<br />
L Seitliches Hinauslehnen des Oberkörpers vermeiden – Unfallgefahr !<br />
L Beine nicht durch Auflegen auf andere Gegenstände entlasten – Unfallgefahr<br />
L Keine Körperteile oder Gegenstände während einer Verstellung zwischen<br />
Scharniere, Gelenke oder andere Klemmteile halten – Quetschgefahr !<br />
L Hände während der Bein- oder Rückenverstellung nicht zwischen Rahmen und<br />
Matratze schieben – Quetschgefahr !<br />
L Verwenden Sie den Netzstecker nur an einer Netzsteckdose nach VDE (220V/230V,<br />
50 Hz).<br />
L Ziehen Sie alle Steckverbindungen nur am Stecker; ziehen Sie nicht an den<br />
Leitungen.<br />
L Sperren Sie die Hand<strong>bed</strong>ienung nach jedem Gebrauch mit der Sperrbox.<br />
L Verwenden Sie Ihr Pflegebett nur in trockenen Räumen.<br />
L Verwenden Sie nur eine Matratze, die den Vorgaben des Bettenherstellers entspricht.<br />
L Bei Verformungen des Aufrichters ist dieser auszutauschen.<br />
L Die Seitengitter müssen auch bei mauerzugewandter Seite montiert bleiben.<br />
L Führen Sie keine Reparaturen selbstständig durch – Unfallgefahr !<br />
L Öffnen Sie kein Gehäuse des Antriebssystems – Unfallgefahr !<br />
L Der Transport des Patienten mit dem Pflegebett ist nur in der untersten und in der<br />
waagerechten Liegeposition zulässig.<br />
L Achten Sie darauf, dass alle elektrischen Leitungen ohne Knickstellen,<br />
Scheuerstellen oder andere mechanische Schäden aufgehängt werden.<br />
L Alle Kabel sind so zu verlegen, dass kein Bodenkontakt besteht und keine<br />
Quetschungen der Kabel vorliegen.
<strong>Luna</strong><br />
2010-11<br />
L Die zusätzliche Verwendung und Anbringung von mechanischen oder elektrischen<br />
Geräten ist untersagt.<br />
L Wartung, Inspektion, Instandsetzung und Desinfektion sind nur von autorisierten und<br />
geschulten Personen durchzuführen.<br />
L Verwenden Sie nur Originalersatzteile des Herstellers für Ihr Pflegebett.<br />
L Belasten Sie Ihr Pflegebett nicht über den vom Hersteller angegebenen Wert (max.<br />
140 kg).<br />
L Innerhalb des Pflegebettes besteht ein Verbot von offenen Flammen oder<br />
Glimmkörpern (Kerzen, Zigaretten, etc.)<br />
L Ersetzen Sie Ihre Seitengitter, wenn diese verbogen oder durchgebrochen sind, da<br />
sonst die Gefahr des Herausfallens aus dem Bett besteht.<br />
L Die Nutzung Ihres Bettes kann andere elektrische Geräte beeinflussen<br />
(Störgeräusche). Vermeiden Sie den gleichzeitigen Gebrauch.<br />
L Beachten Sie alle Sicherheits- und Gebrauchshinweise.<br />
L Ein elektrisch betriebenes Bett muss in einem gewissen Abstand zu einer<br />
Netzsteckdose aufgestellt werden.<br />
L Das Pflegebett darf nur mit einer Hebevorrichtung benutzt werden, deren Füße unter<br />
den eingeschränkten Platz des Pflegebettes geschoben werden kann.<br />
2 Verwendung<br />
In diesem Kapitel wird die tägliche Verwendung beschrieben. Diese Anweisungen richten<br />
sich an den Benutzer und an den Fachhändler.<br />
Der Pflegebett wird Ihnen vollständig aufgebaut von Ihrem Fachhändler geliefert.<br />
Anweisungen für den Fachhändler, wie der Pflegebett zusammengebaut und eingerichtet<br />
wird, befinden sich in § 3.<br />
L WARNUNG: Achten Sie darauf, keine Kabel zwischen den Teilen des<br />
Pflegebettes einzuklemmen.<br />
L WARNUNG: Das Pflegebett darf nur mit einer Hebevorrichtung benutzt werden,<br />
deren Füße unter den eingeschränkten Platz des Pflegebettes geschoben werden<br />
kann.<br />
2.1 Sperrbox (SOFERN AM BETT INSTALLIERT)<br />
L VORSICHT: Verletzungsgefahr - Achten Sie darauf, dass die Kabel nicht<br />
eingeklemmt werden können.<br />
Der folgende Absatz findet Anwendung, wenn die Sperrbox am Bett installiert ist und<br />
in Verbindung mit der Hand<strong>bed</strong>ienung ohne Sperrfunktion verwendet wird.<br />
Eine Sperrbox wird zwischen dem Transformator und der Hand<strong>bed</strong>ienung installiert, um eine<br />
unfreiwillige elektrische Bedienung des Pflegebettes zu verhindern. Die Sperrbox befindet<br />
sich am Querträger des Pflegebett-Unterwagens). Die Sperrbox verfügt über Drehschalter,<br />
die die Hand<strong>bed</strong>ienung aktivieren oder sperren.<br />
1<br />
3<br />
�<br />
�<br />
4<br />
2<br />
Seite 7<br />
1 = Sperrbox<br />
2 = Transformatoranschluss<br />
3 = Anschluss für Hand<strong>bed</strong>ienung<br />
4 = Sperrregler<br />
�= Gesperrt<br />
�= Freigegeben<br />
DE
DE<br />
Seite 8<br />
<strong>Luna</strong><br />
2010-11<br />
2.2 Hand<strong>bed</strong>ienung ohne Sperrfunktion<br />
L VORSICHT: Verletzungsgefahr - Einstellungen durch den Patienten sind nur bei<br />
Überwachung durch das Pflegepersonal zulässig.<br />
Diese Hand<strong>bed</strong>ienung darf nur in Verbindung mit der Sperrbox verwendet werden.<br />
Die Höhe der Liegefläche, der Winkel der Rückenlehne und der Knieknick können über die<br />
Hand<strong>bed</strong>ienung gewählt werden. Nach Gebrauch ist die Hand<strong>bed</strong>ienung am Seitenholm<br />
aufzuhängen und mit der Sperrbox zu sichern.<br />
Die folgenden Einstellungen können gewählt werden:<br />
Rückenbereich hoch und herunter fahren<br />
Matratzenstütze herunter und hoch fahren<br />
Beinbereich hoch und herunter fahren<br />
Anti-Trendelenburg<br />
Beim Anschließen der Hand<strong>bed</strong>ienung an der Sperrbox ist sicherzustellen, dass<br />
der Verbindungstecker in der Sperrbox besonders gesichert ist. Bitte beachten Sie folgende<br />
Hinweise:<br />
1. Entfernen Sie den Sicherungsring aus dem<br />
Steckverbinder.<br />
2. Stecken Sie den Steckverbinder für die<br />
Hand<strong>bed</strong>ienung in die Sperrbox.<br />
3. Setzen Sie den Sicherungsring so in den Anschluss<br />
an der Sperrbox, dass das Kabel nicht<br />
unbeabsichtigt herausgezogen werden kann.<br />
Das Verbindungskabel kann nur dann aus der Sperrbox herausgezogen werden, nachdem<br />
der Sicherungsring entfernt wurde.
2.3 Hand<strong>bed</strong>ienung mit Sperrfunktion<br />
Anstelle der Sperrbox kann eine Hand<strong>bed</strong>ienung mit Sperrfunktion verwendet werden.<br />
Freigegeben<br />
Seite 9<br />
<strong>Luna</strong><br />
2010-11<br />
Die Hand<strong>bed</strong>ienung verfügt über eine Sperrfunktion.<br />
Sie ermöglicht das Sperren bzw. Freigeben einer oder<br />
mehrerer Funktionen.<br />
Vorsichtsmaßnahmen:<br />
• Zum Wechseln zwischen den Positionen zum Sperren<br />
und Freigeben muss ein kleiner Schalter zwischen den<br />
Bedienungstasten mithilfe eines Schlüssels gedreht<br />
werden. Dieser Schlüssel darf nur dem Pflegepersonal<br />
zugänglich sein.<br />
Gesperrt<br />
2.4 Betätigen der Bremsen<br />
L WARNUNG: Die Funktion der Lenkrollen wird durch Verschleiß und<br />
Kontamination der Räder (Wasser, Öl …) beeinflusst – Prüfen Sie den Zustand der<br />
Lenkrollen vor jeder Verwendung.<br />
L WARNUNG: Die Lenkrollen können verschleißen – Prüfen Sie den Zustand der<br />
Lenkrollen vor jeder Verwendung.<br />
L WARNUNG: Unfallgefahr - Stellen Sie immer alle Lenkrollen fest. Beim<br />
Feststellen nur einer Lenkrolle rollt die freilaufende um die festgestellte<br />
Lenkrolle.<br />
Um ungewollte Rollbewegungen zu verhindern, sind alle Lenkräder feststellbar.<br />
Feststellen (A)<br />
Fläche des Kipphebels mit dem Fuß bis zum Anschlag nach unten treten.<br />
Lösen (B)<br />
Fläche des Kipphebels mit dem Fuß bis zum Anschlag nach vorne treten.<br />
A<br />
B<br />
DE
DE<br />
2.5 Zugentlastung<br />
L WARNUNG: Die Zugentlastung darf nicht entfernt werden.<br />
L WARNING: Nothing must be fitted to or hung on the relief unit.<br />
Seite 10<br />
<strong>Luna</strong><br />
2010-11<br />
Unterhalb des Querholms des Kopflattenrostes befindet sich die Aufnahme zur Befestigung<br />
der Zugentlastung<br />
Führen Sie die Zugentlastung des Netzkabels (4) in die dafür vorgesehene<br />
Aufhängung (3).<br />
Ziehen Sie das Netzkabel (1) so in die gewünschte Länge, dass das Netzkabel (2)<br />
ohne Durchhängen unterhalb des Lattenrostes verlegt werden kann. Achten Sie<br />
darauf, dass in keinen Verstellpositionen das Kabel (2) unter Zug gerät.<br />
Sichern Sie das Netzkabel, indem Sie die Zugentlastung des Netzkabels (4) handfest<br />
anziehen.<br />
Sichern Sie die Position der Zugentlastung, indem Sie die Verschraubung (5)<br />
handfest anziehen.<br />
1<br />
4<br />
2.6 Netzkabel<br />
L WARNUNG: Keine anderen Gegenstände außer der Netzzuleitung aufhängen.<br />
L WARNUNG: Das Netzkabel könnte beschädigt werden - Das Netzkabel muss<br />
sorgfältig ohne Knickstellen, Zug- oder Scherbelastung oder andere mögliche<br />
Beschädigung und ohne Bodenkontakt aufgehängt werden.<br />
Damit Ihr Netzkabel auch nach langem Einsatz in einem funktionstauglichen und<br />
sichertechnischem Zustand bleibt, haben wir am Querholm des Lattenrostes (neben der<br />
Zugentlastung) für den Fall, dass Sie Ihr Bett nicht elektrisch benutzen eine Aufhängung<br />
vorgesehen, an der Sie Ihr Netzkabel aufgerollt am Pflegebett hinterlassen können.<br />
3<br />
5<br />
2<br />
1 = Netzkabel<br />
(Netzanschluss)<br />
2 = Netzkabel<br />
(Anschluss Trafo)<br />
3 = Aufhängung<br />
Zugentlastung<br />
4 = Zugentlastung<br />
Netzkabel<br />
5 = Verschraubung<br />
Zugentlastung<br />
Fig. 8a
<strong>Luna</strong><br />
2010-11<br />
2.7 Notablass Kopfliegeteil<br />
L WARNUNG: Quetschgefahr - Achten Sie darauf, dass sich keine Gegenstände<br />
oder Körperteile zwischen der Kopfstütze und dem Rahmen befinden.<br />
Das Kopfliegeteil lässt sicht manuell absenken (Notablass bei Versagen des Motors)<br />
Notablass nur mit mindestens zwei Personen zulässig.<br />
Handhabung: 1. Sicherungslasche der oberen Motorbefestigung umlegen.<br />
2. Eine Person fasst seitlich den Kopfliegerahmen, während eine zweite<br />
Person den Sicherungsbolzen herauszieht und den Motor aus der<br />
Aufhängung entfernt.<br />
3. Kopfteil ablassen.<br />
2.8 Seitengitter<br />
Die Seitengitter sind einseitig absenkbar.<br />
1<br />
Absenken<br />
L WARNUNG: Quetschgefahr - Sichern Sie die Seitengitter gegen<br />
ungewolltes Herabfallen.<br />
L WARNUNG: Quetschgefahr - Achten Sie darauf, dass keine<br />
Gegenstände oder Körperteile über den Liegebereich herausragen.<br />
L WARNUNG: Verletzungsgefahr - Senken Sie das Seitengitter auf einer<br />
Seite nicht ab, wenn der Patient nicht beaufsichtigt wird.<br />
Oberes Seitengitter leicht anheben, Arretierknopf am seitlichen Kopf-/Fußteil<br />
eindrücken und<br />
Seitengitter langsam herablassen. (Ergreifen Sie immer nur die obere Holzlatte !)<br />
Bei dem Modell LUNA Basic befindet sich der Arretierungsknopf an den Außenseiten<br />
der Bettstirnteile und muss zur Entriegelung gezogen werden.<br />
1<br />
2<br />
4<br />
3<br />
2<br />
Seite 11<br />
1 = Sicherungslasche<br />
2 = Motorbefestigung<br />
3 = Kopfliegerahmen<br />
4 = Motor Kopfliegerahmen<br />
1 = Oberes Seitengitter<br />
2 = Arretierungsknopf<br />
DE
DE<br />
Seite 12<br />
<strong>Luna</strong><br />
2010-11<br />
Sollten Seitengittererhöhungen oder Seitengitterabdeckungen zur zusätzlichen Sicherung<br />
des Patienten notwendig sein (z.B. stark abgemagerter Patient), ist darauf zu achten, dass<br />
nach dem Anbau alle Funktionen des Bettes, sowie die CE-konforme Auslegung bei<br />
Erstlieferung nicht beeinträchtigt werden.<br />
2.9 Aufrichter<br />
�<br />
��<br />
�<br />
�<br />
Der Aufrichter ist auf beiden Seiten vom Kopfteilrahmen montierbar (nur für LUNA<br />
verwenden!).<br />
1 = Aufrichter<br />
2 = Aufnahmebuchse Aufrichter<br />
3 = Arretierbolzen<br />
4 = Aufnahmenut<br />
5 = Rahmenende Aufrichter<br />
6 = Aufnahmelochungen<br />
7 = Gurt<br />
8 = Triangel<br />
��<br />
Aufrichter (1) bis zum Anschlag in die gewünschte Aufnahmebuchse (2) setzen.<br />
Arretierbolzen (3) dabei in die Aufnahmenut (4) gleiten lassen.<br />
Metallschlaufe über das obere Rahmenende (5) ziehen, bis der Bolzen in einer der<br />
drei Aufnahmelochungen (6) einsinkt.<br />
Gurt (7) in die Metallschlaufe ziehen, ebenso durch die Triangel (8) und die Länge<br />
festlegen. Gurt feststellen.<br />
2.10 Rastomat (wenn vorhanden)<br />
L VORSICHT: Verletzungsgefahr - Stellen Sie sicher, dass sich beim Verstellen der<br />
Pflegebettes keine Gegenstände oder Personen im Verstellbereich befinden.<br />
Zur Verstellung der Unterschenkelliegefläche fassen Sie die Handschlaufe am Fußende in<br />
der Rahmenmitte an. Ziehen Sie die Unterschenkelliegefläche in die gewünschte Höhe. Der<br />
Rastomat arretiert in Abständen von ca. 2 cm. Zum Ablassen der Unterschenkelliegefläche<br />
ziehen Sie diese an der Handschlaufe am Fußende in die oberste Position. Der Rastomat<br />
sperrt daraufhin alle Arretierungen und Sie können nun die Unterschenkelliegefläche<br />
langsam komplett ablassen, bis diese auf dem Bettenrahmen aufliegt.<br />
Führen Sie diese Verstellung nur mit der Handschlaufe am Fußende durch, da es sonst zu<br />
Verkantungen und Schäden der Rasterverstellung kommen kann.
2.11 Transport in bzw. aus dem Bett<br />
L VORSICHT: Falls Sie sich nicht sicher allein in bzw. aus dem Bett bewegen<br />
können, bitten Sie jemandem um Hilfe.<br />
1. Positionieren Sie sich so nah wie möglich zum Bett.<br />
2. Prüfen Sie, ob die Bremsen am Bett betätigt sind.<br />
3. Entfernen oder klappen Sie die Seitengitter des Bettes herunter.<br />
4. Setzen Sie sich auf das Bett bzw. stehen Sie auf.<br />
Seite 13<br />
<strong>Luna</strong><br />
2010-11<br />
2.12 Transport<br />
L WARNUNG: Verletzungsgefahr – Achten Sie darauf, den Pflegebett<br />
ordnungsgemäß zu befestigen. So vermeiden Sie Verletzungen der<br />
Fahrzeuginsassen bei einer Kollision oder einem plötzlichen Bremsmanöver.<br />
L WARNUNG: Verletzungsgefahr – Verwenden Sie zum Sichern des Pflegebett und<br />
des Fahrzeuginsassens NIEMALS den gleichen Sicherheitsgurt.<br />
L WARNUNG: Verletzungsgefahr – Patiententransport ist nur in der untersten und<br />
waagerechten Liegeposition zulässig!<br />
Um Transportschäden zu vermeiden, achten Sie darauf, dass der Aufrichter abmontiert wird.<br />
Trennen Sie die Netzzuleitung und achten Sie darauf, dass keine hängenden Verkabelungen<br />
in Bodennähe liegen.<br />
2.13 Kabelverlegung<br />
1 = Kopflattenrost<br />
2 = Fußlattenrost<br />
3 = Aufnahmen Aufrichter<br />
4 = Zugentlastung<br />
5 = Netzkabel<br />
6 = Trafo / Kontrollbox<br />
7 = Sperrbox<br />
8 = Motor Kopfliegefläche<br />
9 = Motor Knieknick<br />
10 = Motor Stirnteil Kopf<br />
11 = Motor Stirnteil Fuß<br />
12 = Hand<strong>bed</strong>ienung<br />
Alle Verkabelungen innerhalb<br />
des Bettrahmens sind<br />
so zu verlegen, dass kein<br />
Bodenkontakt und keine<br />
Quetsch- und Scherstellen<br />
entstehen.<br />
DE
DE<br />
3 Zusammenbau und Einstellung<br />
Seite 14<br />
<strong>Luna</strong><br />
2010-11<br />
Die Anweisungen in diesem Kapitel richten sich an den Fachhändler.<br />
Der <strong>Vermeiren</strong> <strong>Luna</strong> wurde so konzipiert, dass er optimal verstellt werden kann und nur ein<br />
Minimum an Ersatzteilen erfordert. Daher ist es nicht erforderlich, dass ein spezieller Vorrat<br />
an Ersatzteilen angelegt wird.<br />
Um einen Fachhändler in Ihrer Nähe zu finden, stehen Ihnen unsere Niederlassungen gerne<br />
zur Verfügung. Eine Auflistung aller <strong>Vermeiren</strong> Niederlassungen finden Sie auf der letzten<br />
Seite dieser Gebrauchsanweisung.<br />
L WARNUNG: Nutzen Sie das Produkt nur gemäß den technischen Vor- und<br />
Angaben dieser Gebrauchsanweisung.<br />
3.1 Werkzeug<br />
Für die Montage des Pflegebettes werden die folgenden Werkzeuge benötigt:<br />
Inbusschlüssel<br />
Schraubendreher<br />
3.2 Lieferumfang<br />
Der Lieferumfang des <strong>Vermeiren</strong> <strong>Luna</strong> umfasst:<br />
2 Stirnteile inkl. Motor + Holzverschalung ca. 17 kg / Stück<br />
Lattenrost, Fußteil inkl. Motor ca. 20 kg<br />
Lattenrost, Kopfteil inkl. Trafo und Motor ca. 20 kg<br />
Seitengitter (2 x 2 Holzlatten) ca. 3 kg / Stück<br />
Bettgalgen + Triangelgriff ca. 10 kg<br />
Hand<strong>bed</strong>ienung ca. 10 kg<br />
Sperrbox<br />
Inbusschlüssel (Aufbau)<br />
Gebrauchsanweisung<br />
Das Pflegebett darf nur mit den hier aufgeführten Bauteilen verwendet werden. Werden<br />
Bauteile weggelassen oder fremde Ausstattungen, Komponenten sowie elektrische Systeme<br />
kombiniert, gilt dieses Bett nicht mehr als ein vom Hersteller geliefertes Pflegebett und die<br />
Benutzung unterliegt eigener Gefahr. Die CE-Konformität und die Herstellerhaftung entfällt.<br />
�<br />
Abhängig von Ihrer Modellversion LUNA kann der Inhalt differieren. Abhängig von Ihrer<br />
Modellversion LUNA können die Abbildungen von der gelieferten Version differieren.<br />
3.3 Aufbau<br />
L VORSICHT: Quetschgefahr - Achten Sie bei der Montage des Pflegebettes auf<br />
Ihre Finger.<br />
L VORSICHT: Klemmgefahr – Halten Sie Ihre Finger fern von sich bewegenden<br />
Teilen des Pflegebettes.<br />
Dargestellte Montage ist anwendbar bei den Modellen: <strong>Luna</strong>, <strong>Luna</strong> Basic, <strong>Luna</strong> Deluxe,<br />
<strong>Luna</strong> X-low. Abhängig von Ihrer Modellversion LUNA können die Abbildungen von der<br />
gelieferten Version differieren.<br />
Beachten Sie folgende Hinweise, die Ihnen den Aufbau Ihres Pflegebettes verdeutlichen.
3.3.1 Stirnteile<br />
2<br />
Schieben Sie die Lattenrostenden in die Stirnteilaufnahmen (Feststellschrauben<br />
müssen zuvor gelöst sein, Verkantung vermeiden !).<br />
ACHTUNG: Lattenrostkopfteil ist mit Aufnahmen für den Aufrichter, sowie der<br />
Netzkabelaufhängung versehen.<br />
Seite 15<br />
<strong>Luna</strong><br />
2010-11<br />
Sichern Sie mit den Feststellschrauben, wobei diese soweit eingedreht werden, dass<br />
sie durch die Aufnahmebohrung der Stirnteilaufnahmen geführt werden und eine<br />
Festklemmung bewriken (handfest anziehen !).<br />
Motorzuleitung vor Quetschungen schützen.<br />
3.3.2 Lattenrost<br />
3<br />
Richten Sie beide Lattenroste auf und schieben diese bündig ineinander.<br />
Sichern Sie danach handfest die Feststellschrauben der Lattenrostverbindung.<br />
Motorzuleitung vor Quetschungen schützen.<br />
1<br />
1 1<br />
2<br />
3<br />
1 = Lattenrostenden<br />
2 = Stirnteilaufnahmen<br />
3 = Feststellschrauben<br />
1 = Lattenroste<br />
2 = Feststell-<br />
schrauben<br />
DE
DE<br />
3.3.3 Seitengitter aus Holz<br />
Seite 16<br />
<strong>Luna</strong><br />
2010-11<br />
Die unten gezeigte Montage gilt für die folgenden Typen: <strong>Luna</strong>, <strong>Luna</strong> Basic, <strong>Luna</strong> Deluxe,<br />
<strong>Luna</strong> X-low.<br />
Abhängig vom Typ Ihres <strong>Luna</strong>-Bettes weichen einige Abbildung eventuell von Ihrem Bett ab.<br />
A. Stecken Sie die kurzen Bolzenschienen (1) rechts und links in die obere Holzlatte.<br />
Stecken Sie die langen Bolzenschienen (2) links und rechts in die untere Holzlatte.<br />
Stecken Sie die langen Bolzenschienen (2) nacheinander in die Holzlatte der<br />
Gleitschiene für das Kopf- und Fußteil und sichern Sie sie, indem Sie die Schienen<br />
so tief einstecken, bis das obere Ende mit einem Klick einrastet. Geben Sie diese<br />
Schiene auf einer Seite wieder frei, bis die Spitze dieser Schiene gerade noch in der<br />
Führung verbleibt, indem Sie den Arretierungsknopf (5) drücken und die obere<br />
Holzlatte vorsichtig nach oben ziehen.<br />
Lassen Sie die Bolzenschienen (2) erneut von der Gleitschiene fallen, bis die Spitze<br />
der Schiene eben in der Führung sitzt. Die kurze Bolzenschiene (1) wird nun<br />
zusammen mit der Holzlatte zwischen den Wänden der langen Bolzenschienen<br />
eingesetzt, und das gesamte Bolzenschienensystem (1) + (2) wird in der<br />
entsprechenden Gleitschiene (4) positioniert, indem nur die obere Holzlatte<br />
angehoben und die Struktur dann in dieser Position gesichert wird.<br />
B. Die Kontermuttern (6) aufsetzen und handfest anziehen.
<strong>Luna</strong><br />
2010-11<br />
3.3.4 Anschlüsse<br />
L VORSICHT: Verletzungsgefahr - Stecker nicht mit nassen Händen berühren.<br />
L VORSICHT: Verletzungsgefahr - Keine Gegenstände auf Anschluss und Zuleitung<br />
stellen, sowie vor mechanischen Belastungen schützen.<br />
1. Als Stromquelle ist eine nach VDE-Bestimmungen errichtete Netzsteckdose<br />
220V/230V, 50Hz zu benutzen.<br />
2. Anschluss an den Transformator nur nach folgendem Schema:<br />
Netzanschlussleitung nur am Stecker anfassen und aus der Netzsteckdose ziehen.<br />
Netzanschlussleitung ohne Schlingen verlegen, nicht knicken oder um scharfe Kanten legen.<br />
Netzanschlussleitung und Zuleitung zum Handschalter vor Quetschung schützen.<br />
6<br />
1 2 3 4<br />
1 2 3 4 5<br />
Seite 17<br />
1 = Anschluss Motor Kopfliegeteil<br />
2 = Anschluss Motor Knieknick<br />
3 = Anschluss Motor Kopfstirnteil<br />
4 = Anschluss Motor Fußstirnteil<br />
5 = Anschluss Sperrbox<br />
6 = Trafo / Kontrollbox<br />
Anschlusskabel der Motoren und Anschlüsse des<br />
Trafos sind mit gleicher Nummerierung gekennzeichnet.<br />
DE
DE<br />
4 Wartung<br />
Die Lebenszeit des Pflegebett hängt ab von der Art der Nutzung, der Einlagerung,<br />
regelmäßigen Kontrollen, Service und Pflege.<br />
4.1 Regelmäßige Wartung<br />
Die Wartungsarbeiten dienen dazu, den ordnungsgemäßen Zustand Ihres <strong>Vermeiren</strong><br />
Pflegebett über lange Zeit sicherzustellen:<br />
� Vor jedem Gebrauch<br />
� Überprüfen Sie die Bereifung und reinigen Sie sie gegebenenfalls. Falls<br />
erforderlich, wechseln Sie den Reifen.<br />
� Überprüfen Sie die Bremsen und stellen Sie sie gegebenenfalls ein.<br />
Seite 18<br />
<strong>Luna</strong><br />
2010-11<br />
� Überprüfen Sie den Pflegebett (Sauberkeit, Risse, Beschädigungen an den<br />
tragenden Teilen usw.) .) und reinigen Sie sie gegebenenfalls. Bessern Sie,<br />
falls erforderlich, die Lackierung aus.<br />
� Prüfen Sie die Verkabelungen auf sichtbare Beschädigungen und ob alle<br />
Steckverbindungen gemäß der Gebrauchsanweisung angeschlossen sind.<br />
Bei Beschädigungen ist sofort der Netzstecker zu ziehen. Informieren Sie Ihre<br />
autorisierte Fachwerkstatt zur Instandsetzung.<br />
� Prüfen Sie die mechanischen Verstellelemente (Seitengitter, Aufrichter,<br />
Fußraster) auf Ihre Funktion. Sollten Funktionseinbußen festzustellen sein,<br />
informieren Sie umgehend Ihren Fachhändler.<br />
� Prüfen Sie Ihre Hand<strong>bed</strong>ienung auf ordnungsgemäße Funktion. Sollte eine<br />
Funktion Ihrer Hand<strong>bed</strong>ienung fehlerhaft sein, ziehen Sie sofort den<br />
Netzstecker.<br />
� Alle 8 Wochen: Überprüfen und Schmieren der folgenden Teile:<br />
� Funktion der Gleitschiene der Seitengitter (Kopf- und Fußteil)<br />
� Aufnahmen der Latten im Lattenrost (wenn vorhanden)<br />
� Beschaffenheit der Holzelemente<br />
� Aufrichter (Passung / Verformung)<br />
� Fetten Sie die beweglichen Teile.<br />
Alle 6 Monate oder für jeden neuen Benutzer<br />
� Allgemeine Durchsicht<br />
� Desinfektion<br />
� Sauberkeit<br />
� Durchfeuchtung der verwendeten Matratze<br />
Zu Ihrer Bequemlichkeit haben wir den Wartungsplan auf der Rückseite dieser<br />
Bedienungsanleitung abgedruckt.<br />
Reparatur und Montage von Ersatzteilen für Ihren Pflegebett dürfen nur von einem<br />
Fachhändler durchgeführt werden.<br />
Es dürfen nur autorisierte <strong>Vermeiren</strong> Ersatzteile verwendet werden.
4.2 Verpackung und Lagerung<br />
Seite 19<br />
<strong>Luna</strong><br />
2010-11<br />
Bei der Verpackung und Lagerung des Pflegebett sind die folgenden Hinweise zu beachten:<br />
Lagern nur bei Temperaturen von +5°C bis +41°C.<br />
Einlagerung bei Luftfeuchtigkeit von 30 % à 70 %.<br />
Achten Sie darauf, den Pflegebett ausreichend abzudecken oder zu verpacken, um<br />
ihn vor Rost und Fremdkörpern zu schützen (z. B. Salzwasser, Seeluft, Sand, Staub).<br />
Alle abgebauten Teile zusammen an einem Ort lagern (ggf. kennzeichnen), damit bei<br />
Wiederaufbau keine Verwechslung mit anderen Produkten auftreten kann.<br />
Alle Bauteile müssen belastungsfrei gelagert werden (legen Sie keine schweren Teile<br />
auf den Pflegebett, klemmen Sie den Pflegebett nicht zwischen anderen Teilen ein<br />
usw.).<br />
Netzanschlussleitung knicksicher in der dafür vorgesehenen Halterung aufrollen.<br />
Interne Verkabelungen auf Quetsch- und Knicksicherheit prüfen.<br />
4.3 Pflege<br />
4.3.1 Metallrahmen, Holzteile<br />
Beachten Sie die folgenden Hinweise bei der Reinigung des Metallrahmens und der<br />
Holzteile:<br />
� Reinigen Sie die Metallrahmen und die Holzteile mit einem mit heißem<br />
Wasser angefeuchtetem Tuch. Achten Sie darauf, dass der Metallrahmen und<br />
die Holzteile nicht übermäßig nass werden.<br />
� Bei hartnäckiger Verschmutzung können die Bezüge mit einem<br />
handelsüblichen Feinwaschmittel gewaschen werden.<br />
� Flecken können mit einem Schwamm oder mit einer weichen Bürste entfernt<br />
werden.<br />
� Verwenden Sie keine aggressiven Reinigungsmittel, z. B. Lösungsmittel, oder<br />
harte Bürsten.<br />
� Die Bezüge dürfen nicht mit einem Dampf- oder Hochdruckreiniger behandelt<br />
werden.<br />
4.3.2 Kunststoffteile<br />
Reinigen Sie alle Kunststoffteile Ihres Pflegebetten mit einem handelsüblichen<br />
Kunststoffreiniger. Verwenden Sie nur eine weiche Bürste oder einen weichen Schwamm.<br />
Achten Sie darauf, dass die Motoren und die Hand<strong>bed</strong>ienung nur mit einem leicht<br />
angefeuchteten Tuch gereinigt werden.<br />
4.3.3 Lackierung<br />
Durch die hochwertige Lackierung wird ein optimaler Korrosionsschutz gewährleistet. Falls<br />
die Lackierung durch Kratzer oder ähnliches beschädigt wird, sollten Sie einen Fachhändler<br />
aufsuchen, um die betroffene Oberfläche instand setzen zu lassen.<br />
Verwenden Sie zur Reinigung der Lackierung nur warmes Wasser und handelsübliche<br />
Haushaltsreiniger mit einer weichen Bürste und ein Tuch. Achten Sie darauf, dass kein<br />
Wasser in die Rohre eintritt.<br />
Bei leichtem Schmutz reiben Sie die verzinkten Teile einfach mit einem trockenen Tuch<br />
sauber. Hartnäckiger Schmutz wird am besten mit einem handelsüblichen Zinkpolitur<br />
entfernt.<br />
DE
DE<br />
4.4 Inspektion<br />
Seite 20<br />
<strong>Luna</strong><br />
2010-11<br />
Grundsätzlich empfehlen wir jährliche Inspektionen, mindestens jedoch vor jedem<br />
Wiedereinsatz. Die folgenden Prüfungen müssen von autorisierten Personen durchgeführt<br />
und dokumentiert werden.<br />
Sichtprüfung der Rahmenteile auf plastische Verformung, Risse und<br />
Funktionsbeeinträchtigungen (Liegefläche, Hubwagen, Rückenteil, Fußteil, Aufrichter,<br />
Aufrichteraufnahme, Rollen).<br />
Sichtprüfung der Lackierung auf Schäden (Korrosionsgefahr)<br />
Funktionsprüfung der Bremsrollen (Freilauf, Sicherheit, Arretierung usw.)<br />
Prüfung aller Schraubverbindungen auf Festigkeit und korrekten Sitz.<br />
Prüfung der Menge des Schmiermittels bei metallisch geführten beweglichen Teilen.<br />
Sichtprüfung aller Gehäuse auf Beschädigungen, festen Sitz aller Schrauben,<br />
offensichtlichen Beschädigungen von Dichtungen.<br />
Sichtprüfung aller Kunststoffteile auf Risse und spröde Stellen<br />
Sichtprüfung der Netzanschlussleitung (EPR oder vergleichbar)<br />
Zustand der Netzzuleitung (insbesondere: Quetschungen, Abrieb, Schnitte, sichtbare<br />
Isolierungen oder Innenleiter, sichtbare metallische Adern, Knicke, Ausbeulungen,<br />
Farbveränderungen der äußeren Hülle, spröde Stellen)<br />
Prüfung der internen Verkabelung der Netzzuleitung (insbesondere: Quetschungen,<br />
Abrieb, Schnitte, sichtbare Isolierungen der Innenleiter, sichtbare metallische Adern,<br />
Knicke, Ausbeulungen, Farbveränderungen der äußeren Hülle, spröde Stellen)<br />
Feuchtigkeitsschutz des elektrischen Systems mind. IPX4 (siehe Typenschild).<br />
Vorrichtung zum Aufhängen der Netzanschlussleitung beim Transport.<br />
Netzanschlussleitung und sonstige elektrische Leitungen sicher verlegt, so dass<br />
Scherung, Quetschung und sonstige mechanische Beanspruchung unwahrscheinlich<br />
ist.<br />
Messprüfung Schutzleiterwiderstand (Ohm) nach VDE 0751-1.<br />
Messprüfung Ersatzableitstrom (A) nach VDE 0751-1.<br />
Messprüfung Isolationswiderstand (MOhm) nach VDE 0751-1.<br />
Funktionsprüfung der Seitengitter (Verriegelung, Abstände nach EN 1970: 2000,<br />
auch bei Belastung, Verformung, Verschleiß durch Belastung)<br />
Funktionsprüfung der Antriebe (Abfahren des kompletten Verstellbereichs der<br />
Motoren �Geräusche, Geschwindigkeit, Leichtlauf, etc., Endabschaltung (z. B.<br />
Strombegrenzung, Endschalter), falls erforderlich: Messen der Leistungsaufnahme<br />
zuerst ohne Last, dann mit der Nennlast (SWL), um evtl. Verschleiß der Motoren<br />
über die Stromaufnahme ermitteln zu können und Vergleich mit den Werten bei der<br />
Auslieferung.<br />
Zustandsprüfung der verwendeten Matratze (nicht bei Wiedereinsatz des Bettes).<br />
Prüfen der Vollständigkeit des Auslieferungszustands; Gebrauchsanweisung<br />
vorhanden?<br />
Messprüfungen dürfen nur von Personen durchgeführt werden, die mindestens auf das<br />
Pflegebett geschult worden sind und mindestens durch eine Elektrofachkraft auf die zu<br />
verwendenden Prüfmittel und Prüfverfahren eingewiesen worden sind. Die Freigabe zum<br />
Einsatz des Pflegebettes nach erfolgten Messprüfungen oder Wartungsmaßnahmen<br />
unterliegt lediglich einer Elektrofachkraft.<br />
Lassen Sie sich den Wartungsdienst nur dann im Wartungsplan unterzeichnen, wenn<br />
mindestens die oben genannten Punkte überprüft wurden.
Seite 21<br />
<strong>Luna</strong><br />
2010-11<br />
Anforderung: Bemerkung:<br />
1.) Sichtprüfung:<br />
n.a. Ja Nein Bemerkung<br />
1.1) Netzanschlussleitung<br />
EPR-Kabel oder vergleichbare Qualität<br />
1.2) Zustand der Netzzuleitung<br />
Besonders zu beachten sind:<br />
Quetschungen, Abrieb, Schnitte, Sichtbare<br />
Isolierungen<br />
der Innenleiter, Sichtbare metallische Adern,<br />
Knicke,<br />
Ausbeulungen, Farbveränderungen der äußeren<br />
Hülle,<br />
Spröde Stellen<br />
1.3) Zustand der internen Leitungen<br />
Besonders zu beachten sind:<br />
Quetschungen, Abrieb, Schnitte, Sichtbare<br />
Isolierungen der Innenleiter, Sichtbare<br />
metallische Adern, Knicke, Ausbeulungen,<br />
Farbveränderungen der äußeren Hülle, spröde<br />
Stellen<br />
1.4) Ausreichende Zugentlastung und<br />
Knickschutz der Netzanschlussleitung<br />
1.5) Ausreichende Zugentlastung und<br />
Knickschutz der internen Leitungen<br />
1.6) Netzanschlussleitung und sonstige<br />
elektrische Leitungen sicher verlegt, so<br />
dass Scherung, Quetschung und sonstige<br />
mechanische Beanspruchung<br />
unwahrscheinlich ist<br />
1.7) Feuchtigkeitsschutz IP X4<br />
1.8) Vorrichtung zum Aufhängen der<br />
Netzanschluss-leitung beim Transport<br />
1.9) Sichtprüfung der Rahmenteile auf<br />
plastische Verformung und/ oder<br />
Verschleiß:<br />
- Bettboden<br />
- Bettlifter<br />
- Rückenteil, Sitzteil, Fußteil<br />
- Aufrichter<br />
- Aufrichteraufnahme<br />
- Rollen<br />
1.10) Gehäuse<br />
Sichtprüfung aller Gehäuse auf Beschädigungen,<br />
Schrauben müssen fest sitzen, Dichtungen dürfen<br />
keine sichtbaren Beschädigungen aufweisen.<br />
n.a. Ja Nein Bemerkung<br />
n.a. Ja Nein Bemerkung<br />
n.a. Ja Nein Bemerkung<br />
n.a. Ja Nein Bemerkung<br />
n.a. Ja Nein Bemerkung<br />
n.a. Ja Nein Bemerkung<br />
n.a. Ja Nein Bemerkung<br />
n.a. Ja Nein Bemerkung<br />
n.a. Ja Nein Bemerkung<br />
n.a. Ja Nein Bemerkung<br />
DE
DE<br />
Tabelle (A) zu Bild (B)<br />
Bezeichnung Maße Anforderung in mm<br />
A Der kleinste Abstand zwischen<br />
Elementen innerhalb des Umfangs<br />
des Seitengitters in seiner<br />
aufgerichteten/eingerasteten<br />
Position oder des Bereiches, der<br />
durch das Seitengitter und festen<br />
Teilen des Bettes gebildet wird.<br />
A 120<br />
B Dicke der Matratze des<br />
wie vom Hersteller<br />
bestimmungsgemäßen Gebrauchs angegeben<br />
C Höhe der oberen Kante des<br />
Seitengitters über der Matratze<br />
(siehe ‘B’) ohne Kompression.<br />
C 220<br />
D Abstand zwischen Kopf- oder<br />
D 60<br />
Fußteil und dem Seitengitter.<br />
oder<br />
D 235<br />
E Abstand zwischen geteilten<br />
E 60<br />
Seitengittern mit der Liegefläche in<br />
oder<br />
flacher Lage.<br />
E 235<br />
F Kleinste Abmessung aller<br />
wenn D 235 dann<br />
zugänglichen Öffnungen zwischen<br />
F 60<br />
Seitengitter und der Liegefläche wenn D 60 dann<br />
F 120<br />
G Gesamtlänge des Seitengitters oder<br />
Summe der Längen der geteilten G 1/2 der Länge<br />
Seitengitter auf einer Seite des<br />
Bettes<br />
der Liegefläche<br />
H Abstand zwischen Kopf- und Fußteil keine<br />
ohne Erweiterungen dieser Teile Anforderungen<br />
Bei Betten, deren Seitengitter die angegebenen Maße<br />
um weniger als 10% überschreiten, ist es notwendig,<br />
dass diese Seitengitter nicht bei kleinen oder<br />
untergewichtigen Patienten zur Anwendung kommen<br />
bzw. dass durch zusätzliche Maßnahmen ein<br />
Einklemmen oder ein Hindurchrutschen dieser<br />
Patienten verhindert wird.<br />
Seitengitter, deren Abmessungen 10% oder mehr über<br />
den vorgegebenen Werten liegen, dürfen bis zur<br />
Beseitigung der Mängel nicht mehr verwendet werden<br />
und müssen ausgetauscht oder nachgerüstet werden.<br />
Neben der Überprüfung anhand der folgenden Punkte<br />
ist die volle Funktionsfähigkeit (Einrastungen,<br />
Befestigungselemente) des Seitengitters zu prüfen.<br />
Festgestellte Mängel müssen beseitigt werden.<br />
Einhaltung der Maße der Seitengitterkomponenten<br />
gemäß der folgenden Skizze.<br />
Seite 22<br />
Istmaß: mm<br />
Istmaß: mm<br />
Istmaß: mm<br />
Istmaß: mm<br />
Istmaß: mm<br />
Istmaß: mm<br />
Istmaß: mm<br />
Istmaß: mm<br />
<strong>Luna</strong><br />
2010-11<br />
n.a. Ja Nein Bemerkung<br />
n.a. Ja Nein Bemerkung<br />
n.a. Ja Nein Bemerkung<br />
n.a. Ja Nein Bemerkung
Bild (B) zu Tabelle (A)<br />
D D<br />
G<br />
C<br />
B<br />
2.) Messprüfungen<br />
2.1) Schutzleiterwiderstand<br />
Istwert: Ohm<br />
2.2) Ersatzableitstrom<br />
Istwert: A<br />
2.3) Isolationswiderstand<br />
Istwert: MOhm<br />
3.) Funktionsprüfungen<br />
A<br />
H<br />
A F<br />
3.1) Funktionsprüfung der Seitengitter:<br />
- Verriegelung, z.B. Spiel in der Verriegelung<br />
- Abstände, auch bei Belastung<br />
- Verformung<br />
- Verschleiß durch Belastung<br />
3.2) Funktionsprüfung der Bremsen:<br />
- Sicherheit<br />
- Arretierung<br />
- Freilauf<br />
3.3) Funktionsprüfung der Antriebe:<br />
- Abfahren des kompletten Verstellbereiches der Motoren<br />
(Geräusche, Geschwindigkeit, Leichtlauf usw.)<br />
- Endabschaltung (z.B. Strombegrenzung, Endschalter)<br />
- falls erforderlich messen der Leistungsaufnahme zuerst<br />
ohne Last, dann mit der Nennlast (SWL), um evtl.<br />
Verschleiß der Motoren über die Stromaufnahme<br />
ermitteln zu können. Vergleich mit den Werten bei der<br />
Auslieferung. Der Hersteller kann Grenzwerte festlegen.<br />
Sonstiges:<br />
Seite 23<br />
<strong>Luna</strong><br />
2010-11<br />
Anmerkung: Wenn die<br />
Streben der Seitengitter<br />
außen sind (dunkelgrau<br />
gezeichnet) dann ist unter<br />
den Seitengittern Abstand<br />
A zur Liegefläche<br />
verbindlich.<br />
n.a. Ja Nein Bemerkung<br />
n.a. Ja Nein Bemerkung<br />
n.a. Ja Nein Bemerkung<br />
n.a. Ja Nein Bemerkung<br />
n.a. Ja Nein Bemerkung<br />
n.a. Ja Nein Bemerkung<br />
n.a. Ja Nein Bemerkung<br />
n.a. Ja Nein Bemerkung<br />
DE
DE<br />
Seite 24<br />
<strong>Luna</strong><br />
2010-11<br />
4.5 Desinfektion<br />
L WARNUNG: Schädliche Produkte - Desinfektionsmittel dürfen nur von<br />
autorisiertem Personal eingesetzt werden.<br />
L WARNUNG: Gefährliche Produkte, die zu Hautveränderungen führen können.<br />
Tragen Sie geeignete Schutzkleidung, da die Desinfektionslösung bei Hautkontakt<br />
Reizungen auslösen kann. Achten Sie dabei auch auf die Produktinformationen<br />
der jeweiligen Lösung.<br />
Alle Teile des Pflegebett können mit einem Desinfektionsmittel abgerieben werden.<br />
Alle Desinfektionsmaßnahmen an Rehabilitationsgeräten, deren Komponenten oder<br />
Zubehörteilen müssen in einem Desinfektionsbuch festgehalten werden. Dabei sind<br />
mindestens die folgenden Informationen aufzuführen und eine Produktdokumentation<br />
beizufügen:<br />
Datum der<br />
Desinfektion<br />
Grund Spezifikation Verwendete<br />
Substanz und<br />
Konzentration<br />
Tabelle 2: Beispiel eines Desinfektionsbuchs<br />
Abkürzungen für die Eintragungen in Spalte 2 (Grund):<br />
V = Vermutete Infektion IF = Infektionsfall W = Wiederholung I = Inspektion<br />
Eine leere Seite eines Desinfektionsbuchs finden Sie in § 9.<br />
Unterschrift
Für die Verwendung am Pflegebett werden die in der folgenden Liste aufgeführten<br />
Desinfektionsmittel (basierend auf einer Liste des Robert Koch Instituts, RKI) empfohlen.<br />
Der aktuelle Stand der in die RKI-Liste aufgenommenen Desinfektionsmittel kann beim<br />
Robert-Koch-Institut (RKI) nachgefragt werden (Homepage: www.rki.de).<br />
Wirkstoff Produktname Wäsche-<br />
Phenol oder<br />
Phenolderivat<br />
Chlor,<br />
organische oder<br />
anorganische<br />
Substanzen mit<br />
Aktivchlor<br />
Perver-<br />
bindungen<br />
Formaldehyd<br />
und/oder<br />
sonstige<br />
Aldehyde bzw.<br />
Derivate<br />
desinfektion<br />
Verdünnte Lösung<br />
Dauer bis Wirksamkeit<br />
Oberflächen-<br />
desinfektion<br />
(Wasch-/Wisch-<br />
desinfektion)<br />
Verdünnte Lösung<br />
Dauer bis Wirksamkeit<br />
Desinfektion von Ausscheidungen Wirksamkeits<br />
1 Teil Auswurf oder Stuhl + 2 Teile bereich<br />
verdünnte Lösung oder 1 Teil Harn +<br />
1 Teil verdünnte Lösung<br />
Seite 25<br />
Auswurf Stuhl Harn<br />
Verdünnte Lösung<br />
% Std. % Std. % Std. % Std. % Std.<br />
Dauer bis Wirksamkeit<br />
Verdünnte Lösung<br />
Dauer bis Wirksamkeit<br />
Verdünnte Lösung<br />
Dauer bis Wirksamkeit<br />
<strong>Luna</strong><br />
2010-11<br />
Hersteller bzw.<br />
Lieferant<br />
Amocid 1 12 5 6 5 4 5 6 5 2 A Lysoform<br />
Gevisol 0,5 12 5 4 5 4 5 6 5 2 A Schülke & Mayr<br />
Helipur 6 4 6 4 6 6 6 2 A B. Braun<br />
m-cresole<br />
Seifenlösung<br />
(DAB 6)<br />
1 12 5 4 A<br />
Phenol 1 12 3 2 A<br />
Chloramin-T<br />
DAB 9<br />
1,5 12 2,5 2 5 4 A 1 B<br />
Clorina 1, 5 12 2,5 2 5 4 A 1 B Lysoform<br />
Trichlorol 2 12 3 2 6 4 A 1 B Lysoform<br />
Apesin AP100 2 4 4 AB Tana<br />
PROFESSIONAL<br />
Dismozon pur 2 4 1 AB Bode Chemie<br />
Perform 2 3 4 AB Schülke & Mayr<br />
Wofesteril 2 2 4 AB Kesla Pharma<br />
Aldasan 2000 4 4 AB Lysoform<br />
Antifect FD 10 3 4 AB Schülke & Mayr<br />
Antiseptica<br />
Flächen-<br />
Desinfektion 7<br />
3 6 AB Antiseptica<br />
Apesin AP30 5 4 A Tana<br />
PROFESSIONAL<br />
Bacillocid special 6 4 AB Bode Chemie<br />
Buraton 10F 3 4 AB Schülke & Mayr<br />
Desomed<br />
A2000<br />
Desinfektionsreiniger<br />
Hospital<br />
Desomed<br />
Perfekt<br />
Formaldehyd<br />
(DAB 10),<br />
(Formalin)<br />
3 6 AB Desomed<br />
8 6 AB Dreiturm<br />
7 4 AB* Desomed<br />
1,5 12 3 4 AB<br />
Incidin Perfekt 1 12 3 4 AB Ecolab<br />
Incidin Plus 8 6 A Ecolab<br />
Kohrsolin 2 12 3 4 AB Bode Chemie<br />
DE
DE<br />
Wirkstoff Produktname Wäsche-<br />
Formaldehyd<br />
und/oder<br />
sonstige<br />
Aldehyde oder<br />
Derivate<br />
Amphoterische<br />
Tenside<br />
(Amfotensiden)<br />
desinfektion<br />
Verdünnte Lösung<br />
Dauer bis Wirksamkeit<br />
Oberflächen-<br />
desinfektion<br />
(Wasch-/Wisch-<br />
desinfektion)<br />
Verdünnte Lösung<br />
Dauer bis Wirksamkeit<br />
Desinfektion von Ausscheidungen Wirksamkeits<br />
1 Teil Auswurf oder Stuhl + 2 Teile bereich<br />
verdünnte Lösung oder 1 Teil Harn +<br />
1 Teil verdünnte Lösung<br />
Seite 26<br />
Auswurf Stuhl Harn<br />
Verdünnte Lösung<br />
% Std. % Std. % Std. % Std. % Std.<br />
Dauer bis Wirksamkeit<br />
Verdünnte Lösung<br />
Dauer bis Wirksamkeit<br />
Verdünnte Lösung<br />
Dauer bis Wirksamkeit<br />
<strong>Luna</strong><br />
2010-11<br />
Hersteller bzw.<br />
Lieferant<br />
Lysoform 4 12 5 6 AB Lysoform<br />
Lysoformin 3 12 5 6 AB Lysoform<br />
Lysoformin 2000 4 6 AB Lysoform<br />
Melsept 2 12 4 6 AB B. Braun<br />
Melsitt 4 12 10 4 AB B. Braun<br />
Minutil 2 12 6 4 AB Ecolab<br />
Multidor 3 6 AB Ecolab<br />
Nûscosept 5 4 AB Dr. Nüsken Chemie<br />
Optisept 7 4 AB* Dr. Schumacher<br />
Pursept-FD 7 4 AB* Merz<br />
Ultrasol F 3 12 5 4 AB Fresenius Kabi<br />
Tensodur 103 2 12 A MFH Marienfelde<br />
Lye Kalkmilch 3 20 6 A 3 B<br />
1 Unwirksam gegen Mykobakterien bei einer routinemäßigen Desinfektion, insbesondere in Gegenwart von Blut.<br />
2 Ungeeignet zur Desinfektion von deutlich mit Blut kontaminierten Flächen oder von porösen Oberflächen (z. B. rohem Holz).<br />
3 Unbrauchbar bei Tuberkulose; Bereitung der Kalkmilch: 1 Teil gelöschter Kalk (Calciumhydroxid) + 3 Teile Wasser.<br />
* Geprüft auf Wirksamkeit gegen Viren gemäß den Prüfmethoden des RKI (Gesundheitsbericht 38 (1995) 242).<br />
A: Geeignet zur Abtötung von vegetativen bakteriellen Keimen einschließlich Mykobakterien sowie von Pilzen einschließlich pilzlicher Sporen.<br />
B: Geeignet zur Inaktivierung von Viren.<br />
Tabelle 3: Desinfektionsmittel<br />
Für Rückfragen zur Desinfektion wenden Sie sich bitte an Ihren Fachhändler, der Ihnen<br />
gerne weiterhelfen wird.
5 Garantie<br />
Auszug aus den allgemeinen Geschäfts<strong>bed</strong>ingungen:<br />
(...)<br />
5. Die Verjährungsfrist für Gewährleistungsansprüche beträgt 24 Monate.<br />
Seite 27<br />
<strong>Luna</strong><br />
2010-11<br />
Wir übernehmen keine Gewähr bei Schäden, die durch konstruktive Veränderungen an<br />
unseren Produkten, mangelnde Wartung, fehlerhafte oder unsachgemäße Behandlung oder<br />
Lagerung oder Verwendung von anderen als Original-Ersatzteilen entstanden sind. Die<br />
Gewährleistung auf Verschleißteile bzw. auf Teile, die einer natürlichen Abnutzung<br />
unterliegen, wird ebenfalls ausgeschlossen.<br />
(...)<br />
6 Entsorgung<br />
Wenden Sie sich zur Entsorgung des Pflegebett an den Ihr lokales Recyclingcenter oder<br />
geben Sie das Produkt an den Fachhändler zurück. Dieser wird den Pflegebett nach einer<br />
fachgerechten Reinigung bzw. Desinfektion an den Hersteller zurücksenden, der den<br />
Pflegebett entsorgt bzw. recycelt.<br />
Die Verpackungsmaterialien können Sie entweder in das Recycling geben oder bei Ihrem<br />
Fachhändler lassen.<br />
7 Übereinstimmungserklärung<br />
DE
DE<br />
8 Wartungsplan<br />
Seite 28<br />
<strong>Luna</strong><br />
2010-11<br />
Datum Wartung Anmerkungen Namenszeichen<br />
1/1/2010 Schmierung und allgemeine<br />
Wartung<br />
9 Desinfektionbuch<br />
Datum der<br />
Desinfektion<br />
keine<br />
Grund Spezifikation Verwendete<br />
Substanz und<br />
Konzentration<br />
Abkürzungen für die Eintragungen in Spalte 2 (Grund):<br />
V = Vermutete Infektion IF = Infektionsfall W = Wiederholung I = Inspektion<br />
Unterschrift
Indice<br />
Pagina 1<br />
<strong>Luna</strong><br />
2010-11<br />
Premessa ............................................................................................... 2<br />
1 Descrizionedel prodotto ........................................................... 3<br />
1.1 Utilizzo previsto .......................................................................................................... 3<br />
1.2 Specifiche tecniche ...................................................................................................... 4<br />
1.3 Componenti ................................................................................................................. 5<br />
1.4 Significato dei simboli ................................................................................................ 5<br />
1.5 Accessori ..................................................................................................................... 6<br />
1.6 Sicurezza ..................................................................................................................... 6<br />
2 Utilizzo ....................................................................................... 7<br />
2.1 Interblocco elettrico (SE INSTALLATO) ................................................................... 7<br />
2.2 Comando manuale senza funzione di blocco .............................................................. 8<br />
2.3 Comando manuale con funzione di blocco ................................................................. 9<br />
2.4 Utilizzo dei freni.......................................................................................................... 9<br />
2.5 Sistema antitrazione .................................................................................................. 10<br />
2.6 Cavo di alimentazione ............................................................................................... 10<br />
2.7 Alzatesta a funzionamento manuale d'emergenza ..................................................... 11<br />
2.8 Sponde di contenimento ............................................................................................ 11<br />
2.9 Staffa di sollevamento ............................................................................................... 12<br />
2.10 Rastomat (se presente) .............................................................................................. 12<br />
2.11 Trasferire il letto all'interno e all'esterno ................................................................... 13<br />
2.12 Transport ................................................................................................................... 13<br />
2.13 Cablaggio .................................................................................................................. 13<br />
3 Installazione e regolazione ..................................................... 14<br />
3.1 Attrezzi ...................................................................................................................... 14<br />
3.2 Modalità di consegna ................................................................................................ 14<br />
3.3 Montaggio ................................................................................................................. 14<br />
4 Manutenzione .......................................................................... 18<br />
4.1 Manutenzione regolare .............................................................................................. 18<br />
4.2 Trasporto e conservazione ......................................................................................... 19<br />
4.3 Pulizia ........................................................................................................................ 19<br />
4.4 Controllo.................................................................................................................... 20<br />
4.5 Disinfezione .............................................................................................................. 24<br />
5 Garanzia .................................................................................. 27<br />
6 Smaltimento ............................................................................. 27<br />
7 Dichiarazione di conformità .................................................. 27<br />
8 Pliano di manutenzione .......................................................... 28<br />
9 Guida alla disinfezione ........................................................... 28<br />
IT
IT<br />
Premessa<br />
Ringraziamo per la fiducia accordataci con l’acquisto di una letto di nostra produzione.<br />
Pagina 2<br />
<strong>Luna</strong><br />
2010-11<br />
Le letto <strong>Vermeiren</strong> sono il risultato di molti anni di ricerca ed esperienza. Durante lo sviluppo,<br />
è stata dedicata attenzione speciale alla facilità d'uso e alla praticità della letto.<br />
La durata del letto dipende fortemente dalla cura e manutenzione che vi si dedicano.<br />
Il presente manuale ha lo scopo di aiutare ad acquisire familiarità con il funzionamento della<br />
letto.<br />
Attenersi alle istruzioni operative e di manutenzione costituisce parte integrante della<br />
garanzia.<br />
Questo manuale riflette gli sviluppi più recenti dei prodotti. <strong>Vermeiren</strong> si riserva il diritto di<br />
apportare modifiche senza preavviso, senza essere tenuta a sostituire o adattare modelli<br />
forniti in precedenza.<br />
Per qualsiasi chiarimento, rivolgersi al rivenditore.
1 Descrizionedel prodotto<br />
1.1 Utilizzo previsto<br />
Pagina 3<br />
<strong>Luna</strong><br />
2010-11<br />
Il letto modello LUNA è stato espressamente concepito per il comfort del paziente e<br />
consente diverse possibilità di mobilità come di seguito precisato. Si consiglia di leggere<br />
attentamente le presenti istruzioni per acquisire familiarità con il veicolo.<br />
Il letto ortopedico è progettato per un singolo paziente adulto di età superiore a 12 anni e per<br />
un peso massimo di140 kg.<br />
Il letto deve essere utilizzato in abbinamento a un materasso idoneo (min. RG 35, spess.<br />
120 mm, max. 20 kg)<br />
Il letto ortopedico/sanitario LUNA è stato progettato per impiego su pavimenti piani, fissi e in<br />
ambiente interno asciutto.<br />
Le diverse versioni di allestimento egli accessori e la concezione modulare consentono<br />
l’utilizzo della letto da parte di persone con impossibilità/difficoltà di deambulazione in<br />
seguito a:<br />
paralisi<br />
amputazione di arti inferiori<br />
difetti o deformazioni degli arti inferiori<br />
contratture o lesioni articolari<br />
insufficienza cardiaca e cardiocircolatoria<br />
disturbi dell'equilibrio<br />
cachessia (deterioramento della massa muscolare)<br />
e per usi geriatrici.<br />
Nella valutazione delle esigenze personali, le seguenti condizioni:<br />
corporatura e peso corporeo (140 kg max)<br />
condizioni psico-fisiche<br />
abitazioni<br />
ambiente<br />
devono essere prese in considerazione.<br />
Il letto deve essere utilizzato come ambiente di applicazione di tipo 4: "assistenza fornita in<br />
ambito domestico tramite apparecchiature elettromedicali utilizzate per alleviare o trattare<br />
lesioni, disabilità o malattia."<br />
Il letto deve essere utilizzato su una superficie piana, in modo che tutte quattro le ruote<br />
pivottanti siano ben salde al suolo.<br />
Non utilizzare la letto come scala, né per trasportare oggetti pesanti o caldi.<br />
Quando utilizzato su pavimenti con tappeti, moquette o rivestimenti, questi potrebbero venire<br />
danneggiati. Su questo tipo di superfici, lo spostamento del letto potrebbe inoltre risultare<br />
difficile (senza il paziente).<br />
Utilizzare solo gli accessori approvati <strong>Vermeiren</strong>.<br />
La casa costruttrice non può essere ritenuta responsabile per danni causati dalla mancanza<br />
di manutenzione adeguata o risultanti dal mancato rispetto delle istruzioni contenute nel<br />
presente manuale.<br />
La conformità con le istruzioni operative e di manutenzione è parte integrante della garanzia.<br />
IT
IT<br />
1.2 Specifiche tecniche<br />
I termini tecnici riportati di seguito sono applicabili alla letto con configurazione standard.<br />
Se sono utilizzati altri accessori, i valori in tabella cambiano.<br />
Produttore <strong>Vermeiren</strong><br />
Indirizzo <strong>Vermeiren</strong>plein 1/15, B-2920 Kalmthout<br />
Tipo Letto<br />
Modello <strong>Luna</strong><br />
Peso massimo dell'occupante 140 kg<br />
Descrizione Min. Max.<br />
Lunghezza 2150 mm (modelli <strong>Luna</strong>) 2240 mm (<strong>Luna</strong> X-low)<br />
Larghezza 1030 mm<br />
Superficie d'appoggio regolabile in<br />
altezza<br />
400 mm (senza materasso)<br />
200 mm (<strong>Luna</strong> X-low)<br />
Lunghezza ripiegata 445 mm<br />
Larghezza ripiegata 935 mm<br />
Altezza ripiegata 1045 mm<br />
Massa totale 95 kg<br />
Regolazione dello schienale 83°<br />
Angolo massimo montante superiore 31.7°<br />
Angolo massimo montante inferiore -14,8°<br />
Carico max di lavoro in condizioni di<br />
sicurezza<br />
Pagina 4<br />
175 kg<br />
Staffa di sollevamento Carico nominale 80 kg<br />
805 mm (senza materasso)<br />
600 mm (<strong>Luna</strong> X-low)<br />
Materasso Min. RG 35, 120 mm spessore, 2000 x 900 mm, max. 20 kg<br />
Spazio libero per sollevatore paziente 150 mm (salvo <strong>Luna</strong> X-low)<br />
Ruote pivottanti (n. 4 ) Ø 125 mm, bloccabili<br />
Motore parte frontale LA273100-A01405040, Linak<br />
Motore sezione posteriore<br />
(schienale)<br />
LA270022-00, Linak<br />
Motore sezione anteriore (gambe) LA270022-00, Linak<br />
Comando manuale HBW074-072, Linak<br />
Interblocco ACL 403500, Linak<br />
Trasformatore CB6404+10019, Linak<br />
<strong>Luna</strong><br />
2010-11<br />
Trasformatore tensione nominale U in: 230 V , ± 10%, 50 Hz, I in: max. 1.5 A, U out: 24V ---, max. 70 VA<br />
Durata di funzionamento 10%, max. 6 min/ora<br />
Rumorosità < 65 dB(A)<br />
Classe / tipo di protezione<br />
Temperatura di utilizzo e di<br />
conservazione<br />
Classe di protezione II, Categoria d'impiego tipo B / IP54<br />
(protetta contro lo stillicidio)<br />
+ 5 °C + 41 °C<br />
Umidità di utilizzo e di conservazione 30% 70%<br />
Ci riserviamo il diritto di apportare modifiche tecniche. Tolleranza ± 15 mm / 1,5 kg / °<br />
Tabella 1: Specifiche tecniche
Il letto è conforme ai requisiti stabiliti dalle normative:<br />
Pagina 5<br />
<strong>Luna</strong><br />
2010-11<br />
EN 1970: Letti regolabili per disabili: Requisiti e metodi di prova<br />
EN 1970+ A1: Letti regolabili per disabili: Requisiti e test per prove<br />
EN 60601-2-38/A1: Apparecchi elettromedicali - Parte 2-38: Norme particolari di sicurezza di letti<br />
per ospedale azionati elettricamente<br />
1.3 Componenti<br />
1.4 Significato dei simboli<br />
Peso massimo<br />
CE conformità<br />
L Indicazioni di sicurezza<br />
�<br />
��<br />
��<br />
�<br />
Attenersi alle istruzioni per l'uso<br />
Procedimento / modalità d'impiego corretti<br />
Procedimento / modalità d'impiego errati<br />
Classe di protezione II<br />
Categoria d'impiego Tipo B<br />
1 = Staffa di sollevamento<br />
2 = Maniglia di<br />
sollevamento triangolare<br />
3 = Contenitore materasso<br />
4 = Sponde laterali<br />
5 = Sezione gambe superiore<br />
6 = Sezione gambe inferiore<br />
7 = Poggiapiedi<br />
8 = Telaio sottostante la<br />
struttura<br />
9 = Ruote<br />
10 = Bloccaggio ruote<br />
11 = Motore<br />
12 = Poggiatesta<br />
13 = Terza sponda di legno<br />
laterale<br />
14 = Comando manuale<br />
15 = Struttura laterale<br />
16 = Sezione schienale<br />
17 = Sezione seduta<br />
18 = Pulsante di montaggio<br />
IT
IT<br />
1.5 Accessori<br />
L AVVERTENZA: Se vengono utilizzati accessori non elencati di seguito, il<br />
paziente potrebbe essere esposto a rischi.<br />
Interblocco elettrico + controllo manuale senza funzione di blocco<br />
Terza sponda di legno<br />
Pagina 6<br />
<strong>Luna</strong><br />
2010-11<br />
1.6 Sicurezza<br />
l Prima dell'uso leggere attentamente le presenti istruzioni.<br />
l Collocare e utilizzare il letto su una superficie piana, in modo che tutt'e quattro le<br />
ruote pivottanti siano ben salde al suolo.<br />
l Verificare che nell'escursione di regolazione del letto non vi siano oggetti od altri<br />
impedimenti.<br />
L Se si tratta di paziente non assistito abbassare il letto al massimo per evitare che<br />
cada o si ferisca quando scende, sale o giace sul letto.<br />
L Inoltre le sponde laterali devono essere alzate al massimo. Per inclinare il letto su<br />
uno o due lati occorre la presenza di una persona che assista il paziente.<br />
L Durante il montaggio, lo smontaggio e l'uso attenti alle mani: pericolo di<br />
schiacciamenti.<br />
L Per trasportare il letto afferrarlo per la struttura fissa o una parte in legno.<br />
L Le quattro ruote pivottanti devono essere bloccate prima dell'uso.<br />
L È vietato l'uso di apparecchi elettromedicali nel letto.<br />
L Non appoggiarsi al letto: potrebbe ribaltarsi.<br />
L Evitare di sporgersi lateralmente col tronco: pericolo di cadute.<br />
L Non appoggiare i piedi su altri oggetti: pericolo di cadute.<br />
L Evitare che parti del corpo ed oggetti durante la regolazione finiscano tra cerniere,<br />
articolazioni ed altri elementi di presa: pericolo di schiacciamento.<br />
L Durante la regolazione dei piedi o dello schienale non infilare le mani tra struttura e<br />
materasso: pericolo di schiacciamento.<br />
L Utilizzare presa e spina a norme VDE (220V/230V, 50 Hz).<br />
L Collegare la spina di alimentazione alla presa e non direttamente alla linea.<br />
L Dopo l'uso bloccare il comando manuale tramite l'apposito interblocco.<br />
L Utilizzare il letto solo in ambienti asciutti.<br />
L Utilizzare esclusivamente materassi che soddisfano i requisiti della casa costruttrice<br />
del letto.<br />
L In caso di deformazione del bastone per alzarsi dal letto sostituirlo.<br />
L Le sponde devono essere montate anche se il letto è posto contro il muro.<br />
L Non effettuare riparazioni da soli: rischio di incidente.<br />
L Non aprire l'involucro del sistema d'azionamento: rischio di incidente.<br />
L Il trasporto del paziente è ammesso solo col letto completamente abbassato e<br />
orizzontale.<br />
L Verificare che i cavi non siano piegati, non presentino tagli o altri danni di tipo<br />
meccanico.<br />
L Inoltre i cavi devono essere disposti in modo da evitare che vadano a contatto col<br />
corpo o restino schiacciati.<br />
L È vietato l'uso e il collegamento di apparecchi elettrici.<br />
L Le operazioni di manutenzione, controllo, revisione e disinfezione devono essere<br />
eseguite da personale autorizzato e competente.<br />
L Utilizzare solo ricambi originali.
Pagina 7<br />
<strong>Luna</strong><br />
2010-11<br />
L Non caricare il letto oltre il limite ammesso (max 140 kg).<br />
L Nel letto è vietato l'uso di fiamme libere e oggetti combustibili (candele, sigarette etc.)<br />
L Sostituire le sponde laterali se sono piegate o rotte, altrimenti sussiste il rischio di<br />
caduta dal letto.<br />
L L'uso del letto può disturbare altre apparecchiature elettriche (interferenze). Non<br />
usare il letto assieme ad altre apparecchiature.<br />
L Rispettare le istruzioni di sicurezza e d'uso.<br />
L Il letto azionato elettricamente è posizionato a distanza dalla presa di alimentazione.<br />
L Il letto ortopedico deve essere utilizzato con un sollevatore paziente posizionabile<br />
entro i limiti dello spazio sottostante il letto.<br />
2 Utilizzo<br />
In questo capitolo viene descritto l'utilizzo quotidiano. Le presenti istruzioni sono<br />
destinate all'utente e al rivenditore.<br />
La letto viene fornita completamente assemblata dal rivenditore. Le istruzioni destinate al<br />
rivenditore, relative alla configurazione della letto sono descritte nel § 3.<br />
L AVVERTENZA: Prestare attenzione al pericolo di schiacciamento dei cavi o di<br />
altri accessori tra le parti del letto.<br />
L AVVERTENZA: Il letto ortopedico deve essere utilizzato con un sollevatore<br />
paziente posizionabile entro i limiti dello spazio sottostante il letto.<br />
2.1 Interblocco elettrico (SE INSTALLATO)<br />
L ATTENZIONE: Rischio di lesioni - Proteggere i cavi dagli schiacciamenti.<br />
Consultare questo paragrafo se il letto è provvisto di un interblocco elettrico in<br />
combinazione con il comando manuale senza funzione di blocco.<br />
Per evitare l'attivazione accidentale dei comandi elettrici del letto ortopedico, tra il<br />
trasformatore e il comando manuale viene posizionato un interblocco elettrico montato sulla<br />
barra trasversale del telaio inferiore del letto. L'interblocco consente di abilitare o disabilitare<br />
il comando manuale tramite un commutatore a rotazione.<br />
1<br />
3<br />
�<br />
�<br />
4<br />
2<br />
1 = Interblocco elettrico<br />
2 = Collegamento trasformatore<br />
3 = Collegamento del controllo<br />
manuale<br />
4 = Regolatore di interblocco<br />
�= Bloccato<br />
�= Sbloccato<br />
IT
IT<br />
Pagina 8<br />
<strong>Luna</strong><br />
2010-11<br />
2.2 Comando manuale senza funzione di blocco<br />
L ATTENZIONE: Rischio di lesioni - Le regolazioni da parte del paziente possono<br />
essere effettuate solo con la supervisione di un assistente.<br />
Il comando manuale deve essere utilizzato solo insieme all'interblocco elettrico.<br />
L'altezza della superficie d'appoggio, l'inclinazione dello schienale e la piegatura del<br />
ginocchio sono regolabili mediante il comando manuale. Dopo l'uso il comando manuale<br />
deve essere agganciato alla sponda laterale e bloccato tramite l'interblocco.<br />
Sono possibili le seguenti regolazioni:<br />
Sollevamento e abbassamento dello schienale<br />
Sollevamento e abbassamento della superficie d'appoggio per<br />
il materasso<br />
Sollevamento e abbassamento della sezione gambe<br />
Posizione antishock (posizione di Trendelenburg)<br />
Quando si collega il comando manuale all'interblocco, accertarsi che<br />
la presa di collegamento sia ben fissata. A tale scopo, procedere nel modo seguente:<br />
1. Rimuovere l'anello di sicurezza dal collegamento.<br />
2. Inserire nell'interblocco la presa di collegamento<br />
per il comando manuale.<br />
3. Posizionare l'anello di sicurezza nel collegamento<br />
dell'interblocco in modo tale da evitare la rimozione<br />
accidentale del cavo.<br />
Il cavo di collegamento potrà essere rimosso dall'interblocco solo dopo la rimozione<br />
dell'anello di sicurezza.
2.3 Comando manuale con funzione di blocco<br />
Pagina 9<br />
<strong>Luna</strong><br />
2010-11<br />
È possibile sostituire l'interblocco con un comando manuale che dispone di una funzione di<br />
blocco.<br />
Sbloccato<br />
2.4 Utilizzo dei freni<br />
L AVVERTENZA: Sull'adeguato funzionamento delle ruote pivottanti incide l'usura<br />
e la mancanza di pulizia degli pneumatici (presenza di acqua, olio o altro) –<br />
Verificare le condizioni degli pneumatici prima di ciascun utilizzo.<br />
L AVVERTENZA: Le ruote pivottanti possono usurarsi – Controllare il<br />
funzionamento delle ruote pivottanti prima di ciascun utilizzo.<br />
L AVVERTENZA: Pericolo d'incidenti - Se si blocca una sola ruota le altre<br />
trascinano anche questa in movimento.<br />
Per evitare spostamenti involontari, tutte le ruote pivottanti sono bloccabili.<br />
Bloccaggio (A)<br />
Spingere a fondo verso il basso la leva di bloccaggio.<br />
Il controllo manuale dispone di una funzione di blocco<br />
che consente di attivare o disattivare una o più funzioni.<br />
Misure di sicurezza:<br />
• Per passare dalla posizione di blocco a quella di<br />
sblocco, è necessario girare un piccolo pulsate situato<br />
tra i comandi manuali utilizzando una chiave apposita.<br />
La chiave deve essere custodita solo dal personale<br />
infermieristico.<br />
Bloccato<br />
Sbloccaggio (B)<br />
Sollevare completamente verso l'alto la leva di bloccaggio.<br />
A<br />
B<br />
IT
IT<br />
2.5 Sistema antitrazione<br />
L AVVERTENZA: Non rimuovere il sistema antitrazione.<br />
L AVVERTENZA: Non posare o agganciare oggetti sul sistema antitrazione.<br />
Pagina 10<br />
<strong>Luna</strong><br />
2010-11<br />
Sotto alla barra trasversale della parte testiera dalla rete a doghe si trova l'alloggio per il<br />
fissaggio del sistema antitrazione.<br />
Far passare il dispositivo antitrazione del cavo di alimentazione (4) nell'apposito<br />
gancio (3).<br />
Tirare i cavo di alimentazione (1) alla lunghezza voluta in maniera tale che il cavo di<br />
alimentazione (2) venga posizionato sotto alla rete senza inflessioni. Verificare che in<br />
nessuna posizione il cavo (2) venga a trovarsi in trazione.<br />
Fissare il cavo di alimentazione, stringendo a mano il dispositivo antitrazione del<br />
cavo medesimo (4).<br />
Bloccare il dispositivo antitrazione in posizione stringendo a mano il collegamento a<br />
vite (5).<br />
1<br />
4<br />
2.6 Cavo di alimentazione<br />
L AVVERTENZA: Detto sostegno serve esclusivamente per agganciarvi il cavo di<br />
alimentazione.<br />
L AVVERTENZA: Il cavo di alimentazione può essere danneggiato - ll cavo di<br />
alimentazione deve essere posizionato con molta attenzione in modo che non vi<br />
siano piegature, trazioni, abrasioni o altri danni meccanici e senza che vi sia<br />
contatto con il pavimento.<br />
Per garantire un funzionamento regolare e di lunga durata del cavo di alimentazione è<br />
previsto un apposito sostegno per agganciarvi il cavo arrotolato quando il letto non viene<br />
utilizzato elettricamente.<br />
3<br />
5<br />
2<br />
1 = Cavo d'alimentazione<br />
(attacco linea)<br />
2 = Cavo d'alimentazione<br />
(attacco trasformatore)<br />
3 = Aggancio dispositivo<br />
antitrazione<br />
4 = Cavo d'alimentazione<br />
dispositivo antitrazione<br />
5 = Collegamento a vite<br />
dispositivo antitrazione
2.7 Alzatesta a funzionamento manuale d'emergenza<br />
L AVVERTENZA: Rischio di schiacciamento - Verificare che oggetti o parti del<br />
corpo non rimangano schiacciati tra il poggiatesta e il telaio.<br />
Pagina 11<br />
<strong>Luna</strong><br />
2010-11<br />
L'alzatesta può essere abbassato manualmente in caso di mancato funzionamento<br />
del motore.<br />
L'operazione dev'essere eseguita da almeno due persone.<br />
Procedura: 1. Ribaltare il coperchio di sicurezza del sostegno superiore del motore.<br />
2. Una persona deve afferrare lateralmente la struttura del poggiatesta,<br />
mentre l'altra sfila il perno di bloccaggio e toglie il motore<br />
dall'appoggio.<br />
3. Abbassare il poggiatesta.<br />
2.8 Sponde di contenimento<br />
1<br />
4<br />
Le sponde di contenimento possono essere abbassate da un sol lato.<br />
3<br />
Abbassamento<br />
L AVVERTENZA: Rischio di schiacciamento - Fissare bene le sponde di<br />
contenimento per evitare il rischio di cadute accidentali.<br />
L AVVERTENZA: Rischio di schiacciamento - Verificare che oggetti o<br />
parti del corpo non sporgano dalla superficie di appoggio.<br />
L AVVERTENZA: Rischio di lesioni - Non abbassare le sponde di<br />
contenimento da un lato se il paziente non è assistito.<br />
Sollevare leggermente la sponda superiore, premere il pomello di blocco nella<br />
testiera /pediera laterale e abbassare lentamente la sponda. Afferrare solo e sempre<br />
la stecca di legno superiore. Per il Letto <strong>Luna</strong> Basic, la manopola e posizionata<br />
all'esterno dalla parte testa e piedi.<br />
2<br />
1<br />
2<br />
1 = Coperchio di sicurezza<br />
2 = Sostegno del motore<br />
3 = Struttura del<br />
poggiatesta<br />
4 = Motore struttura<br />
poggiatesta<br />
1 = Sponda superiore<br />
2 = Manopola d'arresto<br />
IT
IT<br />
Pagina 12<br />
<strong>Luna</strong><br />
2010-11<br />
Se le condizioni del paziente richiedono rialzi o coperture delle sponde (es. paziente<br />
fortemente debilitato), verificare che dopo l'installazione le caratteristiche di conformità CE<br />
restino inalterate.<br />
�<br />
��<br />
�<br />
2.9 Staffa di sollevamento<br />
�<br />
Il staffa di sollevamento può essere installato su ambo il lati della testiera (solo modelli<br />
LUNA).<br />
1 = Staffa di sollevamento<br />
2 = Alloggio per detto<br />
3 = Perno d'arresto<br />
4 = Scanalatura di alloggiamento<br />
5 = Estremità del bastone<br />
6 = Fori di alloggiamento<br />
7 = Cinghia<br />
8 = Triangolo<br />
Inserire il staffa di sollevamento (1) fino a battuta in uno degli alloggiamenti (2).<br />
Far scorrere i perni d'arresto (3) nell'apposita scanalatura (4).<br />
Tirare l'anello metallico sopra l'estremità superiore del telaio (5), fino a quando il<br />
perno non entra in uno dei tre fori (6) .<br />
Infilare la cinghia (7) nell'anello metallico tramite il triangolo (8) e regolare la<br />
lunghezza. Bloccare la cinghia.<br />
2.10 Rastomat (se presente)<br />
L ATTENZIONE: Rischio di lesioni - Evitare che oggetti o persone si trovino nella<br />
zona di regolazione durante la sistemazione.<br />
Per la regolazione del poggiagamba servirsi dell'anello posto all'estremità pediera al centro<br />
del telaio. Tirare il poggiagamba nella posizione desiderata. Il Rastomat presenta punti di<br />
arresto ogni 2 cm circa. Per rilasciare il poggiagamba tirare nella posizione più elevata<br />
l'anello posto all'estremità pediera. Il Rastomat sblocca tutti gli arresti, consentendo di<br />
rilasciare completamente il poggiagamba in modo che vada a collocarsi nel telaio del letto.<br />
Eseguire questa regolazione esclusivamente tramite l'anello posto all'estremità<br />
pediera onde evitare inclinazioni e danni del dispositivo di regolazione a tacche.<br />
��
<strong>Luna</strong><br />
2010-11<br />
2.11 Trasferire il letto all'interno e all'esterno<br />
L ATTENZIONE: Nel caso in cui non si riesca a eseguire il trasferimento in modo<br />
sicuro, chiedere assistenza.<br />
1. Avvicinarsi al letto il più possibile.<br />
2. Verificare che i freni del letto siano attivati.<br />
3. Rimuovere o ripiegare le sponde di contenimento del letto.<br />
4. Effettuare il trasferimento da/verso il letto.<br />
2.12 Transport<br />
L AVVERTENZA: Rischio di lesioni – Controllare che la letto sia collegata in<br />
modo adeguato, in modo da evitare lesioni ai passeggeri durante gli urti o frenate<br />
brusche.<br />
L AVVERTENZA: Rischio di lesioni – NON utilizzare la stessa cintura di sicurezza<br />
per il passeggero e la letto.<br />
L AVVERTENZA: Rischio di lesioni – Il trasporto del paziente è consentito solo col<br />
letto completamente abbassato e orizzontale.<br />
Per evitare danni durante il trasporto smontare il bastone per alzarsi prima di trasportare il<br />
letto. Scollegare il cavo di alimentazione e verificare che non vi siano cablaggi pendenti nelle<br />
vicinanze del pavimento.<br />
2.13 Cablaggio<br />
Pagina 13<br />
1 = Parte testiera della rete<br />
2 = Parte pediera della rete<br />
3 = Alloggio bastone<br />
4 = Dispositivo antitrazione<br />
5 = Cavo d'alimentazione<br />
6 = Trasformatore /<br />
Centralina di comando<br />
7 = Interblocco<br />
8 = Motore poggiatesta<br />
9 = Motore piegatura<br />
ginocchio<br />
10 = Motore estremità<br />
superiore<br />
11 = Motore estremità inferiore<br />
12 = Pulsantiera<br />
Tutti i cablaggi all'interno del<br />
telaio del letto devono essere<br />
disposti in modo che i cavi non<br />
siano in contatto con il corpo e<br />
non vi siano punti di<br />
schiacciamento o zone taglienti.<br />
IT
IT<br />
3 Installazione e regolazione<br />
Pagina 14<br />
<strong>Luna</strong><br />
2010-11<br />
Le istruzioni contenute nel presente capitolo sono destinate al rivenditore.<br />
La letto <strong>Vermeiren</strong> V100 è stata messa a punto per essere regolata con un numero minimo<br />
di parti di ricambio. Non è necessario un altro set di parti di ricambio.<br />
Per ricercare un centro assistenza o un rivenditore specializzato nelle vicinanze, contattare il<br />
più vicino centro <strong>Vermeiren</strong>. Nell'ultima pagina è presente una lista dei centri <strong>Vermeiren</strong>.<br />
L AVVERTENZA: Pericolo di limiti non sicuri. Utilizzare solo i limiti descritti nel<br />
presente manuale.<br />
3.1 Attrezzi<br />
Per montare il letto sono necessari gli attrezzi seguenti:<br />
Chiave a brugola<br />
Cacciavite<br />
3.2 Modalità di consegna<br />
La letto <strong>Vermeiren</strong> <strong>Luna</strong> può essere distribuita con:<br />
2 parti frontali compreso motore + traversa in legno circa 17 kg / cadauna<br />
Rete a doghe, pediera incl. motore circa 20 kg<br />
Rete a doghe, testiera incl. trasformatore e motore circa 20 kg<br />
Sponde laterali (2 x 2 stecche di legno) circa 3 kg / cadauna<br />
Cavalletto + maniglia circa 10 kg<br />
Comando manuale circa 10 kg<br />
Interblocco<br />
Chiave a brugola (montaggio)<br />
Istruzioni per l'uso<br />
Il letto può essere utilizzato esclusivamente con gli accessori in dotazione. Se alcuni<br />
componenti vengono tolti o abbinati a dotazioni, componenti e sistemi elettrici di terzi il letto<br />
non si considera più di fornitura della casa costruttrice, e può esporre il paziente a rischi.<br />
Inoltre vengono meno la conformità CE e la responsabilità del costruttore.<br />
�<br />
Quanto sopra descritto potrebbe essere diverso a seciionda del tipo di Letto <strong>Luna</strong> da Voi<br />
scelto: <strong>Luna</strong>, <strong>Luna</strong> Basic, <strong>Luna</strong> Deluxe, <strong>Luna</strong> x-low. Inoltre anche le immagini che appargono<br />
sul manuale possono apparire differenti a seconda del Letto <strong>Luna</strong> scelto.<br />
3.3 Montaggio<br />
L ATTENZIONE: Rischio di schiacciamento - Prestare attenzione a non mettere le<br />
dita tra i componenti del letto.<br />
L ATTENZIONE: Rischio di schiacciamento - Tenere le dita lontano dalle parti<br />
mobili del letto.<br />
L'assemblaggio esposto qui sotto e applicabile ai modelli: <strong>Luna</strong>, <strong>Luna</strong> Basic, <strong>Luna</strong> Deluxe,<br />
<strong>Luna</strong> x-low. Inoltre anche le immagini che appargono sul manuale possono apparire<br />
differenti a seconda del Letto <strong>Luna</strong> scelto.<br />
Per il montaggio del letto attenersi alle seguenti istruzioni.
3.3.1 Parti frontali<br />
2<br />
Pagina 15<br />
<strong>Luna</strong><br />
2010-11<br />
Infilare le estremità della rete a doghe negli alloggi sulla parte frontale (previo<br />
allentamento delle viti di bloccaggio; attenzione a non piegare!).<br />
ATTENZIONE: La parte testiera della rete a doghe è dotata di alloggi per il sollevatore e di<br />
gancio per il cavo di alimentazione.<br />
Bloccare con le apposite viti serrando fino a quando non escono dal foro<br />
dell'alloggiamento sulla parte frontale, realizzando il bloccaggio (stringere a mano!).<br />
Proteggere contro gli schiacciamenti il cablaggio di alimentazione motore.<br />
3.3.2 Rete a doghe<br />
3<br />
1<br />
1 1<br />
Allineare le due parti della rete e infilarle una nell'altra.<br />
Stringere a mano le viti di bloccaggio.<br />
Proteggere contro gli schiacciamenti il cablaggio di alimentazione motore.<br />
2<br />
3<br />
1 = Estremità rete a<br />
doghe<br />
2 = Alloggio parte<br />
frontale<br />
3 = Viti di fissaggio<br />
1 = Rete a doghe<br />
2 = Viti di<br />
fissaggio<br />
IT
IT<br />
3.3.3 Sponde di contenimento in legno<br />
Pagina 16<br />
<strong>Luna</strong><br />
2010-11<br />
Lo schema di montaggio illustrato è riferito ai quatto modelli di letto seguenti: <strong>Luna</strong>, <strong>Luna</strong><br />
Basic, <strong>Luna</strong> Deluxe, <strong>Luna</strong> X-low.<br />
In base al modello di letto <strong>Luna</strong>, alcune illustrazioni potrebbero essere diverse.<br />
A. Inserire la guida perni corta (1) a destra e a sinistra nella stecca di legno superiore.<br />
Inserire la la guida perni lunga (2) a destra e a sinistra nella stecca di legno inferiore.<br />
Inserire la guida perni lunga (2) nella stecca rispettivamente nelle guide di<br />
scorrimento della testiera e della pediera una alla volta e bloccarle portando la guida<br />
fino all'estremità superiore fino a ottenerne l'aggancio con uno scatto. Rilasciare su<br />
un lato questa guida fino alla punta premendo il pulsante di bloccaggio (5) e tirando<br />
verso l'alto la stecca di legno con delicatezza.<br />
Fare scorrere le guide perni (2) ancora una volta nell'alloggiamento finché la punta<br />
della guida si trova al limite dell'alloggiamento. A questo punto la guida perni corta (1)<br />
va inserita con la stecca di legno con i bordi della guida perni lunga e l'intero sistema<br />
di guide perni (1) + (2) va inserito nelle rispettive guide di scorrimento (4) tirando<br />
verso l'alto quando si afferra solo la stecca di legno superiore e quindi bloccando il<br />
sistema in posizione.<br />
B. Inserire e bloccare manualmente i dadi di bloccaggio (6).<br />
1 = Guida perni corta<br />
2 = Guida perni lunga<br />
3 = Stecca di legno (2 stecche per<br />
lato)<br />
4 = Guida<br />
5 = Pulsante di bloccaggio<br />
6 = Dado di bloccaggio
<strong>Luna</strong><br />
2010-11<br />
3.3.4 Collegamenti<br />
L AVVERTENZA: Rischio di lesioni - Non toccare la spina con le mani umide.<br />
L AVVERTENZA: Rischio di lesioni - Non interporre nulla tra collegamento e<br />
cavo e proteggere contro i carichi meccanici.<br />
1. Per l'alimentazione utilizzare una spina a norma VDE a 220V/230V, 50Hz.<br />
2. L'illustrazione seguente mostra lo schema dei collegamenti per il trasformatore:<br />
Collegare il cavo di alimentazione alla spina e inserirlo nella presa.<br />
Disporre il cavo di alimentazione senza anse e pieghe e non sopra a spigoli vivi.<br />
Proteggere contro gli schiacciamenti il cavo di alimentazione e quello del comando manuale.<br />
6<br />
1 2 3 4<br />
1 2 3 4 5<br />
Pagina 17<br />
1 = Attacco motore poggiatesta<br />
2 = Attacco motore piegatura ginocchio<br />
3 = Attacco motore estremità superiore<br />
4 = Attacco motore estremità inferiore<br />
5 = Attacco interblocco<br />
6 = Trasformatore / Centralina di comando<br />
I cavi di collegamento dei motori e gli attacchi del<br />
trasformatore sono contrassegnati con la stessa<br />
numerazione.<br />
IT
IT<br />
4 Manutenzione<br />
Pagina 18<br />
<strong>Luna</strong><br />
2010-11<br />
La durata della letto dipende dalle condizioni d'uso, conservazione, manutenzione regolare,<br />
manutenzione e pulizia.<br />
4.1 Manutenzione regolare<br />
Di seguito sono descritte le attività di manutenzione per garantire una condizione adeguata<br />
alla letto <strong>Vermeiren</strong>:<br />
� Prima di ogniutilizzo<br />
� Controllare gli pneumatici e farli pulire. Se necessario cambiare lo<br />
pneumatico.<br />
� Controllare i freni e regolare se necessario.<br />
� Controllare la letto (pulizia, rotture, danni sulle parti strutturali ecc.) e farla<br />
pulire. Se necessario sostituire il rivestimento.<br />
� Verificare che i cablaggi non presentino danni visibili e che tutte le<br />
connessioni spina-presa siano collegate secondo le istruzioni per l'uso. In<br />
caso di danni scollegare immediatamente la spina del cavo di rete. Rivolgersi<br />
ad un centro manutenzione autorizzato.<br />
� Verificare che gli elementi di regolazione meccanici (sponde, sollevatore etc.)<br />
funzionino regolarmente. In caso di problemi di funzionamento rivolgersi<br />
immediatamente al rivenditore.<br />
� Verificare che i comandi manuali funzionino correttamente. Se il<br />
funzionamento non è adeguato, scollegare la presa di alimentazione.<br />
� Ogni 8 settimane: effettuare una verifica o una regolazione<br />
� Funzionamento delle guide di scorrimento delle sponde (testiera e pediera)<br />
� Alloggi delle doghe delle reti (se presenti)<br />
� Stato degli elementi in legno<br />
� Sollevatore (regolazione / deformazione)<br />
� Lubrificazione dalle parti mobili<br />
Ogni sei mesi o per ogni nuovo utente<br />
� Esame generale<br />
� Disinfezione<br />
� Pulizia<br />
� Umidità del materasso<br />
Per comodità, sul retro del manuale è riportato un piano di manutenzione.<br />
Per la riparazione e il montaggio delle parti di ricambio della letto occorre rivolgersi al<br />
rivenditore.<br />
Installare solo le parti di ricambio autorizzate <strong>Vermeiren</strong>.
4.2 Trasporto e conservazione<br />
Attenersi alle istruzioni seguenti per la trasporto e conservazione della letto:<br />
Conservare solo in ambienti asciutti (+5 ÷ +41 °C).<br />
Umidità relativa tra 30 e il 70 %.<br />
Pagina 19<br />
<strong>Luna</strong><br />
2010-11<br />
Fornire copertura o imballaggio adeguato per proteggere la letto da ruggine e oggetti<br />
estranei (ad es., acqua salata, aria salmastra, sabbia, polvere).<br />
Conservare tutte le parti rimosse insieme (o contrassegnarle se necessario) per<br />
evitare di confonderle con altri prodotti al momento del rimontaggio.<br />
Conservare i componenti senza sottoporli a sollecitazioni (non poggiare parti pesanti<br />
sulla letto, non incastrarla tra altri oggetti, ecc.).<br />
Avvolgere il cavo d'alimentazione e agganciarlo all'apposito sostegno.<br />
Verificare che i cablaggi interni non siano schiacciati o piegati.<br />
4.3 Pulizia<br />
4.3.1 Telai in metallo e componenti in legno<br />
Per la pulizia dei telai in metallo e dei componenti in legno, attenersi alle indicazioni<br />
seguenti:<br />
� Pulire i telai in metallo e i componenti in legno con un panno inumidito con<br />
acqua calda. Prestare attenzione a non bagnare eccessivamente i telai in<br />
metallo e i componenti in legno.<br />
� Utilizzare un detergente delicato disponibile in commercio per rimuovere lo<br />
sporco ostinato.<br />
� Eliminare le macchie con una spugna o una spazzola morbida.<br />
� Non utilizzare detergenti aggressivi, ad esempio solventi, né spazzole dure.<br />
� Non pulire con dispositivi a vapore e/o a pressione.<br />
4.3.2 Parti in plastica<br />
Per pulire tutte le parti in plastica della letto, utilizzare detergenti per plastica disponibili in<br />
commercio. Utilizzare solo una spazzola o una spugna morbida.<br />
I motori e le unità per il comando manuale devono essere puliti con un panno leggermente<br />
umido.<br />
4.3.3 Rivestimento<br />
La qualità elevata del trattamento superficiale garantisce una protezione ottimale contro la<br />
corrosione. Se il rivestimento esterno è danneggiato da rigature o in altri modi, far riparare la<br />
superficie dal rivenditore.<br />
Durante la pulizia, utilizzare solo acqua tiepida e detergenti per uso domestico, con spazzole<br />
e panni morbidi. Non far entrare umidità all'interno dei tubi.<br />
Per la pulizia iniziale delle parti zincate utilizzare un panno asciutto. È possibile rimuovere<br />
lo sporco ostinato utilizzando un lucidante apposito per lo zinco disponibile in commercio.<br />
IT
IT<br />
4.4 Controllo<br />
Pagina 20<br />
<strong>Luna</strong><br />
2010-11<br />
Inizialmente è preferibile un controllo all'anno e almeno uno prima della ripresa dell'utilizzo.<br />
Eseguire tutti i controlli indicati di seguito accompagnati da documentazione compilata da<br />
persone autorizzate:<br />
Controllo visivo delle deformazioni plastiche, dell'usura o del mal funzionamento dei<br />
componenti del telaio (superficie d'appoggio, struttura, schienale, pediera, staffa per<br />
il sollevamento, alloggiamento per la staffa, ruote).<br />
Controllo visivo per escludere danni alla verniciatura (pericolo di corrosione).<br />
Verifica del funzionamento delle ruote (rotazione scorrevole, sicurezza, sistema di<br />
bloccaggio e altro).<br />
Verifica che tutte le viti siano in sede e ben fissate.<br />
Verifica della quantità di grasso sulle giunzioni metalliche delle parti mobili.<br />
Controllo visivo dei danni agli alloggiamenti, serraggio delle viti, stato delle<br />
guarnizioni.<br />
Controllo visivo dei componenti in plastica per escludere rotture e punti danneggiati.<br />
Controllo visivo del cavo di alimentazione (EPR o equivalente).<br />
Verifica dello stato del cavo di alimentazione, in particolare: schiacciamenti,<br />
abrasioni, tagli, isolamento visibile dei conduttori, conduttori metallici visibili, pieghe,<br />
gobbe, cambiamenti di colore della guaina esterna, infragilimenti.<br />
Verifica dello stato del cablaggio interno del cavo di alimentazione, in particolare:<br />
schiacciamenti, abrasioni, tagli, isolamento visibile dei conduttori, conduttori metallici<br />
visibili, pieghe, gobbe, cambiamenti di colore della guaina esterna, infragilimenti.<br />
Verifica della protezione contro l'umidità dell'impianto elettrico, minimo IPX4 (vedere<br />
etichetta Tipo).<br />
Verifica del dispositivo di aggancio del cavo di alimentazione durante il trasporto.<br />
Verifica della disposizione in sicurezza del cavo di alimentazione e di tutti i cavi<br />
elettrici onde evitare tagli, schiacciamenti e altre sollecitazioni meccaniche.<br />
Misura della resistenza dei conduttori di protezione (Ohm) secondo VDE 0751-1.<br />
Misura della corrente di dispersione (A) secondo VDE 0751-1.<br />
Misura della resistenza d'isolamento equivalente (MOhm) secondo VDE 0751-1.<br />
Verifica funzionale delle sponde (bloccaggio, distanze sec. EN 1970: 2000, carico,<br />
deformazione, usura da carico).<br />
Verifica del funzionamento motori, prova su tutta la gamma di regolazione dei motori<br />
� rumorosità, velocità, marcia regolare etc., disinserimento (ad esempio limitatore di<br />
corrente, finecorsa), ed eventualmente: misura delle prestazioni, dapprima senza<br />
carico, poi al carico nominale ("SWL") per valutare l’usura dei motori confrontando i<br />
valori dell’assorbimento di corrente con i dati tecnici del letto.<br />
Verifica dello stato del materasso (non in caso di riutilizzo del letto).<br />
Verifica della completezza della condizione di consegna e della disponibilità del<br />
manuale di istruzioni.<br />
Le misurazioni devono essere eseguite da personale specializzato nel settore dei presìdi per<br />
disabili e da elettricisti specializzati in strumenti e procedimenti di controllo. L'autorizzazione<br />
all'uso del letto dopo i controlli e le manutenzioni è di competenza dell'elettricista.<br />
Gli interventi di manutenzione, se sono stati controllati almeno aspetti menzionati, devono<br />
essere riportati nella scheda del piano di manutenzione.
Requisito: Note:<br />
1.) Controllo visivo:<br />
n.d. Sì No Note<br />
1.1) Linea di alimentazione<br />
Cavo EPR o di qualità equivalente<br />
1.2) Condizioni del cavo di alimentazione<br />
Prestare particolare attenzione a:<br />
schiacciamenti, abrasioni, tagli, isolamento visibile<br />
del conduttore interno, variazioni metalliche visibili,<br />
pieghe,<br />
Ingobbature, cambiamento di colore della guaina<br />
esterna,<br />
Zone di fragilità<br />
1.3) Condizioni dei cavi interni<br />
Osservare con particolare attenzione:<br />
schiacciamenti, abrasioni, tagli, isolamento visibile<br />
dei conduttori, conduttori metallici visibili, pieghe,<br />
gobbe, cambiamenti di colore della guaina esterna,<br />
infragilimenti).<br />
1.4) Sufficiente protezione contro la trazione e<br />
la piegatura del cavo di alimentazione<br />
1.5) Sufficiente protezione contro la trazione e<br />
la piegatura dei cavi interni<br />
1.6) Verifica della disposizione sicura del cavo<br />
di alimentazione e di tutti i cavi elettrici<br />
onde evitare tagli, schiacciamenti ed altre<br />
sollecitazioni meccaniche.<br />
1.7) Protezione contro l'umidità IP X4<br />
1.8) Dispositivo per appendere il cavo di<br />
alimentazione durante il trasporto<br />
1.9) Controllo visivo dei componenti del telaio:<br />
deformazione plastica e/o usura:<br />
- Fondo del letto<br />
- Sollevatore<br />
- Schienale, seduta, pediera<br />
- Bastone per alzarsi dal letto<br />
- Alloggio del bastone per alzarsi dal letto<br />
- Ruote<br />
1.10) Involucro<br />
Esame visivo dei danni agli involucri, serraggio<br />
delle viti, stato delle guarnizioni.<br />
Pagina 21<br />
n.d. Sì No Note<br />
n.d. Sì No Note<br />
n.d. Sì No Note<br />
n.d. Sì No Note<br />
n.d. Sì No Note<br />
n.d. Sì No Note<br />
n.d. Sì No Note<br />
n.d. Sì No Note<br />
n.d. Sì No Note<br />
n.d. Sì No Note<br />
<strong>Luna</strong><br />
2010-11<br />
IT
IT<br />
I<br />
Tabella (A) fig. (B)<br />
Designazione Dimensione Requisito in mm<br />
A Distanza minima tra gli elementi<br />
all'interno del perimetro della<br />
sponda laterale in posizione<br />
estesa/abbassata o del settore<br />
delimitato dalla sponda laterale e<br />
dalle parti fisse del letto<br />
A 120<br />
B Spessore del materasso per uso come indicato<br />
conforme alle specifiche<br />
dal costruttore<br />
C Altezza dello spigolo superiore della<br />
sponda laterale rispetto al<br />
materasso (vedere ‘B’) senza<br />
compressione<br />
C 220<br />
D Distanza tra la parte testiera o<br />
D 60<br />
pediera e la sponda laterale<br />
oppure<br />
D 235<br />
E Distanza tra le sponde laterali<br />
E 60<br />
separate con la superficie<br />
oppure<br />
d'appoggio in posizione piana<br />
E 235<br />
F Dimensione minima di tutte le se D 235, F 60<br />
aperture accessibili tra sponda<br />
se D 60,<br />
laterale e superficie d'appoggio<br />
F 120<br />
G Lunghezza complessiva della<br />
G 1/2 della<br />
sponda laterale o somma delle lunghezza della<br />
lunghezze delle sponde laterali<br />
superficie<br />
separate su un lato del letto<br />
d'appoggio<br />
H Distanza tra parte testiera o pediera nessun<br />
senza ampliamento di dette parti<br />
requisito<br />
Per i letti le cui sponde superano le dimensioni indicate<br />
di meno del 10% è necessario che le stesse non<br />
vengano utilizzate con pazienti piccoli o sottopeso o<br />
che vengano adottate ulteriori misure per evitare che il<br />
paziente vi resti infilato o possa cadere.<br />
Le sponde che superano le dimensioni indicati del 10%<br />
ed oltre non possono essere utilizzate fino a che non<br />
viene eliminato il difetto e devono essere sostituite o<br />
modificate.<br />
Oltre al controllo sulla base dei punti seguenti occorre<br />
verificare la completa funzionalità (tacche di bloccaggio,<br />
elementi di fissaggio) delle sponde. I difetti individuati<br />
devono essere eliminati. Rispetto delle dimensioni dei<br />
componenti delle sponde come da schizzo seguente.<br />
Pagina 22<br />
Valore nominale: mm<br />
Valore nominale: mm<br />
Valore nominale: mm<br />
Valore nominale: mm<br />
Valore nominale: mm<br />
Valore nominale: mm<br />
Valore nominale: mm<br />
Valore nominale: mm<br />
n.d. Sì No Note<br />
n.d. Sì No Note<br />
n.d. Sì No Note<br />
n.d. Sì No Note<br />
<strong>Luna</strong><br />
2010-11
Fig. (B) Tabella (A)<br />
D D<br />
G<br />
C<br />
B<br />
2.) Verifiche dimensionali<br />
A<br />
H<br />
A F<br />
2.1) Resistenza del conduttore di protezione<br />
Valore nominale: Ohm<br />
2.2) Corrente di dispersione equivalente<br />
Valore nominale: A<br />
2.3) Resistenza d'isolamento<br />
Valore nominale: MOhm<br />
3.) Verifiche funzionali<br />
3.1) Verifica funzionale delle sponde:<br />
- Bloccaggio, ad es. giochi<br />
- Distanze, anche sotto carico<br />
- Deformazione<br />
- Usura da carico<br />
3.2) Verifica funzionale dei freni:<br />
- Sicurezza<br />
- Arresto<br />
- Marcia in folle<br />
3.3) Verifica funzionale dell'azionamento:<br />
- Campo di regolazione completo dei motori<br />
(rumorosità, velocità, funzionamento regolare etc..)<br />
- Interruttori (es. limitatore di corrente, interruttore di fine<br />
corsa)<br />
- all'occorrenza misurare prima di tutto gli assorbimenti<br />
senza carico, quindi al carico nominale (SWL), per poter<br />
eventualmente determinare.<br />
l'usura dei motori tramite l'assorbimento<br />
. Confrontare con i valori indicati dal<br />
fornitore. Il costruttore può stabilire valori limite.<br />
Varie:<br />
Pagina 23<br />
n.d. Sì No Note<br />
n.d. Sì No Note<br />
n.d. Sì No Note<br />
n.d. Sì No Note<br />
n.d. Sì No Note<br />
n.d. Sì No Note<br />
n.d. Sì No Note<br />
n.d. Sì No Note<br />
<strong>Luna</strong><br />
2010-11<br />
Nota: Quando i montanti delle<br />
sponde laterali sono sfilati (in<br />
grigio scuro nel disegno) è<br />
obbligatorio mantenere sotto alle<br />
sponde la distanza A rispetto alla<br />
superficie d'appoggio.<br />
IT
IT<br />
4.5 Disinfezione<br />
L AVVERTENZA: prodotti pericolosi. L'utilizzo di disinfettanti è limitato al<br />
personale autorizzato.<br />
L AVVERTENZA: prodotti pericolosi, irritanti per la pelle. Indossare indumenti<br />
protettivi adeguati poiché i disinfettanti possono irritare la pelle. Attenersi alle<br />
istruzioni allegate ai prodotti disinfettanti.<br />
Tutte le parti della letto possono essere trattate con un disinfettante.<br />
Pagina 24<br />
<strong>Luna</strong><br />
2010-11<br />
Tutte le disposizioni in materia di disinfezione di presidi medico-sanitari per riabilitazione, i<br />
loro componenti o accessori sono riportate in una guida alla disinfezione contenente almeno<br />
le seguenti informazioni e allegata alla documentazione del prodotto:<br />
Data della<br />
disinfezione<br />
Motivo Specifica Sostanza e<br />
concentrazione<br />
Tabella 2: Esempio di guida alla disinfezione<br />
Sigle utilizzate in colonna 2 (motivo):<br />
V = Sospetta infezione IF = Infezione W = Ripetizione I = Controllo<br />
Per un foglio bianco della guida alla disinfezione, vedere § 9.<br />
Firma
<strong>Luna</strong><br />
2010-11<br />
I disinfettanti consigliati (come da elenco del Robert Koch Institute (RKI)) sono riportati nella<br />
tabella che segue. Richiedere l’aggiornamento dei disinfettanti riportati nell’elenco RKI al<br />
Robert Koch Institute (sito Web: www.rki.de).<br />
Principio attivo Nome del<br />
prodotto<br />
Fenolo o<br />
derivati<br />
Cloro, sostanze<br />
organiche e<br />
inorganiche con<br />
cloro attivo<br />
Disinfezione<br />
per lavaggio<br />
Prodotto diluito<br />
Tempo di azione<br />
Disinfezione<br />
della<br />
superficie<br />
(disinfezione<br />
per<br />
sfregamento<br />
/con un<br />
panno)<br />
Prodotto diluito<br />
Tempo di azione<br />
Disinfezione di escrezioni<br />
1 parte di espettorato o feci + 2 parti di<br />
soluzione diluita o 1 parte di urina + 1<br />
parte di soluzione diluita<br />
Pagina 25<br />
Espettorato Feci Urina<br />
Prodotto diluito<br />
% Ore % Ore % Ore % Ore % Ore<br />
Tempo di azione<br />
Prodotto diluito<br />
Tempo di azione<br />
Prodotto diluito<br />
Tempo di azione<br />
Area di<br />
efficacia<br />
Produttore o<br />
fornitore<br />
Amocid 1 12 5 6 5 4 5 6 5 2 A Lysoform<br />
Gevisol 0,5 12 5 4 5 4 5 6 5 2 A Schülke & Mayer<br />
Helipur 6 4 6 4 6 6 6 2 A B. Braun<br />
soluzione con<br />
sapone m-cresilico<br />
(DAB 6)<br />
1 12 5 4 A<br />
Fenolo 1 12 3 2 A<br />
Cloramina T DAB 9 1,5 12 2,5 2 5 4 A 1 B<br />
Clorina 1,5 12 2,5 2 5 4 A 1 B Lysoform<br />
Trichlorol 2 12 3 2 6 4 A 1 B Lysoform<br />
Perossidi Apesin AP100 2 4 4 AB Tana<br />
PROFESSIONAL<br />
Formaldeide<br />
e/o altre aldeidi<br />
o derivati<br />
Dismozon pur 2 4 1 AB Bode Chemie<br />
Perform 2 3 4 AB Schülke & Mayer<br />
Wofesteril 2 2 4 AB Kesla Pharma<br />
Aldasan 2000 4 4 AB Lysoform<br />
Antifect FD 10 3 4 AB Schülke & Mayer<br />
Disinfezione della<br />
superficie<br />
Antiseptica 7<br />
3 6 AB Antiseptica<br />
Apesin AP30 5 4 A Tana<br />
PROFESSIONAL<br />
Bacillocid special 6 4 AB Bode Chemie<br />
Buraton 10F 3 4 AB Schülke & Mayr<br />
Desomed A 2000 3 6 AB Desomed<br />
Detergente<br />
disinfettante<br />
ospedaliero<br />
8 6 AB Dreiturm<br />
Desomed Perfekt 7 4 AB* Desomed<br />
Soluzione a base<br />
di formaldeide<br />
(DAB 10),<br />
(formalina)<br />
1,5 12 3 4 AB<br />
Incidin Perfekt 1 12 3 4 AB Ecolab<br />
Incidin Plus 8 6 A Ecolab<br />
Kohrsolin 2 12 3 4 AB Bode Chemie<br />
Lysoform 4 12 5 6 AB Lysoform<br />
IT
IT<br />
Principio attivo Nome del<br />
prodotto<br />
Formaldeide<br />
e/o altre aldeidi<br />
o derivati<br />
Surfattanti<br />
anfoterici<br />
(amfotensiden)<br />
Disinfezione<br />
per lavaggio<br />
Prodotto diluito<br />
Tempo di azione<br />
Disinfezione<br />
della<br />
superficie<br />
(disinfezione<br />
per<br />
sfregamento<br />
/con un<br />
panno)<br />
Prodotto diluito<br />
Tempo di azione<br />
Disinfezione di escrezioni<br />
1 parte di espettorato o feci + 2 parti di<br />
soluzione diluita o 1 parte di urina + 1<br />
parte di soluzione diluita<br />
Pagina 26<br />
Espettorato Feci Urina<br />
Prodotto diluito<br />
% Ore % Ore % Ore % Ore % Ore<br />
Tempo di azione<br />
Prodotto diluito<br />
Tempo di azione<br />
Prodotto diluito<br />
Tempo di azione<br />
Area di<br />
efficacia<br />
<strong>Luna</strong><br />
2010-11<br />
Produttore o<br />
fornitore<br />
Lysoformin 3 12 5 6 AB Lysoform<br />
Lysoformin 2000 4 6 AB Lysoform<br />
Melsept 2 12 4 6 AB B. Braun<br />
Melsitt 4 12 10 4 AB B. Braun<br />
Minutil 2 12 6 4 AB Ecolab<br />
Multidor 3 6 AB Ecolab<br />
Nûscosept 5 4 AB Dr. Nüsken<br />
Chemie<br />
Optisept 7 4 AB* Dr. Schumacher<br />
Pursept-FD 7 4 AB* Merz<br />
Ultrasol F 3 12 5 4 AB Fresenius Kabi<br />
Tensodur 103 2 12 A MFH Marienfelde<br />
Lye Latte di calce 3 20 6 A 3 B<br />
1 Non efficace contro i micobatteri, particolarmente in presenza di sangue, nella disinfezione di servizio.<br />
2 Non adatto per la disinfezione di superfici contaminate da sangue o porose (ad es., legno grezzo).<br />
3 Non utilizzabile in caso di tubercolosi; preparazione del latte di calce: 1 parte di calce sciolta (idrossido di calcio) + 3 parti d’acqua.<br />
* Efficacia controllata sui virus, in accordo con i metodi di controllo del RKI (report salute federale 38 (1995) 242).<br />
A: adatto per l’abbattimento di vegetazioni batteriche compresi i micobatteri e funghi, spore incluse.<br />
B: adatto per a disattivazione di virus.<br />
Tabella 3: Disinfettanti<br />
Rivolgersi al rivenditore in caso di dubbi su questioni relative alla disinfezione, sarà a<br />
disposizione.
5 Garanzia<br />
Tranne per le "Condizioni generali aziendali":<br />
(...)<br />
5. Il periodo per i reclami in garanzia è pari a 24 mesi.<br />
Non rientrano in garanzia danni derivanti da modifiche strutturali ai prodotti, scarsa<br />
manutenzione, gestione o conservazione difettosa o impropria, né utilizzo di parti non<br />
originali. Non rientrano inoltre in garanzia parti o parti operative soggette a usura e<br />
logoramento naturali.<br />
(...)<br />
6 Smaltimento<br />
Pagina 27<br />
<strong>Luna</strong><br />
2010-11<br />
Al momento dello smaltimento della letto, contattare il centro di raccolta locale o restituire il<br />
prodotto al rivenditore, che dopo averla sottoposta a una procedura igienica la potrà inviare<br />
al produttore che la smaltirà e riciclerà nel modo corretto, separando componenti e materiali.<br />
I materiali di imballaggio possono essere portati ai centri di raccolta o riconsegnati al<br />
rivenditore.<br />
7 Dichiarazione di conformità<br />
IT
IT<br />
8 Pliano di manutenzione<br />
Data Manutenzione Osservazioni Sigla<br />
1/1/2010 Ingrassaggio e manutenzione<br />
generale<br />
9 Guida alla disinfezione<br />
Data della<br />
disinfezione<br />
Motivo Specifica Sostanza e<br />
concentrazione<br />
Sigle utilizzate in colonna 2 (motivo):<br />
V = Sospetta infezione IF = Infezione W = Ripetizione I = Controllo<br />
Pagina 28<br />
no<br />
<strong>Luna</strong><br />
2010-11<br />
Firma
Índice<br />
Página 1<br />
<strong>Luna</strong><br />
2010-11<br />
Introducción ......................................................................................... 2<br />
1 Descripción del producto ......................................................... 3<br />
1.1 Uso previsto................................................................................................................. 3<br />
1.2 Especificaciones técnicas ............................................................................................ 4<br />
1.3 Componenti ................................................................................................................. 5<br />
1.4 Explicación de los símbolos ........................................................................................ 5<br />
1.5 Accesorios ................................................................................................................... 6<br />
1.6 Por su seguridad .......................................................................................................... 6<br />
2 Uso .............................................................................................. 7<br />
2.1 Dispositivo de desactivación (SI ESTÁ INSTALADO EN LA CAMA) ................... 7<br />
2.2 Control manual sin función de bloqueo ...................................................................... 8<br />
2.3 Control manual con función de bloqueo ..................................................................... 9<br />
2.4 Funcionamiento de los frenos ..................................................................................... 9<br />
2.5 Facilidad de empuje .................................................................................................. 10<br />
2.6 Cable de alimentación ............................................................................................... 10<br />
2.7 Bajada de emergencia del cabecero........................................................................... 11<br />
2.8 Rieles laterales........................................................................................................... 11<br />
2.9 Poste de elevación ..................................................................................................... 12<br />
2.10 Muesca de parada (si está disponible) ....................................................................... 12<br />
2.11 Traslado a la cama y desde esta ................................................................................. 13<br />
2.12 Transporte .................................................................................................................. 13<br />
2.13 Cableado .................................................................................................................... 13<br />
3 Instalación y ajuste ................................................................. 14<br />
3.1 Herramientas ............................................................................................................. 14<br />
3.2 Forma de suministro .................................................................................................. 14<br />
3.3 Montaje...................................................................................................................... 14<br />
4 Mantenimiento ........................................................................ 18<br />
4.1 Mantenimiento periódico .......................................................................................... 18<br />
4.2 Envío almacenamiento .............................................................................................. 19<br />
4.3 Cuidados .................................................................................................................... 19<br />
4.4 Inspección.................................................................................................................. 20<br />
4.5 Desinfección .............................................................................................................. 24<br />
5 Garantía ................................................................................... 27<br />
6 Eliminación .............................................................................. 27<br />
7 Declaración de conformidad .................................................. 27<br />
8 Plan de mantenimiento ........................................................... 28<br />
9 Registro de desinfección ......................................................... 28<br />
ES
ES<br />
Introducción<br />
Página 2<br />
<strong>Luna</strong><br />
2010-11<br />
En primer lugar, nos gustaría agradecerle que haya confiado en nosotros escogiendo una<br />
de nuestras camilla.<br />
Las camilla <strong>Vermeiren</strong> son el resultado de muchos años de experiencia e investigación.<br />
Durante su desarrollo, hemos puesto especial atención en crear una camilla práctica y fácil<br />
de usar.<br />
La vida útil de su cama dependerá en gran medida de los cuidados y el mantenimiento que<br />
le dedique.<br />
Este manual le permitirá familiarizarse con el funcionamiento de su camilla.<br />
El seguimiento de las instrucciones para el usuario y de las instrucciones de mantenimiento<br />
son parte indispensable de la garantía.<br />
Este manual incluye las mejoras de producto más recientes. <strong>Vermeiren</strong>, se reserva el<br />
derecho de introducir cambios sin tener ninguna obligación de adaptar o sustituir los<br />
modelos entregados previamente.<br />
Si tiene más preguntas, le rogamos que consulte a su distribuidor especializado.
1 Descripción del producto<br />
1.1 Uso previsto<br />
Página 3<br />
<strong>Luna</strong><br />
2010-11<br />
Con el modelo LUNA, ha adquirido una camilla desarrollada íntegramente para su<br />
comodidad. Esta camilla ofrece varias posibilidades de ajuste individuales que se explican a<br />
continuación. Por favor, lea este manual con atención para familiarizarse con su camilla.<br />
La camilla LUNA está diseñada para su uso en interiores de ambiente seco, sobre suelos<br />
llanos y sólidos.<br />
La camilla ha sido diseñada para un paciente adulto (a partir de los 12 años, y de hasta 140<br />
kg de peso).<br />
Debe utilizarse con un colchón adecuado (RG35 como mínimo, de 120 mm de grosor y 20<br />
kg como máximo).<br />
La camilla LUNA está diseñada para su uso en interiores de ambiente seco, sobre suelos<br />
llanos y sólidos.<br />
Los diferentes tipos de accesorios y su construcción modular permiten que sea usada<br />
plenamente por personas discapacitadas debido a:<br />
parálisis,<br />
pérdida de miembros (amputación de piernas),<br />
defectos en los miembros o deformaciones,<br />
articulaciones anquilosadas o dañadas,<br />
insuficiencias cardíacas o circulatorias,<br />
problemas de equilibrio,<br />
caquexia (atrofia muscular),<br />
así como por ancianos.<br />
En cada caso particular, se debe tener también en cuenta:<br />
la envergadura y el peso (máx. 140 kg),<br />
el estado físico y psicológico,<br />
las características de la vivienda,<br />
el entorno.<br />
La cama debe emplearse en un entorno de aplicación de nivel 4: "cuidados en una zona<br />
doméstica donde se utiliza equipo médico para aliviar o compensar una lesión, una<br />
discapacidad o una enfermedad".<br />
La cama solo debe emplearse sobre superficies en las que las cuatro ruedas estén en<br />
contacto con el suelo.<br />
La camilla no debe usarse como escalera, ni tampoco como medio de transporte para<br />
objetos pesados o calientes.<br />
Cuando se sitúa sobre alfombras, suelos enmoquetados o revestimientos de suelo sueltos,<br />
estos pueden sufrir daños y, además, será más difícil trasladar la camilla (¡sin paciente!).<br />
Sólo use accesorios <strong>Vermeiren</strong> aprobados.<br />
El fabricante no se hace responsable de los daños causados por la falta de mantenimiento,<br />
un mantenimiento inadecuado o como resultado de no observar las instrucciones indicadas<br />
en este manual.<br />
El cumplimiento de las instrucciones del usuario y de mantenimiento es parte indispensable<br />
de la garantía.<br />
ES
ES<br />
1.2 Especificaciones técnicas<br />
Página 4<br />
<strong>Luna</strong><br />
2010-11<br />
Las condiciones técnicas indicadas a continuación son válidas para camilla de configuración<br />
estándar.<br />
En caso de utilizar tros accesorios diferentes a los indicados, los valores cambian.<br />
Fabricante <strong>Vermeiren</strong><br />
Dirección <strong>Vermeiren</strong>plein 1/15, B-2920 Kalmthout<br />
Tipo Camilla<br />
Modelo <strong>Luna</strong><br />
Peso máximo del ocupante 140 kg<br />
Descripción Min. Max.<br />
Longitud 2150 mm (<strong>Luna</strong> models) 2240 mm (<strong>Luna</strong> X-low)<br />
Anchura 1030 mm<br />
Ajuste de la altura de la superficie de<br />
la cama<br />
400 mm (sin colchón)<br />
200 mm (<strong>Luna</strong> X-low)<br />
Longitud plegada 445 mm<br />
Anchura plegada 935 mm<br />
Altura plegada 1045 mm<br />
Peso total 95 kg<br />
Ajuste de la sección del respaldo 83°<br />
Máximo ángulo en el muslo 31.7°<br />
Máximo ángulo en la parte inferior de<br />
la pierna<br />
-14,8°<br />
Carga máx. segura 175 kg<br />
Poste de elevación Carico nominale 80 kg<br />
805 mm (sin colchón)<br />
600 mm (<strong>Luna</strong> X-low)<br />
Colchón Min. RG 35, grosor 120 mm, 2000 x 900 mm, max. 20 kg<br />
Espacio libre para el elevador del paciente 150 mm (excepto <strong>Luna</strong> X-low)<br />
Ruedecillas de dirección (4 unidades) Ø 125 mm, bloccabili<br />
Parte delantera del motor LA273100-A01405040, Linak<br />
Motor de la sección del respaldo LA270022-00, Linak<br />
Motor de la sección de las patas LA270022-00, Linak<br />
Manejo manual HBW074-072, Linak<br />
Caja de barrera ACL 403500, Linak<br />
Transformador CB6404+10019, Linak<br />
Tensión nominal, transformador<br />
U entrada: 230 V , ± 10%, 50 Hz, corriente: más. 1.5 A, voltaje de<br />
salida: 24V ---, máx. 70 VA<br />
Período de encendido 10%, max. 6 min/hora<br />
Nivel sonoro < 65 dB(A)<br />
Clase de protección<br />
Temperatura de almacenamiento y<br />
de uso<br />
Humedad de almacenamiento y de<br />
uso<br />
Clase de protección II, aplicación tipo B / IP54 (protección contra<br />
salpicaduras)<br />
+ 5 °C + 41 °C<br />
30% 70%<br />
Reservado el derecho de aplicar modificaciones técnicas. Tolerancia de las medidas ±15 mm/ 1,5 kg/°<br />
Tabla 1: Especificaciones técnicas
La cama cumple las siguientes especificaciones:<br />
EN 1970: Camas ajustables para personas con discapacidad: Requisitos y métodos de<br />
ensayo<br />
EN 1970+ A1: Camas ajustables para personas con discapacidad: Requisitos y métodos de<br />
ensayo<br />
EN 60601-2-38/A1: Equipos electromédicos - Parte 2-38: Requisitos particulares de seguridad<br />
para las camas de hospital electromecánicas<br />
1.3 Componenti<br />
1.4 Explicación de los símbolos<br />
Peso máximo<br />
Conformidad con la normativa CE<br />
L Instrucciones de seguridad<br />
�<br />
��<br />
��<br />
�<br />
Observe les instrucciones de uso<br />
El procedimiento o método de uso correcto<br />
Procedimiento o método de uso incorrecto<br />
Clase de protección II<br />
Aplicación de tipo B<br />
Página 5<br />
<strong>Luna</strong><br />
2010-11<br />
1 = Poste de elevación<br />
2 = Triángulo<br />
3 = Dispositivo de<br />
retención del colchón<br />
4 = Raíl lateral<br />
5 = Sección superior de<br />
las patas<br />
6 = Sección inferior de las<br />
patas<br />
7 = Pies de la cama<br />
8 = Bastidor inferior<br />
9 = Rueda<br />
10 = Bloqueo de las ruedas<br />
11 = Motor<br />
12 = Cabecera<br />
13 = Mesilla de noche<br />
14 = Control manual<br />
15 = Estructura lateral<br />
16 = Sección del respaldo<br />
17 = Sección del asiento<br />
18 = Botón de ensamblaje<br />
ES
ES<br />
Página 6<br />
<strong>Luna</strong><br />
2010-11<br />
1.5 Accesorios<br />
L ADVERTENCIA: Deben tomarse precauciones si se utilizan accesorios distintos<br />
a los siguientes.<br />
Dispositivo de desactivación + el control manual sin función de bloqueo<br />
Mesilla de noche<br />
1.6 Por su seguridad<br />
l Lea atentamente el manual de instrucciones antes de usar la camilla.<br />
l Instale y use su camilla únicamente sobre superficies llanas y lisas y asegúrese de<br />
que las cuatro ruedecillas de dirección estén firmemente colocadas sobre el suelo.<br />
l Una vez colocada la camilla en su posición, asegúrese de que no haya obstáculos<br />
en toda el área de ajuste.<br />
L Si el paciente no está bajo supervisión, la cama se debe ajustar previamente a la<br />
posición más baja para reducir el riesgo de lesiones por caída al subir o bajar de la<br />
cama o al estar tumbado en ella.<br />
L Si el paciente no se encuentra bajo supervisión, los raíles laterales de ambos lados<br />
se deben levantar hasta la posición más alta. Los raíles solo se pueden bajar de un<br />
lado o de ambos lados en presencia de un supervisor.<br />
L Cuidado con las manos al montar, desmontar o usar la cama – ¡peligro de<br />
aplastamiento!<br />
L Al transportar la cama, sujétela únicamente por las partes sólidas del bastidor y por<br />
las piezas de madera.<br />
L Las cuatro ruedas de dirección deben estar siempre bloqueadas antes de usar la<br />
camilla.<br />
L Se prohíbe la aplicación de tratamientos médicos con electricidad en la camilla.<br />
L No se apoye en los raíles laterales – ¡peligro de accidente!<br />
L Evite apoyarse lateralmente con la parte superior del cuerpo – ¡peligro de accidente!<br />
L No apoye las piernas sobre otros objetos - ¡peligro de accidente!<br />
L Al ajustar las bisagras, las juntas u otros sistemas de sujeción, asegúrese de que no<br />
haya en ellos partes del cuerpo u otros objetos - ¡peligro de aplastamiento!<br />
L No coloque las manos entre el bastidor y el colchón al ajustar las piernas o los<br />
respaldos - ¡peligro de aplastamiento!<br />
L Use únicamente tomas de corriente en cumplimiento de VDE (220 V / 230 V, 50 Hz)<br />
para enchufar.<br />
L Para desconectar los enchufes, tire del propio enchufe, nunca del cable.<br />
L Bloquee el manejo manual con la caja de barrera tras cada uso.<br />
L La camilla sólo se debe usar en estancias no húmedas.<br />
L Use únicamente colchones que cumplan las normas del fabricante de la camilla.<br />
L Si el soporte sobre el cabecero está torcido, debe cambiarlo.<br />
L Los raíles laterales se deben colocar incluso si el lado en cuestión está situado<br />
contra la pared.<br />
L No realice reparaciones por su cuenta - ¡peligro de accidente!<br />
L No abra las carcasas del sistema de traslado - ¡peligro de accidente!<br />
L Sólo se podrá trasladar a un paciente en la camilla si está tumbado en la posición<br />
horizontal más baja.<br />
L Asegúrese de que todos los cables de corriente estén tendidos sin pliegues, roturas<br />
ni otros daños mecánicos.<br />
L Todos los cables se deben tender sin contacto con el suelo y sin pliegues.
Página 7<br />
<strong>Luna</strong><br />
2010-11<br />
L No se pueden usar ni instalar aparatos mecánicos o eléctricos adicionales.<br />
L Las labores de mantenimiento, inspección, reparación y desinfección se<br />
encomendarán únicamente a personas autorizadas con la debida formación.<br />
L Use únicamente repuestos originales del fabricante para su camilla.<br />
L No sobrepase la carga máxima de 140 kg que indica el fabricante.<br />
L Está prohibido el uso de fuego abierto, como velas o de objetos incandescentes,<br />
como cigarrillos, dentro de la camilla.<br />
L Sustituya los raíles laterales si están doblados o rotos ya que, de lo contrario, existe<br />
el peligro de que el paciente se caiga de la cama.<br />
L El uso de la camilla puede afectar a otros aparatos eléctricos (ruidos). Evite el uso<br />
simultáneo de esos aparatos.<br />
L Cumpla todas las instrucciones de uso y seguridad.<br />
L Coloque la cama eléctrica a cierta distancia de la toma de corriente.<br />
L La cama solo debe utilizarse con un elevador que pueda colocarse bajo el espacio<br />
limitado del que dispone.<br />
2 Uso<br />
Este capítulo describe el uso diario. Estas instrucciones están destinadas al usuario y a<br />
los distribuidores especializados.<br />
La camilla se entrega completamente montada por su distribuidor especializado. Las<br />
instrucciones dirigidas al distribuidor especializado con respecto al montaje de la camilla se<br />
encuentran en el capítulo 3.<br />
L ADVERTENCIA: Procure no pinzar los cables de otros equipos entre las piezas<br />
de la cama.<br />
L ADVERTENCIA: La cama solo debe utilizarse con un elevador que pueda<br />
colocarse bajo el espacio limitado del que dispone.<br />
2.1 Dispositivo de desactivación (SI ESTÁ INSTALADO EN LA<br />
CAMA)<br />
L ATENCIÓN: Peligro de lesiones - Procure no pinzar los cables eléctricos.<br />
Este párrafo solo se aplica si la cama dispone de un dispositivo de desactivación, y<br />
se utiliza en combinación con el control manual sin función de bloqueo.<br />
El dispositivo de desactivación se coloca entre el transformador y el control manual para<br />
evitar el funcionamiento eléctrico involuntario de la cama (se monta en el travesaño del<br />
soporte inferior). Dispone de un interruptor rotativo que activa o impide el funcionamiento<br />
manual.<br />
1<br />
3<br />
�<br />
�<br />
4<br />
2<br />
1 = Dispositivo de desactivación<br />
2 = Conexión del transformador<br />
3 = Conexión del control manual<br />
4 = Control de desactivación<br />
�= Bloqueado<br />
�= Desbloqueado<br />
ES
ES<br />
2.2 Control manual sin función de bloqueo<br />
L ATENCIÓN: Peligro de lesiones - El paciente solo debe realizar ajustes<br />
bajo supervisión.<br />
Página 8<br />
<strong>Luna</strong><br />
2010-11<br />
El control manual debe utilizarse junto con el dispositivo de desactivación.<br />
La altura de la superficie de la cama, el ángulo del respaldo y el ángulo de doblez de las<br />
rodillas pueden ajustarse con el control manual. Después de su uso, es necesario colgar el<br />
control manual del raíl lateral y fijarlo mediante el dispositivo de desactivación.<br />
Pueden utilizarse los siguientes ajustes:<br />
Función de subida y bajada de la sección del respaldo<br />
Subida y bajada de la plataforma de soporte del colchón<br />
Función de subida y bajada de las patas<br />
Sistema de bloqueo de posición de Trendelenburg<br />
Cuando conecte el control manual al dispositivo de desactivación, asegúrese de que el<br />
conector del dispositivo esté fijo. Siga estas instrucciones:<br />
1. Extraiga el anillo de seguridad de la conexión.<br />
2. Inserte el conector del control manual en el<br />
dispositivo de desactivación.<br />
3. Coloque el anillo de seguridad en la conexión del<br />
dispositivo de desactivación de forma que el cable<br />
no pueda moverse por sí solo.<br />
El cable de conexión solo puede extraerse del dispositivo de desactivación después de que<br />
se haya extraído el anillo de seguridad.
2.3 Control manual con función de bloqueo<br />
Página 9<br />
<strong>Luna</strong><br />
2010-11<br />
El dispositivo de desactivación puede ser sustituido por un control manual con función de<br />
bloqueo.<br />
Desbloqueado<br />
El control manual tiene una función de bloqueo.<br />
Con él, es posible desactivar o liberar varias funciones.<br />
Medidas de precaución:<br />
• Para cambiar de posición de bloqueo a liberación y<br />
viceversa, hay que girar un pequeño botón entre los<br />
dos interruptores de control manual con una llave.<br />
Es recomendable que la llave solo esté en posesión del<br />
personal médico.<br />
Bloqueado<br />
2.4 Funcionamiento de los frenos<br />
L ADVERTENCIA: El buen funcionamiento de las ruedas depende de su desgaste<br />
y de las sustancias presentes en ellas (agua, aceite...) – Compruebe las<br />
condiciones de las ruedas antes de utilizarlas.<br />
L ADVERTENCIA: Las ruedas pueden desgastarse – Compruebe su<br />
funcionamiento antes de utilizarlas.<br />
L ADVERTENCIA: ¡peligro de accidente!- Si sólo hay una rueda frenada, las<br />
ruedas sueltas girarán alrededor de la bloqueada.<br />
Todas las ruedecillas de dirección se pueden bloquear para evitar que rueden<br />
inesperadamente.<br />
Sujeción (A)<br />
Presione la superficie de la palanca de inclinación hacia abajo con el pie, hasta que<br />
frene la rueda.<br />
Liberación (B)<br />
Levante la superficie de la palanca de inclinación con el pie hasta que se suelte la<br />
rueda.<br />
A<br />
B<br />
ES
ES<br />
2.5 Facilidad de empuje<br />
L ADVERTENCIA: No extraiga la unidad de alivio.<br />
L ADVERTENCIA: Nunca adjunte ni cuelgue nada en la unidad de alivio.<br />
Página 10<br />
<strong>Luna</strong><br />
2010-11<br />
Bajo el mástil del bastidor de lamas en el cabecero hay un soporte para sujetar la unidad de<br />
alivio<br />
Inserte la unidad de alivio del cable de potencia (4) en la suspensión (3).<br />
Tienda el cable de corriente con la longitud deseada (1) de modo que el cable de<br />
corriente (2) se pueda tender bajo el somier de lamas sin combarlo. Evite que el<br />
cable (2) quede bajo el sistema de tracción en cualquier posición ajustada.<br />
Sujete el cable de alimentación apretando adecuadamente la unidad de alivio del<br />
cable de alimentación (4).<br />
Fije la posición de la unidad de descanso apretando adecuadamente los tornillos de<br />
sujeción (5).<br />
1<br />
4<br />
2.6 Cable de alimentación<br />
L ADVERTENCIA: No debe colgar nada aquí salvo el cable de alimentación.<br />
L ADVERTENCIA: El cable de alimentación puede sufrir daños - Debe colocarse<br />
con cuidado sin pliegues, roturas ni otros daños mecánicos, y sin que toque el<br />
suelo.<br />
Para asegurarse de que su cable de alimentación siga funcionando correctamente y se<br />
mantenga en un estado técnicamente seguro incluso tras un uso intensivo, y en caso de<br />
que no maneje la camilla por medios eléctricos, en el mástil del bastidor de lamas (bajo la<br />
unidad de alivio) hemos colocado un dispositivo donde puede dejar el cable enrollado bajo<br />
la camilla con seguridad<br />
3<br />
5<br />
2<br />
1 = Cables de Alimentación<br />
(conexión dealimentación)<br />
2 = Cables de alimentación<br />
(conexión de<br />
transformador)<br />
3 = Suspensión Facilidad de<br />
empuje<br />
4 = Facilidad de empuje<br />
Cables de alimentación<br />
5 = Tornillos de sujeción<br />
Facilidad de empuje
<strong>Luna</strong><br />
2010-11<br />
2.7 Bajada de emergencia del cabecero<br />
L ADVERTENCIA: Peligro de aplastamiento - Compruebe que no haya objetos o<br />
partes corporales entre el cabecero y el bastidor.<br />
El cabecero se puede bajar a mano (bajada de emergencia en caso de que falle el motor).<br />
Sólo se permite efectuar la bajada de emergencia si hay al menos dos personas<br />
disponibles.<br />
Procedimiento: 1. Gire el bucle de sujeción del motor superior.<br />
2. Una persona sujeta un lateral del cabecero mientras otra persona tira<br />
de los pernos de sujeción y saca el motor de su suspensión.<br />
3. Ahora se puede bajar el cabecero.<br />
2.8 Rieles laterales<br />
Los rieles laterales se pueden bajar de un lado.<br />
1<br />
Bajada<br />
L ADVERTENCIA: Peligro de aplastamiento - Asegure los raíles laterales<br />
para evitar caídas accidentales.<br />
L ADVERTENCIA: Peligro de aplastamiento - Asegúrese de que ningún<br />
objeto ni parte corporal sobresalga de la superficie de contacto con la<br />
cama.<br />
L ADVERTENCIA: Peligro de lesiones - No baje los raíles laterales de<br />
uno de los lados si el paciente no está bajo supervisión.<br />
Levante la banda lateral superior suavemente, pulse el botón de sujeción del lado del<br />
cabecero o del pie y baje lentamente el riel lateral. (Sujete siempre únicamente la<br />
banda de Madera superior). Para la cama <strong>Luna</strong> Basic, el botón está localizado en la<br />
parte exterior del cabecero/piecero.<br />
2<br />
1<br />
4<br />
3<br />
2<br />
Página 11<br />
1 = Bucle de sujeción<br />
2 = Alojamiento del motor<br />
3 = Marcos del cabecero<br />
4 = Motor del cabecero<br />
1 = Riel lateral superior<br />
2 = Botón de sujeción<br />
ES
ES<br />
Página 12<br />
<strong>Luna</strong><br />
2010-11<br />
Si necesita subir o cubrir los rieles laterales para incrementar la seguridad del paciente (p.<br />
ej. un paciente muy delgado), tenga en cuenta que no debe afectar a las funciones de la<br />
camilla ni al cumplimiento de la normativa CE garantizado cuando se suministró el producto.<br />
�<br />
��<br />
�<br />
2.9 Poste de elevación<br />
�<br />
El poste de elevación sobre el cabecero se puede montar a cualquier lado del cabecero<br />
(usar únicamente para LUNA).<br />
1 = Poste de elevación<br />
2 = Zócalo para el soporte<br />
suspendido<br />
3 = Pernos de bloqueo<br />
4 = Ranura de inserción<br />
5 = Soporte suspendido, bastidor<br />
superior<br />
6 = Orificios de alojamiento<br />
7 = Cinta<br />
8 = Triángulo<br />
��<br />
Introduzca el poste de elevación (1) todo lo que pueda en el zócalo correspondiente<br />
(2).<br />
Introduzca los pernos de enclavamiento (3) en la ranura (4).<br />
Tire del bucle de metal por el extremo del marco superior (5) hasta que los pernos<br />
encastren en uno de los tres orificios soporte (6).<br />
Pase también la cinta (7) por dentro del bucle de metal y a través del triángulo (8);<br />
ajuste la altura. Fije la cinta.<br />
2.10 Muesca de parada (si está disponible)<br />
L ATENCIÓN: Peligro de lesiones - No permita que haya personas u objetos cerca<br />
del lugar que se está ajustando.<br />
Para ajustar la superficie de contacto de la pierna, sujete la tira de palanca del extremo del<br />
pie en el centro del bastidor. Tire de la superficie de contacto de la pierna hasta llevarla a la<br />
altura deseada. La muesca de parada encaja a intervalos de aprox. 2 cm. Para bajar la<br />
superficie de contacto de la pierna, use la tira de palanca del extremo del pie y llévela a la<br />
posición superior. La muesca de parada dejará de encajar; ahora puede dejar que la<br />
superficie de contacto de la pierna baje por completo hasta que llegue al bastidor de la<br />
cama.<br />
Realice los ajustes únicamente mediante la tira de palanca del pie, para evitar<br />
inclinaciones o daños en los ajustes del bastidor.
2.11 Traslado a la cama y desde esta<br />
L ATENCIÓN: En caso de no poder realizar el traslado de forma segura, pida a<br />
alguien que le ayude.<br />
1. Acérquese lo máximo posible a la cama.<br />
2. Compruebe que los frenos de la cama estén accionados.<br />
3. Extraiga o pliegue los raíles laterales de la cama.<br />
4. Traslado a/desde la cama.<br />
Página 13<br />
<strong>Luna</strong><br />
2010-11<br />
2.12 Transporte<br />
L ADVERTENCIA: Riesgo de lesiones - compruebe que la camilla se encuentra<br />
correctamente fijada. Para evitar cualquier daño a los pasajeros en caso de<br />
colisión o frenado brusco.<br />
L ADVERTENCIA: Riesgo de lesiones - no utilice NUNCA el mismo cinturón de<br />
seguridad para fijar la camilla y el pasajero.<br />
L ADVERTENCIA: Riesgo de lesiones - Sólo se puede transportar a los pacientes<br />
si están tumbados en la posición horizontal más baja.<br />
Para evitar daños durante el transporte, el soporte suspendido sobre el cabecero se debe<br />
separar del cable de alimentación y se comprobará que no haya cables colgando cerca del<br />
suelo.<br />
2.13 Cableado<br />
1 = Bastidor de bandas del<br />
cabecero<br />
2 = Bastidor de bandas del pie<br />
3 = Zócalos para el soporte<br />
suspendido<br />
4 = Dispositivo de alivio<br />
5 = Cables de alimentación<br />
6 = Transformador / caja de<br />
control<br />
7 = Caja de barrera<br />
8 = Motor de la superficie del<br />
cabecero<br />
9 = Motor de ángulo de doblez<br />
de las rodillas<br />
10 = Motor del cabecero<br />
11 = Motor del pie<br />
12 = Manejo manual<br />
Todos los cables situados dentro<br />
del bastidor de la camilla se han<br />
colocado de modo que se evite<br />
el contacto con el suelo, así<br />
como aplastamientos o<br />
pinzamientos.<br />
ES
ES<br />
3 Instalación y ajuste<br />
Página 14<br />
<strong>Luna</strong><br />
2010-11<br />
Este capítulo contiene instrucciones destinadas a los distribuidores especializados.<br />
La camilla <strong>Vermeiren</strong> <strong>Luna</strong> está diseñada para ser regulada mediante un mínimo de piezas<br />
de repuesto. No es necesario disponer de un stock extra de piezas de repuesto.<br />
Para encontrar un centro de servicio o un distribuidor especializado cerca de usted,<br />
póngase en contacto con el centro <strong>Vermeiren</strong> más próximo. Puede encontrar una lista con<br />
los centros <strong>Vermeiren</strong> en la última página.<br />
L ADVERTENCIA: Riesgo por cotos peligrosos; utilice únicamente los cotos<br />
indicados en este manual.<br />
3.1 Herramientas<br />
Para montar la cama, necesita las siguientes herramientas.<br />
Llave Allen<br />
Destornillador<br />
3.2 Forma de suministro<br />
La camilla <strong>Vermeiren</strong> <strong>Luna</strong> se entrega con:<br />
2 frontales, incl. motor + revestimiento de madera Aprox. 17 kg / unidad<br />
Somier de lamas, pie, incl. motor Unos 20 kg<br />
Somier de lamas, cabecero, incl. transformador y motor Unos 20 kg<br />
Raíles laterales (2 x 2 bandas de Madera) Unos. 3 kg / unidad<br />
Soporte sobre el cabecero + mango triangular Unos 10 kg<br />
Manejo manual Unos 10 kg<br />
Caja de barrera<br />
Llave allen (para el montaje)<br />
Manual de instrucciones<br />
La camilla sólo se puede usar con las piezas aquí enumeradas. Si se omiten piezas o si se<br />
incluyen accesorios, componentes o sistemas eléctricos ajenos, esta cama no se<br />
considerará una camilla suministrada por el fabricante, y la estará usando por su cuenta y<br />
riesgo. En tal caso, no se aplicarán la conformidad con la CE ni la garantía del fabricante.<br />
El contenido de la entrega puede variar dependiendo del modelo: <strong>Luna</strong>, <strong>Luna</strong> Basic, <strong>Luna</strong><br />
Deluxe, <strong>Luna</strong> X-low. También dependiendo del modelo, algunos de los dibujos pueden<br />
parecer distintos en el manual.<br />
3.3 Montaje<br />
L ATENCIÓN: Peligro de pellizcarse los dedos - No meta los dedos entre los<br />
componentes de la cama.<br />
L ATENCIÓN: Peligro de que los dedos queden atrapados - Mantenga los dedos<br />
alejados de las partes móviles de la cama.<br />
El montaje que se muestra es aplicable para los tipos: <strong>Luna</strong>, <strong>Luna</strong> Basic, <strong>Luna</strong> Deluxe, <strong>Luna</strong><br />
X-low. Dependiendo del modelo de la cama <strong>Luna</strong>, algunos de los dibujos pueden parecer<br />
distintos.<br />
Debe cumplir las instrucciones de montaje de su camilla, que se exponen a continuación.
3.3.1 Piezas delanteras<br />
2<br />
3<br />
Página 15<br />
<strong>Luna</strong><br />
2010-11<br />
Sitúe los extremos del bastidor en bandas en los zócalos de las partes frontales (los<br />
tornillos de sujeción se deben aflojar previamente, ¡no los incline!).<br />
Nota: El cabecero del bastidor en bandas está montado con sujeciones para el soporte<br />
sobre el cabecero, así como una suspensión para el cable de alimentación.<br />
Apriete los tornillos de sujeción lo bastante como para que pasen por los orificios de<br />
sujeción de los zócalos de las piezas frontales, bloqueándolos en su sitio (apretar<br />
correctamente).<br />
Proteja el cable eléctrico del motor contra posibles daños por aplastamiento.<br />
3.3.2 Somier de lamas<br />
1<br />
1 1<br />
Levante ambos marcos del somier de lamas e insértelos entre sí.<br />
Reapriete adecuadamente los tornillos de la conexión del somier de lamas.<br />
Proteja el cable eléctrico del motor contra posibles daños por aplastamiento.<br />
2<br />
3<br />
1 = Extremos del<br />
bastidor de bandas<br />
2 = Zócalos de las<br />
partes frontales<br />
3 = Tornillos de sujeción<br />
1 = Somier de<br />
lamas<br />
2 = Tornillos de<br />
sujeción<br />
ES
ES<br />
3.3.3 Raíles laterales de madera<br />
Página 16<br />
<strong>Luna</strong><br />
2010-11<br />
Las instrucciones de montaje que se especifican a continuación se aplican a los siguientes<br />
modelos: <strong>Luna</strong>, <strong>Luna</strong> Basic, <strong>Luna</strong> Deluxe, <strong>Luna</strong> X-low.<br />
Las imágenes pueden ser diferentes en función del tipo de cama <strong>Luna</strong>.<br />
A. Introduzca los raíles de perno corto (1) a derecha e izquierda de la banda de madera<br />
superior. Introduzca los raíles de perno largo (2) a derecha e izquierda de la banda<br />
de madera inferior.<br />
Introduzca los raíles de perno largo (2) en la banda de madera del raíl de<br />
deslizamiento de la sección de la cabeza y los pies uno por uno, y asegúrelos<br />
insertando los raíles hasta que el extremo superior quede introducido y haga un clic.<br />
En uno de los lados, libere de nuevo este raíl hasta la punta pulsando el botón de<br />
bloqueo de la posición (5), y tire hacia arriba con suavidad de la banda de madera<br />
superior.<br />
Deje que los raíles de perno (2) desciendan una vez más por el raíl de deslizamiento<br />
hasta que la punta del raíl roce la guía. Ahora hay que insertar el raíl de perno corto<br />
(1) junto con la banda de madera entre los límites de los raíles de perno largo, y todo<br />
el sistema de raíles de perno (1) + (2) se colocará en el raíl de deslizamiento<br />
pertinente (4) tirando hacia arriba cuando quede adherida la banda de madera<br />
superior y bloqueando a continuación la estructura en su posición.<br />
B. Introduzca las contratuercas (6) y apriételas manualmente.<br />
1 = Raíles de perno corto<br />
2 = Raíles de perno largo<br />
3 = Bandas de madera (2 piezas en<br />
cada lado)<br />
4 = Raíl de deslizamiento<br />
5 = Botón de bloqueo de la posición<br />
6 = Contratuerca
<strong>Luna</strong><br />
2010-11<br />
3.3.4 Conexiones<br />
L ADVERTENCIA: Riesgo de lesiones - No toque el enchufe con las manos<br />
húmedas.<br />
L ADVERTENCIA: Riesgo de lesiones - No coloque objetos en la conexión ni el<br />
cable y protéjalos contra cargas mecánicas.<br />
1. Se requiere una toma de corriente A 220 V / 230 V, 50 Hz de acuerdo con las<br />
especificaciones de VDE.<br />
2. El diagrama de las conexiones del transformador se encuentra en la figura de abajo:<br />
Sujete el enchufe únicamente para sacarlo de la toma.<br />
El cable de corriente debe estar tendido sin bucles ni pliegues y no debe tocar bordes<br />
afilados.<br />
El cable de corriente que lleva al interruptor manual debe estar protegido contra<br />
aplastamientos.<br />
6<br />
1 2 3 4<br />
1 2 3 4 5<br />
Página 17<br />
1 = Conexión del motor del cabecero<br />
2 = Conexión del motor del ángulo de flexión<br />
de las rodillas<br />
3 = Conexión del motor del cabecero<br />
4 = Conexión del motor del pie<br />
5 = Conexión de la caja de barrera<br />
6 = Transformador / caja de control<br />
Los cables de los motores y conexiones de los<br />
transformadores llevan los mismos números.<br />
numerazione.<br />
ES
ES<br />
4 Mantenimiento<br />
La vida útil de la camilla depende del uso, del almacenamiento, del mantenimiento<br />
periódico, de las inspecciones y de la limpieza.<br />
4.1 Mantenimiento periódico<br />
A continuación se describen las operaciones de mantenimiento para asegurar el buen<br />
estado de su camilla <strong>Vermeiren</strong>:<br />
� Antes de cada uso<br />
� Compruebe los neumáticos y límpielos. Si fuera necesario, cambie el<br />
neumático.<br />
� Verifique los frenos y ajústelos si es necesario.<br />
� Verifique la camilla (limpieza, roturas, desperfectos en su estructura...) y<br />
límpiela. Si fuera necesario, cambie el revestimiento.<br />
Página 18<br />
<strong>Luna</strong><br />
2010-11<br />
� Verificare che i cablaggi non presentino danni visibili e che tutte le<br />
connessioni spina-presa siano collegate secondo le istruzioni per l'uso. In<br />
caso di danni scollegare immediatamente la spina del cavo di rete. Rivolgersi<br />
ad un centro manutenzione autorizzato.<br />
� Verificare che gli elementi di regolazione meccanici (sponde, sollevatore etc.)<br />
funzionino regolarmente. In caso di problemi di funzionamento rivolgersi<br />
immediatamente al rivenditore.<br />
� Compruebe que los controles manuales funcionen adecuadamente. Si una<br />
función no es correcta, desconecte el enchufe de alimentación.<br />
� Cada 8 semanas: inspeccione o ajuste la cama<br />
� Funzionamento delle guide di scorrimento delle sponde (testiera e pediera)<br />
� Alloggi delle doghe delle reti (se presenti)<br />
� Stato degli elementi in legno<br />
� Sollevatore (regolazione / deformazione)<br />
� Engrase las partes móviles<br />
Cada 6 meses o para cada nuevo usuario<br />
� revisión general,<br />
� desinfección,<br />
� Pulizia<br />
� Umidità del materasso<br />
Al final de este manual encontrará un plan de mantenimiento para su información.<br />
La reparación y montaje de las piezas de repuesto de su camilla deberá ser efectuado por<br />
su distribuidor especializado.<br />
Sólo instale piezas de repuesto <strong>Vermeiren</strong> autorizadas.
4.2 Envío almacenamiento<br />
El envío y almacenamiento de la camilla deberá realizarse conforme a las instrucciones<br />
siguientes:<br />
Almacenamiento en un lugar seco (entre 5°C y 41°C).<br />
La humedad relativa del aire debe situarse entre el 30% y el 70%.<br />
Página 19<br />
<strong>Luna</strong><br />
2010-11<br />
Recubra y embale adecuadamente la camilla para protegerla del óxido y de cuerpos<br />
extraños. (p. ej. agua salada, aire del mar, arena, polvo).<br />
Almacene todas las partes desmontadas juntas en el mismo sitio (o márquelas si es<br />
necesario) para evitar mezclarlas con otros productos al volver a montar el producto.<br />
Deberá almacenar los componentes de forma que no queden presionados (no<br />
coloque piezas pesadas sobre la silla, no la empotre entre otros objetos...).<br />
Enrolle cuidadosamente el cable de alimentación sin dobleces y sitúelo en el<br />
receptáculo previsto para ello.<br />
Revise los cables internos para detectar aplastamiento y prevenir dobleces.<br />
4.3 Cuidados<br />
4.3.1 Bastidor metálico, piezas de madera<br />
La limpieza del bastidor metálico y las piezas de madera debe realizarse de la siguiente<br />
manera:<br />
� Limpie el bastidor metálico y las piezas de madera con un paño humedecido<br />
en agua caliente. Tenga cuidado de no empapar el bastidor metálico y las<br />
piezas de madera.<br />
� Utilice un detergente comercial suave para retirar la suciedad rebelde.<br />
� Las manchas se pueden eliminar con una esponja o un cepillo suave.<br />
� No emplee líquidos agresivos de limpieza, como disolventes. Tampoco debe<br />
usar cepillos duros.<br />
� Nunca realice limpiezas a vapor y/o a presión.<br />
4.3.2 Piezas de plástico<br />
Limpie las piezas de plástico de su camilla con limpiadores de plástico comerciales. Sólo<br />
utilice cepillos o esponjas suaves.<br />
Los motores y la unidad manual solo se deben limpiar con un paño ligeramente<br />
humedecido.<br />
4.3.3 Recubrimiento<br />
La alta calidad de los acabados de las superficies garantiza una protección óptima contra la<br />
corrosión. Si el revestimiento exterior presenta arañazos u otros daños, pida a su<br />
distribuidor especializado que repare la superficie afectada.<br />
Durante la limpieza, sólo utilice agua tibia y productos de limpieza normales, cepillos y<br />
paños suaves. Asegúrese de que no entra humedad en los tubos.<br />
En principio, las piezas cincadas solo hay que frotarlas con un paño seco. La suciedad<br />
rebelde se retira mejor con un producto comercial adecuado para pulir cinc.<br />
ES
ES<br />
4.4 Inspección<br />
Página 20<br />
<strong>Luna</strong><br />
2010-11<br />
En principio recomendamos una inspección anual, y una como mínimo cuando deje de<br />
utilizarse. Todas las verificaciones que se indican a continuación deben ser realizadas y<br />
documentadas por personal autorizado:<br />
Compruebe las partes del bastidor para detectar deformaciones plásticas, grietas y<br />
deterioros (superficie de contacto, soporte inferior, respaldo, pies, soporte suspendido de<br />
enderezamiento, receptáculo para el soporte suspendido y ruedas).<br />
Verifique visualmente el estado de la pintura (peligro de corrosión).<br />
Revise el funcionamiento de las ruedas con freno (libertad de movimiento, seguridad,<br />
bloqueo, etcétera).<br />
Verifique la solidez y el engaste de todos los tornillos.<br />
Verifique la cantidad de grasa en las juntas metálicas de las partes móviles.<br />
Realice una inspección visual de todas las carcasas para detectar daños; además, los<br />
tornillos deben estar firmemente sujetos, y los sellos y las juntas no pueden presentar<br />
daños visibles.<br />
Verifique visualmente la ausencia de roturas y puntos frágiles en todas las piezas de<br />
plástico.<br />
Inspeccione la conexión de alimentación (EPR o similar).<br />
Compruebe el estado del cable de alimentación (especialmente: aplastamiento, abrasión,<br />
cortes, aislamientos visibles de los conductores internos, hilos metálicos visibles,<br />
dobleces, perforaciones, cambios de color de la capa exterior y secciones frágiles).<br />
Revise el cableado interno de la alimentación (especialmente: aplastamiento, abrasión,<br />
cortes, aislamientos visibles de los conductores internos, hilos metálicos visibles,<br />
dobleces, irregularidades, cambios de color de la capa exterior y secciones frágiles).<br />
Compruebe la protección anti-humedad del sistema eléctrico, al menos IPX4 (ver etiqueta<br />
de tipo).<br />
Compruebe el dispositivo de suspensión del cable de alimentación durante el transporte.<br />
El cable de alimentación y otros cables eléctricos deben estar tendidos de forma segura,<br />
para descartar cizallamientos, abrasiones y otras tensiones mecánicas.<br />
Mida la resistencia del trenzado protector (ohmios) de acuerdo con la norma VDE 0751-1.<br />
Mida la corriente de desviación residual (A) de acuerdo con la norma VDE 0751-1.<br />
Mida la resistencia del aislamiento (MOhm) de acuerdo con la norma VDE 0751-1.<br />
Revise el funcionamiento de los raíles laterales (bloqueo y distancias, de acuerdo con la<br />
norma EN 1970: 2000; verifíquelo también al cargar, y compruebe si se producen<br />
deformaciones y desgastes por la carga).<br />
Compruebe el funcionamiento de los accionamientos (en todo el rango de ajuste de los<br />
motores) � ruidos, velocidad, libertad de movimiento, etc., interruptor de final de carrera<br />
(p. ej. limitación de corriente, interruptor principal), si es necesario: mida el rendimiento,<br />
primero sin carga y después con la carga nominal ("SWL") para estudiar el desgaste y la<br />
abrasión de los motores comparando los valores de la corriente eléctrica con los valores<br />
en el momento de la entrega del producto.<br />
Revise el estado del colchón (no cuando se retoma el uso de la cama).<br />
¿Se han suministrado todos los componentes? ¿Dispone de manual de instrucciones?<br />
Las mediciones eléctricas sólo se pueden encomendar a personas que hayan recibido,<br />
como mínimo, formación sobre la camilla e instrucción por parte de un electricista sobre los<br />
instrumentos y procedimientos a aplicar. Únicamente un electricista puede aprobar el uso de<br />
la camilla tras realizar las mediciones y el mantenimiento requeridos.<br />
Únicamente firme en el plan de mantenimiento conforme se ha realizado el mantenimiento<br />
si se ha verificado un mínimo de los aspectos anteriormente mencionados.
Página 21<br />
<strong>Luna</strong><br />
2010-11<br />
Requisito: Nota:<br />
1.) Revisar:<br />
N.D. Sí No Observación<br />
1.1) Cable de alimentación<br />
Cable EPR o calidad equivalente<br />
1.2) Estado del cable de alimentación<br />
Buscar especialmente:<br />
aplastamiento, abrasión, cortes, aislamiento visible<br />
de los conductores internos, hilos metálicos visibles, dobleces,<br />
perforaciones, cambios de color de la capa exterior,<br />
puntos frágiles<br />
1.3) Estado de los cables internos<br />
Buscar especialmente:<br />
aplastamiento, abrasión, cortes, aislamientos visibles de los<br />
conductores internos, hilos metálicos visibles, dobleces,<br />
irregularidades, cambios de color de la capa exterior,<br />
secciones frágiles)<br />
1.4) Suficiente capacidad de tracción y anti-dobleces del cable<br />
de alimentación<br />
1.5) Suficiente capacidad de tracción y anti-dobleces de los<br />
cables internos<br />
1.6) El cable de alimentación y otros cables eléctricos deben<br />
estar tendidos de forma segura, para descartar<br />
cizallamientos, abrasión y otras tensiones mecánicas.<br />
1.7) Protección contra humedad IP X4<br />
1.8) Dispositivo de suspensión del cable de alimentación<br />
durante el transporte.<br />
1.9) Compruebe las piezas del bastidor para detectar<br />
deformaciones plásticas y/o desgaste y abrasión<br />
- parte inferior de la cama<br />
- elevador de la cama<br />
- respaldo, zona de asiento, zona de los pies<br />
- soporte suspendido<br />
- zócalo del soporte suspendido<br />
- ruedas<br />
1.10) Carcasas<br />
Inspección visual de todas las carcasas para detectar daños,<br />
los tornillos deben estar firmemente sujetos, los sellos y<br />
juntas no pueden presentar daños visibles.<br />
N.D. Sí No Observación<br />
N.D. Sí No Observación<br />
N.D. Sí No Observación<br />
N.D. Sí No Observación<br />
N.D. Sí No Observación<br />
N.D. Sí No Observación<br />
N.D. Sí No Observación<br />
N.D. Sí No Observación<br />
N.D. Sí No Observación<br />
N.D. Sí No Observación<br />
ES
ES<br />
Tabla (A) en la figura (B)<br />
Símbolo Tamaño Requisito en mm<br />
A La distancia mínima entre los<br />
elementos dentro de la<br />
circunferencia de los rieles laterales<br />
en una posición elevada/insertada,<br />
o el área incluida por los rieles<br />
laterales y las partes fijas de la<br />
cama.<br />
B Grosor del colchón de acuerdo con<br />
el uso normalizado<br />
C Altura de los lados superiores de los<br />
rieles laterales sobre el colchón (ver<br />
"B") sin compresión.<br />
D Distancia entre el cabecero o el pie<br />
y los rieles laterales.<br />
E Distancia entre los rieles laterales<br />
tomada independientemente con la<br />
superficie de contacto en posición<br />
plana.<br />
F Distancia mínima de todas las<br />
aberturas accesibles entre el riel<br />
lateral y la superficie de contacto<br />
G Longitud total de los rieles laterales<br />
o suma total de las longitudes de los<br />
rieles laterales tomados<br />
independientemente en un lado de<br />
la cama.<br />
H Distancia entre el cabecero y el pie<br />
sin extensión de dichas partes.<br />
A 120<br />
Según indicación del<br />
fabricante<br />
C 220<br />
D 60<br />
o<br />
D 235<br />
E 60<br />
o<br />
E 235<br />
Si D 235 entonces F 60<br />
Si D 60 entonces<br />
F 120<br />
G 1/2 de la longitud de la<br />
superficie de apoyo<br />
Sin requisitos<br />
Con camas cuyos rieles laterales superan las medidas indicadas en<br />
menos del 10%, dichos rieles no se tienen que usar con pacientes de<br />
poca envergadura o bajo peso, o bien se deben aplicar medidas<br />
adicionales para evitar que dichos pacientes queden atrapados o<br />
resbalen entre los rieles.<br />
Los rieles laterales que superen los valores indicados en un 10% o<br />
más, no se podrán usar hasta que las carencias se hayan resuelto y<br />
deberán ser cambiados o renovados.<br />
Además de los puntos siguientes, se debe comprobar la total<br />
funcionalidad (p. ej. bloqueos, elementos de sujeción) de los rieles<br />
laterales. Todos los defectos deben ser reparados. Observe los<br />
tamaños de los componentes de los rieles laterales de acuerdo con<br />
el siguiente esquema.<br />
Página 22<br />
Tamaño real: mm<br />
Tamaño real: mm<br />
Tamaño real: mm<br />
Tamaño real: mm<br />
Tamaño real: mm<br />
Tamaño real: mm<br />
Tamaño real: mm<br />
Tamaño real: mm<br />
<strong>Luna</strong><br />
2010-11<br />
N.D. Sí No Observación<br />
N.D. Sí No Observación<br />
N.D. Sí No Observación<br />
N.D. Sí No Observación
Figura (B) en la tabla (A)<br />
D D<br />
G<br />
C<br />
B<br />
2.) Comprobación de los tamaños<br />
2.1) Resistencia del trenzado protector<br />
Tamaño real: ohmios<br />
2.2) Corriente de desviación residual<br />
Tamaño real: A<br />
2.3) Resistencia del aislamiento<br />
Tamaño real: MOhmios<br />
3.) Revisión de funcionamiento<br />
A<br />
H<br />
A F<br />
3.1) Revisión de funcionamiento de los rieles laterales:<br />
- bloqueo, p. ej. holgura en el dispositivo de bloqueo<br />
- distancias, inclusive bajo carga<br />
- deformación<br />
- desgaste y abrasión debidos a la carga<br />
3.2) Revisión de funcionamiento de los frenos:<br />
- seguridad<br />
- frenada<br />
- punto neutro<br />
3.3) Revisión de funcionamiento de los accionamientos:<br />
- en todo el rango de ajuste de los motores<br />
(ruidos, velocidad, punto neutro, etc.)<br />
- interruptores de fin de carrera (p. ej. límite de corriente,<br />
interruptor principal)<br />
- si es necesario, mida primero el rendimiento del motor sin<br />
carga y después con la carga nominal (SWL) para<br />
comprobar el desgaste y la abrasión de los motores<br />
Compare con los valores dados en el momento de la<br />
entrega. El fabricante le proporcionará los límites.<br />
Otros:<br />
Página 23<br />
<strong>Luna</strong><br />
2010-11<br />
Nota: Si los brazos de los rieles laterales<br />
están fuera (representados en gris oscuro), es<br />
obligatorio mantener la distancia A de los<br />
rieles laterales para la superficie de contacto.<br />
N.D. Sí No Observación<br />
N.D. Sí No Observación<br />
N.D. Sí No Observación<br />
N.D. Sí No Observación<br />
N.D. Sí No Observación<br />
N.D. Sí No Observación<br />
N.D. Sí No Observación<br />
N.D. Sí No Observación<br />
ES
ES<br />
Página 24<br />
<strong>Luna</strong><br />
2010-11<br />
4.5 Desinfección<br />
L ADVERTENCIA: Productos peligrosos: el uso de desinfectantes está restringido<br />
al personal autorizado.<br />
L ADVERTENCIA: Los productos peligrosos irritan la piel. Use ropa protectora<br />
adecuada para evitar que los desinfectantes irriten la piel. Del mismo modo,<br />
deberá tener en cuenta también las informaciones indicadas en los productos<br />
sobre las respectivas disoluciones.<br />
Todas las partes de la camilla se pueden limpiar frotando con un desinfectante.<br />
Todas las medidas que se tomen para la desinfección del equipamiento de rehabilitación, de<br />
sus componentes u otros accesorios deberán registrarse en un informe de desinfección que<br />
contenga un mínimo de la siguiente información (además de la documentación del<br />
producto):<br />
Fecha de<br />
desinfección<br />
Motivo Especificaciones Sustancia y<br />
concentración<br />
Tabla 2: Ejemplo de registro de desinfección<br />
Abreviaturas usadas en la columna 2 (motivo):<br />
V = Sospecha de infección IF = Caso de infección W = Repetición I = Inspección<br />
En el apartado 9 encontrará una hoja de registro en blanco.<br />
Firma
<strong>Luna</strong><br />
2010-11<br />
Los desinfectantes recomendados para desinfección por frotamiento (según la lista facilitada<br />
por el Robert Koch Institute, RKI) se indican en la siguiente tabla. El estado actual de los<br />
desinfectantes incluidos en la lista del RKI se puede consultar en el Instituto Robert Koch<br />
(página web: www.rki.de).<br />
Sustancia activa Nombre de<br />
producto<br />
Fenol o derivado<br />
fenólico<br />
Cloro, sustancias<br />
orgánicas o<br />
inorgánicas con<br />
cloro activo<br />
Para<br />
combinaciones<br />
Formaldehído y/o<br />
otros aldehídos o<br />
derivados<br />
Desinfección<br />
por lavado<br />
Solución diluida<br />
Tiempo para hacer efecto<br />
Desinfección<br />
de superficie<br />
(desinfección<br />
por<br />
frotamiento)<br />
Solución diluida<br />
Tiempo para hacer efecto<br />
Desinfección de excrementos<br />
1 parte esputo o heces + 2 partes<br />
solución diluida o 1 parte orina + 1<br />
parte solución diluida<br />
Página 25<br />
Esputo Heces Orina<br />
Solución diluida<br />
% h % h % h % h % h<br />
Tiempo para hacer efecto<br />
Solución diluida<br />
Tiempo para hacer efecto<br />
Solución diluida<br />
Tiempo para hacer efecto<br />
Área de<br />
efectividad<br />
Fabricante o<br />
distribuidor<br />
Amocid 1 12 5 6 5 4 5 6 5 2 A Lysoform<br />
Gevisol 0,5 12 5 4 5 4 5 6 5 2 A Schülke & Mayer<br />
Helipur 6 4 6 4 6 6 6 2 A B. Braun<br />
solución<br />
jabonosa mcresylic<br />
(DAB 6)<br />
1 12 5 4 A<br />
Fenol 1 12 3 2 A<br />
Chloramin-T<br />
DAB 9<br />
1,5 12 2,5 2 5 4 A 1 B<br />
Clorina 1,5 12 2,5 2 5 4 A 1 B Lysoform<br />
Trichlorol 2 12 3 2 6 4 A 1 B Lysoform<br />
Apesin AP100 2 4 4 AB Tana<br />
PROFESSIONAL<br />
Dismozon pur 2 4 1 AB Bode Chemie<br />
Perform 2 3 4 AB Schülke & Mayer<br />
Wofesteril 2 2 4 AB Kesla Pharma<br />
Aldasan 2000 4 4 AB Lysoform<br />
Antifect FD 10 3 4 AB Schülke & Mayer<br />
Antiseptica<br />
surface<br />
disinfection 7<br />
3 6 AB Antiseptica<br />
Apesin AP30 5 4 A Tana<br />
PROFESSIONAL<br />
Bacillocid<br />
special<br />
6 4 AB Bode Chemie<br />
Buraton 10F 3 4 AB Schülke & Mayer<br />
Desomed<br />
A2000<br />
Limpiador<br />
desinfectante<br />
hospitalario<br />
Desomed<br />
Perfekt<br />
Formaldehydesolution<br />
(DAB<br />
10), (formaline)<br />
3 6 AB Desomed<br />
8 6 AB Dreiturm<br />
7 4 AB* Desomed<br />
1,5 12 3 4 AB<br />
Incidin Perfekt 1 12 3 4 AB Ecolab<br />
Incidin Plus 8 6 A Ecolab<br />
Formaldehído y/o Kohrsolin 2 12 3 4 AB Bode Chemie<br />
ES
ES<br />
Sustancia activa Nombre de<br />
producto<br />
Desinfección<br />
por lavado<br />
Solución diluida<br />
Tiempo para hacer efecto<br />
Desinfección<br />
de superficie<br />
(desinfección<br />
por<br />
frotamiento)<br />
Solución diluida<br />
Tiempo para hacer efecto<br />
Desinfección de excrementos<br />
1 parte esputo o heces + 2 partes<br />
solución diluida o 1 parte orina + 1<br />
parte solución diluida<br />
Página 26<br />
Esputo Heces Orina<br />
Solución diluida<br />
Tiempo para hacer efecto<br />
Solución diluida<br />
Tiempo para hacer efecto<br />
Solución diluida<br />
Tiempo para hacer efecto<br />
Área de<br />
efectividad<br />
Fabricante o<br />
distribuidor<br />
% h % h % h % h % h<br />
otros aldehídos o<br />
derivados Lysoform 4 12 5 6 AB Lysoform<br />
Tensioactivos<br />
anfóteros<br />
(amfotensiden)<br />
Lysoformin 3 12 5 6 AB Lysoform<br />
Lysoformin 2000 4 6 AB Lysoform<br />
Melsept 2 12 4 6 AB B. Braun<br />
Melsitt 4 12 10 4 AB B. Braun<br />
Minutil 2 12 6 4 AB Ecolab<br />
Multidor 3 6 AB Ecolab<br />
Nûscosept 5 4 AB Dr. Nüsken<br />
Chemie<br />
<strong>Luna</strong><br />
2010-11<br />
Optisept 7 4 AB* Dr. Schumacher<br />
Pursept-FD 7 4 AB* Merz<br />
Ultrasol F 3 12 5 4 AB Fresenius Kabi<br />
Tensodur 103 2 12 A MFH Marienfelde<br />
Lejía Lechada de cal 3 20 6 A 3 B<br />
1 No es efectivo frente a micobacterias durante la desinfección, en especial si hay sangre.<br />
2 No es adecuado para la desinfección de superficies contaminadas con sangre o porosas (p. ej. madera virgen).<br />
3 No tiene ningún efecto frente a la tuberculosis. Preparación de lechada de cal: 1 parte de lechada de cal (hidróxido de calcio) + 3 partes de<br />
agua.<br />
* Comprobada su efectividad contra virus conforme a los métodos de verificación del RKI (Informe de Salud Federal 38 (1995) 242).<br />
A: Adecuado para eliminar gérmenes bacterianos latentes, incluidas las micobacterias, así como hongos, incluidas sus esporas.<br />
B: Adecuado para eliminar virus.<br />
Tabla 3: Desinfectantes<br />
Consulte a su distribuidor especializado si tiene cualquier duda sobre temas relacionados<br />
con la desinfección. Estará encantado de atenderle.
5 Garantía<br />
Extracto de las "Condiciones Comerciales Generales":<br />
(...)<br />
5. El período para reclamaciones en garantía es de 24 meses.<br />
Página 27<br />
<strong>Luna</strong><br />
2010-11<br />
La garantía no incluye los daños provocados por cambios estructurales en nuestros<br />
productos, un mantenimiento insuficiente, una manipulación o almacenamiento defectuosos<br />
o inadecuados, o el uso de piezas no originales. Asimismo, la garantía no incluye las partes<br />
o piezas funcionales sometidas a desgaste y abrasión naturales.<br />
(...)<br />
6 Eliminación<br />
Para desechar la camilla, póngase en contacto con la planta de deshechos de su región o<br />
devuelva el producto a su distribuidor especializado, quien, una vez realizado el proceso<br />
higiénico, devolverá la silla al fabricante, que la desechará o reciclará de forma correcta<br />
separando sus componentes.<br />
Los embalajes deberán a llevares a las plantas de desecho o reciclaje o a su distribuidor<br />
especializado.<br />
7 Declaración de conformidad<br />
ES
ES<br />
8 Plan de mantenimiento<br />
Página 28<br />
<strong>Luna</strong><br />
2010-11<br />
Fecha Mantenimiento Comentarios Firma manual<br />
1/1/2010 Engrase y mantenimiento<br />
general<br />
9 Registro de desinfección<br />
Fecha de<br />
desinfección<br />
ninguno<br />
Motivo Especificaciones Sustancia y<br />
concentración<br />
Abreviaturas usadas en la columna 2 (motivo):<br />
V = Sospecha de infección IF = Caso de infección W = Repetición I = Inspección<br />
Firma
SERVICE<br />
The <strong>bed</strong> was serviced:<br />
Le lit contrôlé:<br />
Het <strong>bed</strong> is gecontroleerd:<br />
Dealer´s stamp • Cachet du revendeur • Stempel van de handelaar<br />
Händlerstempel • Timbro del rivenditore • Sello del distribuidor:<br />
Date • Datum • Data • Fecha:<br />
Dealer´s stamp • Cachet du revendeur • Stempel van de handelaar<br />
Händlerstempel • Timbro del rivenditore • Sello del distribuidor:<br />
Date • Datum • Data • Fecha:<br />
Dealer´s stamp • Cachet du revendeur • Stempel van de handelaar<br />
Händlerstempel • Timbro del rivenditore • Sello del distribuidor:<br />
Date • Datum • Data • Fecha:<br />
Dealer´s stamp • Cachet du revendeur • Stempel van de handelaar<br />
Händlerstempel • Timbro del rivenditore • Sello del distribuidor:<br />
Date • Datum • Data • Fecha:<br />
Dealer´s stamp • Cachet du revendeur • Stempel van de handelaar<br />
Händlerstempel • Timbro del rivenditore • Sello del distribuidor:<br />
Page 29<br />
Das Bett wurde überprüft:<br />
Il letto è stat ispezionata:<br />
La cama ha sido revisado:<br />
<strong>Luna</strong><br />
2010-11<br />
Dealer´s stamp • Cachet du revendeur • Stempel van de handelaar<br />
Händlerstempel • Timbro del rivenditore • Sello del distribuidor:<br />
Date • Datum • Data • Fecha:<br />
Dealer´s stamp • Cachet du revendeur • Stempel van de handelaar<br />
Händlerstempel • Timbro del rivenditore • Sello del distribuidor:<br />
Date • Datum • Data • Fecha:<br />
Dealer´s stamp • Cachet du revendeur • Stempel van de handelaar<br />
Händlerstempel • Timbro del rivenditore • Sello del distribuidor:<br />
Date • Datum • Data • Fecha:<br />
Dealer´s stamp • Cachet du revendeur • Stempel van de handelaar<br />
Händlerstempel • Timbro del rivenditore • Sello del distribuidor:<br />
Date • Datum • Data • Fecha:<br />
Dealer´s stamp • Cachet du revendeur • Stempel van de handelaar<br />
Händlerstempel • Timbro del rivenditore • Sello del distribuidor:<br />
Date • Datum • Data • Fecha:<br />
Date • Datum • Data • Fecha:<br />
For service checklists an additional technical information, please see our specialist dealers nearest to you.<br />
More information on our website at: www.vermeiren.com.<br />
Les listes des contrôles à effectuer lors des entretiens de même que toute autre information technique sont<br />
disponibles auprès de nos filiales. Pour de plus amples informations, consultez le site: www.vermeiren.fr.<br />
Servicelijsten en andere technische informatie kunt u aanvragen bij onze vestigingen. Meer informatie vindt<br />
u ook op: www.vermeiren.be.<br />
Servicechecklisten und weitere technische Informationen erhalten Sie über unsere Niederlassungen.<br />
Informationen unter: www.vermeiren.de, www.vermeiren.at, www.vermeiren.ch.<br />
Gli elenchi di controllo di manutenzione e ulteriori informazioni tecniche sono disponibili presso le nostre<br />
filiali. Per informazioni consultare il sito: www.vermeiren.com.
Notes<br />
....................................................................................................................................................<br />
....................................................................................................................................................<br />
....................................................................................................................................................<br />
....................................................................................................................................................<br />
....................................................................................................................................................<br />
....................................................................................................................................................<br />
....................................................................................................................................................<br />
....................................................................................................................................................<br />
....................................................................................................................................................<br />
....................................................................................................................................................<br />
....................................................................................................................................................<br />
....................................................................................................................................................<br />
....................................................................................................................................................<br />
....................................................................................................................................................<br />
....................................................................................................................................................<br />
....................................................................................................................................................<br />
....................................................................................................................................................<br />
....................................................................................................................................................<br />
....................................................................................................................................................<br />
....................................................................................................................................................<br />
....................................................................................................................................................<br />
....................................................................................................................................................<br />
....................................................................................................................................................<br />
....................................................................................................................................................
VERMEIREN<br />
ITALIANO<br />
GARANZIA CONTRATTUALE<br />
La carrozzine manuali sono garantite 5 anni, la carrozzine<br />
ultra leggera 4 anni. Le carrozzine elettroniche, tricicli, letti e<br />
altri prodotti: 2 anno contro tutti i difetti di costruzione o di<br />
materiale (batterie 6 mesi). Multiposizioni 3 anni. Questa<br />
garanzia e’ limitata alle sostituzione di parti riconosciute difettose.<br />
WAARBORG<br />
GARANTIE<br />
WARRANTY<br />
GARANTIE<br />
GARANZIA<br />
CONDIZIONI<br />
Per far valere la garanzia, e’ necessario indirizzarla al vostro<br />
distributore di fiducia che presentera’ al produttore il<br />
tagliando.<br />
RISERVE<br />
Questa garanzia non potra’ essere applicata nei seguenti<br />
casi:<br />
- danno dovuto al cattivo ed improprio utilizzo della<br />
carrozzina,<br />
- danno subito durante il trasporto,<br />
- incidente o caduta,<br />
- smontaggio, modifica, o riparazione effettuate in proprio,<br />
- usura abituale della carrozzina,<br />
- invio del tagliando di garanzia con la data di acquisto.<br />
N.V. VERMEIREN N.V. Tel.: 00 32 (0)3 620 20 20<br />
VERMEIRENPLEIN 1-15 Fax: 00 32 (0)3 666 48 94<br />
B-2920 Kalmthout www.vermeiren.com<br />
B A<br />
"<br />
Naam/Nom/Name<br />
Name/Nome<br />
Adres/Adresse/Address<br />
Adresse/Indrizzo<br />
Naam/Nom/Name<br />
Name/Nome<br />
Adres/Adresse/Address<br />
Adresse/Indrizzo<br />
Woonplaats/Domicile/Home<br />
Wohnort/Citta<br />
Woonplaats/Domicile/Home<br />
Wohnort/Citta<br />
E-mail<br />
E-mail<br />
Artikel/Article/Article<br />
Artikel/Articolo<br />
Artikel/Article/Article<br />
Artikel/Articolo<br />
Reeks nr./N° de série/Serie nr.<br />
Serien-Nr./No. di serie<br />
Reeks nr./N° de série/Serie nr.<br />
Serien-Nr./No. di serie<br />
Aankoopdatum/Date d’achat/Date of purchase<br />
Kaufdatum/Data di acquisto<br />
Aankoopdatum/Date d’achat/Date of purchase<br />
Kaufdatum/Data di acquisto<br />
Stempel verkoper/Timbre du vendeur<br />
Dealer stamp/Händlerstempel<br />
Timbro del rivenditore<br />
Stempel verkoper/Timbre du vendeur<br />
Dealer stamp/Händlerstempel<br />
Timbro del rivenditore
"<br />
N.V. VERMEIREN N.V.<br />
<strong>Vermeiren</strong>plein 1/15<br />
B-2920 Kalmthout<br />
BELGIUM<br />
B<br />
- in geval van herstelling, kaart “B” bijvoegen.<br />
- en cas de réparation, veuillez ajouter la carete “B”.<br />
- in case of repair, please add part “B”.<br />
- im Falle einer Reparatur, Karte “B” beifügen<br />
- in case di riparazione, rispediteci la carta “B”.<br />
prodotto al nostro web site, http://www.vermeiren.be/registration<br />
A<br />
- terugsturen binnen de 8 dagen na aankoop of registreer uw product via<br />
onze website, http://www.vermeiren.be/registration<br />
- à renvoyer dans les 8 jours après achat ou régistrer votre produit sur<br />
notre site, http://www.vermeiren.be/registration<br />
- please return within 8 days of date of purchase or register your product at<br />
our website, http://www.vermeiren.be/registration<br />
- zurückschicken innerhalb von 8 Tagen nach kauf oder registrieren Sie<br />
Ihr Produkt auf unserer website, http://www.vermeiren.be/registration<br />
- da restituire entro 8 giorni dalla data di acquisto o registri il vostro<br />
"<br />
- schade te wijten aan het verkeerd gebruik<br />
van de rolstoel,<br />
- beschadiging tijdens het transport,<br />
- een val of een ongeval<br />
- een demontage, wijziging of herstelling uitgevoerd<br />
buiten onze firma,<br />
- normale slijtage van de rolstoel,<br />
- niet inzenden van de garantiestrook.<br />
- dommage dû à la mauvaise utilisation du fauteuil,<br />
- endommagement pendant le transport,<br />
- accident ou chute,<br />
- démontage, modification ou réparation fait en<br />
dehors de notre société,<br />
- usure normale du fauteuil,<br />
- non retour du coupon de garantie.<br />
UITZONDERINGEN<br />
Deze garantie is niet van toepassing in geval van:<br />
RESERVES<br />
Cette garantie ne pourra être appliquée en cas de:<br />
- damage due to incorrect usage of the wheelchair,<br />
- damage during transport,<br />
- involvement in an accident,<br />
- a dismount, modification or repair carried outside<br />
of our company and/or official <strong>Vermeiren</strong><br />
dealership,<br />
- normal wear of the wheelchair,<br />
- non-return of the warranty card<br />
Sollte einmal der Fall eingetreten sein, dass Sie aus<br />
berechtigtem Grunde mit Ihrem Rollstuhl unzufrieden sind,<br />
so wenden Sie sich bitte unverzüglich an Ihren Fachhändler.<br />
Er wird sich in enger Zusammenarbeit mit uns darum bemühen,<br />
eine für Sie zufriedenstellende Lösung zu finden.<br />
TOEPASSINGSVOORWAARDEN<br />
Om aanspraak te kunnen maken op de waarbord, bezorgt u<br />
het garantiecertificaat dat u heeft bewaard, aan uw <strong>Vermeiren</strong><br />
dealer. De waarborg is enkel geldig in de zetel van de<br />
onderneming.<br />
CONDITIONS D’APPLICATION<br />
Pour prétendre à cette garantie, il faut présenter le certificat<br />
de garantie que vous avez conservé à votre distributeur <strong>Vermeiren</strong>.<br />
La garantie est uniquement valable au siège de la<br />
société.<br />
EXCEPTIONS<br />
This warranty is not valid in case of:<br />
APPLICATION CONDITIONS<br />
In order to claim tis warranty, part “B” of this card has to be<br />
given to your official Vermerien dealer. The warranty is only<br />
valid when parts are replaced by <strong>Vermeiren</strong> in Belgium.<br />
Auf Standardrollstühle gewähren wir eine Garantie von 5<br />
Jahren, auf Leichtgewichtrollstühle 4 Jahre, auf elektronische<br />
Rollstühle, Dreiräder, Betten und andere Produkte: 2<br />
Jahre (Batterien 6 Monate), auf Multifunktionsrollstühle 3<br />
Jahre.<br />
In dieser Garantie eingeschlossen sind alle Mängel, die auf<br />
einen Produkt- oder Verarbeitungsfehler zurückzuführen<br />
sind, Dieser Garantie unterliegen keine Schäden aus unsachgemäßer<br />
Benutzung. Ebenfalls sind Verschleißteile von<br />
der Garantie ausgenommen.<br />
CONTRACTUELE GARANTIE<br />
Op de manuele rolstoelen geven wij 5 jaar, lichtgewicht rolstoelen<br />
4 jaar. Op de elektronische rolstoelen, driewielers,<br />
<strong>bed</strong>den en andere producten : 2 jaar waarborg op constructie<br />
- of materiaalfouten (batterijen 6 maanden). Op multipositie<br />
rolstoelen geven we 3 jaar waarborg. Deze garantie<br />
is uitdrukkelijk beperkt tot de vervanging van defecte stukken<br />
of onderdelen.<br />
GARANTIE CONTRACTUELLE<br />
Les fauteuils manuels standard sont garantis 5 ans, les fauteuils<br />
ultra légers 4 ans. Les fauteuils électroniques, tricycles,<br />
lits et d’autres produits: 2 ans contre tous vices de<br />
construction ou de matériaux (batteries 6 mois). Fauteuils<br />
multiposition 3 ans. Cette garantie est expressément limitée<br />
au remplacement des éléments ou pièces détachées reconnues<br />
défectueuses.<br />
CONTRACTUAL WARRANTY<br />
We offer 5 years of warranty on standard wheelchairs, lightweight<br />
wheelchairs 4 years. Electronic wheelchairs, tricycles,<br />
<strong>bed</strong>s and other products: 2 years (batteries 6 months) and<br />
multiposition wheelchairs 3 years. This warranty is limited to<br />
the replacement of defective or spare parts.<br />
GARANTIEERKLÄRUNG<br />
Wir garantieren, dass für unsere Rollstühle hochwertige Produkte<br />
verwendet werden, die in sorgfältiger Verarbeitung<br />
nach dem neuesten Stand der Technik montiert werden.<br />
Bevor Ihr Rollstuhl unser Werk verlassen hat, wurde er einer<br />
eingehenden Endkontrolle unterzogen, um auch letzte,<br />
eventuell vorhandene Mängel aufzuspüren.<br />
NEDERLANDS<br />
FRANCAIS<br />
ENGLISH DEUTSCH
Belgium<br />
N.V. <strong>Vermeiren</strong> N.V.<br />
<strong>Vermeiren</strong>plein 1 / 15<br />
B-2920 Kalmthout<br />
Tel: +32(0)3 620 20 20<br />
Fax: +32(0)3 666 48 94<br />
website: www.vermeiren.be<br />
e-mail: info@vermeiren.be<br />
Page 28 <br />
Germany<br />
<strong>Vermeiren</strong> Deutschland GmbH<br />
Wahlerstraße 12 a<br />
D-40472 Düsseldorf<br />
Tel: +49(0)211 94 27 90<br />
Fax: +49(0)211 65 36 00<br />
website: www.vermeiren.de<br />
e-mail: info@vermeiren.de<br />
France<br />
Austria<br />
<strong>Vermeiren</strong> France S.A. L. <strong>Vermeiren</strong> Ges. mbH<br />
Z. I., 5, Rue d´Ennevelin<br />
Winetzhammerstraße 10<br />
F-59710 Avelin<br />
A-4030 Linz<br />
Tel: +33(0)3 28 55 07 98<br />
Tel: +43(0)732 37 13 66<br />
Fax: +33(0)3 20 90 28 89<br />
Fax: +43(0)732 37 13 69<br />
website: www.vermeiren.fr<br />
website: www.vermeiren.at<br />
e-mail: info@vermeiren.fr<br />
e-mail: info@vermeiren.at<br />
Italy Switzerland<br />
Reatime S.R.L. <strong>Vermeiren</strong> Suisse S.A.<br />
Via Torino 5<br />
Hühnerhubelstraße 64<br />
I-20039 Varedo MI<br />
CH-3123 Belp<br />
Tel: +39 0362 55 49 50<br />
Tel: +41(0)31 818 40 95<br />
Fax: +39 0362 54 30 91<br />
Fax: +41(0)31 818 40 98<br />
website: www.reatime.it<br />
website: www.vermeiren.ch<br />
e-mail: info@reatime.it<br />
e-mail: info@vermeiren.ch<br />
Poland The Netherlands<br />
<strong>Vermeiren</strong> Polska Sp. z o.o <strong>Vermeiren</strong> Nederland B.V.<br />
ul. czna 1<br />
Domstraat 50<br />
PL-55-100 Trzebnica<br />
NL-3864 PR Nijkerkerveen<br />
Tel: +48(0)71 387 42 00<br />
Tel: +31(0)33 2536424<br />
Fax: +48(0)71 387 05 74<br />
Fax: +31(0)33 2536517<br />
website: www.vermeiren.pl<br />
website: www.vermeiren.com<br />
e-mail: info@vermeiren.pl<br />
e-mail: info@vermeiren.be<br />
Spain Czech Republic<br />
<strong>Vermeiren</strong> Iberica, S.L. <strong>Vermeiren</strong> ČR S.R.O.<br />
Trens Petits, 6. - Pol. Ind. Mas Xirgu.<br />
Sezemická 2757/2 - VGP Park<br />
17005 Girona<br />
193 00 Praha 9 - Horní Počernice<br />
Tel: +34 902 48 72 72<br />
Tel: +420 731 653 639<br />
Fax: +34 972 40 50 54<br />
Fax: +420 596 121 976<br />
website: www.vermeiren.es<br />
website: www.vermeiren.cz<br />
e-mail: info@vermeiren.es<br />
e-mail: info@vermeiren.cz<br />
Albatros<br />
2010-12<br />
R.E.: N.V. <strong>Vermeiren</strong> N.V., <strong>Vermeiren</strong>plein 1/15 - 2920 Kalmthout - Belgium – 2010-11 - Manual <strong>Luna</strong>-vA