
You also want an ePaper? Increase the reach of your titles
YUMPU automatically turns print PDFs into web optimized ePapers that Google loves.
1<br />
2<br />
3<br />
recall it by holding the TIME MODE/RECALL CUE (25) down for 3<br />
seconds,until the LCD display shows the word ‘LOAD’ along with the<br />
time of the MASTER CUE POINT. Then press the MASTER CUE BUTTON (17) to<br />
assign the recalled Cue Point.<br />
FWD<br />
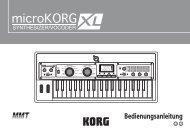
17. REVERSE SWITCH (26): During playback, flipping the<br />
reverse switch will play the audio program backwards from<br />
the current time displayed. In CD Mode, the REVERSE<br />
SWITCH (26) will affect CD playback. In TT Mode, the<br />
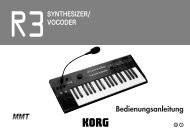
20. PLATTER SPEED CONTROL (42): This button allows to you<br />
to change the speed of the platter to 33, 45, or 78rpm.<br />
Although this is the same concept as a conventional<br />
turntable, the functionality has been extended to control a<br />
few different areas of the unit:<br />
CHANGING DEFAULT CD CONTROL SPEED: ECHO Since FILTER FLANGER some <strong>DJ</strong>s are accustomed to<br />
REV<br />
spinning records at one platter speed, the default “normal” speed can be<br />
altered to provide the feel necessary according to preference. This can be<br />
REVERSE SWITCH (26) affects the playback of Vinyl only. In Mix Mode, the done while the unit is in Stop Mode (not in Pause mode) by pressing the<br />
REVERSE SWITCH (26) again affects the playback of Vinyl only, even if there PLATTER SPEED CONTROL (42) momentarily to toggle between 33 and<br />
is a CD playing simultaneously.<br />
45rpm (78rpm is not supported for CD control). If the unit is in Play<br />
18. INSTANT REVERSE MODES (27): There are 3 Reverse Modes Mode, press the STOP/EJECT BUTTON (41) once before changing the setting.<br />
1 found on the <strong>CDT</strong>-<strong>05</strong>, which can apply to different performance THE PLATTER SPEED LED INDICATORS (43) will reflect what speed has been<br />
INSTANT REV scenarios. Here is a brief explanation of each mode, and an selected.<br />
example 2 of how it may be applied:<br />
CHANGING PLAYBACK SPEED: If you wish to change the actual playback speed<br />
NOT ENGAGED - When the INSTANT REVERSE MODES (27) LED is completely of a CD during playback, simply press the PLATTER SPEED CONTROL (42)<br />
unlit, and 3 the switch is flipped to ‘REV,’ the platter will turn counterclock- momentarily while in Play or Pause Mode to toggle between 33 and 45rpm<br />
wise, and the music program will play backwards. When the switch is (78rpm is not supported for CD playback). You will hear an audible change<br />
flipped to ‘FWD,’ the platter will turn clockwise, and the music will in the tempo and key of the music, as you are effectively playing the record-<br />
resume playing forwards from the time point at which the switch was ing at a speed much slower or faster than it was intended.<br />
flipped back to ‘FWD.’ This is effectively the same exact implementation CHANGING PLAYBACK SPEED FOR VINYL: If you wish to change the actual play-<br />
of the Reverse feature on a vinyl turntable.<br />
back speed of a Vinyl record during playback, simply press the PLATTER<br />
INSTANT REVERSE MODE #1 - This mode is engaged by pressing the INSTANT SPEED CONTROL (42) momentarily, while in Mix or TT Mode, to toggle<br />
REVERSE MODES (27) button momentarily, which will solidly illuminate the between 33 and 45rpm. 78rpm is engaged by holding down the PLATTER<br />
INSTANT REVERSE MODES (27) LED. When the switch is flipped to ‘REV,’ the SPEED CONTROL (42) for 3 seconds.<br />
platter will turn counterclockwise, and the music program will play back-<br />
ON / OFF<br />
wards, but you will not hear the sound of the motor slowing down as the<br />
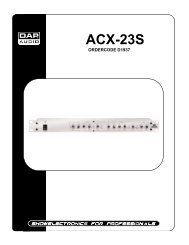
SEAMLESS LOO P 21. LOOP SECTION (28), (29), (30): Using the<br />
LOOP SECTION allows you to seamlessly repeat a<br />
platter in order to turn in the opposite direction. When the switch is<br />
segment of audio from the CD section. The<br />
flipped to ‘FWD,’ the platter will turn clockwise, and the music will<br />
A B/ LOOP RE LOO P<br />
LOOP IN A (28) sets the starting point of the seg-<br />
resume playing, without slowdown effect, forwards from the time that ment. The LOOP OUT B/EDIT (29) sets the end point of the segment. RELOOP<br />
would read on the display had you never engaged the Reverse feature to (30) restarts the loop from the beginning once it has been engaged. Loop<br />
begin with. This allows you to reverse at any time, even while beatmixing points can be set on the fly during playback or can be set in Pause Mode.<br />
with another device, as the music will stay completely in time and the To end looping, when it is engaged, press the LOOP OUT B/EDIT (29) button.<br />
musical structure will never be altered. This is very useful for <strong>DJ</strong>s that play To edit the loop points, press the LOOP OUT B/EDIT (29) button, find the<br />
electronic music and rely on beatmatching for a large part of their per- point you wish you replace, then press either The LOOP IN A (28) or LOOP<br />
formance.<br />
1<br />
OUT B/EDIT (29) to set the point you wish you replace. For step-by-step<br />
INSTANT REVERSE MODE #2 - This mode is engaged by pressing and hold- information 2 on the Loop functions of the <strong>CDT</strong>-<strong>05</strong>, see the section entitled<br />
ing the INSTANT REVERSE MODES (27) button for 2 seconds, which will flash ‘Setting Cue Points and Loops’.<br />
the INSTANT REVERSE MODES (27) LED. When the switch is flipped to ‘REV,’<br />
the platter will turn counterclockwise, and the music program will play<br />
3<br />
SETTING CUE POINTS AND LOOPS:<br />
+<br />
backwards, but you will not hear the sound of the motor slowing down as<br />
the platter in order to turn in the opposite direction. When the switch is<br />
flipped to ‘FWD,’ the platter will turn clockwise, and the music will<br />
resume playing, without slowdown effect, forwards from the time point at<br />
1. SETTING THE MASTER CUE POINT:<br />
a. During the playback of a CD, find the point at which you want to set the<br />
MASTER CUE POINT.<br />
which the switch was flipped back to ‘FWD.’<br />
b. Pause the playback by pressing the PLAY/PAUSE BUTTON (16). The platter<br />
19. STOP/EJECT BUTTON (41): During CD playback, this button will stop. ON / OFF<br />
stops the audio and disengages the laser from reading the disc.<br />
Once the unit has stopped, pressing the STOP/EJECT BUTTON<br />
(41) will eject the disc from the CD transport.<br />
c. Using the SCRATCH CONTROL VINYL PLATE (3), make any necessary adjustments<br />
to the MASTER CUE POINT. Using the SCRATCH CONTROL VINYL PLATE (3)<br />
to make adjustments is limited to CD Mode.<br />
d. To memorize the MASTER CUE POINT, press the PLAY/PAUSE BUTTON (16)<br />
again. The platter will start again, and the music will resume playback.<br />
ON / OFF<br />
33 78 45<br />
<br />
ECHO FILTER<br />
FLANGER<br />
e. To advance to the MASTER CUE POINT, press the MASTER CUE BUTTON (17).<br />
You may now press the PLAY/PAUSE BUTTON (16) to begin playback from the<br />
set MASTER CUE POINT<br />
f. To preview the MASTER CUE POINT, first press the MASTER CUE BUTTON (17)<br />
to advance to the MASTER CUE POINT, then press and hold down the MASTER<br />
CUE BUTTON (17) for as long as needed to preview. When the MASTER CUE<br />
BUTTON (17) is released, the unit will advance back to the MASTER CUE<br />
POINT.<br />
g. To advance and begin playing from the set MASTER CUE POINT without<br />
interruption, press the HOT START CUE FUNCTION (18) button.<br />
h. To permanently save the MASTER CUE POINT to the memory of the <strong>CDT</strong>-<br />
<strong>05</strong> (for CD Audio discs only, not MP3 discs), hold the MEMO BUTTON (23)<br />
down for 3 seconds. When the MASTER CUE POINT has been saved to memory,<br />
the bottom line of the LCD DISPLAY (1) will read ‘SAVE’ along with the<br />
track number and time of the MASTER CUE POINT. Whenever you load an<br />
Audio CD that you have stored MASTER CUE POINT information for, the bottom<br />
left portion of the LCD DISPLAY (1) will flash the word ‘CUE.’<br />
i. To recall the MASTER CUE POINT that has been saved, hold down the TIME<br />
MODE/RECALL CUE (25) button for 3 seconds, until the bottom line of the<br />
LCD DISPLAY (1) reads ‘LOAD’ along with the track number and time of the<br />
MASTER CUE POINT. Press the MASTER CUE BUTTON (17) to confirm the<br />
assignment of the saved cue point to the MASTER CUE. Now you are free to<br />
use the loaded MASTER CUE POINT as normal.<br />
ECHO FILTER FLANGER<br />
j. When the track is advanced using the TRACK SKIP & DSP PARAMETER (22)<br />
knob, the MASTER CUE POINT will be cleared from temporary memory. You<br />
may choose to set a new MASTER CUE POINT or use the RECALL CUE function<br />
to load a saved point.<br />
2. SETTING HOT CUE POINTS:<br />
a. During the playback of a CD, find the point at which you want to set a<br />
HOT CUE POINT. If you want to set a HOT CUE POINT on the fly, proceed to<br />
+<br />
step B. Otherwise, while in CD Mode only, you may pause the playback by<br />
pressing the PLAY/PAUSE BUTTON (16), and adjust the position by using the<br />
SCRATCH CONTROL VINYL PLATE (3), then proceed to step B.<br />
b. To memorize a HOT CUE POINT, first press the MEMO BUTTON (23)<br />
momentarily, until the light inside of the button becomes illuminated.<br />
c. At the point of which you wish to set the HOT CUE POINT, press the<br />
desired HOT STARTABLE CUE POINT (24) button which corresponds to the<br />
bank of which you wish the point to be saved.<br />
d. Repeat the process for up to a total of 3 HOT STARTABLE CUE POINTS.<br />
e. To advance to a saved HOT STARTABLE CUE POINT, simply press the desired<br />
HOT STARTABLE CUE POINT (24) button which corresponds to the bank of<br />
which you wish to play. The unit will advance to this point (and the corresponding<br />
track from which the point was set) without interruption, regardless<br />
of which track is currently playing.<br />
f. To reset a HOT STARTABLE CUE POINT, simply repeat the process and overwrite<br />
the HOT STARTABLE CUE POINT (24) which corresponds to the bank of<br />
which you wish to overwrite.<br />
+