SacroLoc® - BraceProDirect.com
SacroLoc® - BraceProDirect.com
SacroLoc® - BraceProDirect.com
You also want an ePaper? Increase the reach of your titles
YUMPU automatically turns print PDFs into web optimized ePapers that Google loves.
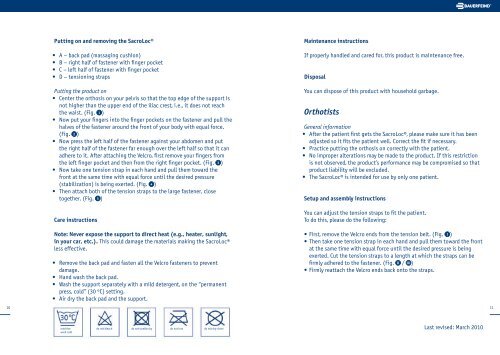
Putting on and removing the <strong>SacroLoc®</strong><br />
• A – back pad (massaging cushion)<br />
• B – right half of fastener with nger pocket<br />
• C – left half of fastener with nger pocket<br />
• D – tensioning straps<br />
Putting the product on<br />
• Center the orthosis on your pelvis so that the top edge of the support is<br />
not higher than the upper end of the iliac crest, i.e., it does not reach<br />
the waist. (Fig. 1 )<br />
• Now put your ngers into the nger pockets on the fastener and pull the<br />
halves of the fastener around the front of your body with equal force.<br />
(Fig. 2 )<br />
• Now press the left half of the fastener against your abdomen and put<br />
the right half of the fastener far enough over the left half so that it can<br />
adhere to it. After attaching the Velcro, rst remove your ngers from<br />
the left nger pocket and then from the right nger pocket. (Fig. 3 )<br />
• Now take one tension strap in each hand and pull them toward the<br />
front at the same time with equal force until the desired pressure<br />
(stabilization) is being exerted. (Fig. 4 )<br />
• Then attach both of the tension straps to the large fastener, close<br />
together. (Fig. 5 )<br />
Care instructions<br />
Note: Never expose the support to direct heat (e.g., heater, sunlight,<br />
in your car, etc.). This could damage the materials making the <strong>SacroLoc®</strong><br />
less effective.<br />
• Remove the back pad and fasten all the Velcro fasteners to prevent<br />
damage.<br />
• Hand wash the back pad.<br />
• Wash the support separately with a mild detergent, on the “permanent<br />
press, cold” (30 ºC) setting.<br />
• Air dry the back pad and the support.<br />
Maintenance instructions<br />
If properly handled and cared for, this product is maintenance free.<br />
10 11<br />
machine<br />
wash cold<br />
do not bleach do not tumble dry do not iron do not dry-clean<br />
Disposal<br />
You can dispose of this product with household garbage.<br />
Orthotists<br />
General information<br />
• After the patient rst gets the <strong>SacroLoc®</strong>, please make sure it has been<br />
adjusted so it ts the patient well. Correct the t if necessary.<br />
• Practice putting the orthosis on correctly with the patient.<br />
• No improper alterations may be made to the product. If this restriction<br />
is not observed, the product’s performance may be <strong>com</strong>promised so that<br />
product liability will be excluded.<br />
• The <strong>SacroLoc®</strong> is intended for use by only one patient.<br />
Setup and assembly instructions<br />
You can adjust the tension straps to t the patient.<br />
To do this, please do the following:<br />
• First, remove the Velcro ends from the tension belt. (Fig. I )<br />
• Then take one tension strap in each hand and pull them toward the front<br />
at the same time with equal force until the desired pressure is being<br />
exerted. Cut the tension straps to a length at which the straps can be<br />
rmly adhered to the fastener. (Fig. II / III)<br />
• Firmly reattach the Velcro ends back onto the straps.<br />
Last revised: March 2010


