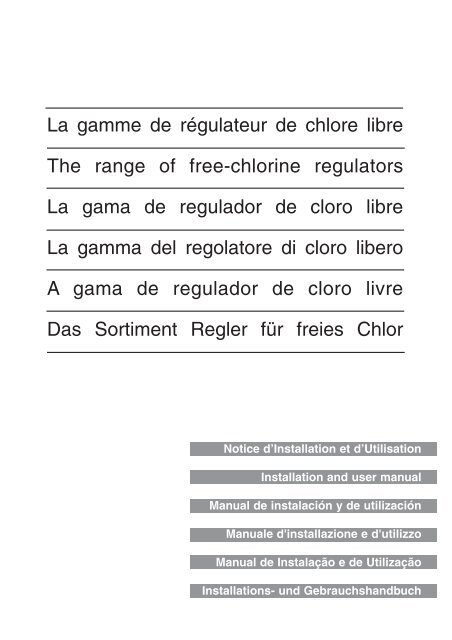
La gamme de régulateur de chlore libre The range of ... - VitaPiscine
La gamme de régulateur de chlore libre The range of ... - VitaPiscine
La gamme de régulateur de chlore libre The range of ... - VitaPiscine

Create successful ePaper yourself
Turn your PDF publications into a flip-book with our unique Google optimized e-Paper software.
<strong>La</strong> <strong>gamme</strong> <strong>de</strong> <strong>régulateur</strong> <strong>de</strong> <strong>chlore</strong> <strong>libre</strong><br />
<strong>The</strong> <strong>range</strong> <strong>of</strong> free-chlorine regulators<br />
<strong>La</strong> gama <strong>de</strong> regulador <strong>de</strong> cloro <strong>libre</strong><br />
<strong>La</strong> gamma <strong>de</strong>l regolatore di cloro libero<br />
A gama <strong>de</strong> regulador <strong>de</strong> cloro livre<br />
Das Sortiment Regler für freies Chlor<br />
Notice d’Installation et d’Utilisation<br />
Installation and user manual<br />
Manual <strong>de</strong> instalación y <strong>de</strong> utilización<br />
Manuale d'installazione e d'utilizzo<br />
Manual <strong>de</strong> Instalação e <strong>de</strong> Utilização<br />
Installations- und Gebrauchshandbuch
<strong>La</strong> <strong>gamme</strong> <strong>de</strong> <strong>régulateur</strong> <strong>de</strong> <strong>chlore</strong> <strong>libre</strong><br />
<strong>The</strong> <strong>range</strong> <strong>of</strong> free-chlorine regulators<br />
<strong>La</strong> gama <strong>de</strong> regulador <strong>de</strong> cloro <strong>libre</strong><br />
<strong>La</strong> gamma <strong>de</strong>l regolatore di cloro libero<br />
A<br />
gama <strong>de</strong> regulador <strong>de</strong> cloro livre<br />
Das Sortiment Regler für freies Chlor<br />
SOMMAIRE<br />
ATTENTION page 3<br />
1 - Codification du colis page 4<br />
2 - Caractéristiques techniques page 4<br />
Les pictogrammes page 4<br />
3 - Principes <strong>de</strong> fonctionnement page 5<br />
4 - Précautions à prendre avant la<br />
mise en service page 5<br />
5 - Installation dans le local technique page 6<br />
6 - Installation du vase page 7<br />
7 - Détecteur <strong>de</strong> débit page 8<br />
8 - Installation <strong>de</strong> la terre page 8<br />
9 - Alimentation <strong>de</strong> l’électro<strong>de</strong> sel page 8<br />
10 - Réglages page 8<br />
11 - Mise en service page 9<br />
12 - Vérifications page 10<br />
13 - Hivernage ou mise en sommeil page 10<br />
14 - Liste <strong>de</strong>s défauts éventuels page 11<br />
15 - Garantie page 11<br />
16 - Que faire en cas <strong>de</strong> problème ? page 11<br />
Notice d’Installation et d’Utilisation<br />
Installation and User Manual<br />
Manual <strong>de</strong> instalación y <strong>de</strong> utilización<br />
Manuale d'installazione e di utilizzo<br />
Manual <strong>de</strong> Instalação e <strong>de</strong> Utilização<br />
Installations- und Gebrauchshandbuch<br />
SUMMARY<br />
CAUTION page 12<br />
1 - Parcel coding page 13<br />
2 - Technical characteristics page 13<br />
Pictograms page 13<br />
3 - Operating principles page 14<br />
4 - Precautions to take before<br />
switching on for the first time page 14<br />
5 - Installation in the pool house page 15<br />
6 - Installing the chamber page 16<br />
7 - Flow switch page 17<br />
8 - Installing the ground-wire page 17<br />
9 - Salt electro<strong>de</strong> power supply page 17<br />
10 - Settings page 17<br />
11 - Switching on page 18<br />
12 - Verifications page 19<br />
13 - Winterizing or inactive mo<strong>de</strong> page 19<br />
14 - Troubleshooting page 20<br />
15 - Guarantee page 20<br />
16 - What to do in case <strong>of</strong> problem? page 11<br />
1
ÍNDICE<br />
ATENCIÓN page 26<br />
1 - Codificación <strong>de</strong>l paquete page 27<br />
2 - Características técnicas page 27<br />
Pictogramas page 27<br />
3 - Principios <strong>de</strong> funcionamiento page 28<br />
4 - Precauciones a tomar antes <strong>de</strong> la<br />
puesta en marcha page 28<br />
5 - Instalación en el local técnico page 29<br />
6 - Instalación <strong>de</strong>l vaso page 30<br />
7 - Flujostato page 31<br />
8 - Instalación <strong>de</strong> la tierra page 31<br />
9 - Alimentación <strong>de</strong>l electrodo sal page 31<br />
10 - Ajustes page 31<br />
11 - Puesta en servicio page 32<br />
12 - Verificaciones page 33<br />
13 - Hibernación o reposo page 33<br />
14 - Lista <strong>de</strong> <strong>de</strong>fectos eventuales page 34<br />
15 - Garantía page 34<br />
16 - ¿Qué hacer si surge un problema? page 11<br />
ÍNDICE<br />
ATENÇÃO página 35<br />
1 - Codificação do conteudo página 36<br />
2 - Características técnicas página 36<br />
Os pictogramas página 36<br />
3 - Princípios <strong>de</strong> funcionamento página 37<br />
4 - Precauções a ter antes da<br />
entrada em serviço página 37<br />
5 - Instalação no local técnico página 38<br />
6 - Instalação do vaso página 39<br />
7 - Detector <strong>de</strong> caudal página 40<br />
8 - Instalação da terra página 40<br />
9 - Alimentação do eléctrodo sal página 40<br />
10 - Regulações página 40<br />
11 - Entrada em serviço página 41<br />
12 - Verificações página 42<br />
13 - Invernia ou inactivida<strong>de</strong> página 42<br />
14 - Lista dos eventuais <strong>de</strong>feitos página 43<br />
15 - Garantia página 43<br />
16 - O que fazer em caso <strong>de</strong> problema? página 11<br />
2<br />
SOMMARIO<br />
ATTENZIONE pagina 35<br />
1 - Codifica <strong>de</strong>l collo pagina 36<br />
2 - Caratteristiche tecniche pagina 36<br />
I pittogrammi pagina 36<br />
3 - Principi di funzionamento pagina 37<br />
4 - Precauzioni da assumere prima <strong>de</strong>lla<br />
messa in servizio pagina 37<br />
5 - Installazione nel locale tecnico pagina 38<br />
6 - Installazione <strong>de</strong>l vaso pagina 39<br />
7 - Rilevatore di portata pagina 40<br />
8 - Installazione <strong>de</strong>lla terra pagina 40<br />
9 - Alimentazione <strong>de</strong>ll'elettrodo sale pagina 40<br />
10 - Regolazioni pagina 40<br />
11 - Messa in servizio pagina 41<br />
12 - Verifiche pagina 42<br />
13 - Rimessaggio o cessazione<br />
temporanea d'utilizzo pagina 42<br />
14 - Lista <strong>de</strong>gli eventuali difetti pagina 43<br />
15 - Garanzia pagina 43<br />
16 - Che cosa fare in caso di problema ? pagina 11<br />
INHALTSVERZEICHNIS<br />
WICHTIGE HINWEISE Seite 44<br />
1 - Verpackungscodierung Seite 45<br />
2 - Technische Eigenschaften Seite 45<br />
Piktogramme Seite 45<br />
3 - Funktionsprinzip Seite 46<br />
4 - Vorsichtsmaßnahmen vor <strong>de</strong>r<br />
Inbetriebnahme Seite 46<br />
5 - Installation im Technikraum Seite 47<br />
6 - Installation <strong>de</strong>r Elektrolysezelle Seite 48<br />
7 - Durchfluss<strong>de</strong>tektor Seite 49<br />
8 - Installation <strong>de</strong>r Erdung Seite 49<br />
9 - Stromversorgung <strong>de</strong>r Elektro<strong>de</strong> Seite 49<br />
10 - Einstellungen Seite 49<br />
11 - Inbetriebnahme Seite 50<br />
12 - Kontrollen Seite 51<br />
13 - Überwinterung Seite 51<br />
14 - Fehlerliste Seite 52<br />
15 - Garantie Seite 52<br />
16 - Probleme und ihre Lösungen Seite 11
3<br />
Attention<br />
Cet appareil n'est pas prévu pour être utilisé par<br />
<strong>de</strong>s personnes (y compris les enfants) dont les<br />
capacités physiques, sensorielles, mentales sont<br />
réduites ou <strong>de</strong>s personnes dénuées d'expérience<br />
ou <strong>de</strong> connaissance sauf si elles ont pu bénéficier,<br />
par l'intermédiaire d'une personne responsable<br />
<strong>de</strong> leur sécurité, d'une surveillance ou d'instructions<br />
préalables concernant l'utilisation <strong>de</strong> cet<br />
appareil. (NF EN 60335 -1/A1)<br />
Précaution à prendre avant l'intervention à l'intérieur<br />
du c<strong>of</strong>fret :<br />
Isoler l'installation électrique à l'ai<strong>de</strong> d'un dispositif<br />
<strong>de</strong> séparation <strong>de</strong> l'énergie sous forme d'un :<br />
ou<br />
ou<br />
- disjoncteur sectionneur<br />
- interrupteur sectionneur<br />
- sectionneur à fusible.<br />
Votre appareil est en fin <strong>de</strong> vie.<br />
Vous souhaitez vous en débarrasser<br />
ou le remplacer, ne le jetez pas<br />
à la poubelle ni dans les bacs <strong>de</strong><br />
tri sélectifs <strong>de</strong> votre commune. Ce<br />
symbole, sur un appareil neuf,<br />
signifie que l'équipement ne doit<br />
pas être jeté et qu'il fera l'objet<br />
d'une collecte sélective en vue <strong>de</strong><br />
sa réutilisation, <strong>de</strong> son recyclage ou <strong>de</strong> sa valorisation.<br />
S'il contient <strong>de</strong>s substances potentiellement<br />
dangereuses pour l'environnement, celles-ci<br />
seront éliminées ou neutralisées.<br />
Vous pouvez le donner à une association sociale<br />
et solidaire, qui pourra le réparer et le remettre<br />
en circulation. Si vous en achetez un nouveau,<br />
vous pouvez déposer l'ancien au magasin<br />
ou <strong>de</strong>man<strong>de</strong>r au livreur <strong>de</strong> le reprendre.<br />
FRANÇAIS<br />
Dispositif à installer pour les protections <strong>de</strong>s<br />
courts circuits ou surintensités :<br />
C'est la reprise dite “Un pour Un”. Sinon, rapportez-le<br />
dans une déchetterie, si votre commune<br />
a mis en place une collecte sélective <strong>de</strong><br />
ces produits.<br />
- disjoncteur différentiel 30 mA (puissance<br />
à adopter suivant l'installation). Le ca<strong>libre</strong><br />
du dispositif <strong>de</strong> protection ne pourra dépasser 10 A.<br />
Précaution :<br />
Raccor<strong>de</strong>r le conducteur vert- jaune du câble<br />
d'alimentation au circuit général <strong>de</strong> protection.<br />
L'installation du c<strong>of</strong>fret dans les locaux<br />
techniques ou sous abri est obligatoire.<br />
Donner<br />
à une<br />
Association<br />
à<br />
vocation<br />
sociale<br />
Rendre<br />
l’appareil<br />
usagé au<br />
distributeur<br />
lors d’un<br />
nouvel<br />
achat<br />
Déposer<br />
l’appareil<br />
usagé<br />
en<br />
déchetterie<br />
NF EN 60335-1/A1
4<br />
1 - Codification du colis<br />
FRANÇAIS<br />
Régulateur<br />
<br />
V2<br />
Régulateur<br />
<br />
V2.2<br />
Régulateur<br />
<br />
Injection<br />
Régulateur<br />
Injection <br />
2 en 1 <br />
2 en 1<br />
<br />
Références<br />
m 3<br />
Régulation <strong>chlore</strong><br />
Régulation pH<br />
Electrolyseur interne<br />
Electrolyseur externe<br />
Pompe ou électrovanne<br />
Mini-chloration choc<br />
ANA01 0 à suivant prod X X X<br />
ANA02 0 à suivant prod X X X X<br />
ANA031 <strong>de</strong> 0 à 30 m 3 X X X X<br />
ANA032 <strong>de</strong> 30 à 500 m 3 X X X X<br />
ANA04 1 - 30 m 3 X X X X<br />
ANA05 30 - 100 m 3 X X X X<br />
Réactif amichloryte<br />
Réactif pH<br />
2 - Caractéristiques techniques<br />
Les pictogrammes :<br />
Pour le bon fonctionnement <strong>de</strong> votre appareil,<br />
veuillez respecter les valeurs suivantes :<br />
Branchement : 220 volts-50/60 Hz<br />
asservi à la pompe <strong>de</strong> filtration.<br />
Mesure colorimétrique : 350 nm à 600 nm.<br />
Amorçage<br />
Production<br />
Pompe P1 péristaltique : 6 litres/heure pour la<br />
prise d'échantillon.<br />
Défaut<br />
Pompe P2 péristaltique : 0,1 litres/heure pour<br />
le dosage du réactif.<br />
Set<br />
Température <strong>de</strong> l’eau : Ne pas faire fonctionner<br />
en <strong>de</strong>ssous <strong>de</strong> 15°C.<br />
Réactif <strong>de</strong> comparaison colorimétrique :<br />
Amichloryte ®.<br />
Conforme aux normes CE.<br />
CL +<br />
g<br />
Mini chloration<br />
choc<br />
Réglage<br />
<strong>de</strong>s valeurs
5<br />
3 - Principe <strong>de</strong> fonctionnement<br />
Le <strong>régulateur</strong> prélève <strong>de</strong> l'eau <strong>de</strong> votre<br />
bassin, ajoute automatiquement un réactif<br />
«AMICHLORYTE®» breveté et compare la<br />
variation colorimétrique du mélange pour<br />
définir le taux <strong>de</strong> <strong>chlore</strong> présent dans le<br />
bassin.<br />
Suivant la configuration et l'utilisation <strong>de</strong><br />
votre piscine, vous choisissez le taux <strong>de</strong><br />
<strong>chlore</strong> nécessaire à une bonne désinfection<br />
laissant l'appareil piloter les appareils <strong>de</strong><br />
production <strong>de</strong> <strong>chlore</strong>.<br />
Les analyses se font toutes les 30 minutes<br />
lorsque le taux <strong>de</strong> <strong>chlore</strong> est inférieur au<br />
point <strong>de</strong> consigne et toutes les 2 heures<br />
lorsque ce taux est atteint.<br />
Il est possible <strong>de</strong> modifier ces fréquences,<br />
(voir paragraphe 10. )<br />
A chaque modification <strong>de</strong> la consigne une<br />
nouvelle analyse est effectuée.<br />
En cas d'écart important avec la mesure<br />
précé<strong>de</strong>nte, l'appareil effectue une nouvelle<br />
analyse <strong>de</strong> confirmation.<br />
- Vérifier que le bassin n'a pas été<br />
traité au peroxy<strong>de</strong> d'hydrogène ou<br />
anti-algues à base <strong>de</strong> peroxy<strong>de</strong><br />
d'hydrogène durant les trois<br />
semaines précédant l'installation,<br />
sinon repousser la mise en route<br />
d'autant.<br />
- Régler le pH entre 7,0 et 7,4.<br />
- Le taux <strong>de</strong> stabilisant <strong>de</strong> <strong>chlore</strong> doit<br />
être compris entre 20 et 50 ppm.<br />
(sauf piscines intérieures)<br />
- Régler le TAC (taux d'alcalinité<br />
complet) entre 12° et 18°F.<br />
- <strong>La</strong> température <strong>de</strong> l'eau du bassin<br />
doit être supérieure à 18° C pour<br />
une mesure optimum <strong>de</strong> l'appareil.<br />
- Taux <strong>de</strong> sel :<br />
Recommandé : 4 g/l.<br />
Minimum : 3,5 g/l.<br />
- Si vous utilisez une pompe doseuse<br />
<strong>de</strong> <strong>chlore</strong>, pensez à dimensionner la<br />
pompe en fonction du volume et <strong>de</strong><br />
la fréquentation du bassin.<br />
FRANÇAIS<br />
Après chaque analyse, l’appareil déclenche<br />
ou non, en fonction du point <strong>de</strong> consigne, le<br />
système <strong>de</strong> production <strong>de</strong> <strong>chlore</strong>.<br />
(electrolyseur, pompe doseuse, électrovanne)<br />
Le modèle “injection” est livré avec une<br />
pompe <strong>chlore</strong> :<br />
- 0 à 30 m 3 2,2 l/h<br />
- 30 à 500 m 3 6,0 l/h<br />
4 - Précautions à prendre avant<br />
la mise en service<br />
En cas d'installation dans un bassin déjà<br />
chloré (Cl > à 5 ppm), faire <strong>de</strong>scendre ce<br />
taux <strong>de</strong> <strong>chlore</strong> (CL < 5 ppm) avant <strong>de</strong> mettre<br />
en service l’appareil.<br />
Compatibilité :<br />
Assurez-vous que les matériaux mis en<br />
oeuvre (piscine et alentours) soient<br />
compatibles avec l’utilisation <strong>de</strong> l’eau<br />
salée et chlorée.
6<br />
5 - Installation dans le local technique<br />
FRANÇAIS<br />
Schéma électrique à titre indicatif. Se référer au schéma fourni par le fabricant<br />
du c<strong>of</strong>fret.<br />
1) Fixer le boîtier dans le local technique à hauteur<br />
<strong>de</strong> manipulation, à l'ai<strong>de</strong> <strong>de</strong>s vis et chevilles<br />
fournies. Mettre impérativement le boîtier <strong>de</strong><br />
niveau.<br />
2) Fixer le conteneur <strong>de</strong> réactif <strong>de</strong> préférence le<br />
plus proche possible du boîtier jamais plus<br />
haut.
7<br />
3) Mettre en place le collier <strong>de</strong> prise en charge<br />
sur le circuit <strong>de</strong> refoulement entre la filtration et<br />
les appareils <strong>de</strong> chauffage, <strong>de</strong> régulations, <strong>de</strong><br />
productions <strong>de</strong> <strong>chlore</strong> et d'injections <strong>de</strong> produit.<br />
En cas <strong>de</strong> prise d'air continuelle, mettre le collier<br />
<strong>de</strong> prise en charge clapet en bas ou sur le côté.<br />
Raccor<strong>de</strong>r ce collier au tube cristal transparent<br />
(aspiration).<br />
4) Visser et étancher le raccord d'alimentation<br />
en respectant le sens du flux signalé par une<br />
flèche sur le clapet.<br />
5) Mettre en place le <strong>de</strong>uxième collier <strong>de</strong> prise<br />
en charge sur l'égout (version filtre à sable) ou<br />
se raccor<strong>de</strong>r sur une évacuation la plus proche.<br />
Raccor<strong>de</strong>r et ajuster le tuyau noir d'évacuation<br />
sortant <strong>de</strong> l'appareil. Attention à ne pas pincer les<br />
tuyaux lors du montage.<br />
6) Raccor<strong>de</strong>r le tuyau <strong>de</strong> sortie du conteneur <strong>de</strong><br />
l’Amichloryte sur la pompe P2 et libérer le clamp<br />
s'il y a lieu. Raccor<strong>de</strong>r électriquement l'appareil<br />
sur le contacteur d'asservissement <strong>de</strong> la pompe<br />
piscine. S'assurer que l'appareil s'éteint en<br />
même temps que la filtration.<br />
7) Raccor<strong>de</strong>r l'électrolyseur ou la pompe<br />
doseuse sur la boîte <strong>de</strong> connexion livrée et rattachée<br />
au boîtier suivant modèle (voir installation<br />
du vase). Si pompe doseuse voir configuration<br />
modèle pompe doseuse/éléctrovanne.<br />
FRANÇAIS<br />
6 - Installation du vase<br />
Coller le vase sur la canalisation du<br />
retour vers la piscine, après le filtre et<br />
après le réchauffeur ou départ du surpresseur.<br />
L’eau doit circuler du Té vers la réduction<br />
(suivre le sens <strong>de</strong> la flèche sur le<br />
vase) ; le flux d’eau doit impérativement<br />
circuler entre les plaques (électro<strong>de</strong>).<br />
Prévoir un espace suffisant du<br />
côté démontable du vase pour<br />
pouvoir retirer l’électro<strong>de</strong>.<br />
Si le vase est monté en bypass,<br />
s’assurer que 80% minimum<br />
du flux passe par ce<br />
<strong>de</strong>rnier.
8<br />
7 - Détecteur <strong>de</strong> Débit (Flow switch)<br />
uniquement modèle 2 en 1<br />
9 - Alimentation <strong>de</strong> l’électro<strong>de</strong><br />
sel<br />
FRANÇAIS<br />
Nous préconisons l’installation du détecteur <strong>de</strong><br />
débit dans les cas suivants :<br />
- pompe <strong>de</strong> filtration située au <strong>de</strong>ssus du<br />
niveau <strong>de</strong> l’eau (risque <strong>de</strong><br />
désamorçage),<br />
Principe <strong>de</strong> fonctionnement :<br />
Si le flux est interrompu acci<strong>de</strong>ntellement ou lors<br />
d’un contre-lavage et, dans tous les cas, lorsque<br />
la vitesse <strong>de</strong> passage <strong>de</strong> l’eau est inférieure à<br />
2,9 m 3 /h, le détecteur coupera l’appareil.<br />
Installation :<br />
Installer le détecteur sur le vase dans son<br />
emplacement en positionnant la flèche se trouvant<br />
<strong>de</strong>ssus dans le sens du flux.<br />
Le détecteur est équipé d’une résistance ce qui<br />
permet au boîtier <strong>de</strong> le détecter automatiquement.<br />
Pour cette raison ne pas utiliser un<br />
détecteur qui ne serait pas équipé <strong>de</strong> cette résistance.<br />
Brancher le câble prévu à cet effet. Serrer correctement<br />
les écrous.<br />
Un raccord mal serré provoquerait <strong>de</strong>s surchauffes.<br />
Au <strong>de</strong>là <strong>de</strong> la longeur du câble fourni avec l’appareil,<br />
la section <strong>de</strong>vra être adaptée et les raccor<strong>de</strong>ments<br />
<strong>de</strong>vront être protégés et adaptés à la<br />
section du câble utilisé.<br />
Le raccor<strong>de</strong>ment électrique sera obligatoirement<br />
effectué par un électricien qualifié et<br />
sera conforme à la norme NFC 15-100 (Edition<br />
2002).<br />
<strong>La</strong> mise sous tension <strong>de</strong> l’électro<strong>de</strong> se fera<br />
automatiquement après une pério<strong>de</strong> <strong>de</strong> temporisation.<br />
- Réglages usine :<br />
modèle 30 - 4,5 A - maximum<br />
modèle 100 - 10 A - maximum<br />
8 - Installation <strong>de</strong> la Terre<br />
uniquement modèle 2 en 1<br />
Nous recommandons l’installation <strong>de</strong> la terre afin<br />
<strong>de</strong> capter les courants résiduels présents dans<br />
l’eau.<br />
Montage <strong>de</strong> la terre :<br />
Mettre en place la terre en fonction <strong>de</strong>s normes<br />
en vigueur dans le pays d’installation.<br />
10 - Réglages<br />
L’appareil en fonctionnement indique “nor”.<br />
Pour modifier, faire appel à un pr<strong>of</strong>essionnel<br />
agréé par le fabricant.<br />
Fonction menu <strong>régulateur</strong> g & c + ON<br />
Voir schéma page suivante.
9<br />
10 - Réglages (suite)<br />
menu PRODUCTION<br />
ECL* = Electrolyseur<br />
PCL = Pompe <strong>chlore</strong> ou Electrovanne<br />
F menu FILTRATION éloignée<br />
OFF* = Distance <strong>de</strong> prise d’échantillon<br />
inférieure à 5 m.<br />
ON = Distance <strong>de</strong> prise d’échantillon<br />
<strong>de</strong> 5 à 30 m.<br />
FRANÇAIS<br />
PRO menu COLLECTIVITÉ ou<br />
ANALYSE forcée<br />
OFF* = Analyse en mo<strong>de</strong> normale.<br />
Toutes les 2 heures.<br />
ON = Analyse forcée<br />
Toutes les 30 minutes.<br />
DUR menu INVERSION <strong>de</strong><br />
POLARITÉ<br />
4* = Inversion toutes les 4 heures.<br />
1 = Inversion toutes les heures.<br />
En restant appuyé sur c le temps<br />
augmente jusqu’à l’obtention du<br />
temps d’inversion <strong>de</strong> polarité désiré.<br />
Relacher c .<br />
INT menu AMPERAGE<br />
Réglage d’usine à 10A.<br />
Un appui sur c donne 4,5 A.<br />
En restant appuyé sur c la valeur<br />
augmente <strong>de</strong> 0,5 A en 0,5 A.<br />
Quand la valeur voulue est atteinte<br />
relâcher c et appuyer sur g .<br />
* VALEUR D’USINE PAR DÉFAUT.<br />
Par exemple le choix <strong>de</strong> l’électrolyseur ou <strong>de</strong> la<br />
pompe <strong>chlore</strong> :<br />
Après être entré dans le menu _CL apparaît,<br />
appuyer sur c , ECL apparaît. Pour changer<br />
pour pompe doseuse appuyer sur c et vali<strong>de</strong>r<br />
par g .<br />
Pour passer d’une fonction à l’autre appuyer<br />
sur c pour changer ou sur g pour vali<strong>de</strong>r.<br />
Après 5 secon<strong>de</strong>s sans manipulation l’appareil<br />
sort automatiquement du menu.
10<br />
FRANÇAIS<br />
11 - Mise en Service<br />
Mettre la filtration en marche et allumer l’appareil<br />
(position ON).<br />
11. 1 Sel<br />
Verser le sel directement dans le bassin en laissant<br />
la filtration en marche.<br />
Ne pas mettre en marche l’appareil jusqu’à dissolution<br />
complète du sel.<br />
11. 5 <strong>La</strong> dio<strong>de</strong> verte clignote jusqu'à détection<br />
<strong>de</strong> réactif dans la chambre d'analyse, puis elle<br />
reste allumée dès l'amorçage terminé.<br />
11. 6 Quand la dio<strong>de</strong> verte reste fixe, éteindre<br />
l'appareil (position OFF), puis rallumer l'appareil.<br />
Deux à trois analyses peuvent être nécessaires<br />
pour la détermination du taux <strong>de</strong> <strong>chlore</strong> réel du<br />
bassin.<br />
11. 2 Ajout <strong>de</strong> Sel<br />
Vérifier le taux <strong>de</strong> sel. Si la concentration est<br />
inférieure à 4 g/l rajouter du sel en faisant le calcul<br />
suivant :<br />
Q = (4-T) x V<br />
Q = quantité en Kg <strong>de</strong> sel à rajouter<br />
4 = taux <strong>de</strong> sel correct<br />
T = taux relevé dans la piscine<br />
V = volume <strong>de</strong> la piscine en m 3 .<br />
Toujours arrêter l’appareil avant <strong>de</strong> rajouter<br />
quelque produit que ce soit.<br />
Attendre que le sel soit dissous avant <strong>de</strong> remettre<br />
en marche l’appareil.<br />
11. 3 Stabilisant<br />
<strong>La</strong> présence <strong>de</strong> stabilisant à 20 g/m 3 dans l’eau<br />
est fortement conseillée par fortes chaleurs pour<br />
éviter l’évaporation du <strong>chlore</strong> et diminuer la corrosion.<br />
Taux maximum : 50 g/m 3<br />
ATTENTION : Un taux <strong>de</strong> stabilisant trop BAS<br />
doublera la consommation <strong>de</strong> <strong>chlore</strong> <strong>de</strong> votre<br />
bassin. A l'inverse, un taux <strong>de</strong> stabilisant trop<br />
HAUT annulera l'action du <strong>chlore</strong> !<br />
Si la piscine était traitée par galets <strong>de</strong> <strong>chlore</strong>,<br />
mesurer le taux <strong>de</strong> stabilisant présent dans<br />
l'eau. Si la concentration dépasse 50 g/m 3 ,<br />
renouveler une partie <strong>de</strong> l'eau avant d'ajouter<br />
le sel.<br />
11. 4 Après une temporisation <strong>de</strong> 15 secon<strong>de</strong>s<br />
environ, procé<strong>de</strong>r à l'amorçage <strong>de</strong> l’amichloryte<br />
en appuyant sur durant 1 secon<strong>de</strong>.<br />
Si besoin faire un amorçage manuel en exerçant<br />
une pression continue sur pendant 15<br />
secon<strong>de</strong>s.<br />
11. 7 Régler le taux <strong>de</strong> <strong>chlore</strong> désiré en fonction<br />
<strong>de</strong> la configuration <strong>de</strong> votre bassin. Appuyer sur<br />
c et sur g , la dio<strong>de</strong> rouge tourne dans le sens<br />
<strong>de</strong>s aiguilles d'une montre. Relâcher le bouton<br />
en face du taux choisi.<br />
g<br />
Pour lancer une analyse forcée, appuyer sur c<br />
et g .<br />
11. 8 L'appareil fait une analyse du taux <strong>de</strong><br />
<strong>chlore</strong> <strong>de</strong> votre piscine, pilote et déclenche la<br />
production <strong>de</strong> <strong>chlore</strong> pour atteindre le point <strong>de</strong><br />
consigne sélectionné.<br />
- Si la mesure du <strong>chlore</strong> est inférieure au<br />
taux <strong>de</strong>mandé, la dio<strong>de</strong> verte s'allume et la<br />
production <strong>de</strong> <strong>chlore</strong> se met en marche (attention<br />
: n'oubliez pas <strong>de</strong> mettre l'électrolyseur<br />
ou la pompe doseuse en marche)<br />
- Si la mesure du <strong>chlore</strong> est supérieure<br />
au taux <strong>de</strong>mandé, la dio<strong>de</strong> est éteinte et les<br />
appareils <strong>de</strong> production <strong>de</strong> <strong>chlore</strong> ne fonctionnent<br />
pas.<br />
11. 9 Réglage <strong>de</strong> la durée<br />
d’inversion <strong>de</strong> polarité<br />
Votre appareil a été programmé en usine pour un<br />
changement <strong>de</strong> polarité toutes les 4 heures. Il est<br />
possible <strong>de</strong> modifier cette durée d’inversion <strong>de</strong> 1<br />
à 99 heures en fonction <strong>de</strong> la dureté <strong>de</strong> l’eau<br />
(TH) : (voir paragraphe 10)<br />
A titre indicatif :<br />
> 50° TH ≅ 3 heures<br />
entre 50°TH & 20°TH ≅ 4 à 20 heures<br />
< 20°TH ≅ 20 à 99 heures<br />
Si du calcaire se dépose sur l’électro<strong>de</strong>, il conviendra<br />
<strong>de</strong> diminuer le temps d’inversion.
11<br />
12 - Vérifications<br />
Mesurer le taux <strong>de</strong> <strong>chlore</strong> et le comparer à celui<br />
indiqué par l'appareil, une différence peut être<br />
constatée en fonction <strong>de</strong> l'endroit où a été<br />
prélevé l'échantillon analysé. Nous préconisons<br />
<strong>de</strong>s prélèvements à l'entrée <strong>de</strong>s skimmers ou<br />
directement sur le robinet <strong>de</strong> prise d'échantillon.<br />
12. 1 Ajout <strong>de</strong> produits chimiques<br />
Rappel : Chaque type d’électro<strong>de</strong> reçoit un<br />
courant spécifique indiqué sur l’étiquette latérale<br />
gauche.<br />
Exemple : Pour le modèle 30 = 4,5 A<br />
Pour le modèle 100 = 10 A (réglage usine)<br />
12. 3 <strong>La</strong>vage du filtre-vidange du<br />
bassin<br />
Arrêter l’appareil lors <strong>de</strong> toute manipulation <strong>de</strong> la<br />
vanne 6 voies du filtre : lavage, rinçage, vidange...<br />
FRANÇAIS<br />
Toujours arrêter le boîtier avant <strong>de</strong> rajouter <strong>de</strong>s<br />
produits chimiques directement dans le bassin.<br />
Attendre que les produits chimiques soient dissous<br />
avant <strong>de</strong> remettre en marche l’appareil.<br />
12. 2 Electro<strong>de</strong><br />
L'électro<strong>de</strong> est une pièce d'usure dont la<br />
longévité dépend <strong>de</strong>s facteurs suivants :<br />
- Taux <strong>de</strong> sel : Ne jamais faire fonctionner avec<br />
un taux <strong>de</strong> sel inférieur à 3,5 g/l.<br />
- Température <strong>de</strong> l'eau et hivernage : Couper le<br />
fonctionnement dès que la température <strong>de</strong> l'eau<br />
<strong>de</strong>scend à 15°C.<br />
L’électro<strong>de</strong> doit présenter un aspect net sans<br />
incrustation <strong>de</strong> calcaire. Le cas échéant la<br />
détartrer en la plongeant dans une solution contenant<br />
80% d’eau et 20% d’aci<strong>de</strong> chlorhydrique.<br />
Vérifier ensuite les raisons <strong>de</strong> l’entartrage :<br />
- trop faible concentration en sel,<br />
- réglage trop long du temps d’inversion<br />
<strong>de</strong> polarité,<br />
- électro<strong>de</strong> en fin <strong>de</strong> vie (voir paragraphe<br />
suivant),<br />
- défaut d’inversion du boîtier.<br />
<strong>La</strong> tension mesurable aux <strong>de</strong>ux bornes <strong>de</strong> l’électro<strong>de</strong><br />
doit être d’environ 9 volts. <strong>La</strong> mesurer en<br />
position V continu (DC), avec un taux <strong>de</strong> sel <strong>de</strong><br />
4g/l, une température d’eau supérieure à 15°C et<br />
une électro<strong>de</strong> non incrustée <strong>de</strong> calcaire.<br />
Si la tension dépasse 10,5 volts, l’électro<strong>de</strong> est<br />
usée et <strong>de</strong>vra être remplacée sous peu.<br />
12. 4 Mini chloration choc<br />
Appuyer sur Cl+ pendant 5 secon<strong>de</strong>s, toutes les<br />
dio<strong>de</strong>s clignotent en tournant. L’appareil<br />
déclenche la production <strong>de</strong> <strong>chlore</strong> pour monter le<br />
taux à 5 ppm ou effectue une production “forcée”<br />
pendant 2 heures. <strong>La</strong> sortie du mo<strong>de</strong> mini chloration<br />
choc est automatique et l’appareil reprend<br />
son cycle normal avec le point <strong>de</strong> consigne choisi<br />
précé<strong>de</strong>mment.<br />
12. 5 Inversion <strong>de</strong> polarité<br />
Votre appareil est réglable (voir chapitre 11. 9 ).<br />
<strong>La</strong> durée <strong>de</strong> vie <strong>de</strong> l'électro<strong>de</strong> dépend du nombre<br />
<strong>de</strong>s inversions subies. Par exemple : elle s'usera<br />
moins rapi<strong>de</strong>ment en inversant toutes les 6<br />
heures et plus rapi<strong>de</strong>ment en inversant toutes les<br />
2 heures.<br />
13 - Hivernage ou mise<br />
en sommeil<br />
- Mettre le réactif à l'abri du gel (refermer le<br />
clamp avant <strong>de</strong> débrancher le tuyau du réactif à<br />
l'entrée <strong>de</strong> la pompe P2).<br />
- Purger la pompe P2 en appuyant en continu sur<br />
jusqu'à épuisement du réactif dans le<br />
tuyau.<br />
- Eteindre l'appareil (bouton OFF).<br />
- Vi<strong>de</strong>r le vase d'analyse en sortant le tube cristal<br />
du collier « refoulement » et en déboîtant le<br />
tuyau à l'entrée <strong>de</strong> la pompe P1.
12<br />
FRANÇAIS<br />
14 - Liste <strong>de</strong>s défauts éventuels A01 Problème <strong>de</strong> flux<br />
- Manque <strong>de</strong> réactif ou pas <strong>de</strong> réactif détecté<br />
(dio<strong>de</strong> clignotante).<br />
- <strong>La</strong>tex <strong>de</strong> pompe usé ou hors service (dio<strong>de</strong><br />
clignotante).<br />
- Valeur incohérente ou manque <strong>de</strong> lumière<br />
(dio<strong>de</strong> allumée fixe).<br />
- Dio<strong>de</strong> <strong>chlore</strong> maxi clignotante (supérieur à<br />
2.5 mg/l), production arrêtée : Piscine<br />
désamorcée ou prises d'air intempestives.<br />
- Dio<strong>de</strong> clignotant intermittent long<br />
(3 secon<strong>de</strong>s) : défaut <strong>de</strong> détecteur <strong>de</strong> débit.<br />
- absence d’eau ou <strong>de</strong> flux dans la chambre<br />
d’analyse.<br />
- pompe hors d’usage ou défectueuse.<br />
A02 Problème <strong>de</strong> capteur<br />
- appareil ouvert.<br />
A03 Problème <strong>de</strong> capteur<br />
- dio<strong>de</strong> faible ou hors d’usage.<br />
En cas <strong>de</strong> défaut inexpliqué, mettre l'appareil en<br />
« by-pass » en appuyant sur g durant 10 secon<strong>de</strong>s<br />
et appeler votre service après vente (pour<br />
remettre le <strong>régulateur</strong> en fonctionnement normal<br />
appuyer sur g durant 10 secon<strong>de</strong>s).<br />
Cette position « by-pass » implique qu'il faut<br />
régler à nouveau manuellement les appareils<br />
<strong>de</strong> production <strong>de</strong> <strong>chlore</strong> suivant la configuration<br />
<strong>de</strong> votre piscine ---- production continue.<br />
A04 Problème <strong>de</strong> calcul <strong>de</strong> taux <strong>de</strong><br />
<strong>chlore</strong><br />
- valeurs incohérentes.<br />
A06 Défaut injection<br />
- pas ou plus <strong>de</strong> réactif.<br />
INFORMATIONS POUR SAV<br />
Les co<strong>de</strong>s erreurs A --<br />
sont affichés directement<br />
à l’écran. Ils impliquent une intervention sur<br />
l’appareil.<br />
Les co<strong>de</strong>s erreur b --<br />
et C --<br />
sont <strong>de</strong>s<br />
informations relatives à une anomalie temporaire<br />
ou un dysfonctionnement ne <strong>de</strong>mandant pas une<br />
maintenance immédiate. L’appareil fonctionne<br />
normalement. Ces erreurs n’apparaissent pas<br />
directement dans le menu. Elles sont indiquées<br />
par un point sur l’afficheur 888 .<br />
Pour faire apparaitre ces informations il faut<br />
appuyer sur CL + et g pour faire défiler s’il y a<br />
plusieurs erreurs .<br />
A07 Problème <strong>de</strong> lecture<br />
- pas <strong>de</strong> débit dans le circuit.<br />
b05 Problème <strong>de</strong> lecture<br />
- instabilité <strong>de</strong>s mesures,<br />
- air dans le circuit,<br />
- perturbation du capteur.<br />
b09 Défaut avertissement C<br />
- plus <strong>de</strong> sel (si électrolyseur),<br />
_<br />
- électro<strong>de</strong> entartrée ou défectueuse,<br />
- plus <strong>de</strong> <strong>chlore</strong> si pompe doseuse ou<br />
électrovanne,<br />
- pompe <strong>chlore</strong> ou électrovanne défectueuse,<br />
- plus <strong>de</strong> puissance en sortie <strong>de</strong> carte sel,<br />
- relais <strong>de</strong> comman<strong>de</strong> d’asservissement<br />
défectueux.
13<br />
B10<br />
Incohérences <strong>de</strong> lecture<br />
- défaut injection,<br />
- réactif presque vi<strong>de</strong>.<br />
C11<br />
Défaut système<br />
- problème interne sur la carte électronique.<br />
c12<br />
Défaut journal<br />
- problème interne sur la carte électronique.<br />
16 - Que faire en cas <strong>de</strong><br />
problème ?<br />
Toute intervention électrique sera<br />
réalisée par un électricien qualifié.<br />
Seul un pr<strong>of</strong>essionnel reconnu est<br />
habilité à ouvrir l’appareillage.<br />
Problème : L’appareil reste éteint<br />
Solution : Vérifiez le branchement sur le<br />
c<strong>of</strong>fret <strong>de</strong> filtration.<br />
Problème : L’appareil n’atteint pas la<br />
consigne <strong>de</strong> courant<br />
Solution : Vérifier :<br />
1- Le Taux <strong>de</strong> Sel (> 3.5 g/L),<br />
2- <strong>La</strong> température <strong>de</strong> l’eau (> 15°C),<br />
3- L'état <strong>de</strong> l'électro<strong>de</strong>, elle doit être propre<br />
sans incrustation. Si le problème persiste c’est<br />
que votre électro<strong>de</strong> faiblit et qu’elle <strong>de</strong>vra être<br />
remplacée.<br />
FRANÇAIS<br />
15 - Garantie<br />
Ces appareils sont garantis 2 ans pièces et main<br />
d'oeuvre hors pièce d'usure et réactif.<br />
Cette garantie couvre tout défaut, constaté pendant<br />
cette pério<strong>de</strong>, ne pouvant être imputé à une<br />
mauvaise utilisation par l'utilisateur.<br />
Le fabricant étant le seul apte à juger <strong>de</strong>s suites<br />
à donner au recours exercé.<br />
Notre responsabilité ne saurait être engagée<br />
dans le cadre du coût <strong>de</strong> maintien <strong>de</strong> l'eau <strong>de</strong><br />
baigna<strong>de</strong> pendant la pério<strong>de</strong> <strong>de</strong> réparation <strong>de</strong><br />
l'appareil (ajout <strong>de</strong> produits chimiques, etc…).<br />
L'utilisateur <strong>de</strong>vra accepter, si besoin était, un<br />
contrôle <strong>de</strong> son installation par notre S.A.V. qui<br />
effectuerait tout test nécessaire à la mise en évi<strong>de</strong>nce<br />
du défaut constaté.<br />
<strong>La</strong> garantie ne sera effective qu'après retour<br />
du certificat <strong>de</strong> garantie complété et renvoyé<br />
à l'adresse indiquée par votre installateur<br />
agréé. Le retour <strong>de</strong> chaque appareil est à la<br />
charge du client.<br />
En ce qui concerne l'utilisateur, la présente<br />
garantie ne fait pas obstacle à l'application <strong>de</strong> la<br />
garantie légale <strong>de</strong> vices cachés telle qu'elle<br />
résulte <strong>de</strong>s articles 1641 et suivants du co<strong>de</strong><br />
civil.<br />
Elle n'exonère pas non plus <strong>de</strong> la garantie légale<br />
<strong>de</strong> conformité inscrite dans le co<strong>de</strong> <strong>de</strong> la consommation<br />
par ordonnance 2005136 du<br />
17/02/05.<br />
Problème : Chloration faible malgré un<br />
fonctionnement correct <strong>de</strong><br />
l’appareil<br />
Solution : Vérifier :<br />
1- Vérifier le pH (entre 6,9 et 7,4),<br />
2- Le taux <strong>de</strong> stabilisant (entre 20 et 50 g/m 3 ),<br />
3- Augmenter le temps <strong>de</strong> filtration.<br />
Problème : Taux <strong>de</strong> <strong>chlore</strong> nul malgré<br />
un fonctionnement <strong>de</strong><br />
l’appareil<br />
Solution : Vérifier :<br />
1- Présence <strong>de</strong> peroxy<strong>de</strong> d’hydrogène : Ce produit<br />
annule la lecture du <strong>chlore</strong> pendant 3<br />
semaines environ,<br />
2- Eau saturée ou déséquilibrée : Procé<strong>de</strong>r à une<br />
chloration choc, équi<strong>libre</strong>r le TAC (12 à 18° F) si<br />
nécessaire renouveler une partie <strong>de</strong> l’eau <strong>de</strong> la<br />
piscine.<br />
Problème : Chlore trop bas : CL<br />
sur afficheur :<br />
Solution : Causes possibles :<br />
1- Electrolyseur : éteint ou défectueux en sécurité<br />
température, manque <strong>de</strong> sel, électro<strong>de</strong><br />
défectueuse, appareil externe sous dimensionné.<br />
2- Pompe <strong>chlore</strong> : sous dimensionnée, plus <strong>de</strong><br />
<strong>chlore</strong> liqui<strong>de</strong>, latex défectueux, pompe éteinte<br />
ou défectueuse.<br />
3- Electrovanne : dysfonctionnement ou éteinte,<br />
plus <strong>de</strong> <strong>chlore</strong>.<br />
4- Eau : manque <strong>de</strong> stabilisant, présence <strong>de</strong> peroxy<strong>de</strong><br />
d’hydrogène, produit extérieur masquant<br />
la lecture du <strong>chlore</strong>.<br />
III
14<br />
Caution<br />
FRANÇAIS<br />
This machine should not be used by persons<br />
(including children) with reduced physical, sensory<br />
or mental abilities, nor by people who have no<br />
experience or knowledge <strong>of</strong> it, unless they benefited<br />
from supervision or prior instructions concerning<br />
the use <strong>of</strong> the apparatus, by a person<br />
responsible for their safety (NF EN 60335-1/A1).<br />
Precautions to take before working on the insi<strong>de</strong><br />
<strong>of</strong> the box:<br />
Isolate the electrical installation using an energyseparating<br />
<strong>de</strong>vice such as:<br />
- section circuit breaker<br />
or - switch disconnector<br />
or - fuse-linked circuit breaker.<br />
Device to be installed to protect from short-circuits<br />
or overcurrent:<br />
- 30 mA differential circuit breaker (power to be<br />
adapted <strong>de</strong>pending on the installation). <strong>The</strong> protection<br />
<strong>de</strong>vice caliber cannot exceed 10 A.<br />
End-<strong>of</strong>-life <strong>of</strong> the machine<br />
If you wish to replace or dispose <strong>of</strong><br />
the machine, do not discard it<br />
as household waste nor put it<br />
in your local recycling containers.<br />
On a new machine, this symbol<br />
means that the equipment must<br />
not be thrown out as trash and<br />
should be specifically collected in<br />
or<strong>de</strong>r to be re-used, recycled or valorized.<br />
If it contains substances that are potentially dangerous<br />
for the environment, these must be eliminated<br />
or neutralized.<br />
You can give the machine to a charitable or<br />
social organization which can repair it and put it<br />
back in circulation. If you buy a new machine,<br />
you can leave the old one at the point <strong>of</strong> purchase<br />
or request that the <strong>de</strong>livery company take<br />
it back.<br />
This is known as a "one for one" return. If not,<br />
bring the machine to a drop-<strong>of</strong>f recycling center,<br />
if your locality has set up selective collection <strong>of</strong><br />
these products.<br />
Precaution :<br />
Connect the green-yellow power supply conductor<br />
cable to the general protection circuit.<br />
<strong>The</strong> unit must be installed in a pool<br />
house (plant room) or in a covered place.<br />
Give to a<br />
social<br />
organization<br />
Return the<br />
used machine<br />
to the<br />
distributor<br />
when making<br />
a new<br />
purchase<br />
Leave the<br />
used<br />
machine at<br />
the drop-<strong>of</strong>f<br />
recycling<br />
center<br />
NF EN 60335-1/A1
15<br />
1 - Parcel coding<br />
Regulator<br />
<br />
V2<br />
Regulator<br />
<br />
V2.2<br />
Injection<br />
<br />
regulator<br />
Injection<br />
regulator <br />
2 in 1 <br />
2 in 1<br />
<br />
References<br />
ANA01<br />
m 3<br />
Chlorine regulation<br />
pH regulation<br />
Internal salt chlorinator<br />
External salt chlorinator<br />
Pump or solenoid valve<br />
Mini shock-chlorination<br />
0 to: <strong>de</strong>pending<br />
on prod<br />
X X X<br />
0 to: <strong>de</strong>pending<br />
ANA02<br />
on prod<br />
X X X X<br />
ANA031 from 0 to 30 m 3 X X X X<br />
ANA032 from 30 to 500 m 3 X X X X<br />
ANA04 1 - 30 m 3 X X X X<br />
ANA05 30 - 100 m 3 X X X X<br />
Amichloryte reagent<br />
pH reagent<br />
ENGLISH<br />
2 - Technical characteristics<br />
pictograms:<br />
For your machine to operate properly, please<br />
comply with the following specifications:<br />
Electrical connection: 220 volts - 50/60 Hz<br />
controlled by the filtration pump.<br />
Priming<br />
Production<br />
Colorimetric level: 350 nm to 600 nm.<br />
P1 peristaltic pump: 6 liters/hour for sampling.<br />
Default<br />
P2 peristaltic pump: 0.1 liters/hour for dosing<br />
the reagent.<br />
Set<br />
Water temperature: Do not operate below<br />
15°C.<br />
Colorimetric comparison reagent:<br />
Amichloryte ®.<br />
Compliant with EEC standards.<br />
CL +<br />
g<br />
Mini shockchlorination<br />
Adjusting the<br />
values
16<br />
ENGLISH<br />
3 - Operating principles<br />
<strong>The</strong> regulator takes a sample <strong>of</strong> your pool<br />
water, automatically adds a patented<br />
reagent, «AMICHLORYTE®» and compares<br />
the colorimetric variation <strong>of</strong> the mixture<br />
to <strong>de</strong>termine the chlorine concentration<br />
<strong>of</strong> your pool.<br />
Depending on the configuration and on the<br />
frequency <strong>of</strong> use <strong>of</strong> your pool, you choose<br />
the chlorine concentration necessary for<br />
<strong>de</strong>sired disinfection, leaving the machine to<br />
run the chlorine production systems.<br />
Analyses are carried out every 30 minutes<br />
when the chlorine concentration is below<br />
the set point, and every 2 hours when this<br />
concentration has been attained.<br />
It is possible, as well, to change this frequency<br />
(see paragraph 10. )<br />
Every time a set point is changed, a new<br />
analysis is carried out.<br />
If there is a significant difference with the<br />
previous measurement, the machine carries<br />
out a new confirmatory analysis.<br />
After each analysis, the machine will trigger<br />
the chlorine production system (salt generator,<br />
dosage pump, solenoid valve) or not,<br />
<strong>de</strong>pending on the set point.<br />
- Check that the pool has not been<br />
treated with hydrogen peroxi<strong>de</strong> or with<br />
hydrogen peroxi<strong>de</strong>-based anti-algae<br />
treatments in the three weeks preceding<br />
the installation. If it has been, then postpone<br />
the commissioning for the same<br />
amount <strong>of</strong> time.<br />
- Adjust the pH between 7.0 and 7.4.<br />
- <strong>The</strong> chlorine stabilizer concentration<br />
should be between 20 and 50 ppm (except<br />
for indoor pools).<br />
- Adjust the TA (rate <strong>of</strong> total alkalinity)<br />
between 12° and 18°F.<br />
- <strong>The</strong> water temperature in the pool<br />
must be 18°C or above, for optimal<br />
machine measurement.<br />
- Salt concentration:<br />
Recommen<strong>de</strong>d: 4 g/l.<br />
Minimum: 3.5 g/l.<br />
- If you use a chlorine dosage pump,<br />
remember to size the pump in relation to<br />
the volume <strong>of</strong> pool water and frequency <strong>of</strong><br />
pool use.<br />
<strong>The</strong> “injection” mo<strong>de</strong>l is <strong>de</strong>livered with a<br />
chlorine pump:<br />
- 0 to 30 m 3 2,2 l/h<br />
- 30 to 500 m 3 6,0 l/h<br />
4 - Precautions to take before<br />
switching on for the first time<br />
If installing this machine in the case <strong>of</strong> a<br />
pool that is already chlorinated (Cl > 5<br />
ppm), <strong>de</strong>crease the chlorine concentration<br />
(Cl < 5 ppm) before turning on the machine.<br />
Compatibility :<br />
Make sure that the construction materials<br />
(<strong>of</strong> pool and surrounding areas) are<br />
compatible with the use <strong>of</strong> chlorinated<br />
and salt water.
17<br />
5 - Installing in the pool house or machine area<br />
ENGLISH<br />
Example <strong>of</strong> an electrical set-up. Please refer to the diagram provi<strong>de</strong>d by the manufacturer<br />
<strong>of</strong> the electric box.<br />
1) Using the screws and pegs provi<strong>de</strong>d, fasten<br />
the electric box in the pool house at a reasonable<br />
handling height. It is essential that the box be<br />
perfectly level.<br />
2) Fasten the reagent container as close as<br />
possible to the box, but never any higher than<br />
it.
18<br />
ENGLISH<br />
3) Position the pipe saddle clamp on the discharge<br />
circuit between the filtration box and the<br />
<strong>de</strong>vices for heating, adjustments, chlorine production<br />
and product injection. If there is continual<br />
air intake, place the pipe saddle clamp with the<br />
check valve un<strong>de</strong>rneath or on the si<strong>de</strong>. Connect<br />
this pipe saddle to the transparent crystal tube<br />
(suction line).<br />
4) Screw in the feed connection and make it<br />
water-tight by following the direction <strong>of</strong> flow indicated<br />
by the arrow on the check valve.<br />
5) Position a second pipe saddle clamp on the<br />
waste line (sand filter mo<strong>de</strong>l) or else connect up<br />
to the closest waste outlet.<br />
To it, connect and adjust the black waste pipe<br />
which protru<strong>de</strong>s from the machine. Be careful not<br />
to pinch or crimp the pipes when doing this.<br />
6) Connect the Amichloryte container's discharge<br />
pipe to the P2 pump and loosen the pipe<br />
saddle if necessary. Electrically connect the<br />
machine to the pool pump's servo-control switch.<br />
Make sure that the machine switches <strong>of</strong>f at the<br />
same time the filtration does.<br />
7) Connect the salt chlorinator or dosage pump<br />
to the connection box provi<strong>de</strong>d and suited for the<br />
mo<strong>de</strong>l purchased (see chamber installation). If<br />
it is a dosage pump, please refer to the<br />
"dosage pump/solenoid valve" configuration<br />
example.<br />
6 - Installing the chamber<br />
Affix the chamber onto the piping<br />
returning to the pool, after the filter and<br />
after the preheater or start <strong>of</strong> the surge<br />
tank.<br />
<strong>The</strong> water must circulate from the T-<br />
connection towards the reduction (follow<br />
the direction <strong>of</strong> the arrow on the<br />
chamber); the water flow must imperatively<br />
circulate between the plates<br />
(electro<strong>de</strong>).<br />
Plan for enough space on the<br />
removable si<strong>de</strong> <strong>of</strong> the chamber<br />
so as to be able to <strong>de</strong>tach the<br />
electro<strong>de</strong>. If the chamber is<br />
installed on a by-pass, make<br />
sure that at least 80% <strong>of</strong> the<br />
flow goes through it.
19<br />
7 - Flow switch<br />
only on mo<strong>de</strong>l 2-in-1<br />
9 - Salt electro<strong>de</strong> electrical<br />
supply<br />
We recommend installing a flow switch in the following<br />
cases:<br />
- filtration pump situated above the water<br />
level (risk <strong>of</strong> <strong>de</strong>-priming).<br />
Operating principle :<br />
If the flow is acci<strong>de</strong>ntally interrupted, or if backwashing<br />
is done, and in all cases when the water<br />
passage speed is below 2.9m 3 /h, the <strong>de</strong>tector will<br />
switch <strong>of</strong>f the machine.<br />
Installation :<br />
Install the flow switch on the chamber in its<br />
emplacement by positioning the arrow above it in<br />
the direction <strong>of</strong> flow.<br />
<strong>The</strong> flow switch is equipped with a resistance<br />
which enables the box to <strong>de</strong>tect it automatically.<br />
For this reason do not use a flow switch that is<br />
not equipped with this type <strong>of</strong> resistance.<br />
Connect the cable inten<strong>de</strong>d for this use. Correctly<br />
tighten the nuts.<br />
A poorly-tightened connection can result in overheating.<br />
Beyond the length <strong>of</strong> cable supplied with the<br />
machine, the cable section should be sufficient,<br />
and the connections should be protected and<br />
adapted to the cable section used.<br />
<strong>The</strong> electrical connection must be carried out<br />
by a qualified electrician and must be compliant<br />
with the standard: NFC 15-100 (Edition<br />
2002).<br />
<strong>The</strong> electro<strong>de</strong> will automatically be powered-up<br />
after a time-lag period.<br />
- Factory settings :<br />
mo<strong>de</strong>l 30 - 4,5 A - maximum<br />
mo<strong>de</strong>l 100 - 10 A - maximum<br />
ENGLISH<br />
8 - Installing the Earth<br />
only for mo<strong>de</strong>l 2-in-1<br />
We recommend installing an earth in or<strong>de</strong>r to<br />
catch residual electrical currents in the water<br />
(static).<br />
10 - Settings<br />
Mounting the Earth :<br />
Install the Earth according to the standards in<br />
practice in the country <strong>of</strong> installation.<br />
Device indicates “nor” when functioning.<br />
To change the settings, please use the<br />
services <strong>of</strong> a manufacturer-listed<br />
pr<strong>of</strong>essional.<br />
Menu function: regulator g & c + ON<br />
See diagram on the following page.
20<br />
10 - Settings (cont.)<br />
menu: PRODUCTION<br />
ECL* = Salt chlorinator<br />
PCL = Chlorine pump or solenoid valve<br />
F menu: remote FILTRATION<br />
OFF* = Distance for sampling less than 5 m.<br />
ON = Distance for sampling from 5 to 30 m.<br />
ENGLISH<br />
PRO menu: PUBLIC or forced<br />
ANALYSIS<br />
OFF* = Normal analysis mo<strong>de</strong>.<br />
Every 2 hours.<br />
ON = Forced analysis<br />
Every 30 minutes.<br />
DUR menu: CHANGE OF<br />
POLARITY<br />
4* = Polarity changed every 4 hours.<br />
1 = Polarity changed every hour. By<br />
pressing on c for several seconds,<br />
the time increases until obtention <strong>of</strong><br />
the <strong>de</strong>sired time <strong>of</strong> change <strong>of</strong> polarity.<br />
Stop pressing on c .<br />
INT menu: AMPERAGE<br />
Factory setting: 10A.<br />
By pressing once on c the 4.5 A<br />
value is displayed. By maintaining<br />
pressure on c the value increases in<br />
0.5 A increments.<br />
When the <strong>de</strong>sired value has been<br />
reached, release c and press on g .<br />
* FACTORY SETTINGS.<br />
For example, for choosing the salt chlorinator<br />
or chlorine pump :<br />
After accessing the menu, _CL will be displayed.<br />
Press on c , then ECL ECL will be displayed.<br />
To change and select the dosage pump,<br />
press on c and then confirm by pressing on<br />
g .<br />
To move from one function to another, press on<br />
c C to change or press on g + to confirm.<br />
After 5 seconds without any manipulation, the<br />
machine will automatically move out <strong>of</strong> the<br />
menu.
21<br />
11 - Switching on<br />
Activate the filtration and turn on the machine<br />
(position: "ON”).<br />
11. 1 Salt<br />
Pour the salt directly into the pool, with the filtration<br />
running.<br />
Do not turn the machine on until the salt has<br />
been completely dissolved.<br />
11. 2 Adding Salt<br />
Check the salt concentration. If it is less than 4 g/l<br />
add salt by using the following calculation:<br />
Q = (4-T) x V<br />
Q = quantity <strong>of</strong> salt to add, in kg<br />
4 = correct salt concentration<br />
T = concentration recor<strong>de</strong>d in pool<br />
V = pool volume in m 3 .<br />
Always turn <strong>of</strong>f the machine before adding any<br />
products whatsoever.<br />
Wait until the salt is dissolved before turning the<br />
machine back on again.<br />
11. 3 Stabilizer<br />
<strong>The</strong> use <strong>of</strong> a stabilizer, 20 g/m 3 in water, is strongly<br />
recommen<strong>de</strong>d in very hot weather to avoid<br />
chlorine evaporation and to lessen corrosion.<br />
Maximum concentration: 50 g/m 3<br />
NOTE: Too LOW a concentration <strong>of</strong> stabilizer<br />
will double chlorine consumption in your<br />
pool. On the other hand, too HIGH a concentration<br />
<strong>of</strong> stabilizer will cancel out the chlorine<br />
effect!<br />
If the pool treatment is done by means <strong>of</strong><br />
chlorine tablets, measure the concentration<br />
<strong>of</strong> stabilizer present in the water. If the concentration<br />
exceeds 50 g/m3, replenish part <strong>of</strong><br />
the water before adding the salt.<br />
11. 4 After a time-lag period <strong>of</strong> approximately 15<br />
seconds, begin the amychlorite priming by pushing<br />
on for 1 second. If necessary, carry<br />
out a manual priming by continuously pressing<br />
on for 15 seconds.<br />
11. 5 <strong>The</strong> green led light will blink until reagent<br />
has been <strong>de</strong>tected in the analysis chamber, and<br />
then it will remain lit once the priming is finished.<br />
11. 6 When the green led light has stopped<br />
blinking, turn <strong>of</strong>f the machine (position "OFF"),<br />
then turn the machine back on again. It may be<br />
necessary to do two or three analyses in or<strong>de</strong>r to<br />
<strong>de</strong>termine the real chlorine concentration <strong>of</strong> the<br />
pool.<br />
11. 7 Adjust the <strong>de</strong>sired chlorine concentration<br />
<strong>de</strong>pending on your pool's configuration. Press on<br />
c and on g , and the red led will move clockwise.<br />
Let go <strong>of</strong> the g button when it has reached<br />
the chosen concentration point.<br />
To launch a forced analysis, press on c and g .<br />
11. 8 <strong>The</strong> machine carries out an analysis <strong>of</strong><br />
your pool's chlorine concentration, and manages<br />
and triggers chlorine production, in or<strong>de</strong>r to reach<br />
the selected set point.<br />
- If the chlorine measurement is below<br />
the requested concentration, the green led<br />
comes on and the chlorine concentration starts<br />
up.<br />
(Note: do not forget to turn on the salt chlorinator<br />
or dosage pump).<br />
- If the chlorine measurement is above<br />
the requested concentration, the led is <strong>of</strong>f,<br />
and the chlorine production <strong>de</strong>vices do not work.<br />
11. 9 Adjusting the change <strong>of</strong><br />
polarity time<br />
Your machine has been factory-set for a change<br />
<strong>of</strong> polarity every 4 hours. It is possible to modify<br />
this change <strong>of</strong> polarity time, from 1 to 99 hours,<br />
<strong>de</strong>pending on the total hardness <strong>of</strong> the water<br />
(TH). (See paragraph 10)<br />
As an indication :<br />
> 50° TH ≅ 3 hours<br />
between 50°TH & 20°TH ≅ 4 to 20 hours<br />
< 20°TH ≅ 20 to 99 hours<br />
If the electro<strong>de</strong> scales-up, you should shorten the<br />
change <strong>of</strong> polarity time.<br />
ENGLISH
22<br />
ENGLISH<br />
12 - Verifications<br />
Measure the chlorine concentration and compare<br />
it to the concentration displayed by the machine.<br />
A difference may be noted, <strong>de</strong>pending on the<br />
place where the analysis sample was taken. We<br />
suggest that sampling be done at the inlet to the<br />
skimmers or directly on the sampling stopcock.<br />
12. 1 Adding chemical products<br />
Always turn the system <strong>of</strong>f before adding chemical<br />
directly into the pool. Wait until the chemical<br />
products have all dissolved before turning the<br />
machine on again.<br />
12. 2 Electro<strong>de</strong><br />
<strong>The</strong> electro<strong>de</strong> is a wear-sensitive part, and its life<br />
span <strong>de</strong>pends on the following factors:<br />
- Salt concentration: Never run the machine<br />
with a salt concentration less than 3.5 g/l.<br />
- Water temperature and winterizing: Turn <strong>of</strong>f<br />
the machine whenever the water temperature<br />
drops to 15°C.<br />
<strong>The</strong> electro<strong>de</strong> should be clean-looking, without<br />
any scaling. If need be, <strong>de</strong>-scale the electro<strong>de</strong> by<br />
dipping it in a solution <strong>of</strong> 80% water and 20%<br />
hydrochloric acid. Next, check the reasons for<br />
this furring-up.<br />
- the salt concentration is too low,<br />
- the setting for change <strong>of</strong> polarity time is<br />
too long,<br />
- the electro<strong>de</strong> is worn out (see<br />
paragraph below),<br />
- the box has an inversion <strong>de</strong>fect.<br />
<strong>The</strong> measurable voltage at the two poles <strong>of</strong> the<br />
electro<strong>de</strong> should be about 9 volts. Measure this in<br />
continuous V position (DC), with a salt concentration<br />
<strong>of</strong> 4g/l, water temperature above 15°C and<br />
an electro<strong>de</strong> that is not furred-up with scale.<br />
the voltage exceeds 10.5 volts, the electro<strong>de</strong> is<br />
worn out and should be replaced rapidly.<br />
Remin<strong>de</strong>r : Each type <strong>of</strong> electro<strong>de</strong> needs a specific<br />
type <strong>of</strong> electrical current, indicated on the left<br />
si<strong>de</strong> label.<br />
Example : For mo<strong>de</strong>l 30 = 4.5 A<br />
For mo<strong>de</strong>l 100 = 10 A (original factory setting).<br />
12. 3 Washing the pool drainage<br />
filter<br />
Turn the machine <strong>of</strong>f whenever you handle the 6-<br />
way filter control valve: washing, rinsing, draining,<br />
etc.<br />
12. 4 Mini shock-chlorination<br />
Press on "Cl+" for 5 seconds; all <strong>of</strong> the led lights<br />
blink and turn. <strong>The</strong> machine starts chlorine production<br />
to increase the concentration to 5 ppm or<br />
carries out a "forced" production run for 2 hours.<br />
Afterwards, the machine will automatically move<br />
out <strong>of</strong> mini chlorination-shock mo<strong>de</strong>, and the system<br />
will return to its normal cycle with the previously-chosen<br />
set point.<br />
12. 5 Change <strong>of</strong> polarity<br />
Your machine is adjustable (see heading 11. 9 ).<br />
<strong>The</strong> life span <strong>of</strong> the electro<strong>de</strong> <strong>de</strong>pends on the<br />
number <strong>of</strong> changes <strong>of</strong> polarity carried out. For<br />
example: it will wear out less quickly if there is<br />
change <strong>of</strong> polarity every 6 hours, and more quickly<br />
if this is done every 2 hours.<br />
13 - Winterizing or inactive<br />
mo<strong>de</strong><br />
- Store the reagent in a place where it will not<br />
freeze (close the clamp before disconnecting the<br />
reagent piping at the inlet to pump P2).<br />
- Purge pump P2 by pressing continuously on<br />
until there is no more reagent in the<br />
pipe.<br />
- Turn the machine <strong>of</strong>f (“OFF” button).<br />
- Empty the analysis chamber by removing the<br />
crystal tube from the "discharge" pipe saddle,<br />
and by disconnecting the pipe at the inlet to the<br />
P1 pump.
23<br />
14 - List <strong>of</strong> potential problems A01 Problem with flow<br />
- Not enough reagent or no reagent <strong>de</strong>tected at<br />
all (blinking led).<br />
- Pump latex worn or broken (blinking led).<br />
- Incoherent measurement or lack <strong>of</strong> light ( led<br />
continually on).<br />
- "Chlorine max" led is blinking (above 2.5 mg/l),<br />
production stopped: pool <strong>de</strong>-primed or<br />
unplanned in-leaking <strong>of</strong> air.<br />
- led blinks slowly (3 seconds): problem with<br />
flow <strong>de</strong>tector.<br />
If there is an inexplicable problem, put the<br />
machine on "by-pass" by pressing on g for 10<br />
seconds, and call your after-sales service (to put<br />
the regulator back on normal operations, press<br />
on g for 10 seconds).<br />
This "by-pass" position means that the chlorine<br />
production machines must once again be<br />
manually set to fit your pool configuration ----<br />
continuous production.<br />
- no water or flow in the analysis chamber.<br />
- pump <strong>de</strong>fective or out <strong>of</strong> or<strong>de</strong>r.<br />
A02 Problem with sensor<br />
- machine open.<br />
A03 Problem with sensor<br />
- dio<strong>de</strong> weak or out <strong>of</strong> or<strong>de</strong>r.<br />
A04 Problem with calculating chlorine<br />
concentration<br />
- inconsistent values.<br />
A06 Injection <strong>de</strong>fect<br />
- no reagent present, or none left.<br />
ENGLISH<br />
INFORMATION FOR AFTER-SALES<br />
SERVICE<br />
A --<br />
are directly displayed<br />
<strong>The</strong> error co<strong>de</strong>s<br />
on the screen. <strong>The</strong>y mean that the machine<br />
needs maintenance.<br />
b --<br />
and C --<br />
indicate<br />
<strong>The</strong> error co<strong>de</strong>s<br />
information pertaining to a temporary dysfunction<br />
or a problem that does not require immediate<br />
maintenance. <strong>The</strong> machine is running normally.<br />
<strong>The</strong>se errors do not appear directly in the menu.<br />
<strong>The</strong>y are indicated by a dot on the display screen<br />
888 .<br />
To display this information, it is necessary to<br />
press on CL + and g to roll out the menu indications<br />
if there are several errors.<br />
A07 Reading error<br />
- no flow through the circuit.<br />
b05 Reading error<br />
- unstable measurements,<br />
- air in the circuit,<br />
- sensor disruption.<br />
_<br />
b09 Warning error C<br />
- no salt left (if salt chlorinator),<br />
- electro<strong>de</strong> scaled-up or <strong>de</strong>fective,<br />
- no chlorine left, if dosage pump or solenoid<br />
valve,<br />
- chlorine pump or solenoid valve <strong>de</strong>fective,<br />
- no electrical power at output from salt board,<br />
- servo-control relay <strong>de</strong>fective.
24<br />
ENGLISH<br />
B10<br />
Reading inconsistencies<br />
- injection <strong>de</strong>fect,<br />
- reagent nearly empty.<br />
C11<br />
System <strong>de</strong>fect<br />
- internal problem with the electronic board.<br />
c12<br />
Logging <strong>de</strong>fect<br />
- internal problem with the electronic board.<br />
15 - Guarantee<br />
<strong>The</strong>se machines are guaranteed two years for<br />
parts and manpower, except wearing parts and<br />
reagents.<br />
This guarantee covers all <strong>de</strong>fects recor<strong>de</strong>d during<br />
this period that are not imputed to improper<br />
handling by the user.<br />
<strong>The</strong> manufacturer is sole judge <strong>of</strong> what must be<br />
done to remedy the reported claim.<br />
We would in no way be responsible for maintaining<br />
the pool water during the time it might take to<br />
repair the machine (addition <strong>of</strong> chemical products,<br />
etc). If need be, the user must accept a verification<br />
<strong>of</strong> the installation by our after-sales<br />
agent who will carry out all tests necessary to<br />
prove the existence <strong>of</strong> the reported <strong>de</strong>fect.<br />
16 - Troubleshooting?<br />
Any electrical manipulations must<br />
be done by a qualified electrician.<br />
Only approved pr<strong>of</strong>essionals are<br />
authorized to open the machine.<br />
Problem : <strong>The</strong> machine remains turned<br />
<strong>of</strong>f<br />
Solution : Check the electrical connection on<br />
the filtration box.<br />
Problem : <strong>The</strong> machine does not reach<br />
the electric current set point<br />
Solution : Check:<br />
1- <strong>The</strong> salt concentration (> 3.5 g/l),<br />
2- <strong>The</strong> water temperature (> 15°C),<br />
3- <strong>The</strong> condition <strong>of</strong> the electro<strong>de</strong>: it must be clean<br />
and scale-free. If the problem persists, this<br />
means that your electro<strong>de</strong> is wearing out and<br />
needs to be replaced.<br />
Problem : Low chlorination in spite <strong>of</strong> the<br />
proper running <strong>of</strong> the machine<br />
Solution : Check:<br />
1- <strong>The</strong> pH (between 6.9 and 7.4),<br />
2- <strong>The</strong> stabilizer concentration (between 20 and<br />
50g/m 3 ),<br />
3- Increase the filtration time.<br />
Problem : No chlorine, in spite <strong>of</strong> the<br />
proper running <strong>of</strong> the machine<br />
Solution : Check:<br />
1- Presence <strong>of</strong> hydrogen peroxi<strong>de</strong>: this product<br />
cancels the chlorine reading for approximately 3<br />
weeks,<br />
2- Saturated or imbalanced water: carry out<br />
shock-chlorination, re-balance the TA (12 to<br />
18°F) and, if necessary, replenish part <strong>of</strong> the pool<br />
water.<br />
This guarantee will only be binding after the<br />
guarantee certificate has been filled in and<br />
sent to the address indicated by your<br />
approved installer. Machine return costs are<br />
borne by the user.<br />
With regard to the user, this guarantee does not<br />
hin<strong>de</strong>r the application <strong>of</strong> legal guarantees covering<br />
hid<strong>de</strong>n <strong>de</strong>fects such as those <strong>de</strong>fined in<br />
Articles1641 and others <strong>of</strong> the French civil co<strong>de</strong><br />
<strong>of</strong> law.<br />
Neither does it exonerate from the legal conformity<br />
guarantee established in the French consumer<br />
co<strong>de</strong> <strong>of</strong> law, ordinance 2005136 <strong>of</strong> Feb.<br />
17, 2005.<br />
Problem : Chlorine too low: CL<br />
on the display:<br />
Solution : Possible causes:<br />
1- Salt chlorinator: turned <strong>of</strong>f or <strong>de</strong>fective concerning<br />
temperature safety, salt shortage, <strong>de</strong>fective<br />
electro<strong>de</strong>, outsi<strong>de</strong> machine too small.<br />
2- Chlorine pump: too small, shortage <strong>of</strong> liquid<br />
chlorine, <strong>de</strong>fective latex, pump turned <strong>of</strong>f or<br />
<strong>de</strong>fective.<br />
3- Solenoid valve: dysfunction or turned <strong>of</strong>f; no<br />
more chlorine.<br />
4- Water: stabilizer shortage, presence <strong>of</strong> hydrogen<br />
peroxi<strong>de</strong>, outsi<strong>de</strong> product masking the chlorine<br />
reading.<br />
III
25<br />
Advertencia<br />
Este aparato no está previsto para ser utilizado<br />
por personas (o niños) con capacida<strong>de</strong>s físicas,<br />
sensoriales o mentales reducidas, o por personas<br />
sin experiencia o conocimientos, salvo si han<br />
podido beneficiarse, gracias a una persona<br />
responsable <strong>de</strong> su seguridad, <strong>de</strong> una vigilancia o<br />
<strong>de</strong> instrucciones previas sobre su utilización. (NF<br />
60335-1 / A1)<br />
Precaución a tomar antes <strong>de</strong> cualquier intervención<br />
<strong>de</strong>ntro <strong>de</strong> la caja:<br />
Aislar la instalación eléctrica mediante un dispositivo<br />
<strong>de</strong> separación <strong>de</strong> la energía en forma <strong>de</strong> un:<br />
- disyuntor seccionador<br />
o - interruptor seccionador<br />
o - seccionador <strong>de</strong> fusible.<br />
Su aparato ha terminado su vida<br />
útil.<br />
Si <strong>de</strong>sea <strong>de</strong>sembarazarse <strong>de</strong> él o<br />
sustituirlo, no lo tire al cubo <strong>de</strong><br />
la basura ni a los contenedores<br />
selectivos <strong>de</strong> su municipio. En un<br />
aparato nuevo, este símbolo significa<br />
que el equipo no <strong>de</strong>be tirarse<br />
y que será objeto <strong>de</strong> una colecta<br />
selectiva con vistas a su reutilización,<br />
a su reciclaje o a su valorización.<br />
Si contiene sustancias potencialmente peligrosas<br />
para el medio ambiente, éstas se eliminarán<br />
o neutralizarán.<br />
Pue<strong>de</strong> darlo a una asociación social y solidaria,<br />
que podrá repararlo y volver a ponerlo en circulación.<br />
Si compra uno nuevo, pue<strong>de</strong> <strong>de</strong>positar el<br />
viejo en la tienda o pedirle al repartidor que lo<br />
recupere.<br />
ESPAÑOL<br />
Dispositivo a instalar para protegerse contra cortocircuitos<br />
o sobreintensida<strong>de</strong>s:<br />
- disyuntor diferencial 30 mA (adoptar la potencia<br />
en función <strong>de</strong> la instalación). El ca<strong>libre</strong> <strong>de</strong>l dispositivo<br />
<strong>de</strong> protección no podrá sobrepasar los<br />
10A.<br />
Es la recuperación <strong>de</strong>nominada “Uno por Uno”.<br />
Si no, llévelo a un Punto limpio, si su municipio<br />
ha organizado una colecta selectiva <strong>de</strong> estos<br />
productos.<br />
Precaución:<br />
Conectar el conductor ver<strong>de</strong>-amarillo <strong>de</strong>l cable <strong>de</strong><br />
alimentación al circuito general <strong>de</strong> protección.<br />
Es obligatorio instalar la caja en los<br />
locales técnicos o bajo cubierta.<br />
Dar a una<br />
Asociación<br />
con vocación<br />
social<br />
Devolver el<br />
aparato<br />
usado al<br />
distribuidor<br />
al comprar<br />
uno nuevo<br />
Depositar el<br />
aparato<br />
usado en un<br />
Punto Limpio<br />
NF EN 60335-1/A1
26<br />
1 - Codificación <strong>de</strong>l paquete<br />
Regulador<br />
<br />
V2<br />
Regulador<br />
<br />
V2.2<br />
Regulador<br />
Inyección <br />
Regulador<br />
Inyección <br />
2 en 1 <br />
2 en 1<br />
<br />
Referencias<br />
m 3<br />
Regulación cloro<br />
Regulación pH<br />
Electrolizador interno<br />
Electrolizador externo<br />
Bomba o electroválvula<br />
Mini-cloración choque<br />
ANA01 0 a siguiente prod X X X<br />
ANA02 0 a siguiente prod X X X X<br />
ANA031 <strong>de</strong> 0 a 30 m 3 X X X X<br />
ANA032 <strong>de</strong> 30 a 500 m 3 X X X X<br />
ANA04 1 - 30 m 3 X X X X<br />
ANA05 30 - 100 m 3 X X X X<br />
Reactivo amichloryte<br />
Reactivo pH<br />
ESPAÑOL<br />
2 - Características técnicas<br />
Respete los valores siguientes para un a<strong>de</strong>cuado<br />
funcionamiento <strong>de</strong> su aparato:<br />
Pictogramas:<br />
Cebadura<br />
Alimentación: 220 voltios 50/60Hz con<br />
servidumbre a la bomba <strong>de</strong> filtración.<br />
Medida colorimétrica: 350 a 600 nm<br />
Producción<br />
Bomba P1 peristáltica: 6 litros por hora para la<br />
toma <strong>de</strong> muestras.<br />
Defecto<br />
Bomba P2 peristáltica: 0,1 litros por hora para<br />
la dosificación <strong>de</strong>l reactivo.<br />
Set<br />
Temperatura <strong>de</strong>l agua: no hacerlo funcionar<br />
por <strong>de</strong>bajo <strong>de</strong> los 15 °C.<br />
Reactivo <strong>de</strong> comparación colorimétrica:<br />
Amichloryte ®.<br />
Cumple las normas CE.<br />
CL +<br />
g<br />
Minicloración<br />
choque<br />
Ajuste <strong>de</strong> los<br />
valores
27<br />
3 - Principio <strong>de</strong> funcionamiento<br />
El regulador toma agua <strong>de</strong> su piscina,<br />
aña<strong>de</strong> automáticamente un reactivo<br />
«AMICHLORYTE®» patentado y compara<br />
la variación colorimétrica <strong>de</strong> la mezcla para<br />
<strong>de</strong>terminar el índice <strong>de</strong> cloro presente en la<br />
piscina.<br />
Según la configuración y la utilización <strong>de</strong> su<br />
piscina, usted selecciona el índice <strong>de</strong> cloro<br />
necesario para una a<strong>de</strong>cuada <strong>de</strong>sinfección,<br />
<strong>de</strong>jando que el aparato controle los<br />
aparatos <strong>de</strong> producción <strong>de</strong> cloro.<br />
Los análisis se realizan cada 30 minutos<br />
cuando el índice <strong>de</strong> cloro es inferior al<br />
punto <strong>de</strong> consigna, y cada dos horas cuando<br />
se alcanza este índice.<br />
Estas frecuencias pue<strong>de</strong>n modificarse (vea<br />
párrafo 10. )<br />
A cada modificación <strong>de</strong> la consigna se lleva<br />
a cabo un nuevo análisis.<br />
- Compruebe que la piscina no haya<br />
sido tratada con peróxido <strong>de</strong><br />
hidrógeno o un producto antialgas<br />
a base <strong>de</strong> peróxido <strong>de</strong> hidrógeno<br />
durante las tres semanas que<br />
prece<strong>de</strong>n la instalación; <strong>de</strong> no ser<br />
así, retrase la puesta en marcha<br />
otro tanto.<br />
- Ajuste el pH entre 7,0 y 7,4.<br />
- El índice <strong>de</strong> estabilizante <strong>de</strong> cloro<br />
<strong>de</strong>be estar comprendido entre 20 y<br />
50 ppm (salvo piscinas interiores).<br />
- Ajuste el TAC (índice <strong>de</strong> alcalinidad<br />
completo) entre 12° y 18°.<br />
- <strong>La</strong> temperatura <strong>de</strong>l agua <strong>de</strong> la<br />
piscina <strong>de</strong>be ser superior a 18° C<br />
para una medida óptima <strong>de</strong>l aparato.<br />
- Tasa <strong>de</strong> sal:<br />
Recomendada: 4 g/l.<br />
Mínima: 3,5 g/l.<br />
ESPAÑOL<br />
En caso <strong>de</strong> diferencia importante con la<br />
medida anterior, el aparato efectúa un<br />
nuevo análisis <strong>de</strong> confirmación.<br />
Después <strong>de</strong> cada análisis, el aparato activa<br />
o no, en función <strong>de</strong>l punto <strong>de</strong> consigna, el<br />
sistema <strong>de</strong> producción <strong>de</strong> cloro (electrolizador,<br />
bomba dosificadora, electroválvula).<br />
4 - Precauciones a tomar antes<br />
<strong>de</strong> su puesta en marcha<br />
En caso <strong>de</strong> instalación en una piscina ya<br />
clorada (Cl > a 5 ppm), disminuya este<br />
índice <strong>de</strong> cloro (CL < 5 ppm) antes <strong>de</strong> poner<br />
en funcionamiento el aparato.<br />
- Si utiliza una bomba dosificadora <strong>de</strong><br />
cloro, no olvi<strong>de</strong> dimensionar la<br />
bomba con arreglo al volumen <strong>de</strong> la<br />
piscina y a su frecuentación.<br />
El mo<strong>de</strong>lo “inyección” se entrega con una<br />
bomba <strong>de</strong> cloro:<br />
- 0 a 30 m 3 2,2 l/h<br />
- 30 a 500 m 3 6,0 l/h<br />
Compatibilidad:<br />
Asegúrese <strong>de</strong> que los materiales utilizados<br />
(piscina y alre<strong>de</strong>dores) sean compatibles<br />
con la utilización <strong>de</strong> agua salada<br />
y clorada.
28<br />
5 - Instalación en el local técnico<br />
ESPAÑOL<br />
Esquema eléctrico a título indicativo. Consulte el esquema suministrado por el<br />
fabricante <strong>de</strong> la caja.<br />
1) Fije la caja en el local técnico a una altura<br />
que permita maniobrarla, mediante los tornillos y<br />
pasadores suministrados. Ponga obligatoriamente<br />
la caja a nivel.<br />
2) Fije el contenedor <strong>de</strong> reactivo preferentemente<br />
lo más cerca posible <strong>de</strong> la caja, pero<br />
nunca más alto.
29<br />
3) Coloque la abraza<strong>de</strong>ra en el circuito <strong>de</strong> reflujo<br />
entre la filtración y los aparatos <strong>de</strong> calefacción,<br />
<strong>de</strong> regulación, <strong>de</strong> producción <strong>de</strong> cloro y <strong>de</strong> inyección<br />
<strong>de</strong> producto. En caso <strong>de</strong> toma continua <strong>de</strong><br />
aire, ponga la abraza<strong>de</strong>ra con la chapaleta abajo<br />
o en un lado. Conecte esta abraza<strong>de</strong>ra al tubo <strong>de</strong><br />
cristal transparente (aspiración).<br />
4) Atornille y estanqueice el racor <strong>de</strong> alimentación,<br />
respetando la dirección <strong>de</strong>l flujo<br />
señalada por una flecha en la chapaleta.<br />
5) Coloque la segunda abraza<strong>de</strong>ra en el<br />
<strong>de</strong>sagüe (versión filtro <strong>de</strong> arena) o conéctese a<br />
la evacuación más cercana.<br />
Conecte y ajuste el tubo negro <strong>de</strong> evacuación<br />
que sale <strong>de</strong>l aparato. Cuidado: no apriete los<br />
tubos durante el montaje.<br />
6) Conecte el tubo <strong>de</strong> salida <strong>de</strong>l contenedor <strong>de</strong><br />
Amichloryte a la bomba P2, liberando el caballete<br />
si es preciso. Conecte eléctricamente el<br />
aparato al contactor <strong>de</strong> servidumbre <strong>de</strong> la bomba<br />
<strong>de</strong> la piscina. Asegúrese <strong>de</strong> que el aparato se<br />
apaga al mismo tiempo que la filtración.<br />
7) Conecte el electrolizador o la bomba dosificadora<br />
a la caja <strong>de</strong> conexión suministrada y vinculada<br />
a la caja según el mo<strong>de</strong>lo (ver instalación<br />
<strong>de</strong>l vaso). Si utiliza bomba dosificadora, ver<br />
configuración mo<strong>de</strong>lo bomba dosificadora<br />
/electroválvula.<br />
6 - Instalación <strong>de</strong>l vaso<br />
ESPAÑOL<br />
Pegar el vaso en la canalización <strong>de</strong>l<br />
retorno hacia la piscina, <strong>de</strong>spués <strong>de</strong>l filtro<br />
y <strong>de</strong>spués <strong>de</strong>l calentador o en la<br />
salida <strong>de</strong> la bomba <strong>de</strong> impulsión.<br />
El agua <strong>de</strong>be circular <strong>de</strong>l tubo en T<br />
hacia la reducción (seguir el sentido <strong>de</strong><br />
la flecha en el vaso); el flujo <strong>de</strong> agua<br />
<strong>de</strong>be circular imperativamente entre las<br />
placas (electrodos).<br />
Prever un espacio suficiente<br />
en el lado <strong>de</strong>smontable <strong>de</strong>l<br />
vaso para po<strong>de</strong>r retirar el electrodo.<br />
Si el vaso se monta en<br />
by-pass, asegúrese <strong>de</strong> que al<br />
menos un 80% <strong>de</strong>l flujo pasa<br />
por éste.
30<br />
7 - Flujostato (Flow switch) únicamente en<br />
mo<strong>de</strong>lo 2 en 1<br />
9 - Alimentación <strong>de</strong>l electrodo<br />
Recomendamos instalar el <strong>de</strong>tector <strong>de</strong> caudal en<br />
el siguiente caso:<br />
- bomba <strong>de</strong> filtración situada por encima<br />
<strong>de</strong>l nivel <strong>de</strong> agua<br />
(riesgo <strong>de</strong> <strong>de</strong>scebadura)<br />
Principio <strong>de</strong> funcionamiento:<br />
Si el flujo se interrumpe acci<strong>de</strong>ntalmente o<br />
durante un contralavado y, en cualquier caso,<br />
cuando la velocidad <strong>de</strong> paso <strong>de</strong>l agua es inferior<br />
a 2,9 m 3 por hora, el <strong>de</strong>tector <strong>de</strong>tendrá el aparato.<br />
Conectar el cable previsto con este fin. Apretar<br />
correctamente las tuercas.<br />
Un racor mal apretado provocaría sobrecalentamientos.<br />
Más allá <strong>de</strong> la longitud <strong>de</strong>l cable suministrado<br />
con el aparato, <strong>de</strong>berá adaptarse la sección y las<br />
conexiones <strong>de</strong>berán protegerse y adaptarse a la<br />
sección <strong>de</strong>l cable utilizado.<br />
<strong>La</strong> conexión eléctrica <strong>de</strong>berá efectuarla obligatoriamente<br />
un electricista cualificado, y<br />
<strong>de</strong>berá cumplir la norma NFC 15-100 (Edición<br />
2002).<br />
ESPAÑOL<br />
Instalación:<br />
El <strong>de</strong>tector está equipado <strong>de</strong> una resistencia, lo<br />
que permite a la caja <strong>de</strong>tectarlo automáticamente.<br />
Por esta razón, no utilizar un <strong>de</strong>tector que no<br />
esté equipado <strong>de</strong> esta resistencia.<br />
<strong>La</strong> puesta en tensión <strong>de</strong>l electrodo se hará<br />
automáticamente tras un período <strong>de</strong> espera.<br />
- Ajustes <strong>de</strong> fábrica:<br />
modèle 30 - 4,5 A - máximo<br />
modèle 100 - 10 A - máximo<br />
8 - Instalación <strong>de</strong> la tierra<br />
únicamente en mo<strong>de</strong>lo 2 en 1<br />
Recomendamos instalar la toma <strong>de</strong> tierra para<br />
captar las corrientes residuales presentes en el<br />
agua.<br />
10 - Ajustes<br />
Montaje <strong>de</strong> la tierra:<br />
Instalar la tierra con arreglo a las normas<br />
vigentes en el país <strong>de</strong> instalación.<br />
El aparato in funcionamiento indica "nor"<br />
Para modificarlos, recurra a un pr<strong>of</strong>esional<br />
autorizado por el fabricante.<br />
Función menú regulador g & c + ON<br />
Ver esquema en la página siguiente.
31<br />
10 - Ajustes (continuación)<br />
menú PRODUCCIÓN<br />
ECL* = Electrolizador<br />
PCL = Bomba cloro o Electroválvula<br />
F menú FILTRACIÓN alejada<br />
OFF* = Distancia <strong>de</strong> toma <strong>de</strong> muestras<br />
inferior a 5 m.<br />
ON = Distancia <strong>de</strong> toma <strong>de</strong> muestras <strong>de</strong><br />
5 a 30 m.<br />
PRO menú COLECTIVIDAD o<br />
ANÁLISIS forzado<br />
OFF* = Análisis en modo normal.<br />
Cada dos horas.<br />
ON = Análisis forzado.<br />
Cada treinta minutos.<br />
DUR menú INVERSIÓN <strong>de</strong><br />
POLARIDAD<br />
4* = Inversión cada cuatro horas.<br />
1 = Inversión todas las horas.<br />
Manteniendo pulsada c aumenta el<br />
tiempo hasta obtener el tiempo <strong>de</strong><br />
inversión <strong>de</strong> polaridad <strong>de</strong>seado.<br />
Soltar c .<br />
ESPAÑOL<br />
INT menú AMPERAJE<br />
Ajuste <strong>de</strong> fábrica a 10 A.<br />
Pulsando c se obtiene 4,5 A.<br />
Manteniendo pulsada c el valor<br />
aumenta <strong>de</strong> 0,5 A en 0,5 A.<br />
Cuando se alcanza el valor <strong>de</strong>seado,<br />
soltar c y pulsar g .<br />
* VALOR DE FÁBRICA POR DEFECTO.<br />
Por ejemplo, la elección <strong>de</strong>l electrolizador o <strong>de</strong><br />
la bomba <strong>de</strong> cloro:<br />
Tras entrar en el menú aparece _CL ; pulsar<br />
, y aparece ECL . Para cambiar para bomba<br />
c<br />
dosificadora pulsar c validar mediante g .<br />
Para pasar <strong>de</strong> una función a otra, pulsar c<br />
para cambiar o g para validar.<br />
Después <strong>de</strong> cinco segundos sin manipulación,<br />
el aparato sale automáticamente <strong>de</strong>l menú.
32<br />
11 - Puesta en Servicio<br />
Poner en marcha la filtración y encen<strong>de</strong>r el<br />
aparato (posición ON).<br />
11. 1 Sal<br />
Vierta la sal directamente en la piscina, <strong>de</strong>jando<br />
la filtración en marcha.<br />
No ponga en marcha el aparato hasta la completa<br />
disolución <strong>de</strong> la sal.<br />
11. 5 El diodo ver<strong>de</strong> parpa<strong>de</strong>a hasta <strong>de</strong>tectar<br />
reactivo en la cámara <strong>de</strong> análisis, y permanece<br />
encendido en cuanto termina la cebadura<br />
11. 6 Cuando el diodo ver<strong>de</strong> permanece fijo,<br />
apagar el aparato (posición OFF), y vuelva a<br />
encen<strong>de</strong>rlo. Pue<strong>de</strong>n ser necesarios dos o tres<br />
análisis para <strong>de</strong>terminar el tipo <strong>de</strong> cloro real <strong>de</strong> la<br />
piscina.<br />
ESPAÑOL<br />
11. 2 Adición <strong>de</strong> sal<br />
Verifique el índice <strong>de</strong> sal. Si la concentración es<br />
inferior a 4g/litro, añada sal según el siguiente<br />
cálculo:<br />
Q = (4-T) x V<br />
Q = cantidad a añadir en kg <strong>de</strong> sal<br />
4 = índice <strong>de</strong> sal correcto<br />
T = índice medido en la piscina<br />
V = volumen <strong>de</strong> la piscina en m 3 .<br />
Detenga siempre el electrolizador antes <strong>de</strong><br />
añadir sal directamente a la piscina.<br />
Espere a que se disuelva la sal antes <strong>de</strong> volver a<br />
poner en marcha el electrolizador.<br />
11. 3 Estabilizante<br />
Con altas temperaturas, se aconseja fuertemente<br />
la presencia <strong>de</strong> estabilizante a 20 g/m 3 en<br />
el agua para evitar la evaporación <strong>de</strong>l cloro y disminuir<br />
la corrosión.<br />
Índice máximo: 50 g/ m 3<br />
ATENCIÓN: Una tasa <strong>de</strong> estabilizante <strong>de</strong>masiado<br />
BAJA duplicará el consumo <strong>de</strong> cloro <strong>de</strong><br />
su piscina.<br />
¡A la inversa, una tasa <strong>de</strong> estabilizante<br />
<strong>de</strong>masiado ALTA anulará la acción <strong>de</strong>l cloro!<br />
Si la piscina ha sido tratada con tabletas <strong>de</strong><br />
cloro, mida la tasa <strong>de</strong> estabilizante presente<br />
en el agua. Si la concentración supera los 50<br />
g/ m 3 , renueve una parte <strong>de</strong>l agua antes <strong>de</strong><br />
añadir la sal.<br />
11. 4 Tras una espera <strong>de</strong> unos 15 segundos,<br />
realice la cebadura <strong>de</strong>l amichloryte pulsando<br />
durante un segundo.<br />
Si es preciso haga una cebadura manual ejerciendo<br />
una presión continua sobre<br />
durante 15 segundos.<br />
11. 7 Ajuste el tipo <strong>de</strong> cloro <strong>de</strong>seado en función<br />
<strong>de</strong> la configuración <strong>de</strong> su piscina. Pulse c y g ,<br />
el diodo rojo gira en el sentido <strong>de</strong> las agujas <strong>de</strong><br />
un reloj. Suelte el botón g en frente <strong>de</strong>l tipo<br />
seleccionado.<br />
Para lanzar un análisis forzado, pulse c y g .<br />
11. 8 El aparato realiza un análisis <strong>de</strong>l tipo <strong>de</strong><br />
cloro <strong>de</strong> su piscina, dirige y <strong>de</strong>senca<strong>de</strong>na la producción<br />
<strong>de</strong> cloro para alcanzar el punto <strong>de</strong><br />
consigna seleccionado.<br />
- Si la medida <strong>de</strong>l cloro es inferior a la<br />
tasa solicitada, el diodo ver<strong>de</strong> se encien<strong>de</strong> y<br />
se pone en marcha la producción <strong>de</strong> cloro (atención:<br />
no olvi<strong>de</strong> poner en marcha el electrolizador<br />
o la bomba dosificadora)<br />
- Si la medida <strong>de</strong>l cloro es superior a la<br />
tasa solicitada, se apaga el diodo y los<br />
aparatos <strong>de</strong> producción <strong>de</strong> cloro no funcionan.<br />
11. 9 Ajuste <strong>de</strong> la duración <strong>de</strong><br />
inversión <strong>de</strong> polaridad<br />
Su electrolizador ha sido programado en fábrica<br />
para cambiar <strong>de</strong> polaridad cada cuatro horas.<br />
Según la dureza <strong>de</strong>l agua (TH), es posible modificar<br />
esta duración <strong>de</strong> inversión <strong>de</strong>s<strong>de</strong> una hora<br />
hasta 99 horas (ver párrafo 10)<br />
A título indicativo:<br />
> 50° TH ≅ 3 horas<br />
entre 50°TH y 20°TH ≅ 4 a 20 horas<br />
< 20°TH ≅ 20 a 99 horas<br />
Si se <strong>de</strong>posita cal en el electrodo, convendrá disminuir<br />
el tiempo <strong>de</strong> inversión.
33<br />
12 - Verificaciones<br />
Mida el índice <strong>de</strong> cloro y compárelo con el índice<br />
que indica el aparato; según el lugar en que se<br />
haya tomado la muestra analizada pue<strong>de</strong> observarse<br />
una diferencia. Recomendamos realizar<br />
las tomas en la entrada <strong>de</strong> los skimmers, o directamente<br />
en el grifo <strong>de</strong> toma <strong>de</strong> muestras.<br />
12. 1 Adición <strong>de</strong> productos<br />
químicos<br />
Detener siempre el equipo antes <strong>de</strong> añadir productos<br />
químicos directamente en la piscina.<br />
Esperar a que se disuelvan los productos químicos<br />
antes <strong>de</strong> volver a poner en marcha el aparato.<br />
12. 2 Electrodo<br />
El electrodo es una pieza <strong>de</strong> <strong>de</strong>sgaste cuya<br />
longevidad <strong>de</strong>pen<strong>de</strong> <strong>de</strong> los siguientes factores:<br />
- Tasa <strong>de</strong> sal: no haga funcionar nunca con una<br />
tasa <strong>de</strong> sal inferior a 3,5 g/l.<br />
- Temperatura <strong>de</strong>l agua e hibernaje: <strong>de</strong>tenga el<br />
funcionamiento en cuanto la temperatura <strong>de</strong>l<br />
agua baje hasta los 15°C.<br />
El electrodo <strong>de</strong>be presentar un aspecto neto, sin<br />
incrustación <strong>de</strong> caliza. Si llega el caso, elimine la<br />
incrustación sumergiéndolo en una solución que<br />
contenga un 80% <strong>de</strong> agua y un 20% <strong>de</strong> ácido<br />
clorhídrico. Verifique luego las causas <strong>de</strong> la<br />
incrustación:<br />
- concentración <strong>de</strong> sal <strong>de</strong>masiado débil,<br />
- ajuste <strong>de</strong> la inversión <strong>de</strong> polaridad<br />
<strong>de</strong>masiado largo,<br />
- electrodo en final <strong>de</strong> vida (ver párrafo<br />
siguiente),<br />
- <strong>de</strong>fecto <strong>de</strong> inversión <strong>de</strong>l equipo.<br />
<strong>La</strong> tensión mensurable en los dos bornes <strong>de</strong>l<br />
electrodo <strong>de</strong>be rondar los 9 voltios. Medirla en<br />
posición V continuo (DC), con una tasa <strong>de</strong> sal <strong>de</strong><br />
4g/l, una temperatura <strong>de</strong> agua superior a los<br />
15°C y un electrodo no incrustado <strong>de</strong> cal.<br />
Si la tensión supera 10,5 voltios, el electrodo<br />
está gastado y <strong>de</strong>berá sustituirse en breve.<br />
Recuer<strong>de</strong>: cada tipo <strong>de</strong> electrodo recibe una corriente<br />
específica indicada sobre la etiqueta lateral<br />
izquierda.<br />
Ejemplo: Para el mo<strong>de</strong>lo 30 = 4,5 A<br />
Para el mo<strong>de</strong>lo 100 = 10 A (ajuste <strong>de</strong> fábrica)<br />
12. 3 Operaciones con el filtro <strong>de</strong><br />
la piscina<br />
Detenga el aparato siempre que manipule la<br />
válvula <strong>de</strong> 6 vías <strong>de</strong>l filtro: lavado, enjuague,<br />
vaciado, recirculación …<br />
12. 4 Minicloración <strong>de</strong> choque<br />
Pulsar Cl+ durante cinco segundos: todos los<br />
diodos parpa<strong>de</strong>an. El aparato arranca la producción<br />
<strong>de</strong> cloro para subir la tasa a 5 ppm o efectúa<br />
una producción “forzada” durante dos horas. <strong>La</strong><br />
salida <strong>de</strong>l modo <strong>de</strong> minicloración <strong>de</strong> choque es<br />
automática, y el aparato reanuda su ciclo normal<br />
con el punto <strong>de</strong> consigna anteriormente seleccionado.<br />
12. 5 Inversión <strong>de</strong> polarida<strong>de</strong>s<br />
Su aparato es regulable (ver capítulo 11. 9 ).<br />
<strong>La</strong> vida útil <strong>de</strong>l electrodo <strong>de</strong>pen<strong>de</strong> <strong>de</strong>l número <strong>de</strong><br />
inversiones a que ha sido sometido. Por ejemplo,<br />
se gastará menos rápidamente invirtiendo cada<br />
seis horas, y más rápidamente invirtiendo cada<br />
dos horas.<br />
13 - Hibernación o puesta en<br />
reposo<br />
- Proteja el reactivo <strong>de</strong> las heladas (volver a cerrar<br />
el “clamp” antes <strong>de</strong> <strong>de</strong>sconectar el tubo <strong>de</strong>l<br />
reactivo en la entrada <strong>de</strong> la bomba P2).<br />
- Purgue la bomba P2 pulsando sin<br />
interrupción hasta que se agote el reactivo en el<br />
tubo.<br />
- Apague el aparato (botón OFF).<br />
- Vacíe el vaso <strong>de</strong> análisis sacando el tubo cristal<br />
<strong>de</strong>l collarín <strong>de</strong> “reflujo” y <strong>de</strong>sacoplando el tubo en<br />
la entrada <strong>de</strong> la bomba P1.<br />
ESPAÑOL
34<br />
14 - Lista <strong>de</strong> <strong>de</strong>fectos<br />
eventuales<br />
- Falta reactivo o no se <strong>de</strong>tecta reactivo (diodo<br />
parpa<strong>de</strong>ante).<br />
- Látex <strong>de</strong> bomba <strong>de</strong>sgastado o fuera <strong>de</strong> servicio<br />
(diodo parpa<strong>de</strong>ante).<br />
- Valor incoherente o falta <strong>de</strong> luz (diodo<br />
encendido fijo).<br />
- Diodo cloro máximo parpa<strong>de</strong>ante (superior a<br />
2,5 mg/l), producción <strong>de</strong>tenida: piscina <strong>de</strong>sactivada<br />
o tomas <strong>de</strong> aire intempestivas.<br />
- Diodo parpa<strong>de</strong>ante intermitente largo (3<br />
segundos): <strong>de</strong>fecto <strong>de</strong> flujostato.<br />
En caso <strong>de</strong> <strong>de</strong>fecto inexplicado, ponga el aparato<br />
en “by-pass” pulsando g durante 10 segundos<br />
y llame a su servicio postventa (para volver<br />
a poner el regulador en funcionamiento normal<br />
pulse g durante 10 segundos).<br />
A01<br />
Problema <strong>de</strong> flujo<br />
- ausencia <strong>de</strong> agua o flujo en la cámara <strong>de</strong><br />
análisis.<br />
- bomba fuera <strong>de</strong> uso o <strong>de</strong>fectuosa.<br />
A02 Problema <strong>de</strong> captador<br />
- aparato abierto.<br />
A03 Problema <strong>de</strong> captador<br />
- diodo débil o fuera <strong>de</strong> uso.<br />
A04 Problema <strong>de</strong> cálculo <strong>de</strong> tasa <strong>de</strong><br />
cloro<br />
- valores incoherentes.<br />
ESPAÑOL<br />
Esta posición “by-pass” implica que es necesario<br />
volver a ajustar manualmente los<br />
aparatos <strong>de</strong> producción <strong>de</strong> cloro según la<br />
configuración <strong>de</strong> su piscina ---- producción<br />
continua.<br />
A06 Defecto <strong>de</strong> inyección<br />
- no queda reactivo.<br />
INFORMACIÓN PARA EL SERVICIO<br />
POSTVENTA<br />
A07 Problema <strong>de</strong> lectura<br />
- no hay flujo en el circuito.<br />
Los códigos <strong>de</strong> error A --<br />
se indican directamente<br />
en la pantalla. Necesitan una intervención<br />
en el aparato.<br />
Los códigos <strong>de</strong> error b --<br />
y C --<br />
son informaciones<br />
relativas a una anomalía temporal o a<br />
un fallo que no exige un mantenimiento inmediato.<br />
El aparato funciona normalmente. Estos<br />
errores no aparecen directamente en el menú.<br />
Se indican mediante un punto en la pantalla<br />
888 .<br />
Para visualizar esta información es necesario<br />
pulsar CL + y g para hacerla <strong>de</strong>sfilar si hay varios<br />
errores.<br />
b05 Problema <strong>de</strong> lectura<br />
- inestabilidad <strong>de</strong> las medidas,<br />
- aire en el circuito,<br />
- perturbación <strong>de</strong>l captador.<br />
b09 Defecto <strong>de</strong> alerta C_<br />
- no queda sal (si electrolizador),<br />
- electrodo incrustado o <strong>de</strong>fectuoso,<br />
- no queda cloro si funciona con bomba<br />
dosificadora o electroválvula,<br />
- bomba cloro o electroválvula <strong>de</strong>fectuosa,<br />
- ya no hay potencia en salida <strong>de</strong> tarjeta sal,<br />
- enlace <strong>de</strong> mando <strong>de</strong> servidumbre<br />
<strong>de</strong>fectuoso.<br />
_
35<br />
B10<br />
Incoherencias <strong>de</strong> lectura<br />
- <strong>de</strong>fecto <strong>de</strong> inyección,<br />
- reactivo casi vacío.<br />
C11<br />
Defecto sistema<br />
- problema interno en la tarjeta electrónica.<br />
c12<br />
Defecto historial<br />
- problema interno en la tarjeta electrónica.<br />
15 - Garantía<br />
Estos aparatos están garantizados dos años<br />
(salvo las piezas <strong>de</strong> <strong>de</strong>sgaste y el reactivo),<br />
piezas y mano <strong>de</strong> obra.<br />
Esta garantía cubre cualquier <strong>de</strong>fecto, constatado<br />
durante este período, que no pueda<br />
imputarse a una mala utilización por parte <strong>de</strong>l<br />
usuario.<br />
El fabricante es el único apto para juzgar la<br />
respuesta que <strong>de</strong>berá darse al recurso ejercitado.<br />
No tendremos ninguna responsabilidad en el<br />
marco <strong>de</strong>l coste <strong>de</strong> conservación <strong>de</strong>l agua <strong>de</strong><br />
baño durante el período <strong>de</strong> reparación <strong>de</strong>l aparato<br />
(adición <strong>de</strong> productos químicos, etcétera). El<br />
usuario <strong>de</strong>berá aceptar, si fuera necesario, que<br />
controle su instalación nuestro Servicio postventa,<br />
que efectuaría todos los tests necesarios para<br />
poner en evi<strong>de</strong>ncia el <strong>de</strong>fecto constatado.<br />
<strong>La</strong> garantía sólo será efectiva una vez <strong>de</strong>vuelto<br />
el certificado <strong>de</strong> garantía, completado, a la<br />
dirección indicada por su instalador autorizado.<br />
El retorno <strong>de</strong> cada aparato correrá a cargo<br />
<strong>de</strong>l cliente.<br />
Para el usuario, la presente garantía no impi<strong>de</strong> la<br />
aplicación <strong>de</strong> la garantía legal <strong>de</strong> vicios ocultos,<br />
tal como resulta <strong>de</strong> los artículos 1.641 y siguientes<br />
<strong>de</strong>l Código Civil.<br />
Tampoco exonera <strong>de</strong> la garantía legal <strong>de</strong> conformidad<br />
inscrita en el código <strong>de</strong>l consumo por<br />
<strong>de</strong>creto 2005136 <strong>de</strong> 17/02/05.<br />
16 - ¿Qué hacer si surge un<br />
problema?<br />
Todas las intervenciones eléctricas<br />
<strong>de</strong>berán ser realizadas por un electricista<br />
cualificado. Sólo un pr<strong>of</strong>esional<br />
autorizado está habilitado para abrir el<br />
aparato.<br />
Problema:<br />
Solución:<br />
filtración.<br />
El electrolizador permanece<br />
apagado<br />
Verificar la acometida en la caja <strong>de</strong><br />
Problema: El aparato no alcanza la<br />
consigna <strong>de</strong> corriente<br />
Solución: Verificar:<br />
1 - <strong>La</strong> tasa <strong>de</strong> sal (> 3,5 g/L),<br />
2 - <strong>La</strong> temperatura <strong>de</strong>l agua (> 15 °C),<br />
3 - El estado <strong>de</strong>l electrodo: <strong>de</strong>be estar limpio, sin<br />
ninguna incrustación. Si el problema persiste, es<br />
porque su electrodo se está <strong>de</strong>bilitando y <strong>de</strong>berá<br />
ser sustituido.<br />
Problema: Cloración escasa, a pesar <strong>de</strong>l<br />
correcto funcionamiento <strong>de</strong>l<br />
electrolizador<br />
Solución: Verificar :<br />
1 - El pH (entre 6,9 y 7,4),<br />
2 - <strong>La</strong> tasa <strong>de</strong> estabilizante (entre 20 y 50 g/m 3 ),<br />
3 - Aumentar el tiempo <strong>de</strong> filtración.<br />
Problema: Índice <strong>de</strong> cloro nulo a pesar<br />
<strong>de</strong>l funcionamiento <strong>de</strong>l<br />
electrolizador<br />
Solución: Verificar :<br />
1 - Verificar la presencia <strong>de</strong> peróxido <strong>de</strong><br />
hidrógeno: este producto anula la lectura <strong>de</strong>l<br />
cloro durante unas tres semanas,<br />
2 - Agua saturada o <strong>de</strong>sequilibrada: realizar una<br />
cloración <strong>de</strong> choque, equilibrar el TAC (12 a 18 °<br />
F) y, si es necesario, renovar una parte <strong>de</strong>l agua<br />
<strong>de</strong> la piscina.<br />
Problema: Índice <strong>de</strong> cloro <strong>de</strong>masiado<br />
bajo: CL en pantalla<br />
Solución: Causas posibles:<br />
1- Electrolizador: apagado o <strong>de</strong>fectuoso en<br />
seguridad temperatura, falta <strong>de</strong> sal, electrodo<br />
<strong>de</strong>fectuoso, aparato externo subdimensionado.<br />
2- Bomba <strong>de</strong> cloro: subdimensionada, más<br />
cloro líquido, látex <strong>de</strong>fectuoso, bomba apagada o<br />
<strong>de</strong>fectuosa.<br />
3- Electroválvula: fallo o apagada, más cloro.<br />
4- Agua: falta estabilizante, presencia <strong>de</strong> peróxido<br />
<strong>de</strong> hidrógeno, producto exterior dificulta la lectura<br />
<strong>de</strong>l cloro.<br />
III<br />
ITALIANO
36<br />
Attenzione<br />
ITALIANO<br />
Il presente apparecchio non <strong>de</strong>ve essere utilizzato<br />
da persone (ivi compresi i bambini) le cui<br />
capacità fisiche, sensoriali, mentali siano ridotte o<br />
da persone prive di sufficienti esperienze e<br />
conoscenze, salvo se esse hanno potuto beneficiare,<br />
tramite una persona responsabile <strong>de</strong>lla<br />
loro sicurezza, di sorveglianza o di istruzioni preliminari,<br />
relative all'utilizzo <strong>de</strong>l presente apparecchio.<br />
(NF EN 60335 -1/A1)<br />
Precauzioni da pren<strong>de</strong>re prima <strong>de</strong>ll'intervento<br />
all'interno <strong>de</strong>l c<strong>of</strong>anetto :<br />
Isolare l'installazione elettrica per mezzo di un<br />
dispositivo di separazione <strong>de</strong>ll'energia, sotto<br />
forma di un :<br />
o<br />
o<br />
- pulsante sezionatore<br />
- interruttore sezionatore<br />
- fusibile sezionatore.<br />
Dispositivo da installare per le protezioni <strong>de</strong>i cortocircuiti<br />
o <strong>de</strong>lle sovratensioni :<br />
- interruttore differenziale 30 mA (potenza da<br />
adottare a seconda il tipo <strong>de</strong>ll'installazione). Il calibro<br />
<strong>de</strong>l dispositivo di protezione non potrà superare<br />
le 10 A.<br />
L'apparecchio è a fine <strong>de</strong>l suo ciclio<br />
di vita.<br />
Se <strong>de</strong>si<strong>de</strong>rate sbarazzarvene o sostituirlo,<br />
non gettatelo nella<br />
spazzatura o nei contenitori di<br />
raccolta selettiva e differenziata<br />
<strong>de</strong>l proprio comune. Questo simbolo,<br />
su un apparecchio nuovo,<br />
significa che l'apparecchiatura non<br />
<strong>de</strong>ve essere gettata nella spazzatura<br />
e che dovrà essere oggetto di una raccolta<br />
selettiva in vista di un nuovo utilizzo, di riciclaggio<br />
o di valorizzazione.<br />
Se contiene sostanze potenzialmente pericolose<br />
per l'ambiente, queste <strong>de</strong>vono essere eliminate<br />
o neutralizzate.<br />
Potete regalarlo ad una associazione sociale e<br />
solidale, che potrà ripararlo e rimetterlo in circolazione.<br />
Se ne acquistate uno nuovo, potete ren<strong>de</strong>re<br />
il prece<strong>de</strong>nte in un negozio o potete<br />
chie<strong>de</strong>re al fornitore di ripren<strong>de</strong>rlo.<br />
È l'acquisto <strong>de</strong>finito “Uno per Uno”. In caso contrario,<br />
portatelo in un centro di raccolta selettiva,<br />
se il vostro comune ha realizzato una unità di<br />
raccolta selettiva per tale tipo di prodotti.<br />
Precauzioni :<br />
Collegare il conduttore ver<strong>de</strong> - giallo <strong>de</strong>l cavo d'alimentazione<br />
al circuito generale di protezione.<br />
È obbligatorio posizionare ed installare<br />
l'apparecchio nei locali tecnici o al coperto.<br />
Offrire ad<br />
una<br />
Associazione<br />
a vocazione<br />
sociale<br />
Restituire<br />
l'apparecchio<br />
usato al<br />
distributore,<br />
al momento<br />
di un nuovo<br />
acquisto.<br />
Depositare<br />
l'apparecchio<br />
usato presso<br />
un centro di<br />
raccolta<br />
selettivo (isole<br />
ecologiche)<br />
NF EN 60335-1/A1
37<br />
1 - Composizione <strong>de</strong>l contenuto <strong>de</strong>ll'imballo<br />
Regolatore<br />
<br />
V2<br />
Regolatore<br />
<br />
V2.2<br />
Regolatore<br />
<br />
Iniezione<br />
Regolatore<br />
Iniezione <br />
2 in 1 <br />
2 in 1<br />
<br />
Referenze<br />
ANA01<br />
m 3<br />
Regolazione cloro<br />
Regolazione pH<br />
Elettrolizzatore interno<br />
Elettrolizzatore esterno<br />
Pompa o elettrovalvola<br />
Mini clorazione shock<br />
0 a seconda<br />
produzione<br />
X X X<br />
0 a seconda<br />
ANA02<br />
produzione<br />
X X X X<br />
ANA031 da 0 a 30 m 3 X X X X<br />
ANA032 da 30 a 500 m 3 X X X X<br />
ANA04 1 - 30 m 3 X X X X<br />
ANA05 30 - 100 m 3 X X X X<br />
Reattivo amichloryte<br />
Reattivo pH<br />
2 - Caratteristiche tecniche<br />
I pittogrammi :<br />
Per il corretto funzionamento <strong>de</strong>ll'apparecchio,<br />
vogliate rispettare i seguenti valori :<br />
Collegamento : 220 volts - 50/60 Hz asservito<br />
alla pompa di filtrazione.<br />
Misura colorimetrica : da 350 nm a 600 nm.<br />
Pompa P1 peristaltica : 6 litri / ora per la presa<br />
di campione.<br />
A<strong>de</strong>scamento<br />
Produzione<br />
Guasto<br />
ITALIANO<br />
Pompa P2 peristaltica :<br />
dosaggio <strong>de</strong>l reattivo.<br />
0,1 litri / ora per il<br />
Set<br />
Temperatura <strong>de</strong>ll'acqua : Non fare funzionare<br />
al di sotto di 15°C.<br />
Reattivo di confronto colorimetrico :<br />
Amichloryte ®.<br />
Conforme alle norme CE.<br />
CL +<br />
g<br />
Mini-clorazione<br />
shock<br />
Regolazione <strong>de</strong>i<br />
valori
38<br />
ITALIANO<br />
3 - Principi di funzionamento<br />
Il regolatore preleva acqua dal vostro bacino,<br />
aggiunge automaticamente un reattivo<br />
«AMICHLORYTE®» brevettato e confronta<br />
la variazione colorimetrica <strong>de</strong>lla miscela per<br />
<strong>de</strong>finire il tasso di cloro presente nel bacino.<br />
A seconda <strong>de</strong>lla configurazione e l'utilizzo<br />
<strong>de</strong>lla piscina, scegliete il tasso di cloro necessario<br />
ad una corretta disinfezione, lasciando<br />
che l'apparecchio azioni i componenti<br />
di produzione <strong>de</strong>l cloro.<br />
Le analisi si realizzano ogni 30 minuti,<br />
quando il tasso di cloro è inferiore al valore<br />
prefissato ed ogni 2 ore, quando questo<br />
tasso è stato raggiunto.<br />
È possibile modificare queste frequenze,<br />
(ve<strong>de</strong>re paragrafo 10. )<br />
Ad ogni modifica <strong>de</strong>l valore prefissato,<br />
viene effettuata una nuova analisi.<br />
In caso di elevata differenza con la misura<br />
prece<strong>de</strong>nte, l'apparecchio effettua una<br />
nuova analisi di conferma.<br />
Dopo ogni analisi, l'apparecchio fa scattare<br />
o meno, in funzione <strong>de</strong>l valore prefissato, il<br />
sistema di produzione <strong>de</strong>l cloro (elettrolizzatore,<br />
pompa dosatrice, elettrovalvola).<br />
- Verificare che il bacino non sia<br />
stato trattato al perossido<br />
d'idrogeno o con un prodotto<br />
anti-alghe a base di perossido<br />
d'idrogeno nel corso <strong>de</strong>lle tre<br />
settimane prece<strong>de</strong>nti l'installazione,<br />
ed, in tal caso, rinviare di pari<br />
tempo la messa in funzione.<br />
- Regolare il pH fra 7,0 e 7,4.<br />
- Il tasso di stabilizzante <strong>de</strong>l cloro<br />
<strong>de</strong>ve essere compreso fra 20 e<br />
50 ppm. (eccetto per le piscine<br />
interne).<br />
- Regolare il TAC (tasso d'alcalinità<br />
completo) fra 12° e 18°F.<br />
- <strong>La</strong> temperatura <strong>de</strong>ll'acqua <strong>de</strong>l<br />
bacino <strong>de</strong>ve essere superiore a<br />
18° C per una misura ottimale<br />
<strong>de</strong>ll'apparecchio.<br />
- Tasso di sale :<br />
Raccomandato : 4 g/l.<br />
Minimo : 3,5 g/l.<br />
- Se utilizzate una pompa dosatrice di<br />
cloro, provve<strong>de</strong>re a dimensionare la<br />
pompa in funzione <strong>de</strong>l volume e<br />
<strong>de</strong>lla frequentazione <strong>de</strong>l bacino.<br />
Il mo<strong>de</strong>llo “iniezione” viene fornito con una<br />
pompa cloro :<br />
4 - Precauzioni da assumere<br />
prima <strong>de</strong>lla messa in servizio<br />
- da 0 a 30 m 3 2,2 l/h<br />
- da 30 a 500 m 3 6,0 l/h<br />
In caso di installazione in un bacino già<br />
clorato (Cl > a 5 ppm), far diminuire il tasso<br />
di cloro (CL < 5 ppm) prima di mettere in<br />
servizio l'apparecchio.<br />
Compatibilità :<br />
Verificate che i materiali messi in opera<br />
(piscina e dintorni) siano compatibili<br />
con l'utilizzo d'acqua salata e clorata.
39<br />
5 - Installazione nel locale tecnico<br />
Schema elettrico a titolo indicativo. Fare riferimento allo schema fornito dal fabbricante<br />
<strong>de</strong>l c<strong>of</strong>anetto.<br />
ITALIANO<br />
1) Fissare la scatola nel locale tecnico al livello<br />
<strong>de</strong>lla manipolazione, per mezzo <strong>de</strong>lle viti e <strong>de</strong>i<br />
cavicchi forniti. Mettere imperativamente la<br />
scatola a livello.<br />
2) Fissare il contenitore <strong>de</strong>l reattivo il più vicino<br />
possibile alla scatola mai più in alto.
40<br />
3) Posizionare la presa a staffa sul circuito di<br />
mandata fra il dispositivo di filtrazione e gli<br />
apparecchi di riscaldamento, di regolazione, di<br />
produzione di cloro e di iniezioni di prodotto. In<br />
caso di presa d'aria continua, mettere la presa a<br />
staffa con la valvola volta verso il basso o sul<br />
lato. Collegare questo collare al tubo di cristallo<br />
trasparente (aspirazione).<br />
4) Avvitare ed impermeabilizzare il raccordo<br />
d'alimentazione, rispettando il senso <strong>de</strong>l flusso<br />
segnalato da una freccia sulla valvola.<br />
5) Posizionare la seconda presa a staffa sullo<br />
scarico (versione filtro a sabbia) oppure collegarsi<br />
sull'evacuazione più vicina.<br />
Collegare e regolare il tubo nero d'evacuazione<br />
in uscita dall'apparecchio. Attenzione a non stringere<br />
le tubazioni al momento <strong>de</strong>l montaggio.<br />
6) Collegare il tubo di uscita <strong>de</strong>l contenitore<br />
<strong>de</strong>ll'Amichloryte sulla pompa P2 e, nel caso, liberare<br />
la morsa. Collegare elettricamente l'apparecchio<br />
sul contattore d'asservimento <strong>de</strong>lla<br />
pompa piscina. Verificare che l'apparecchio si<br />
spenga contemporaneamente allla filtrazione.<br />
7) Collegare l'elettrolizzatore o la pompa<br />
dosatrice sulla scatola di collegamento fornita e<br />
collegata alla scatola in funzione <strong>de</strong>l mo<strong>de</strong>llo<br />
(ve<strong>de</strong>re installazione <strong>de</strong>l vase). Per la pompa<br />
dosatrice ve<strong>de</strong>re la configurazione mo<strong>de</strong>llo<br />
pompa dosatrice / elettrovalvola.<br />
6 - Installazione <strong>de</strong>l vaso<br />
Incollare il vaso sulla canalizzazione<br />
<strong>de</strong>l ritorno verso la piscina, dopo il filtro<br />
e dopo il riscaldatore o la partenza <strong>de</strong>l<br />
compressore.<br />
ITALIANO<br />
L'acqua <strong>de</strong>ve circolare a partire dal<br />
tubo a T verso la riduzione (seguire il<br />
senso <strong>de</strong>lla freccia sul vaso) ; il flusso<br />
d'acqua <strong>de</strong>ve circolare imperativamente<br />
fra le piastre (elettrodo).<br />
Assicurarsi di avere spazio sufficiente<br />
sul lato smontabile <strong>de</strong>l<br />
vaso per potere togliere l'elettrodo.<br />
Se il vaso è montato in<br />
by-pass, verificare che per lo<br />
meno l'80% <strong>de</strong>l flusso passi<br />
per quest' ultimo.
41<br />
7 - Rilevatore di Portata<br />
(Flow switch) unicamente mo<strong>de</strong>llo 2 in 1<br />
9 - Alimentazione <strong>de</strong>ll'elettrodo<br />
sale<br />
Consigliamo l'installazione <strong>de</strong>l rilevatore di portata<br />
nei seguenti casi :<br />
- pompa di filtrazione al di sopra <strong>de</strong>l<br />
livello <strong>de</strong>ll'acqua (rischio di<br />
disa<strong>de</strong>scamento),<br />
Principi di funzionamento :<br />
Se il flusso è interrotto casualmente oppure in<br />
caso di controlavaggio, ed, in ogni caso, quando<br />
la velocità di passaggio <strong>de</strong>ll'acqua è inferiore a<br />
2,9m 3 /h, il rilevatore spegnerà l'apparecchio.<br />
Installazione :<br />
Installare il rilevatore sul vaso nel vano relativo<br />
posizionando la freccia che si trova al di sopra<br />
nel senso <strong>de</strong>l flusso.<br />
Il rilevatore è dotato di una resistenza che permette<br />
alla scatola di rilevarlo automaticamente.<br />
Per tale motivo non si <strong>de</strong>ve utilizzare un rilevatore<br />
che non sia dotato di tale tipo di resistenza.<br />
8 - Installazione <strong>de</strong>lla Terra<br />
Unicamente mo<strong>de</strong>llo 2 in 1<br />
Collegare il cavo <strong>de</strong>bitamente previsto a tale<br />
scopo. Stringere correttamente i dadi.<br />
Un raccordo stretto male provocherrebbe il surriscaldamento.<br />
Al di là <strong>de</strong>lla lunghezza <strong>de</strong>l cavo fornito con l'apparecchio,<br />
la sezione dovrà essere adattata ed i<br />
collegamenti dovranno essere protetti ed adattati<br />
alla sezione <strong>de</strong>l cavo utilizzato.<br />
Il collegamento elettrico dovrà obbligatoriamente<br />
essere effettuato da un elettricista <strong>de</strong>bitamente<br />
qualificato e dovrà essere conforme<br />
alla norma NFC 15-100 (Edizione 2002).<br />
<strong>La</strong> messa in tensione <strong>de</strong>ll'elettrodo verrà fatta<br />
automaticamente dopo un periodo di temporizzazione.<br />
- Regolazioni in fabbrica :<br />
mo<strong>de</strong>llo 30 - 4,5 A - massimo<br />
mo<strong>de</strong>llo 100 - 10 A - massimo<br />
ITALIANO<br />
Consigliamo l'installazione <strong>de</strong>lla terra, per<br />
captare le correnti residue presenti nell'acqua.<br />
Montaggio <strong>de</strong>lla terra :<br />
Installare la terra in funzione <strong>de</strong>lle norme in vigore<br />
nel paese di installazione.<br />
10 - Regolazioni<br />
L'apparecchio in funzionamento indica "nor"<br />
Per modificare le regolazioni, utilizzare i<br />
servizi di un operatore pr<strong>of</strong>essionista <strong>de</strong>bitamente<br />
autorizzato dal fabbricante.<br />
Funzione menu regolatore g & c + ON<br />
Ve<strong>de</strong>re schema pagina successiva.
42<br />
10 - Regolazioni (seguito)<br />
menu PRODUZIONE<br />
ECL* = Elettrolizzatore<br />
PCL = Pompa cloro o Elettrovalvola<br />
F menu FILTRAZIONE lontana<br />
OFF* = Distanza di presa di campione<br />
inferiore a 5 m.<br />
ON = Distanza di presa di campione da<br />
5 a 30 m.<br />
PRO menu COLLETTIVITÀ o<br />
ANALISI forzata<br />
OFF* = Analisi in modo normale.<br />
Ogni 2 ore.<br />
ON = Analisi forzata.<br />
Ogni 30 minuti.<br />
DUR menu INVERSIONE di<br />
POLARITÀ<br />
4* = Inversione ogni 4 ore.<br />
1 = Inversione ogni ora.<br />
Premendo su c il tempo aumenta<br />
fino ad ottenimento <strong>de</strong>l tempo di<br />
inversione di polarità <strong>de</strong>si<strong>de</strong>rato.<br />
Non premere più c .<br />
ITALIANO<br />
INT menu AMPERAGGIO<br />
Regolazione in fabbrica a 10A.<br />
Una pressione su c da 4,5 A.<br />
Premendo su c il valore aumenta da<br />
0,5 A in 0,5 A.<br />
Quando il valore <strong>de</strong>si<strong>de</strong>rato è stato<br />
raggiunto, non premere più su c e<br />
premere su g .<br />
VALORE DI FABBRICA IN MODO PREDEFINITO.<br />
Per esempio, la scelta <strong>de</strong>ll'elettrolizzatore o<br />
<strong>de</strong>lla pompa cloro :<br />
Dopo essere entrato nel menu _CL appare,<br />
premere su c , ECL appare. Per cambiare, per<br />
pompa dosatrice premere su c e convalidare<br />
con g .<br />
Per passare da una funzione all'altra, premere<br />
su c per cambiare o su g per convalidare.<br />
Dopo 5 secondi senza manipolazione, l'apparecchio<br />
esce automaticamente dalla funzione<br />
menu.
43<br />
11 - Messa in servizio<br />
Mettere in funzione la filtrazione ed accen<strong>de</strong>re<br />
l'apparecchio (posizione ON).<br />
11. 5 Il diodo ver<strong>de</strong> lampeggia fino a rilevazione<br />
<strong>de</strong>l reattivo nella camera di analisi, poi rimane<br />
acceso a partire dal momento in cui l'a<strong>de</strong>scamento<br />
è terminato.<br />
11. 1 Sale<br />
Versare il sale direttamente nel bacino, lasciando<br />
la filtrazione in funzione.<br />
Non mettere in funzione l'apparecchio fino<br />
alla dissoluzione completa <strong>de</strong>l sale.<br />
11. 6 Quando il diodo ver<strong>de</strong> rimane fisso, spegnere<br />
l'apparecchio (posizione OFF), poi riaccen<strong>de</strong>rlo.<br />
Per la <strong>de</strong>terminazione <strong>de</strong>l tasso <strong>de</strong>l cloro<br />
reale <strong>de</strong>l bacino possono essere necessarie da<br />
due a tre analisi.<br />
11. 2 Aggiunta di sale<br />
Verificare il tasso di sale. Se la concentrazione è<br />
inferiore a 4 g/l, aggiungere <strong>de</strong>l sale, facendo il<br />
calcolo seguente :<br />
Q = (4-T) x V<br />
Q = quantità in Kg di sale da aggiungere<br />
4 = tasso di sale corretto<br />
T = tasso rilevato nella piscina<br />
V = volume <strong>de</strong>lla piscina in m 3 .<br />
Spegnere sempre l'apparecchio, prima di aggiungere<br />
un eventuale prodotto.<br />
Aspettare che il sale si dissolva prima di rimettere<br />
in funzione l'apparecchio.<br />
11. 3 Stabilizzante<br />
<strong>La</strong> presenza di stabilizzante a 20 g/m 3 nell'acqua<br />
è fortemente consigliata in caso di calore elevato<br />
per evitare l'evaporazione <strong>de</strong>l cloro e diminuire la<br />
corrosione. Tasso massimo : 50 g/m 3<br />
ATTENZIONE : Un tasso di stabilizzante troppo<br />
BASSO raddoppierà il consumo di cloro<br />
nel vostro bacino. Al contrario, un tasso di<br />
stabilizzante troppo ALTO annullerà l'azione<br />
<strong>de</strong>l cloro ! Se la piscina era trattata con ciotoli<br />
di cloro, misurare il tasso di stabilizzante presente<br />
nell'acqua. Se la concentrazione supera<br />
i 50 g/m 3 , cambiare una parte <strong>de</strong>ll'acqua prima<br />
di aggiungere il sale.<br />
11. 4 Dopo una temporizzazione di 15 secondi<br />
circa, proce<strong>de</strong>re all'a<strong>de</strong>scamento <strong>de</strong>ll'amichloryte,<br />
premendo su<br />
per 1 secondo. Se<br />
necessario, realizzare un a<strong>de</strong>scamento manuale,<br />
esercitando una pressione continua su<br />
per 15 secondi.<br />
11. 7 Regolare il tasso di cloro <strong>de</strong>si<strong>de</strong>rato in funzione<br />
<strong>de</strong>lla configurazione <strong>de</strong>l bacino. Premere<br />
su c e su g , il diodo rosso gira nel senso <strong>de</strong>lle<br />
lancette di un orologio. Non premere più sul pulsante<br />
g quando si sarà di fronte al tasso scelto.<br />
Per lanciare una analisi forzata, premere su<br />
c e g .<br />
11. 8 L'apparecchio realizza l'analisi <strong>de</strong>l tasso di<br />
cloro <strong>de</strong>lla piscina, pilota e fa scattare la produzione<br />
di cloro per raggiungere il punto pre<strong>de</strong>finito<br />
selezionato.<br />
- Se la misura <strong>de</strong>l cloro è inferiore al tasso<br />
richiesto, il diodo ver<strong>de</strong> si accen<strong>de</strong> e la produzione<br />
di cloro si mette in funzione (attenzione:<br />
non dimenticate di mettere l'elettrolizzatore<br />
o la pompa dosatrice in funzione)<br />
- Se la misura <strong>de</strong>l cloro è superiore al<br />
tasso domandato, il diodo è spento e gli<br />
apparecchi di produzione <strong>de</strong>l cloro non funzionano<br />
più.<br />
11. 9 Regolazione <strong>de</strong>lla durata<br />
d'inversione <strong>de</strong>lla polarità<br />
L'apparecchio è stato programmato in fabbrica<br />
per un cambio di polarità ogni 4 ore. È possibile<br />
modificare questa durata d'inversione da 1 a 99<br />
ore in funzione <strong>de</strong>lla durezza <strong>de</strong>ll'acqua (TH) :<br />
(ve<strong>de</strong>re paragrafo 10)<br />
A titolo indicativo :<br />
> 50° TH ≅ 3 ore<br />
fra 50°TH & 20°TH ≅ da 4 a 20 ore<br />
< 20°TH ≅ da 20 a 99 ore<br />
Se <strong>de</strong>l calcare si <strong>de</strong>posita sull'elettrodo, si<br />
dovranno diminuire i tempi d'inversione.<br />
ITALIANO
44<br />
ITALIANO<br />
12 - Verifiche<br />
Misurare il tasso di cloro e confrontarlo a quello<br />
indicato dall'apparecchio, si può constatare una<br />
differenza in funzione <strong>de</strong>l luogo in cui è stato prelevato<br />
il campione analizzato. Consigliamo <strong>de</strong>i<br />
prelievi all'entrata <strong>de</strong>gli skimmer o direttamente<br />
sul rubinetto di presa campione.<br />
12. 1 Aggiunta di prodotti chimici<br />
Spegnere sempre la scatola, prima di aggiungere<br />
<strong>de</strong>i prodotti chimici direttamente nel bacino.<br />
Aspettare che i prodotti chimici si siano dissolti<br />
prima di rimettere in funzione l'apparecchio.<br />
12. 2 Elettrodo<br />
L'elettrodo è un componente d'usura la cui<br />
longevità dipen<strong>de</strong> dai seguenti fattori :<br />
- Tasso <strong>de</strong>l sale : Mai fare funzionare con un<br />
tasso di sale inferiore a 3,5 g/l.<br />
- Temperatura <strong>de</strong>ll'acqua e rimessaggio :<br />
Interrompere immediatamente il funzionamento<br />
quando la temperatura <strong>de</strong>ll'acqua scen<strong>de</strong> a 15°C.<br />
L'elettrodo <strong>de</strong>ve avere un aspetto pulito e non<br />
<strong>de</strong>ve avere incrostazioni di calcare. Se necessario,<br />
proce<strong>de</strong>re a disincrostazione immergendolo<br />
in una soluzione contenente l'80% d'acqua ed<br />
il 20% d'acido cloridrico. In seguito, verificare i<br />
motivi <strong>de</strong>lle incrostazioni :<br />
- concentrazione troppo bassa di sale,<br />
- regolazione troppo lunga <strong>de</strong>i tempi di<br />
inversione di polarità,<br />
- elettrodo in fin di vita (ve<strong>de</strong>re paragrafo<br />
successivo),<br />
- difetto d'inversione <strong>de</strong>lla scatola.<br />
<strong>La</strong> tensione misurabile sui due morsetti <strong>de</strong>ll'elettrodo<br />
<strong>de</strong>ve essere di circa 9 volt. Misurarla in<br />
posizione V continuo (DC), con un tasso di sale<br />
di 4g/l, una temperatura d'acqua superiore a<br />
15°C ed un elettrodo non incrostato di calcare.<br />
Se la tensione supera i 10,5 volt, l'elettrodo è<br />
usato e dovrà essere sostituito rapidamente.<br />
Richiamo : Ogni tipo d'elettrodo riceve una corrente<br />
specifica indicata sull'etichetta laterale sinistra.<br />
Esempio : Per il mo<strong>de</strong>llo 30 = 4,5 A. Per il<br />
mo<strong>de</strong>llo 100 = 10 A (regolazione in fabbrica)<br />
12. 3 <strong>La</strong>vaggio <strong>de</strong>l filtro di scarico<br />
<strong>de</strong>l bacino<br />
Spegnere l'apparecchio per qualsiasi eventuale<br />
manipolazione <strong>de</strong>lla valvola 6 vie <strong>de</strong>l filtro : lavaggio,<br />
sciacquatura, scarico, ...<br />
12. 4 Mini clorazione shock<br />
Premere su Cl+ per 5 secondi, tutti i diodi lampeggiano<br />
girando. L'apparecchio fa scattare la<br />
produzione di cloro per fare aumentare il tasso a<br />
5 ppm oppure effettua una produzione “forzata”<br />
per 2 ore. L'uscita dal modo mini clorazione<br />
shock è automatica e l'apparecchio ripren<strong>de</strong> il<br />
suo ciclo normale con il valore prefissato scelto in<br />
prece<strong>de</strong>nza.<br />
12. 5 Inversione di polarità<br />
Il vostro apparecchio è regolabile (ve<strong>de</strong>re capitolo<br />
11. 9 ).<br />
<strong>La</strong> durata di vita <strong>de</strong>ll'elettrodo dipen<strong>de</strong> dal<br />
numero <strong>de</strong>lle inversioni subite. Per esempio :<br />
esso si consumerà meno rapidamente invertendo<br />
ogni 6 ore e più rapidamente invertendo ogni 2<br />
ore.<br />
13 - Rimessaggio o cessazione<br />
temporanea d'utilizzazione<br />
- Mettere il reattivo prodotto al riparo dal gelo<br />
(richiu<strong>de</strong>re la pinza prima di scollegare il tubo <strong>de</strong>l<br />
reattivo all'entrata <strong>de</strong>lla pompa P2).<br />
- Spurgare la pompa P2 premendo in continuo su<br />
fino ad esaurimento <strong>de</strong>l reattivo presente<br />
nel tubo.<br />
- Spegnere l'apparecchio (pulsante OFF).<br />
- Svuotare il vaso d'analisi, estraendo il tubo di<br />
cristallo <strong>de</strong>lla presa a staffa « mandata » e spostando<br />
il tubo all'entrata <strong>de</strong>lla pompa P1.
45<br />
14 - Liste <strong>de</strong>s défauts éventuels A01 Problema di flusso<br />
- Assenza di reattivo o nessun reattivo rilevato<br />
(diodo lampeggiante).<br />
- <strong>La</strong>tex <strong>de</strong>lla pompa usato oppure fuori servizio<br />
(diodo lampeggiante).<br />
- Valore incoerente o mancanza di luce<br />
(diodo acceso fisso).<br />
- Diodo cloro massimo lampeggiante (superiore a<br />
2.5 mg/l), produzione interrotta : Piscina<br />
disinnescata o prese d'aria intempestive.<br />
- Diodo lampeggiante intermittente lungo<br />
(3 secondi) : difetto <strong>de</strong>l rilevatore di portata.<br />
- assenza d'acqua o di flusso nella camera<br />
d'analisi.<br />
- pompa fuori uso o guasta.<br />
A02 Problema di sensori<br />
- apparecchio aperto.<br />
A03 Problema di sensori<br />
- diodo <strong>de</strong>bole o fuori uso.<br />
In caso di difetto non spiegato, mettere l'apparecchio<br />
in « by-pass » premendo su g per 10 secondi<br />
e contattare il servizio post vendita (per<br />
rimettere il regolatore in fase di funzionamento<br />
normale premere su g per 10 secondi).<br />
A04 Problema di calcolo <strong>de</strong>l tasso<br />
di cloro<br />
- valori non coerenti.<br />
Questa posizione « by-pass » implica che si<br />
<strong>de</strong>vono regolare nuovamente e manualmente<br />
gli apparecchi di produzione di cloro, in funzione<br />
<strong>de</strong>lla configurazione <strong>de</strong>lla piscina ----<br />
produzione continua.<br />
INFORMAZIONI PER SAV<br />
A06 Difetto iniezione<br />
- assenza o mancanza di reattivo.<br />
A07 Problema di lettura<br />
- assenza di erogazione nel circuito.<br />
A --<br />
sono visualizzati diretta-<br />
I codici errori<br />
mente sullo schermo. Essi implicano un intervento<br />
sull'apparecchio.<br />
I codici errore b --<br />
e C --<br />
sono <strong>de</strong>lle informazioni<br />
relative ad una anomalia temporanea<br />
oppure ad un cattivo funzionamento che non<br />
richie<strong>de</strong> una manutenzione immediata.<br />
L'apparecchio funziona normalmente. Questi<br />
errori non compaiono direttamente nel menu.<br />
Essi sono indicati con un punto sul display 888<br />
.<br />
Per fare apparire queste informazioni, si <strong>de</strong>ve<br />
premere su CL + e g per verificare la presenza<br />
di più errori.<br />
b05 Problema di lettura<br />
- instabilitá <strong>de</strong>lle misure,<br />
- aria nel circuito,<br />
- interferenze <strong>de</strong>l sensore.<br />
b09 Difetto avvertimento C _<br />
- mancanza di sale (se elettrolizzatore),<br />
- elettrodo incrostato o guasto,<br />
- assenza di cloro, se pompa dosatrice o<br />
elettrovalvola,<br />
- pompa cloro o elettrovalvola guasta,<br />
- assenza di potenza in uscita dalla<br />
scheda sale,<br />
- relé di comando d'asservimento guasto.<br />
_<br />
ITALIANO
46<br />
B10<br />
C11<br />
Incoerenze di lettura<br />
- guasto iniezione,<br />
- reattivo quasi vuoto.<br />
Guasto sistema<br />
- problema interno sulla scheda<br />
elettronica.<br />
16 - Che cosa fare in caso di<br />
problema ?<br />
Qualsiasi intervento di natura elettrica sarà<br />
realizzato da un elettricista qualificato. Solo<br />
un pr<strong>of</strong>essionista <strong>de</strong>bitamente autorizzato è<br />
abilitato ad aprire l'apparecchiatura.<br />
Problema : L'apparecchio rimane spento<br />
Soluzione : Verificare il collegamento sulla centralina<br />
di filtrazione.<br />
ITALIANO<br />
c12<br />
Guasto giornale<br />
- problema interno sulla scheda<br />
elettronica.<br />
15 - Garanzia<br />
Questi apparecchi sono garantiti 2 anni pezzi e<br />
mano d'opera, extra pezzi d'usura e reattivo. Tale<br />
garanzia copre tutti i difetti, constatati durante<br />
questo lasso di tempo, che non possono essere<br />
imputati a cattiva utilizzo da parte <strong>de</strong>ll'utente. Il<br />
fabbricante è il solo atto a giudicare <strong>de</strong>lle azioni<br />
da realizzare relativamente al ricorso esercitato.<br />
<strong>La</strong> nostra responsabilità non sarà impegnata relativamente<br />
alle spese di mantenimento <strong>de</strong>ll'acqua<br />
di balneazione durante il periodo di<br />
riparazione <strong>de</strong>ll'apparecchio (aggiunta di prodotti<br />
chimici, ecc, …). L'utilizzatore dovrà accettare,<br />
se necessario, il controllo <strong>de</strong>lla sua installazione<br />
da parte <strong>de</strong>l nostro Servizio Post Vendita, che<br />
effettuerà tutti i test necessari all'individuazione<br />
<strong>de</strong>l difetto constatato.<br />
<strong>La</strong> garanzia sarà effettiva solo dopo la<br />
ricezione <strong>de</strong>l certificato di garanzia <strong>de</strong>bitamente<br />
completato e rinviato all'indirizzo indicato<br />
dal vostro installatore <strong>de</strong>bitamente<br />
autorizzato. Le spese di spedizione di ogni<br />
singolo apparecchio sono a carico <strong>de</strong>l<br />
cliente.<br />
Per quanto riguarda l'utilizzatore, la presente<br />
garanzia non è contraria all'applicazione <strong>de</strong>lla<br />
garanzia legale di eventuali vizi nascosti, quale<br />
risulta dagli articoli 1641 e successivi <strong>de</strong>l codice<br />
civile.<br />
Tale garanzia non esonera neppure dalla<br />
garanzia legale di conformità quale iscritta nel<br />
codice <strong>de</strong>l consumo con ordinanza 2005136 <strong>de</strong>l<br />
17/02/05.<br />
Problema : L'apparecchio non raggiunge il<br />
valore prefissato di corrente<br />
Soluzione : Verificare :<br />
1- Il tasso di sale (> 3.5 g/L),<br />
2- <strong>La</strong> temperatura <strong>de</strong>ll'acqua (> 15°C),<br />
3- Lo stato <strong>de</strong>ll'elettrodo, che <strong>de</strong>ve essere pulito<br />
e senza incrostazioni. Se il problema persiste,<br />
questo significa che il vostro elettrodo è in fin di<br />
vita e che dovrà essere sostituito.<br />
Problema : Clorazione insufficiente,<br />
malgrado il funzionamento<br />
corretto <strong>de</strong>ll'apparecchio<br />
Soluzione : Verificare :<br />
1- Verificare il pH (fra 6,9 e 7,4),<br />
2- Il tasso <strong>de</strong>llo stabilizzante (fra 20 e 50 g/m 3 ),<br />
3- Aumentare il tempo di filtrazione.<br />
Problema : Tasso di cloro nullo,<br />
malgrado il funzionamento<br />
corretto <strong>de</strong>ll'apparecchio<br />
Soluzione : Verificare :<br />
1- Presenza di perossido d'idrogeno : Questo<br />
prodotto annulla la lettura <strong>de</strong>l cloro per circa 3<br />
settimane,<br />
2- Acqua satura o squilibrata : Proce<strong>de</strong>re ad una<br />
clorazione shock, equilibrare il TAC (da 12 a 18°<br />
F), se necessario rinnovare una parte <strong>de</strong>ll'acqua<br />
<strong>de</strong>lla piscina.<br />
Problema : Cloro troppo basso :<br />
CL sul display :<br />
Soluzione : Cause possibili :<br />
1- Elettrolizzatore : spento o guasto in sicurezza<br />
temperatura, mancanza di sale, elettrodo difettoso,<br />
apparecchio esterno di dimensioni inferiori<br />
al necessario.<br />
2- Pompa cloro : dimensioni inferiori al necessario,<br />
assenza di cloro liquido, latex difettoso,<br />
pompa spenta o guasta.<br />
3- Elettrovalvola : guasta o spenta, assenza di<br />
cloro.<br />
4- Acqua : mancanza di stabilizzante, presenza<br />
di perossido d'idrogeno, prodotto esterno che<br />
maschera la lettura <strong>de</strong>l cloro.<br />
III
47<br />
Atenção<br />
Este aparelho não <strong>de</strong>ve ser utilizado por pessoas<br />
(inclusive crianças) com limitações das capacida<strong>de</strong>s<br />
físicas, sensoriais ou mentais ou falta <strong>de</strong><br />
experiência e/ou <strong>de</strong> conhecimento do mesmo, a<br />
não ser que seja efectuada uma vigilância por<br />
uma pessoa responsável pela sua segurança ou<br />
que recebam instruções acerca do funcionamento<br />
do aparelho (NF EN 60335-1/A1).<br />
Precauções a ter antes <strong>de</strong> qualquer intervenção<br />
no interior da caixa:<br />
Isolar a instalação eléctrica com ajuda <strong>de</strong> um dispositivo<br />
<strong>de</strong> separação da energia sob a forma <strong>de</strong><br />
um:<br />
- disjunctor seccionador<br />
ou - interruptor seccionador<br />
ou - seccionador <strong>de</strong> fusível.<br />
Dispositivo a instalar para proteger contra os<br />
curto-circuitos ou as sobrecargas:<br />
O seu aparelho está em fim <strong>de</strong> vida.<br />
Deseja <strong>de</strong>sembaraçar-se <strong>de</strong>le ou<br />
substituí-lo, não o <strong>de</strong>scarte no<br />
caixote <strong>de</strong> lixo nem nos contentores<br />
<strong>de</strong> triagem selectiva<br />
municipais. Num aparelho novo,<br />
este símbolo significa que o<br />
equipamento não <strong>de</strong>ve ser <strong>de</strong>scartado<br />
e que será objecto <strong>de</strong> uma<br />
recolha selectiva com vista à sua reutilização,<br />
reciclagem ou valorização.<br />
Se o aparelho contiver substâncias potencialmente<br />
perigosas para o meio ambiente, estas<br />
serão eliminadas ou neutralizadas.<br />
Po<strong>de</strong> dar o aparelho a uma associação social e<br />
solidária, que o po<strong>de</strong>rá reparar e voltar a colocálo<br />
em circulação. Se comprar um novo, po<strong>de</strong><br />
entregar o antigo na loja ou distribuidor para o<br />
recuperar<br />
É a recuperação <strong>de</strong>signada “Um para Um”.<br />
Caso contrário, <strong>de</strong>scarte-o numa lixeira, caso a<br />
Câmara Municipal tenham implementado uma<br />
recolha selectiva <strong>de</strong>ste tipo <strong>de</strong> produtos.<br />
- disjuntor diferencial 30 mA (potência a adaptar<br />
em função da instalação). O ca<strong>libre</strong> do dispositivo<br />
<strong>de</strong> protecção não po<strong>de</strong>rá ultrapassar 10 A.<br />
Precaução :<br />
Ligar o condutor ver<strong>de</strong>-amarelo do cabo <strong>de</strong> alimentação<br />
ao circuito geral <strong>de</strong> protecção.<br />
É obrigatória a instalação da caixa nos<br />
locais técnicos ou sob abrigo.<br />
Dar a uma<br />
Associação<br />
com vocação<br />
social<br />
Devolver o<br />
aparelho<br />
usado ao<br />
distribuidor<br />
ao comprar<br />
um novo<br />
Descartar o<br />
aparelho<br />
usado numa<br />
lixeira<br />
PORTUGÛES<br />
NF EN 60335-1/A1
48<br />
Regulador<br />
<br />
V2<br />
Regulador<br />
<br />
V2.2<br />
Regulador<br />
<br />
Injecção<br />
Regulador<br />
<br />
Injecção<br />
2 em 1 <br />
2 em 1<br />
1 - Conteúdo do pacote<br />
<br />
Referências<br />
ANA01<br />
m 3<br />
Regulação do cloro<br />
Regulação pH<br />
Electrolisador interno<br />
Electrolisador externo<br />
Bomba ou electroválvula<br />
Mini-cloração <strong>de</strong> choque<br />
0 a consoante a<br />
produção<br />
X X X<br />
0 a consoante a<br />
ANA02<br />
produção<br />
X X X X<br />
ANA031 <strong>de</strong> 0 a 30 m 3 X X X X<br />
ANA032 <strong>de</strong> 30 a 500 m 3 X X X X<br />
ANA04 1 - 30 m 3 X X X X<br />
ANA05 30 - 100 m 3 X X X X<br />
Reactivo amichloryte<br />
Reactivo pH<br />
2 - Características técnicas<br />
Os pictogramas:<br />
Para o bom funcionamento do seu aparelho,<br />
respeite os seguintes valores:<br />
Arranque<br />
Ligação : 220 volts-50/60 Hz submetida à<br />
bomba <strong>de</strong> filtração.<br />
Medida colorimétrica : 350 nm a 600 nm.<br />
Produção<br />
Bomba P1 peristáltica : 6 litros/hora para a<br />
recolha <strong>de</strong> amostra.<br />
Por Defeito<br />
PORTUGÛES<br />
Bomba P2 peristáltica : 0,1 litros/hora para a<br />
dosagem do reactivo.<br />
Temperatura da água : Não colocar em funcionamento<br />
a uma temperatura inferior a 15°C.<br />
Reactivo <strong>de</strong> comparação colorimétrica :<br />
Amichloryte ®.<br />
Em conformida<strong>de</strong> com as normas CE.<br />
CL +<br />
g<br />
Set<br />
Mini-cloração <strong>de</strong><br />
choque<br />
Regulação<br />
dos valores
49<br />
3 - Princípio <strong>de</strong> funcionamento<br />
O regulador retira água da sua piscina, adiciona<br />
automaticamente um reactivo<br />
«AMICHLORYTE®» patenteado e compara<br />
a variação colorimétrica da mistura a<br />
fim <strong>de</strong> <strong>de</strong>finir a taxa <strong>de</strong> cloro que está presente<br />
na piscina.<br />
Consoante a configuração e a utilização da<br />
sua piscina, o regulador vai escolher a taxa<br />
<strong>de</strong> cloro necessária para a boa <strong>de</strong>sinfecção<br />
<strong>de</strong>ixando o dispositivo pilotar os aparelhos<br />
<strong>de</strong> produção <strong>de</strong> cloro.<br />
As análises fazem-se todos os 30 minutos<br />
quando a taxa <strong>de</strong> cloro é inferior ao ponto<br />
<strong>de</strong> referência e todas as 2 horas quando<br />
ela for atingida.<br />
É possível modificar estas frequências, (ver<br />
parágrafo 10. )<br />
A cada modificação <strong>de</strong> referência uma nova<br />
análise é efectuada.<br />
Em caso <strong>de</strong> diferença importante com a<br />
medida anterior, o aparelho efectua uma<br />
nova análise <strong>de</strong> confirmação.<br />
Após cada análise, o aparelho <strong>de</strong>senca<strong>de</strong>ia<br />
ou não, em função do ponto <strong>de</strong> referência,<br />
o sistema <strong>de</strong> produção <strong>de</strong> cloro (electrolisador,<br />
bomba doseadora, electroválvula).<br />
4 - Precauções a ter antes da<br />
entrada em serviço<br />
Se a instalação for feita numa piscina já<br />
clorada (Cl > a 5 ppm), <strong>de</strong>ve baixar a taxa<br />
<strong>de</strong> cloro (CL < 5 ppm) antes <strong>de</strong> colocar o<br />
aparelho a funcionar.<br />
- Verificar se a piscina não foi tratada<br />
com peróxido <strong>de</strong> hidrogénio ou<br />
anti-algas à base <strong>de</strong> peróxido <strong>de</strong><br />
hidrogénio durante as três<br />
semanas que antece<strong>de</strong>m a<br />
instalação, caso contrário, atrase a<br />
colocação em funcionamento <strong>de</strong><br />
outro tanto.<br />
- Ajustar o pH entre 7,0 e 7,4.<br />
- A taxa <strong>de</strong> estabilizante <strong>de</strong> cloro <strong>de</strong>ve<br />
estar compreendida entre 20 e<br />
50 ppm. (salvo em piscinas<br />
interiores).<br />
- Ajustar o TAC (taxa <strong>de</strong> alcalinida<strong>de</strong><br />
completa) entre 12° e 18°F.<br />
- A temperatura da água da piscina<br />
<strong>de</strong>ve ser superior a 18° C para uma<br />
medida óptima do aparelho.<br />
- Taxa <strong>de</strong> sal:<br />
Recomendada: 4 g/l.<br />
Mínimo: 3,5 g/l.<br />
- Se utilizar uma bomba doseadora<br />
<strong>de</strong> cloro, não se esqueça <strong>de</strong><br />
dimensionar a bomba em função do<br />
volume e da frequentação da<br />
piscina.<br />
O mo<strong>de</strong>lo “injecção” é entregue com uma<br />
bomba <strong>de</strong> cloro:<br />
- 0 a 30 m 3 2,2 l/h<br />
- 30 a 500 m 3 6,0 l/h<br />
Compatibilida<strong>de</strong> :<br />
Verifique se os materiais utilizados<br />
(tanto na piscina como em redor da<br />
mesma) são compatíveis com a utilização<br />
<strong>de</strong> água salgada e clorada.<br />
PORTUGÛES
50<br />
5 - Instalação no local técnico<br />
Esquema eléctrico a título indicativo. Consultar o esquema fornecido pelo fabricante<br />
da caixa.<br />
PORTUGÛES<br />
1) Fixar a caixa no local técnico a uma altura<br />
que permita manobrá-lo, com ajuda dos parafusos<br />
e patilhas <strong>de</strong> fixação incluídas. Instalar<br />
imperativamente a caixa bem em nivel perfeito.<br />
2) Fixar o contentor <strong>de</strong> reactivo preferencialmente<br />
o mais perto possível da caixa mas<br />
nunca mais alto.
51<br />
3) Colocar a braça<strong>de</strong>ira no circuito <strong>de</strong> saída<br />
entre a filtração e os aparelhos <strong>de</strong> aquecimento,<br />
<strong>de</strong> regulação, <strong>de</strong> produções <strong>de</strong> cloro e <strong>de</strong> infjecção<br />
<strong>de</strong> produto. Em caso <strong>de</strong> entrada <strong>de</strong> ar<br />
contínua, colocar a braça<strong>de</strong>ira do ralo em baixo<br />
ou num lado. Conectar esta braça<strong>de</strong>ira ao tubo<br />
<strong>de</strong> cristal transparente (aspiração).<br />
4) Aparafusar e vedar o raccord <strong>de</strong> alimentação<br />
respeitando a direcção do fluxo indicado por uma<br />
seta no ralo.<br />
5) Colocar a segunda braça<strong>de</strong>ira no esgoto<br />
(versão filtro <strong>de</strong> areia) ou conectá-la à evacuação<br />
mais próxima.<br />
Conectar e ajustar o tubo preto <strong>de</strong> evacuação<br />
que sai do aparelho. Cuidado para não apertar<br />
os tubos durante a montagem.<br />
6) Conectar o tubo <strong>de</strong> saída do contentor <strong>de</strong><br />
Amichloryte à bomba P2, libertar o clamp se for<br />
necessário. Conectar electricamente o aparelho<br />
ao contactor <strong>de</strong> servidão da bomba da piscina.<br />
Verificar se o aparelho se apaga ao mesmo<br />
tempo que a filtração.<br />
7) Conectar o electrolisador ou a bomba<br />
doseadora à caixa <strong>de</strong> conexão fornecida e ligada<br />
à caixa, consoante o mo<strong>de</strong>lo (ver a instalação do<br />
vaso). Se houver bomba doseadora ver<br />
esquema do mo<strong>de</strong>lo bomba doseadora / electroválvula.<br />
6 - Instalação do vaso<br />
Colar o vaso sobre a canalização <strong>de</strong><br />
retorno da piscina, <strong>de</strong>pois do filtro e<br />
<strong>de</strong>pois do reaquecedor ou arranque do<br />
compressor auxiliar.<br />
A água <strong>de</strong>ve circular do Tê em direcção<br />
à redução (seguir o sentido da seta no<br />
vaso); o caudal <strong>de</strong> água <strong>de</strong>ve obrigatoriamente<br />
circular entre as placas (eléctrodo).<br />
Prever um espaço suficientemente<br />
gran<strong>de</strong> do lado<br />
<strong>de</strong>smontável do vaso para<br />
po<strong>de</strong>r retirar o eléctrodo. Se o<br />
vaso estiver montado em bypass,<br />
assegurar-se que no<br />
mínimo 80% do caudal passa<br />
por este último.<br />
PORTUGÛES
52<br />
7 - Detector <strong>de</strong> Caudal (Flow switch)<br />
unicamente no mo<strong>de</strong>lo 2 em 1<br />
Recomendamos a instalação do <strong>de</strong>tector <strong>de</strong> caudal<br />
nos seguintes casos:<br />
- bomba <strong>de</strong> filtração situada acima do<br />
nível da água (risco <strong>de</strong> interrupção),<br />
Princípio <strong>de</strong> funcionamento :<br />
Se o fluxo for interrompido aci<strong>de</strong>ntalmente ou<br />
aquando <strong>de</strong> uma contra-lavagem, e em todos os<br />
casos, quando a velocida<strong>de</strong> <strong>de</strong> passagem da<br />
água for inferior a 2,9m 3 /h, o <strong>de</strong>tector <strong>de</strong>sligará o<br />
aparelho.<br />
Instalação :<br />
Instalar o <strong>de</strong>tector sobre o vaso no respectivo<br />
local posicionando a seta que se encontra por<br />
cima no sentido do caudal.<br />
O <strong>de</strong>tector está equipado <strong>de</strong> uma resistência o<br />
que permite à caixa <strong>de</strong>tectá-lo automaticamente.<br />
Por este motivo não utilizar um <strong>de</strong>tector que não<br />
esteja equipado com a referida resistência.<br />
9 - Alimentação do eléctrodo sal<br />
Ligar o cabo previsto para este efeito. Apertar<br />
correctamente as porcas.<br />
Uma junção mal apertada provocaria sobreaquecimentos.<br />
Se o comprimento for superior ao do cabo incluído<br />
com o aparelho, a secção <strong>de</strong>verá ser adaptada<br />
e as conexões <strong>de</strong>verão ser protegidas e<br />
adaptadas à secção do cabo utilizado.<br />
A conexão eléctrica será obrigatoriamente<br />
efectuada por um electricista qualificado e<br />
<strong>de</strong>verá estar em conformida<strong>de</strong> com a norma<br />
NFC 15-100 (Edição 2002).<br />
A colocação sob tensão do eléctrodo será feita<br />
automaticamente no seguimento <strong>de</strong> um período<br />
<strong>de</strong> temporização.<br />
- Regulações fábrica :<br />
mo<strong>de</strong>lo 30 - 4,5 A - máximo<br />
mo<strong>de</strong>lo 100 - 10 A - máximo<br />
8 - Instalação da Terra<br />
Unicamente para o mo<strong>de</strong>lo 2 em 1<br />
PORTUGÛES<br />
Recomendamos a instalação da terra a fim <strong>de</strong><br />
captar as correntes residuais presentes na água.<br />
Montagem da terra :<br />
Instalar a terra em função das normas em vigor<br />
no país da instalação.<br />
10 - Regulações<br />
O aparato em funcionamento indica "nor"<br />
As modificações <strong>de</strong>vem ser efectuadas por<br />
um pr<strong>of</strong>issional autorizado pelo fabricante.<br />
Função menu regulador g & c + ON<br />
Ver esquema na página seguinte.
53<br />
10 - Regulações (continuação)<br />
menu PRODUÇÃO<br />
ECL* = Electrolisador<br />
PCL = Bomba cloro ou Electroválvula<br />
F menu FILTRAÇÃO afastada<br />
OFF* = Distância <strong>de</strong> recolha <strong>de</strong> amostra<br />
inferior a 5 m.<br />
ON = Distância <strong>de</strong> recolha <strong>de</strong> amostra<br />
<strong>de</strong> 5 a 30 m.<br />
PRO menu COLECTIVIDADE ou<br />
ANÁLISE forçada<br />
OFF* = Análise em modo normal.<br />
Todas as 2 horas.<br />
ON = Análise forçada<br />
Todos os 30 minutos.<br />
DUR menu INVERSÃO <strong>de</strong><br />
POLARIDADE<br />
4* = Inversão todas as 4 horas.<br />
1 = Inversão todas as horas.<br />
Mantenha a pressão sobre a tecla c<br />
c para aumentar o tempo até<br />
obtenção do tempo <strong>de</strong> inversão <strong>de</strong><br />
polarida<strong>de</strong> <strong>de</strong>sejado. Soltar c .<br />
INT menu AMPERAGEM<br />
Regulação <strong>de</strong> fábrica a 10A.<br />
Uma pressão em c dá 4,5 A.<br />
Mantendo a pressão sobre a tecla<br />
c o valor aumenta <strong>de</strong> 0,5 A em 0,5A.<br />
Quando o valor requerido for<br />
alcançado soltar c e pressionar g .<br />
*VALOR DE FÁBRICA POR DEFEITO.<br />
Por exemplo a escolha do electrolisador ou da<br />
bomba <strong>de</strong> cloro :<br />
Quando entra no menu aparece _CL, se pressionar<br />
c , aparece ECL. Para mudar para a<br />
bomba doseadora pressionar c e validar com<br />
g .<br />
Para passar <strong>de</strong> uma função para outra pressionar<br />
c para mudar ou g para validar.<br />
Após 5 segundos sem manipulação o aparelho<br />
sai automaticamente do menu.<br />
PORTUGÛES
54<br />
11 - Entrada em serviço<br />
Colocar a filtração em funcionamento e ligar o<br />
aparelho (posição ON).<br />
11. 1 Sal<br />
Verter o sal directamente na piscina <strong>de</strong>ixando a<br />
filtração a funcionar.<br />
Não colocar em funcionamento o aparelho<br />
até à dissolução completa do sal.<br />
11. 5 O díodo ver<strong>de</strong> pisca até à <strong>de</strong>tecção <strong>de</strong><br />
reactivo na câmara <strong>de</strong> análise, em seguida fica<br />
aceso logo que termine a iniciação.<br />
11. 6 Quando o díodo ver<strong>de</strong> <strong>de</strong>ixa <strong>de</strong> piscar,<br />
<strong>de</strong>sligar o aparelho (posição OFF), em seguida<br />
voltar a acendê-lo. Po<strong>de</strong>m ser necessárias duas<br />
a três análises para <strong>de</strong>terminar o índice real <strong>de</strong><br />
cloro na piscina.<br />
PORTUGÛES<br />
11. 2 Adição <strong>de</strong> Sal<br />
Verificar a taxa <strong>de</strong> sal. Se a concentração for<br />
inferior a 4 g/l adicionar sal fazendo o seguinte<br />
cálculo: Q = (4-T) x V<br />
Q = quantida<strong>de</strong> em Kg <strong>de</strong> sal a acrescentar<br />
4 = taxa <strong>de</strong> sal correcta<br />
T = taxa lida na piscina<br />
V = volume da piscina em m 3 .<br />
Desligar sempre o aparelho antes <strong>de</strong> adicionar<br />
qualquer produto, seja ele qual for.<br />
Aguardar que o sal se dissolva antes <strong>de</strong> voltar a<br />
colocar o aparelho em funcionamento.<br />
11. 3 Estabilizante<br />
Em época <strong>de</strong> calor intenso e a fim <strong>de</strong> evitar a<br />
evaporação do cloro e diminuir a corrosão, é<br />
fortemente aconselhada a presença na água <strong>de</strong><br />
estabilizante a 20 g/m 3 .<br />
Taxa máxima: 50 g/m 3<br />
ATENÇÃO: Uma taxa <strong>de</strong> estabilizante <strong>de</strong>masiado<br />
BAIXA duplicaria o consumo <strong>de</strong> cloro da<br />
piscina. Ao contrário, uma taxa <strong>de</strong> estabilizante<br />
<strong>de</strong>masiado ALTA anularia a acção do<br />
cloro!<br />
Se a piscina tiver sido tratada com pastilhas<br />
<strong>de</strong> cloro, medir a taxa <strong>de</strong> estabilizante presente<br />
na água. Se a concentração ultrapassar<br />
50 g/m 3 , renovar uma parte da água antes <strong>de</strong><br />
adicionar o sal.<br />
11. 7 Regular a taxa <strong>de</strong> cloro <strong>de</strong>sejada em<br />
função da configuração da piscina. Pressionar<br />
, o díodo vermelho roda no sentido dos<br />
c e g<br />
ponteiros <strong>de</strong> um relógio. Soltar o botão g em<br />
face da taxa seleccionada.<br />
Para lançar uma análise forçada, pressionar c<br />
e g .<br />
11. 8 O aparelho analisa a taxa <strong>de</strong> cloro da<br />
piscina, pilota e <strong>de</strong>senca<strong>de</strong>ia a produção <strong>de</strong><br />
cloro para atingir o ponto <strong>de</strong> referência seleccionado.<br />
- Se a medida <strong>de</strong> cloro for inferior à taxa solicitada,<br />
o díodo ver<strong>de</strong> acen<strong>de</strong> e a produção <strong>de</strong><br />
cloro começa a funcionar (atenção: não se<br />
esqueça <strong>de</strong> colocar o eléctrodo ou a bomba<br />
doseadora a funcionar)<br />
- Se a medida do cloro for superior à taxa<br />
seleccionada, o díodo apaga e os aparelhos<br />
<strong>de</strong> produção <strong>de</strong> cloro <strong>de</strong>ixam <strong>de</strong> funcionar.<br />
11. 9 Regulação da duração <strong>de</strong><br />
inversão <strong>de</strong> polarida<strong>de</strong><br />
O seu aparelho foi programado na fábrica para<br />
uma mudança <strong>de</strong> polarida<strong>de</strong> todas as 4 horas. É<br />
possível modificar esta duração <strong>de</strong> inversão <strong>de</strong> 1<br />
a 99 horas em função da dureza da água (TH):<br />
(ver parágrafo 10)<br />
11. 4 Após uma temporização <strong>de</strong> cerca <strong>de</strong> 15<br />
segundos, proce<strong>de</strong>r ao arranque do amichloryte<br />
pressionando<br />
durante 1 segundo. Se<br />
for necessário, proce<strong>de</strong>r ao arranque manual<br />
exercendo uma pressão contínua sobre<br />
durante 15 segundos.<br />
A título indicativo:<br />
> 50° TH ≅ 3 horas<br />
entre 50°TH & 20°TH ≅ 4 a 20 horas<br />
< 20°TH ≅ 20 a 99 horas<br />
Se se <strong>de</strong>positar calcário no eléctrodo, é conveniente<br />
diminuir o tempo <strong>de</strong> inversão.
55<br />
12 - Verificações<br />
Medir a taxa <strong>de</strong> cloro e compará-la àquela indicada<br />
pelo aparelho, po<strong>de</strong> ser constatada uma diferença<br />
em função do local on<strong>de</strong> foi trecolhida a<br />
amostra analisada. Aconselhamos a que faça as<br />
suas recolhas à entrada dos skimmers ou directamente<br />
na torneira <strong>de</strong> recolha <strong>de</strong> amostras.<br />
12. 1 Adição <strong>de</strong> produtos químicos<br />
Desligar sempre o aparelho antes <strong>de</strong> adicionar<br />
produtos químicos directamente na piscina.<br />
Aguardar que os produtos químicos estejam dissolvidos<br />
antes <strong>de</strong> voltar a colocar em funcionamento<br />
o aparelho.<br />
12. 2 Eléctrodo<br />
O eléctrodo é uma peça <strong>de</strong> <strong>de</strong>sgaste cuja<br />
longevida<strong>de</strong> <strong>de</strong>pen<strong>de</strong> dos seguintes factores:<br />
- Taxa <strong>de</strong> sal : nunca colocar em funcionamento<br />
com uma taxa <strong>de</strong> sal inferior a 3,5 g/l.<br />
- Temperatura da água e invernia : <strong>de</strong>sligar logo<br />
que a temperatura da água <strong>de</strong>sça a 15°C..<br />
O eléctrodo <strong>de</strong>ve apresentar um aspecto<br />
impecável sem qualquer incrustação <strong>de</strong> calcário.<br />
Se tal não for o caso, <strong>de</strong>ve proce<strong>de</strong>r-se à<br />
remoção das incrustações mergulhando o eléctrodo<br />
numa solução contendo 80% <strong>de</strong> água e<br />
20% <strong>de</strong> ácido clorídrico. Em seguida, verificar as<br />
causas da incrustação:<br />
- concentração <strong>de</strong> sal <strong>de</strong>masiado fraca,<br />
- regulação <strong>de</strong>masiado longa do tempo<br />
<strong>de</strong> inversão das polarida<strong>de</strong>s,<br />
- eléctrodo em fim <strong>de</strong> vida (ver parágrafo<br />
seguinte),<br />
- <strong>de</strong>feito <strong>de</strong> inversão <strong>de</strong> polarida<strong>de</strong> no<br />
aparelho<br />
A tensão mensurável nos dois terminais do eléctrodo<br />
<strong>de</strong>ve situar-se à volta <strong>de</strong> 9 volts. Medi-la<br />
em posição V contínuo (DC), com uma taxa <strong>de</strong><br />
sal <strong>de</strong> 4g/l, uma temperatura <strong>de</strong> água superior a<br />
15°C e um eléctrodo não incrustado <strong>de</strong> calcário.<br />
Se a tensão exce<strong>de</strong>r 10,5 volts, o eléctrodo<br />
está <strong>de</strong>sgastado e <strong>de</strong>verá <strong>de</strong> ser substituído <strong>de</strong>ntro<br />
<strong>de</strong> pouco tempo.<br />
Nota : Cada tipo <strong>de</strong> eléctrodo recebe uma corrente<br />
específica indicada na etiqueta lateral<br />
esquerda.<br />
Exemplo : Para o mo<strong>de</strong>lo 30 = 4,5 A<br />
Para o mo<strong>de</strong>lo 100 = 10 A (regulação na fábrica)<br />
12. 3 <strong>La</strong>vagem do<br />
filtro-esvaziamento da<br />
piscina<br />
Parar o electrolisador ao manipular a válvula <strong>de</strong><br />
6 vias do filtro: lavagem, enxaguamento, esvaziamento...<br />
12. 4 Mini cloração <strong>de</strong> choque<br />
Pressionar Cl+ durante 5 segundos, todos os<br />
díodos piscam girando. O aparelho <strong>de</strong>senca<strong>de</strong>ia<br />
a produção <strong>de</strong> cloro a fim <strong>de</strong> aumentar a taxa a 5<br />
ppm ou efectua uma produção “forçada” durante<br />
2 horas. A saída do modo mini cloração <strong>de</strong><br />
choque é automática e o aparelho retoma o seu<br />
ciclo normal com o ponto <strong>de</strong> referência seleccionado<br />
anteriormente.<br />
12. 5 Inversão <strong>de</strong> polarida<strong>de</strong><br />
O seu aparelho é regulável (ver capítulo 11. 9 ).<br />
A duração <strong>de</strong> vida do eléctrodo <strong>de</strong>pen<strong>de</strong> do<br />
número das inversões efectuadas. Por exemplo:<br />
ele <strong>de</strong>sgartar-se-á menos rapidamente invertendo<br />
todas as 6 horas e mais rapidamente invertendo<br />
todas as 2 horas.<br />
13 - Invernia ou inactivida<strong>de</strong><br />
- Colocar o reactivo ao abrigo da geada (fechar o<br />
clamp antes <strong>de</strong> <strong>de</strong>sconectar o tubo <strong>de</strong> reactivo à<br />
entrada da bomba P2).<br />
- Purgar a bomba P2 pressionando<br />
em contínuo até esgotamento do reactivo no<br />
tubo.<br />
- Desligar o aparelho (botão OFF).<br />
- Esvaziar o vaso <strong>de</strong> análise retirando o tubo <strong>de</strong><br />
cristal da braça<strong>de</strong>ira «saída» e <strong>de</strong>sencaixando o<br />
tubo à entrada da bomba P1.<br />
PORTUGÛES
56<br />
14 - Lista dos eventuais <strong>de</strong>feitos A01 Problema <strong>de</strong> fluxo<br />
- Falta reactivo ou não foi <strong>de</strong>tectado reactivo<br />
(diodo a piscar).<br />
- Látex da bomba <strong>de</strong>sgastado ou fora <strong>de</strong> serviço<br />
(diodo a piscar).<br />
- Valor incoerente ou falta <strong>de</strong> luz<br />
(diodo aceso fixo).<br />
- Díodo <strong>de</strong> cloro máxi a piscar (superior a 2.5<br />
mg/l), produção parada: piscina <strong>de</strong>sactivada ou<br />
entradas <strong>de</strong> ar intempestivas.<br />
- Díodo a piscar por intermitência longa (3<br />
segundos): <strong>de</strong>feito <strong>de</strong> <strong>de</strong>tector <strong>de</strong> débito.<br />
- ausência <strong>de</strong> água ou <strong>de</strong> fluxo na câmara <strong>de</strong><br />
análise.<br />
- bomba em fim <strong>de</strong> vida ou <strong>de</strong>feituosa.<br />
A02 Problemas <strong>de</strong> sensor<br />
- aparelho aberto.<br />
A03 Problema <strong>de</strong> sensor<br />
- díodo fraco ou em fim <strong>de</strong> vida.<br />
Em caso <strong>de</strong> <strong>de</strong>feito inexplicável, colocar o aparelho<br />
em «by-pass» pressionando g durante 10<br />
segundos e contactar o serviço após-venda<br />
(para voltar a colocar o aparelho em funcionamento<br />
normal pressionar g durante 10 segundos).<br />
Esta posição «by-pass» implica que é<br />
necessário voltar a regular manualmente os<br />
aparelhos <strong>de</strong> produção <strong>de</strong> cloro <strong>de</strong> acordo<br />
com a configuração da sua piscina ---- produção<br />
contínua.<br />
INFORMAÇÕES PARA O SAV<br />
A04 Problema <strong>de</strong> cálculo da taxa<br />
<strong>de</strong> cloro<br />
- valores incoerentes.<br />
A06 Defeito injecção<br />
- não há reactivo ou o reactivo acabou.<br />
A07 Problema <strong>de</strong> leitura<br />
- não há débito no circuito.<br />
PORTUGÛES<br />
Os códigos erros A --<br />
são exibidos directamente<br />
no ecrã. Eles implicam uma intervenção<br />
no aparelho.<br />
Os códigos <strong>de</strong> erro b --<br />
e C --<br />
são informações<br />
relativas a uma anomalia temporária ou<br />
um disfuncionamento que não requer qualquer<br />
manutenção imediata. O aparelho funciona normalmente.<br />
Estes erros não aparecem directamente<br />
no menu. Eles são indicados através <strong>de</strong><br />
um ponto no visor 888 .<br />
Para exibir estas informações é necessário pressionar<br />
CL + e g para as fazer <strong>de</strong>sfilar, caso haja<br />
diferentes erros.<br />
b05 Problema <strong>de</strong> leitura<br />
- instabilida<strong>de</strong> das medidas,<br />
- ar <strong>de</strong>ntro do circuito,<br />
- perturbação do sensor.<br />
b09 Defeito advertência C _<br />
- <strong>de</strong>ixou <strong>de</strong> haver sal (se houver<br />
electrolisador),<br />
- eléctrodo incrustado <strong>de</strong> calcário ou<br />
<strong>de</strong>feituoso,<br />
- <strong>de</strong>ixou <strong>de</strong> haver cloro se houver bomba<br />
doseadora ou electroválvula,<br />
- bomba <strong>de</strong> cloro ou electroválvula <strong>de</strong>feituosa,<br />
- <strong>de</strong>ixou <strong>de</strong> haver potência à saída do cartão<br />
sal,<br />
- relés <strong>de</strong> comando <strong>de</strong> advertência <strong>de</strong>feituoso.<br />
_
57<br />
B10<br />
Incoerências <strong>de</strong> leitura<br />
- <strong>de</strong>feito injecção,<br />
- reactivo quase vazio.<br />
C11<br />
Defeito do sistema<br />
- problema interno no cartão electrónico.<br />
16 - O que fazer em caso <strong>de</strong><br />
problema?<br />
Toda intervenção eléctrica <strong>de</strong>verá<br />
ser realizada por um electricista<br />
qualificado. Apenas um pr<strong>of</strong>issional<br />
reconhecido está habilitado a abrir o<br />
aparelho.<br />
c12<br />
Defeito jornal<br />
- problema interno no cartão electrónico.<br />
15 - Garantia<br />
Estes aparelhos estão garantidos durante 2<br />
anos, peças e mão-<strong>de</strong>-obra, à excepção peça <strong>de</strong><br />
<strong>de</strong>sgaste e reactivo. Esta garantia cobre qualquer<br />
<strong>de</strong>feito constatado durante este período,<br />
<strong>de</strong>s<strong>de</strong> que não possa ser imputado a uma utilização<br />
incorrecta por parte do utente. O fabricante é<br />
o único apto para julgar a resposta a dar ao<br />
recurso exercido.<br />
Não assumimos qualquer responsabilida<strong>de</strong> no<br />
que se refere ao custo <strong>de</strong> conservação da água<br />
<strong>de</strong> banho durante o período <strong>de</strong> reparação do<br />
aparelho (adição <strong>de</strong> produtos químicos, etc…). O<br />
utente <strong>de</strong>verá aceitar, se for necessário, que a<br />
instalação seja controlada pelo nosso S.A.V. que<br />
efectuará todos os testes necessários para evi<strong>de</strong>nciar<br />
o <strong>de</strong>feito constatado.<br />
A garantia só será efectiva após envio do<br />
cupão <strong>de</strong> garantia, preenchido, para a morada<br />
indicada pelo seu instalador autorizado. Os<br />
custos <strong>de</strong> <strong>de</strong>volução <strong>de</strong> cada aparelho fica a<br />
cargo do cliente.<br />
Para o utente, a presente garantia não impe<strong>de</strong> a<br />
aplicação da garantia legal <strong>de</strong> vícios ocultos, tal<br />
como resulta dos artigos 1641 e seguintes do<br />
Código Civil.<br />
A<strong>de</strong>mais, não exonera a garantia legal <strong>de</strong> conformida<strong>de</strong><br />
inscrita no código do consumo por<br />
<strong>de</strong>creto 2005136 <strong>de</strong> 17/02/05.<br />
Problema : O aparelho fica apagado<br />
Solução : Verifique a ligação na caixa <strong>de</strong> filtração.<br />
Problema : O aparelho não atinge a<br />
referência <strong>de</strong> corrente<br />
Solução : Verificar:<br />
1- A Taxa <strong>de</strong> Sal (> 3.5 g/L),<br />
2- A temperatura da água (> 15°C),<br />
3- O estado do eléctrodo, ele <strong>de</strong>ve estar limpo<br />
sem qualquer incrustação <strong>de</strong> calcário. Se o problema<br />
continuar é que o eléctrodo está fraco e<br />
terá <strong>de</strong> ser substituído.<br />
Problema : Cloração fraca apesar do<br />
aparelho funcionar<br />
correctamente<br />
Solução : Verificar:<br />
1- Verificar o pH (entre 6,9 e 7,4),<br />
2- A taxa <strong>de</strong> estabilizante (entre 20 e 50 g/m 3 ),<br />
3- Aumentar o tempo <strong>de</strong> filtração.<br />
Problema : Taxa <strong>de</strong> cloro nula apesar <strong>de</strong><br />
o aparelho funcionar<br />
Solução : Verificar:<br />
1- A presença <strong>de</strong> peróxido <strong>de</strong> hidrogénio: Este<br />
produto anula a leitura do cloro durante cerca <strong>de</strong><br />
3 semanas,<br />
2- Água saturada ou <strong>de</strong>siquilibrada: proce<strong>de</strong>r a<br />
uma cloração choque, equilibrar o TAC (12 a 18°<br />
F) se for necessário renovar uma parte da água<br />
da piscina.<br />
Problema: Cloro <strong>de</strong>masiado baixo:<br />
CL no visor:<br />
Solução : Causas possíveis:<br />
1- Electrolisador: apagado ou <strong>de</strong>feituoso em<br />
segurança temperatura, falta <strong>de</strong> sal, eléctrodo<br />
<strong>de</strong>feituoso, aparelho externo subdimensionado.<br />
2- Bomba <strong>de</strong> cloro: subdimensionada, sem<br />
cloro líquido, látex <strong>de</strong>feituoso, bomba <strong>de</strong>sligada<br />
ou <strong>de</strong>feituosa.<br />
3- Electroválvula: disfuncionamento ou <strong>de</strong>sligada,<br />
sem cloro.<br />
4- Água: falta estabilizante, presença <strong>de</strong> peróxido<br />
<strong>de</strong> hidrogénio, produto exterior que escon<strong>de</strong> a<br />
leitura do cloro.<br />
III<br />
PORTUGÛES
58<br />
Wichtige Hinweise<br />
Dieses Gerät ist für die Bedienung durch<br />
Personen (einschließlich Kin<strong>de</strong>r) <strong>de</strong>ren physische,<br />
sensorische o<strong>de</strong>r geistige Fähigkeiten<br />
begrenzt sind o<strong>de</strong>r von Personen ohne Erfahrung<br />
o<strong>de</strong>r Kenntnisse nicht geeignet, außer wenn sie<br />
von einer für ihre Sicherheit verantwortlichen<br />
Person kontrolliert wer<strong>de</strong>n o<strong>de</strong>r vorab für die<br />
Bedienung <strong>de</strong>s Geräts eingewiesen wur<strong>de</strong>n. (NF<br />
EN 60335-1/A1)<br />
Vor Arbeiten im Geräteinneren zu ergreifen<strong>de</strong><br />
Schutzmaßnahmen:<br />
Die Elektroinstallation mit Hilfe einer <strong>de</strong>r folgen<strong>de</strong>n<br />
Energie-Trennvorrichtungen unterbrechen:<br />
o<strong>de</strong>r<br />
o<strong>de</strong>r<br />
- Leistungsschutzschalter<br />
- <strong>La</strong>sttrennschalter<br />
- Schutztrennschalter<br />
Zu installieren<strong>de</strong> Schutzvorrichtung gegen Überstrom<br />
und Kurzschluss:<br />
- Fehlerstromschutzschalter 30 mA<br />
(Leistung <strong>de</strong>r Installation anpassen) Die Nennlast<br />
<strong>de</strong>r Schutzvorrichtung darf 10 A nicht überschreiten.<br />
Ihr Gerät wird nicht mehr verwen<strong>de</strong>t<br />
Wenn Sie Ihr Gerät ausrangieren<br />
o<strong>de</strong>r austauschen wollen, das<br />
Gerät nicht in die Mülltonne<br />
o<strong>de</strong>r in die Behälter für die<br />
Abfalltrennung Ihrer Gemein<strong>de</strong><br />
schmeißen.Dieses Zeichen auf<br />
einem neuen Gerät gibt an, dass<br />
die Ausrüstung nicht weggeworfen<br />
wer<strong>de</strong>n darf und sie für ihre Wie<strong>de</strong>rverwendung,<br />
Aufbereitung o<strong>de</strong>r Verwertung geson<strong>de</strong>rt<br />
gesammelt wer<strong>de</strong>n muss.<br />
Sollte es für die Umwelt potentiell gefährliche<br />
Substanzen beinhalten, wer<strong>de</strong>n diese eliminiert<br />
o<strong>de</strong>r neutralisiert.<br />
Sie können das Gerät auch an einen gemeinnützigen<br />
Verein abgeben, <strong>de</strong>r es zur<br />
Wie<strong>de</strong>rverwendung reparieren lassen kann.<br />
Sollten Sie ein neues Gerät kaufen, können Sie<br />
das alte im Geschäft abgeben o<strong>de</strong>r seine<br />
Abnahme vom Lieferanten verlangen.<br />
Dieses Abnahmeprinzip heißt „Alt gegen Neu“.<br />
An<strong>de</strong>renfalls entsorgen Sie es in einem<br />
Wertst<strong>of</strong>fh<strong>of</strong>, falls Ihre Gemeine für solche<br />
Produkte eine Son<strong>de</strong>rsammelstelle eingerichtet<br />
hat.<br />
Schutzmaßnahme :<br />
DEUTSCH<br />
Schließen Sie das grün-gelbe Kabel <strong>de</strong>r<br />
Stromversorgungsleitung an die<br />
Hauptschutzschaltung an.<br />
Das Steuergerät muss im Technikraum<br />
o<strong>de</strong>r an<strong>de</strong>rweitig geschützt installiert<br />
wer<strong>de</strong>n.<br />
Abgabe an<br />
einen<br />
gemeinnützigen<br />
Verein<br />
Das<br />
gebrauchte<br />
Gerät beim<br />
Kauf eines<br />
neuen beim<br />
Händler<br />
abgeben<br />
NF EN 60335-1/A1<br />
Das<br />
gebrauchte<br />
Gerät in<br />
einem<br />
Wertst<strong>of</strong>fh<strong>of</strong><br />
entsorgen
59<br />
1 - Verpackungscodierung<br />
Regler<br />
<br />
V2<br />
Regler<br />
<br />
V2.2<br />
Regler für <br />
die Injektion<br />
Regler für<br />
<br />
die Injektion<br />
2 en 1 <br />
2 en 1<br />
<br />
Referenzen<br />
m 3<br />
Chlorregulierung<br />
pH-Wert-Regulierung<br />
Internes Elektrolysegerät<br />
Externes Elektrolysegerät<br />
ANA01 0 bis je nach Prod X X X<br />
ANA02 0 bis je nach Prod X X X X<br />
ANA031 0 bis 30 m 3 X X X X<br />
ANA032 30 bis 500 m 3 X X X X<br />
ANA04 1 bis 30 m 3 X X X X<br />
ANA05 30 bis 100 m 3 X X X X<br />
Pumpe o<strong>de</strong>r Magnetventil<br />
Mini-Schockchlorung<br />
Reaktiv Amichloryte<br />
Reaktiv<br />
pH-Wert<br />
2 - Technische Eigenschaften<br />
Piktogramme :<br />
Für <strong>de</strong>n einwandfreien Betrieb Ihres Gerätes<br />
beachten Sie bitte die folgen<strong>de</strong>n Angaben:<br />
Elektrischer Anschluss : 220 Volt -50/60 Hz,<br />
filterpumpengeregelt<br />
Farbmetrischer Messbereich : 350 nm bis<br />
600 nm.<br />
Ansaugen<br />
Produktion<br />
Schlauchpumpe P1 :<br />
Probeentnahme<br />
6 Liter/Stun<strong>de</strong> zur<br />
Störung<br />
Schlauchpumpe P2 : 0,1 Liter/Stun<strong>de</strong> für die<br />
Reagensdosierung<br />
Set<br />
Wassertemperatur : nicht unter 15°C betreiben<br />
Reagens für <strong>de</strong>n Farbvergleich :<br />
Amichloryte ®.<br />
Entspricht <strong>de</strong>n CE-Normen<br />
CL +<br />
g<br />
Mini-<br />
Schockchlorung<br />
Einstellung<br />
<strong>de</strong>r Werte<br />
DEUTSCH
60<br />
DEUTSCH<br />
3 - Funktionsprinzip<br />
Der Regler entnimmt Beckenwasser, fügt<br />
automatisch das patentierte Reagens<br />
«AMICHLORYTE®» hinzu und vergleicht<br />
die farbliche Verän<strong>de</strong>rung <strong>de</strong>s Gemischs,<br />
um <strong>de</strong>n im Beckenwasser herrschen<strong>de</strong>n<br />
Chlorgehalt zu bestimmen.<br />
Sie bestimmen Sie <strong>de</strong>n Chlorgehalt, <strong>de</strong>r je<br />
nach Aufbau und Verwendung ihres Pools<br />
für eine gute Desinfektion benötigt wird,<br />
in<strong>de</strong>m Sie die Anlage für die<br />
Chlorproduktion von Ihrem Gerät steuern<br />
lassen.<br />
Die Analysen erfolgen alle 30 Minuten<br />
solange <strong>de</strong>r Chlorgehalt unter <strong>de</strong>m Soll-<br />
Wert liegt und nach Erreichen <strong>de</strong>s Soll-<br />
Werts, alle 2 Stun<strong>de</strong>n.<br />
Diese Intervalle können verän<strong>de</strong>rt wer<strong>de</strong>n<br />
(siehe Abschnitt 10. )<br />
Nach je<strong>de</strong>r Soll-Wert-Än<strong>de</strong>rung wird eine<br />
neue Analyse durchgeführt.<br />
Bei großen Abweichungen zur vo<strong>range</strong>gangenen<br />
Messung führt das Gerät eine<br />
erneute Analyse zur Bestätigung durch.<br />
Nach je<strong>de</strong>r Analyse löst das Gerät in<br />
Abhängigkeit von <strong>de</strong>m Soll-Wert das<br />
System zur Chlorproduktion<br />
(Elektrolysegerät, Dosierpumpe,<br />
Magnetventil) aus o<strong>de</strong>r nicht.<br />
4 - Vorsichtsmaßnahmen vor <strong>de</strong>r<br />
Inbetriebnahme<br />
Bei <strong>de</strong>r Installation für bereits gechlortes<br />
Beckenwasser (Cl > 5 ppm), <strong>de</strong>n<br />
Chlorgehalt vor <strong>de</strong>r Inbetriebnahme <strong>de</strong>s<br />
Geräts absenken (Cl < 5 ppm).<br />
- Prüfen, ob das Beckenwasser die<br />
letzten drei Wochen vor <strong>de</strong>r<br />
Installation nicht mit<br />
Wasserst<strong>of</strong>fperoxid o<strong>de</strong>r einem<br />
darauf basieren<strong>de</strong>n<br />
Antialgenprodukt behan<strong>de</strong>lt wur<strong>de</strong>,<br />
an<strong>de</strong>renfalls die Inbetriebnahme<br />
entsprechend zurückstellen.<br />
- Den pH-Wert zwischen 7,0 und 7,4<br />
einstellen.<br />
- Der Chlor-Stabilisatorgehalt muss<br />
zwischen 20 und 50 ppm liegen.<br />
(außer geschützte<br />
Schwimmbecken).<br />
- Den TAC (Karbonathärte) auf 12°<br />
bis -7,78Åé einstellen.<br />
- Die Beckenwassertemperatur muss<br />
für eine optimale Messung über<br />
18°C betragen.<br />
- Salzgehalt:<br />
Empfohlen: 4 g/l.<br />
Minimum: 3,5 g/l.<br />
- Bei Verwendung einer Dosierpumpe<br />
darauf achten, die Pumpe <strong>de</strong>m<br />
Beckenvolumen und <strong>de</strong>r Benutzung<br />
anzupassen.<br />
Das Mo<strong>de</strong>ll „Injektion“ wird mit einer<br />
Chlorpumpe geliefert:<br />
- 0 bis 30 m 3 2,2 l/h<br />
- 30 bis 500 m 3 6,0 l/h<br />
Verträglichkeit :<br />
Vergewissern Sie sich, dass die verwen<strong>de</strong>ten<br />
Materialien (Schwimmbecken und<br />
Zubehör) für die Verwendung von<br />
salzigem und gechlortem Wasser<br />
geeignet sind.
61<br />
5 - Installation im Technikraum<br />
Schaltplanbeispiel Halten Sie sich an <strong>de</strong>n vom Gerätehersteller mitgelieferten Plan.<br />
1) Den Gerätekasten mit Hilfe <strong>de</strong>r mitgelieferten<br />
Schrauben und Dübel in Bedienungshöhe im<br />
Technikraum anbringen. Der Kasten muss<br />
waagerecht ausgerichtet sein!<br />
2) Den Reagensbehälter möglichst nahe am<br />
Gerät anbringen, aber niemals höher.<br />
DEUTSCH
62<br />
3) Das Anschlussstück in <strong>de</strong>n Rücklaufkreis,<br />
zwischen Filteranlage und <strong>de</strong>n Geräten für<br />
Heizung, Einstellungen, Chlorproduktion und <strong>de</strong>r<br />
Produktinjektion, installieren. Bei andauern<strong>de</strong>m<br />
Lufteinlass, das Anschlussstück mit <strong>de</strong>r Klappe<br />
nach unten o<strong>de</strong>r an <strong>de</strong>r Seite anbringen. Den<br />
Anschluss mit <strong>de</strong>m transparenten<br />
Kristallschlauch verbin<strong>de</strong>n (Ansaugen)<br />
4) Den Versorgungsanschluss festschrauben<br />
und abdichten, die Fließrichtung entsprechend<br />
<strong>de</strong>m Pfeil auf <strong>de</strong>r Klappe beachten.<br />
5) Ein zweites Anschlussstück am Ablauf<br />
(Version Sandfilter) o<strong>de</strong>r an <strong>de</strong>n nächstgelegenen<br />
Abfluss anbringen.<br />
Den schwarzen Abflussschlauch, <strong>de</strong>r vom Gerät<br />
kommt, anschließen und ausrichten. Die<br />
Schläuche bei <strong>de</strong>r Montage nicht quetschen.<br />
6) Den Schlauch vom Amichloryte-Behälter an<br />
die Pumpe P2 anschließen und falls nötig die<br />
Klemme entriegeln. Das Gerät an <strong>de</strong>n<br />
Regelschütz <strong>de</strong>r Schwimmbadpumpe elektrisch<br />
anschließen. Darauf achten, dass sich das Gerät<br />
gemeinsam mit <strong>de</strong>r Filteranlage abschaltet.<br />
7) Das Elektrolysegerät o<strong>de</strong>r die Dosierpumpe<br />
an <strong>de</strong>n mitgelieferten Anschlusskasten<br />
anschließen, <strong>de</strong>r sich je nach Mo<strong>de</strong>ll in <strong>de</strong>r Regel<br />
am Gerätegehäuse befin<strong>de</strong>t (siehe Installation<br />
<strong>de</strong>r Zelle). Bei einer Dosierpumpe, siehe<br />
Anordnung Version Dosierpumpe/Magnetventil.<br />
6 - Installation <strong>de</strong>r Elektrolysezelle<br />
Montieren Sie die Zelle zwischen die<br />
Beckeneinlaufleitung, nach <strong>de</strong>m Filter<br />
und <strong>de</strong>r Vorheizung o<strong>de</strong>r<br />
Turboanschluss.<br />
Das Wasser muss vom T-Stück in<br />
Richtung <strong>de</strong>r Reduktion (folgend <strong>de</strong>m<br />
Pfeil auf <strong>de</strong>r Zelle) fließen. Die<br />
Wasserströmung muss zwischen <strong>de</strong>n<br />
Platten <strong>de</strong>r Elektro<strong>de</strong> zirkulieren.<br />
Achten Sie auf genügend Platz<br />
an <strong>de</strong>r Serviceseite <strong>de</strong>r Zelle,<br />
um die Elektro<strong>de</strong> herausnehmen<br />
zu können. Ist die<br />
Zelle als Bypass montiert,<br />
stellen Sie sicher, dass min<strong>de</strong>stens<br />
80% <strong>de</strong>s Durchflusses<br />
diese passiert.<br />
DEUTSCH
63<br />
7 - Durchfluss<strong>de</strong>tektor (Flow switch)<br />
nur bei Mo<strong>de</strong>ll 2 in 1<br />
Wir empfehlen die Installation eines<br />
Durchfluss<strong>de</strong>tektors in folgen<strong>de</strong>n Fällen:<br />
- die Filterpumpe befin<strong>de</strong>t über <strong>de</strong>m<br />
Wasserspiegel (Wasserabbruch-Risiko)<br />
Funktionsprinzip :<br />
Wird <strong>de</strong>r Durchfluss ungewollt o<strong>de</strong>r wegen einer<br />
Rückspülung unterbrochen, in je<strong>de</strong>m Fall, wenn<br />
<strong>de</strong>r Wasserdurchfluss weniger als 2,9 m 3 /h<br />
beträgt, unterbricht <strong>de</strong>r Detektor das Gerät.<br />
Installation :<br />
Bringen Sie <strong>de</strong>n Fühler an <strong>de</strong>r Zelle an und richten<br />
Sie bei <strong>de</strong>r Montage <strong>de</strong>n oben befindlichen<br />
Pfeil in die Fliessrichtung aus<br />
Der Detektor hat einen Wirkwi<strong>de</strong>rstand, wodurch<br />
er vom Steuergerät automatisch erkannt wer<strong>de</strong>n<br />
kann. Verwen<strong>de</strong>n Sie <strong>de</strong>shalb niemals einen<br />
Detektor ohne diesen Wirkwi<strong>de</strong>rstand.<br />
9 - Stromversorgung <strong>de</strong>r<br />
Elektro<strong>de</strong><br />
Schließen Sie das dafür vorgesehenen Kabel an.<br />
Ziehen Sie die Kontaktmuttern fest an.<br />
Schlecht festgezogene Anschlüsse können zu<br />
Überhitzungen führen.<br />
Reicht das mit <strong>de</strong>m Gerät mitgelieferte Kabel<br />
nicht aus, muss <strong>de</strong>r Kabelquerschnitt <strong>de</strong>r <strong>La</strong>nge<br />
angepasst wer<strong>de</strong>n. Die Anschlüsse müssen<br />
geschützt wer<strong>de</strong>n und <strong>de</strong>m verwen<strong>de</strong>tem<br />
Kabelquerschnitt entsprechen.<br />
Der elektrische Anschluss muss von einem<br />
qualifizierten Fachmann und konform <strong>de</strong>r<br />
Norm NFC15-100 (Ausgabe 2002) erfolgen.<br />
Nach einer Verzögerungszeit wer<strong>de</strong>n die<br />
Elektro<strong>de</strong>n automatisch unter Strom gesetzt.<br />
- Werkseinstellungen :<br />
Mo<strong>de</strong>ll 30 - 4,5 A - maximum<br />
Mo<strong>de</strong>ll 100 - 10 A - maximum<br />
8 - Installation <strong>de</strong>r Erdung<br />
Nur bei Mo<strong>de</strong>ll 2 in 1<br />
Wir schreiben die Installierung <strong>de</strong>r Erdung vor,<br />
um die im Wasser befindlichen elektrischen<br />
<strong>La</strong>dungen abzuleiten.<br />
Montage <strong>de</strong>r Erdung :<br />
Richten Sie Erdung entsprechend <strong>de</strong>n im <strong>La</strong>nd<br />
<strong>de</strong>r Installation gelten<strong>de</strong>n Normen ein.<br />
10 - Einstellungen<br />
Eines Geräts im Betrieb zeigt "nor"<br />
Wen<strong>de</strong>n Sie sich für Än<strong>de</strong>rungen an einen<br />
vom Hersteller anerkannten Fachmann.<br />
Funktion Reglermenü g & c + ON<br />
Siehe nachfolgen<strong>de</strong>s Schema.<br />
DEUTSCH
64<br />
10 - Einstellungen (Fortsetzung)<br />
Menü PRODUCTION<br />
ECL* = Elektrolysegerät<br />
PCL = Chlorpumpe o<strong>de</strong>r Magnetventil<br />
F Menü FILTERUNG entfernt<br />
OFF* = Entfernung <strong>de</strong>r Probeentnahme unter<br />
5 m<br />
ON = Entfernung <strong>de</strong>r Probeentnahme<br />
zwischen 5 und 30 m<br />
PRO Menü ALLGEMEIN o<strong>de</strong>r<br />
Verstärkte ANALYSE<br />
OFF* = Analyse im Normalbetrieb<br />
Alle 2 Stun<strong>de</strong>n<br />
ON = Verstärkte Analyse<br />
Alle 30 Minuten<br />
DUR Menü<br />
POLARITÄTSUMKEHRUNG<br />
4* = Umkehrung alle 4 Stun<strong>de</strong>n<br />
1 = Stündliche Umkehrung<br />
Durch halten von c wird die Zeit für<br />
die Polaritätsumkehrung bis zum<br />
Erhalten <strong>de</strong>r erwünschen Dauer<br />
erhöht. c loslassen.<br />
INT Menü STROMSTÄRKE<br />
Werkseinstellung 10 A<br />
Ein Druck auf c ergibt 4,5 A<br />
Durch halten von c wird <strong>de</strong>r Wert in<br />
0,5 A Schritten erhöht.<br />
Ist <strong>de</strong>r gewünschte Wert erreicht,<br />
c loslassen und auf g drücken.<br />
* STANDARD-WERKSEINSTELLUNG<br />
DEUTSCH<br />
Beispiel: Auswahl Elektrolysegerät o<strong>de</strong>r<br />
Chlorpumpe :<br />
Nach <strong>de</strong>m Menüaufruf erscheint _CL, nach<br />
drücken auf c , erscheint ECL. . Zum<br />
Wechseln auf Dosierpumpe auf c drücken<br />
und mit g bestätigen.<br />
Zum Wechseln zwischen einer zur an<strong>de</strong>ren<br />
Funktion auf c drücken o<strong>de</strong>r zum Bestätigen<br />
auf g .<br />
Nach 5 Sekun<strong>de</strong>n ohne Eingabe verlässt das<br />
Gerät automatisch das Menü.
65<br />
11 - Inbetriebnahme<br />
Die Filteranlage in Betrieb nehmen und das<br />
Gerät einschalten (Stellung ON).<br />
11. 5 Die grüne Dio<strong>de</strong> blinkt bis in <strong>de</strong>r<br />
Analysekammer das Reagens festgestellt wird,<br />
nach been<strong>de</strong>tem Ansaugvorgang leuchtet sie<br />
durchgehend.<br />
11. 1 Salz<br />
Das Salz bei laufen<strong>de</strong>r Filteranlage direkt in das<br />
Becken geben.<br />
Das Gerät nicht einschalten, bevor das Salz<br />
vollständig aufgelöst ist.<br />
11. 2 Salzbeigabe<br />
Überprüfen Sie <strong>de</strong>n Salzgehalt. Liegt die<br />
Konzentration unter 4 g/l, geben Sie Salz mit folgen<strong>de</strong>m<br />
Kalkül bei:<br />
Q = (4-T) x V<br />
Q = beizugeben<strong>de</strong> Salzmenge in kg<br />
4 = richtiger Salzgehalt<br />
T = Salzgehalt im Becken<br />
V = Beckenvolumen in m 3 .<br />
Das Gerät vor jeglicher Produktbeigabe abschalten.<br />
Warten Sie, bis sich das Salz vollständig<br />
aufgelöst hat, bevor Sie das Gerät wie<strong>de</strong>r einschalten.<br />
11. 3 Stabilisator<br />
Bei starker Hitze sollte <strong>de</strong>m Wasser bis 20 g/m 3<br />
Stabilisator beigemengt wer<strong>de</strong>n, um das<br />
Verdampfen von Chlor zu verhin<strong>de</strong>rn und die<br />
Korrosion zu verringern.<br />
Maximalgehalt: 50 g/m 3<br />
ACHTUNG: Ein zu NIEDRIGER<br />
Stabilisatorg ehalt verdoppelt <strong>de</strong>n<br />
Chlorverbrauch für Ihren Pool. Ein zu HOHER<br />
Stabilisatorgehalt hebt dahingegen die<br />
Chlorwirkung auf!<br />
Wur<strong>de</strong> <strong>de</strong>r Pool mit Chlorpatronen aufbereitet,<br />
<strong>de</strong>n Stabilisatorgehalt im Wasser messen.<br />
Übersteigt die Konzentration 50 g/m 3 , vor <strong>de</strong>r<br />
Salzbeigabe einen Teil <strong>de</strong>s Wassers erneuern.<br />
11. 4 Nach einer Verzögerung von etwa 15<br />
Sekun<strong>de</strong>n das Amichloryte, durch drücken auf<br />
für etwa 1 Sekun<strong>de</strong>, ansaugen. Falls<br />
nötig, <strong>de</strong>n Ansaugvorgang manuell durch anhalten<strong>de</strong>s<br />
Drücken auf<br />
für 15 Sekun<strong>de</strong>n<br />
durchführen.<br />
11. 6 Leuchtet die grüne Dio<strong>de</strong> dauerhaft auf,<br />
das Gerät aus- (Stellung OFF) und wie<strong>de</strong>r einschalten.<br />
Für die Bestimmung <strong>de</strong>s tatsächlichen<br />
Chlorgehalts <strong>de</strong>s Beckenwassers können zwei<br />
bis drei Analysen erfor<strong>de</strong>rlich sein.<br />
11. 7 Den gewünschten Chlorgehalt in<br />
Abhängigkeit von <strong>de</strong>r Beckenanordnung ein-<br />
, die rote<br />
stellen. Drücken Sie auf c und auf g<br />
Dio<strong>de</strong> bewegt sich im Uhrzeigersinn. Die g<br />
Taste bei Erreichen <strong>de</strong>s gewünschten Gehalts<br />
loslassen. Zum Starten einer Zusatzanalyse auf<br />
c und g drücken.<br />
11. 8 Das Gerät analysiert <strong>de</strong>n Chlorgehalt <strong>de</strong>s<br />
Beckenwassers, steuert und startet die<br />
Chlorproduktion, um <strong>de</strong>n eingestellten Soll-Wert<br />
zu erreichen.<br />
- Liegt die Chlormessung unter <strong>de</strong>m<br />
eingestellten Gehalt, leuchtet die grüne LED<br />
auf und die Chlorproduktion wird aufgenommen<br />
(Achtung: Nicht vergessen das<br />
Elektrolysegerät o<strong>de</strong>r die Dosierpumpe<br />
einzuschalten)<br />
- Liegt die Chlormessung über <strong>de</strong>m<br />
eingestellten Gehalt, leuchtet die Dio<strong>de</strong> nicht<br />
und die Geräte zur Chlorproduktion sind nicht in<br />
Betrieb.<br />
11. 9 Zeiteinstellung <strong>de</strong>r<br />
Polaritätsumkehrung<br />
Ihr Gerät wur<strong>de</strong> werksseitig auf einen<br />
Polaritätswechsel alle 4 Stun<strong>de</strong>n programmiert.<br />
Die Umkehrungsdauer kann zwischen 1 bis 99<br />
Stun<strong>de</strong>n, in Abhängigkeit von <strong>de</strong>r Wasserhärte<br />
(TH), eingestellt wer<strong>de</strong>n: (siehe Abschnitt 10)<br />
Richtwerte :<br />
> 50° TH ≅ 3 Stun<strong>de</strong>n<br />
zwischen 50°TH bis 20°TH ≅ 4 à 20 Stun<strong>de</strong>n<br />
< 20°TH ≅ 20 bis 99 Stun<strong>de</strong>n<br />
<strong>La</strong>gert sich auf <strong>de</strong>r Elektro<strong>de</strong> Kalk ab, muss die<br />
Umkehrzeit verringert wer<strong>de</strong>n.<br />
DEUTSCH
66<br />
12 - Kontrollen<br />
Messen Sie <strong>de</strong>n Chlorgehalt und vergleichen Sie<br />
ihn mit <strong>de</strong>m auf <strong>de</strong>m Gerät angezeigten. Der<br />
Wert kann, in Abhängigkeit <strong>de</strong>r Stelle an <strong>de</strong>r die<br />
Probe entnommen wur<strong>de</strong>, verschie<strong>de</strong>n sein. Wir<br />
empfehlen die Entnahmen am Eingang <strong>de</strong>r<br />
Skimmer o<strong>de</strong>r direkt am Hahn zur<br />
Probenentnahme.<br />
12. 1 Beigabe <strong>de</strong>r chemischen<br />
Produkte<br />
Schalten Sie das Steuergerät immer ab, bevor<br />
Sie chemische Produkte direkt in das Becken<br />
geben. Warten Sie, bis sich die chemischen<br />
Produkte vollständig aufgelöst haben, bevor Sie<br />
das Gerät wie<strong>de</strong>r einschalten.<br />
12. 2 Elektro<strong>de</strong><br />
Die Elektro<strong>de</strong> ist ein Verschleißteil, <strong>de</strong>ren<br />
<strong>La</strong>nglebigkeit von folgen<strong>de</strong>n Faktoren abhängt:<br />
- Salzgehalt : Ne jamais faire fonctionner avec<br />
un taux <strong>de</strong> sel inférieur à 3,5 g/l.<br />
Hinweis : Je<strong>de</strong>r Elektro<strong>de</strong>ntyp hat seine eigenen<br />
Versorgungsstrom, <strong>de</strong>r auf <strong>de</strong>m seitlichen Etikett<br />
angegeben ist.<br />
Beispiel : Für das Mo<strong>de</strong>ll 30 = 4,5 A<br />
Für das Mo<strong>de</strong>ll 100 = 10 A (Werkseinstellung)<br />
12. 3 Waschen <strong>de</strong>s Filters für <strong>de</strong>n<br />
Wasserwechsel<br />
Stellen Sie das Gerät bei je<strong>de</strong>r Betätigung <strong>de</strong>s 6<br />
Wegeschiebers <strong>de</strong>r Filteranlage ab: Waschen,<br />
Spülen, Wasserwechsel, …<br />
12. 4 Mini-Schockchlorung<br />
Drücken Sie 5 Sekun<strong>de</strong>n lang CI+, alle LEDs<br />
blinken durchlaufend. Das Gerät startet die<br />
Chlorproduktion, um <strong>de</strong>n Gehalt auf 5 ppm<br />
anzuheben o<strong>de</strong>r eine „erzwungene“ Produktion<br />
für eine Dauer von 2 Stun<strong>de</strong>n. Das Verlassen <strong>de</strong>s<br />
Modus <strong>de</strong>r Mini-Schockchlorung erfolgt automatisch<br />
und das Gerät kehrt in seinen normalen<br />
Zyklus mit <strong>de</strong>m vorab eingestellten Soll-Wert<br />
zurück.<br />
DEUTSCH<br />
- Wassertemperatur und Überwinterung : Den<br />
Betrieb einstellen, wenn die Wassertemperatur<br />
unter 15 °C fällt.<br />
Die Elektro<strong>de</strong> muss sauber und frei von<br />
Kalkablagerungen sein. Ist das nicht <strong>de</strong>r Fall<br />
entkalken Sie sie, durch eintauchen in eine<br />
Lösung aus 80% Wasser und 20% Salzsäure.<br />
Überprüfen Sie danach die Ursachen für die<br />
Verkrustung:<br />
- zu geringe Salzkonzentration<br />
- Zeiteinstellungen für die<br />
Polaritätsumkehrung zu lang<br />
- Elektro<strong>de</strong> verbraucht (siehe nächster<br />
Abschnitt)<br />
- Umkehrungsstörung <strong>de</strong>s Geräts<br />
Die messbare Spannung an <strong>de</strong>n zwei<br />
Anschlüssen <strong>de</strong>r Elektro<strong>de</strong> muss etwa 9 Volt<br />
betragen. Gemessen in Stellung Gleichstrom<br />
(DC), mit einem Salzgehalt von 4 g/l, einer<br />
Wassertemperatur von über 15 °C und einer kalkfreien<br />
Elektro<strong>de</strong>.<br />
Liegt die Spannung über 10,5 Volt, ist die<br />
Elektro<strong>de</strong> verbraucht und muss baldigst ausgetauscht<br />
wer<strong>de</strong>n.<br />
12. 5 Polaritätsumkehrung<br />
Ihr Gerät ist regelbar (siehe Kapitel 11. 9 ).<br />
Die Lebensdauer <strong>de</strong>r Elektro<strong>de</strong> hängt von <strong>de</strong>r<br />
Anzahl <strong>de</strong>r erfolgten Umkehrungen ab. Zum<br />
Beispiel: Sie verbraucht sich bei einer<br />
Umkehrung alle 6 Stun<strong>de</strong>n langsamer und bei<br />
einer 2-stündigen Umkehrung schneller.<br />
13 - Überwinterung<br />
- Das Reagens vor Frost schützen (vor <strong>de</strong>m<br />
Entfernen <strong>de</strong>s Reagensschlauchs vom Eingang<br />
<strong>de</strong>r Pumpe P2, die Klemme schließen).<br />
- Die Pumpe P2 durch stetiges Drücken auf<br />
entleeren, bis kein Reagens mehr im<br />
Schlauch ist.<br />
- Das Gerät ausschalten (Schalter OFF).<br />
- Die Analysezelle durch Entfernen <strong>de</strong>s<br />
Kristallschlauchs vom „Rücklauf“-Anschlussstück<br />
und Abziehen <strong>de</strong>s Schlauchs vom Eingang <strong>de</strong>r<br />
Pumpe P1 entleeren.
67<br />
14 - Fehlerliste A01 Durchflussproblem<br />
- Reagens aufgebraucht o<strong>de</strong>r nicht festgestellt<br />
(Dio<strong>de</strong> blinkt)<br />
- <strong>La</strong>tex <strong>de</strong>r Pumpe verbraucht o<strong>de</strong>r funktionsuntüchtig<br />
(Dio<strong>de</strong> blinkt)<br />
- Wert inkohärent o<strong>de</strong>r fehlen<strong>de</strong>s Licht (Dio<strong>de</strong><br />
leuchtet stetig)<br />
- Dio<strong>de</strong> Chlor max. blinkt (über 2,5 mg/l),<br />
Produktion eingestellt: Wasserbecken leer o<strong>de</strong>r<br />
ungewollter Lufteinzug<br />
- Dio<strong>de</strong> blinkt kurzzeitig (3 Sekun<strong>de</strong>n): Störung<br />
Durchfluss<strong>de</strong>tektor<br />
- kein Wasser o<strong>de</strong>r Durchfluss in <strong>de</strong>r<br />
Analysekammer<br />
- Pumpe außer Betrieb o<strong>de</strong>r <strong>de</strong>fekt<br />
A02 Sensorproblem<br />
- Gerät geöffnet<br />
A03 Sensorproblem<br />
- Dio<strong>de</strong> schwach o<strong>de</strong>r außer Betrieb<br />
Bei unerklärten Störungen das Gerät durch 10<br />
Sekun<strong>de</strong>n langes drücken auf g auf „Bypass“<br />
schalten und <strong>de</strong>n Kun<strong>de</strong>ndienst anrufen (durch<br />
10 Sekun<strong>de</strong>n langes drücken auf g kehrt <strong>de</strong>r<br />
Regler wie<strong>de</strong>r in <strong>de</strong>n Normalbetrieb zurück).<br />
A04 Problem mit <strong>de</strong>r<br />
Chlorgehalt-Bestimmung<br />
- Inkohärente Werte<br />
Der Bypassmodus hat zur Folge, dass die<br />
Geräte für die Chlorproduktion entsprechend<br />
<strong>de</strong>s Aufbaus Ihres Schwimmba<strong>de</strong>s erneut für<br />
eine --- laufen<strong>de</strong> Chlorproduktion manuell<br />
eingestellt wer<strong>de</strong>n müssen.<br />
A06 Injektionsstörung<br />
- Kein o<strong>de</strong>r mehr Reagens<br />
KUNDENDIENSTINFORMATIONEN<br />
Die Fehlerco<strong>de</strong> A --<br />
wer<strong>de</strong>n direkt in <strong>de</strong>r<br />
Anzeige angezeigt. Sie erfor<strong>de</strong>rn eine Überprüfung<br />
am Gerät selbst.<br />
Die Fehlerco<strong>de</strong> b --<br />
und C --<br />
informieren<br />
über eine vorübergehen<strong>de</strong> Anomalie o<strong>de</strong>r<br />
Fehlfunktion, die keine s<strong>of</strong>ortige Wartung<br />
erfor<strong>de</strong>rn. Das Gerät arbeitet normal. Diese<br />
Fehler wer<strong>de</strong>n nicht direkt im Menü angezeigt.<br />
Sie wer<strong>de</strong>n in <strong>de</strong>r Anzeige 888 durch einen<br />
Punkt ausgewiesen.<br />
Zur Anzeige dieser Informationen auf CL drücken<br />
und bei mehreren Fehlern auf CL + et g zum<br />
Durchsuchen.<br />
A07 Leseproblem<br />
- Kein Durchfluss im Kreislauf<br />
b05 Leseproblem<br />
- Instabilität <strong>de</strong>r Messungen<br />
- Luft im Kreislauf<br />
- Sensorstörung<br />
_<br />
b09 Störungsanzeige C<br />
- Kein Salz (siehe Elektrolysegerät)<br />
- Elektro<strong>de</strong> verkalkt o<strong>de</strong>r <strong>de</strong>fekt<br />
- Kein Chlor (wenn Dosierpumpe o<strong>de</strong>r<br />
Magnetventil)<br />
- Chlorpumpe o<strong>de</strong>r Magnetventil <strong>de</strong>fekt<br />
- Keine Leistung am Ausgang <strong>de</strong>r Platine Sel<br />
- Relais Nachlaufsteuerung <strong>de</strong>fekt<br />
DEUTSCH
68<br />
DEUTSCH<br />
B10<br />
15 - Garantie<br />
Lesewi<strong>de</strong>rsprüche<br />
- Injektionsstörung<br />
- Reagens fast leer<br />
C11<br />
Systemstörung<br />
- Internes Problem <strong>de</strong>r Platine<br />
c12<br />
Journalstörung<br />
- Internes Problem <strong>de</strong>r Platine<br />
Die Geräte haben 2 Jahre Garantie auf die<br />
Bauteile und Arbeitszeit, außer Verschleißteile<br />
und das Reagens. Diese Garantie gilt für alle<br />
während dieser Perio<strong>de</strong> auftreten<strong>de</strong>n Mängel,<br />
die nicht auf einen unsachgemäßen Gebrauch<br />
durch <strong>de</strong>n Benutzer zurückzuführen sind. Über<br />
geltend gemachte Haftungsansprüche entschei<strong>de</strong>t<br />
allein <strong>de</strong>r Hersteller.<br />
Unsere Haftpflicht erstreckt sich nicht auf die<br />
Kosten für die Ba<strong>de</strong>wasser-Aufbereitung<br />
während <strong>de</strong>r Zeit einer Gerätereparatur (hinzufügen<br />
chemischer Produkte usw. …) Der Benutzer<br />
muss falls nötig einer Kontrolle seiner Installation<br />
durch unseren Kun<strong>de</strong>ndienst zustimmen, <strong>de</strong>r alle<br />
notwendigen Tests durchführen wird, um die<br />
Ursache für <strong>de</strong>n festgestellten Fehler zu fin<strong>de</strong>n.<br />
Die Garantie wird erst nach Rücksendung <strong>de</strong>s<br />
ausgefüllten Garantiescheins an die von<br />
Ihrem zugelassenen Installateur angegeben<br />
Adresse wirksam. Die Rücksendung je<strong>de</strong>s<br />
Geräts fällt zu <strong>La</strong>sten <strong>de</strong>s Kun<strong>de</strong>n.<br />
Was <strong>de</strong>n Nutzer betrifft, die Garantie behin<strong>de</strong>rt<br />
nicht die Anwendung <strong>de</strong>r gesetzlichen Garantie<br />
für versteckte Mängel, wie sie aus <strong>de</strong>n Artikeln<br />
1641 und entsprechend <strong>de</strong>m BGB hervorgeht.<br />
Des weiteren schließt sie ebenso nicht die gesetzliche<br />
Garantie <strong>de</strong>r Konformität aus, beschrieben<br />
im Verbraucherschutzgesetzbuch durch die<br />
Verordnung 2005136 vom 17/02/05.<br />
16 - Probleme und ihre<br />
Lösungen<br />
Alle elektrischen Arbeiten müssen von<br />
einem qualifizierten Elektriker ausgeführt<br />
wer<strong>de</strong>n. Die Anlage darf nur von<br />
einem zugelassenen Fachmann geöffnet<br />
wer<strong>de</strong>n.<br />
Problem : Das Gerät schaltet nicht ein<br />
Abhilfe : Den Anschluss an <strong>de</strong>n Schaltkasten<br />
<strong>de</strong>r Filteranlage überprüfen.<br />
Problem : Das Gerät erreicht nicht <strong>de</strong>n<br />
Sollstromwert<br />
Abhilfe : Überprüfen Sie:<br />
1- Den Salzgehalt (> 3,5 g/l),<br />
2- Die Wassertemperatur (> 15 °C),<br />
3- Den Zustand <strong>de</strong>r Elektro<strong>de</strong>, die sauber und<br />
ohne Verkrustungen sein muss. Bleibt das<br />
Problem bestehen ist die Elektro<strong>de</strong> verbraucht<br />
und muss ausgewechselt wer<strong>de</strong>n.<br />
Problem : Geringe Chlorung trotz<br />
einwandfreiem Betrieb <strong>de</strong>s<br />
Geräts<br />
Abhilfe : Überprüfen Sie:<br />
1- Den pH-Wert (zwischen 6,9 und 7,4),<br />
2- Den Stabilisatorgehalt (zwischen 20 und 50 g/m 3 ),<br />
3- Die Filterzeit heraufsetzen.<br />
Problem : Keine Chlorproduktion trotz<br />
funktionieren <strong>de</strong>s Geräts<br />
Abhilfe : Überprüfen Sie:<br />
1- Vorhan<strong>de</strong>nsein von Wasserst<strong>of</strong>fperoxid:<br />
Dieses Produkt verhin<strong>de</strong>rt das Ablesen <strong>de</strong>s<br />
Chlorgehalts für etwa 3 Wochen,<br />
2- Gesättigtes o<strong>de</strong>r unstabiles Wasser: Führen<br />
Sie eine Schockchlorung durch, <strong>de</strong>n TAC (12 bis<br />
18 °F) ausgleichen und falls nötig einen Teil <strong>de</strong>s<br />
Beckenwassers erneuern.<br />
Problem : Chlor zu niedrig: CL<br />
auf <strong>de</strong>r Anzeige:<br />
Abhilfe : Mögliche Ursachen:<br />
1- Elektrolysegerät: außer Betrieb o<strong>de</strong>r <strong>de</strong>fekt<br />
wegen Temperatur-Schutzmodus, Salzmangel,<br />
Elektro<strong>de</strong> <strong>de</strong>fekt, externes Gerät zu gering<br />
bemessen.<br />
2- Chlorpumpe: zu gering bemessen, kein flüssiges<br />
Chlor, Dichtung <strong>de</strong>fekt, Pumpe außer<br />
Betrieb o<strong>de</strong>r <strong>de</strong>fekt.<br />
3- Magnetventil: Fehlfunktion o<strong>de</strong>r außer<br />
Betrieb, kein Chlor<br />
4- Eau: Stabilisatormangel, Wasserst<strong>of</strong>fperoxid<br />
präsent, Produkte von außerhalb über<strong>de</strong>cken die<br />
Chlorbestimmung.<br />
III